Team-BHP
(
https://www.team-bhp.com/forum/)
The Hi Lift jack is a very versatile tool to use with many options and additions available.
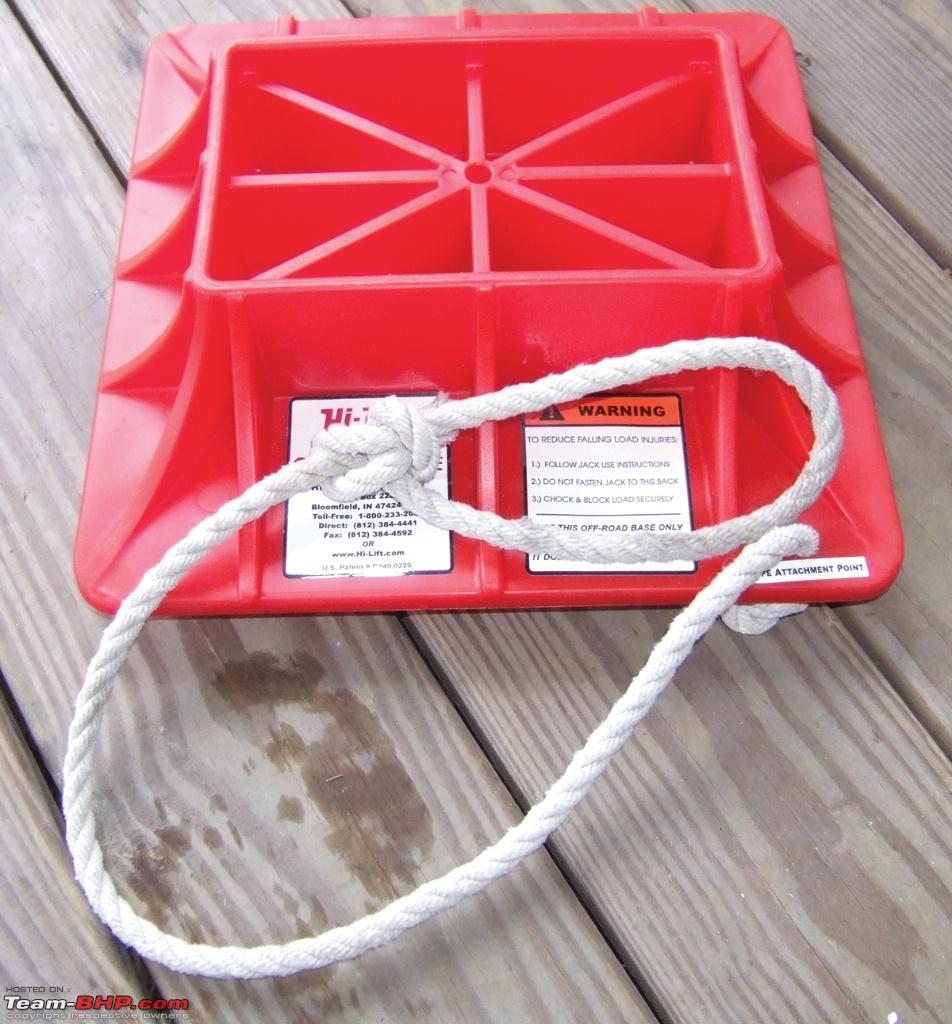
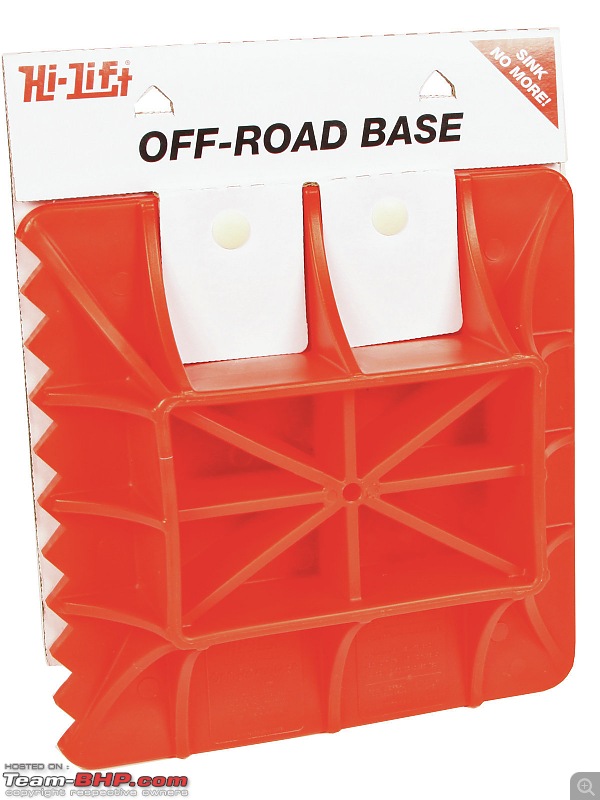
One of them sold by the company is known as the ORB (Offroad Base).
From their site (
http://www.hi-lift.com/accessories/off-road-base.html): Quote:
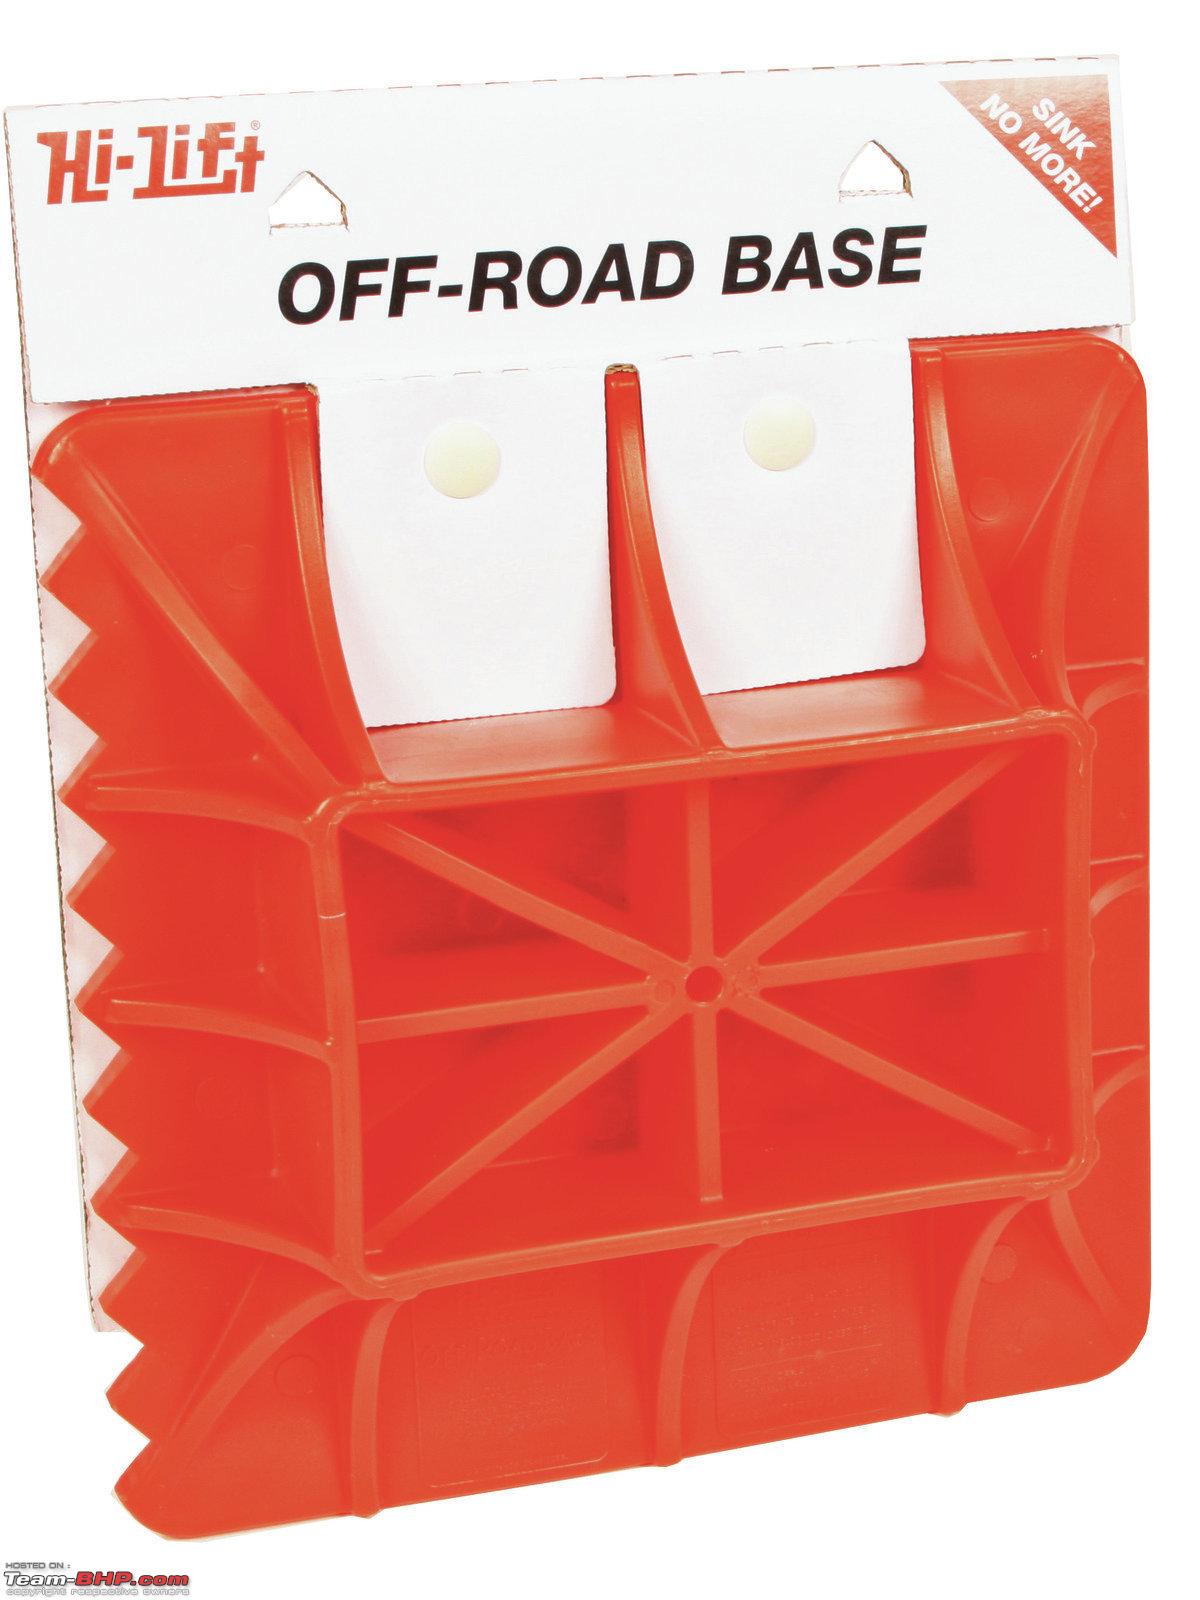
Hi-Lift Off-Road Base (ORB)
Increase your support surface area and make the original power tool even more versatile!
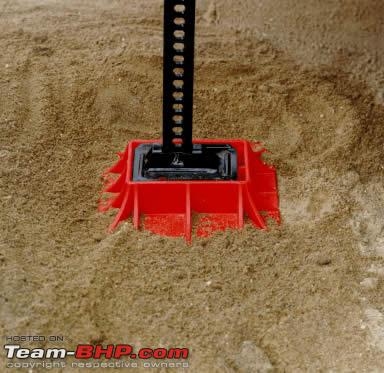
Use the Hi-Lift Off-Road Base to alleviate jack sinkage on soft ground.
Convenient to use, easy to store.
Rugged construction meets Hi-Lift Jack specifications for strength & durability.
Can be used with ANY model of Hi-Lift Jack.
|

An easier and cheaper option recommended by most seasoned offroaders is just to use a 1" plank of wood measuring approximately 12"x12"
You will need to use a hard wood or even marine ply could be used.
I saw it being used by some fellow colleagues in Europe and tried it out myself and found it adequate.
What you will need:
- Piece of wood
- Tools
.- Scissors
.- Lighter
.- Water dish
.- Drilling machine and bit
- Paracord or thick rope
What is paracord?
Parachute cord (also paracord or 550 cord) is a lightweight nylon kernmantle rope originally used in the suspension lines of US parachutes during World War II. Once in the field, paratroopers found this cord useful for many other tasks. It is now used as a general purpose utility cord by both military personnel and civilians. This versatile cord was even used by astronauts during STS-82, the eighty-second Space Shuttle mission, to repair the Hubble Space Telescope.
The braided sheath has a high number of interwoven strands for its size, giving it a relatively smooth texture. The all-nylon construction makes paracord fairly elastic; depending on the application this can be either an asset or a liability.
While the U.S. military has no overall diameter requirements in its specifications, in the field 550 cord typically measures 5⁄32 inches (4 mm) in diameter.
Types
US Military issue paracord is specified by MIL-C-5040H in six types: I, IA, II, IIA, III, IV.Types IA and IIA are composed solely of a sheath without a core. Type III, a type commonly found in use, is nominally rated with a minimum breaking strength of 550 pounds, thus the sobriquet "550 cord".
Source:
http://en.wikipedia.org/wiki/Parachute_cord
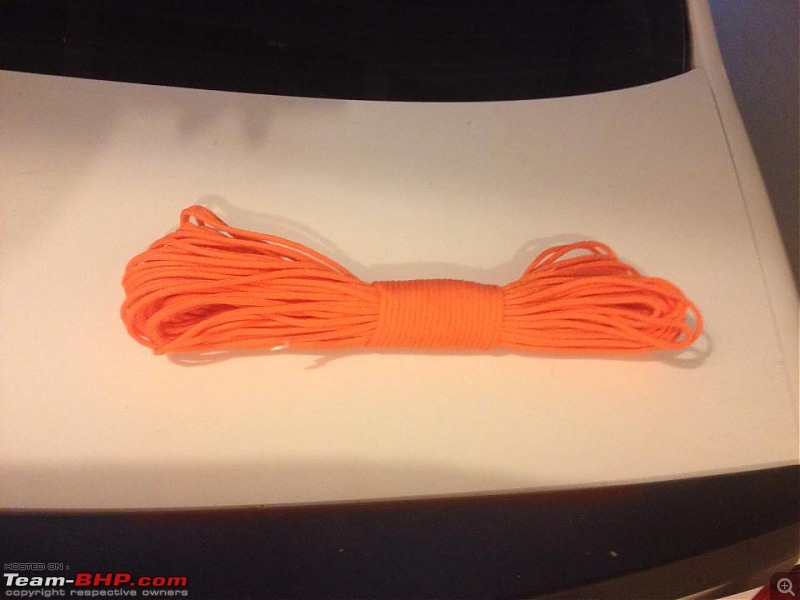
What i am using is a Type III cord that i procured from aliexpress. They come in various colours. I selected a bright colour for easy visibility.
Cost: $4 including shipping (prices may have gone up a bit now).
Specification:
Length:100 ft (31m)
Weight:198 g/6.93oz
Minimum breaking strength:550lb
Core yarns:7 strands
Diameter:approx 3.5-4 mm/0.138''-0.158''
Colour: Orange
Link to buy:
http://www.aliexpress.com/item/New-P...506643468.html
The cord:
The strands:

Step 1.
Select the block of wood. Again hard strong water resistant wood is the best.
I had some marine ply 3/4" lying with me and i nailed two pieces together to form a nice thick piece.
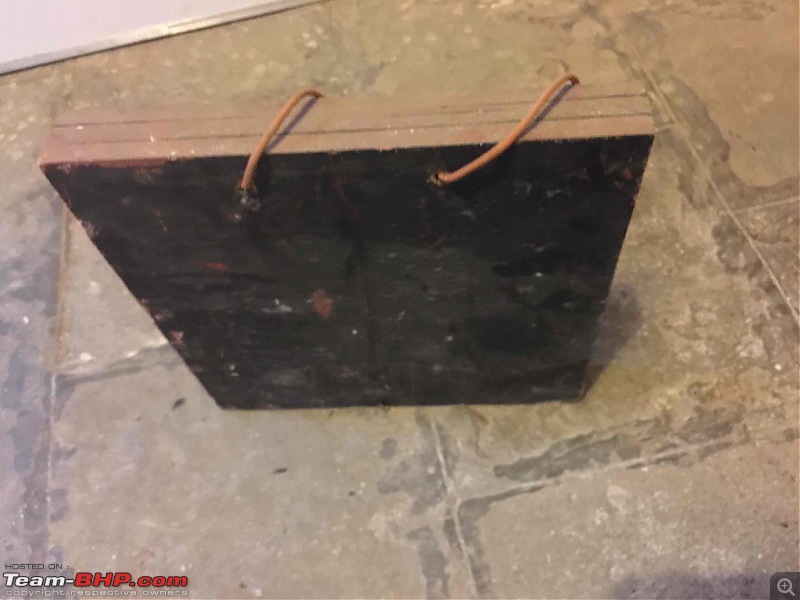
Then i spray painted it red and just one side i painted it black so i will use that side as the down / mud side.
I'm still searching for a good piece of scrap wood to use and i'll change to it once this one gets spoilt. Don't know how long the marine ply will last.
Nevertheless, the procedure to follow doesn't change.
Now you can use this board as your base itself or do some minor changes.
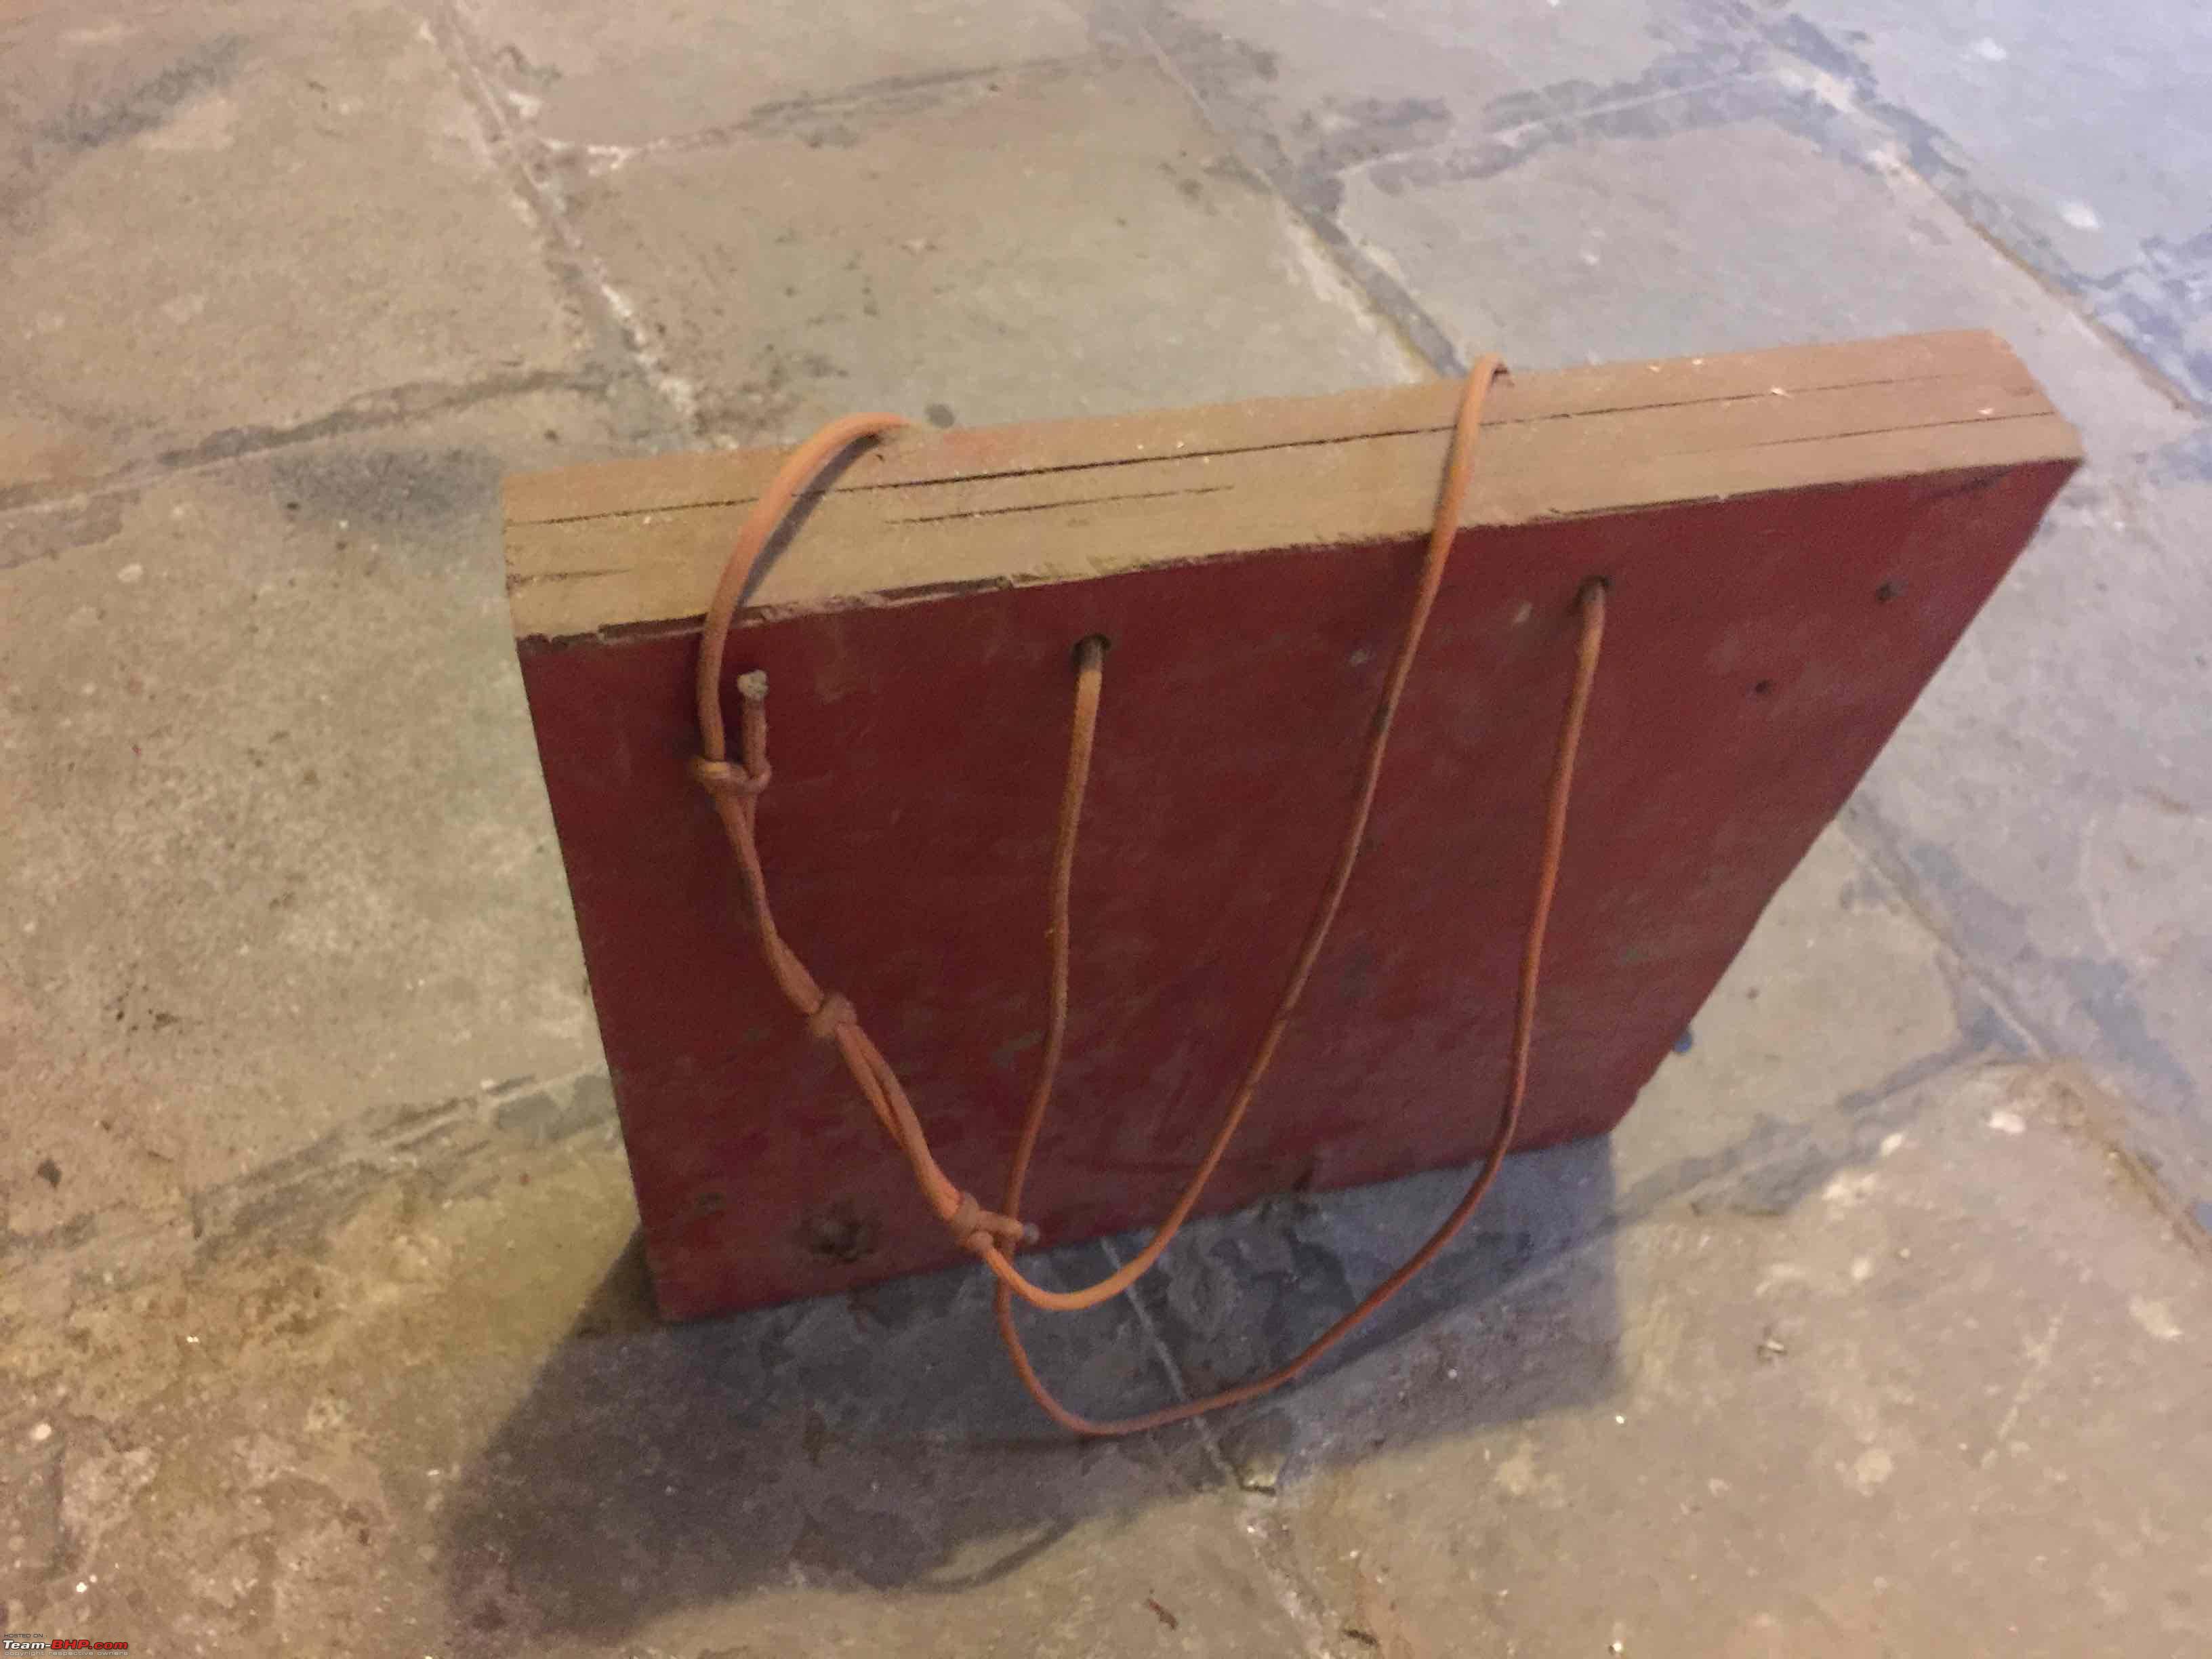
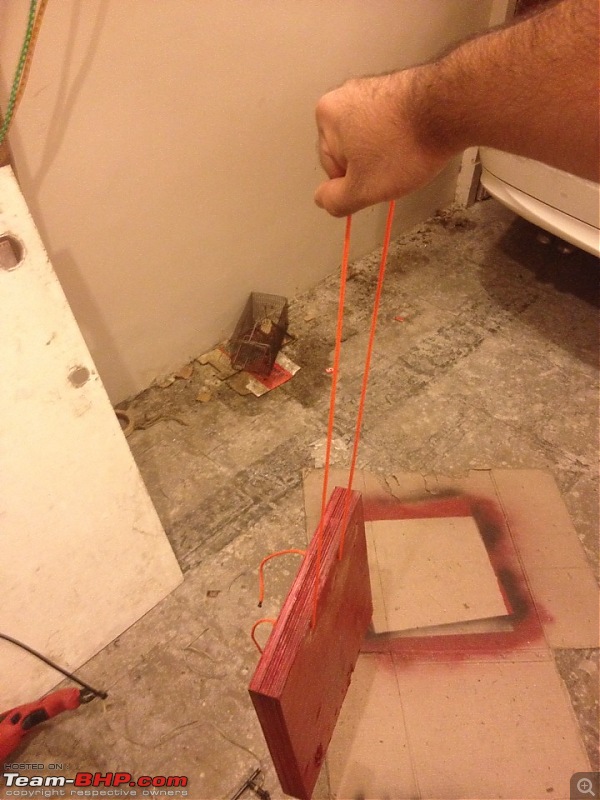
Most of the guys who use the Hi Lift ORB, drill a hole and attach a rope to it so you can easily pull out the sunken base after use:
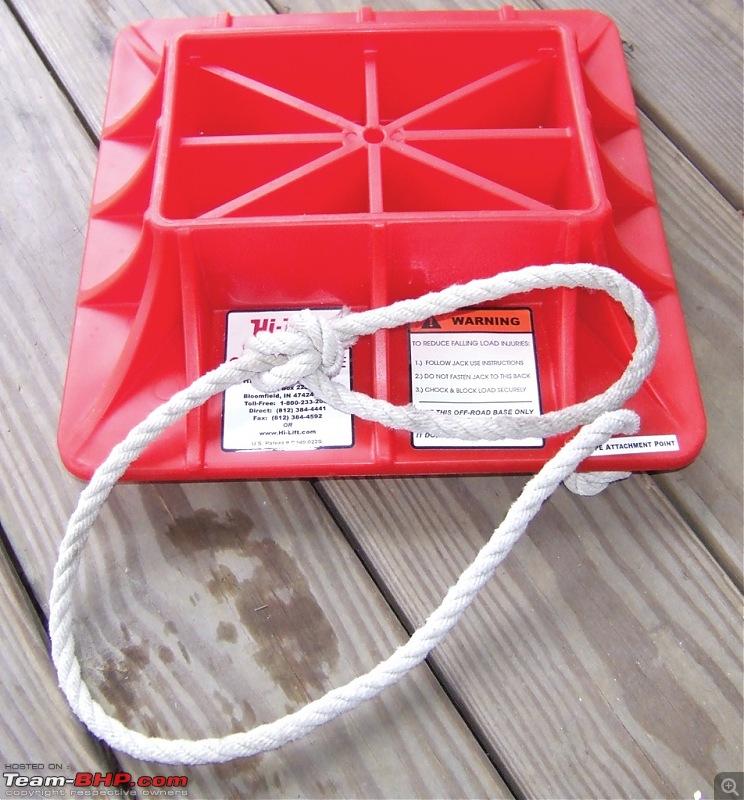
This is what i'm making.
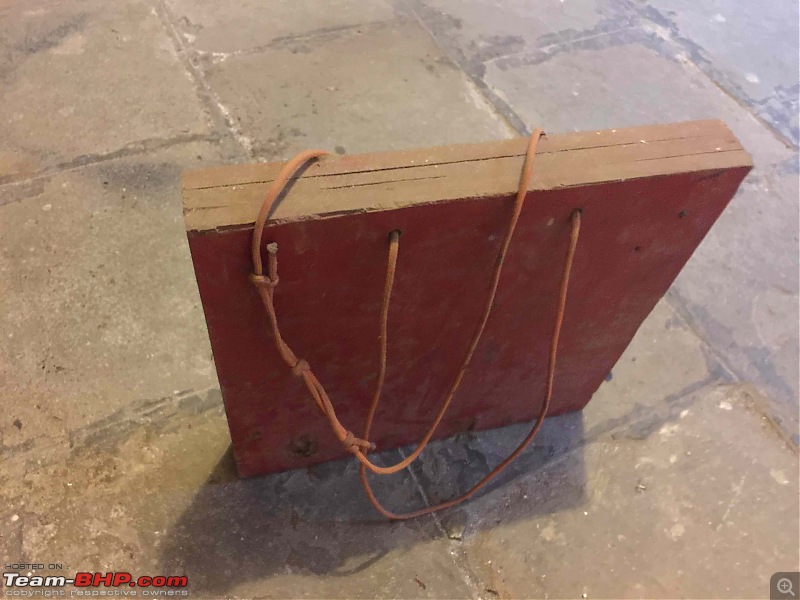
Here's the board:
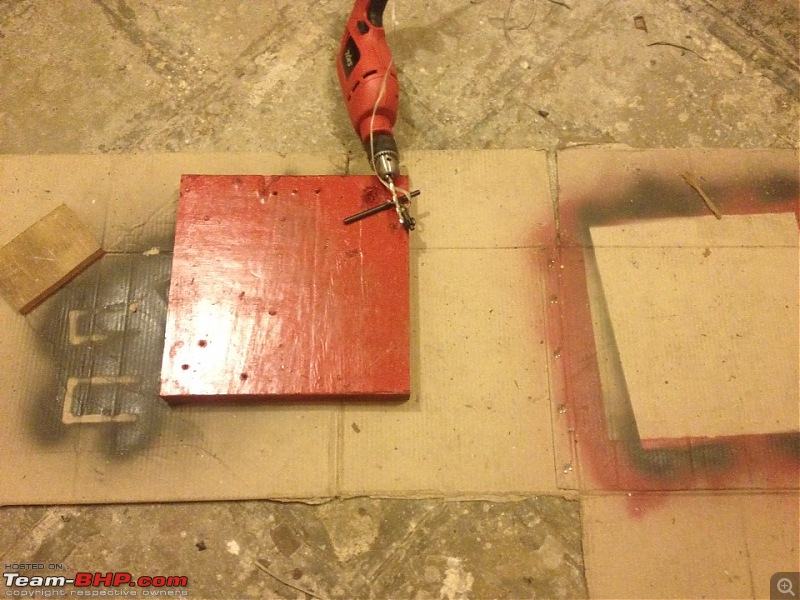
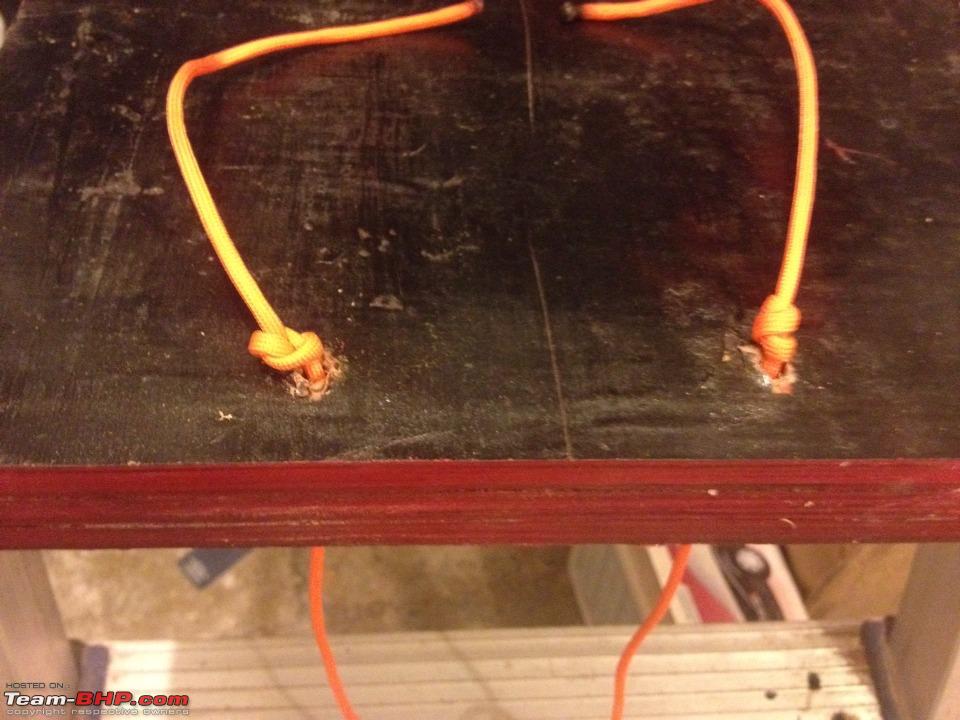
I've drilled two holes:
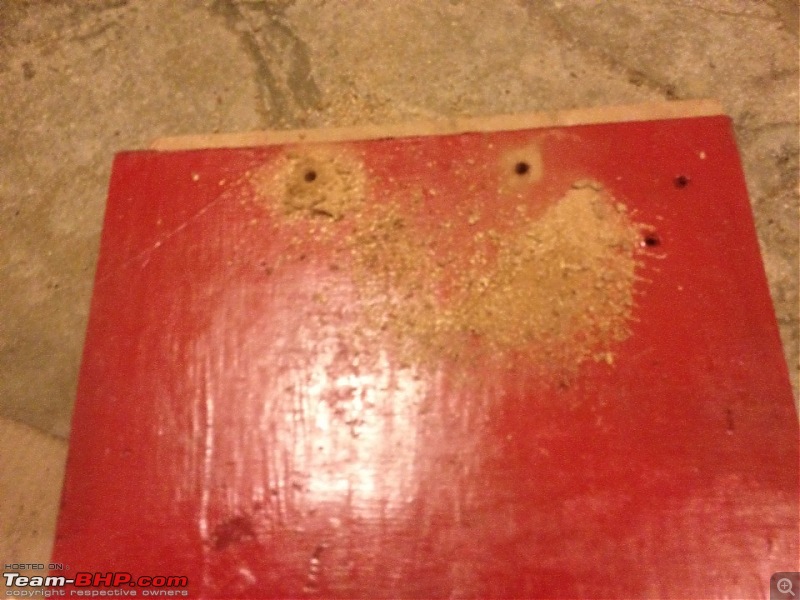
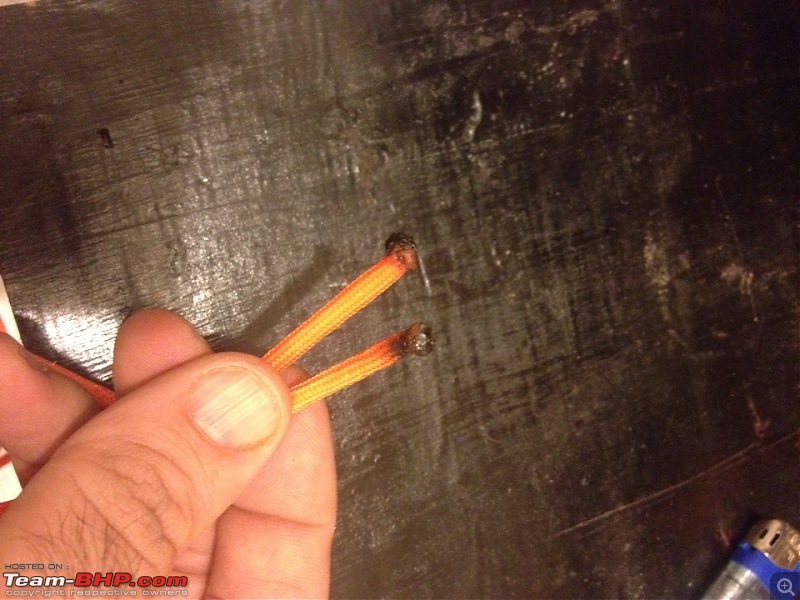
Next thing to do is to cut the paracord and thread it through the holes:

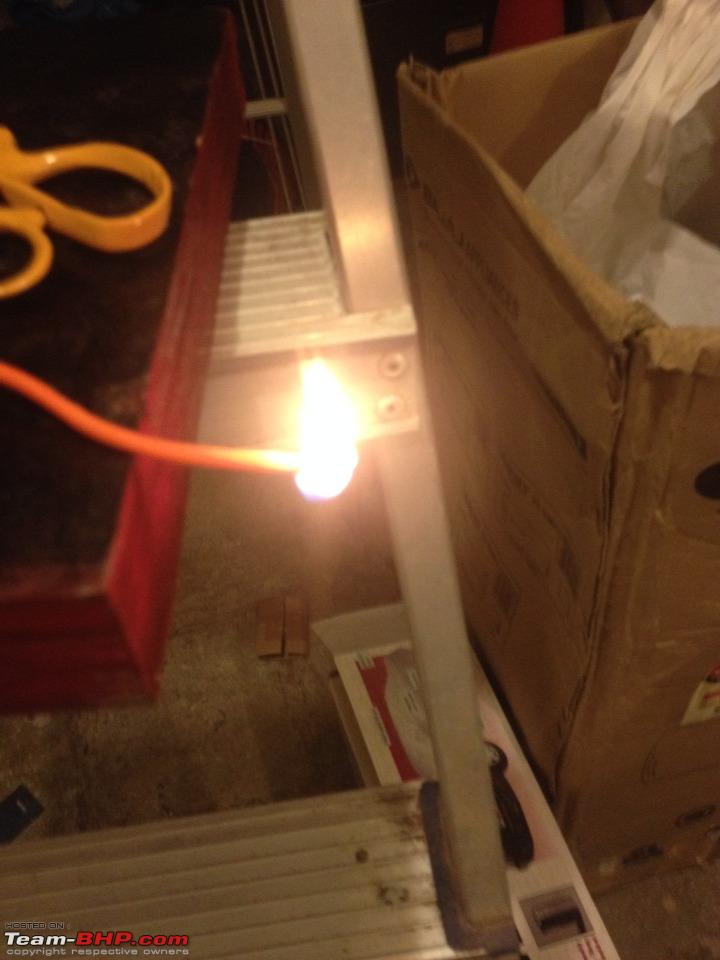
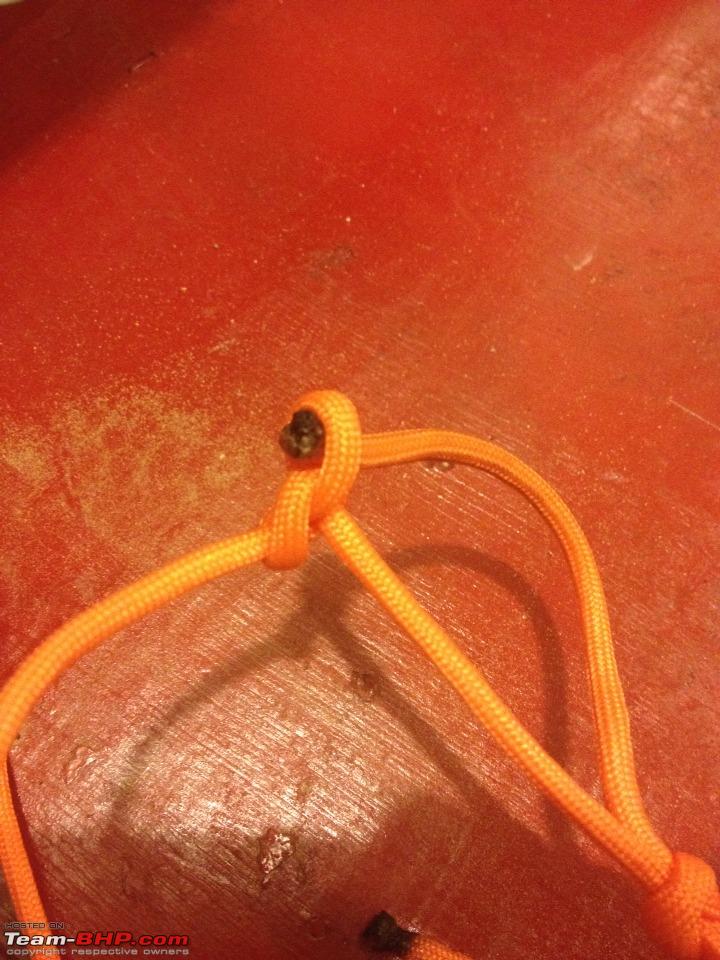
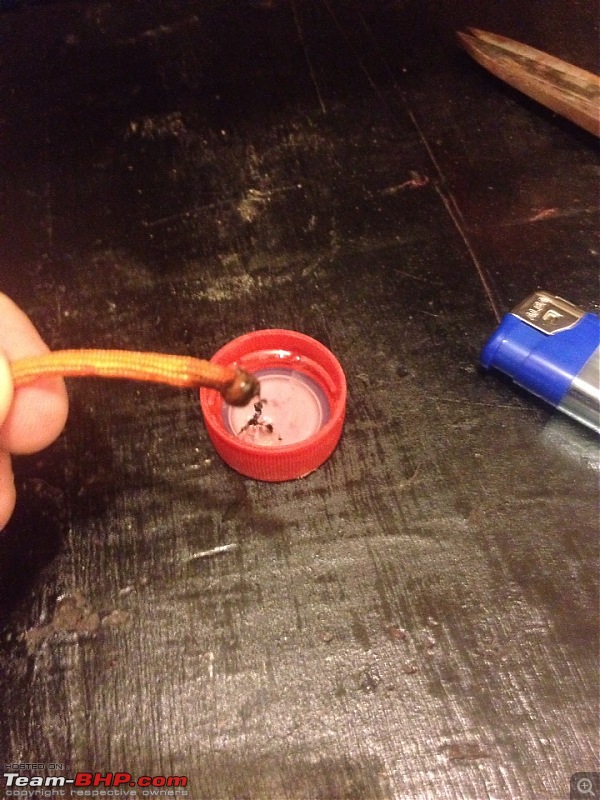
The frayed ends of the paracord need to be sealed. So you need your lighter.
Set the end on fire and it will keep burning like a plastic:

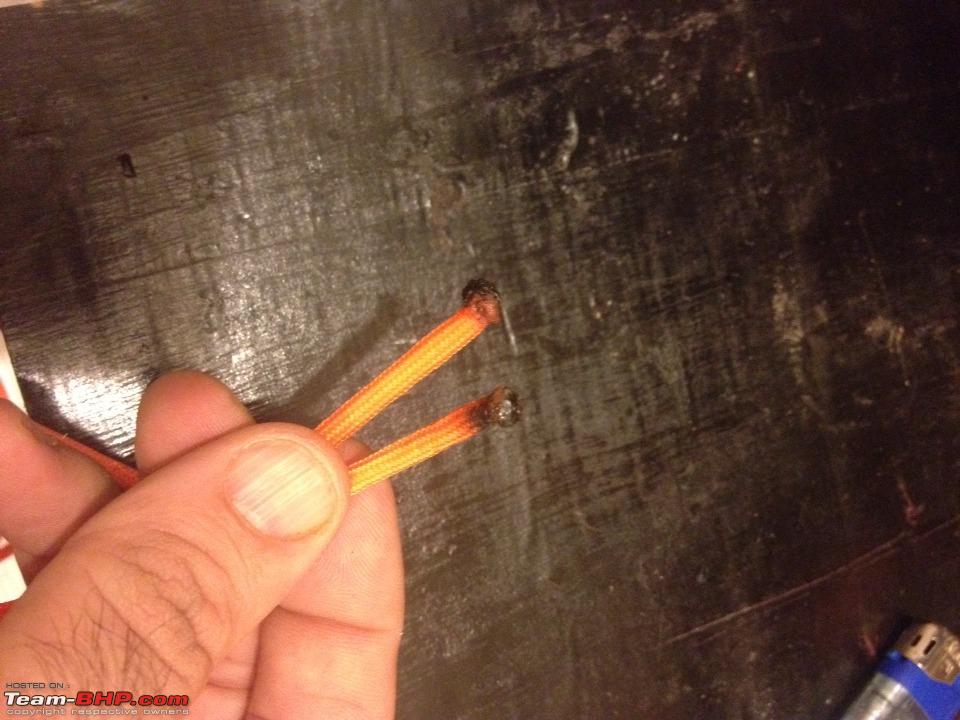
Keep some water handy and dip the glowing tip into that. Now wet your hands and smoothen the blob that has formed. Be careful, it will be hot.
Once sealed, you are ready for the next step:
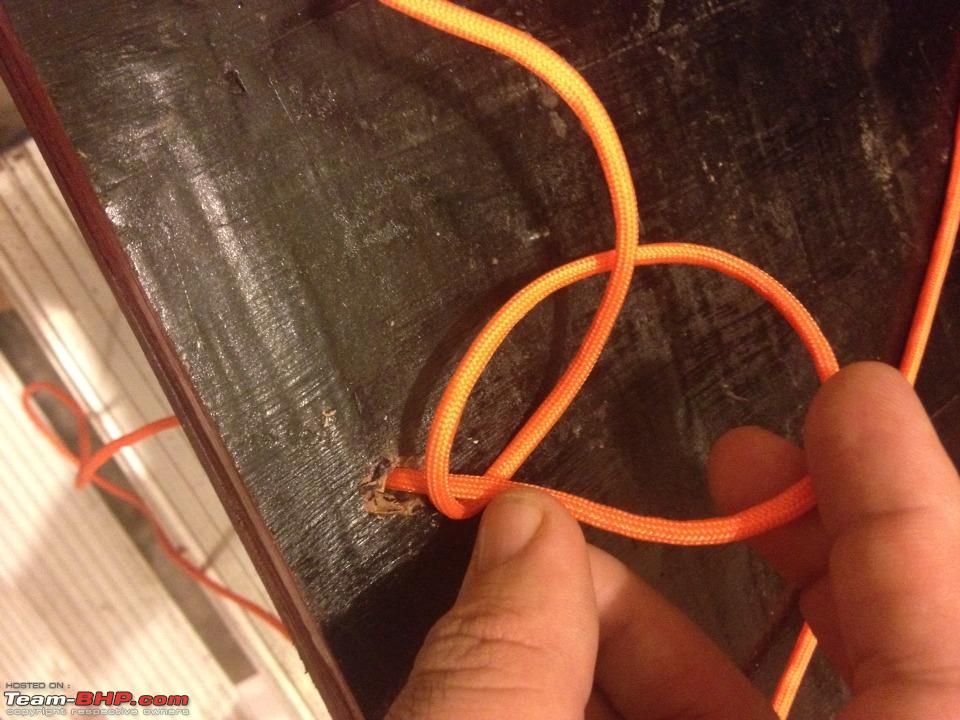
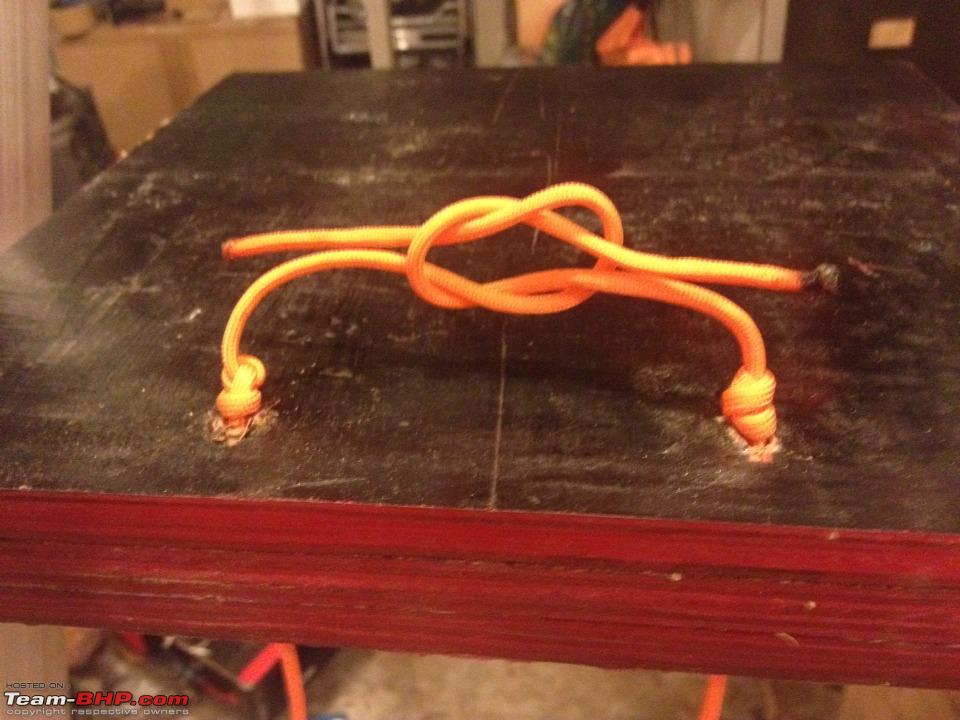
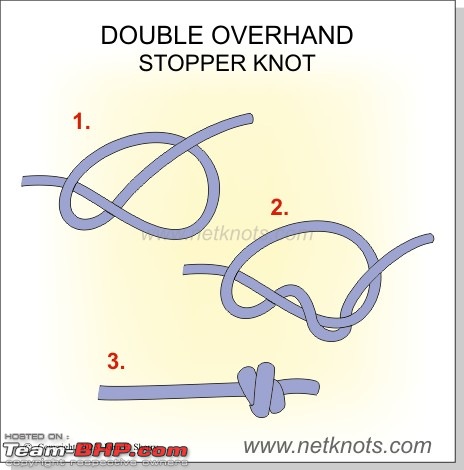
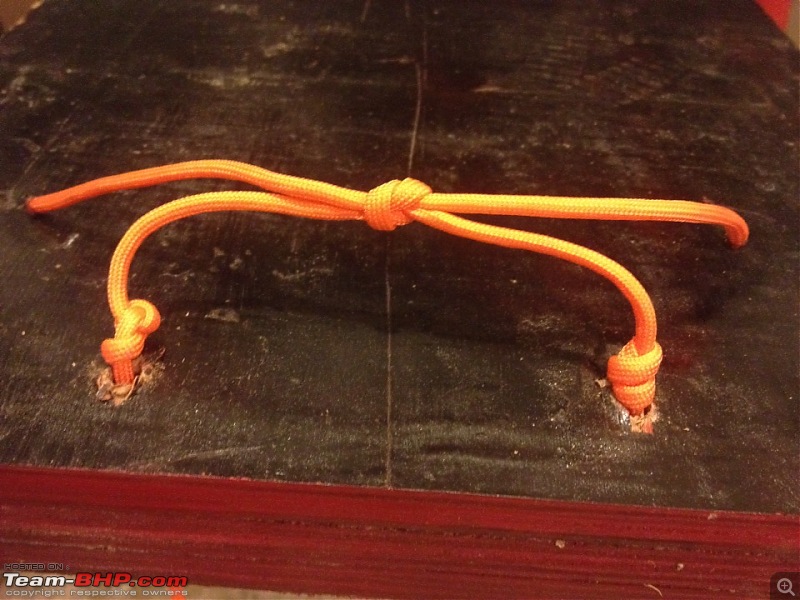
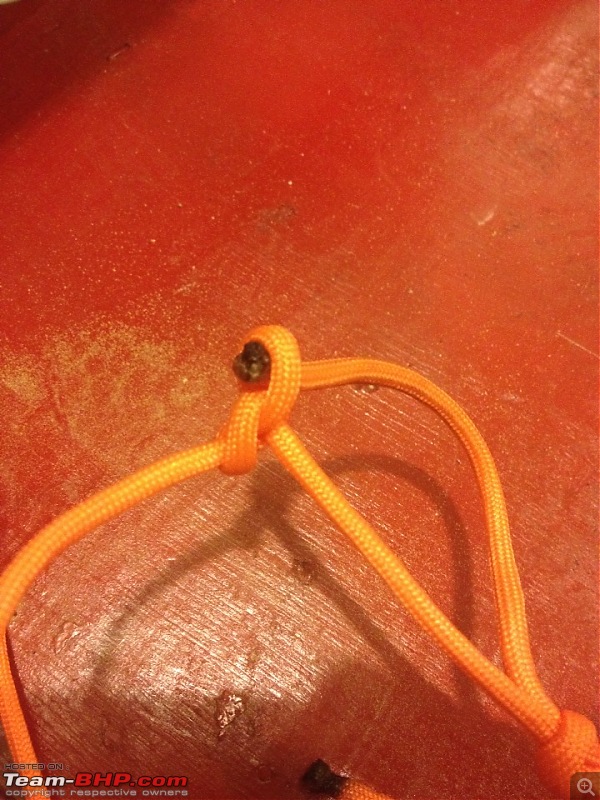
Next step is to knot the ends of the cord.
I'm using a double overhand stopper knot for this.
Quote:
1. Tie an overhand knot at the end of a rope but do not tighten the knot down.
2. Pass the end of the line through the loop created by the first overhand knot.
3. Tighten the knot down while sliding it into place at the end of the line. Be sure to leave some tail sticking out from the end of the knot.
Source: netknots.com
|
Illustration:
Here's what i did:
The first overhand knot:
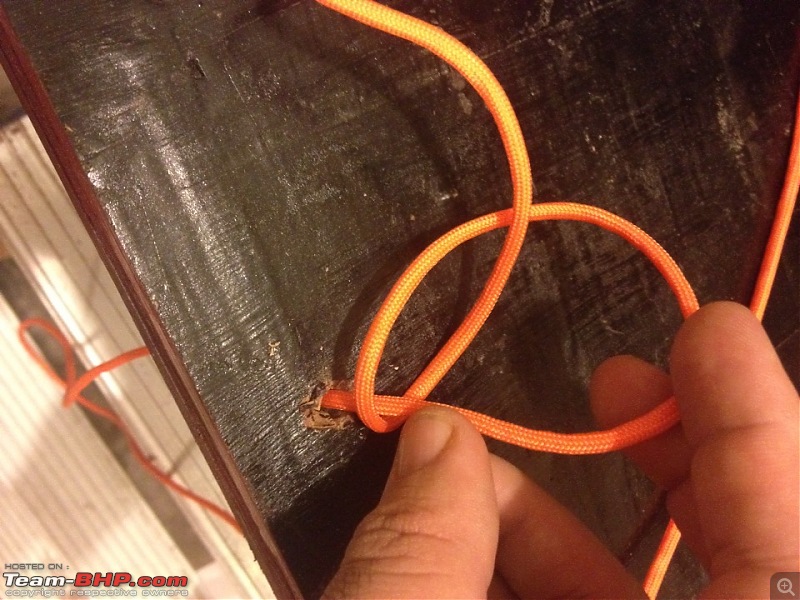
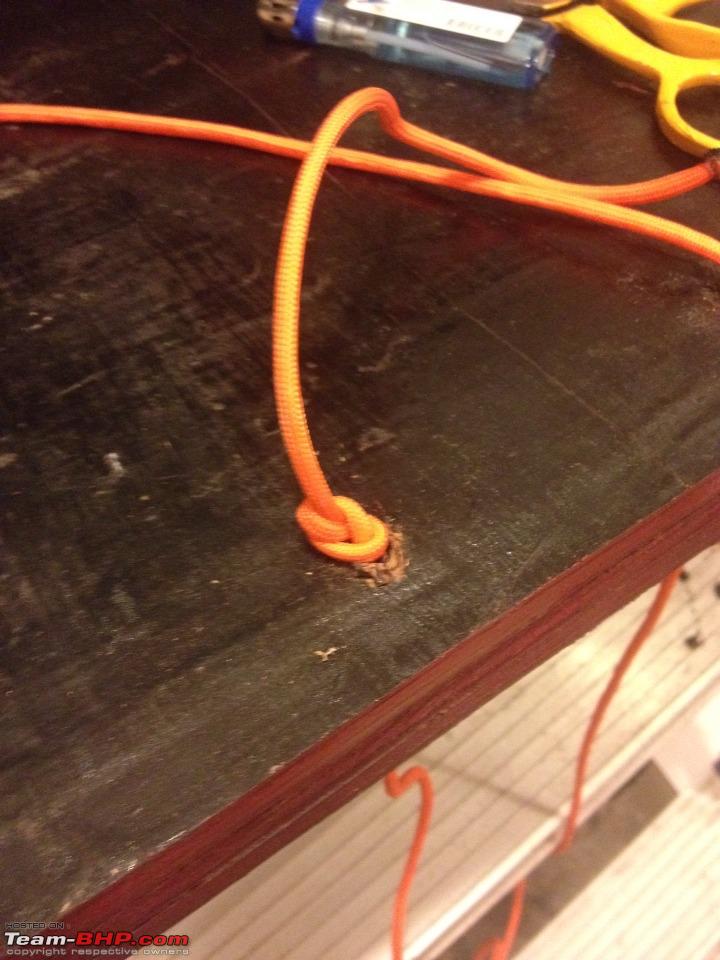
The second loop:
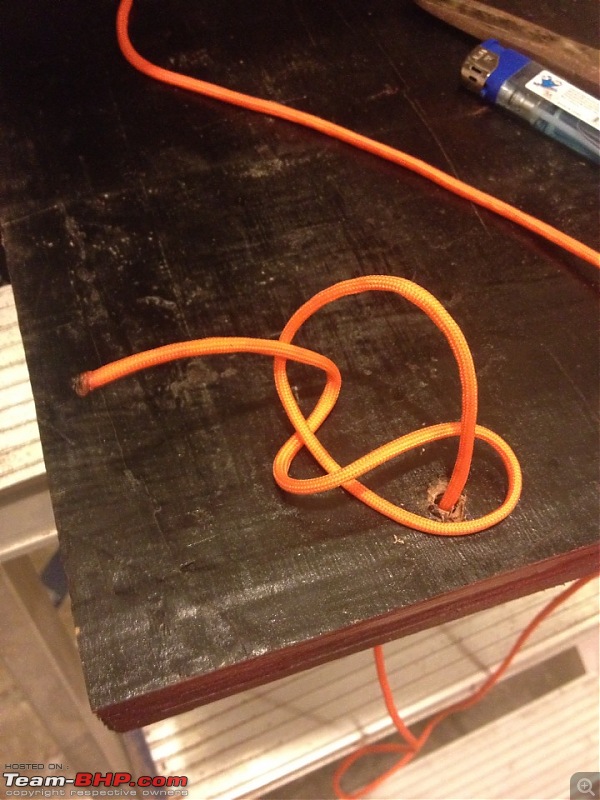
Pulled the ends and tightened the knot:
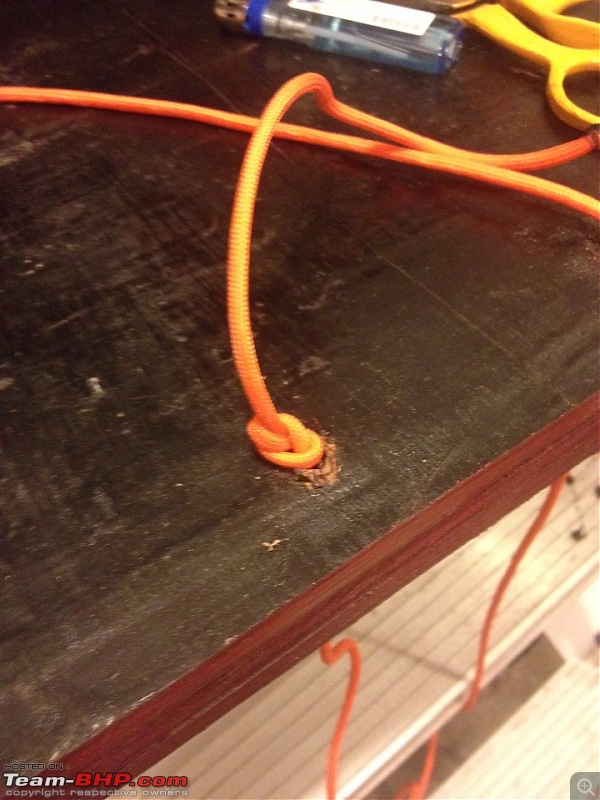
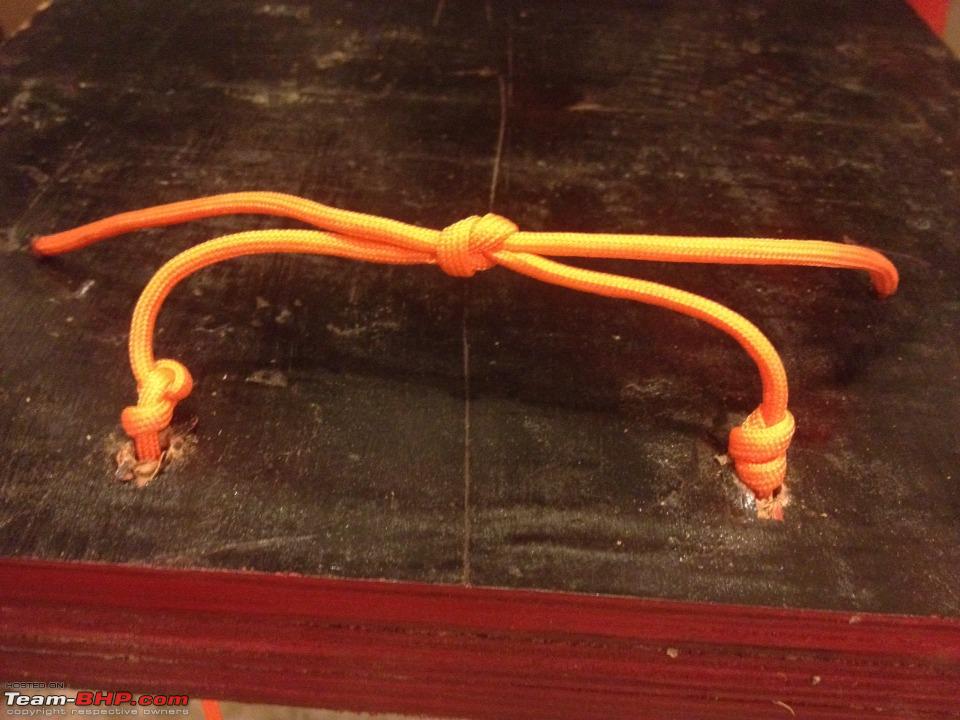
Procedure repeated for other side:
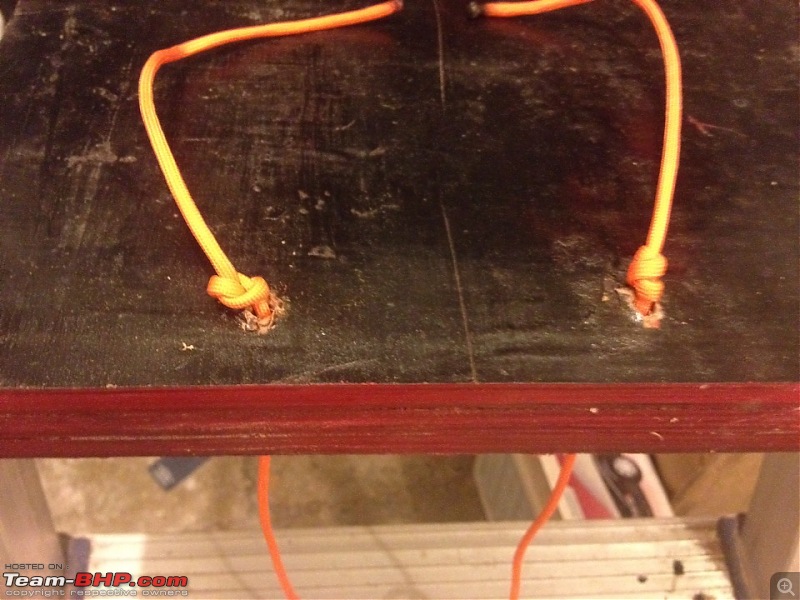
Safely takes the weight:
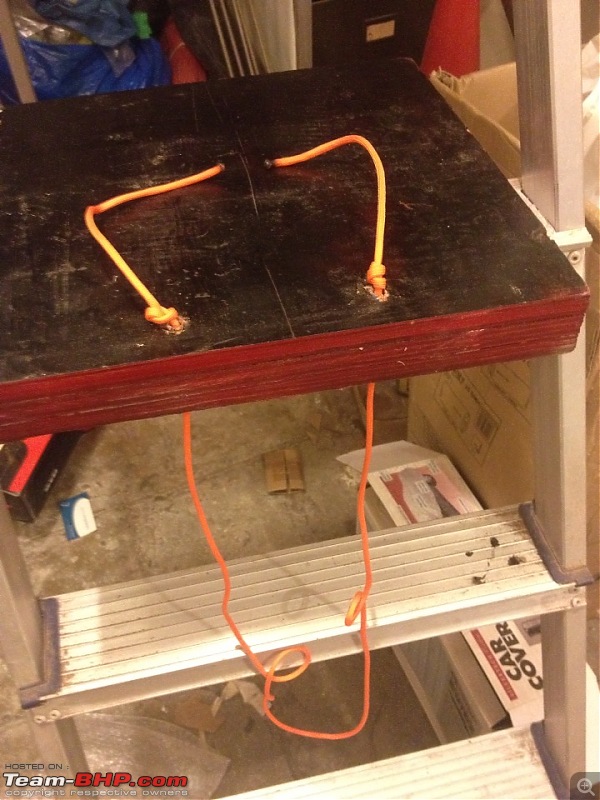
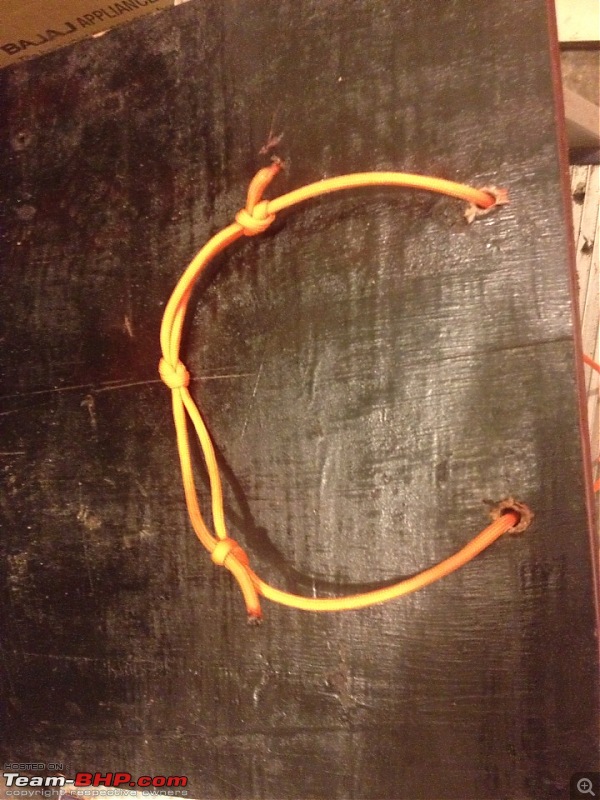
Now i need to do something with the tail. I could have left the tails smaller and let it be. But i purposely left the tails longer since i wanted to tie them both together for extra security and use it incase i need to shorten the length (eg. while carrying)
I used a simple square knot for this purpose.
There are many types of knots and you can search the internet for which suits you the best.

Knotted:
Now i can double the paracord handle to use it as a carry bag while transporting the block:
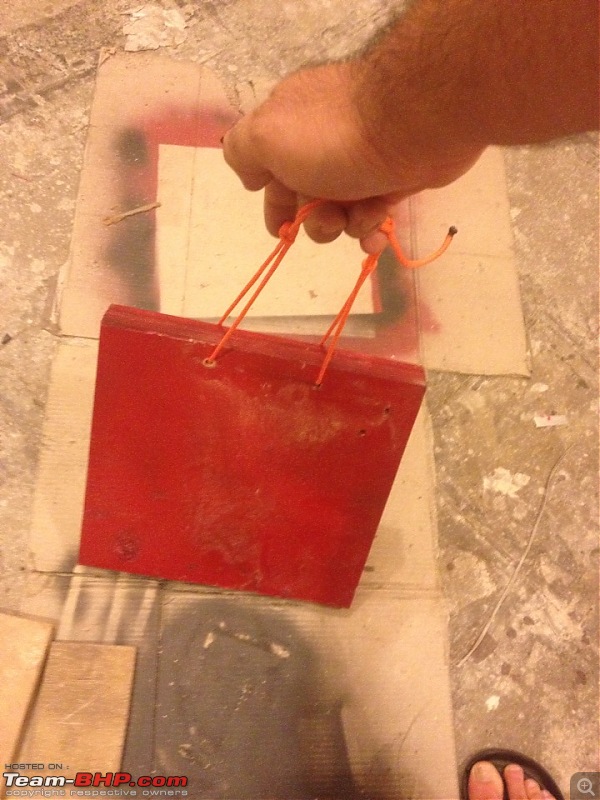
And once in mud i can make it to a single handle as it sinks deeper:
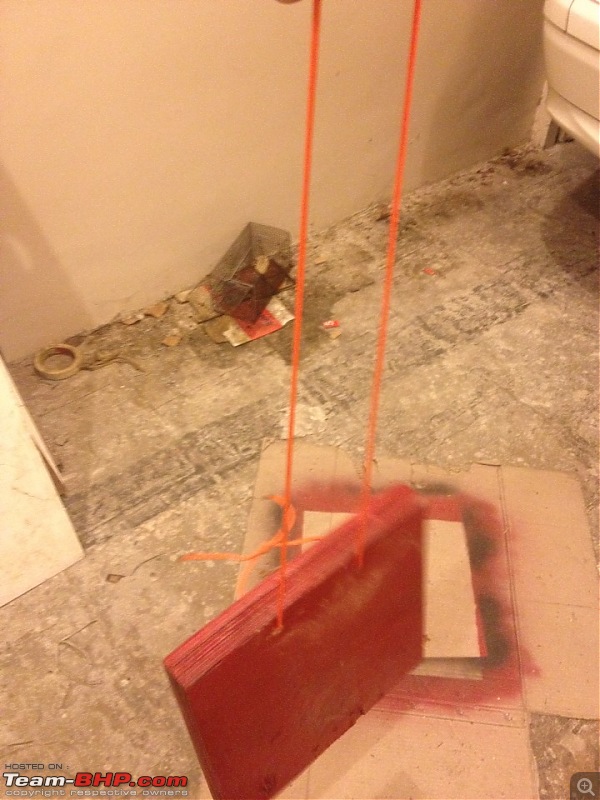
The two tails that are still loose, i slip loosen up my double overhand knot and slip those into it. Advantage of the double overhand knot is that you can easily loosen it and as the weight increases on it, it self tightens:
Self Critique:
- get a better block of wood
- get a plastic paint / wurth paint on existing wood
Miscellaneous:
You can use any other rope as well if you don't have paracord.
Next steps:
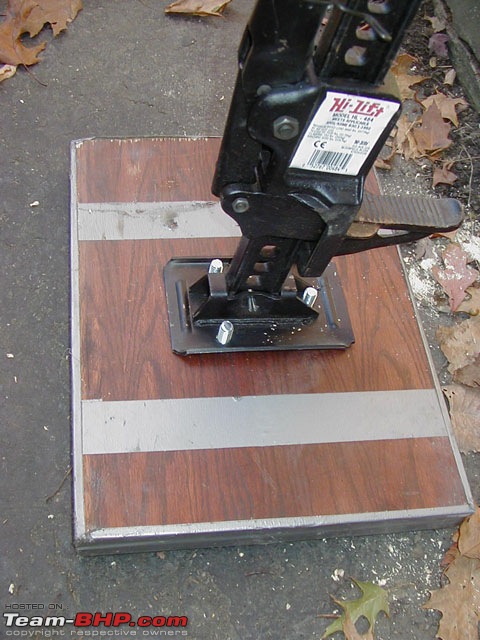
Although this board is fine to use, i'm planning to go ahead another step.
The jack still
may slip of the base. The ORB has a side border to prevent that.
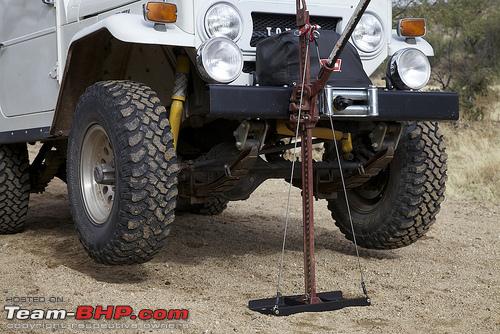
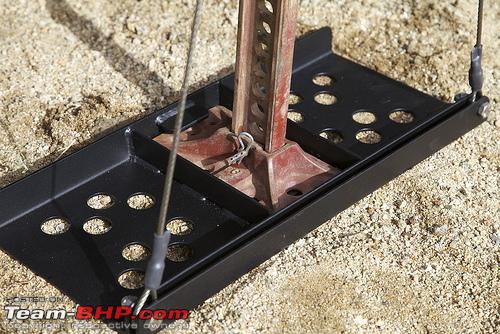
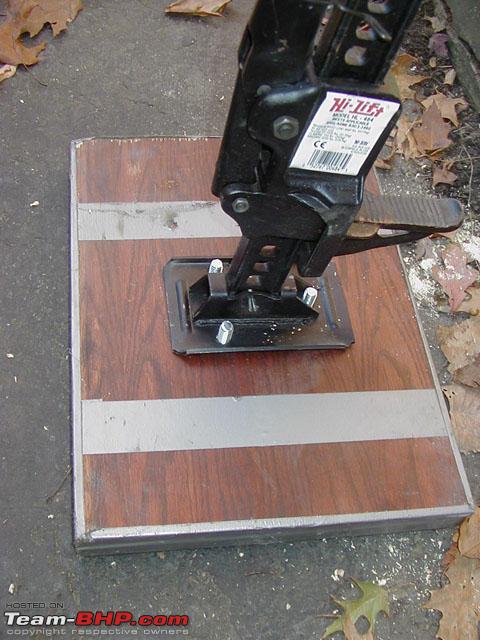
So either i nail a border or what i am considering is to drill holes in the wood coinciding with the holes in the Hi Lift Base and put bolts sticking out. Then i simply slide the jack over it. The bolts will not be the same diameter as the holes in the base plate, but smaller. The jack base does sometimes tilt very slightly as the vehicle is raised and this will allow it to happen without letting the jack slip.
Somewhat like this, but i'm considering a little play by mismatching the diameter. I'll have nuts with washers handy incase i want to tighten it.
Source:
http://www.4x4wire.com/toyota/minutemods/hilift_base/
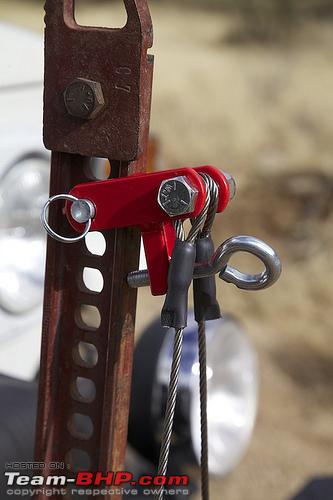
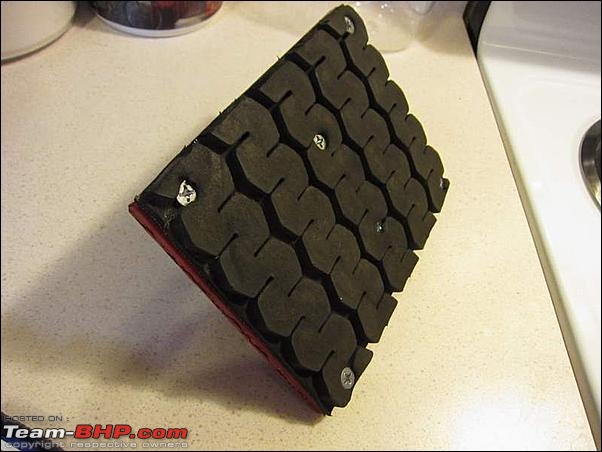
Stage 2 would be to replicate this once the bolts are fit.
A nice mod to prevent slipping of the jack when on hard surface.
Source:
http://www.fjcruiserforums.com/forum...jack-base.html
Would appreciate any better ideas / changes to the design.
Thread moved from the Assembly Line -> 4x4 Technical. Thanks for sharing!
Hi Tejas,
Nice DIY task. The wooden plank looks like laminated wood or ply wood.
These are notorious for soaking water, hence loosing their load bearing characteristics, leading to serious trouble.
Regards,
Arka
Quote:
Originally Posted by Tejas@perioimpl
(Post 3285714)
- get a better block of wood
|
Yes ,a solid piece up to 1.5 inch thick, check the sawmills around Panvel
Quote:
- get a plastic paint / wurth paint on existing wood
|
what ever piece of wood you use, check what kind of paint treatment the fishermen use for the wooden boats they build.
Quote:
Would appreciate any better ideas / changes to the design.
|
Quote:
Originally Posted by ex670c
(Post 3286597)
These are notorious for soaking water, hence loosing their load bearing characteristics, leading to serious trouble.
|
True, even good quality marine boards dont last in constant wet conditions.
Also I dont think joining two planks to increase thickness is good Idea, they budge or buckle early than expected under loads,
This is Pic of planks I have in my kit , these are 1.25 inches thick , a foot long & some 10 inches wide . have not painted them as the Idea about paint grade was not clear to me so left them un painted to get them dry quick
I think for this Particular Purpose a steel plate base would be better (as shown in early pics) than wood .
Sudarshan
I would like to use the foot rest we use to get in and out of the jeep double up as jack base . With a sliding feature to move inside while offroading .
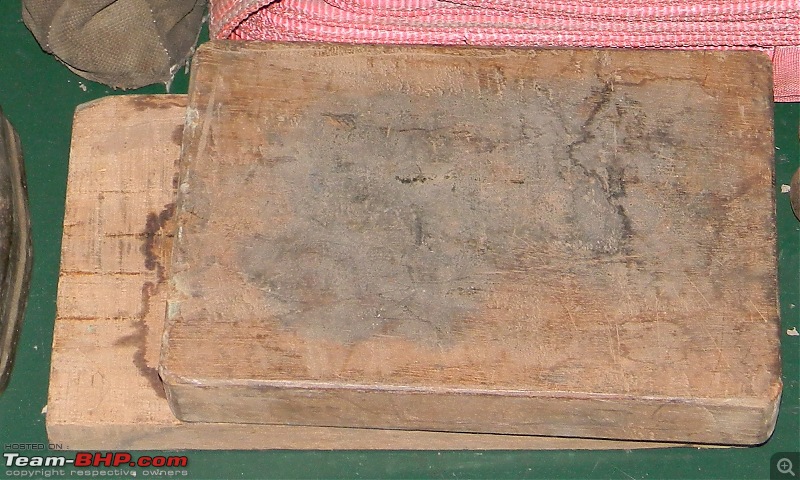
It's been nearly five + years since I made the DIY base and it's seen a fair bit of use as a base for the Hi Lift jack, to level the car during camping, etc and I'm happy to say that even though it's a ply, it has held up very well.
I make it point to wipe it dry after use in rain or muck. That's the only maintenance it gets.
Here it is today:
| All times are GMT +5.5. The time now is 04:33. | |