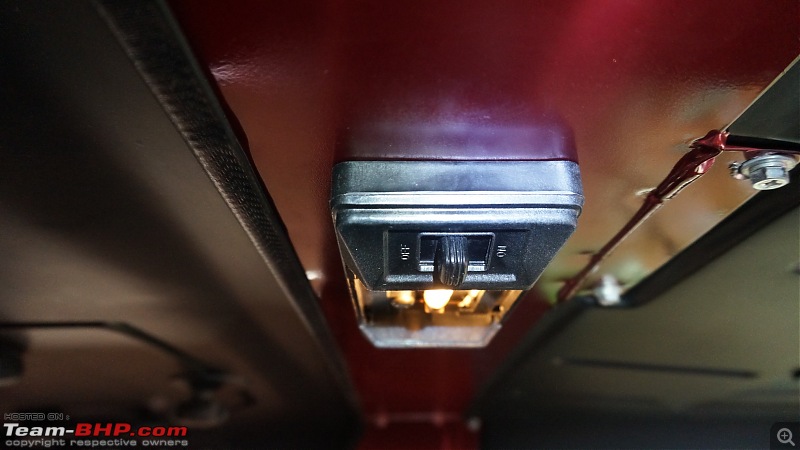
The 'center' position of the cabin lights is pretty standard across most cars and is used to turn the cabin lights 'ON' when one of the doors is opened.
Its a very convenient and simple feature and it really bugged me that this is missing on the Thar.
Fortunately, the existing cabin light assembly already has everything that is needed, to enable this feature.
There are two parts to this mod:
Part-A : Dismantle the cabin light assembly and enable the center switch
Part-B : Install a door open sensor for each door that you want the light to turn on for
Tools:
Spanner to disconnect battery.
Screw driver.
Really long wire.
Soldering equipment / Insulation tape
Door switch.
Part-A:
This mod was done way back in July-2014.
Disconnect the negative terminal of the battery.
Pry out the transparent lens of the light assembly. This can be done by sliding a flat-head screwdriver and lightly tugging it out.
Open the two large screws that are now visible.
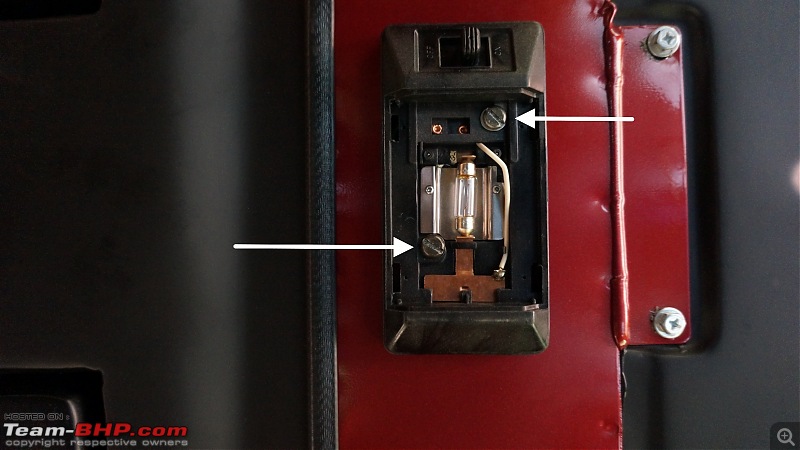
Carefully disconnect the black wire which is at the back of the assembly (sorry, no pic). Place the assembly on a flat surface.
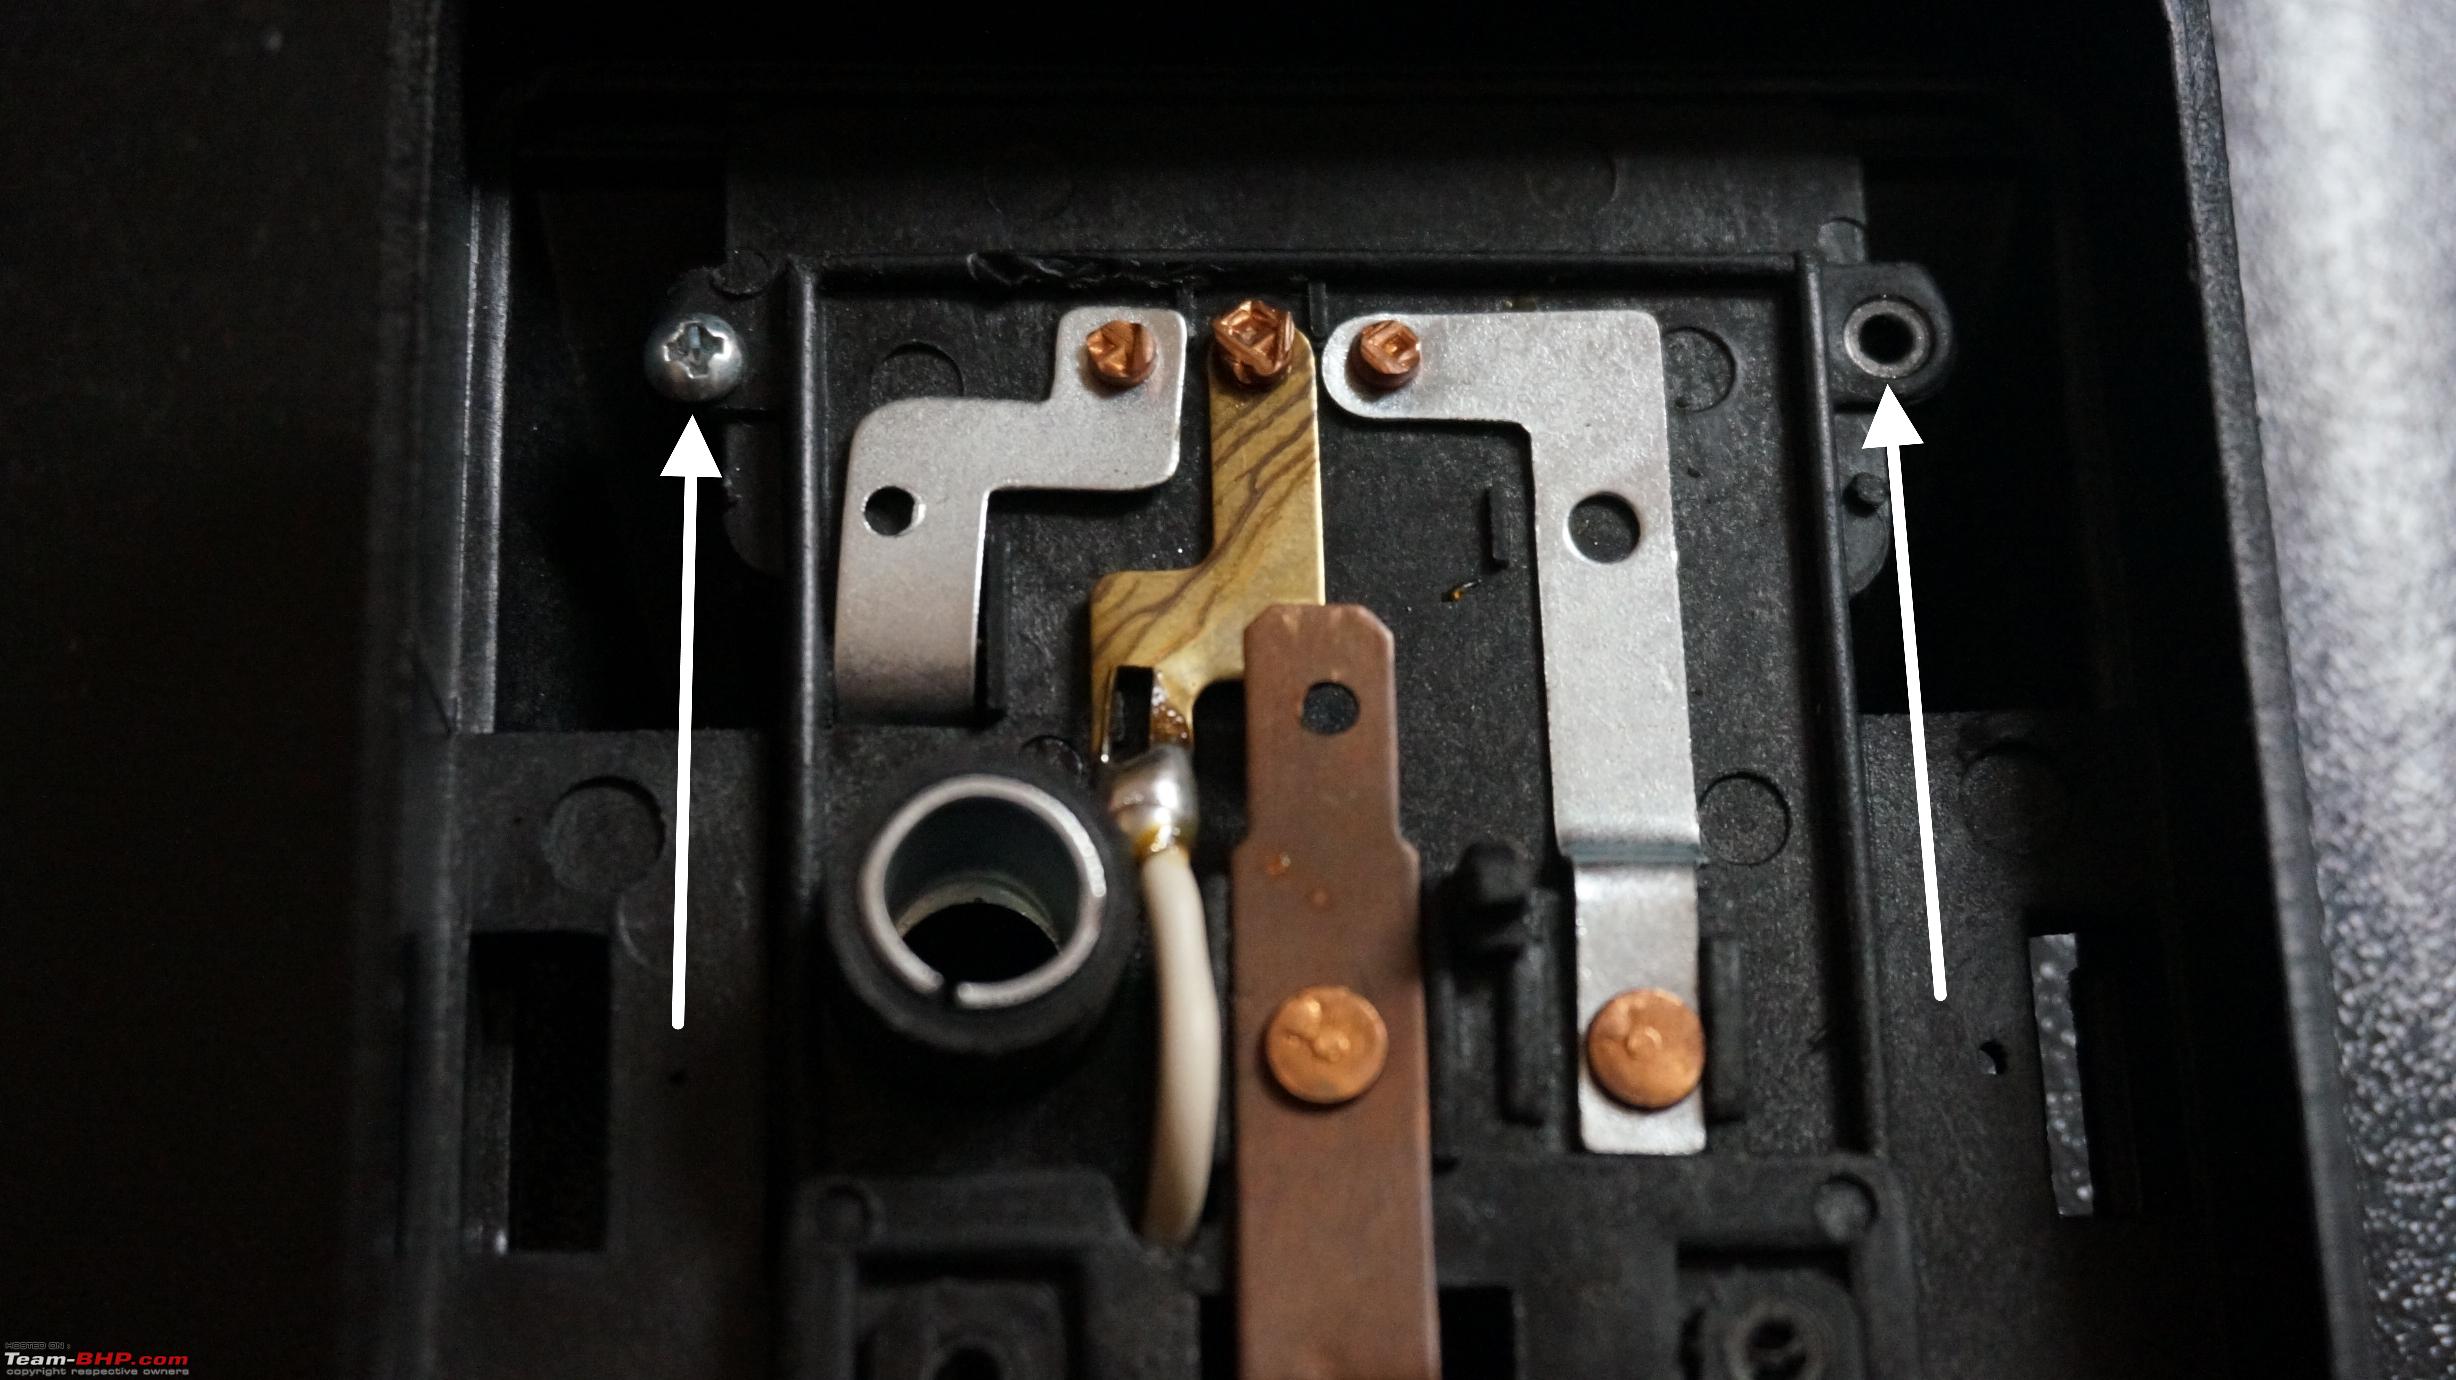
Open the two little screws. This will release the piece that you move from OFF to ON. There is a ball bearing and a spring inside of this.

Take that ball bearing and spring and throw it out!

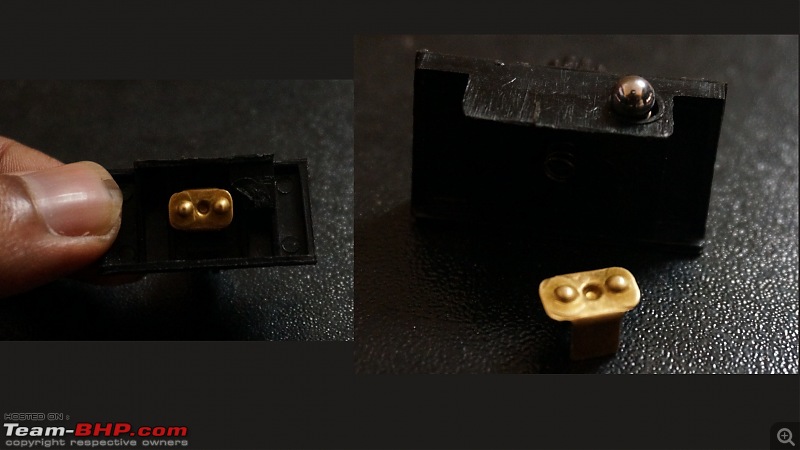
The ball bearing is responsible for the sliding effect that you feel when you move the switch from the OFF to ON position and vice versa. It also stops the contact points from resting at the center position.
This is a good time to understand how this switch works.
The golden piece in the previous image, is a piece of metal which has two protrusions that will make contact with two contacts on the switch assembly. It just shorts those two connections.

When the slider is moved to the ON position, the -ve of the BULB is connected to the VEHICLE GROUND.

When the slider is moved to the OFF position, the -ve of the BULB is connected to nothing.
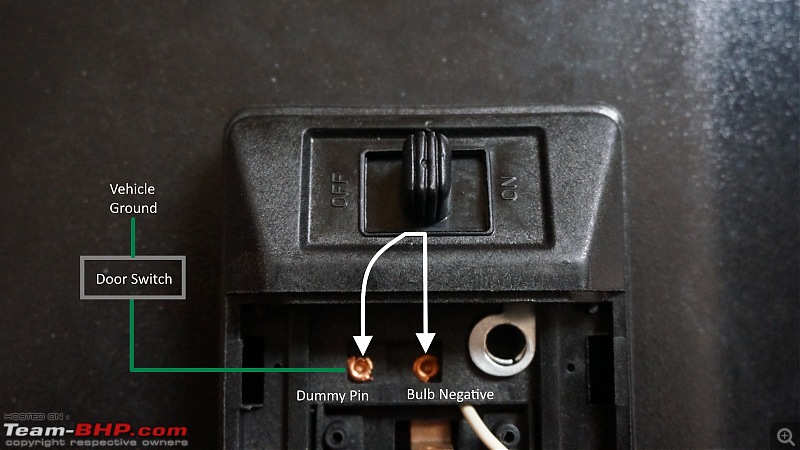
When the slider is moved to the CENTER position, the -ve of the BULB is connected to the VEHICLE GROUND via the door switch. Now it depends on the door being open, for the connection to be completed. This is exactly what we want. Once we remove that ball bearing, the switch will stop in this center position. Although it will feel a bit loose, contact is always maintained.
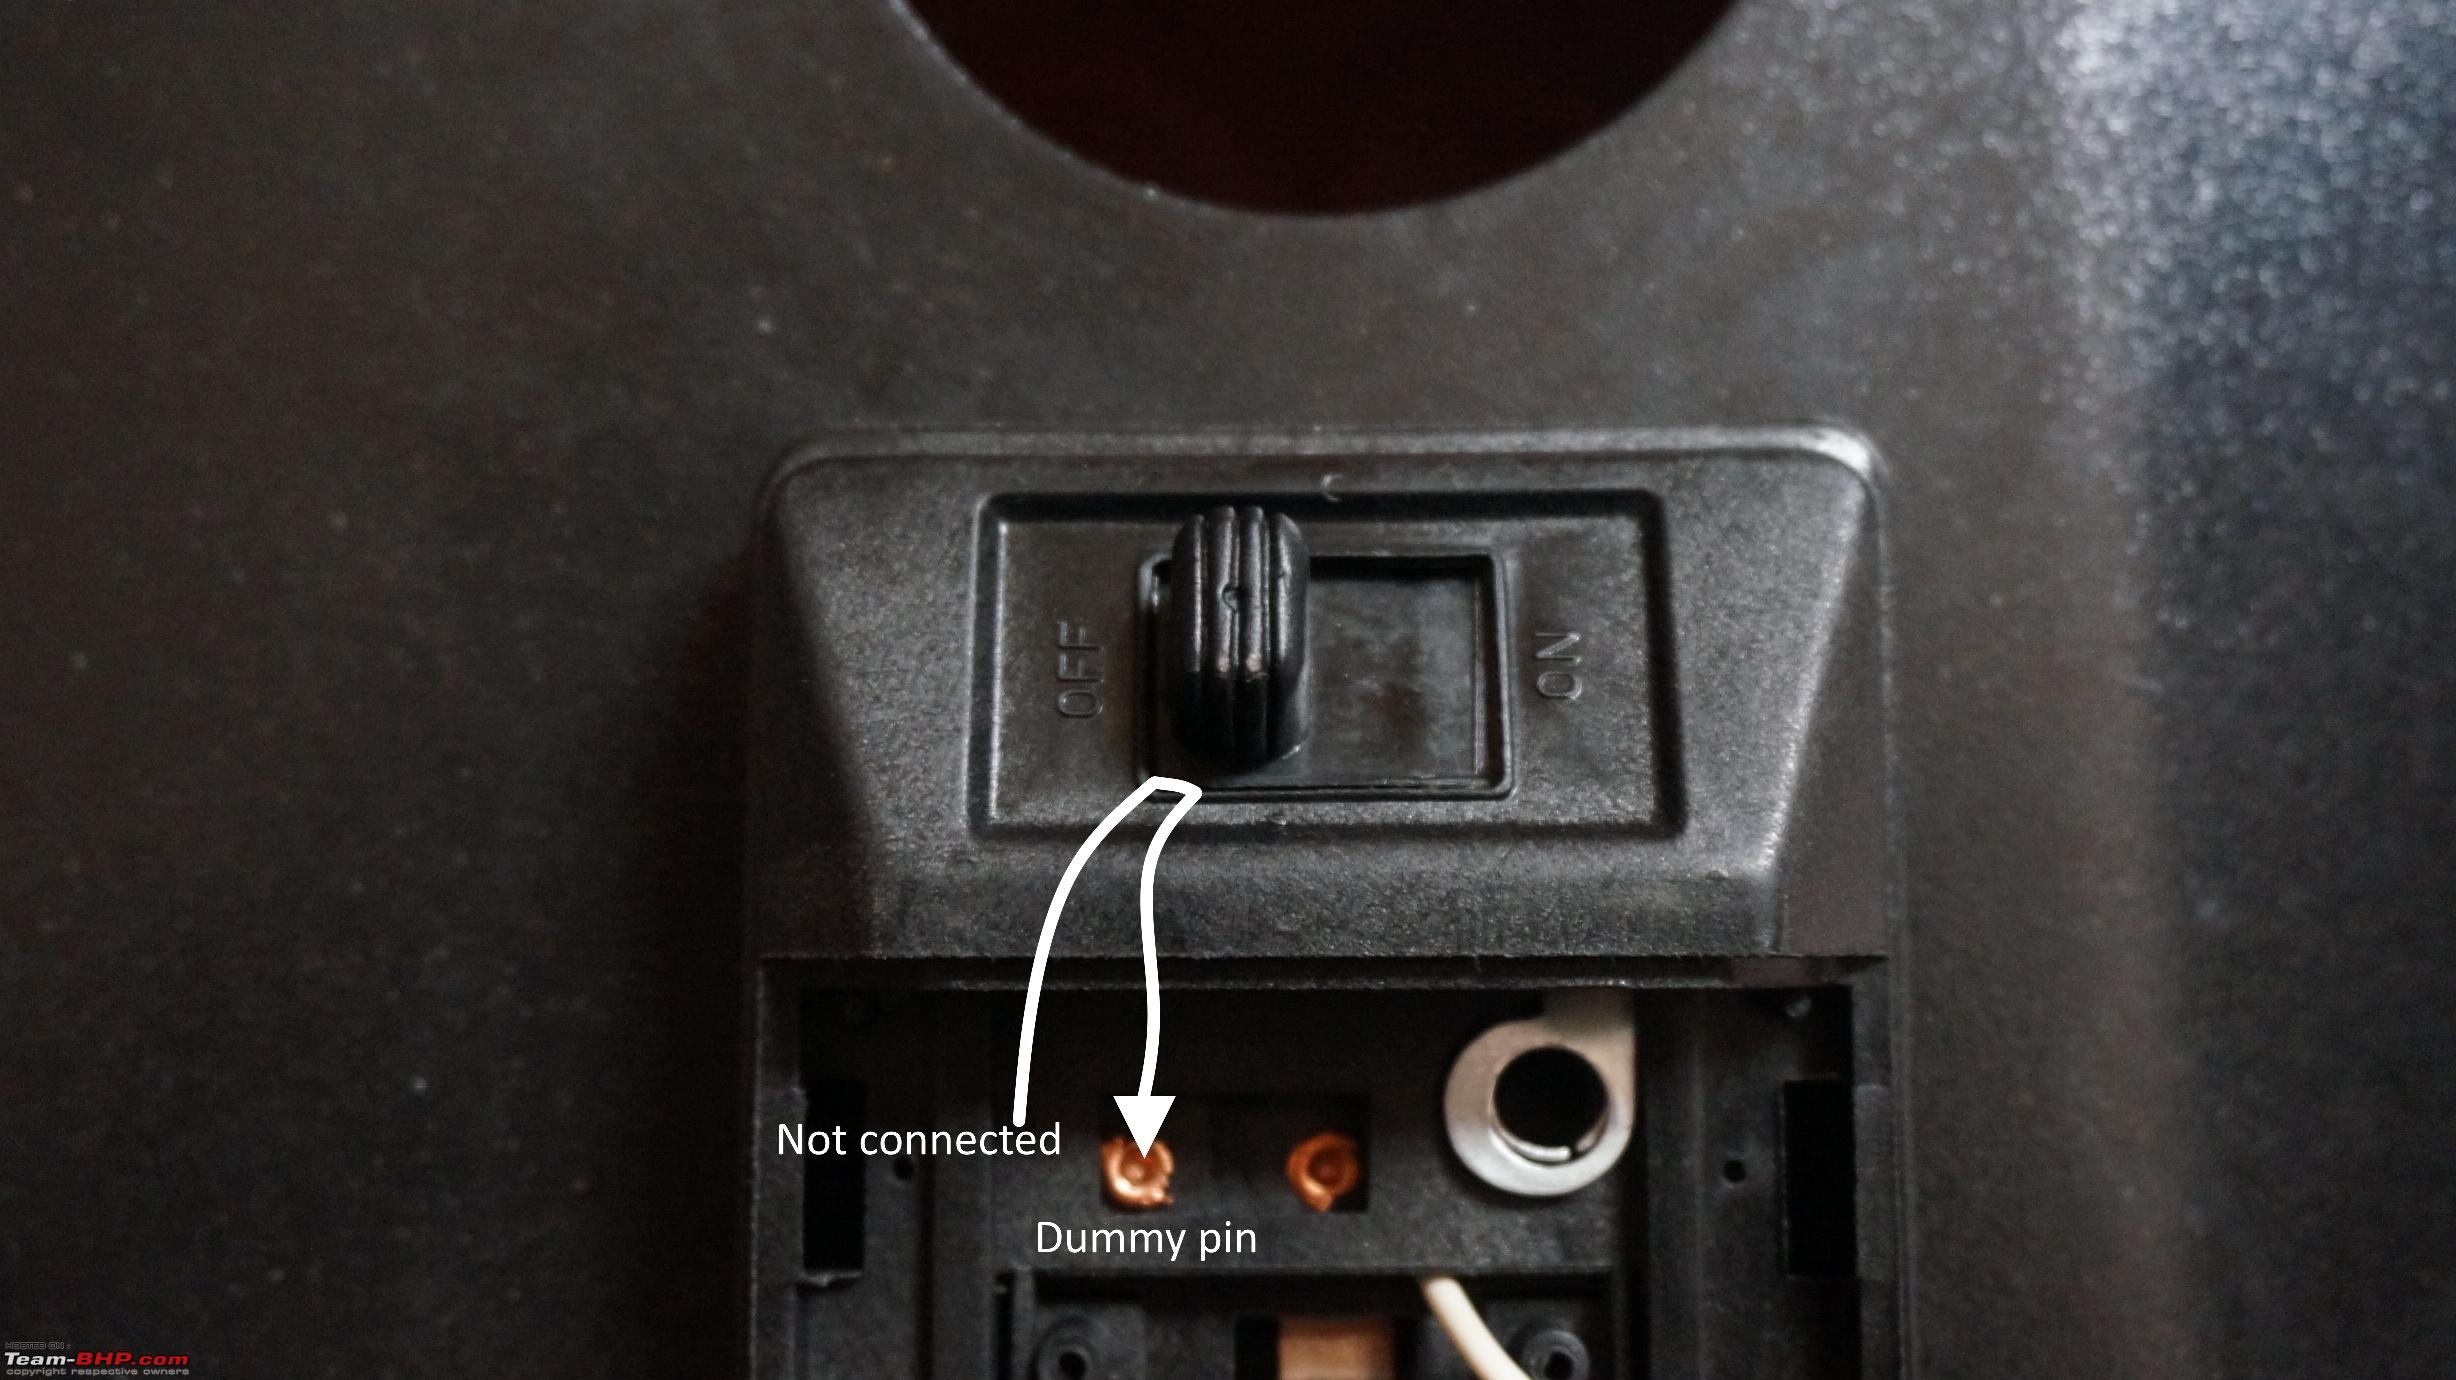
For this we need a really long wire, which will run alongside the black wire in the roof. We need to connect one end of this wire to the DUMMY PIN (not connected to anything by default) which is marked in the image, and the other end to the door switch.
Put the OFF-ON piece back and add the two little screws.
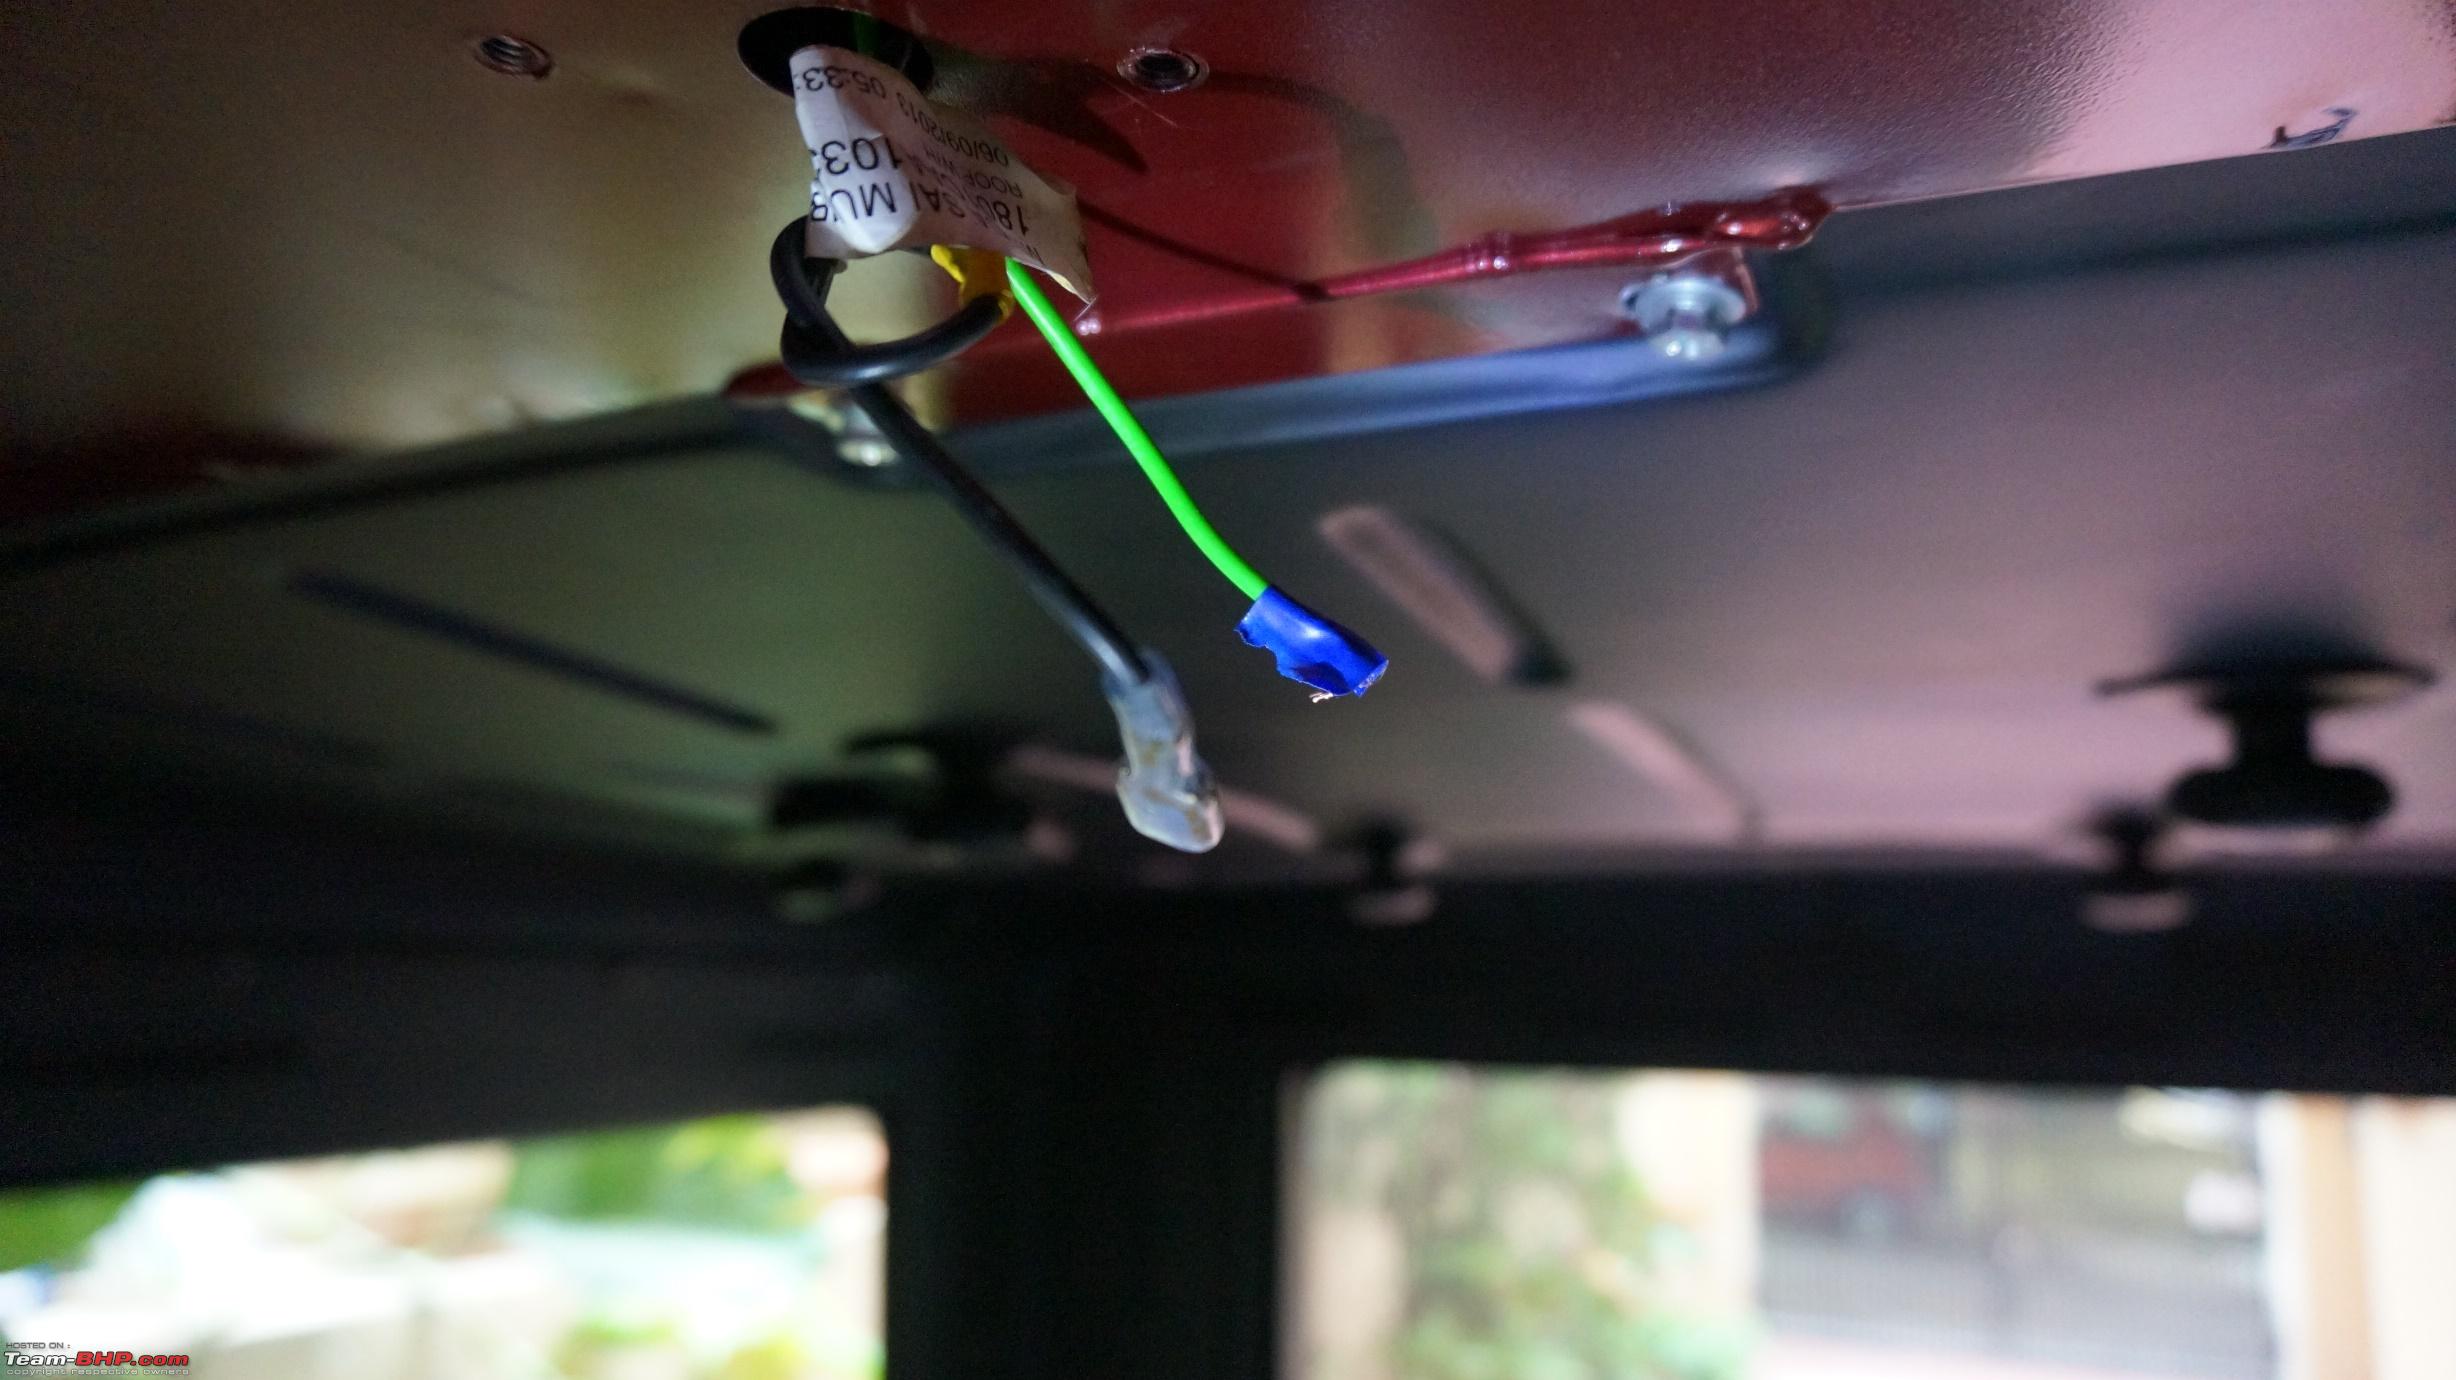
Take a really long wire and push it through the hole in the roof. The wire needs to be so long that it should come out near the passenger foot well.
Slowly wriggle/push the wire in the direction of the passenger door and continue until the wire is seen near the passenger foot well.

Connect the new wire to the silver piece of the light assembly as shown. You could solder it.
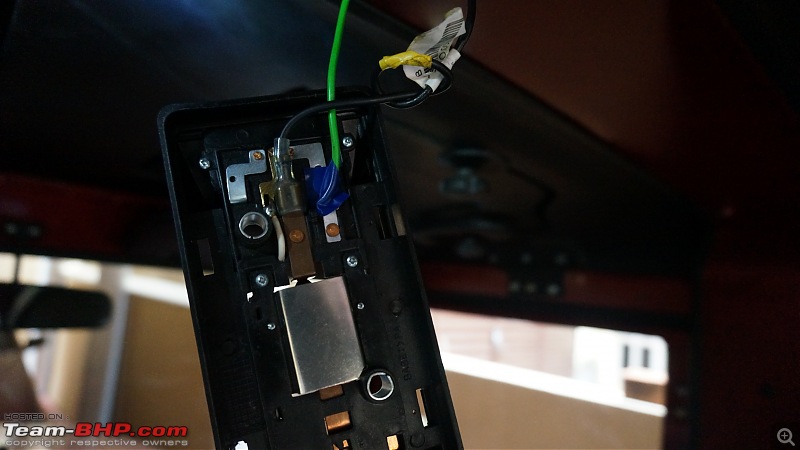
Install the light assembly back on the roof using the two big screws. Put the lamp lens back.
End of Part-A
Part-B
Install a standard door switch. These are available in accessory shops.
I took a different route by using magnetic switches instead. I did not want to go to the accessory store and get holes drilled for the switches. I was somehow convinced that the standard switches would not make proper contact when the door was closed. Anyway, if you are able to install a standard door switch, then that's all that's needed.
The door switch would be of type 'Normally Closed' or 'N.C', which means that the circuit is always closed, until the switch is pressed/activated.
One side of the door switch is connected to ground. Connect the other end of the door switch to the NEW-WIRE that you inserted through the roof.
Connect the battery terminal back. Keep the cabin switch in the center position, and test if the light is ON when the door is open and light is OFF when the door is closed.
Enjoy your renewed lighting experience


 1st November 2014, 12:59


 .
.

 (1)
Thanks
(1)
Thanks
 .
.


 .
. .
.