| |||||||

 |
| Search this Thread |  25,219 views |
 11th November 2022, 23:37
| #1 |
| Senior - BHPian Join Date: Oct 2007 Location: Seattle/Pune
Posts: 1,214
Thanked: 4,876 Times
| Project Chinondale | Building a Carbon-Fiber Bike from scratch A while ago I had free time and decided to build a bike in my patio as a winter project. After reading forums, watching YouTube videos I started looking up carbon frames made by Chinese companies and sold directly or via AliExpress like sites. Primary reason was cost and secondly the custom painting they offered - I could have any color like I wanted! The second option was of course to buy a used bike and perk it up but where is the fun in that? I deferred buying a readymade bike in favor of open-mold CF frame from China. Lot of folks scoff at Chinese goods. I did too. In fact I still do in some cases like those chintzy scooters that are spawning pan India. With apprehension, I went into rabbit hole called open-mold carbon frame manufacturing. Like the name suggests, open mold basically means the design is open-source like in software world. Anyone can take the source or mold in this case and modify per their liking and produce a new frame with some variations. And then sell. And profit. What that means is small boutique bike manufacturers can simply pick up a frame design from vast catalogues, fine tune the geometry, dial in all adjustments and get it manufactured from, where else but China. Once these frames have been manufactured per the requirements of name brand company, they are QC'd, labeled and sold - at astronomical prices in some cases. For this project my inspiration was Cannondale Topstone or a bike like that which usually starts at US$2700 + tax (INR 2.4L roughly) with low end Shimano components and goes upto US$8k. By now surely many of you have guessed how the name for project came to be  Obligatory disclaimer: I am not proposing everyone should build a bike from ground up. If you do and bike breaks in half while going down the hill at 70kmph you are kindly on your own, thank you…please assume the risks with such projects. Not that it WILL break but if does...the warranty on these frames (and wheels) is iffy at best from what I have read. To make myself feel better I dug up instances of Specialized and other top slot bike makers' CF frames breaking up. Its not common but it happens and same for wheels. With that out of the way, lets get into frame and component selection. One of the MOST exciting parts of the build! I mean who doesn't like to spend money online? Frame selectionCore of the build. The most important part of the bike and also the most exciting to hunt because you have SO many choices and custom paint options - its nearly limitless. Like the new Specialized S-Works STR paint job but is vastly out of budget? No worries, just find out the color codes and pattern and send it to custom paint shop. Like a particular bike's geometry? Most probably some frame with same geometry will be available at these shops. When I say shops, I mean various manufacturers and their websites selling open mold frames. I have consolidated all such shops that I considered while purchasing my own frame and put them in the excel sheet below for convenience along with all other parts needed for build and tidbits. I will continue updating it as I make changes and upgrade parts. The frame I ordered is the one highlighted in yellow. The second page has list of all bits and pieces that I ordered along the way. I realize that to open most of those links, you may need a VPN since its mostly AliExpress stuff. Geometry I was personally looking into a frame that would allow comfortable geometry and clearance for wide, thick tires. Which meant it had to be a gravel frame. Since last few years, gravel is a surging trend with companies bowing to market and launching gravel specific products like GRX by Shimano and XPLR by SRAM. How much difference it makes to get gravel specific components over road components? Short answer - not much. Long answer? We will see later, as I found out from my personal experience. Majority of gravel components is marketing gimmick and you should be fine with road components for most use cases. Back to the frame, apart from lazy angles and tire clearance I also wanted a frame that allowed multiple bottle holder mounts, fender mounts, and disc brake compatibility. Disc brake caliper mounting is another pain point as I later found out and if you are looking to build a bike, pay attention to whether the caliper mount is flat or post or IS. Most new frames now a days are coming with flat mount while just a few year ago most frames were post mount. There are plenty of calipers in the market for post and flat mount each. Not only that, since flat mount calipers are the new thing, companies have come out with adapters that let you mount any caliper to any type of mount. Theoretically it is all supposed to work out smoothly but it doesn't. More details about this in component selection. Bottom Bracker Dilemma Then comes the biggest pain of them all, the bottom bracket standard and cranksets that go with them. Another problem that should not have existed if companies didn't try to "innovate" something that was already working fine. Like they say "if it ain't broke..." but biking industry is not the one to think logically. One of the best BB standards guide is here. Its mind boggling. When you purchase a frame, pay special attention to this mess. Ironically, after many standards evolved over last 2 decades, the industry is going back to age old standard called the English BB or threaded BSA. Take my word and look for something with BSA or T47 BB. Refer to above URL for more information. With that said, I ended up with a frame that is BB386 which comes with its own loopholes and pitfalls besides allowing only certain type of cranksets. Of course if you are really willing - there are adapters to allow incompatible cranks fit into it. Of course. Wheel dropout type Wheel dropouts is also something you may want to keep an eye on. The quick release (QR) standard is fast being going out of fashion for gravel/CX frames and being replaced by thru-axle (TA) for more rigidity on harsh terrain. Not all wheels are compatible with these styles. Some companies do allow converting QR wheels to TA but many don't. If you have old set of wheels that you plan on using like me, be cautious. As I found out later, assuming things can be very frustrating. More on this in wheels section! Price And then there is the price. Top notch race spec CF frames by name brand can cost up to $8k to $10k while most consumer spec frames fall into $2k to $4k or thereabouts. Still a top dollar amount, just for the frame. You can save some bucks by going to smaller manufacturers like Bombtrack, IBIS for example. Or you can save some real moolah by going to Chinese open mold frames which is the topic of discussion here. Most of the frames fall into price range of $500 to $800 + shipping and if you decide to paint the frame, that is another $80-100 bucks. The painting costs vary largely per the seller and costs increases per your customization. You also have choice of matter or gloss finish. The ultimate saving comes from keeping the paint raw or UD finish as they call. In that case, it is just the frame and shipping cost. I was tempted to keep it raw but I am not really a black color person and generally try to avoid purchasing anything in black if I have the choice. Decided to get it painted in some "earthly tones" and did a Google search for inspirations. That search led to me to some interesting frame makers. I simply downloaded a picture of one of the frames that I liked and kept for reference. Sizing While looks are important, even important is the sizing. Most of these websites do not have sizing guide like you will find on Cannondale or Specialized. So what I did is this. Went onto Cannondale's website and acquired a size that would suit me. To confirm, I did that on many other websites. Almost all confirmed that I needed a bike in size L or 56 in most cases. Next, I looked at geometry of 8 to 10 different gravel bikes from Cannondale, Marin, Specialized, Trek in size 56 and collected the reach and stack numbers. On average, I needed a reach of 380 to 390mm and stack of 580-595mm. With that finalized it became easy to choose a size since all the Chinese websites do have geometry charts for every frame they sell (thank god). In general I have seen that none of the frame have crazy geometries and stick to mainstream numbers. What that means is if you are size 54 in Trek, you should be good to go with 54 in most of these frames. With that said, still, don't assume and verify numbers. Sometimes those frames are sized according to Asian markets and their size L can very well be M or S for rest of the world. If you do mess up sizing, all is still not lost. Bike feels too upright and short? Add a longer, negative angle stem. Still short? Add angled seatpost and further push the seat on rails. Bike feels too big? Oh well, now you are in real trouble. Pretty much only thing you can do now is add a short 70-80mm stem and hope it works. When in doubt, go for a shorter size. Painting the frame Now we come to colors. Like I said it is entirely optional. If you are one of those "stealth" look guys go for UD matte finish. If not, then find a sample picture of the frame like I did and send it over to sales rep you are talking to. The color accuracy and pattern matching is about 90 to 95%. In my case I would say they came very close to what I had sent. The colors they use are called Pantone or RAL. What you have to do is pick exact color code from the chart and send it over. I found out that eyeballing correct color from huge chart is near impossible and used a website that allows you to pick a color from the image and gives closest matching RAL or Pantone code. Pretty cool! Here is that website - https://www.printkick.com/tools/image-colour-match Purchasing The actual purchase of the frames isn't as straight forward as adding stuff to cart and paying it like on Amazon. Most of these companies have archaic websites looking like they were made in early 2000's with very clunky UI, bad grammar, many clerical mistakes, poor color representation, just plain wrong information in some cases and lastly many of them don't even have prices mentioned anywhere. So the way it works is, you have to find email ID or Skype ID of the sales rep and send them a mail with all your queries. With luck you will get a satisfactory answer in first go but chances of that happening are slim. Basically you keep mailing back and forth until all your questions are answered. If you do this, I urge you to ask all basic questions even if it is mentioned on the website like what kind of BB is supported, which calipers I can mount, is the frame full internal or semi internal etc. Don't leave any stones unturned - you will thank me later. Most importantly as I learnt slowly is to keep the language in the mails as simple as possible. I also found out that Skype is better than emailing them but not all reps have Skype. If you go email route be very, VERY patient. It can be a frustrating experience trust me. When in doubt ask for actual pictures of the frame. Internal cable routing or not Before I forget - industry is leaning heavily towards full internal cable routing (ICR) and most if not all open-mold frames are full ICR. The ICR can be a major, MAJOR pain point not only while building the bike but for future maintenance too. Since I am a sucker for pain, I decided to pucker up and went with full ICR unknown of the hell that was going to be unleashed on me later. The ICR can be achieved in two ways a) fully integrated handlebar where stem and handle are molded together. The angles are fixed and cannot be changed later. b) Separate handle and stem with matching holes on both to route the cables. Regardless of option, both of these can be super frustrating. But, things we do for clean look! Most of the sellers do give you option of semi-ICR which to me sounds like a much better compromise. Looking back I should have gone with semi ICR but its too late now. When time comes I will build the bridge and cross it. The ICR also warrants using expensive compressionless cable housing and preferably PTFE coated inner cables. The more I think about it, the more pointless it seems to me. This particular article explains perfectly the perils of ICR. Any way. After color, pattern, size, pricing (and discounts if any) everything was discussed with the vendor I chose (Velobuild) I was presented three different options to pay. Two of them non-fee and one with fee. I chose the fees option (PayPal G&s) for a nominal fee. If anything went wrong, I wanted some support by my side. For a few bucks, the peace of mind that PayPal provides is invaluable. Again, its not like Amazon. So after payment is done, I sent a mail to sales rep with payment details and order ID. Since each order is highly customized there is a need to associate your payment with the order. Once payment was done, I sent again the frame picture all the Pantone codes and list of other accessories I paid for. Warranty? 2 years - which I hope I never have to claim. Here is what I ordered: 1. Frame in size L/56. 2. Carbon fiber bottle cages 2 pieces. 3. Rear derailleur hanger 2 pieces extra. 4. Headset spacer set 1 piece extra. (set of 5 spacers) 5. Seat post clamp 1 piece extra. 6. Painting fee for 3 colors. One RD hanger, spacer set, seat clamp is all included in the price of the frame but I ordered extras just in case. And it was an excellent decision as I found out later.  Mock up that I sent.  Actual frame I received. Pretty close to mock up I say. As you can see, the frame was done up nicely. The payment to painting took exactly 2 weeks as communicated. After receiving the mock up in the mail, frame was shipped by FedEx in two days and tracking number sent to me. For the records, China to my home in Seattle the frame took 5 days. By 3rd and 4th day I was giggling like kid going to Disneyland. On 4th day I could not wait for delivery and called FedEx local delivery center to put a hold on delivery so that I could pick it up myself - I did not want to keep circling and looking out the window whole day. The next day I reached FedEx center 745AM, about 15 minutes before they opened their doors to impatient customers like me. With a beaming smile I received my package at 805 and drove back home as fast as I could. Boy o boy, I do not remember when was the last time I was THIS excited  Reached home in 15 minutes, carried the surprisingly light box in living room and carefully took pictures of the box from all the angles without opening. Then came the big moment while the wife looking at me questioningly. With shivering hands I cut the tape and opened the box only to be greeted by massive wads of thick foam. Oh, that is a good sign I said to myself. You want as much foam as you can humanly want around your frame. Slowly pulled out everything from the box, and without unwrapping foam strips, took pictures of everything. Then, I unwrapped, made sure my order was fulfilled 100% and went on to proceed with frame for any damage and cracks. Thankfully, there was nothing worth panicking about the frame itself but one of the parts - the bottom bracket was missing. Not a big deal but worth noticing. As I inspected everything there was one more thing missing. The cable guides within the frame for routing. These guides help you push cables into correct outlets. I was bummed a little but couldn't help it. I had seen pictures where the frame came with cable route guides.    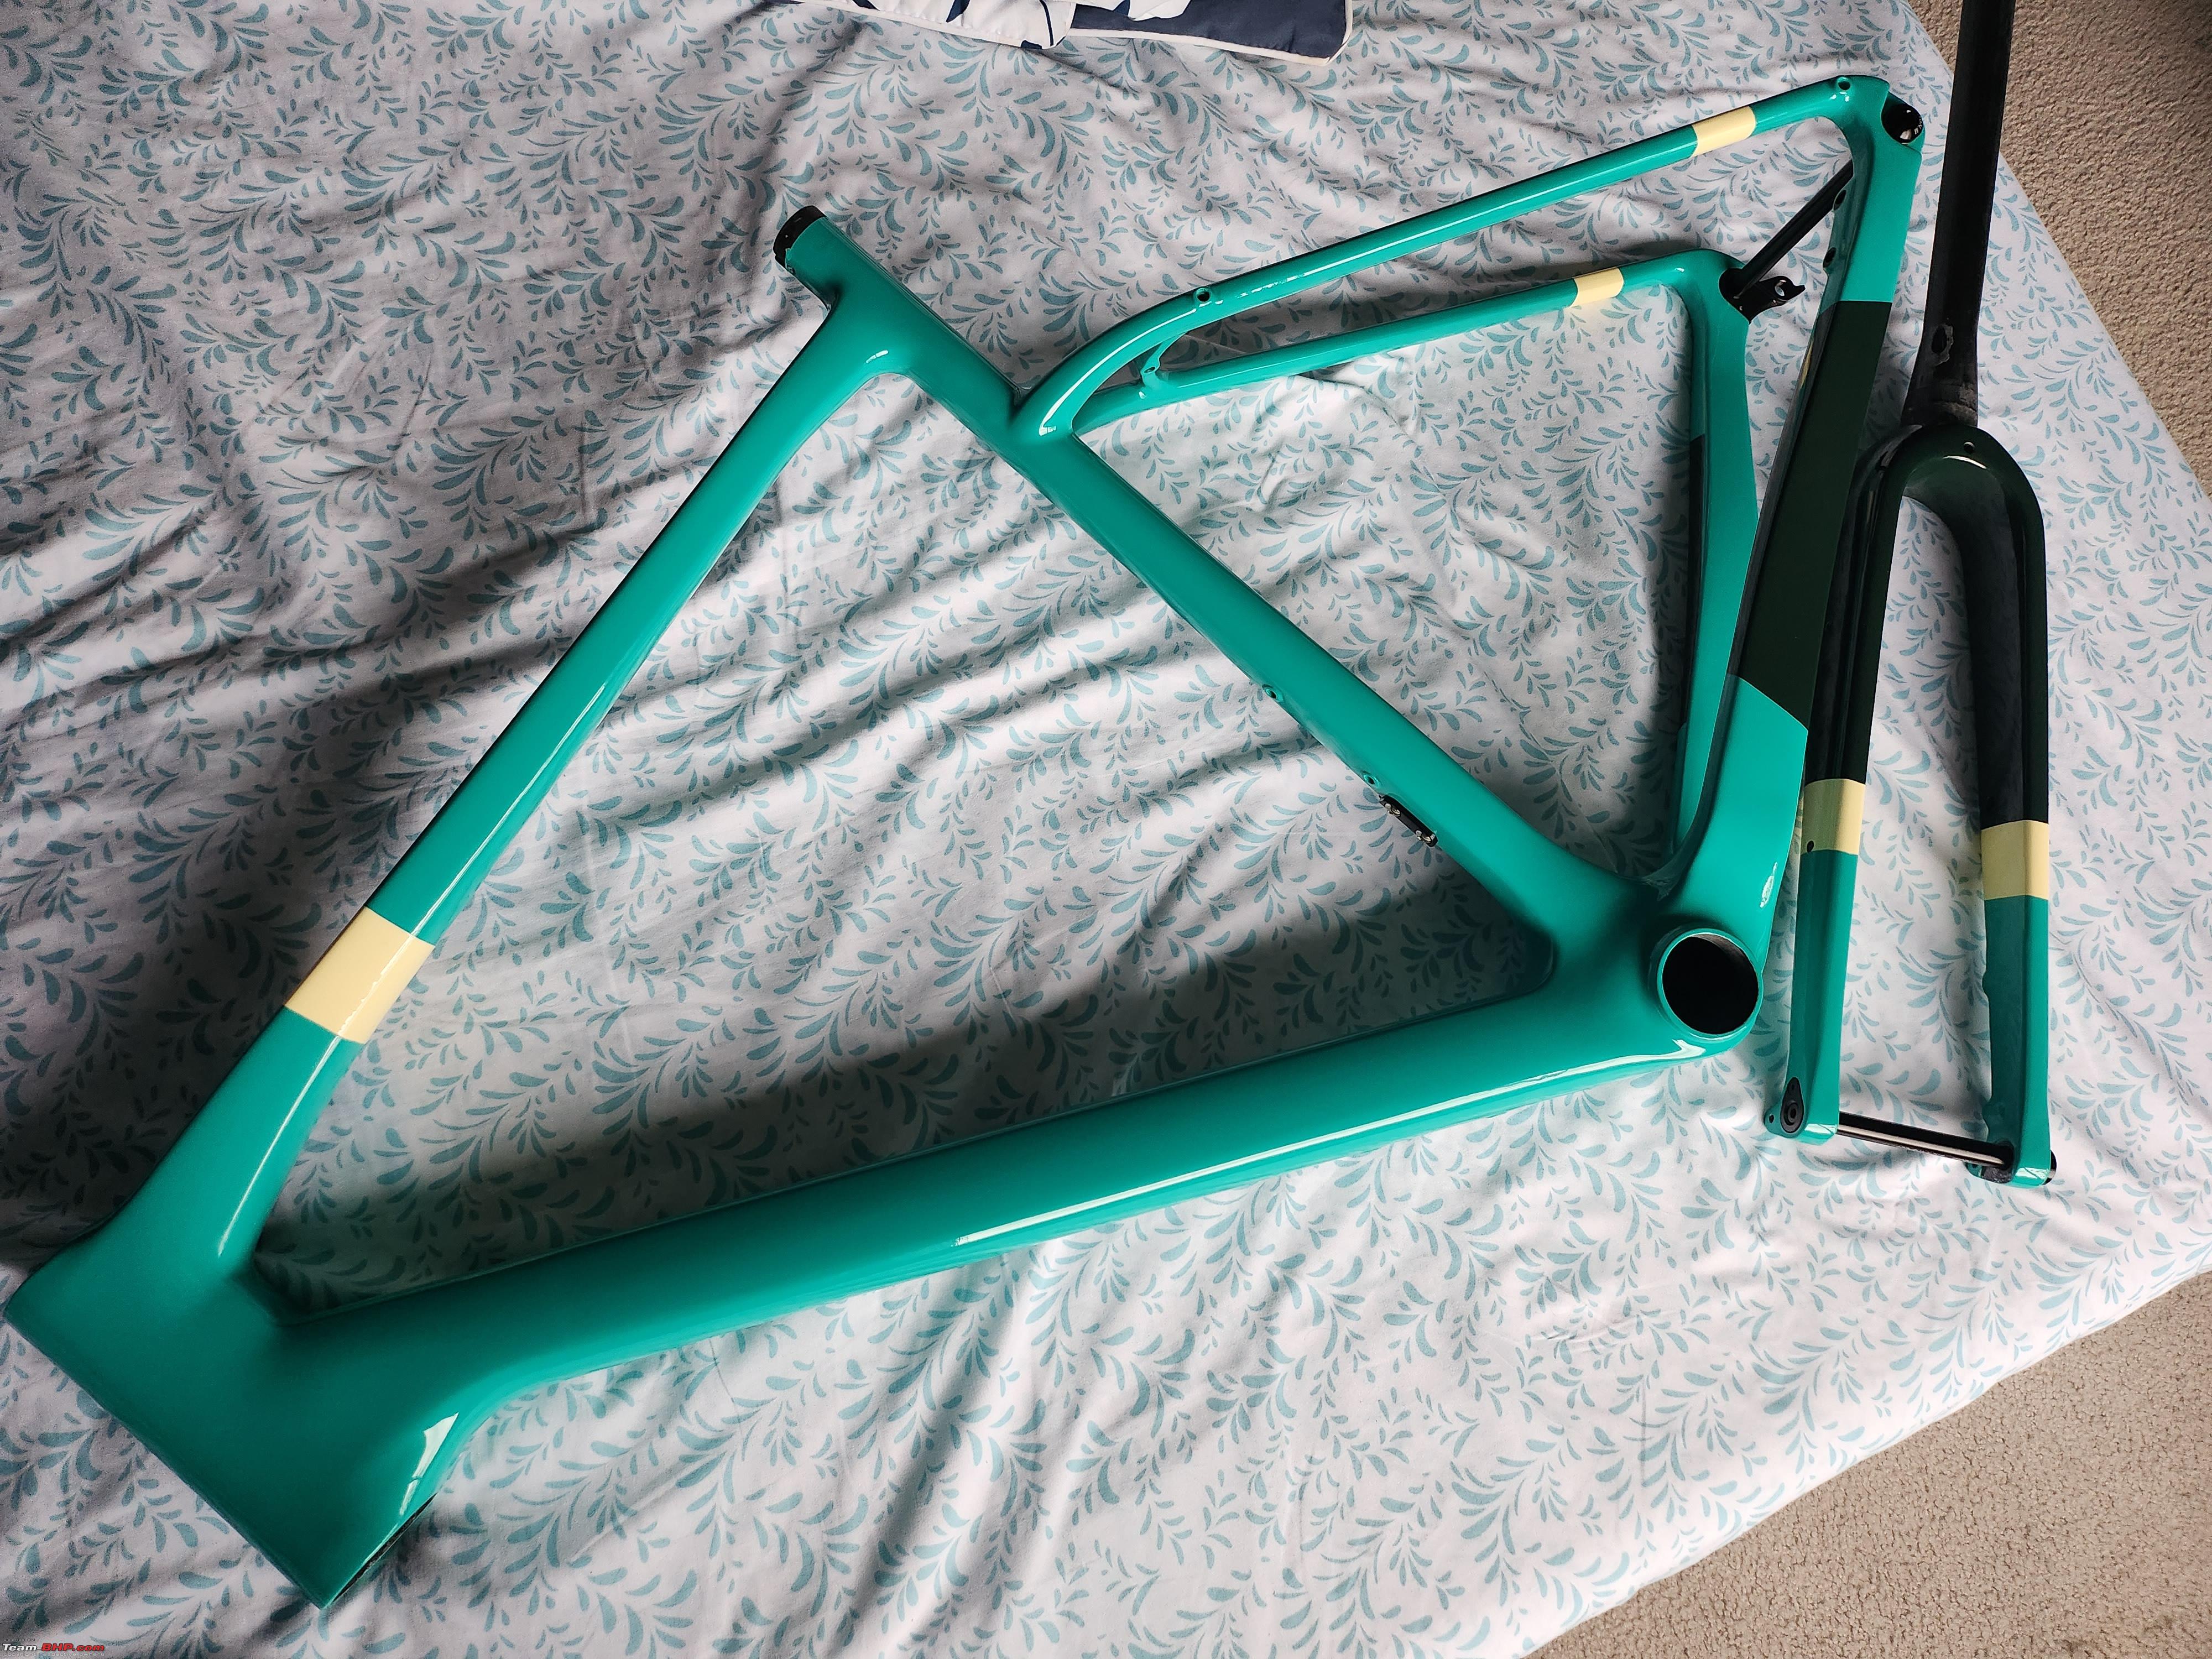 After I was satisfied with the paint quality, frame quality and parts I sent a mail to sales rep informing of the receipt and also of the missing bottom bracket. He apologized and promised to send the BB immediately. The BB came to me in about 2 weeks uneventfully by which time I had already acquired a good bottom bracket the details of which will be discussed in next section. Last edited by amol4184 : 20th December 2022 at 08:59. |

|  (24)
Thanks (24)
Thanks
 |
| The following 24 BHPians Thank amol4184 for this useful post: | 14000rpm, 2himanshu, anshumandun, ashpalio, AtheK, DetonatoR, DevilzzzzOwn, FueledbyFury, GTO, gypsygenes, InControl, kat, KK_HakunaMatata, LordSharan, mh09ad5578, PraNeel, sad:), Samfromindia, shipnil, SJD@NewDelhi, tatafanatic, vb-saan, VinNam, ysjoy |
| |
|
20th December 2022, 05:07
| #2 |
| Senior - BHPian Join Date: Oct 2007 Location: Seattle/Pune
Posts: 1,214
Thanked: 4,876 Times
| re: Project Chinondale | Building a Carbon-Fiber Bike from scratch Wheels selectionAnother rabbit hole if you may. You probably have more options in wheels than the frames. As it stands, biggest weight gains can be had from wheels. In fact more than anything its the wheels that make difference in how the bike rides. I was least bothered about it because I already had a set of wheels from the donor bike that I was going to sacrifice for this build. In my mind it was all going to be a perfect fit with a few adapters - until it didn't. The problem was basic and my over confidence didn't allow me to abandon hope early on. The wheels I had were of quick release style (QR) while the frame I ordered was with thru-axle (TA). I had assumed I could convert my QR wheels into TA and voila! But nope. Not all wheels can be converted. Especially not mine. So I first sent mail to manufacturer (Diamondback) asking for conversion parts. They directed me to wheel maker since they don't make wheels but ordered another company for OEM spec wheels (HED Tomcat). So I sent mail to HED. Looks like HED only makes rims and spokes, they don't actually make hubs. Oh okay? I was getting worried at this point. The HED rep did send me customer care email of the company from who they got the hubs. Exasperated I sent mail to that hub maker called Joytech. After a few days rep from Joytech replied to my mail asking which model of wheels, model year etc I had. My hopes suddenly jumped and sent photos to the rep. Reply came as a definite no-go. Apparently the hubs that I had were custom made to spec by HED for Diamondback and they never made conversion adapters for it or rather there was no need. Who woulda thunk some guy 6 years later will put these wheels on a CF frame with TA? Just next year of my donor bike's manufacturing Diamondback wised up and moved to TA type wheels. I was out of luck. As a last ditch effort I visited a local store and begged for help. They noped out of the situation and gave some obscure brand names that make QR to TA end caps for many wheels and something might fit. In excitement I ordered 4-5 different sets of adapters only to learn that a) none of those fit b) none had return policy. After about 3 weeks of mailing back and forth, spending close to $150 I was left with parts that had turned into paperweights and wheels that did not fit. It was at this point I decided to pursue new wheels which were TA type. But wait. Could that be so simple? Just buy TA type wheels? Well, NO. Of course, how can it be? As it turns out the thru axles also have variations, namely in the diameter of the axle. The earlier TA were of 15mm outer diameter and slowly industry moved to 12mm OD TA. And as is typical in the industry they make....adapters...to convert 15mm TA to 12mm. Learning from my debacle with adapters I decided not to hassle with adapters and started looking for 12mm OD TA wheels. After scouring Craigslist and OfferUp (an app like OLX) I zeroed in on two sets of wheels that were guaranteed to be 12mm TA type and both had wide inner width to accommodate thick gravel tires. On a weekend I finalized and bought one set of lightly used tubeless gravel wheels made by a company called Hunts Wheels. Complete with rim tape and valves I just needed tires. After buying the wheels I took them straight to a bike shop to true them. Thankfully they were proper true and nothing was needed. Got home and weighed them. A respectable 1700 grams for alloy wheels. I was supremely happy with the deal I scored.  The second one is a carbon wheelset also bought used. The labels on it were sanded off and then painted with black matte paint for a sinister look. I applied some decals and custom made graphic on to make them more lively looking.   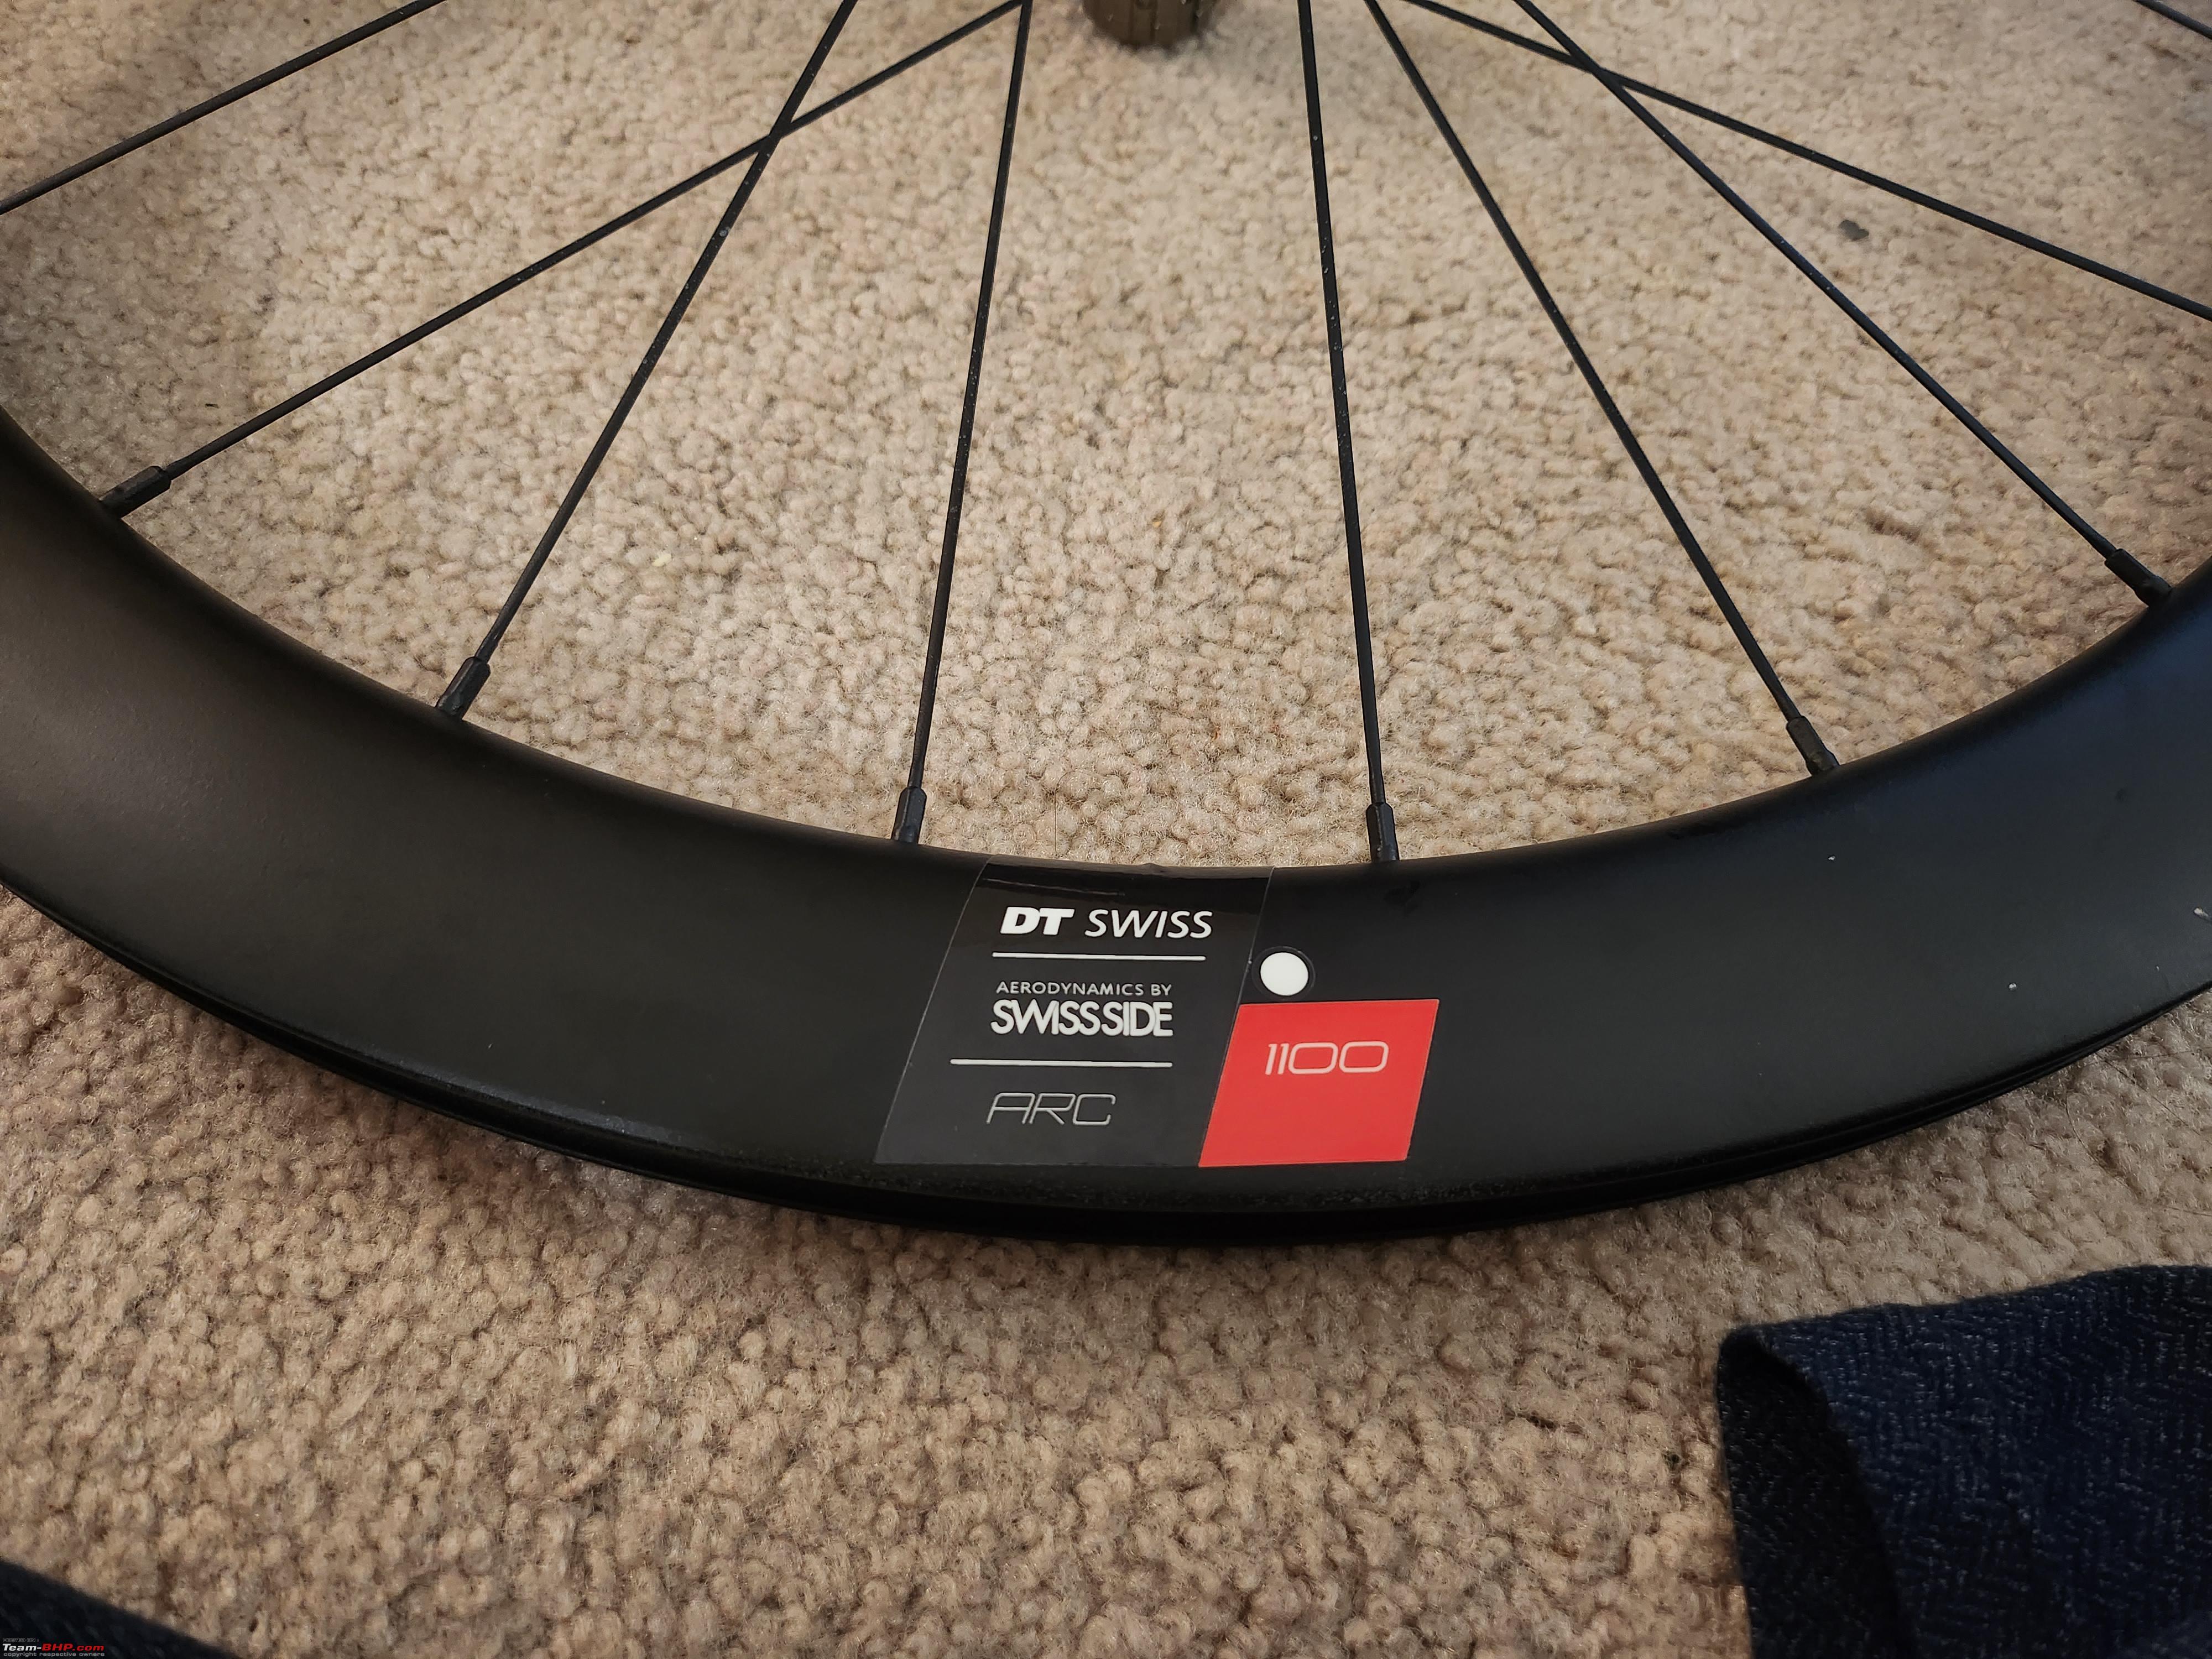 The tires were bought from online resources. I went with two different sets of tires: a pair of 36c and a pair of 32c semi slick tires. My idea is to use alloy wheels with thick tires and carbon with thin tires to make it more of a roadie. 1. 36c Donelly MSO. 2. Panaracer Gravelking SS Since these are tubeless, I also bought tubeless valves, tubeless rim tape and tubeless sealant. 1. Valves. 2. Rim tape. 3. Sealant. Installing the tires on rims took some effort but what improved impossible was inflating them. After struggling for hours I took both sets to bike shop nearby who inflated them with car tire inflator. Tip to self - just take wheels to gas station and inflate them. Once the tires inflate and fit into rim hooks, even if the air leaks you can inflate them again. The problem is only for the first time when tire beads have not set into rim properly. Came home and injected sealant thru the valve. The valve core needs to be removed either with plier or by using a special valve core remover tool.. |
|
| (15)
Thanks
|
| The following 15 BHPians Thank amol4184 for this useful post: | 2himanshu, AtheK, DevilzzzzOwn, GTO, gypsygenes, InControl, KK_HakunaMatata, LordSharan, mh09ad5578, sad:), SJD@NewDelhi, Tgo, vb-saan, VinNam, ysjoy |
|
20th December 2022, 05:12
| #3 |
| Senior - BHPian Join Date: Oct 2007 Location: Seattle/Pune
Posts: 1,214
Thanked: 4,876 Times
| re: Project Chinondale | Building a Carbon-Fiber Bike from scratch Drivetrain selectionThis was laid out for me. My donor bike came with Ultegra R8000 derailleurs, shifters, cassette and chain. The only things that were not Ultegra were the crankset (FSA Gossamer) and brakes (TRP HY/RD). Having ridden the donor bike extensively I knew how good the groupset was. Fantastic smooth shifts and lightweight. Thankfully the donor bike was also BB386 so no changes were needed to fit the crankset on new frame and a major crisis was avoided. After dismantling the donor I thoroughly cleaned each and every component with multiple solutions, finally washing them off with hot water. Stuff looked brand new! Lightly lubed everything and kept it aside. Now, this Ultegra isn't exactly gravel groupset and thus does not support large cassettes that are all the rage in gravel world Shimano says 28t is the largest cassette Ultegra supports. However they are incredibly conservative and you can easily use 11-34 cassettes as I found out. The 34t provides enough climbing gear for me. I reckon for cassettes like 11-42 and up you will need a gravel derailleur. Since I was not going to do serious climbing over rocks I decided not to switch the drivetrain. Besides 50% of my riding was going to be on paved flat roads where road groupset is handy. 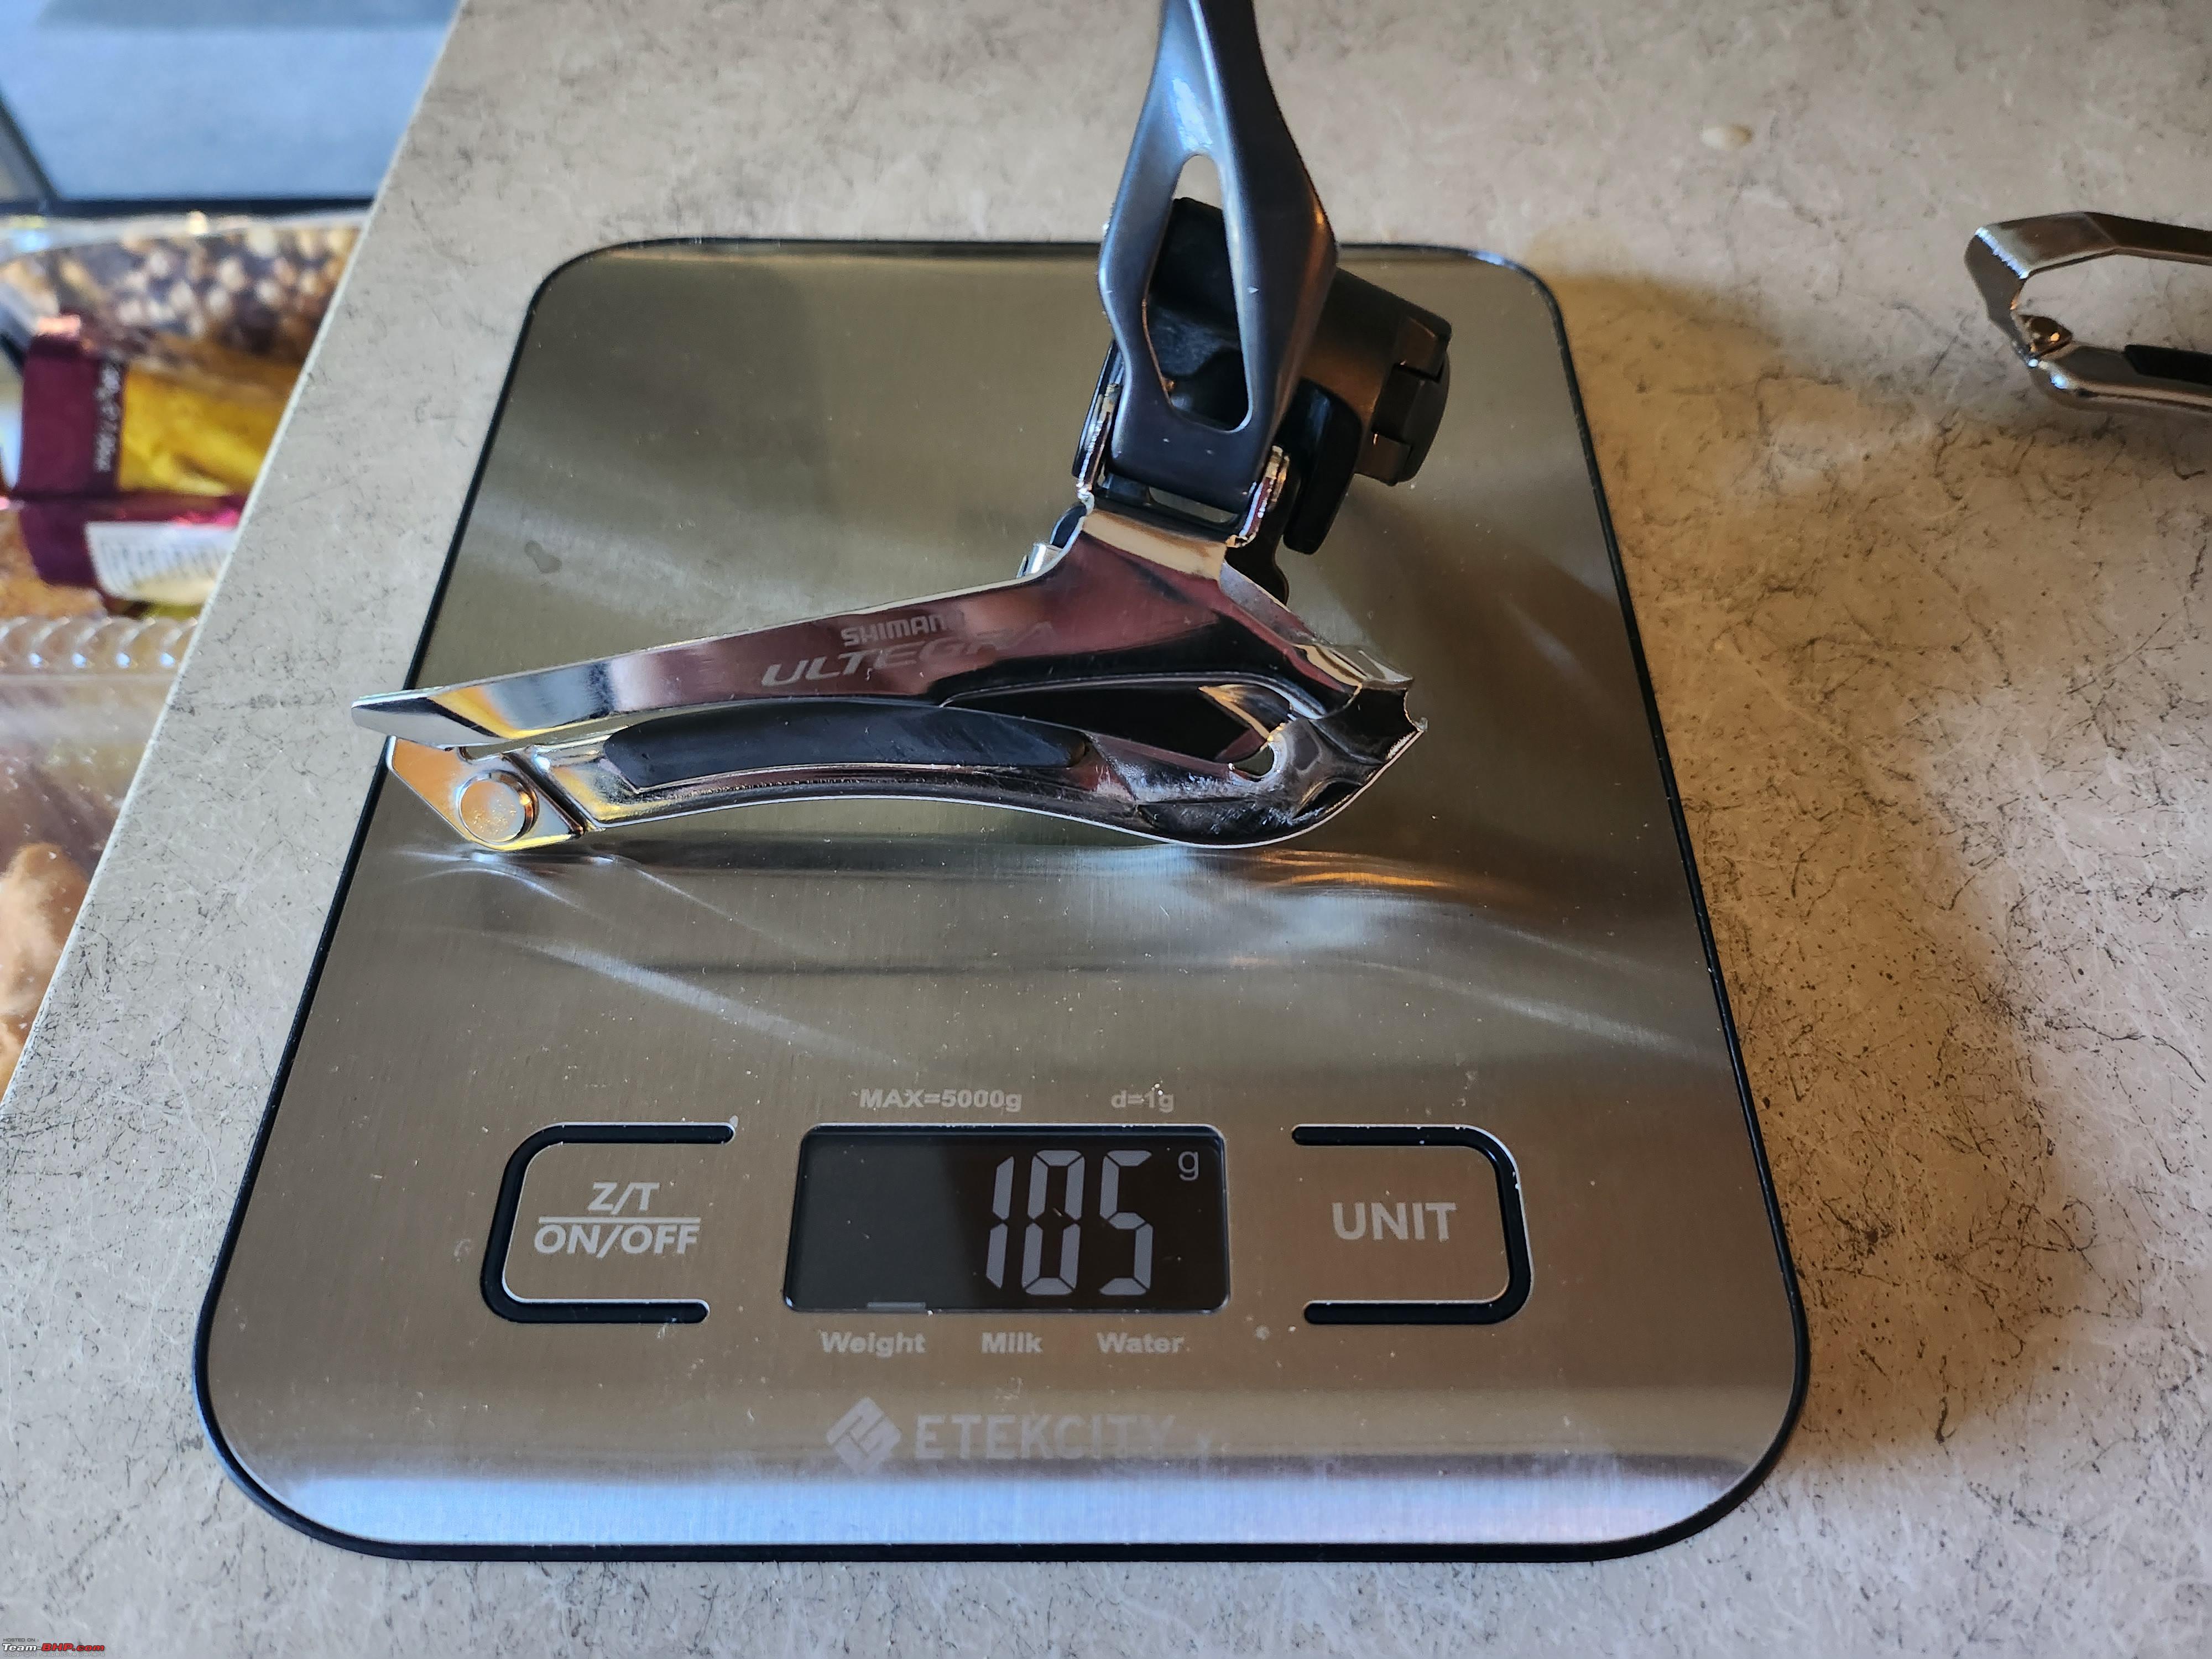 Ultegra R6800 FD.  Ultegra R6800 rear derailleur with 11 speed Ultegra cassette.  FSA Gossamer 48/32 2x crankset |
|
| (13)
Thanks
|
| The following 13 BHPians Thank amol4184 for this useful post: | 2himanshu, AtheK, DevilzzzzOwn, GTO, InControl, Jeroen, kat, LordSharan, mh09ad5578, sad:), Samfromindia, vb-saan, ysjoy |
|
20th December 2022, 05:18
| #4 |
| Senior - BHPian Join Date: Oct 2007 Location: Seattle/Pune
Posts: 1,214
Thanked: 4,876 Times
| re: Project Chinondale | Building a Carbon-Fiber Bike from scratch ToolsCarbon fiber wrenching absolutely needs torque wrench to tighten bolts to spec. Searched on Amazon and found many torque wrench kits made for bicycles. I ordered this one if anyone is curious. To my surprise it came with calibration certificate and handwritten test results signed by the quality inspector. I do not have digital torque measuring equipment so we have to trust whatever is written on the certificate. I am hoping it is not too far off. And then another toolkit for home mechanic by a brand called Foundation which seems like in-house brand of a cycling equipment website called Jenson Cycles here. Also from my prior experience I had realized that usual 90 degree bent Allen keys can be cumbersome to work on few screws so a 3-in-1 hex wrench with long-ish arms was also ordered. I can't explain how incredibly useful this simple tool is. Some cable cutting pliers and needle nose pliers. Some unexpectedly handy tools that I already had: A tiny flashlight and tweezers. These two were immensely helpful in pushing and pulling cables through frame. And finally a repair stand. This is as useful as any other tool if not more! I ordered one from Amazon on budget and has held up okay after initial hiccup. The quality is just about average. On second day of using it, the tightening screw that holds together upper arm of the stand slipped and could not be tightened, effectively rendering the whole thing useless. I sent a mail to customer care with photos. They agreed to refund which I refused and asked for replacement since I needed it urgently. Thankfully they had the whole arm in stock which they sent overnight to my home and stand was back in action in two days. https://www.amazon.com/Repair-Bicycl.../dp/B08HRF7TZM [center]  With all this I believed I was covered on tools aspect except may be specific BB removal tool but I could never make up my mind which one to order. On the torque spec note - the frame did not come with any torque specs for any bolts like you see on name-brand bikes. I was a little disappointed to see them missing this little but important detail so I emailed the sales rep to which he replied "headset stems is 5nm" and nothing about any other bolts on the frame. I have another CF frame bike by Specialized with torque specs written on every bolt. I took that as my guide and decided to follow the spec on new frame too. 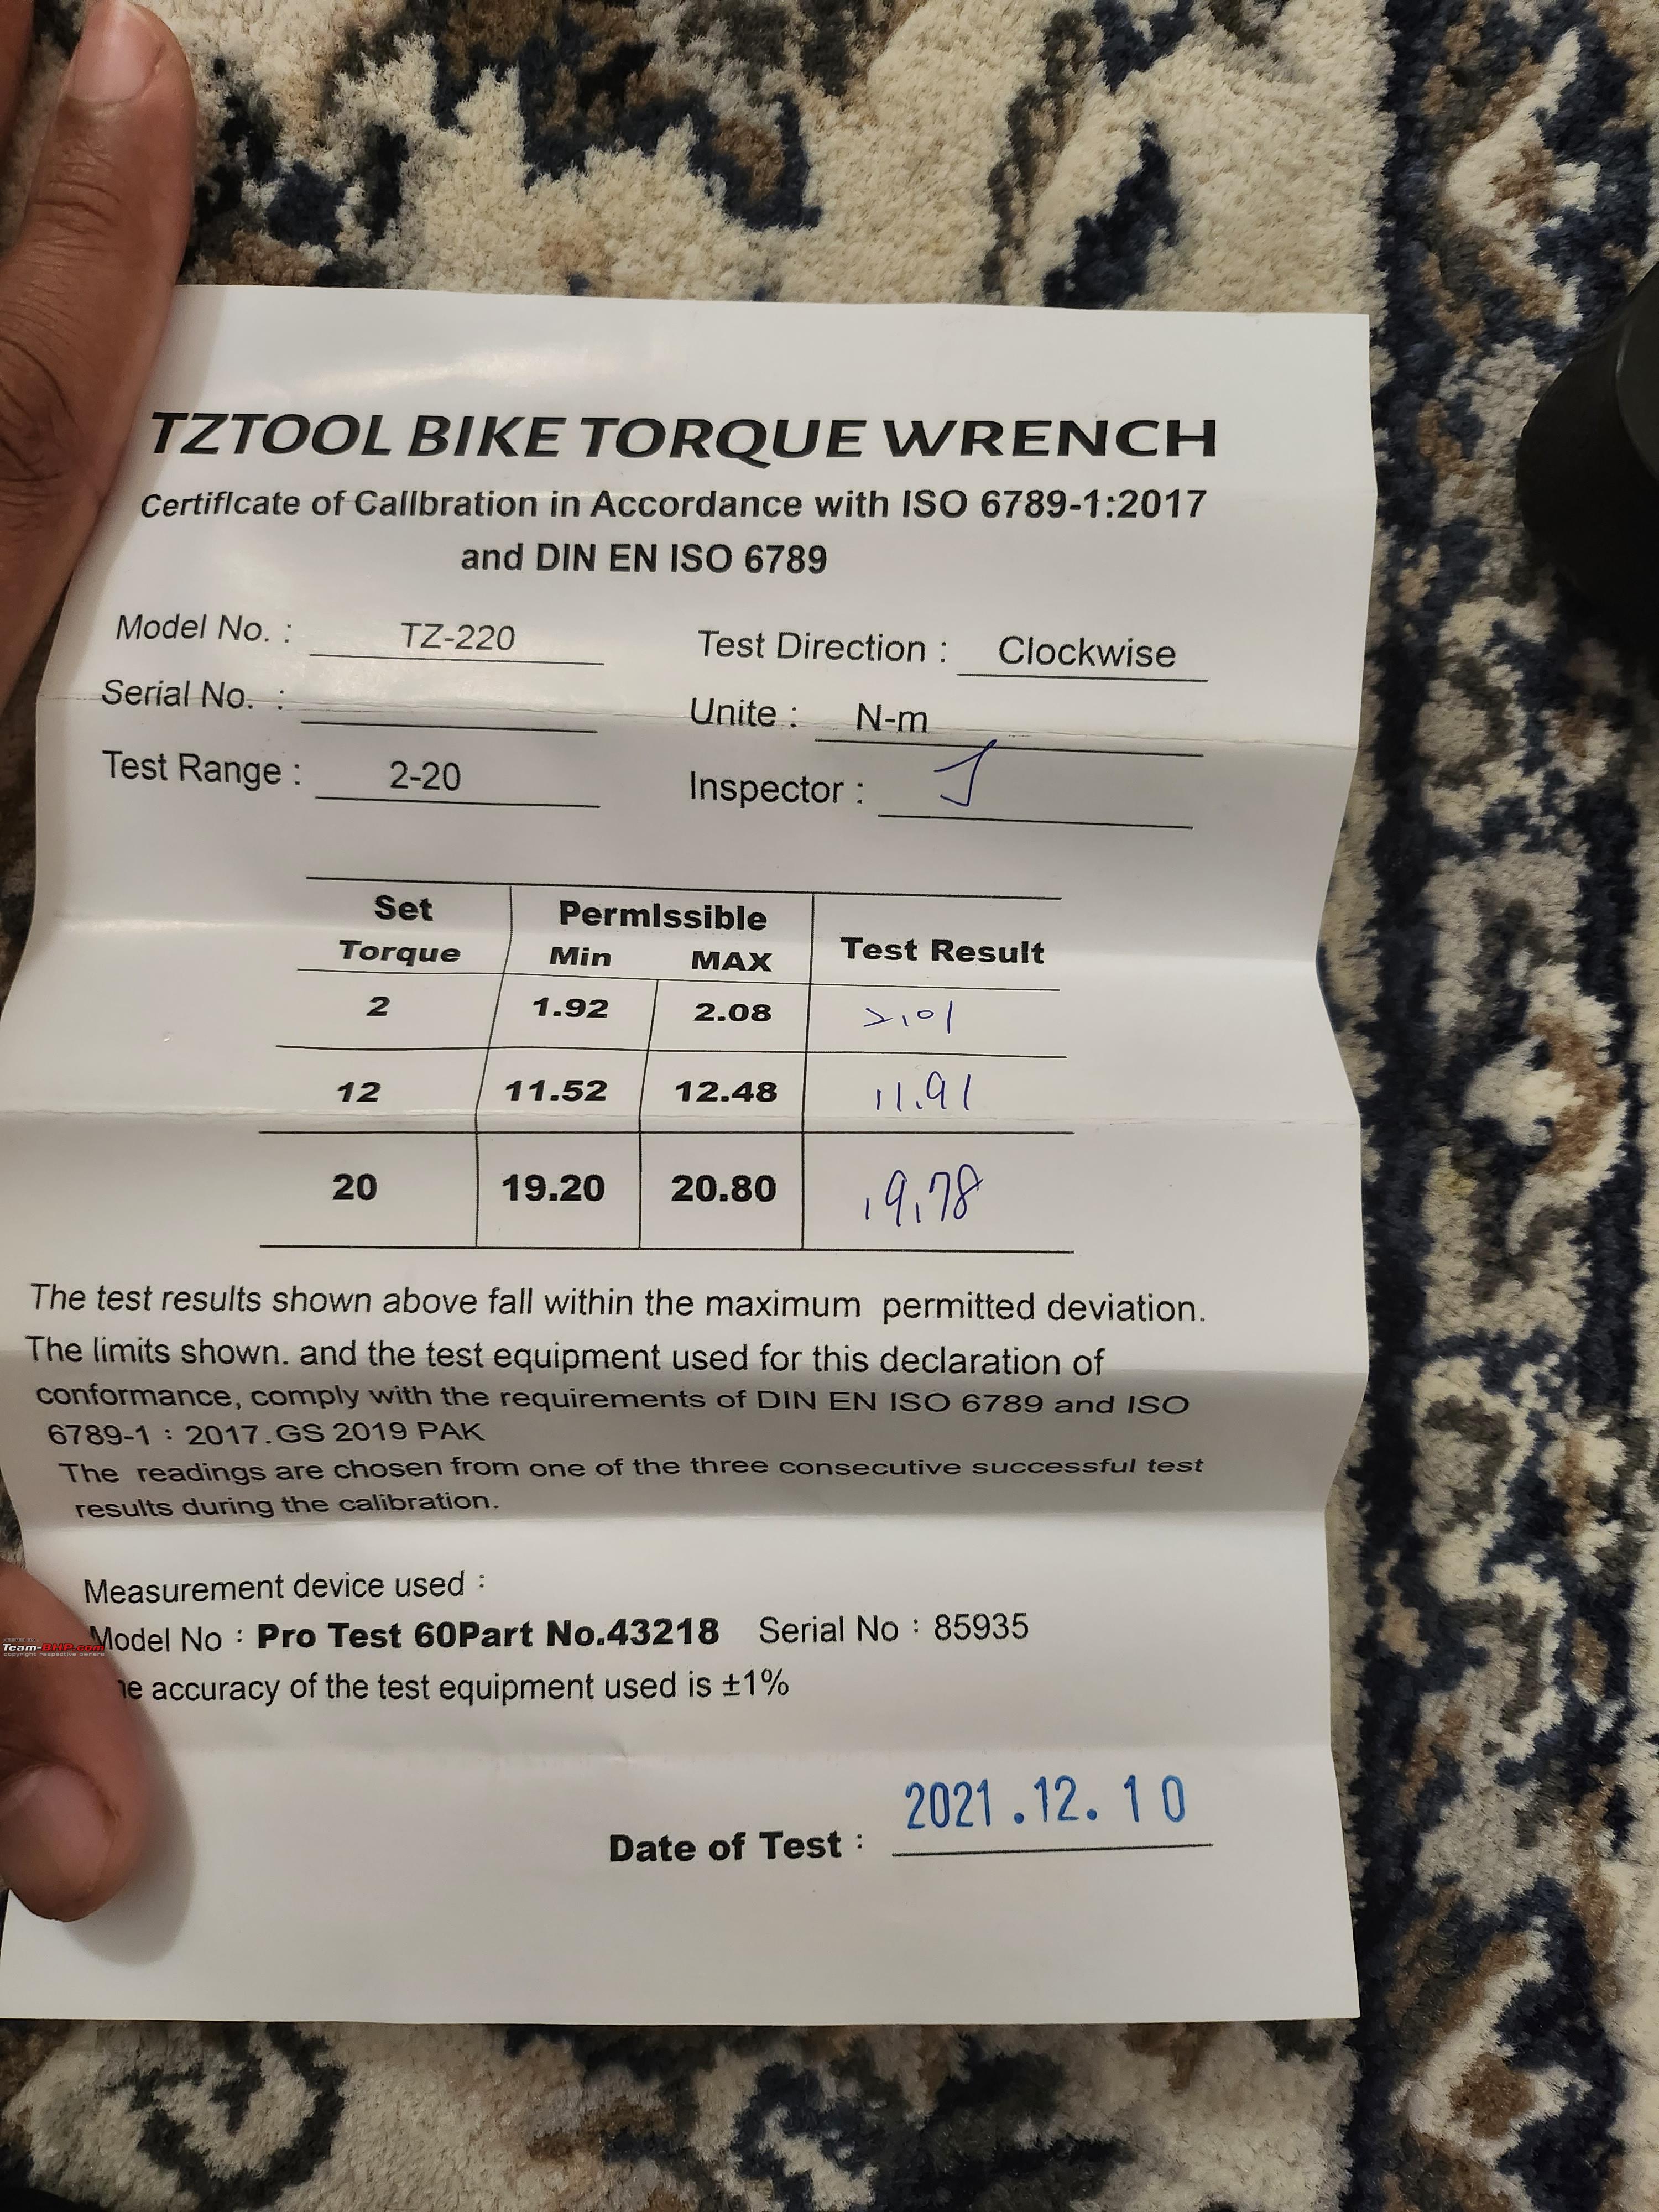  |
|
| (13)
Thanks
|
| The following 13 BHPians Thank amol4184 for this useful post: | 14000rpm, 2himanshu, DevilzzzzOwn, GTO, InControl, kat, LordSharan, mh09ad5578, sad:), Samfromindia, sukiwa, vb-saan, VinNam |
|
20th December 2022, 05:22
| #5 |
| Senior - BHPian Join Date: Oct 2007 Location: Seattle/Pune
Posts: 1,214
Thanked: 4,876 Times
| re: Project Chinondale | Building a Carbon-Fiber Bike from scratch Other misc purchasesI am big on accessories and detail. Even before the frame got delivered I had few decals in my mind to put on it which I got from Etsy. The bike is called Evil Cat, so a matching decal is stuck on the seat stay  Along with decals, many little things from AliExpress as listed below.
I am probably still missing a few other things but these are at the top of my mind. In the meanwhile attaching the sheet which has links to all the products purchased if anyone wants to peruse : https://docs.google.com/spreadsheets...#gid=971193289 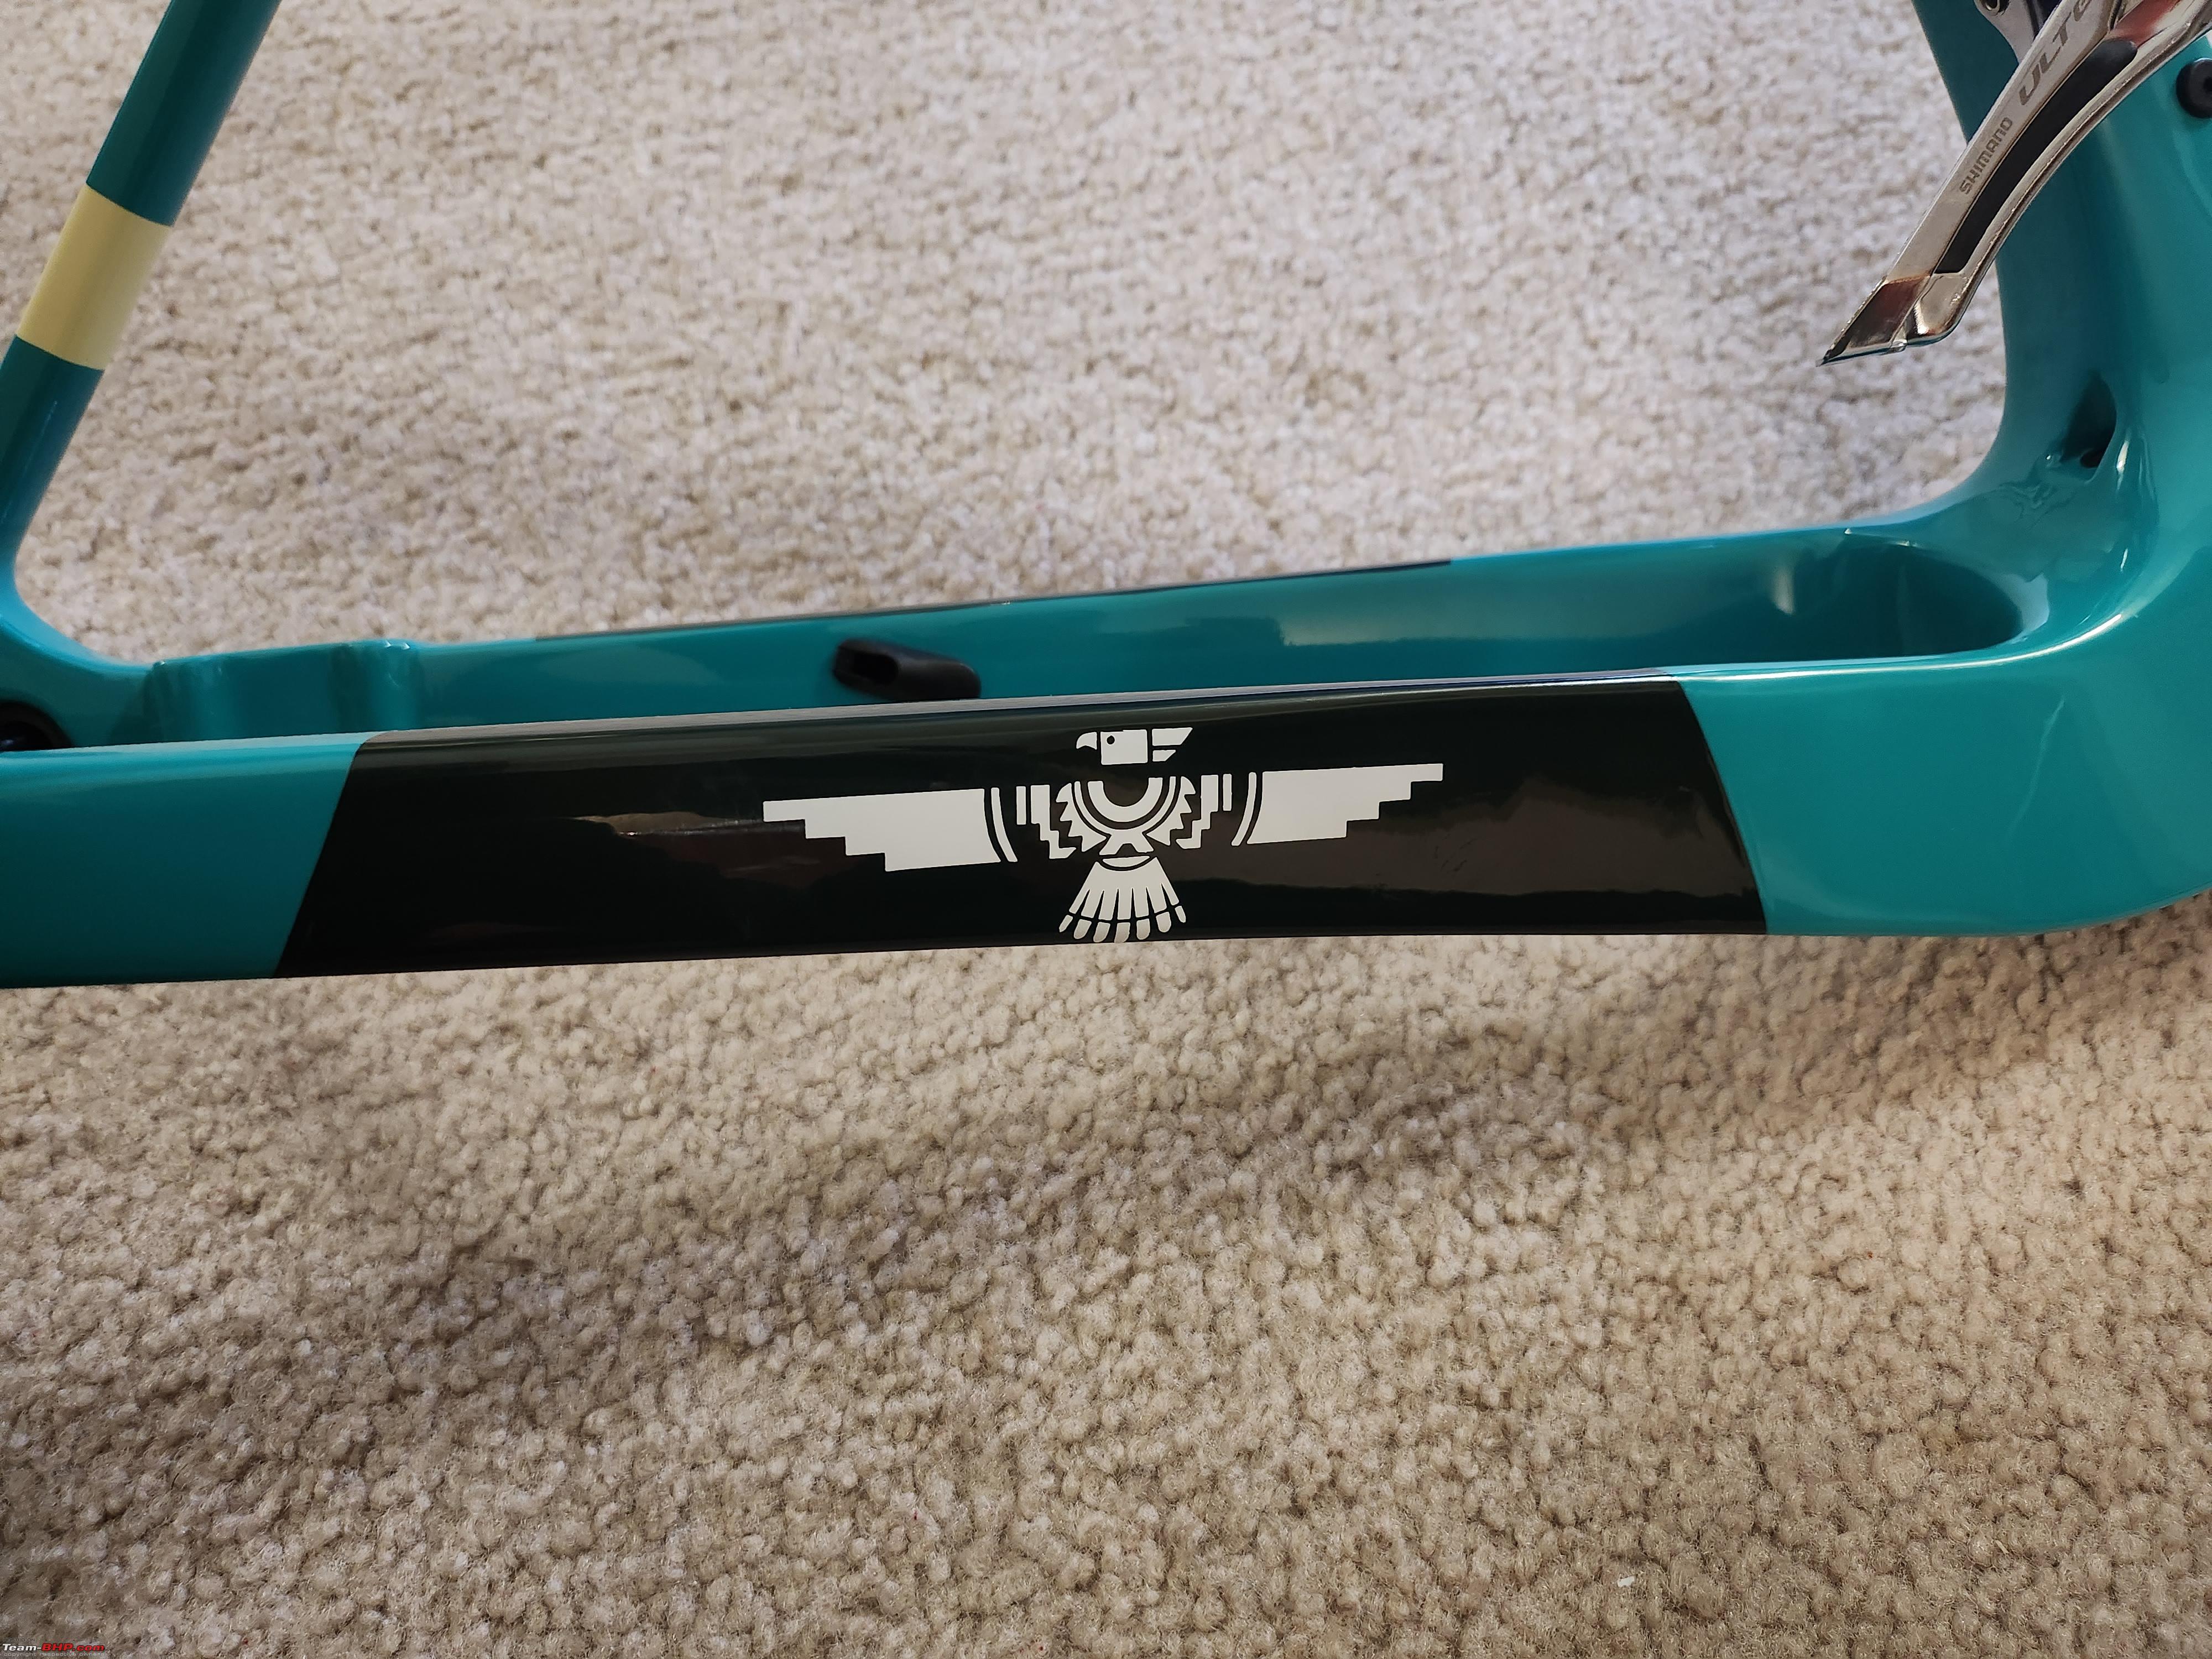 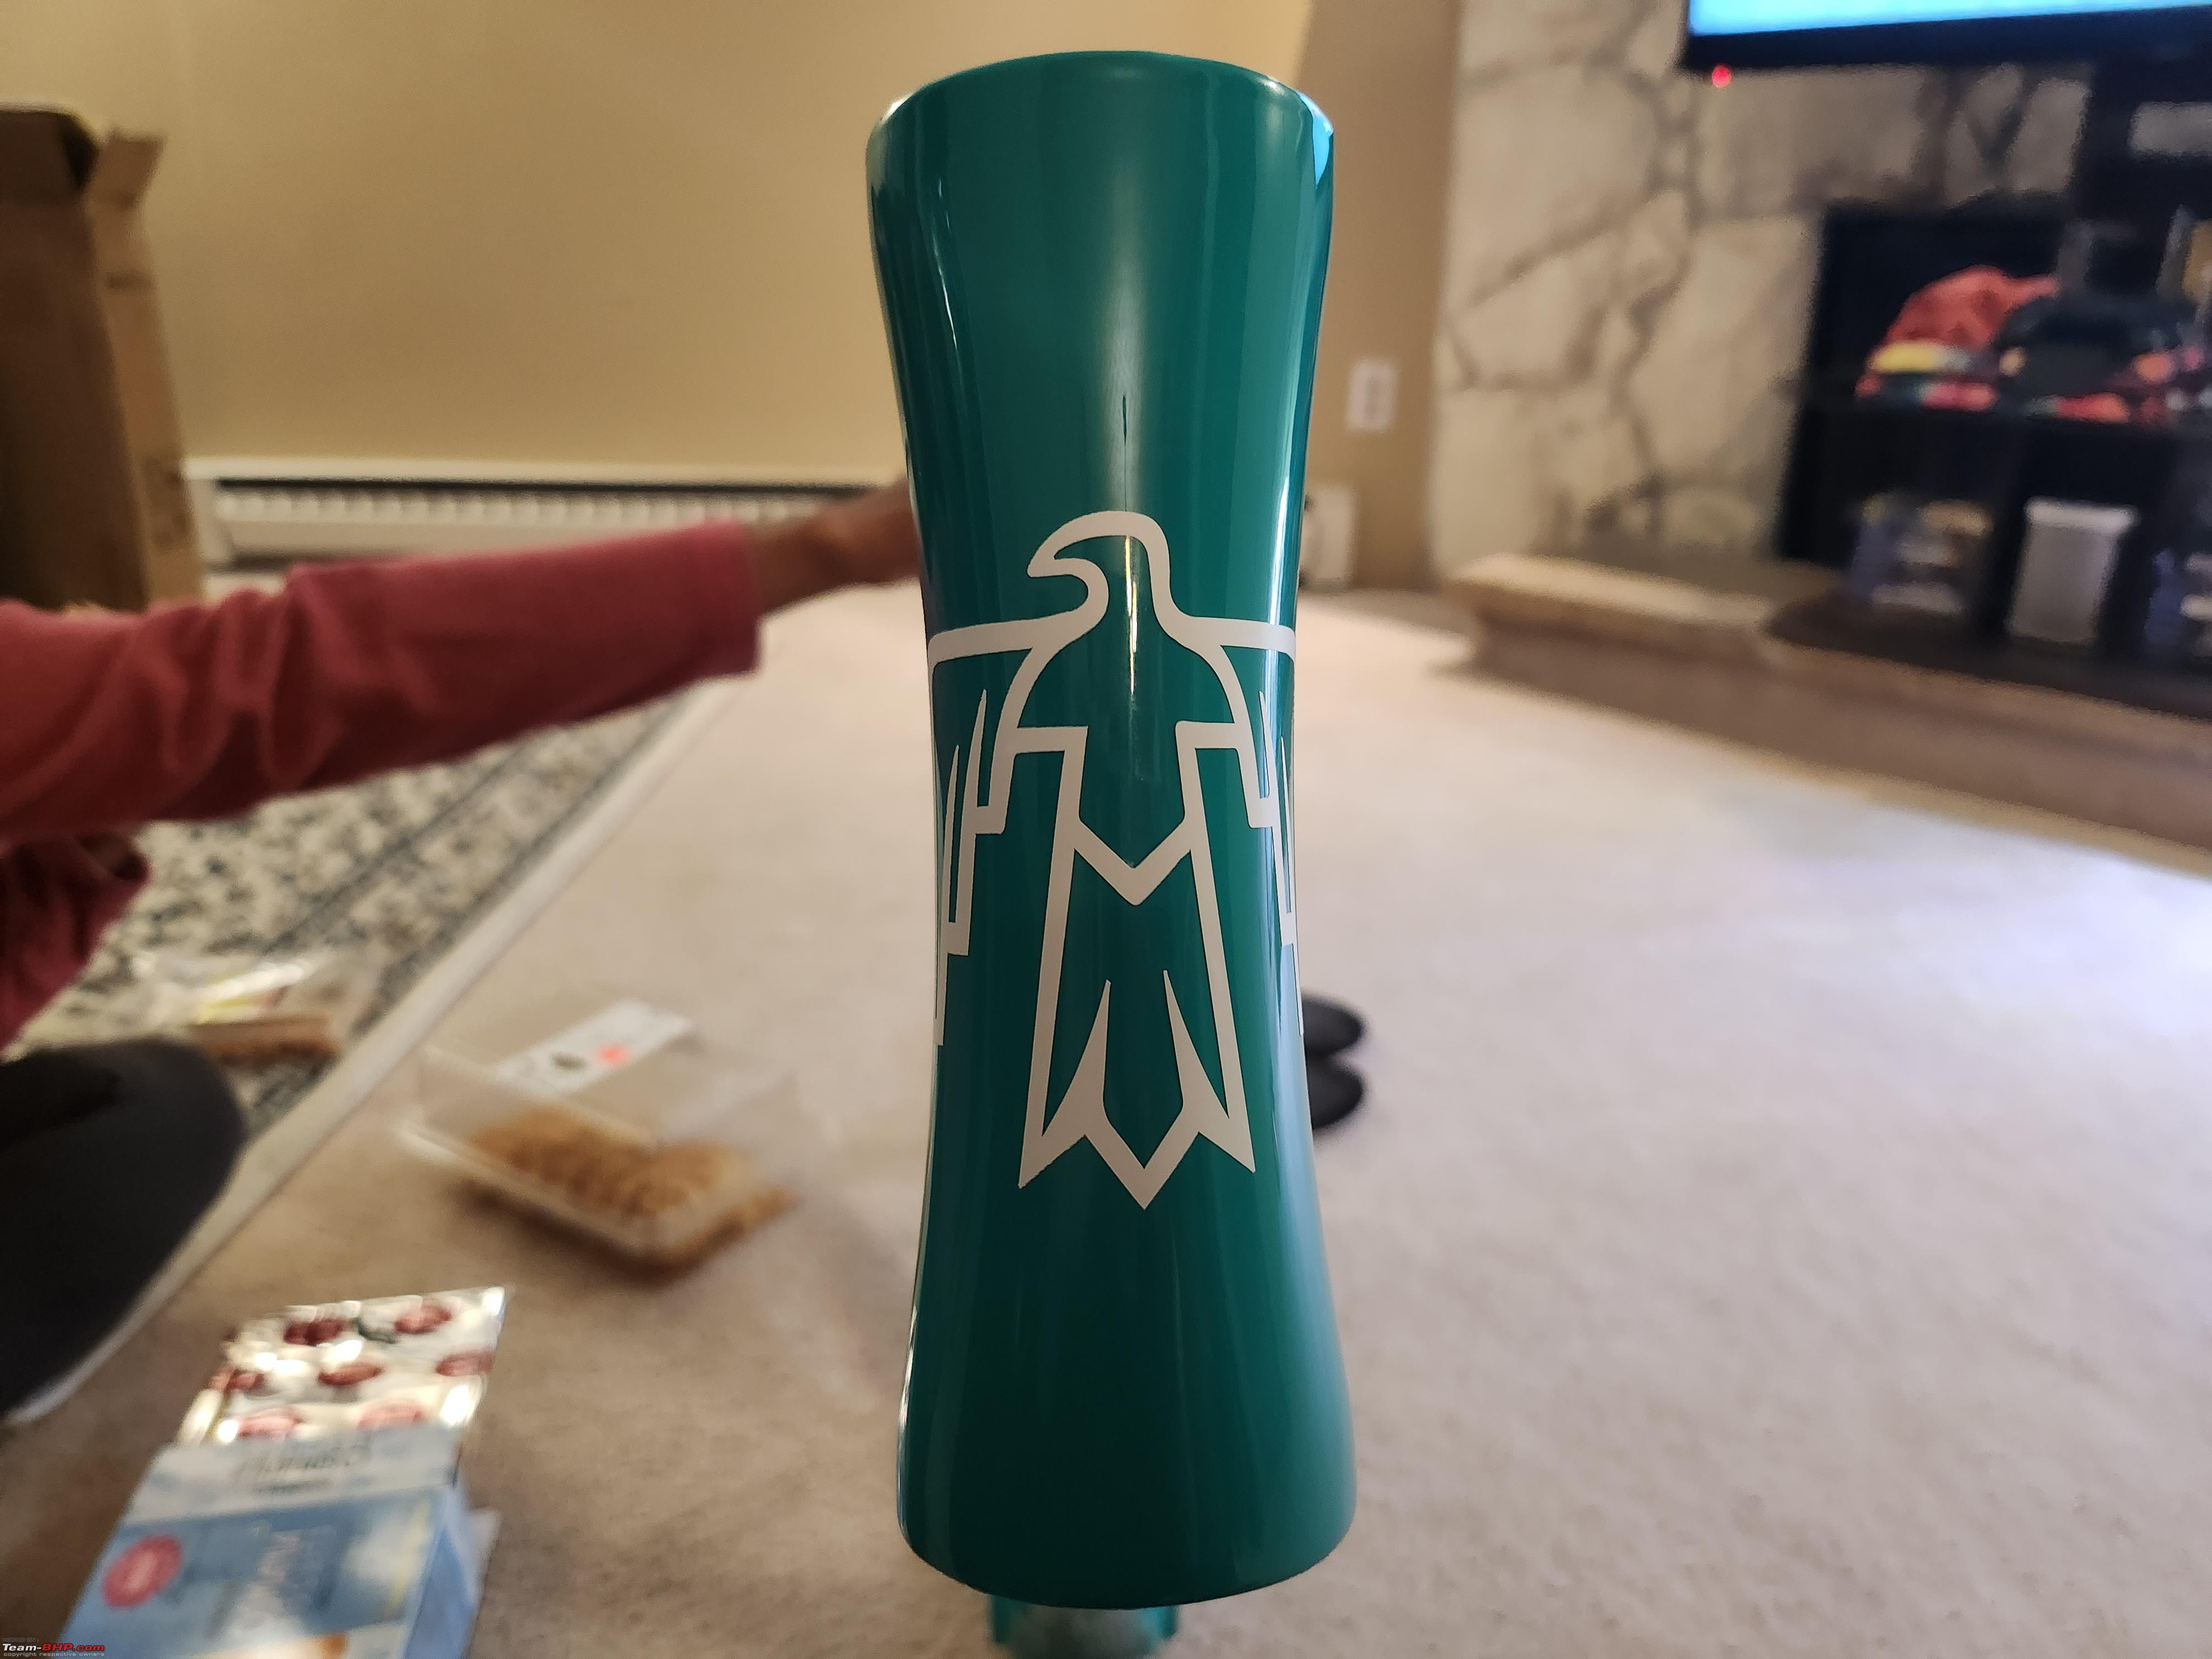  Last edited by amol4184 : 20th December 2022 at 08:41. |
|
| (15)
Thanks
|
| The following 15 BHPians Thank amol4184 for this useful post: | 14000rpm, 2himanshu, DevilzzzzOwn, GTO, InControl, Jeroen, LordSharan, mh09ad5578, sad:), Samfromindia, shipnil, sukiwa, vb-saan, VinNam, ysjoy |
|
20th December 2022, 05:32
| #6 |
| Senior - BHPian Join Date: Oct 2007 Location: Seattle/Pune
Posts: 1,214
Thanked: 4,876 Times
| re: Project Chinondale | Building a Carbon-Fiber Bike from scratch Modifications and adjustmentsThis is where things got serious. I had everything by now all set for the build. As a practice run I loosely put together fork and frame. The frame came with headset, top-bottom bearings, compression ring, dust cap etc. While the machining on all metal parts looked excellent I quickly discovered that the dust cap sits higher up on the compression ring than I expected. The gap between dust cap and top headtube was about 2 mm which seemed ungainly to me. Removed everything, greased up and installed with little rubber hammer this time but still no bueno. Clearly the compression ring and dust cap did not play well with each other. While the fork hung there with velcro straps, I also found out that there is a tiny bit forward-backward movement of the fork which would later create annoying tuck tuck sound in the handlebar every time I hit rough patch. I would have let go of the ungainly gap but this fork movement was absolute no no for me. Dug around internet and some posts on weight weenies mentioned this exact same problem. People had machined their own compression ring, some had bought entirely different headset and spacer set, some had sanded the dust cap etc. I examined the dust cap and comp ring relation with care and found out that underside of the dust cap was slightly recessed to allow comp ring fit through. Clearly the recess was not deep enough. It was just about 0.8mm to 1mm taller than ideal. Elated that I found the solution I almost sanded the inner side of dust cap...almost. I balked at the last moment and abandoned my ambitious plan because even slightly uneven sanding would make it worse than it already was. The sanding had to be absolutely perfectly flat - no other option and there was no way I could achieve that with my handheld Dremel. The only way this could be done was to take it to a cnc shop and sand it. Went to a bike shop whose owner by now knows me. He understood my problem and corroborated the decision of NOT sanding it at home. He confirmed that it has to be done at a shop and pointed me to his friend who had a vertical grinder. The very next day I showed up at guy's home garage with my dust cap. We discussed what needs to be done and how much material needs to be removed from underside of the cap. About 5 minutes later, my dust cap was ready. It apparently took just two passes of the machine to remove about 1mm of material. Drove home as fast as I could and voila, the jugaad worked perfectly! Though it was too much of DIY to my taste. This problem could have been easily avoided at manufacturing level. Clearly, attention to detail is not the strong suite of open mold companies. 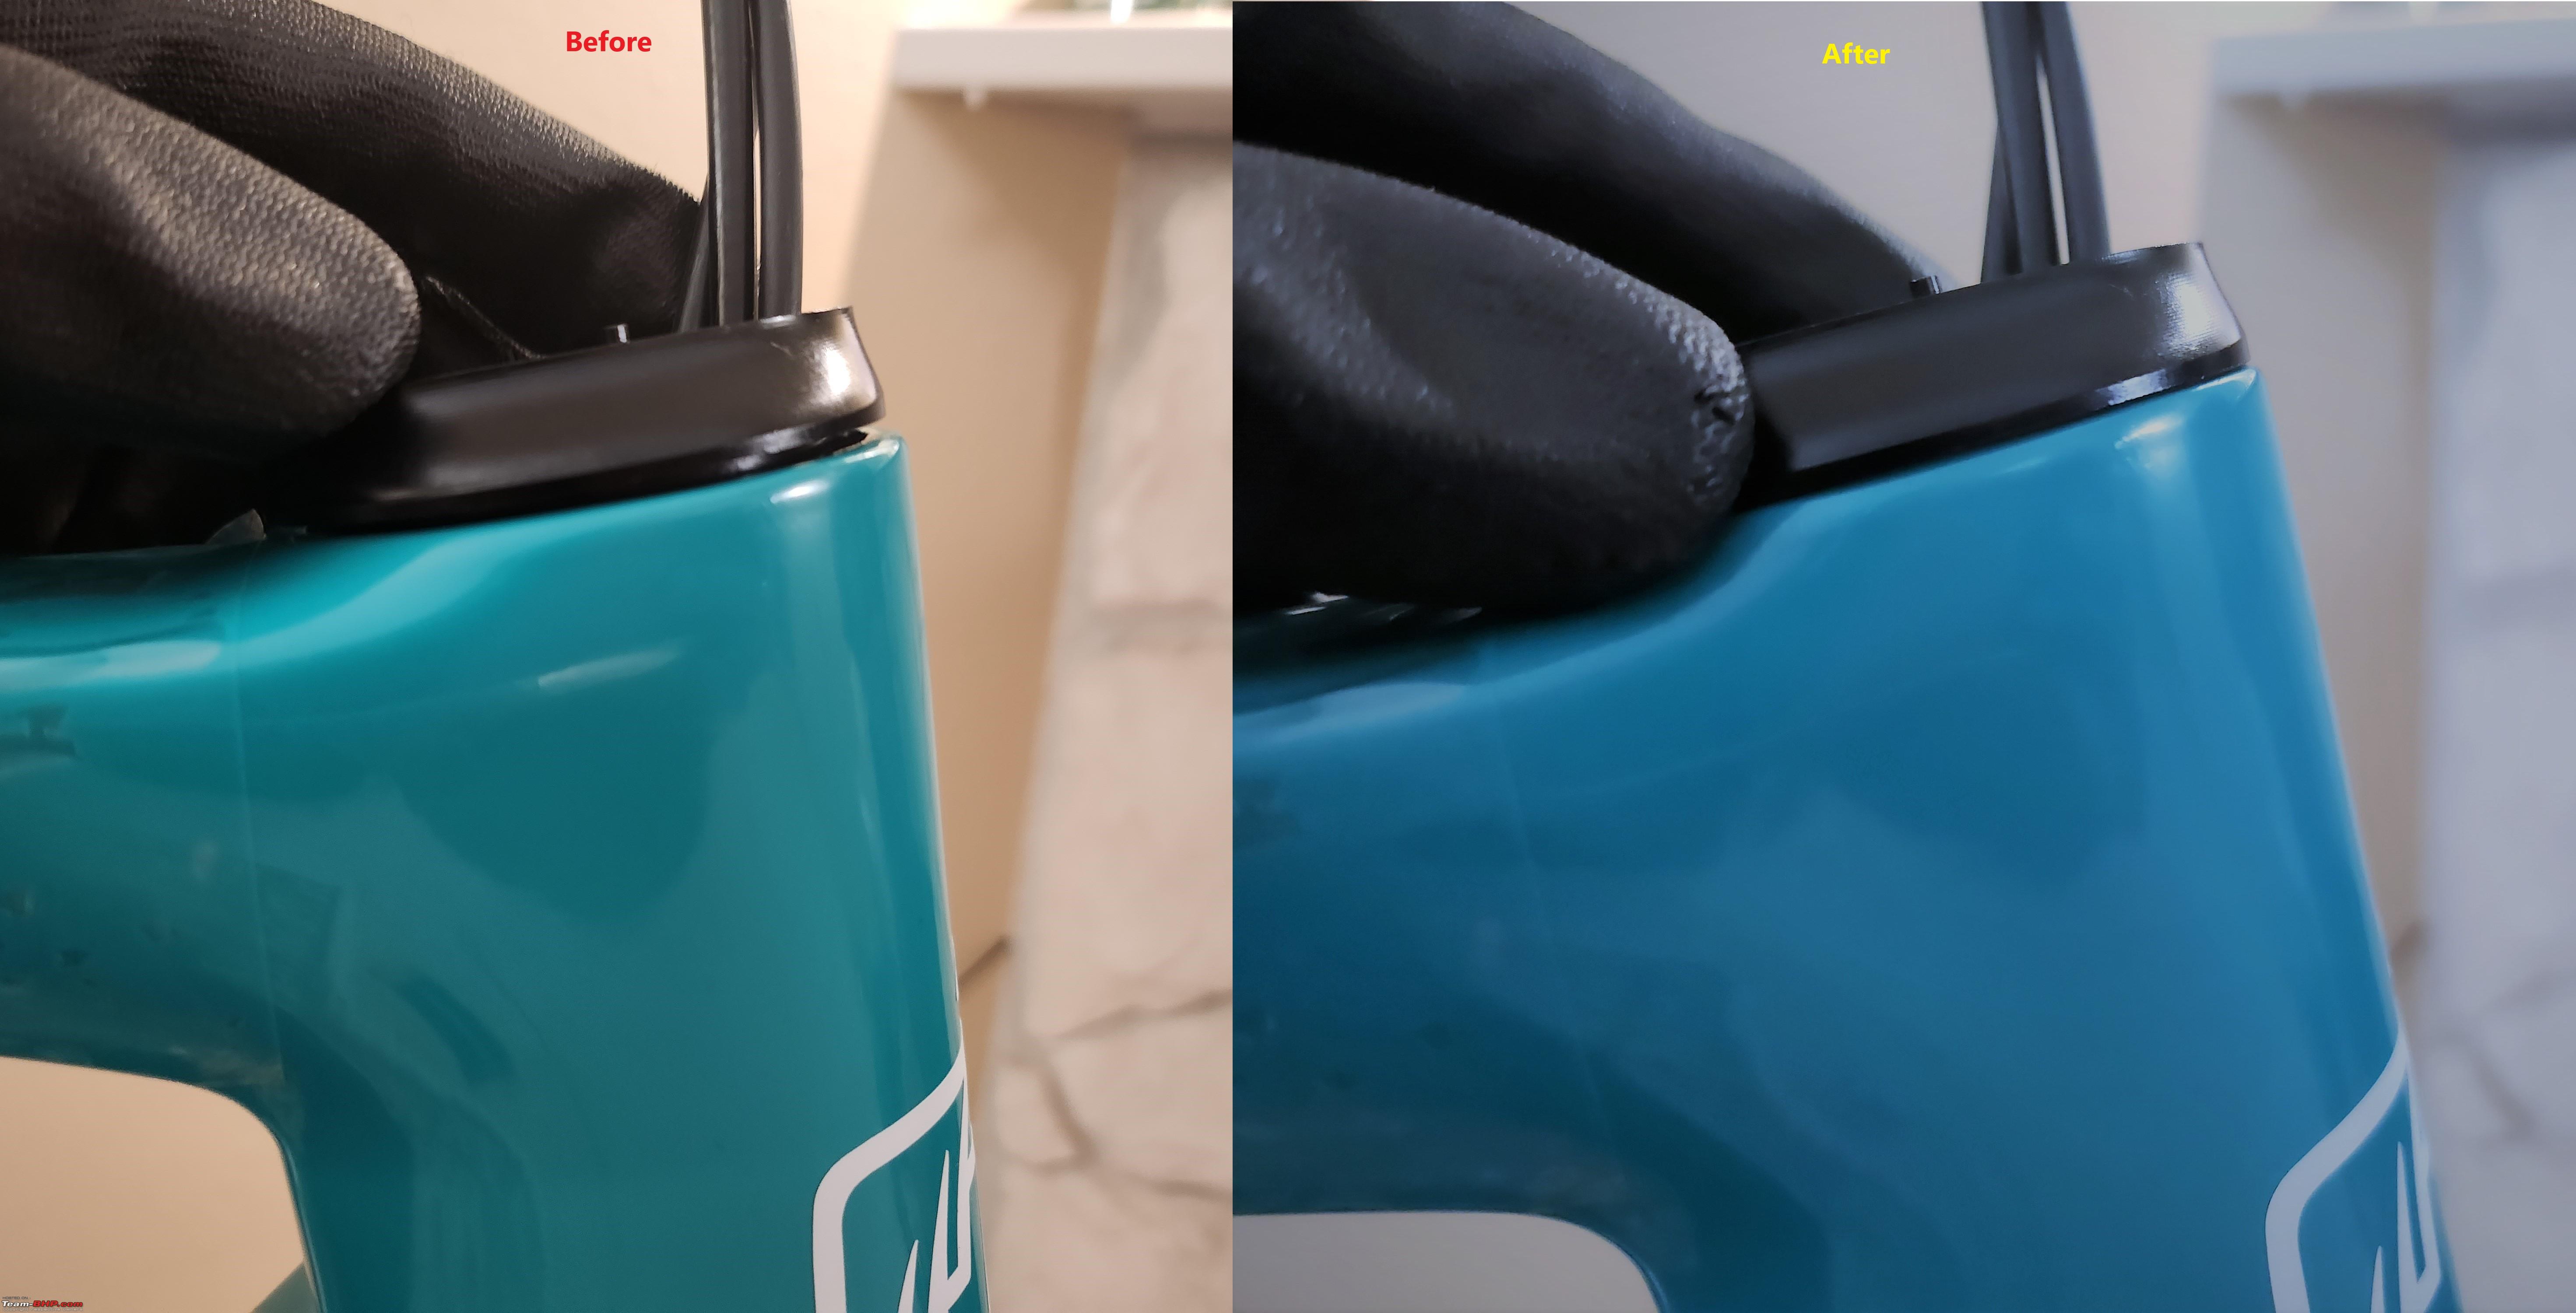 The next up was dreaded internal cable routing (ICR) handlebar and stem combo. I had read that this is the worst part of these frames and those fears came true. There were no cable guides supplied in the frame. They just drilled holes and left it letting cables wandering inside aimlessly. After toiling for two hours with passing cables from one end to another I realized that the edges of the cable holes were way too sharp and my continuous pushing of cables had already caused scars on them. Annoyed, I went to local hardware shop and bought following two items to smoothen edges on handlebar and stem. Again, entirely unnecessary DIY but had to be done. 1. 6 piece file set. 2. 1500 grit sandpapers. Another two hours of carefully sanding edges at extremely awkward angles I felt I had done enough. All rough edges were flattened to a great extent and cable movement became much easier. A point to note. The compressionless cables can be deviously hard to bend but are necessary for tight fitting ICR stuff. On the other hand shifter cables are pretty easy to bend. Thankfully my brakes are not fully hydraulic so all the cables were regular type. I imagine hydraulic cables would be even more cumbersome.  Messy. Keep vacuum cleaner close as one of the tools. I did all cutting, grinding and sanding in the bathroom wearing mask.  ICR nightmare   The horror continues... Just looking at the images should make it clear that maintenance on these cables is a half day job. On external cables, you can do it in 10 minutes. You also cannot have in-line cable adjusters like you see on most bikes. But the clean looks? Priceless. Next up, fork steerer cutting to appropriate length. Basically the fork comes with a full length steerer that can be cut by customers per their liking. If you are into slammed, aggressive look keep it super short. If you don't care about slammed look but do about comfort, cut it taller. Since the geometry of this bike was similar to another gravel bike that I had (Giant Revolt) I decided to keep similar height. This height was also confirmed by inserting headset spacer and stem on the fork. Then I marked the tube with a white marker. Removed stem, spacers and made another mark about 5mm below the earlier mark to accommodate headset expander plug. For cutting the fork I used a normal hacksaw with brand new blade. The cut was uneven but I had cut with some extra margin in anticipation of unfortunate event of uneven cut needing sanding off. The cut was done in 5 minutes but to make it perfectly flat took about 2 hours. Again used the files that I bought earlier and a coarse sandpaper. Better idea would have been to cut it at a shop with clamps and automated saw.  Unreasonably happy with the even edge I finally achieved. Things weren't done going wrong yet, though. As a trial run I installed caliper adapters on fork and frame. These adapters were needed because my brake calipers were post mount (old school) while frame/fork were flat mount popularized by Shimano in recent years. Caliper installation on fork was easy peasy but on the rear there was simply no space to accommodate huge caliper and adapter into the tight triangle. The hydraulic cylinder and actuating arm protruded too much and rubbed against the frame. I looked at it in disbelief. So late in the process and I am realizing one of the vital parts isn't fitting. Short of pulling my hair out I quickly did some research and found out flat mount semi-hydraulic calipers on Aliexpress with promised 10 day delivery. Paid for the damn thing in a jiffy and sat twiddling my thumb. The thing about delivery from China is that most of the delivery timeframes by their state agency are vastly over optimistic. The 10 day delivery time turned into 10, then 15 then 20 and finally it arrived on exactly 24th day after placing the order.  The new brakes that were ordered.  Notice how actuating arm is pushing into the frame.  Waited an excruciating 24 days for these little devils. |
|
| (16)
Thanks
|
| The following 16 BHPians Thank amol4184 for this useful post: | 14000rpm, 2himanshu, DevilzzzzOwn, graaja, GTO, gypsygenes, InControl, Jeroen, LordSharan, mh09ad5578, Pigcee, sad:), Samfromindia, sukiwa, vb-saan, ysjoy |
|
20th December 2022, 05:42
| #7 |
| Senior - BHPian Join Date: Oct 2007 Location: Seattle/Pune
Posts: 1,214
Thanked: 4,876 Times
| re: Project Chinondale | Building a Carbon-Fiber Bike from scratch Putting it all together[left]The time has come to build the bike. I had feelings of excitement, anxiety and looming dread all mixed into one heady cocktail. Having taken care of lot of nitty-gritties I was now ready or so I thought. I had still not looked into assembling bottom bracket. Frame was compatible with BB386 press fit BB. This type of BB allows 30mm spindle cranksets, is lightweight and supposedly "better" than threaded BBs. Contrary to what manufacturers will have you believe, the press fit BBs actually are not better than old school BBs in some ways. For one, there is a high chance they will develop creaking noise as they get older. Since they are press-fit, the BB shell also needs to be perfectly round. There cannot be any tolerance in the BB shell, exactly the thing which is hard to achieve in carbon fiber open mold frames. However it is not a problem with open mold frames only. A simple search on Google showed me that press fit BBs have this inherent problem and people experienced it in their 10k bikes. To solve this problem that should not have existed in the first place, some clever engineers found out design that was threaded but still fit into press-fit BB shell. Genius. Enter the Token Ninja threaded press-fit bottom bracket. This BB, instead of pressing into each other, threads together. There are handful other companies making similar threaded press-fit BBs and can get to be an expensive affair. I bought the Token Ninja and did not risk the simple press-fit BB that came with the frame. My reasoning was simple. I did not want any creaking noise sooner or later or ever and I did not want to open things up. Also, by this time I was running out of patience so the bottom bracket was ordered with overnight delivery. Enough is enough I thought. This BB also came with its installation (or removal) tool. Thereby eliminating need to order another tool. Once the BB arrived, I quickly put it together, inserted the crank with nice dollop of grease and gave it a nice spin with my heart thumping. And it spun like an ice skater on dope. After letting out a huge sigh of relief, I removed it all because I had yet to push brake and derailleur cables through the frame. Yes, wonders of ICR.  But my stars were all aligned that day. Even without any cable guides, with a little hassle I was able to route FD, RD and rear brake cables through the frame all the way from handlebar. The only point of contention was bottom bracket area. I thought about it a lot and finally decided to route all the cables above the bottom bracket. With this, the hardest part was done.  All the cables routed over the BB/crankset spindle. Attaching a few pictures taken in random stages of build process. There were many times when I attached something and later removed it to follow another "strategy" - most of it originating from ICR mess. The handlebar, stem, fork and rest of the frame all have to come to a harmonious integration and to do that I probably did the whole thing about 10 times over. After much frustration, if I remember correctly the final approach that led me to success was this: 1. Route all the cables through stem, handle bar holes through the shifters. 2. Tighten everything including stem bolts and tape the cables just where they enter shifters. 3. Make sure the angle of shifters is as perfect as you can get - there is really no margin for error since cables are so tightly cut there is no extra length to play with. 4. Insert all the dangling cables through the frame into their respective outlets with cable stops pre-installed. This is only possible with a stand, and extra set of hands because as you wriggle with cable someone needs to hold tight the handlebar stem thingy firmly in the air. 5. Insert front brake cable through the fork into outlet (I am yet to cut it to size at this point). 6. Insert dust cap and spacers on the fork steerer tube then insert fork into frame by making sure all previously inserted cables are not getting pinched. 7. Tape all the spacers and dustcap into place so they don't rattle or fall off. 8. Press down stem-handle combo onto fork steerer. Insert headset. Align the handlebar with front tire. Make sure it is as flush fitting as possible without leaving any gaps between spacers or cap. 9. Tighten headset expander plug. Tighten stem bolts gripping the fork. Once handlebar thingy was set I installed wheels and saddle. Then I sat on the bike and rolled back and forth to get a feel of the geometry. The handlebar felt a touch too low despite adding exactly same spacer height as my donor bike and then it dawned on me. The stem that comes with the frame has permanent negative 5 degree angle to it. It cannot be mounted inversed like many other stems. To offset the angle I installed about 1cm of additional spacers that I had ordered extra during the frame purchasing process exactly in anticipation of unforeseen scenario like this. 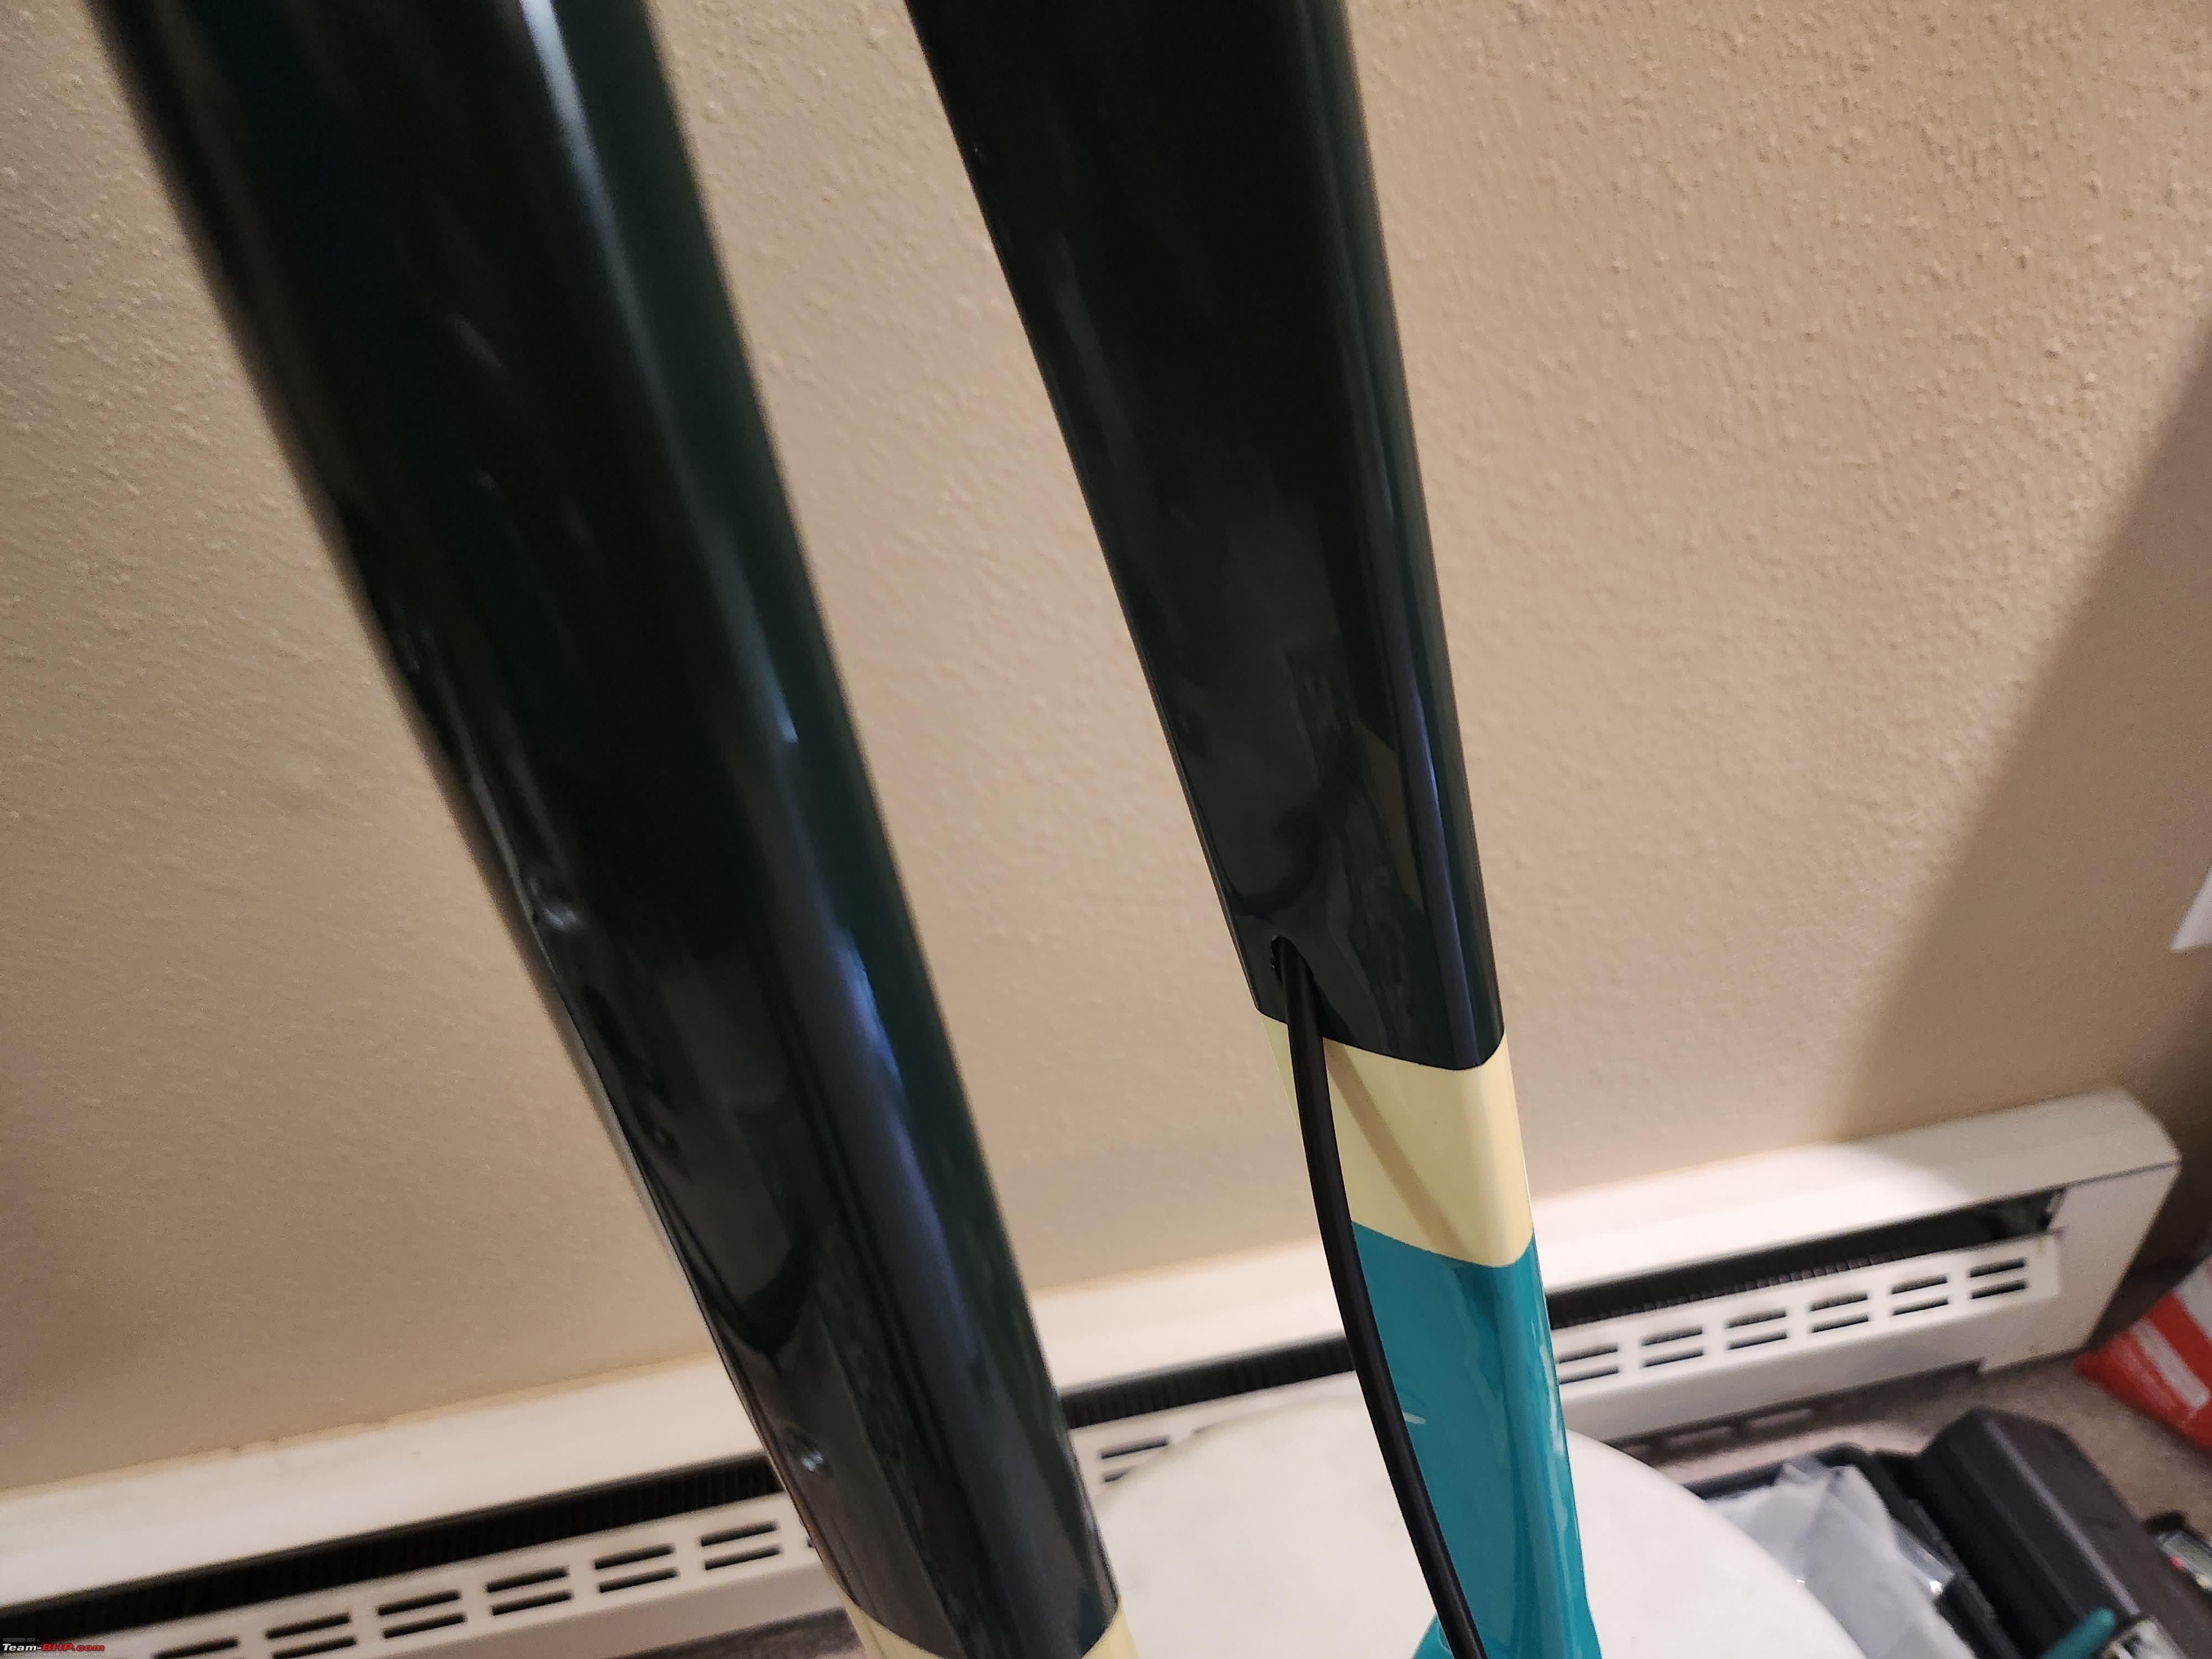   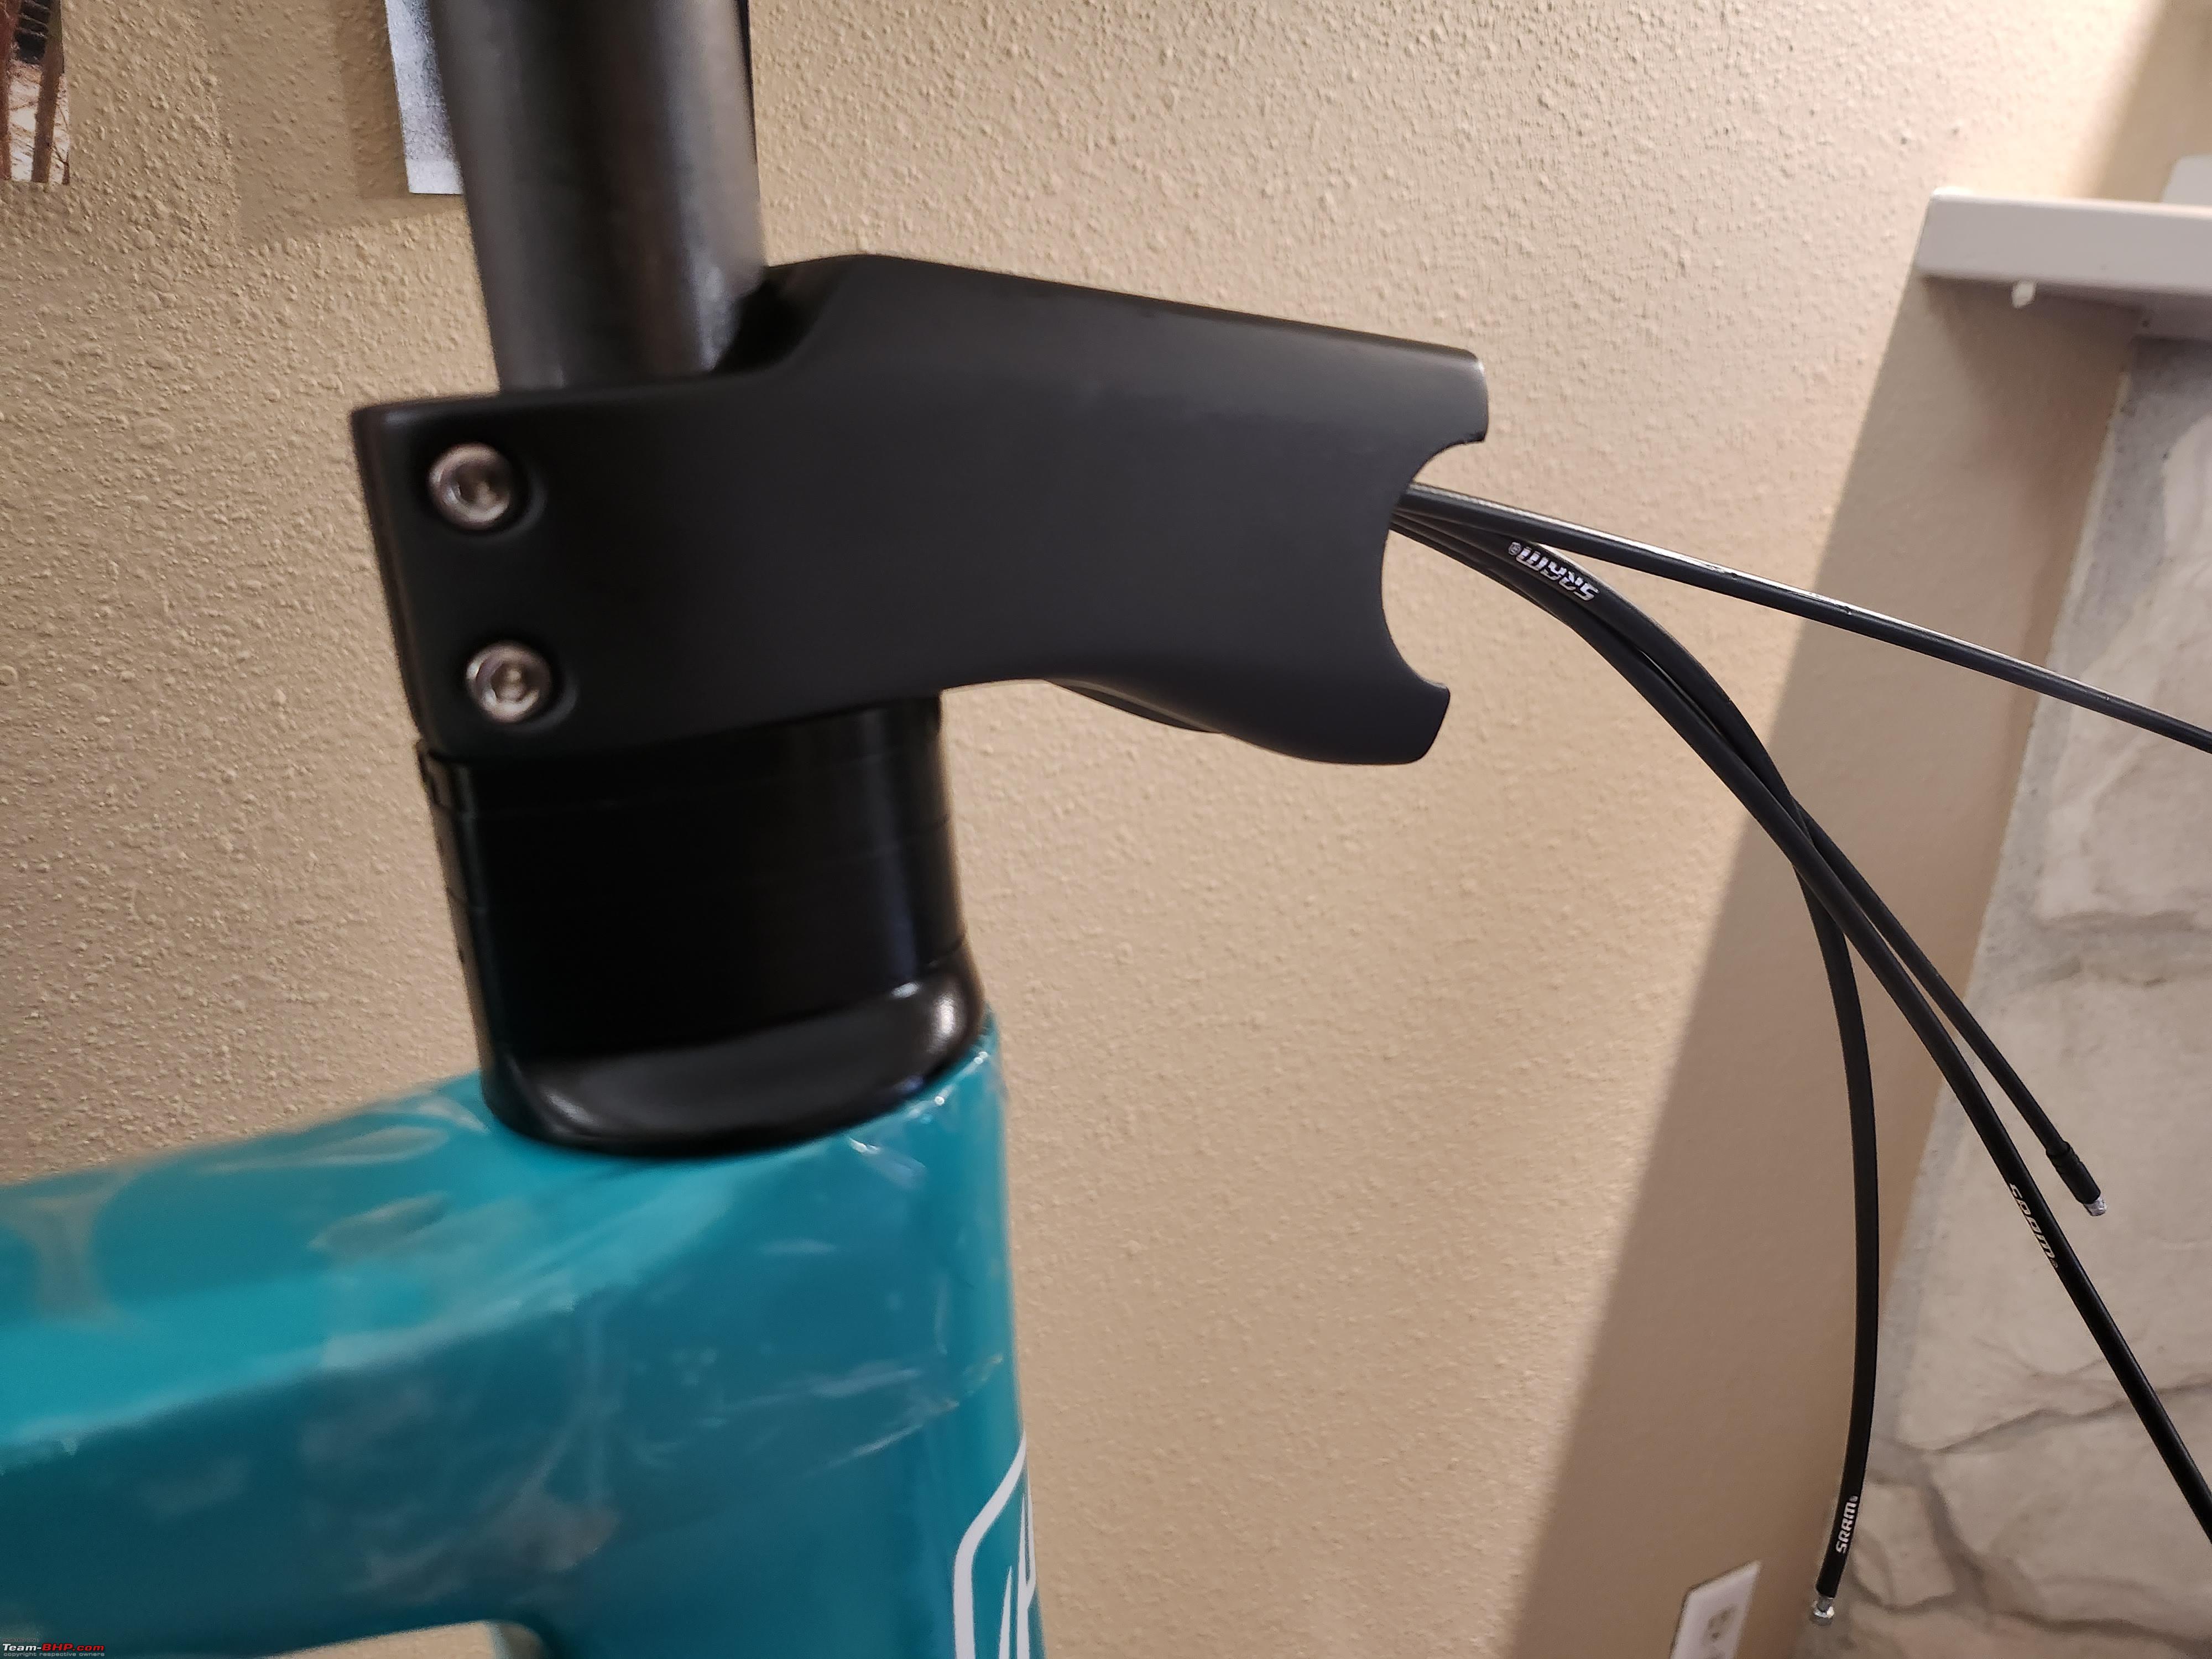 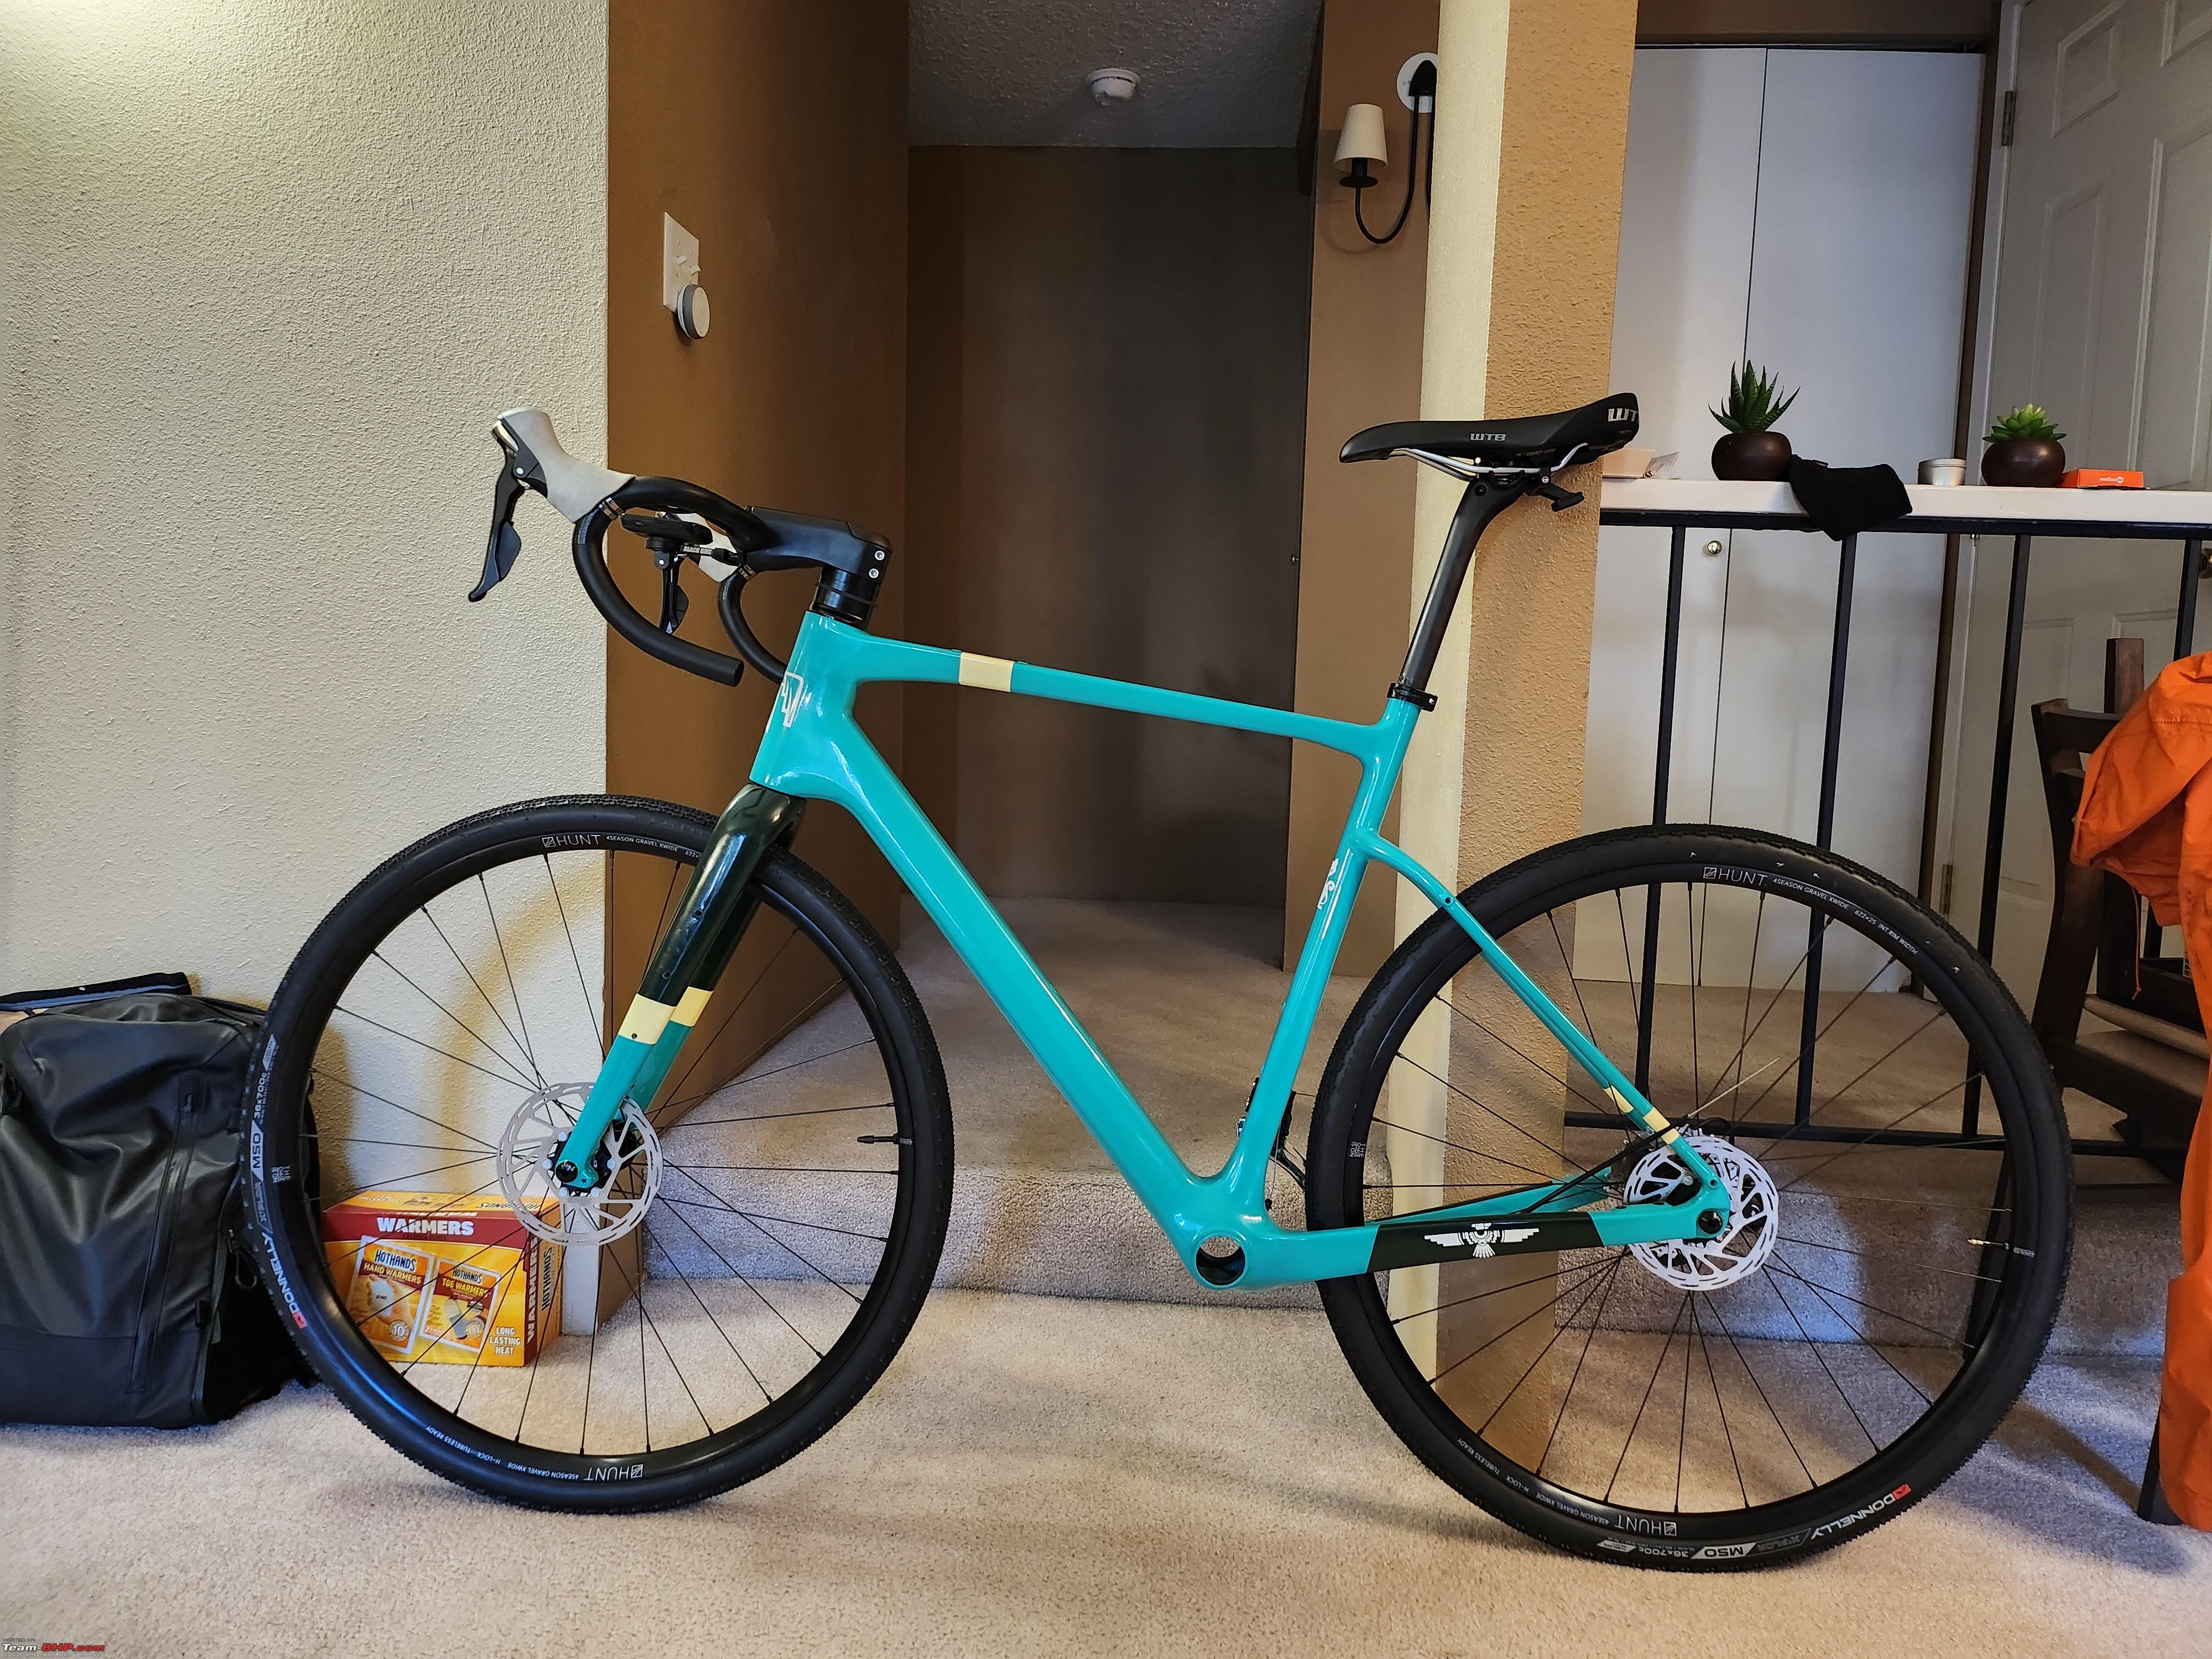 Almost finished. Kept the crankset installation as last piece of the puzzle. Last edited by amol4184 : 20th December 2022 at 08:49. |
|
| (22)
Thanks
|
| The following 22 BHPians Thank amol4184 for this useful post: | 14000rpm, 2himanshu, AROO7, DevilzzzzOwn, gauravanekar, GTO, gypsygenes, InControl, Jeroen, KK_HakunaMatata, LordSharan, mh09ad5578, mugen_pinaki27, RunSam, Samfromindia, shipnil, SRISRI_90, streetfighter, sukiwa, vb-saan, VinNam, ysjoy |
|
20th December 2022, 06:03
| #8 |
| Senior - BHPian Join Date: Oct 2007 Location: Seattle/Pune
Posts: 1,214
Thanked: 4,876 Times
| re: Project Chinondale | Building a Carbon-Fiber Bike from scratch Online resources and tipsMany old posts from weight weenies came handy even though I wasn't targeting an ultra light build. It is a gold mine of information just like team-bhp. And then there is YouTube. A special mention to ParkTool videos and also to get some inspiration on Chinese builds and products, TraceVelo. GCN videos are great too! For real time help and troubleshooting, I resort to Reddit's bikewrench subreddit. Another bike forum literally going by the name bikeforums can be useful if you wish. I always feel the folks there are a bit .. snobbish. I quickly found out that getting help there as a noob is a difficult job. Really though, the biggest guide is yourself in the end. You can watch a dozen videos and still fail at something, then as you struggle your brain automatically does something that makes it work. That and pure luck. Over the course of almost two months I learned some valuable lessons. 1. Gather all tools, components that you may need beforehand unless you want to waste time in-between project like I did. 2. Adapters are a boon and a bane at the same time. No matter how lucrative they sound, they come with catches that you won't realize until its very late. As much as possible, avoid adapters. 3. Simple things can be life savers. Like a torch, tweezers, magnets, Velcro straps, masking/duct tape, razor blade. 4. Always tape parts where you are fiddling around. As I was going through stem and fork installation I scratched the headtube part. Something that I could have easily avoided with a tape (which I later did). 5. Patience and little bit of lubricant go long way. 6. The expenses are never ending. Amazon, AliExpress, eBay are vile blackholes tugging your coat with mouth wide open asking for money. Last edited by amol4184 : 20th December 2022 at 08:49. |
|
| (11)
Thanks
|
| The following 11 BHPians Thank amol4184 for this useful post: | DevilzzzzOwn, gauravanekar, GTO, gypsygenes, InControl, KK_HakunaMatata, LordSharan, mh09ad5578, sad:), Samfromindia, vb-saan |
|
20th December 2022, 06:29
| #9 |
| Senior - BHPian Join Date: Oct 2007 Location: Seattle/Pune
Posts: 1,214
Thanked: 4,876 Times
| re: Project Chinondale | Building a Carbon-Fiber Bike from scratch Completed buildA joyous moment for any DIYer worth his weight in salt! I ordered the very last piece need for my build thru Amazon Prime - the bar tape. In my mind I had pictured that the light brown color will go well with overall earthy tones of the bike but that was idea proved to be disappointing. The tape while being extremely good quality and soft, looked strange to me after installation. Another mistake? The hoods on my shifter were white. At 3AM in the morning after finishing the build, I stared at it and decided that the tape and white hoods needed begone. Rightly so, I ordered black hoods and a black bartape. Yup, expenses keep on building even after the build. Anyhoo, the bike as it stood proudly in my living room on day one: 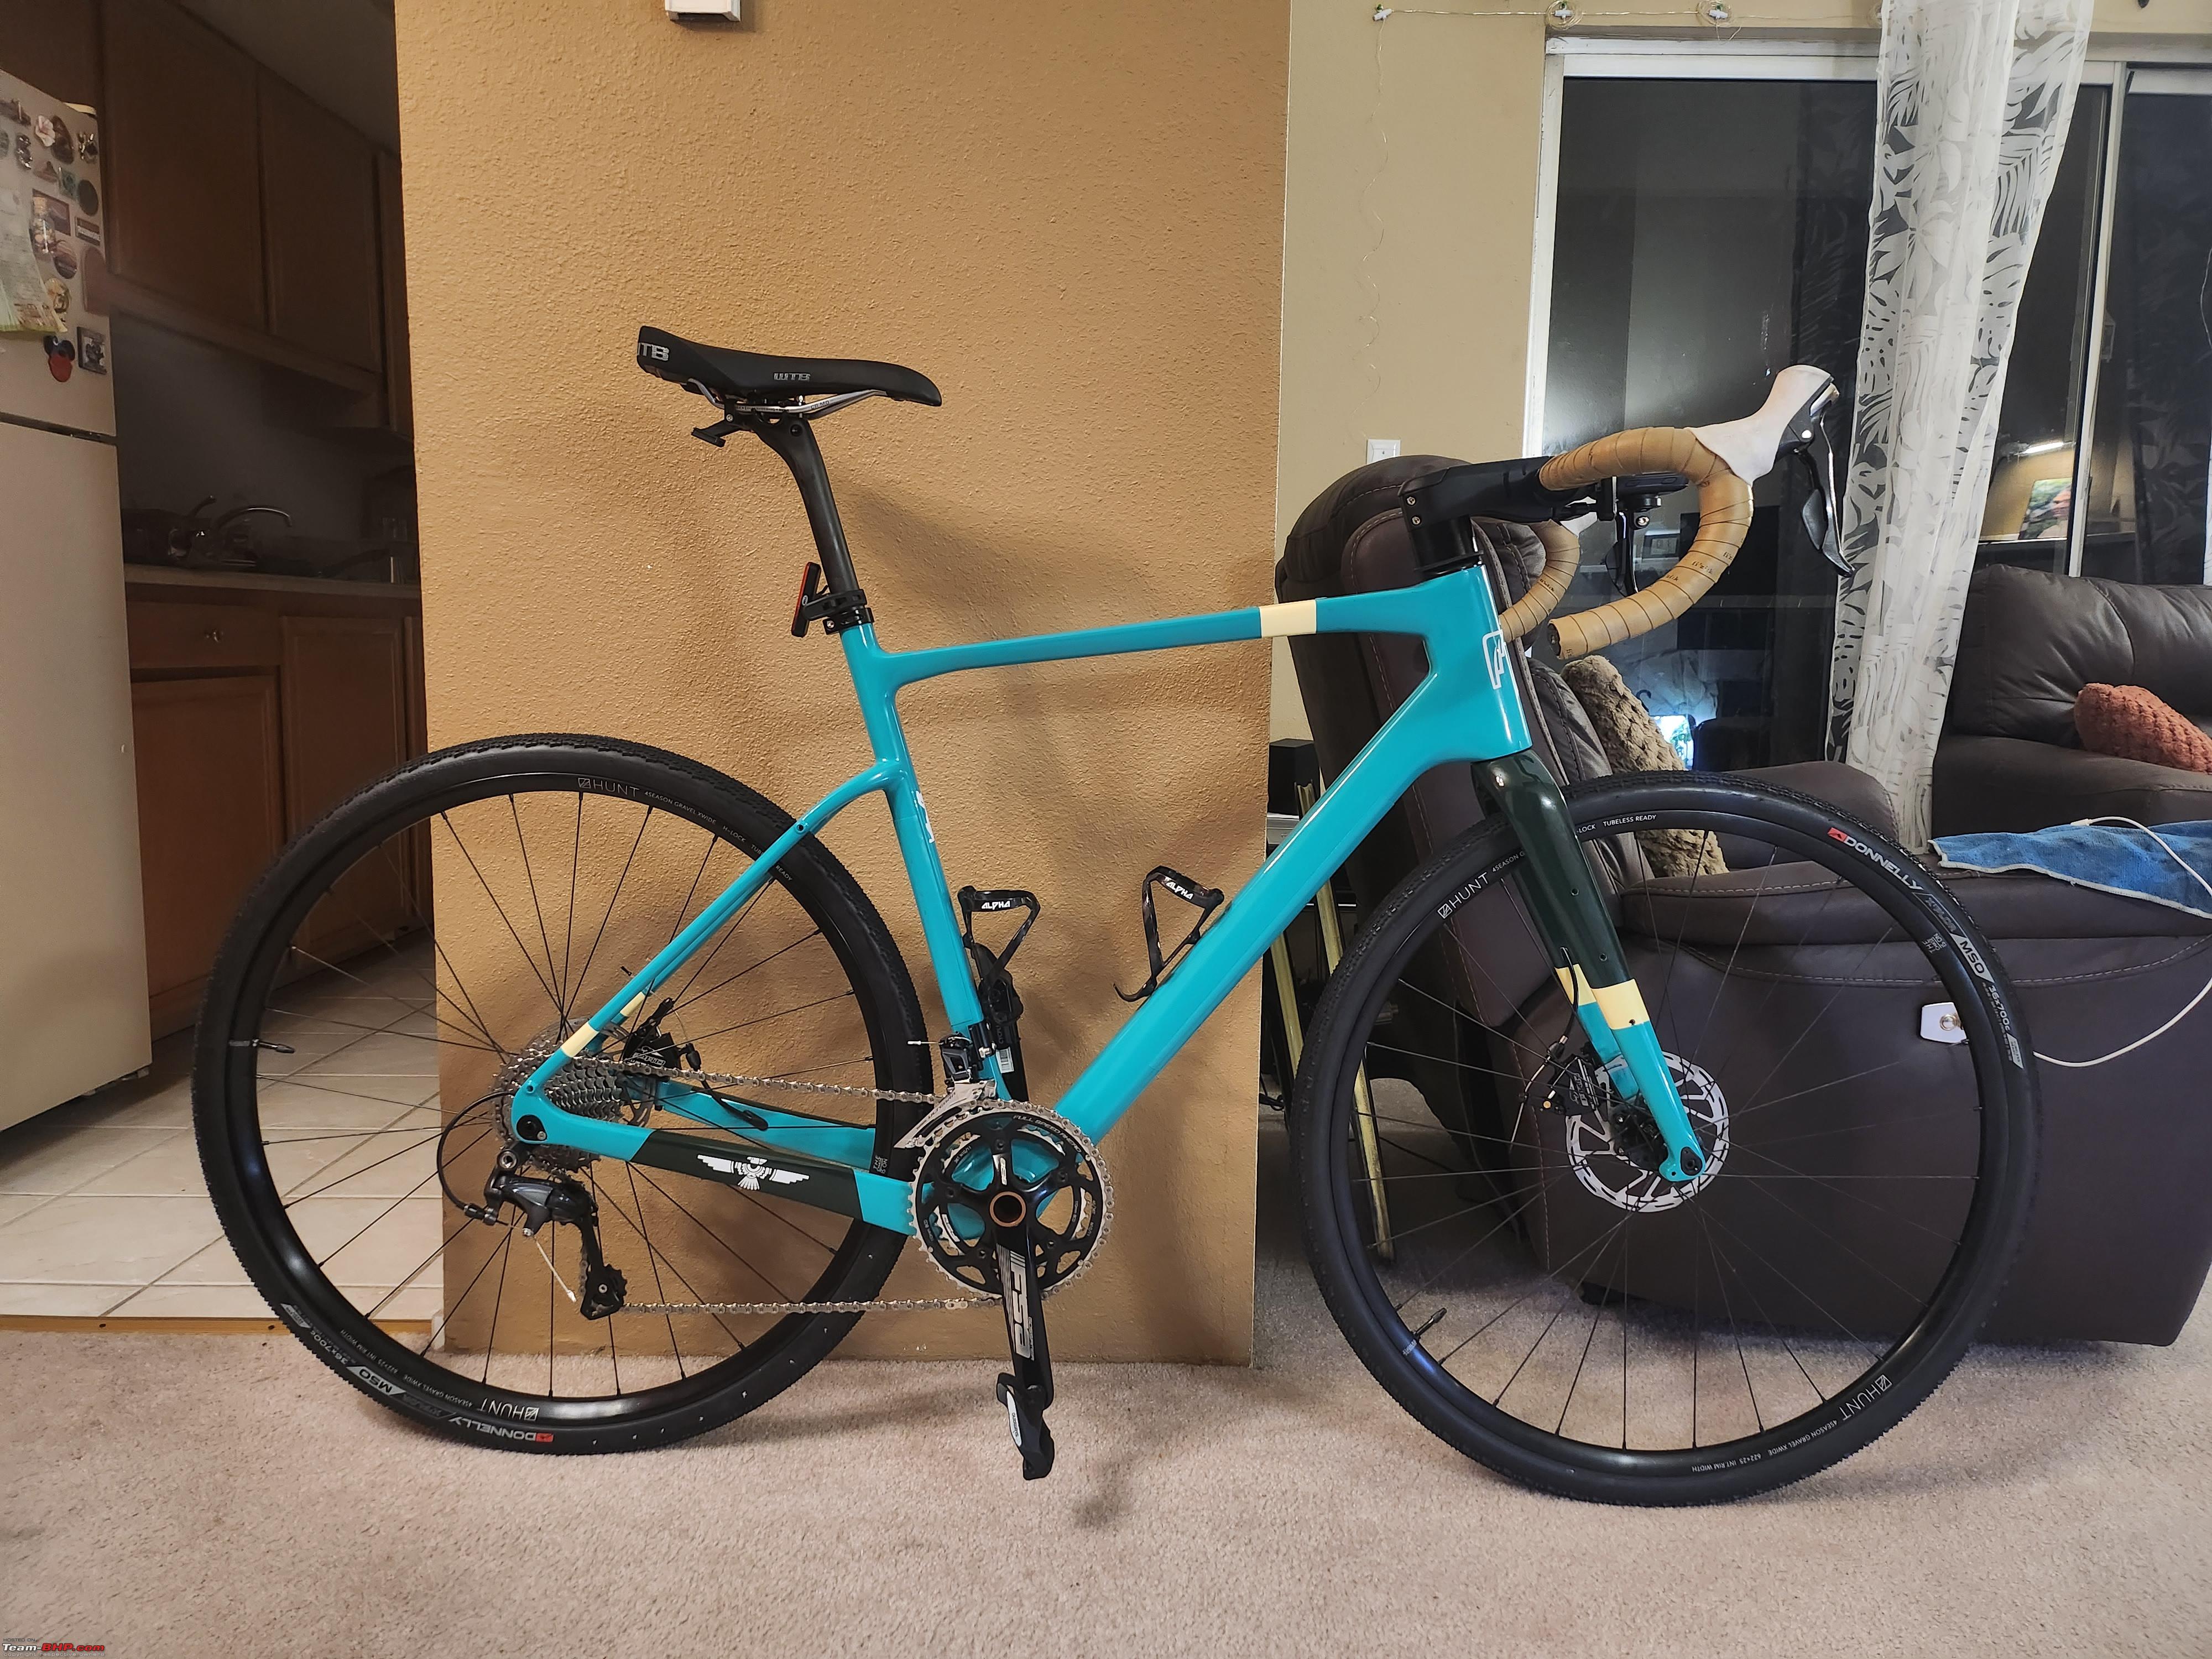 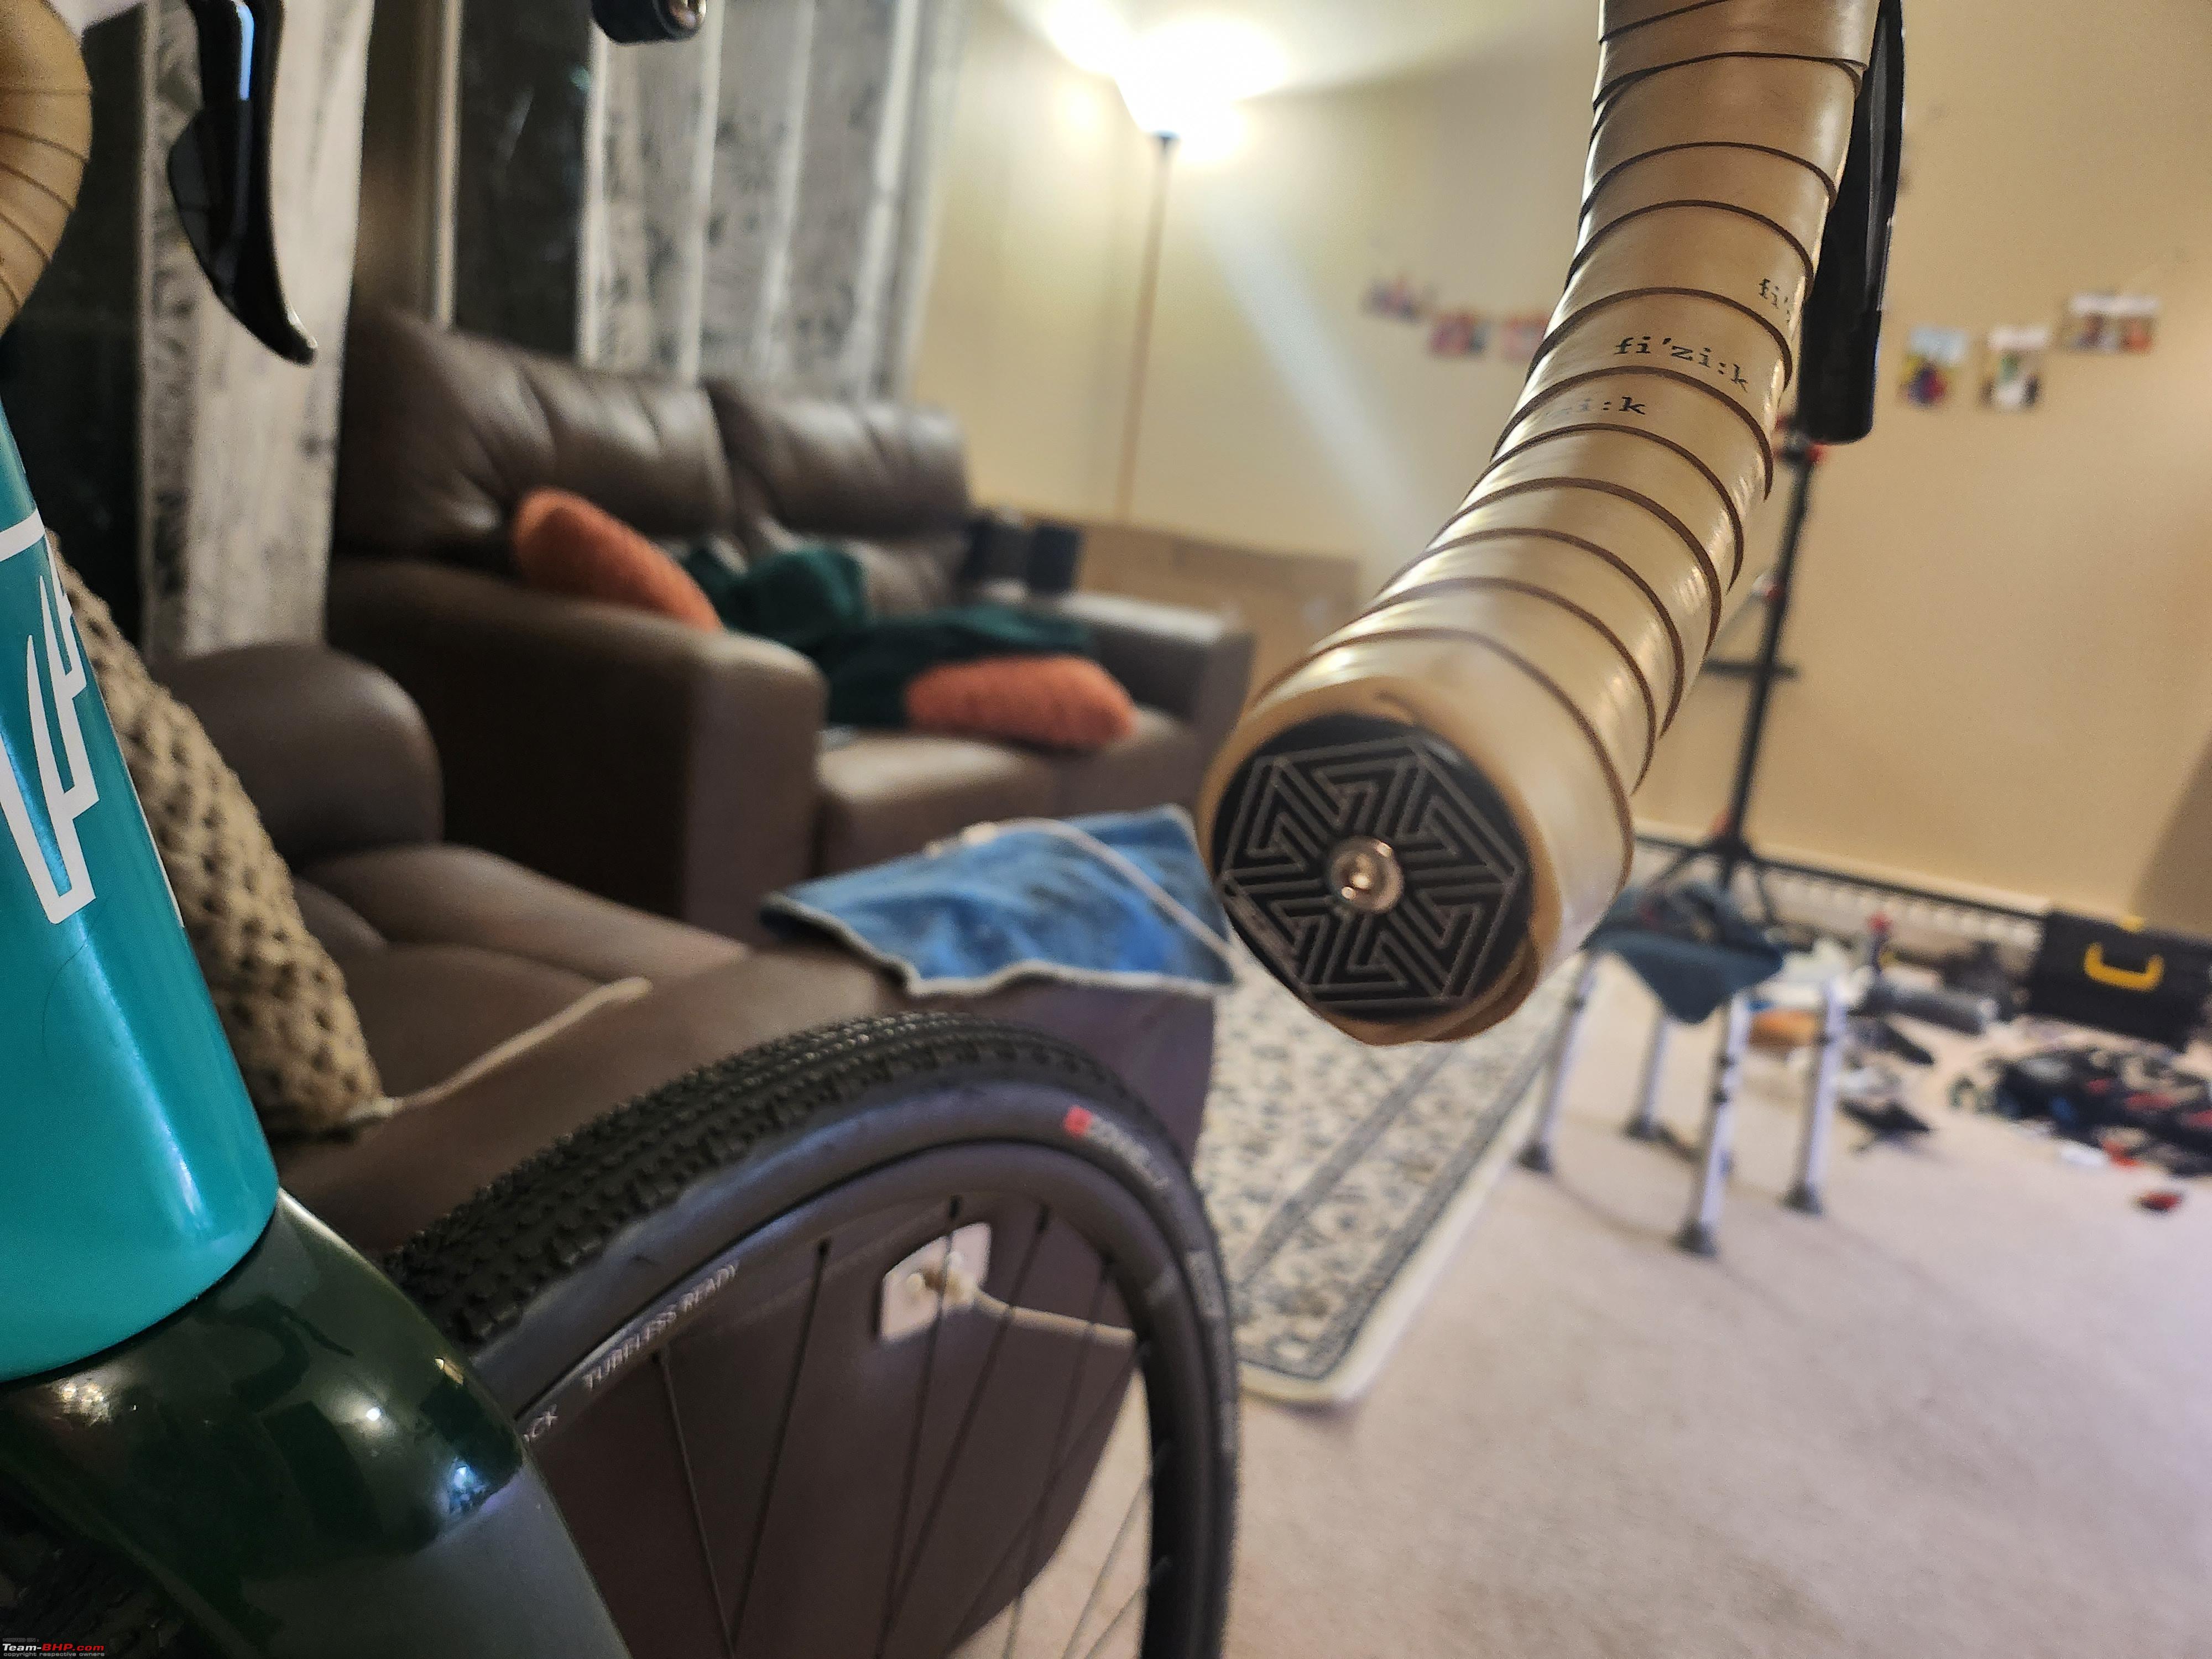   Out on the maiden ride. An incredibly proud moment for me! 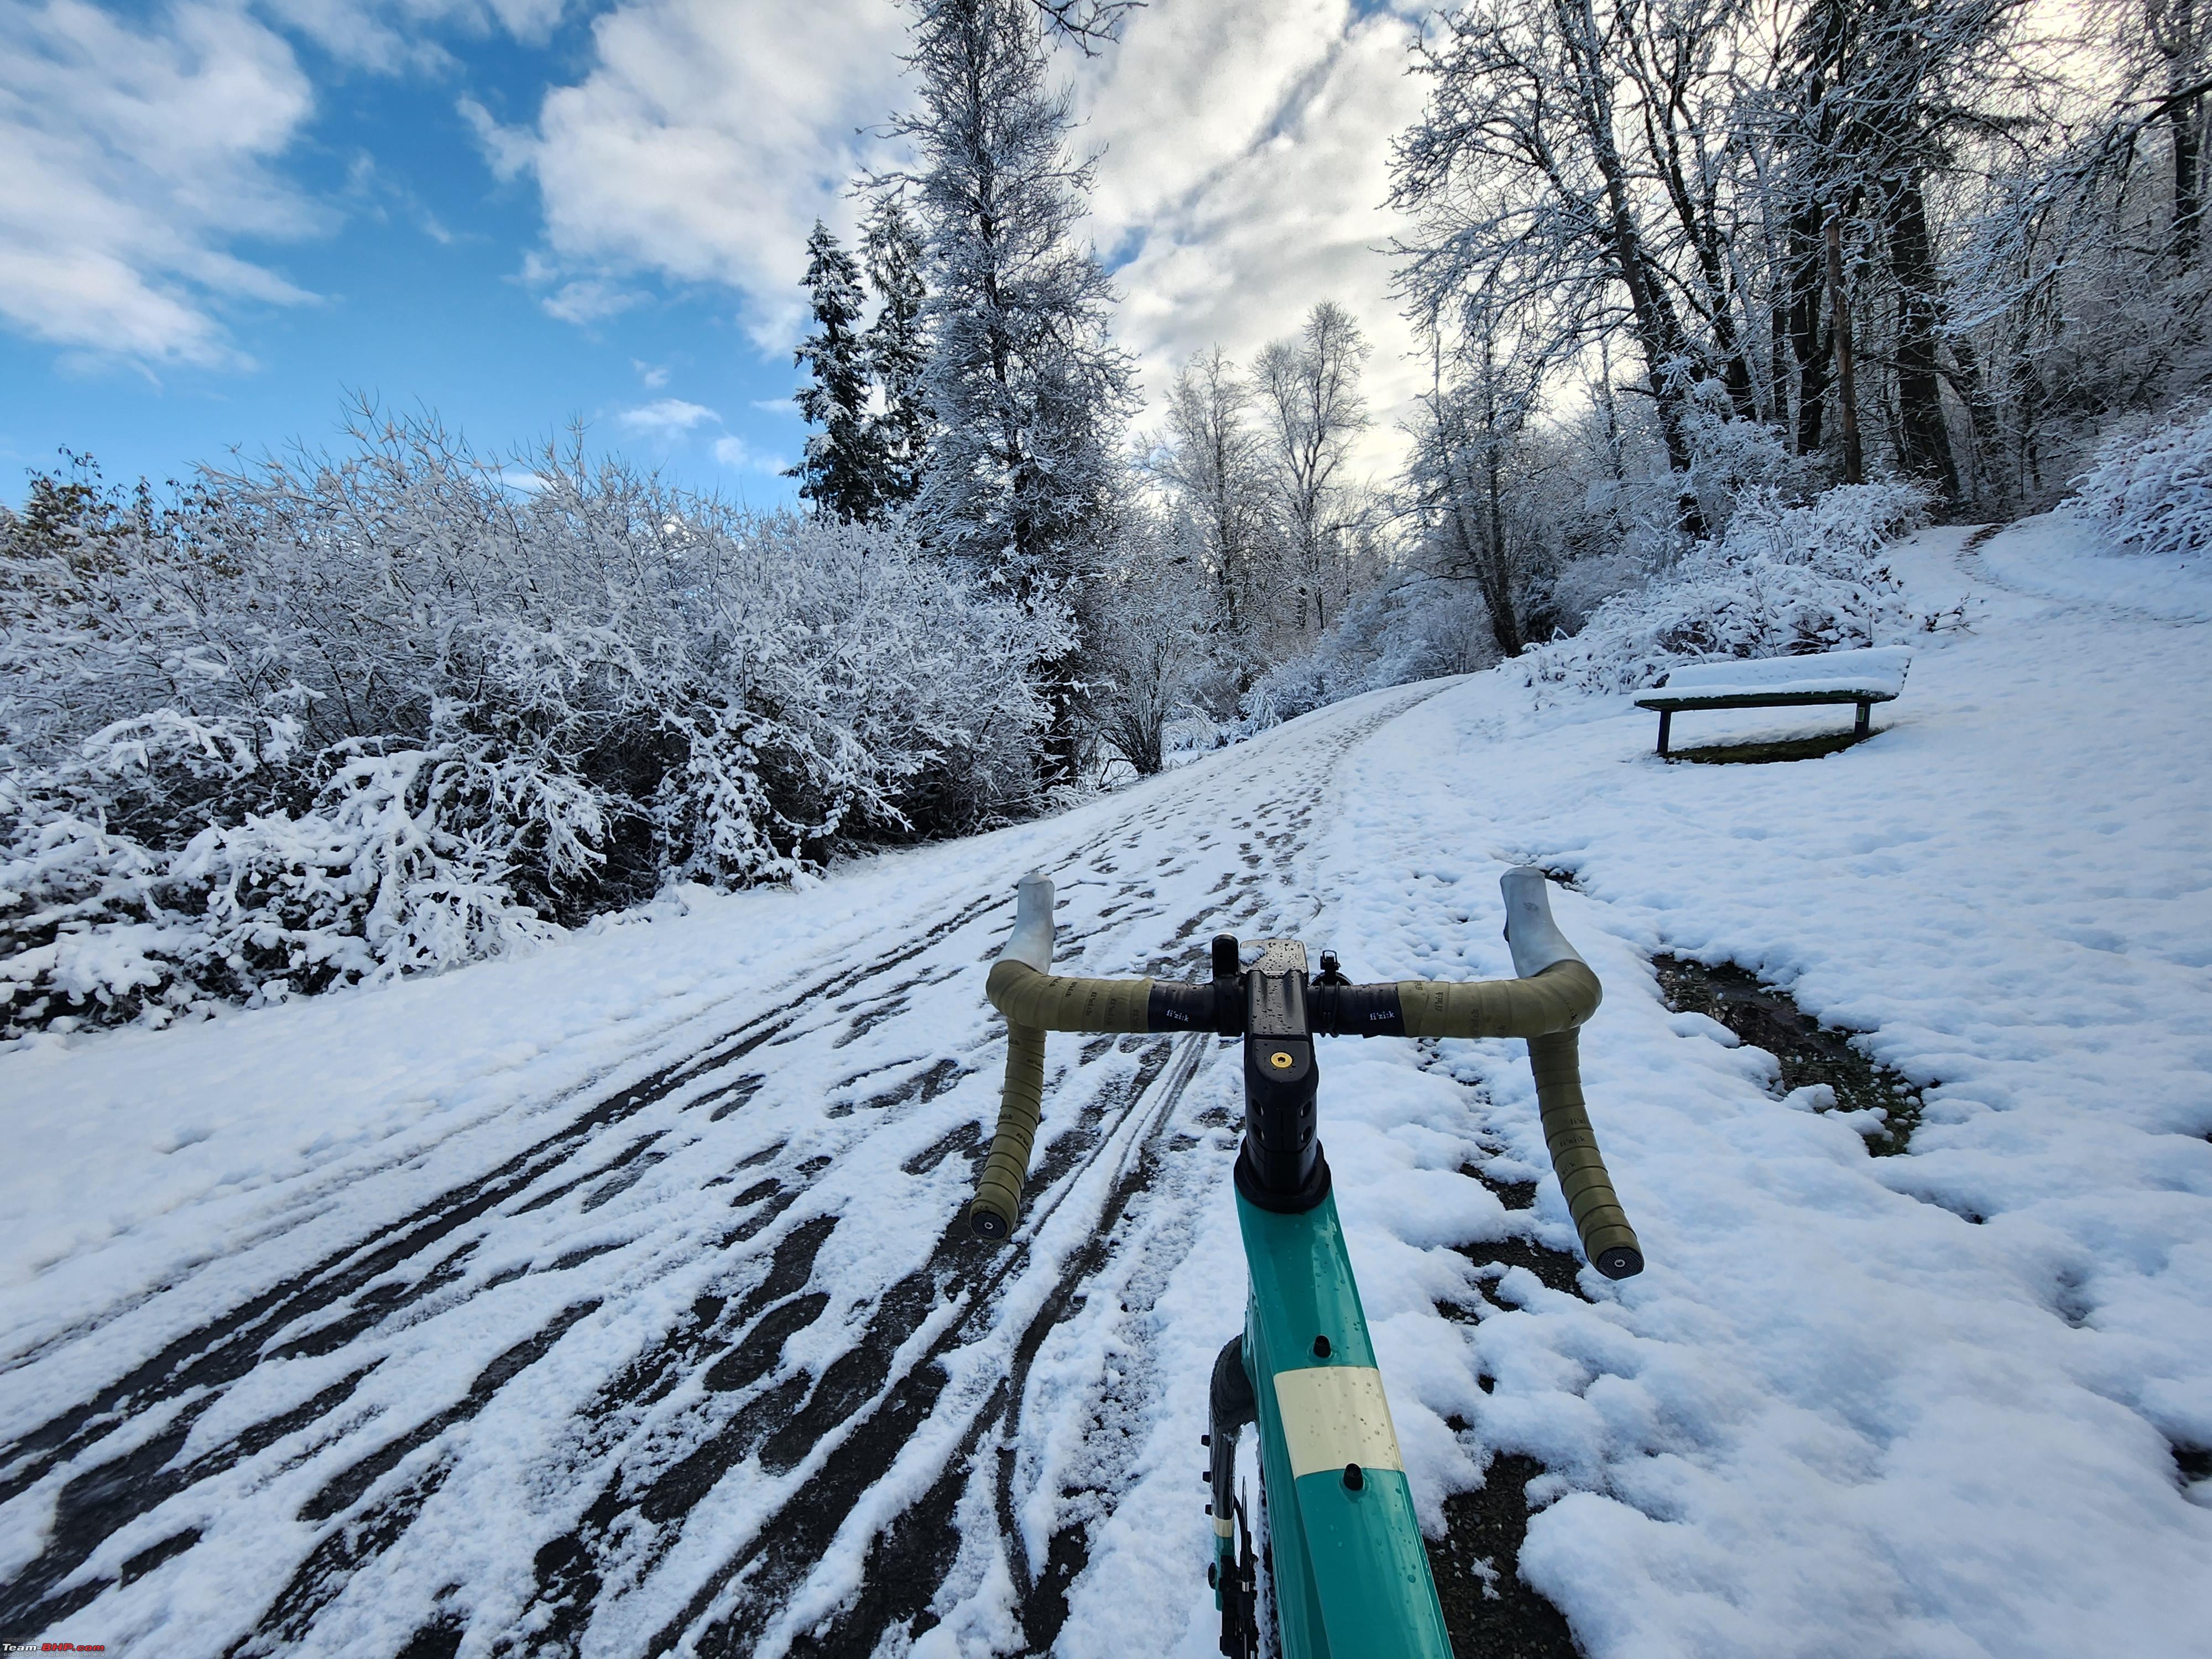 Bike had a rough start in the life  Black bartape and hoods installed for much cleaner looks 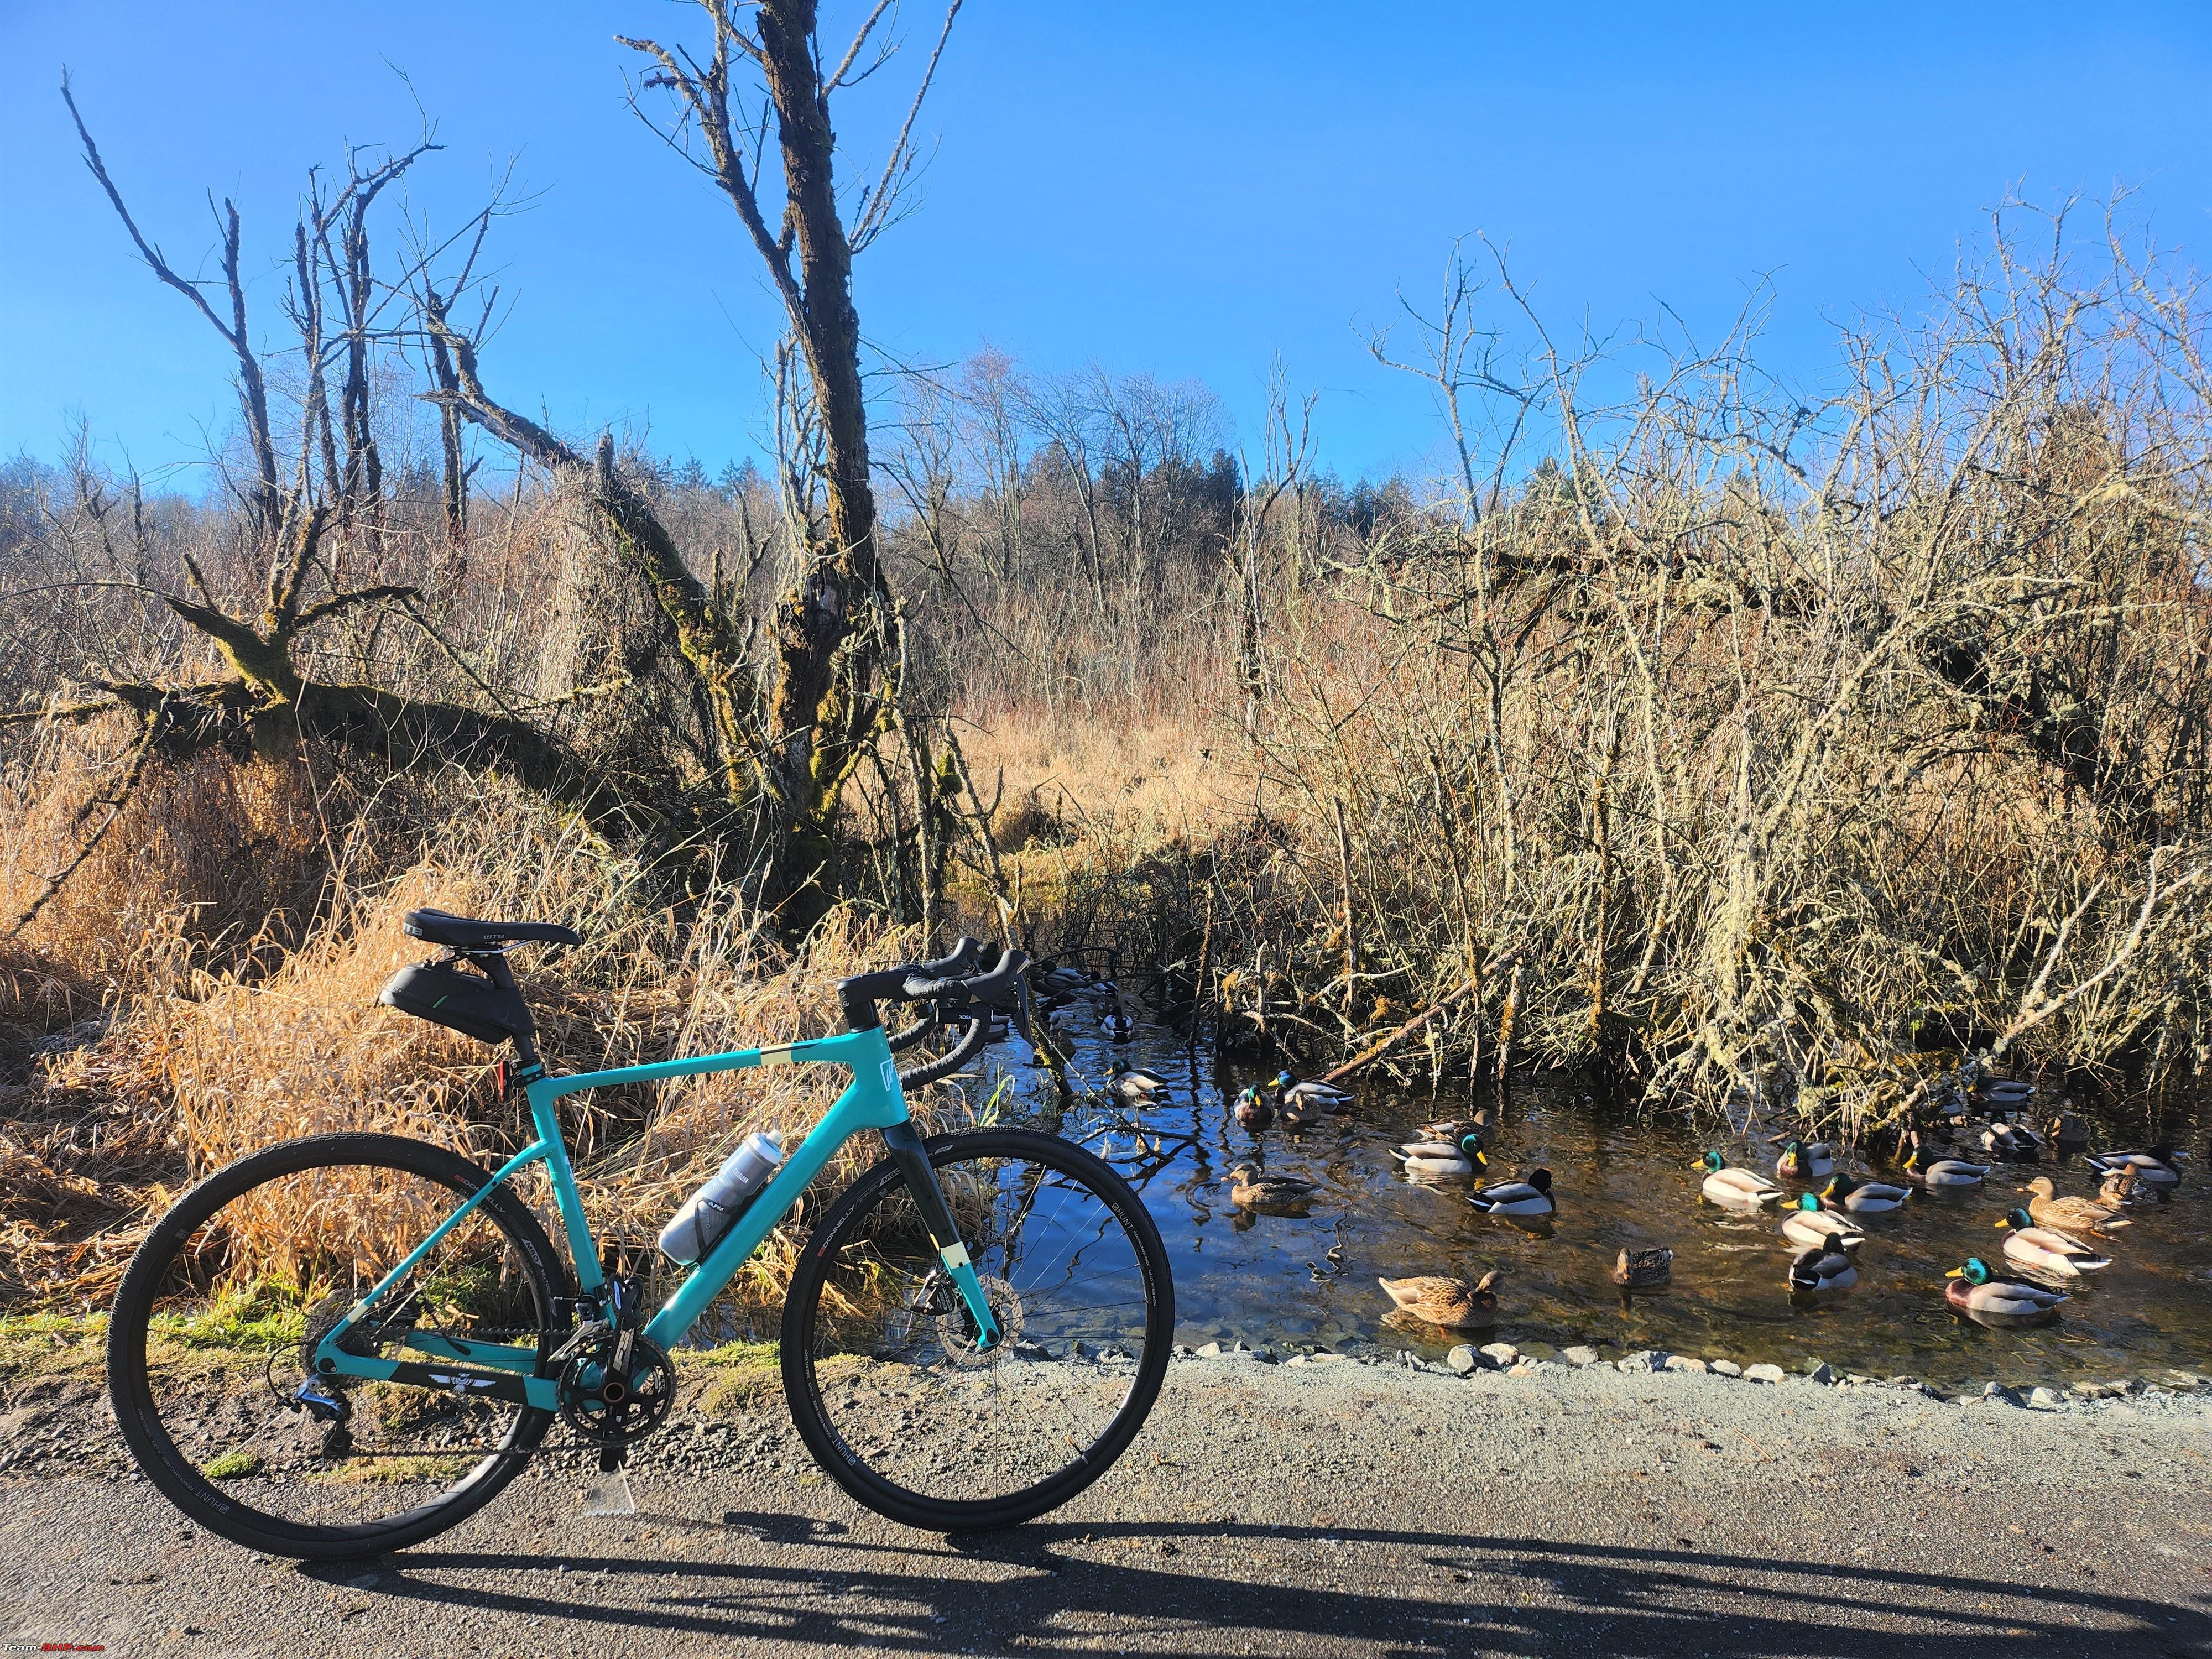 Ooooh babyyyy Hope you liked the journey and the build. .fin. Last edited by amol4184 : 20th December 2022 at 08:29. |
|
| (57)
Thanks
|
| The following 57 BHPians Thank amol4184 for this useful post: | 14000rpm, 2himanshu, abtyagi, aeroamit, anshumandun, apocalypse, Arjun.hb, AROO7, arvind71181, AtheK, batterylow, BoneCollector, bullock-Car, catchjyoti, cdmanju, DevilzzzzOwn, FueledbyFury, G-One, gauravanekar, Gildarts, Godzilla, graaja, GreenerPlanet, GTO, gypsygenes, Harjot37, HTC, InControl, Jeroen, KANNURAN, kat, KK_HakunaMatata, LordSharan, mh09ad5578, Newtown, ninjatalli, Pennant1970, PraNeel, RaviCar, sad:), sainyamk95, sam264_2000, Sanjunair5, shipnil, shravansp24, skviknaraj, srgntpepper, SRISRI_90, streetfighter, sukiwa, swe.desi, sweetvar26, Tgo, vb-saan, VinNam, wheeledwanderer, ysjoy |
|
20th December 2022, 10:47
| #10 |
| Team-BHP Support  Join Date: Feb 2010 Location: S'pore/Thrissur
Posts: 7,261
Thanked: 12,343 Times
| re: Project Chinondale | Building a Carbon-Fiber Bike from scratch Thread moved from Assembly Line to the Bicycles section. Wonderful project indeed. Thank you for sharing! |
|
| (7)
Thanks
|
| The following 7 BHPians Thank vb-saan for this useful post: | Aditya, amol4184, Freespirit27, gauravanekar, GTO, mh09ad5578, sad:) |
|
21st December 2022, 12:18
| #11 |
| BHPian Join Date: Feb 2022 Location: Kochi
Posts: 91
Thanked: 157 Times
| Re: Project Chinondale | Building a Carbon-Fiber Bike from scratch This is exactly the reason I was so desperate to join the Team. Amazing build and story  I mean, it takes more than some to make a decision to go for such a build and you are so honest about the odds you faced despite a seemingly thoroughly thought out plan. I go for a normal cleaning of my bikes- cycle or motor and always end up adding a fix to some part, either because I didn't anticipate or I didn't know the right way of doing it. Life in the times of Amazon and Ali is definitely easier. A great writeup man, felt the read and many more good miles there to you on the Chinondale! Last edited by suhaas307 : 21st December 2022 at 12:46. Reason: spacing for improved readability |
|
| (2)
Thanks
|
| The following 2 BHPians Thank Freespirit27 for this useful post: | amol4184, SRISRI_90 |
| |
|
21st December 2022, 12:36
| #12 |
| BHPian Join Date: Dec 2019 Location: Dubai/Coorg
Posts: 104
Thanked: 249 Times
| Re: Project Chinondale | Building a Carbon-Fiber Bike from scratch Super thread motivating to go DIY! |
|
| (1)
Thanks
|
| The following BHPian Thanks wheeledwanderer for this useful post: | amol4184 |
|
21st December 2022, 13:16
| #13 |
| Newbie Join Date: Nov 2013 Location: Bangalore
Posts: 19
Thanked: 51 Times
| Re: Project Chinondale | Building a Carbon-Fiber Bike from scratch Wow! What a neat project and end result. I think it needs a high level of motivation and skill to organize all of these fragmented suppliers and navigate through unclear standards. Then, the actual fitting... Man, we have had mechanics staring blank at the engine casing design and fittings on our top of the line tractor model, struggling with repairs. I have been dealing with these challenges in the farm equipments space. And, feel so overwhelmed sometimes. Your post is inspiring. Plus, a few lessons in organizing work. Cheers to Chinondale and wish you many satisfying miles on it. |
|
| (2)
Thanks
|
| The following 2 BHPians Thank gypsygenes for this useful post: | amol4184, mh09ad5578 |
|
21st December 2022, 21:16
| #14 |
| BHPian Join Date: Sep 2021 Location: KL 51
Posts: 78
Thanked: 304 Times
| Re: Project Chinondale | Building a Carbon-Fiber Bike from scratch It took me multiple sessions to complete reading through this opus! Mostly because I had no idea what much of the words that seem to make up a bicycle means! �� Still, for some reason, persisted and found the adventure strangely satisfying. Anyway, this is not something I would even think of attempting - so well done. I am in the early stages of a (nebulous) idea of taking up cycling - so it all felt worthwhile. |
|
| (3)
Thanks
|
| The following 3 BHPians Thank Pennant1970 for this useful post: | amol4184, mh09ad5578, tchsvy |
|
21st December 2022, 21:24
| #15 | |
| BHPian Join Date: Mar 2021 Location: Bengaluru
Posts: 61
Thanked: 204 Times
| Re: Project Chinondale | Building a Carbon-Fiber Bike from scratch Hi @amol4184, This is a incredible story! Really loved reading how a full bike build works, so much of passion, hard work and planning going into it! Lots of learning and resources here! Many years back, came across a friend and a friend of his, who had custom built bikes, by themselves Had no idea, how it works! Thanks for sharing! ~ysjoy Quote:
| |
|
| (2)
Thanks
|

| The following 2 BHPians Thank ysjoy for this useful post: | amol4184, mh09ad5578 |
|