| |||||||

| Search Forums |
| Advanced Search |
| Go to Page... |
 |
| Search this Thread |  63,669 views |
 5th July 2022, 06:24
| #1 |
| BHPian Join Date: Oct 2017 Location: Bangalore
Posts: 298
Thanked: 1,676 Times
| High end JL Audio upgrade in my Maruti Baleno RS Disclaimer: I am in no way associated with any of the brands below and the views/opinions are solely my own. The quest for better audio is something I'm sure most of us yearn for, me being no exception to that. Although I wouldn't classify myself as a hard-core audiophile, I do enjoy good clean audio. This led me on a journey to fulfil my desires and in the end finally say 'I'm done with audio.' It all started back in 2018 when the first set of upgrades was done (more details can be found here). Just to summarize the changes:
I had no clue about car audio installation during this time and relied on the installer completely. As it turned out, the installer was absolute trash (something I found out later) Although it was much better than stock, it just didn't sound right. The highs were tinny, mids muddled with vocals and the sub could be heard but not felt. It was also just not playing some of the lower frequencies. The audio also used to cut off now and then, while people in the rear complained that the bass was overpowering and couldn't hear the music clearly. I ran with the setup for a while and tried to find a proper installer in the meantime, someone whom I can really trust to get things done and not just do it for the money. As luck would have it, I stumbled upon an old high school friend who is in the auto industry. Jackpot! I didn't have to worry about getting cheated and ripped off for anything related to cars anymore!! I spoke to him at length about car audio and he got an expert (Raghu) along to help. The first step was to assess the damage: Removing the so-called 3M damping. The only useful thing is those metal plates 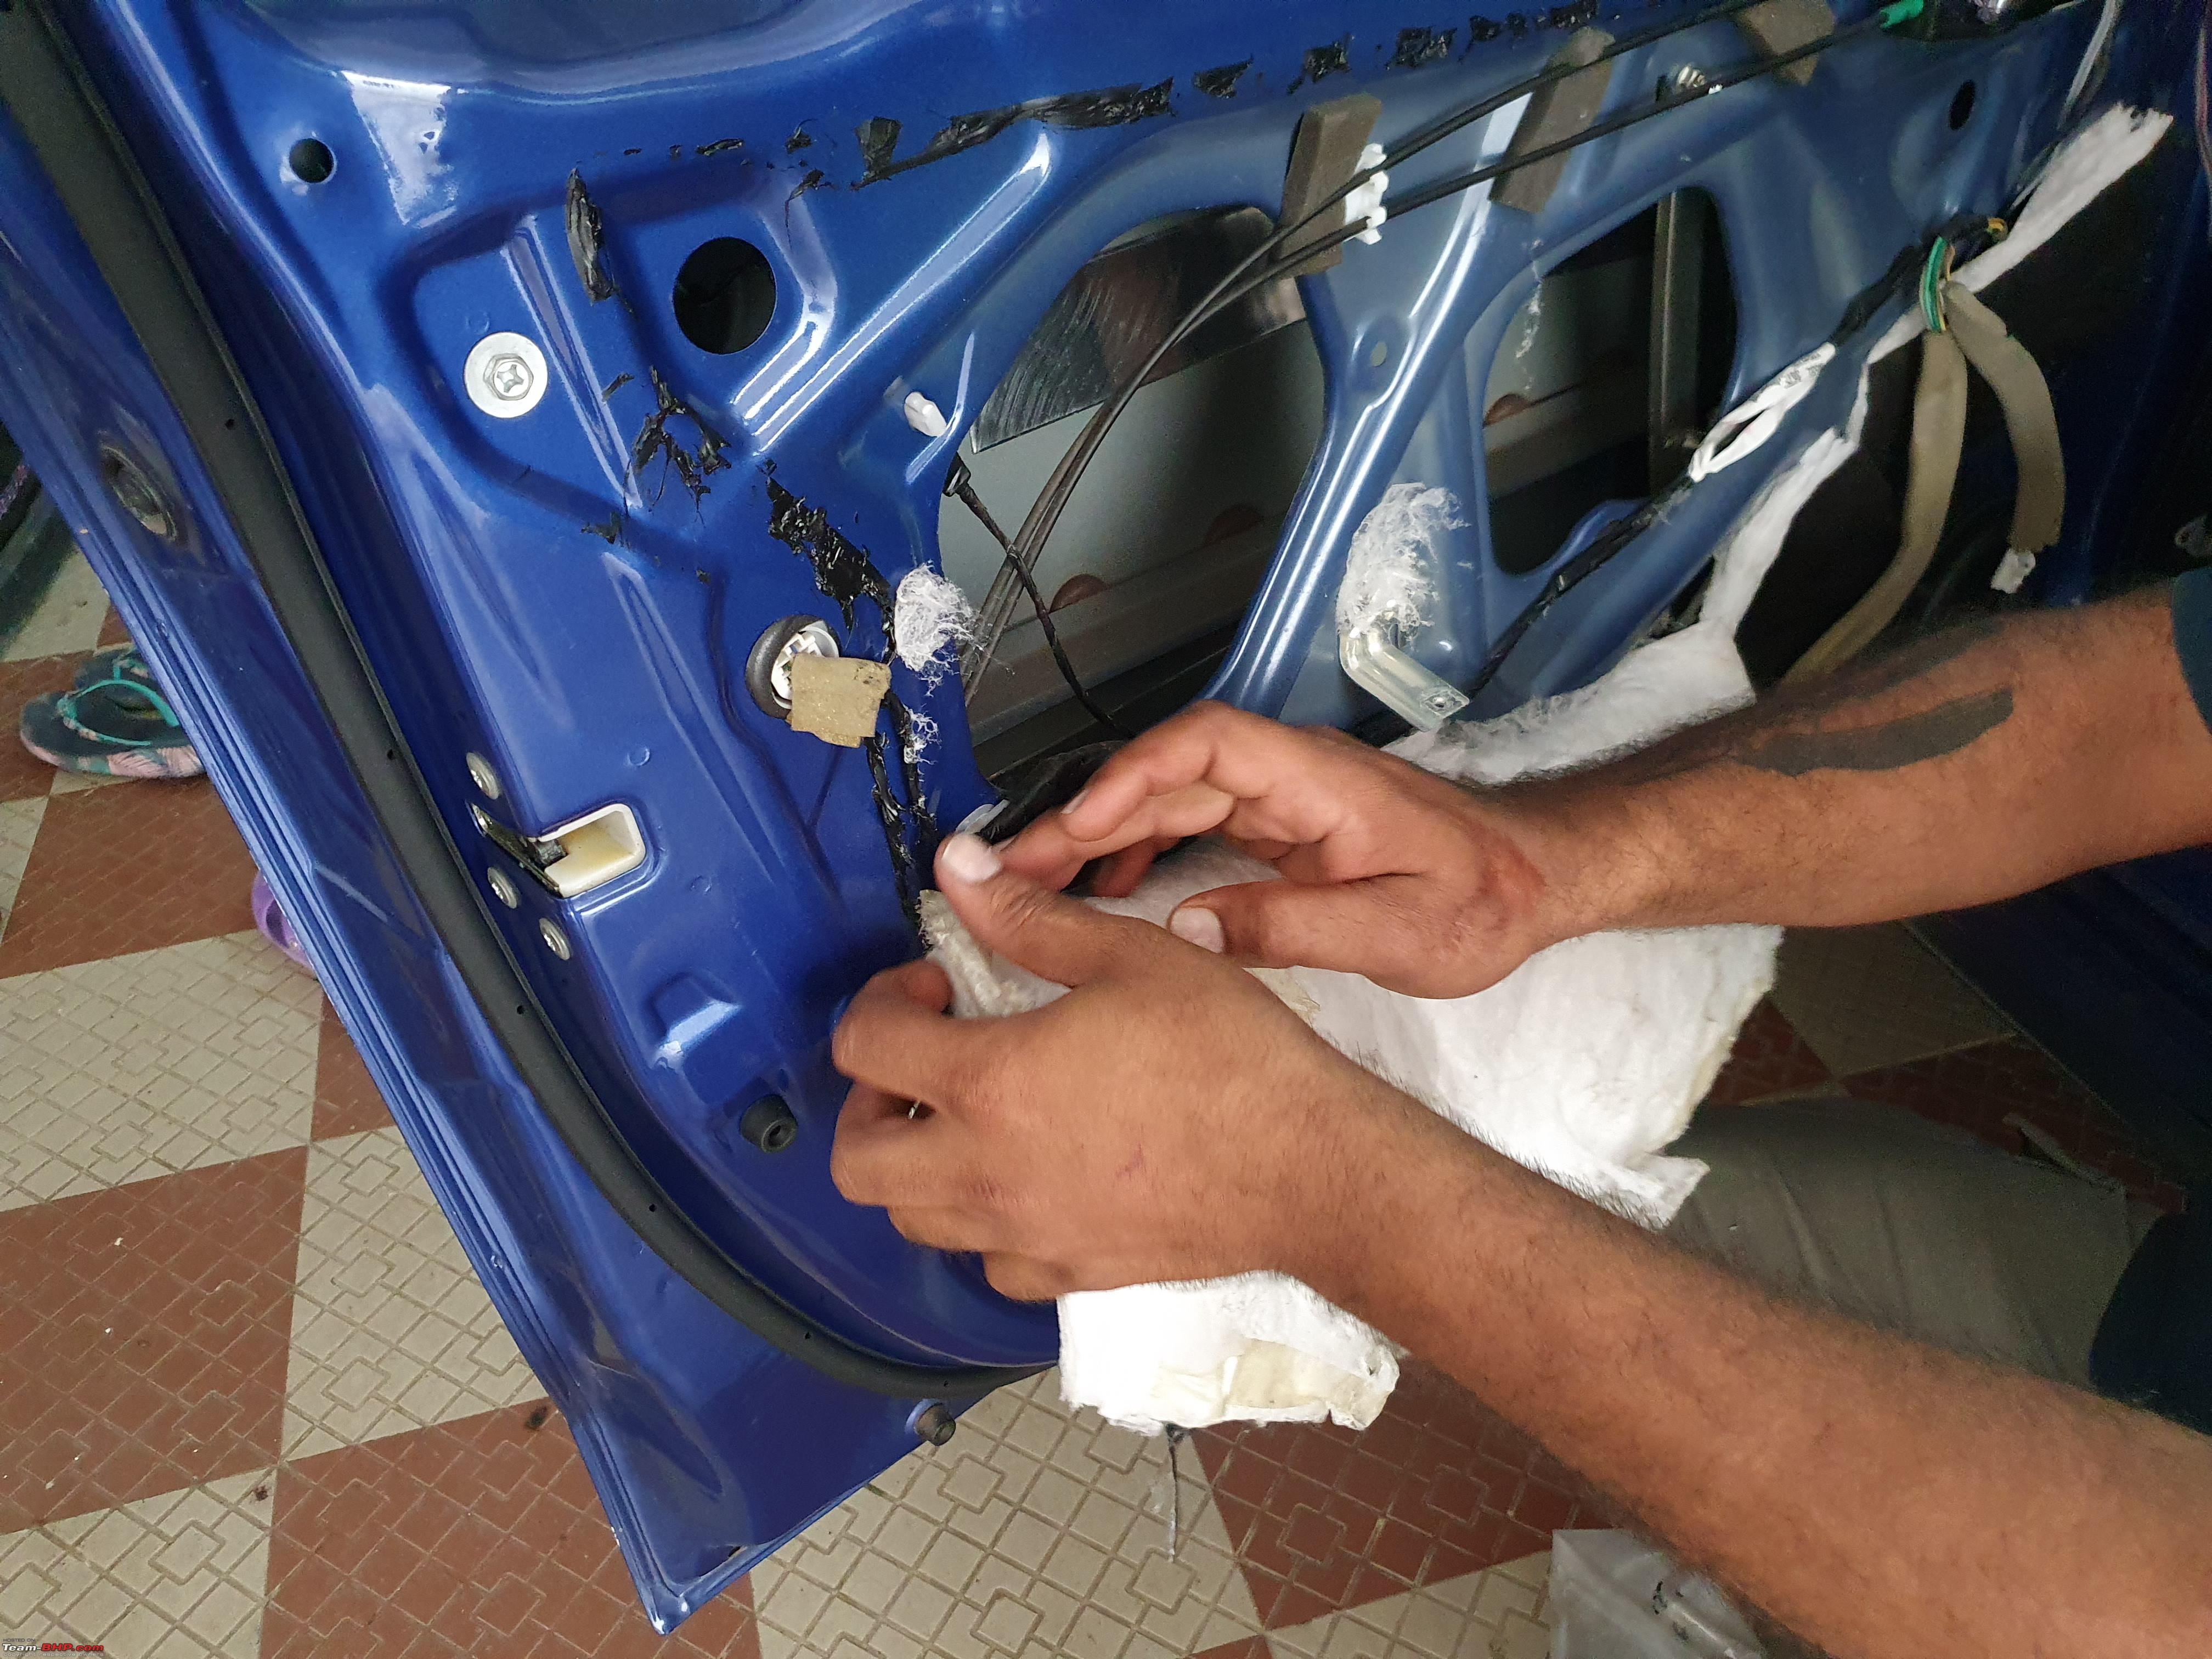  The crossovers were placed inside the door. This explains why the audio used to cut off, it got wet. Luckily nothing shorted. 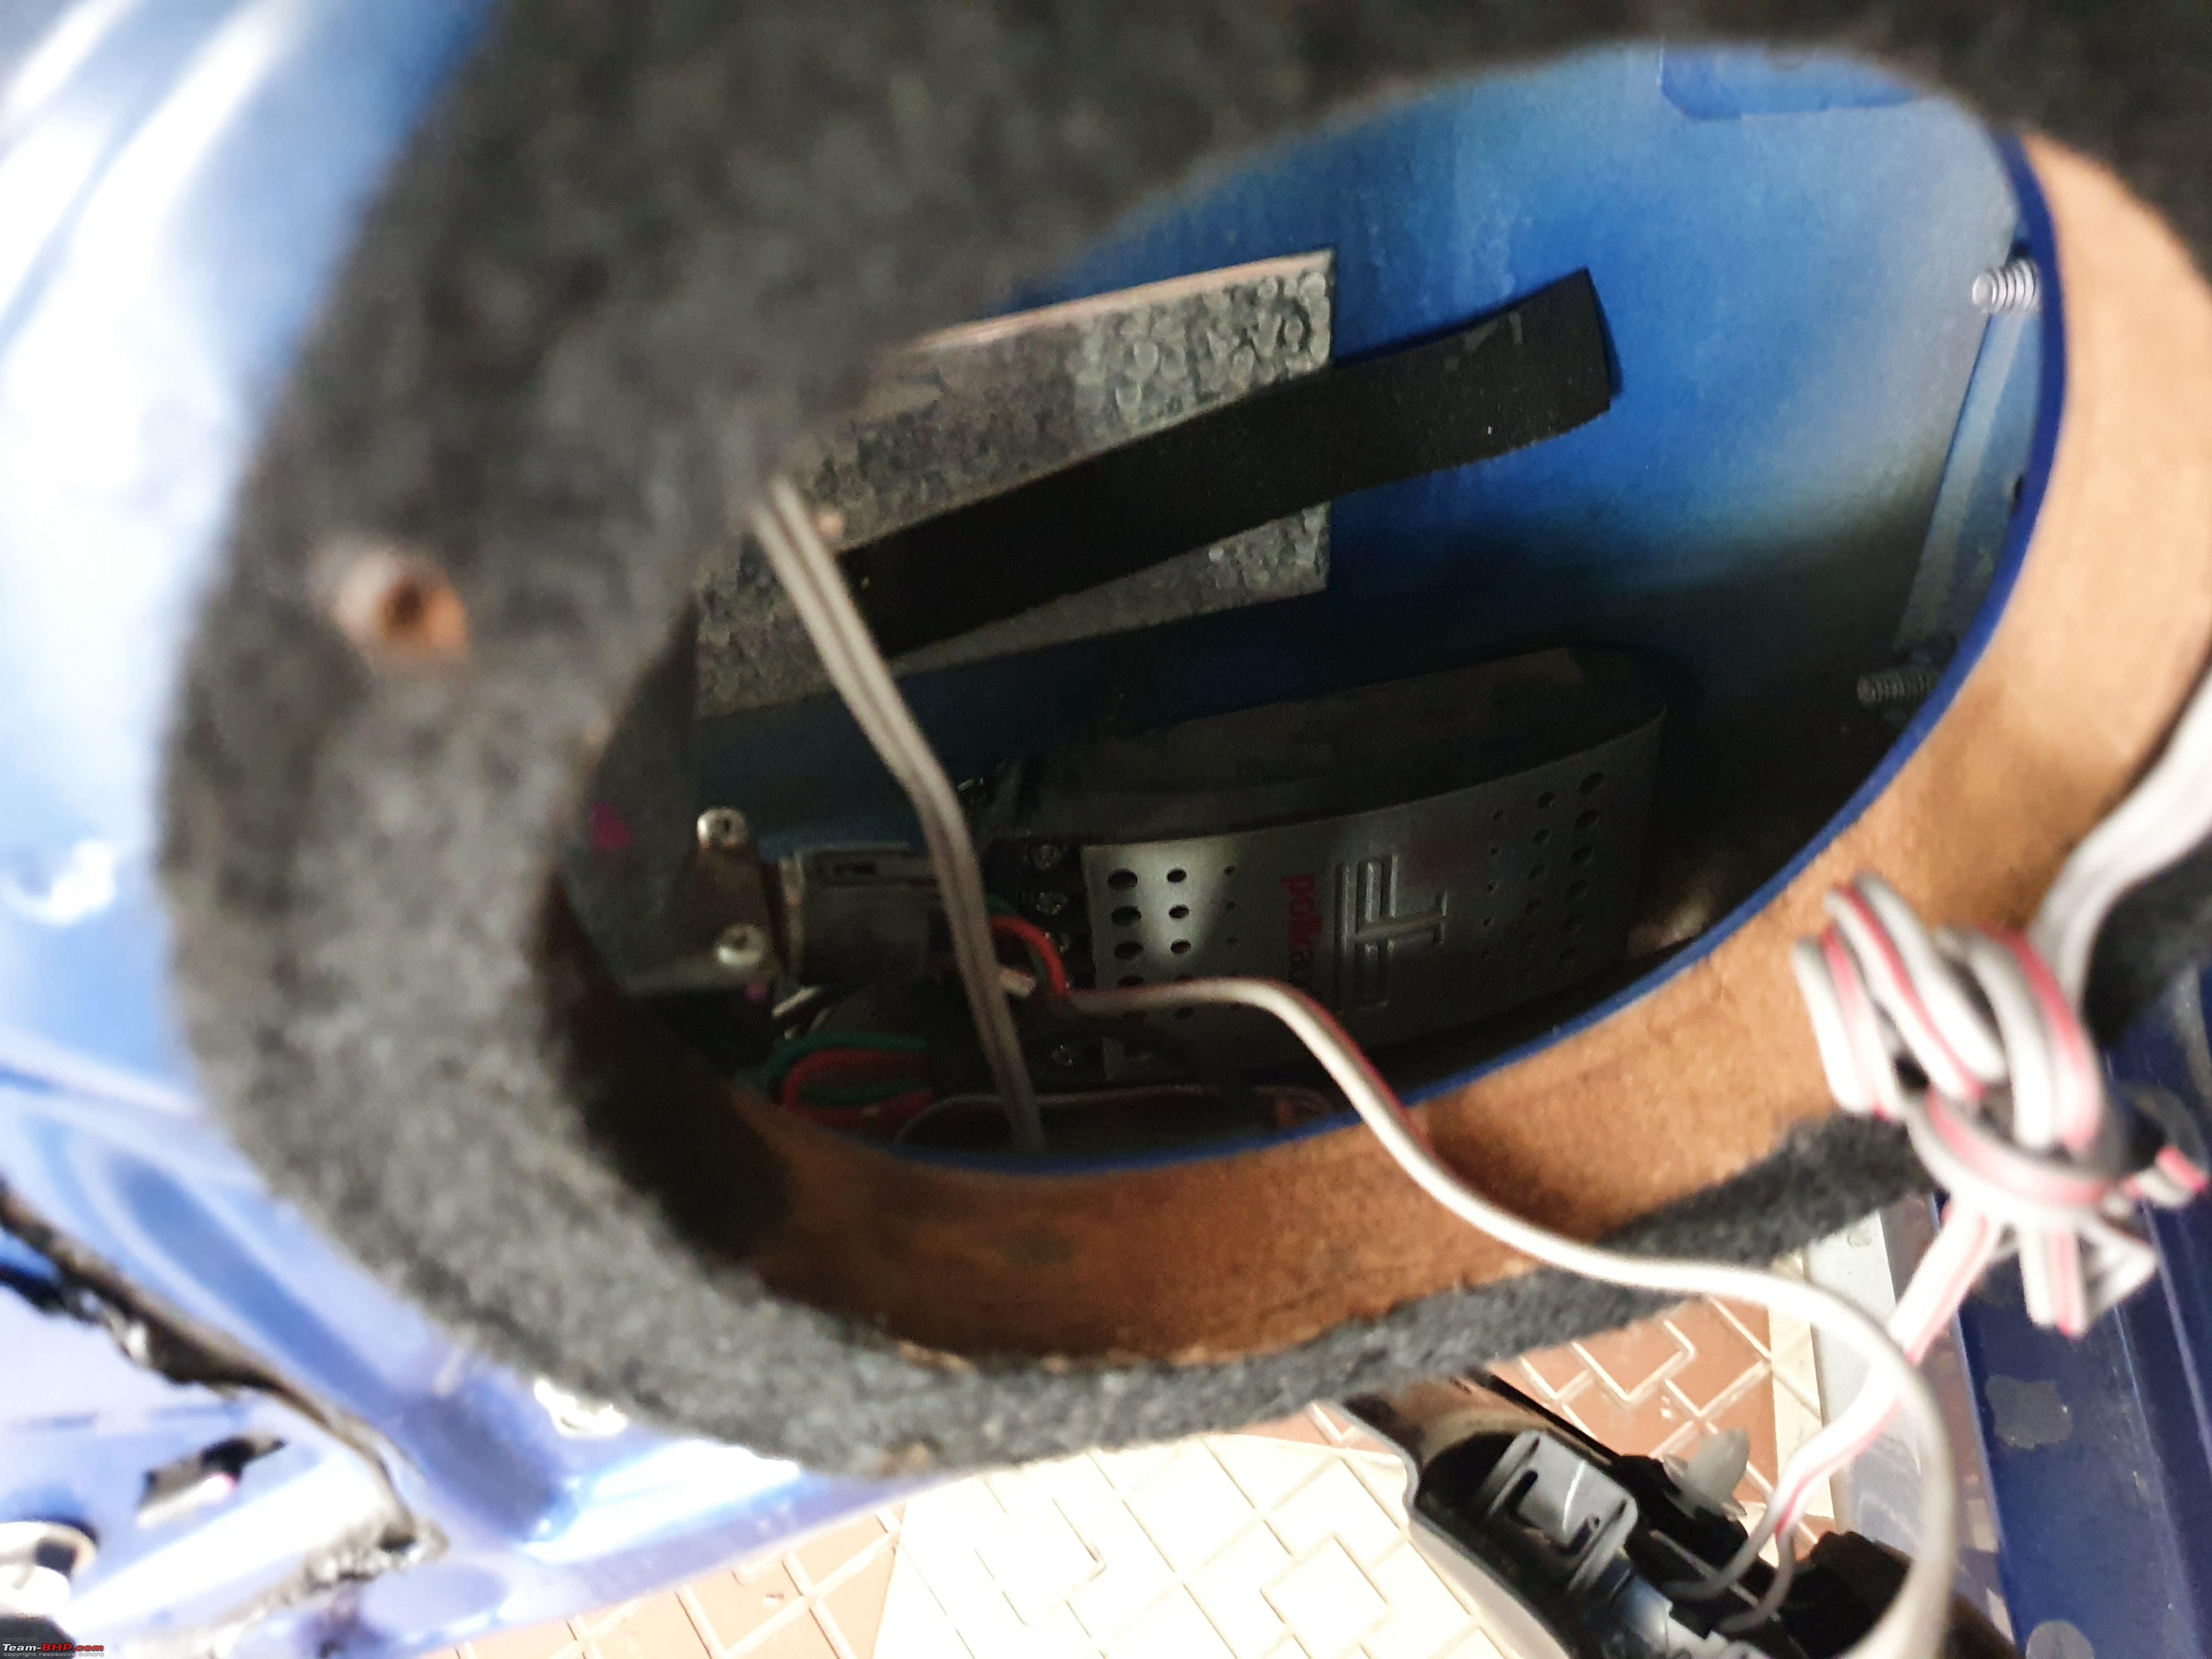 Tapping the wire   Well, it was time to start fixing things. First up, damping! The plan was to damp all 4 doors and the boot. Raghu was meticulous with his process and took about an entire working day to get it done. He decided to use Dr Artex Iridum medium with a thickness of 2.0mm. The damping was done on the interior and exterior of the door, it took about 12 sheets. 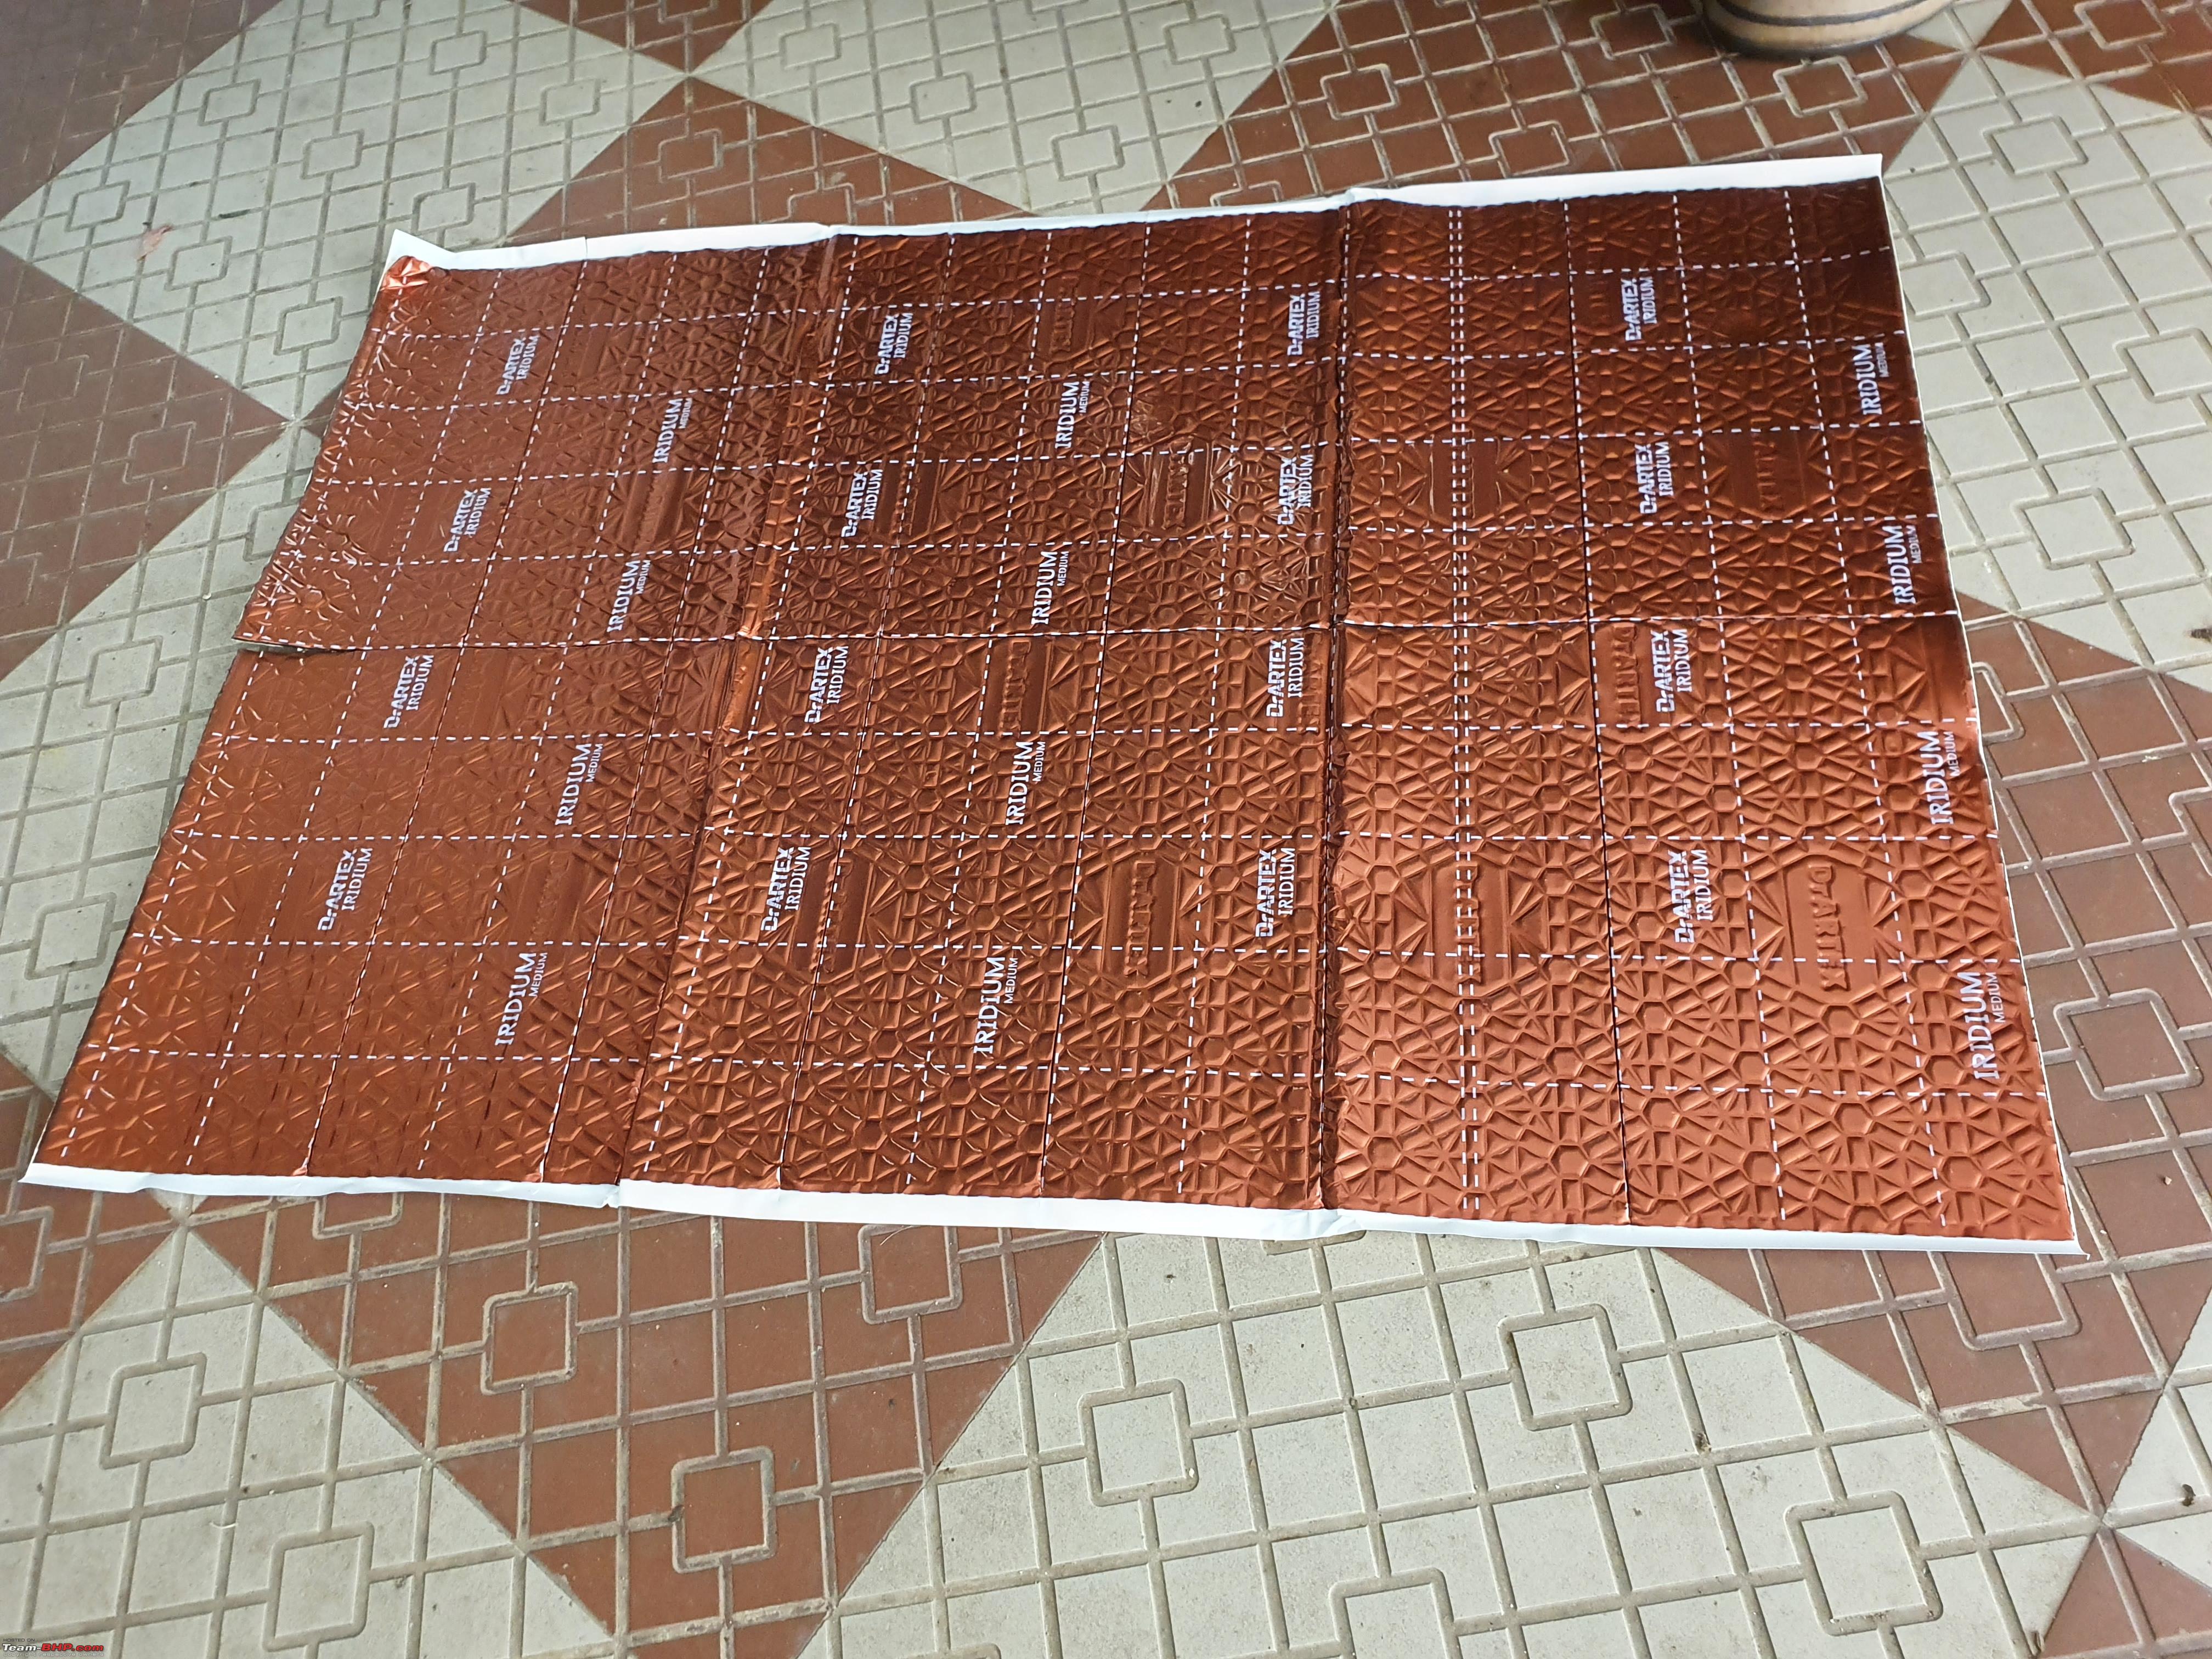 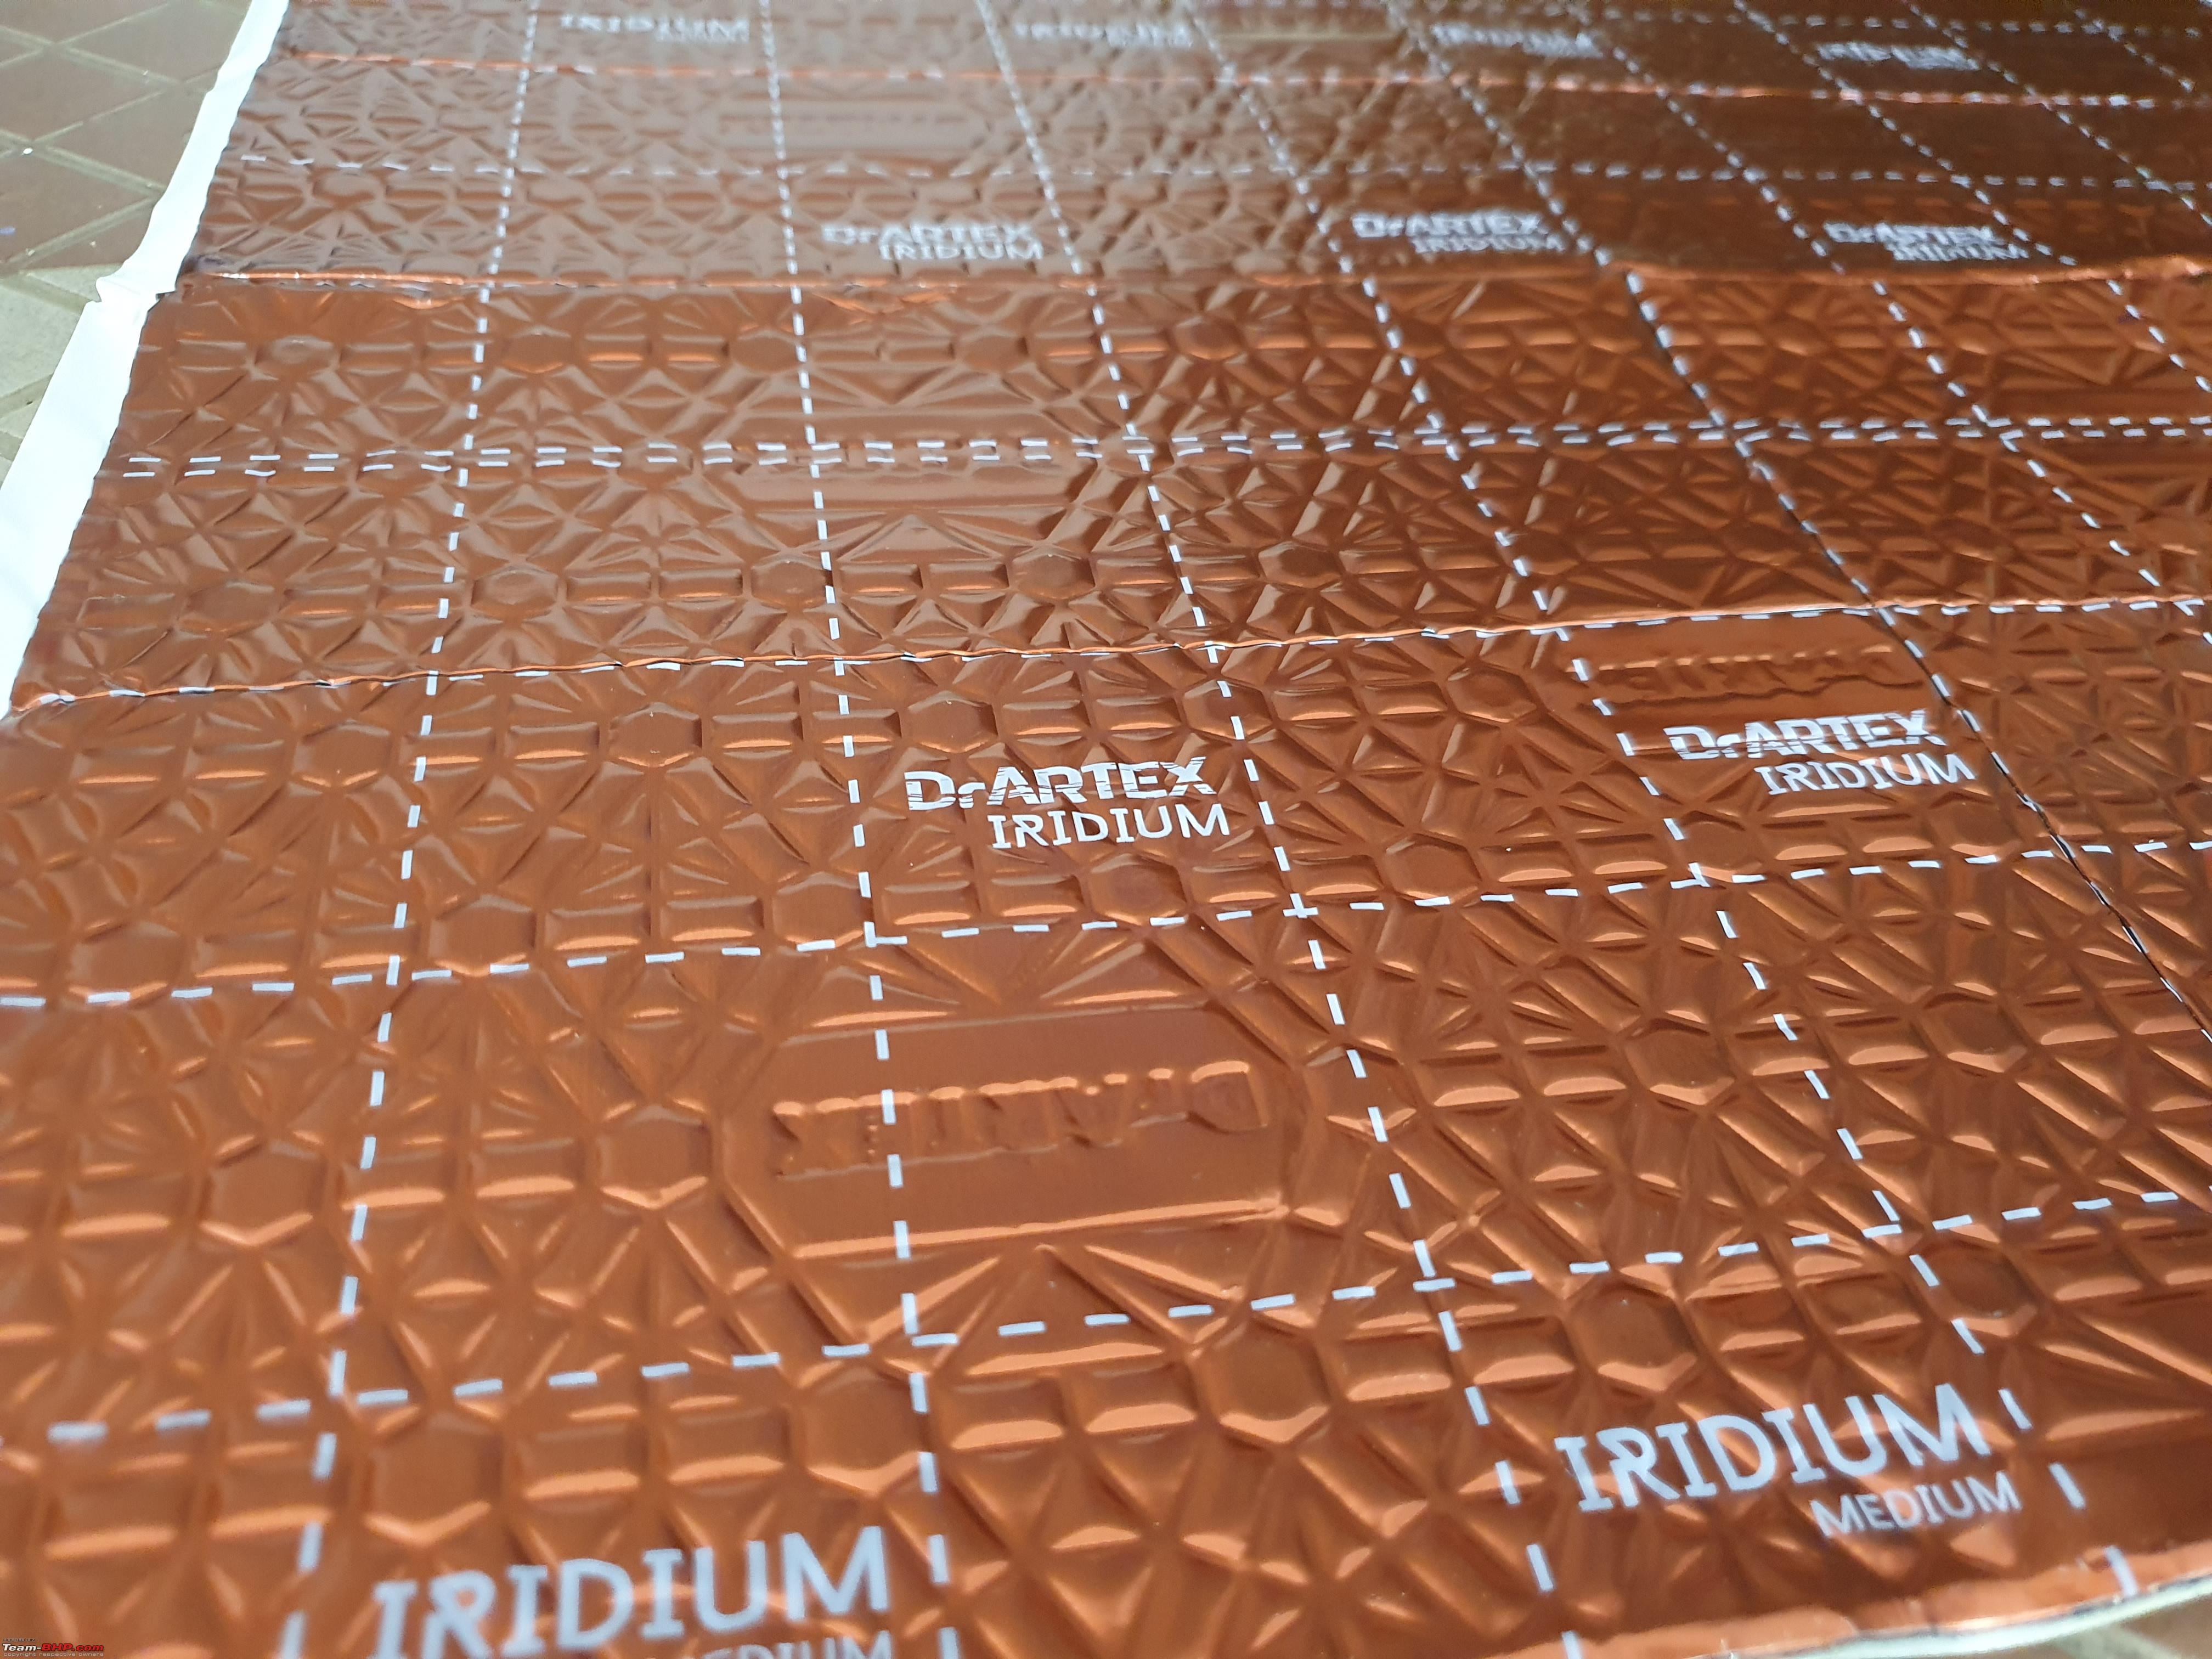 Damping inside  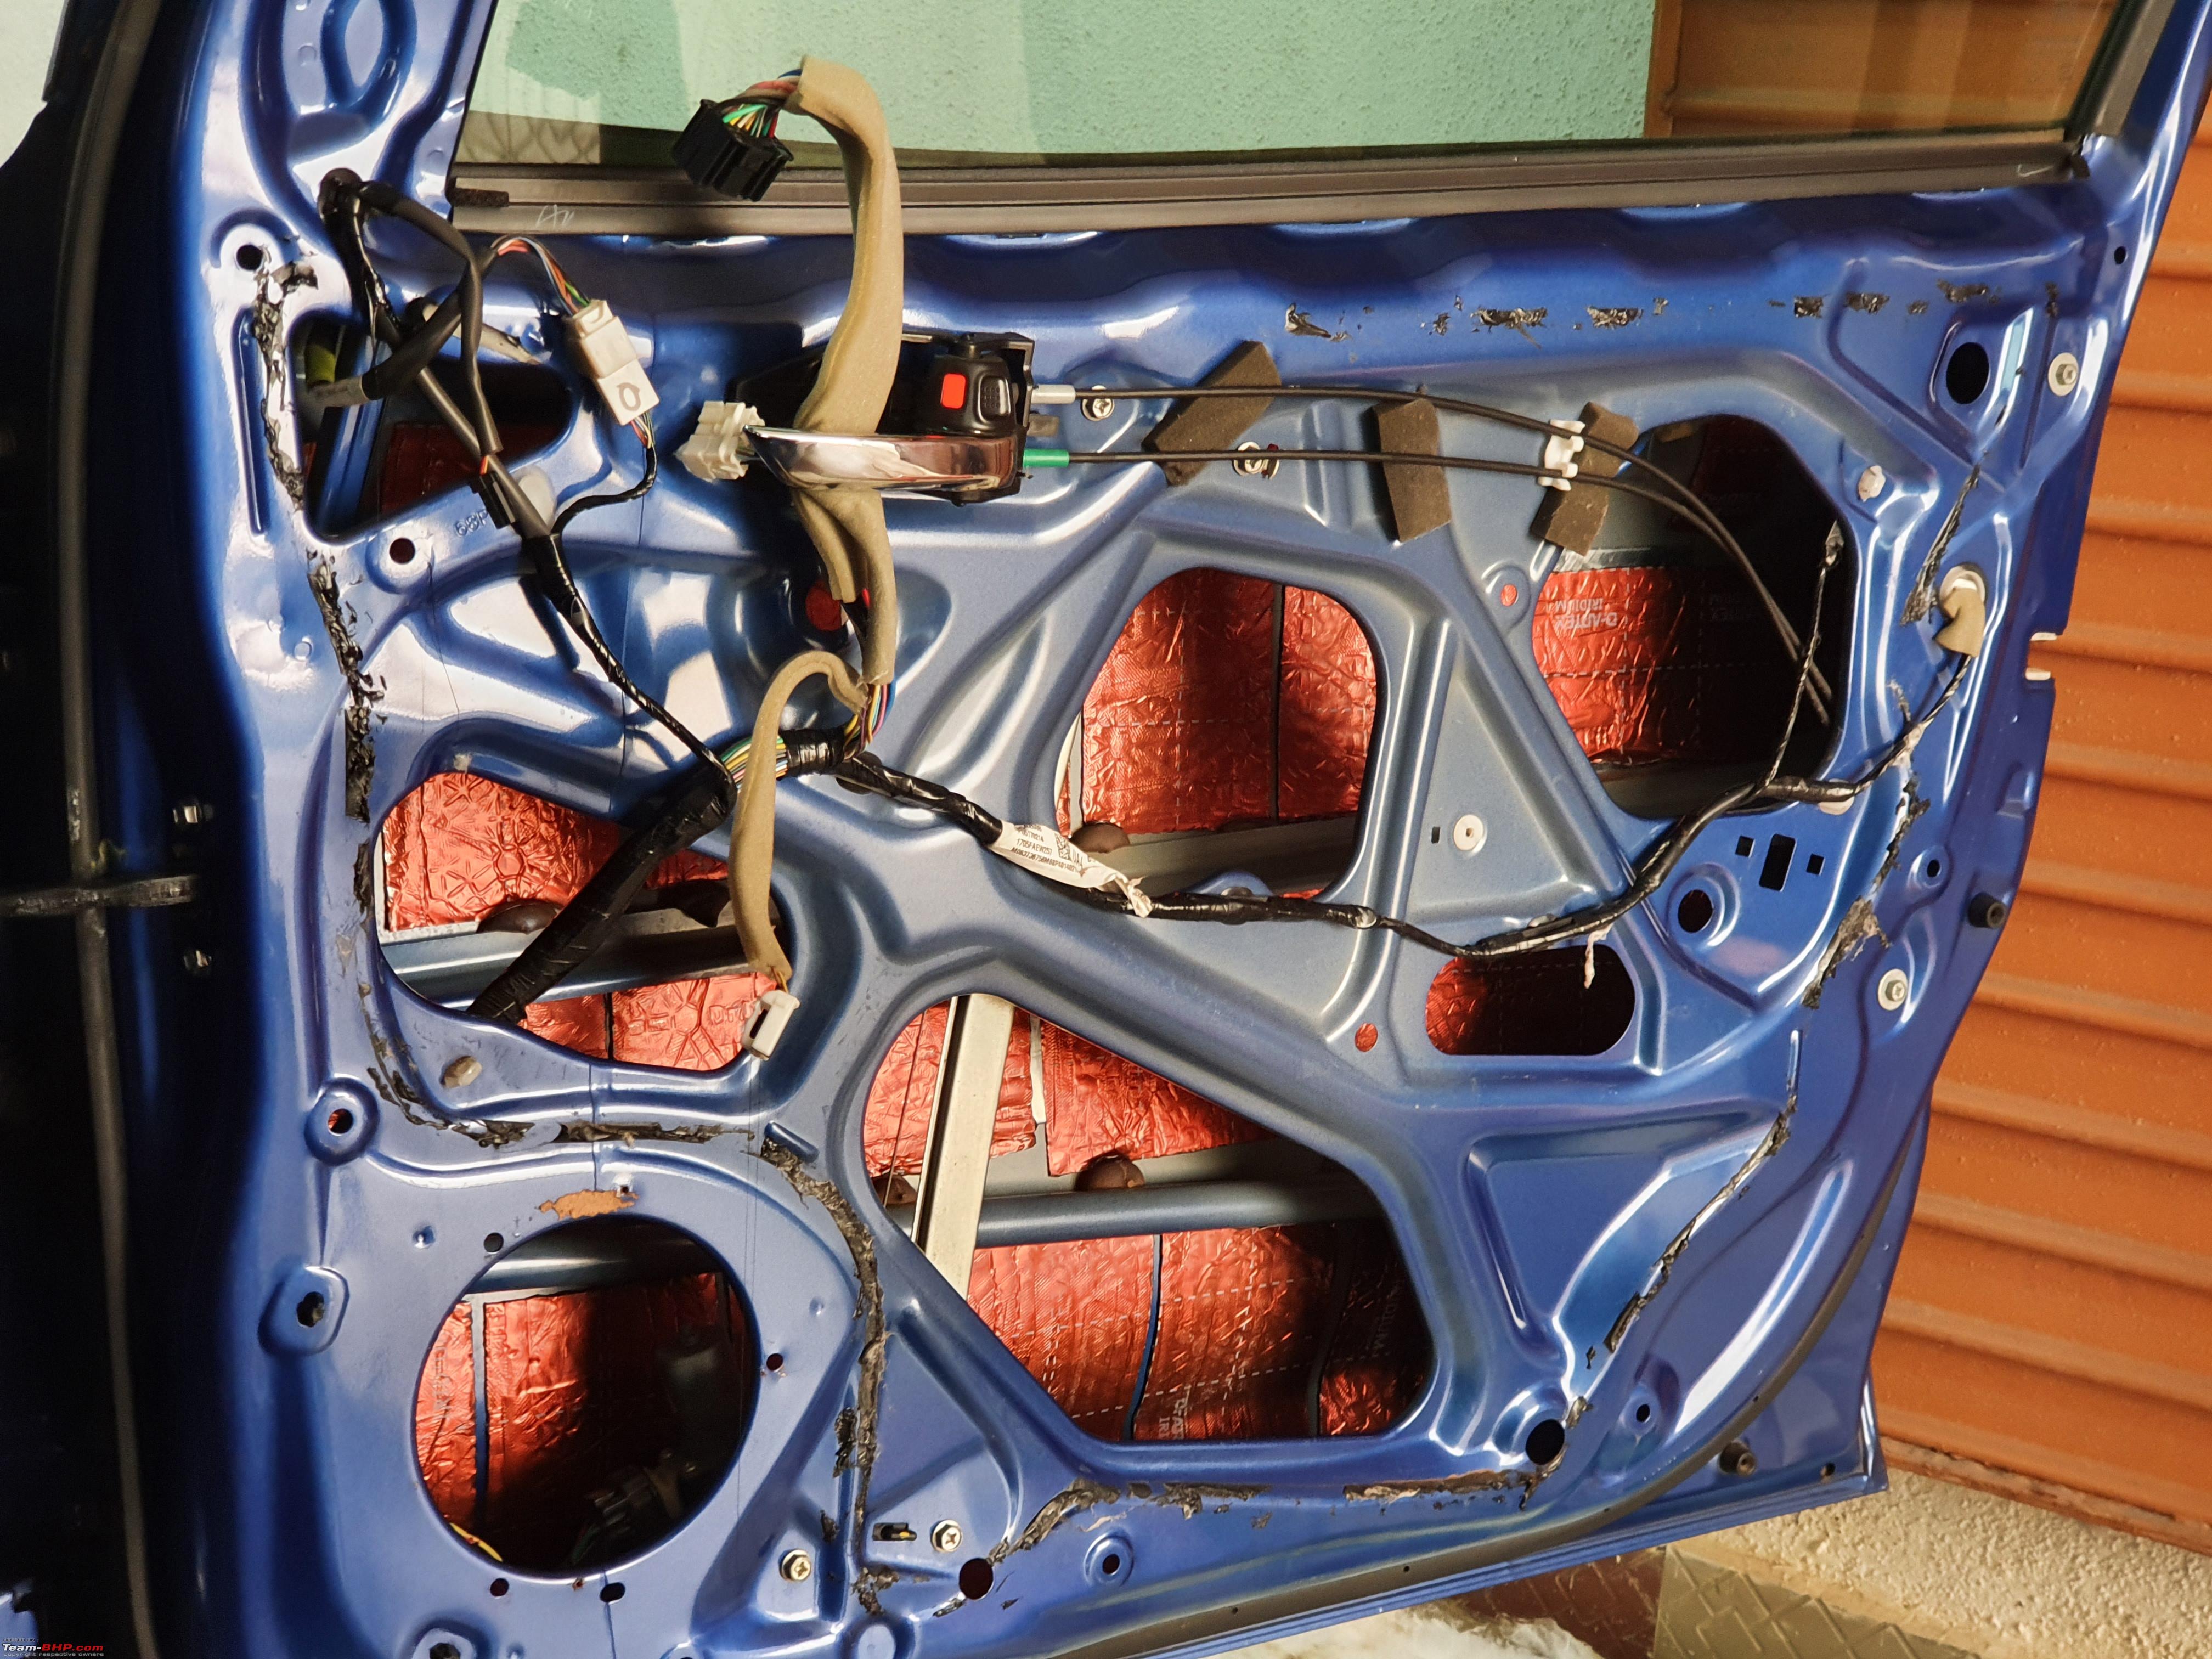 Damping inside the boot lid 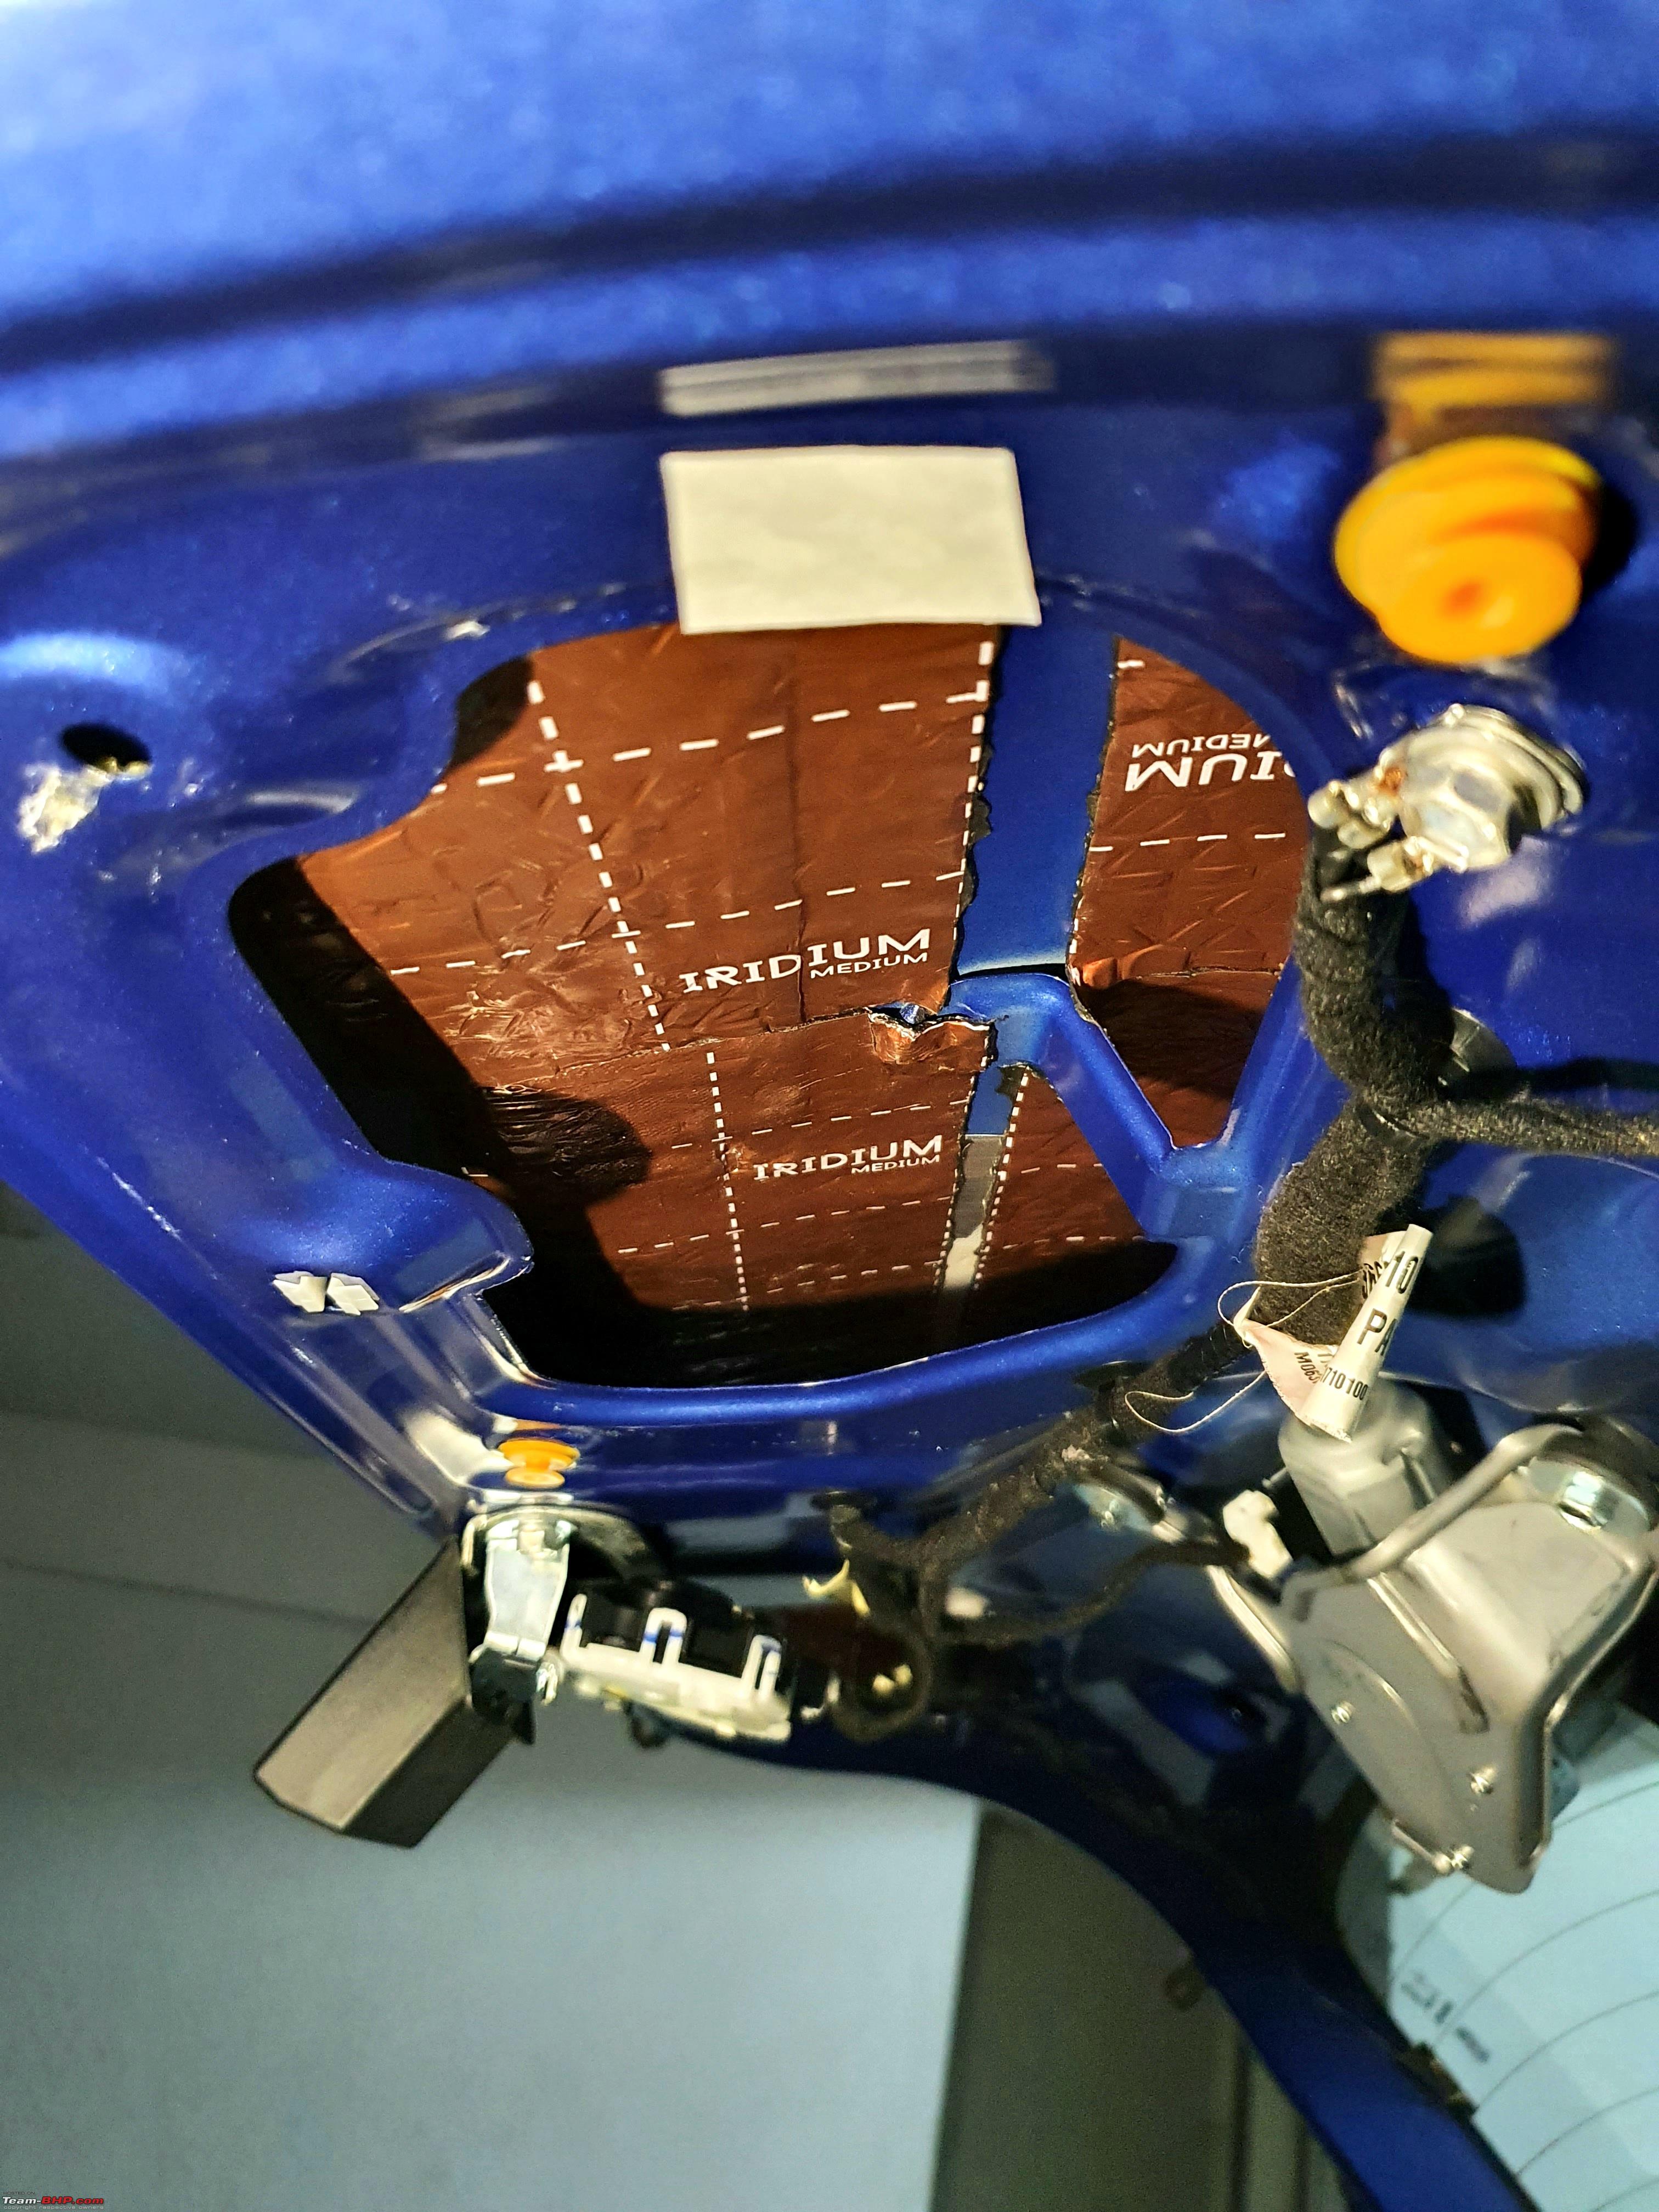 Damping outside  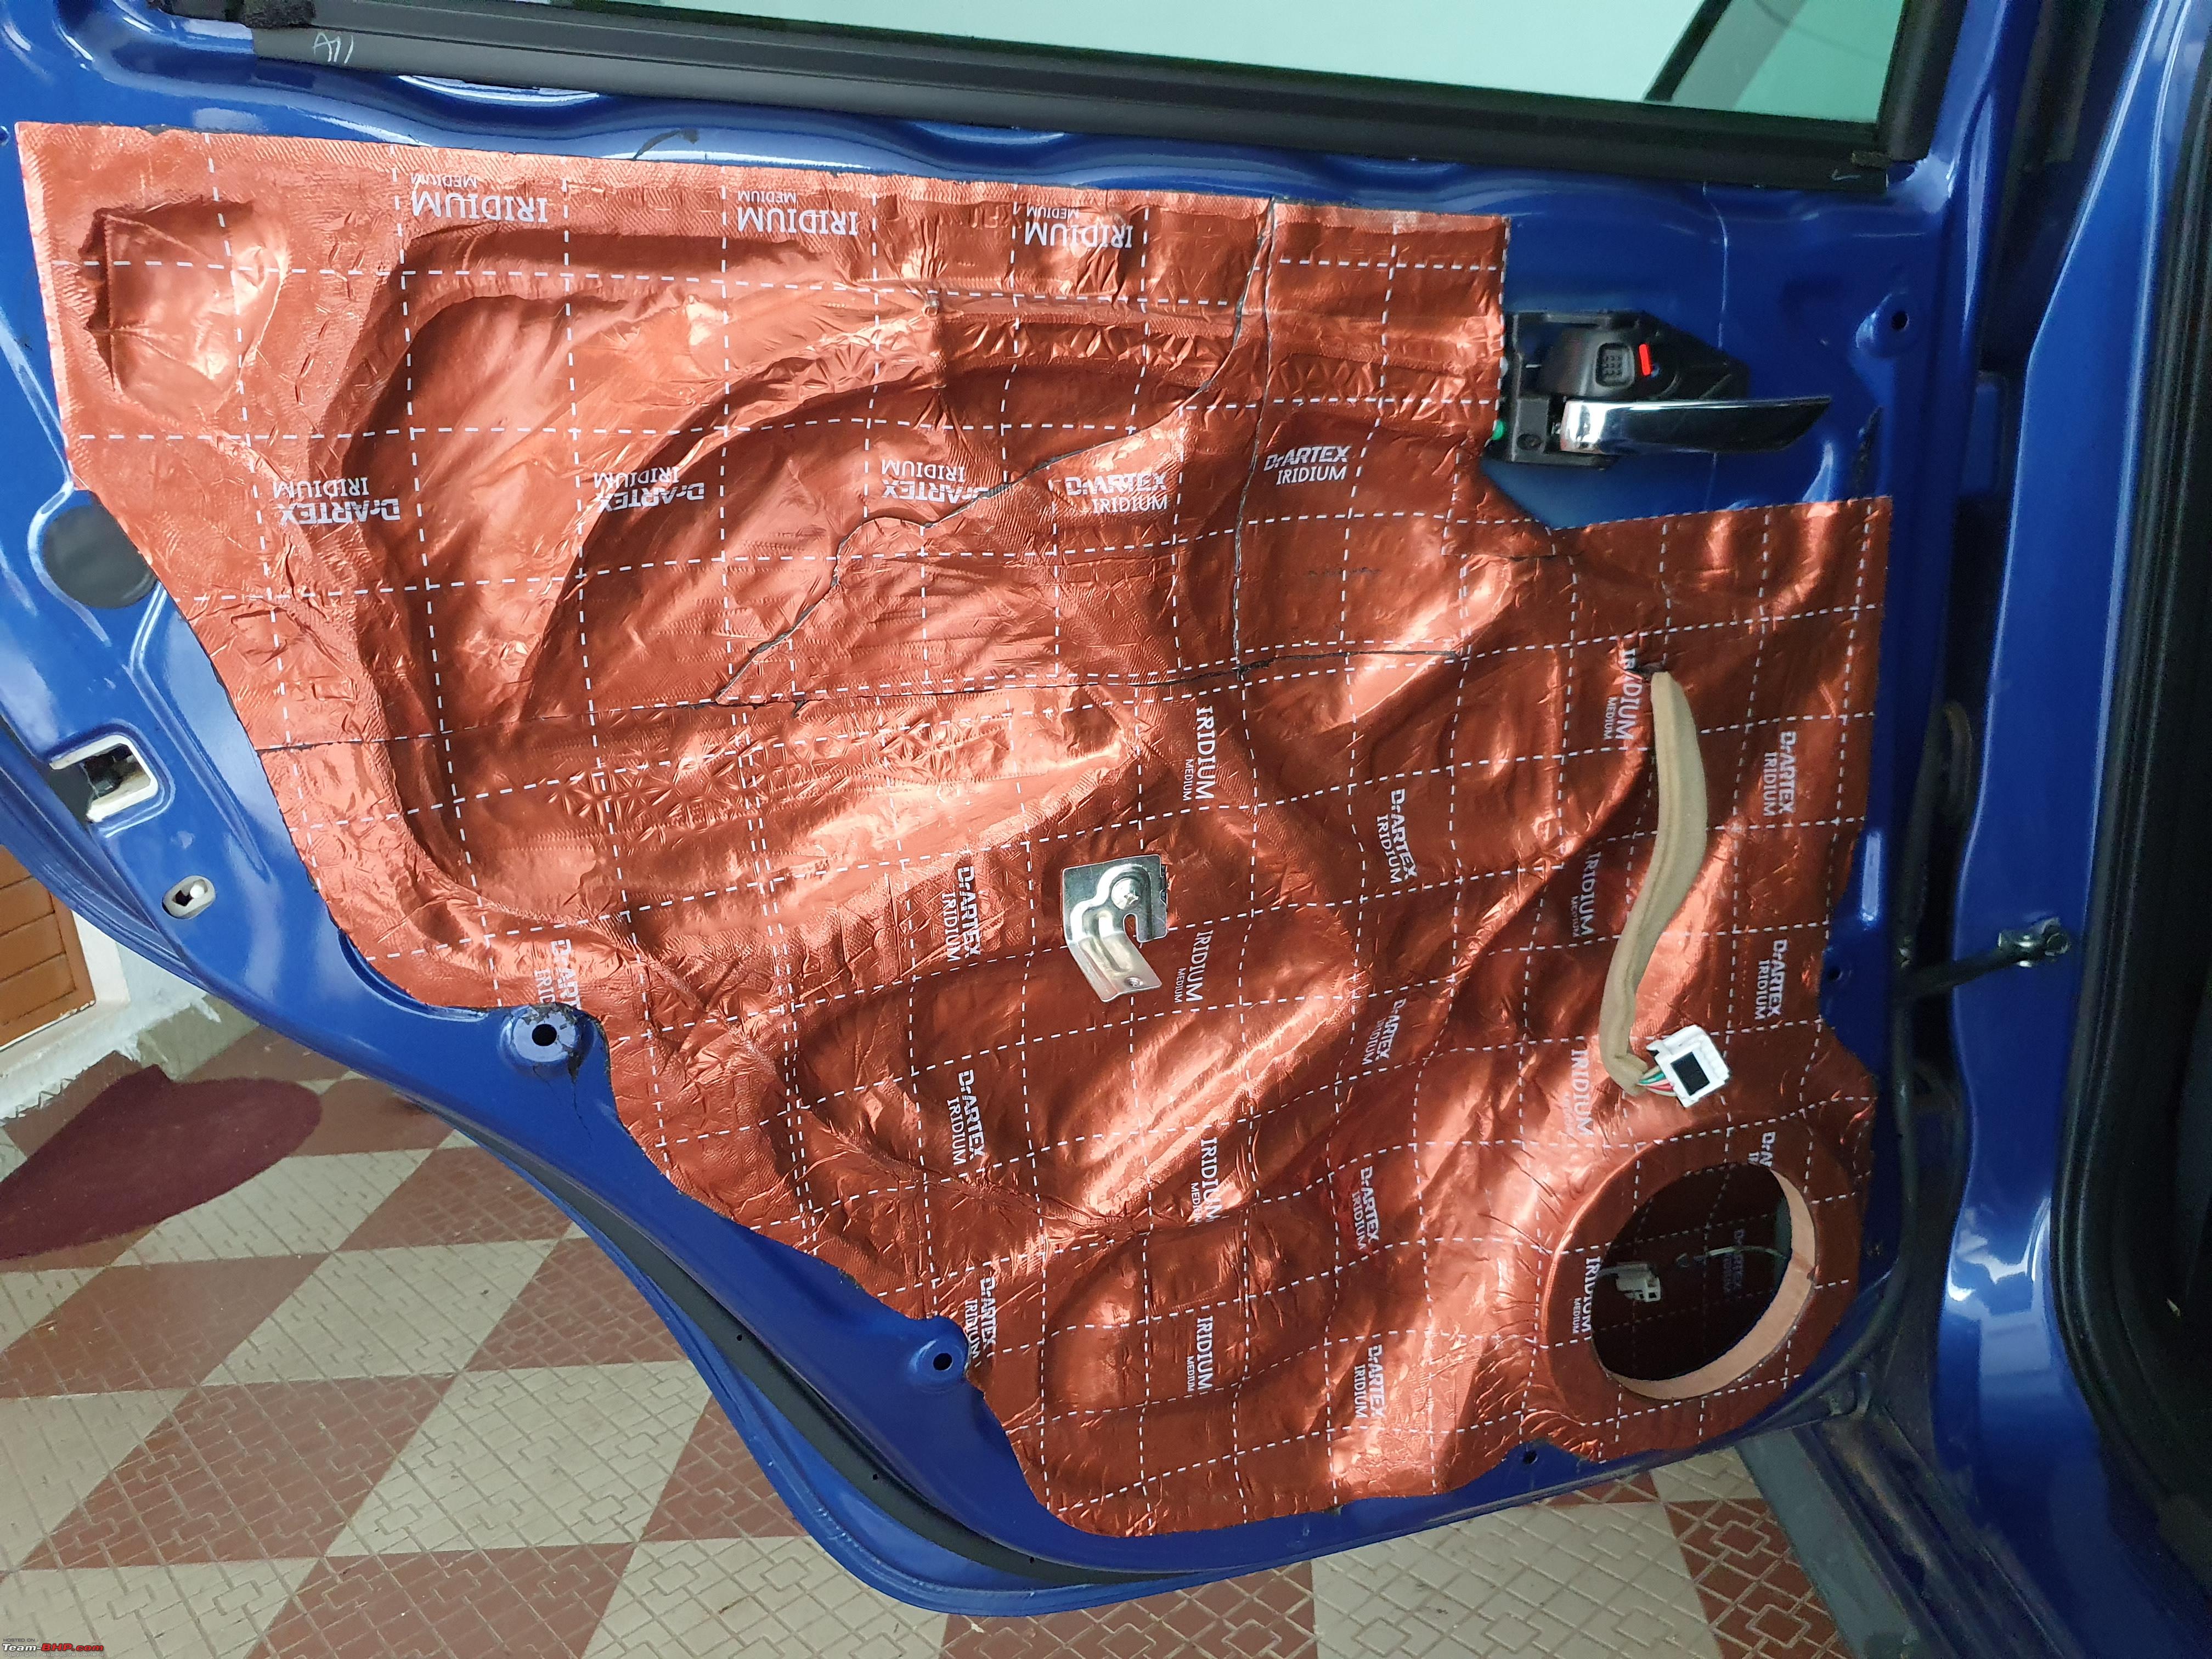 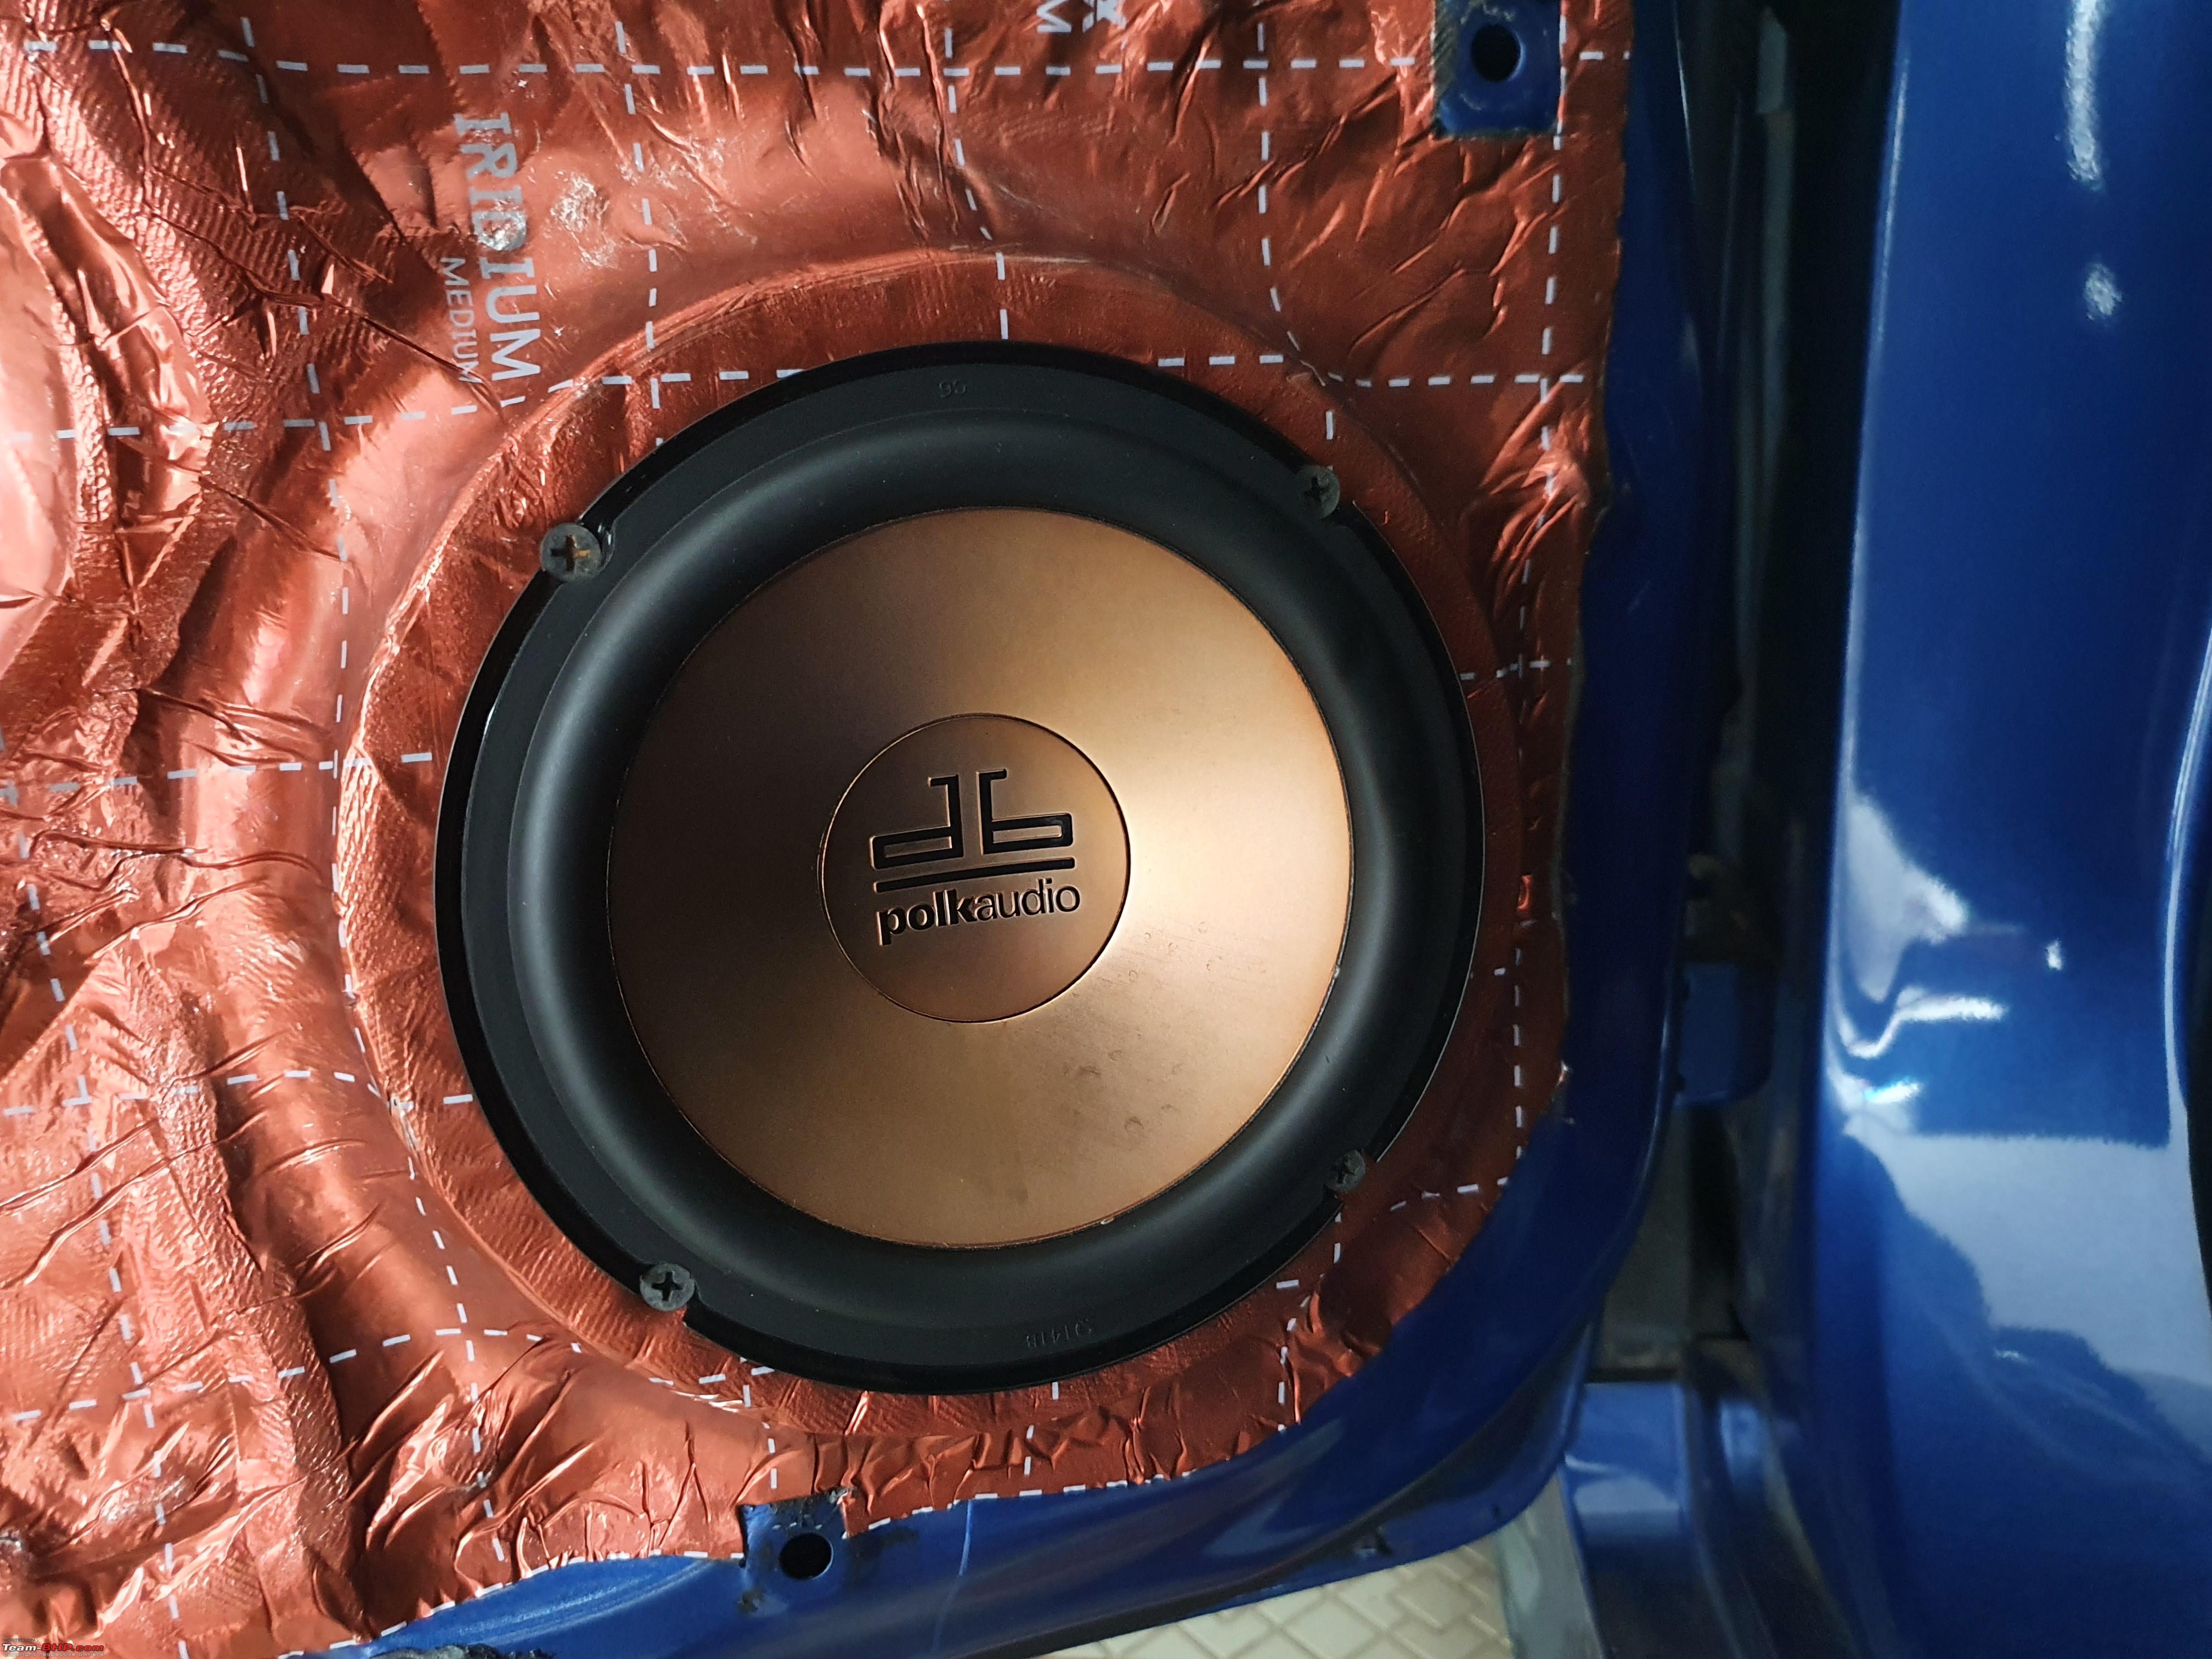 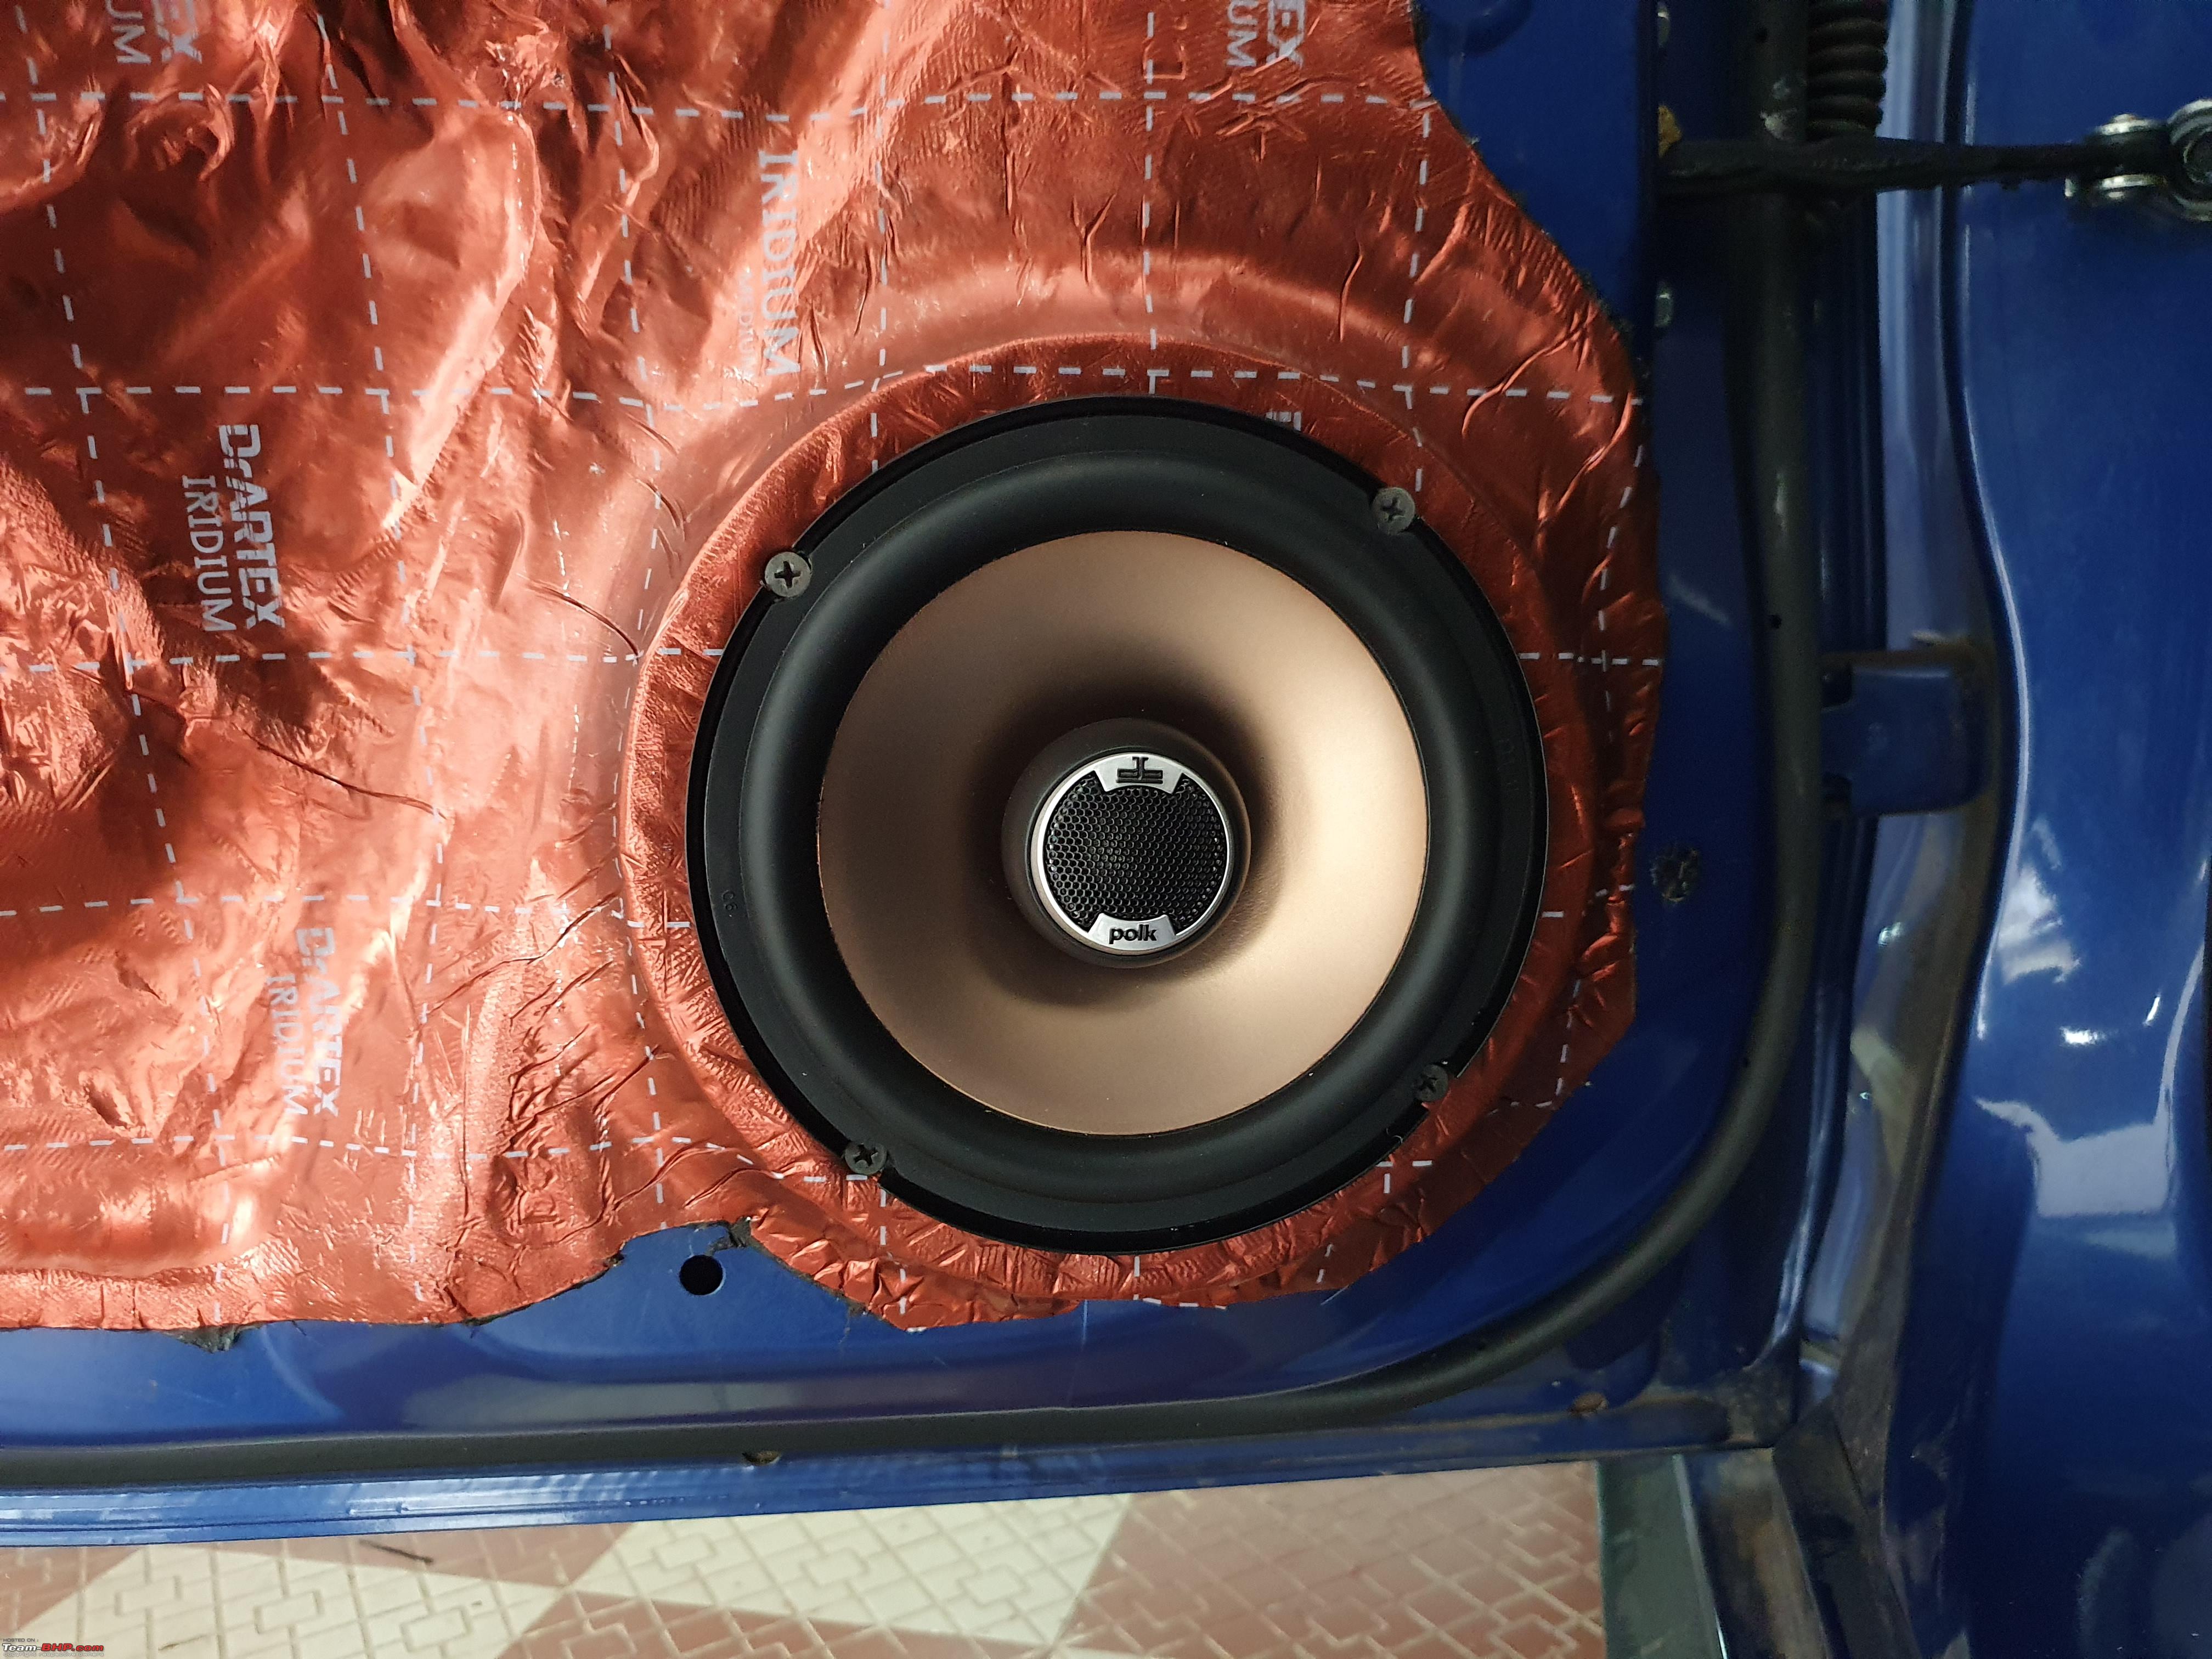 Damping outside the boot lid 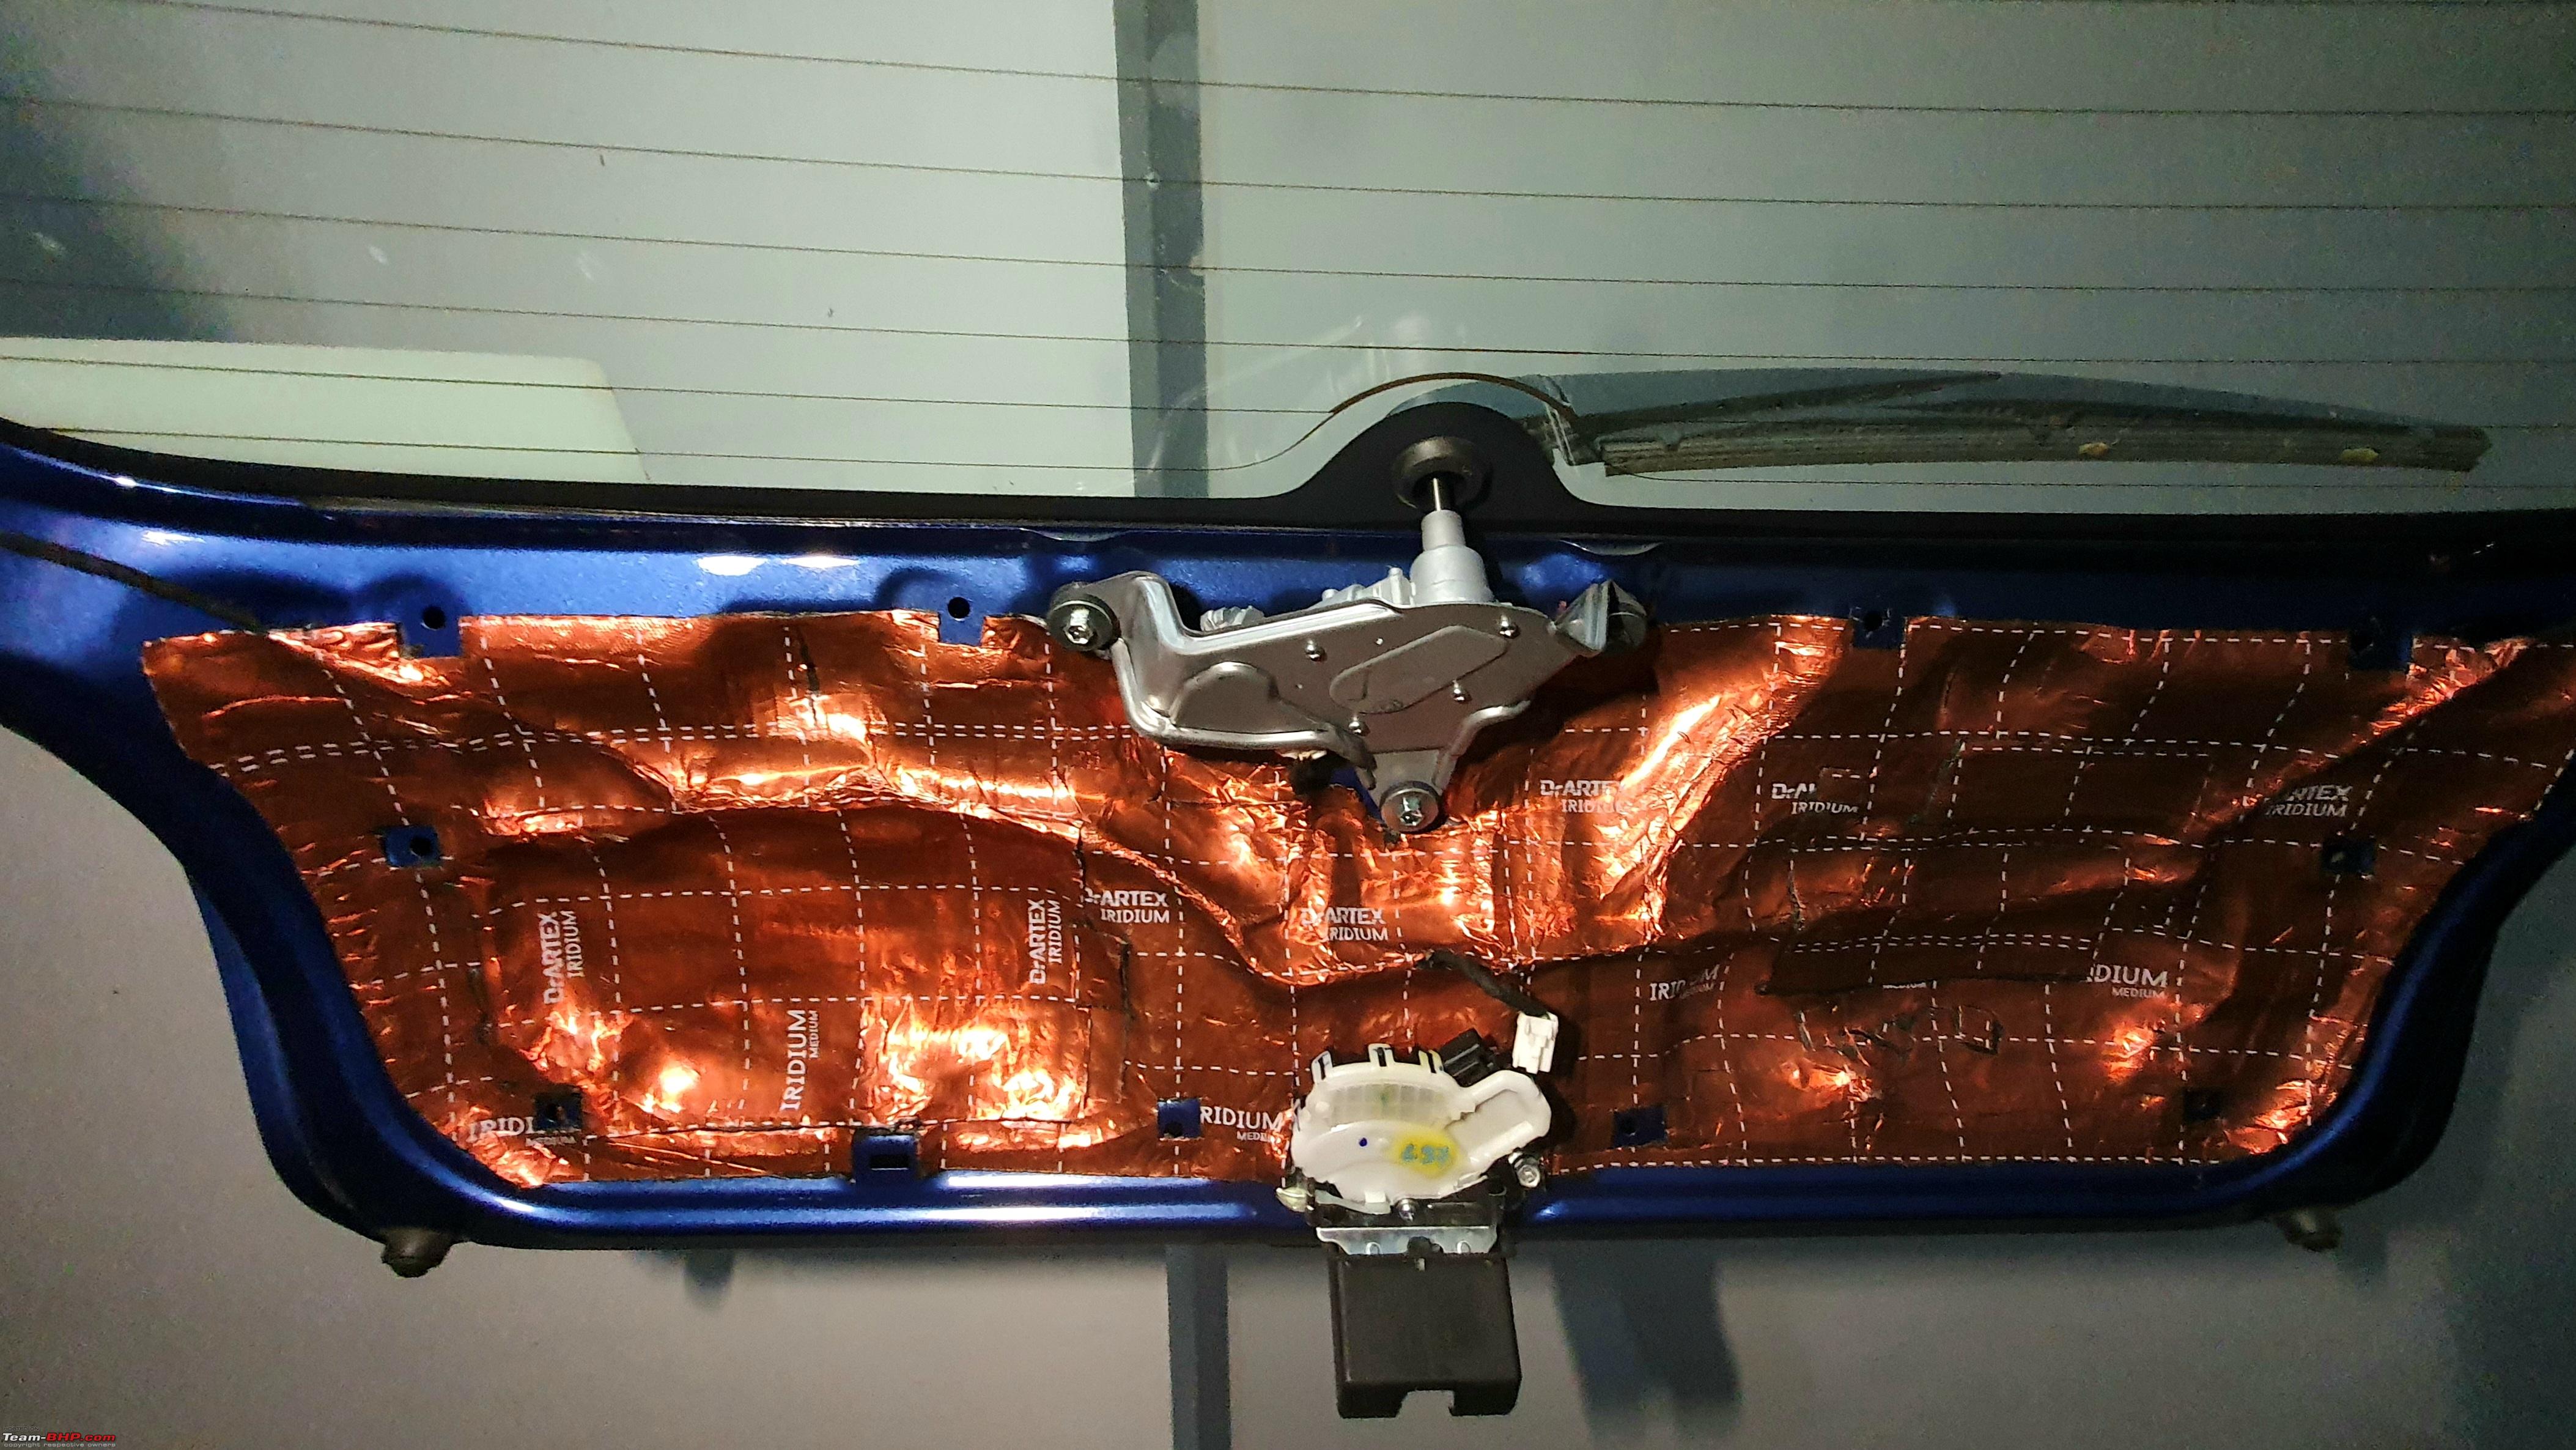 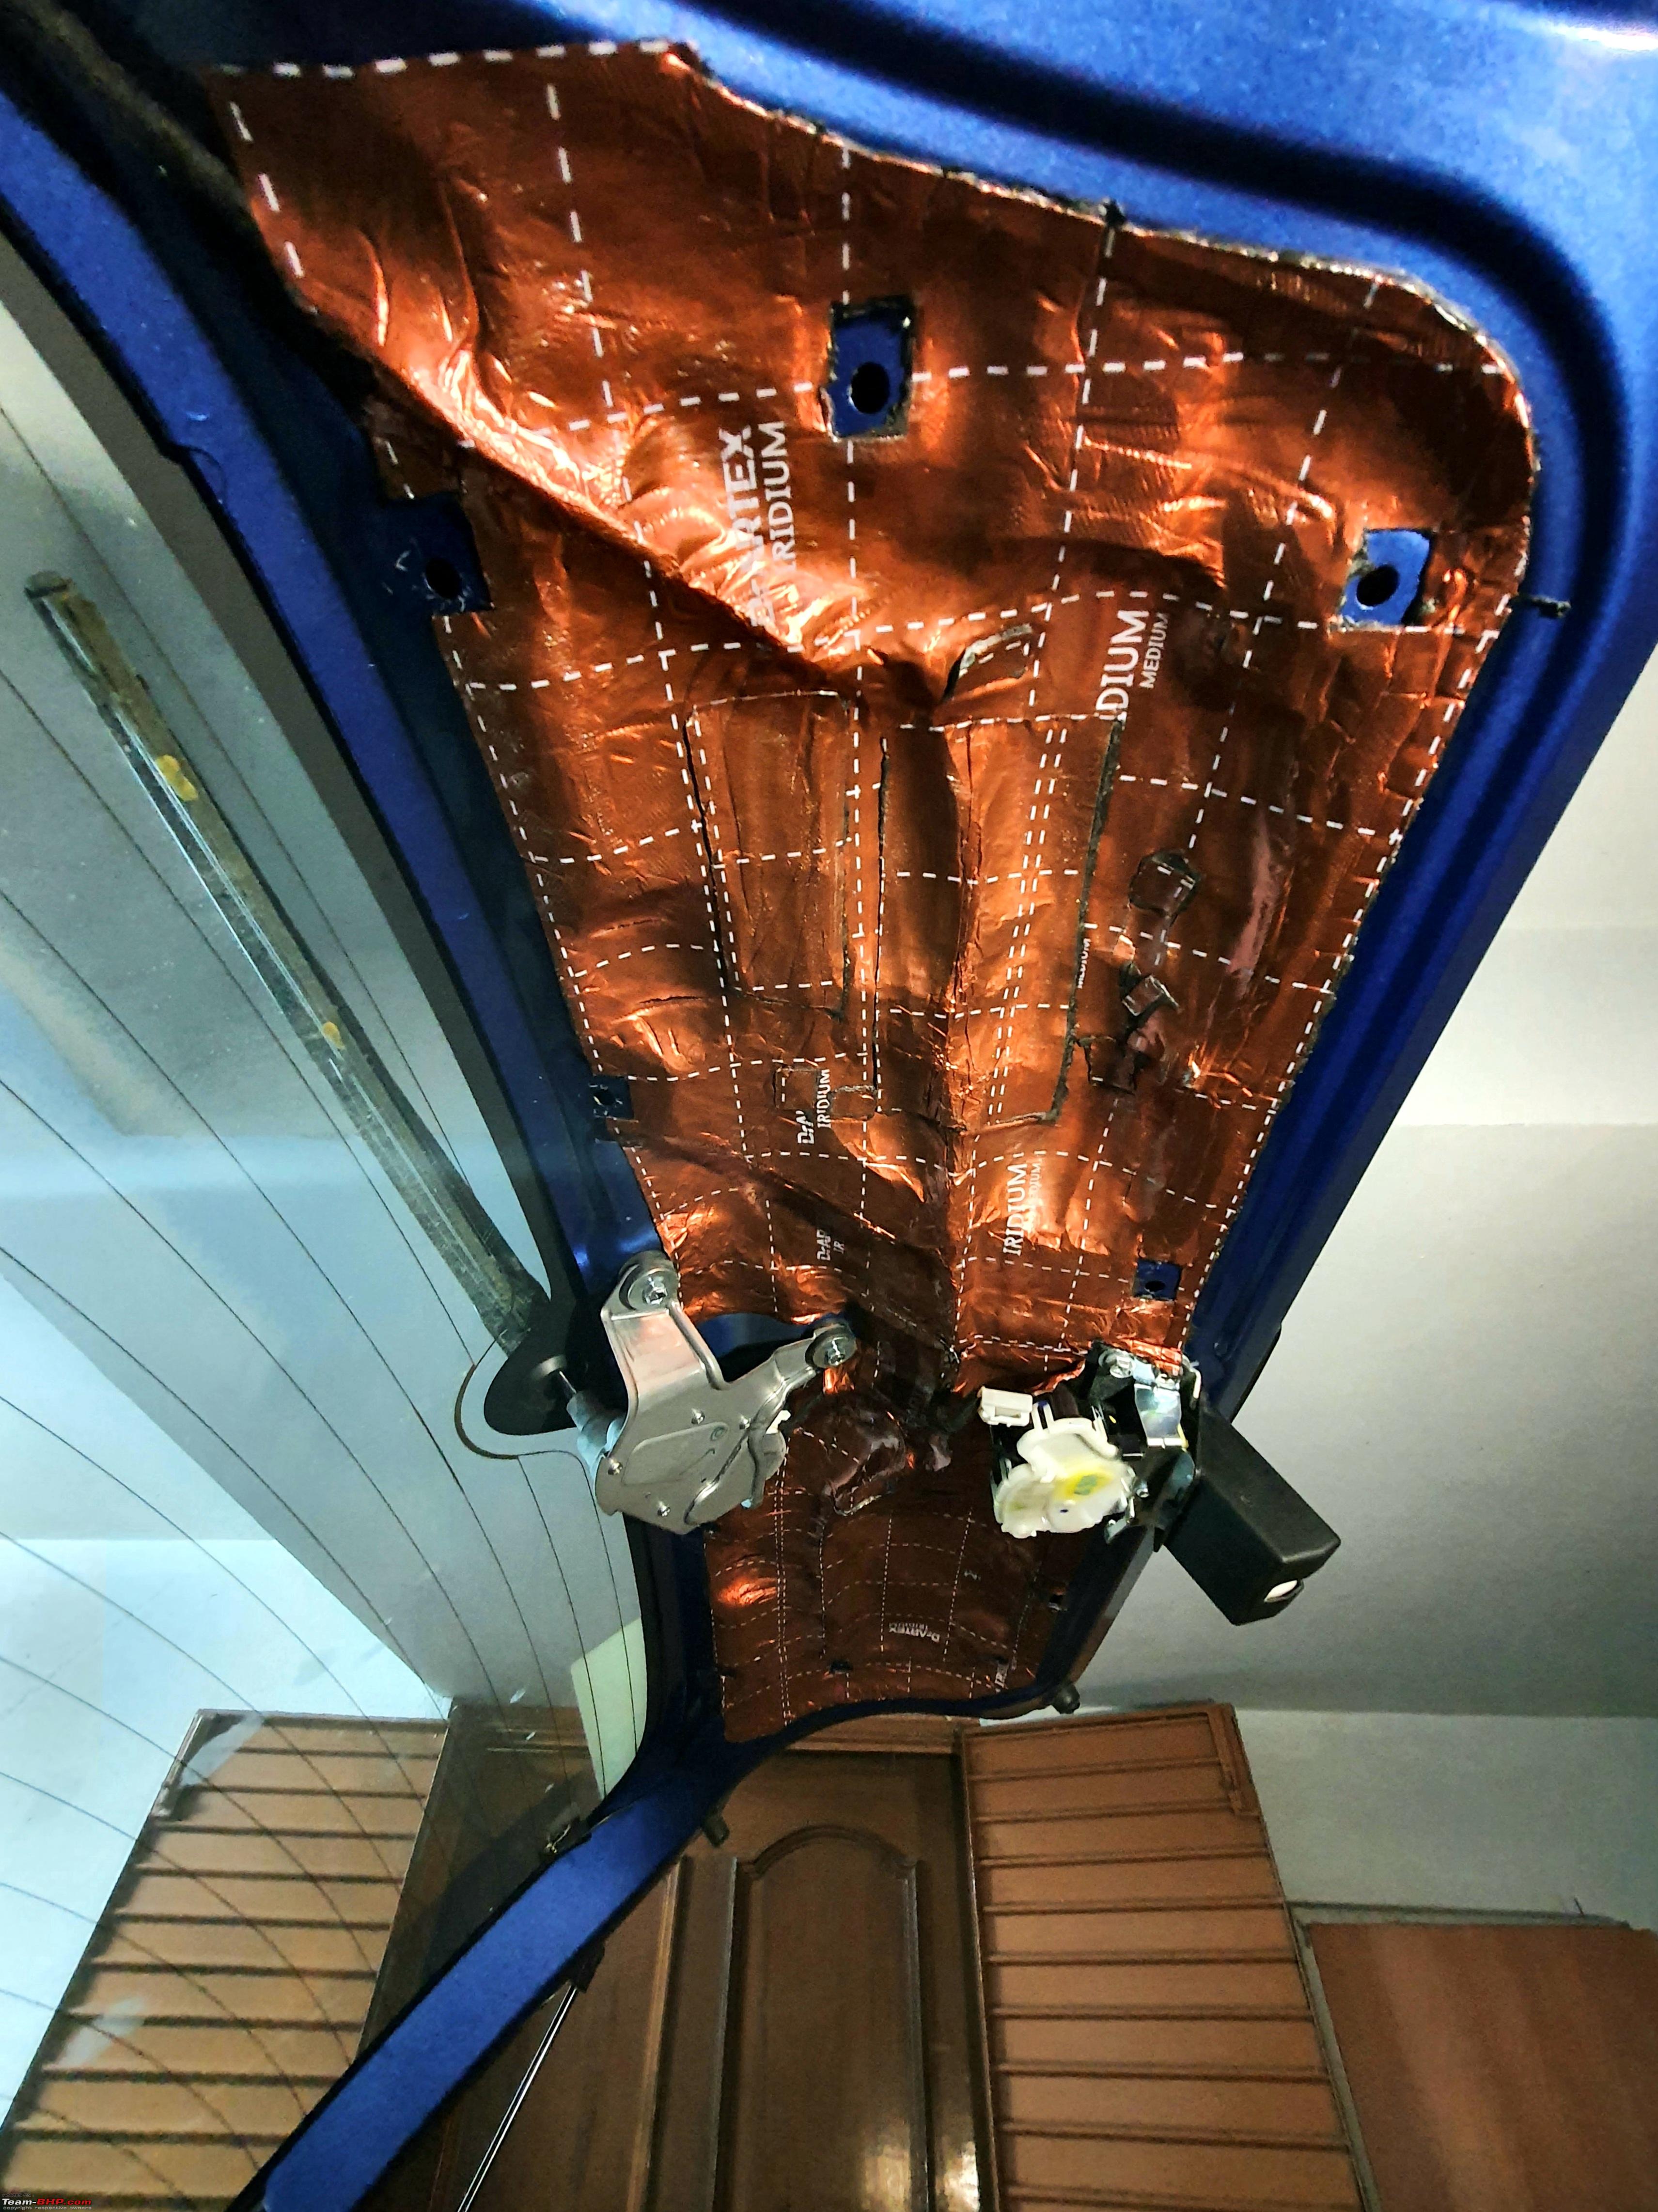 During this process, we realized that the rear speakers (DB522) were only 5.25" and it would be better to have 6.5" speakers instead (another noob thing I did not realize during the initial installation). This is probably why the rear fill was lacking. They had to be replaced and were done so by the Polk DB651, which should complement the front perfectly. The smaller 5.25" DB522 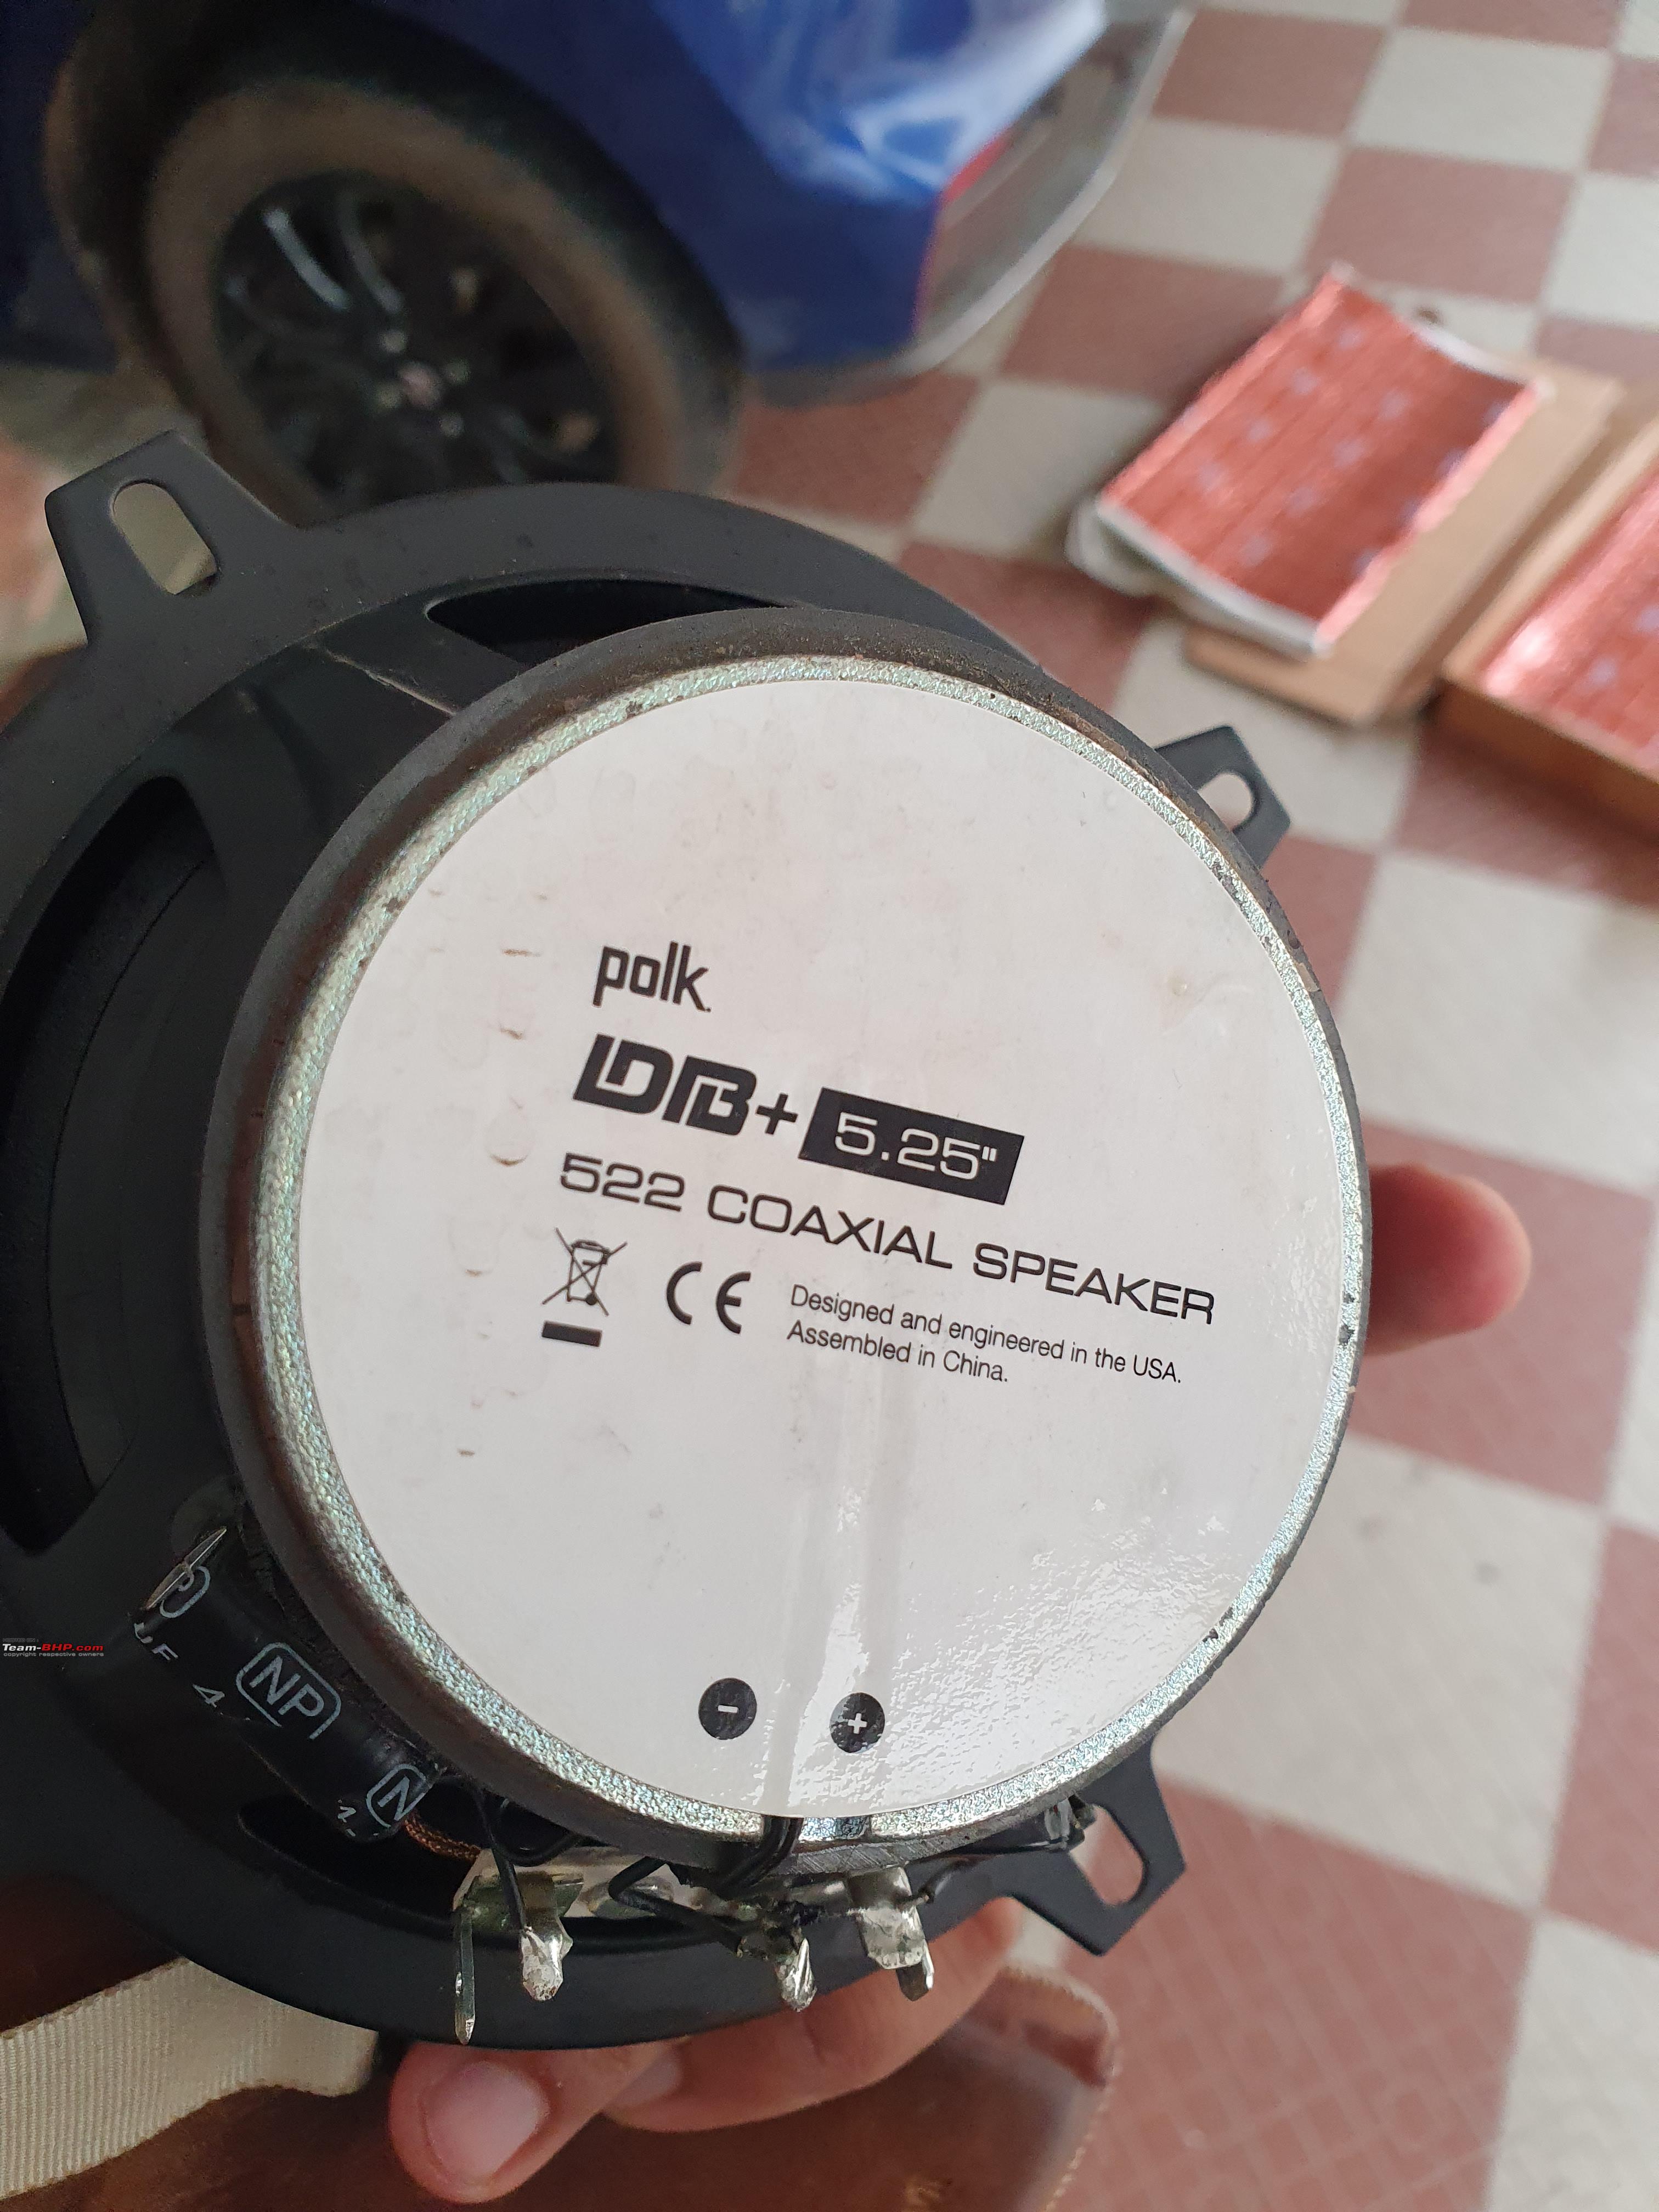 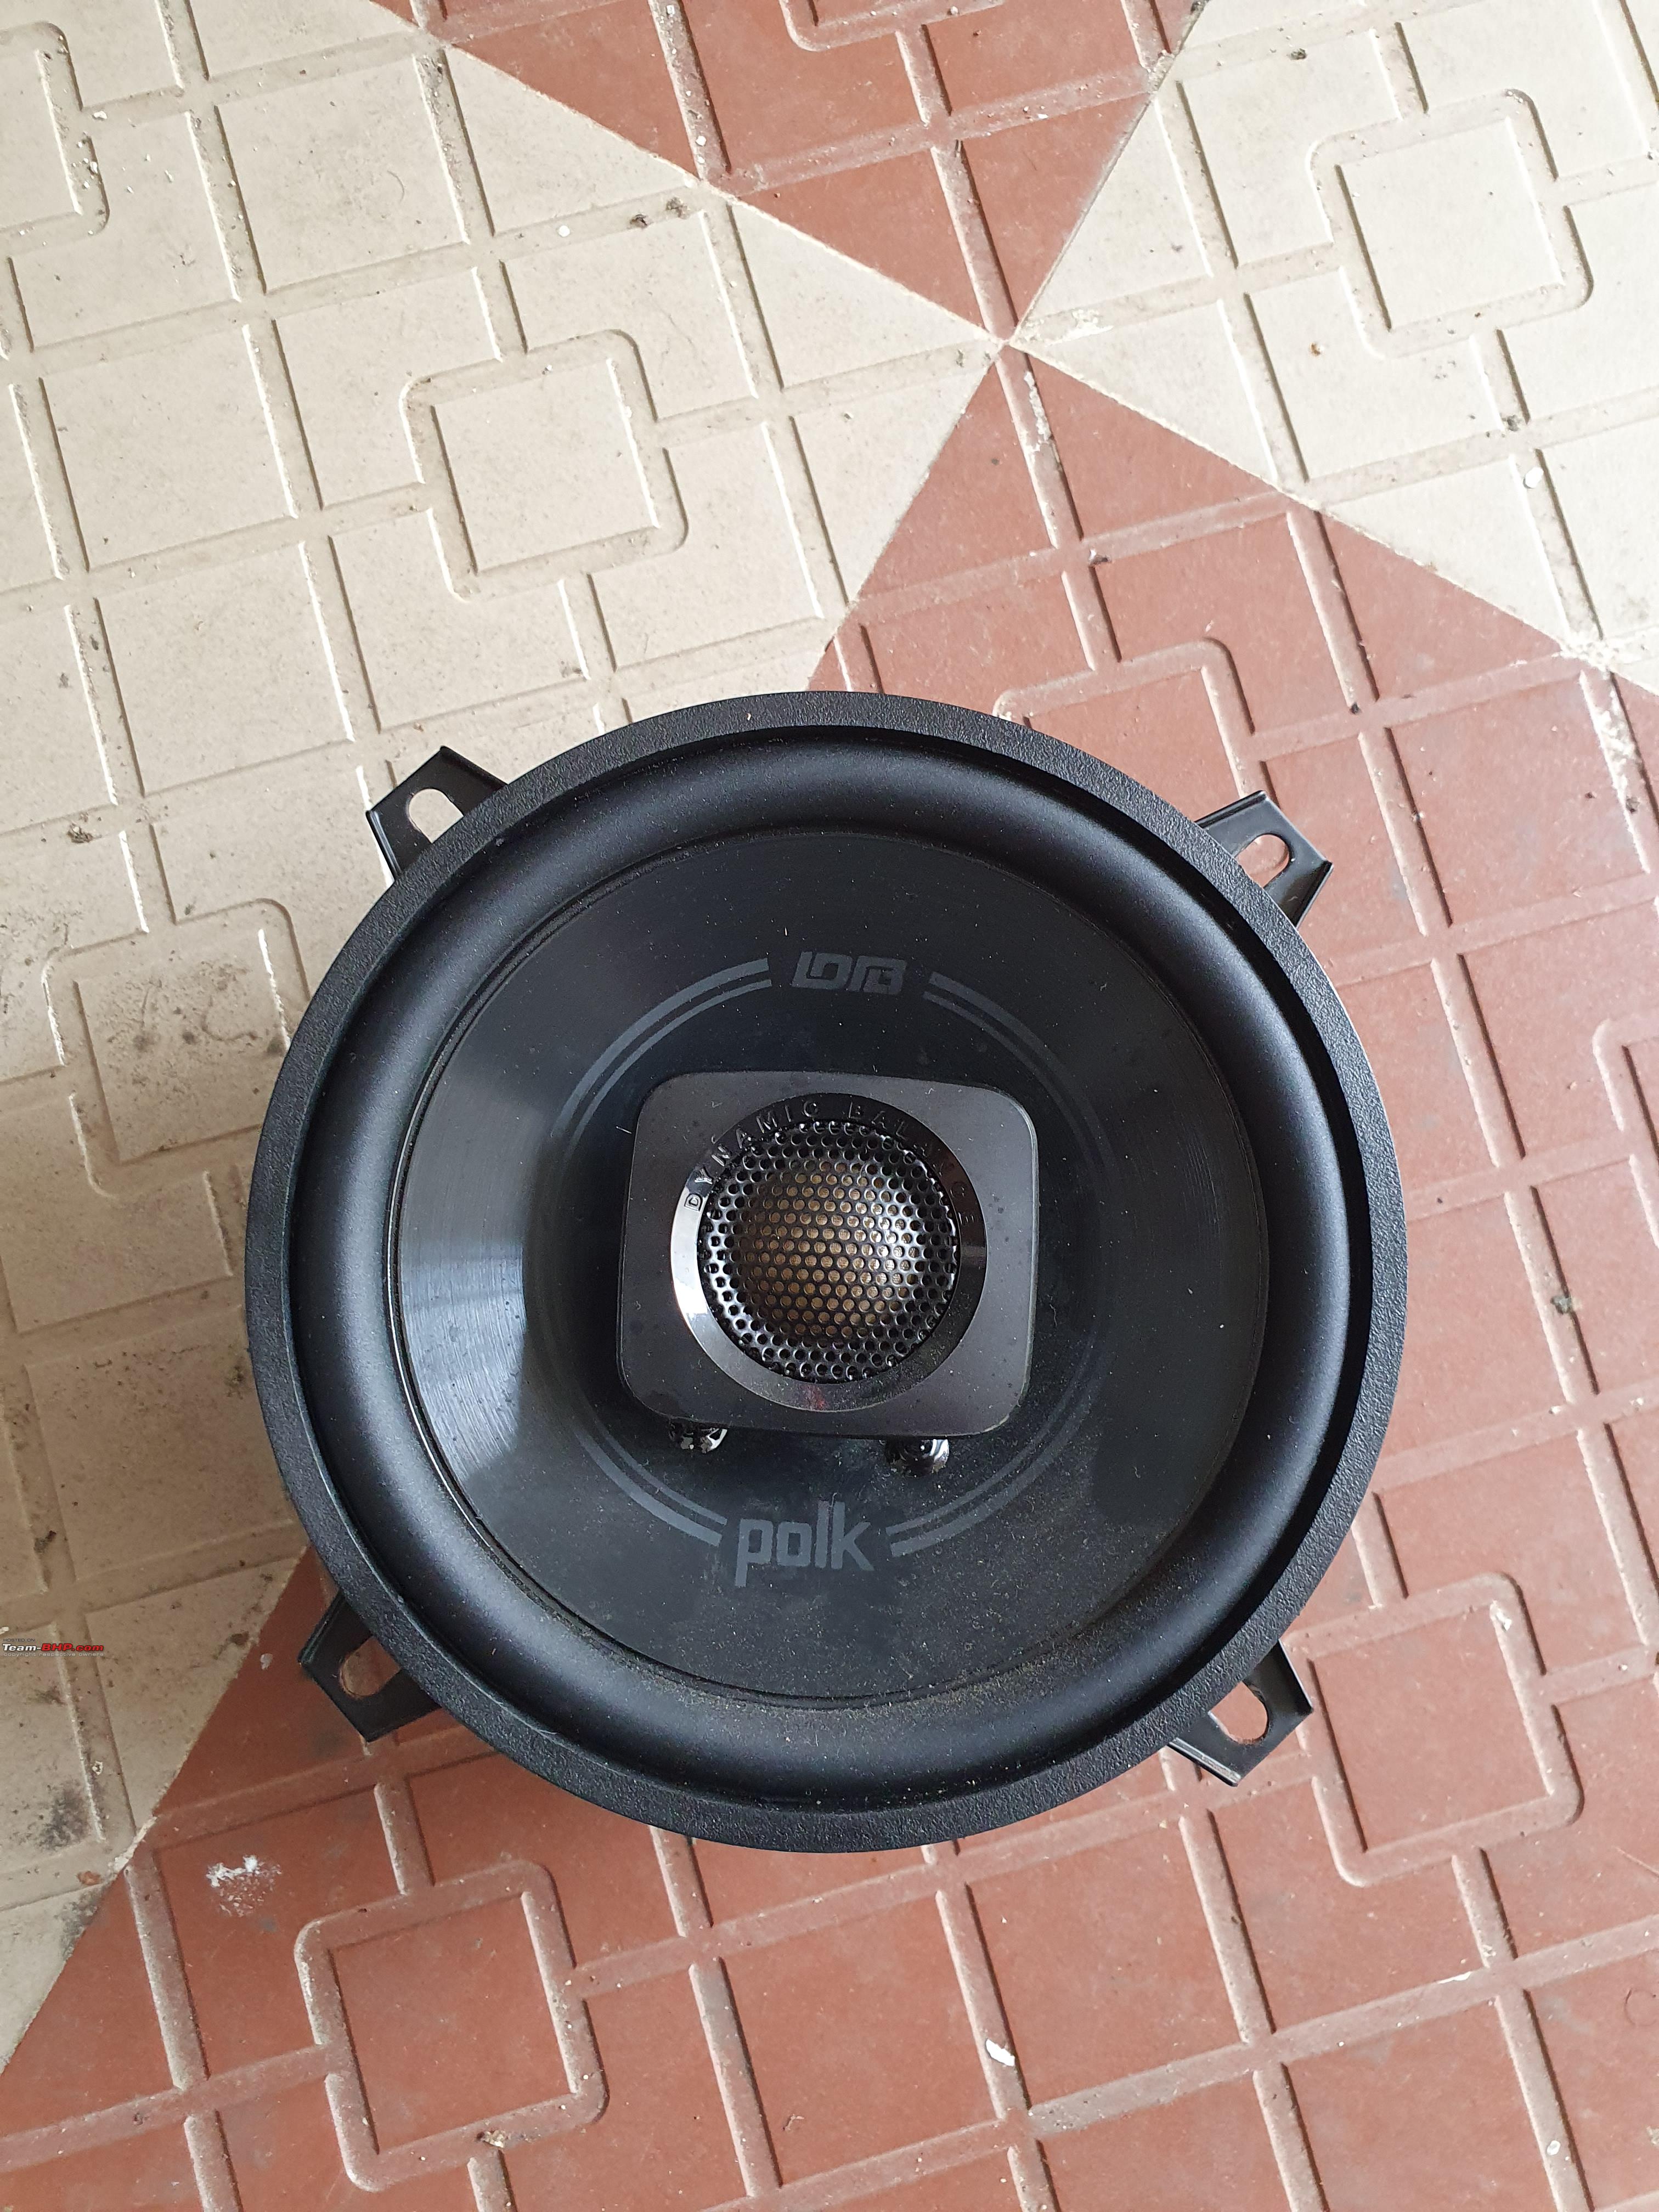 Replaced by the proper 6.5" DB651 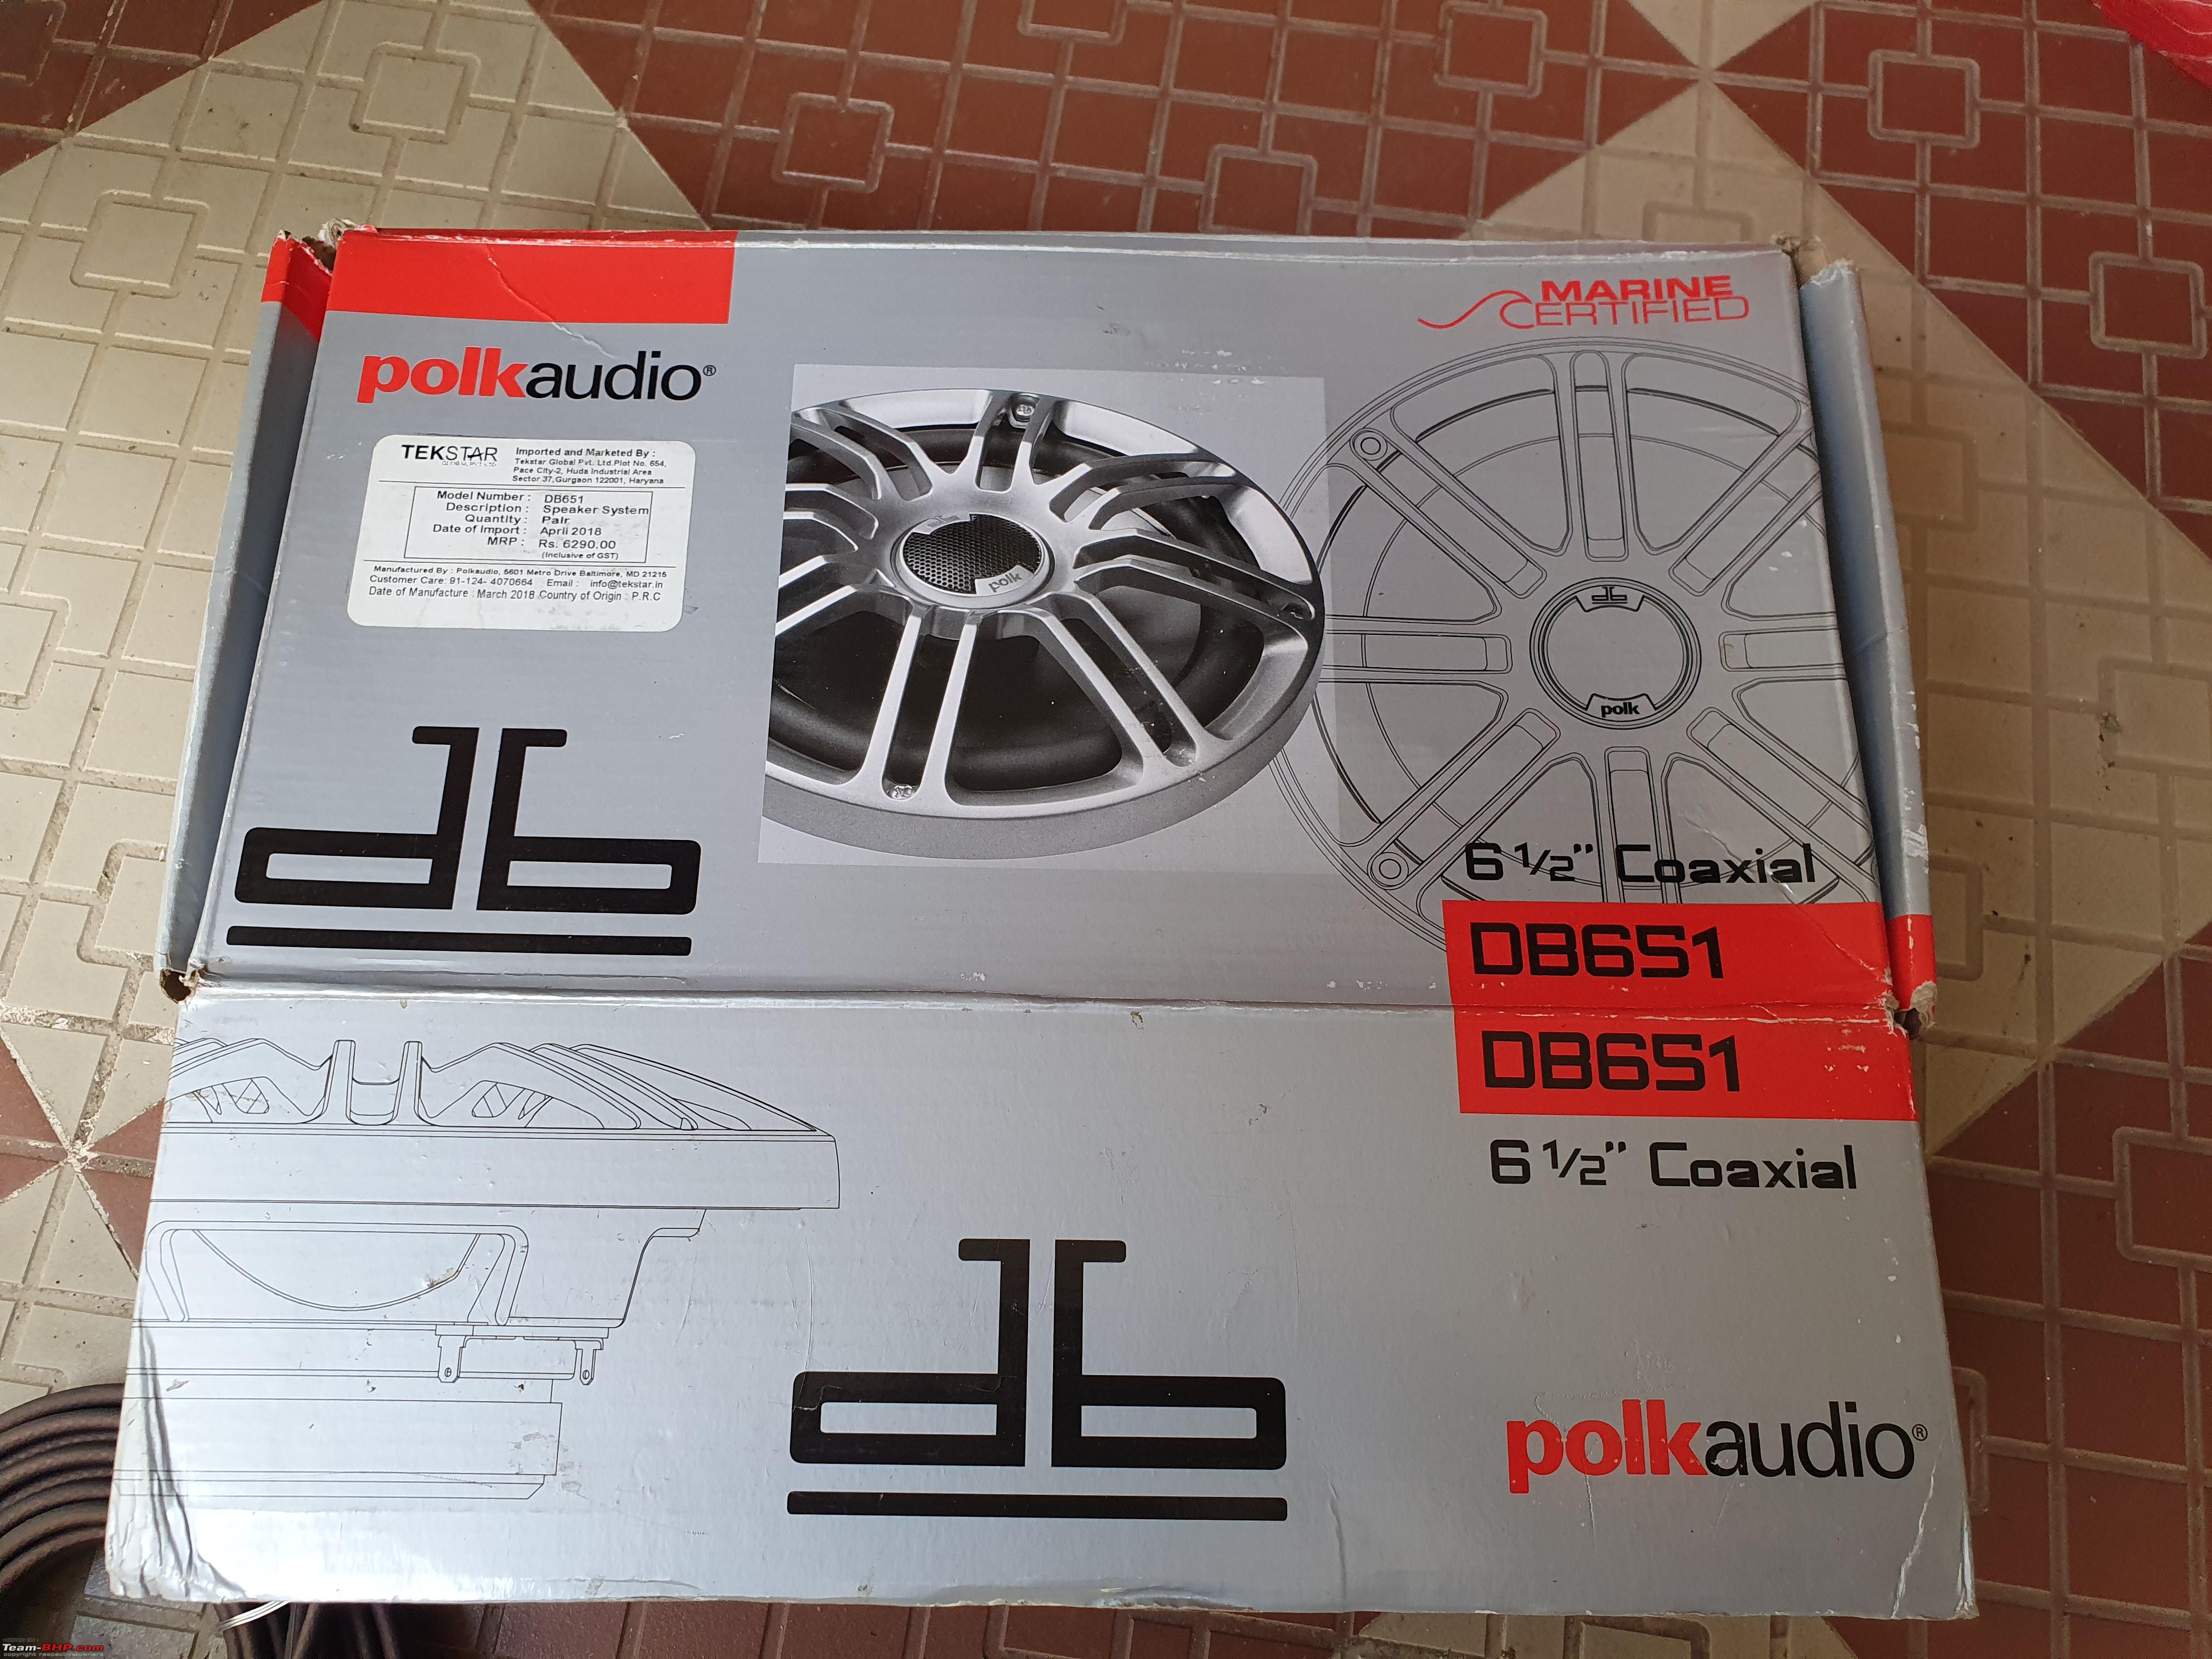 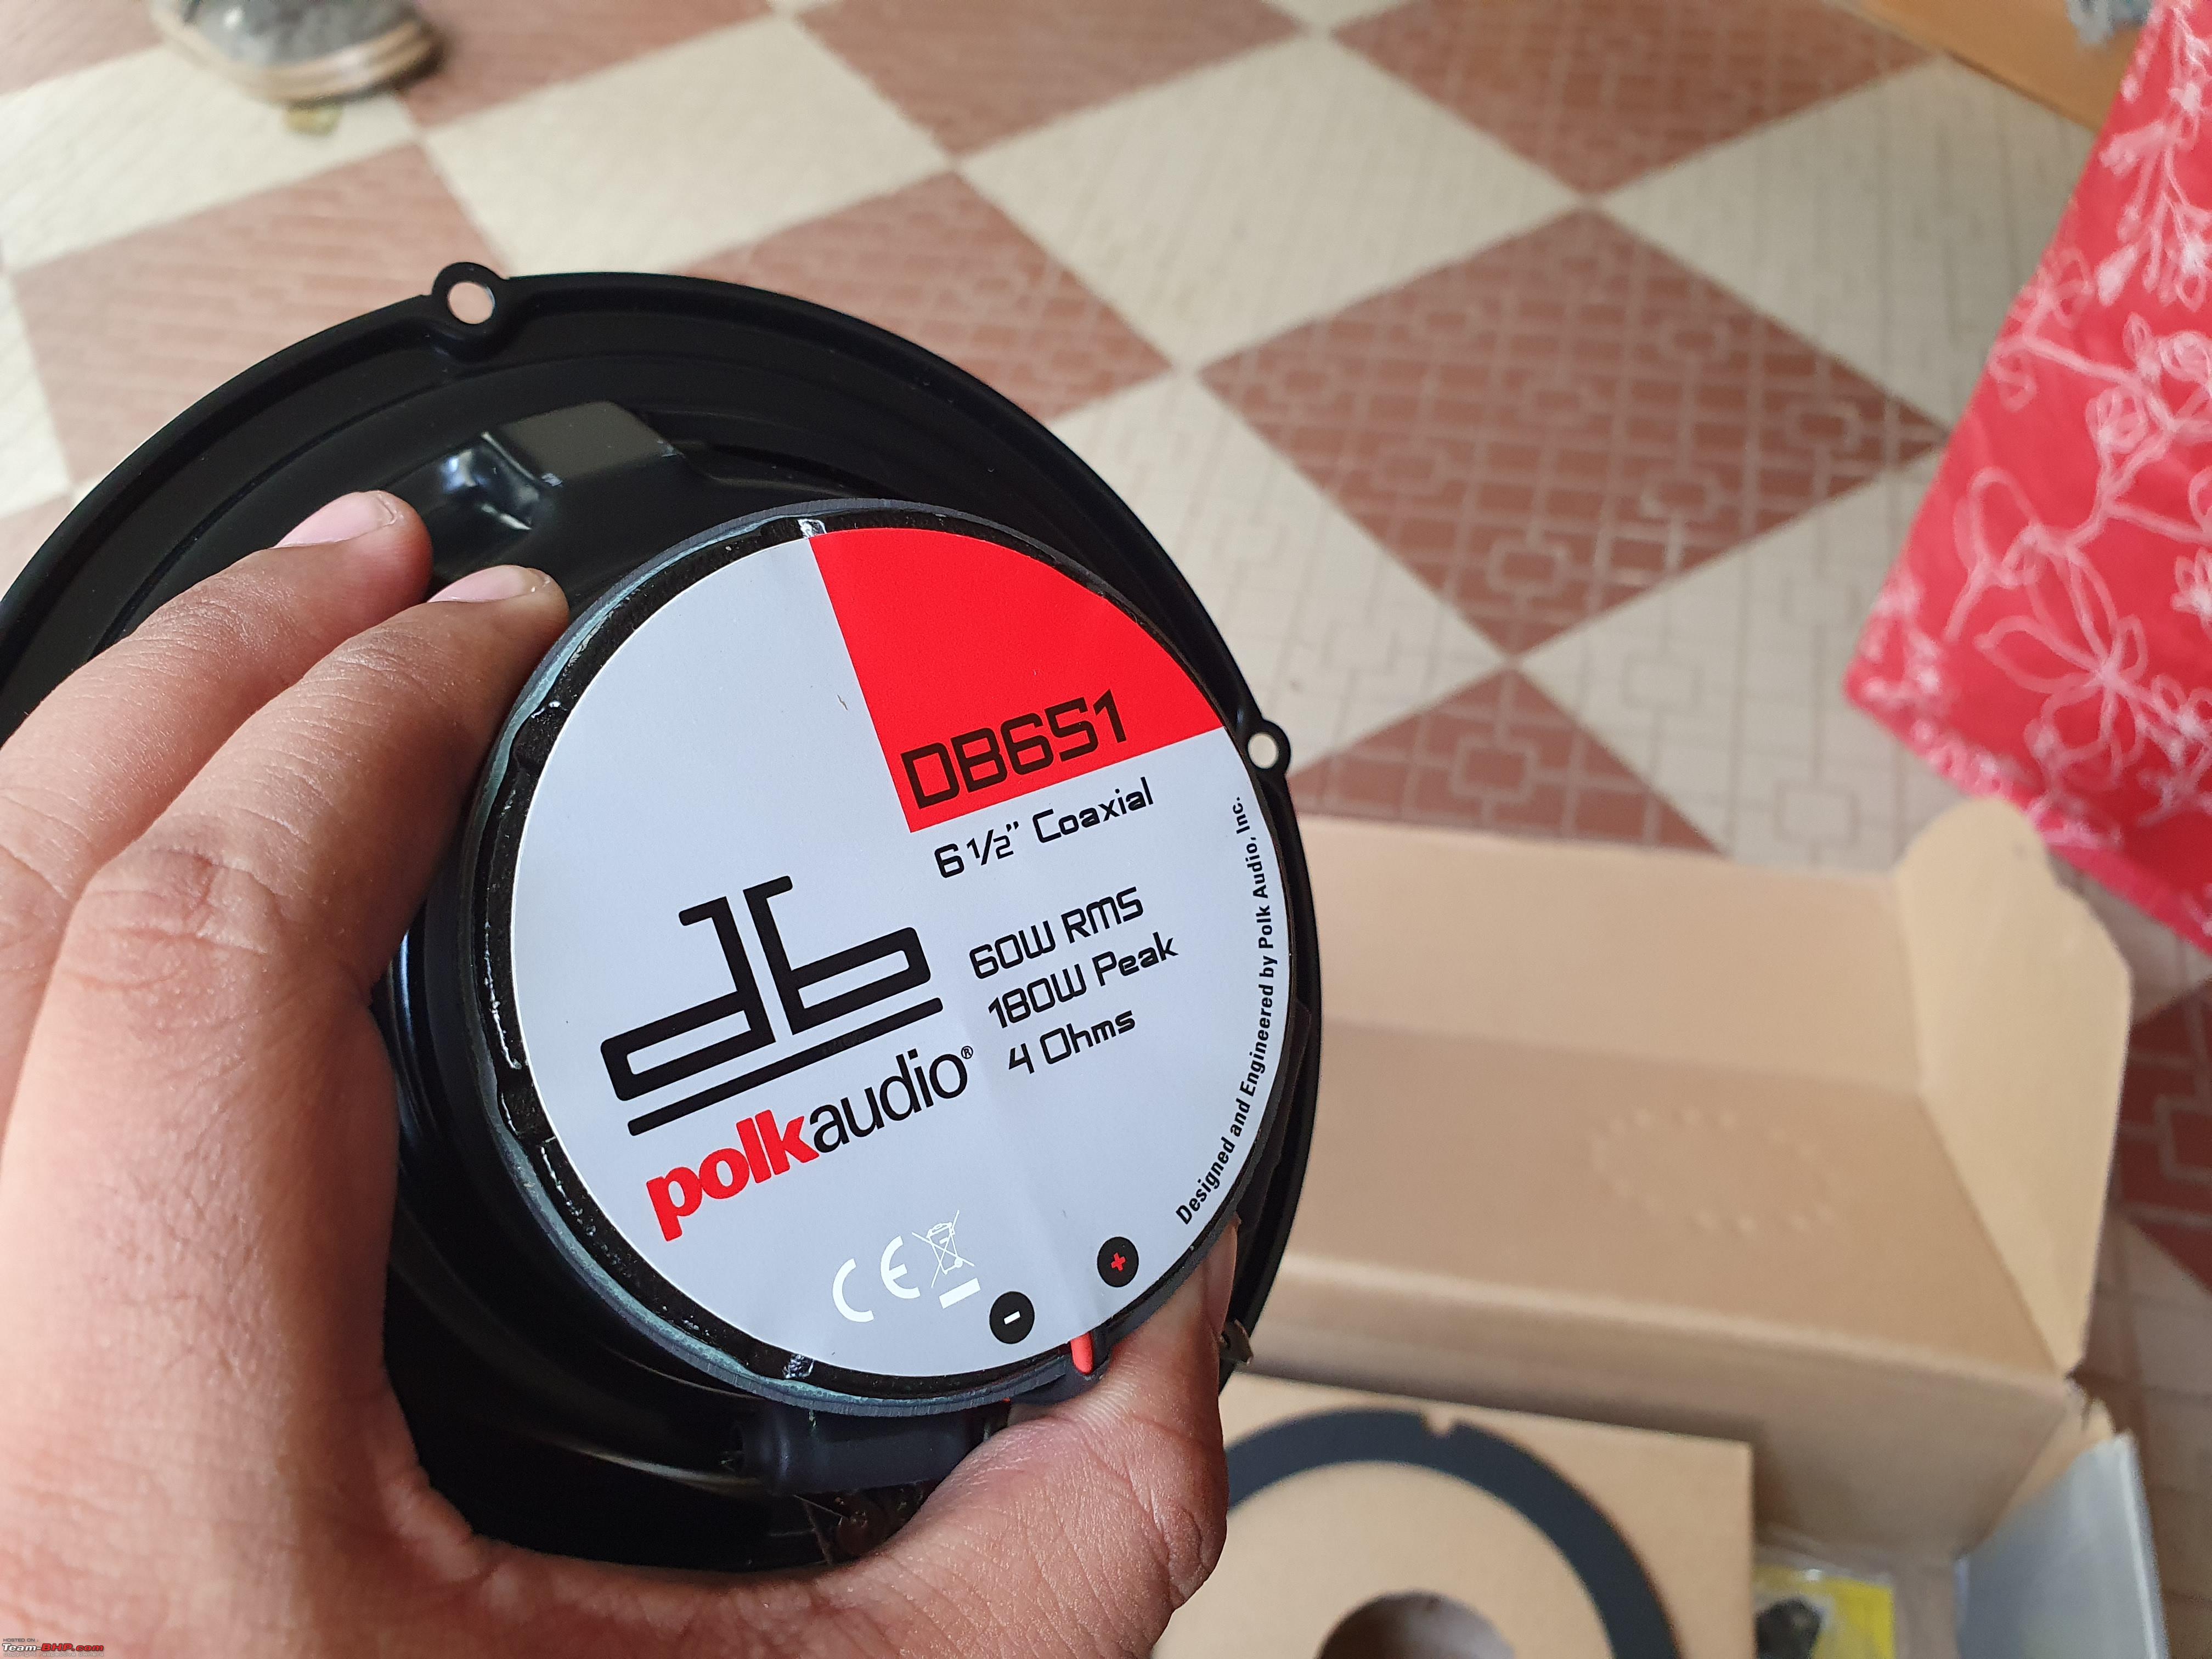  Right, with the speakers and damping sorted, things should sound better. It did, the sound was clearer and had better separation. It still didn't feel balanced though, it's hard to put into words but it felt lacking. Raghu suggested replacing the HU with a Pioneer one, I wasn't ready to shell out so much (at the time) and I wanted to maintain the stock look. The next best thing would be a DSP according to him, my idea of a high-low converter was swiftly dismissed by the claims that it would not help much in terms of SQ. DSP it is then! We decided to add the Pioneer DEQ-S1000A to help fine-tune the sound and improve the overall SQ. A consequence of this would be that all 4 channels of the AMP are needed for the speakers and the sub is left out in the cold. A mono block was needed and came in the form of the JBL Club 5501 and it would also run off the DSP.  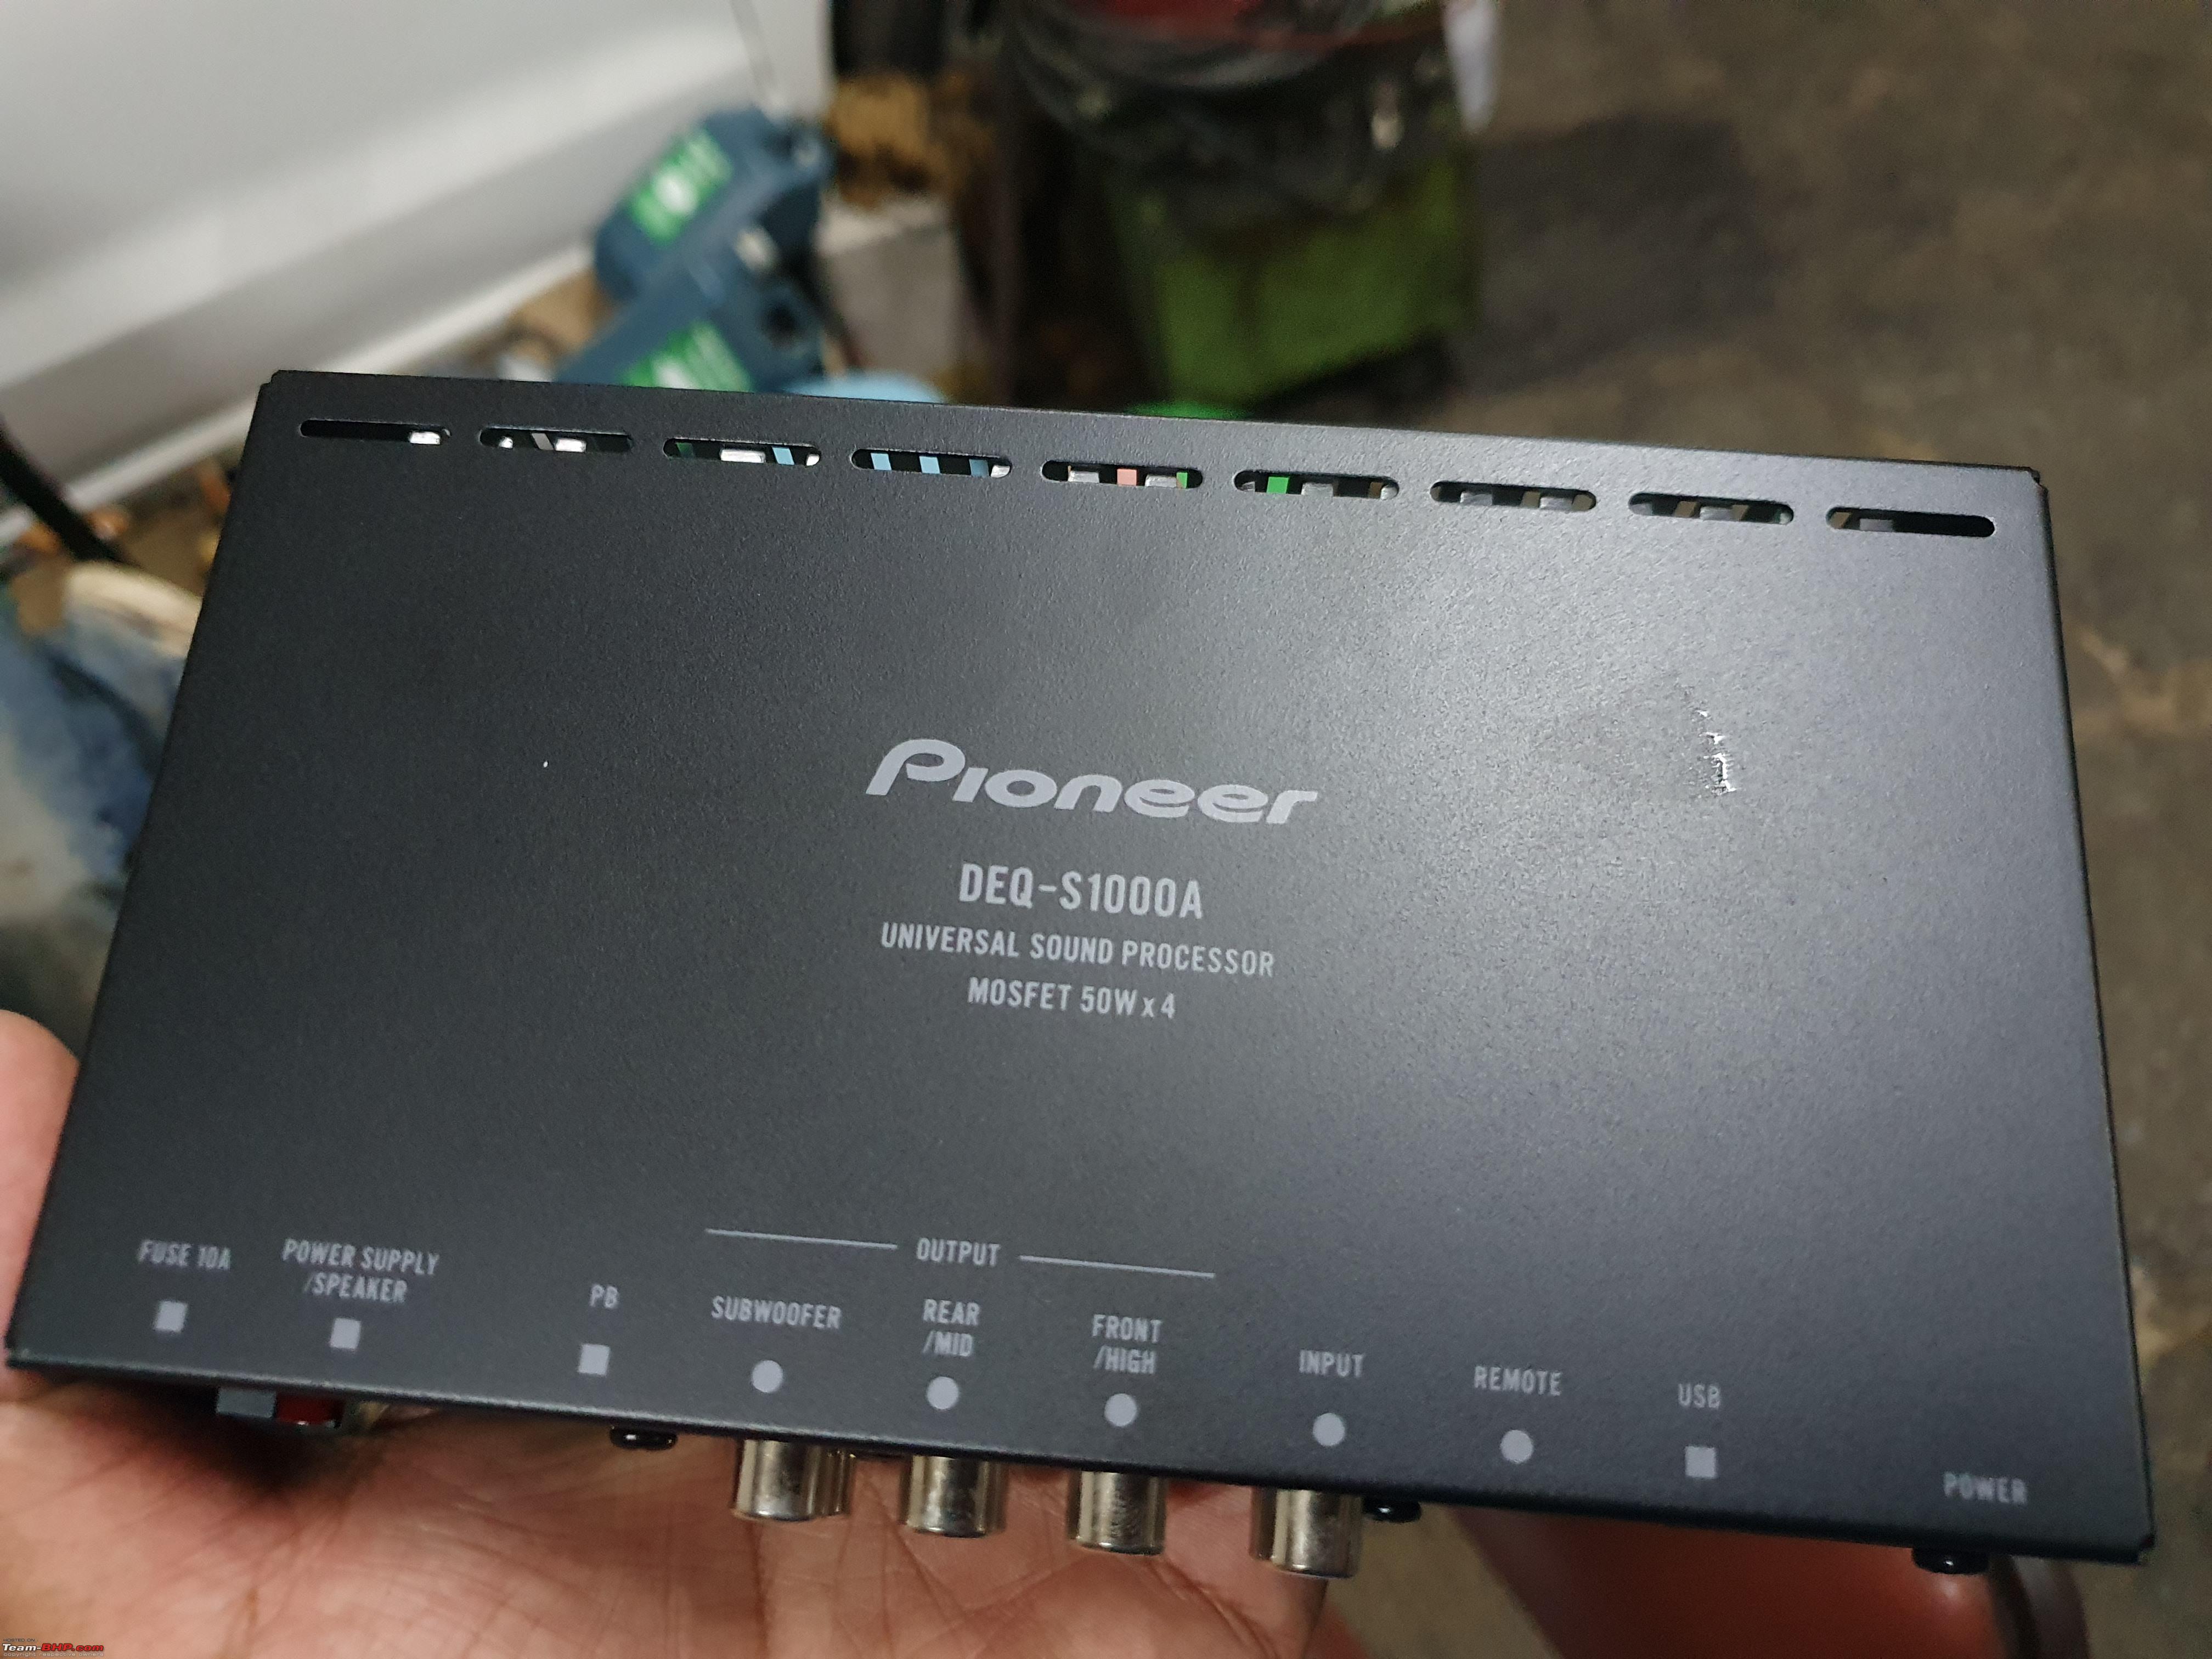 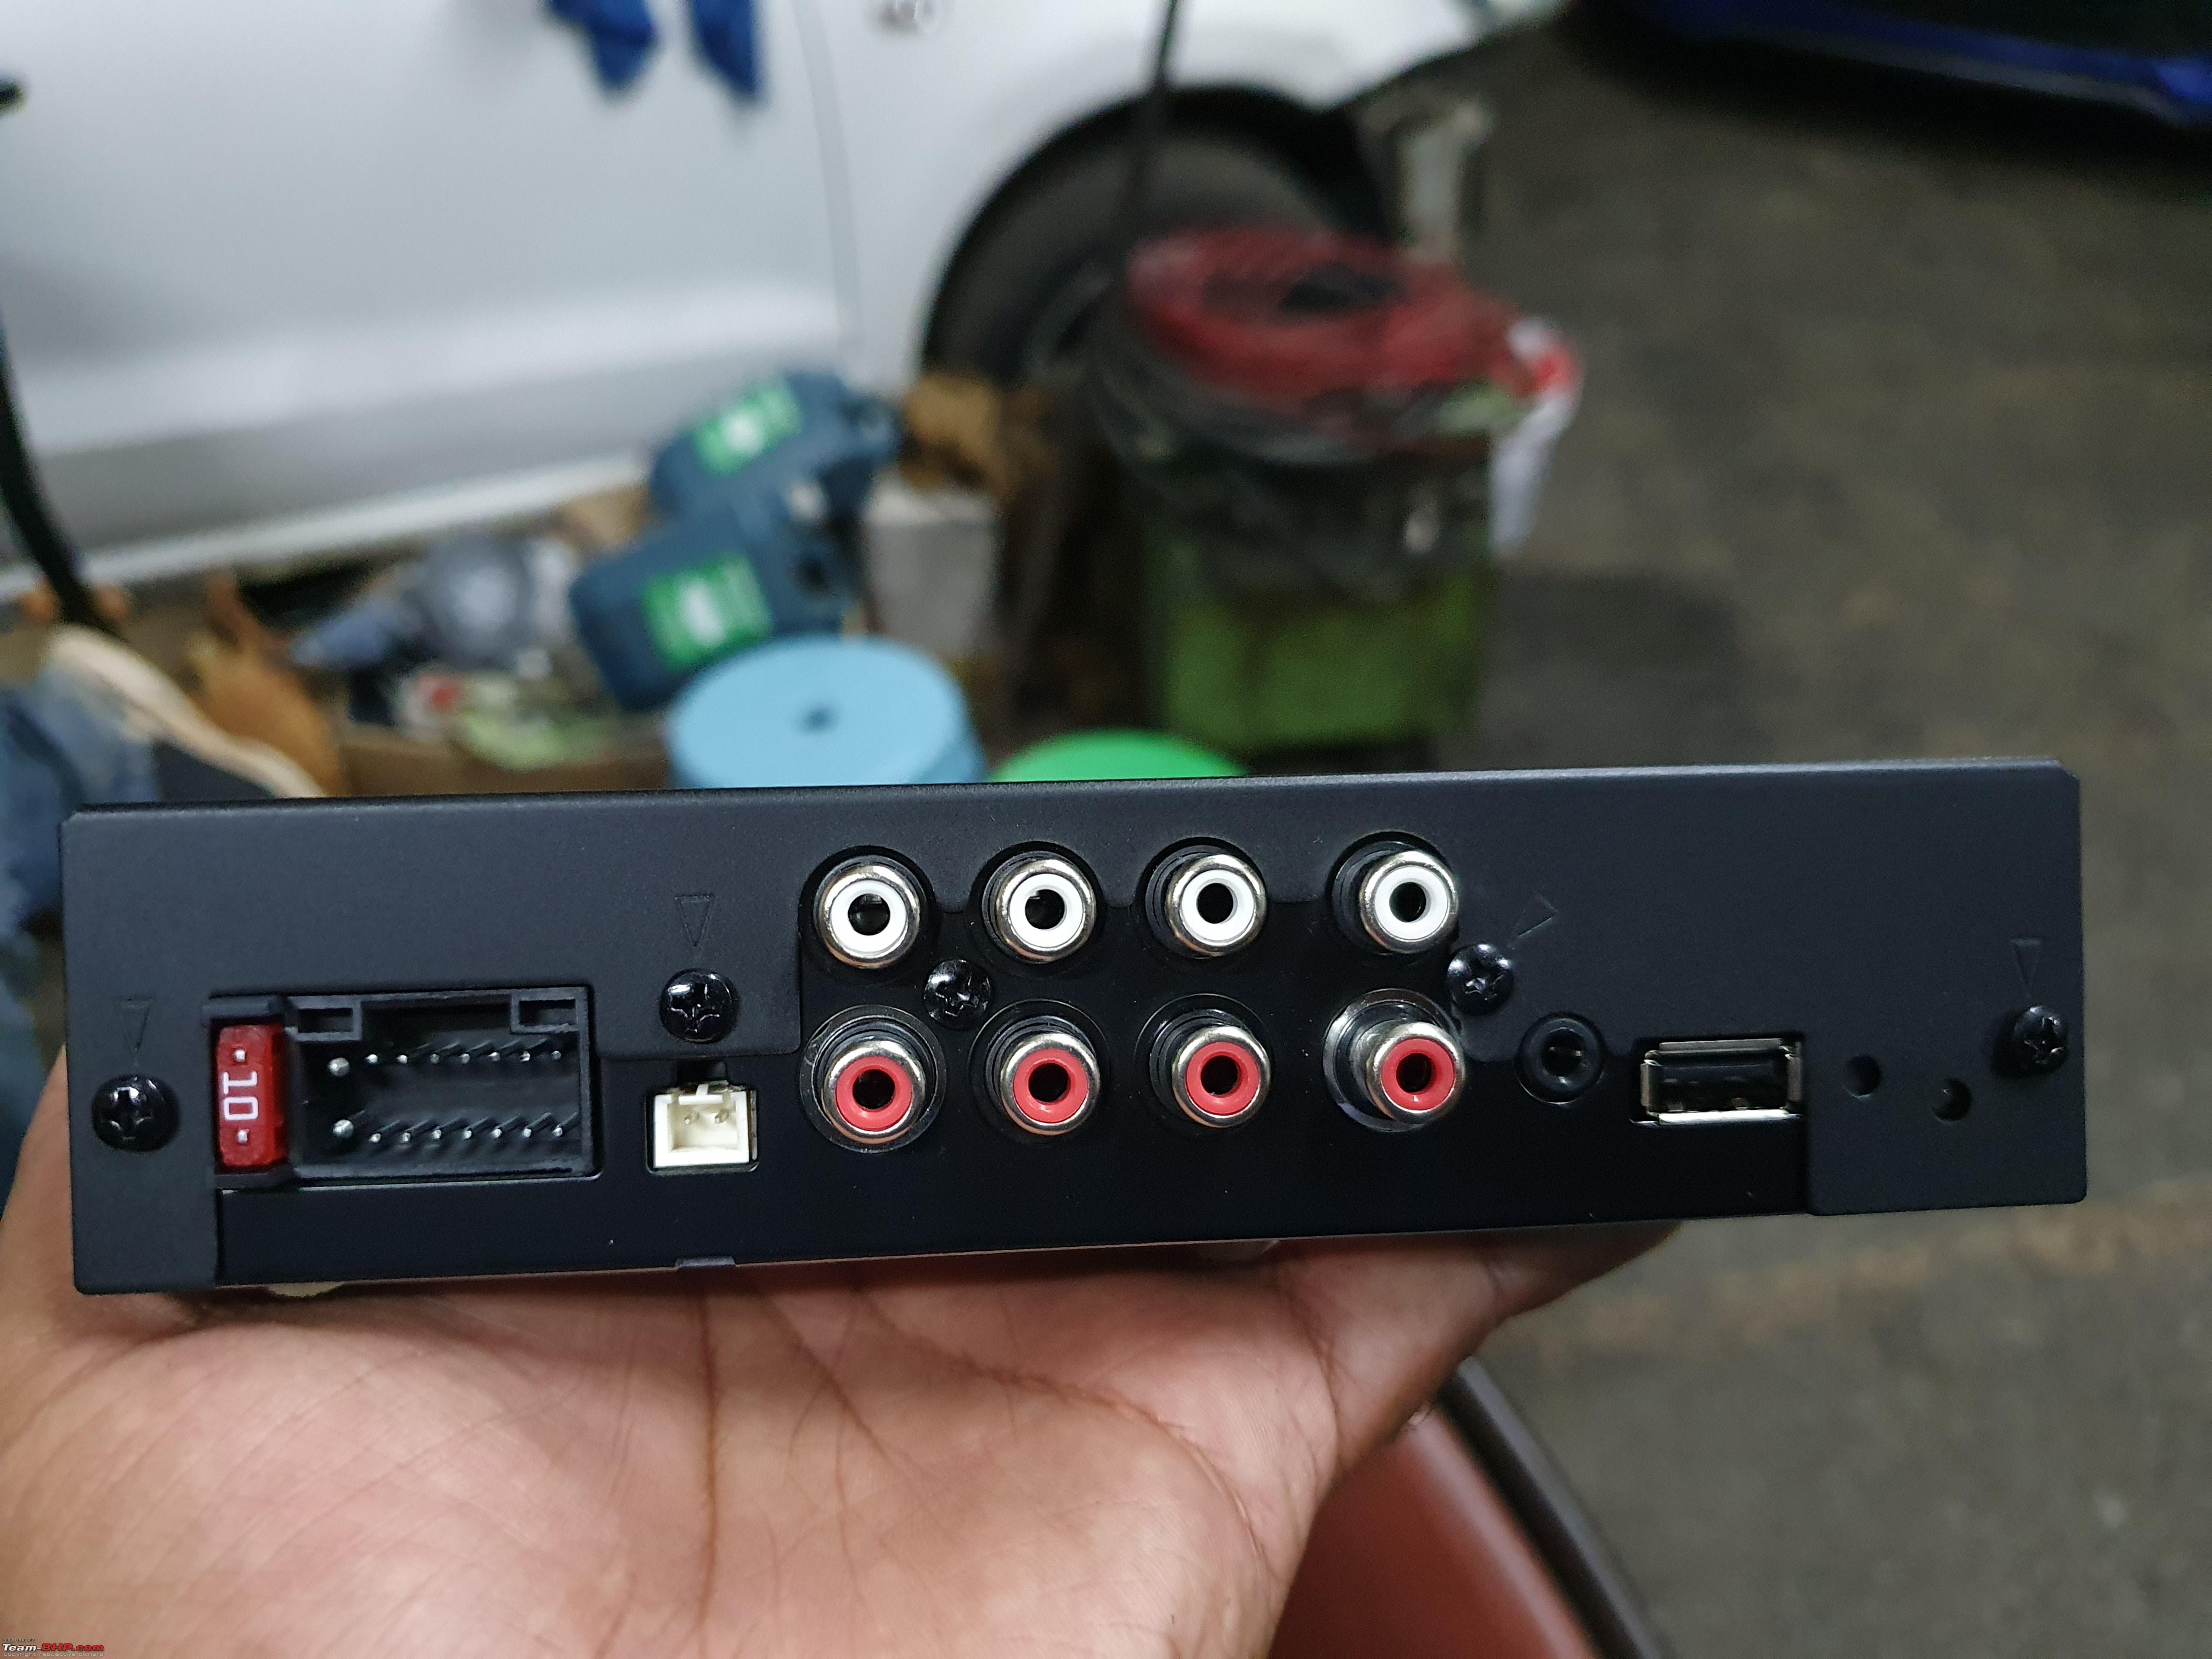 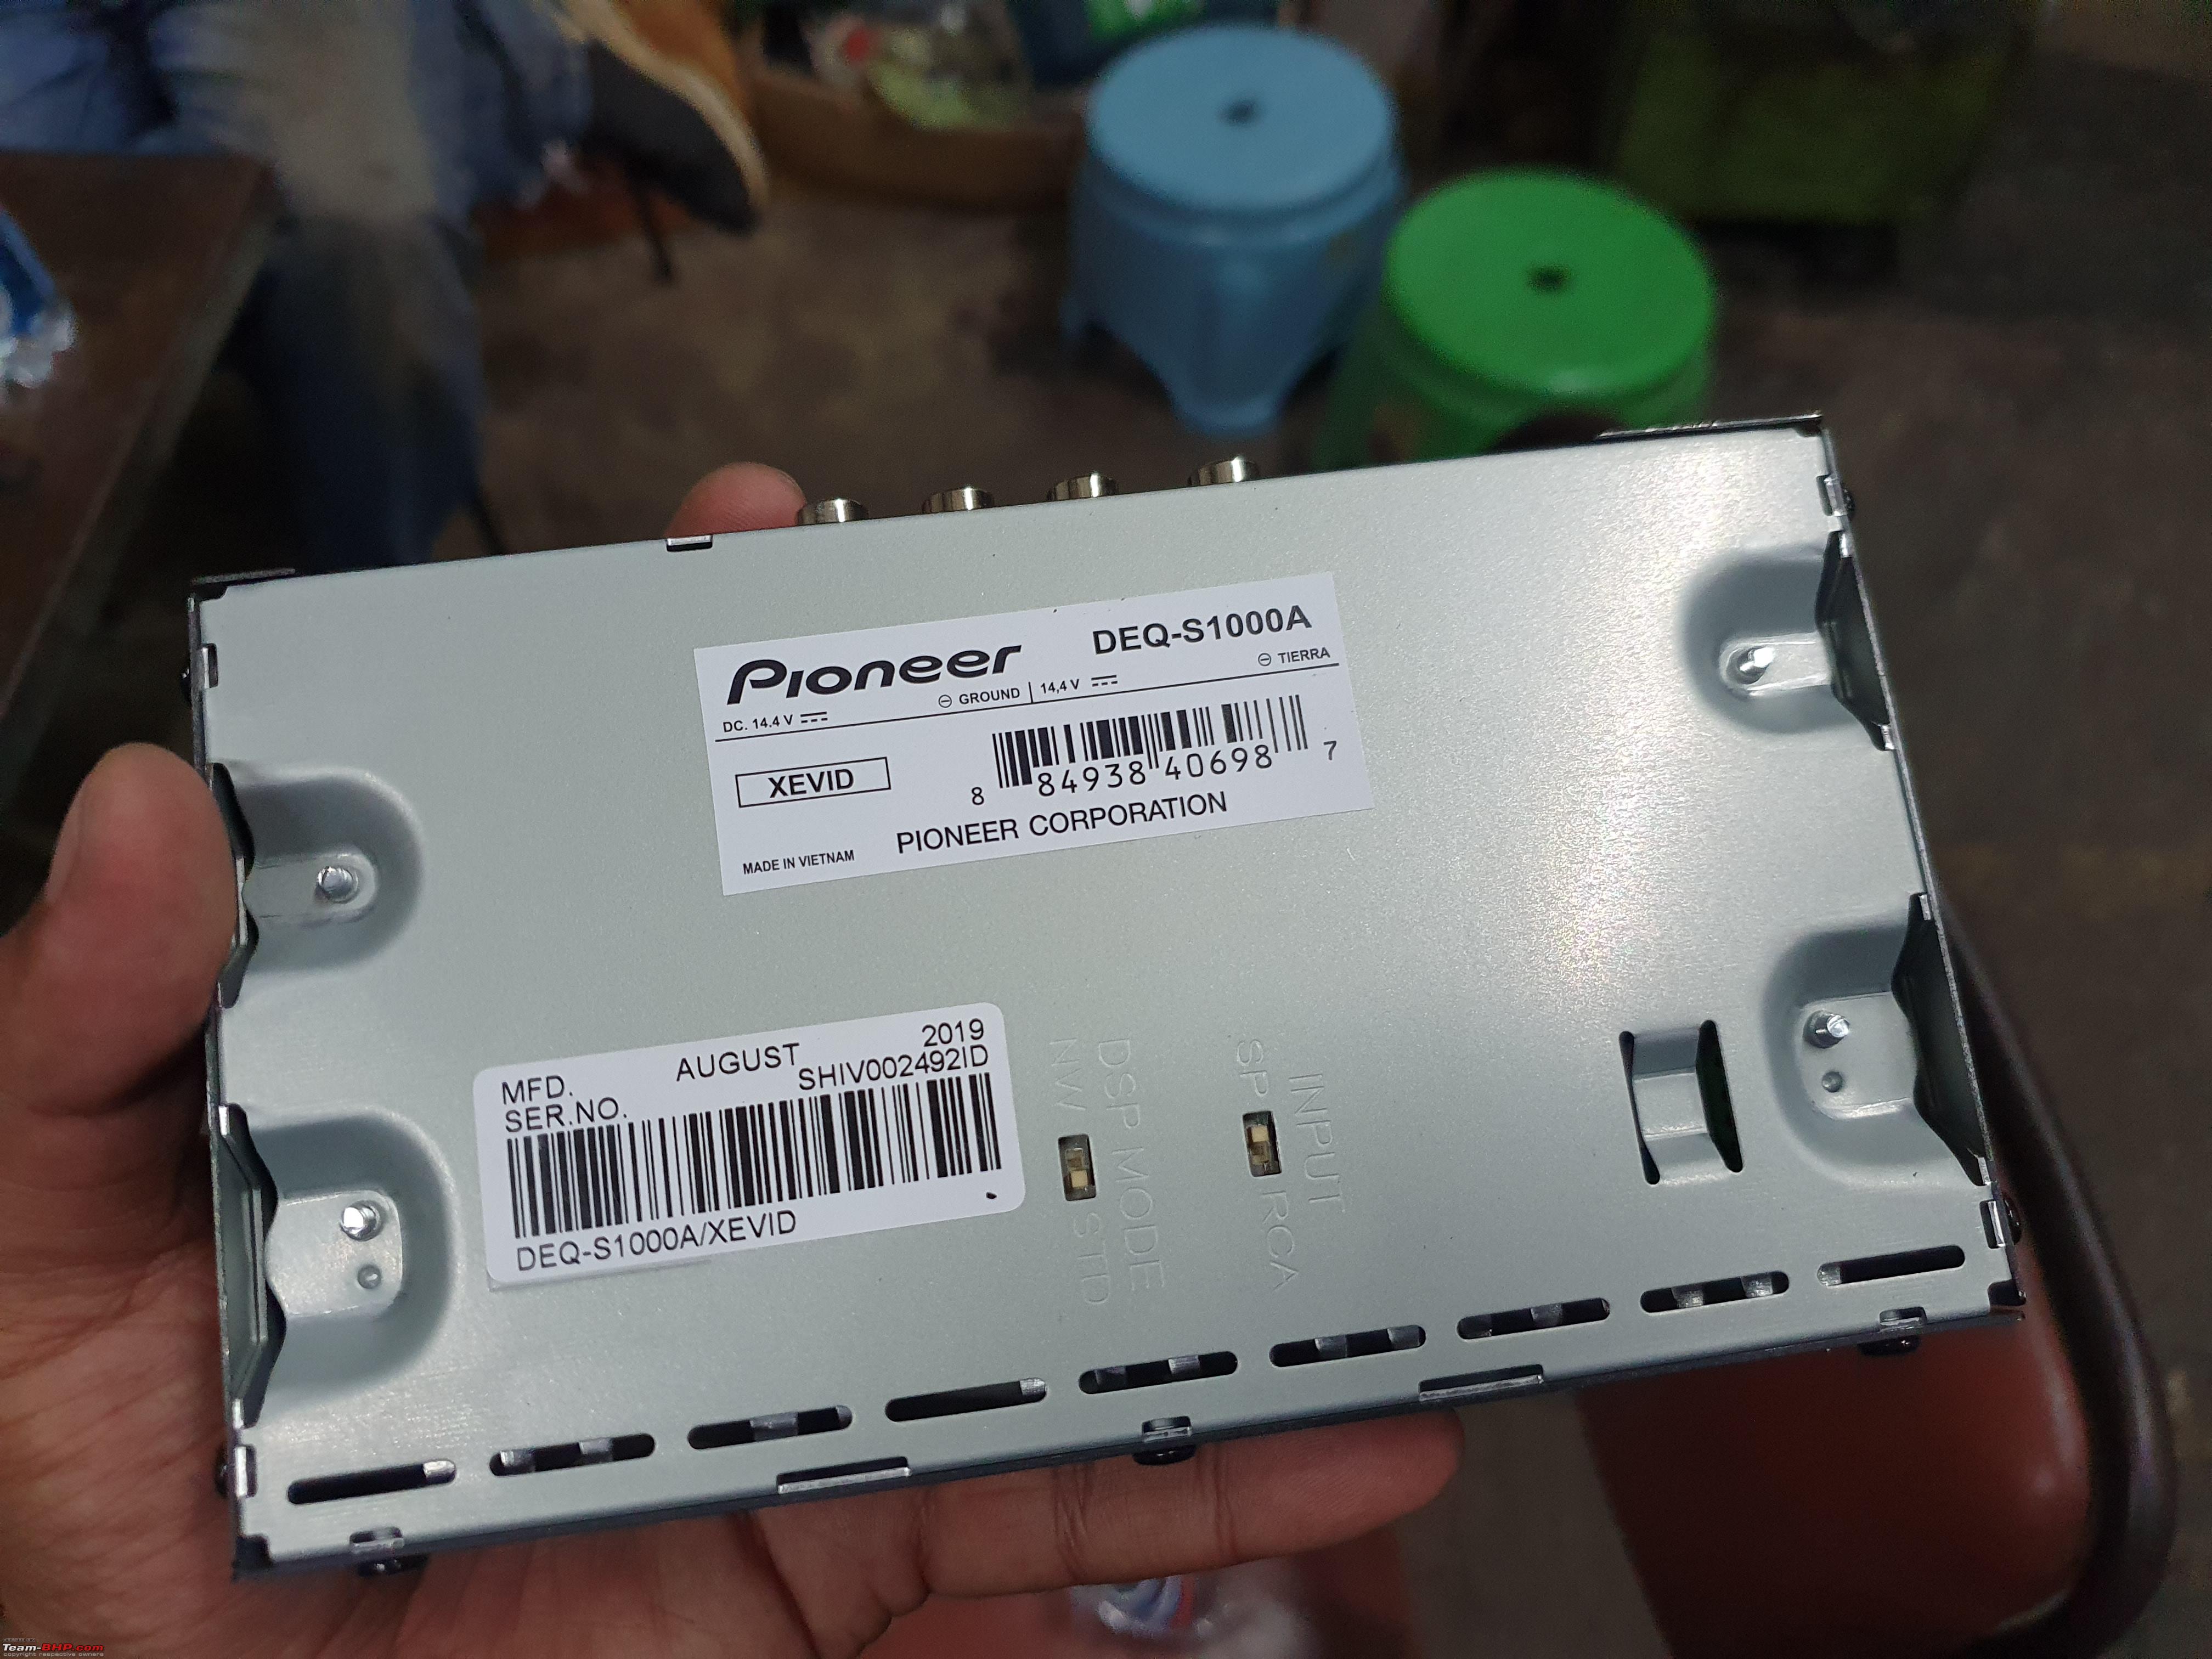 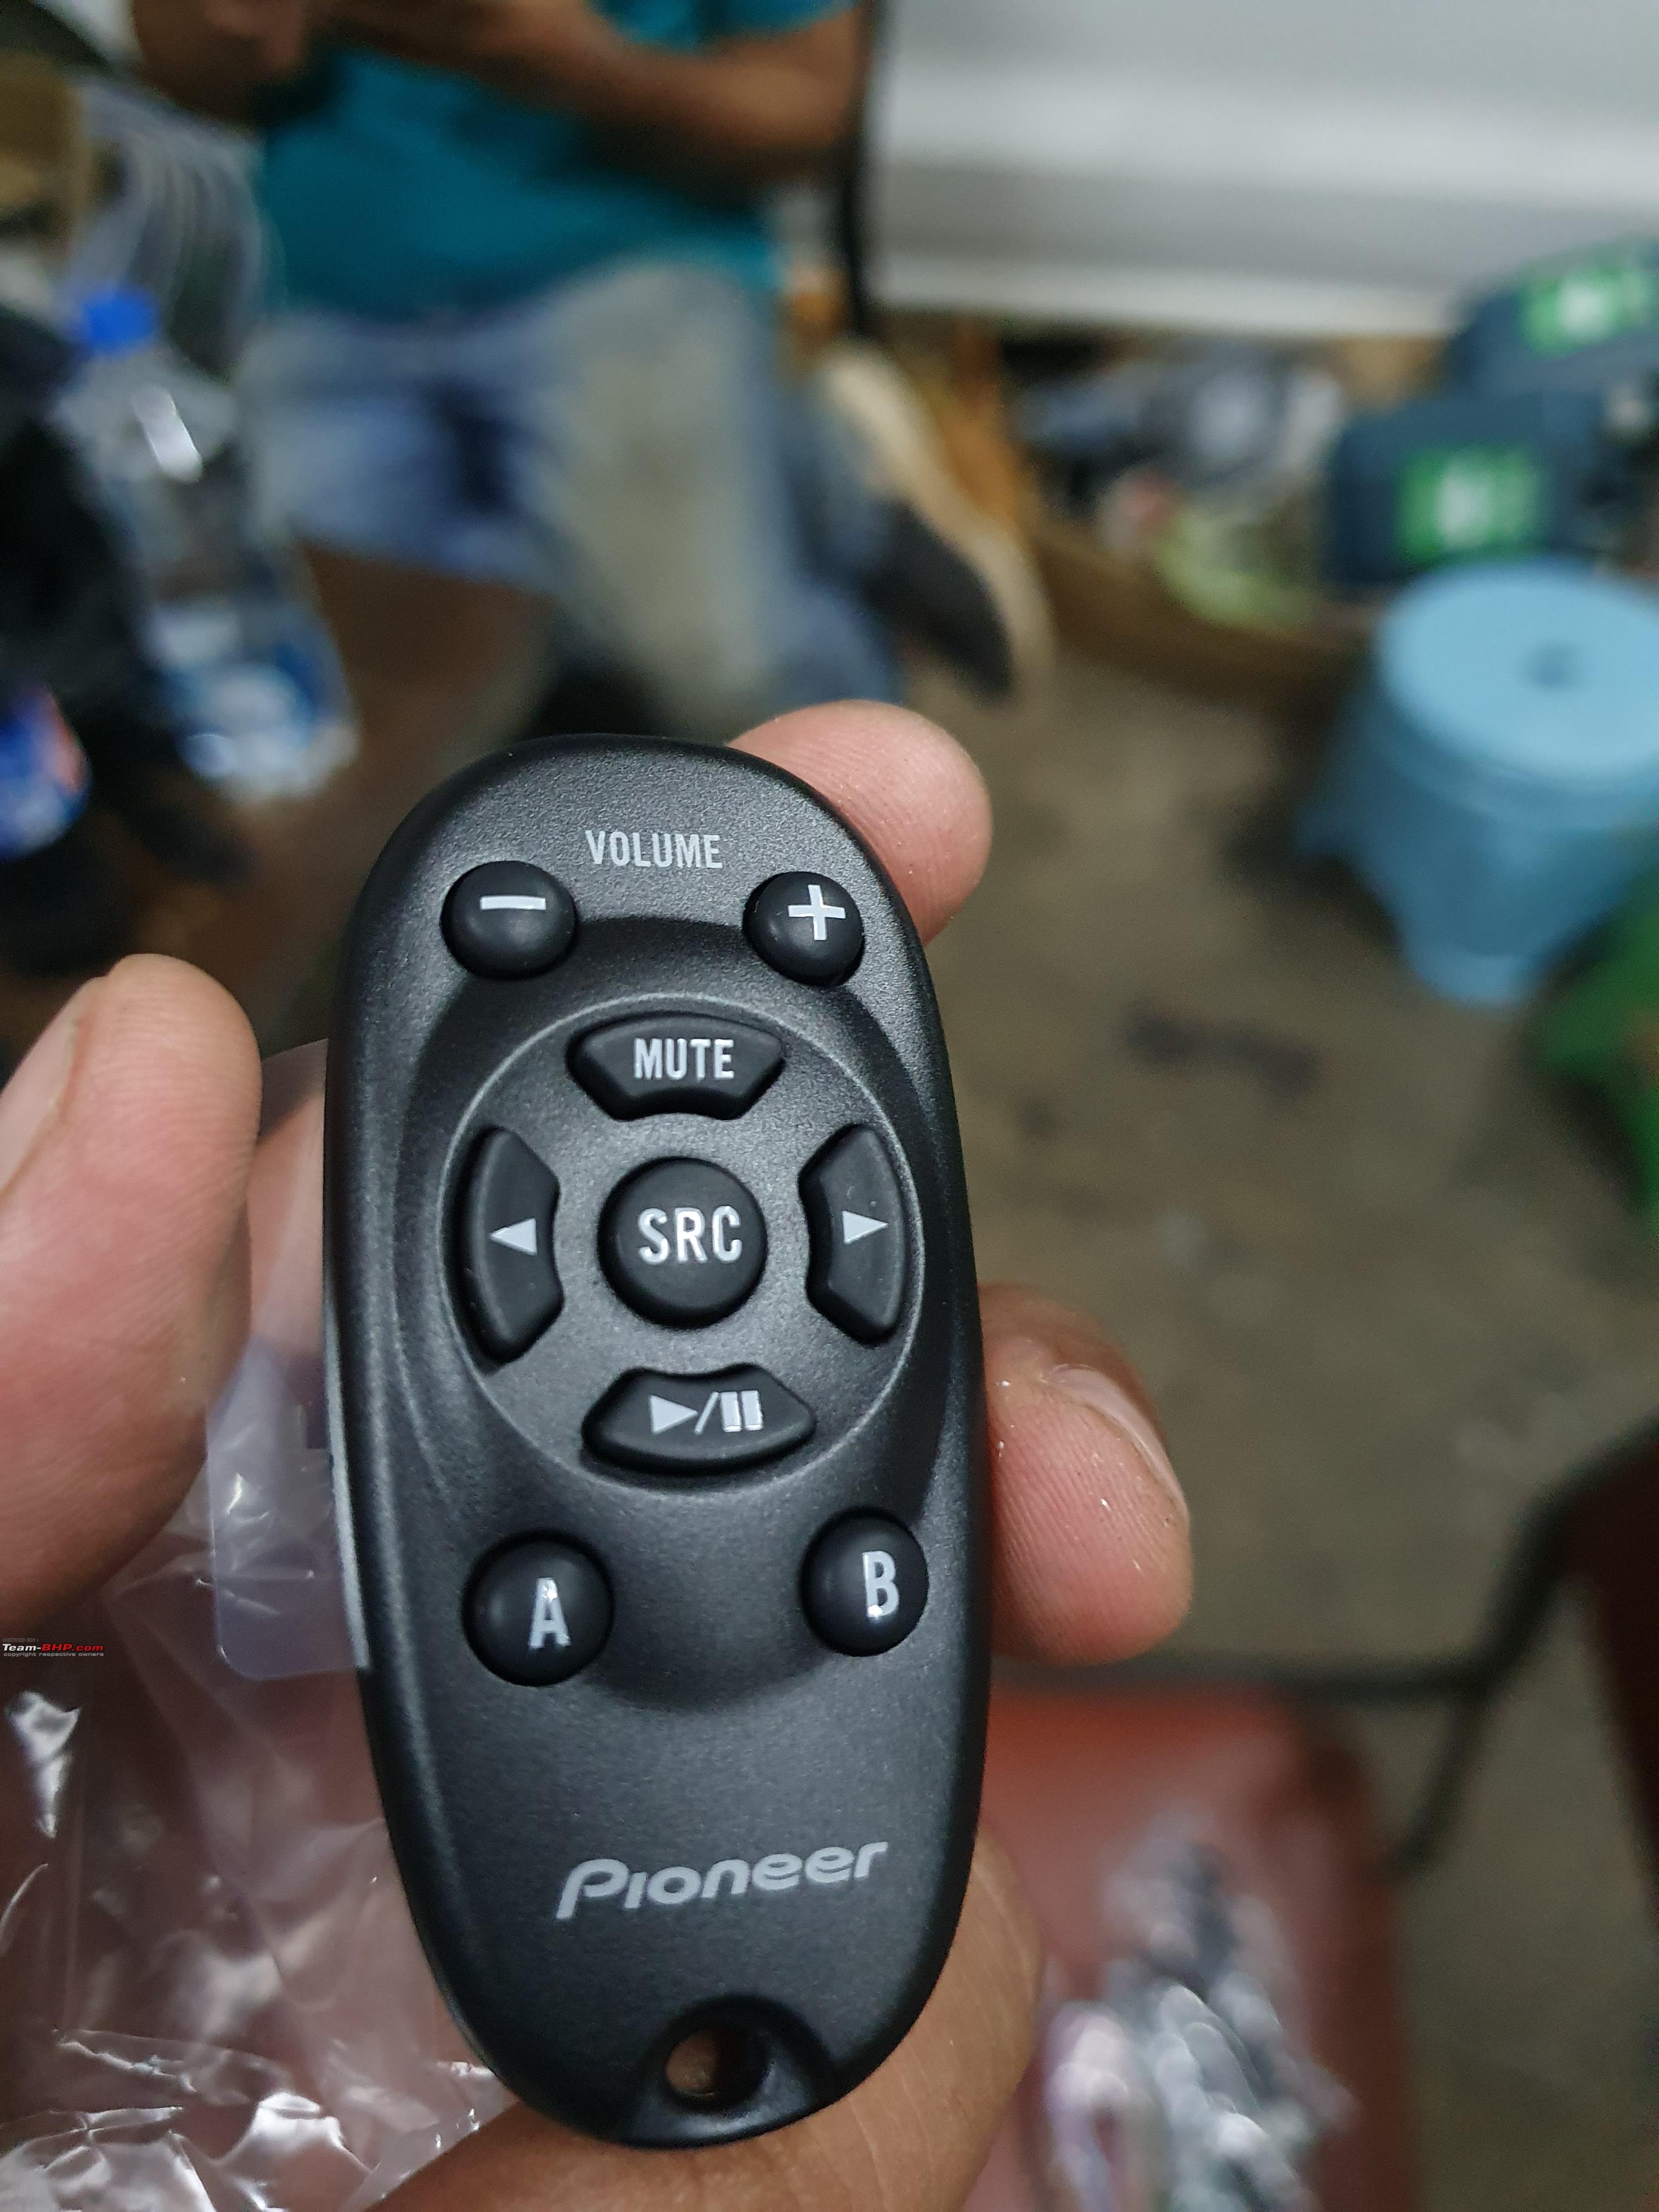   A bit of extra wiring was needed running from the DSP to the AMPs. The speaker wires were not changed and didn't need to be, according to Raghu. The previous installer had cut the main harness to the HU and that also needed fixing. A tedious and time-consuming process. WIP   The DSP was stuck under the stock HU  Last edited by ROG_AK : 12th July 2022 at 13:09. |

|  (44)
Thanks (44)
Thanks
 |
| The following 44 BHPians Thank ROG_AK for this useful post: | Akshay6988, Ashtoncastelino, Avikbrio, batterylow, Bibendum90949, chautob0t, chinmaypillay, Chrome6Boy, CrAzY dRiVeR, deep_behera, digitalnirvana, discoverwild, Divya Sharan, dkaile, fluidicjoy, giri1.8, govigov, GTO, Guru_Shikhar, InControl, keroo1099, Leoshashi, mobike008, Mogs, neil.jericho, planet_rocker, Rehaan, Researcher, rj22, Roy.S, rr0yy, sangam_mm93, sgmuser, singh.b86, Sumer, swiftnfurious, t3rm1n80r, The Rationalist, Varun_HexaGuy, Vasuki, vivek2652, VR/46_Chet, yogiii, ysjoy |
| |
|
12th July 2022, 00:29
| #2 |
| BHPian Join Date: Oct 2017 Location: Bangalore
Posts: 298
Thanked: 1,676 Times
| Re: Hign end JL Audio upgrade in my Baleno RS With all the hardware installation done, it was time for tuning. Pioneer has an app which is used to control the DEQ-S1000A, it covers the basics and that's about it. Raghu went about setting the cross-over frequencies and time alignment along with some changes to the EQ. We spent a considerable amount of time with the EQ and eventually ended up with something I liked the most. I did not take many screenshots of the app, only 2 apparently 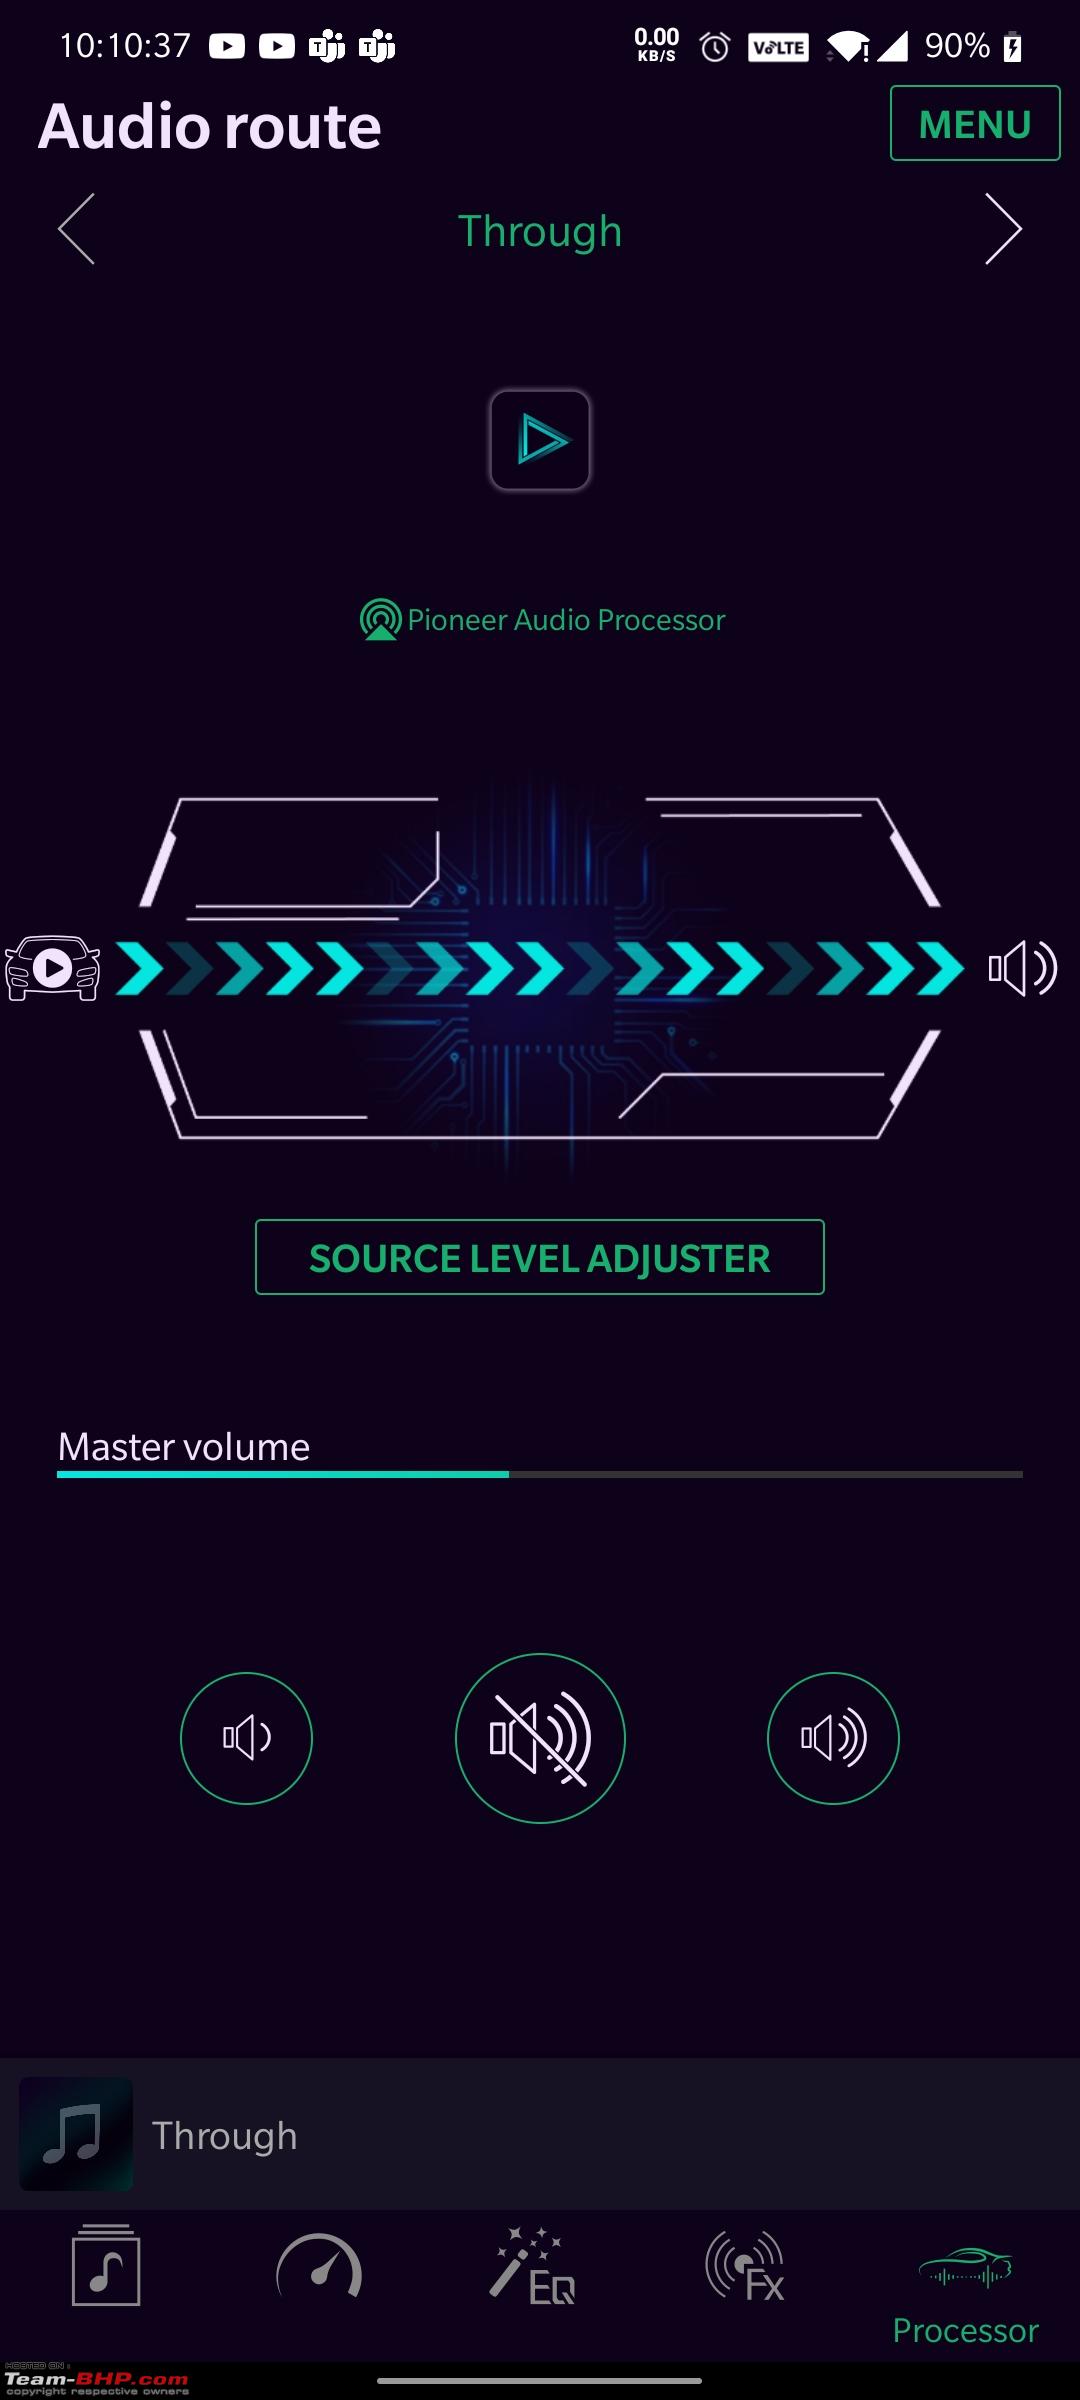 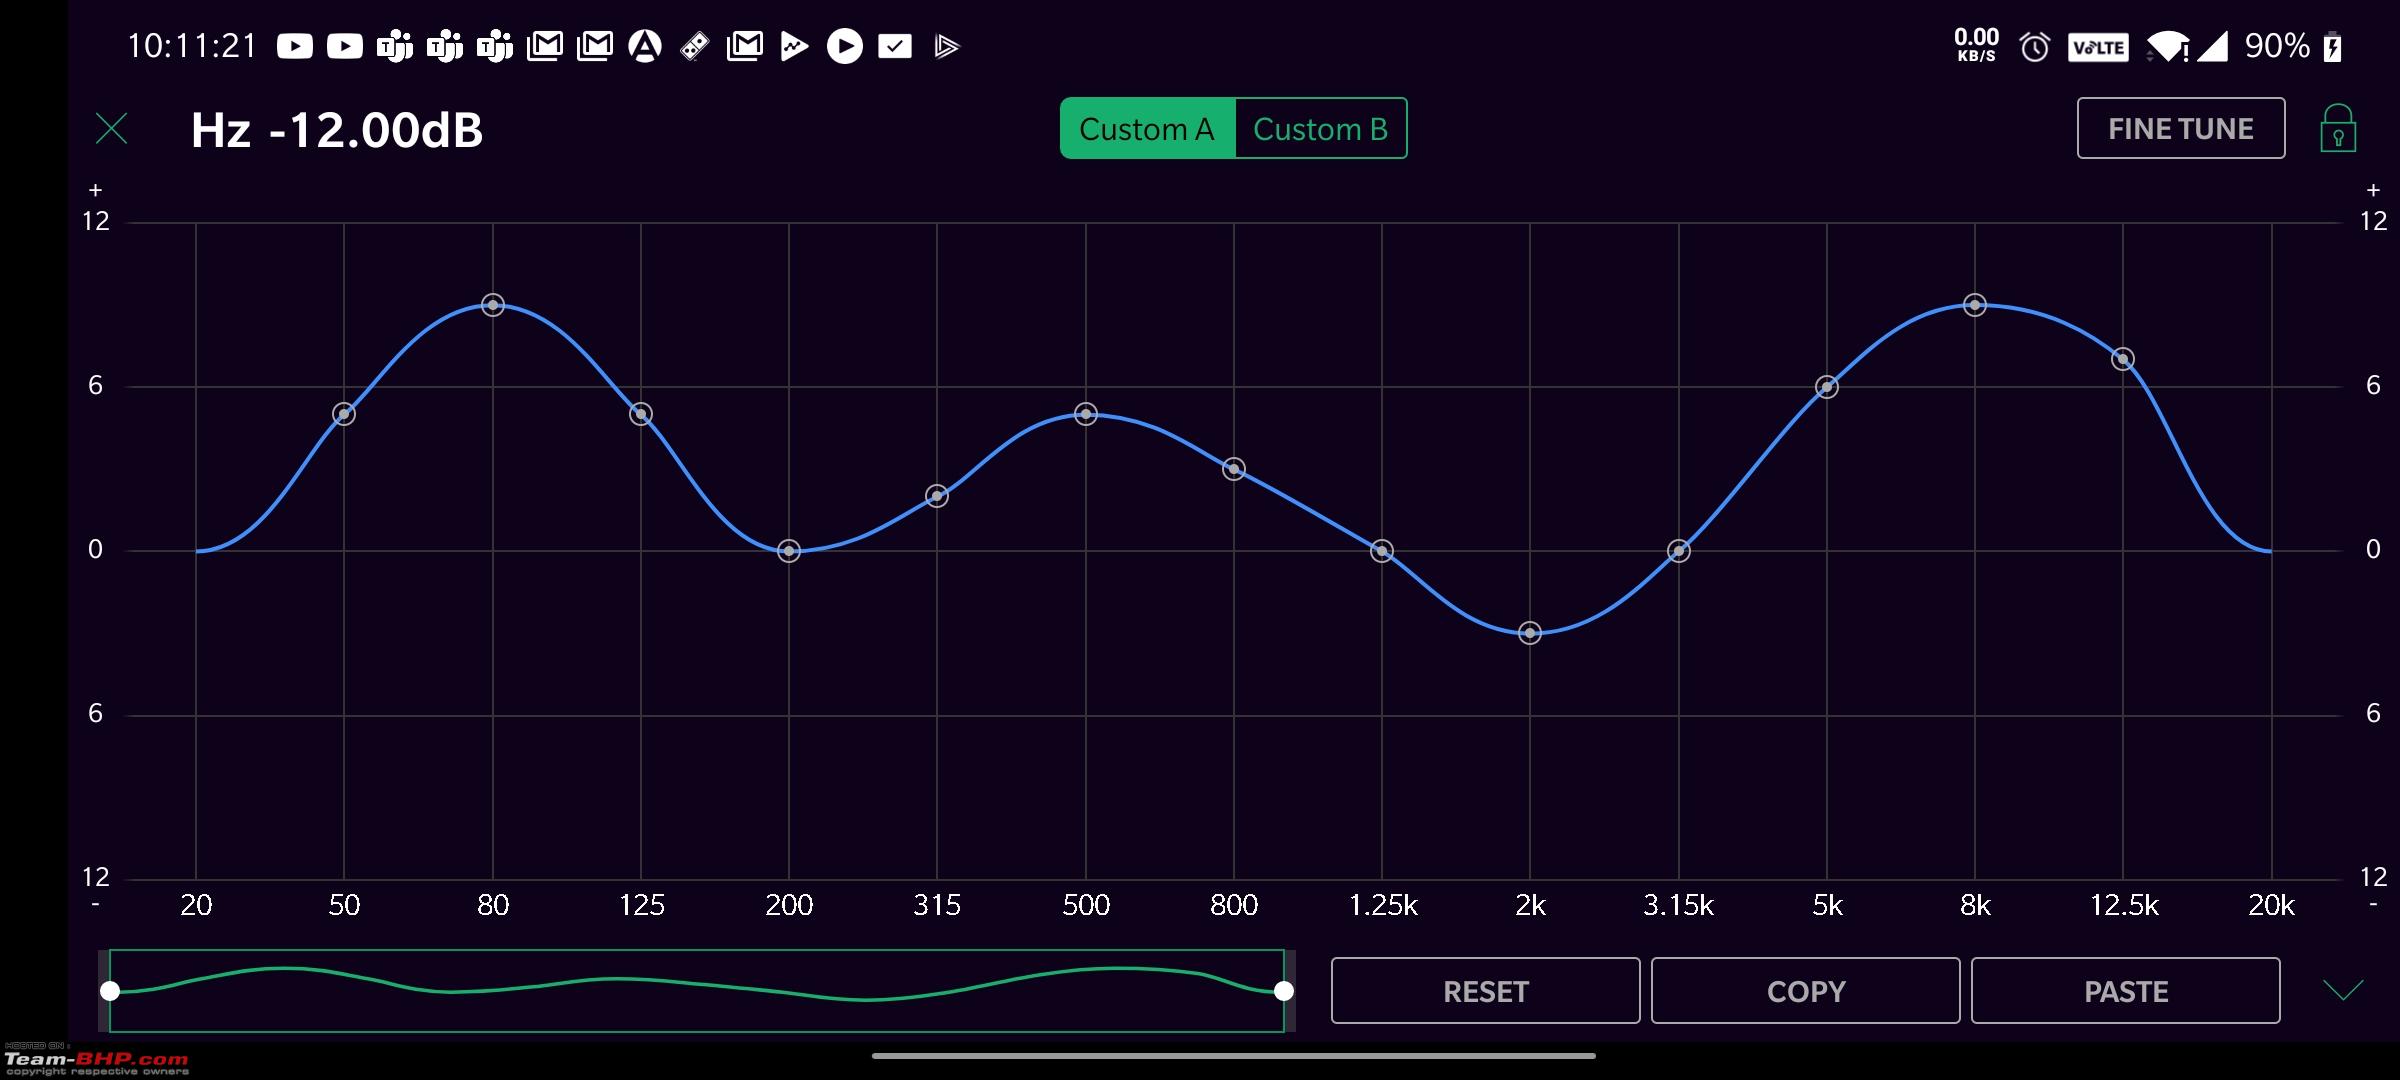 Well, with all of this, it should sound good right? It did, I was starting to enjoy the music now. Let's summarize what we have so far:
Eventually, I bit the bullet and decided to replace the 4-channel Pioneer AMP with something from JL Audio. Enter the JD400/4 (400 meaning 400W and /4 meaning 4 channels). The JD series is the starting point of JL Audio's AMP lineup (sitting just above their MX series) and it certainly sounds as good as it looks. All the AMPs in all the series that JL Audio makes are Class D.     The music came alive with this AMP, everything was crisper, cleaner and had great detail. It is hard to put sound into words so please excuse my lacklustre attempts to describe it. This was it, I just needed a push to go beyond the mental block in my head. The current system had reached its limit. Gone are the thoughts of 'Is it worth it?' etc etc. I wanted to build a setup that would just make me go WOW every time I listened to it and would be the end of my desires for better audio. Everything up until now was just a prelude for what is to come next. The BIG Upgrade After endless discussions with Raghu and my own research, we decided on what to do next:
The Hardware A lot of time went into procuring the components needed for this setup, their supply is limited and the pandemic made things worse. I had to wait months for certain parts, but as they say, good things come to those who wait. Here's what's being used:
 Speakers The C7 sits at the top of JL Audio's speaker range (at the time of writing this) followed by the C3, C2 and C1. As mentioned earlier, the C5 is discontinued and expected to be replaced by the C6. Something which I waited for but never materialized. In order to provide maximum flexibility, the C7 speakers are sold individually (6.5" woofer, 3.5" midrange and 1" tweeter) and don't have any sort of passive crossover. They are only meant for active setups. Their craftsmanship is exquisite and nothing short of sheer perfection. Every single C7 speaker is tested by JL Audio and the acoustic report can be downloaded from their website, by entering the serial no of the speaker. This was easier said than done though! When I tried getting the reports for my speakers, the website threw up an error message. I sent an email to their support and they said they would look into it, stating that there was some issue with their backend system. This went on for months and eventually, they sent the reports. It's not like this is a super important thing but still, was sure a pain in the backside. The 6.5" C7-650cw (125W RMS)  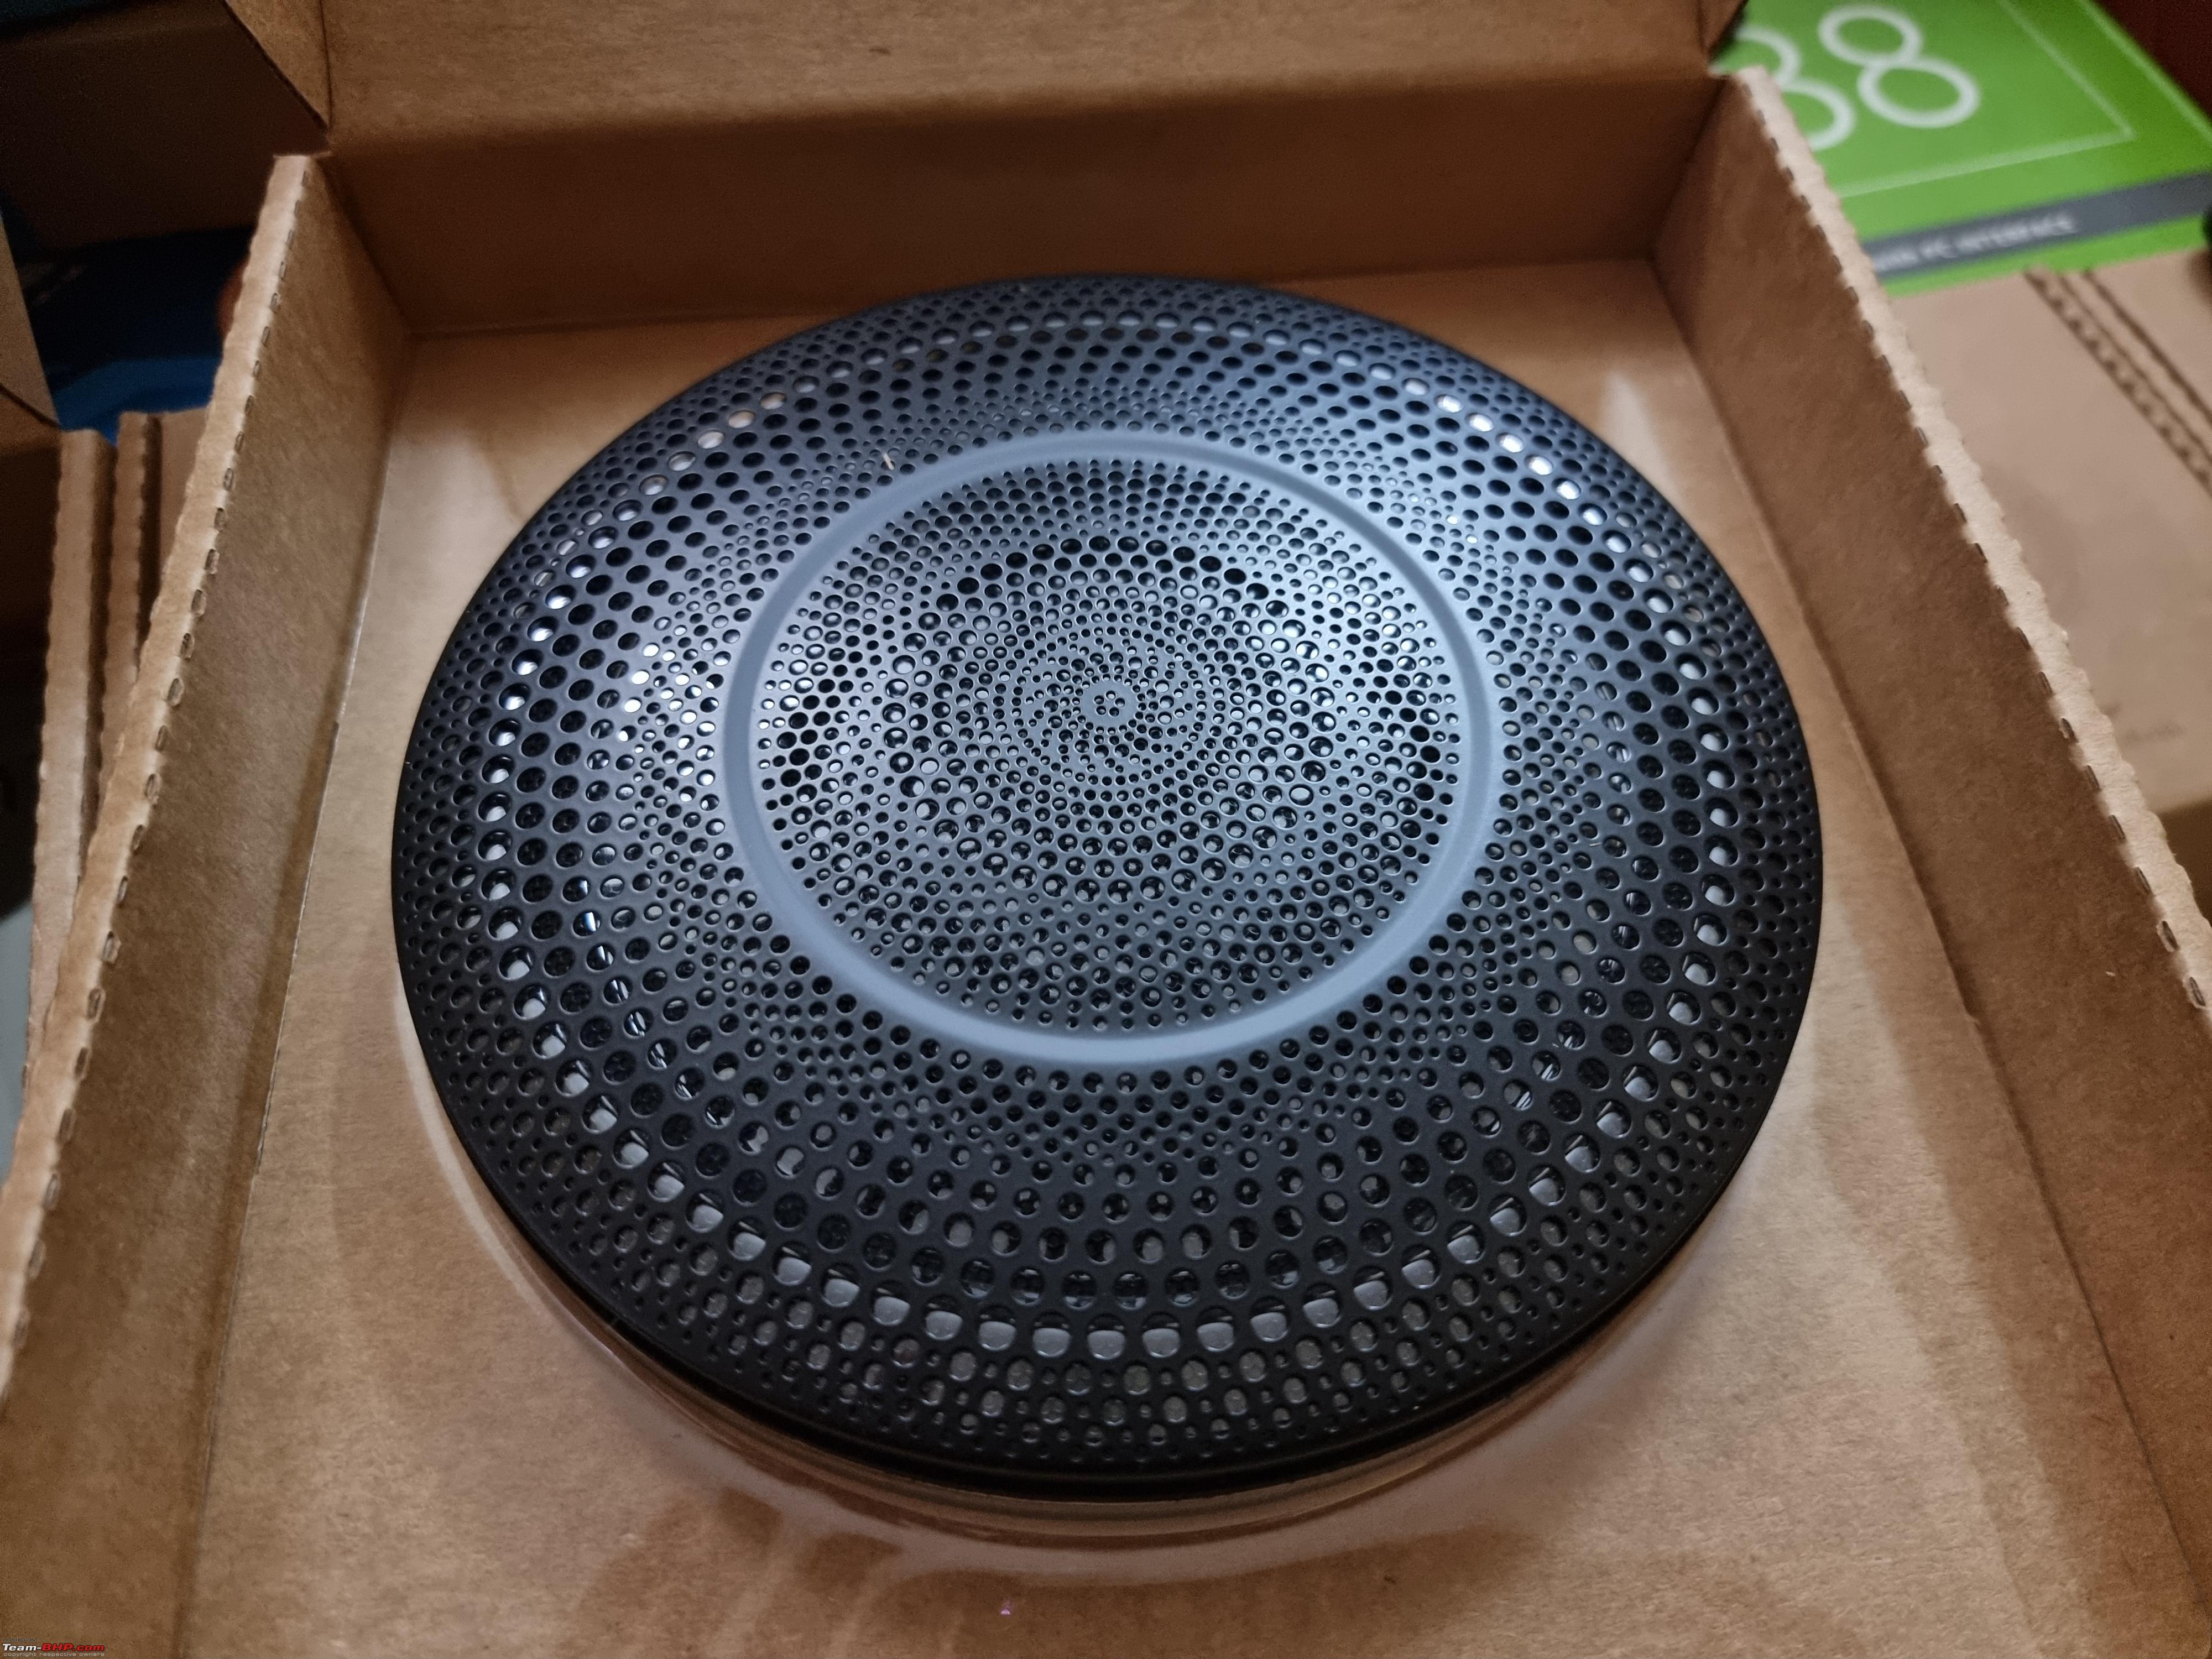   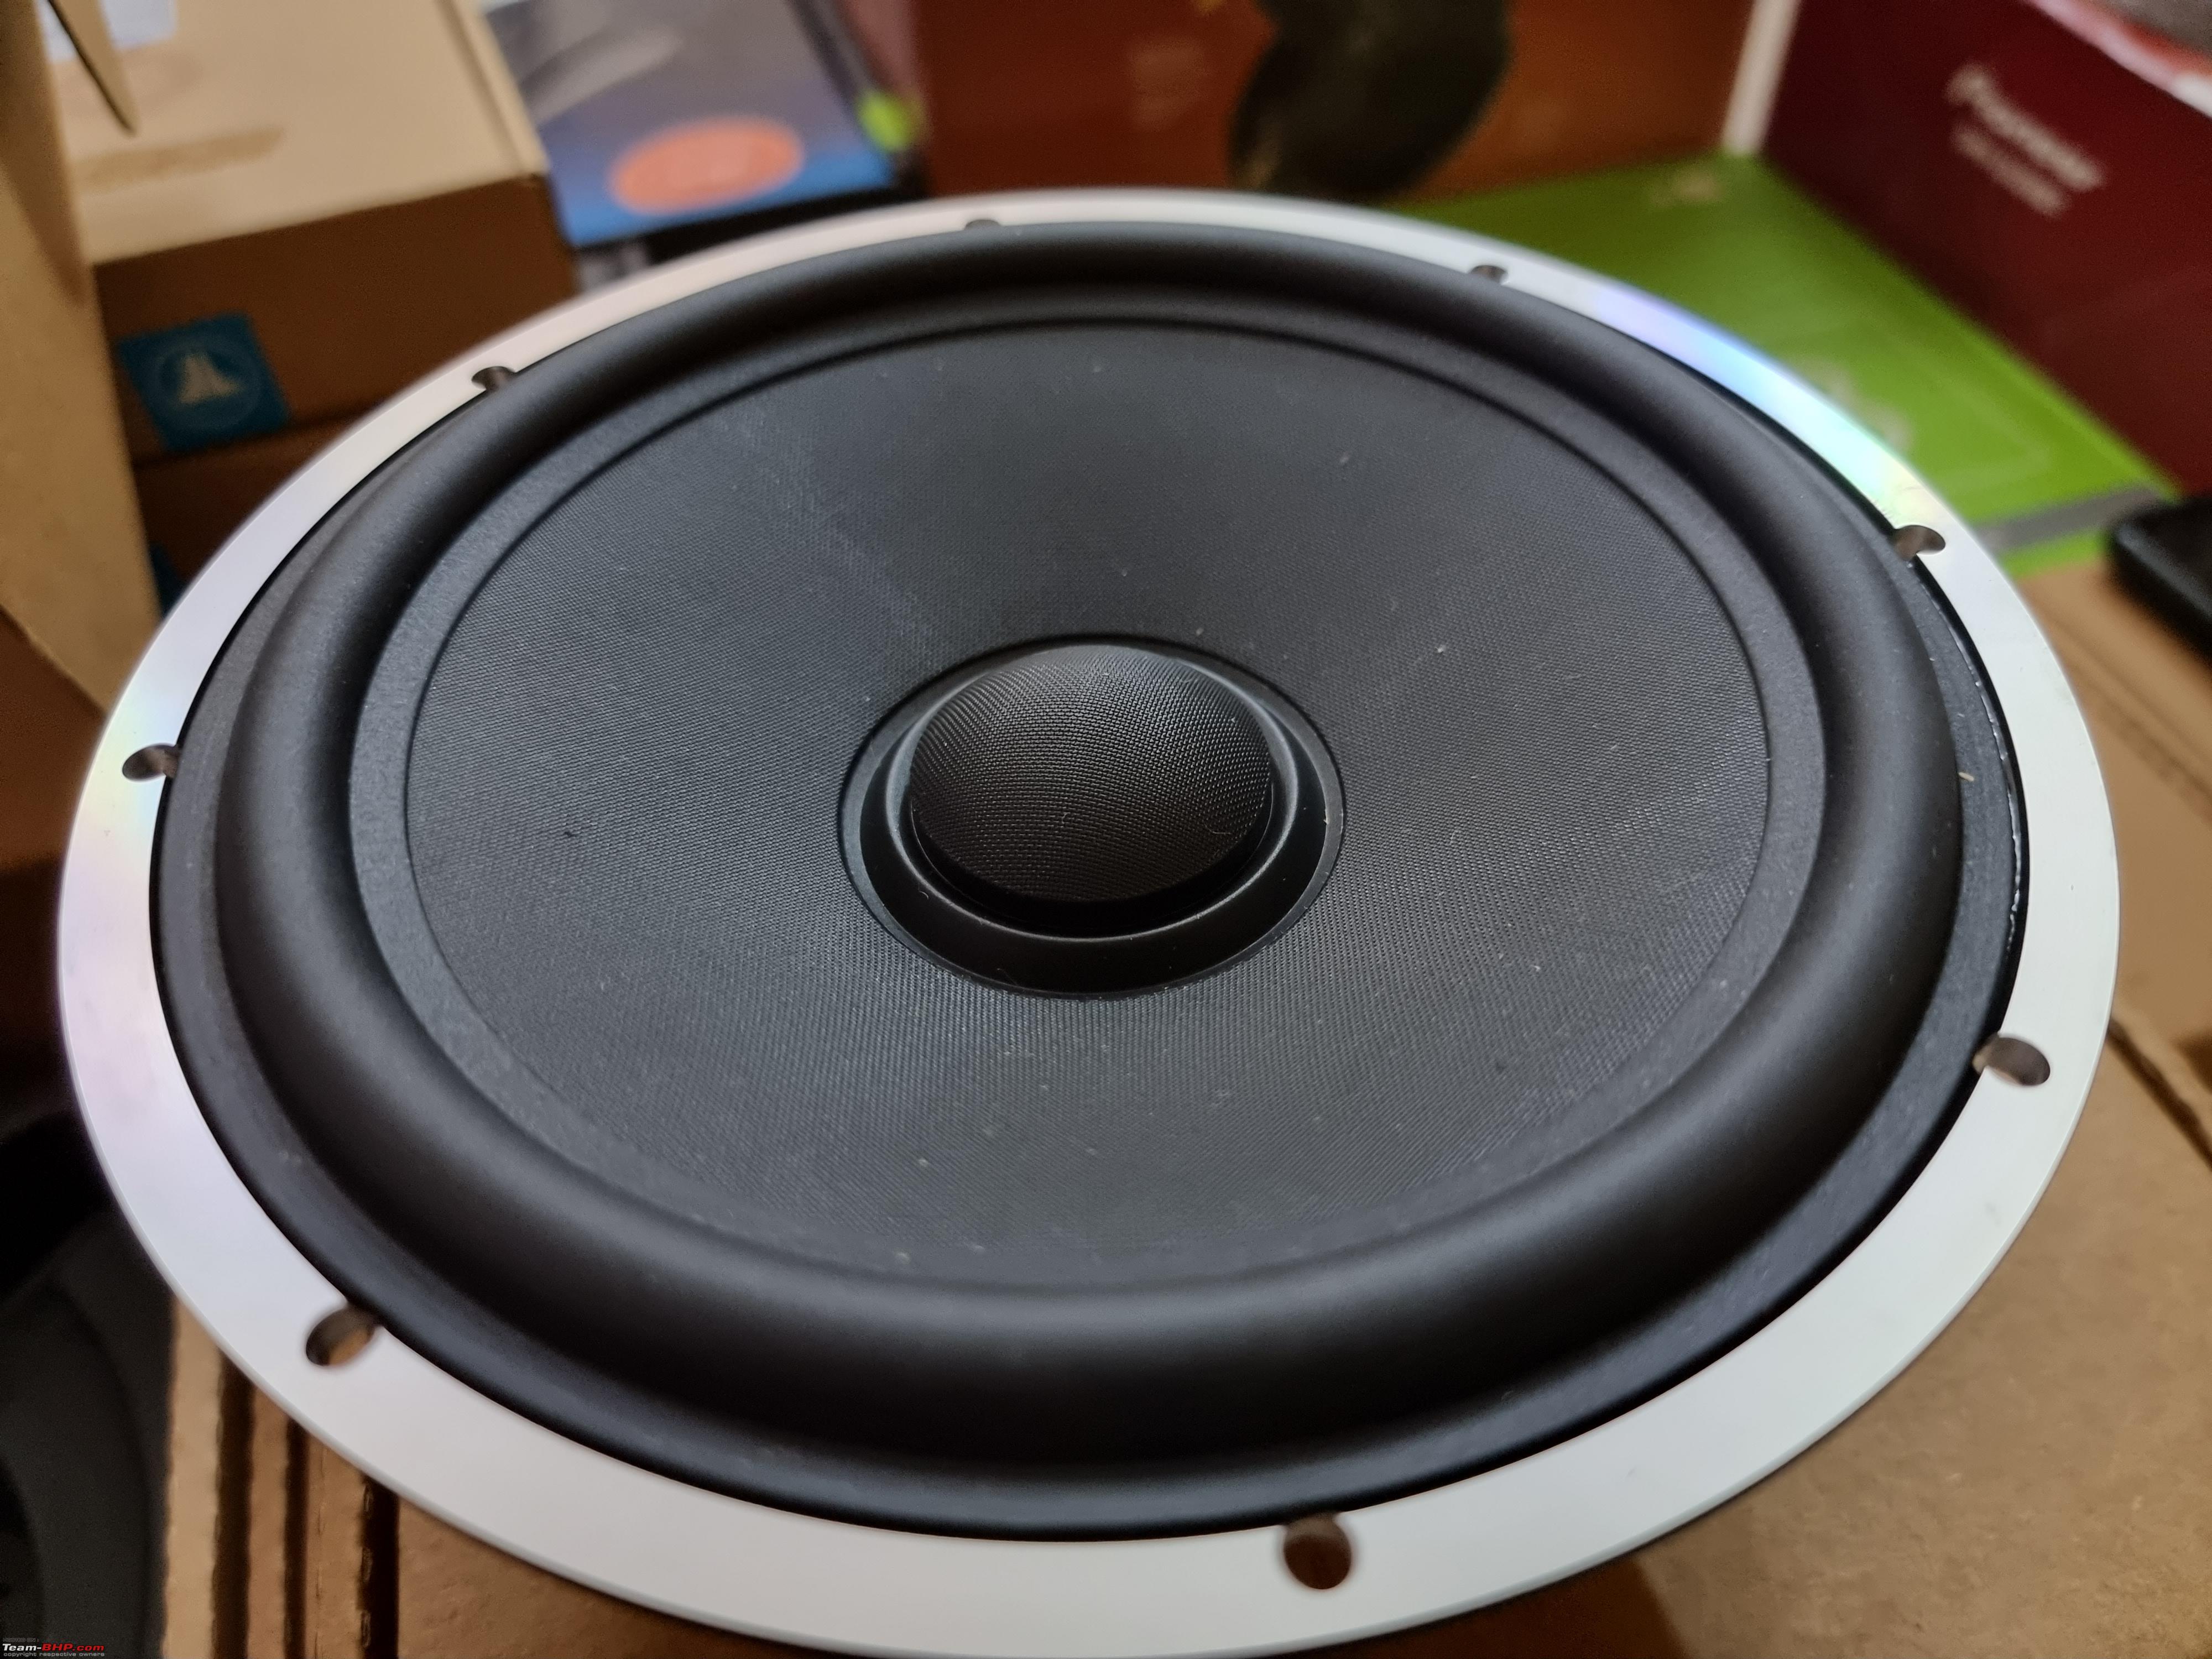   Test report for one of the 6.5" drivers. The C7's have great off-axis staging 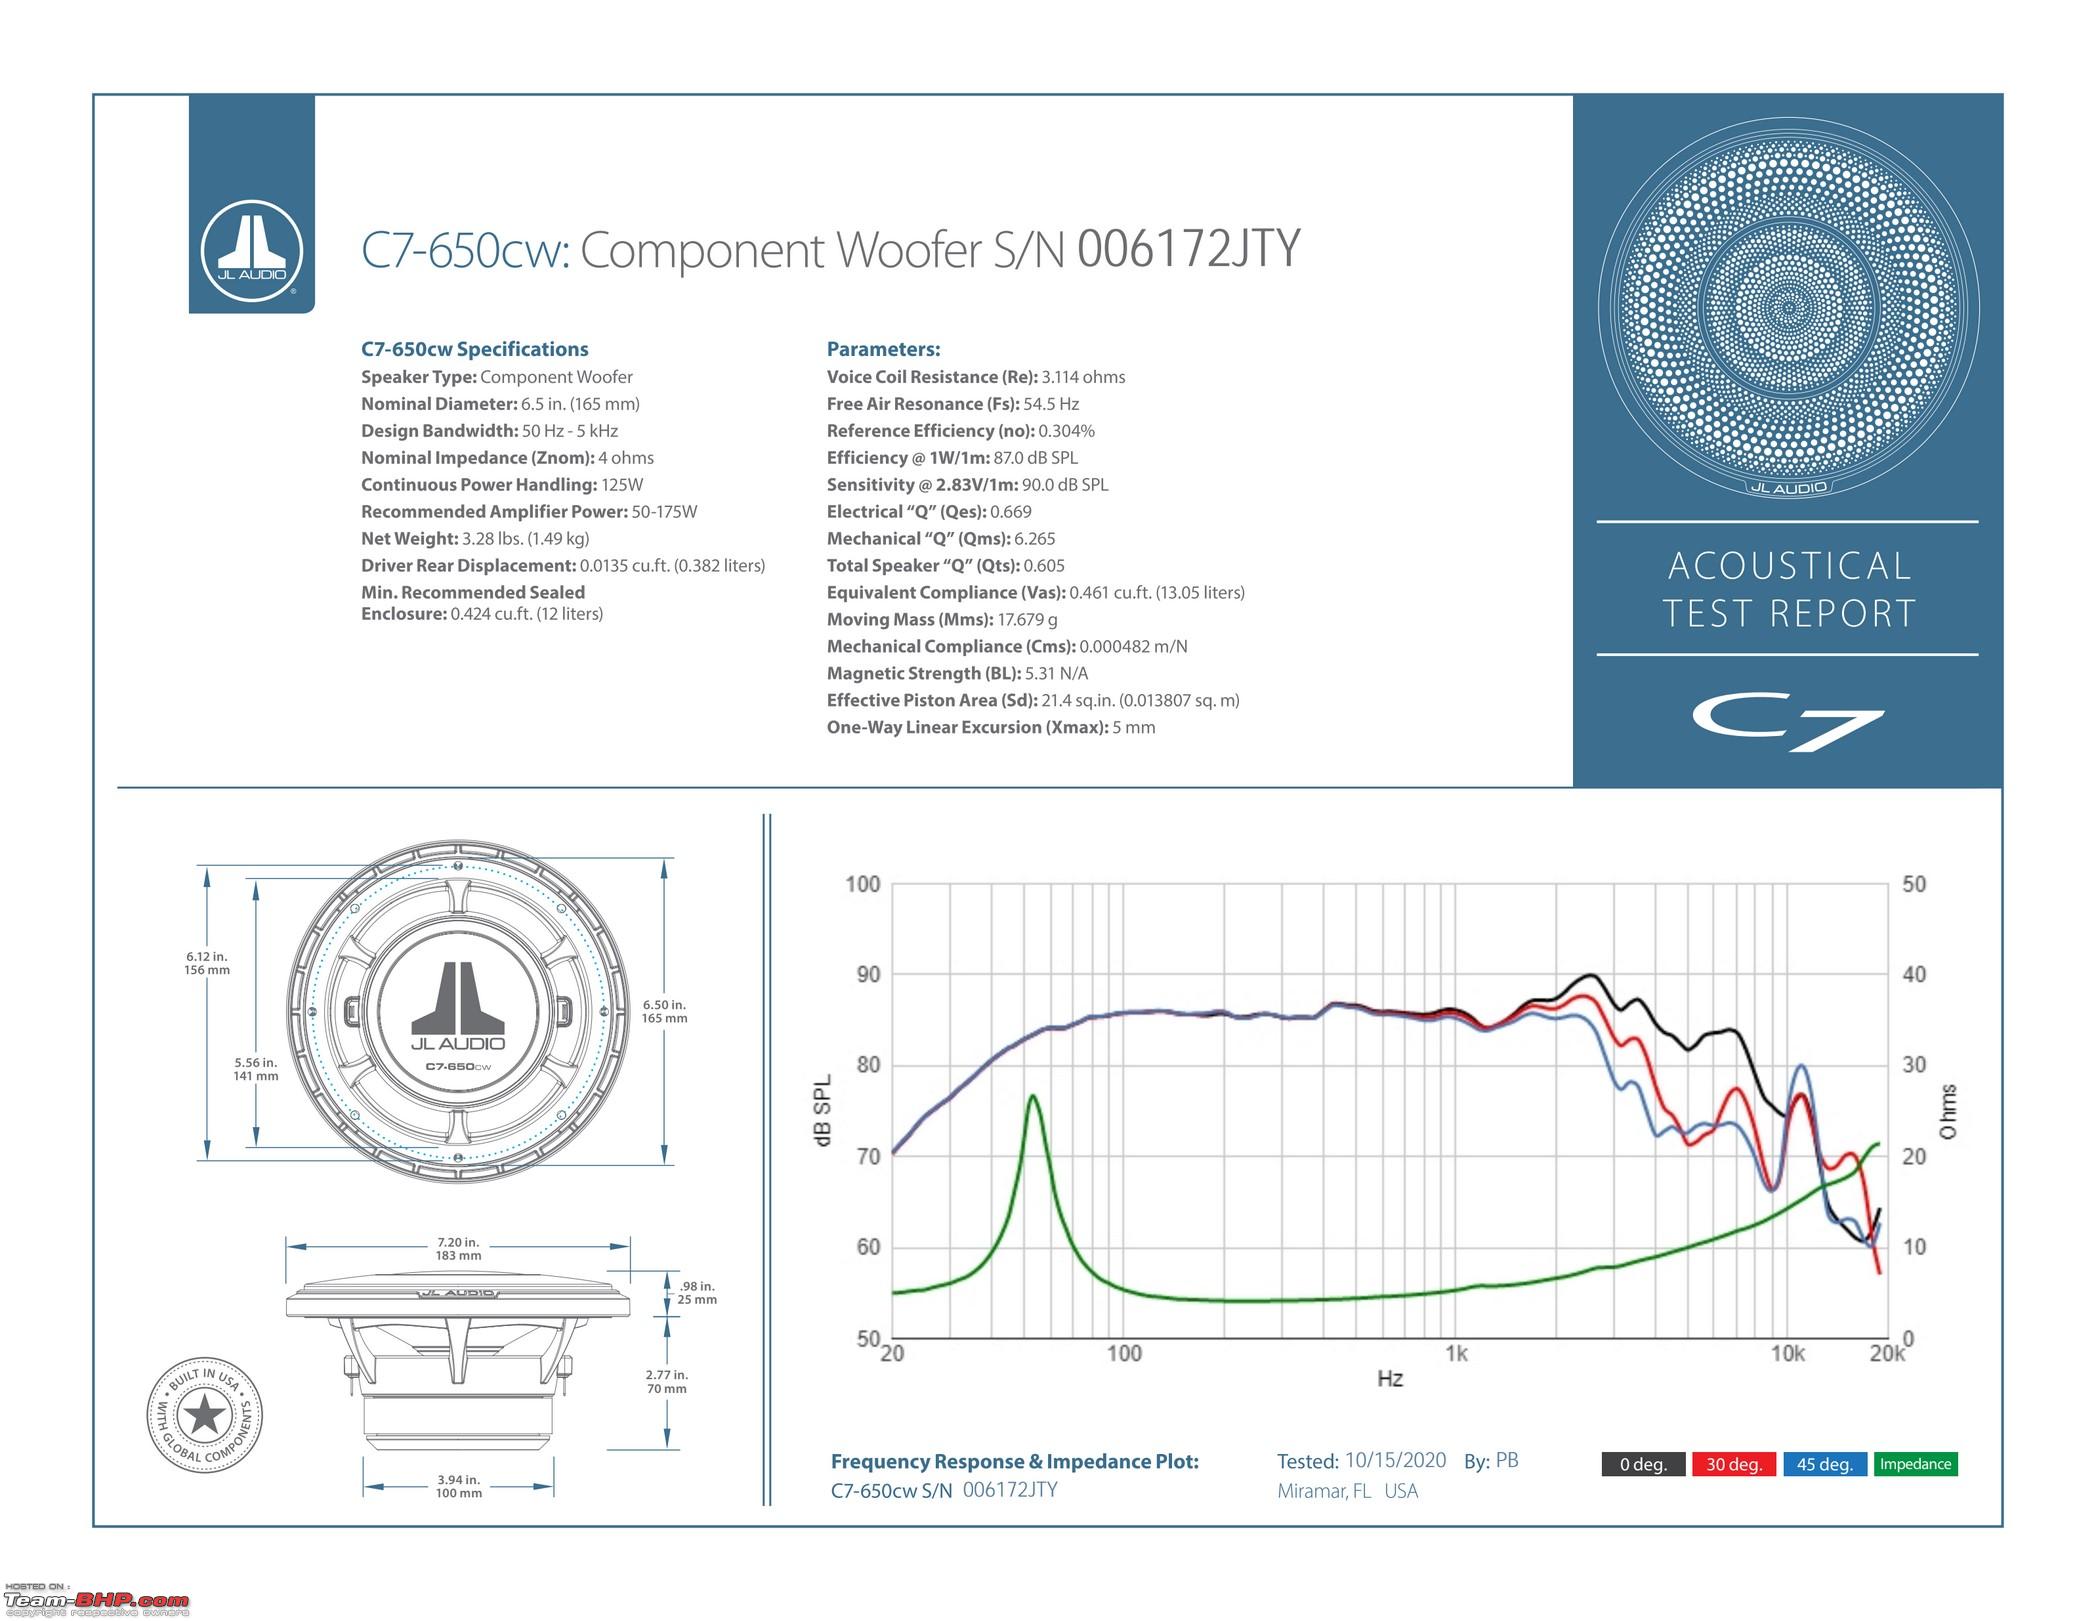 The 3.5" C7-350cm (100W RMS) 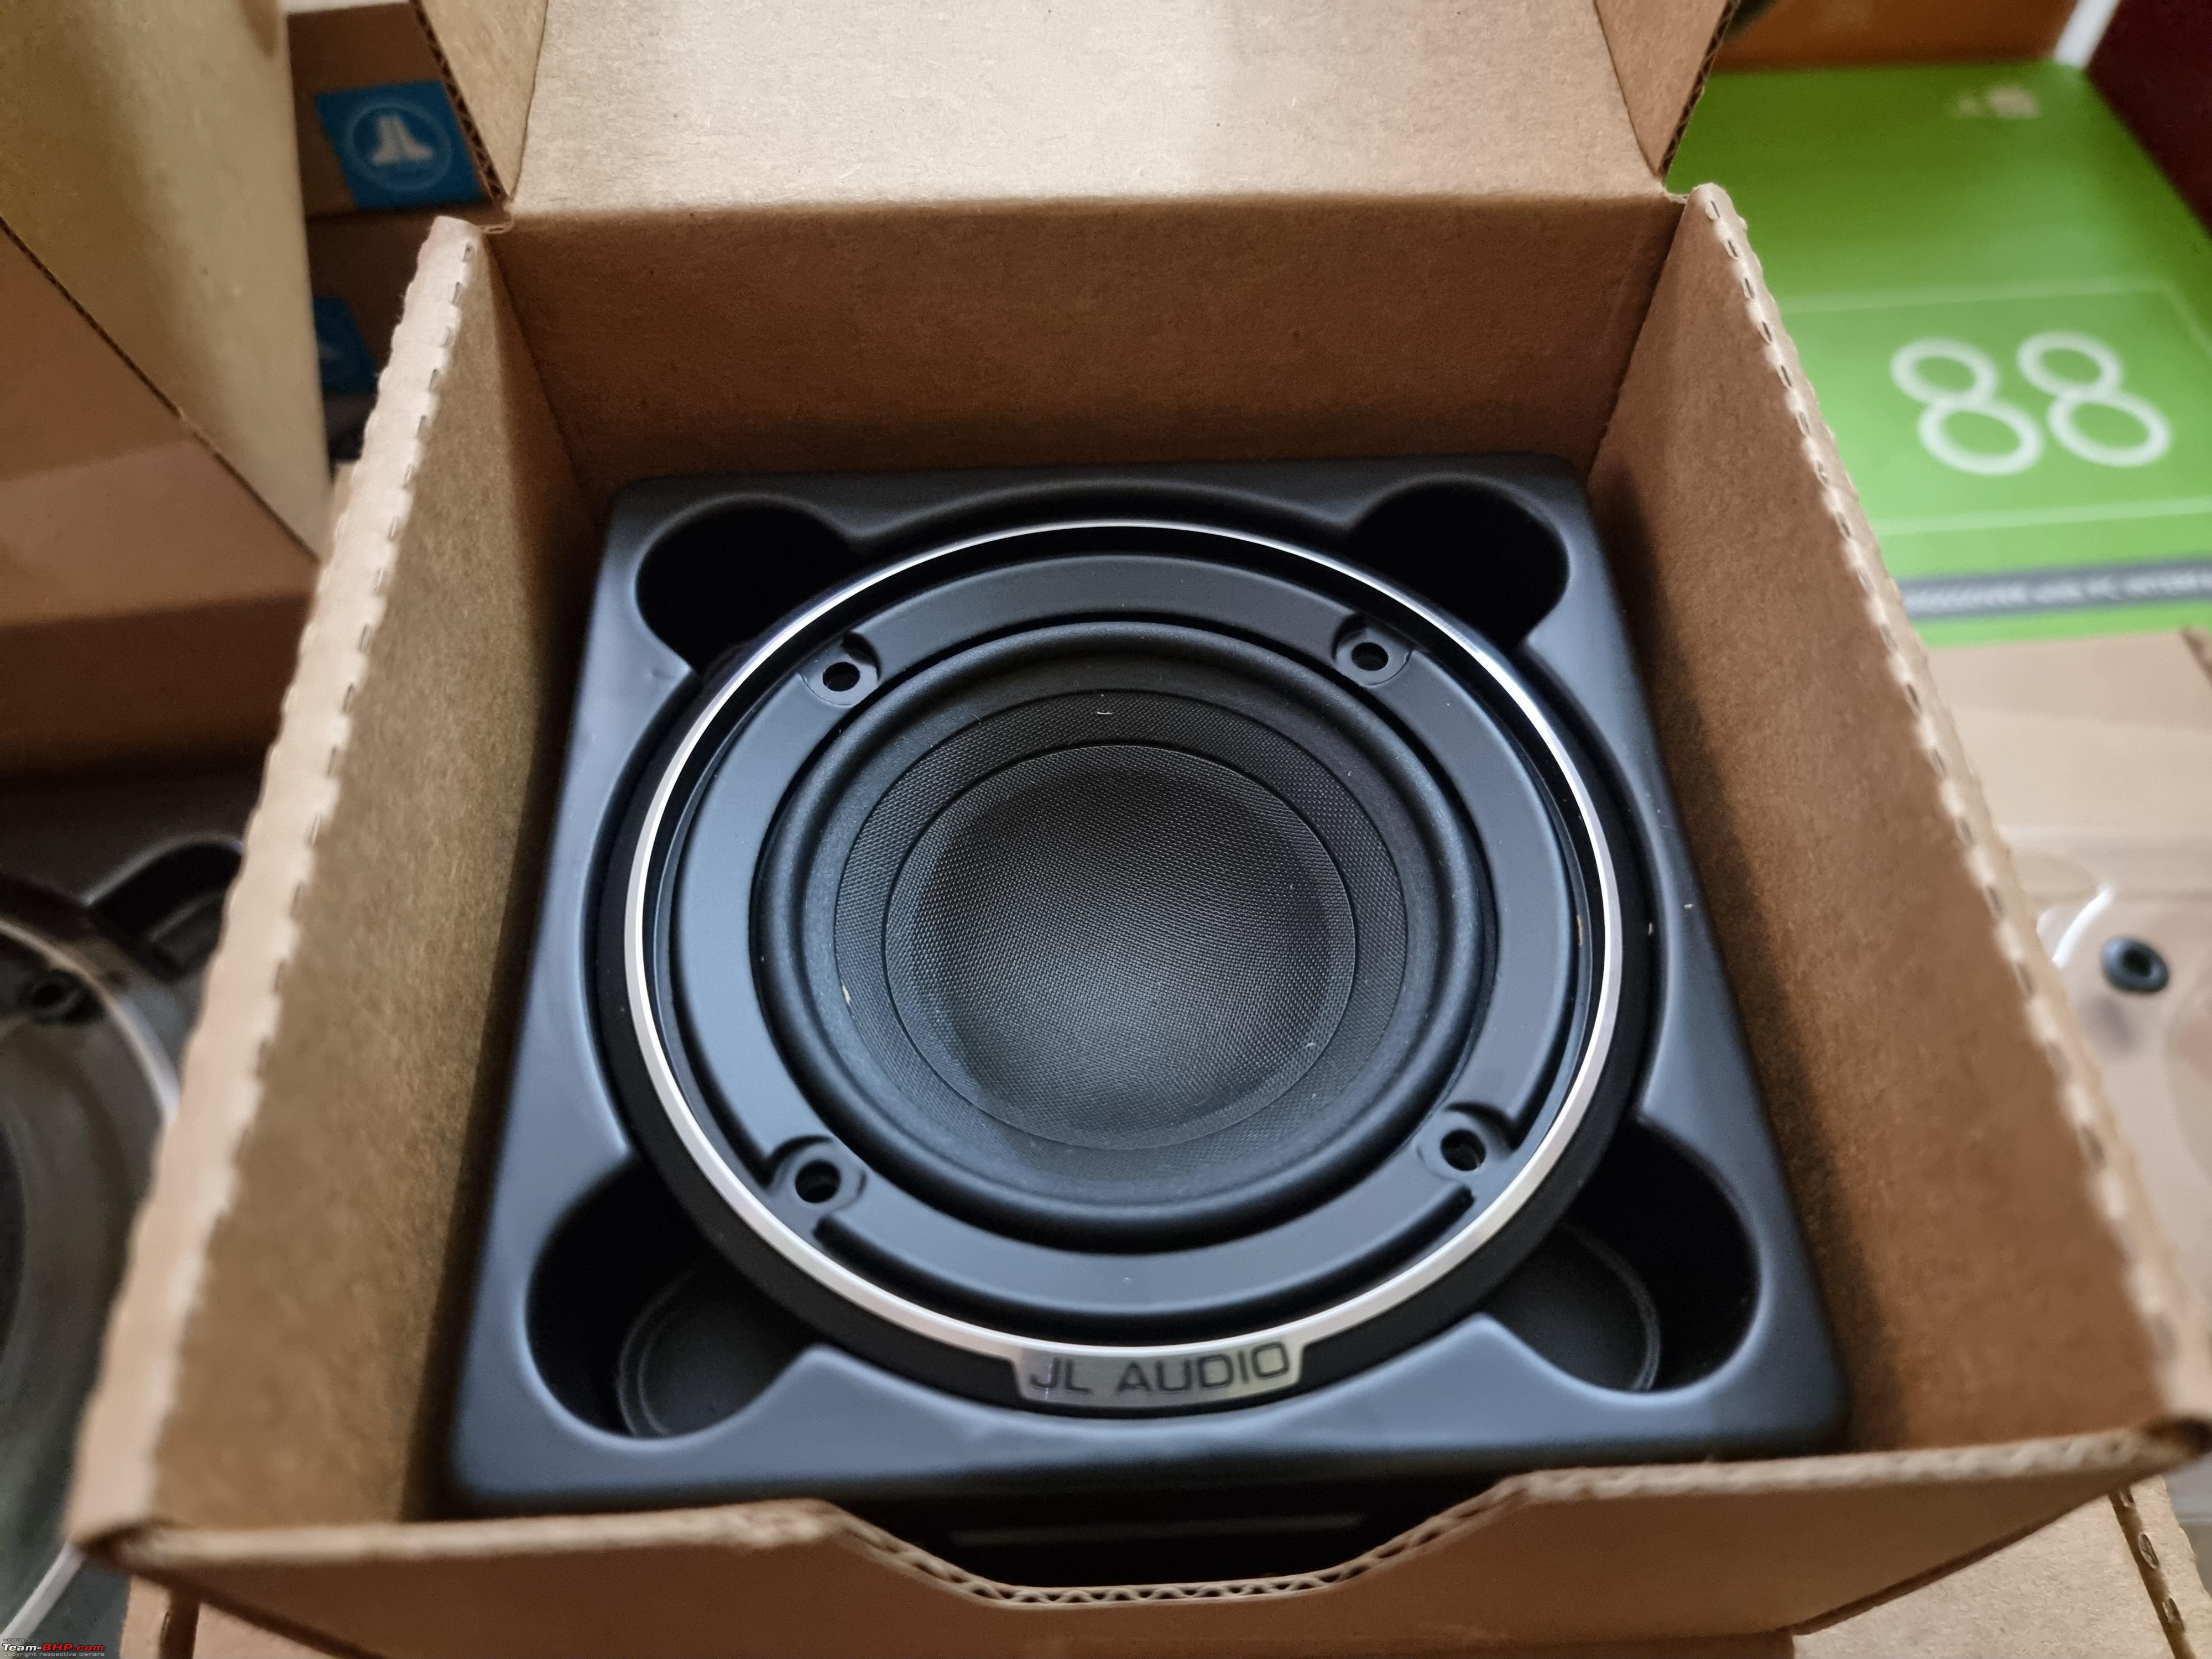 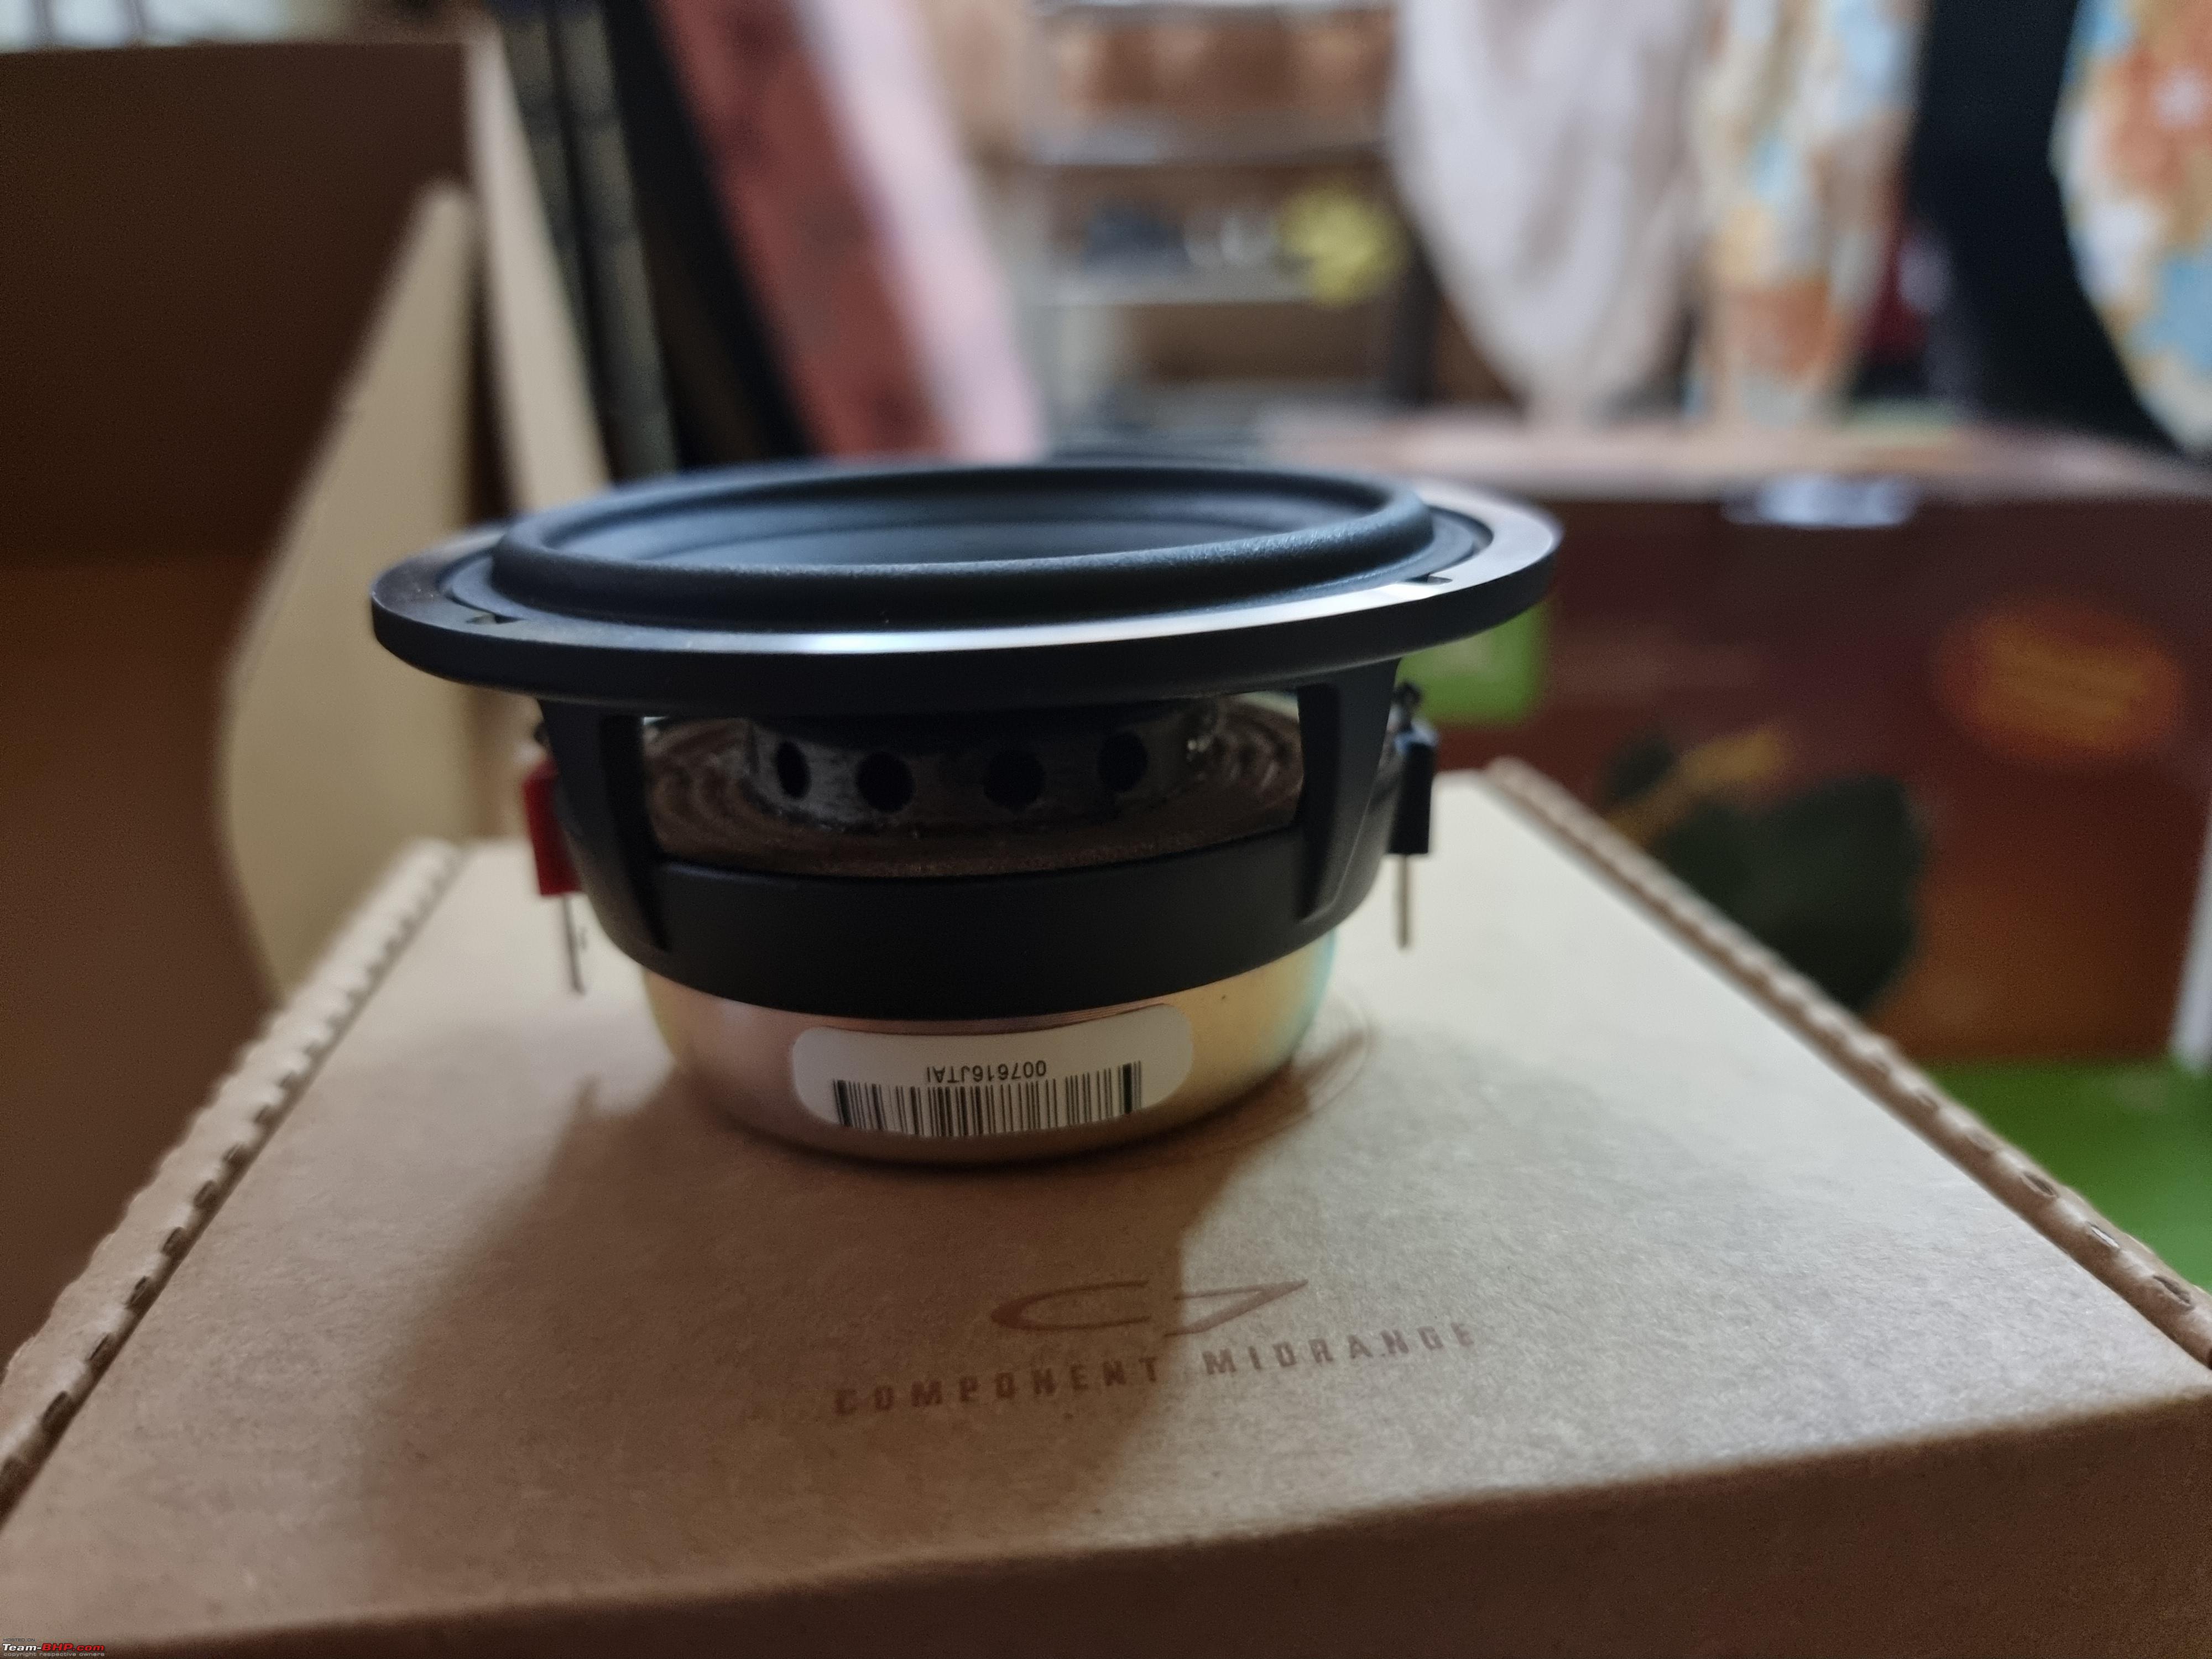  Nice to see 2 grill options with the 3.5" driver, in case you want to keep things simple 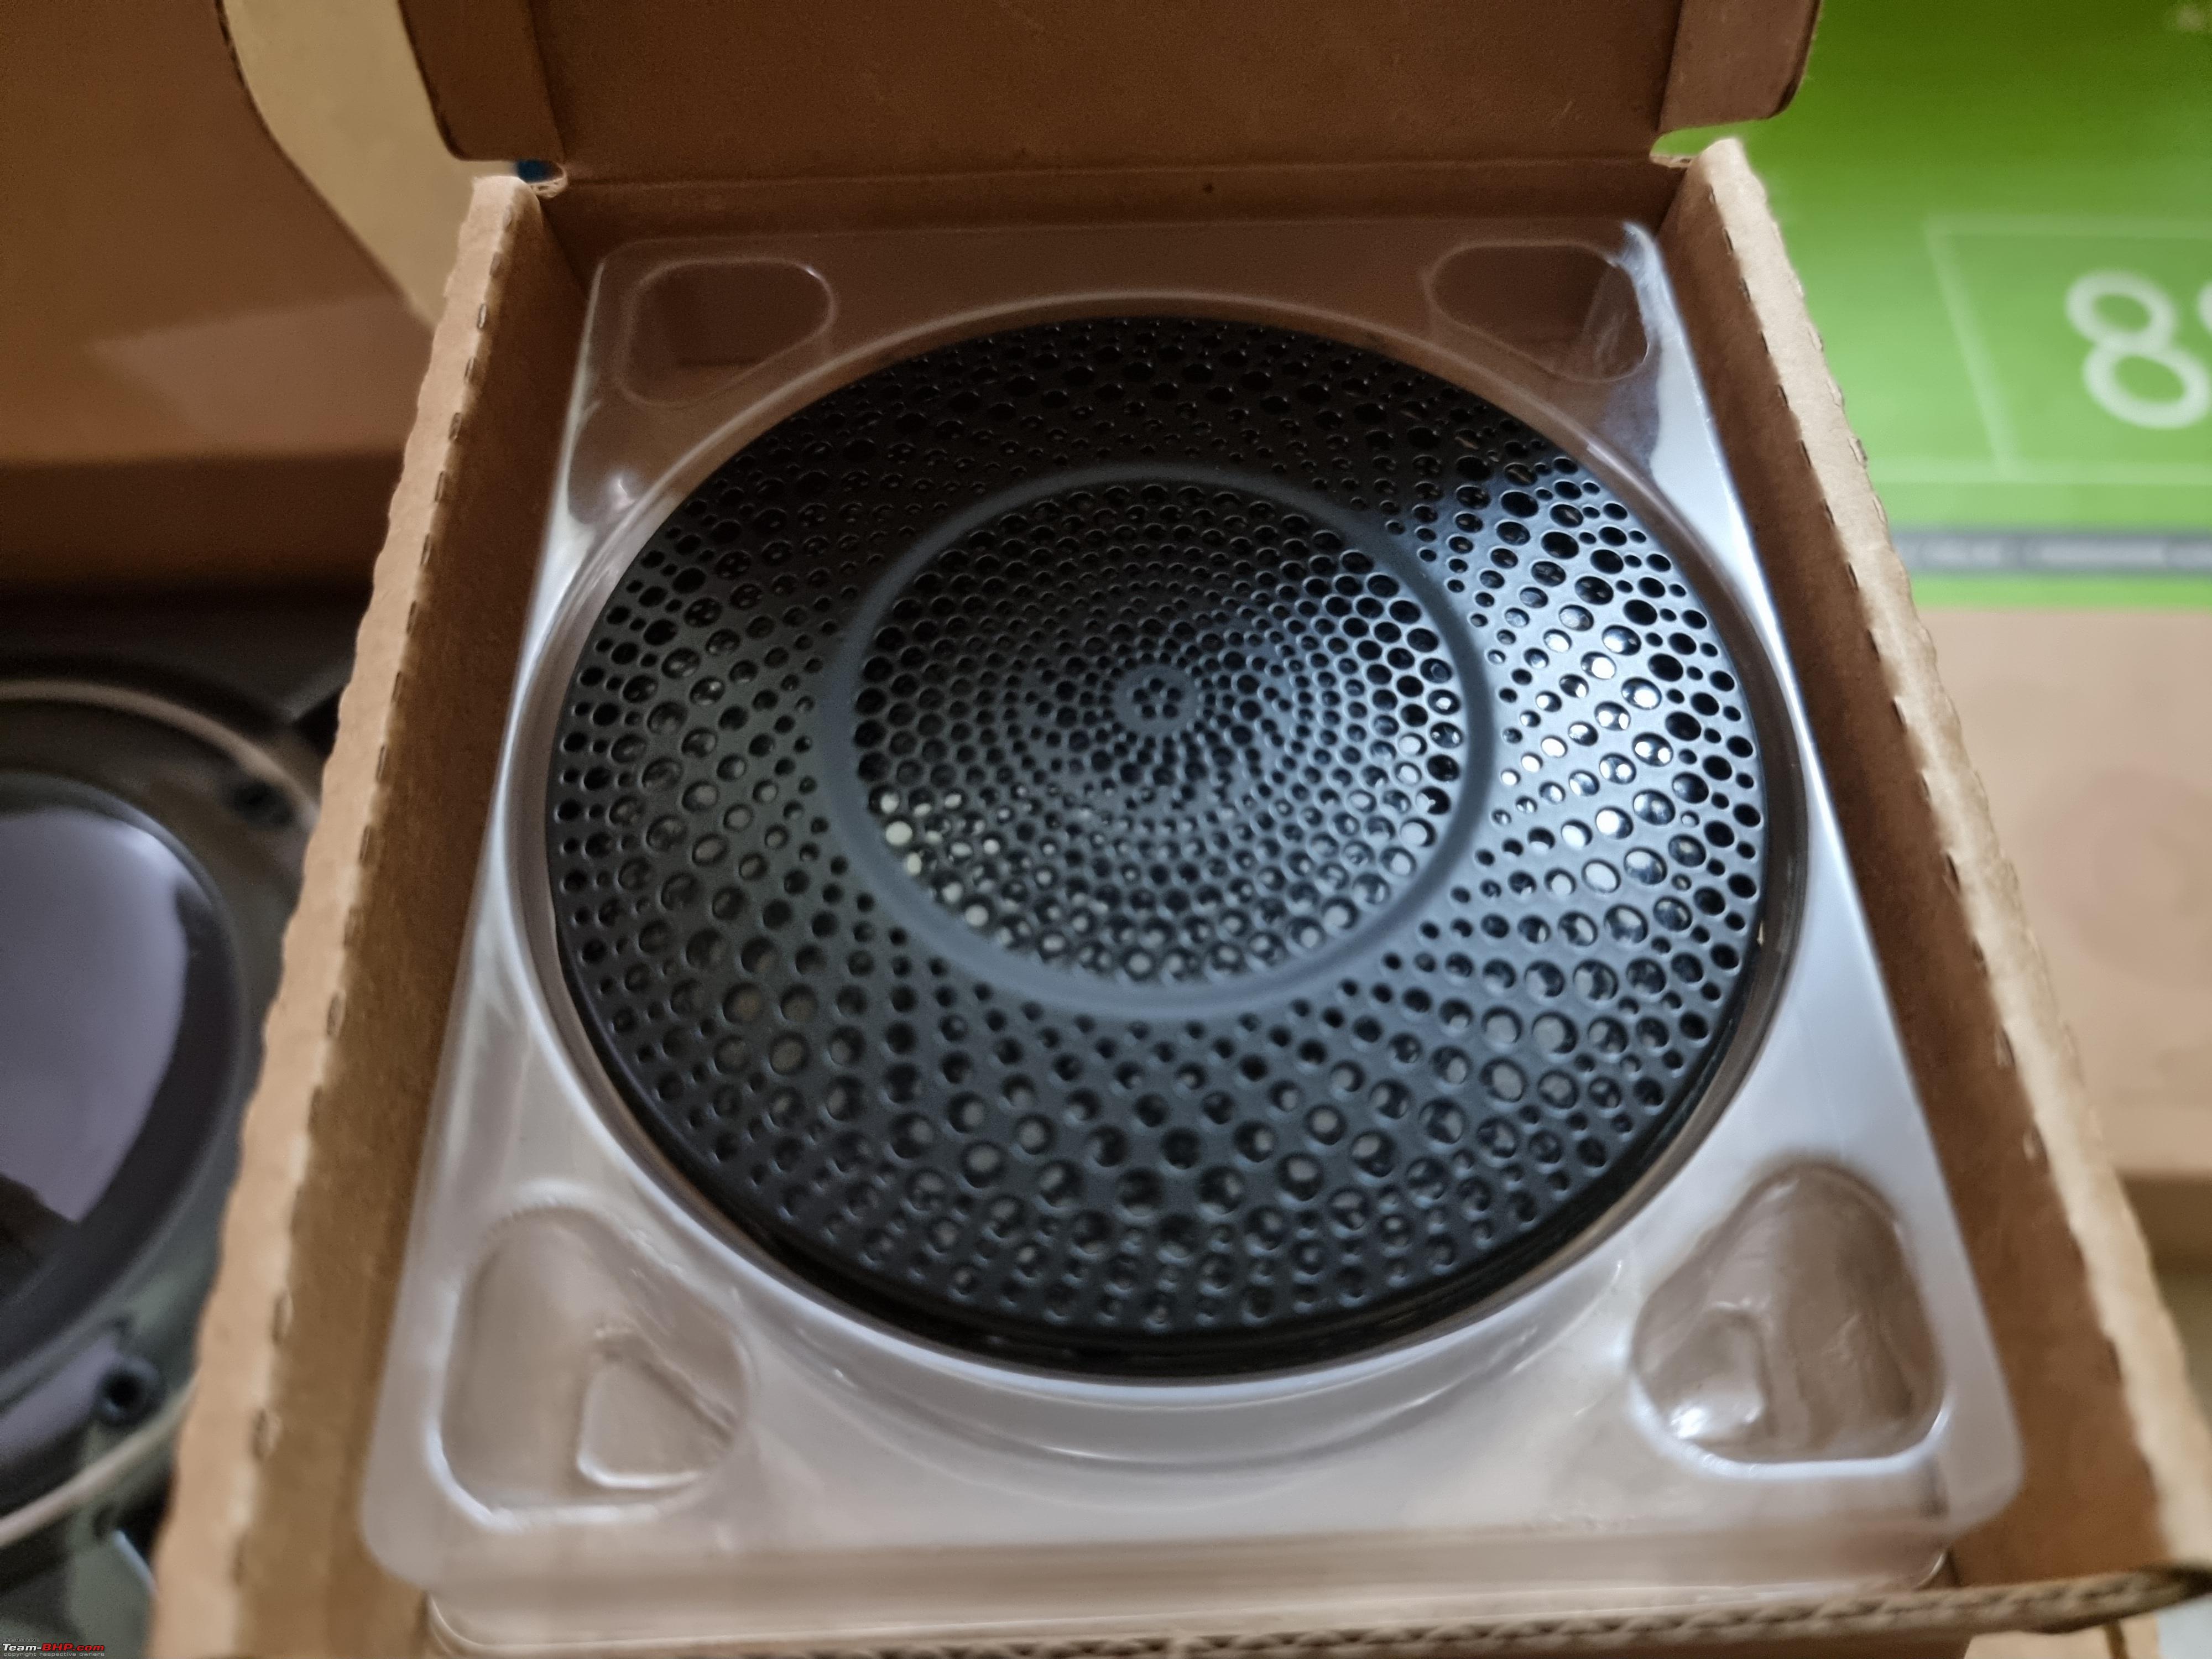 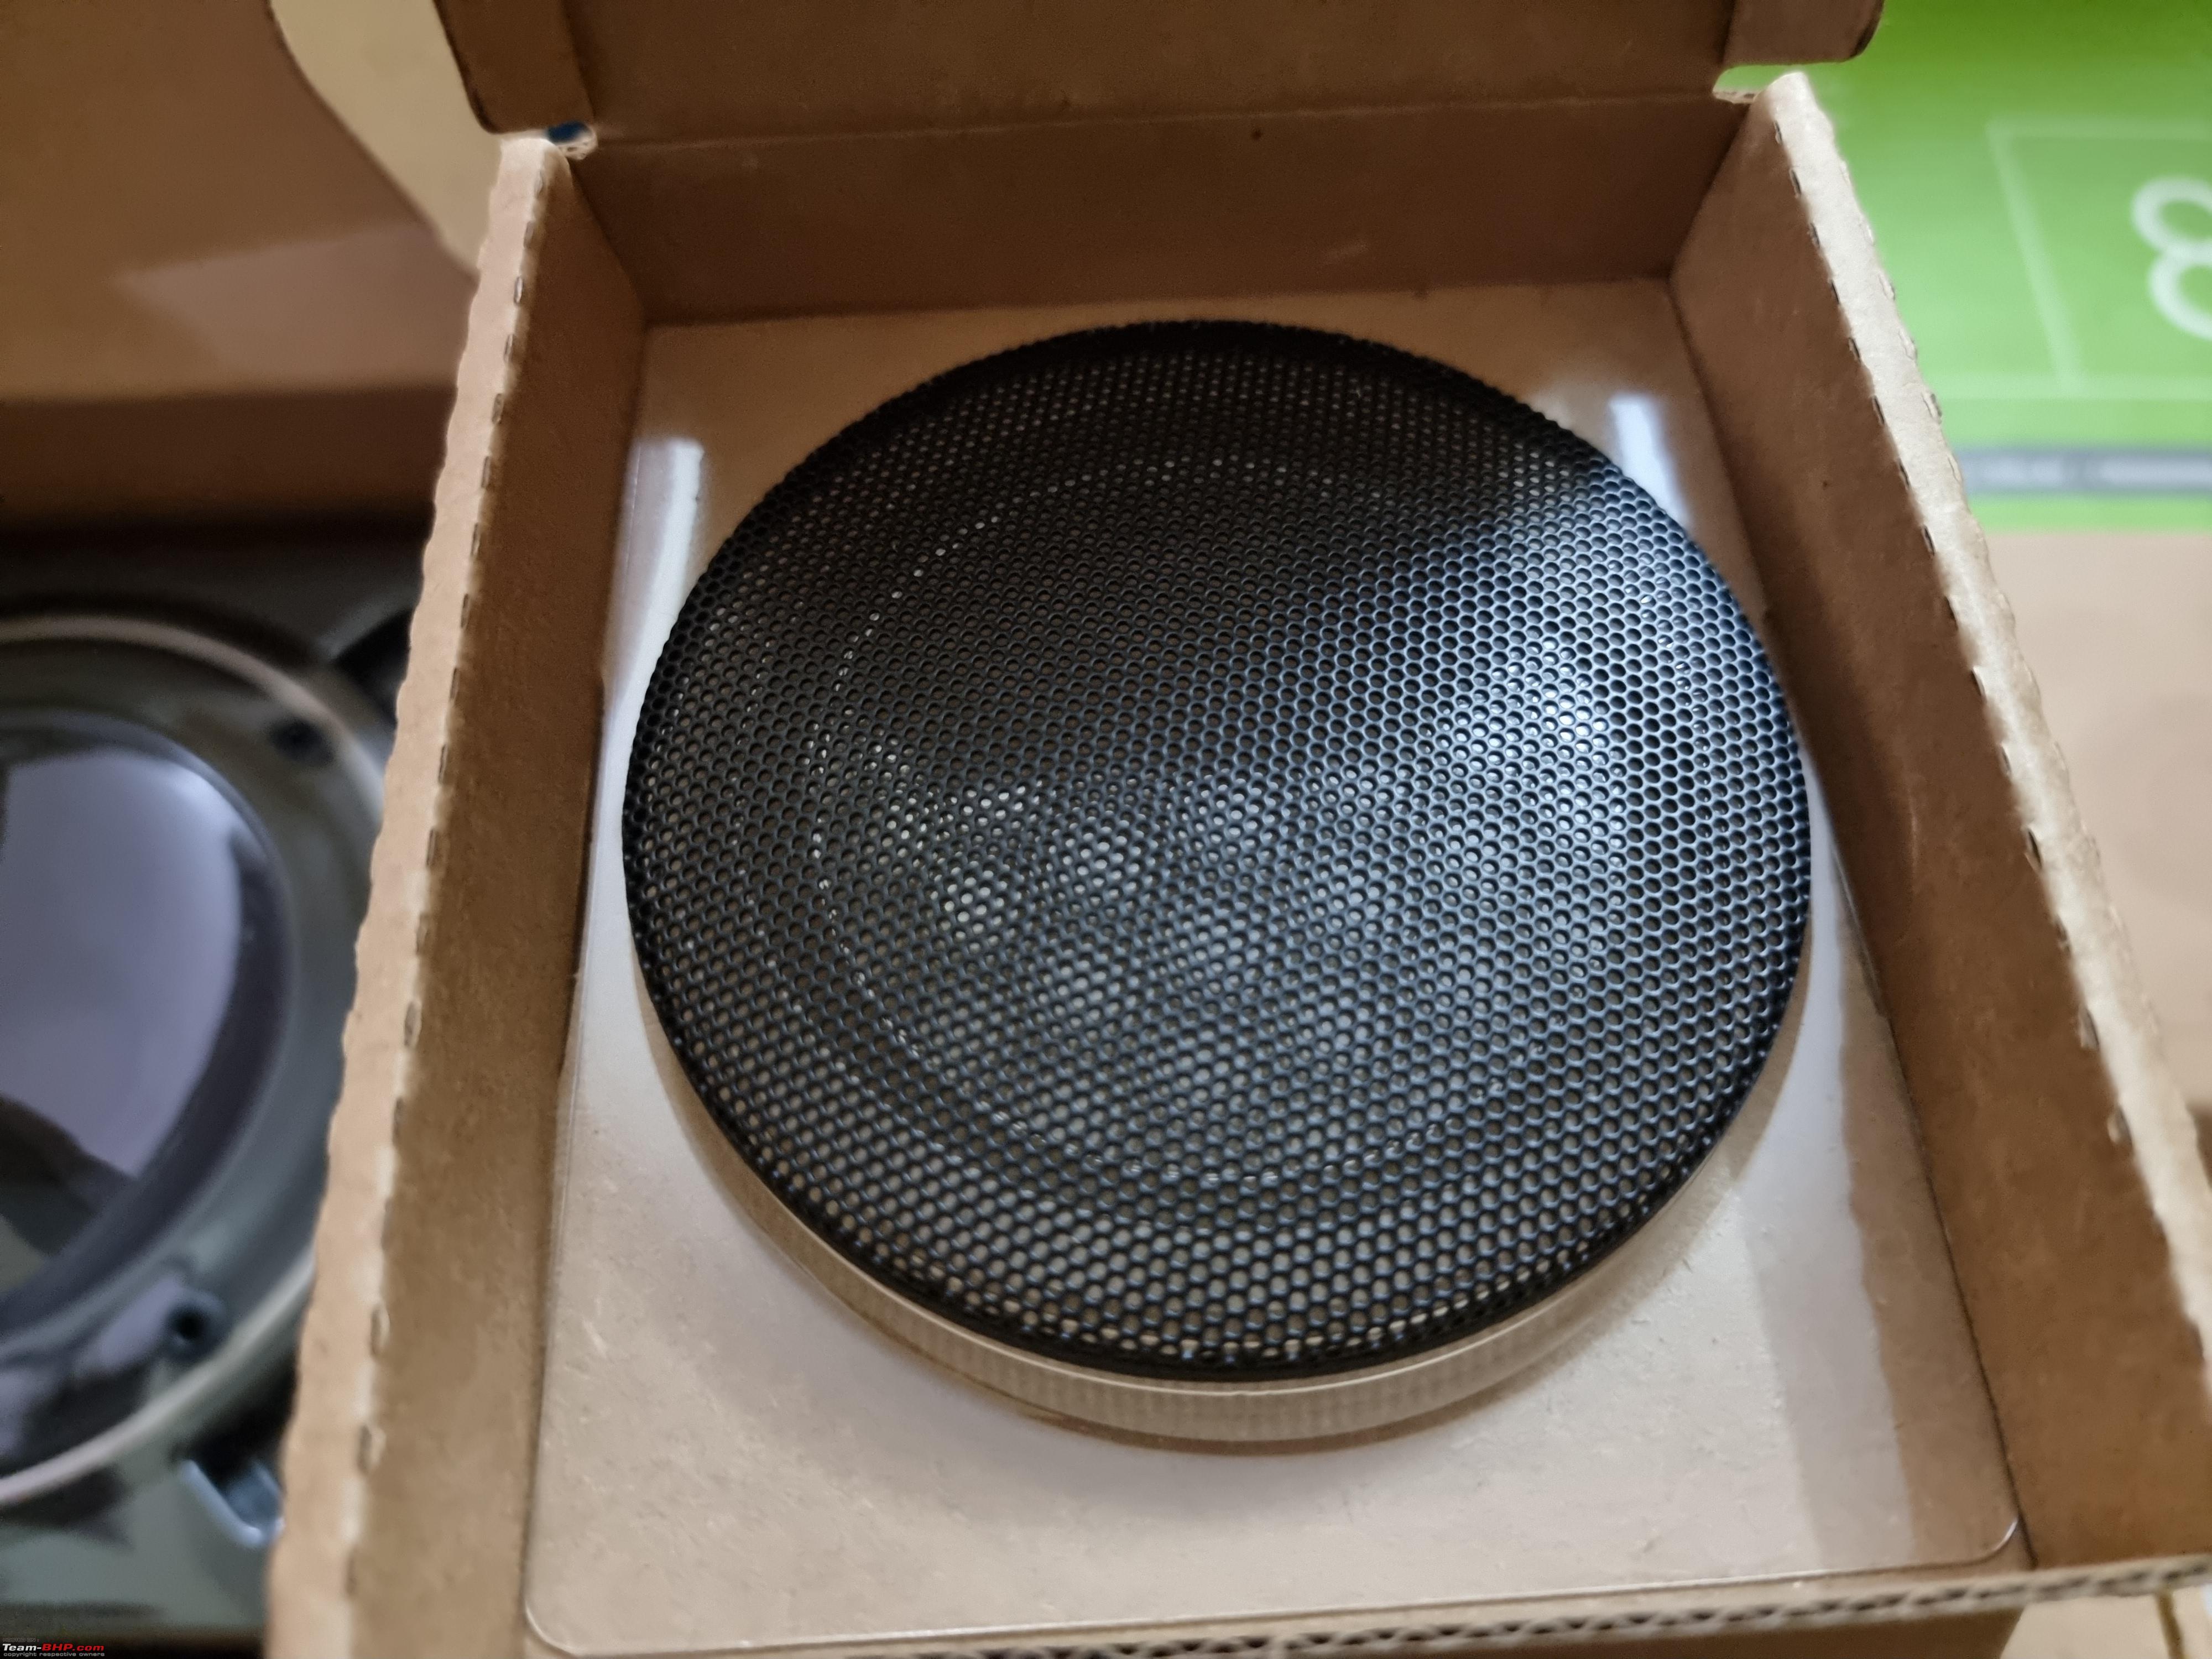 Lastly, the 1" C7-100ct (100W RMS) 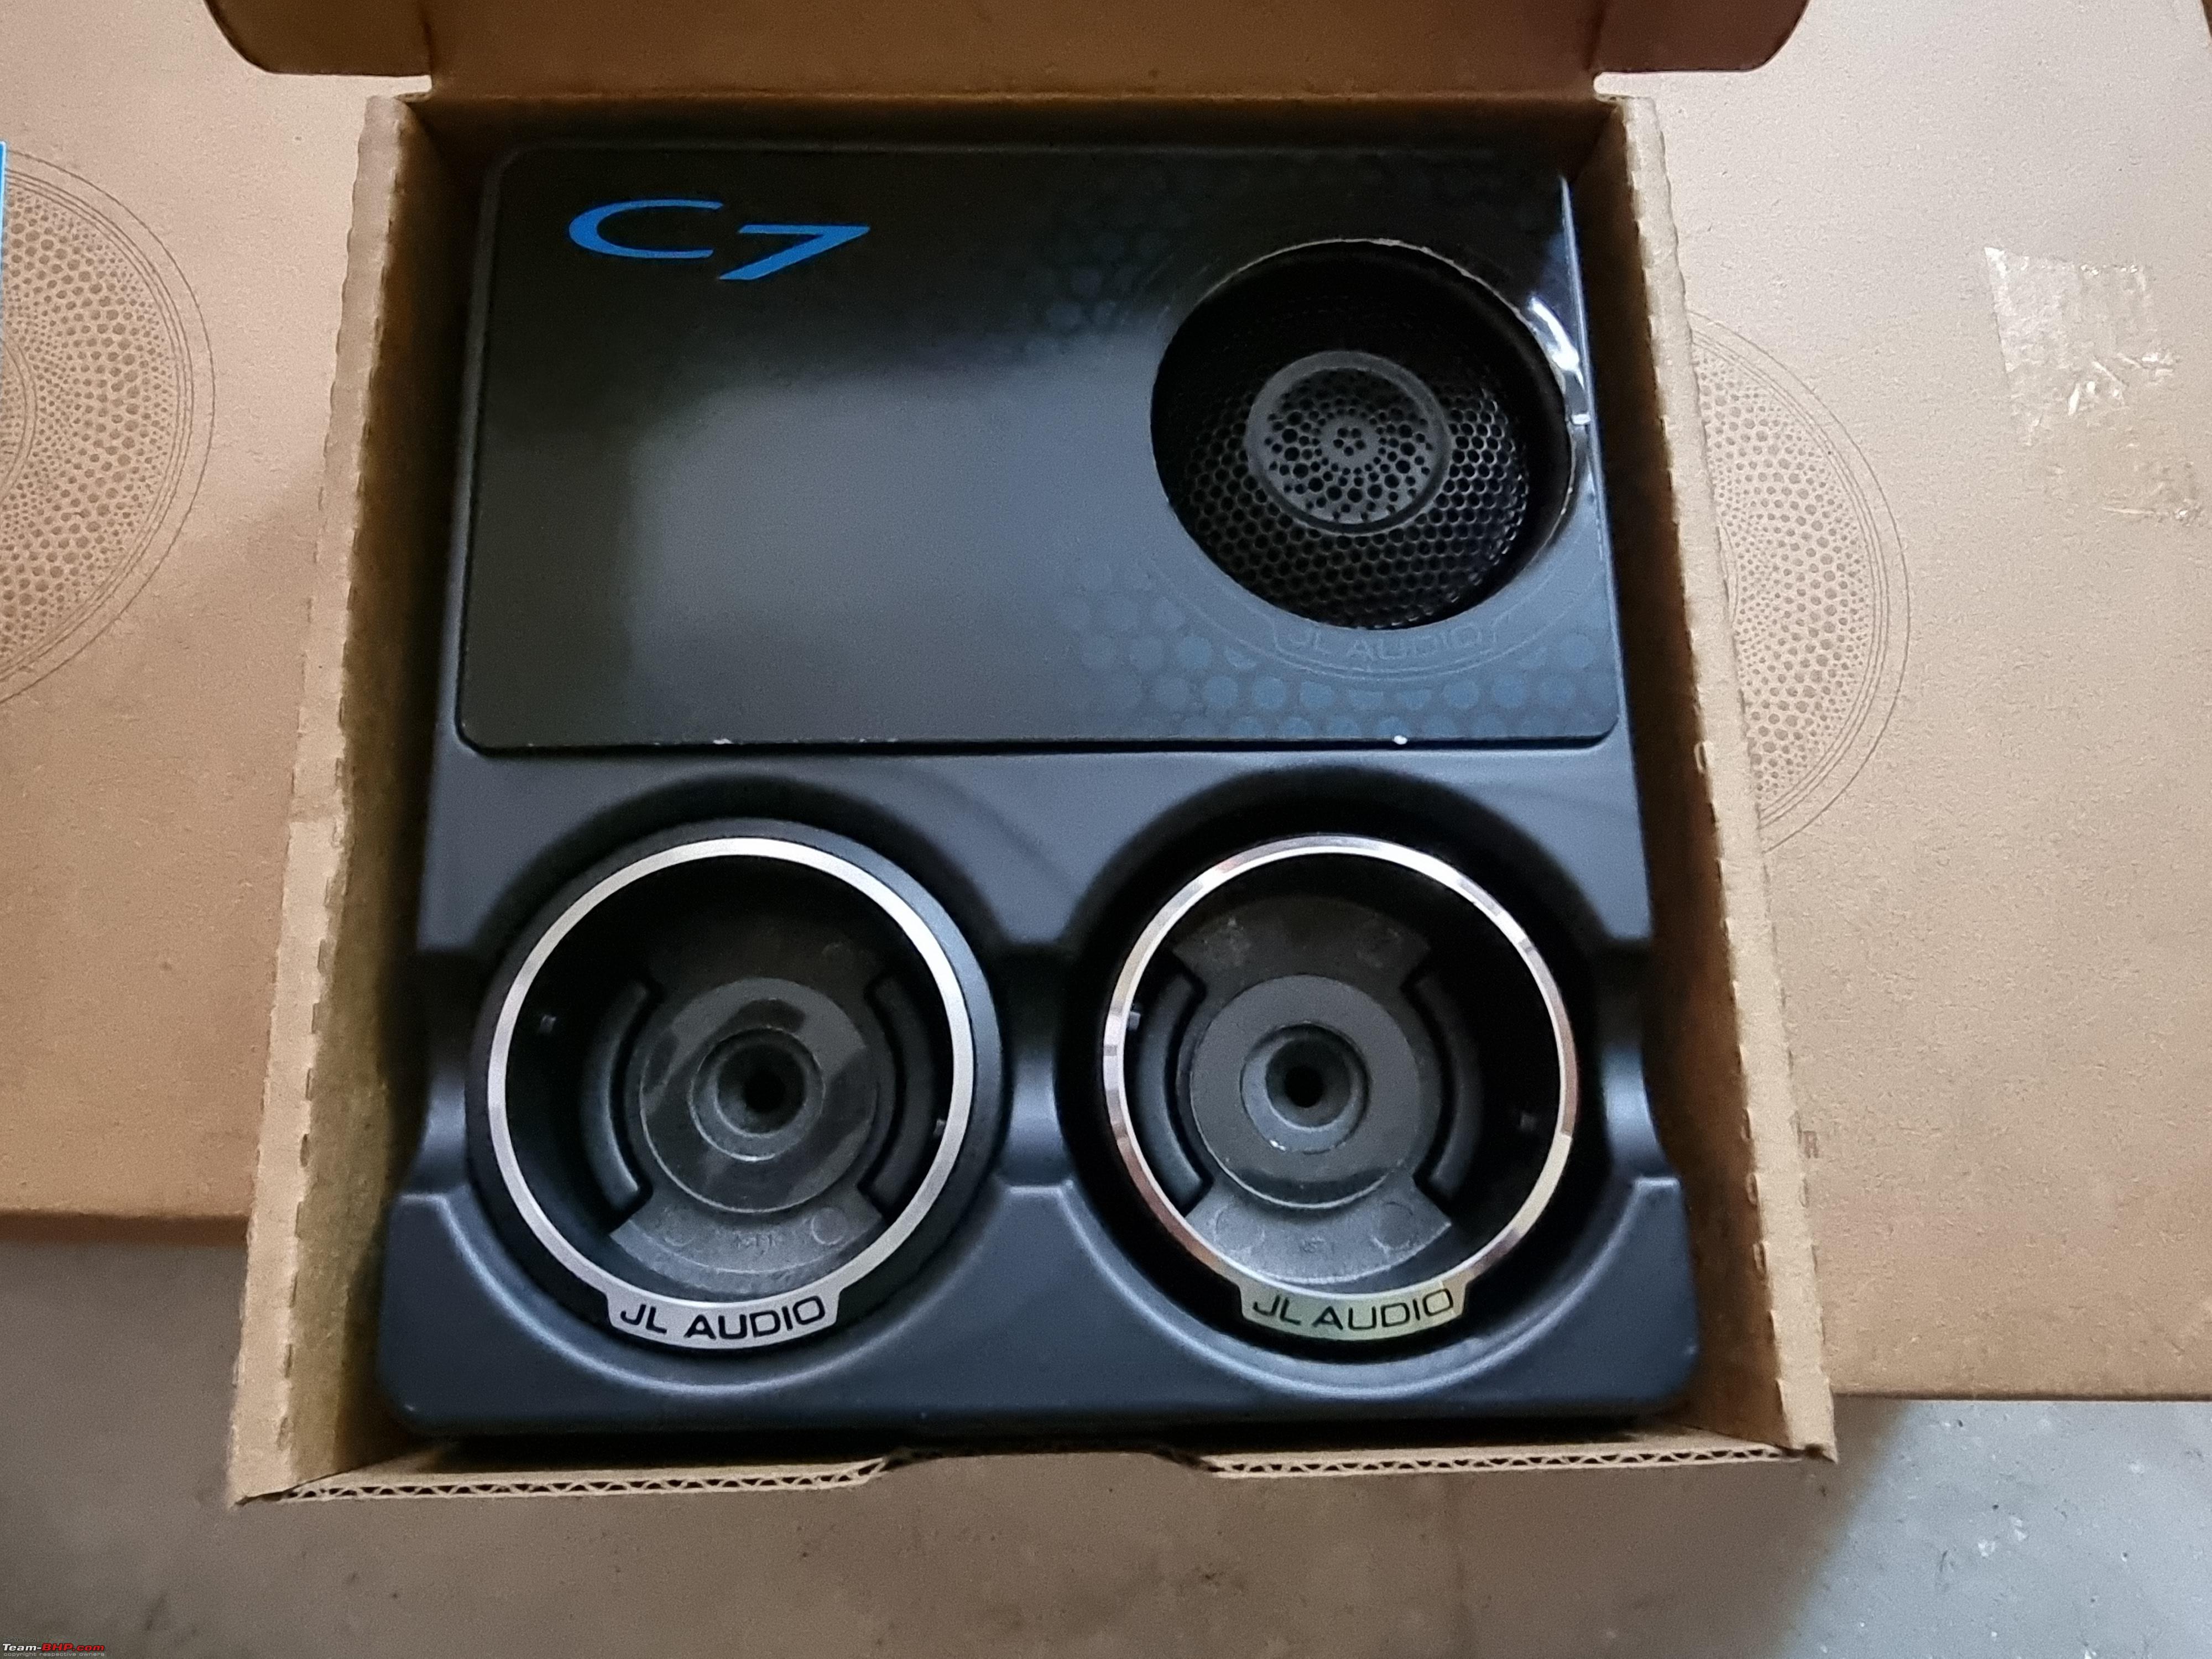  It comes with 2 mounting holders 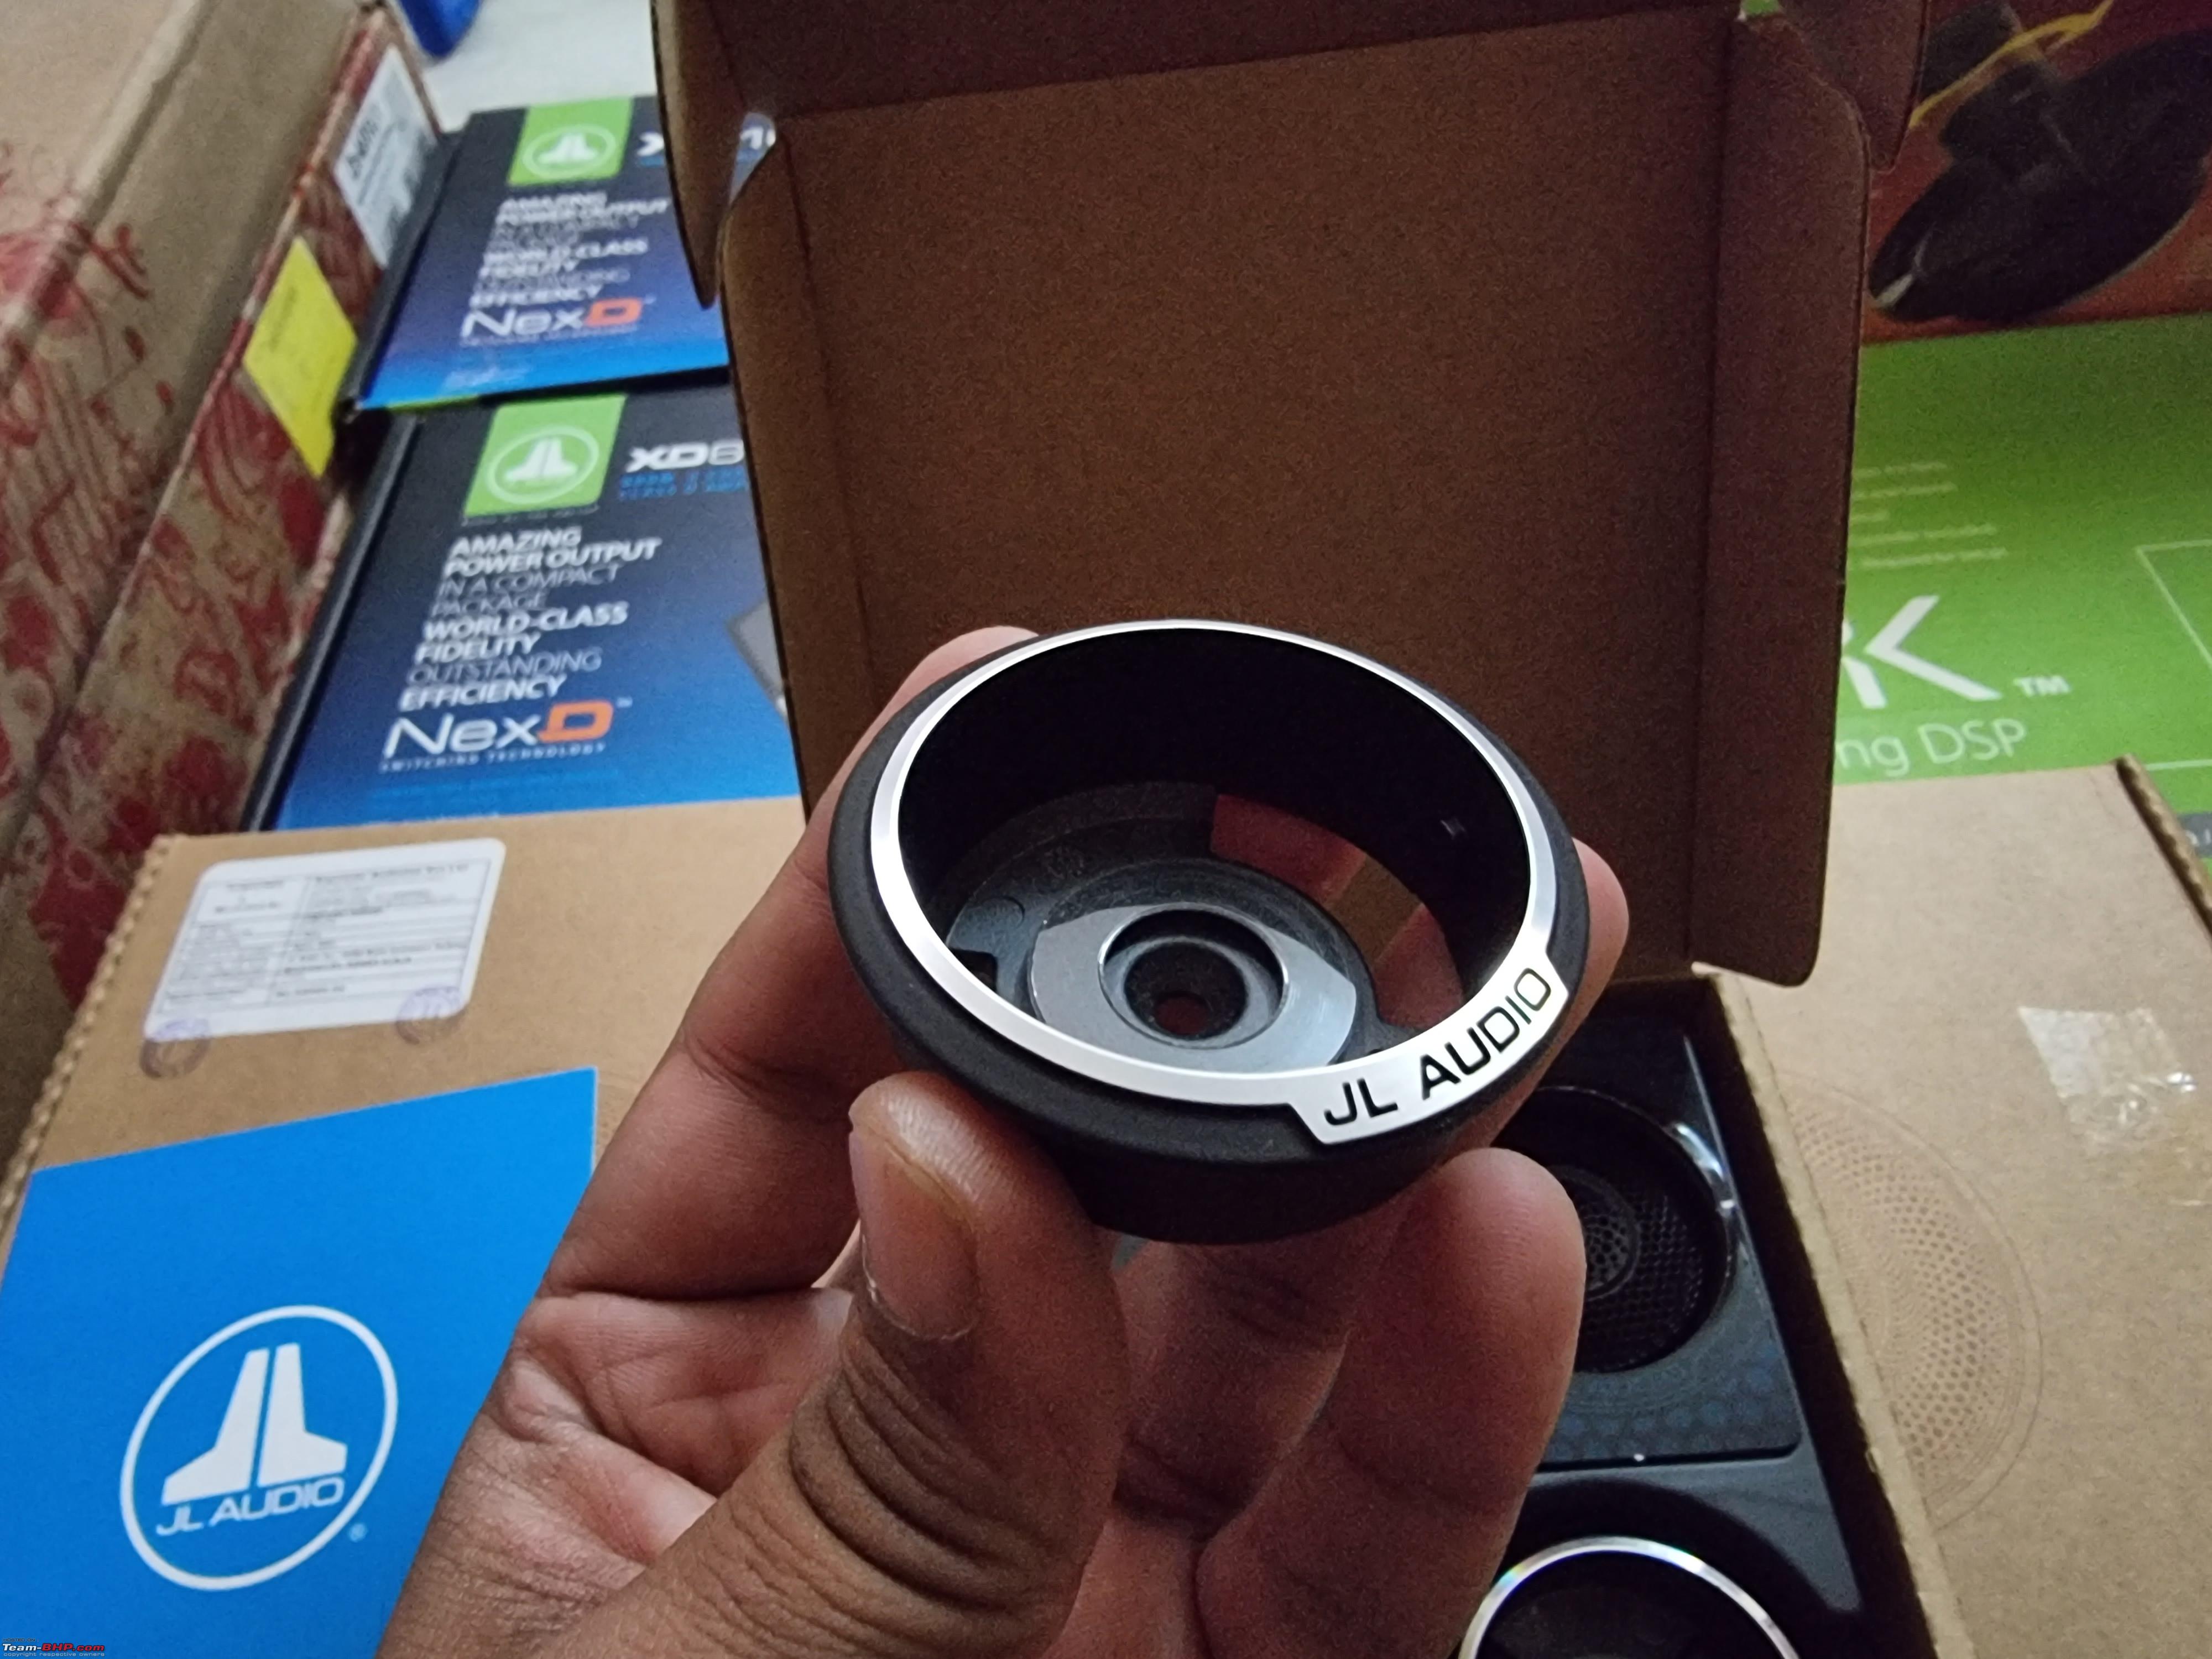  Since the tweeters can be damaged if the wrong frequency is sent, JL Audio provides a capacitor which needs to be installed with them. It does not act as a crossover of any kind and is just a safety measure to protect the tweeters. 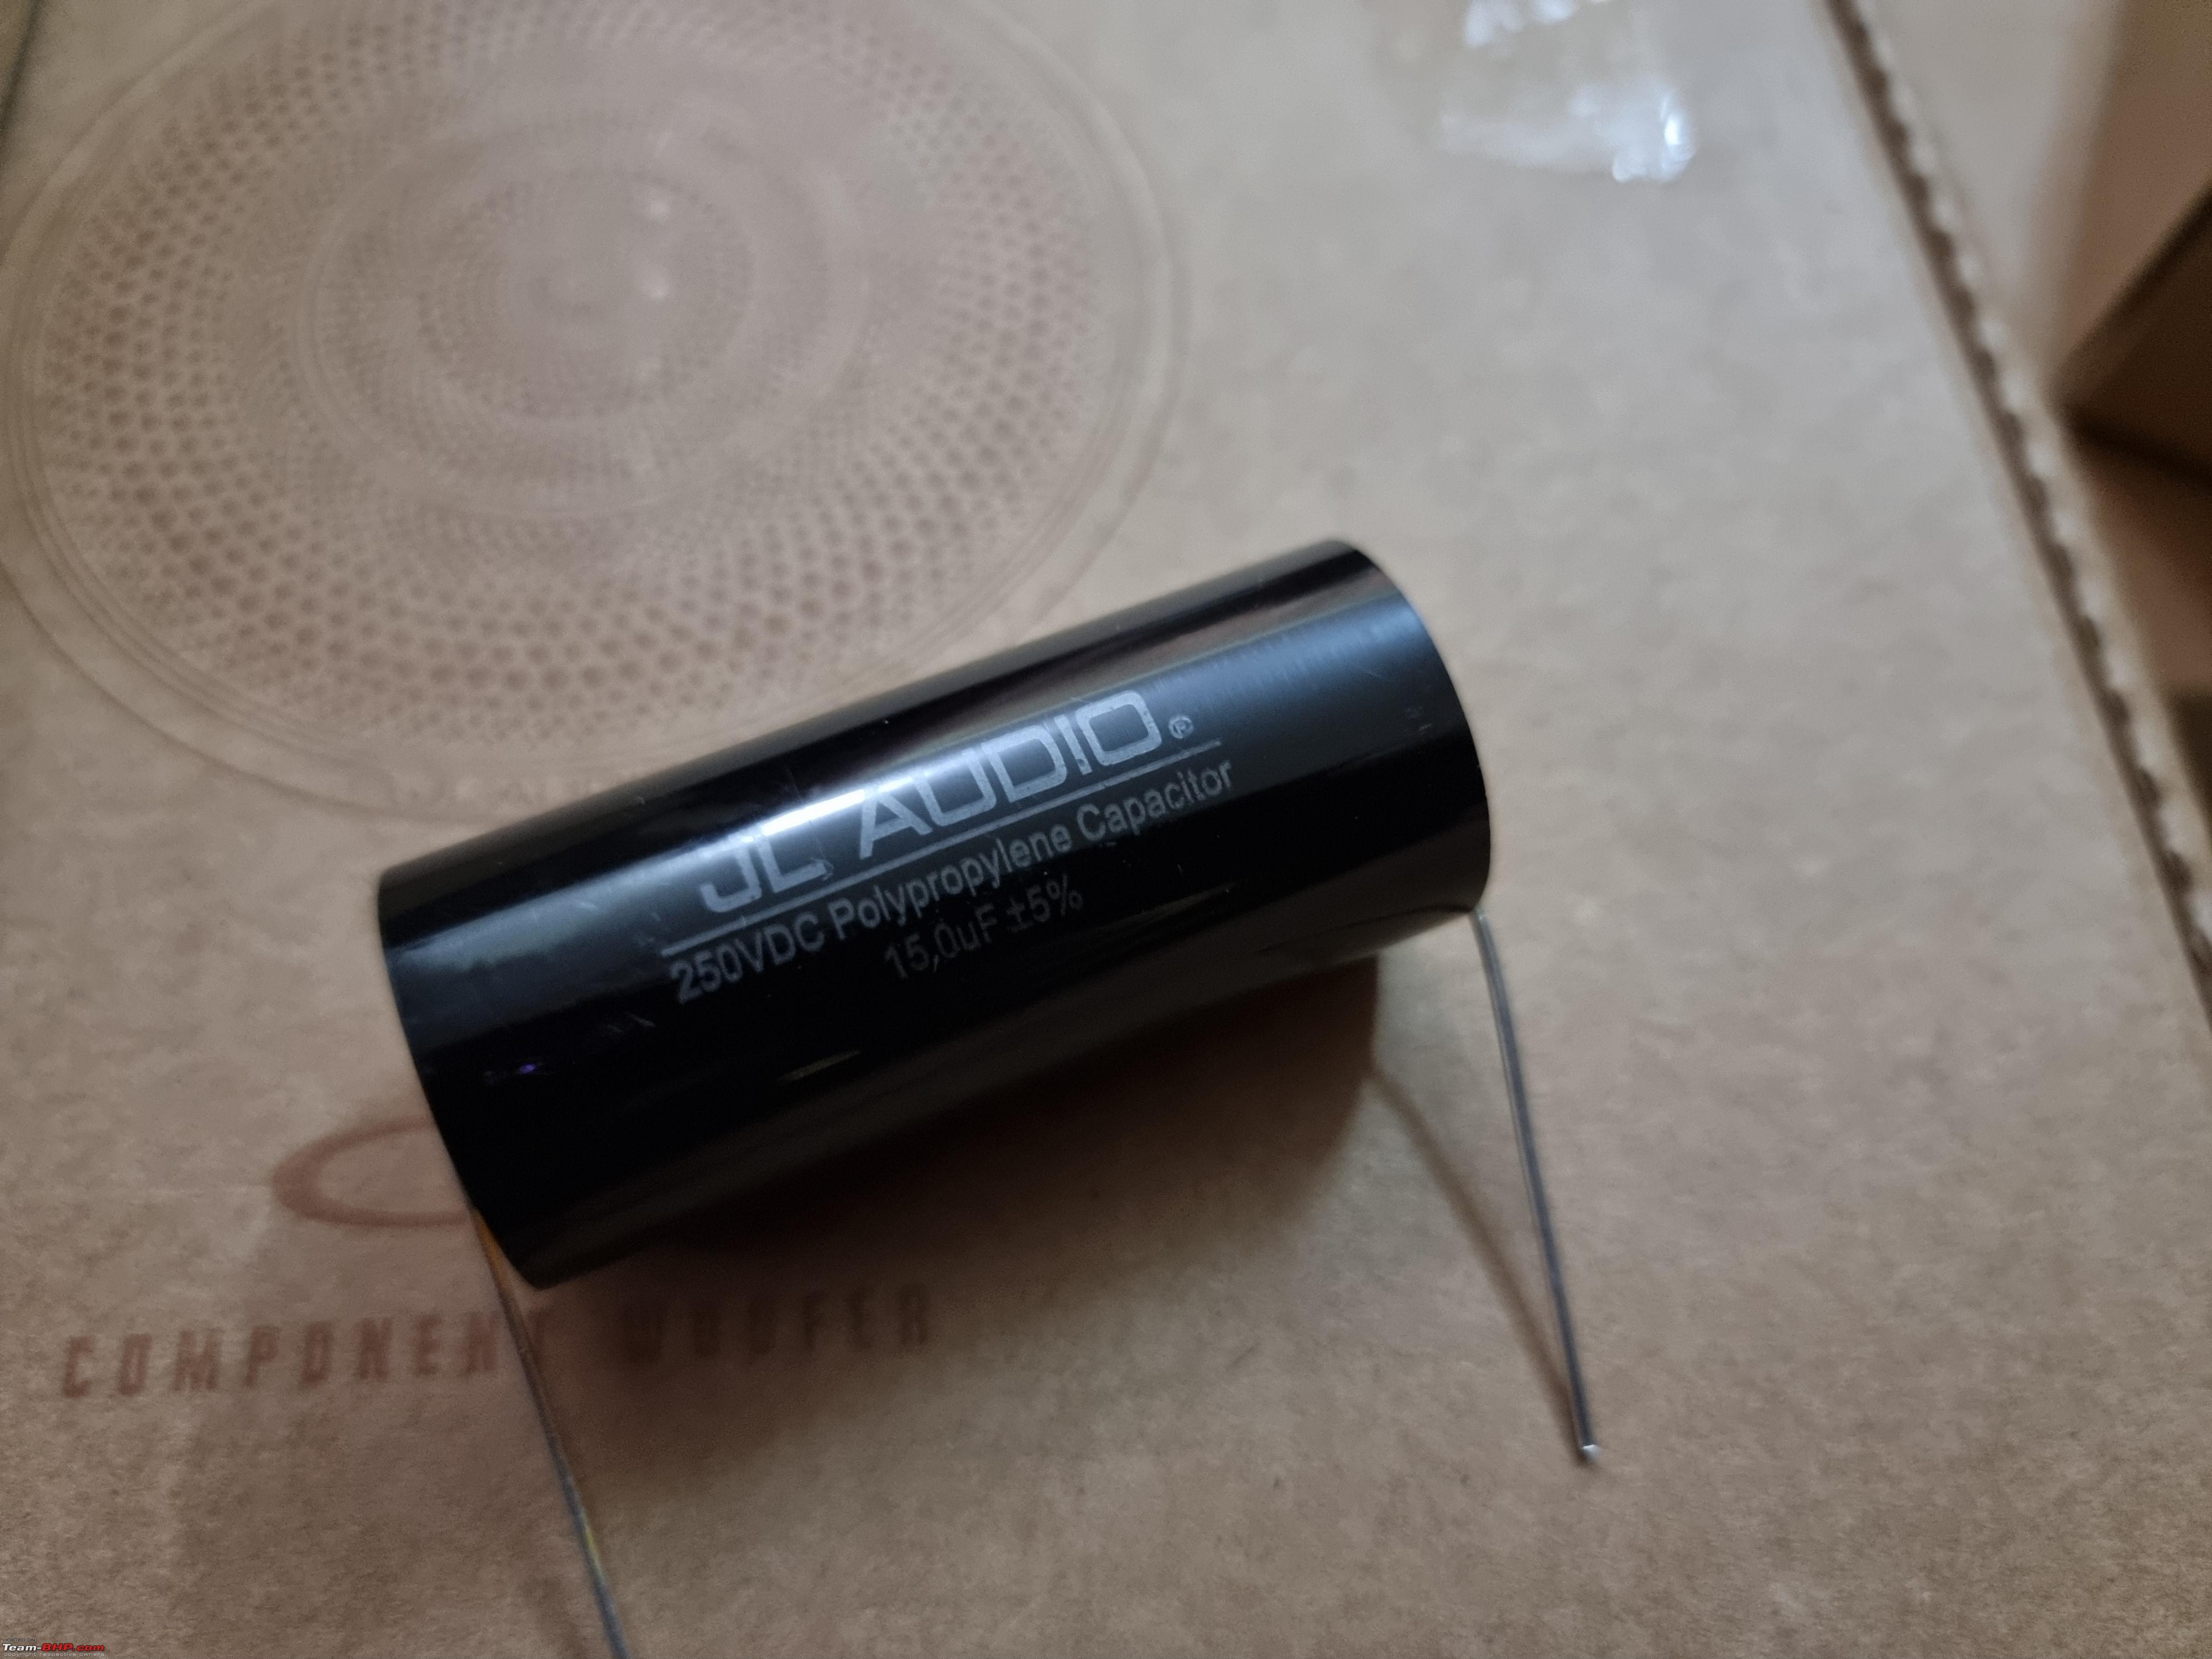 Moving on to the rear speakers, the C3-650. These are more conventional and use a passive crossover but can be configured as coaxials or components. We would be running them as coaxials in our setup. They are rated at 75W RMS. 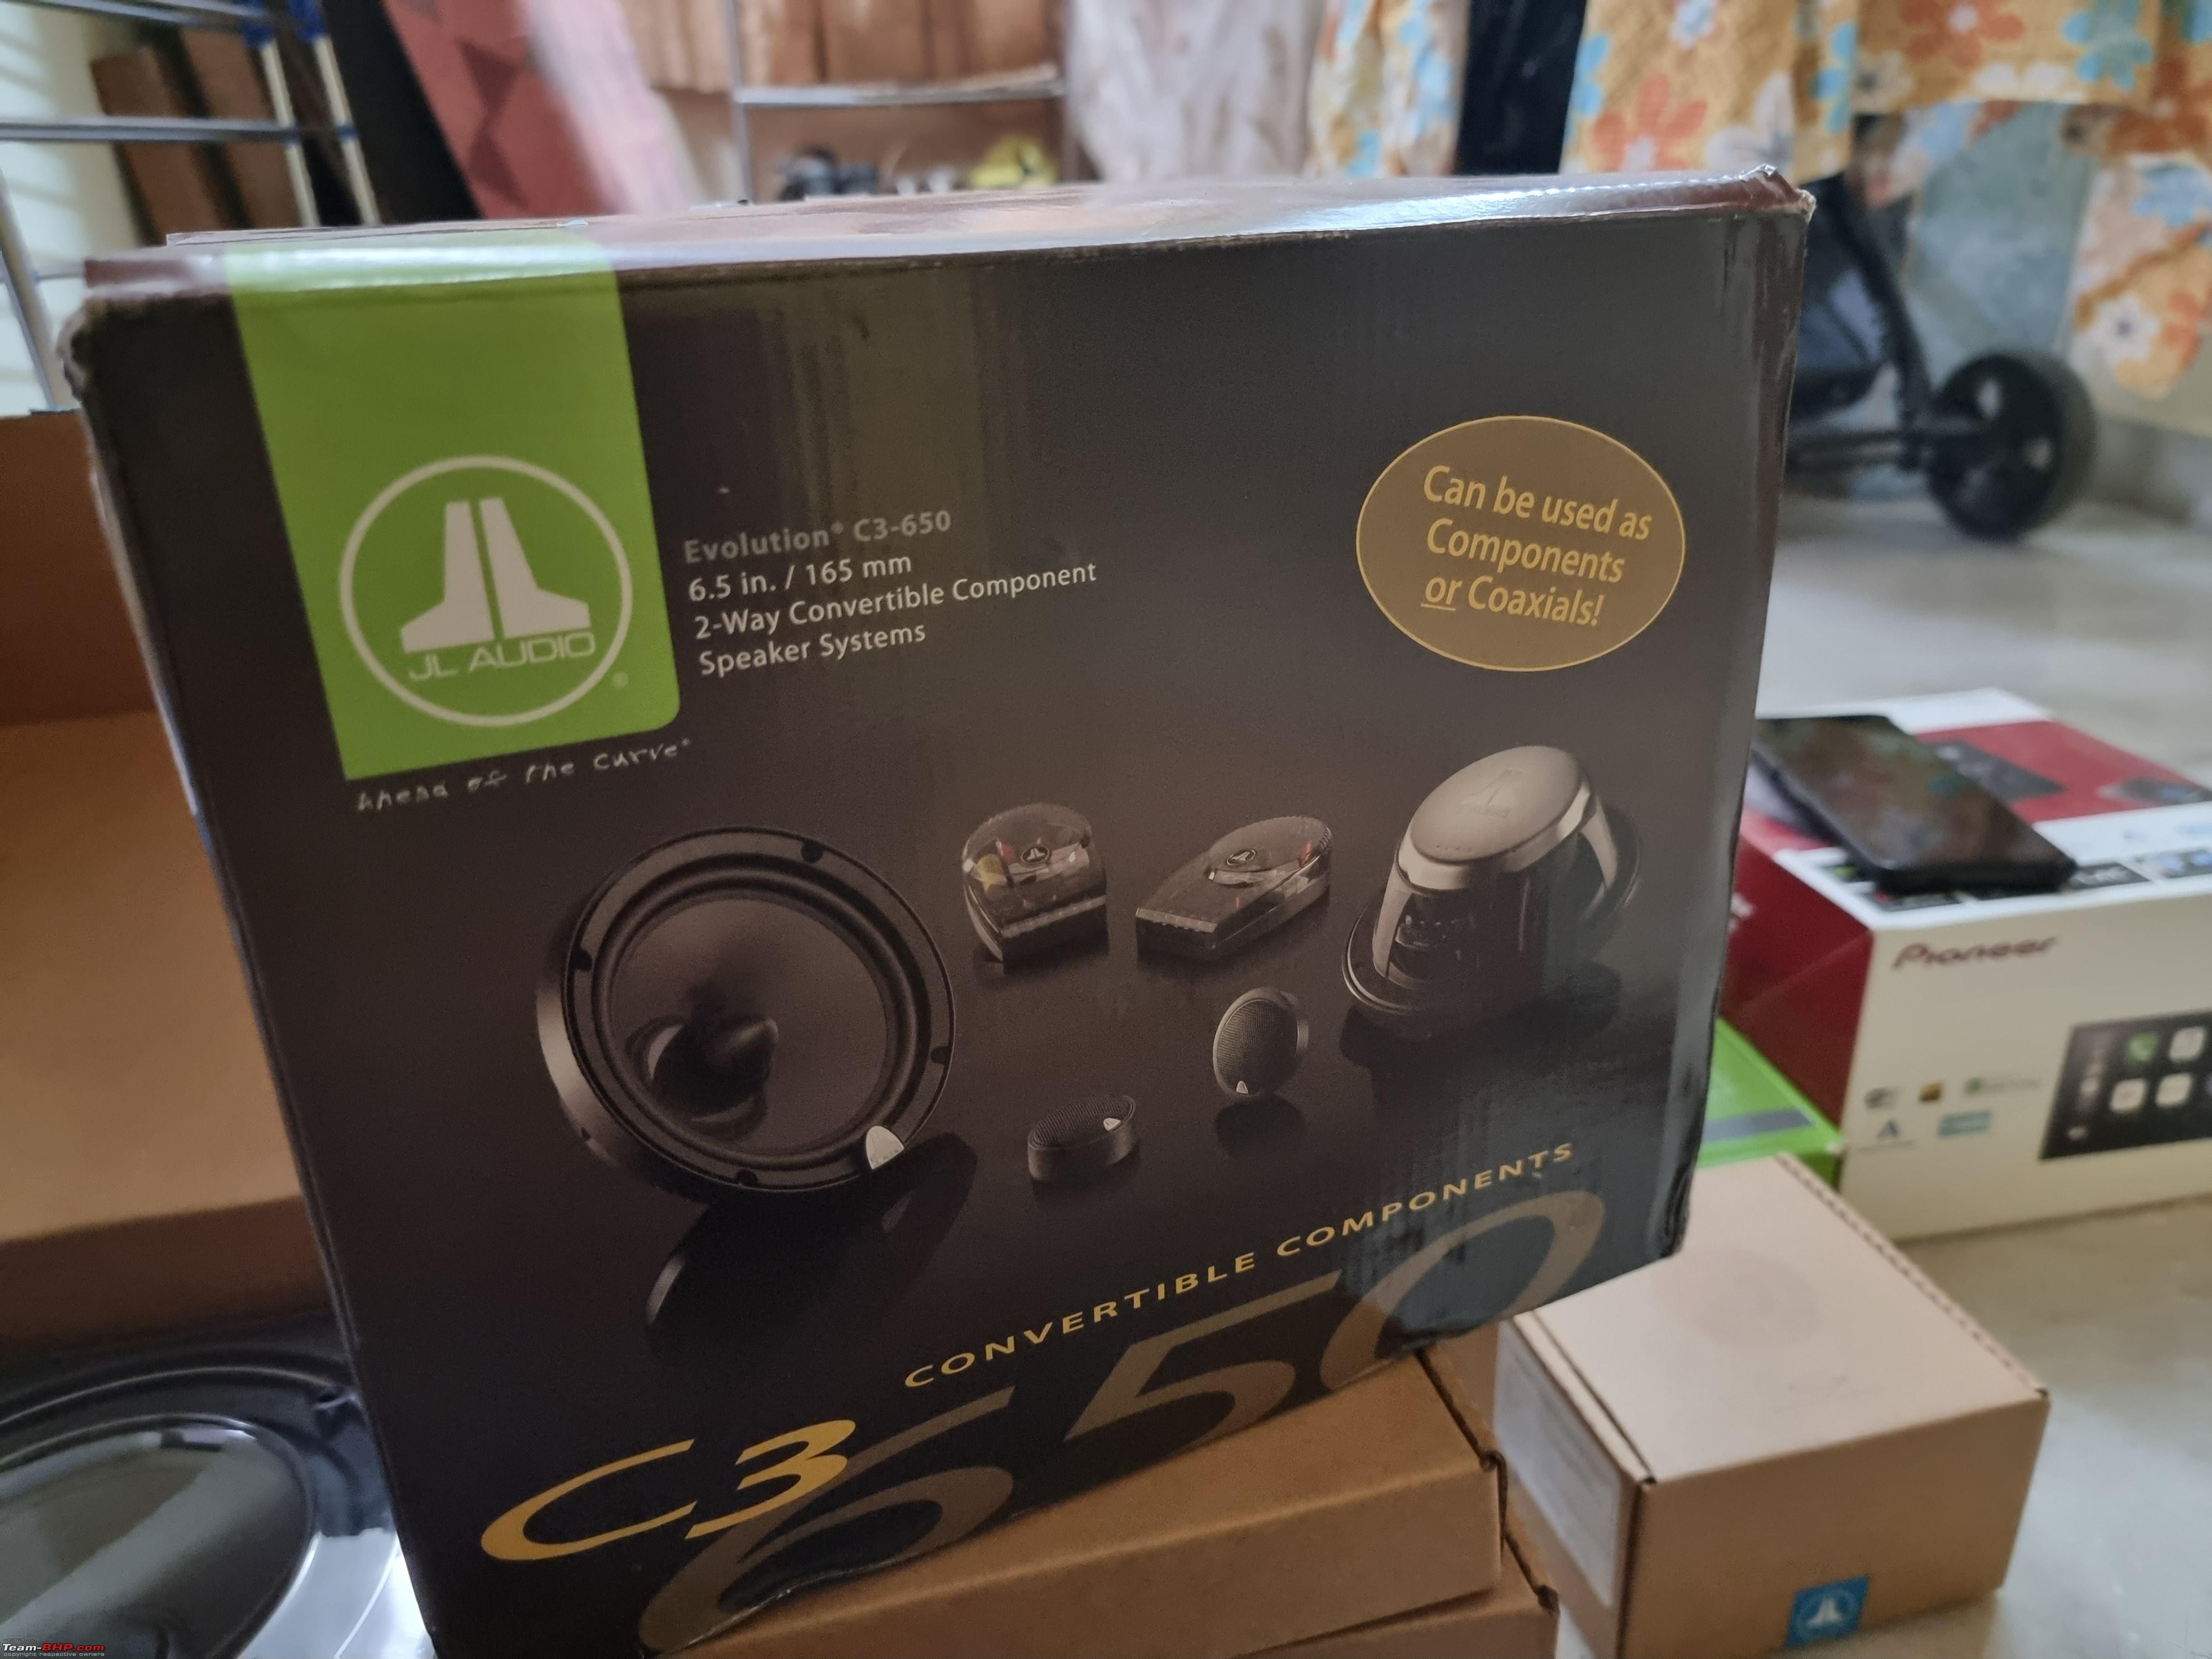    Last edited by ROG_AK : 14th July 2022 at 16:44. |
|
| (35)
Thanks
|
| The following 35 BHPians Thank ROG_AK for this useful post: | AutoNoob, Avikbrio, Bibendum90949, bsdbsd, chinmaypillay, Chrome6Boy, CrAzY dRiVeR, deep_behera, digitalnirvana, Divya Sharan, fluidicjoy, Gannu_1, GaryTSI, graaja, GTO, Guru_Shikhar, immortalmechano, Leoshashi, neil.jericho, planet_rocker, PrasunBannerjee, quickdraw, Rehaan, Researcher, Roy.S, somspaple, swiftnfurious, t3rm1n80r, Tanmay_868, The Rationalist, TrailBlazer007, Varun_HexaGuy, VR/46_Chet, yogiii, ysjoy |
|
12th July 2022, 17:14
| #3 |
| BHPian Join Date: Oct 2017 Location: Bangalore
Posts: 298
Thanked: 1,676 Times
| Re: Hign end JL Audio upgrade in my Baleno RS The crossovers   C7 vs C3. Although the C3s are great speakers on their own, they pale in comparison to the C7.   C3 tweeter on the left 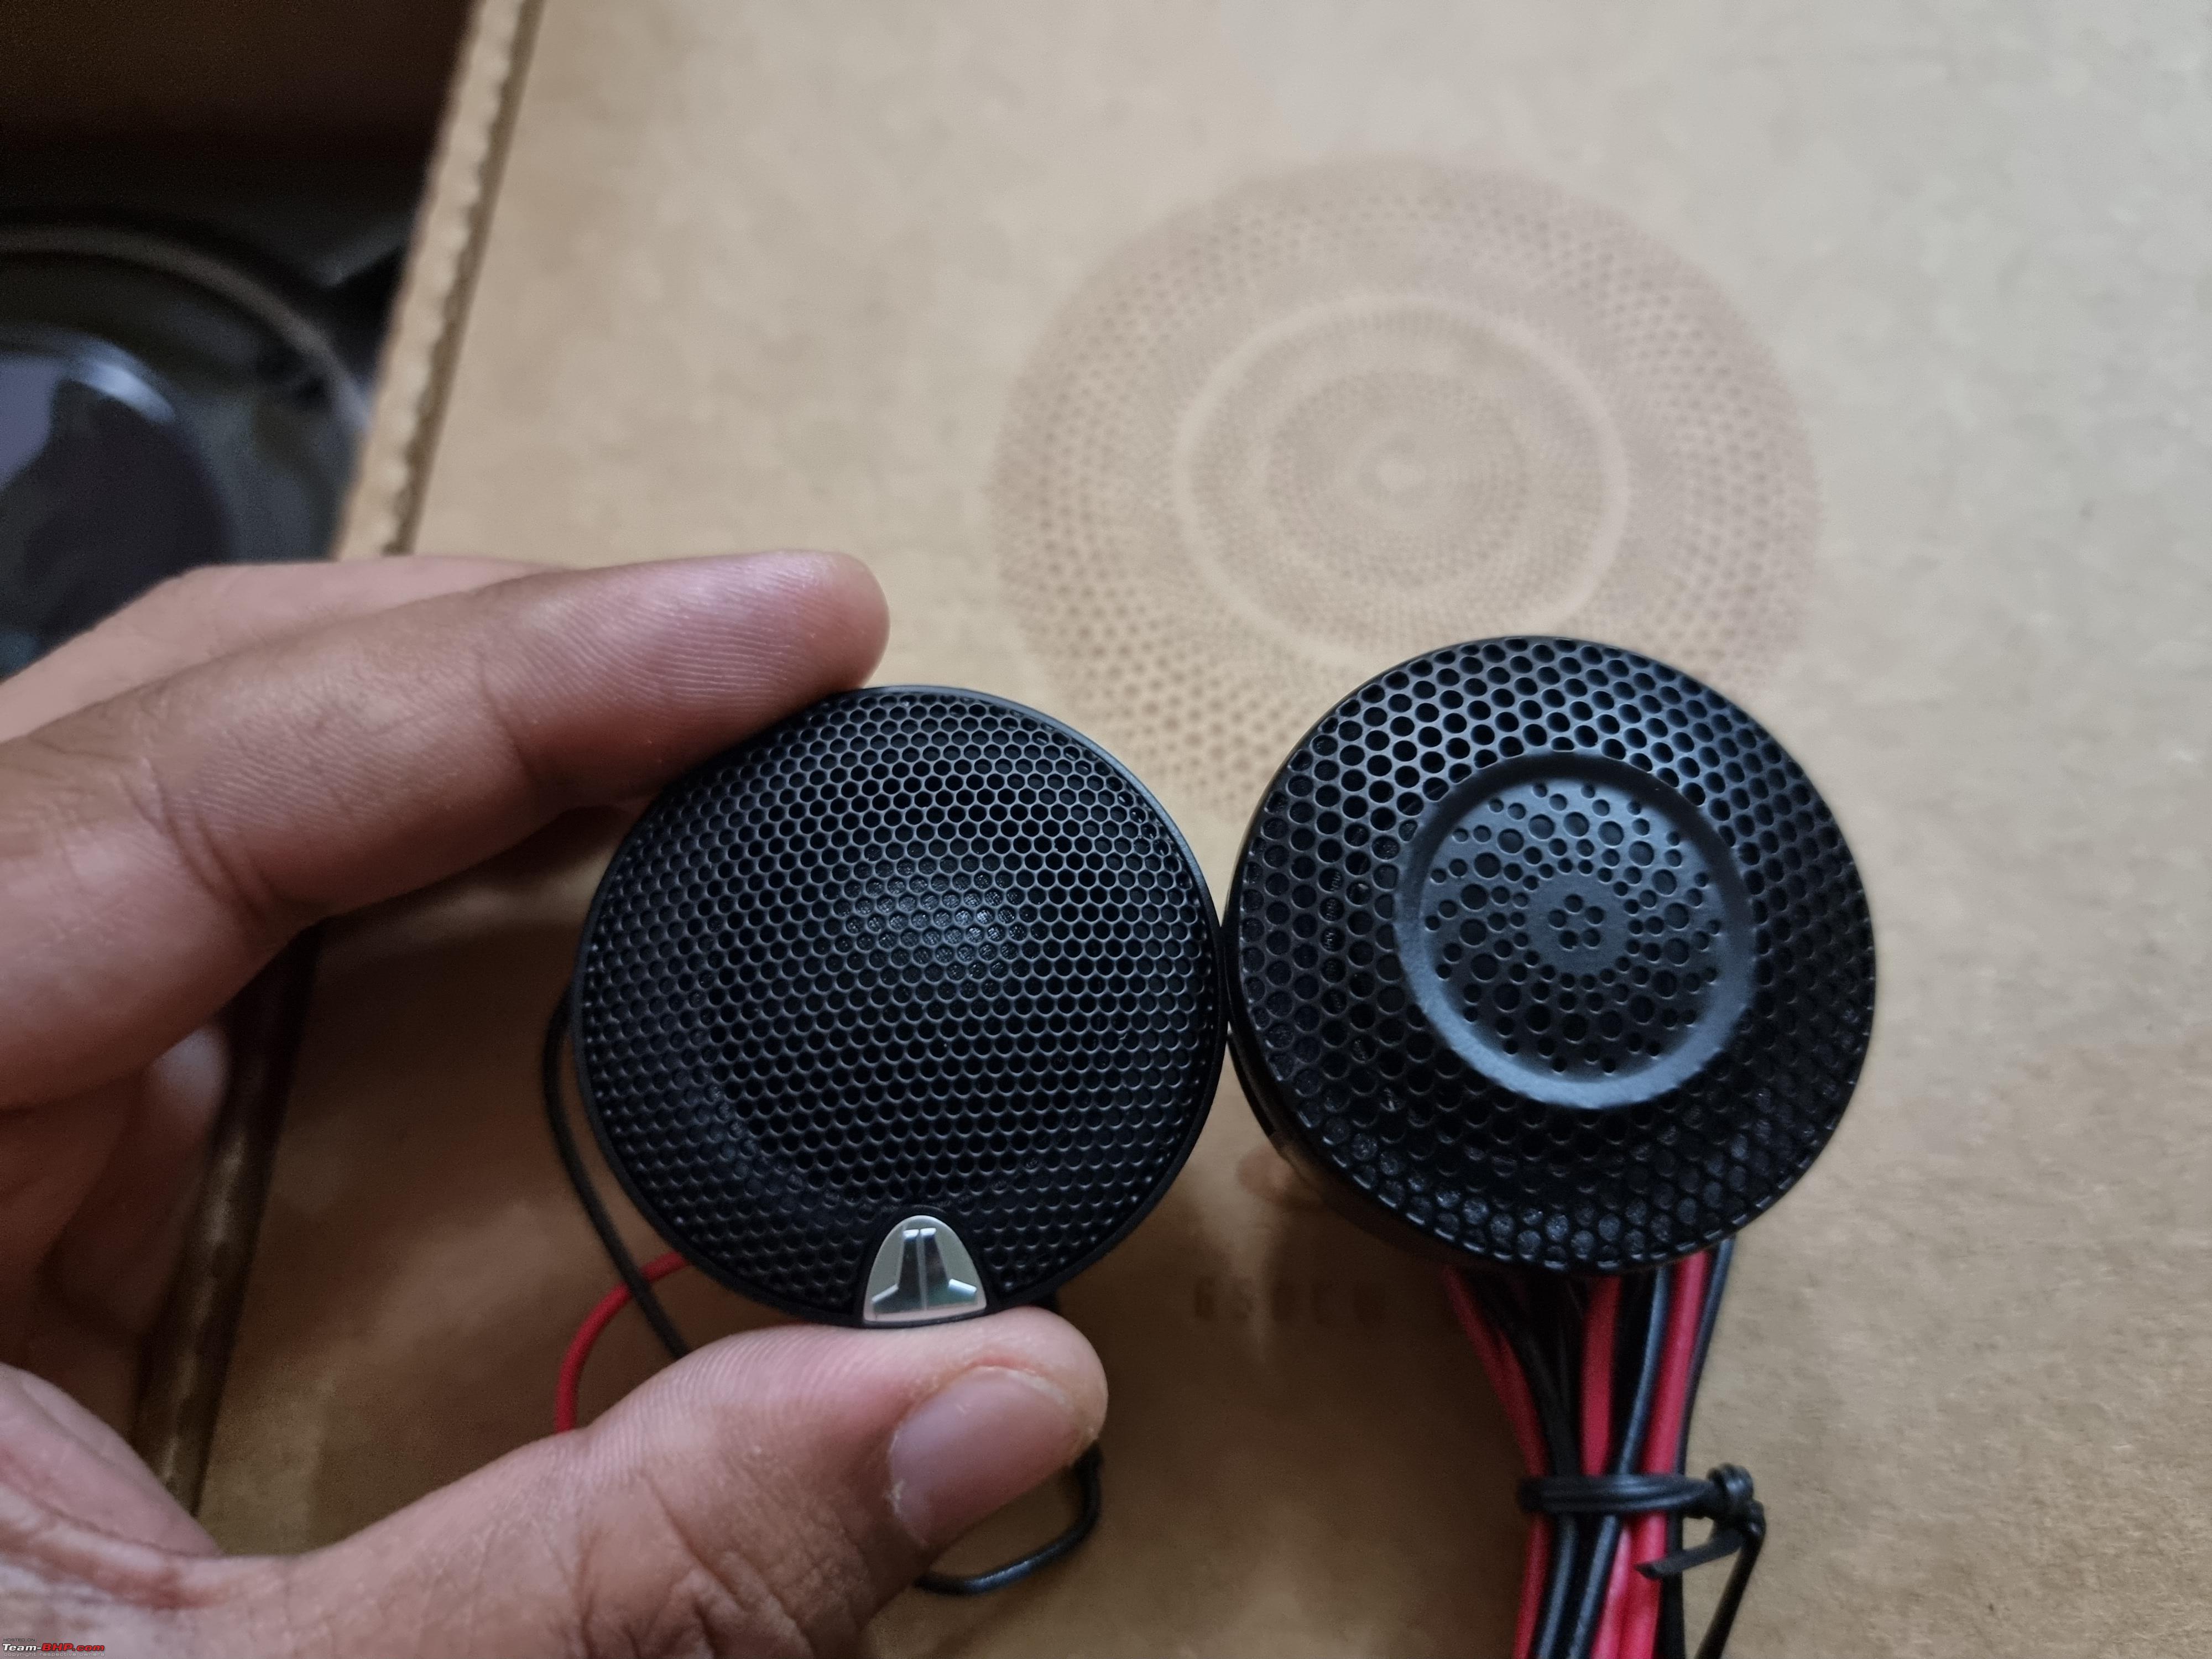 C3 tweeter on the right  The HO112-W6v3 12" subwoofer. This is a complete unit, consisting of the enclosure and subwoofer. I didn't really have faith in getting the box made locally so went with this. It is powered by the W6v3-D4 driver and slots in just below JL Audio's legendary flagship W7AE subwoofer. This thing digs so deep and how! I'm hearing bass notes I never knew existed, truly incredible. This bad boy weighs in at 27kg and is rated at 600W RMS.  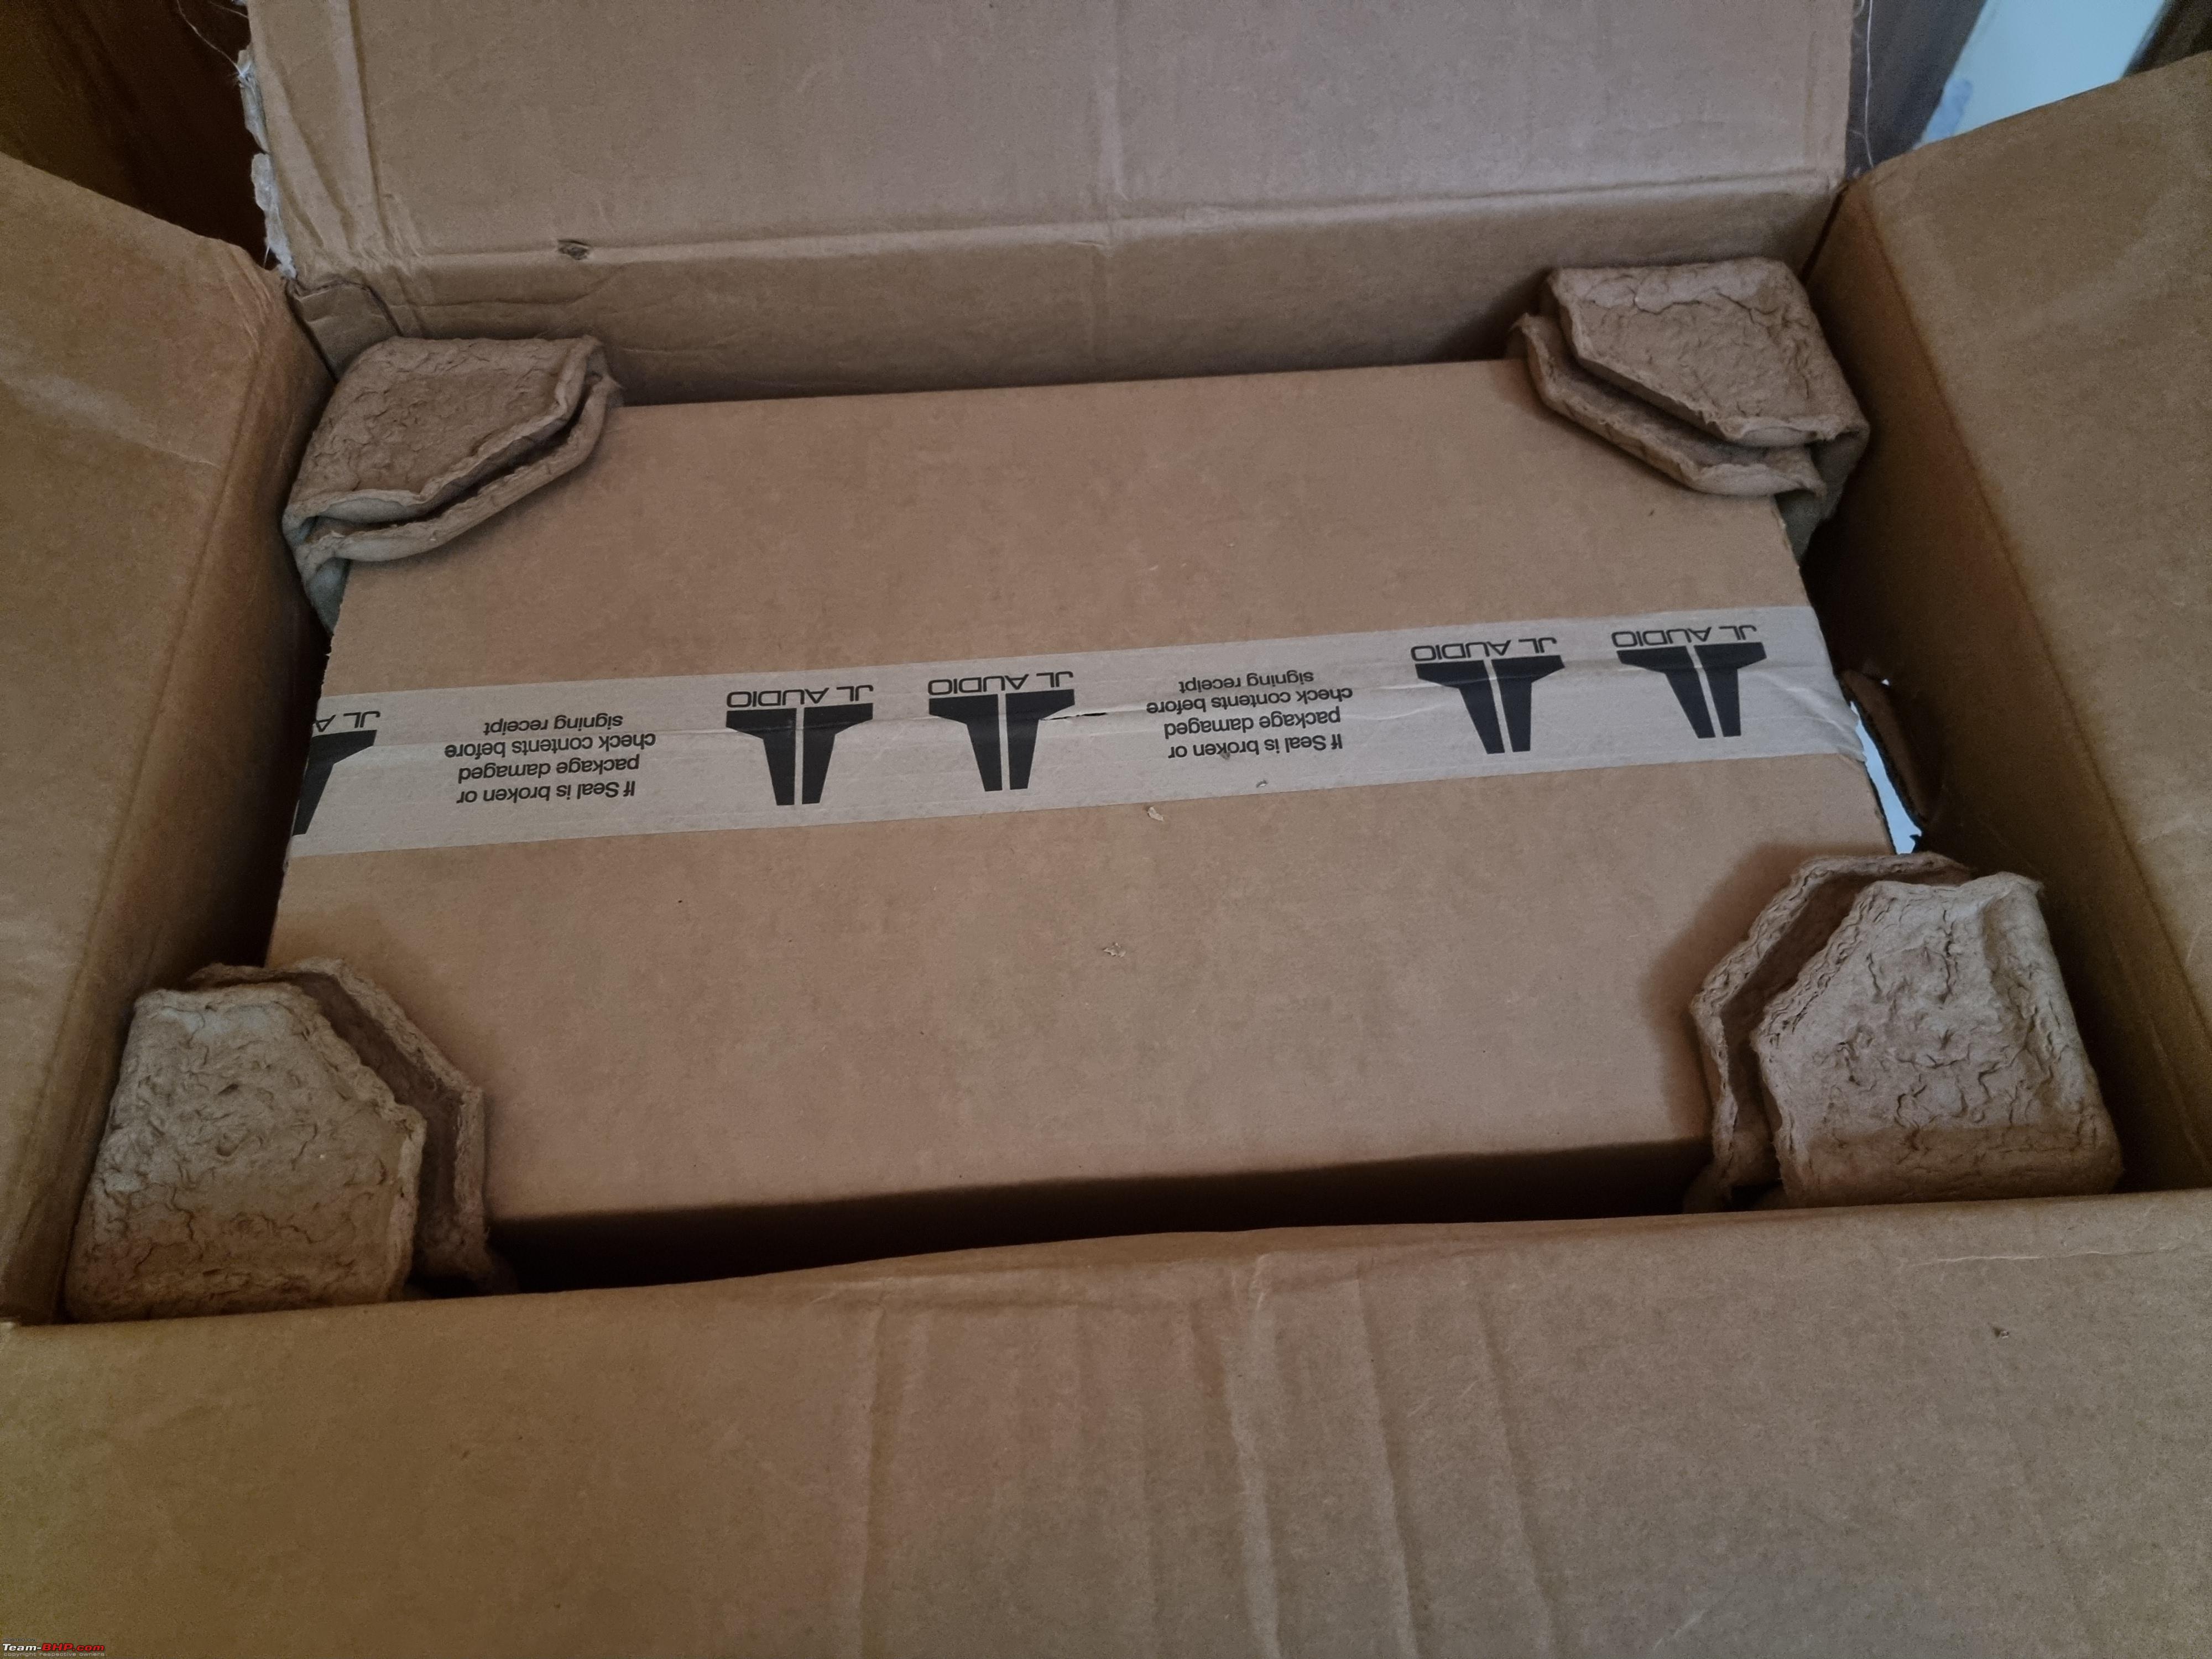   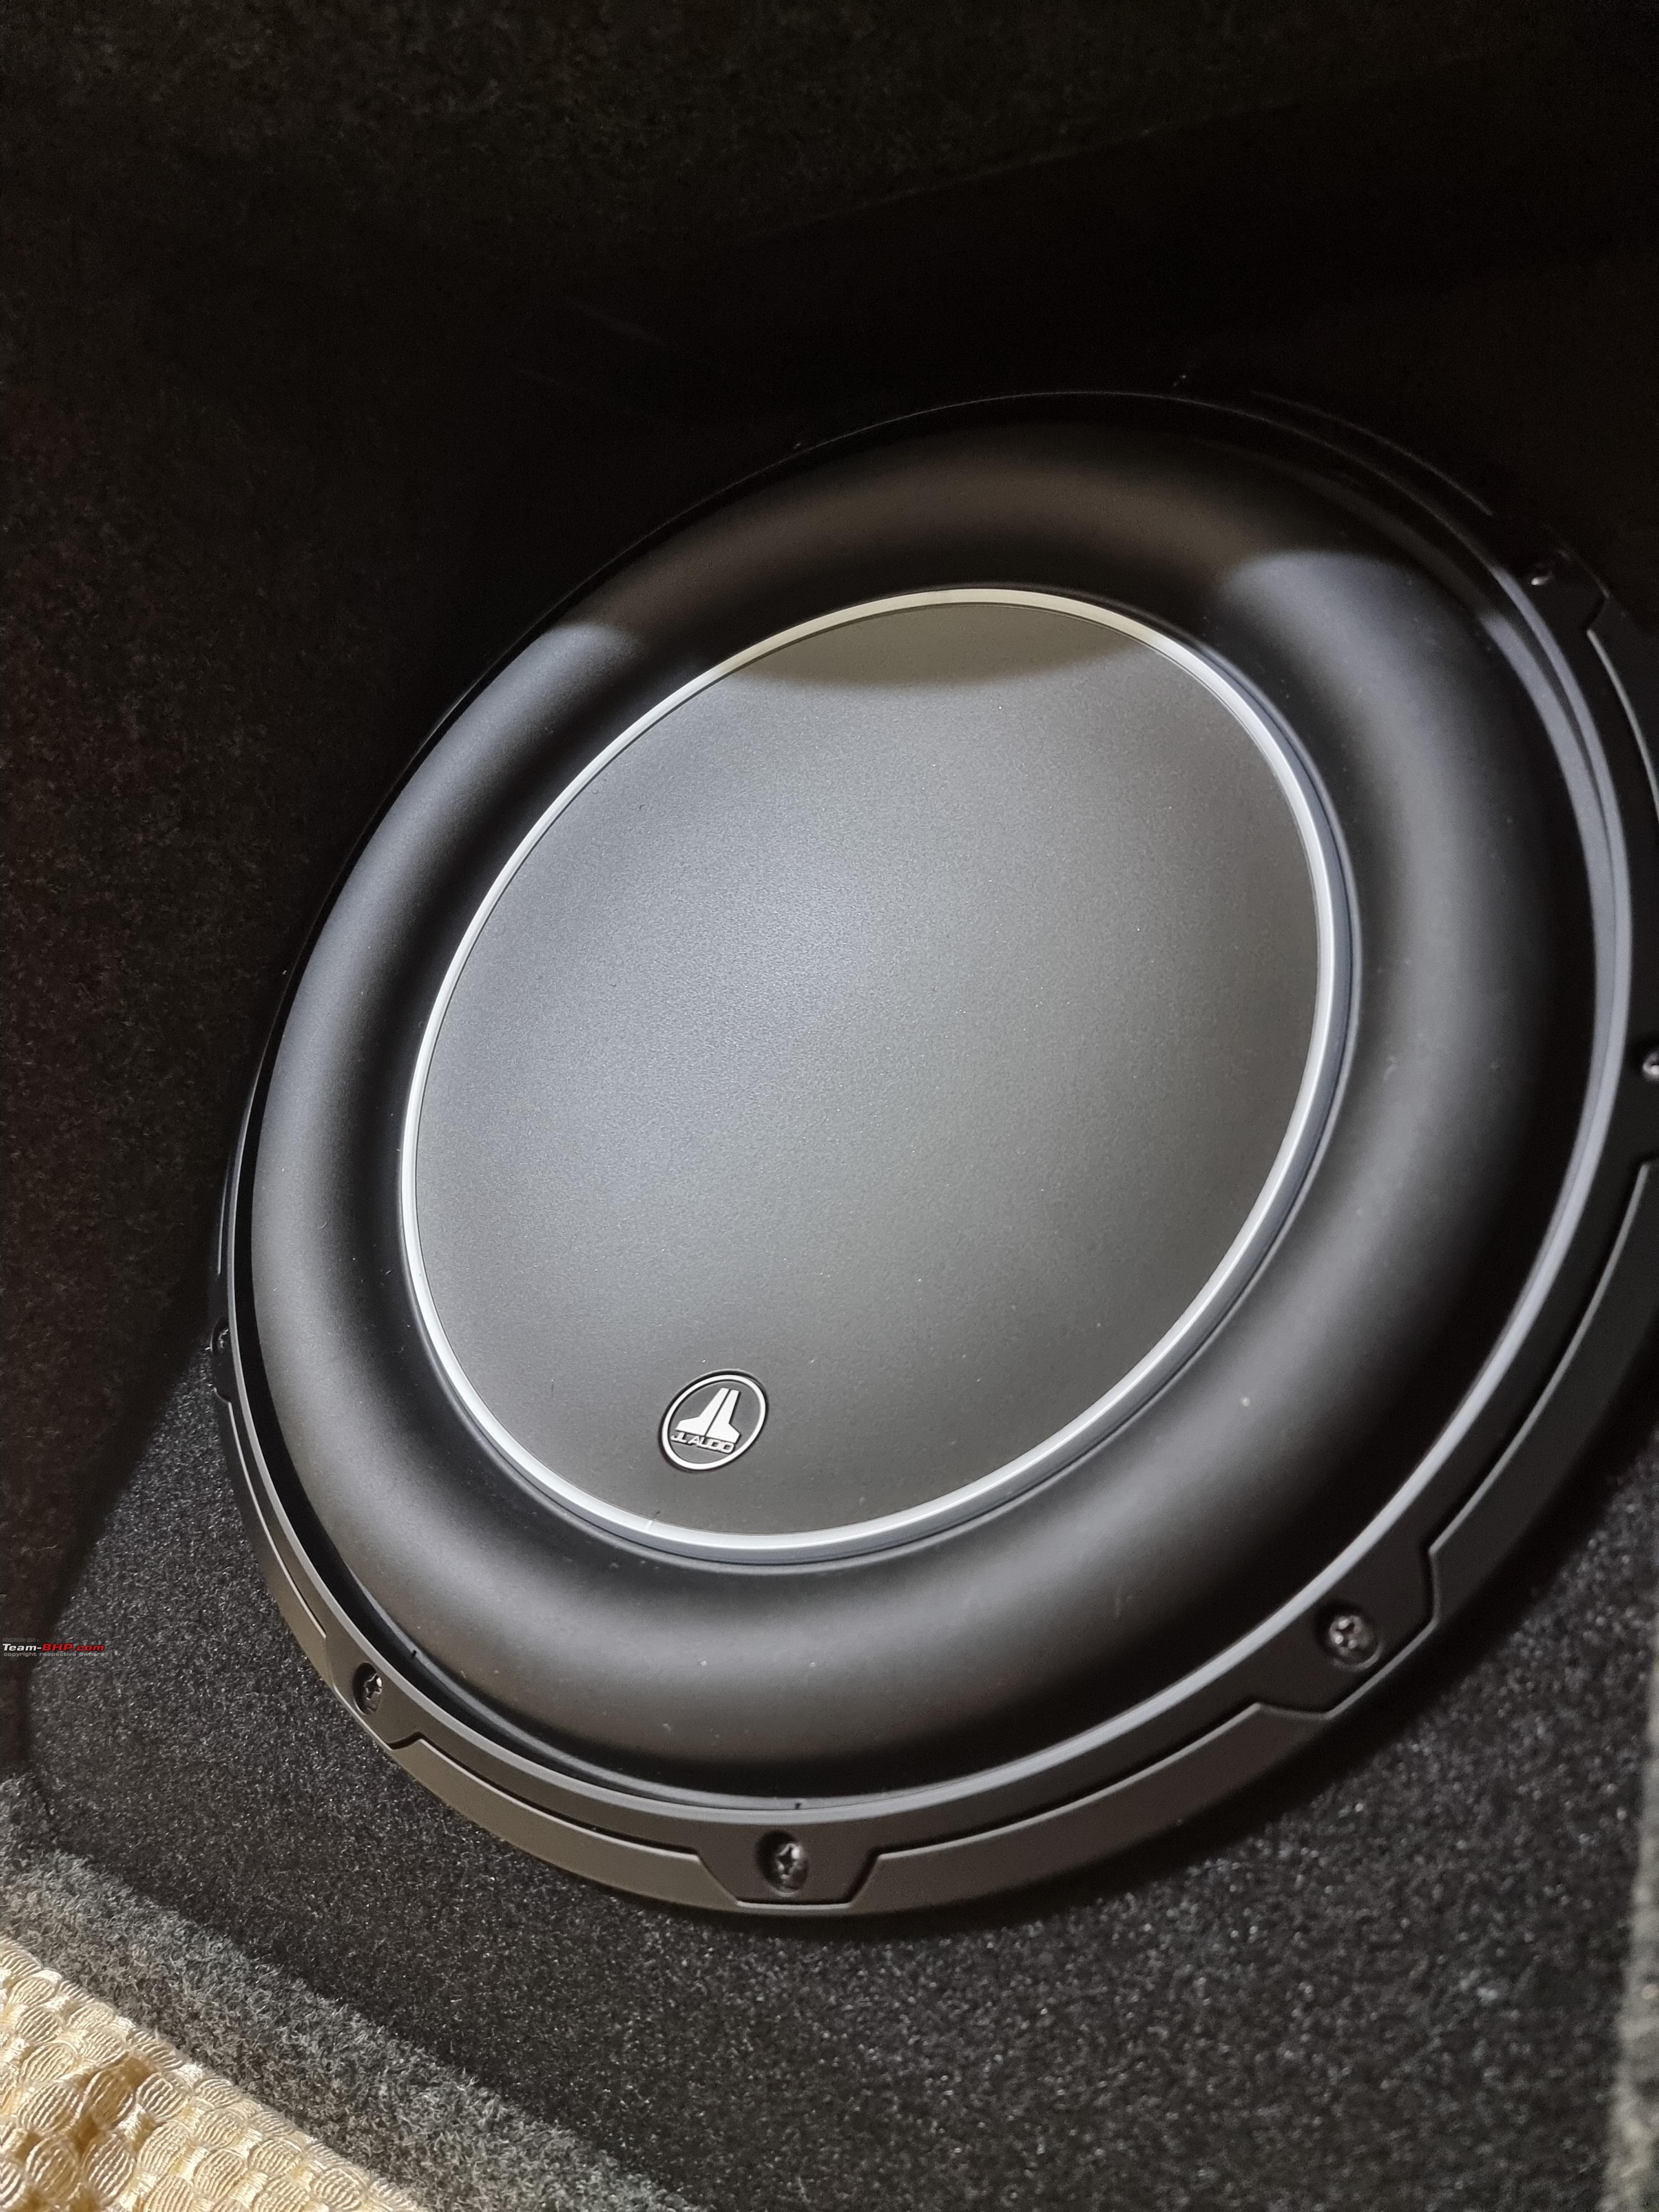   The best part is that it came with stickers  none of the other products did none of the other products did The AMPs All these speakers need some serious juice to get the best out of them, this duty was assigned to the XDv2 series of AMPs. They sit below the flagship VXi range and just under the HD series in JL's lineup. I would have loved to have got the VXi AMPs but they are ridiculously expensive here. The front C7's would be powered by the XD600/6v2, which has 6 channels and 100W per channel.   Simple gorgeous design. All the controls are hidden under a solid aluminium panel  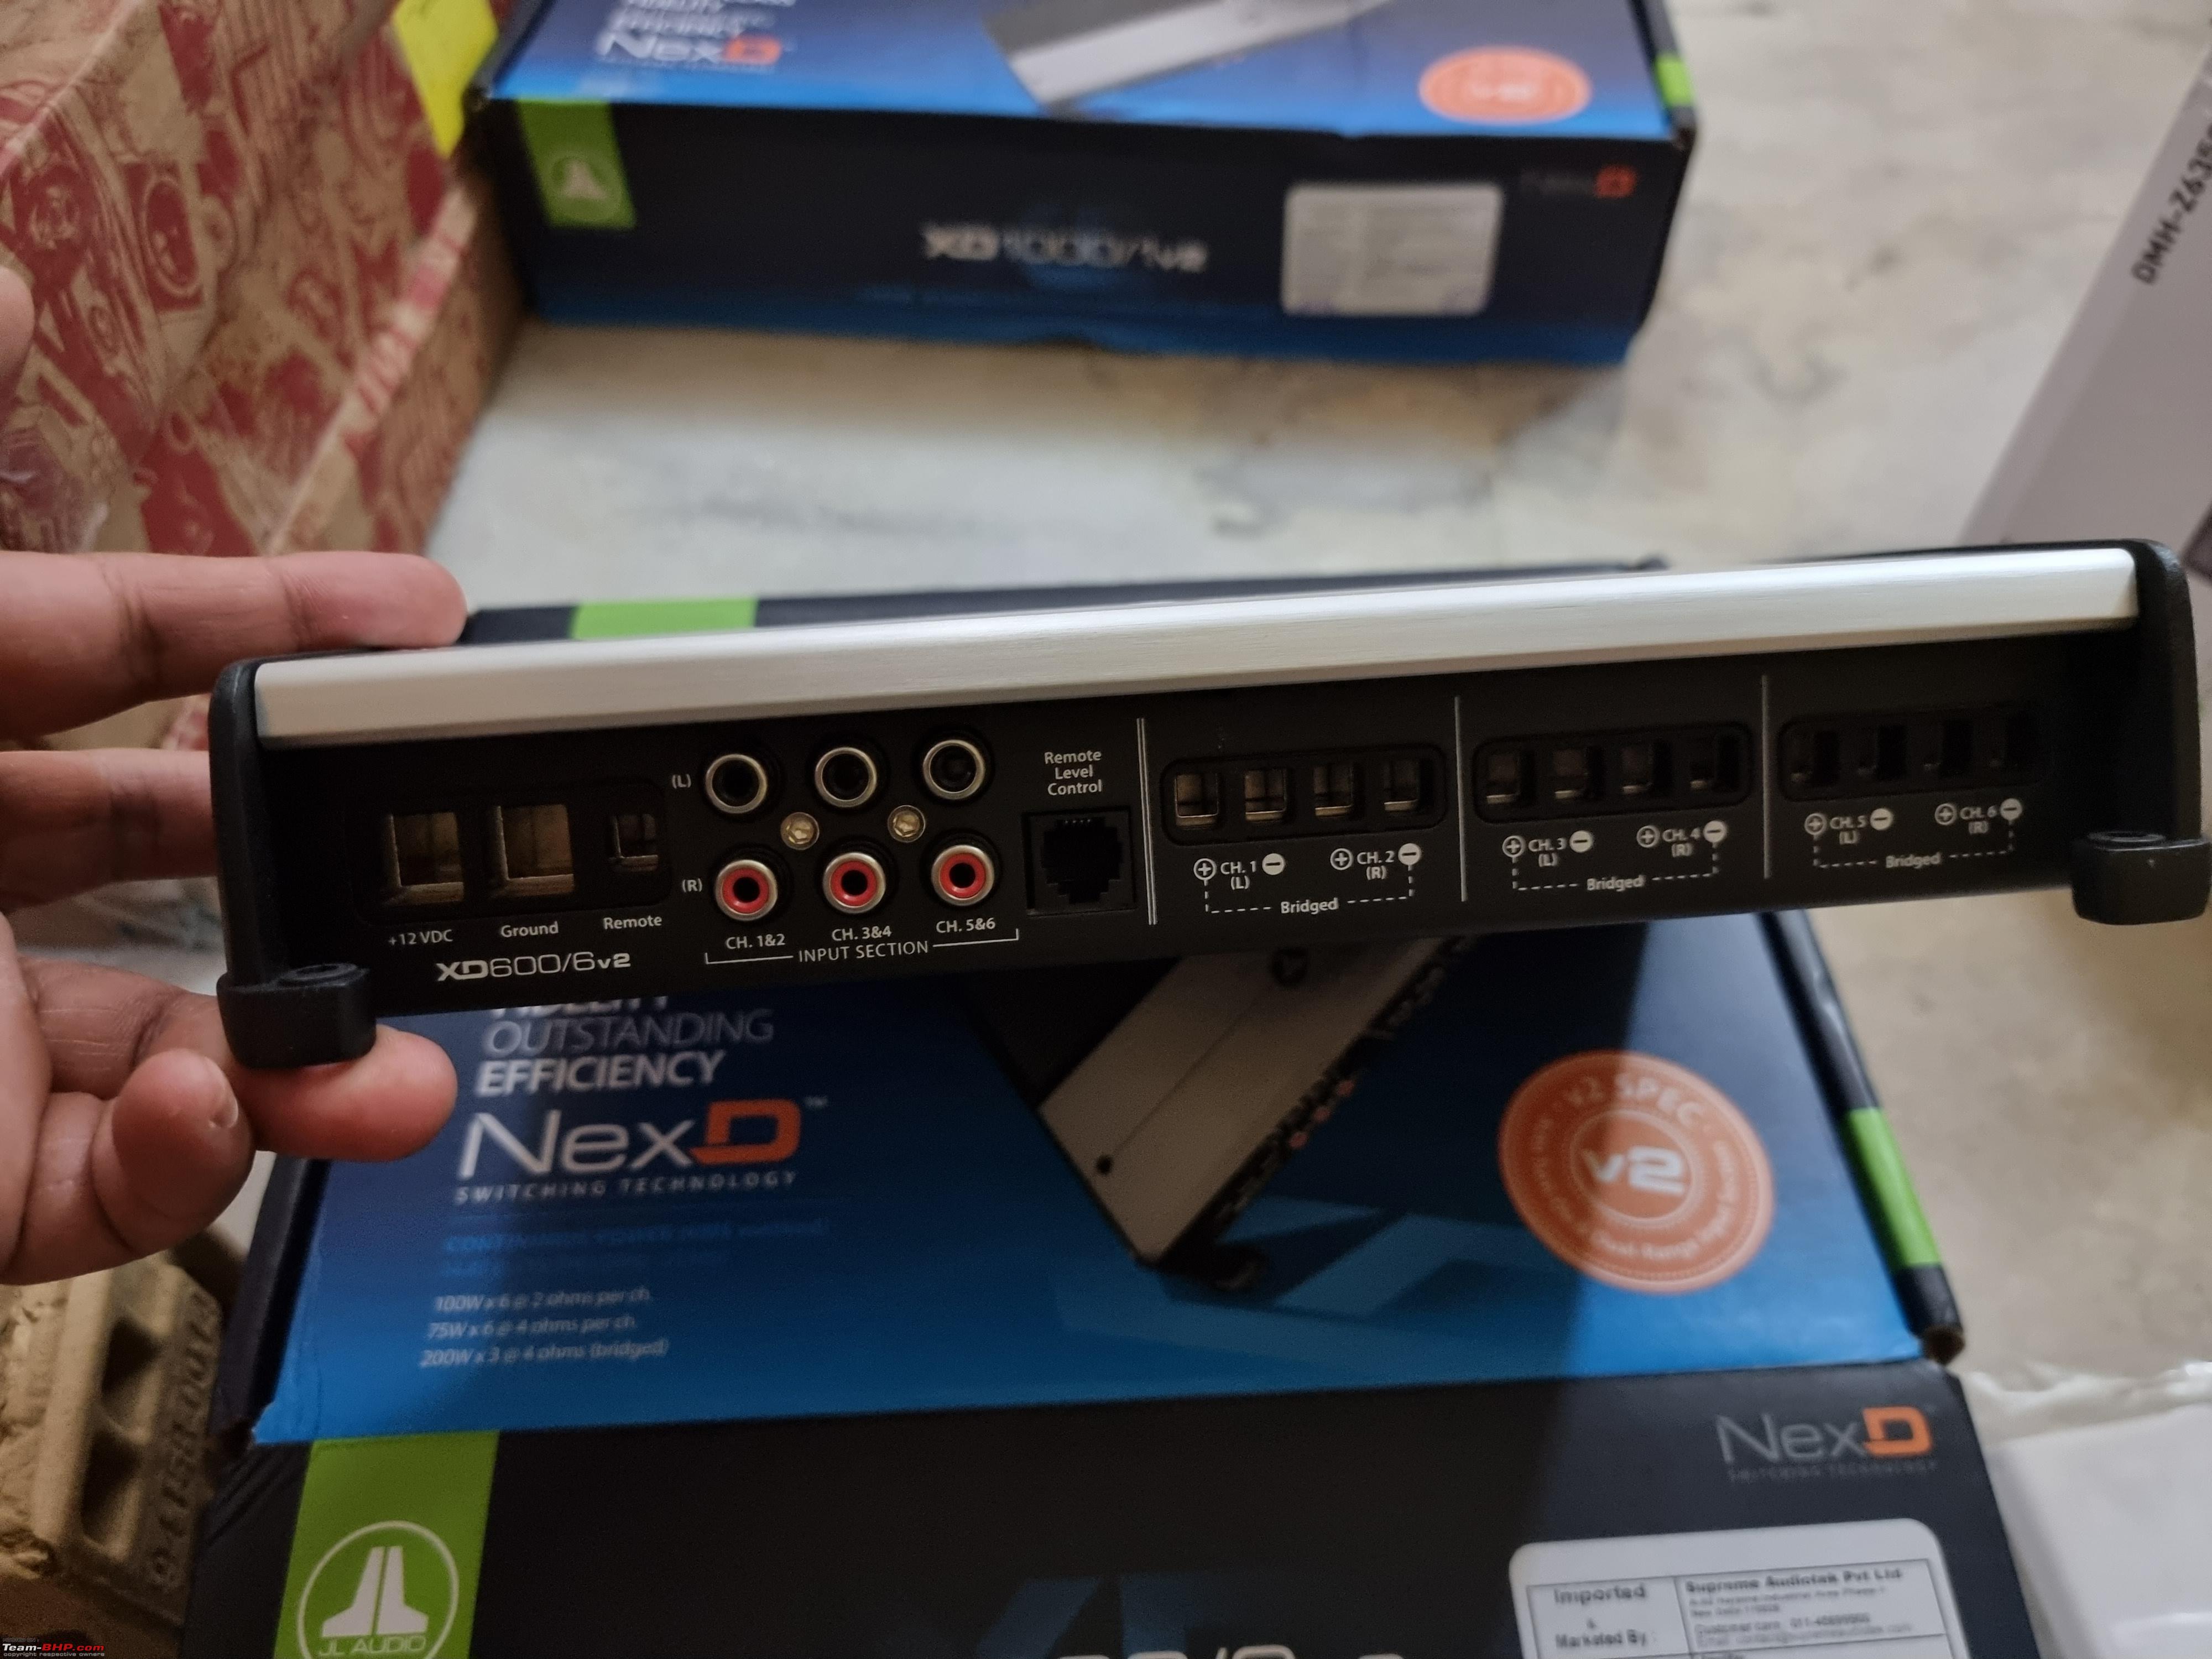 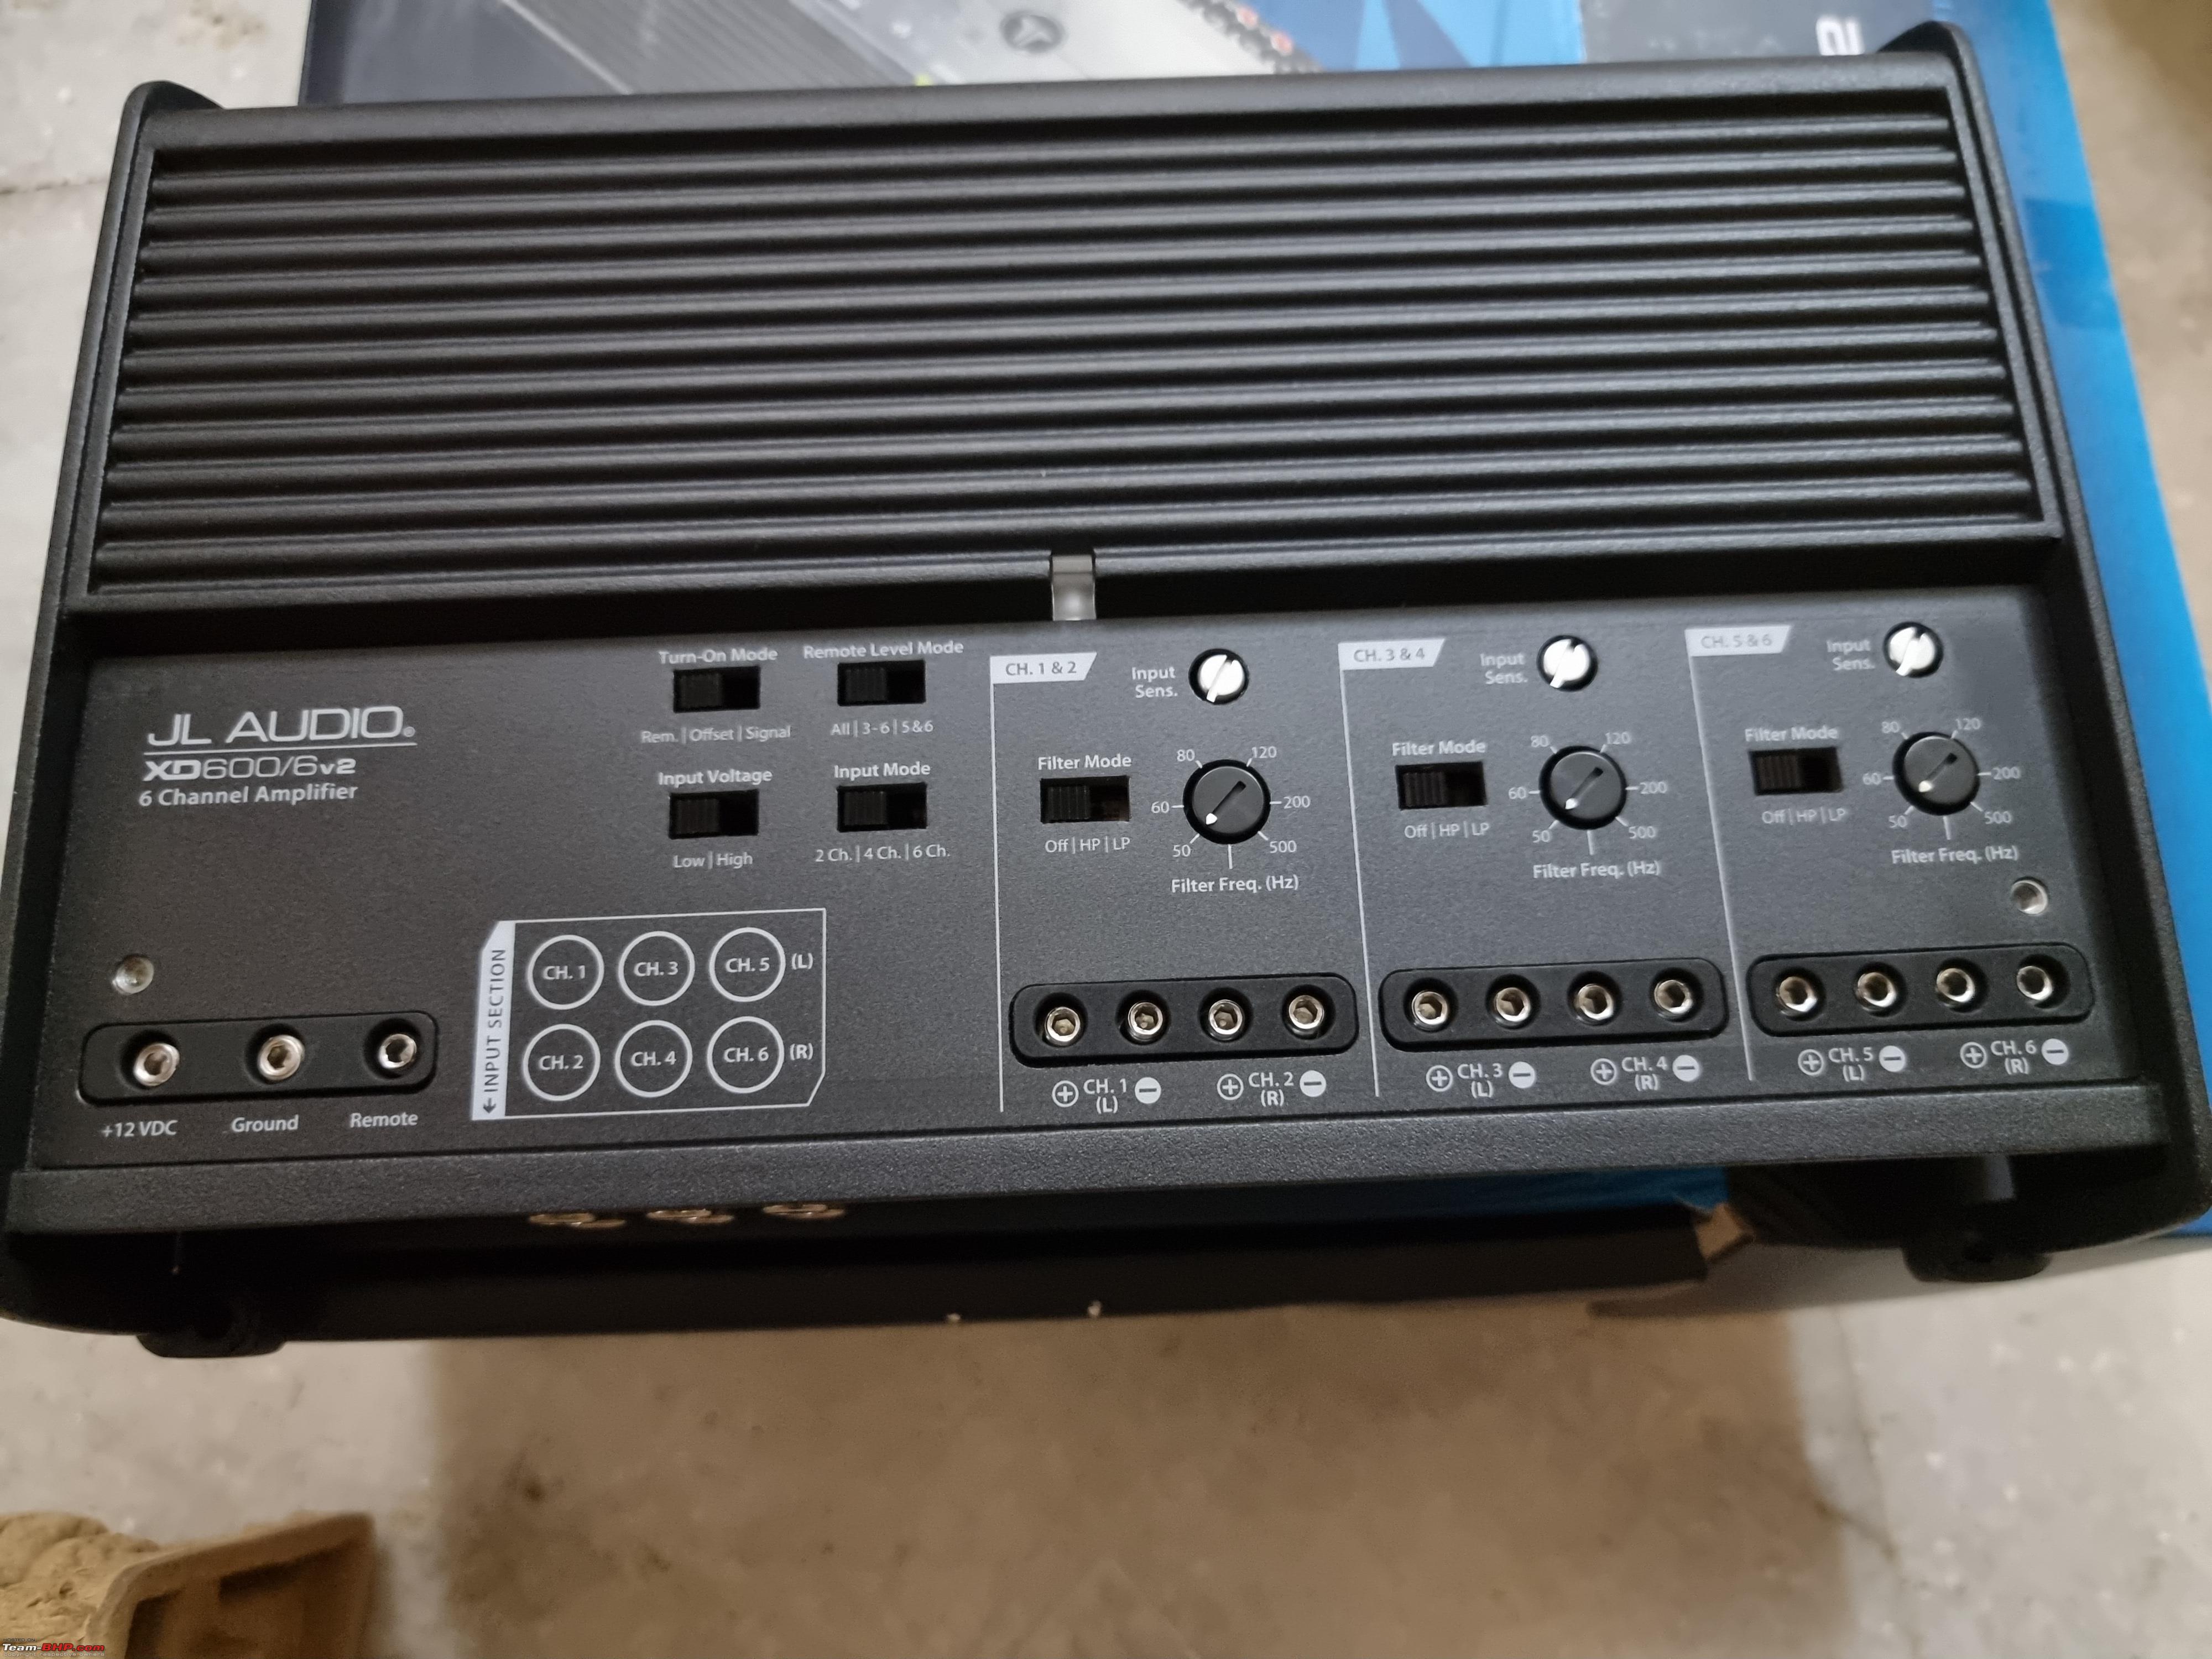  A simple but effective touch by offering a removable logo. It can always be placed the right side up, irrespective of how the AMP is positioned.  Powering the sub would be the XD1000/1v2, rated at 1000W. The sub is only rated at 600W and this is definitely overkill for it. I just wanted a bit more headroom to play around with so got the bigger AMP. 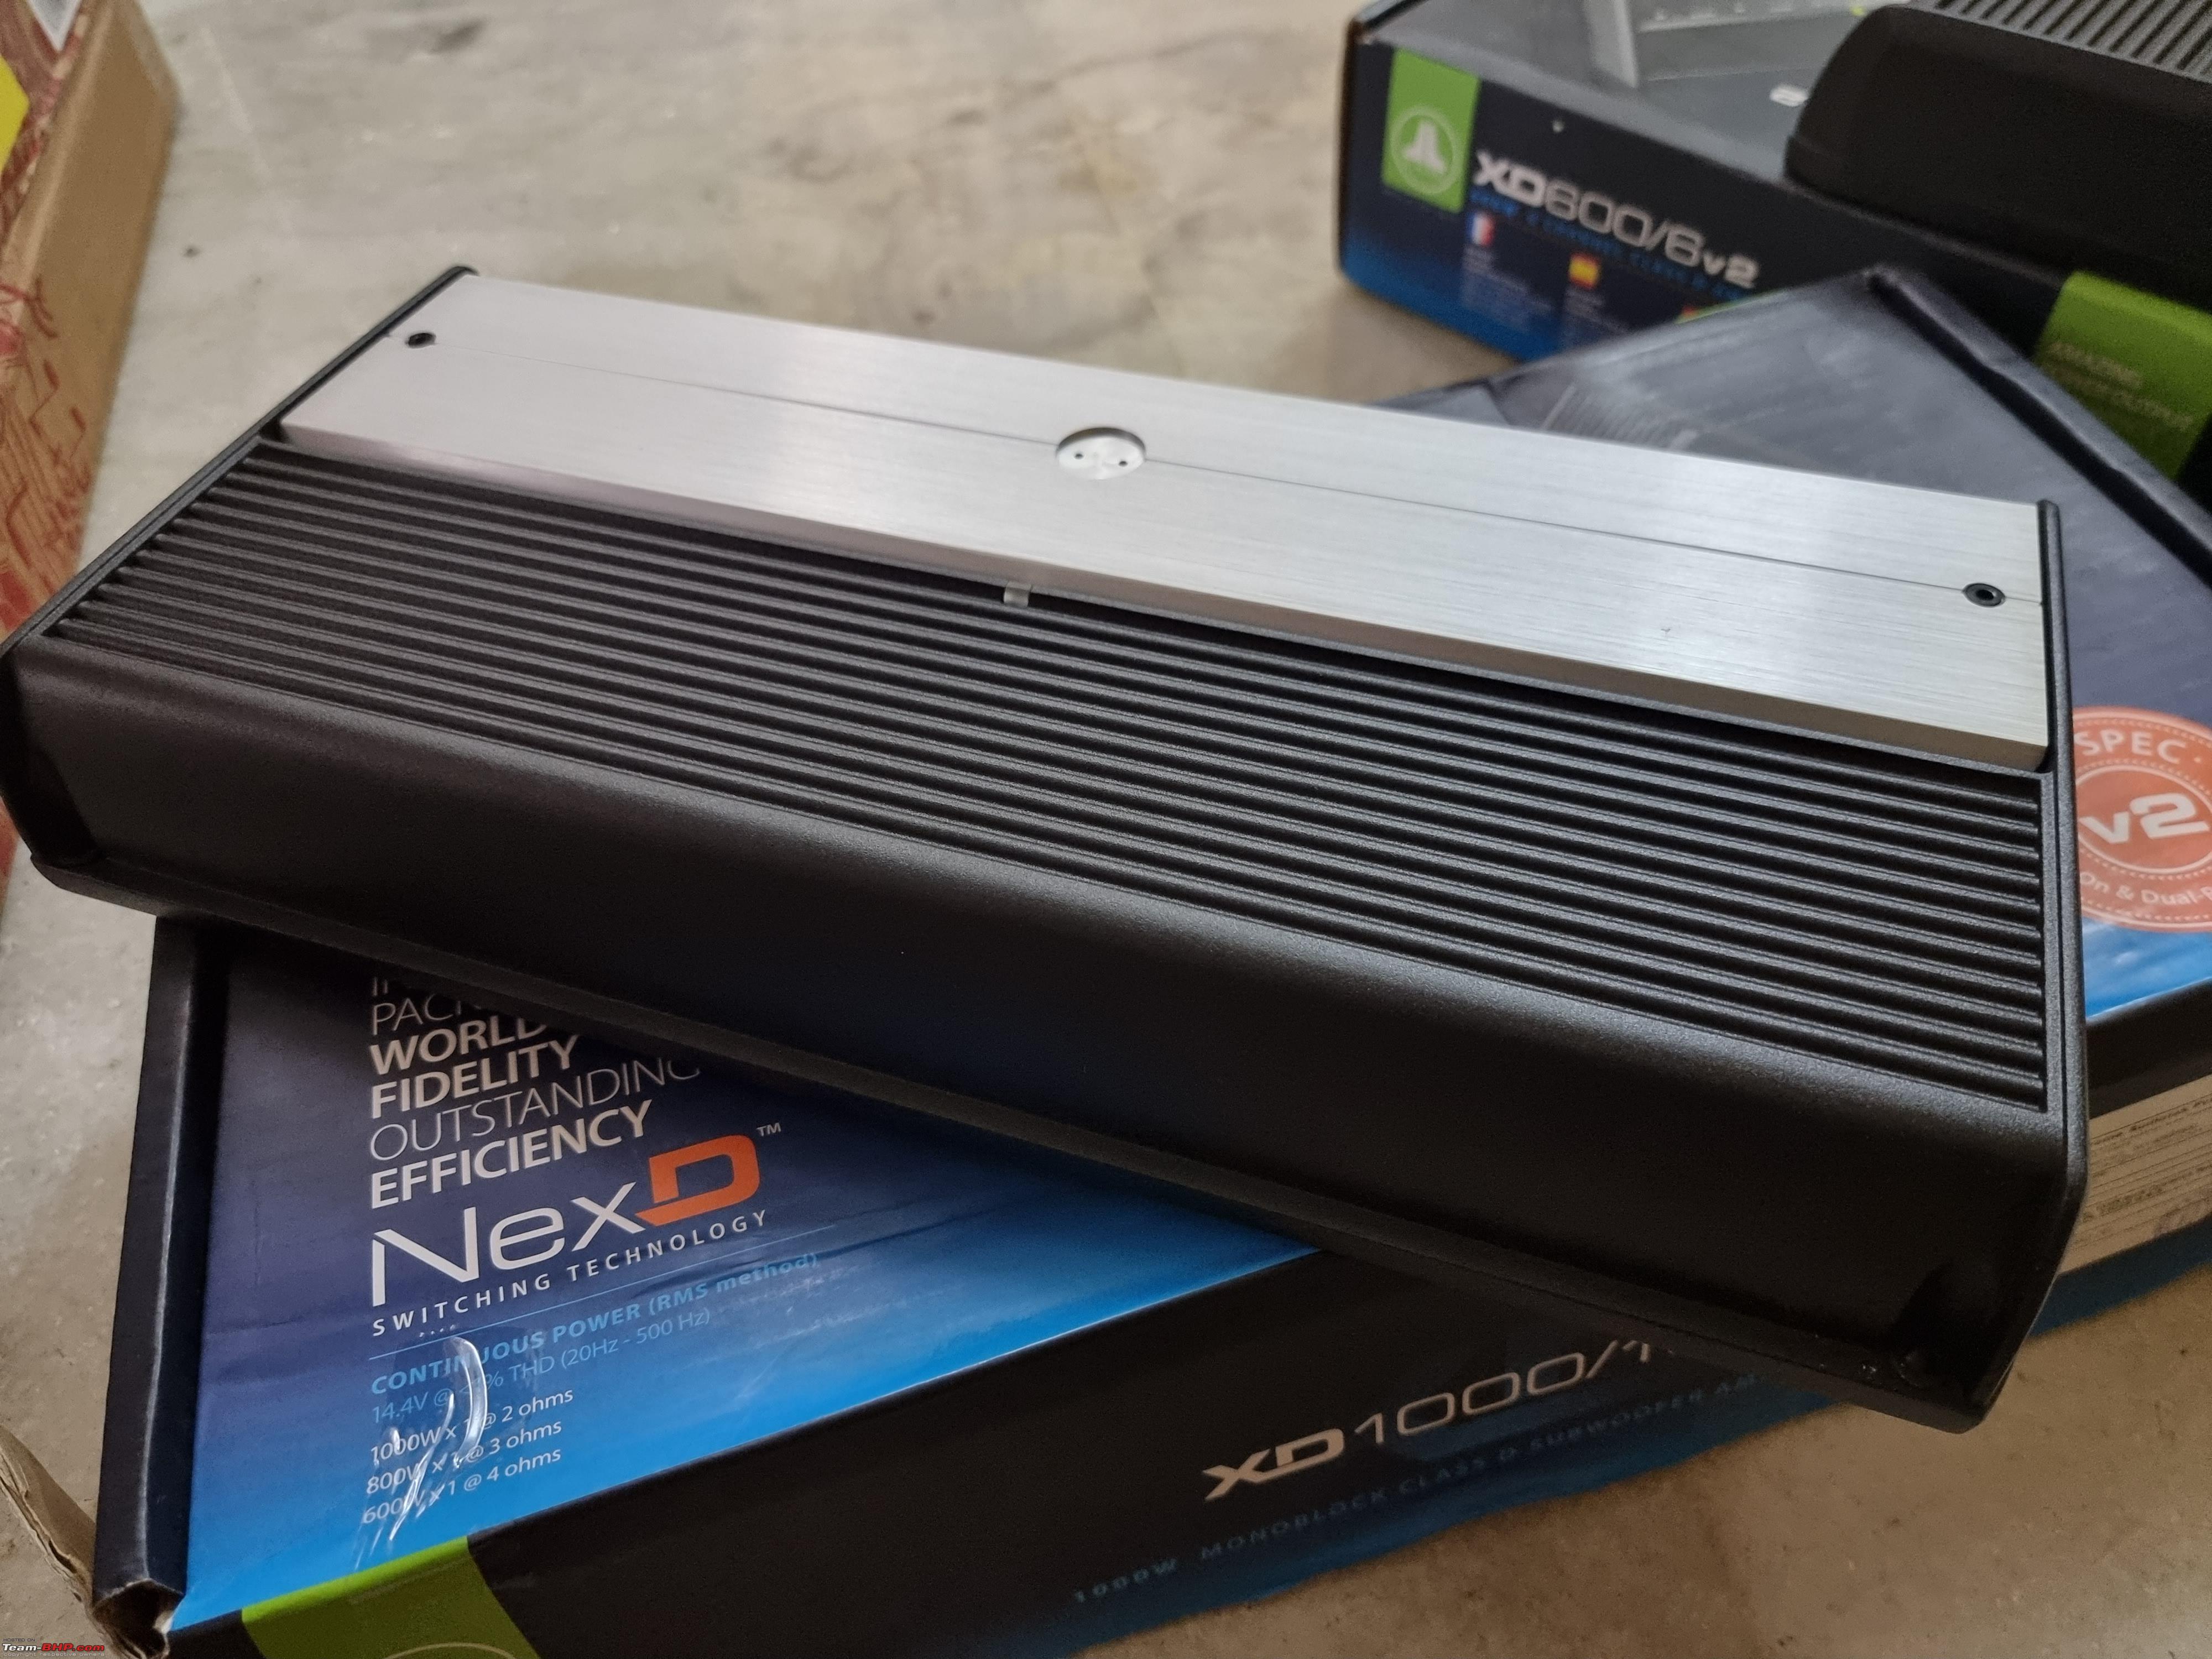 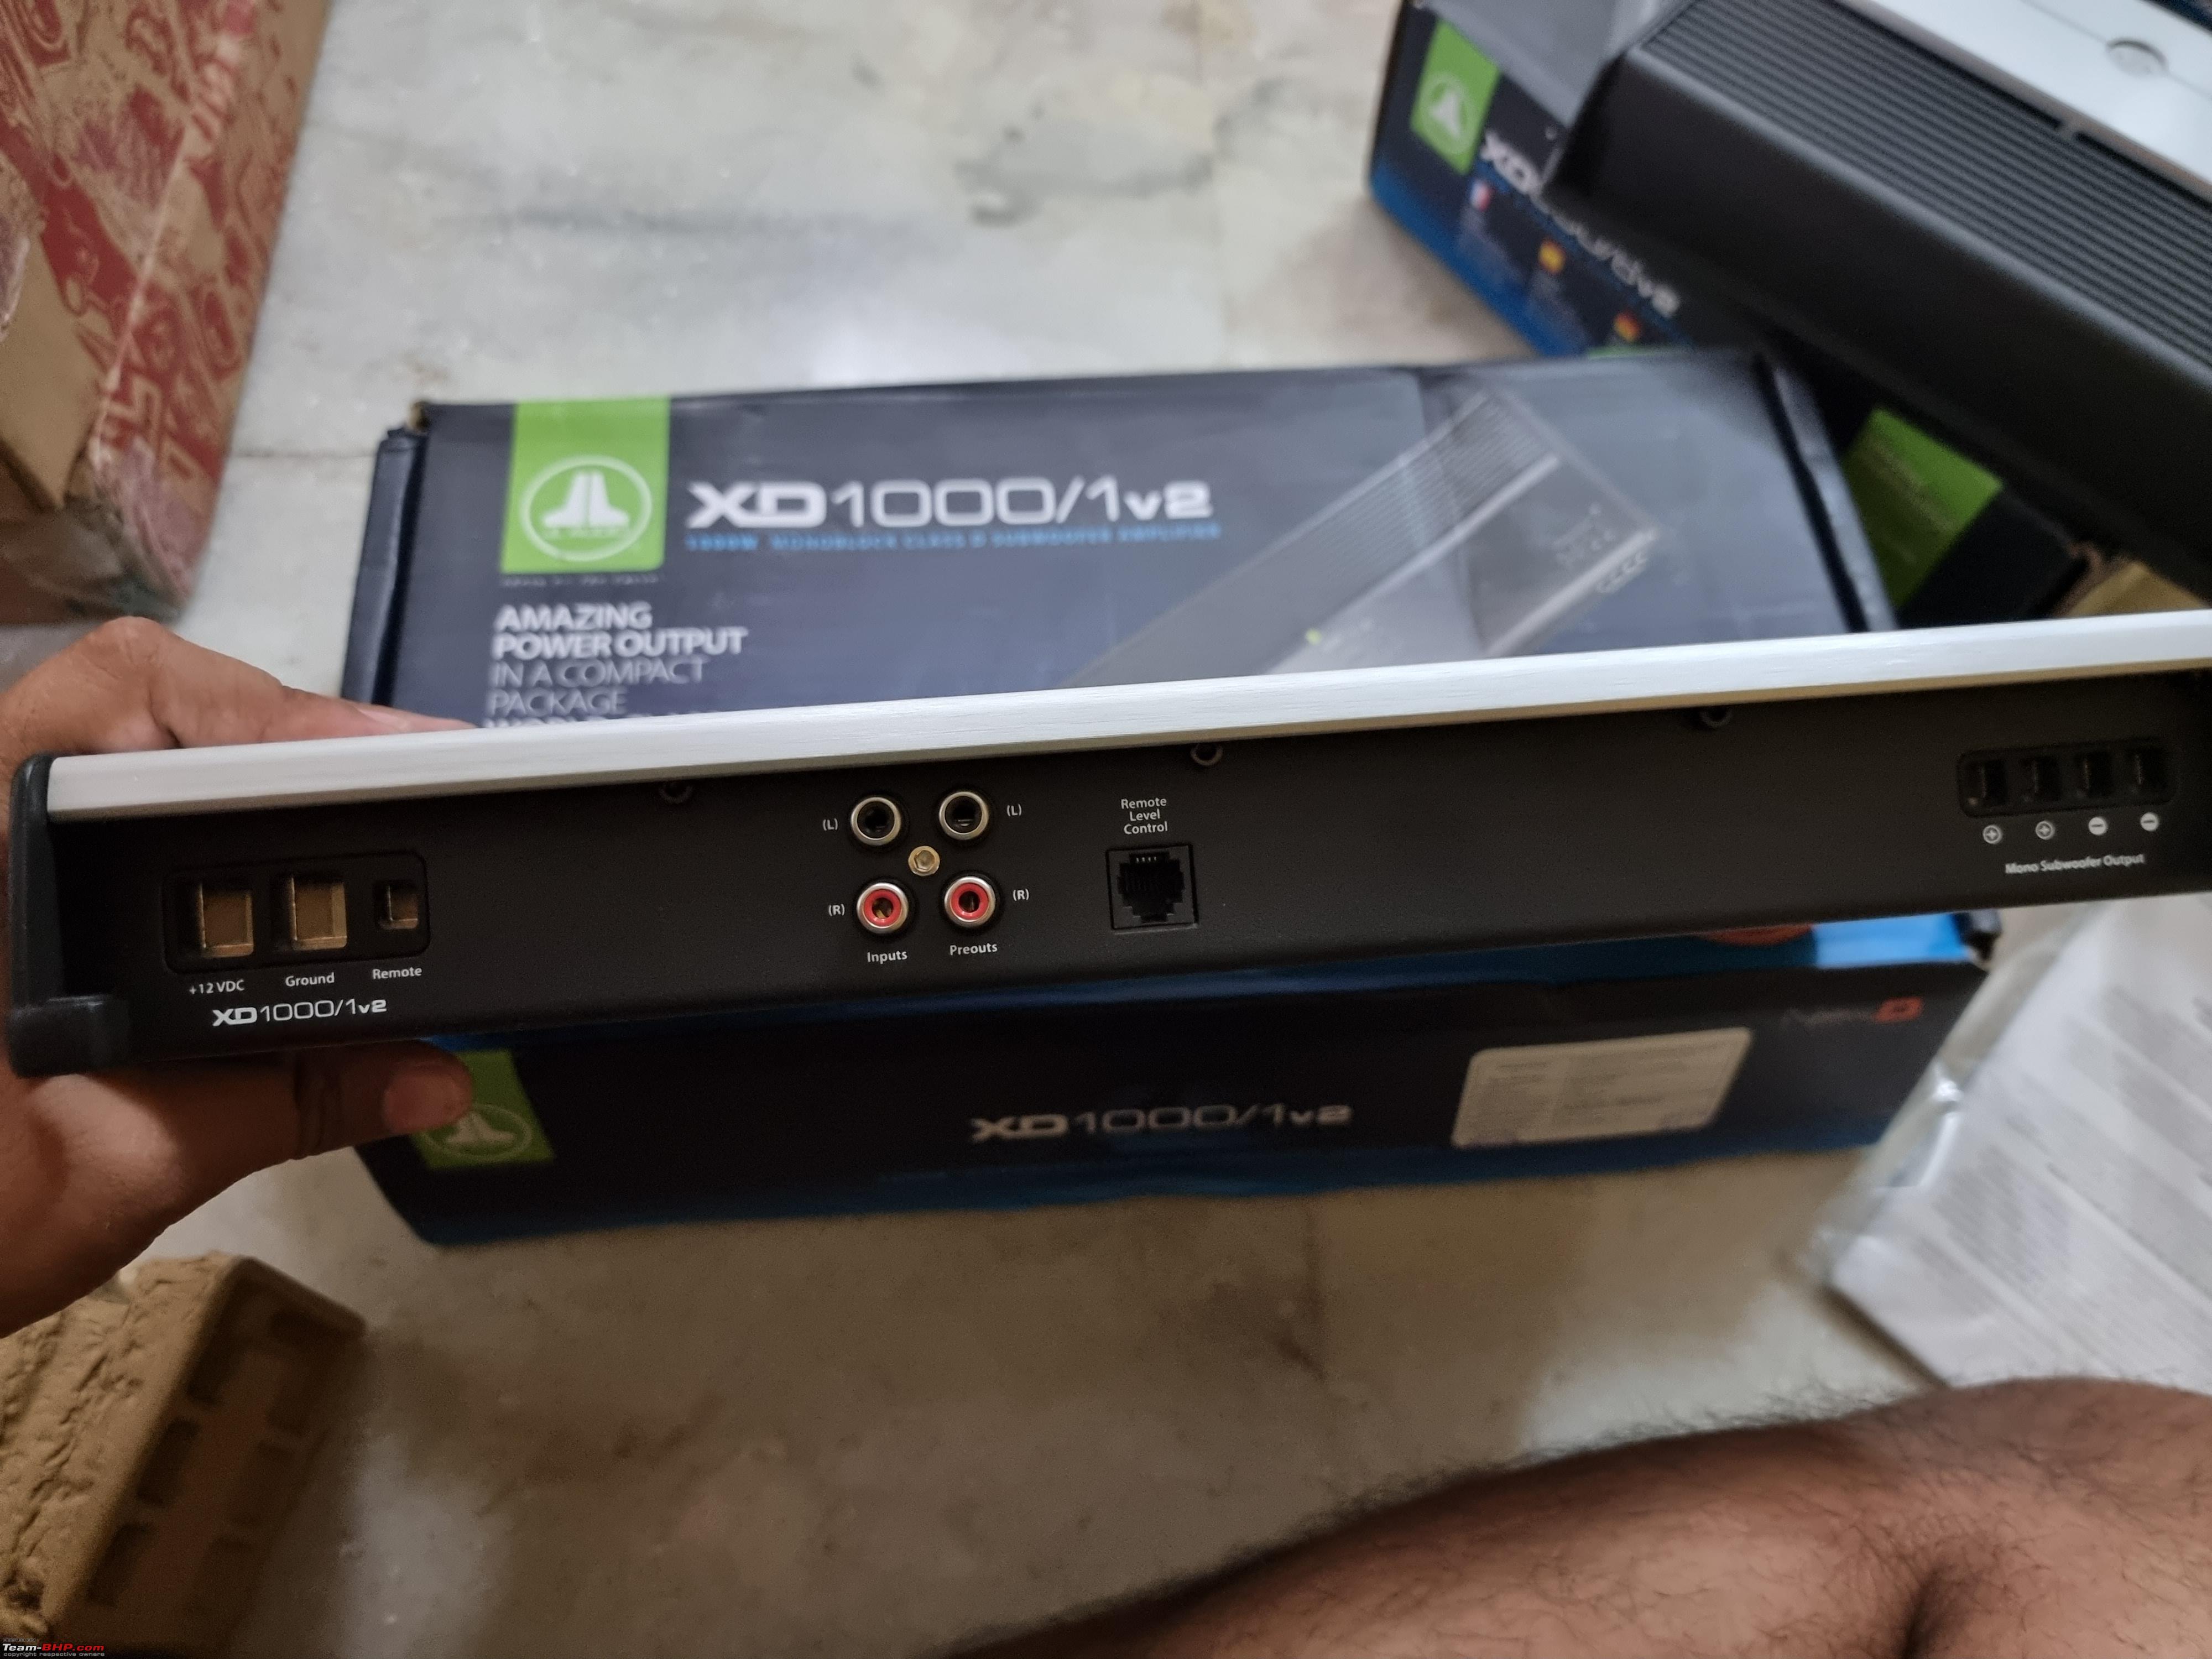 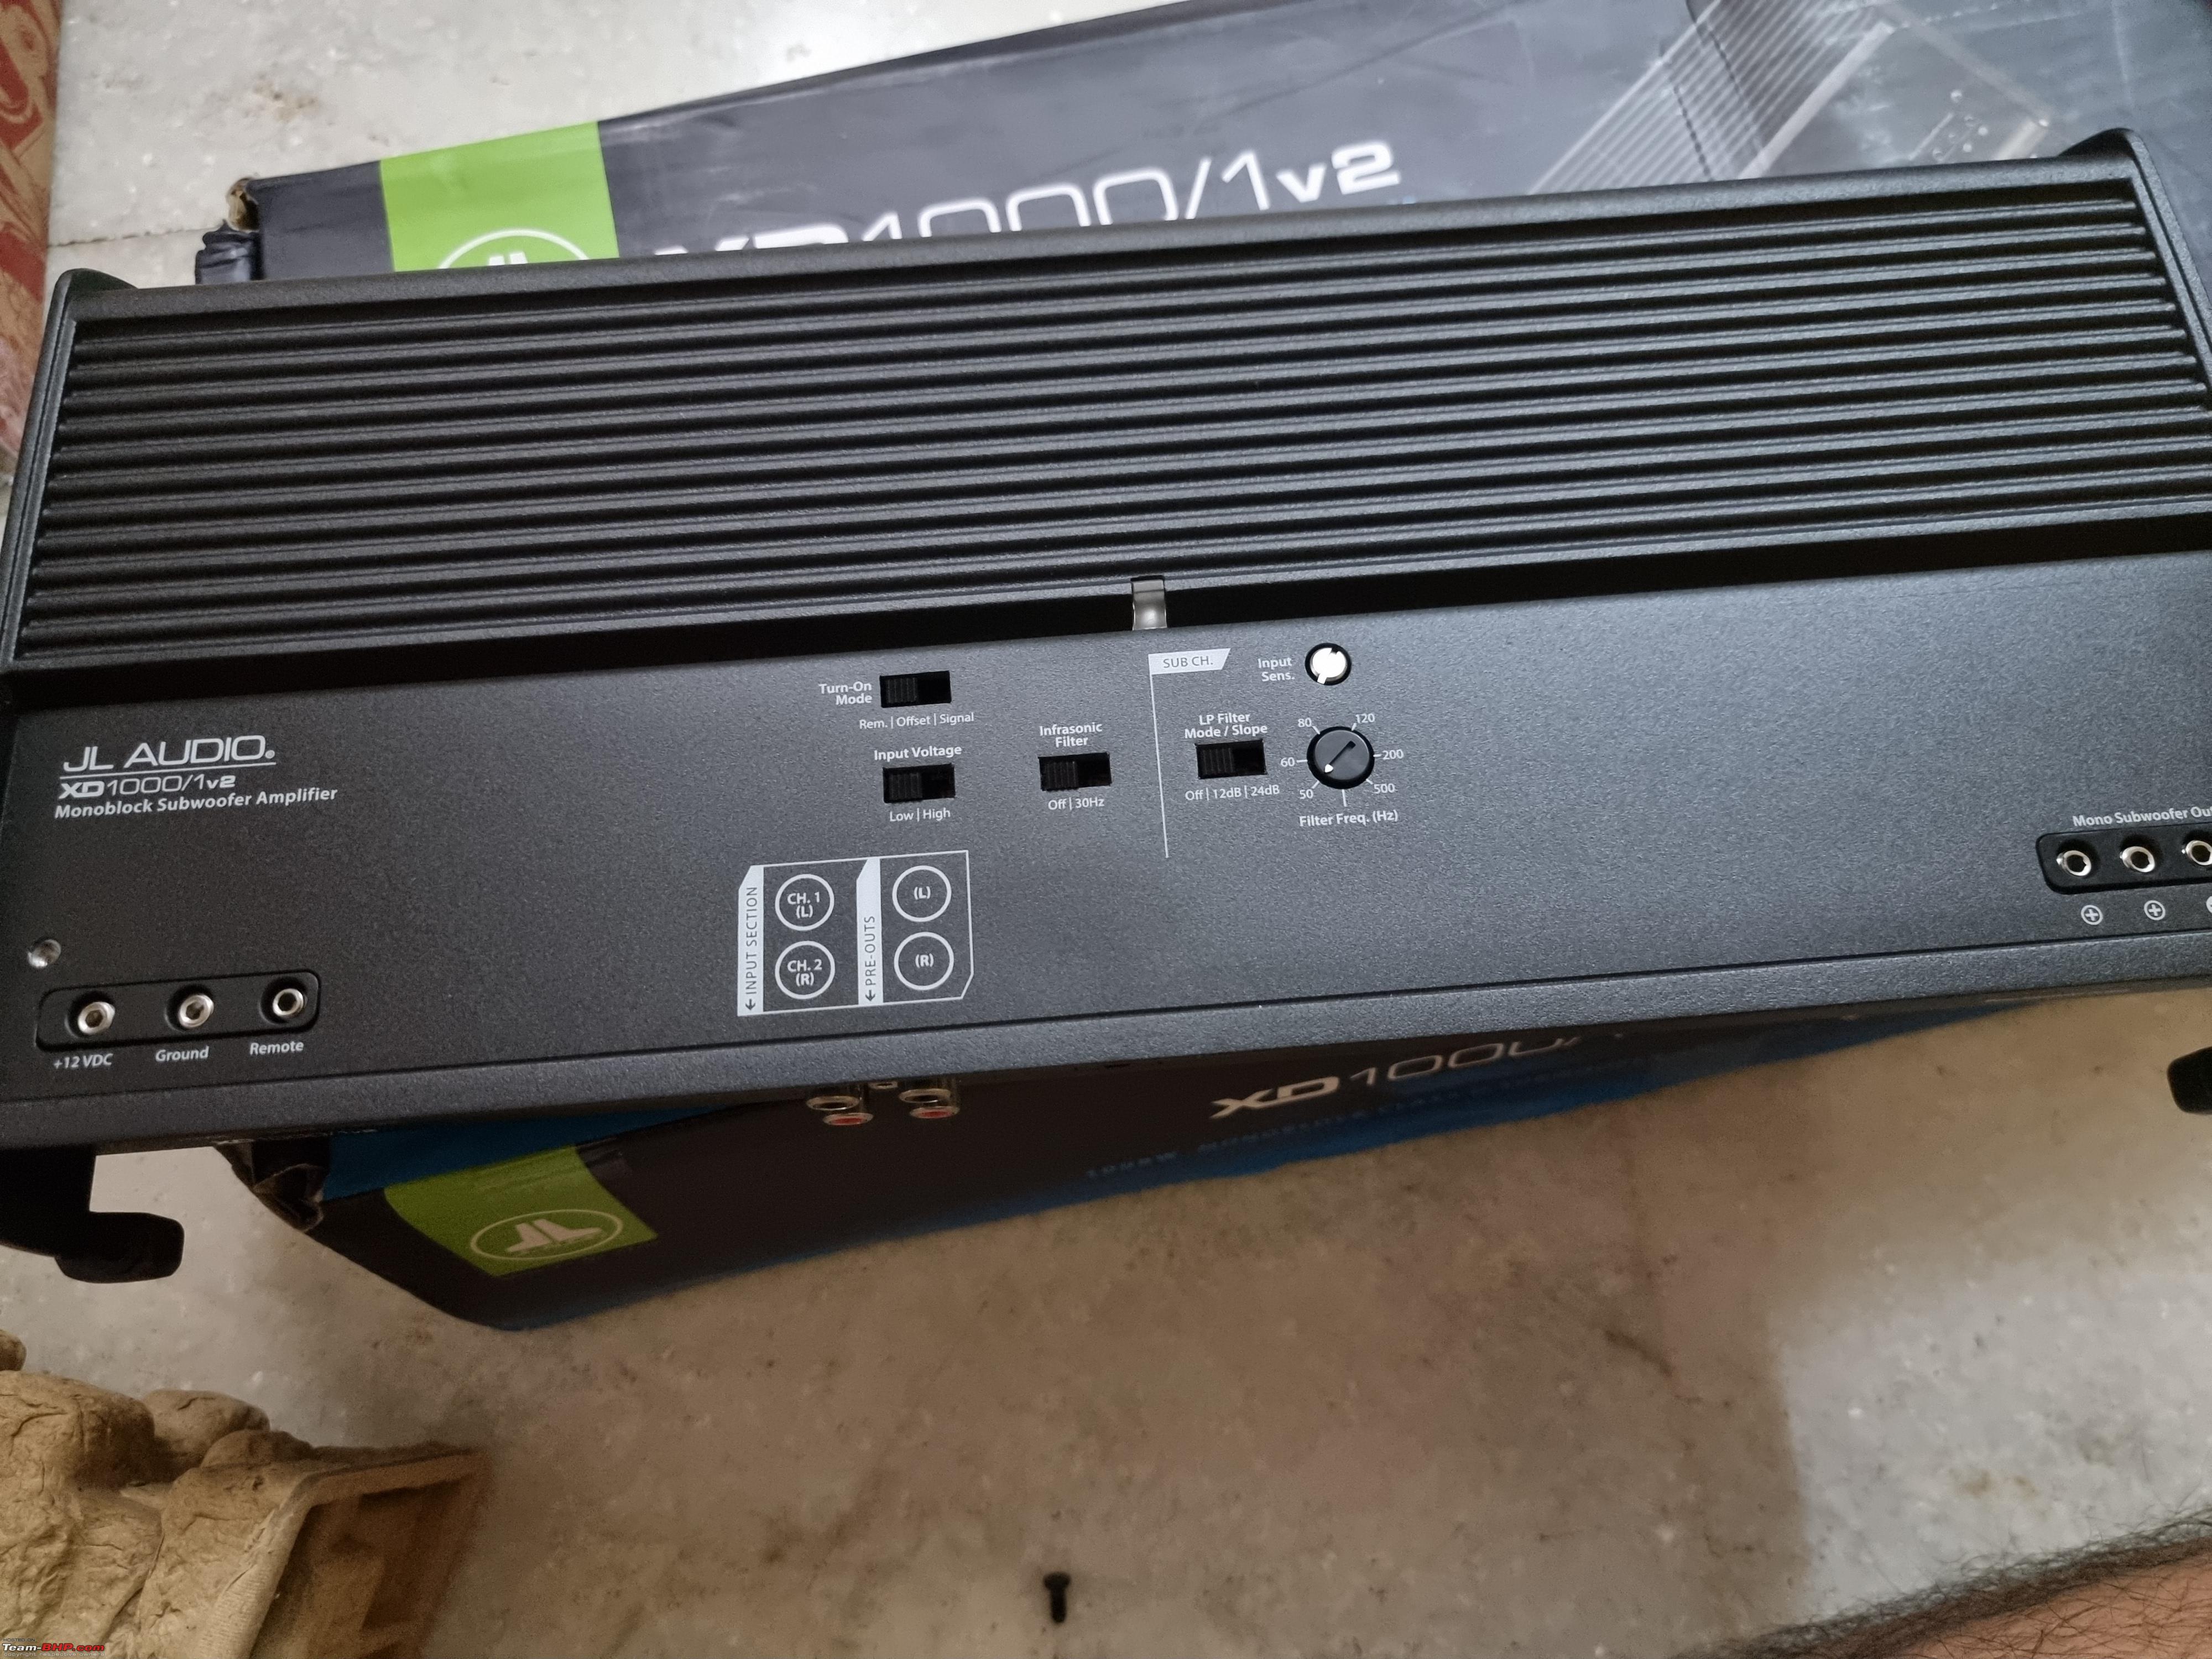 The size difference between the XD600 and XD1000 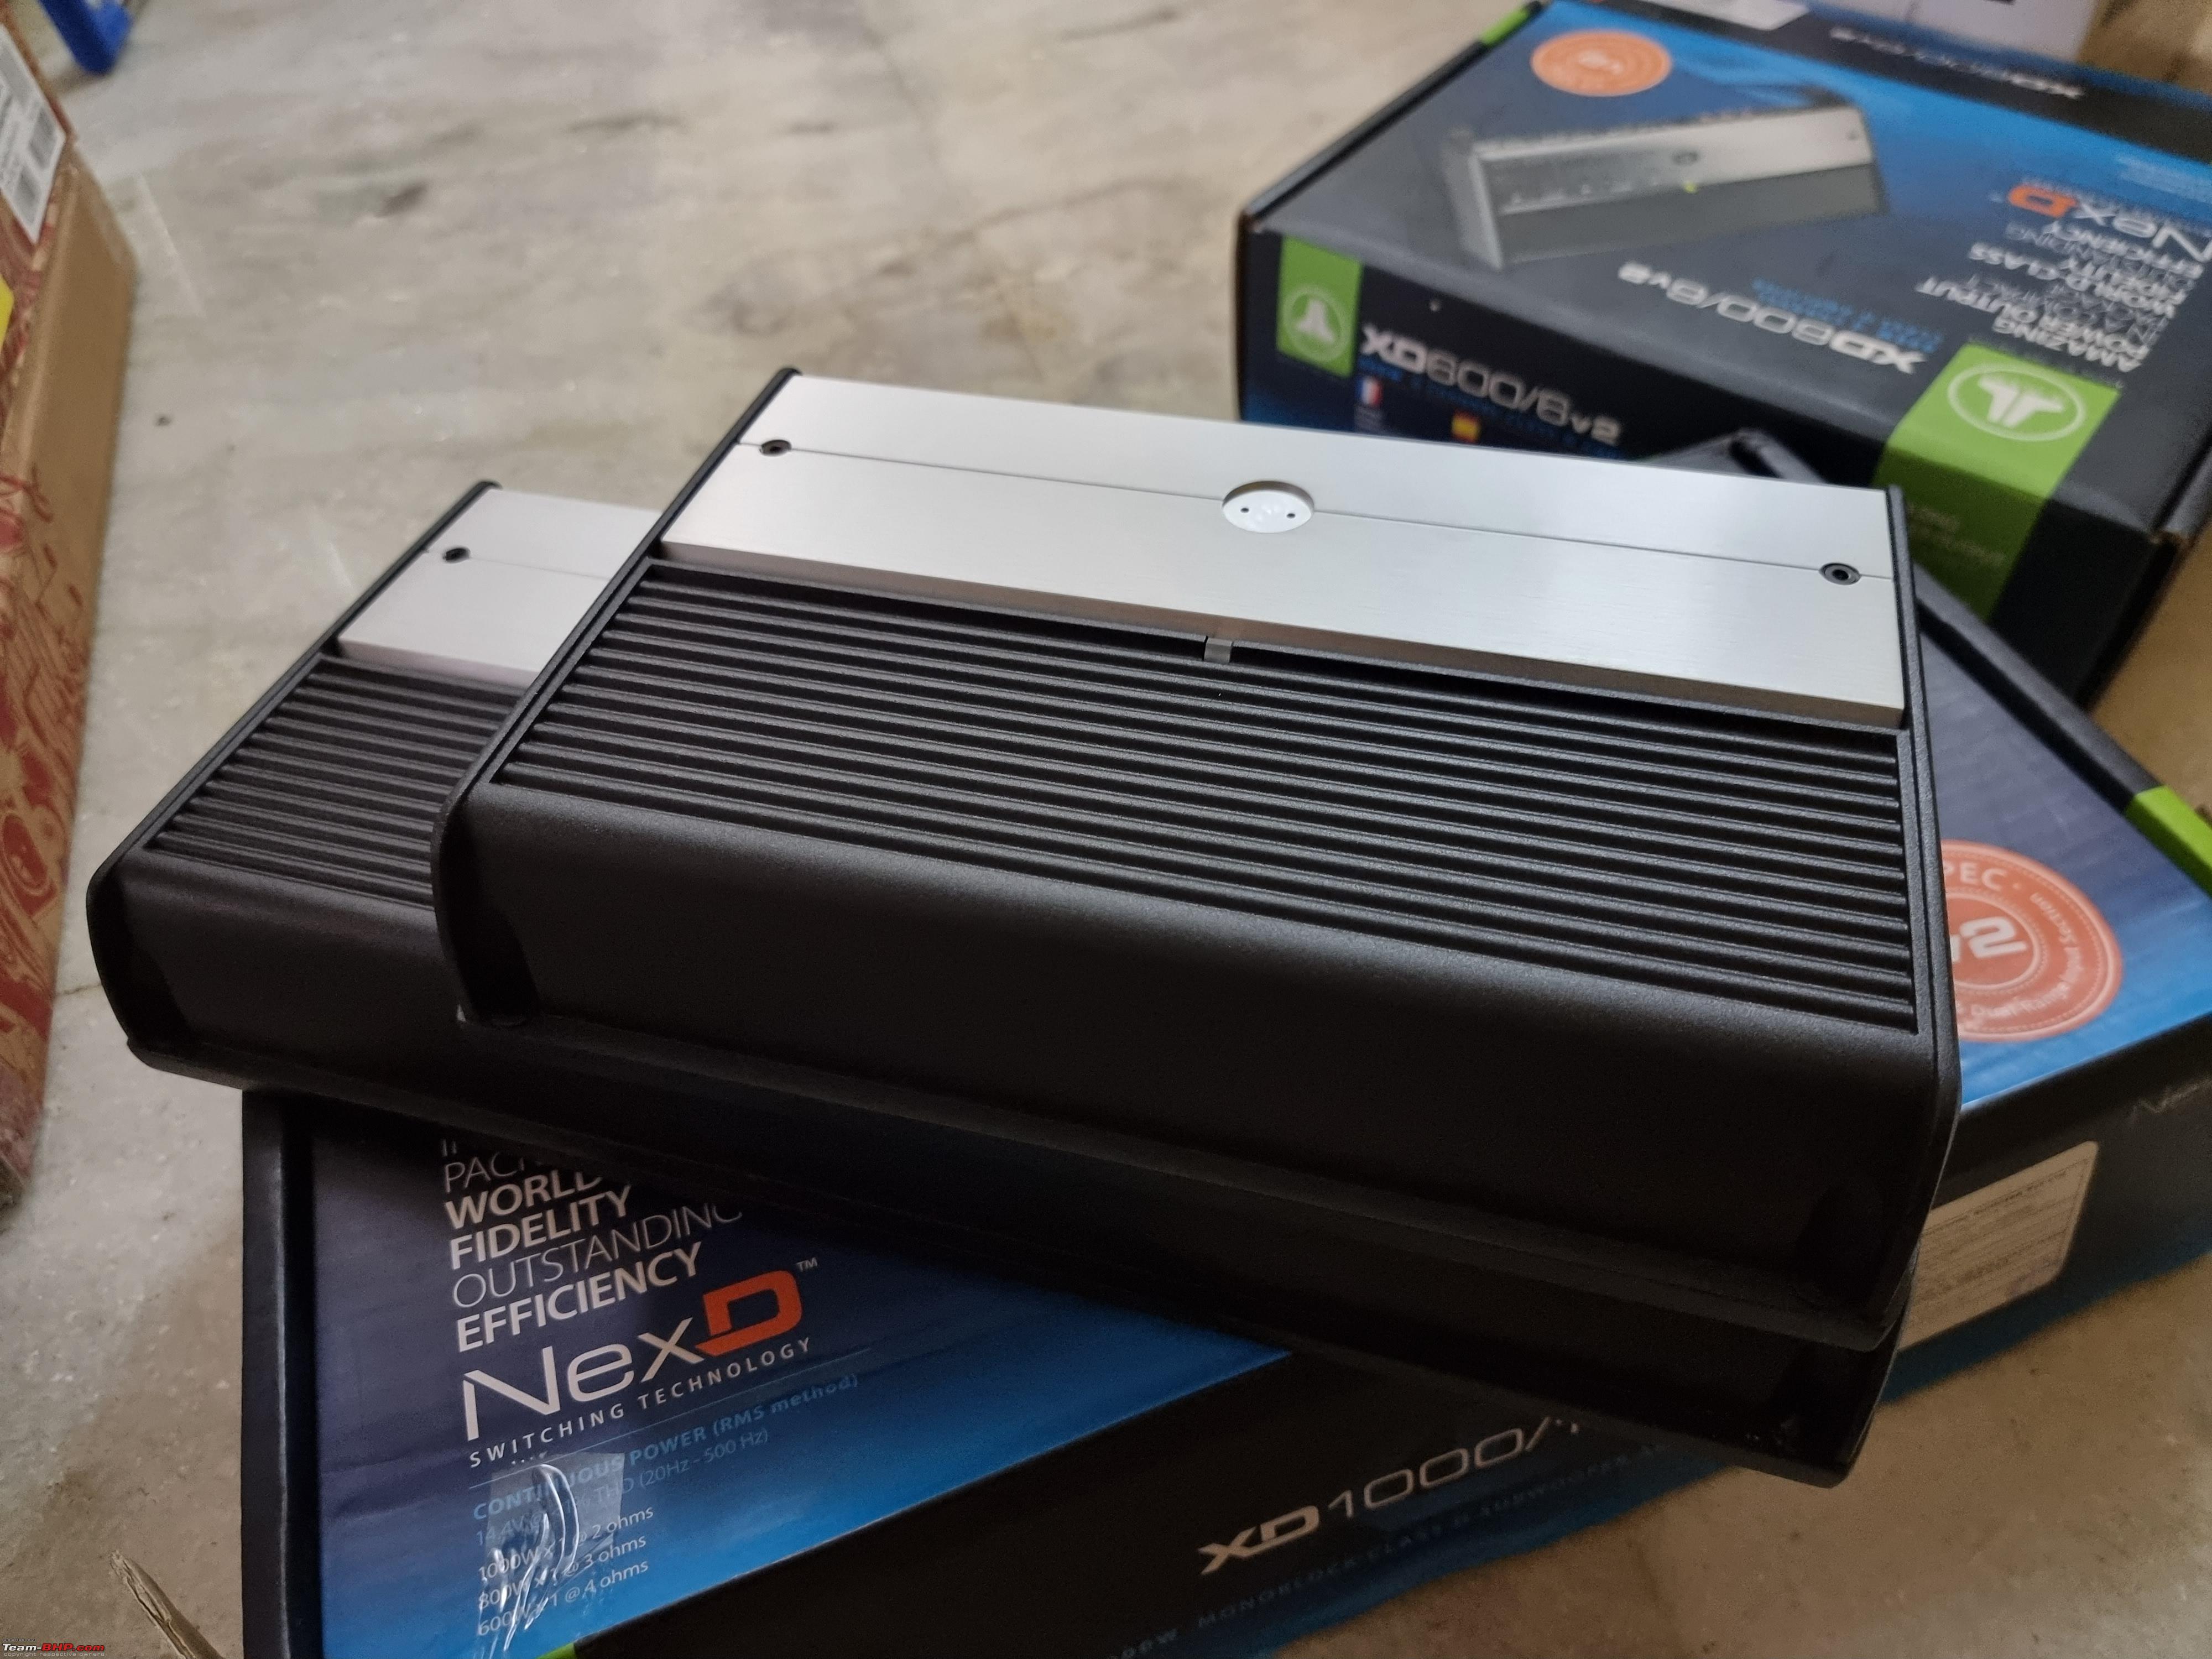 The DSP Great speakers are meaningless if they cannot be tuned properly, hence a DSP is a must. Will get more into tuning later on, let's take a look at the TwK-88 for now. It's an 8-channel DSP, wherein 6 channels would be used for the front speakers and 2 channels for the rear. This left no room for the sub, so we decided to run it directly from the HU to the AMP. Not a major issue since the HU had basic tuning options for the sub and it was more than enough to get the best out of it. Excuse the blurry pics, didn't realize it at the time. 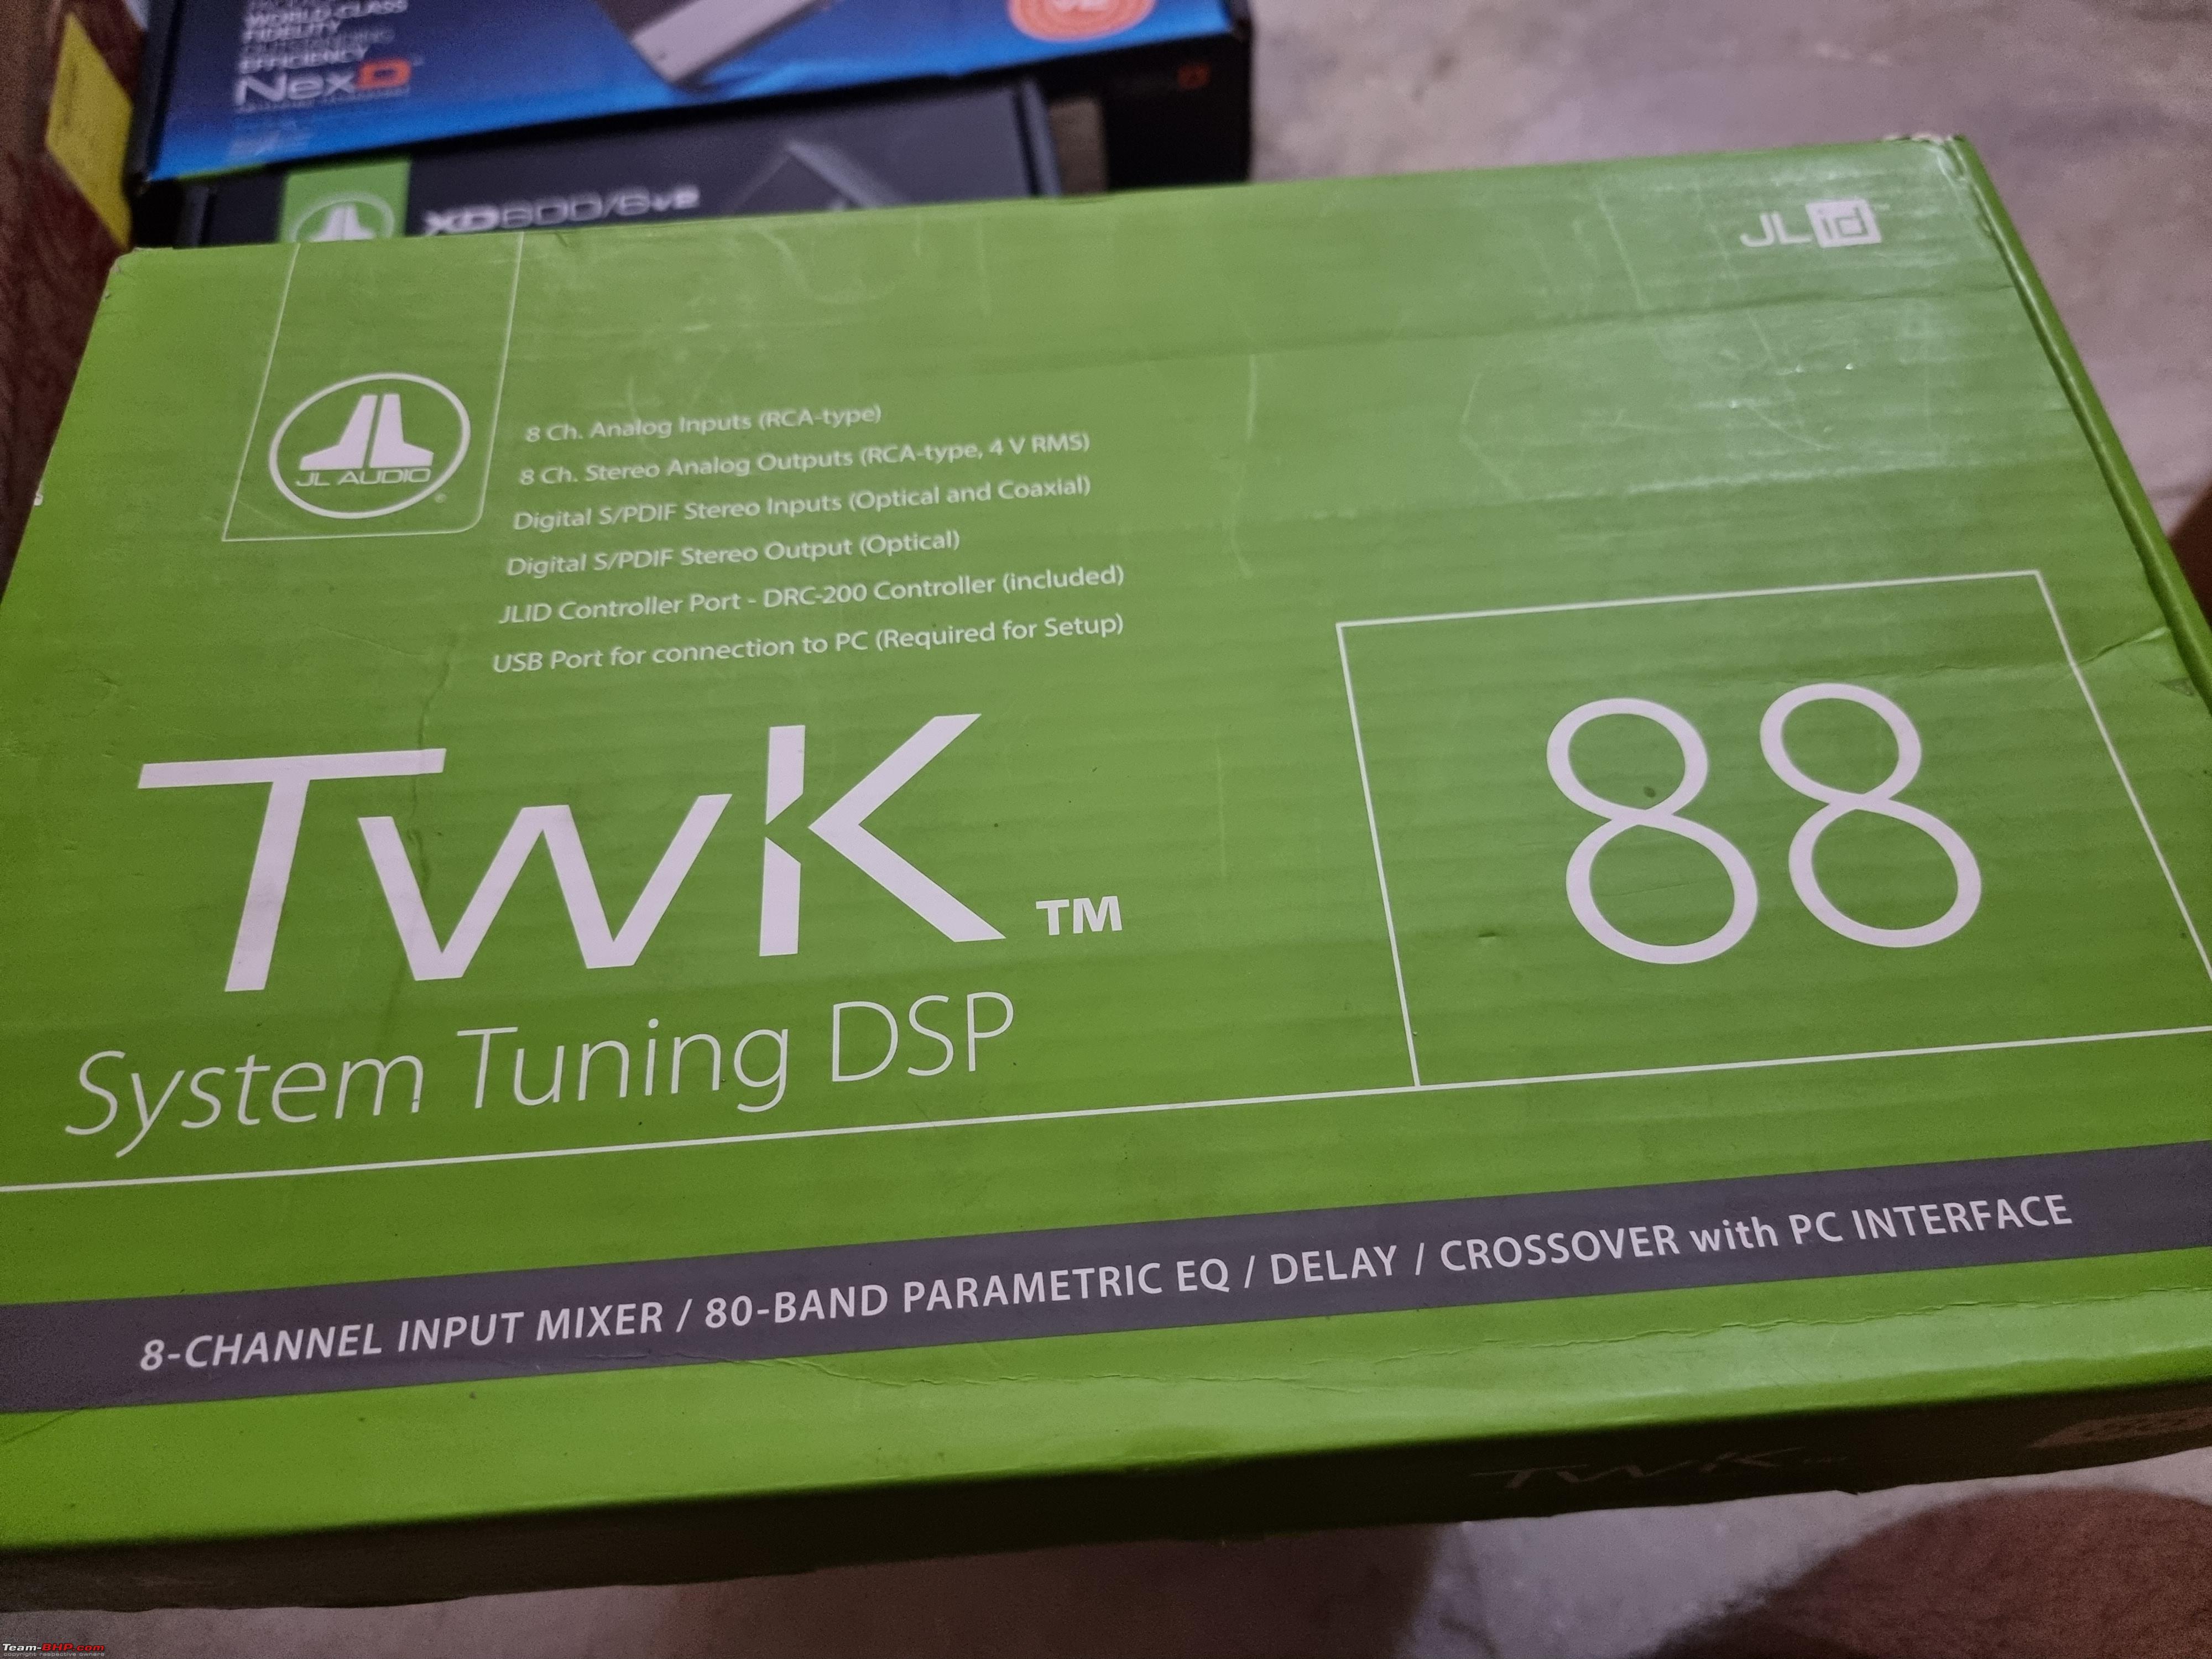 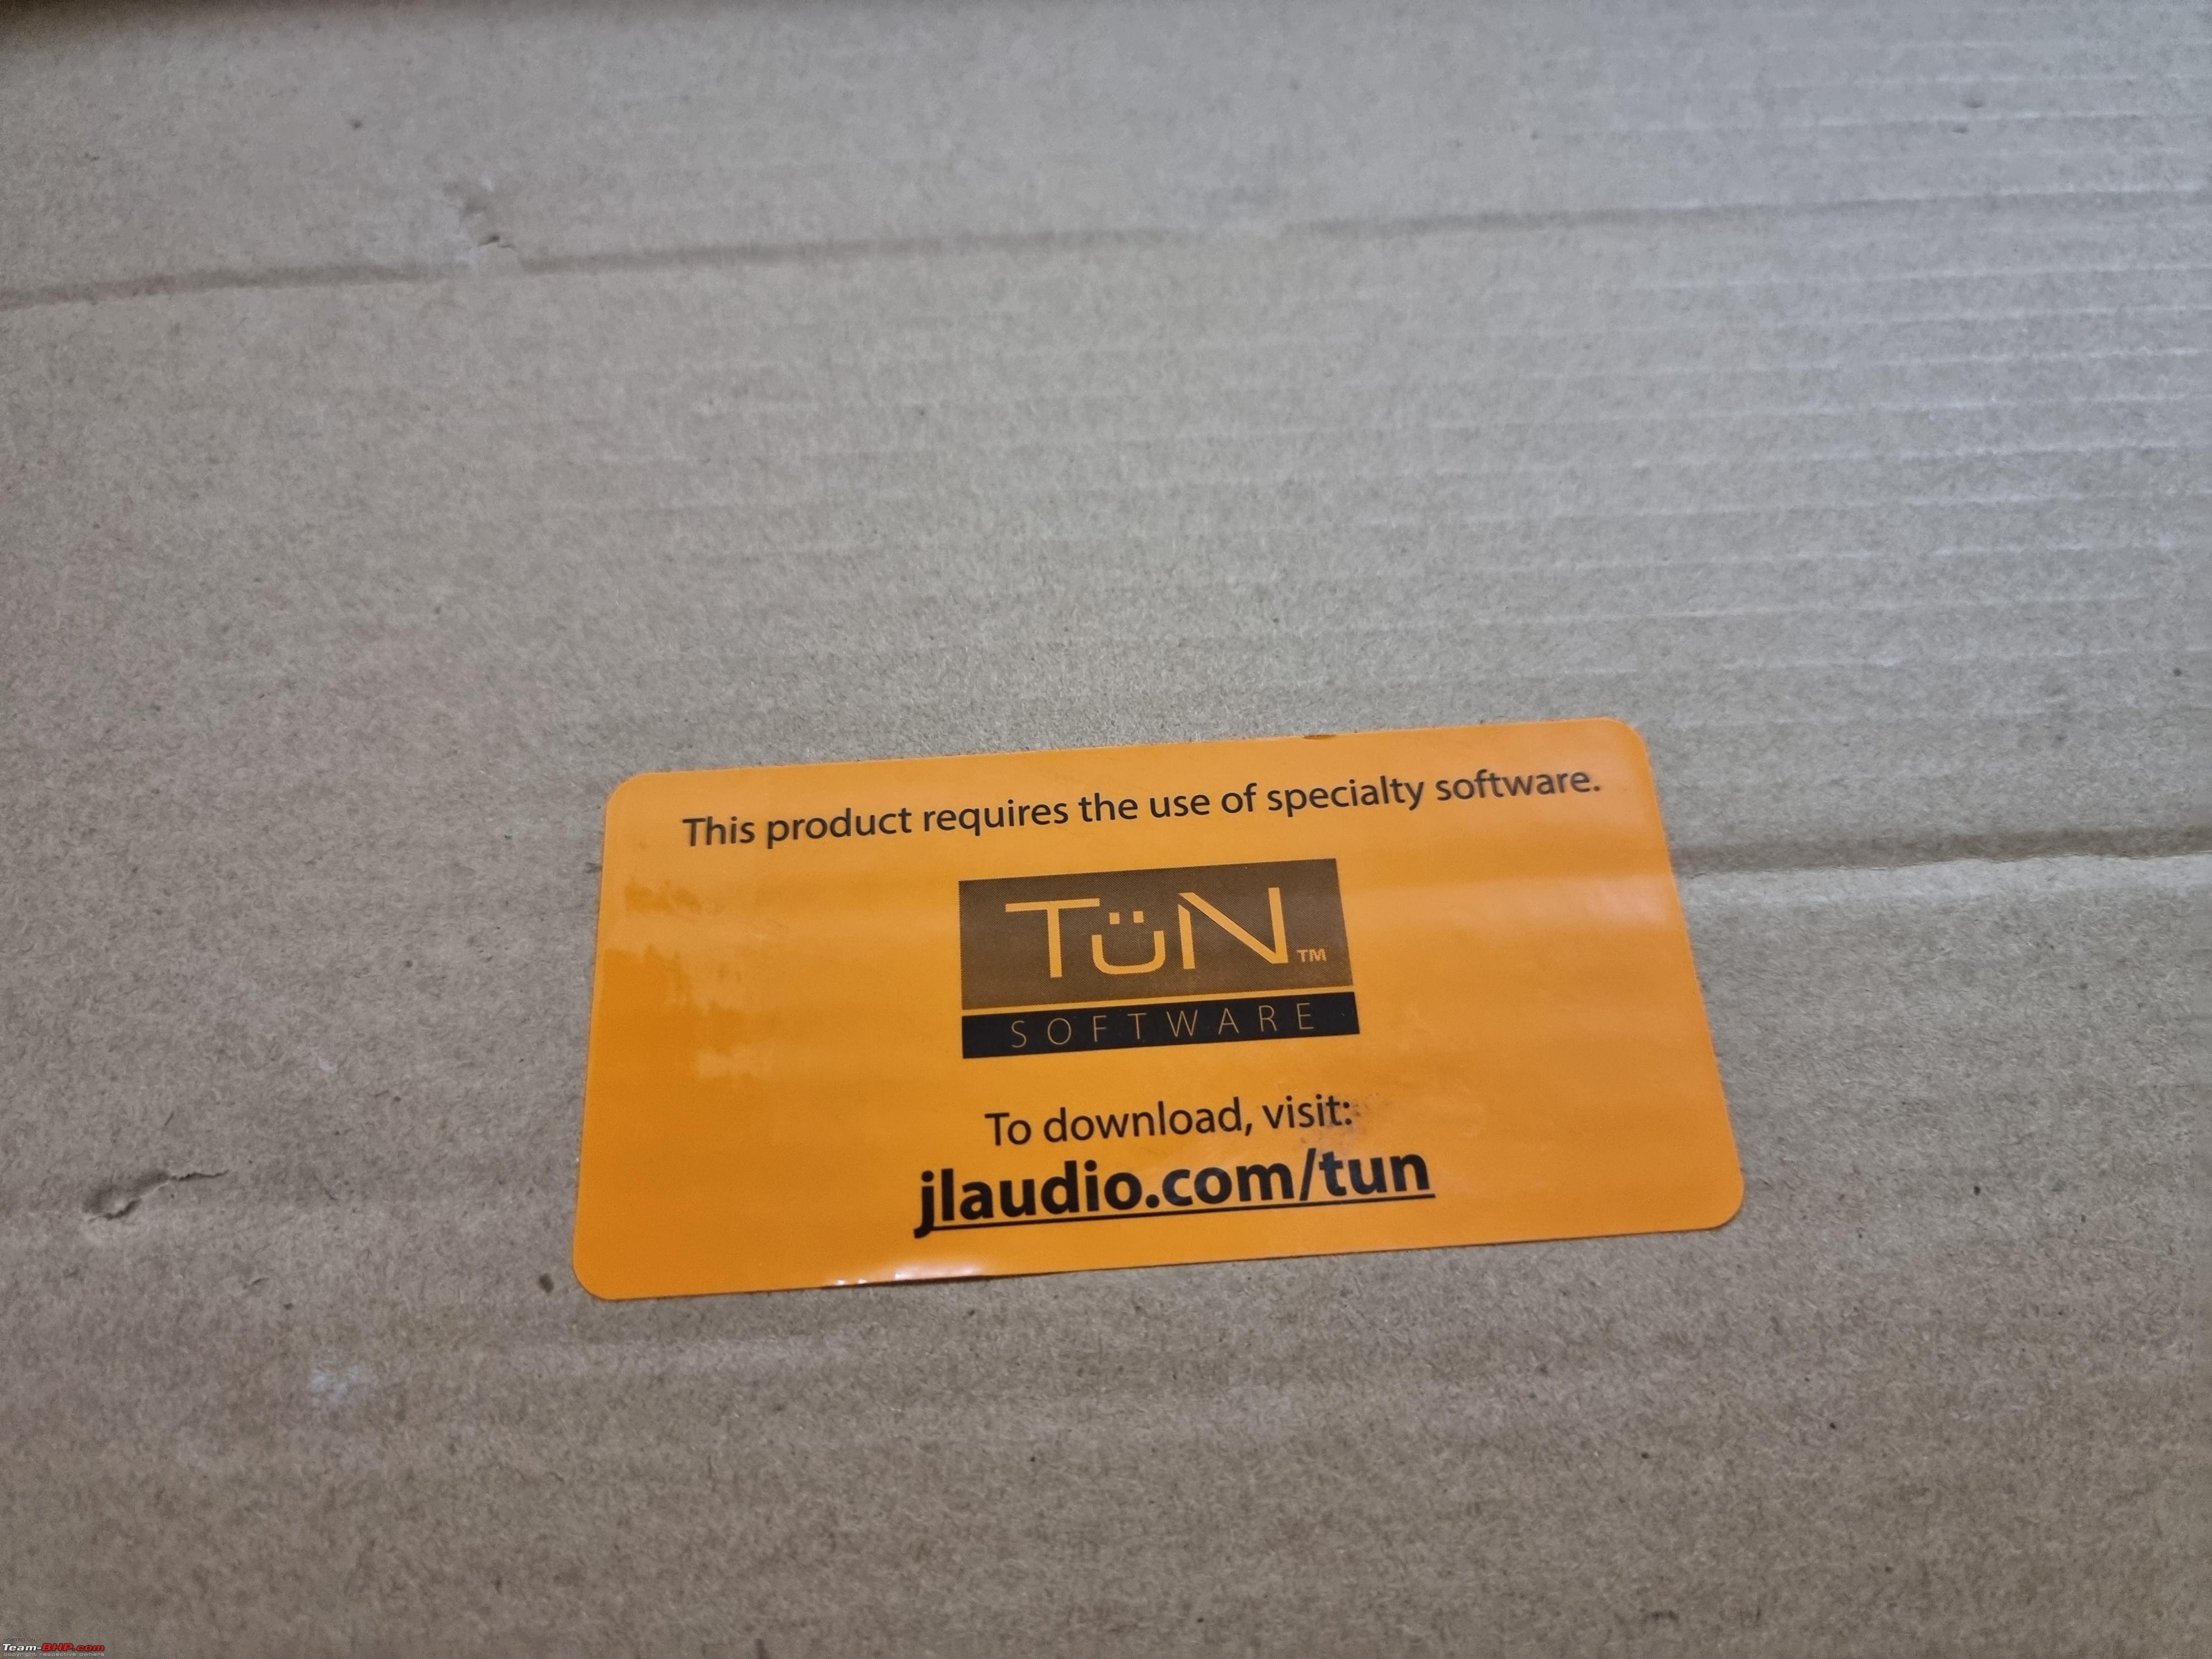  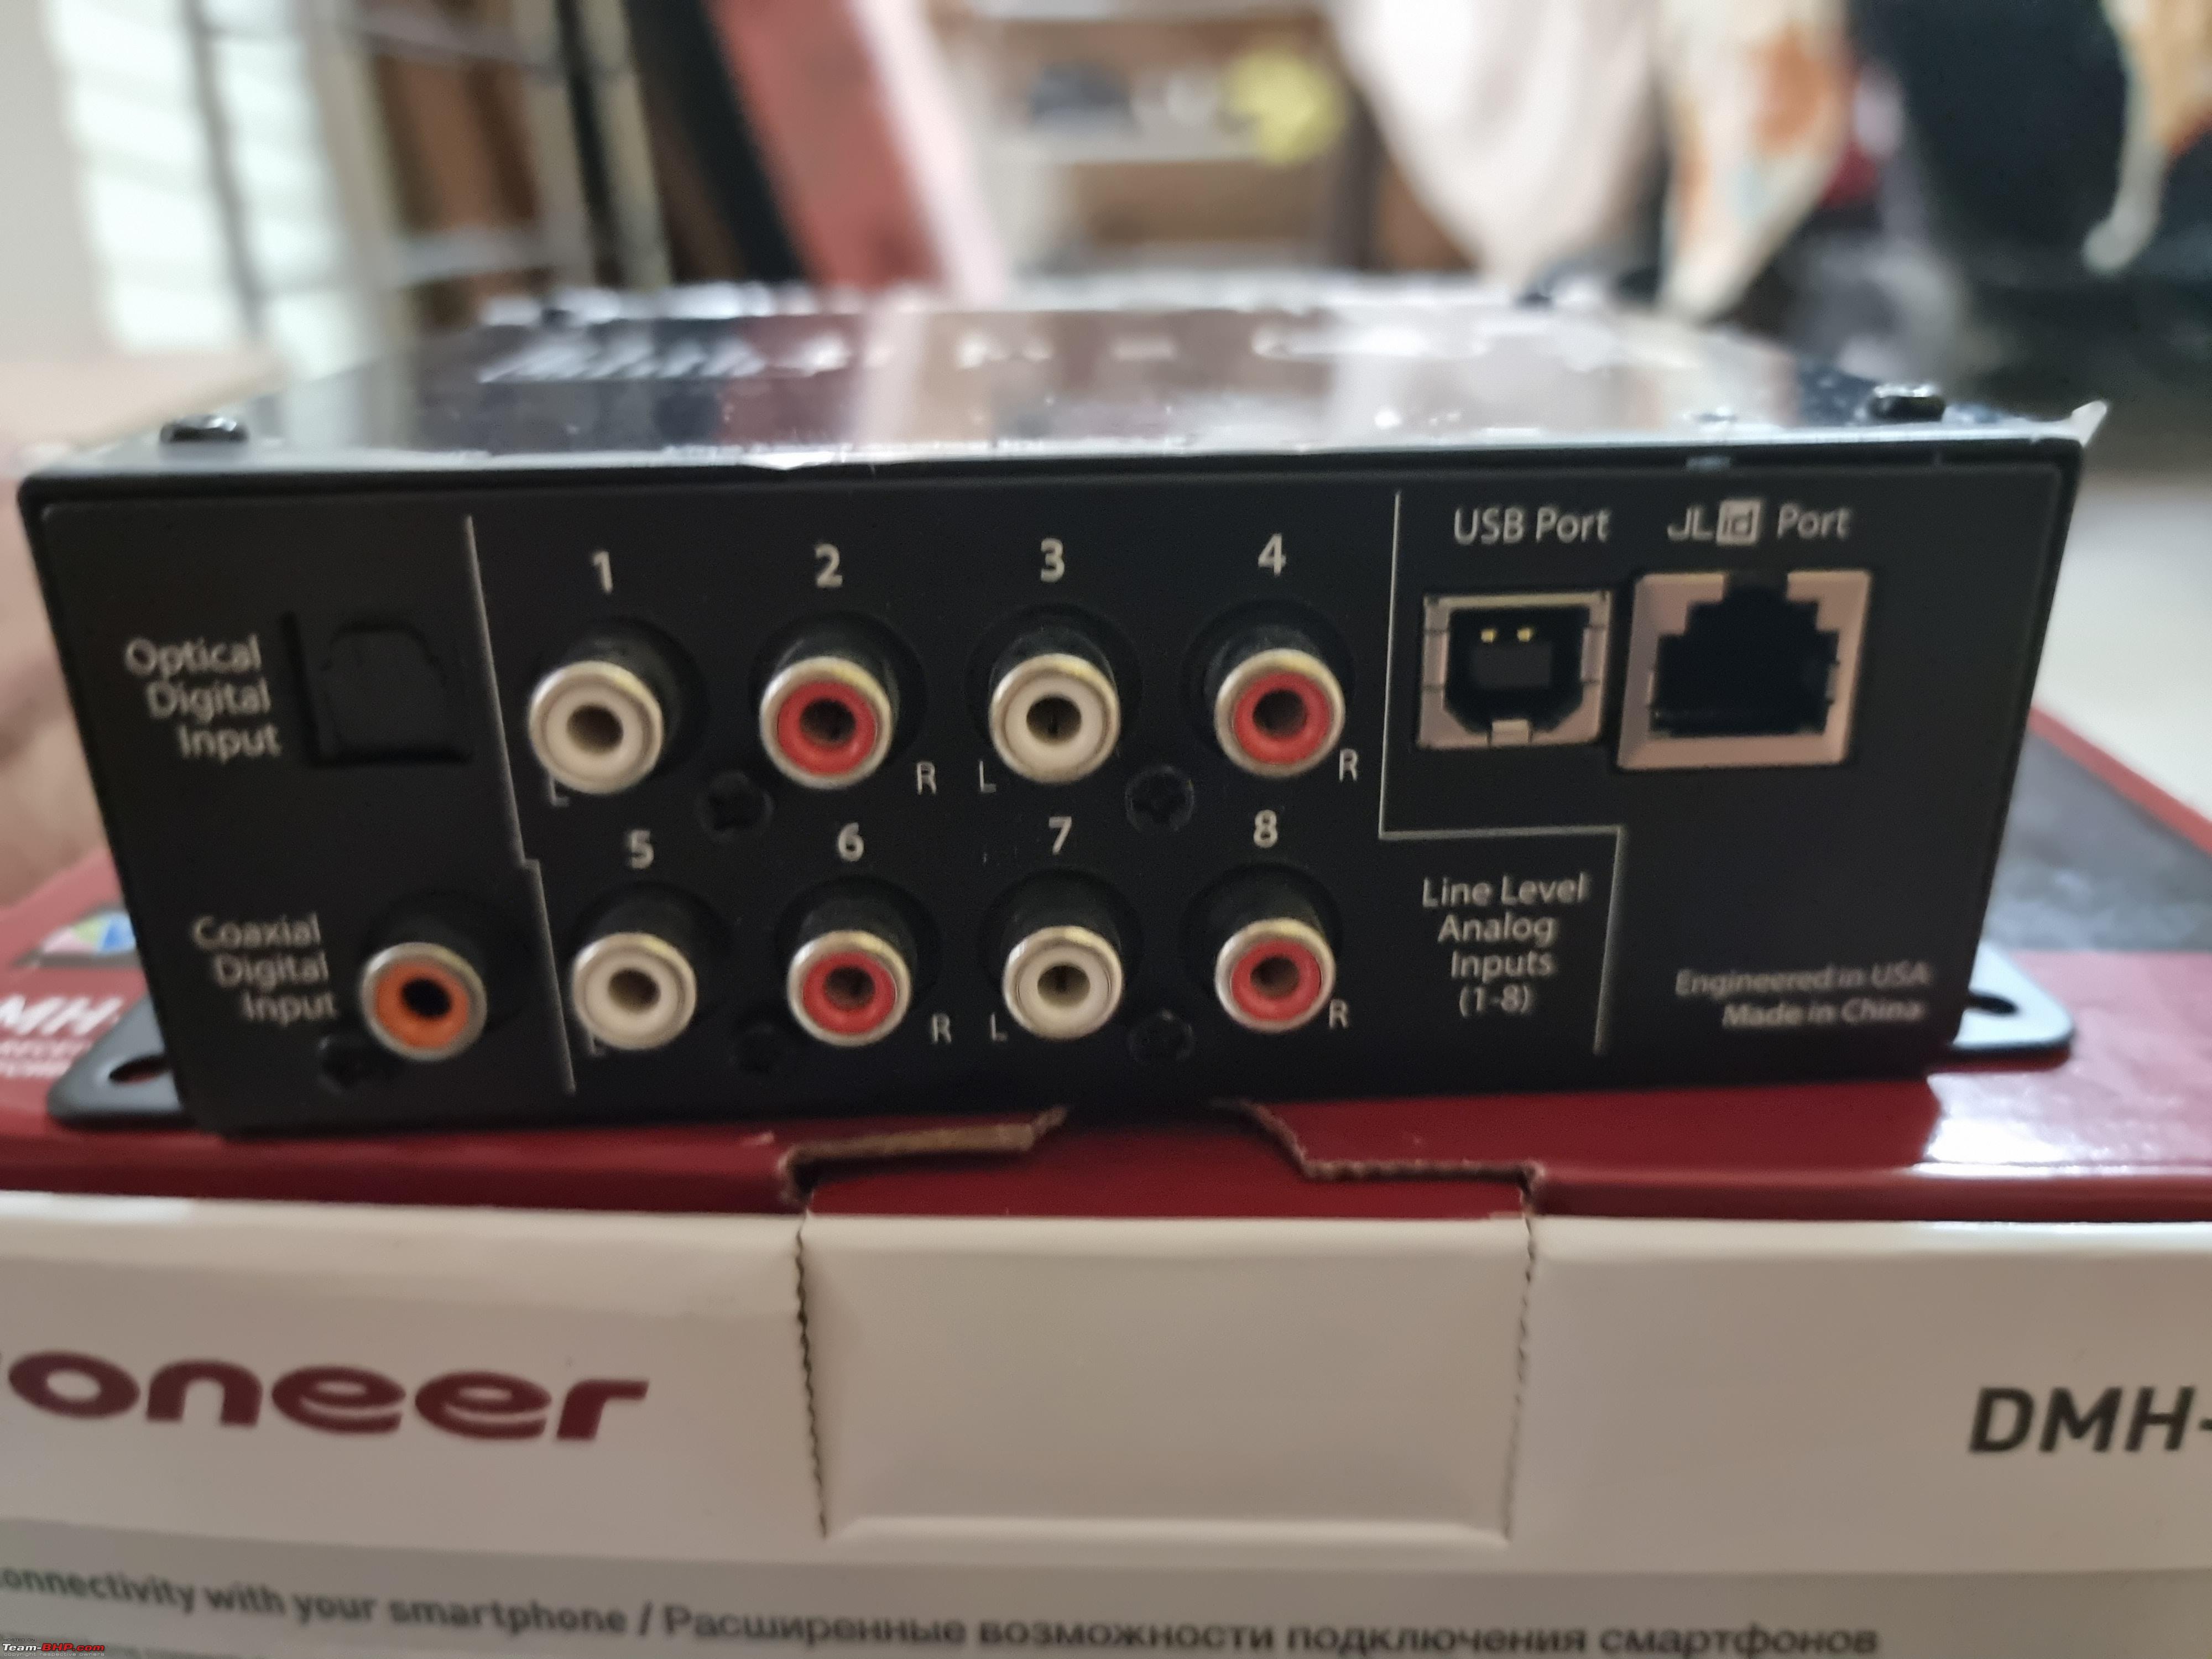 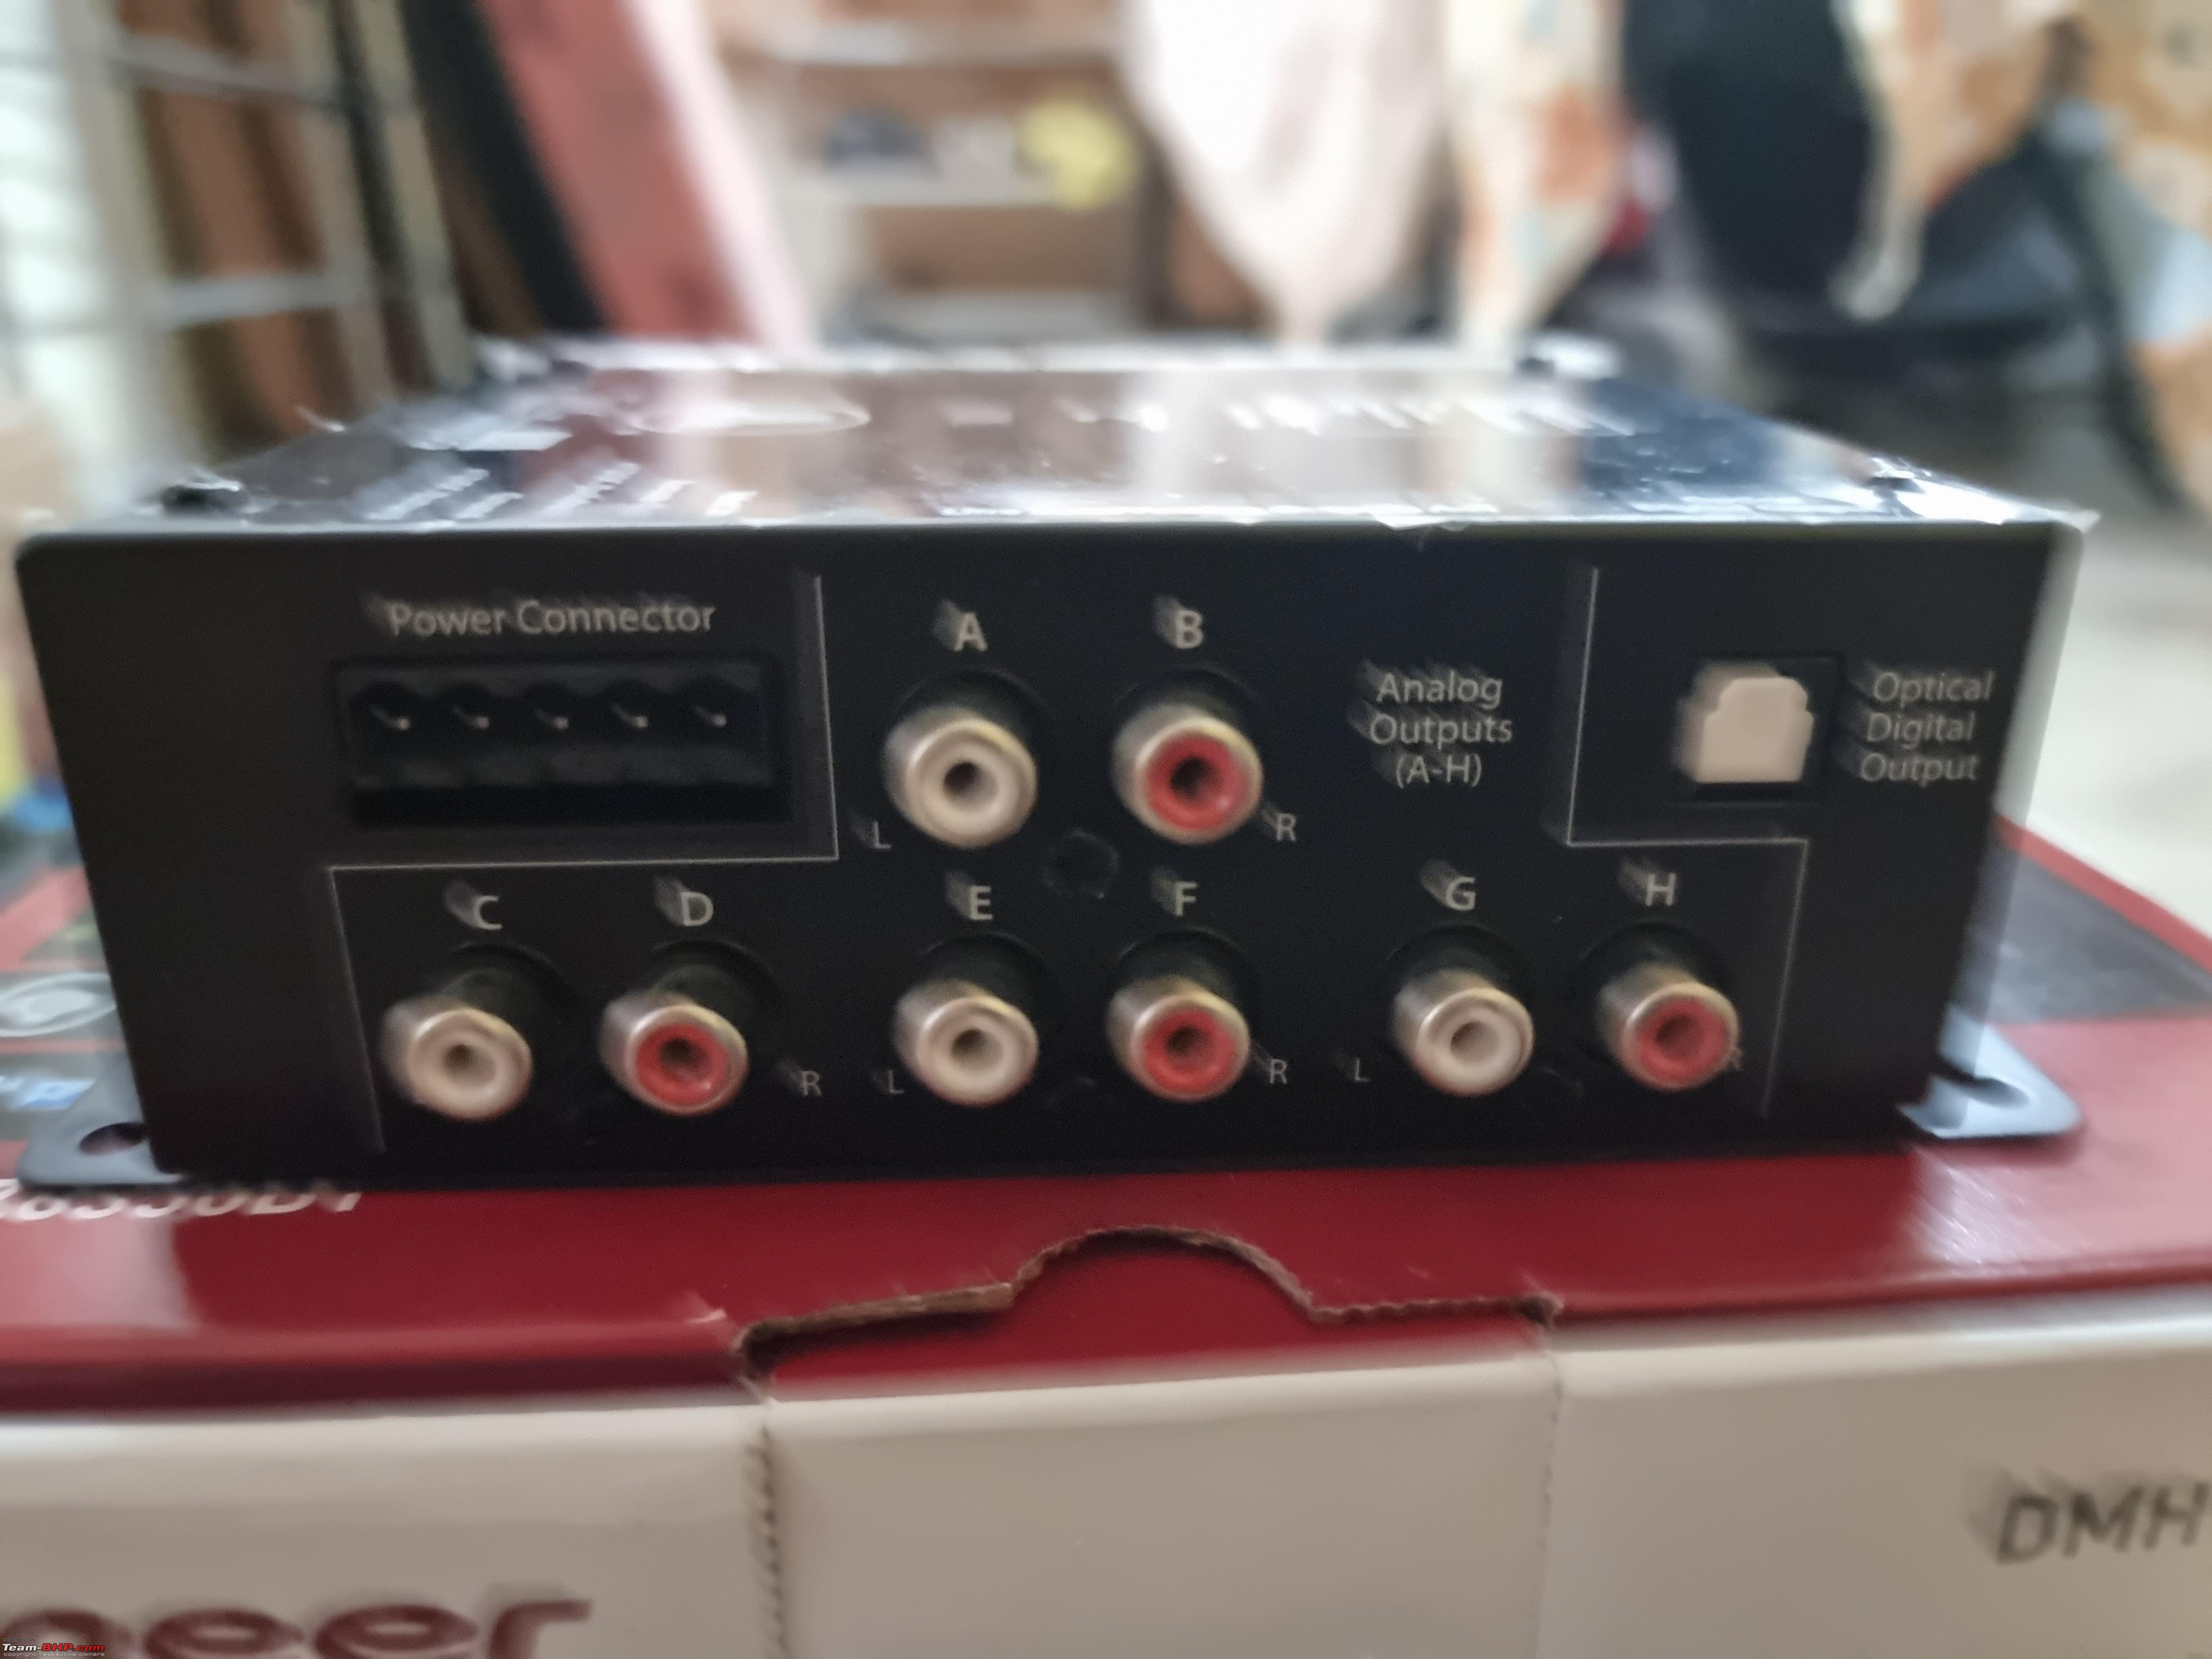 Last edited by ROG_AK : 14th July 2022 at 17:00. |
|
| (30)
Thanks
|
| The following 30 BHPians Thank ROG_AK for this useful post: | Akshay6988, Avikbrio, chautob0t, Chrome6Boy, CrAzY dRiVeR, deep_behera, digitalnirvana, Divya Sharan, fluidicjoy, Gannu_1, govigov, graaja, GTO, Guru_Shikhar, Harjot37, InControl, Jeash.vk, Leoshashi, Mogs, neil.jericho, Rehaan, Researcher, Roy.S, sangam_mm93, sgmuser, swiftnfurious, The Rationalist, Varun_HexaGuy, yogiii, ysjoy |
|
13th July 2022, 07:47
| #4 |
| BHPian Join Date: Oct 2017 Location: Bangalore
Posts: 298
Thanked: 1,676 Times
| Re: Hign end JL Audio upgrade in my Baleno RS You get a nifty little remote with this DSP. It can be used to control the gain and switch between tuned profiles. Super handy.  The HU Running the stock HU would just not make sense with speakers like this, we needed something that could deliver good, clean audio. This is where the Pioneer DMH-Z6350BT comes into the picture. It has all the modern features like wireless Android Auto/CarPlay etc and since it has 2 camera inputs, I decided to add a front camera. My only gripe is the sluggish interface at times, not expected from a higher-end offering like this. Hopefully, it gets better with firmware updates. I didn't want an extra mic sticking out of the A-pillar so the stock one was retained.  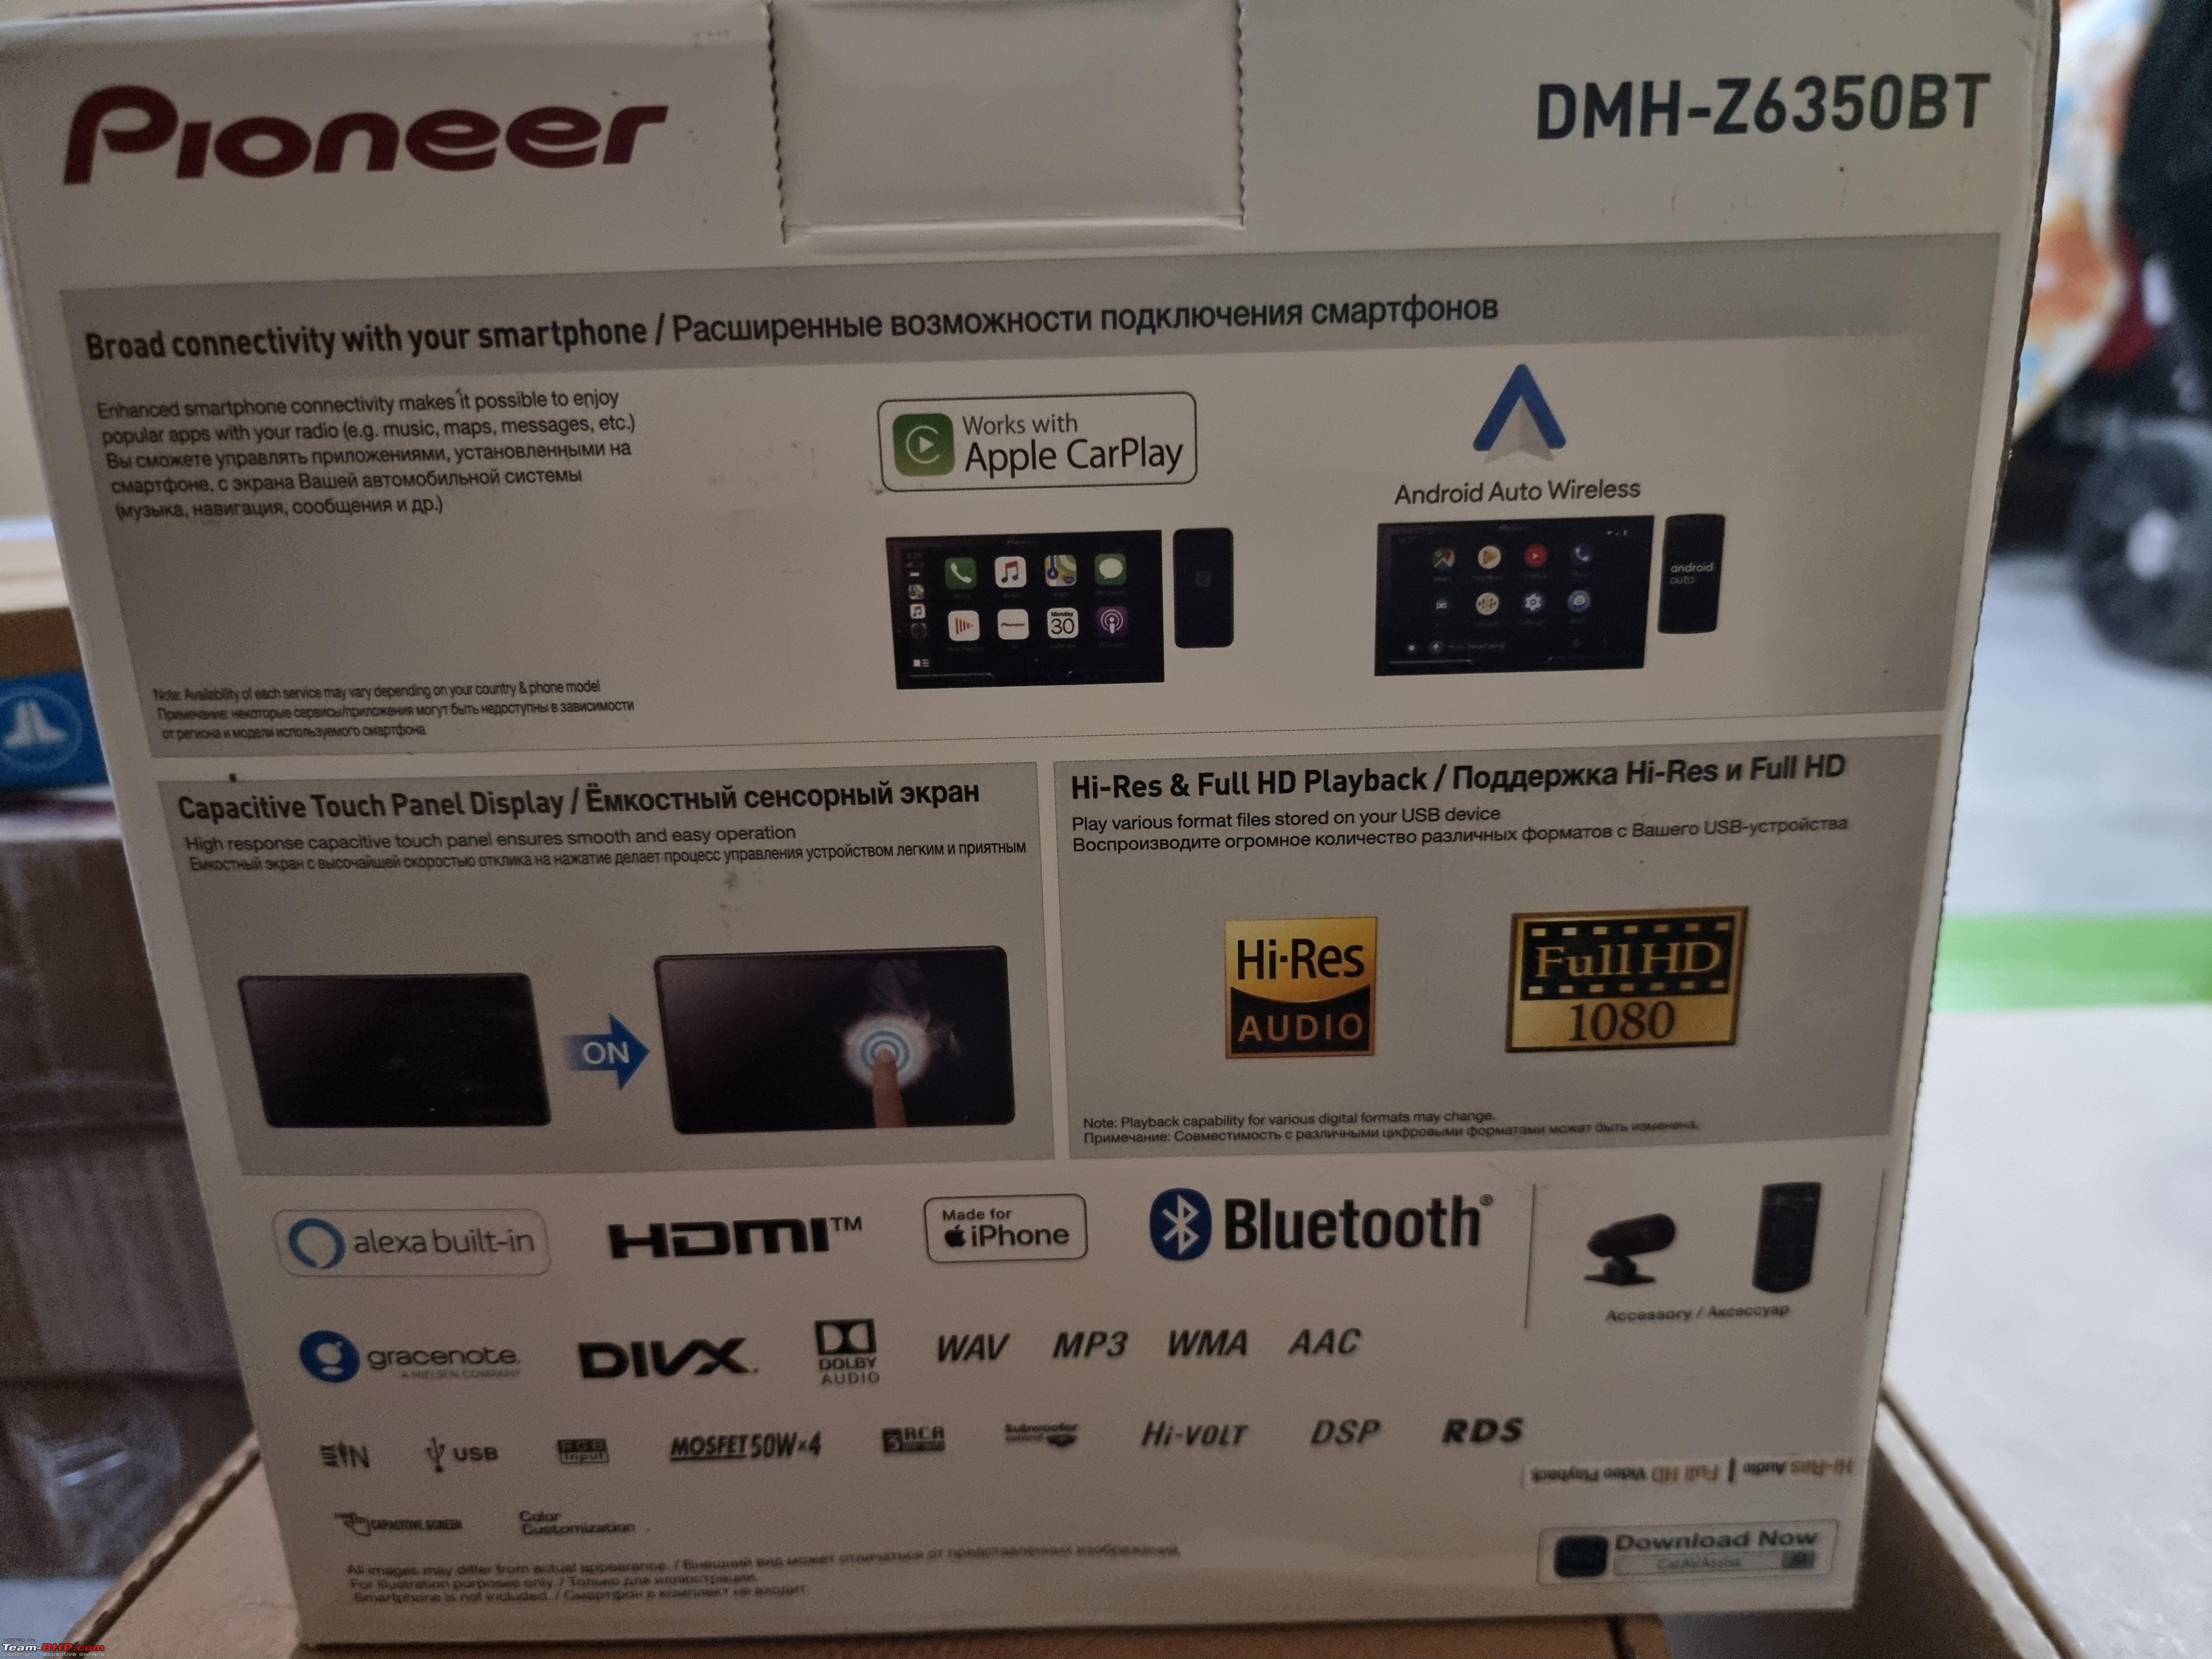 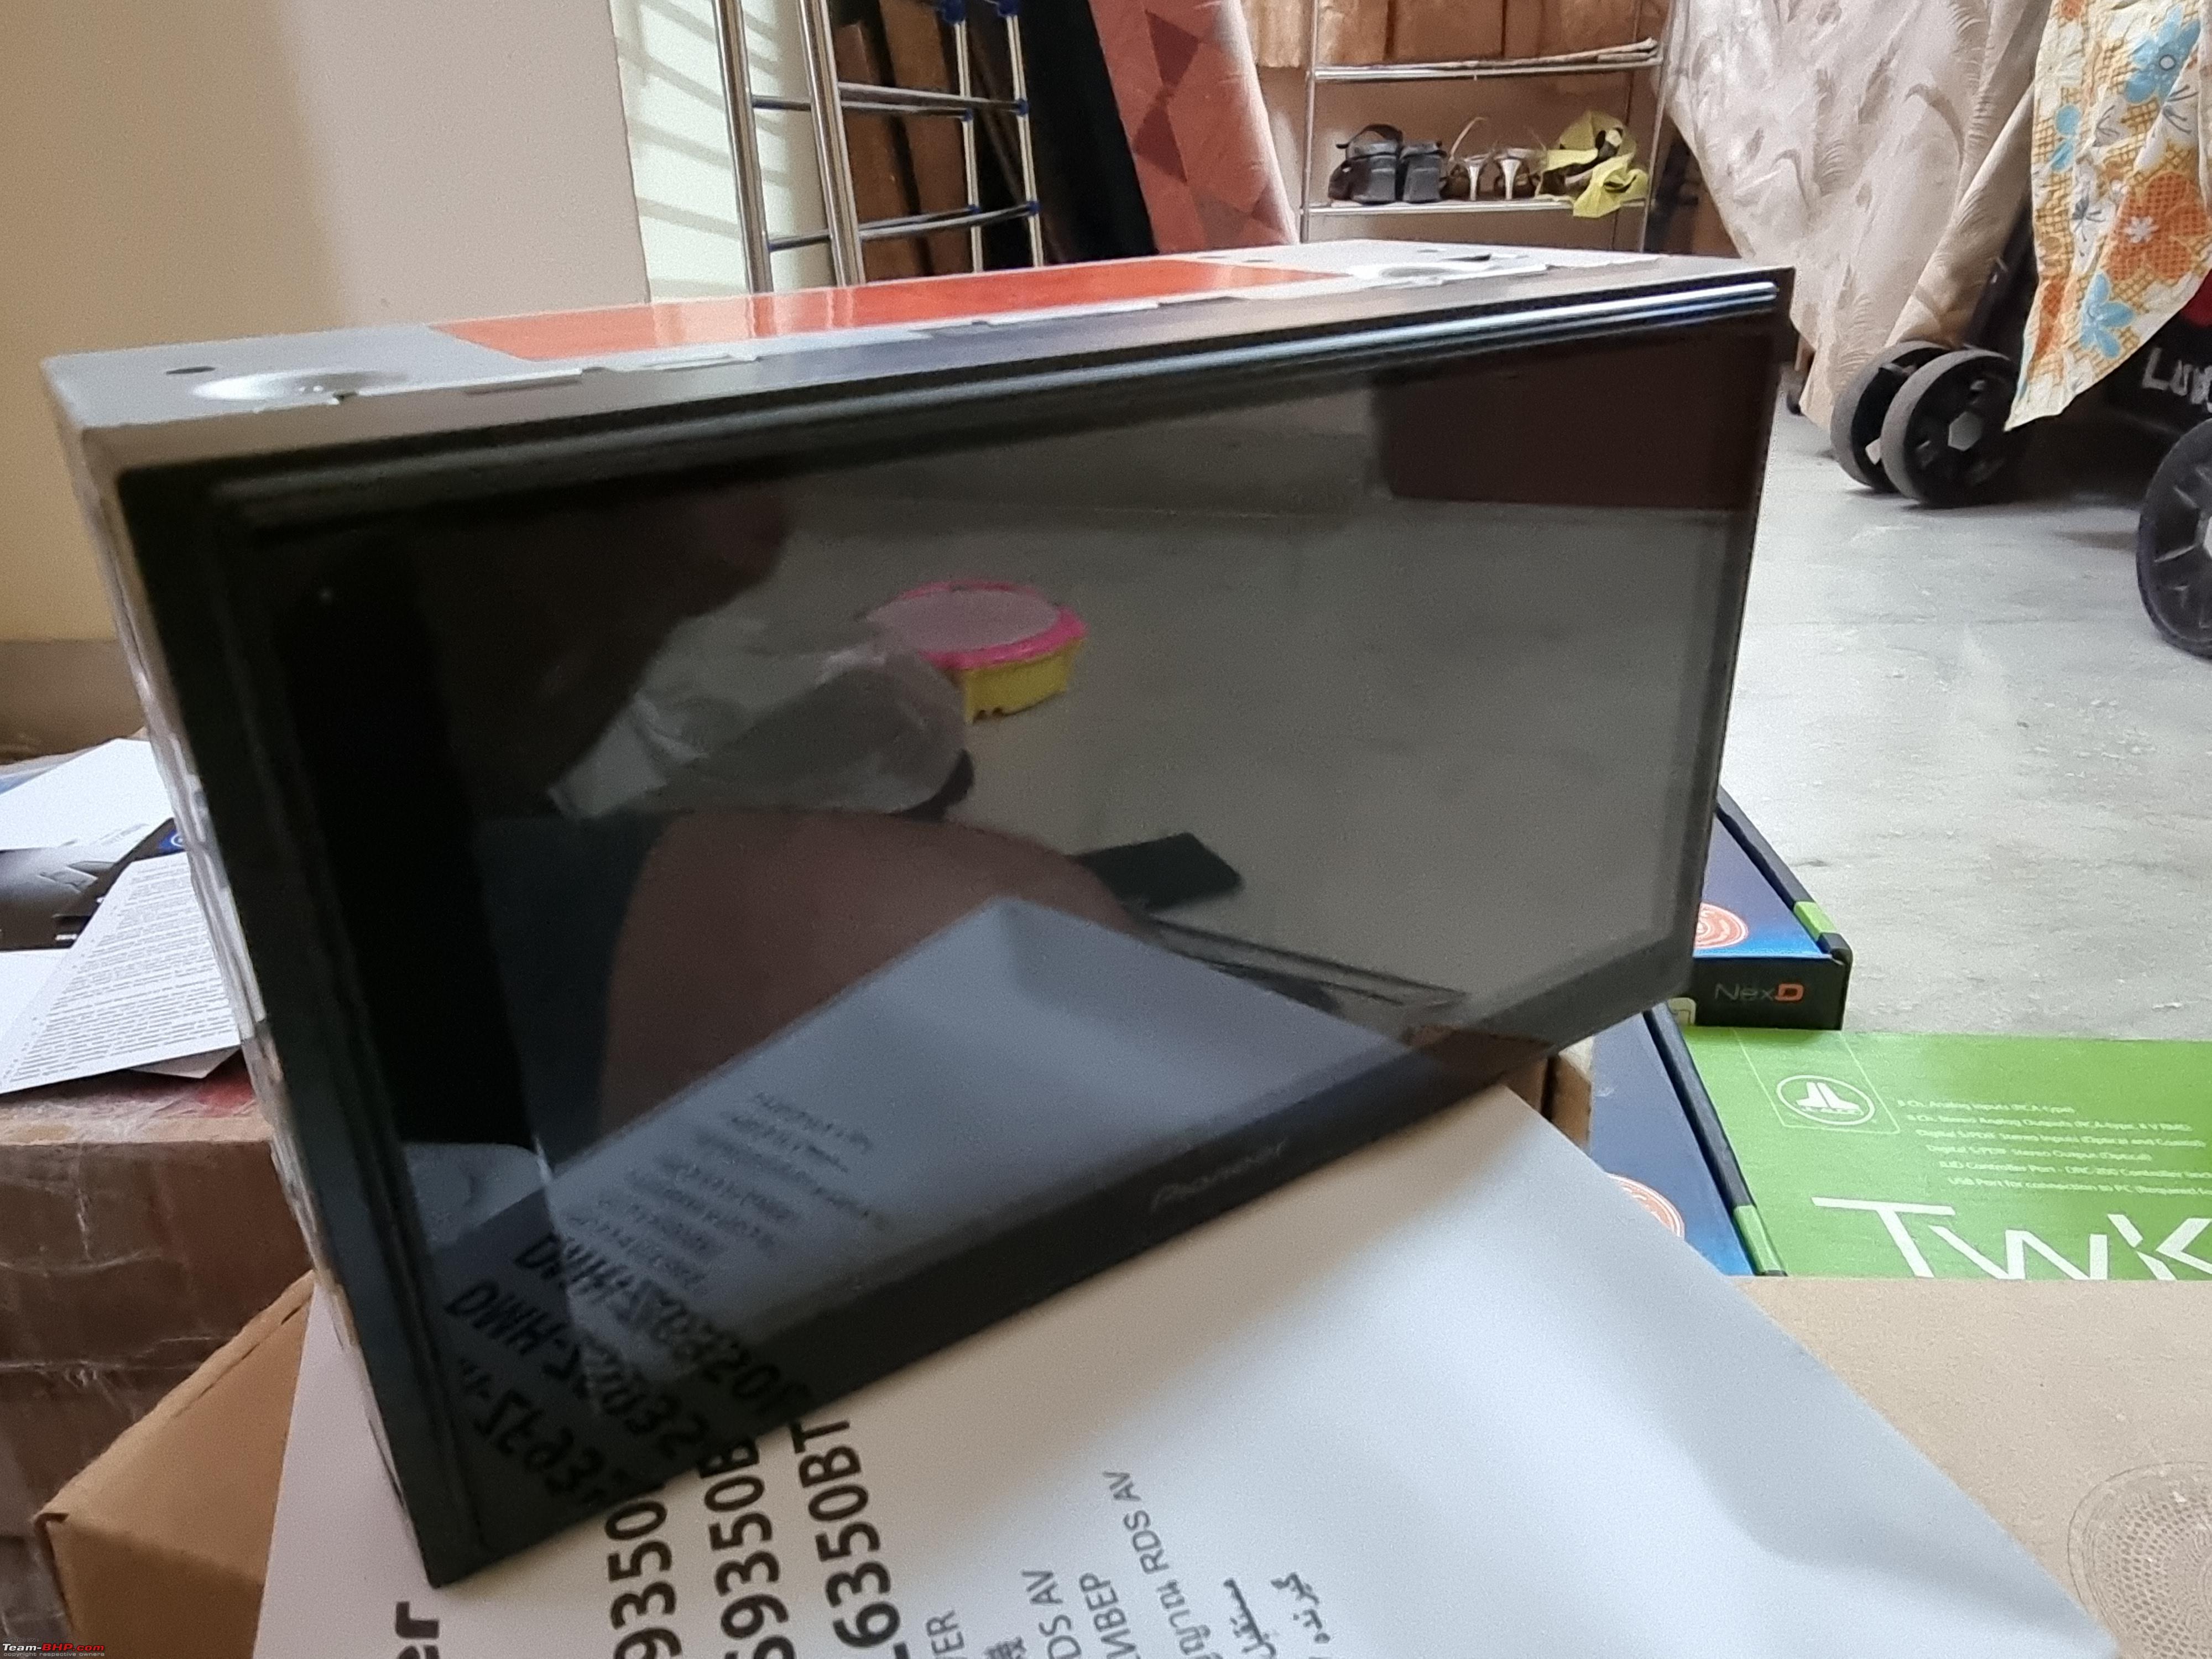   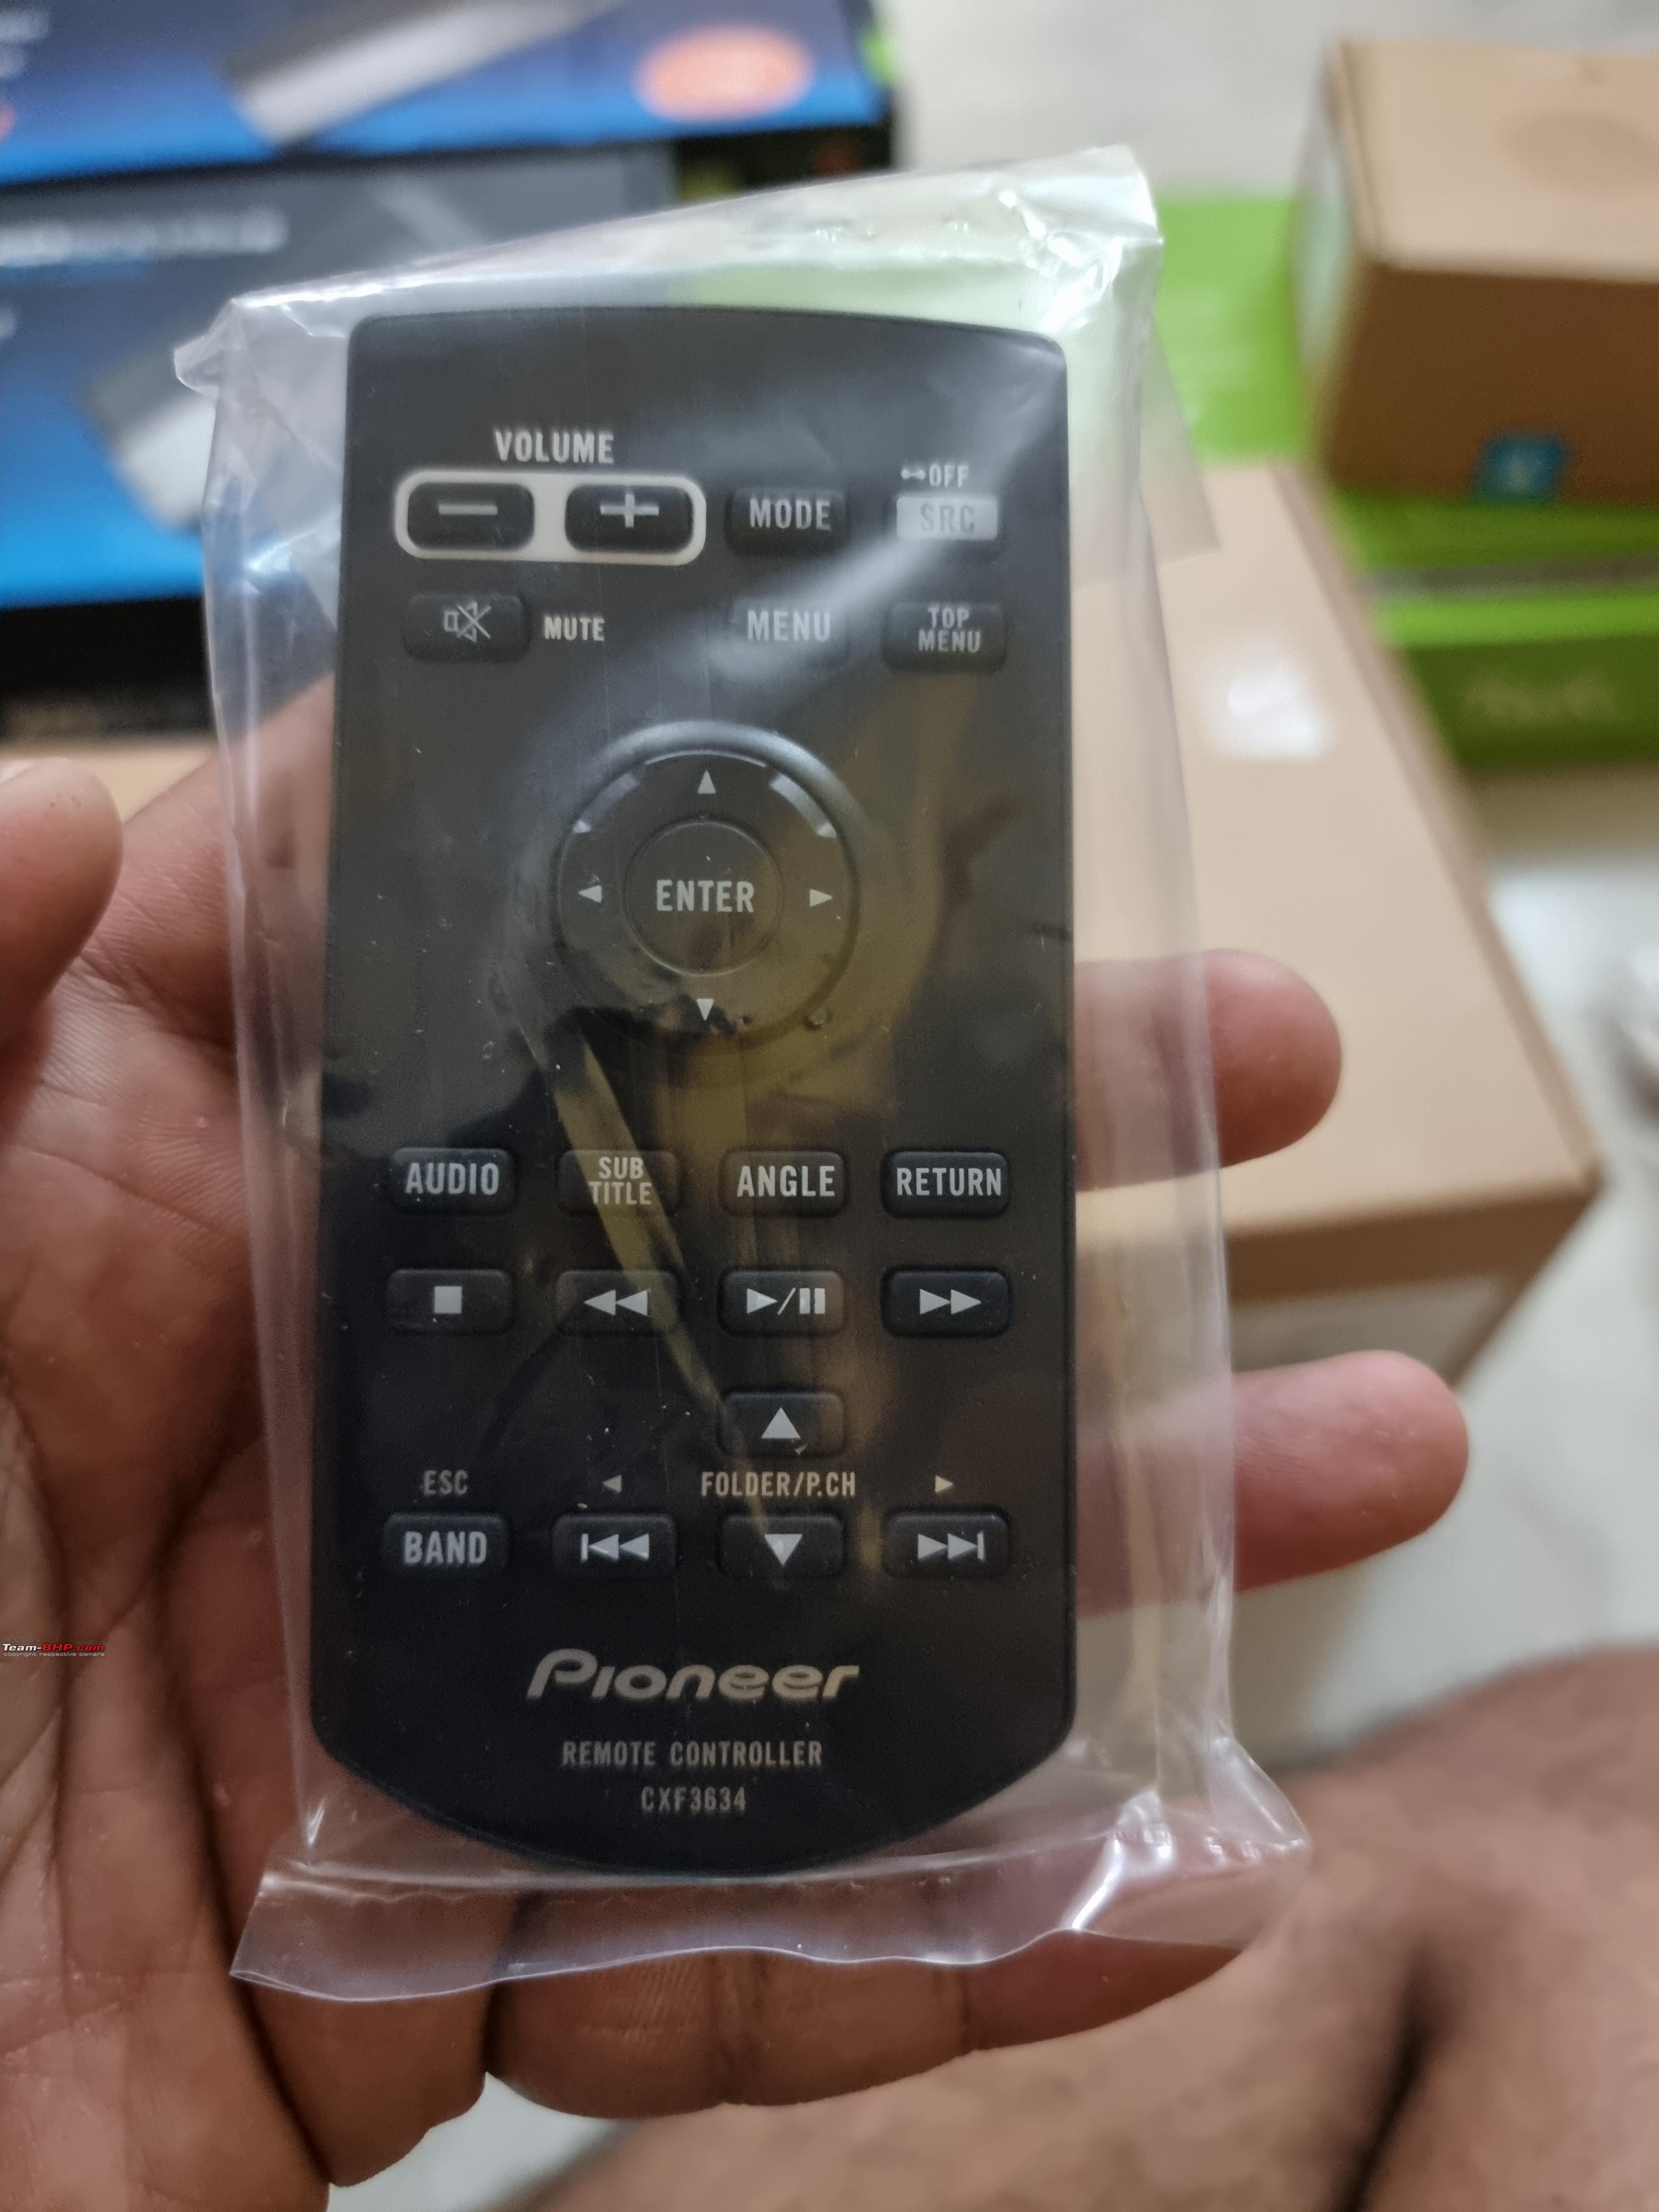 The Installation A critical step that could make or break the entire setup, there was no room for error here. I had complete faith in Raghu to get the job done and he didn't disappoint. Everything was inch-perfect and the results speak for themselves. He wanted to work in his own space and I had to leave the car with him for well over a month. This was a tough thing to do, I had never left this car anywhere for any period of time with anyone. There was no other choice and it had to be done. Note that all the components were sourced by me and Raghu only did the installation. The prices vary drastically (further inflated by chip shortage etc) and I spent a lot of time finding the best deals from different suppliers. Another thing that needed to be figured out is where would all these AMPs etc fit? The best solution was to build an AMP rack in the boot and set up everything there. With the AMP rack and massive sub, the boot space was all but gone. Not a major concern since I would be the only one using the car. Summarizing the process in the sequence they will occur:
Eliminating road noise and vibrations elevates the listening experience and ensures a pure audio experience. Most mainstream cars don't really have good sound insulation and Maruti's are probably slightly worse in this regard. The goal was to add damping to the entire interior of the car, starting with the roof. Keep in mind that the doors had already been damped earlier. We needed something heavy-duty and the Dr Artex Gold HD was up for the task. It comes in at a thickness of 2.6mm and we used 3 boxes (24 sheets) 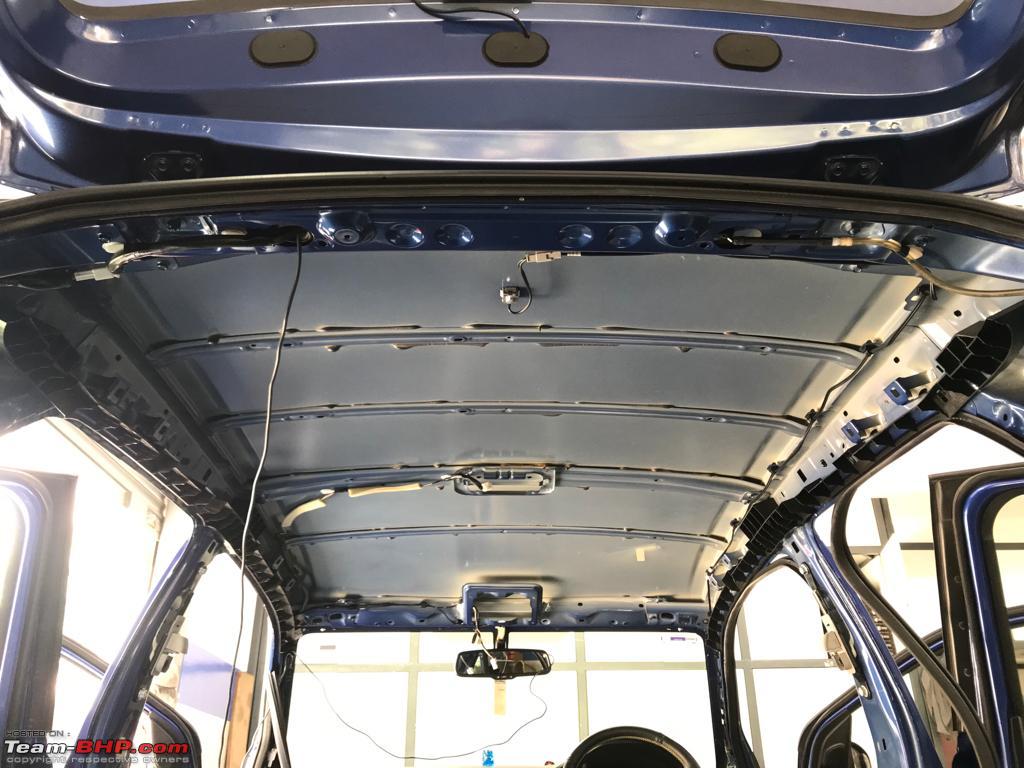 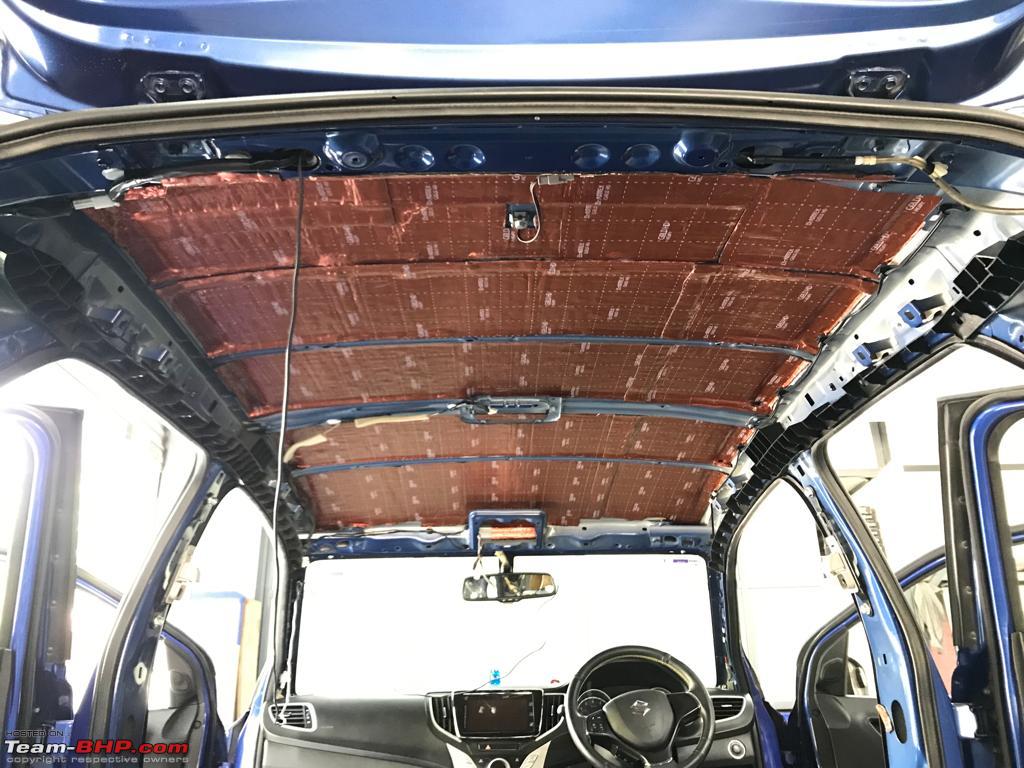 With the roof done, it was time for the floor and rear 3/4. The little black patches seem to be some sort of attempt by Maruti at vibration damping. Not very effective sadly. 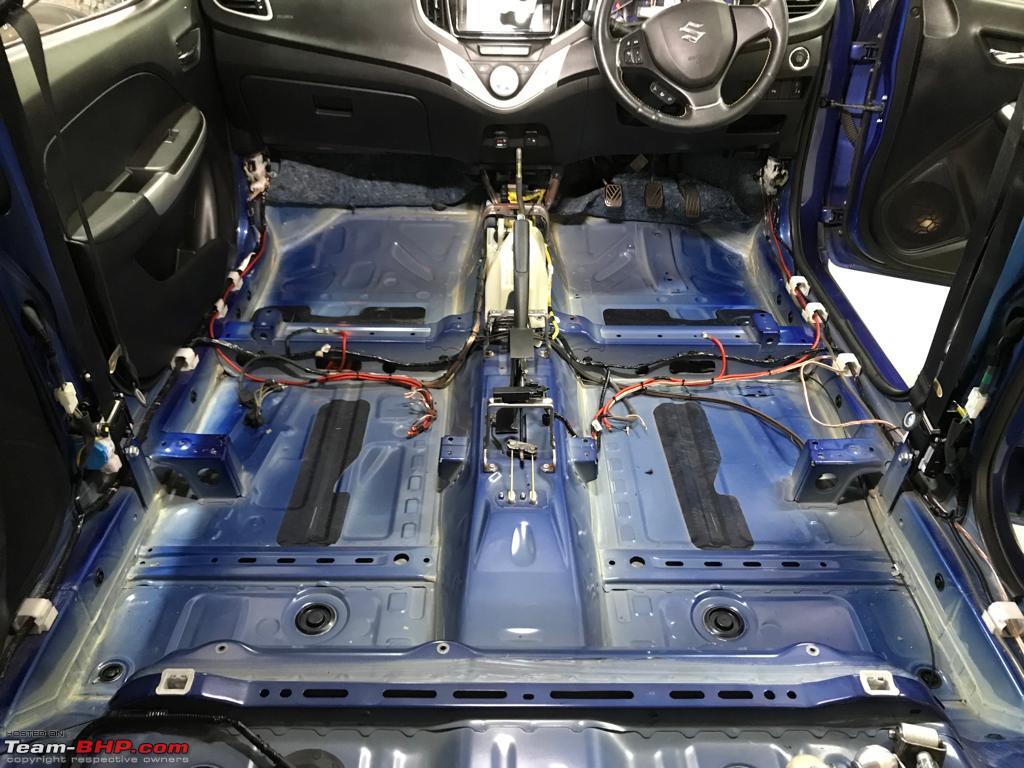 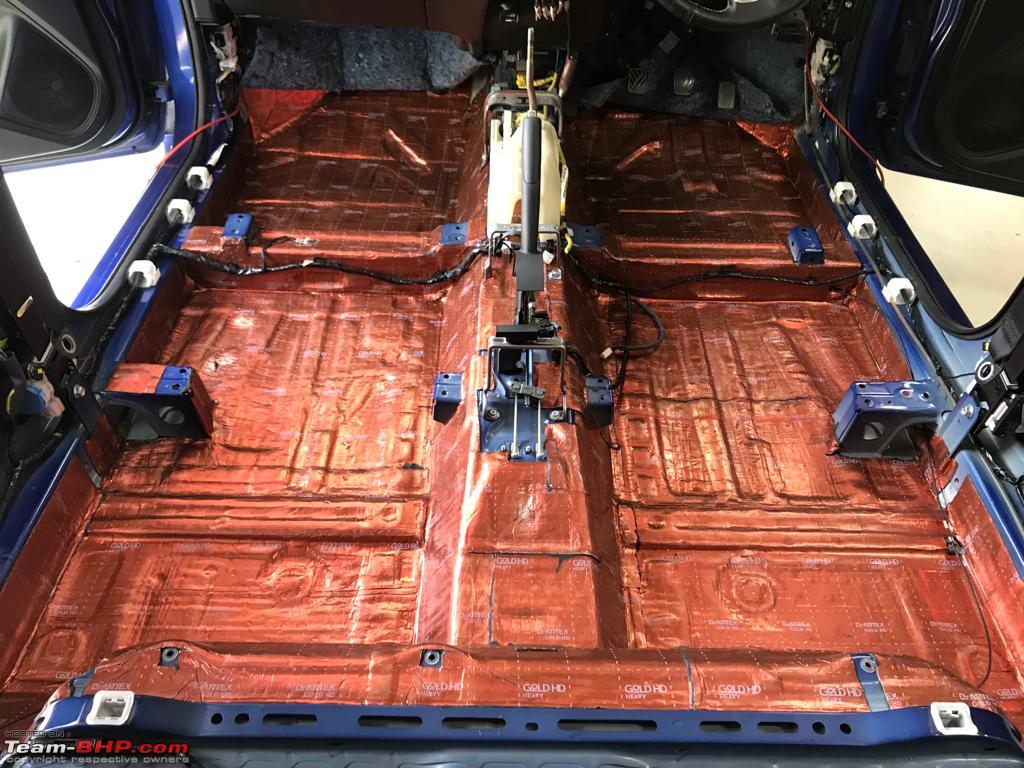   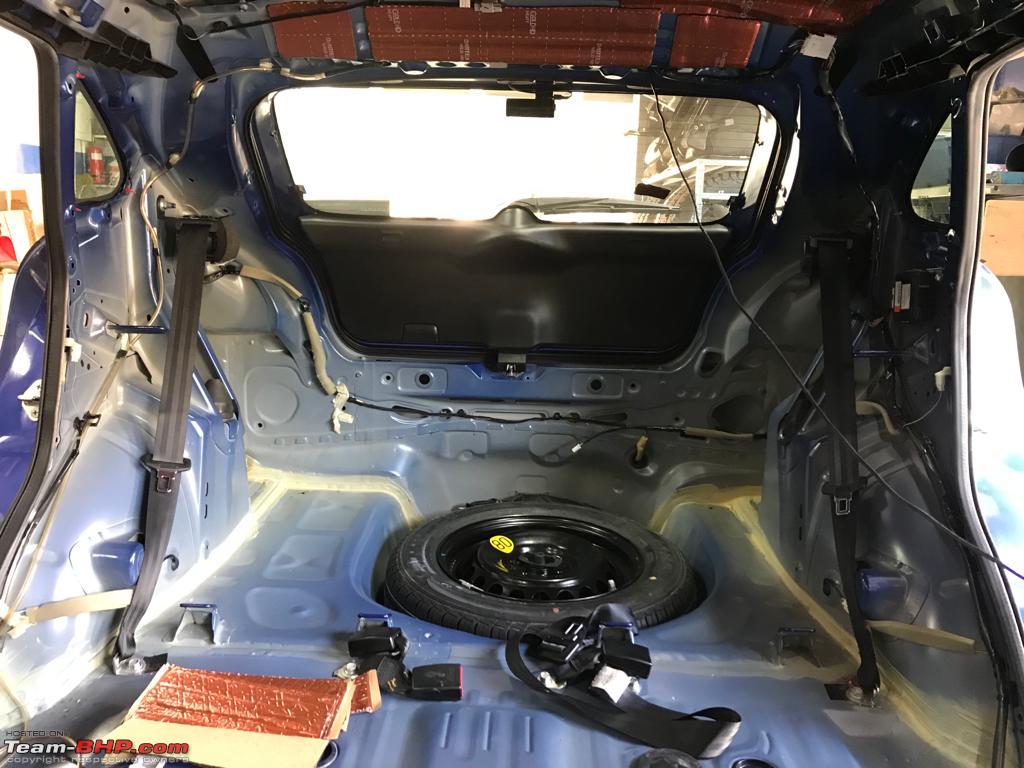  Notice the tools used for damping at the bottom of the image. The key is making sure everything is pressed and rolled properly. And I mean like PROPERLY, not just pressing it with a roller a few times and calling it a day. Extremely time-consuming and energy draining. 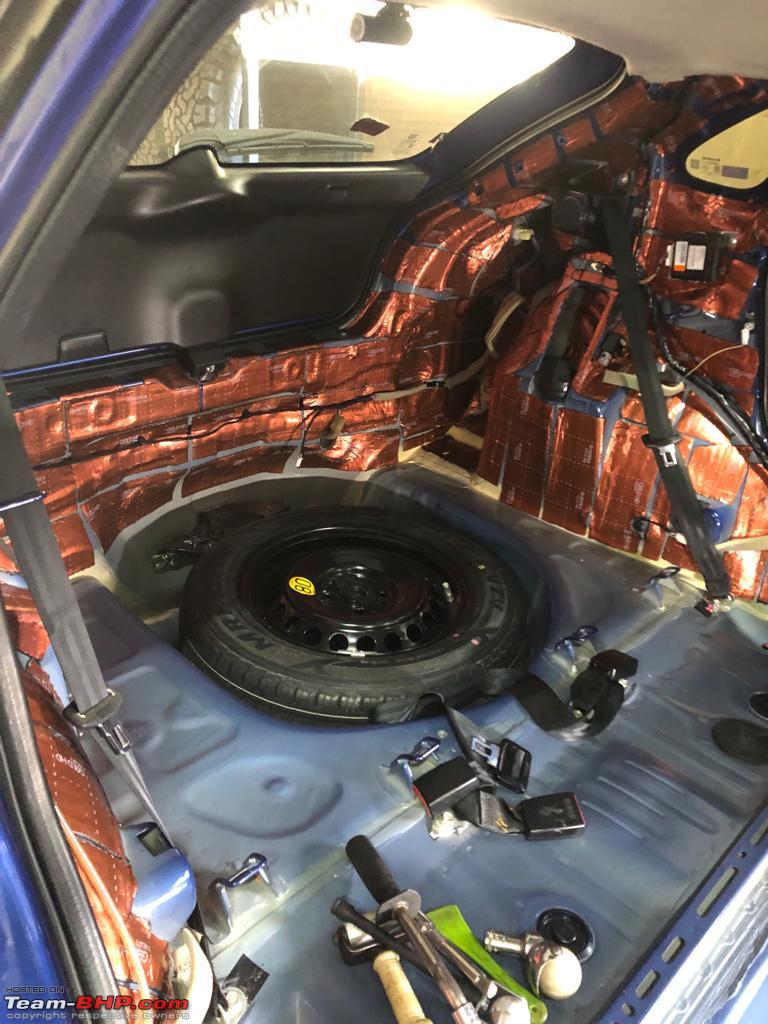 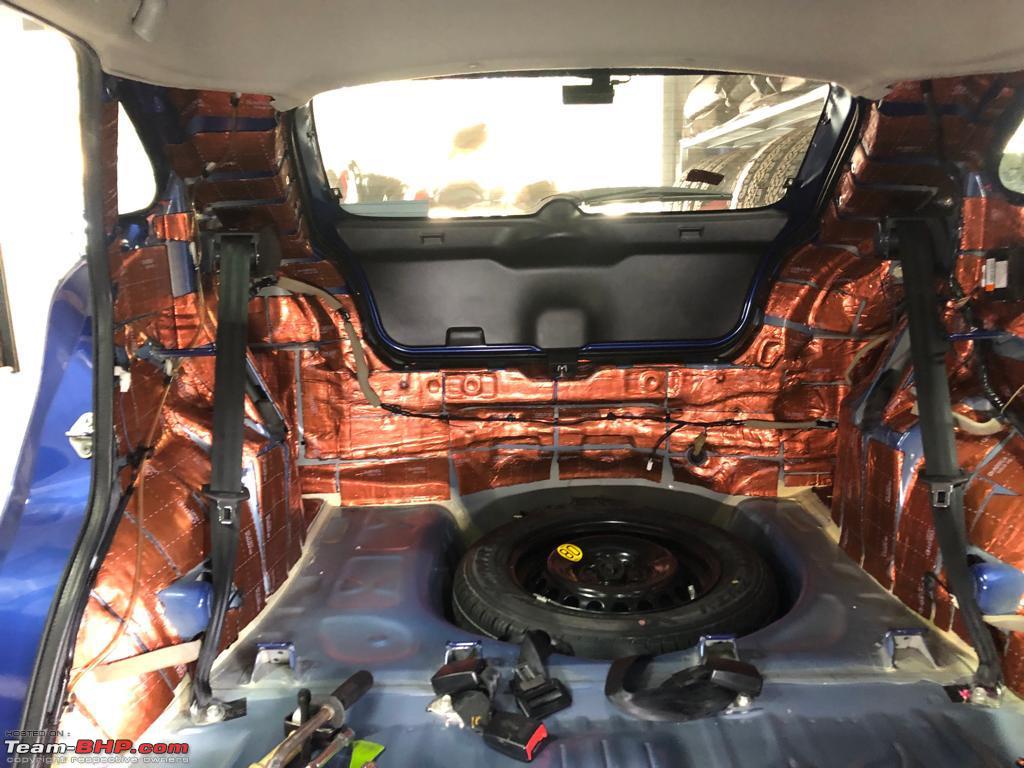  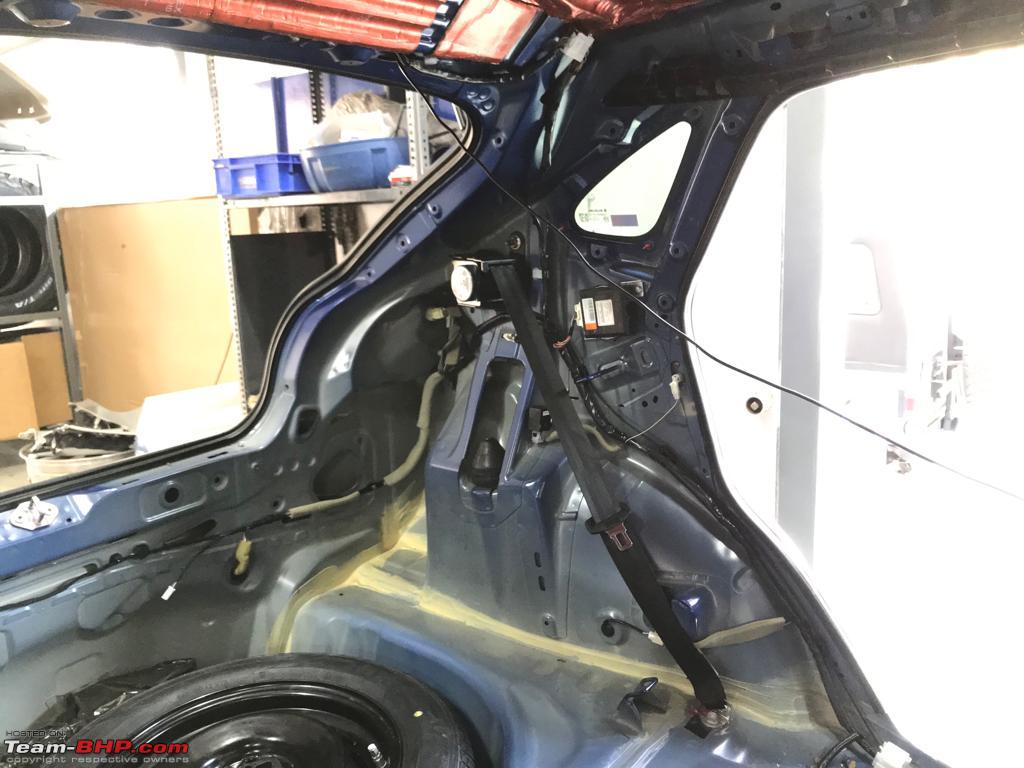 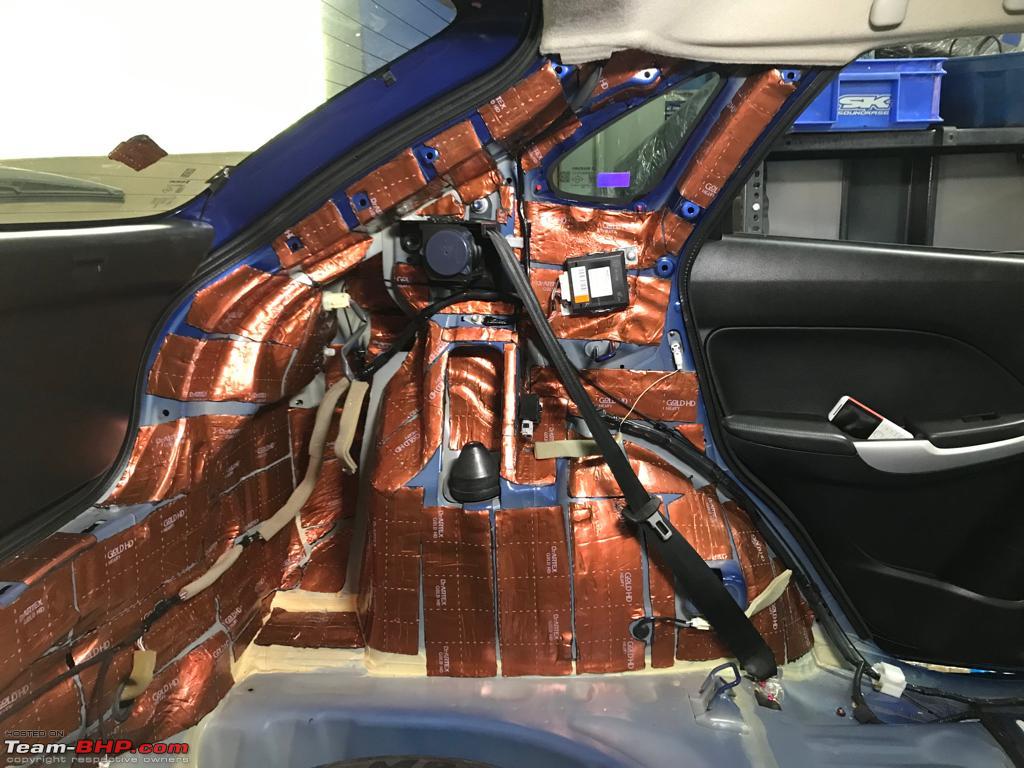    The rear passenger seat and spare wheel well area were damped after all the wiring was done, else the wires would have been a sticky mess. 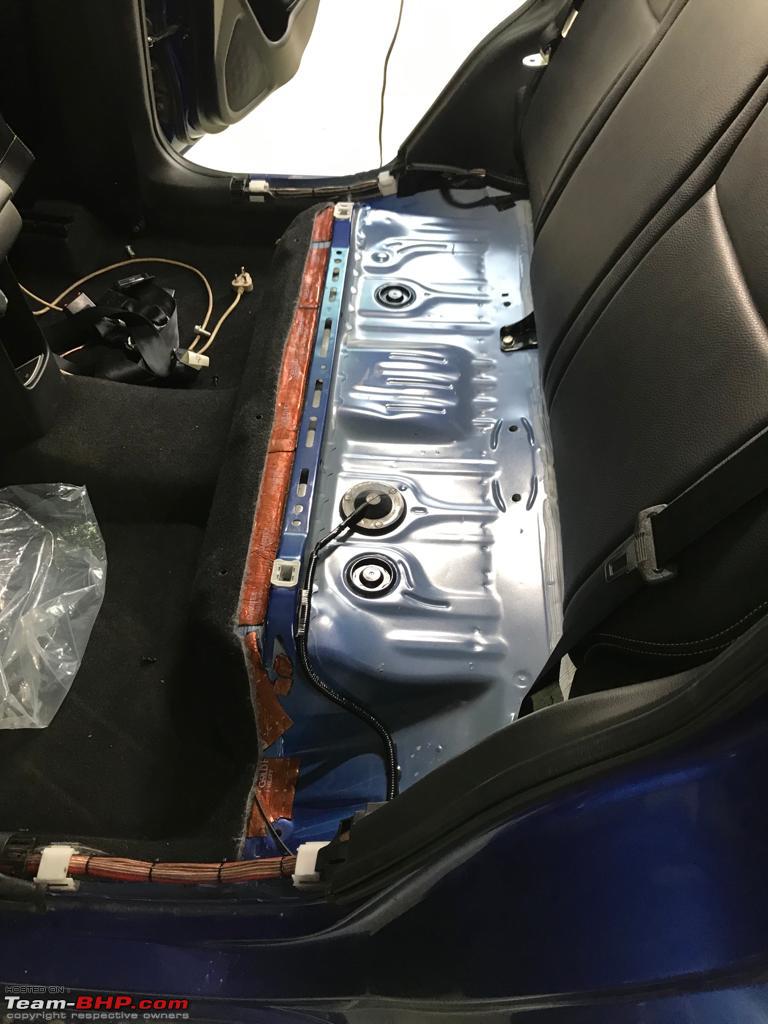   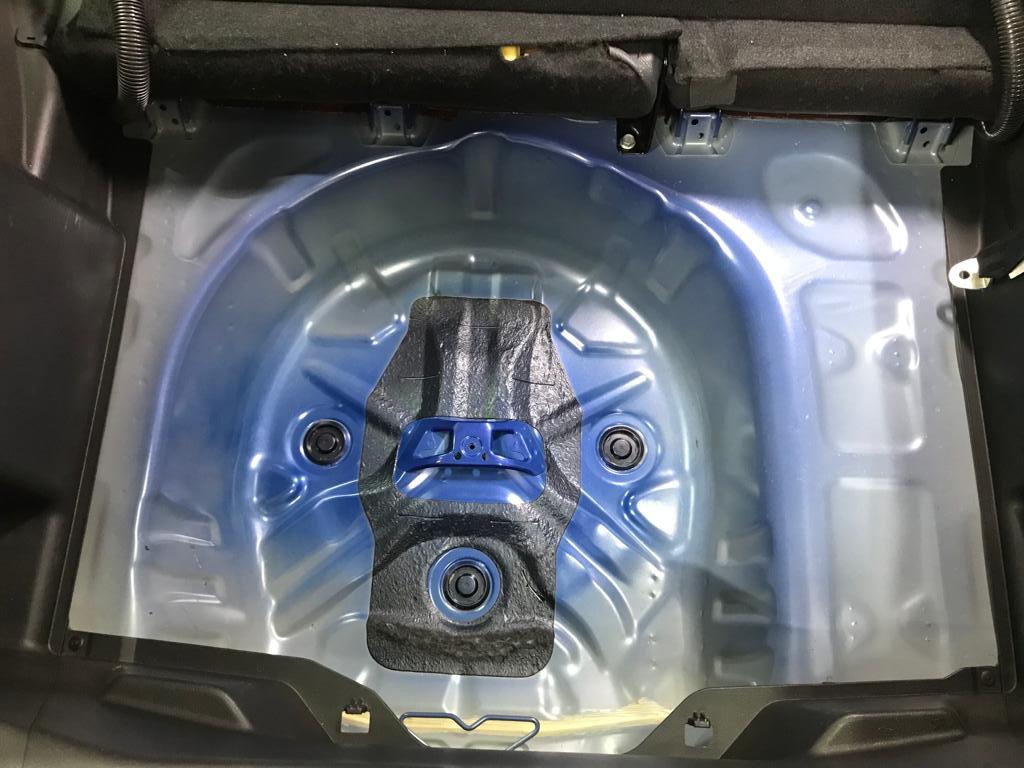 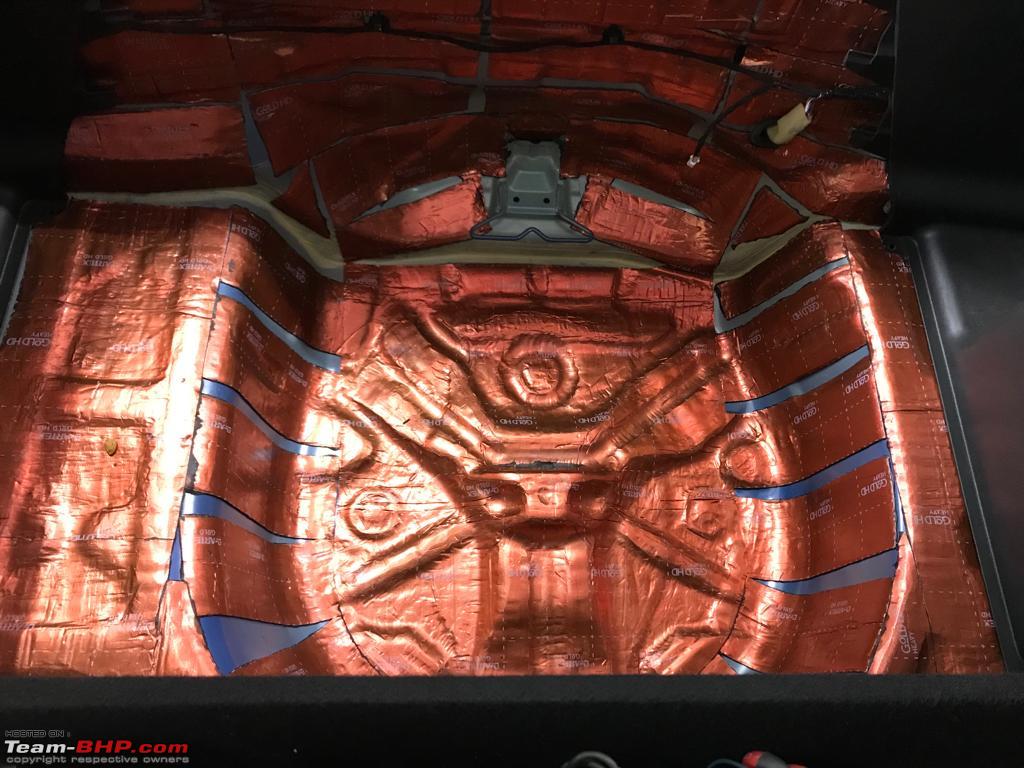 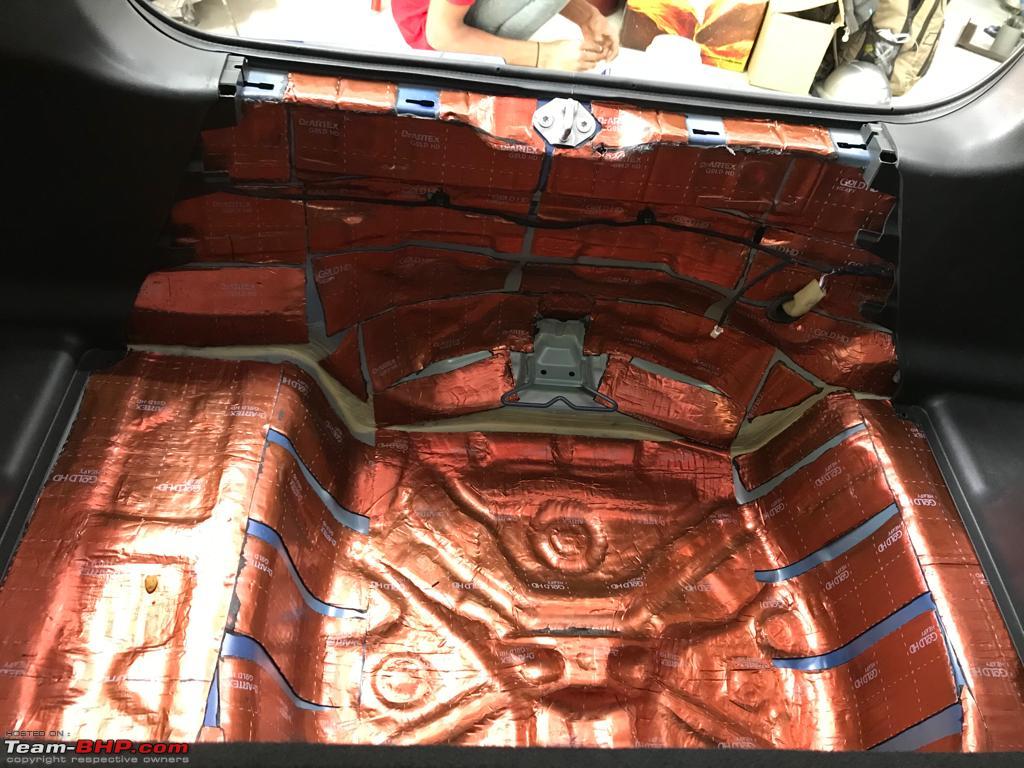 Last edited by ROG_AK : 14th July 2022 at 02:20. |
|
| (42)
Thanks
|
| The following 42 BHPians Thank ROG_AK for this useful post: | Akshay6988, aswin93, audioholic, Avikbrio, chinmaypillay, Chrome6Boy, digitalnirvana, Divya Sharan, dkaile, DriverNo.420, Dry Ice, Gannu_1, GaryTSI, glomus123, graaja, GTO, Guru_Shikhar, InControl, Jeash.vk, keroo1099, krishnaprasadgg, Leoshashi, lxskllr, Meer, Mogs, na_agrawal, neil.jericho, quickdraw, Rehaan, Researcher, Roy.S, rr0yy, sangam_mm93, Shreyans_Jain, somspaple, sunnsood, Swarup5, swiftnfurious, The Rationalist, Varun_HexaGuy, yogiii, ysjoy |
|
13th July 2022, 20:49
| #5 |
| BHPian Join Date: Oct 2017 Location: Bangalore
Posts: 298
Thanked: 1,676 Times
| Re: Hign end JL Audio upgrade in my Baleno RS All the interior cladding pieces needed to be damped as well to prevent any rattling and creaking. I had initially decided to use Dr Artex VibroBarrier 7+ but I was just not able to source it. The next best option was the Lace (15mm), which is what we initially used. Later, during the installation, Raghu was able to source the VibroBarrier and we decided to try it for one of the rear doors and the boot cladding. The results were impressive, it gave a solid feel with absolutely no flexing and creaking. The Lace was definitely not as effective and the decision was made to use VibroBarrier for all the doors. This meant more work as the Lace needed to be removed first, something that required a lot of effort indeed. 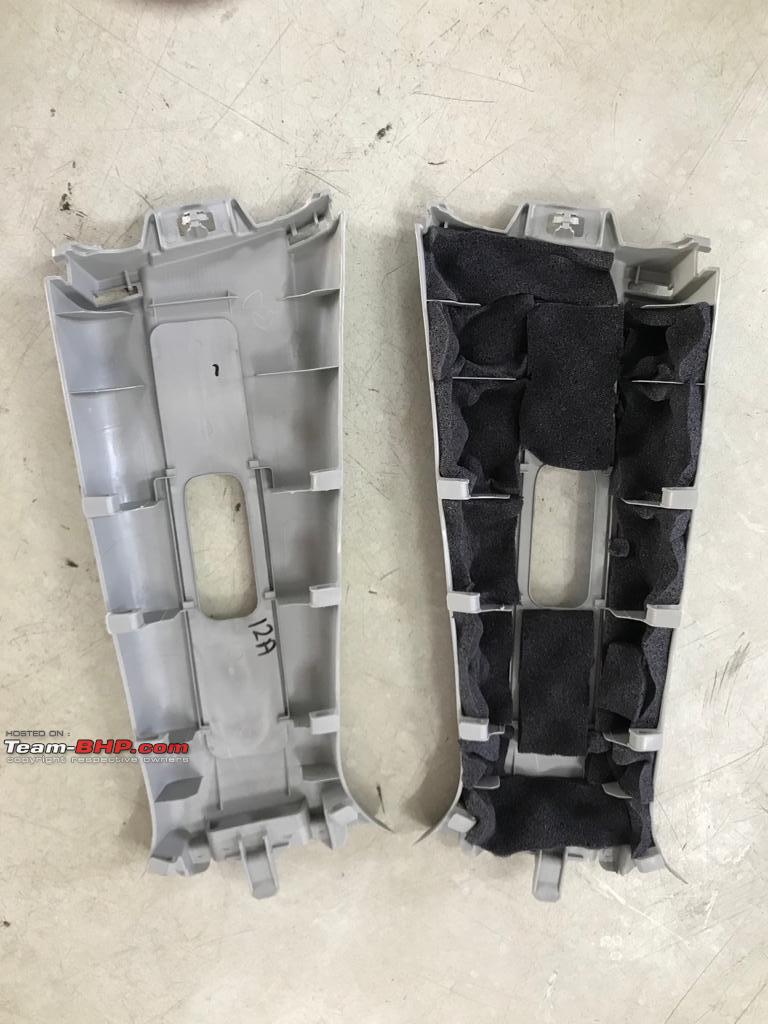  Seems like Maruti made some effort to add damping to the trim pieces 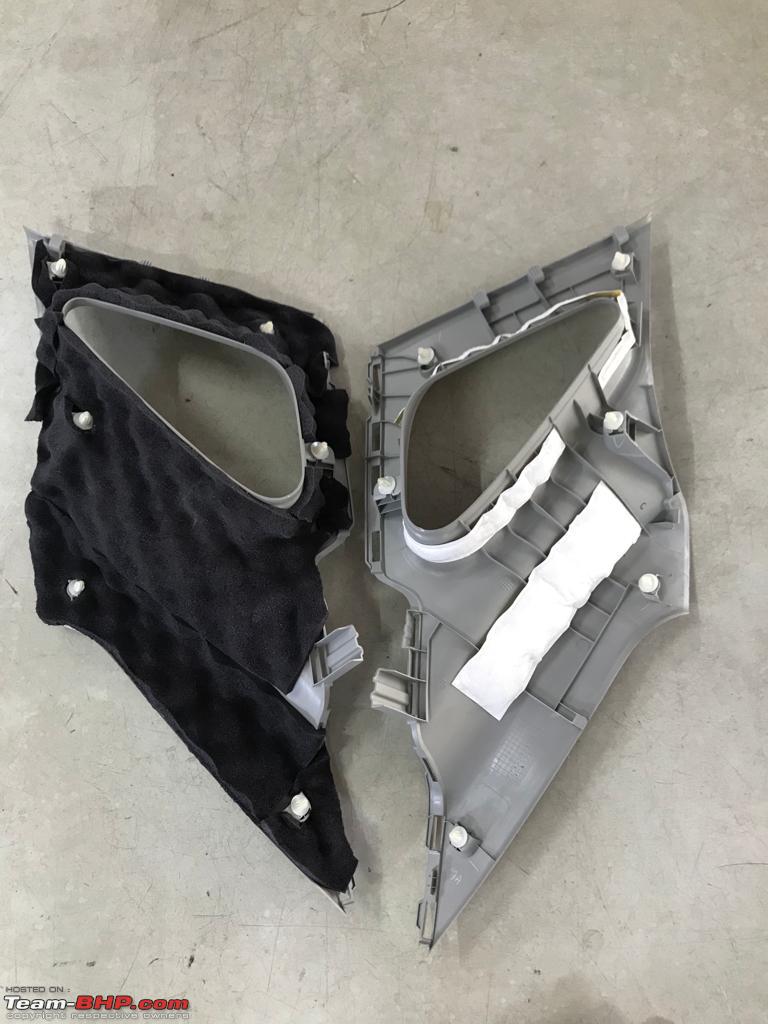  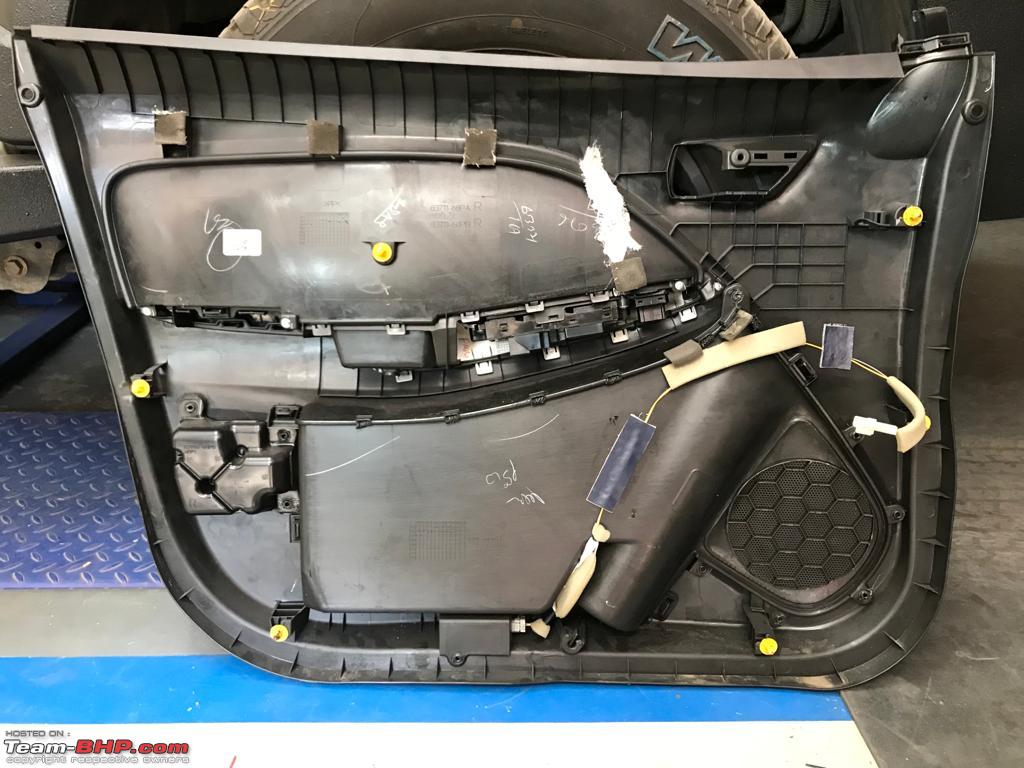 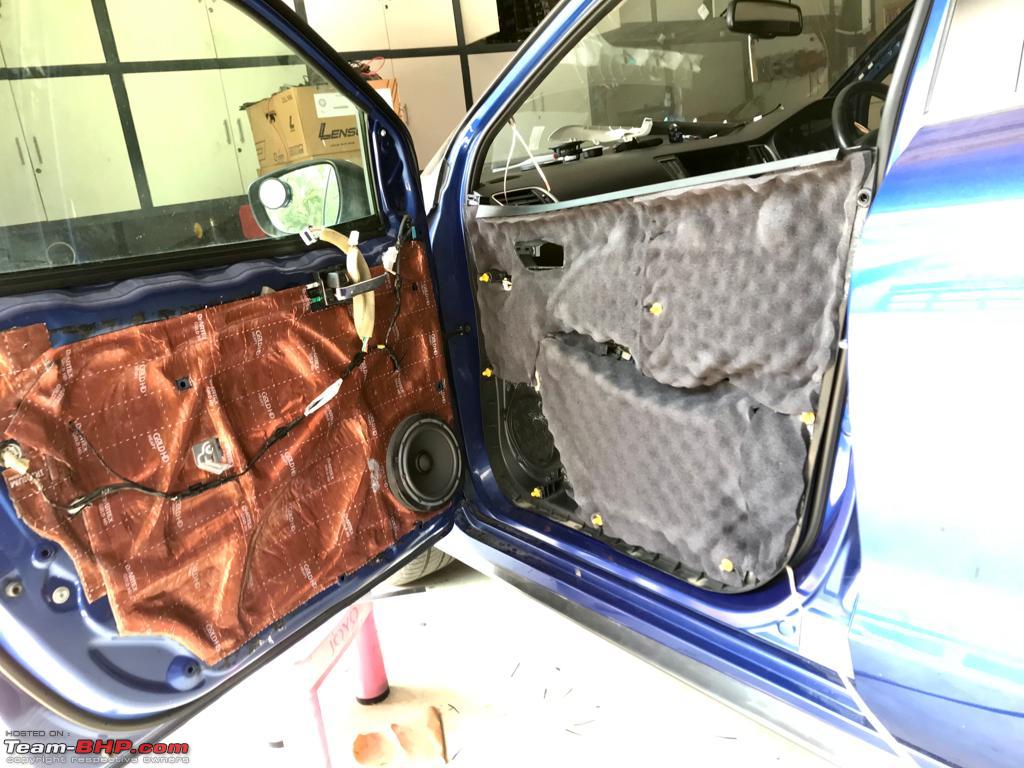  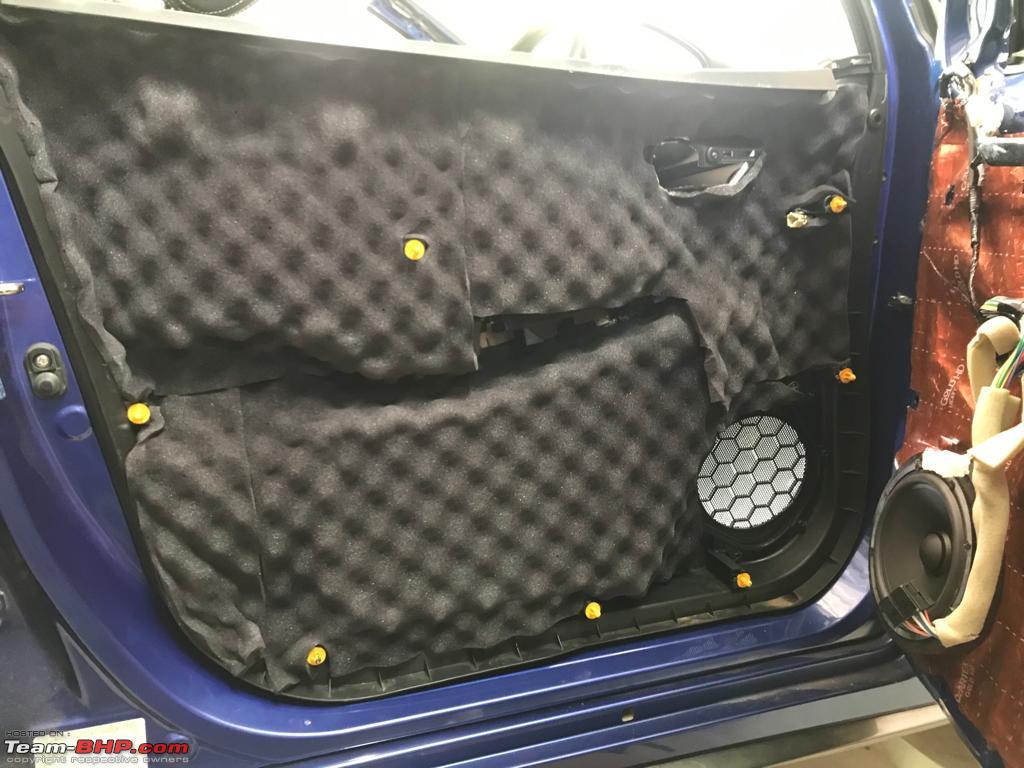 Removing the Lace from the door pads was a huge effort Once done, the residue was cleaned and prepared for the Vibrobarrier 7+ 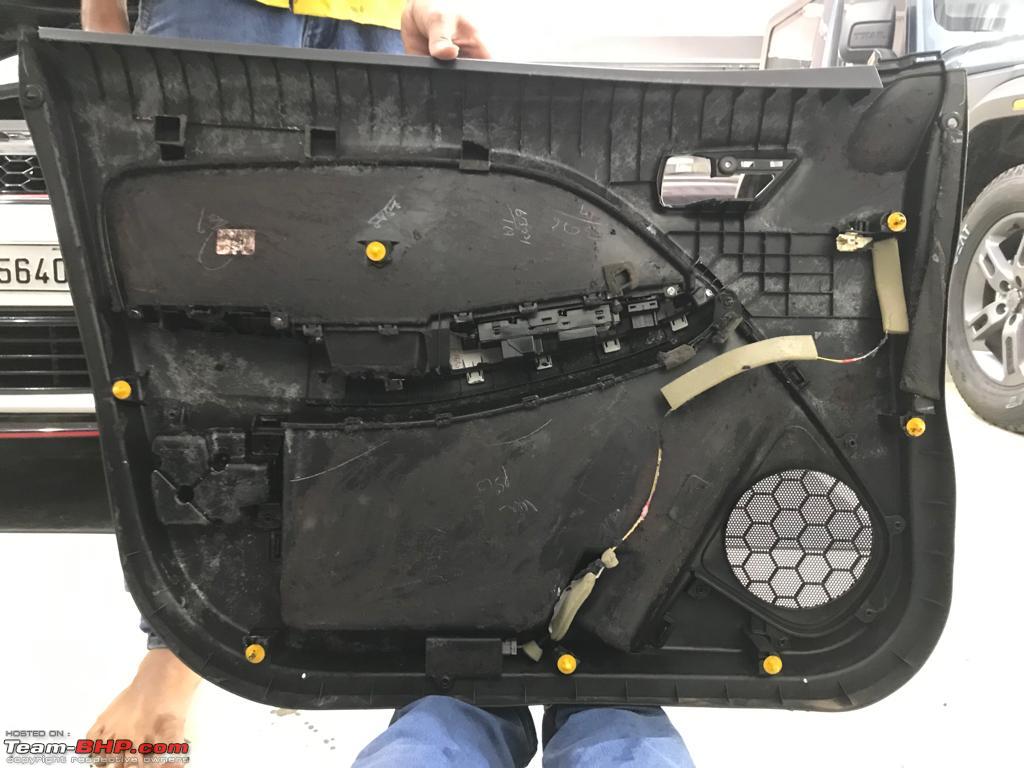 Finally, it was applied! 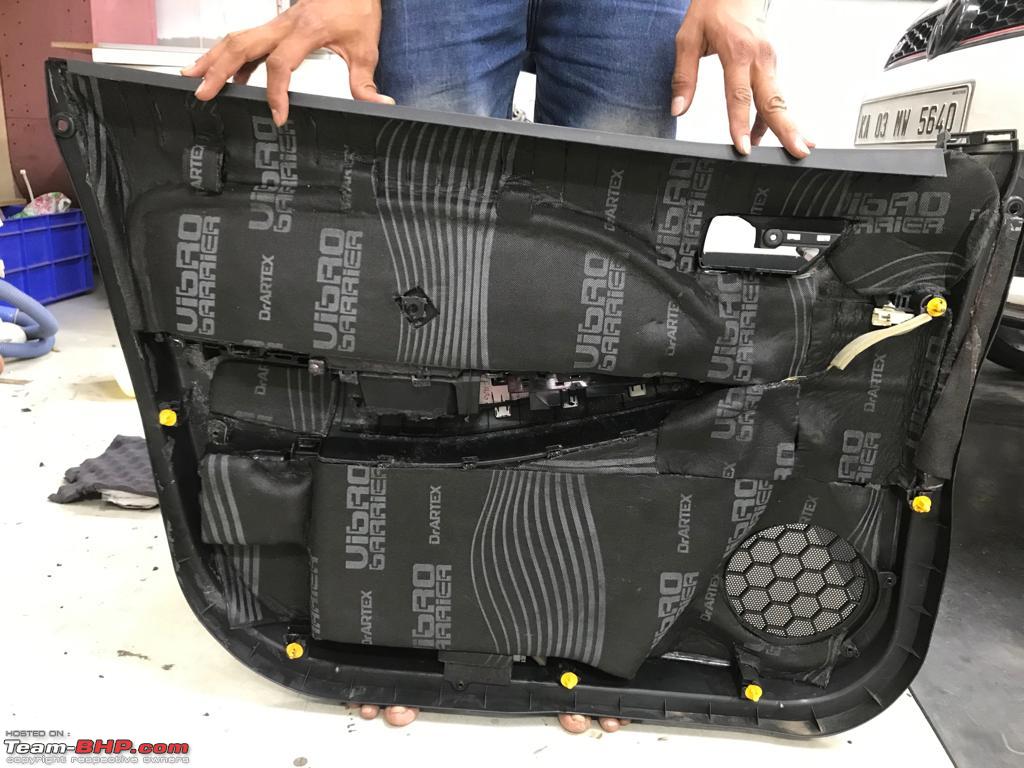    Fabrication With the damping out of the way, it was time to construct the AMP rack and A-pillar speaker pods. First up was the AMP rack, it would be made out of plywood and attached to the rear seat. Bye-bye 60-40 folding feature. The rack would have 2 layers, an interior one for the DSP, distribution block and wiring. The exterior part would be for the AMPs. As I said, everything is inch perfect 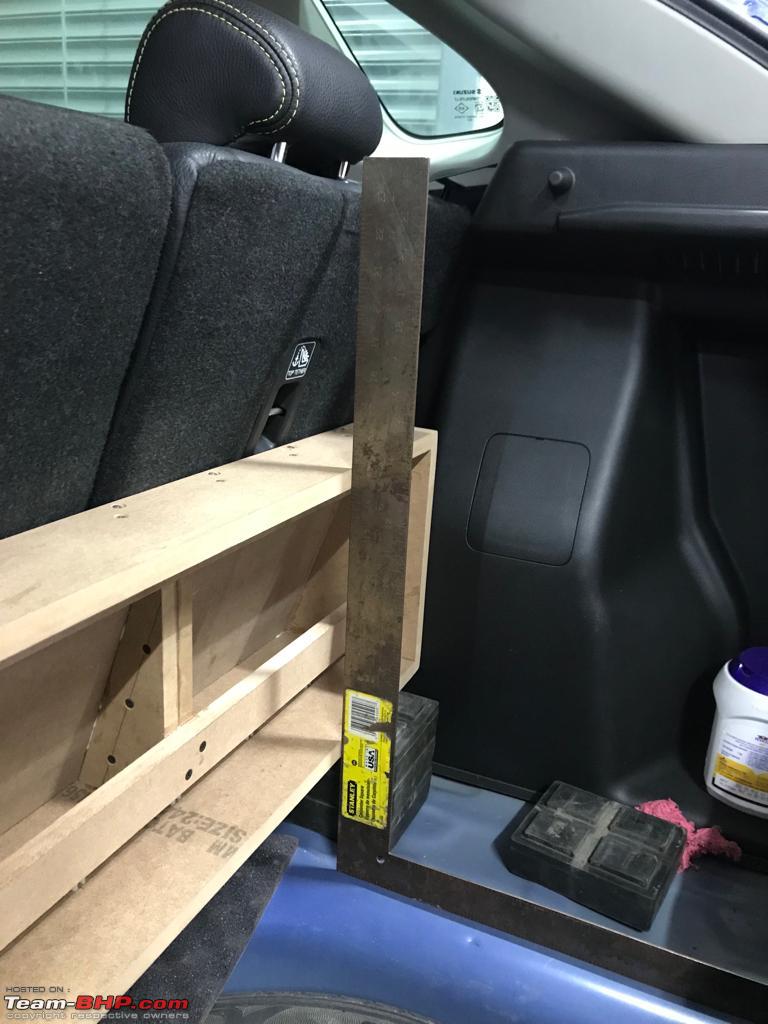 Making sure everything fits properly  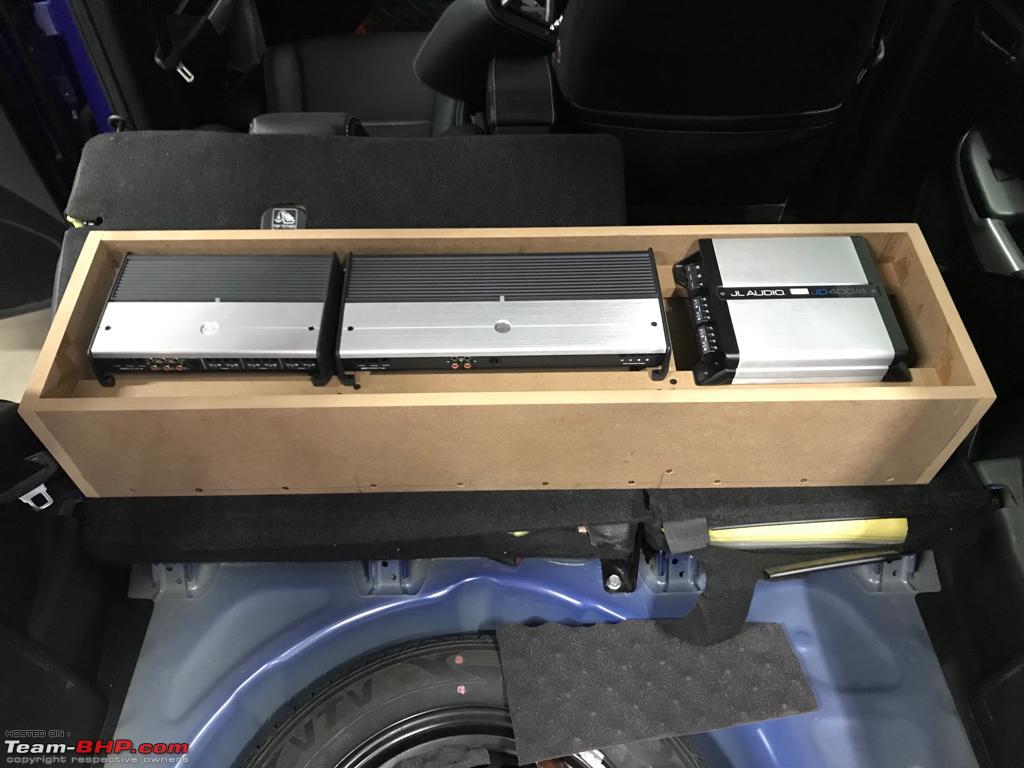 Everything has to be black. Black carpeting was used for the exterior to match the seat back and the interior was painted black.  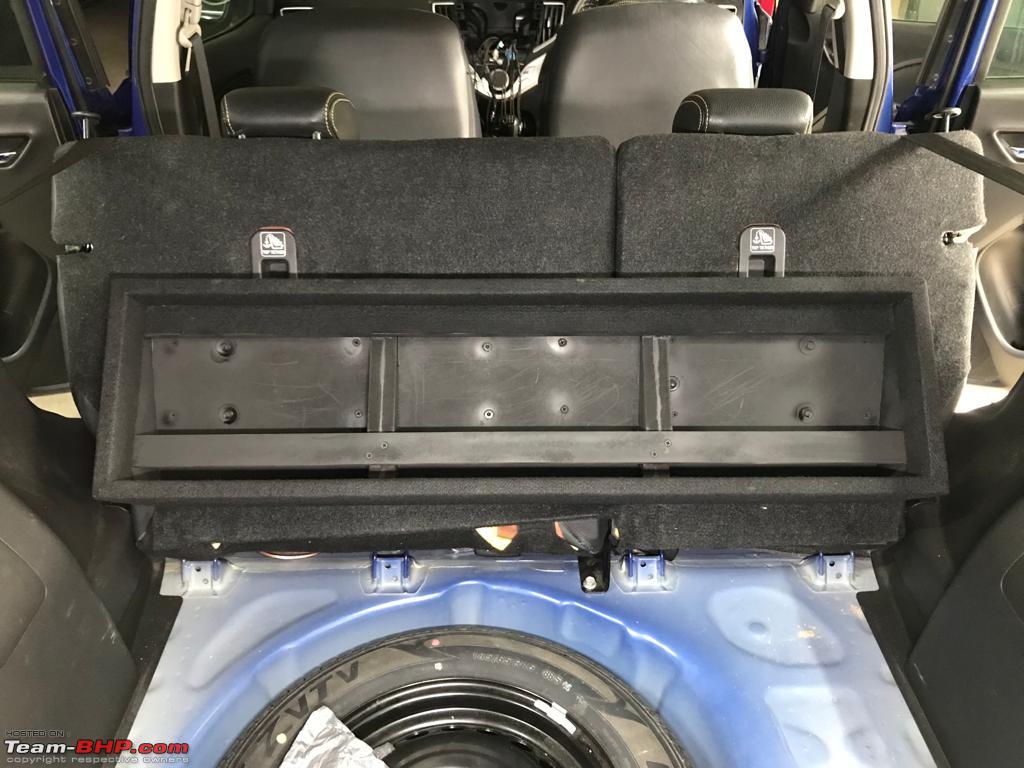 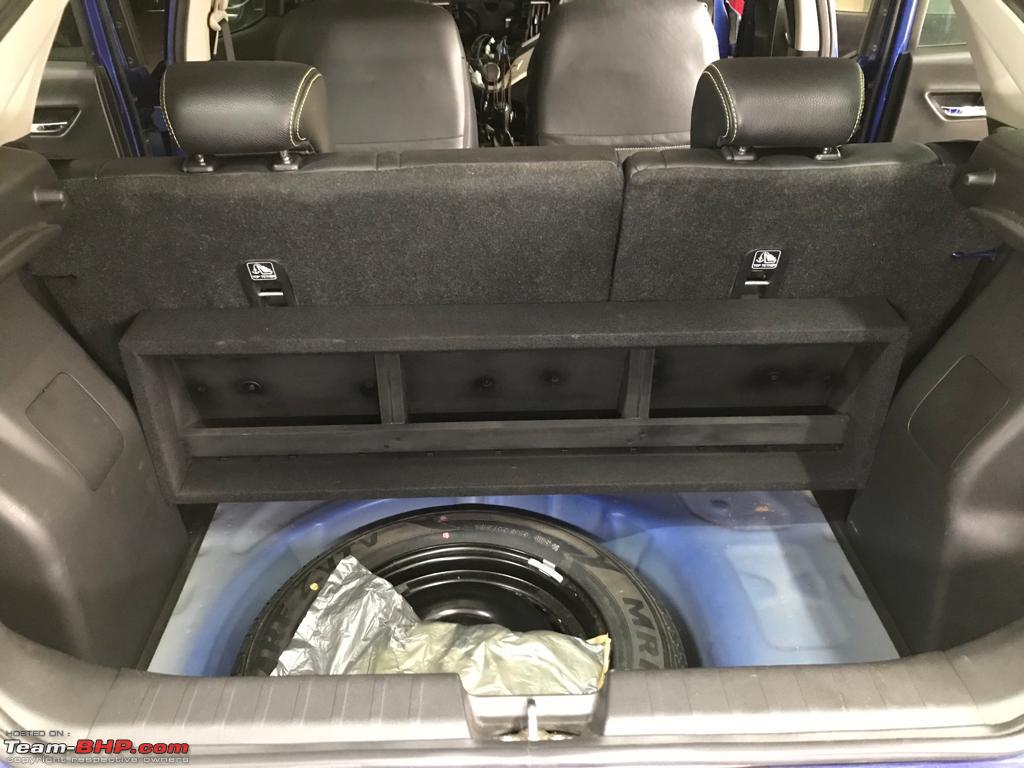 The finished result, the shape was apparently inspired by the middle section of the tail light. I decided to add some bling inside the rack in the form of an LED strip  . Seems kind of pointless now since the massive sub is covering the entire thing, oh well. . Seems kind of pointless now since the massive sub is covering the entire thing, oh well. 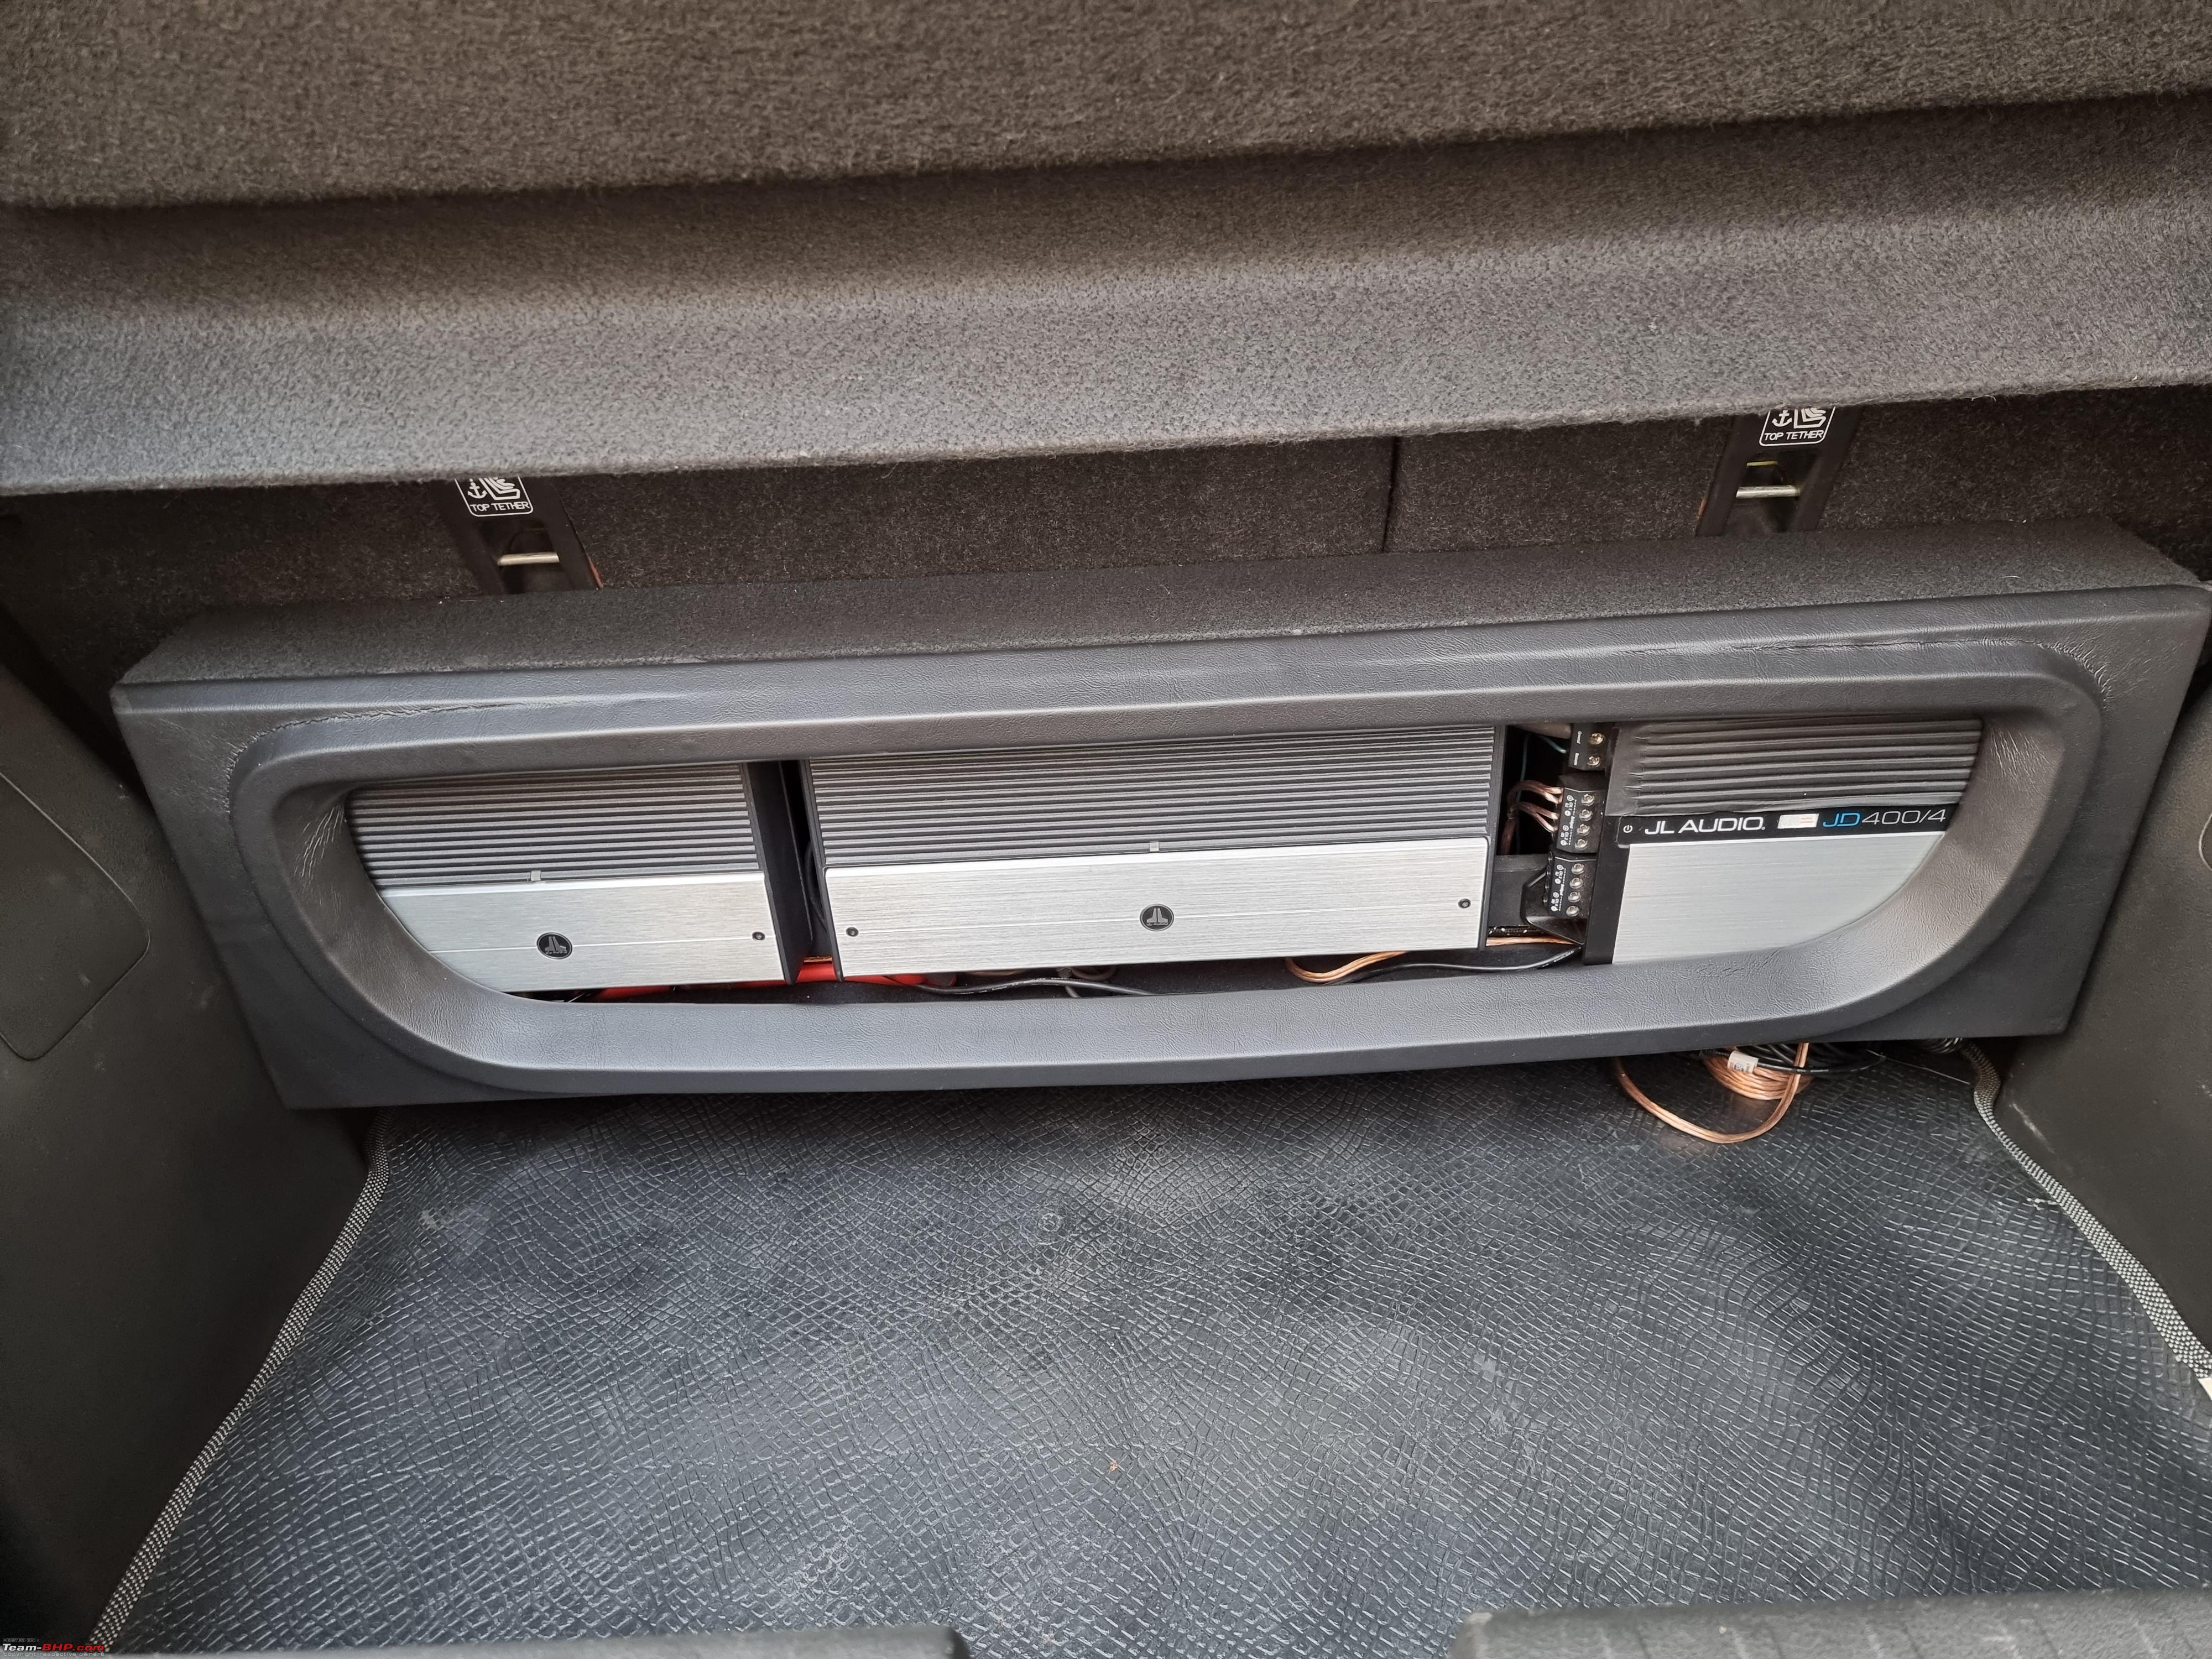  The AMP rack may not always be visible but the A-pillar pods most certainly will be. Both the 3.5" speaker and 1" tweeter would be housed inside them. I decided against using the stock tweeter location, those beautiful little things need to be seen. Fibreglass was the choice of material for these pods. It started with the placement of the spacer rings and trying to get the alignment right. After all, it shouldn't create a blind spot and hamper visibility.  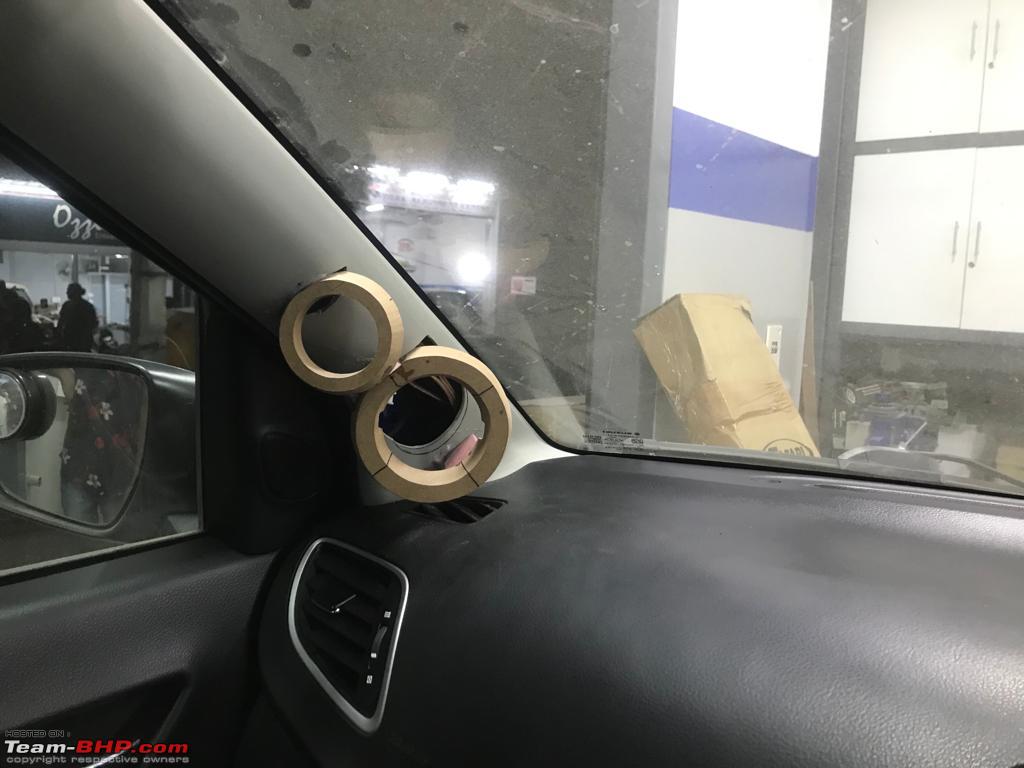  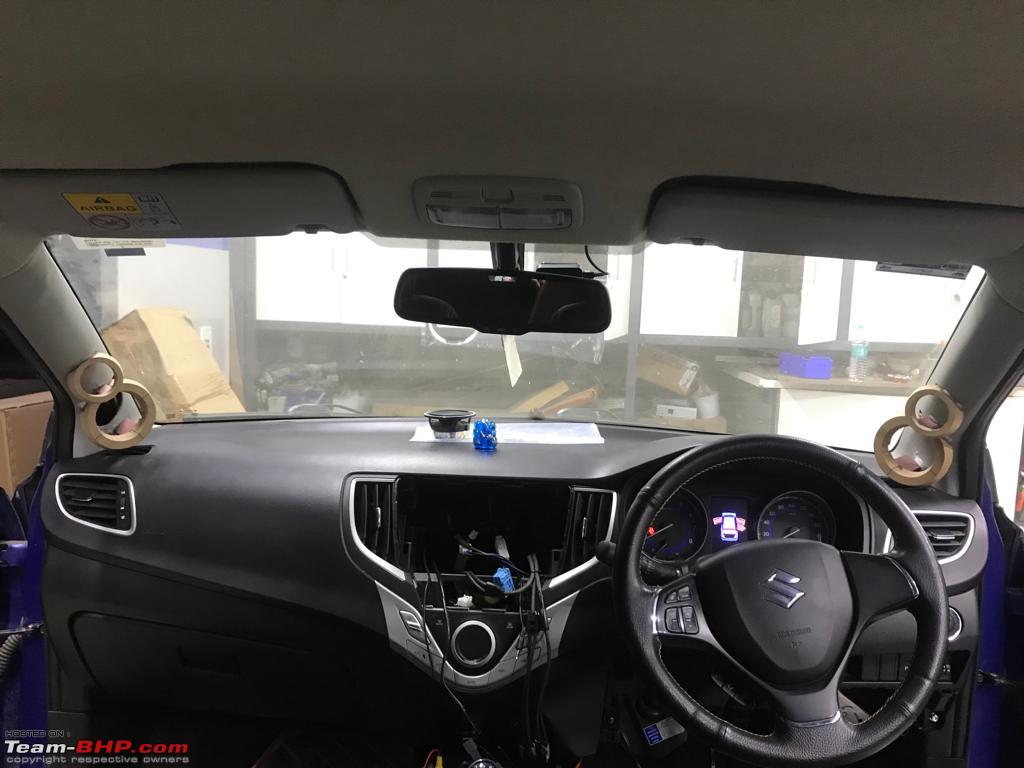 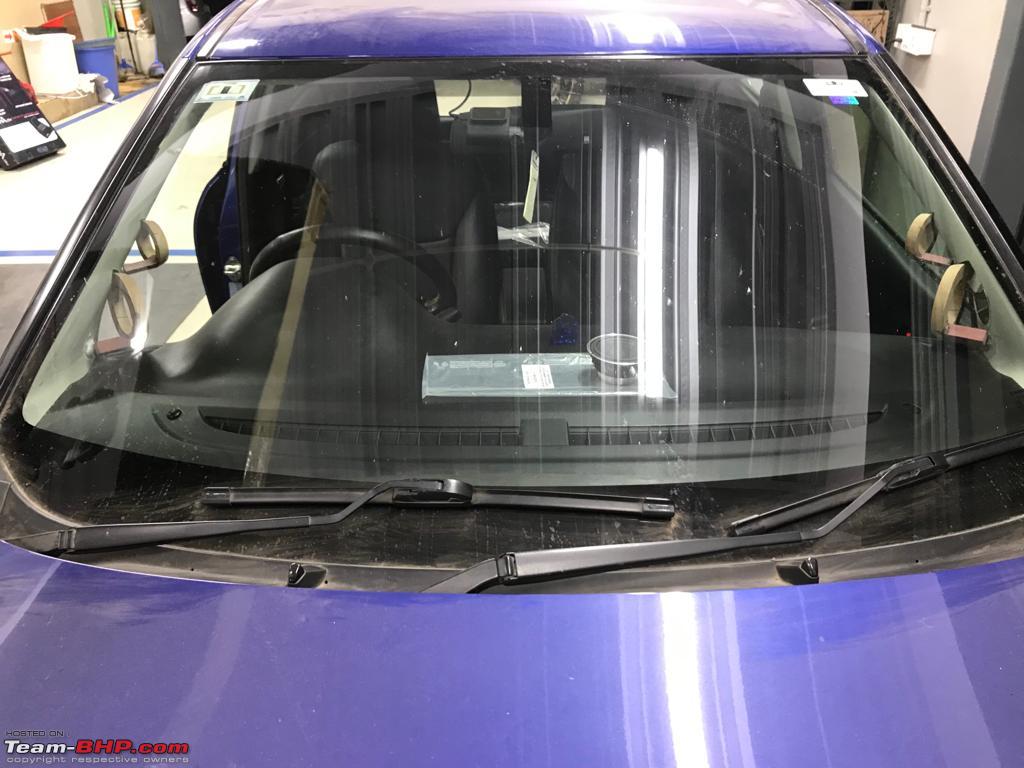 Last edited by ROG_AK : 13th July 2022 at 23:27. |
|
| (32)
Thanks
|
| The following 32 BHPians Thank ROG_AK for this useful post: | 2himanshu, adhd92, Akshay6988, aswin93, Avikbrio, Chrome6Boy, CrAzY dRiVeR, deep_behera, digitalnirvana, Divya Sharan, Gannu_1, GaryTSI, graaja, GTO, Guru_Shikhar, Harjot37, InControl, keroo1099, Leoshashi, Mogs, neil.jericho, PrasunBannerjee, Rehaan, Researcher, Roy.S, sangam_mm93, Shanksta, somspaple, swiftnfurious, The Rationalist, Varun_HexaGuy, yogiii |
|
13th July 2022, 23:37
| #6 |
| BHPian Join Date: Oct 2017 Location: Bangalore
Posts: 298
Thanked: 1,676 Times
| Re: Hign end JL Audio upgrade in my Baleno RS With the placement and alignment sorted, it was time to mould everything together with fibreglass. Things got messed up sometimes and were redone till they came out right. 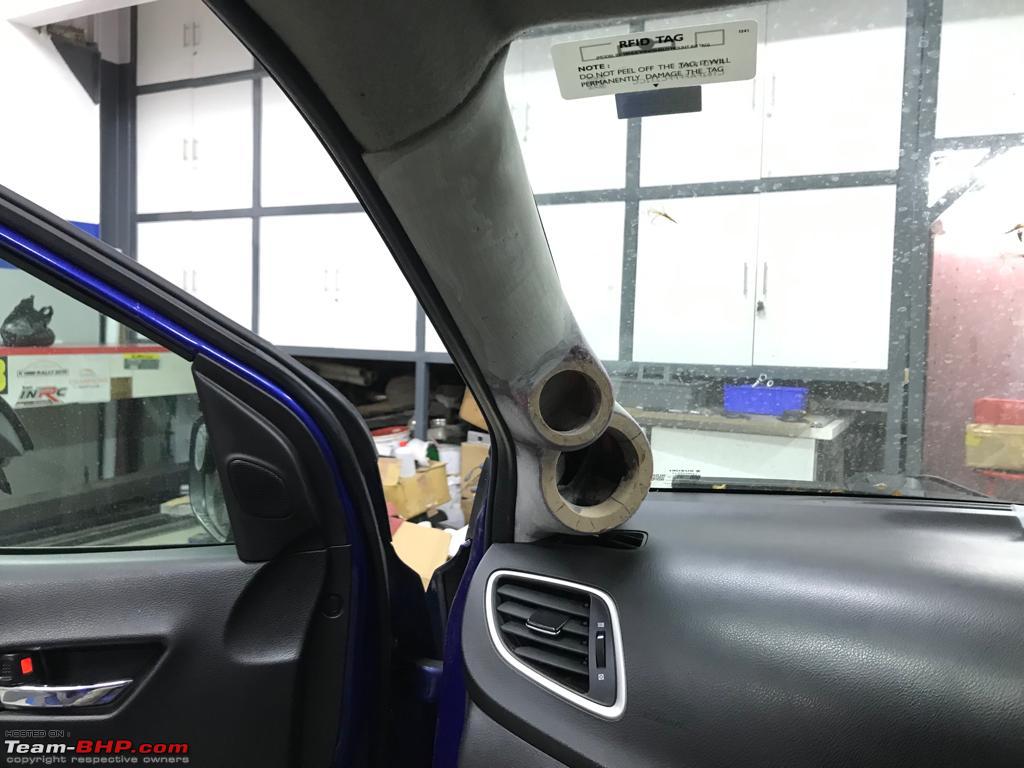 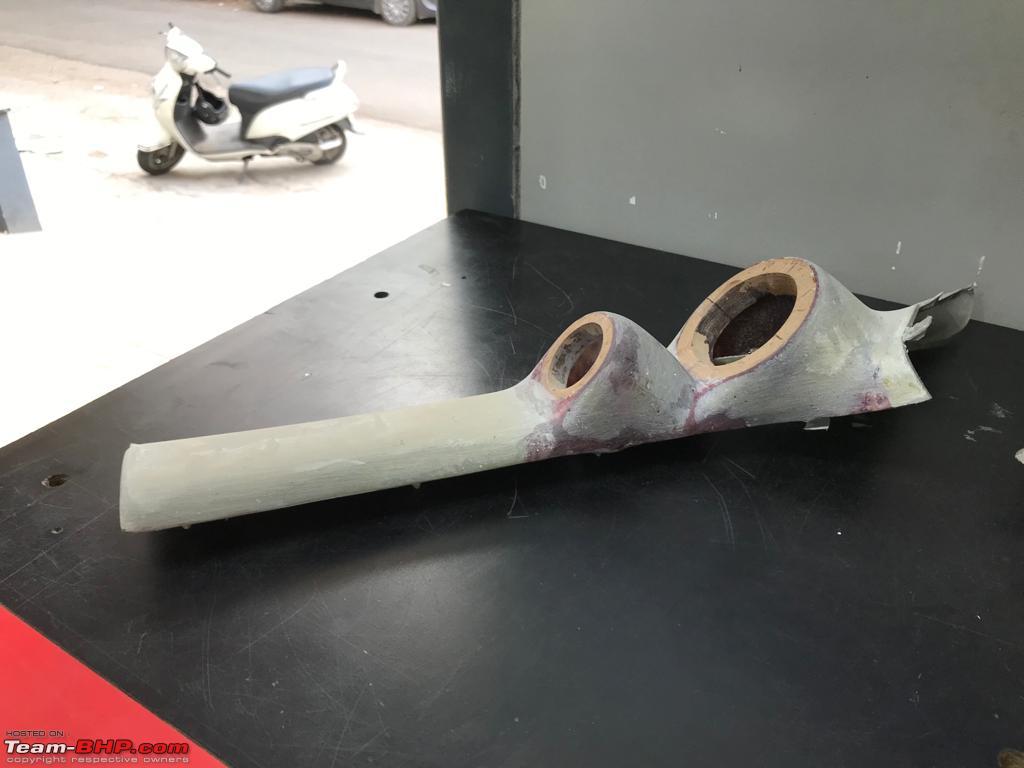  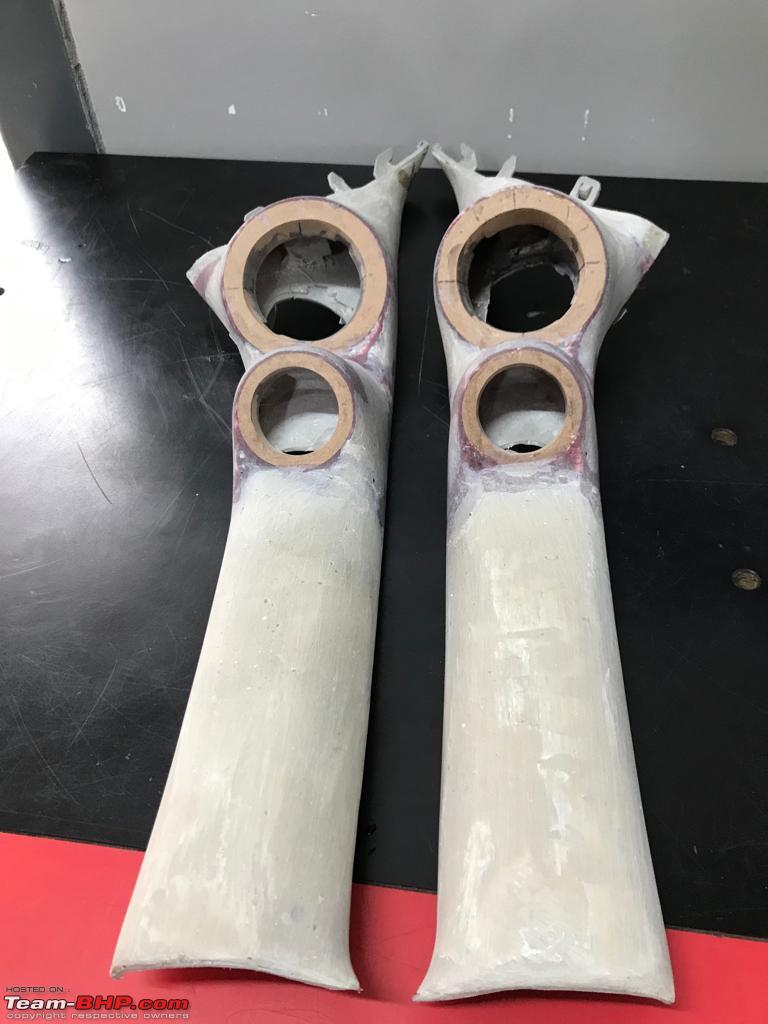 With the structure ready, it had to be wrapped in something. I wanted it done in black leather with yellow stitching to match the seats. The first attempt was abysmal, Raghu gave it to someone and they messed it up. Red stitching was used and the wrapping was bad, it requires a lot of time and patience which they obviously didn't have and mentioned the same to Raghu.  I then decided to take it to the same guy who did my seats, he didn't really want to do it but obliged after some persuasion. They did a good job but we couldn't use it. The leather was too thick and fitting the speaker with the grill proved difficult. 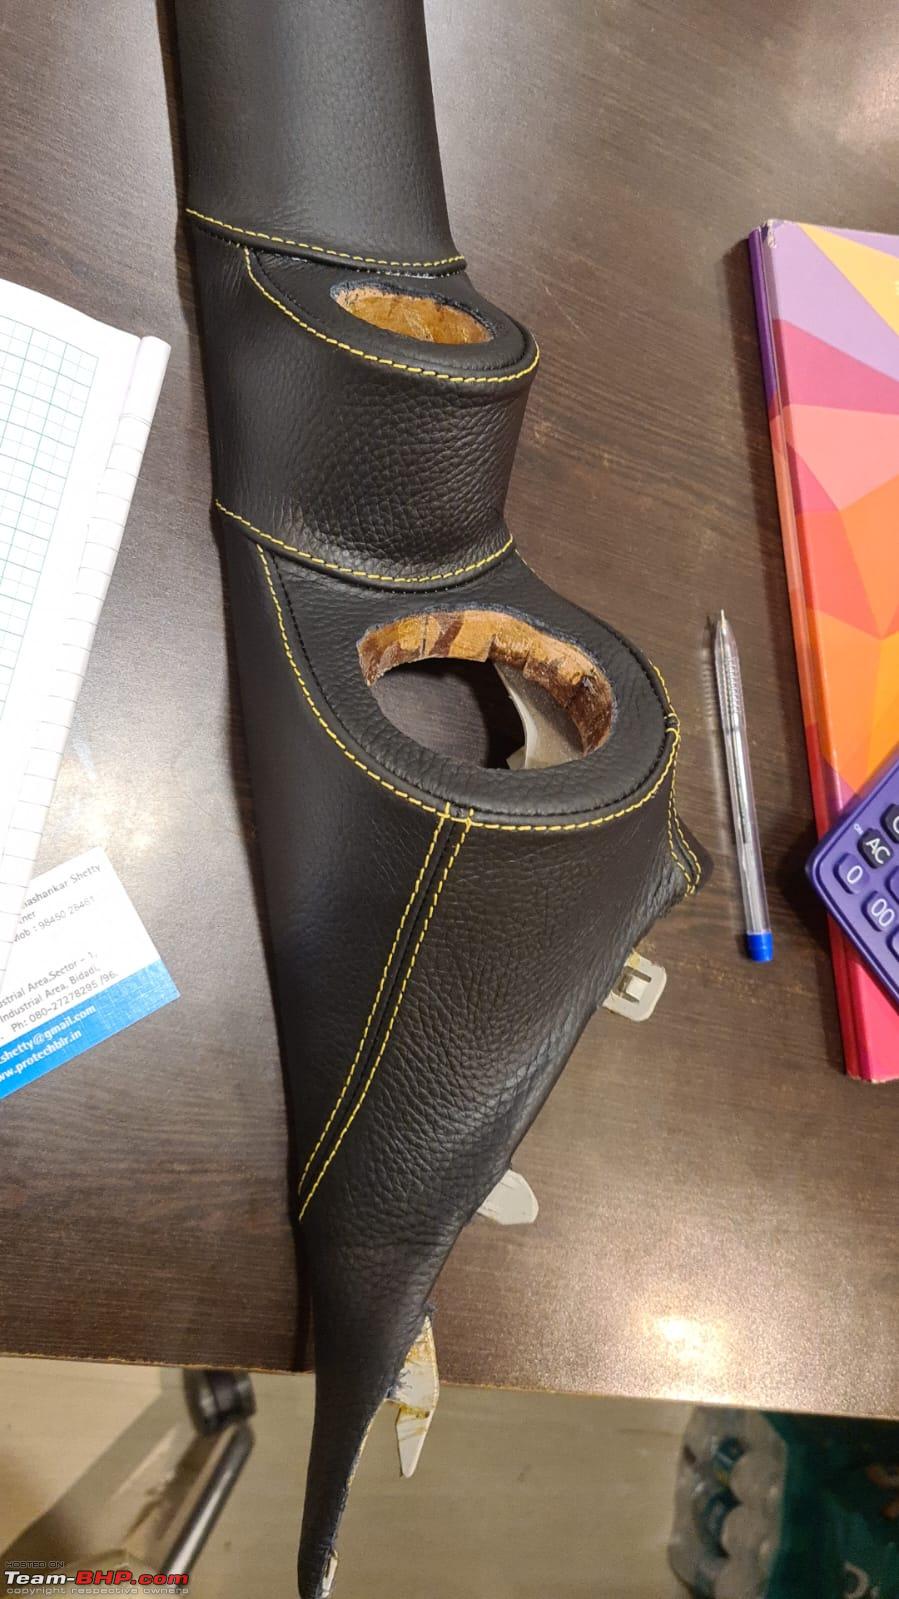 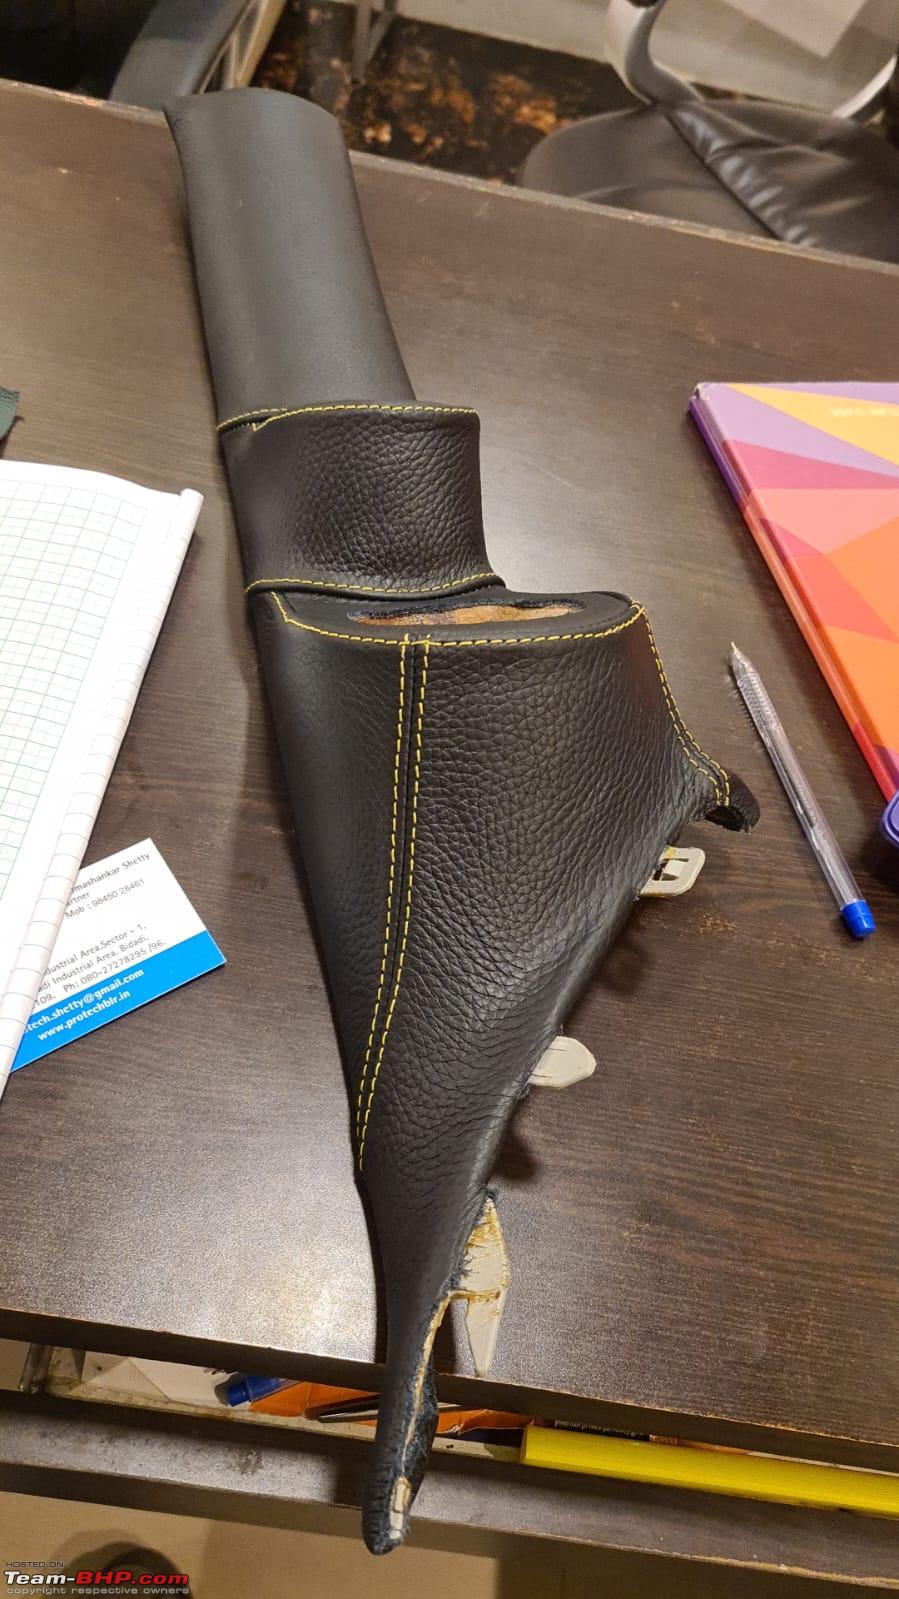  In the end, Raghu decided to do it himself using the fake leather from the 1st attempt, it was painstaking but ended up being a thing of beauty.  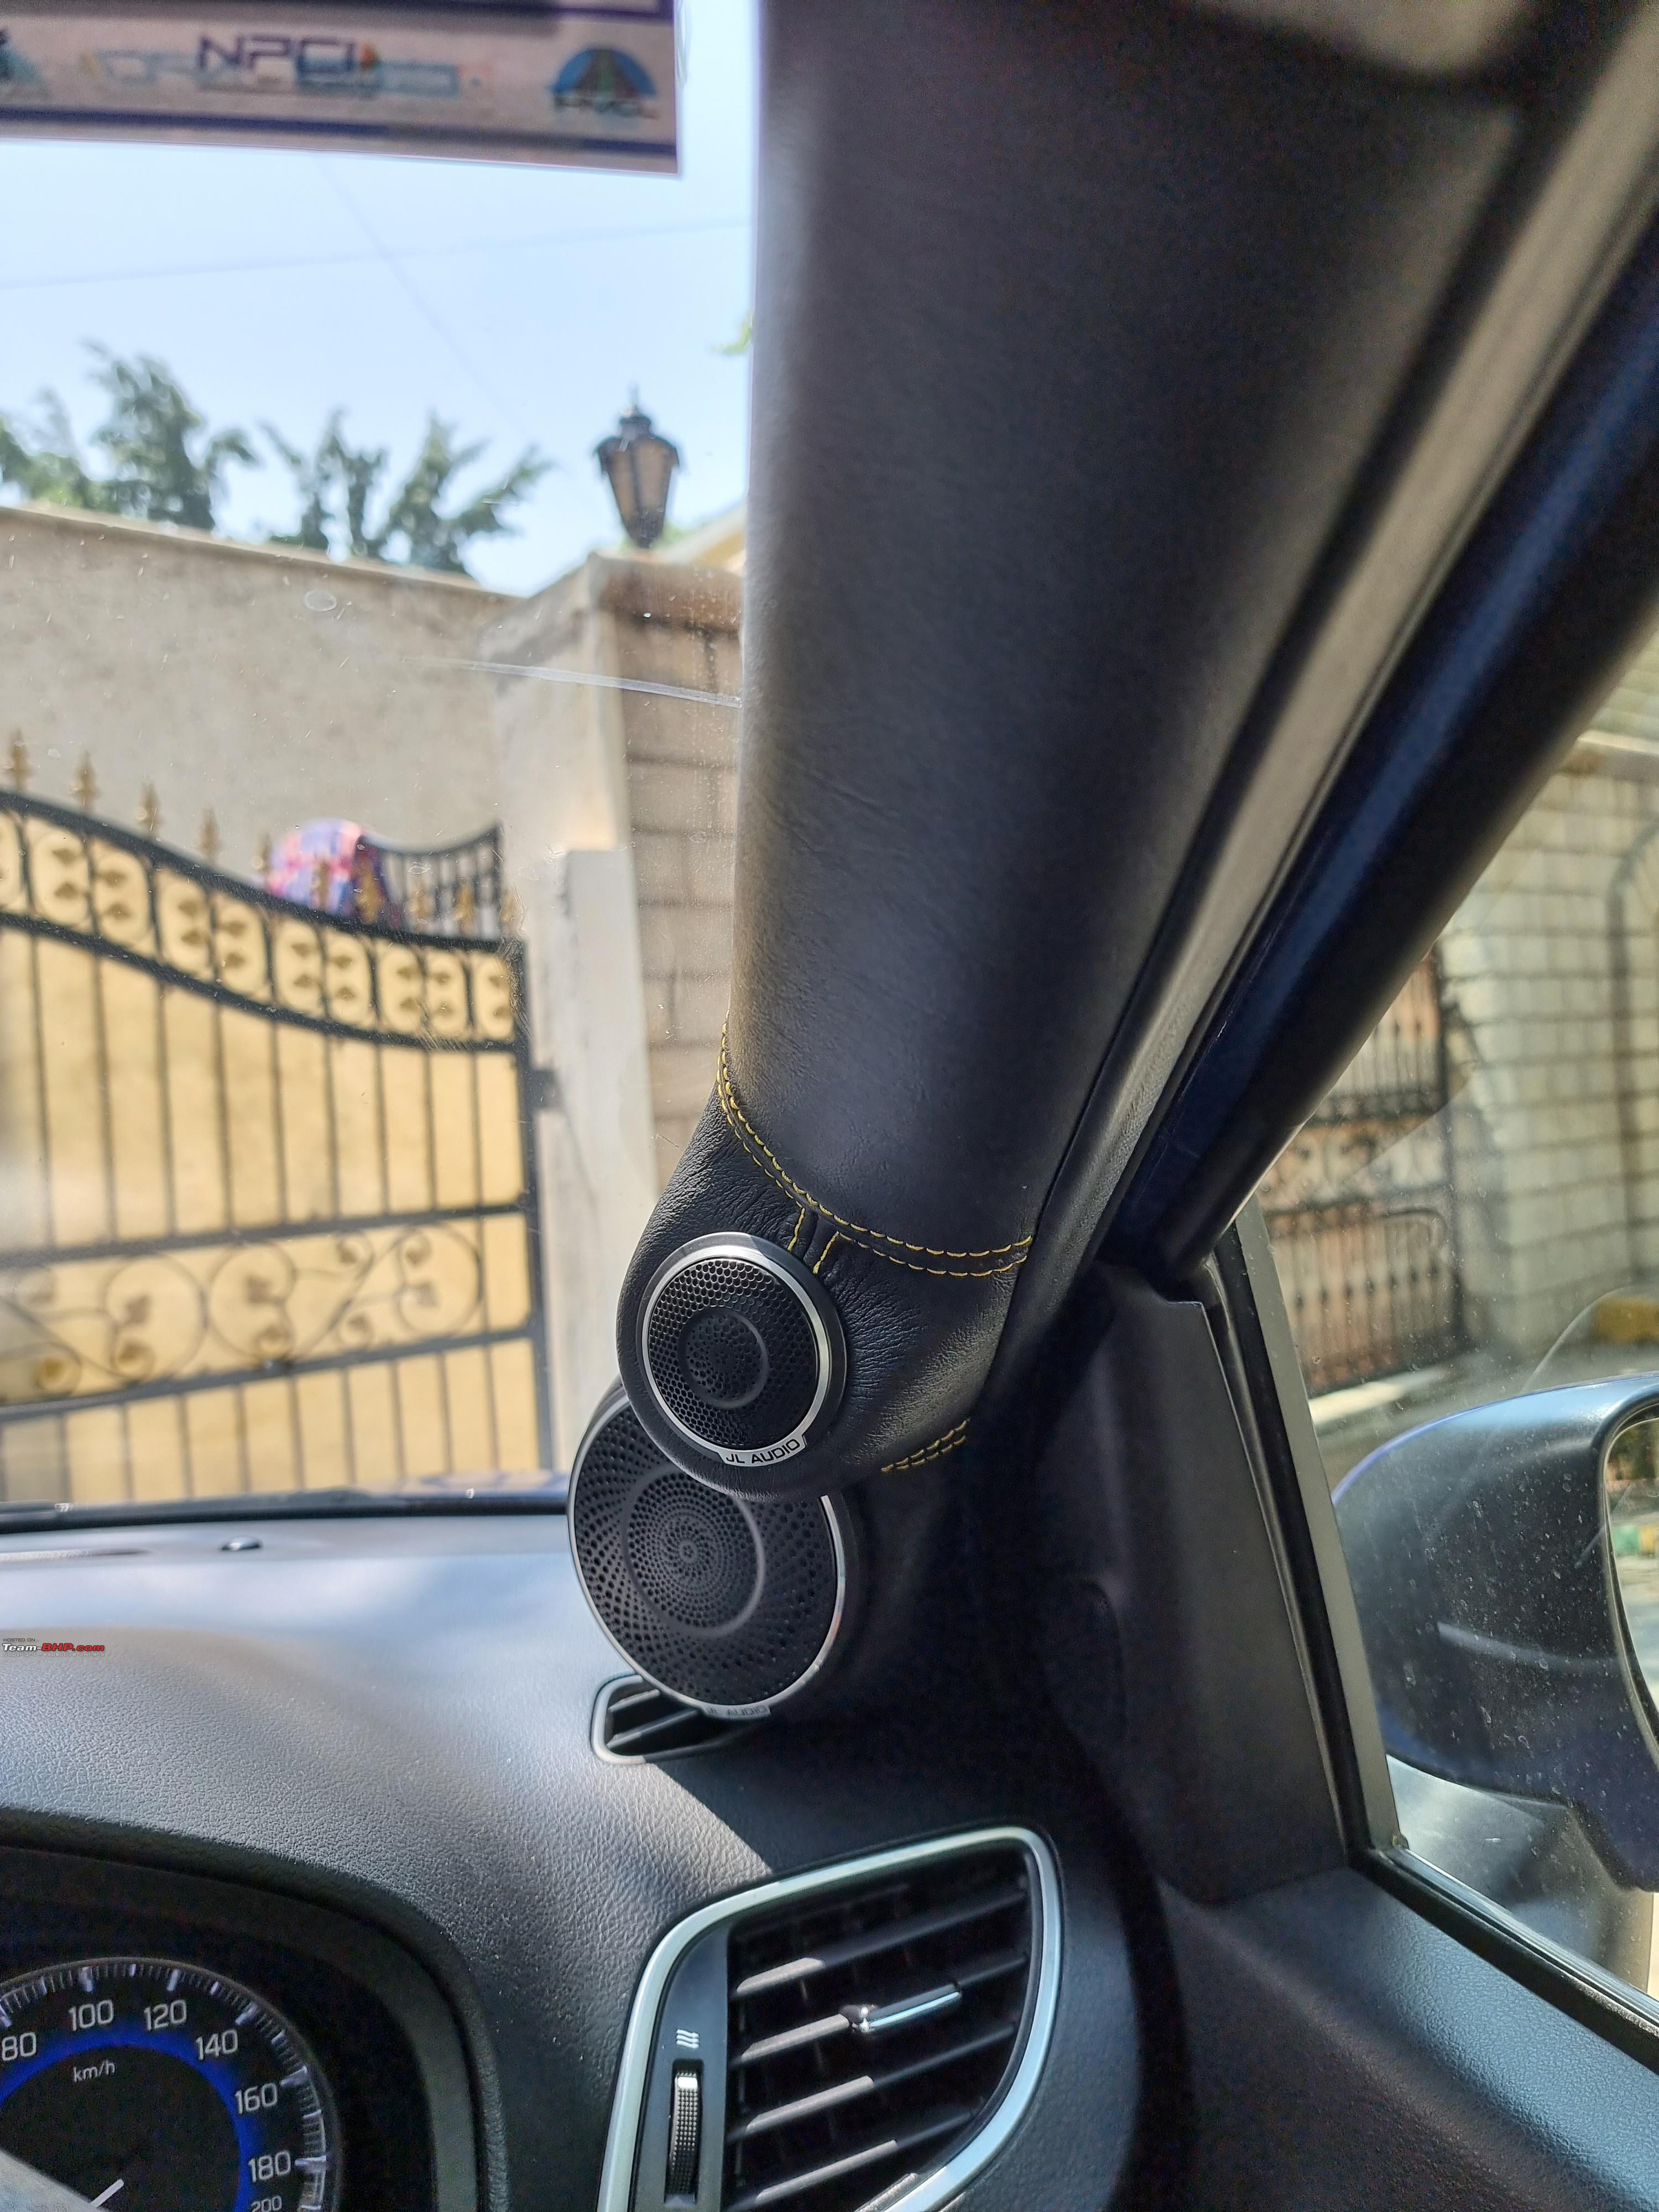 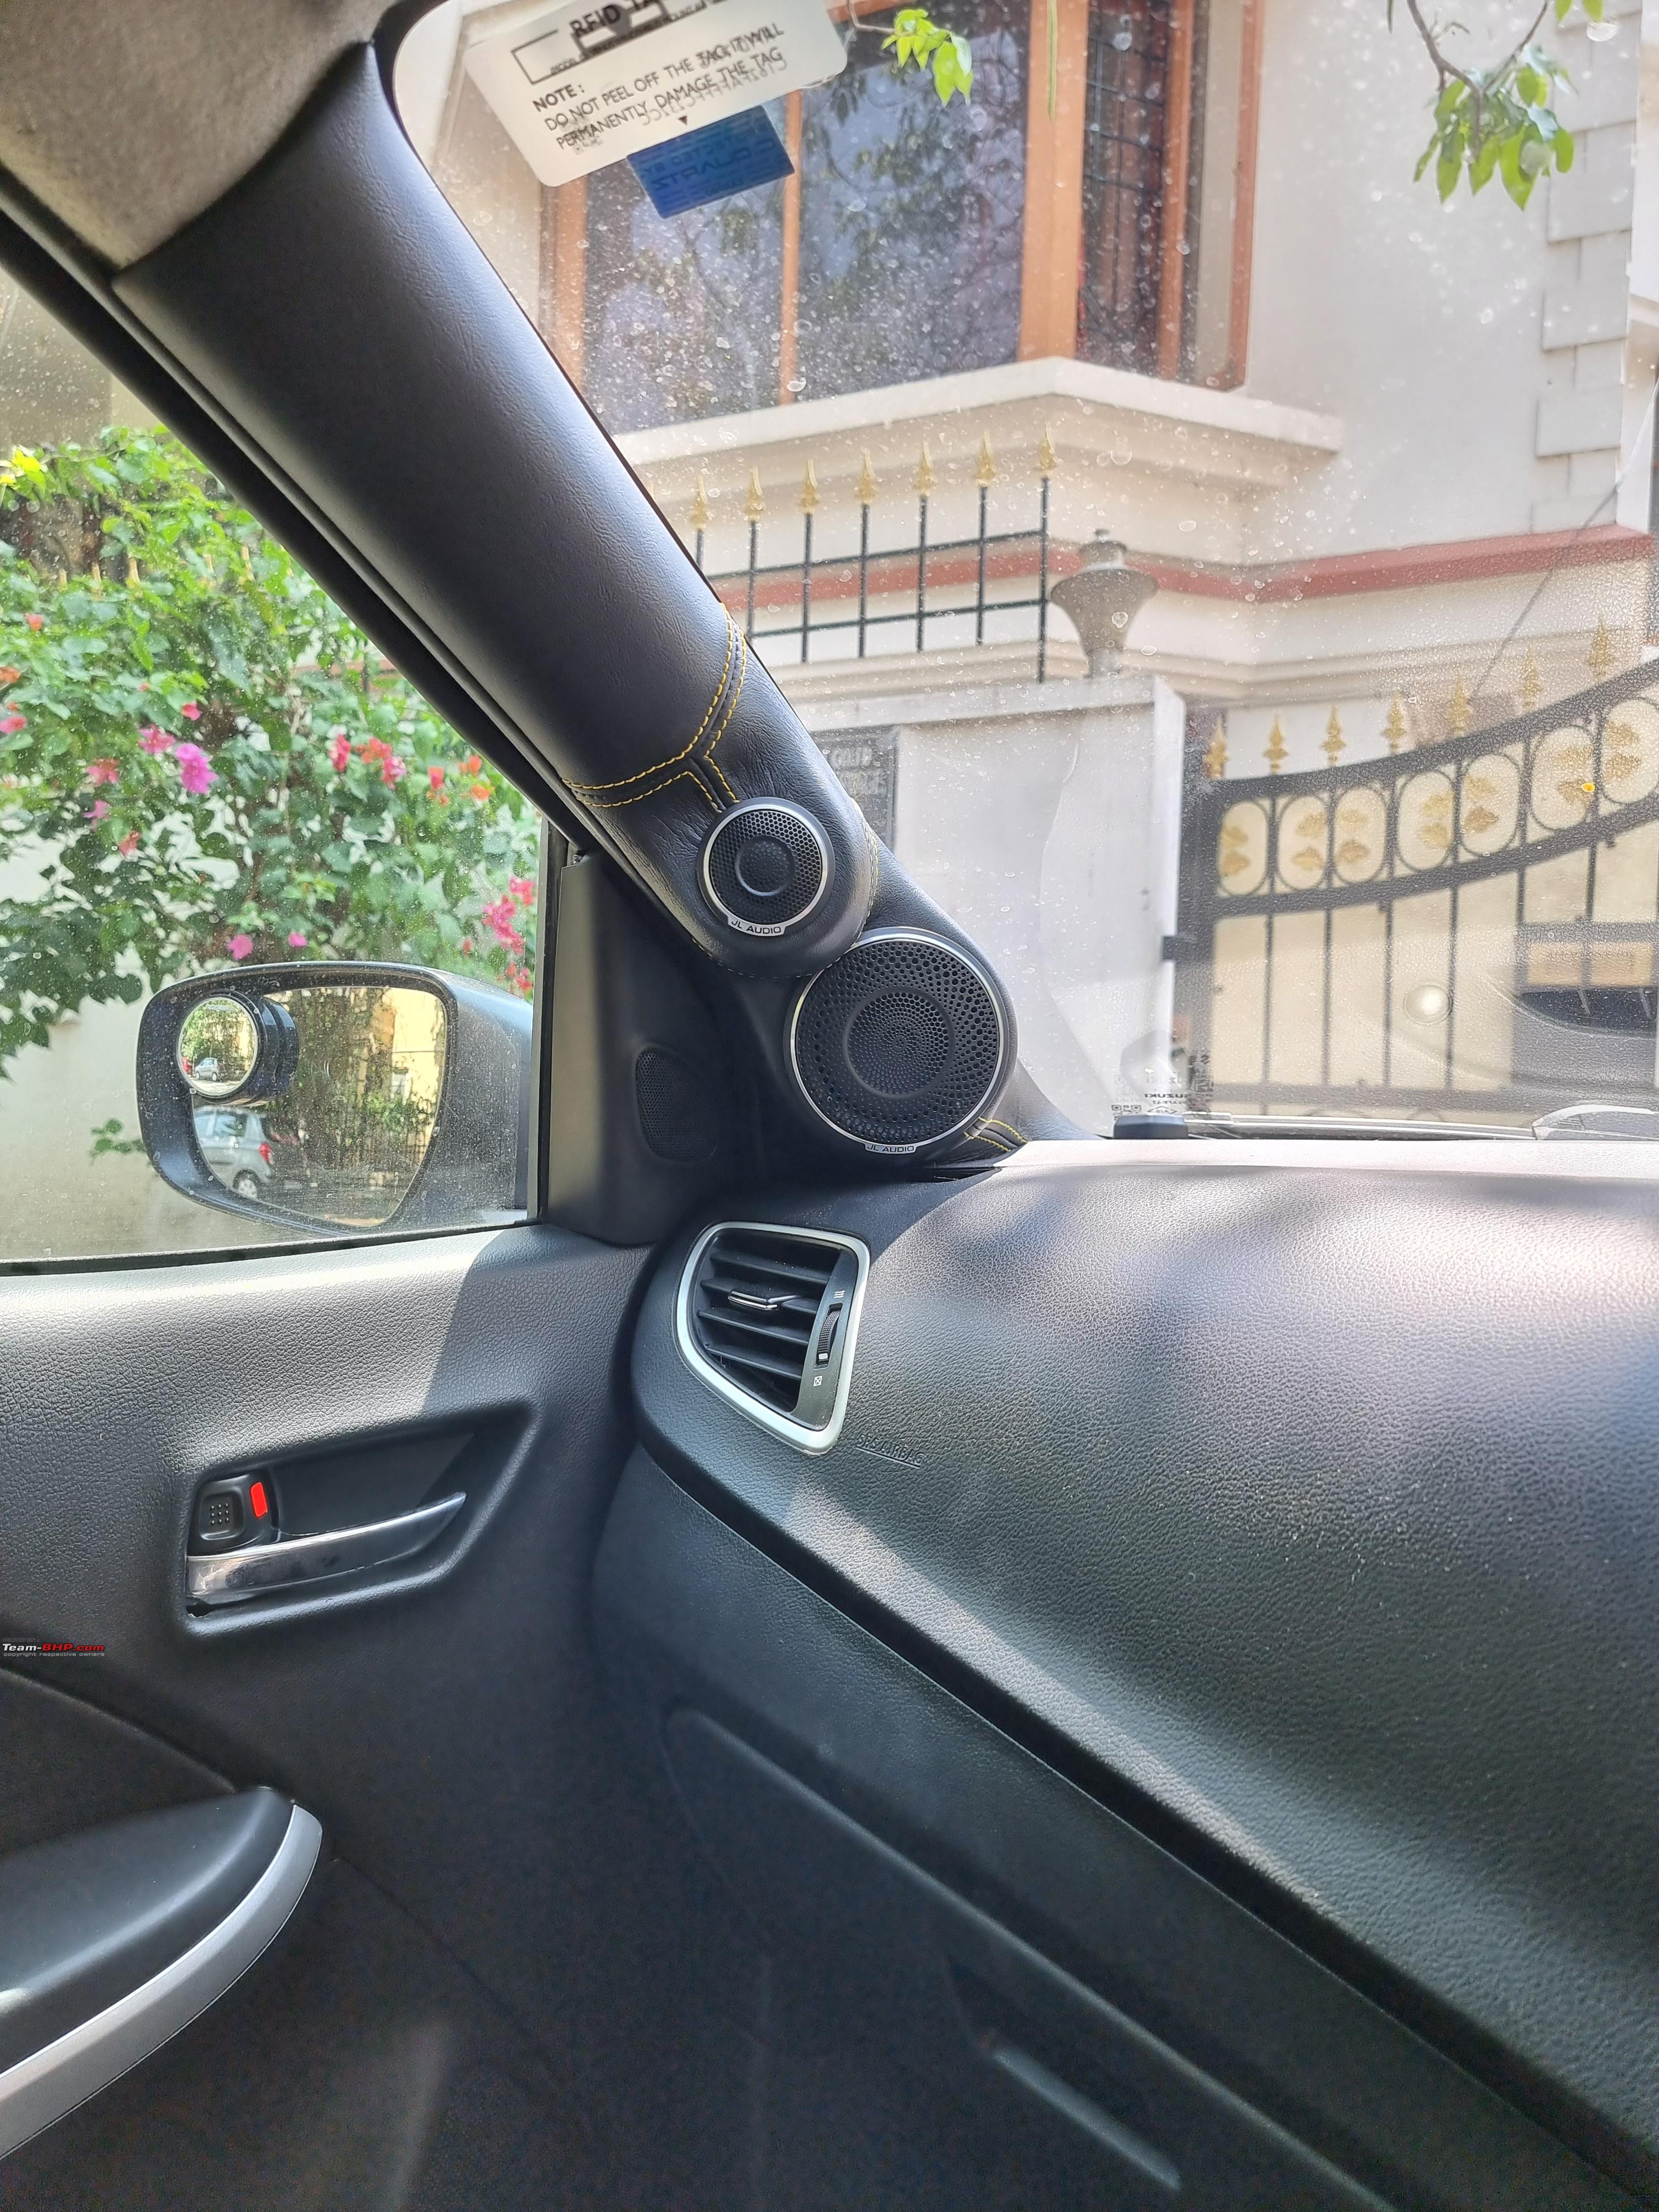 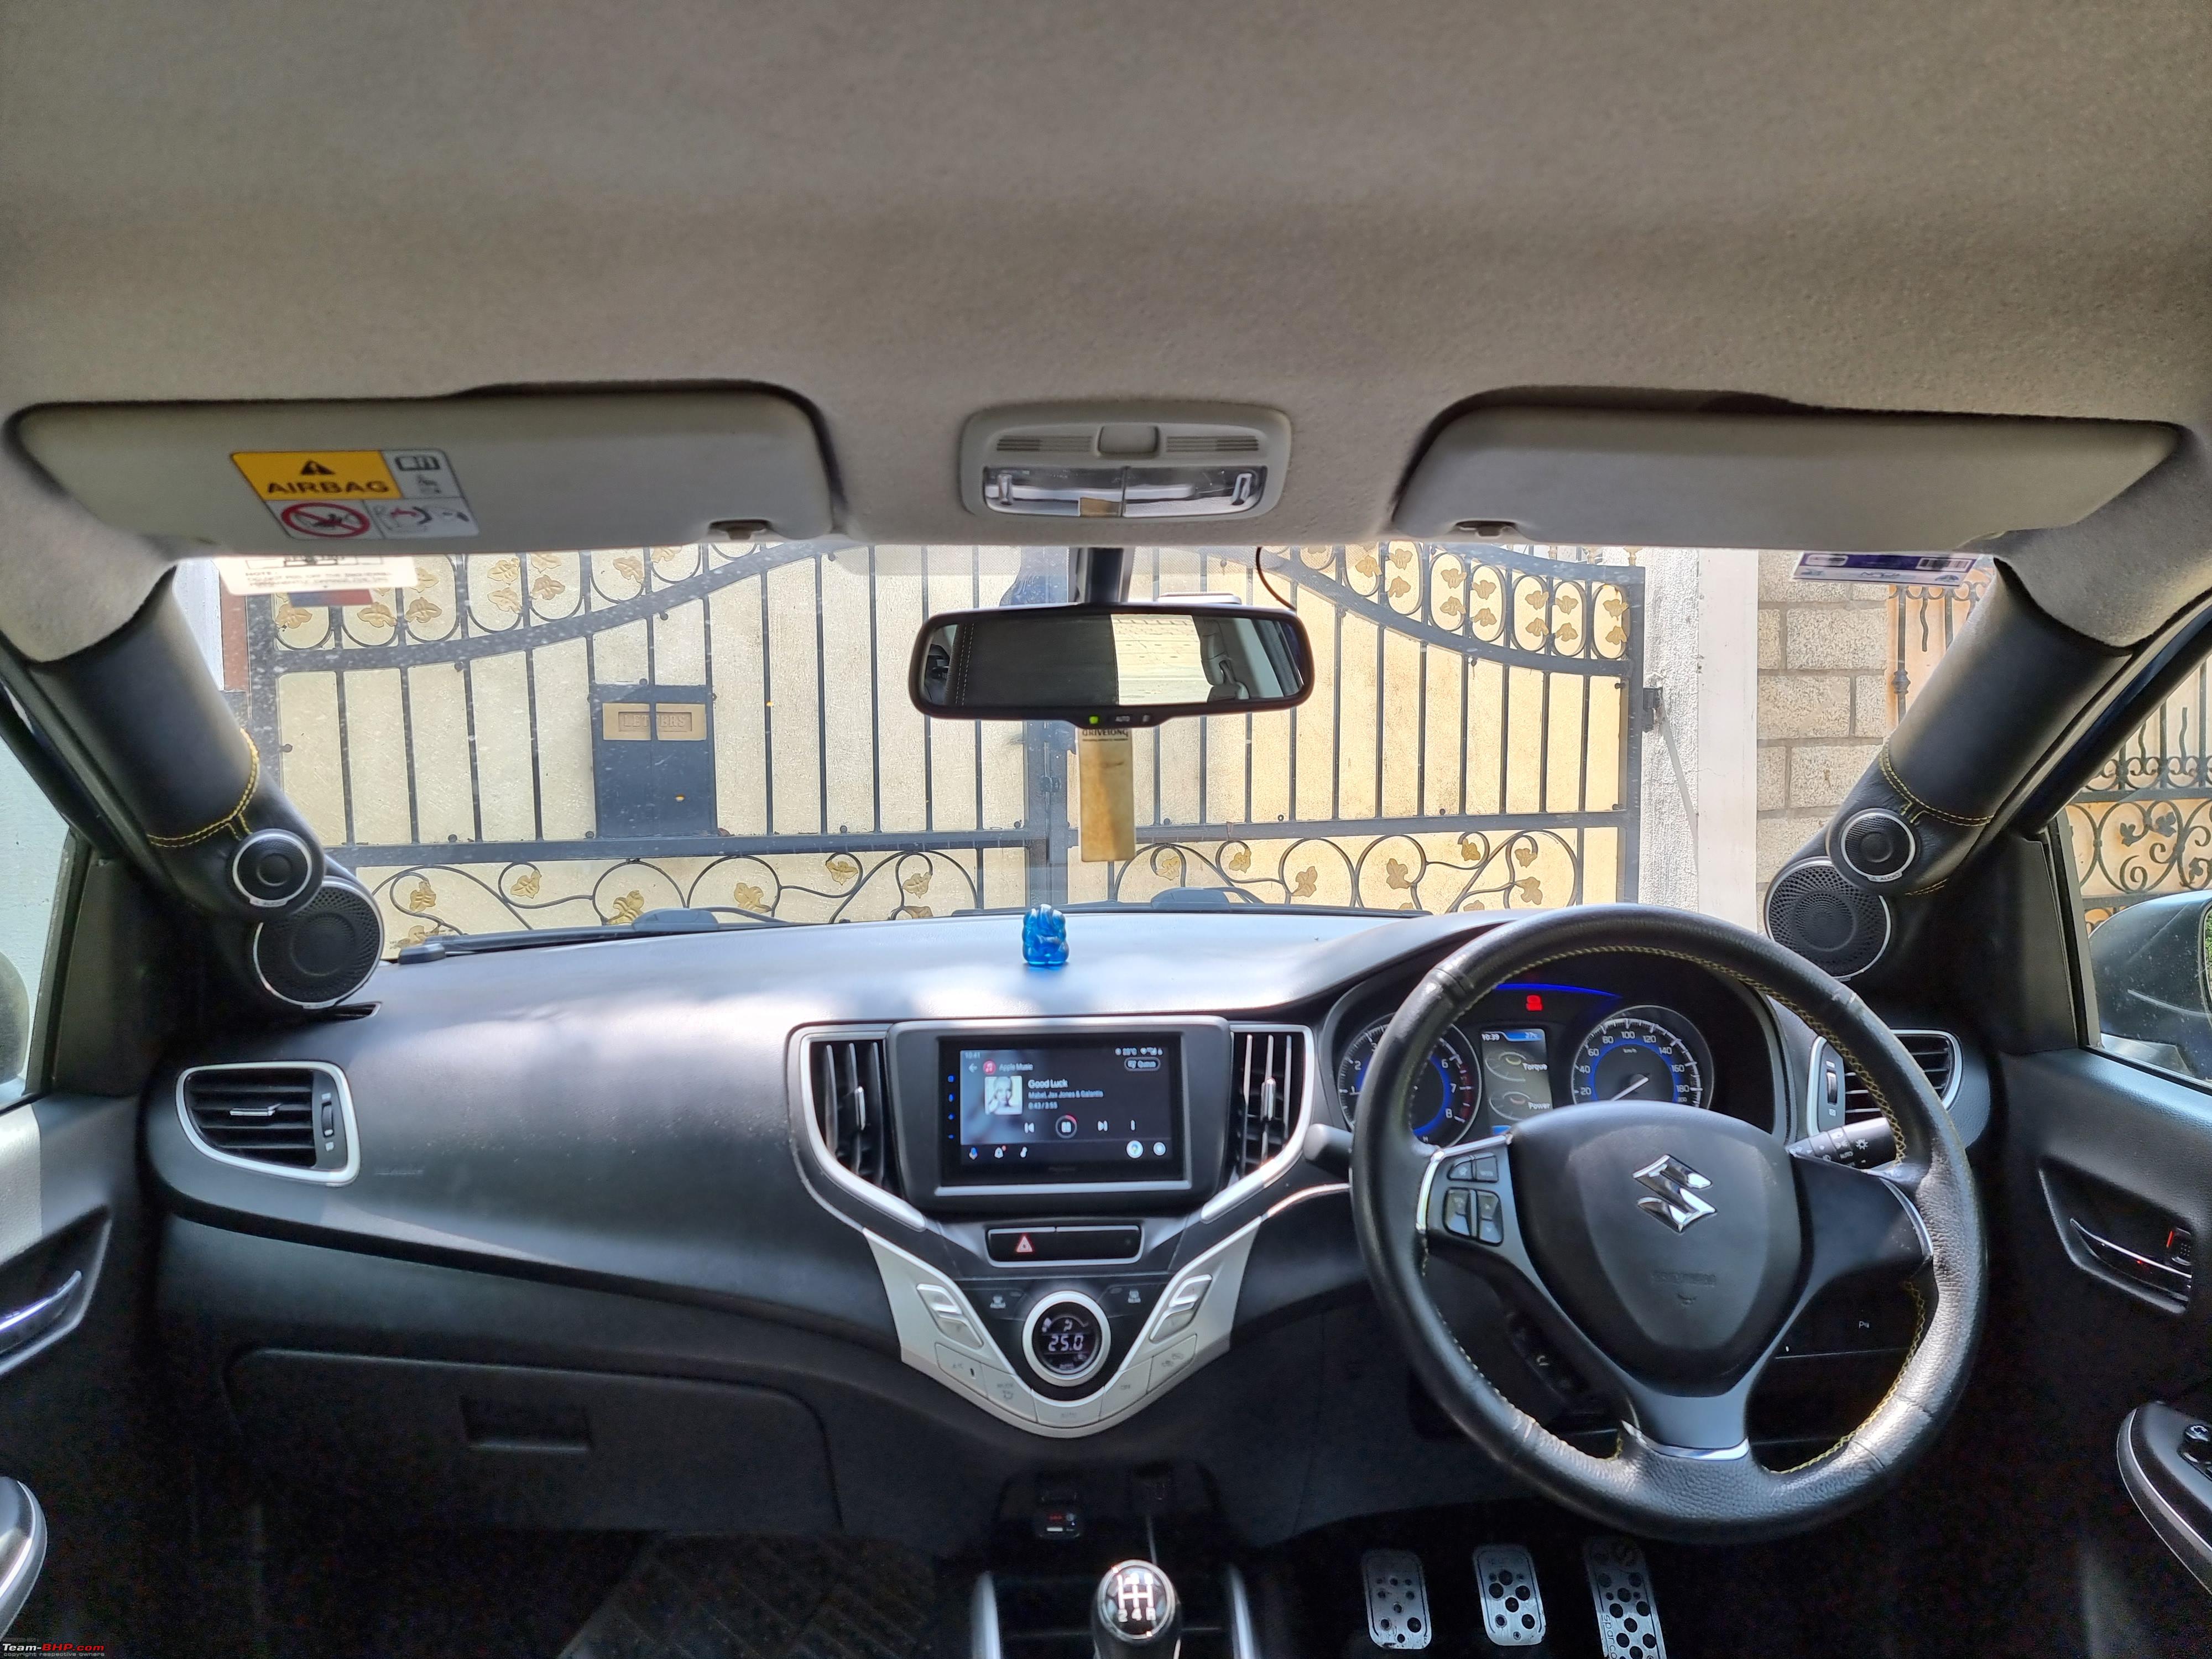 Wiring + Door Speakers It was time to connect everything together with a bunch of wires and cables to bring everything to life. All the wiring would run under the door sills to the AMP rack. There were no changes made to the alternator, battery etc, it's all stock. Let's break down how exactly it was done:
 2 power leads exit the block 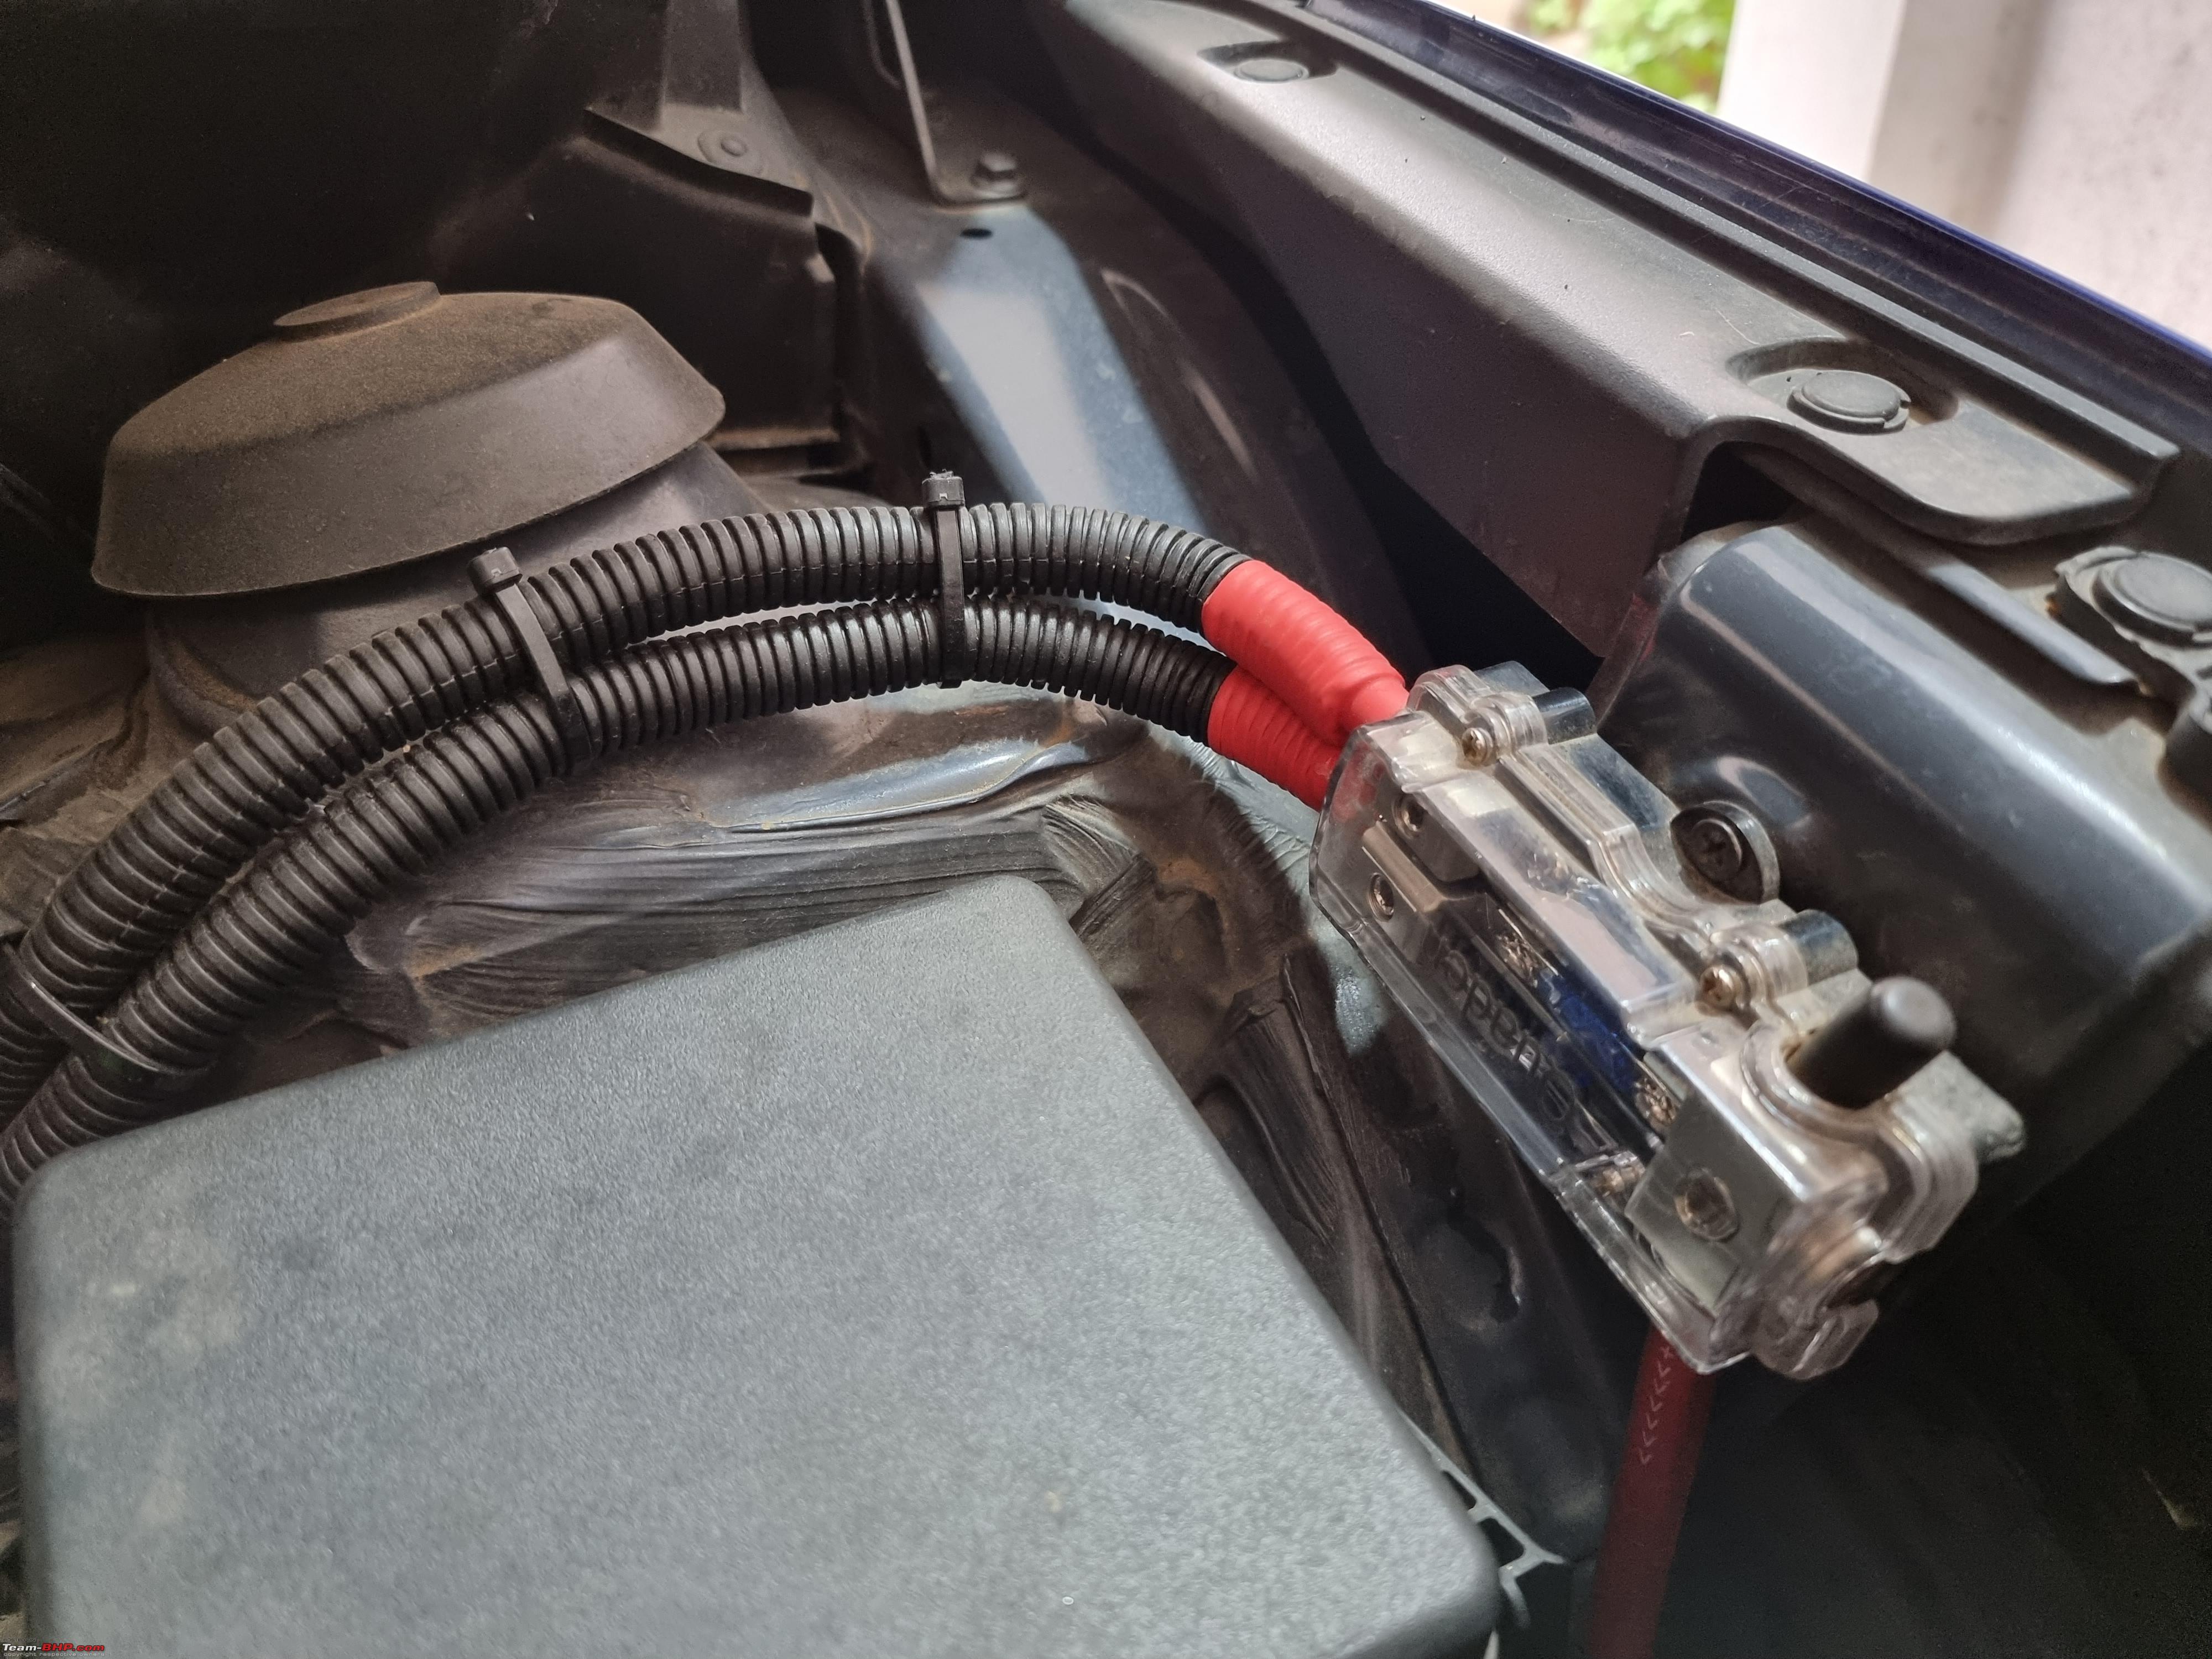 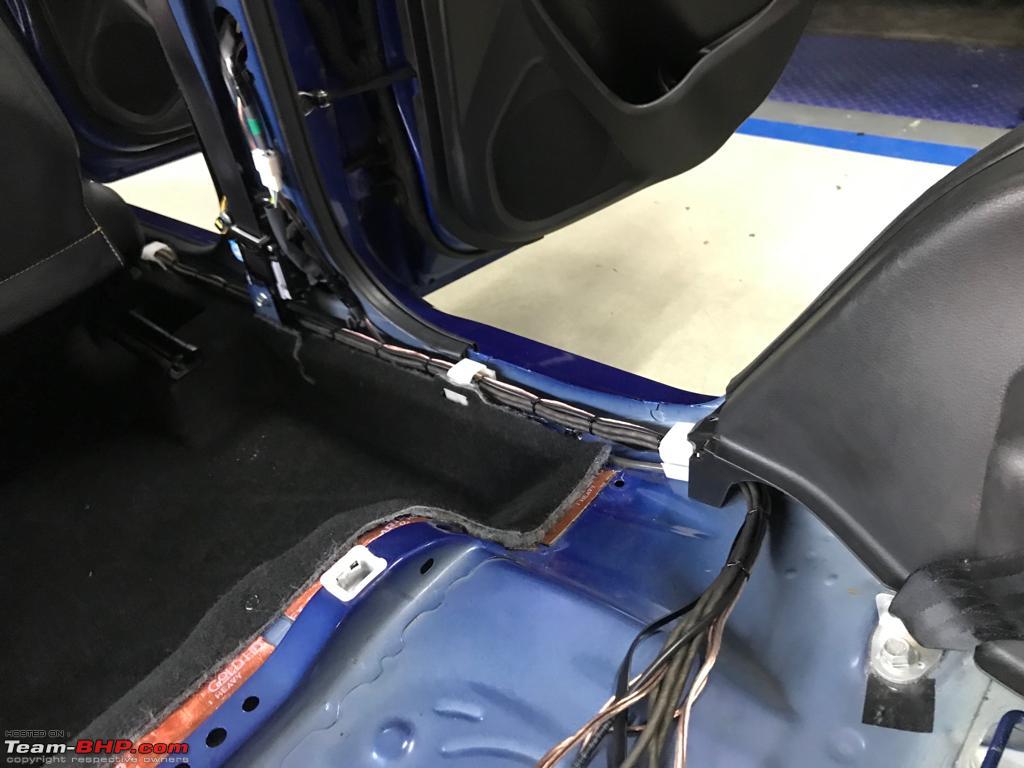 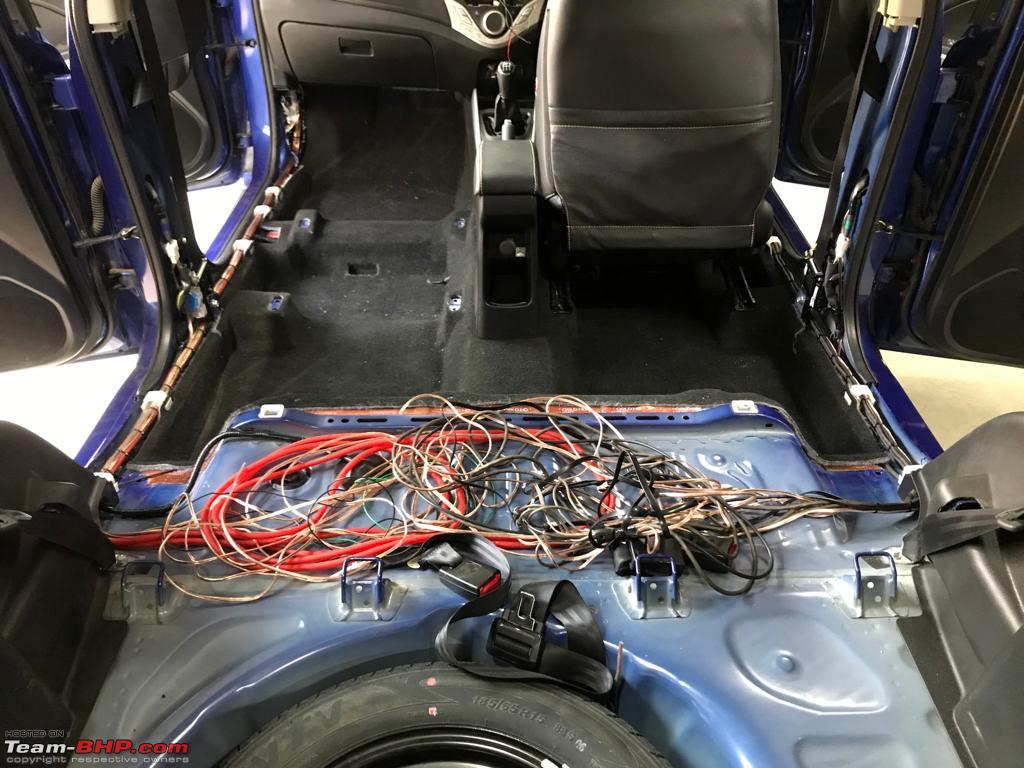   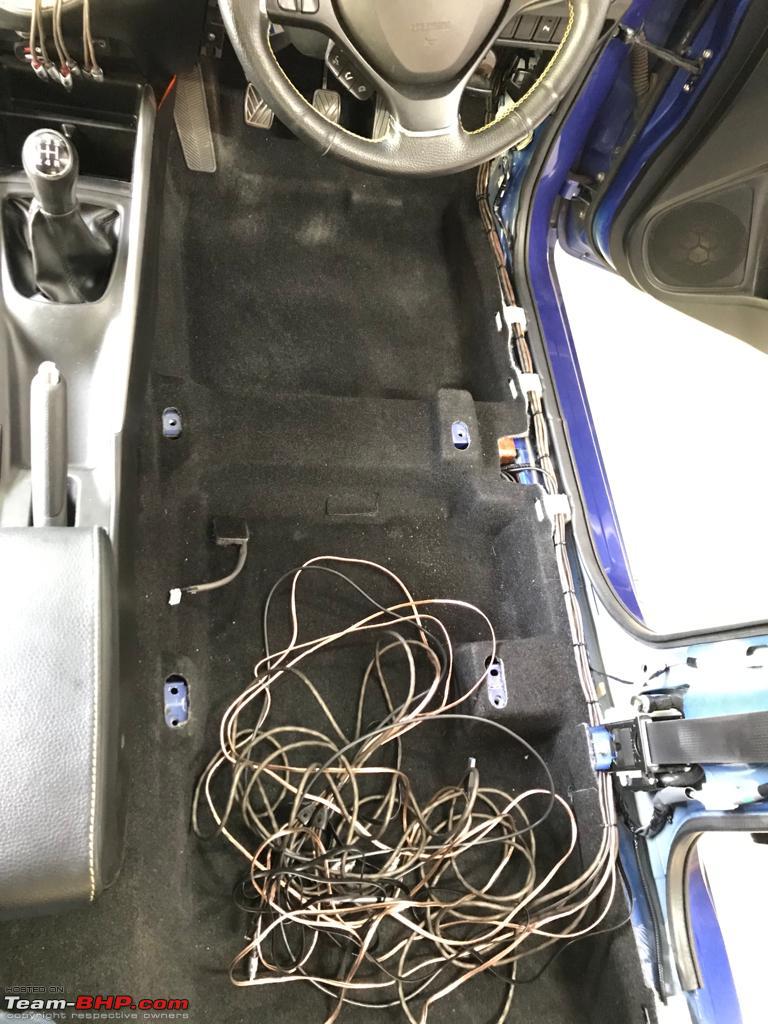 The 150A distribution fuse block in the AMP rack. What's happening here? The connection at the top is one of the leads from the 80A block. The connection in the middle is for the ground. The last row connects to the 6 and 4-channel AMPs. Note that these are just power connections to the AMPs.  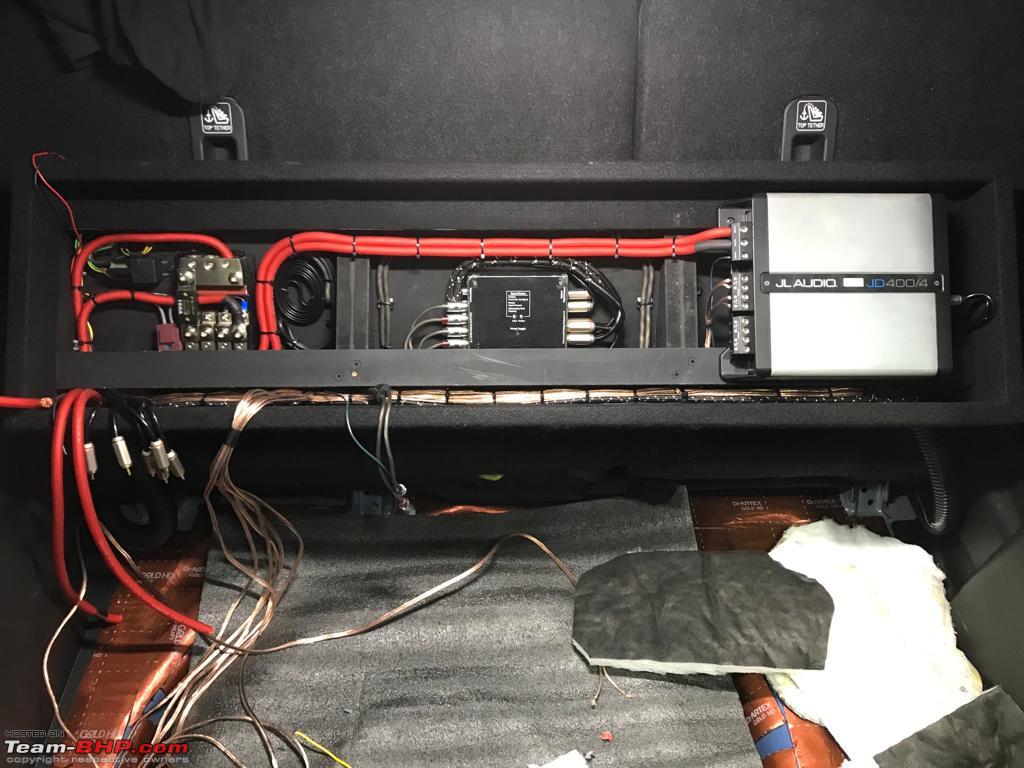 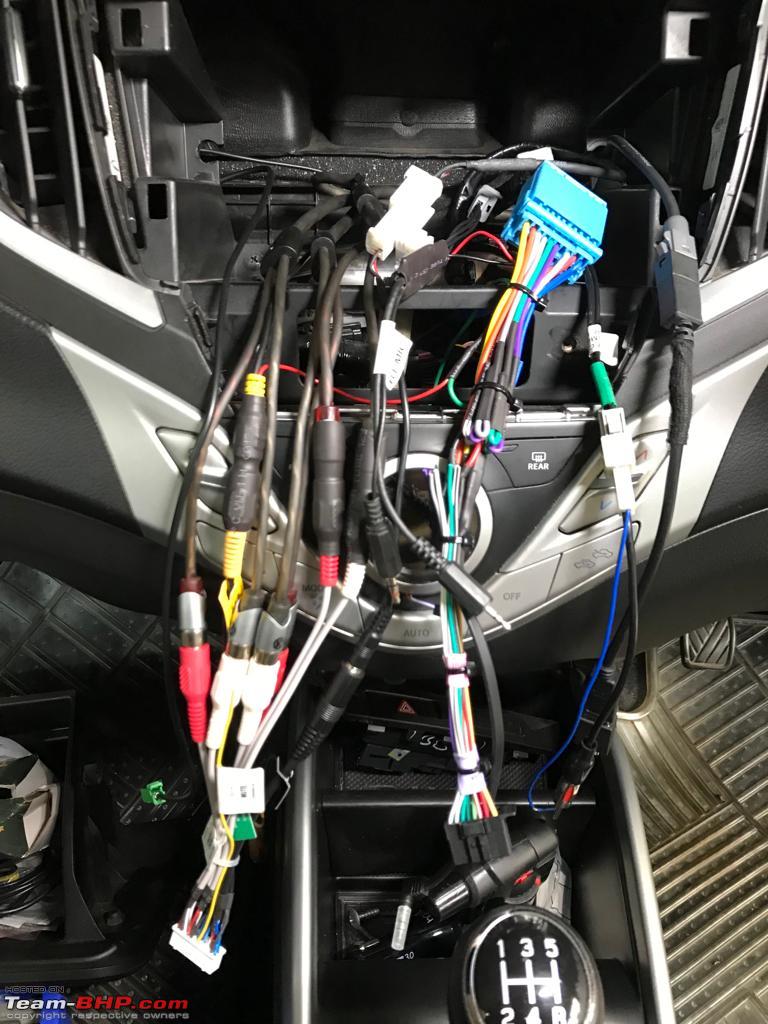 Let's get the door speakers installed. Although I feel it was not required, Raghu decided to use angled spacers to get the possible listening experience. Why no rain guard etc? Not required, the spacers would do the job. The lower part of the door was damped again with the 2.6mm sheet on top of the already existing 2.0mm sheet. 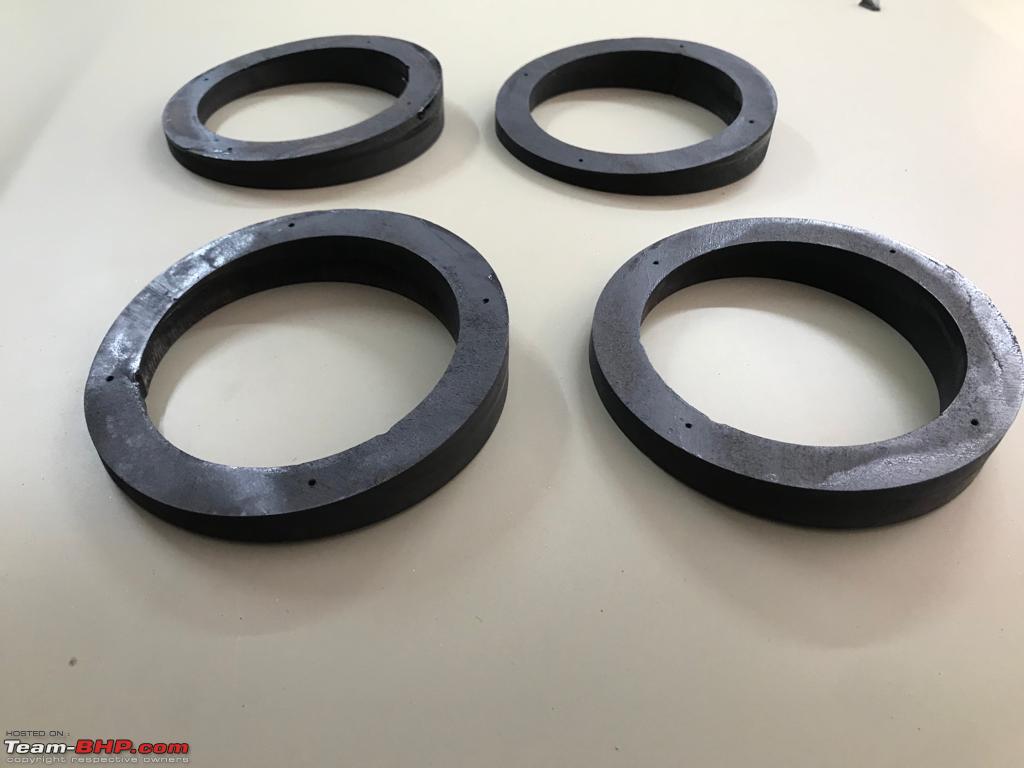 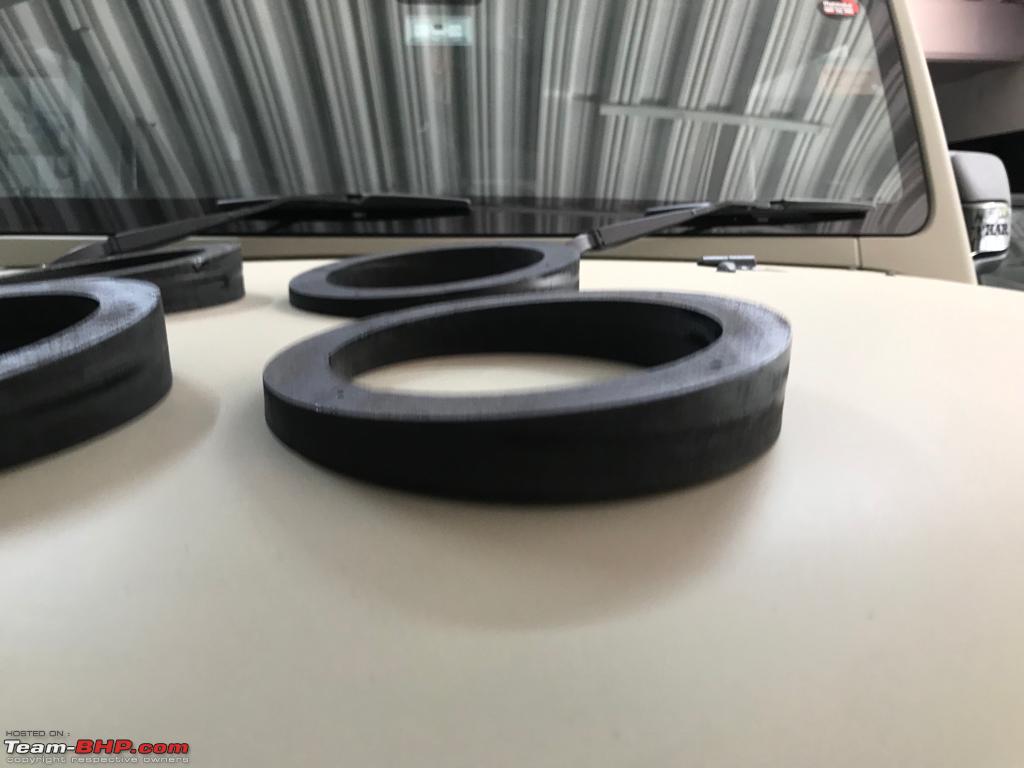 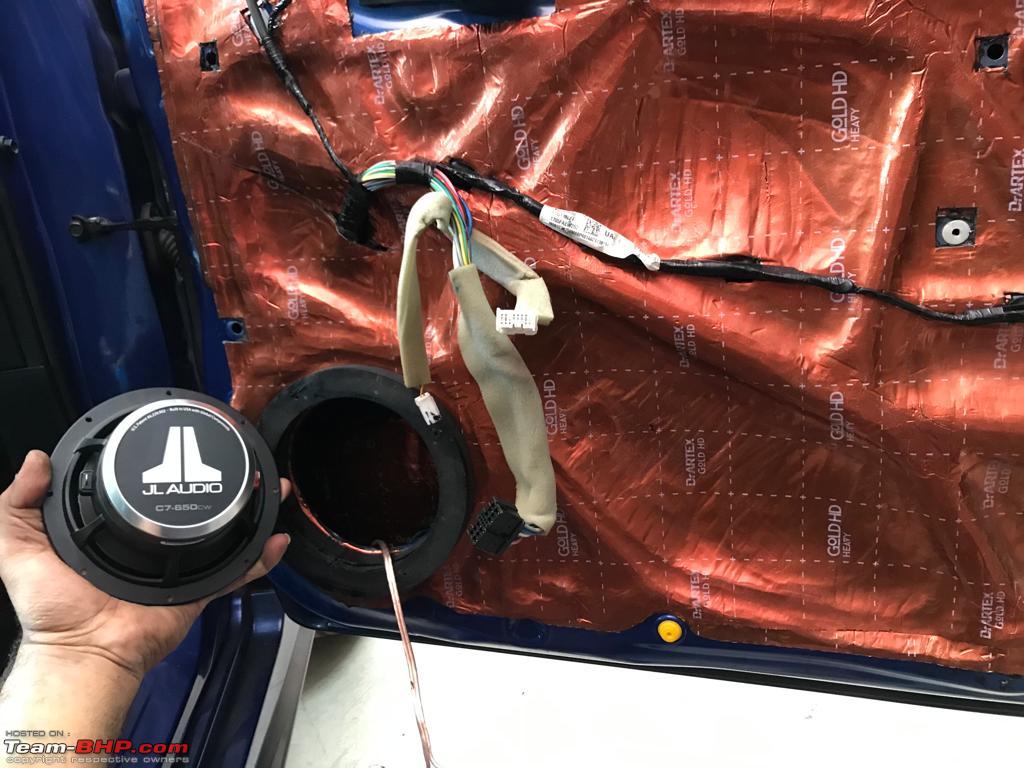   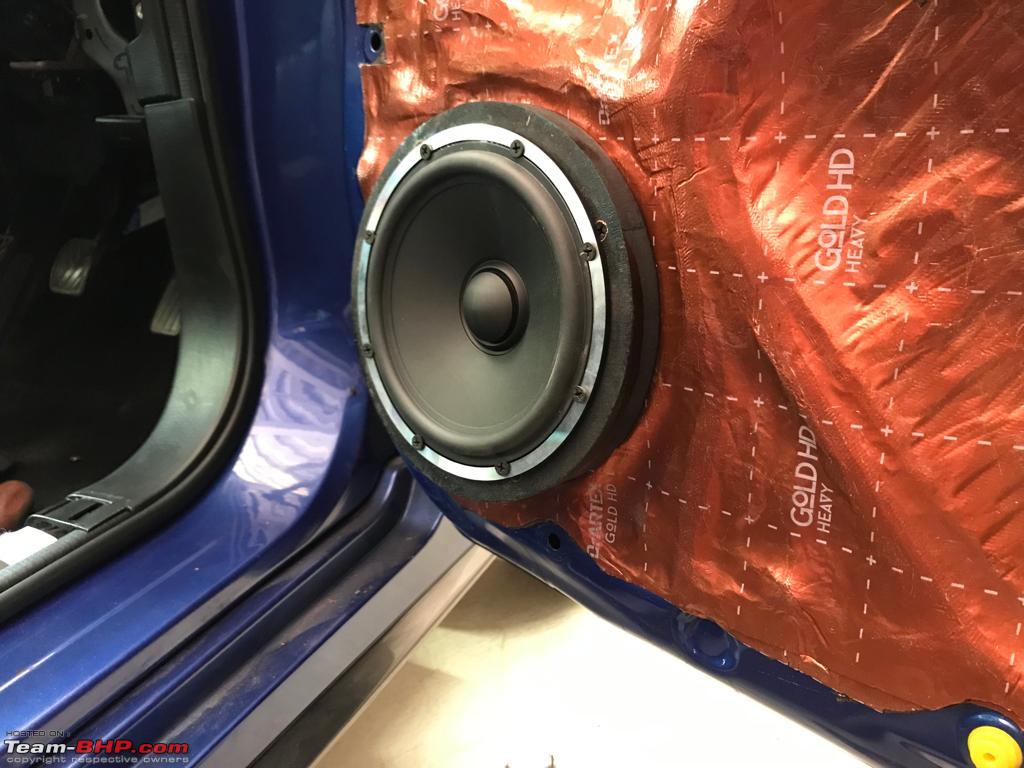  Last edited by ROG_AK : 14th July 2022 at 16:41. |
|
| (43)
Thanks
|
| The following 43 BHPians Thank ROG_AK for this useful post: | 2himanshu, Akshay6988, aswin93, audioholic, Avikbrio, AYP, Chrome6Boy, deep_behera, digitalnirvana, Divya Sharan, DriverNo.420, Gannu_1, GaryTSI, graaja, GTO, Guru_Shikhar, Harjot37, InControl, Jeash.vk, keroo1099, knightfurry, krishnaprasadgg, Leoshashi, navin, na_agrawal, neil.jericho, PrasunBannerjee, Rehaan, Reinhard, Researcher, Roy.S, rr0yy, SaiSW, sangam_mm93, SilverSmoke, somspaple, sunnsood, swiftnfurious, The Rationalist, Varun_HexaGuy, Venkygupta, yogiii, ysjoy |
|
14th July 2022, 02:15
| #7 |
| BHPian Join Date: Oct 2017 Location: Bangalore
Posts: 298
Thanked: 1,676 Times
| Re: Hign end JL Audio upgrade in my Baleno RS Tuning This system was so long in the making that it was hard to believe the end was almost near! Hearing it for the first time you get taken aback by how it sounds, it's a surreal experience. You could run it bone stock with no tuning whatsoever and be completely satisfied. But, why settle for less when there is more to be offered. The DSP has so much flexibility that it would be an injustice not to use it to its maximum potential and get the best out of the speakers. I wasn't satisfied with simply setting the high and low pass filters, adding the time delay and changing the EQ based simply on what we heard. I wanted to tune it with an RTA (real-time analyzer) mic and then further tune it based on what I liked. Since the DSP can store different profiles and they can be switched on the fly, we tuned a couple of different ones. The first would be a pure reference tune, the second tuned by the ear and the third would be a combination of the two. The mic of choice was the popular miniDSP UMIK-1. Each one comes with a unique calibration file and must be used to ensure that accurate tuning takes place. 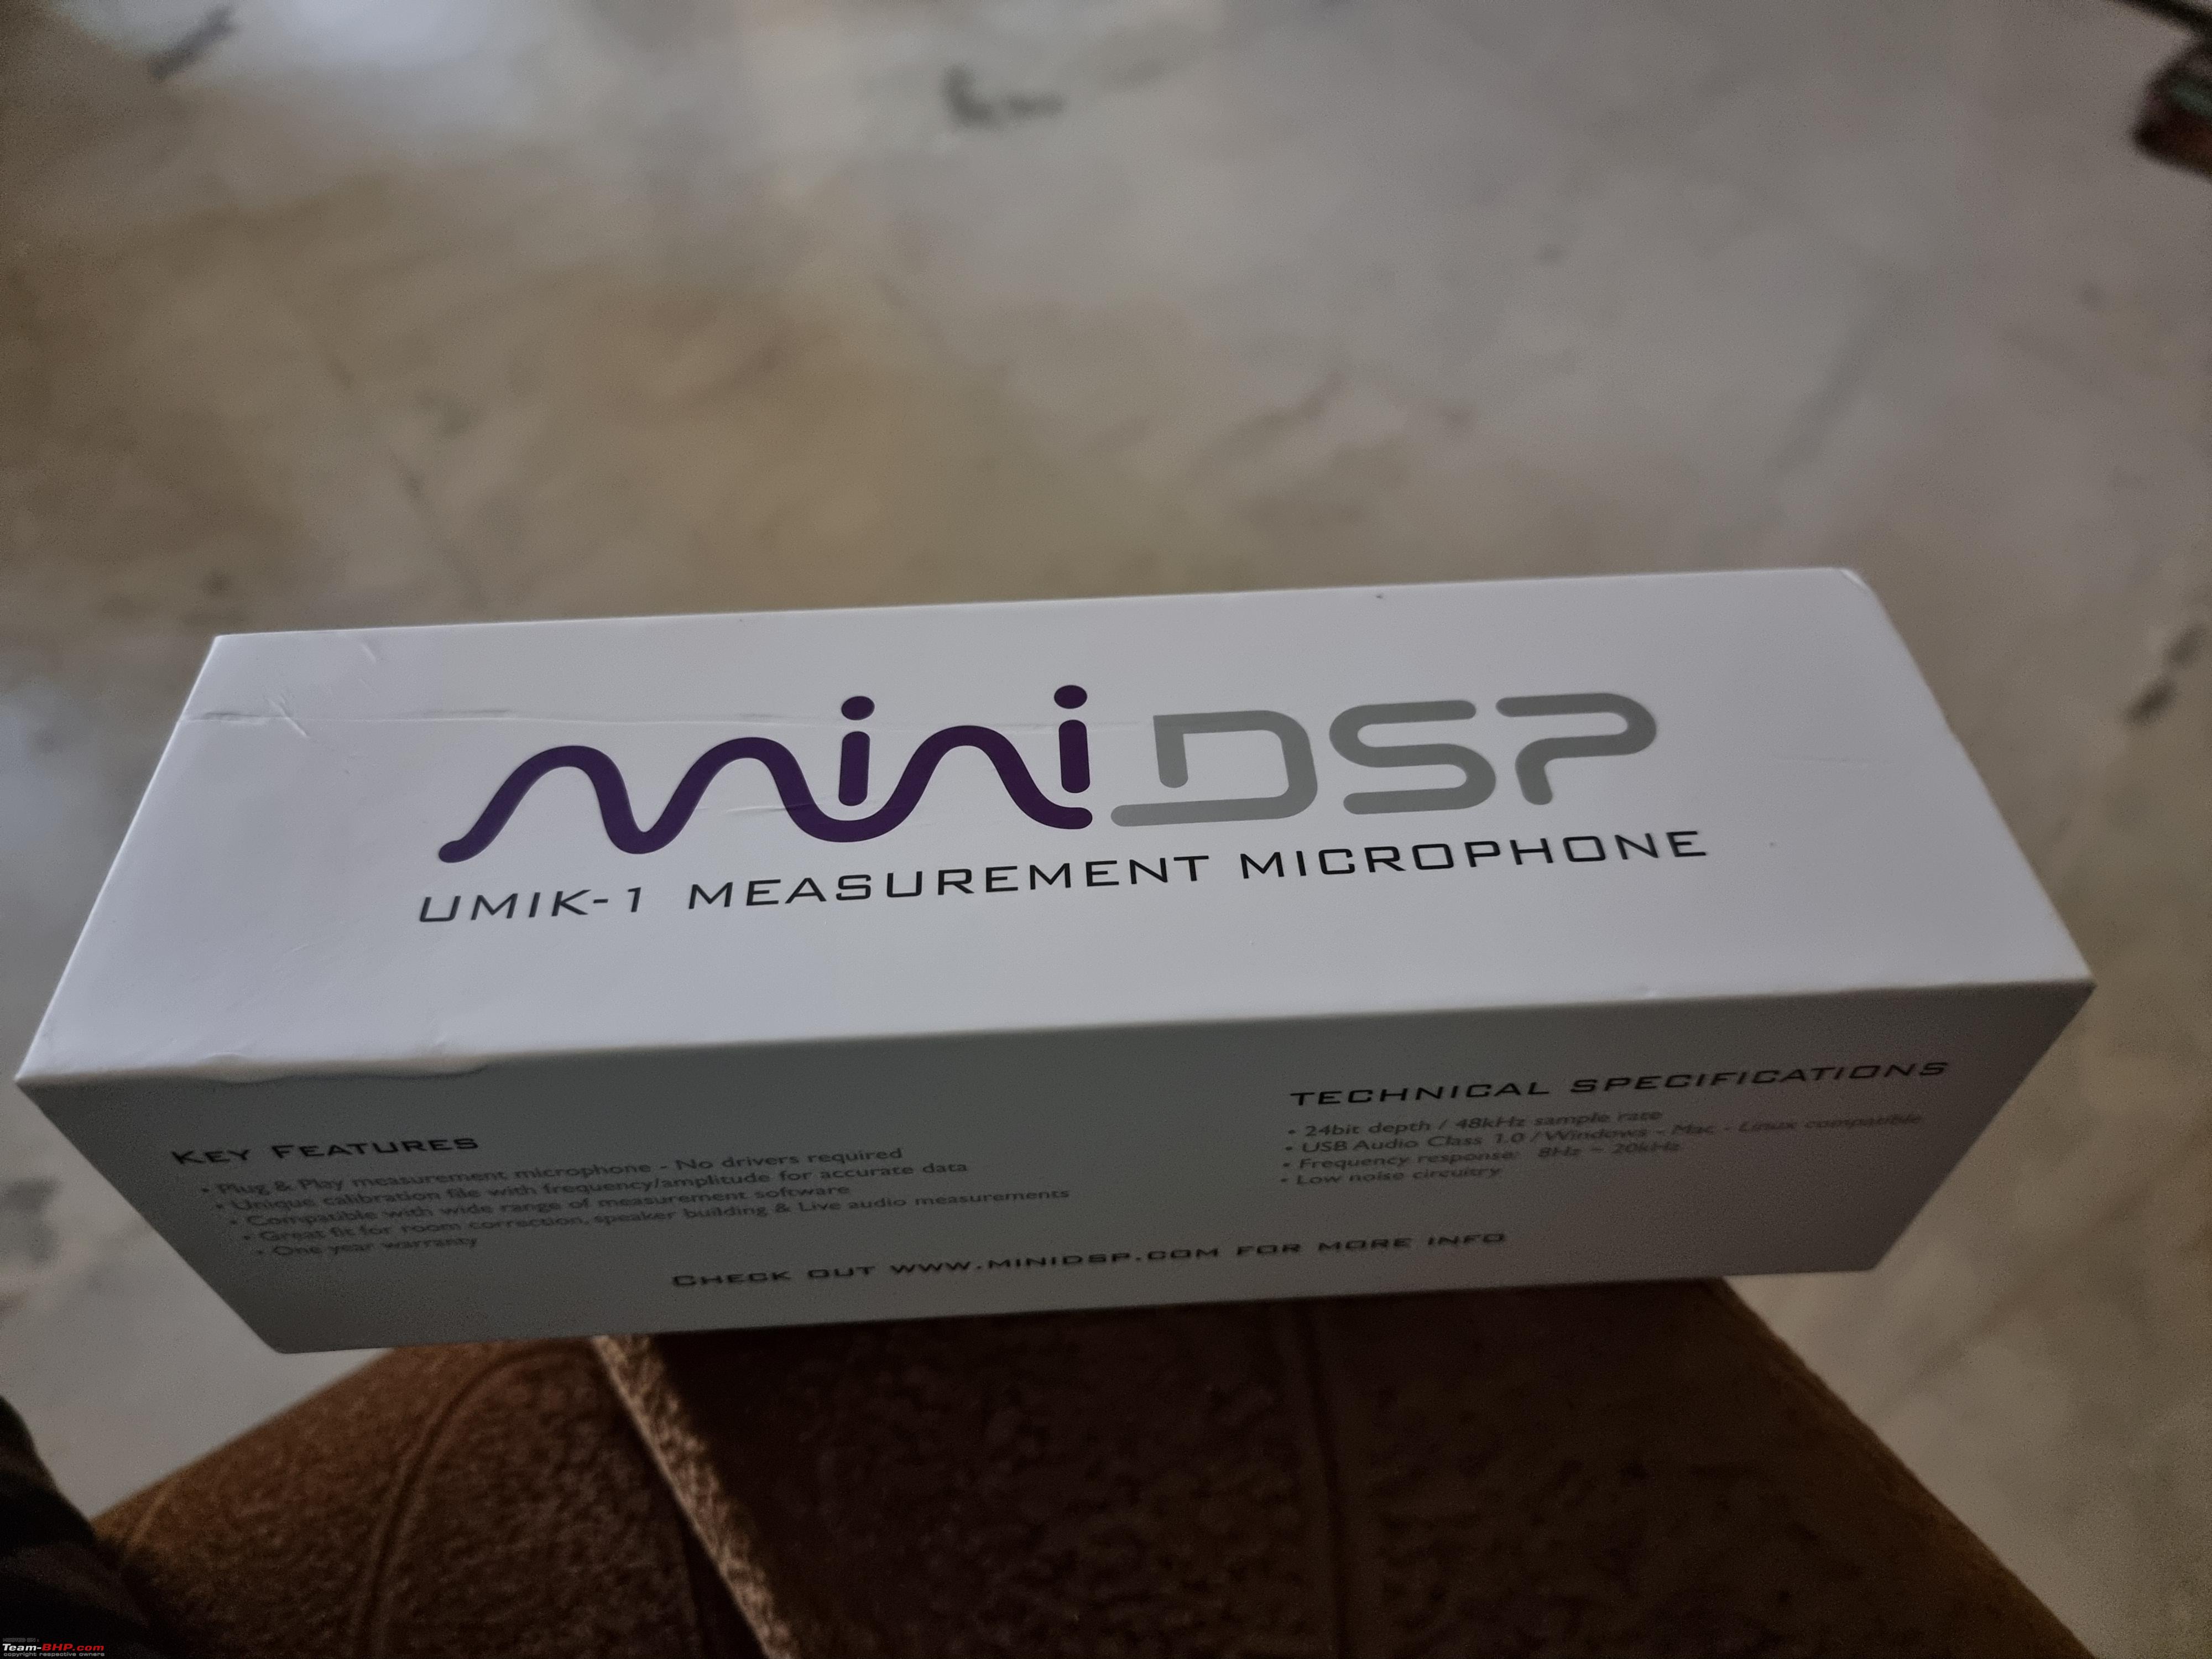  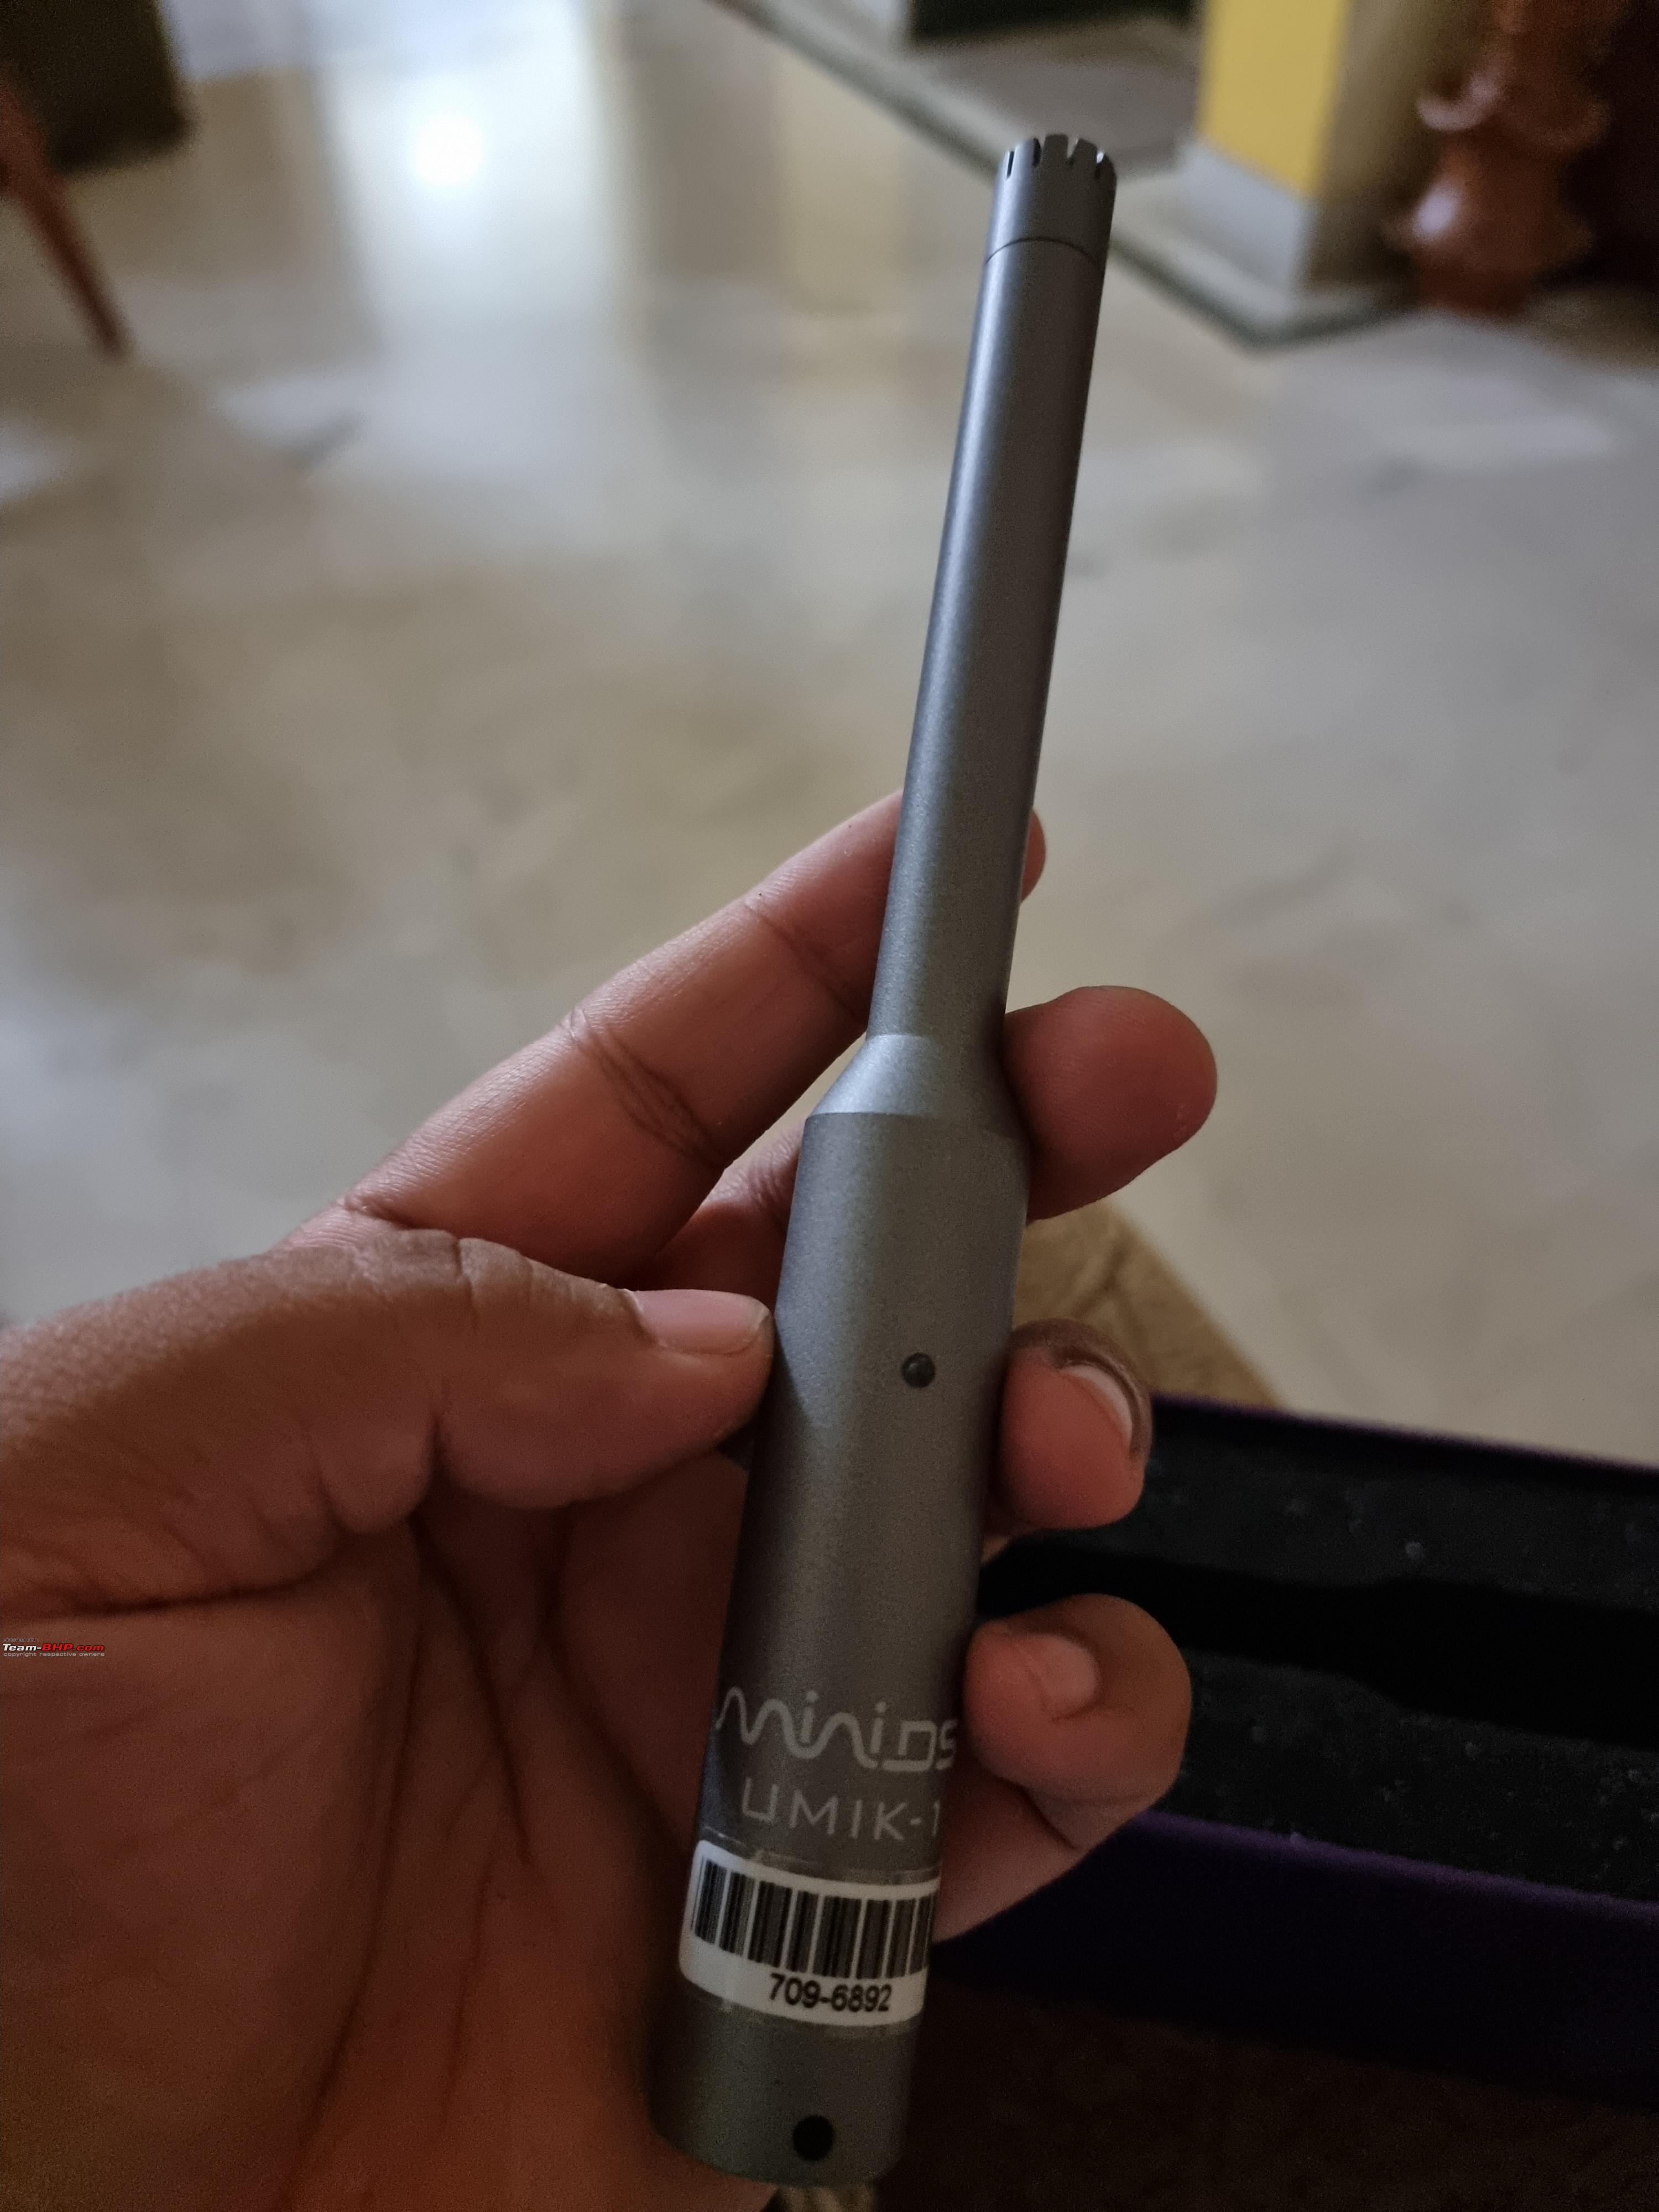   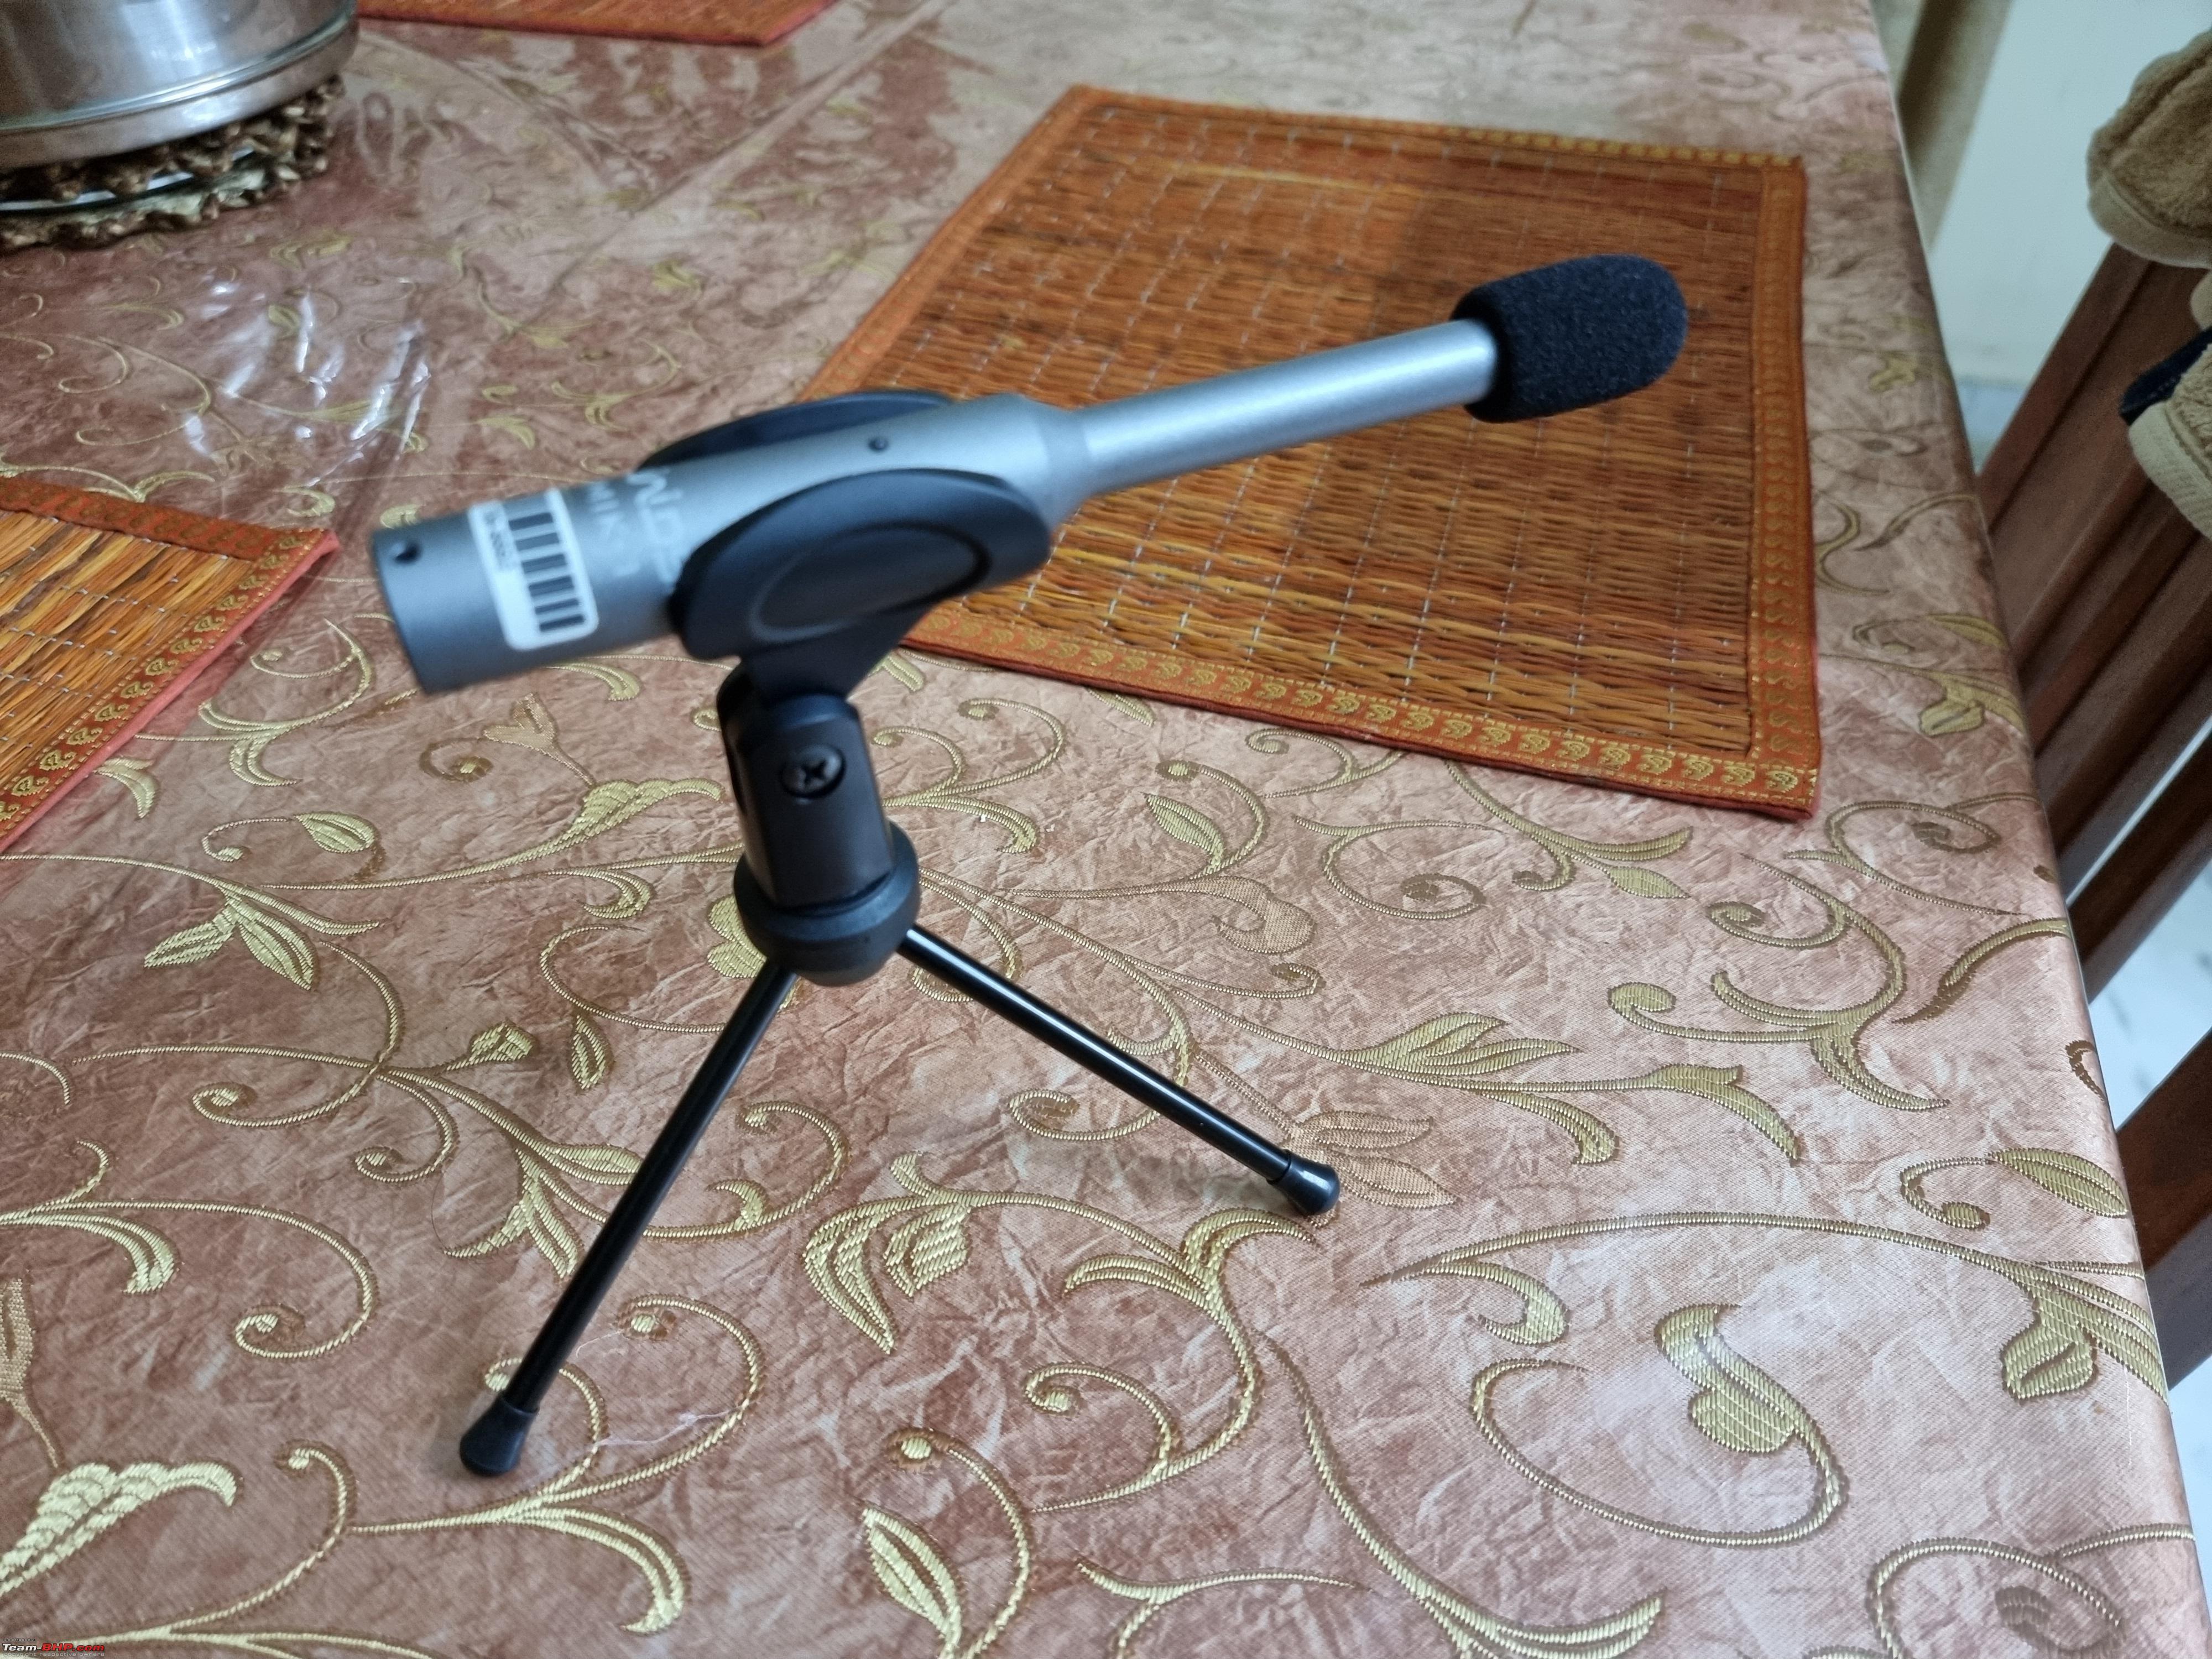 It was time to get tuning:
Mic placement  When we started tuning, notice how the frequency is all over the place 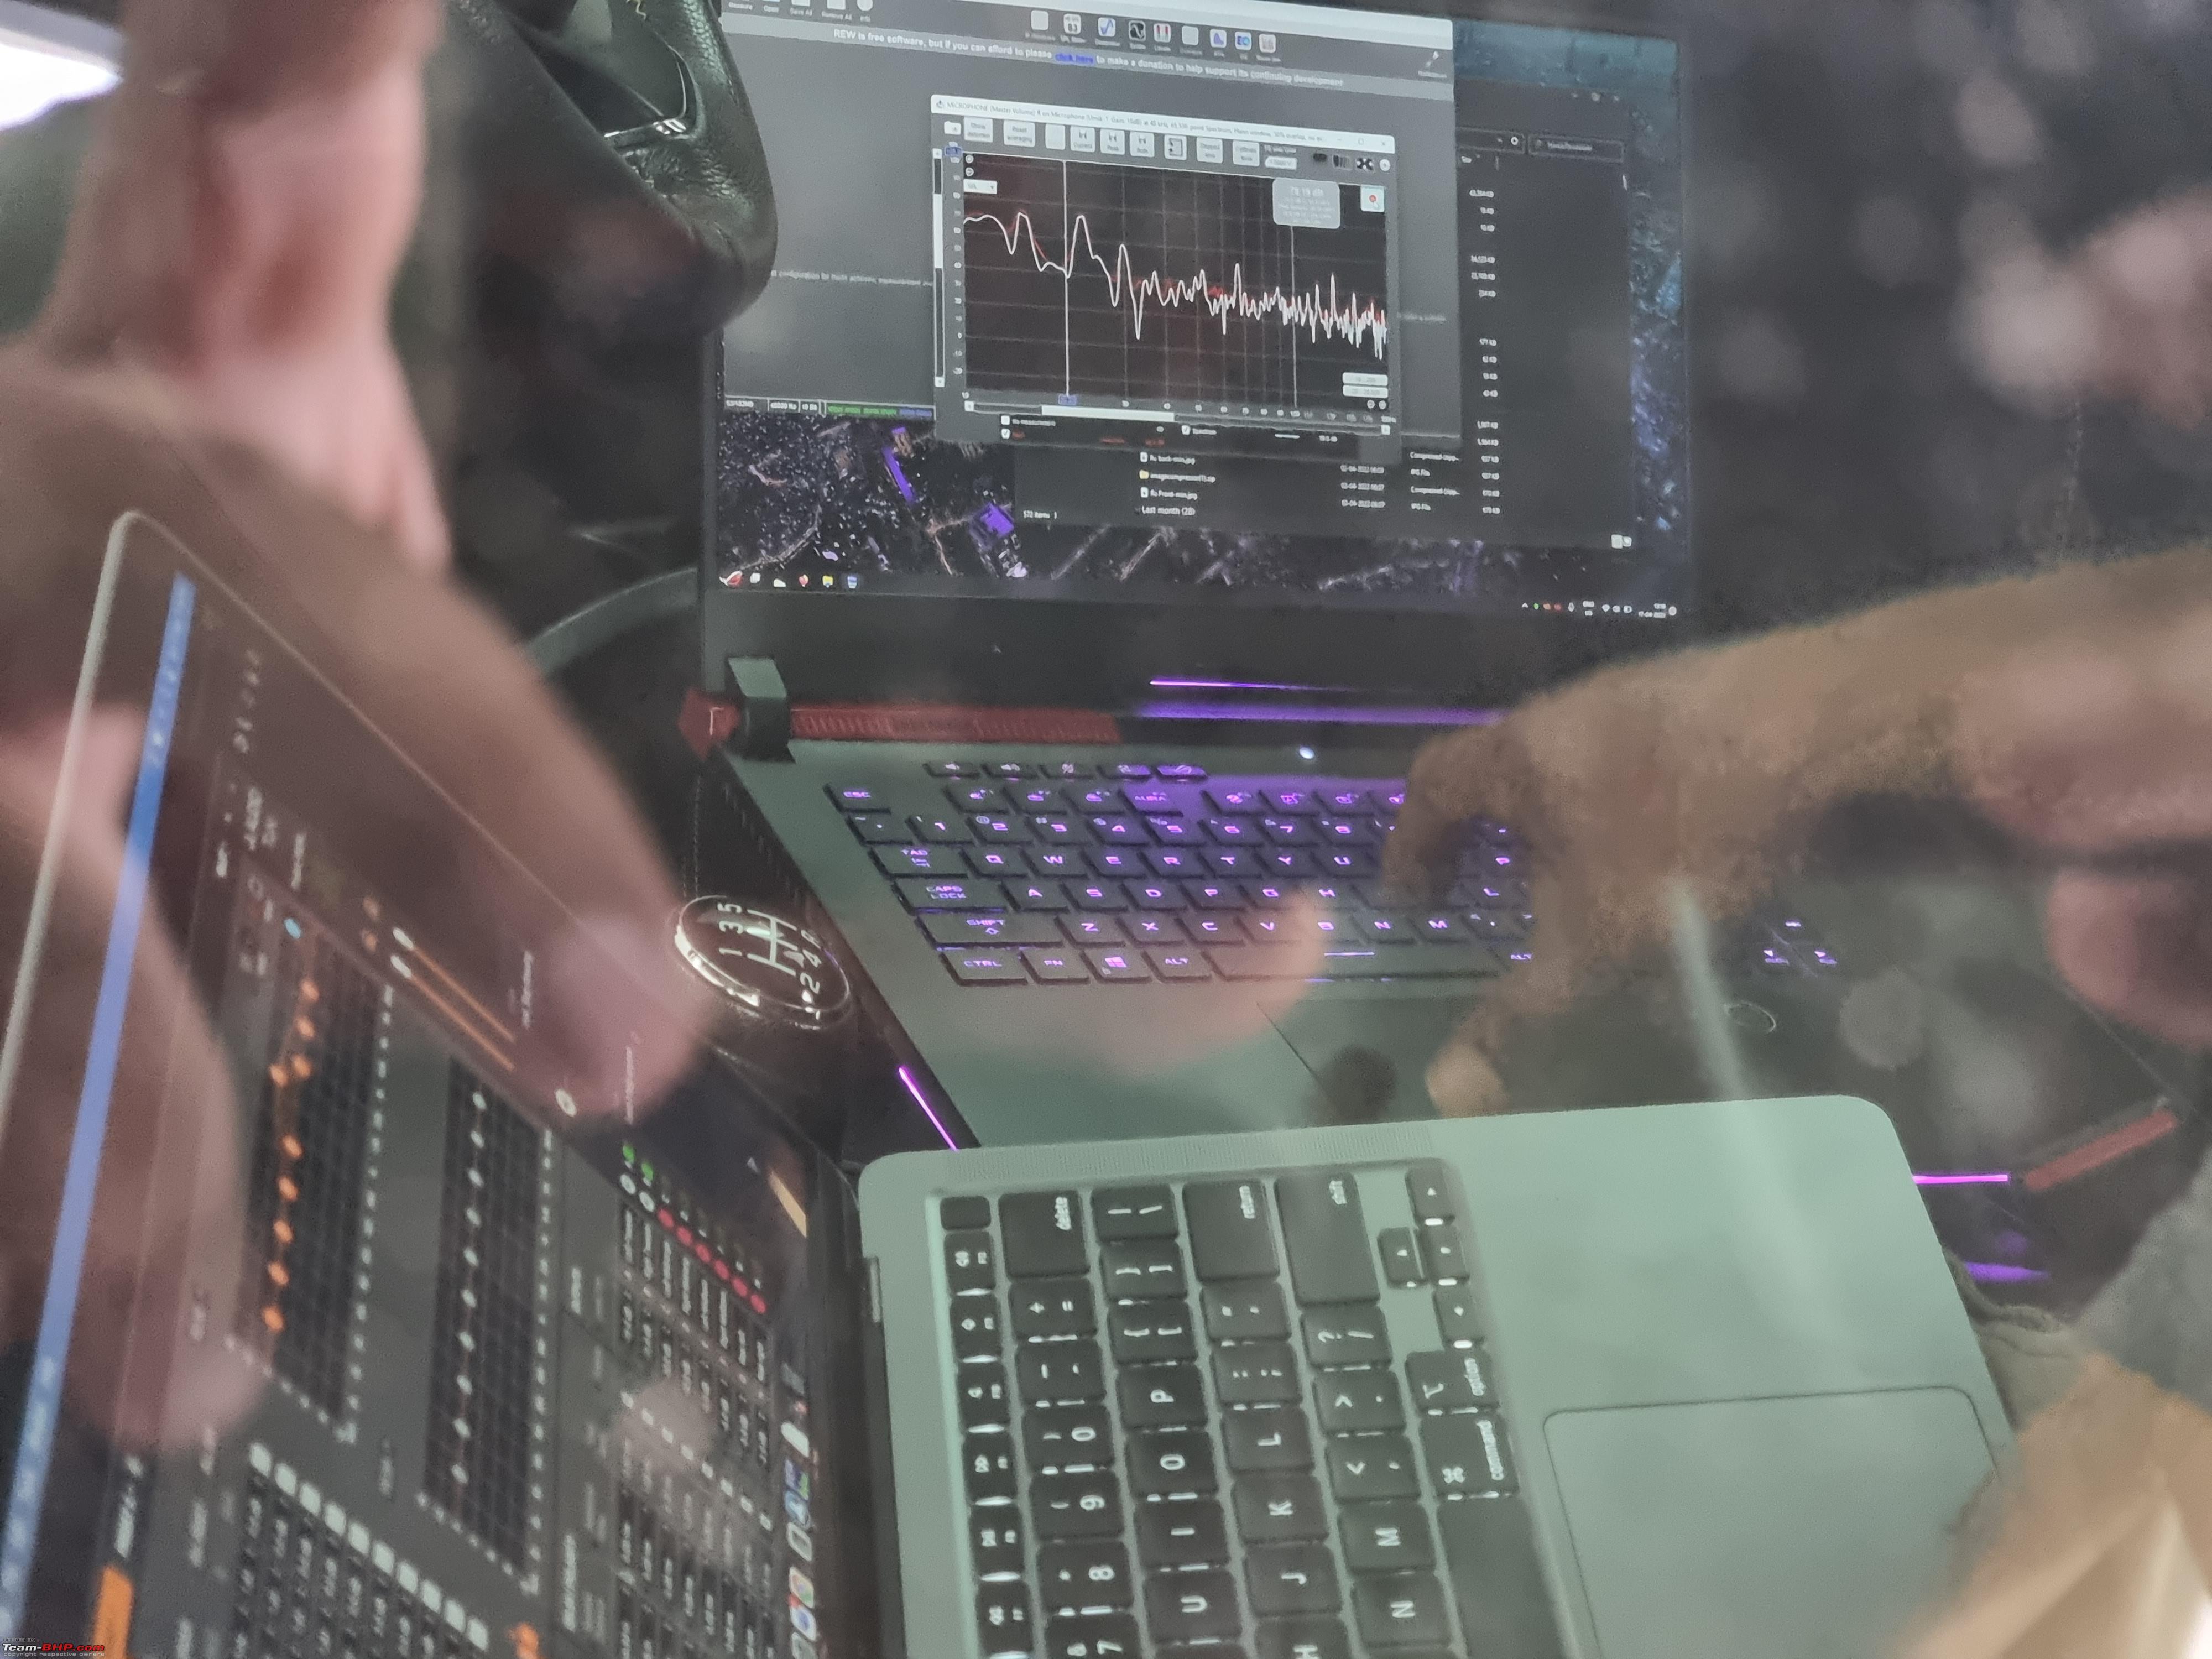 The aim is to get a clean flat line, as close to the reference line as possible  The TuN software for the DSP 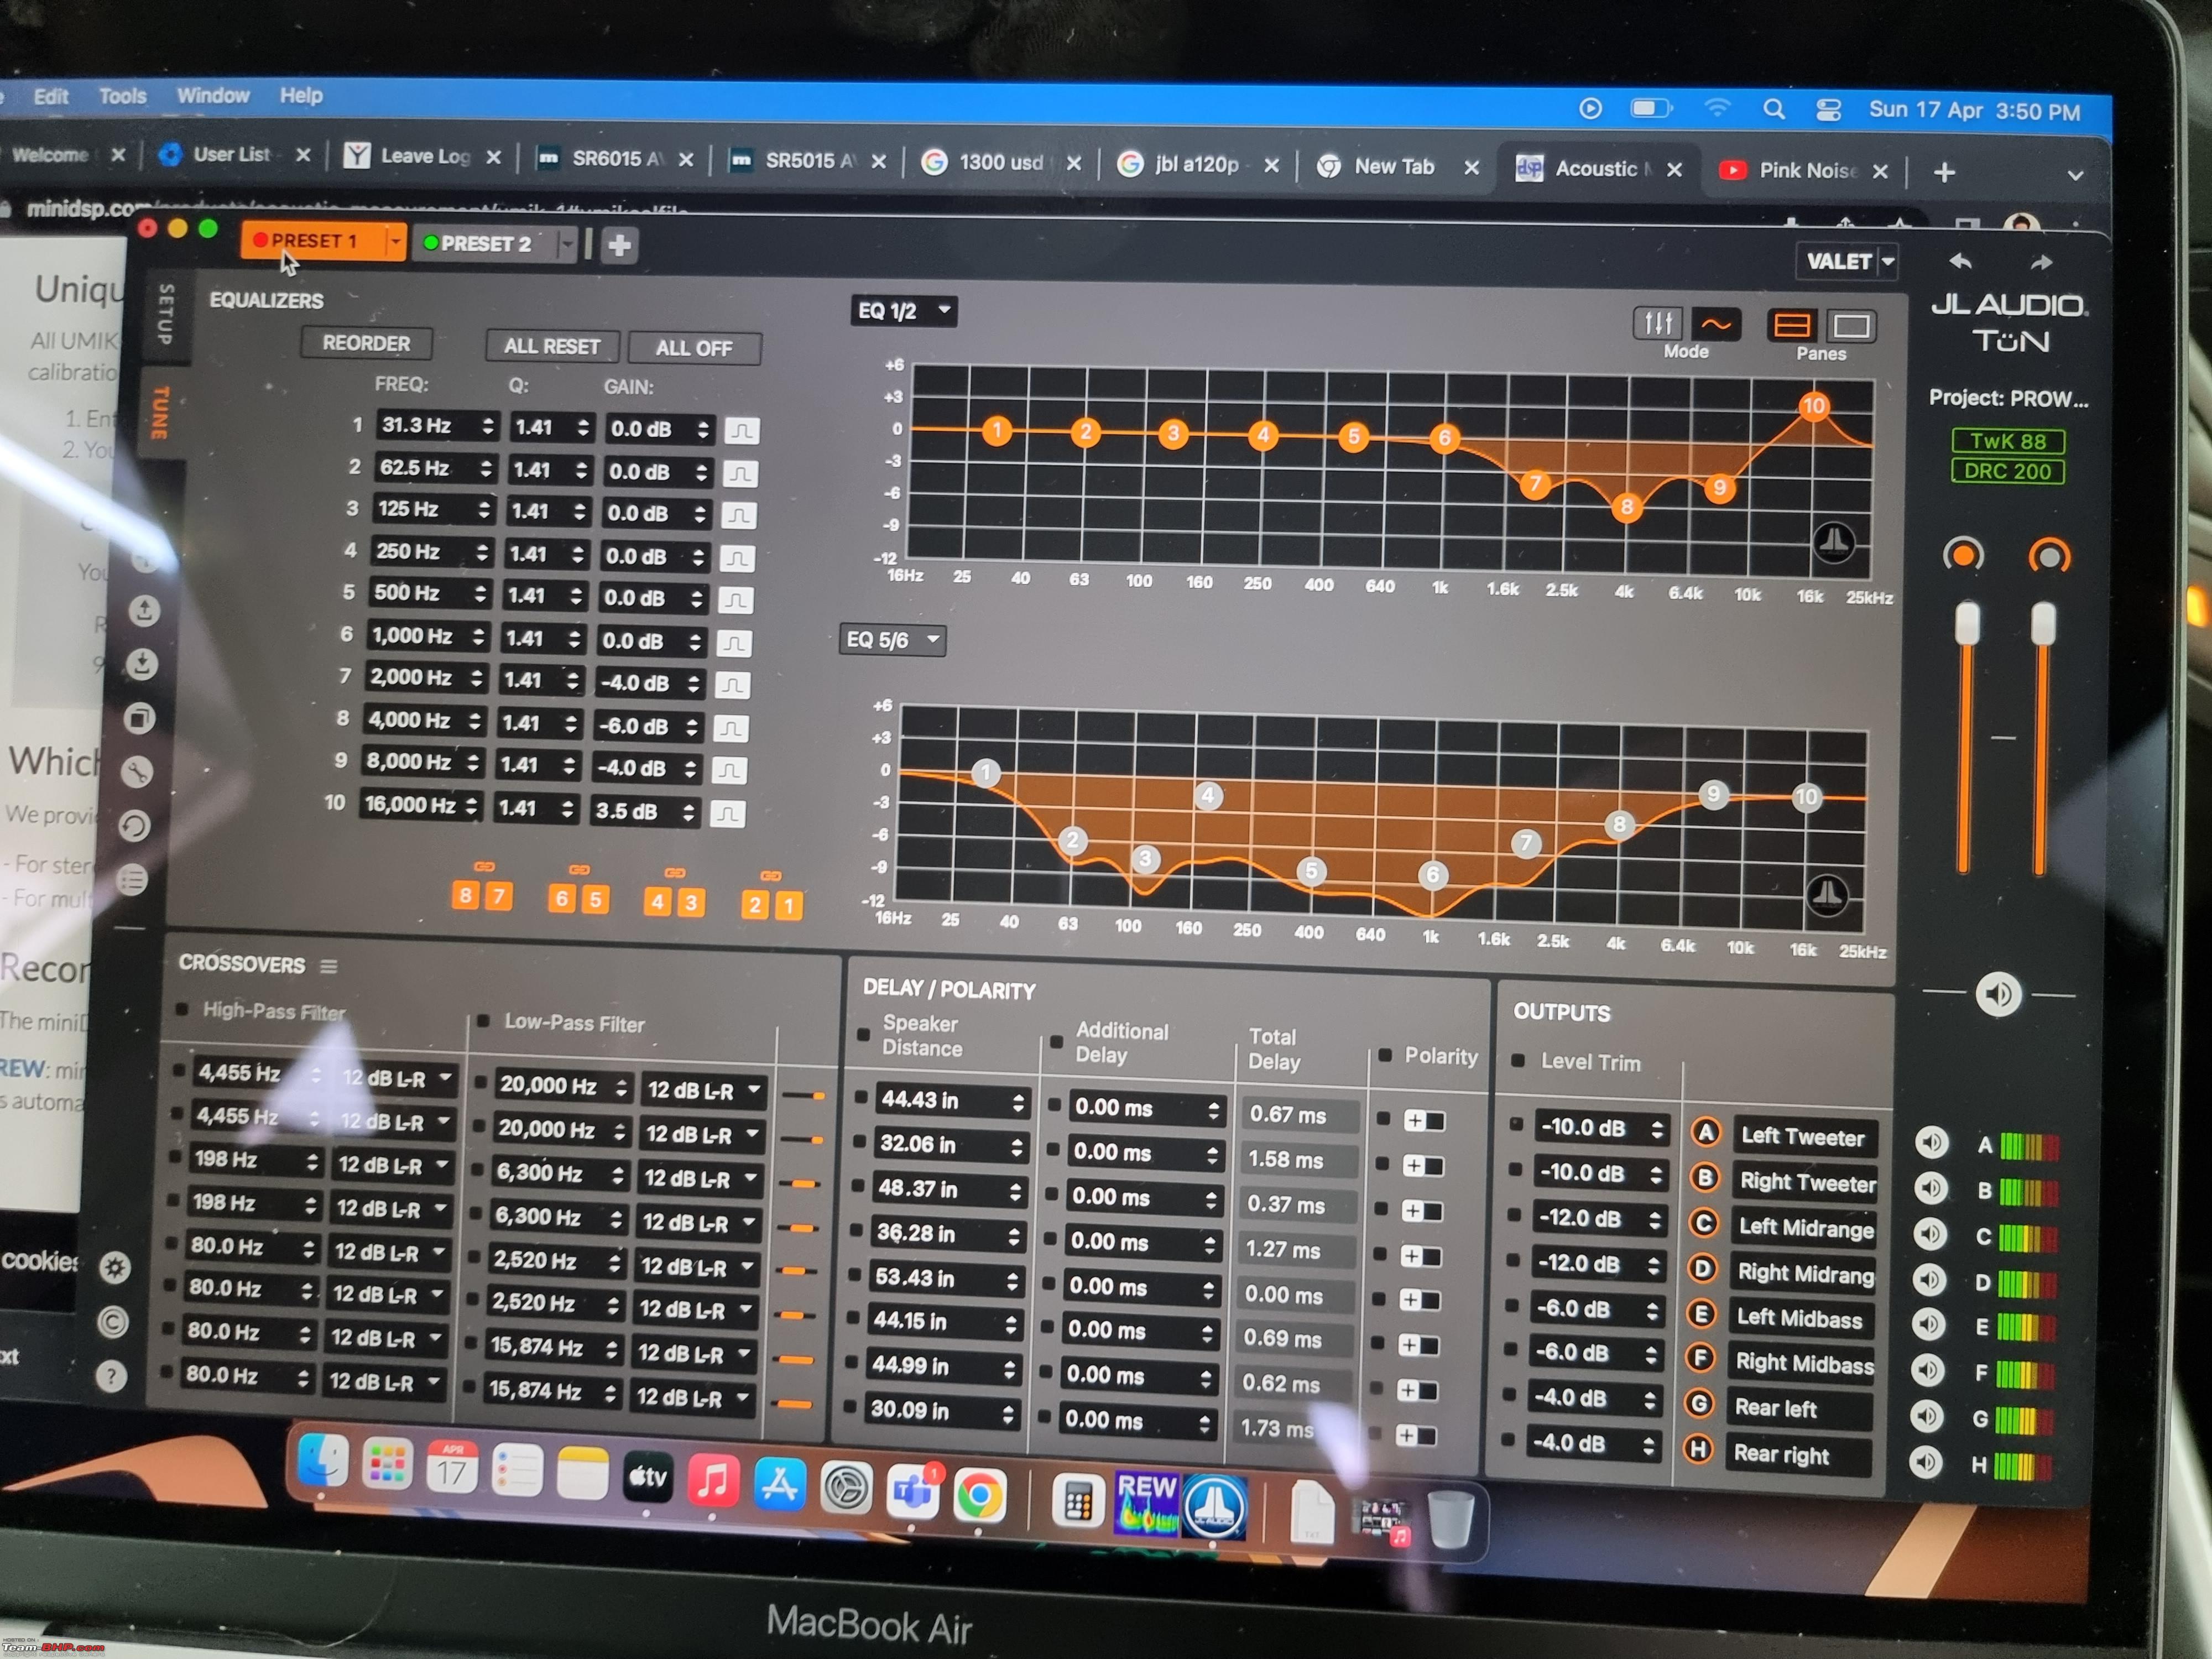 The AMP rack needs to be folded in order for the USB cable from the DSP to reach the laptop. Raghu wasn't happy that the JD AMP looked different from the other 2 (it is all silver with no black ridges) and spoiled the look. He created a design and made sure everything matched. 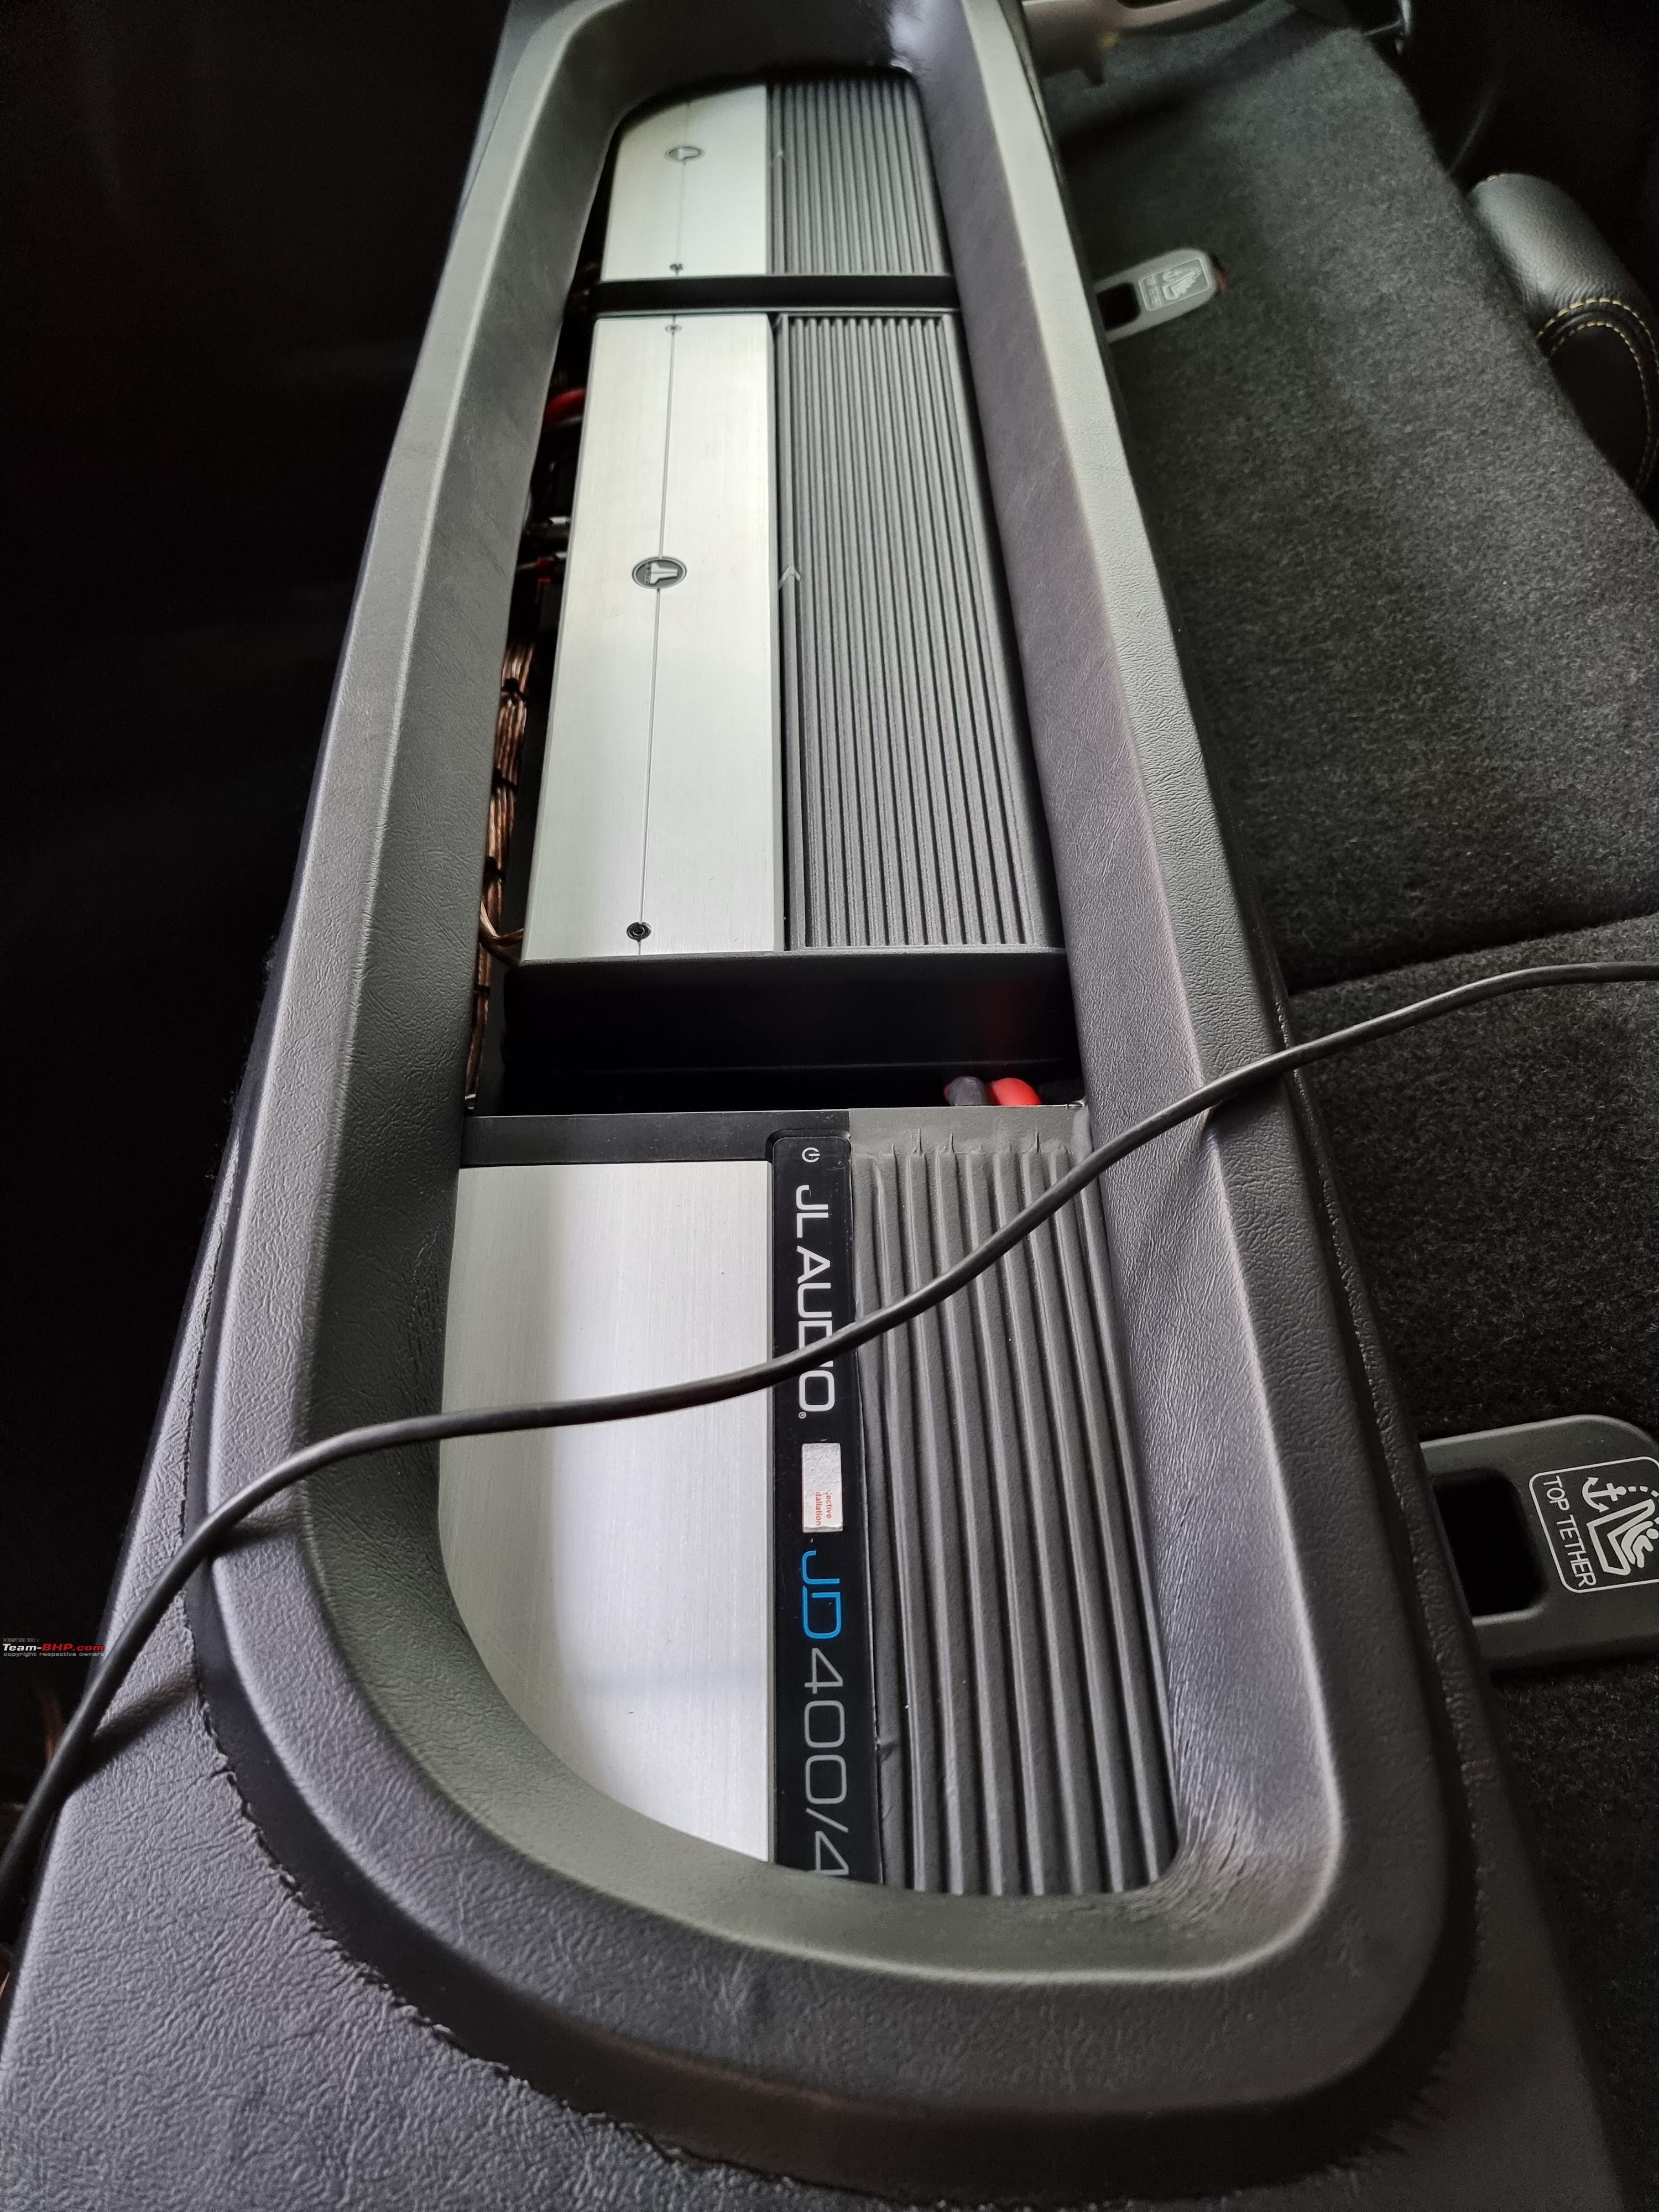 The LED light in the rack   Boot space is all but gone, a couple of small bags still fit though 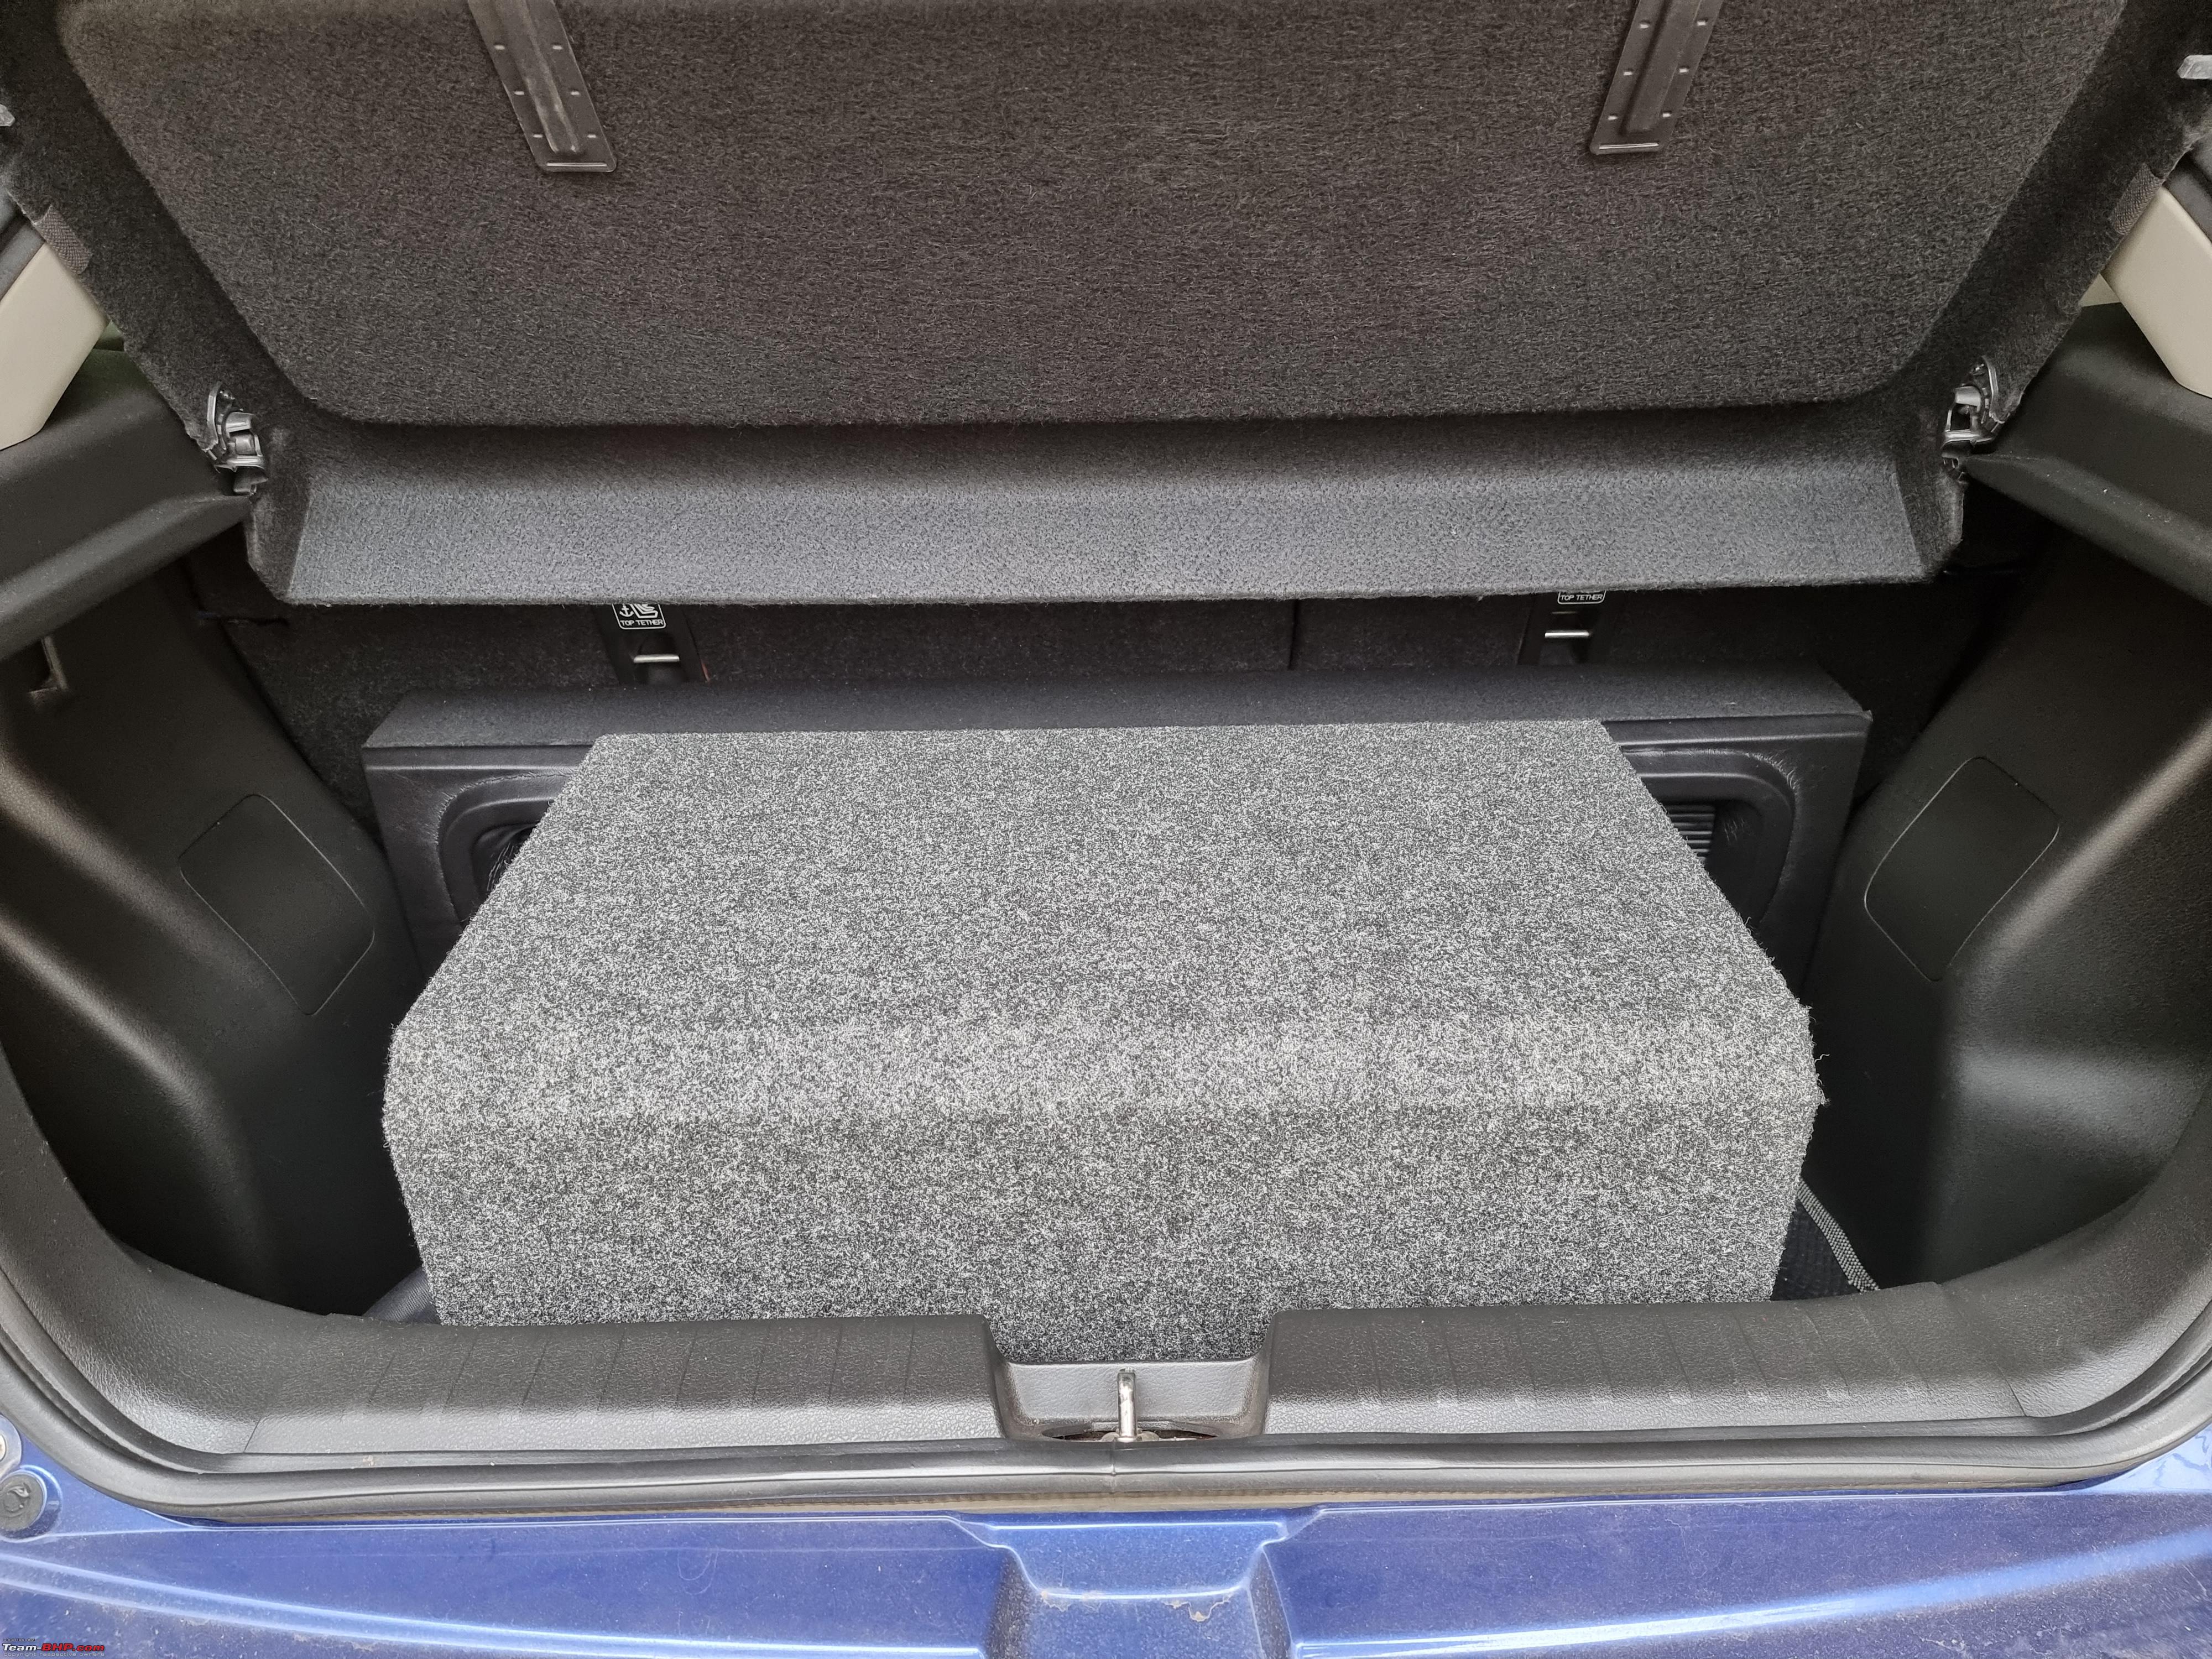 The Source Where was all the music going to be played from? Phone? USB stick? Dedicated player? I tried a multitude of options, that was at my disposal, and ended up with the best solution for my needs. Here's everything I explored:
 Everything is finally done! A gargantuan project eventually comes to an end, and holy moly was it worth it! As I said earlier, it's hard to put sound into words but this setup makes you feel so connected to the music. I simply love it, the tuning made a HUGE difference. I'm sure there's room for further improvement but we decided to put an end to it for now. Another 'side effect' of this entire project was that the car gained about 90kg (64kg of damping + 27kg sub) and this has changed its characteristics. It feels more planted, surefooted and is more composed over bad patches of the road (it doesn't giggle around as much). The NVH has dropped drastically and you hear absolutely nothing from the outside when the music is playing. Overall, it's more enjoyable to drive. I do feel the initial pickup has dropped a smidge, not a big deal really. Cost Ah, the elephant in the room. Most of you may find it absolutely ludicrous to spend so much on audio. Maybe it is. It could have been used for performance upgrades, a new car or anything else. Well yes, all of these permutations/combinations ran through my mind but I reached a simple conclusion: You can never use the full potential of your car all the time, but you can ALWAYS listen to some bloody good music. So, let's break down the damage (only for the JL upgrade):
And with that, let's end this post. A massive shoutout to Raghu (he's the one-man army at Prowork Custom Installs. Contact No: +91 99011 32264) for bringing such an incredible project to fruition. His passion and dedication are unmatched, it was all or nothing from the very beginning. Thanks for reading! Last edited by Aditya : 18th July 2022 at 22:57. Reason: As requested |
|
| (155)
Thanks
|
| The following 155 BHPians Thank ROG_AK for this useful post: | 2himanshu, abhijith, abtyagi, adhd92, aeroamit, Agarwal_Aayush, ais, Akshay6988, amitabhr, amithn, amvj, anantpoddar, aniket13, Arjan, arjithin, arnav17, arvind71181, asbshyam, aswin93, audioholic, AutoNoob, AVash, Avikbrio, baarish84, batterylow, BeingHuman, bejoy, berserk, Bhupi_BHP, Bibendum90949, blackwasp, brownkaiser, Capri89, Car Stalker, chautob0t, chinmaypillay, Chrome6Boy, CrAzY dRiVeR, dealer, deep_behera, digitalnirvana, Divya Sharan, dkaile, dragntailonfire, DreamcarFerrari, DriverNo.420, Dry Ice, Durango Dude, Eddy, envira, Excommunicado, frankmehta, Gannu_1, GaryTSI, gauravanekar, giri1.8, Godzilla, govigov, graaja, GTO, Guru_Shikhar, Harjot37, Herschey, Highh5, HTC, InControl, Jacob1000, jayakumarkp, Jeash.vk, joethomasv, JShah, Kartikaygaur, keroo1099, kiranknair, KK2001, knightfurry, krishnakumar, krishnaprasadgg, Leoshashi, lxskllr, mbhaskar, mi2n, mobike008, Mogs, Nature&Me, Naveen_1176, na_agrawal, neil.jericho, Nicky4WD, nikhil.neon, nirmaljusdoit, Nitish B Shetty, northstar*, NTO, One, Osteon206, PearlJam, prakhar30, PrasunBannerjee, pun337, quickdraw, Raghu M, RaghuVis, rainmaster, Rambo-RS, Rehaan, Reinhard, Researcher, rk_sans, Roy.S, Safari_Beast, Sahilrai166, sangam_mm93, sarav100, ScorpWarp, Seagull76, Shanksta, Sheel, sheelapratosh, Shreyas Aterkar, Shubhendra, silverBOT, singh.b86, SnS_12, somspaple, Spinnerr, Sran, Sreejith V, sukhbirST, Sumer, sunnsood, Swarup5, swe.desi, sweetvar26, swiftnfurious, Teesh@BHP, The Rationalist, the.dogfather, TheNormalOne, tp_dominator, TSIboy, Vaishak, varunanb, Varun_HexaGuy, VeBdrivE, Venkygupta, Viju, Vikram9193, vivek2652, VizagRider, VRJ, W.A.G.7, yogiii, youngknight, ysjoy |
|
15th July 2022, 06:42
| #8 |
| Team-BHP Support  | Re: High end JL Audio upgrade in my Maruti Baleno RS Thread moved out from the Assembly Line. Thanks for sharing! |
|
| (5)
Thanks
|
| The following 5 BHPians Thank Aditya for this useful post: | digitalnirvana, GTO, navin, Researcher, ROG_AK |
|
15th July 2022, 10:17
| #9 |
| BHPian Join Date: Oct 2021 Location: BLR -> Mumbai
Posts: 354
Thanked: 1,207 Times
| Re: High end JL Audio upgrade in my Maruti Baleno RS Well that's one hell of an audio upgrade if I've ever seen one and by the looks of it seems to have turned out perfectly. The JL Audio amp's and subwoofer and and the horizontal rack in the boot brings back memories of early 2000's Need For Speed games like Underground and Underground 2 as back in those days big subwoofers and AMP's in the boot were a prevalent part of the Tuner culture that developed in the west in the late 90's/early 2000's. May the bass be with you  |
|
| (11)
Thanks
|
| The following 11 BHPians Thank GreasyCarb55 for this useful post: | ayushagnihotri, chautob0t, GaryTSI, gauravanekar, Godzilla, Guru_Shikhar, neil.jericho, Nitish B Shetty, ROG_AK, sunnsood, yogiii |
|
15th July 2022, 10:44
| #10 |
| Distinguished - BHPian  | Re: High end JL Audio upgrade in my Maruti Baleno RS I understand nothing about audio really. But the sheer effort, finesse, attention to detail and tenacity to achieve a perfect fit and finish - is awe inspiring. Immaculate execution and professional level result really. Such beautiful structured cabling, enclosures and installation of all components of the setup. No corners cut. And boy is that some next level damping .Rating the thread 5 stars that are well deserved. Thanks for sharing. |
|
| (22)
Thanks
|
| The following 22 BHPians Thank Reinhard for this useful post: | abhijith, Akshay6988, Avikbrio, Bhupi_BHP, chautob0t, digitalnirvana, GaryTSI, gauravanekar, Godzilla, Guru_Shikhar, Jabberwocky, neil.jericho, Nitish B Shetty, RaghuVis, rj22, ROG_AK, SilverSmoke, SnS_12, The Rationalist, Vikram9193, yogiii, youngknight |
|
15th July 2022, 11:04
| #11 |
| BHPian Join Date: Oct 2020 Location: Bengaluru
Posts: 48
Thanked: 150 Times
| Re: High end JL Audio upgrade in my Maruti Baleno RS Awesome my friend, many congratulations on a great audio setup! Thank you for the meticulous post, it made my day. I have been through a similar upgrade path on my cars, but no match to yours. Wishing you many blissful rides. |
|
| (2)
Thanks
|
| The following 2 BHPians Thank Mogs for this useful post: | neil.jericho, ROG_AK |
| |
|
15th July 2022, 11:11
| #12 |
| Team-BHP Support Join Date: Apr 2013 Location: Madras
Posts: 7,174
Thanked: 20,220 Times
| Re: High end JL Audio upgrade in my Maruti Baleno RS Dude, you better work, live, eat and sleep in that car! Insane upgrade and incredible sound damping. That RS must be silent as a grave now. Many congrats and enjoy the new setup. Thank you for sharing the report. |
|
| (38)
Thanks
|
| The following 38 BHPians Thank Gannu_1 for this useful post: | Akshay6988, amitabhr, amvj, AppyS, audioholic, Avikbrio, Capri89, deep_behera, digitalnirvana, dkaile, Dry Ice, FiestaST, GaryTSI, gauravanekar, Guru_Shikhar, Harjot37, Jabberwocky, jeeva, krishnakumar, lxskllr, neil.jericho, nikhil.neon, rageshgr, RaghuVis, rj22, RoadMonkey, ROG_AK, saikishor, Shreyas Aterkar, SilverSmoke, Sreejith V, sunnsood, swiftnfurious, The Rationalist, turbowhistle, VeBdrivE, Viju, yogiii |
|
15th July 2022, 11:18
| #13 |
| Senior - BHPian Join Date: Jul 2020 Location: Hyderbad
Posts: 1,007
Thanked: 3,532 Times
| Re: High end JL Audio upgrade in my Maruti Baleno RS Man, oh my God! That is one heck of an upgrade. I won't call it an upgrade, you have done what many would not even dare to do. I for one would not trust someone with door damping. You went ahead and got such a lot of work done. The A, B pillar tweeter placement looked very odd at the beginning. I would have even shouted at the guy working on it. The end result does look stylish. One question - if you were to sell your car, what would you quote? Just hypothetically, wouldn't that cost a bomb? I can't imagine someone looking at a used Baleno and seeing the price be 12+ or even 15+ lakhs with 50K or 70K on the odo! Last edited by Raghu M : 15th July 2022 at 11:19. |
|
| (15)
Thanks
|
| The following 15 BHPians Thank Raghu M for this useful post: | Akshay6988, AutoNoob, deep_behera, Divya Sharan, Doonite, GaryTSI, Guru_Shikhar, Harjot37, lxskllr, neil.jericho, ROG_AK, SnS_12, swiftnfurious, The Rationalist, X-Saint |
|
15th July 2022, 11:22
| #14 |
| BHPian Join Date: Aug 2021 Location: Manipal
Posts: 255
Thanked: 2,061 Times
| Re: High end JL Audio upgrade in my Maruti Baleno RS Wow that is a Fantastic Audio upgrade ! Glad the old wiring and problems were rectified. The work done is Awesome and was super happy to not see any electrical tapes used but heat shrinks. Great Job by Raghu, I absolutely loved the attention to detail and the wiring seems to be done PERFECTLY. Rated the thread 5 stars! This thread is by far the most detailed audio upgrade I've come across on the forum. Regards Ashton Castelino |
|
| (2)
Thanks
|
| The following 2 BHPians Thank Ashtoncastelino for this useful post: | neil.jericho, ROG_AK |
|
15th July 2022, 11:58
| #15 |
| BHPian Join Date: Jul 2014 Location: Thane, Mumbai
Posts: 57
Thanked: 150 Times
| Re: High end JL Audio upgrade in my Maruti Baleno RS Short words : 1. Unbelievable 2. Heavenly 3. Speechless Gave me goosebumps just reading through. Cannot imagine what the music in the car would do to my senses!! Wishing you happy listening and more envious looks as you drive through! |
|
| (1)
Thanks
|
| The following BHPian Thanks cdrajeevkumar for this useful post: | ROG_AK |
|