Team-BHP > In-Car Entertainment
Register New Topics New Posts Top Thanked Team-BHP FAQ


Reply
  Search this Thread
32,432 views
Old 29th February 2008, 10:52   #31
Team-BHP Support
 
navin's Avatar
 
Join Date: Mar 2004
Location: Mumbai
Posts: 25,202
Thanked: 9,319 Times

Quote:
Originally Posted by blueraven316 View Post
OT : What is your opinion on the Rockford Punch component speakers post 05' ? I am asking you this as you have seen and heard a lot more speakers than I have.
I have not heard Rockford for a long time. I cant comment of speakers I have not heard. Sorry.

I dont think I have that many speakers. You are from the industry. I am just as I call it "an interested bystander". So dont be modest.

Quote:
Originally Posted by akbaree View Post
Navin, as always, your posts make me feel that I am living in some 17th century and you are from the 21st century. I tried looking up "Mellisa" on google, and could not find anything.

Would you mind telling me in more simpler way. I would like to try and fix these anomalies and would be in a position to better appreciate this.

Is this something that I can do?
Is equalizing a good solution?
1. I would think it would be the other way around. I am from the 17th century (just ask my wife and son).

2. Try googling for "MLSSA" or even "Using Mellisa for Loudspeaker Modellling". There is a recent thread on TBHP that discusses this.

3. Polks tend to have a aggressive uppper midrange (around 3K). Uisng simple software like Clio or LspCad (there is a free version called LSpCad Lite) one can model the existing crossovers and then adjust components to compensate for this.

However when using such software remember that while adjusting frequency response, the power response must also be considered. For example if one pushes the Q of the HPF (tweeter crossover) too low one can overload the tweeter by not giving it adequate protection against excursion. More tweeters die from over excursion than thermal stress (too much power).

Equallising (a parametric EQ is more efficient for this) can help but one must be judicious. EQs are often over used and then are "more problem than cure". My old Alpine HU has a quasi-parametic EQ built in, mnaybe your HU does too.

Last edited by navin : 29th February 2008 at 10:55.
navin is offline  
Old 29th February 2008, 12:33   #32
BANNED
 
Join Date: Feb 2008
Location: Bangalore
Posts: 131
Thanked: Once

RockFord fosgate!!!!

They have good stuff!!!

I'd Recommend thenm as well as JBLs

Both these Brands have Seen the Evolution of ICE.
nripin is offline  
Old 14th June 2009, 01:39   #33
BHPian
 
akbaree's Avatar
 
Join Date: Jun 2005
Location: Ahmedabad
Posts: 613
Thanked: 107 Times
In the season of upgrades...

I am a keen follower of the ICE section, especially the Sound Off Show Off section. Like any other ICE lover at tbhp, I remain pretty excited about the upgrades and the new installs.

But this time around my story is different. No new equipment, actually no upgrades. Even after trying all my tricks (ofcourse I couldn't try any of Navin's suggestion for lack of knowledge), I remain a little dissatisfied with ICE setup for it's inability to play midrange as cleanly as other frequencies. Moreover, I used to get a boomy feeling about the bass in some songs. I reduced the volume of subwoofer box to around 0.85 cubic feet by sticking wood patches inside the box. But that didn't helped much.

It took me almost 8 months to troubleshoot the actual issue. One fine day wisdom dawned on me and I tried my idea of playing just the fronts and the sub. And that's it. It has been three months of experimenting with all kind of music and finally my decision to get rid of my rear speakers. They were coloring the lows giving a feel that my sub is little boomy actually when it's so sweet. As sweet as a RF can be. They were also coloring the midrange especially at higher volumes where they couldn't play as clean as my components in the front. The time alignment only made this deficiencies more prominent. Yeah, it took me a long time to troubleshoot.
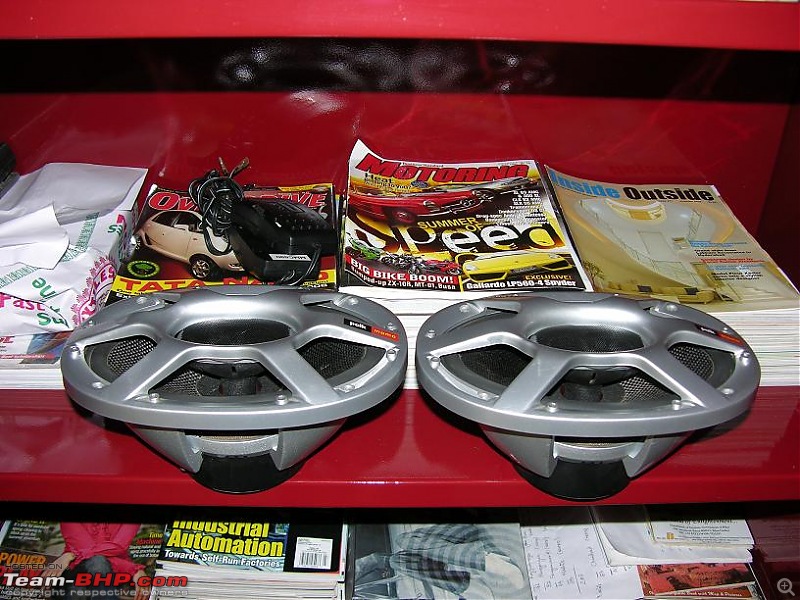
The 6x9 cooling their heels.
My long ordeal with my car's ICE-dscn5510.jpg

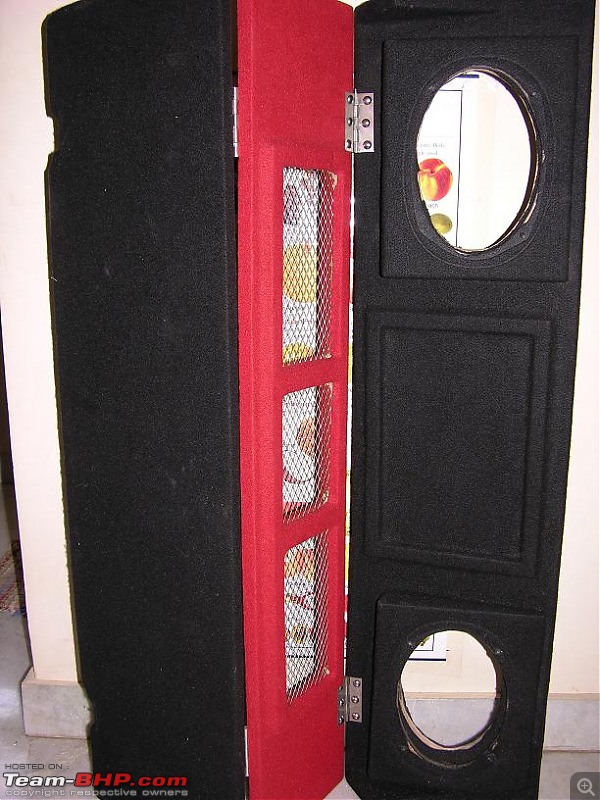
The custom MDF tray comes out as well.
My long ordeal with my car's ICE-dscn5512.jpg

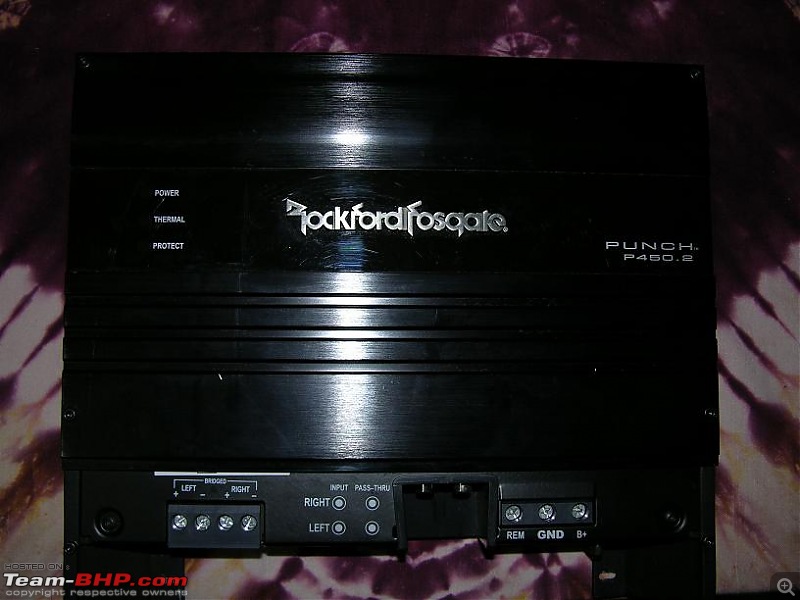
The beatiful and equally substantive RF P450.2.
My long ordeal with my car's ICE-dscn5543.jpg

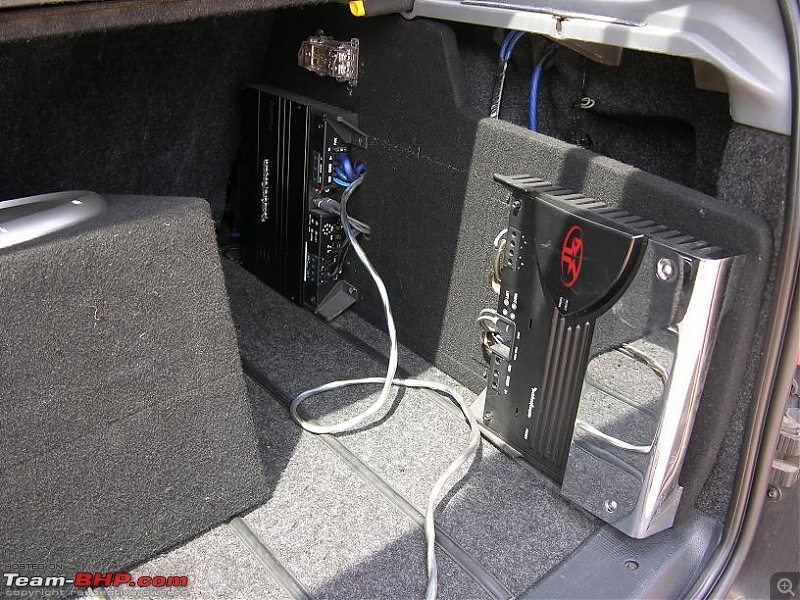
Although I feel bad to see this equipment out of my car, but they have given way to many ideas for another installation.

The train of amplifiers looked broken after one of the amplifiers was taken out.
My long ordeal with my car's ICE-dscn5513.jpg
akbaree is offline  
Old 14th June 2009, 02:00   #34
BHPian
 
akbaree's Avatar
 
Join Date: Jun 2005
Location: Ahmedabad
Posts: 613
Thanked: 107 Times
Gold plated component terminals or....

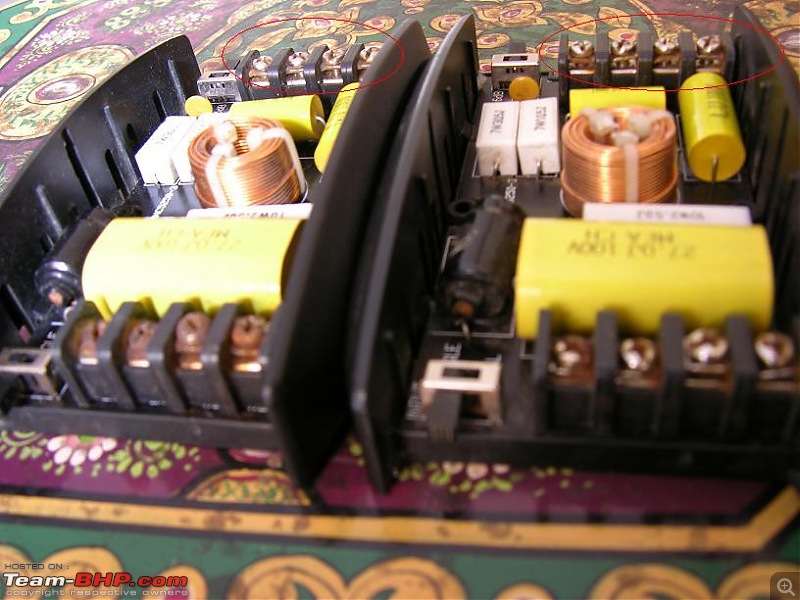
So much so for my costly components. One fine day, I decide to open up front components to manually service them. And to my after opening up the woofers, I realize that the crossovers are wet from recent bangalore rains. I have no idea how can this happen inside a door (I told you that in my previous post) till I realize that water goes inside the door from the windows as I open and close them.
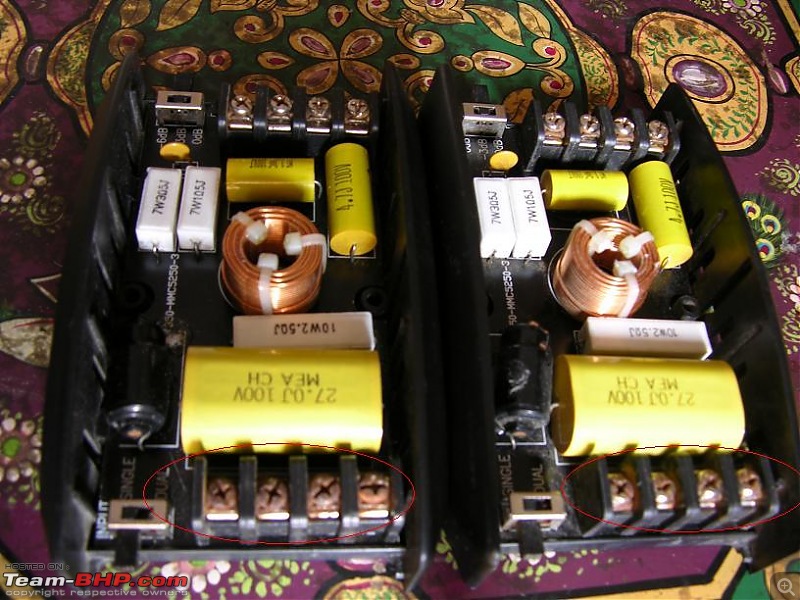
In this section we have talked much about gold plated cross over terminals in some high end component systems. I have paid only 13.5k for these components and so I only deserve RUST plated terminals.

I have tried Pidilite's Zorric but I could make them only as clean as in the picture below.

The input terminals are the most affected
My long ordeal with my car's ICE-dscn5505.jpg
But the output terminals are not far behind in competition
My long ordeal with my car's ICE-dscn5508.jpg

ICE Gurus, please advice what could go wrong using rust plated terminals. Things seem to be fine though.

I have now pulled the crossover out and have stick them near the gear lever. In the process I realized that one crossover was set at 0db and one was set at -3 db when both should have been set to -3db (as I had liked it at -3db during the installation.

I have also changed the wire from the crossover to woofer and tweeter to monster speaker cable that became available when I removed the 6x9. I always thought that I am spending on expensive wiring because I am emotional. But this change has proved me wrong. After this switch my components are sounding relatively warmer.
akbaree is offline  
Old 14th June 2009, 02:27   #35
BHPian
 
akbaree's Avatar
 
Join Date: Jun 2005
Location: Ahmedabad
Posts: 613
Thanked: 107 Times
New casing for the amplifiers

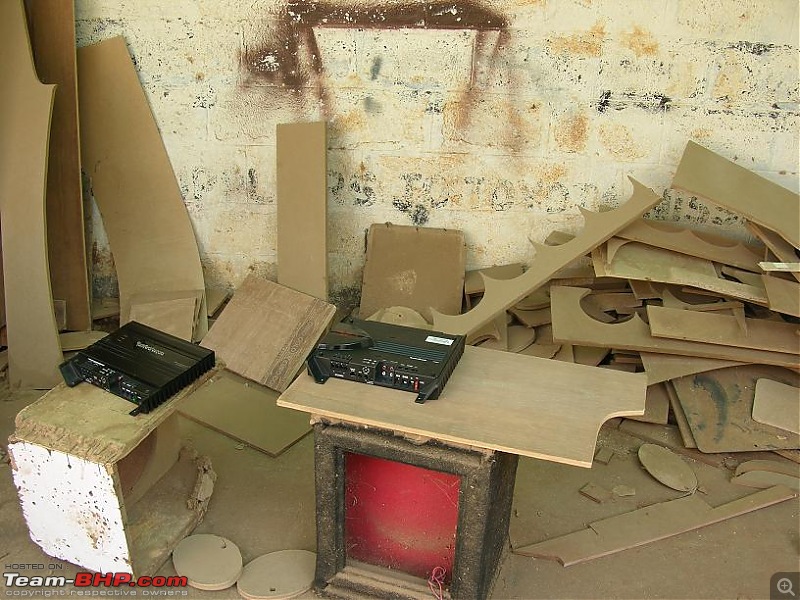
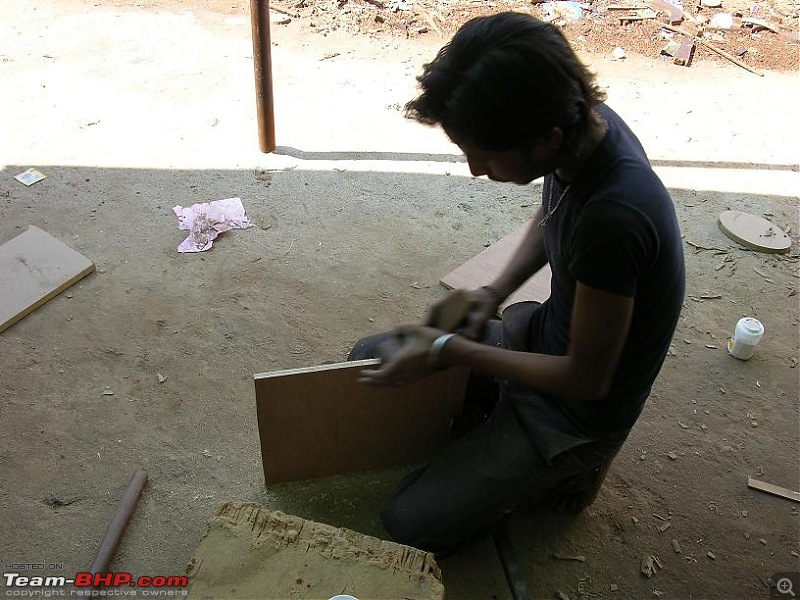
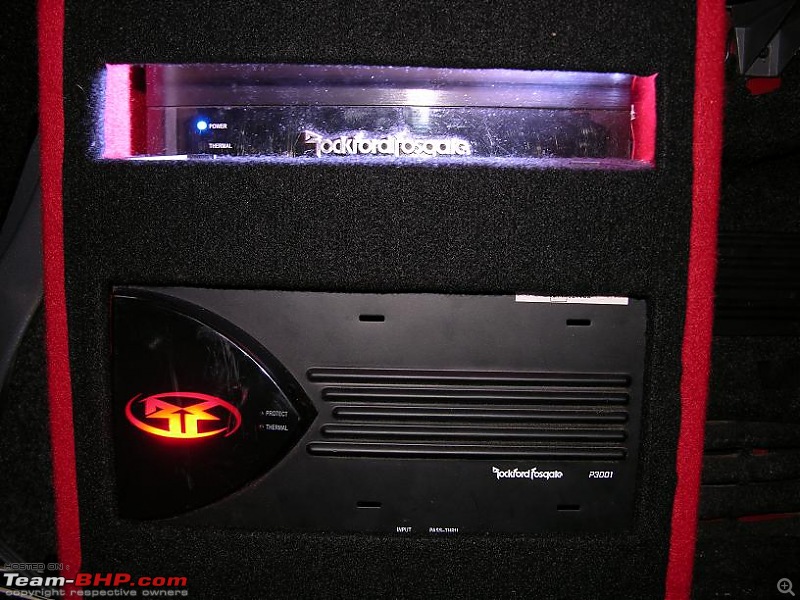
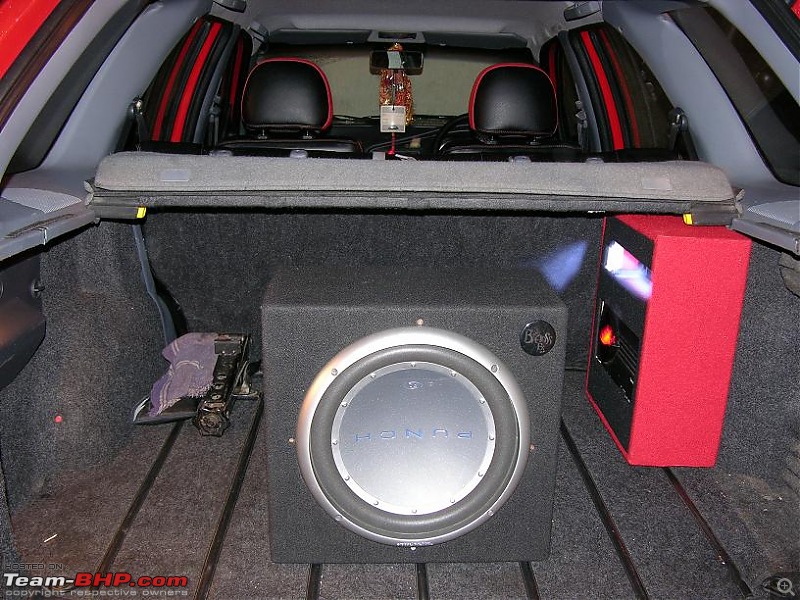
I hated the long train of amplifiers in my car's boot. I spoke with many installers for better ideas but nothing shaped up. As I got rid of one of the amplifiers, it was perfect time to get rid of the train like set up and do something new.

Dearth of ideas but I was determined to change the look this time. So I decided to spend a day with the installer who I know has few carpenters.

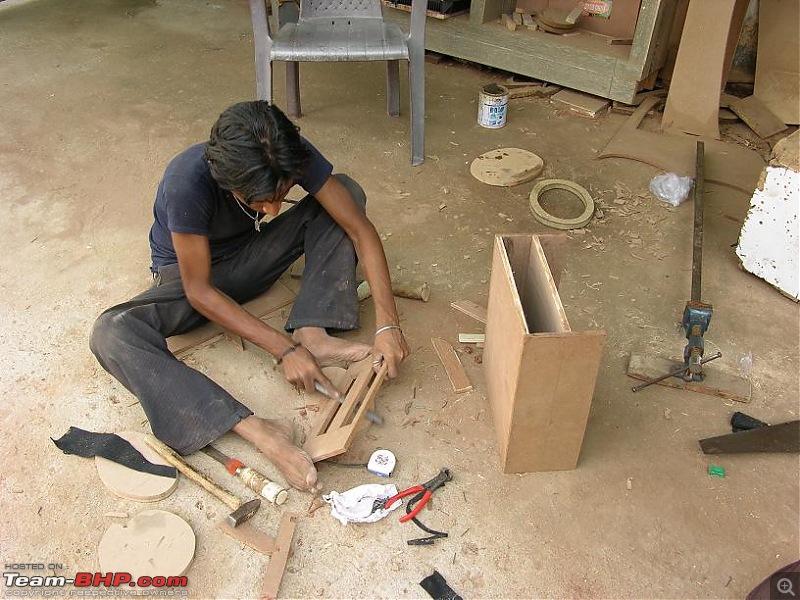
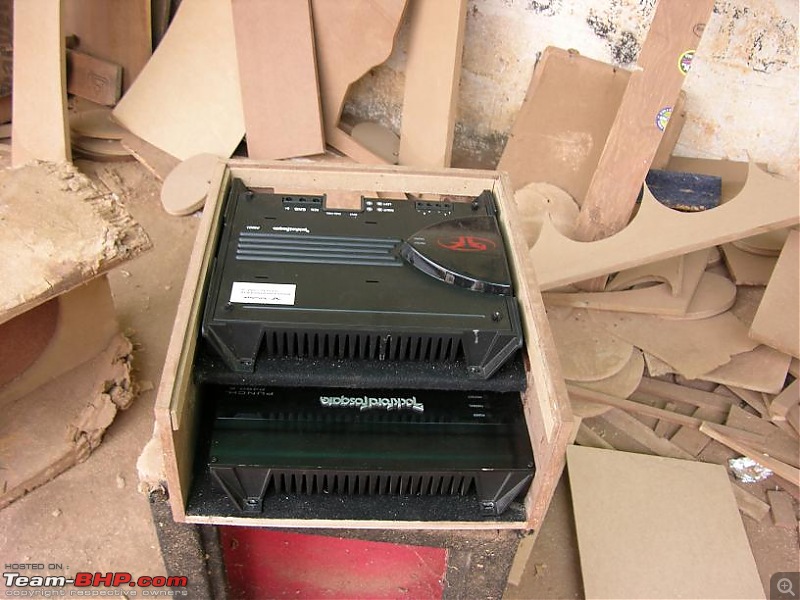
After some mind scratching, I felt trying with an idea of double decker casing. I requested the installer to leave me at his workshop with his carpenter.

Sizing it out...
My long ordeal with my car's ICE-dscn5514.jpg

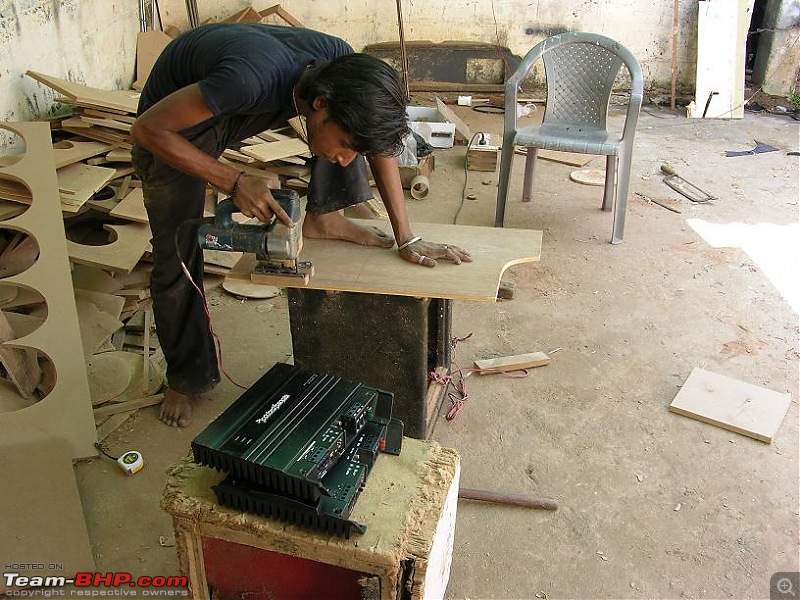
Cutting...
My long ordeal with my car's ICE-dscn5515.jpg

And filing...
My long ordeal with my car's ICE-dscn5516.jpg
My long ordeal with my car's ICE-dscn5519.jpg

Trying it out...
My long ordeal with my car's ICE-dscn5521.jpg

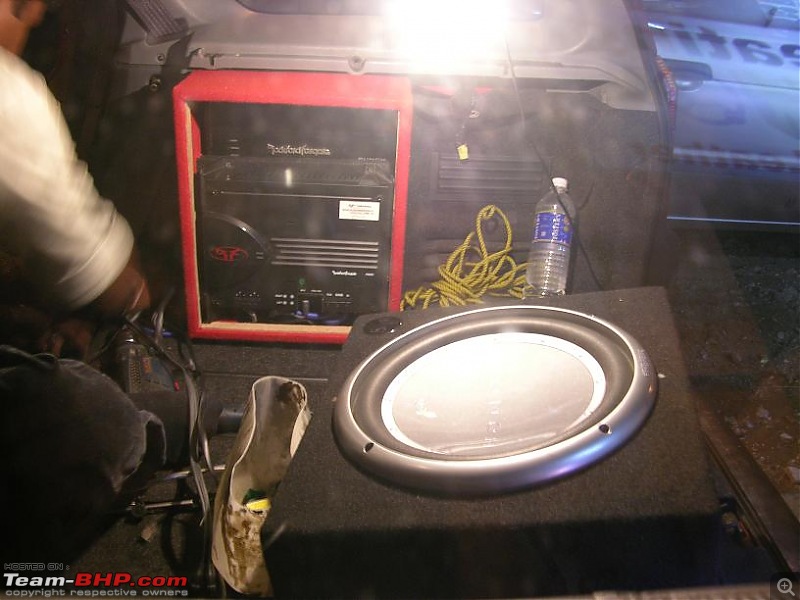
Finally installing it...
My long ordeal with my car's ICE-dscn5523.jpg
My long ordeal with my car's ICE-dscn5526.jpg

I went to the workshop at 1:00 pm today and came back at 11:30pm. And this is what it turned out to be...
My long ordeal with my car's ICE-dscn5534.jpg
My long ordeal with my car's ICE-dscn5539.jpg
I am not sure what this means for heat dissipation. Installing it was complicated as well. But my amplifiers are set at all pass mode as I use my Head Unit's crossovers. Moreover I played with the gains today and the gains are set to zero (minmum). The gain for sub can be played around from the Head Unit as well. So I may never need to play around with these two important controls of the amplifiers and I don't mind if they remain hidden somewhere. I play around with the Head Unit controls.

Please share your feedback guys. I am not happy with couple of things and will be making a few cosmetic changes here and there. But only after a week or so. Will upload the pictures then.
akbaree is offline  
Old 14th June 2009, 10:10   #36
BHPian
 
shreyasma's Avatar
 
Join Date: Jan 2007
Location: Bang!
Posts: 652
Thanked: 6 Times

well well well...it looks very nice Anant. Try to stick in a small fan for cool air.

And try sanding to remove the rust from your X-over terminals. I have a small file that can be used for the inside the groves. Let me know if you need it.
shreyasma is offline  
Old 14th June 2009, 10:42   #37
BHPian
 
pranava999's Avatar
 
Join Date: Aug 2006
Location: BANGALORE
Posts: 845
Thanked: 23 Times

Hey that's a really neat and cleanly made amp enclosure. Space saving and good looking. I like it. Wonder how the heat dissipation is in such an enclosure?
pranava999 is offline  
Old 14th June 2009, 11:10   #38
BHPian
 
akbaree's Avatar
 
Join Date: Jun 2005
Location: Ahmedabad
Posts: 613
Thanked: 107 Times
Music is personal again... very very personal

I mean how selfish one can get...
  • spending more money on ICE then many other things that may have immensely more value to your family...
  • then going with a combination of front and sub is takes that selfishness to still higher levels...
  • and if that was enough, time alignment is the height of it. Just one sweet spot in your car...
Taking the 6x9 and rear MDF tray out gave me another opportunity to retune the set up. I seem to have got the time alignment formula wrong last time. Ofcourse I was using my not so developed wisdom to adjust it so far but today I took fresh measurements and now the sound stage is near perfect.

Of-course I have never felt music so good in my car ever before. The sub integrates with the fronts so well that one has to open the boot to realize that the sub is installed there. The adjusting of gains have also resulted in a sub level that's just present and not announcing its presence by shaking the seats. It is also the result of how much level is needed for the sub to become integrated rather than how much level is needed to get the desired SPL levels.

The front are more clean and expressive in some of the frequencies. In fact they always were but were bogged down by the 6x9 and may be incorrect time alignment. The wiring change from the crossover to tweeter and woofer has also helped.

I may say the obvious but I have learned it the hard way - do away with your rear speakers (if you can).

Limitations: The fronts are crossed at 80 Hz and their resonance frequency is 86 Hz. And to compensate even the Sub is crossed at 80 Hz. I would like the front stage to have resonant frequency of around 50 Hz so that I can comfortable cross them at 63 Hz. Moreover my sub is at its best when crossed at 63 Hz.

But I am fine with this limitation. Presently my car is my Shangri-la. And I can't be happier.
akbaree is offline  
Old 14th June 2009, 11:21   #39
BHPian
 
akbaree's Avatar
 
Join Date: Jun 2005
Location: Ahmedabad
Posts: 613
Thanked: 107 Times

Quote:
Originally Posted by shreyasma View Post
well well well...it looks very nice Anant. Try to stick in a small fan for cool air.
That seems to be a nice idea.

Quote:
And try sanding to remove the rust from your X-over terminals. I have a small file that can be used for the inside the groves. Let me know if you need it.
I will ping you some time, I may need the file. I would like the terminals to be without rust.


Quote:
Originally Posted by pranava999 View Post
Hey that's a really neat and cleanly made amp enclosure. Space saving and good looking. I like it. Wonder how the heat dissipation is in such an enclosure?
Even I am not sure about heat dissipation. I will consider Shreyas's idea as well as I am planning to alter the front cover to give more breathing. I will try this on the coming weekend and will post pictures then.
akbaree is offline  
Old 14th June 2009, 12:06   #40
BHPian
 
shreyasma's Avatar
 
Join Date: Jan 2007
Location: Bang!
Posts: 652
Thanked: 6 Times

Anant, I forgot man. I have a dremel kit. We can easily remove the rust.

Hey ping me if you going for any wood work. I wanted a pair of 5.25 mdf spacers.
shreyasma is offline  
Old 14th June 2009, 12:45   #41
Senior - BHPian
 
DerAlte's Avatar
 
Join Date: Mar 2007
Location: Bangalore
Posts: 8,069
Thanked: 2,919 Times

Yes, use the Dremel with a wire-wheel for cleaning (do hold the screws with a nose plier unless you want to shred your fingertips ). After you put back everything together and wiring it, apply white petroleum jelly ('vaseline') liberally to the terminals.

The other way to remove the rust completely is to soak them in oxalic acid for some time, but it would be rather difficult to get that.
DerAlte is offline  
Old 14th June 2009, 13:59   #42
Senior - BHPian
 
hydrashok's Avatar
 
Join Date: Aug 2006
Location: In my Office
Posts: 2,528
Thanked: 17 Times

Good going, akbaree!

IMHO,taking a second (then third and then fourth) look at the way your existing ICE is set up is actually the best and the most intelligent way of improving your overall install without spending a lot of money on changing equipment.

Those comps are excellent and installed well, they can kick the backsides of many comps that cost a lot more. I've been guilty of judging them negatively in sub-par installs, before I heard them properly installed and tuned in iPlay's setup. You have the added advantage of a great headunit.

That amp-rack looks really nice. I was also wondering if the amps are getting enough air to cool themselves. If it were me, I'd use the same idea, but without the wooden panels on the sides and on the top. That would keep the double-decker configuration intact, and still give the amps enough air.

If you'd like to keep the rack an enclosed-style one, it might be a good idea to use two fans. One to push air in at one end (preferably low down, on one of the sides), and another fan to push air out of the rack (preferably on the top). That would ensure maximum air movement and maximum cooling. You would need to use good quality, silent fans, as your car is basically a big hatch and the drone of the fans would be more evident than in a sedan.

I noticed that your sub-box looks like it is a ready-made one (going by the logo). If it is not within the recommended specs, you can perhaps consider changing it. If it is a ready-made one, it might have straight walls on all sides (can't make out from the photo if the rear is sloped). Having a sloping wall on at least one side will reduce standing wave issues.

From what I've read, one way of checking for standing waves with the current box would be to open a door while music is playing. If the sub suddenly sounds louder/boomier, then you might benefit (a bit) from a box that eliminates standing waves. Now this would be an incremental change, more that a huge difference, but if you are looking at extracting the maximum from the current equipment, this might be one thing you can consider doing.

3 cheers to you for taking the effort and for voluntarily going through the hassle of redoing aspects of the install to improve things, rather than take the short-cut method of "upgrading". Enjoy the fruits of the labour!

Last edited by hydrashok : 14th June 2009 at 14:02.
hydrashok is offline  
Old 14th June 2009, 16:07   #43
Senior - BHPian
 
DerAlte's Avatar
 
Join Date: Mar 2007
Location: Bangalore
Posts: 8,069
Thanked: 2,919 Times

Quote:
Originally Posted by hydrashok View Post
... I was also wondering if the amps are getting enough air to cool themselves.
...
(can't make out from the photo if the rear is sloped). Having a sloping wall on at least one side will reduce standing wave issues. ...
The simplest would be to cut slots in the top of box, similar to the slots in the base of the box. This will create enough updraft (heated air rises) to cool the amps. You can check for air circulation by using a lit agarbatti. The sides of the box won't create a problem, instead will help channelize air.

The way the sub box shows in the pics (4th pic in first post, 6th and 7th pics in third post) where it is lying on its back, looks like the rear wall is sloped.
DerAlte is offline  
Old 15th June 2009, 12:04   #44
BHPian
 
akbaree's Avatar
 
Join Date: Jun 2005
Location: Ahmedabad
Posts: 613
Thanked: 107 Times

Quote:
Originally Posted by hydrashok View Post
That amp-rack looks really nice. I was also wondering if the amps are getting enough air to cool themselves. If it were me, I'd use the same idea, but without the wooden panels on the sides and on the top. That would keep the double-decker configuration intact, and still give the amps enough air.

If you'd like to keep the rack an enclosed-style one, it might be a good idea to use two fans. One to push air in at one end (preferably low down, on one of the sides), and another fan to push air out of the rack (preferably on the top). That would ensure maximum air movement and maximum cooling. You would need to use good quality, silent fans, as your car is basically a big hatch and the drone of the fans would be more evident than in a sedan.
Quote:
Originally Posted by DerAlte View Post
The simplest would be to cut slots in the top of box, similar to the slots in the base of the box. This will create enough updraft (heated air rises) to cool the amps. You can check for air circulation by using a lit agarbatti. The sides of the box won't create a problem, instead will help channelize air.
After retrospecting on the design, I am sure I would like to make it more airy. Fitting fans will be relatively complex thing to do then making the design more airy. For the sake of simplicity, I will alter the design. This weekend will have to see some more action with the carpenter. Thanks for your suggestions.

Quote:
Originally Posted by shreyasma View Post
Anant, I forgot man. I have a dremel kit. We can easily remove the rust.

Hey ping me if you going for any wood work. I wanted a pair of 5.25 mdf spacers.
Quote:
Originally Posted by DerAlte View Post
Yes, use the Dremel with a wire-wheel for cleaning (do hold the screws with a nose plier unless you want to shred your fingertips ). After you put back everything together and wiring it, apply white petroleum jelly ('vaseline') liberally to the terminals.

The other way to remove the rust completely is to soak them in oxalic acid for some time, but it would be rather difficult to get that.
Thanks Shreyas and DerAlte.
Shreyas I will ping you over this weekend if you have some time. I will be going to the carpenter as there are a few modifications that need to be made to the amplifier casing. I will carry back the spacer rings for you. Would you be putting them outside or inside - the finishing of the rings will depend on the requirement.

Last edited by akbaree : 15th June 2009 at 12:07.
akbaree is offline  
Old 15th June 2009, 12:57   #45
BHPian
 
shreyasma's Avatar
 
Join Date: Jan 2007
Location: Bang!
Posts: 652
Thanked: 6 Times

Quote:
Originally Posted by akbaree View Post
Shreyas I will ping you over this weekend if you have some time. I will be going to the carpenter as there are a few modifications that need to be made to the amplifier casing. I will carry back the spacer rings for you. Would you be putting them outside or inside - the finishing of the rings will depend on the requirement.
It can be considered inside. I need these for fibreglassing the mount for my 5.25 polks. Also need a set of 6.5" and 12" rings.

Shall I accompany you to the carpenter? May get some more ideas looking at them work. Helps a lot for my DIYs
shreyasma is offline  
Reply

Most Viewed


Copyright ©2000 - 2024, Team-BHP.com
Proudly powered by E2E Networks