Team-BHP
(
https://www.team-bhp.com/forum/)
DIY #1: Swapping cabin light:
This is a pretty simple DIY and a relatively inexpensive one for about 2000 INR. Not absolutely essential unlike an arm-rest or a dead pedal which is a must have but this lends an upmarket feel to the interiors of the cabin. :)
Few BHPians have already swapped the cabin lights on their rides. For the benefit of the community, I thought of penning down this guide quickly. So here goes.
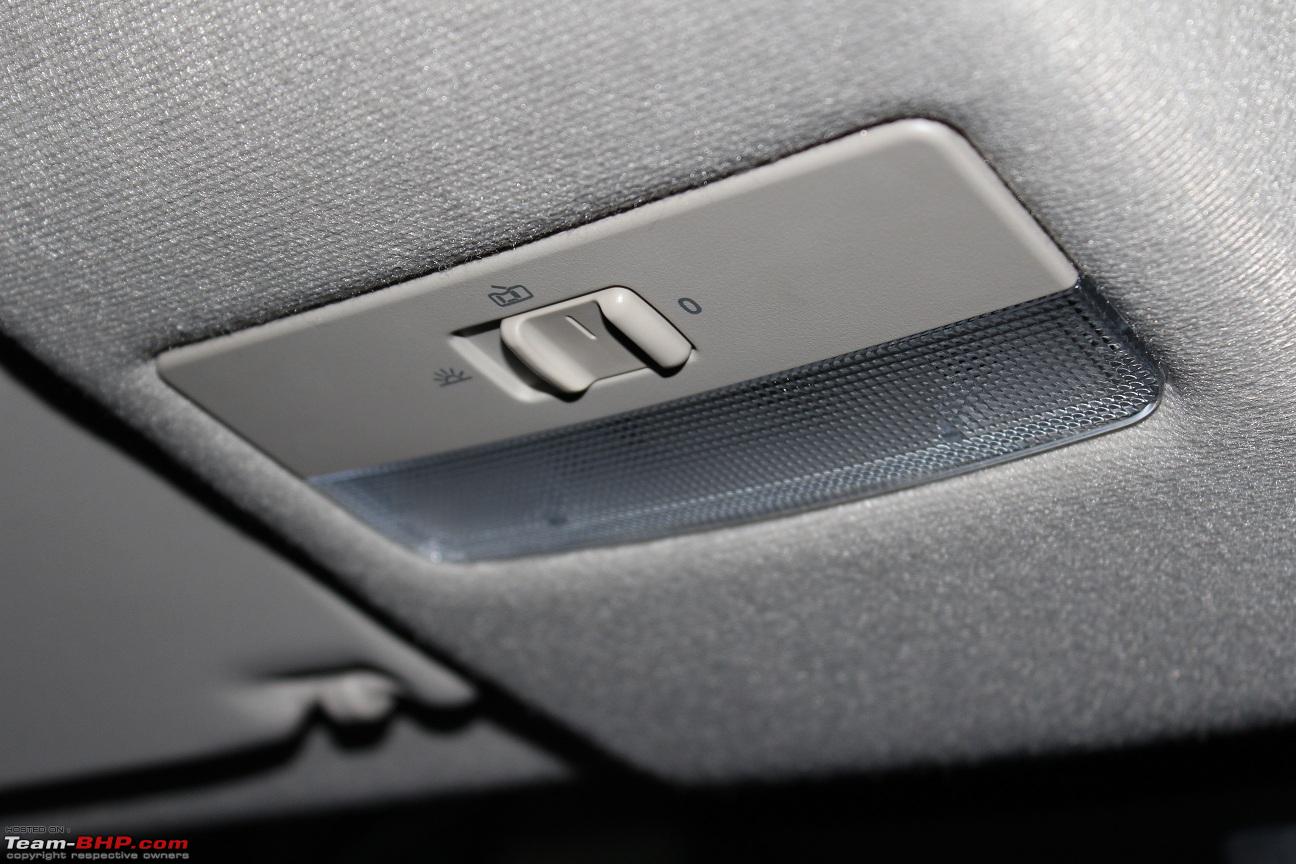
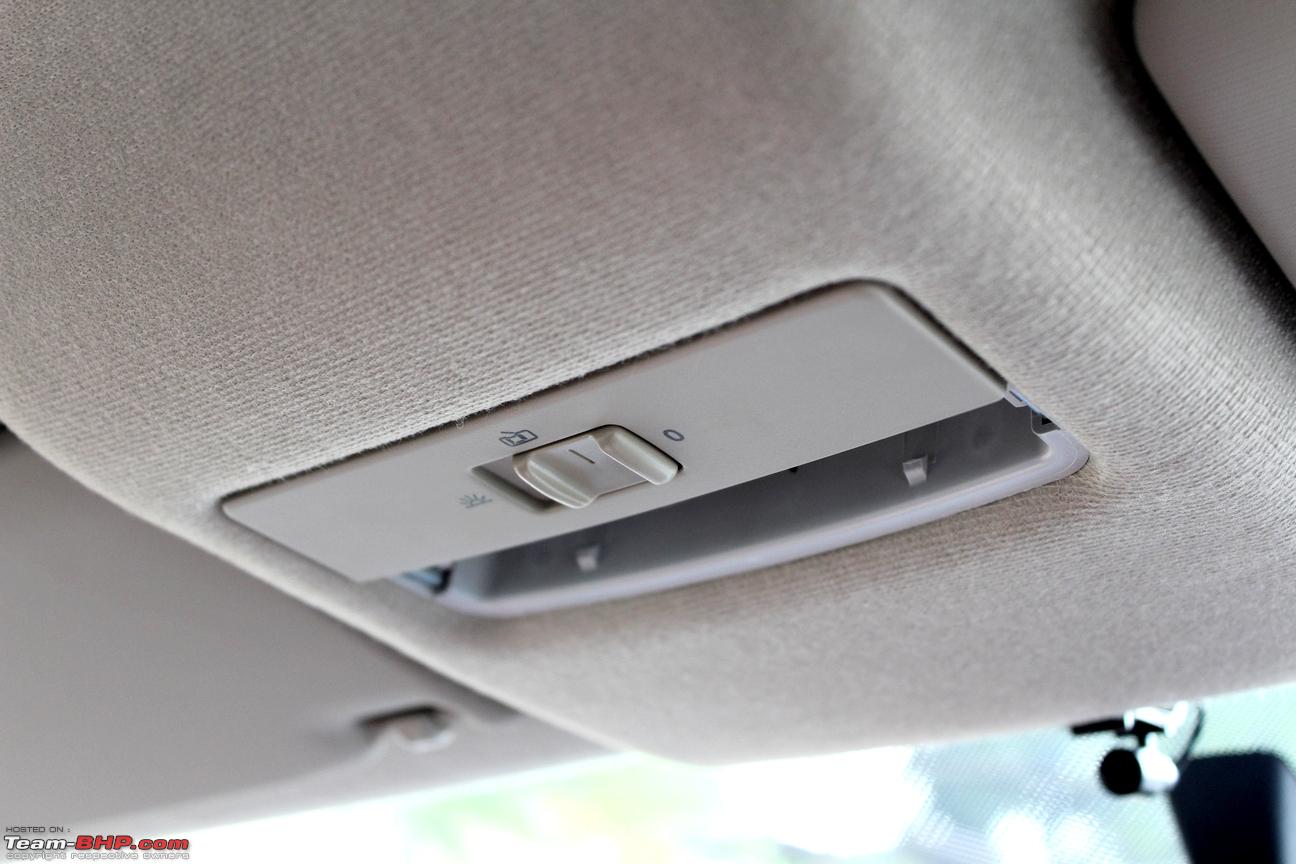
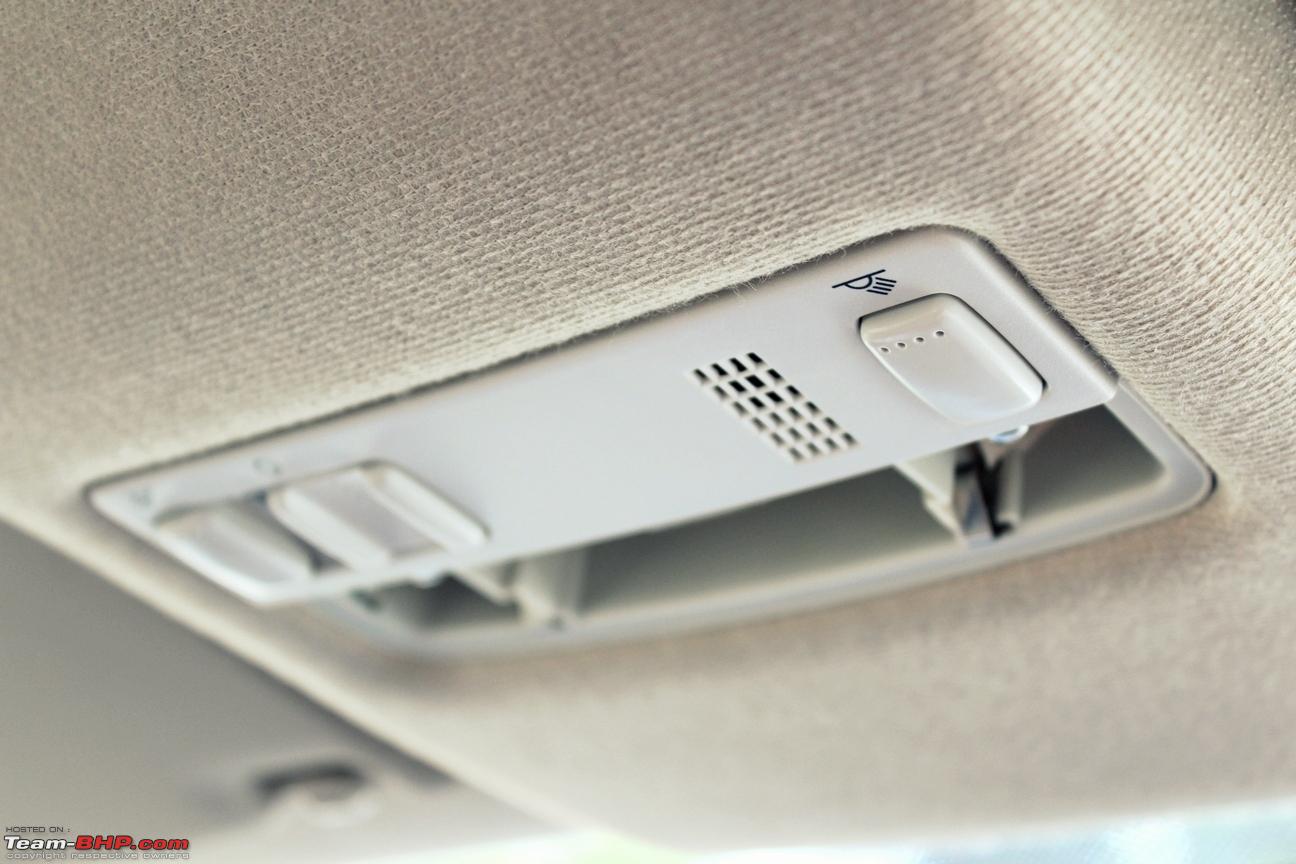
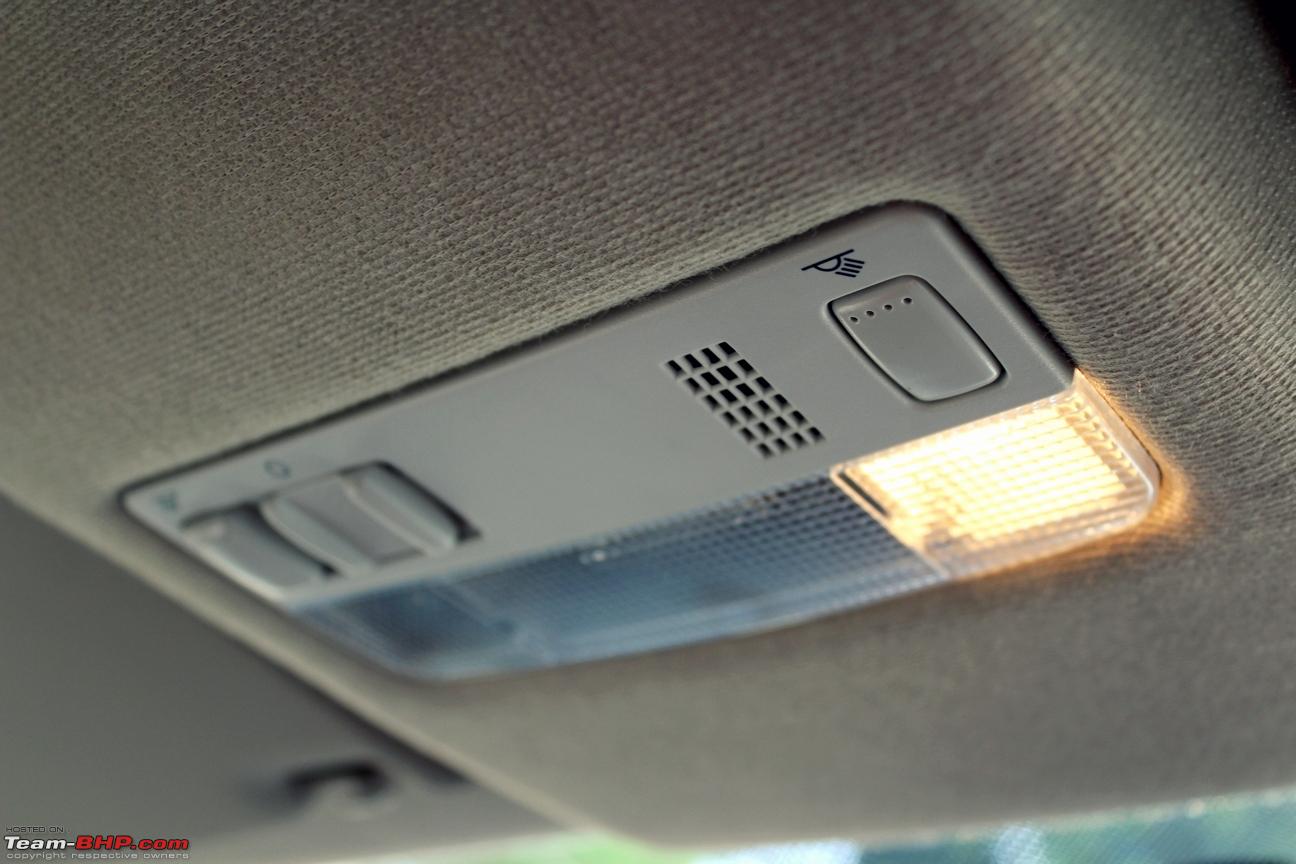
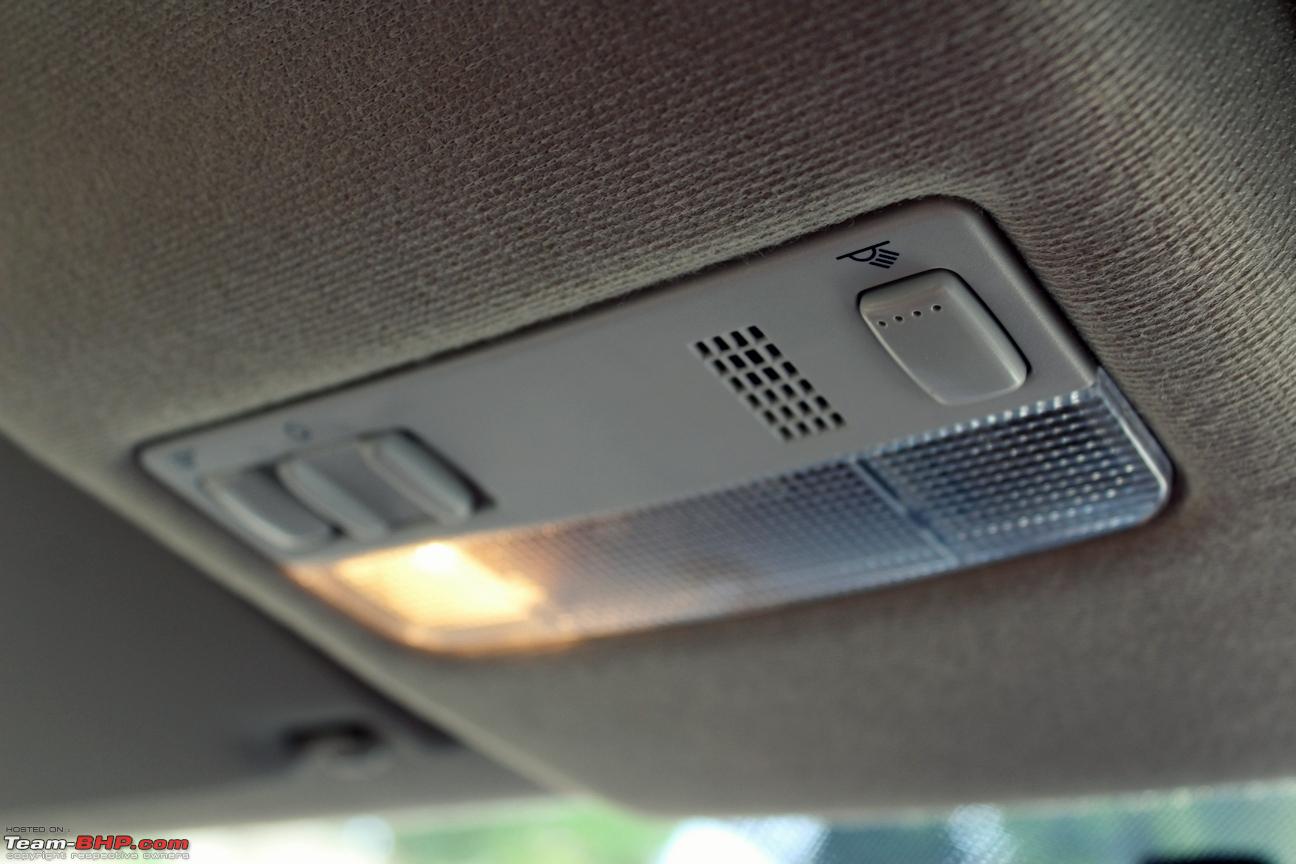
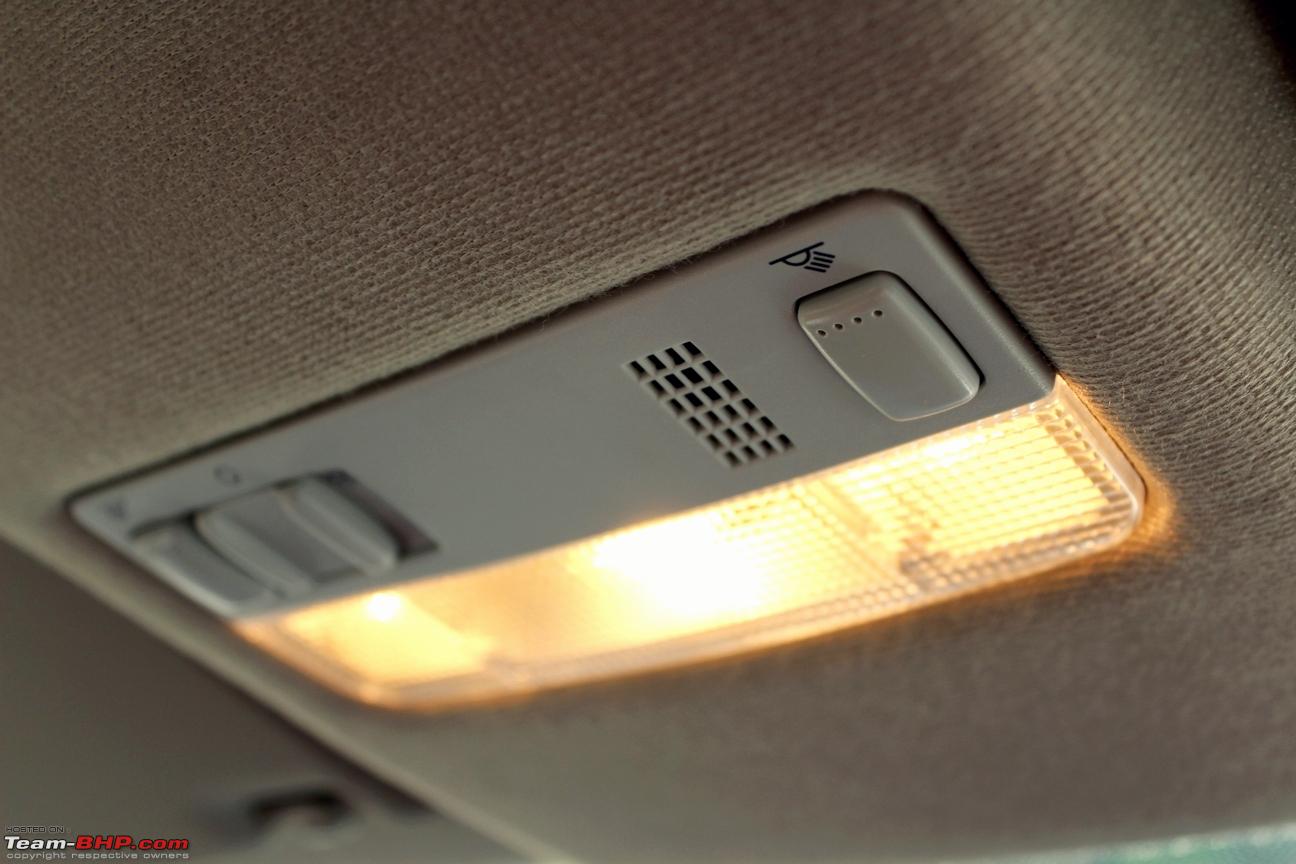
This is the front cabin light inside the VW Polo sold here (i.e. India):

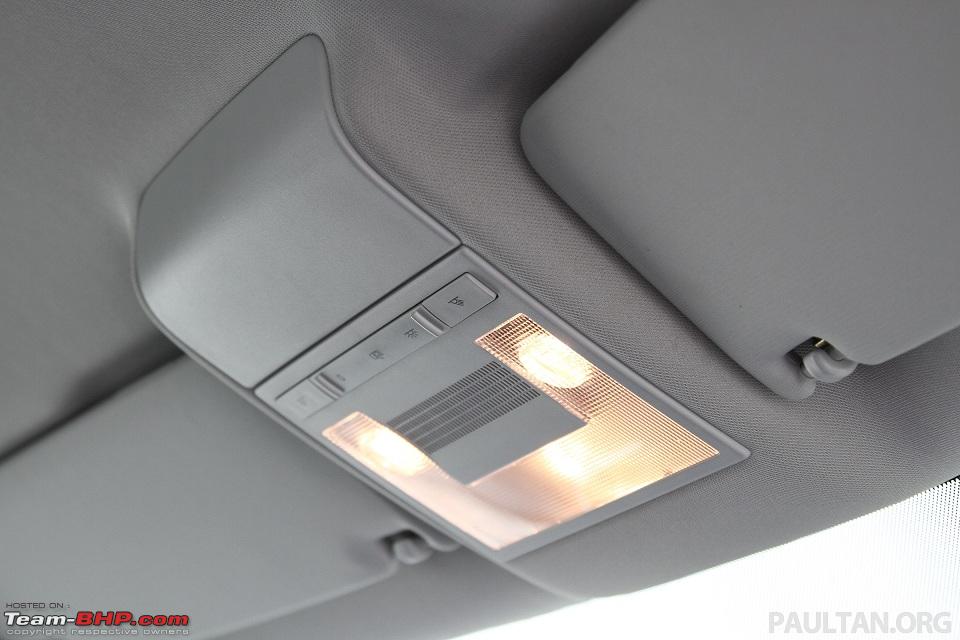
Whereas this is the one inside the Polo sold abroad and the Vento sold here:
 Image courtesy: Paultan Review
So much for cost cutting!
And this is the one installed in some of the variants of the Jetta, Golf, Laura and Fabia:
 Image courtesy: ECS Tuning
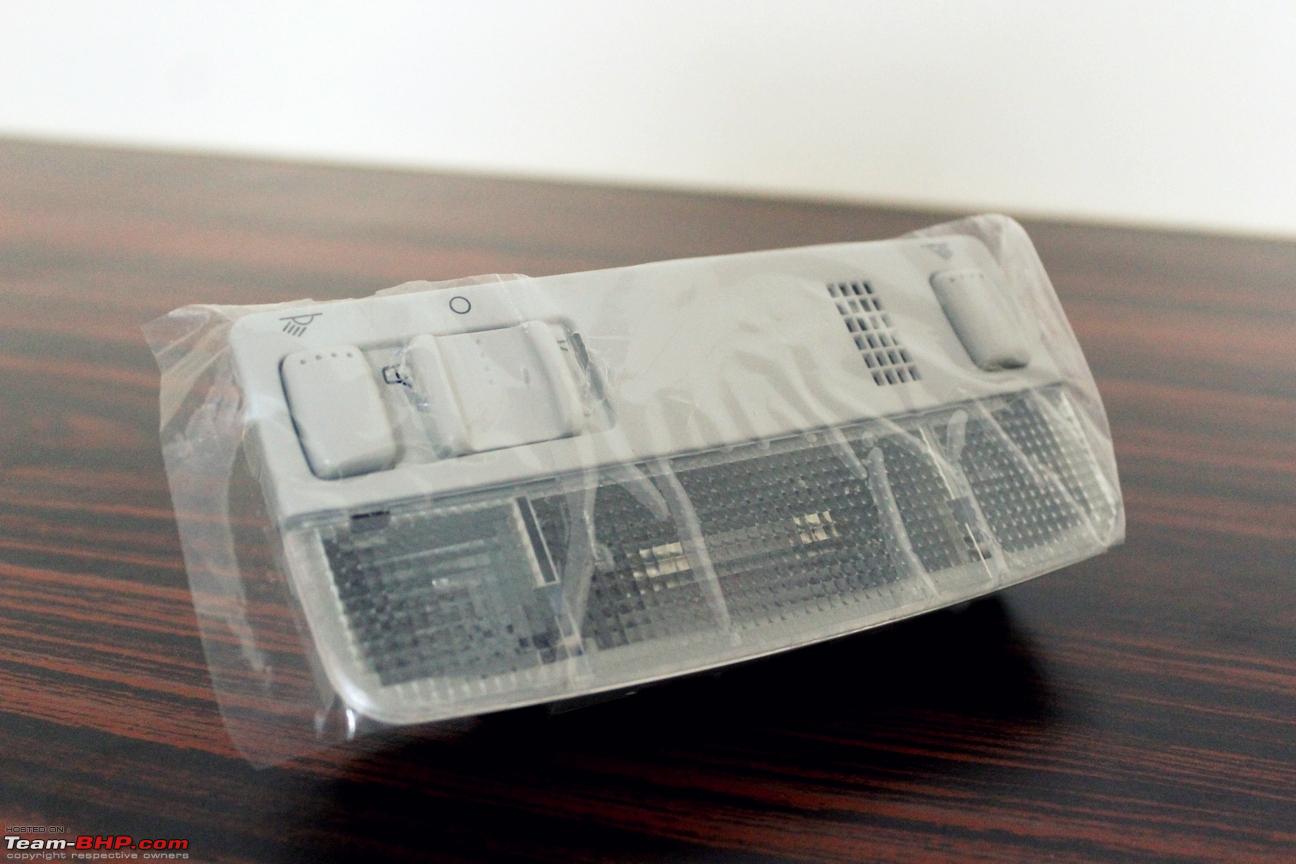
This is a straight swap with the stock cabin light installed in the Polo here. The good thing about this unit is, in addition to the central light we get 2 additional reading/spot lights for the driver and the co-driver. Plus, a slot for securing the HU microphone. The RCD-510/RNS-510 can use a wireless BT mic harness whereas some others have a wired one like the one bundled with the Blaupunkt Philadelphia 835.
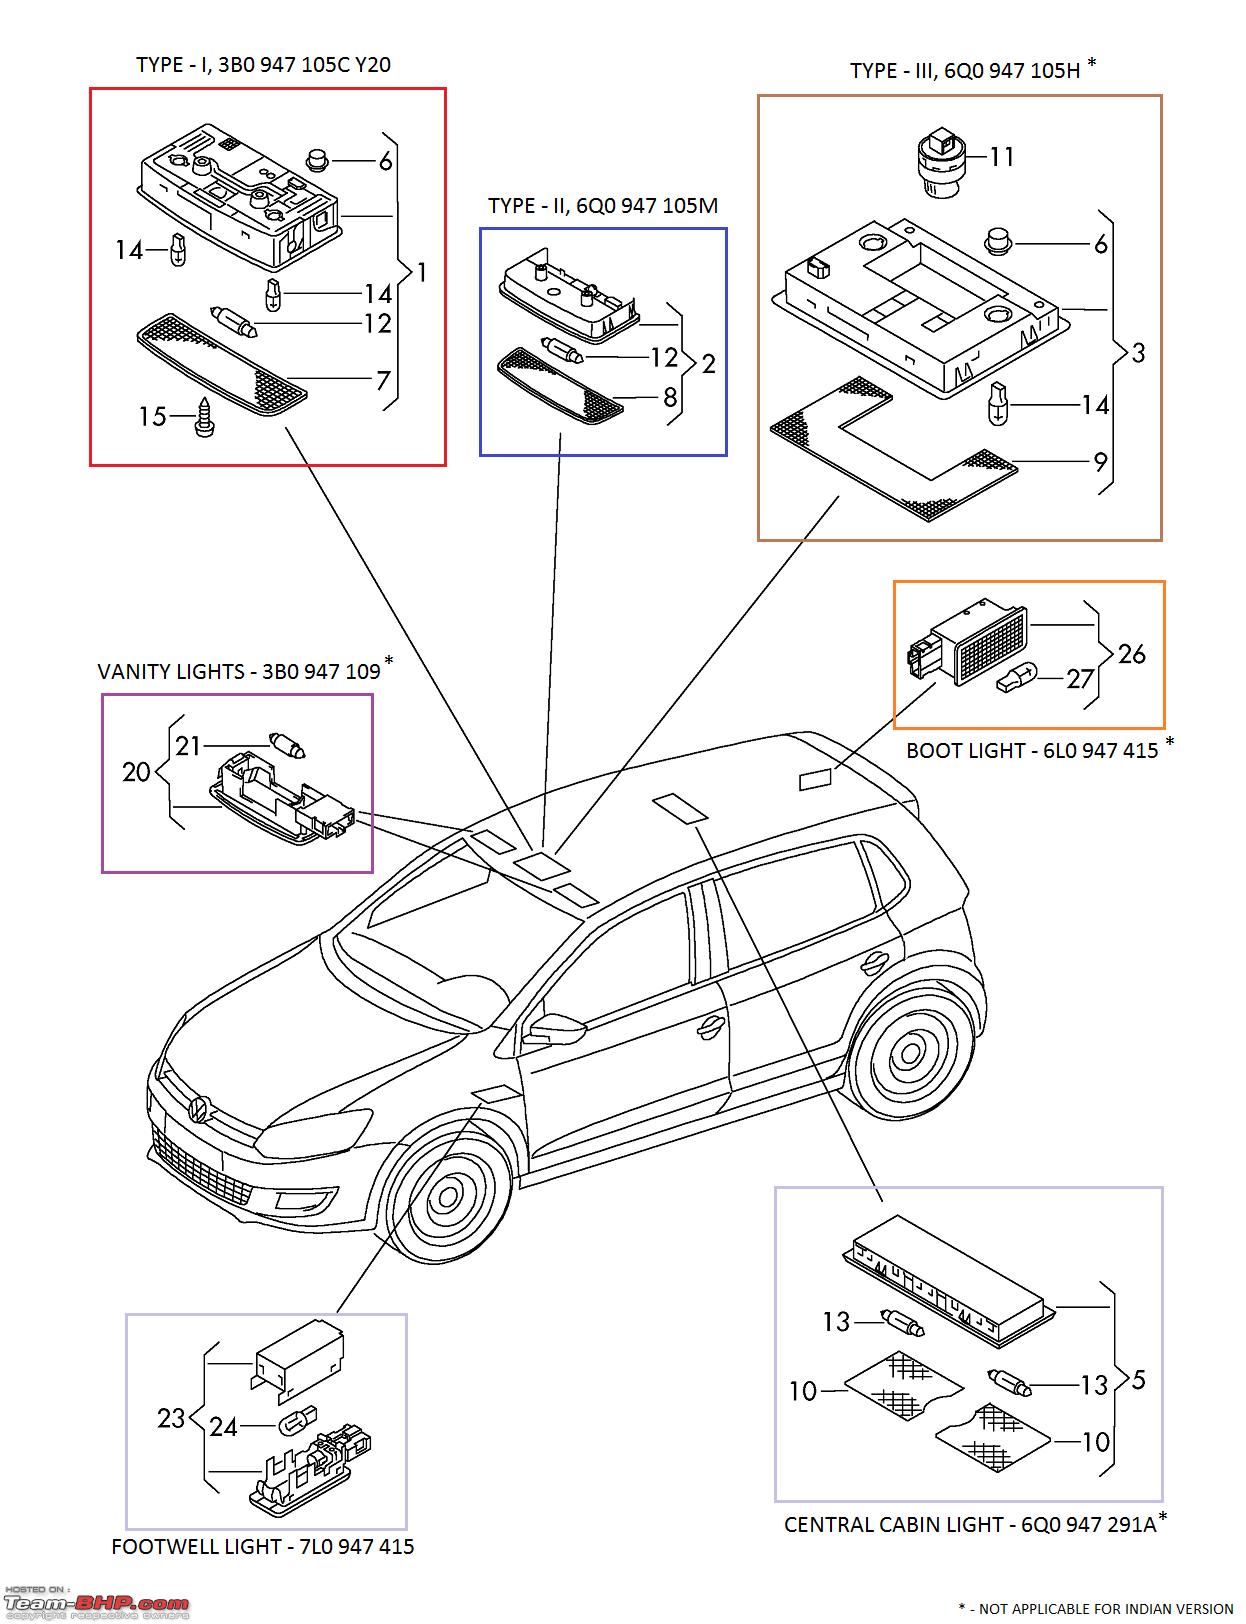
Anyways, heres the image indicating various interior lights and their corresponding part numbers installed in the Polo sold abroad:
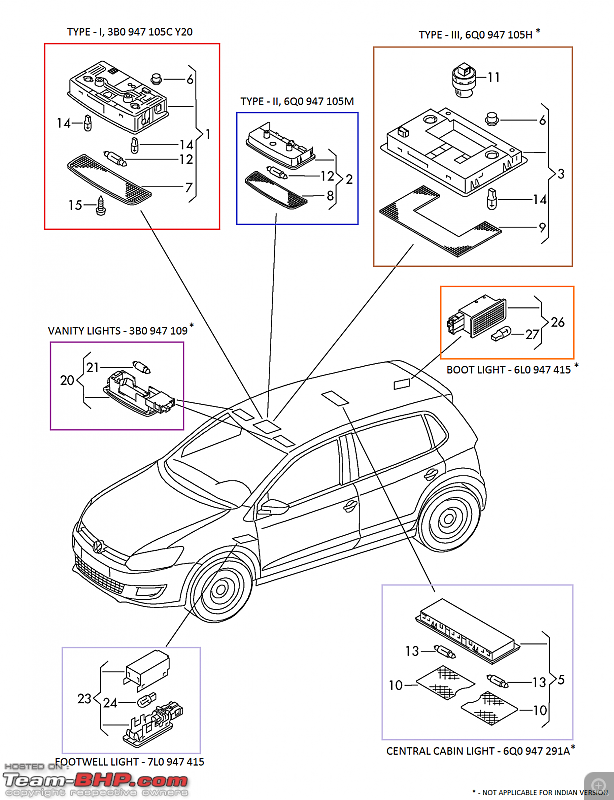 Image courtesy: partsbase.org Parts Required:
1. Cabin Light -
3B0 947 105C Y20
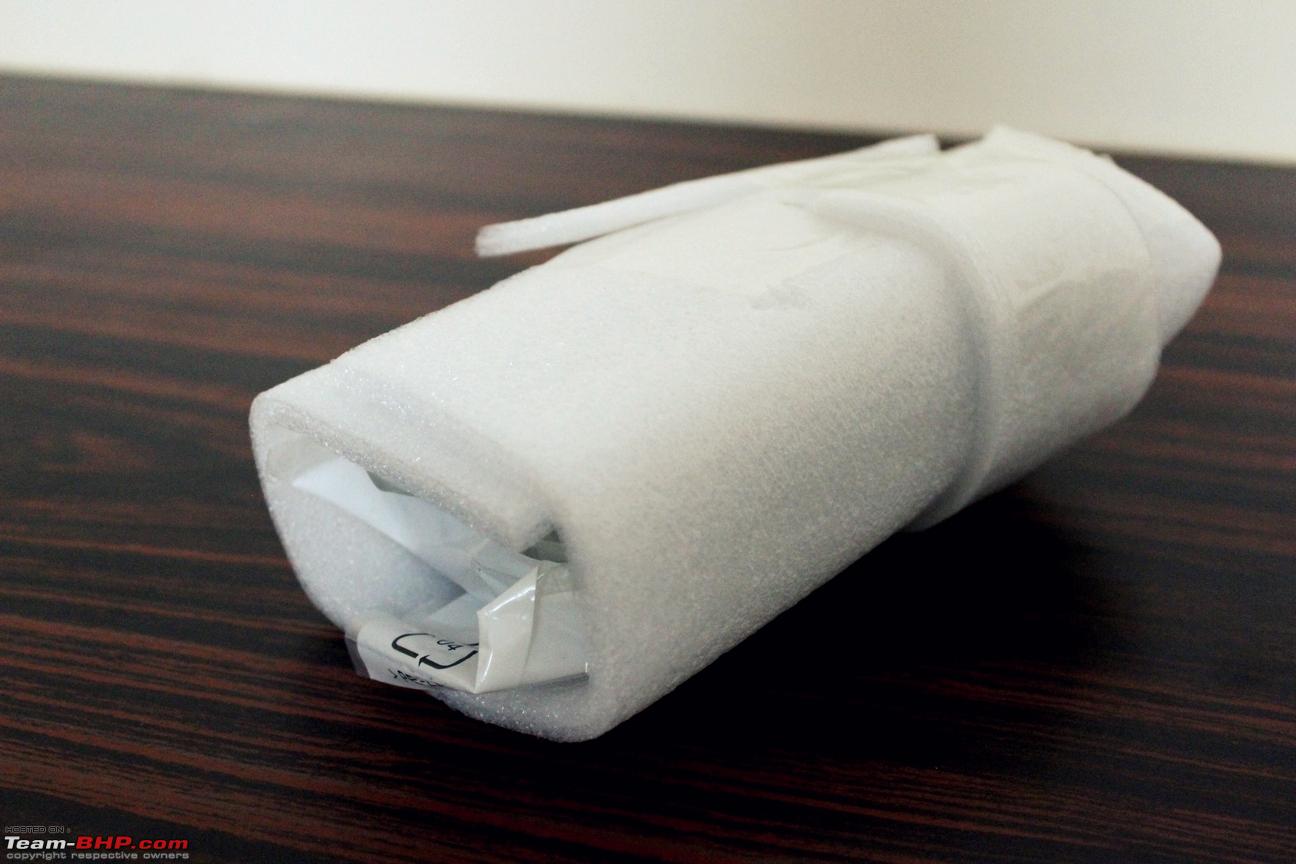
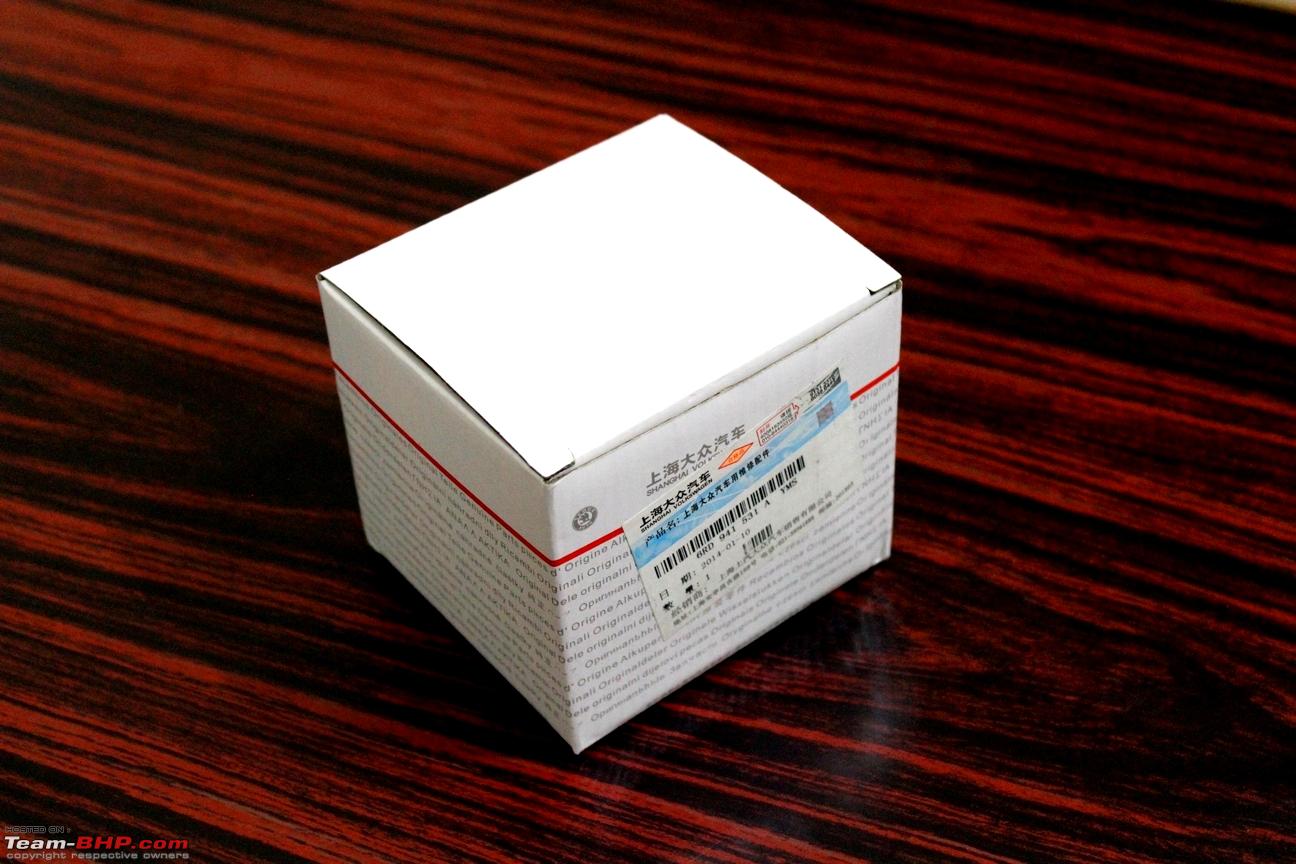
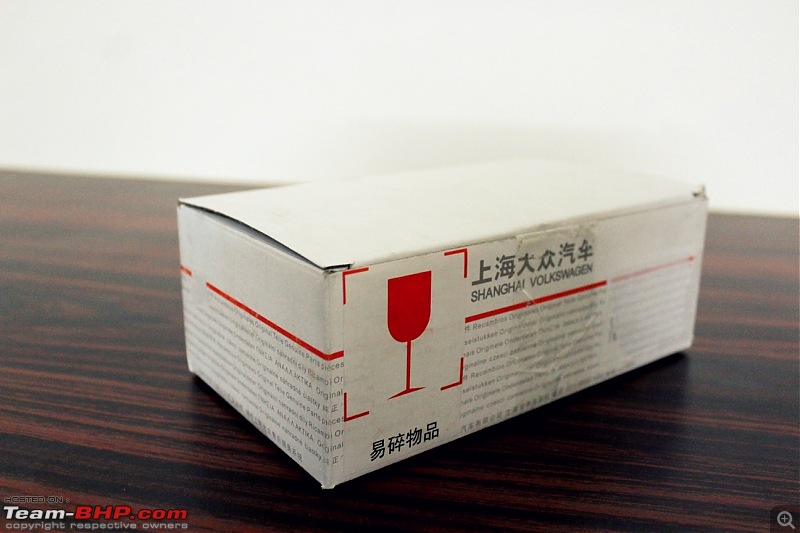
Here are few shots of the unit and the packaging it arrived in:

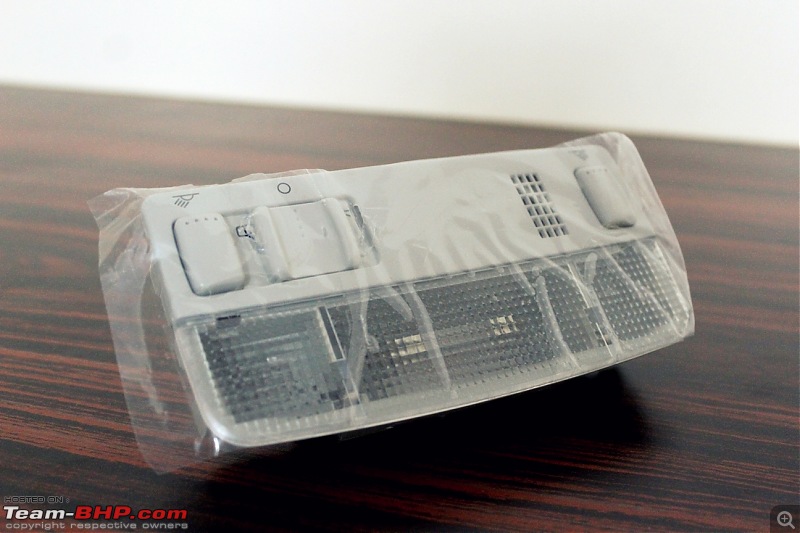
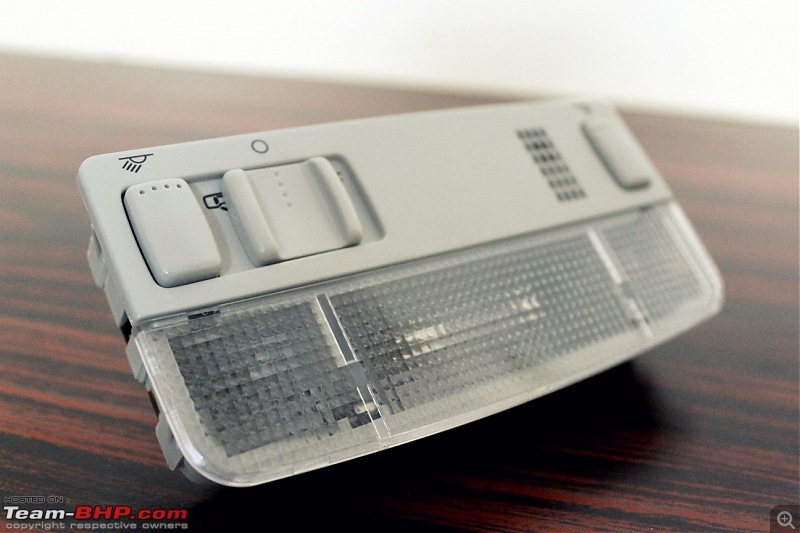
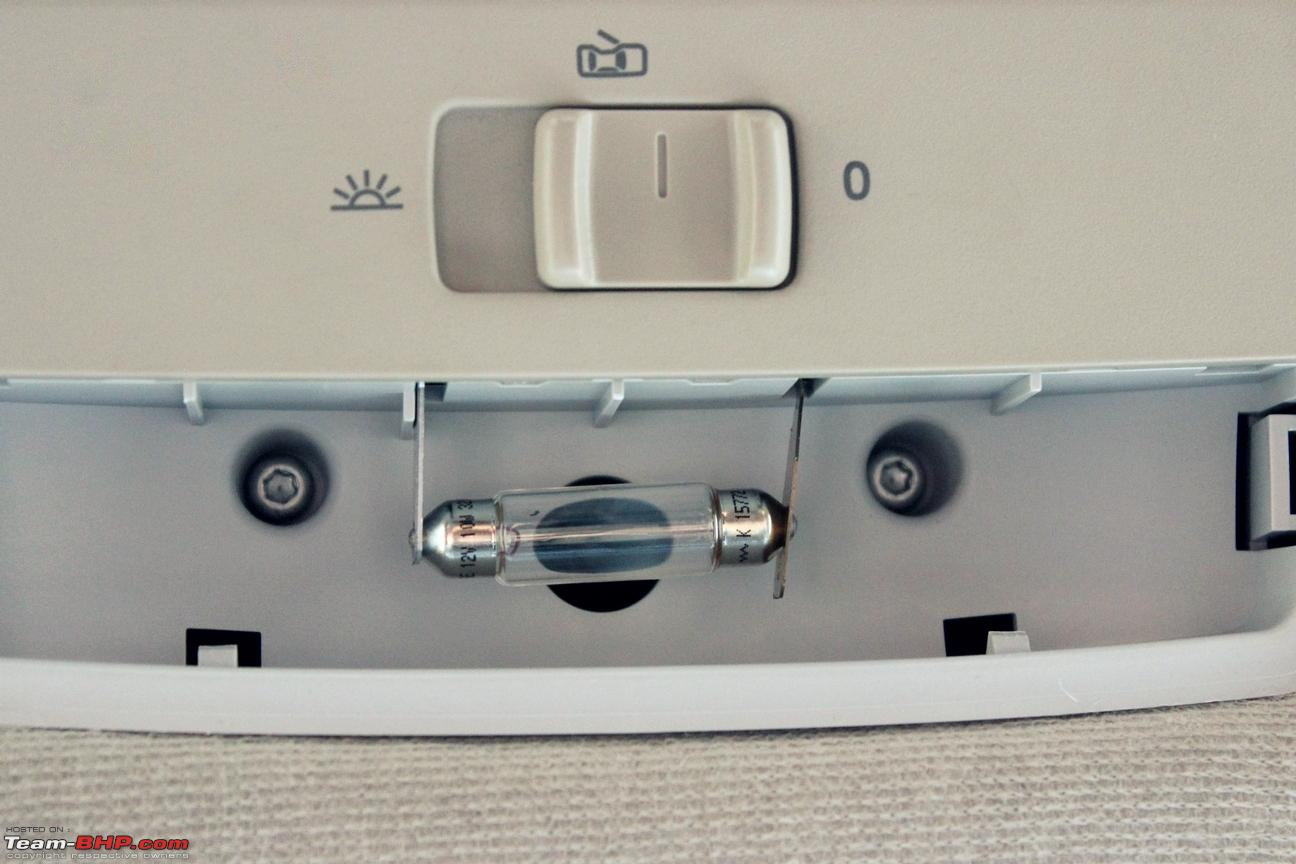
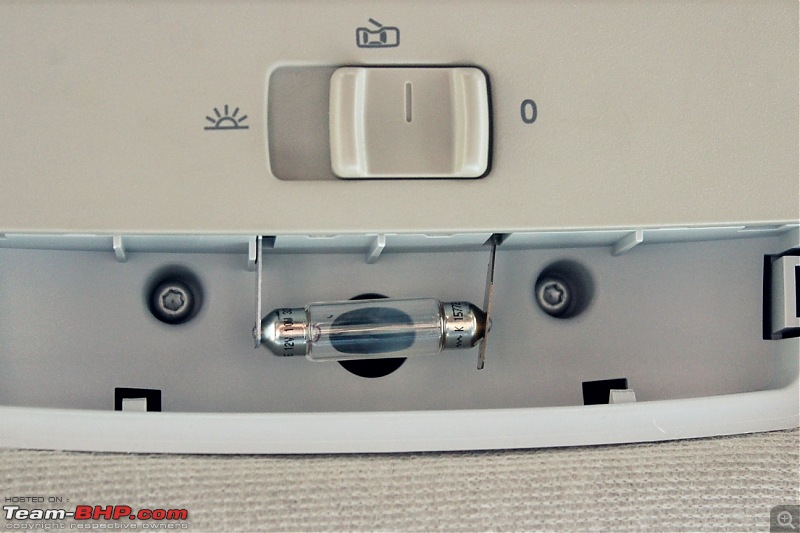
The unit uses 2 nos. W5W bulbs and 1 C5W (42mm) bulb:

This is a pearl grey colored unit (thus the color code
Y20 at the end of the part number) which is suitable for the Polos grey headliner. Additionally, there is a light beige (
8YS) and black (
B41) variant as well. The black one used to be installed in the Laura vRS.
Tools required:
1. A T20 Torx head screw driver.
2. An expired loyalty card or something similar.
Procedure:
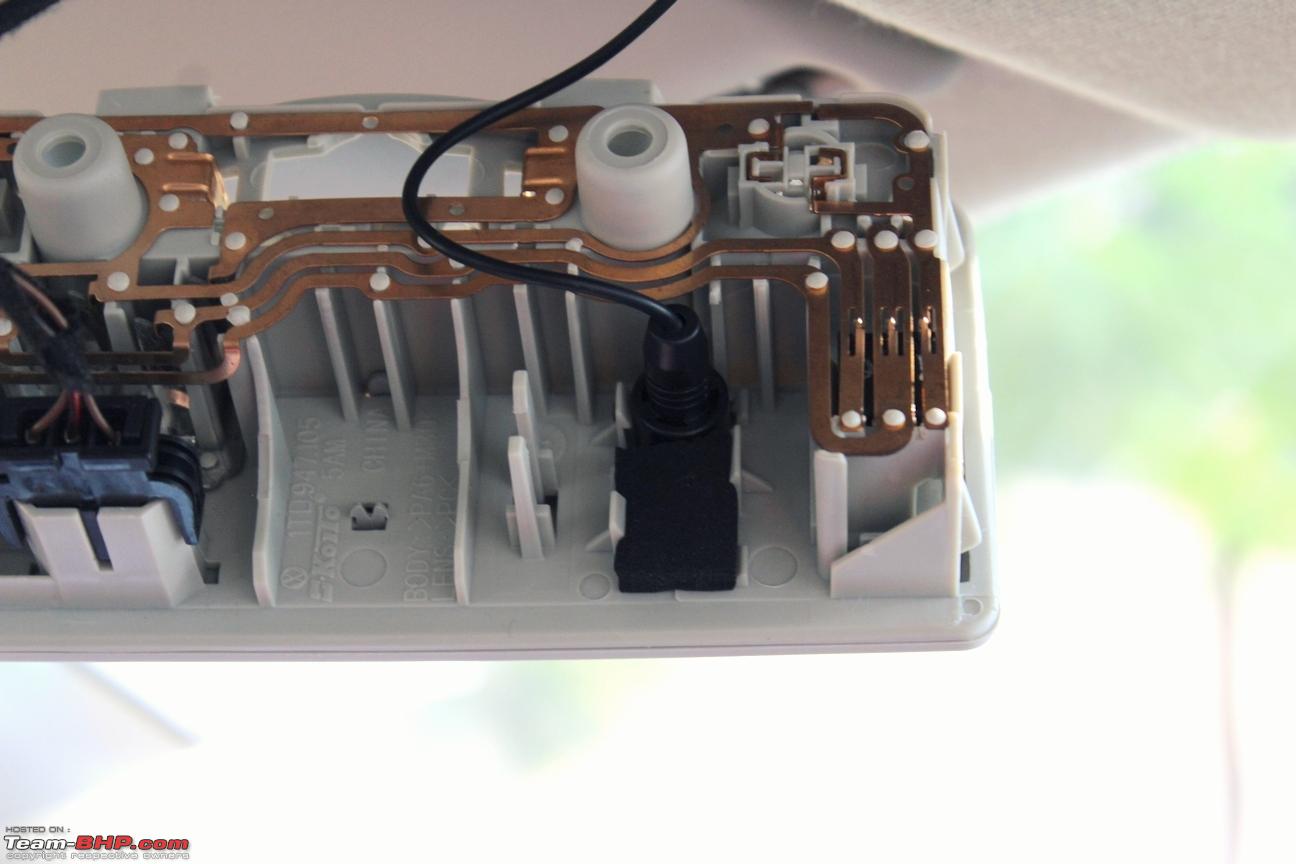
1. Using the card, pry open the diffuser lens from the stock cabin light:


2. Using the Torx head screw driver, unscrew the unit from the ceiling. There are 2 screws:
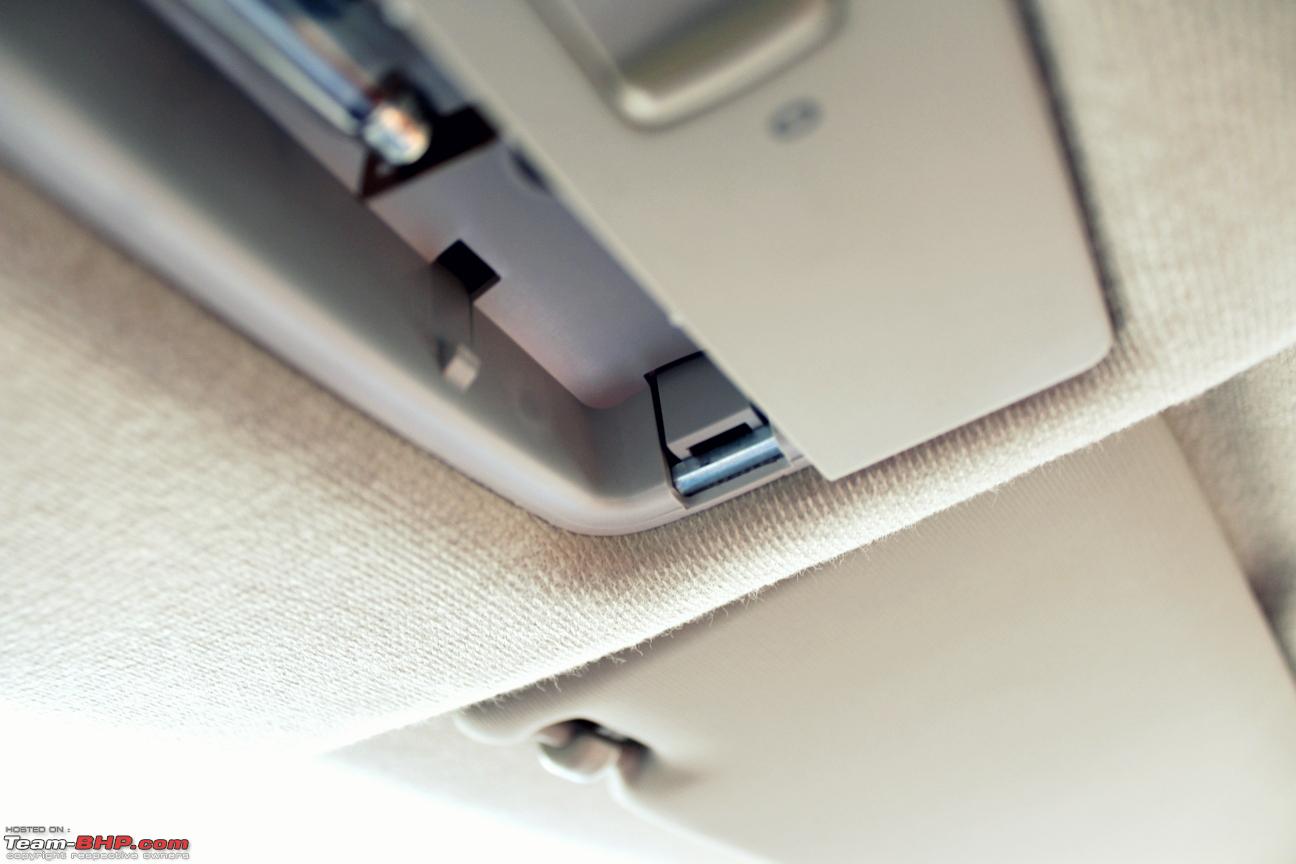
3. Release the tabs on either side of the light:

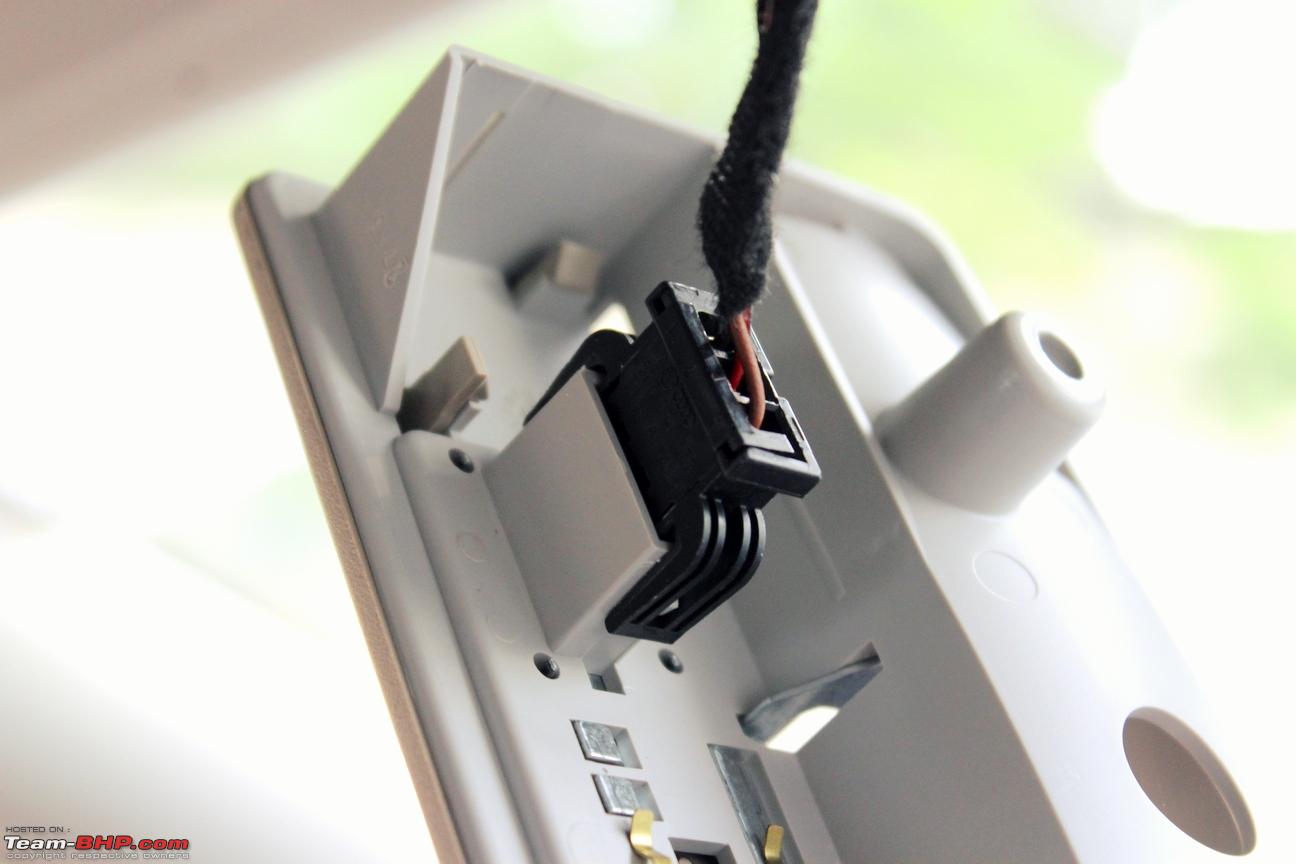
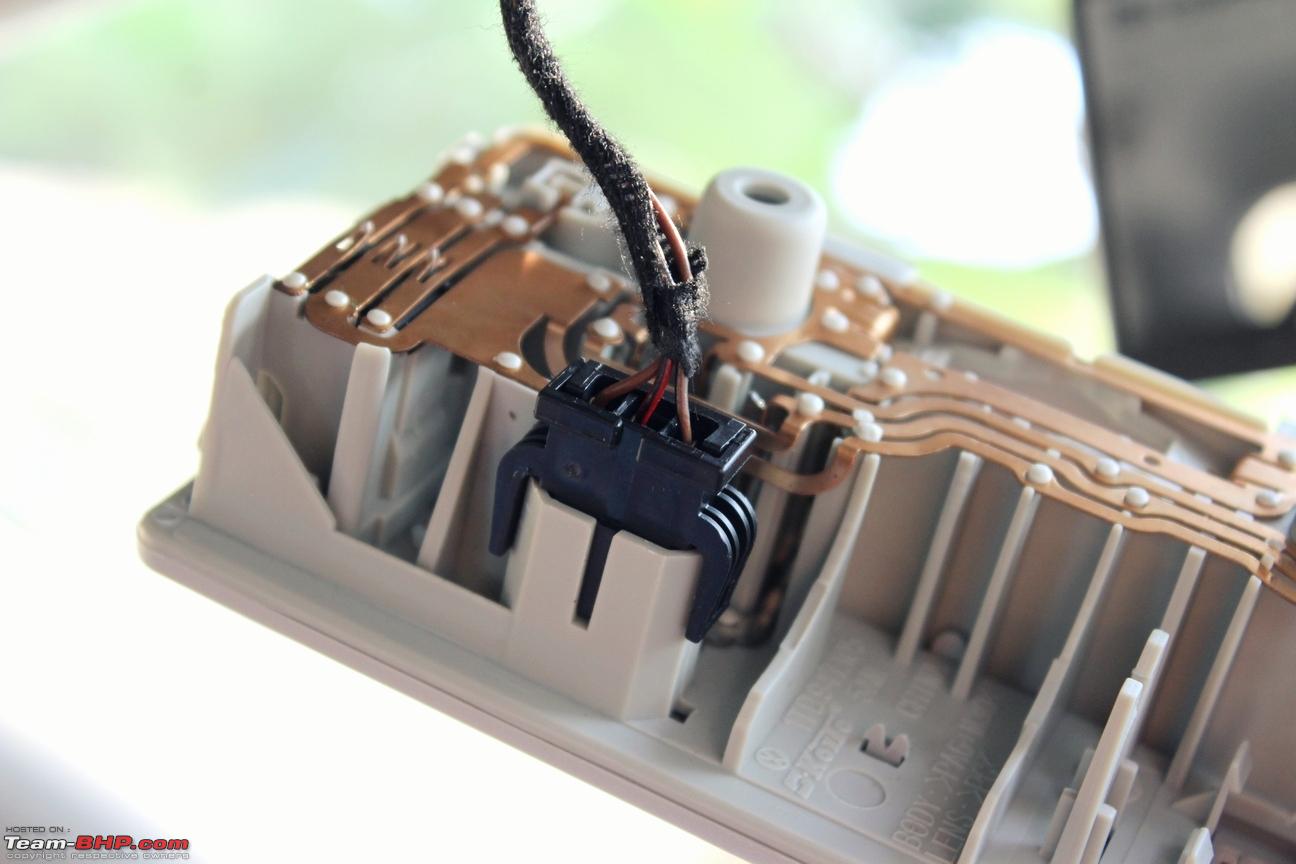
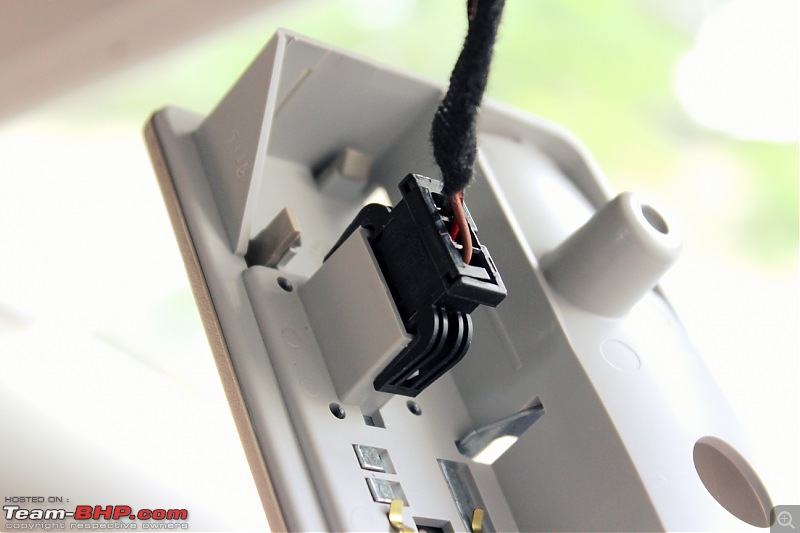
4. Disconnect the harness from the unit by pulling the connector off:
5.
Optional: If there is a mic harness from the HU, place it in the slot of the new cabin light:

The OEM BT mic harness should be a perfect fit for this slot. For the rest, secure it using the PU piece.
6. Plug the connector to the new cabin light:

7. Pry open the diffuser lens, secure the cabin light in place and screw the unit firmly:

8. Replace the diffuser lens.
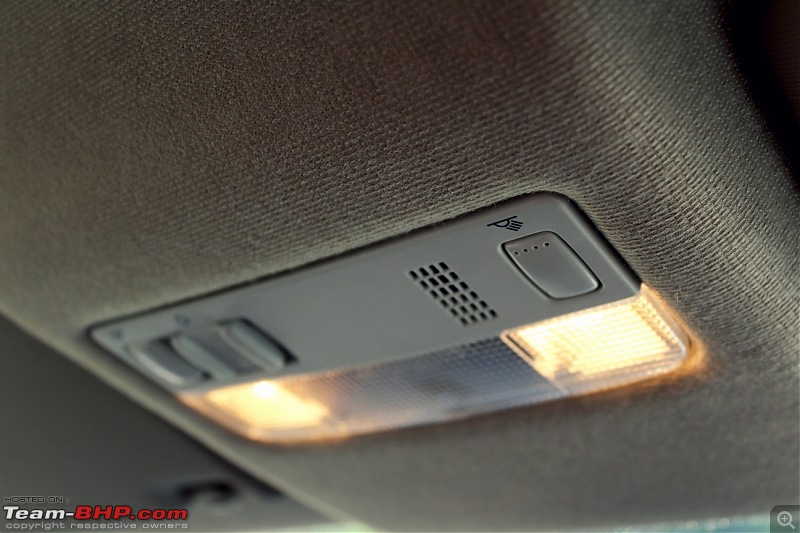
Were done! Test the results by switching on/off each map-reading light and opening/closing the door.


Replacing the bulbs with some CANBUS error-free LEDs would brighten up the cabin as well!
Part No. 3B0 947 105C Y20
Source: AliExpress
Price: 35 USD (Rs. 2260)
Customs duties paid: Nil
Courier: DPEX (proper tracking is available)
Transit time: 6 days
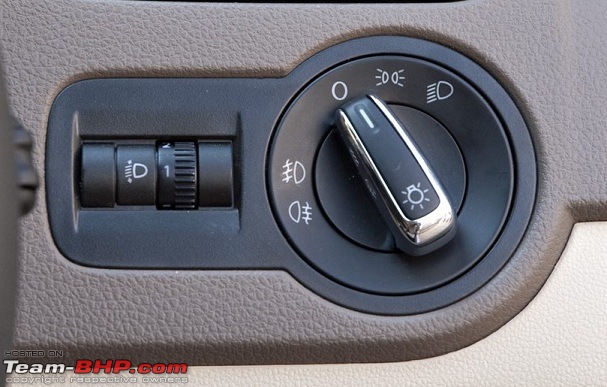
DIY #2: Swapping headlight switch:
This is another simple, inexpensive DIY and doesn't require any tools. Adds a bit of bling to the interiors with the chrome garnished knob. :p
Parts Required:
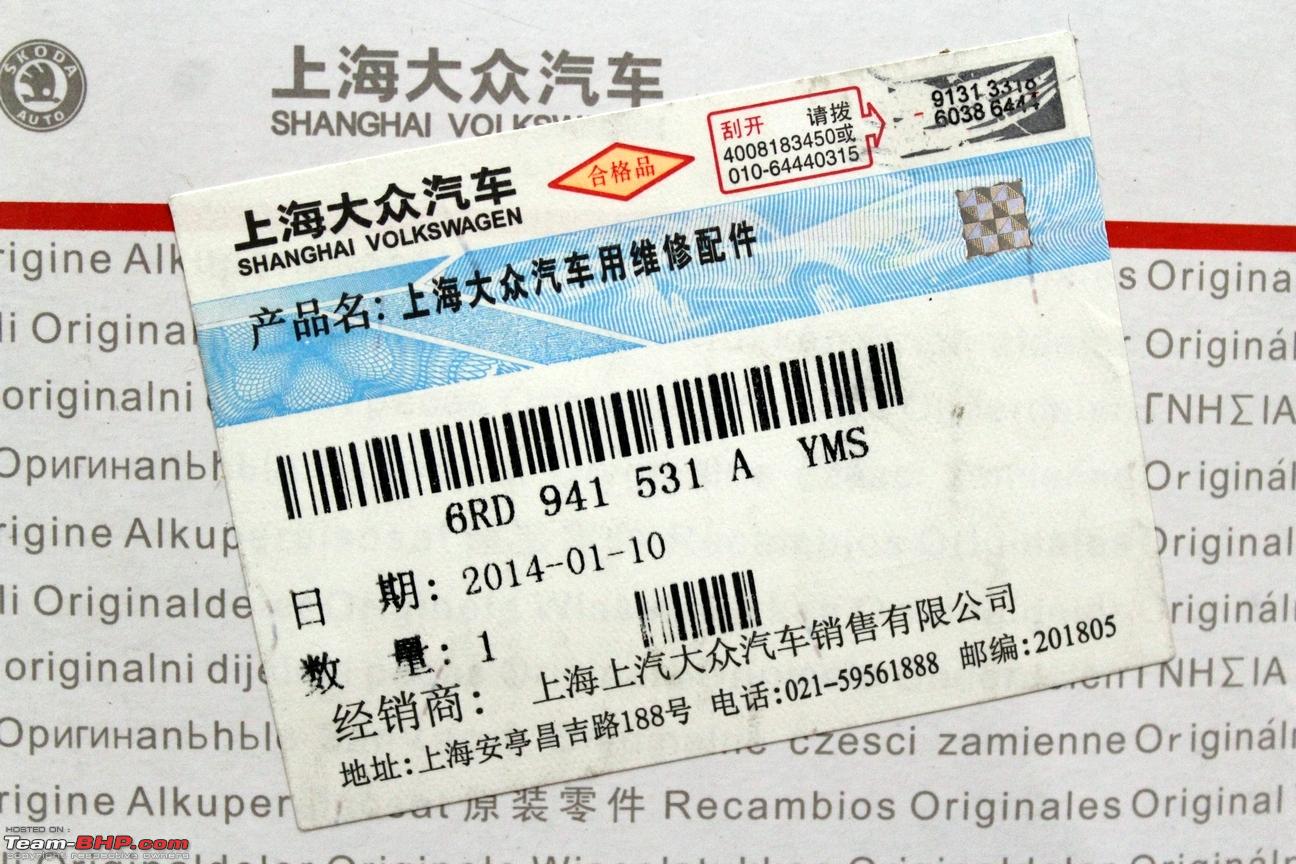
1. Headlight Switch -
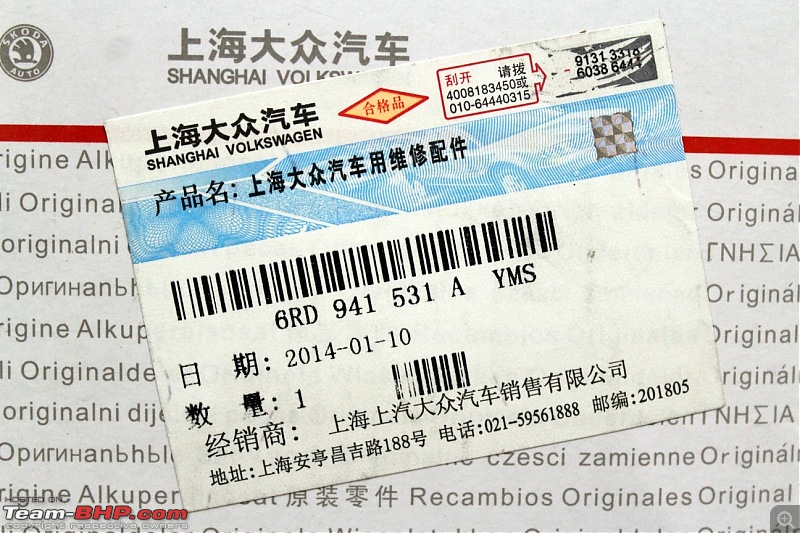
6RD 941 531A YMS
Here are the shots of the unit and the packaging it arrived in:


 Procedure:
It is pretty easy to take out the headlight switch on the VAG cars and the procedure applies for almost all the cars right from the Polo, Rapid to the Passat and Superb. I am sure quite a few of you may know this already but for those who don’t here goes a quick rundown.
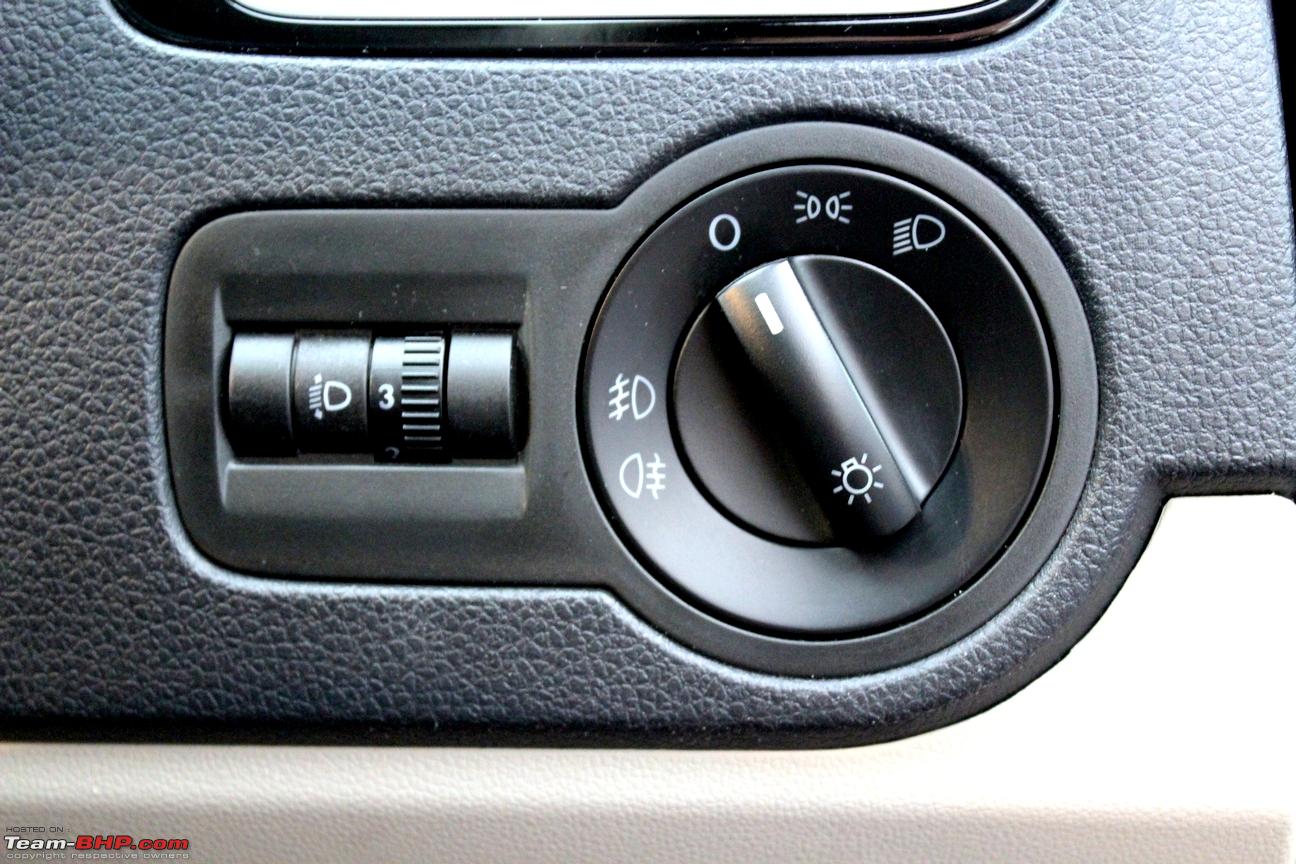
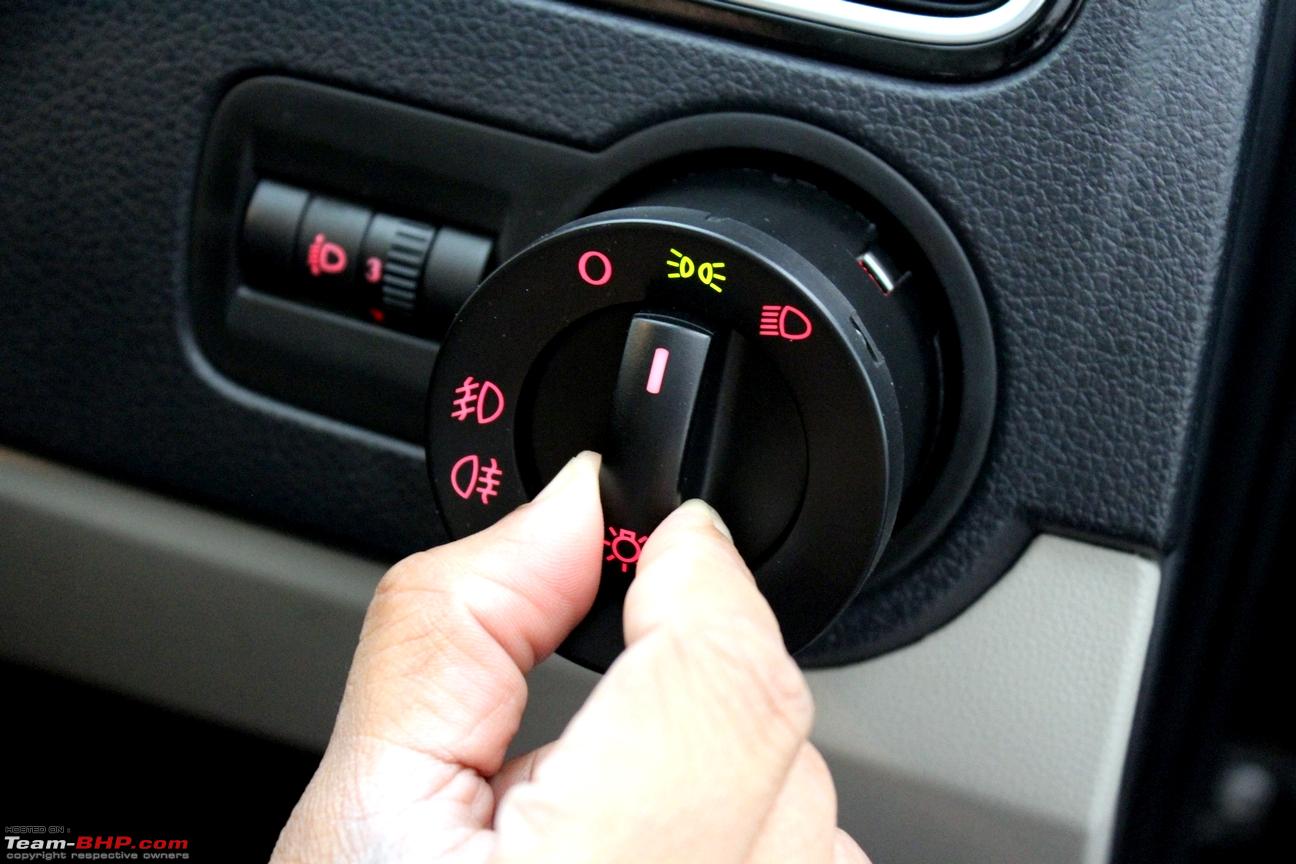
1. Turn the knob to position ‘O’ i.e. off:

2. Now, push the knob inward at position ‘O’ and turn it towards the next position i.e. the parking lights symbol:
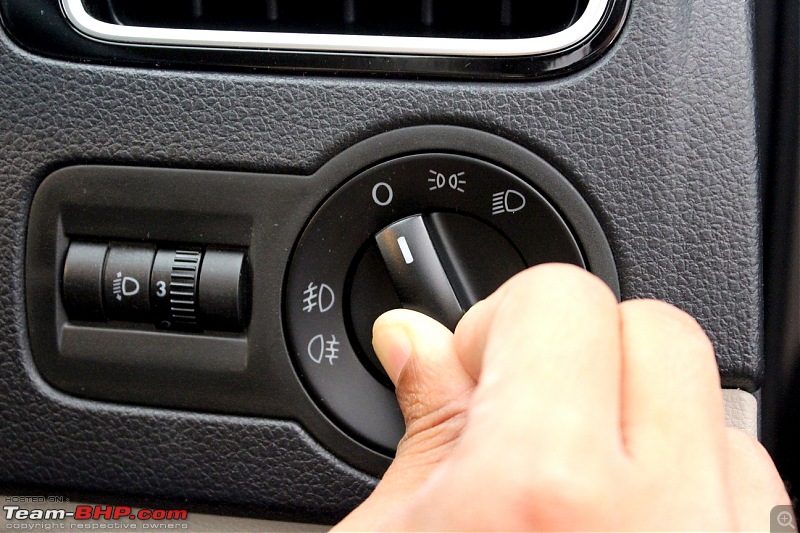

3. Now hold the knob and pull the whole unit off the enclosure:

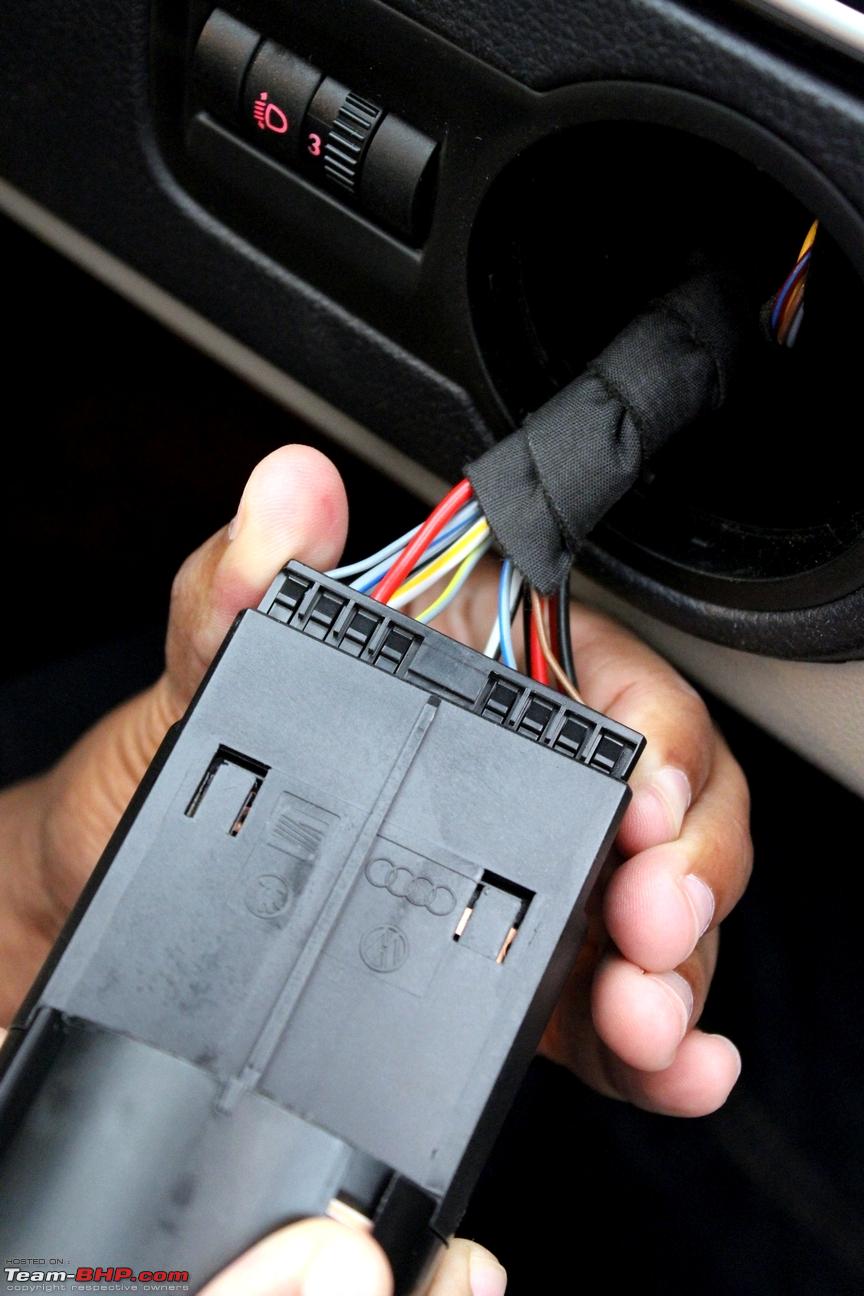
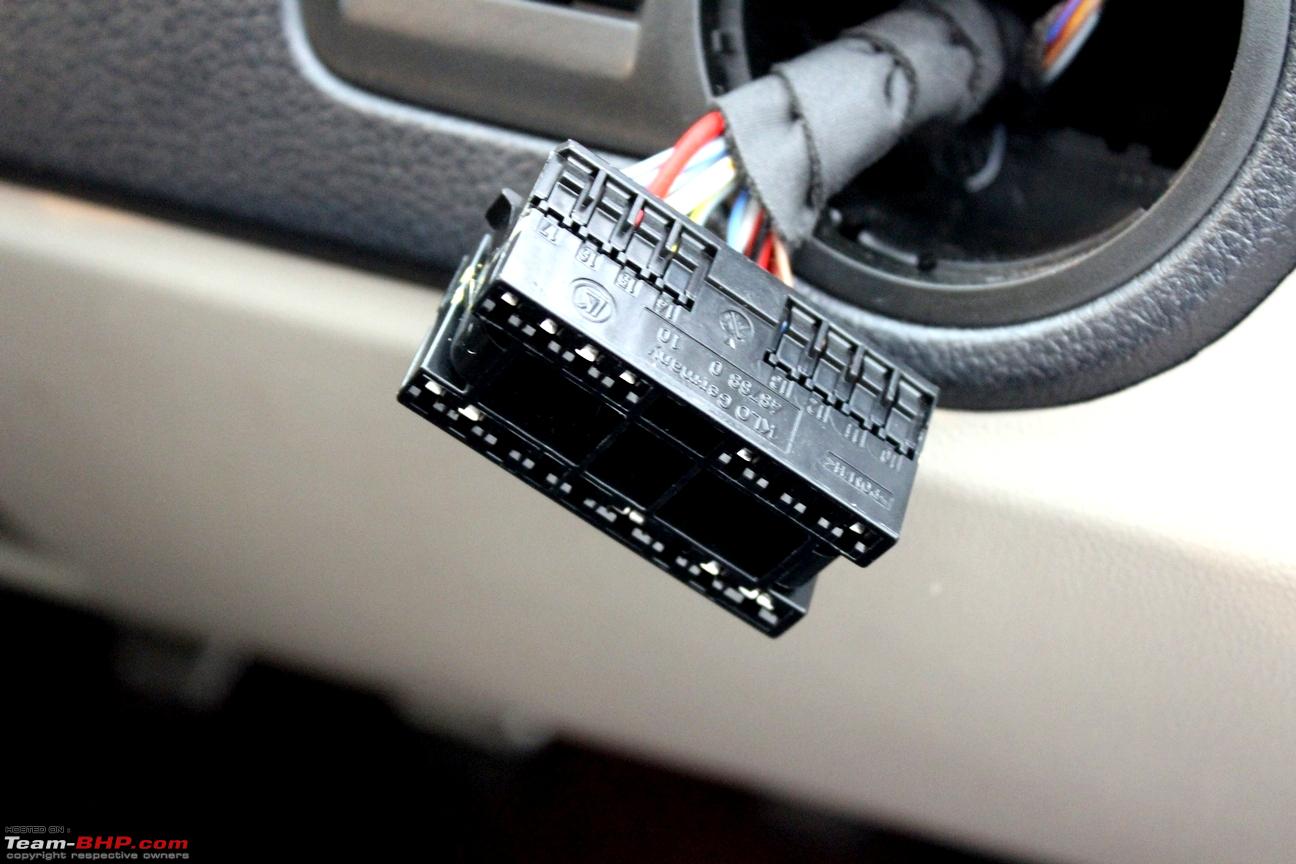
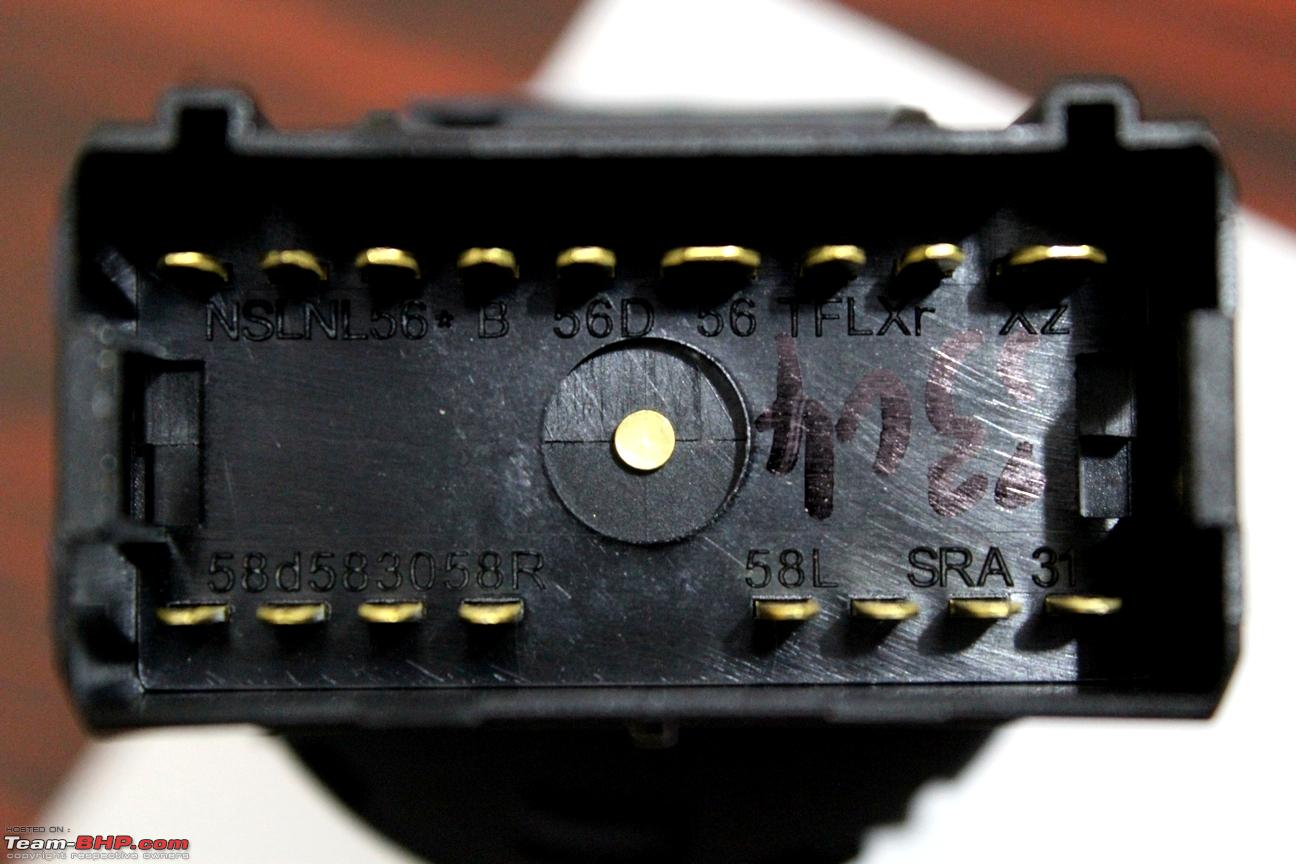
4. Disconnect the harness from the rear of the unit by pulling the connector:

The connector:

The Octavia, Jetta, Passat and the Superb which have the 'Auto' headlamps have a different smaller connector.
5. Plug the connector to the new headlight switch, replace the switch into the socket and it should lock with the enclosure.
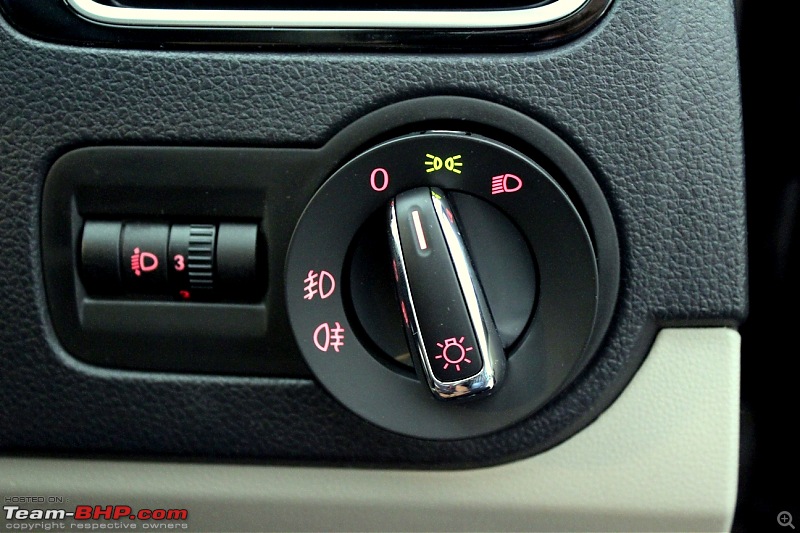

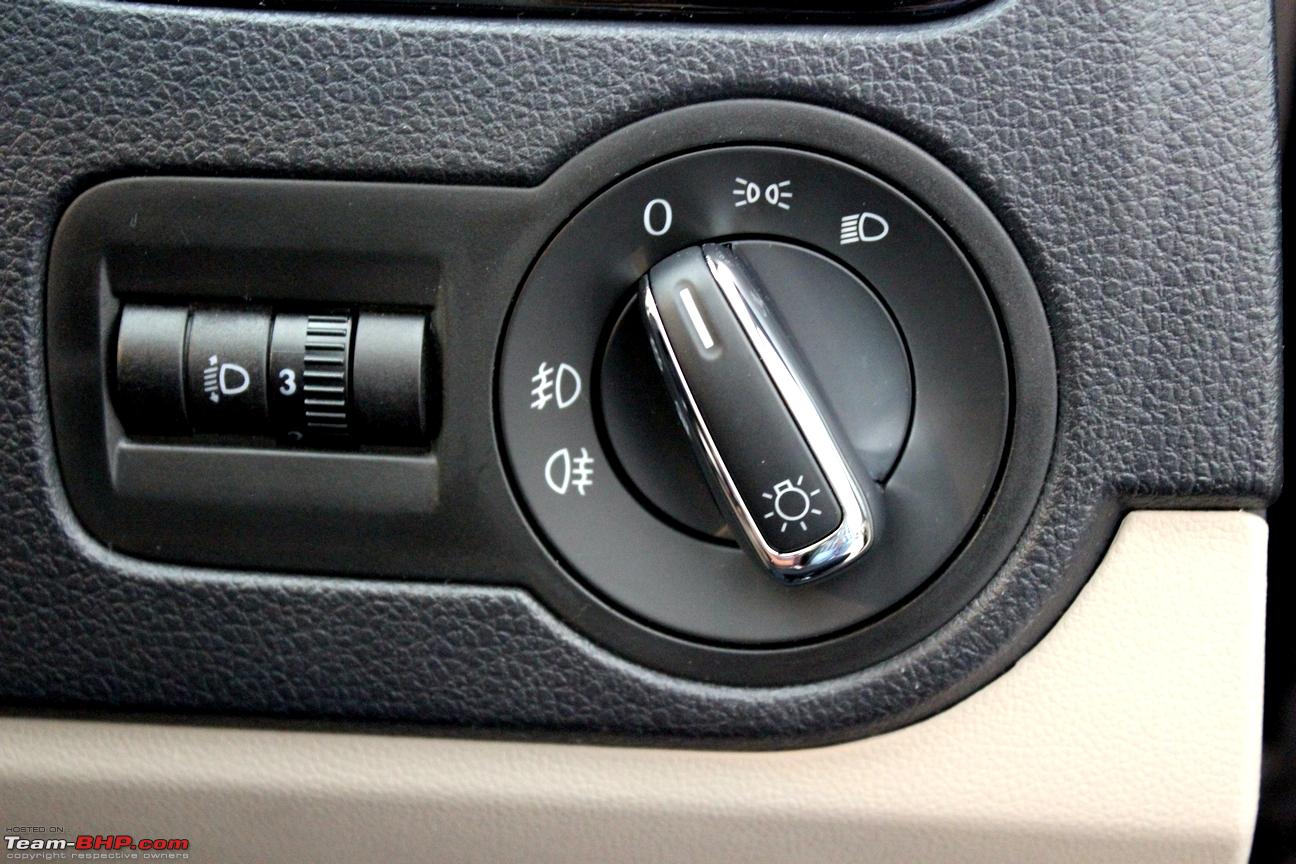
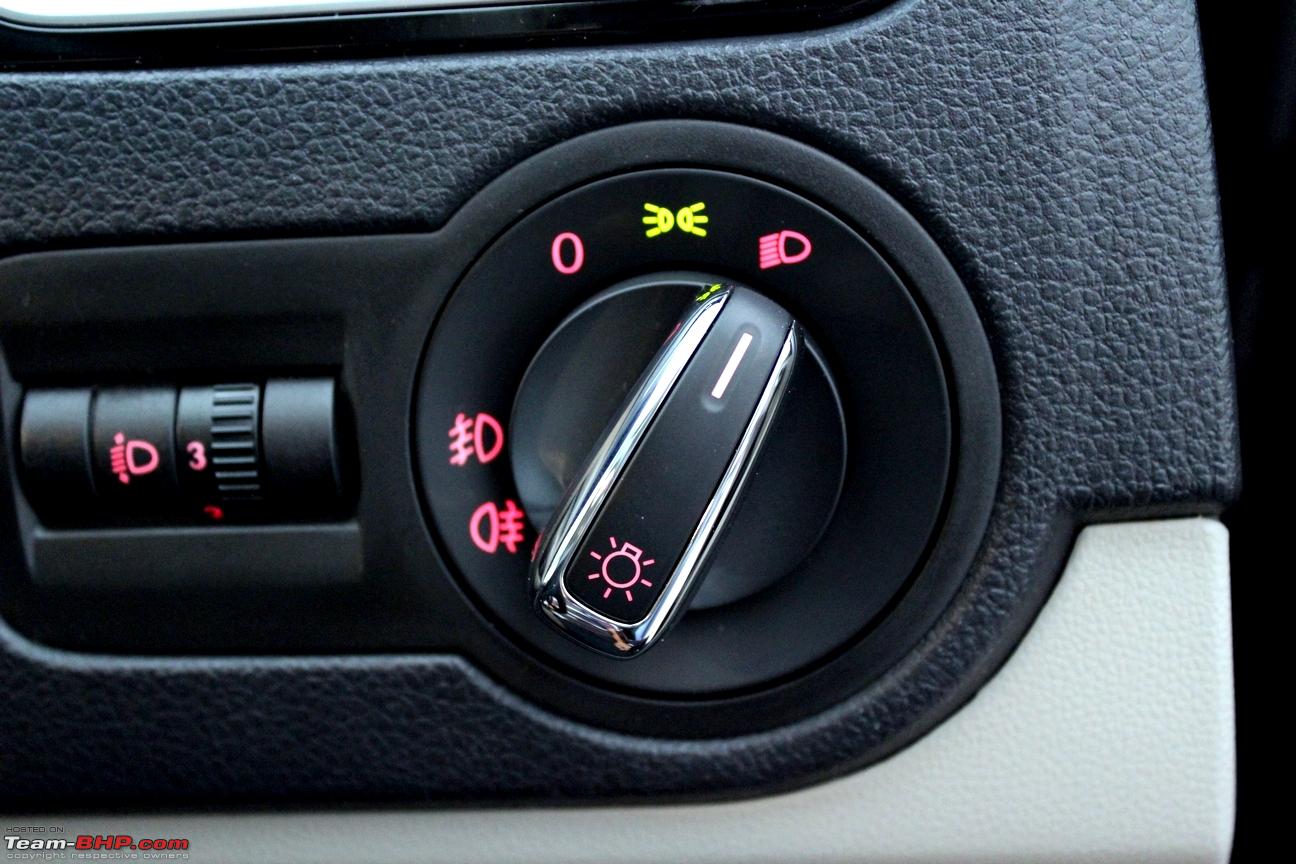
We are done! Looks much better than the stock one doesn’t it? :)

The shot of the connectors on the back of the switches:
Stock:
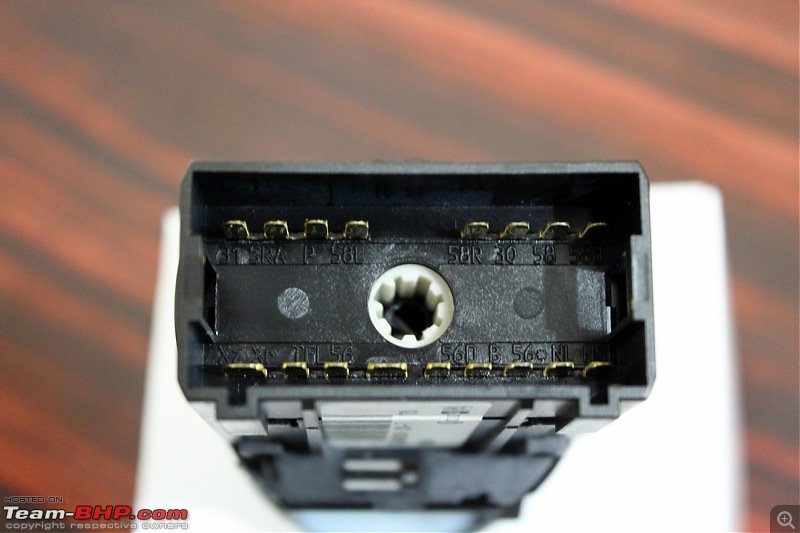
Chrome:

The same switch can be seen on the Skoda Rapid as well:
 (Image courtesy: Team BHP Review)
PS: The Vento has a brushed Aluminium trim on the knob instead of the chrome. Out of curiosity, I asked the local VW Service Center for the price of the headlight switch and the representative replied, “
Rs. 7700 Sir”!
Part No. 6RD 941 531A YMS
Source: AliExpress
Price: 25 USD (Rs. 1615)
Customs duties paid: Nil
Courier: DPEX
Transit time: 6 days
DIY #3: Installing footwell lights:
A footwell light aids in the ambient lighting in the car’s footwell regions. Some cars come with the footwell lights pre-installed whereas some do not.
Now, there are 2 ways to wire up the footwell lights in the Indian spec'd Polo from whatever homework I’ve done so far:
1. The hard way - through the BCM (Body Control Module) by stripping 2 existing wires from the 73-pin cable harness, soldering the 2 wires of the footwell light harness to cables 4 and 65 (
VW Polo 6R_BCM Connector Assignments.pdf) and enabling footwell lights through VCDS. Messing up with the stock cables will
most definitely void the warranty and VW will make an issue out of this modification later on during warranty claims if they come to know of this. Besides, light intensity of the footwell lights can only be controlled if the instrument cluster has the larger and better MFD available in the Euro-spec Polo.
2. The easy way - by tapping a connection from the interior dome light. The dome light turns on when the car is unlocked using the key-fob and fades off when the key is turned or the car is locked. The fading or delay happens because of the dimming relay.
The cabin light is a perfect tapping point for the footwell lights. Since I have soldered a cable to the aftermarket dome light’s copper strips, no factory cables were spliced and taped. The entire procedure can be reversed back to the stock state and the stock dome light can be replaced in case of any issues/warranty claims in the future.
Parts Required:
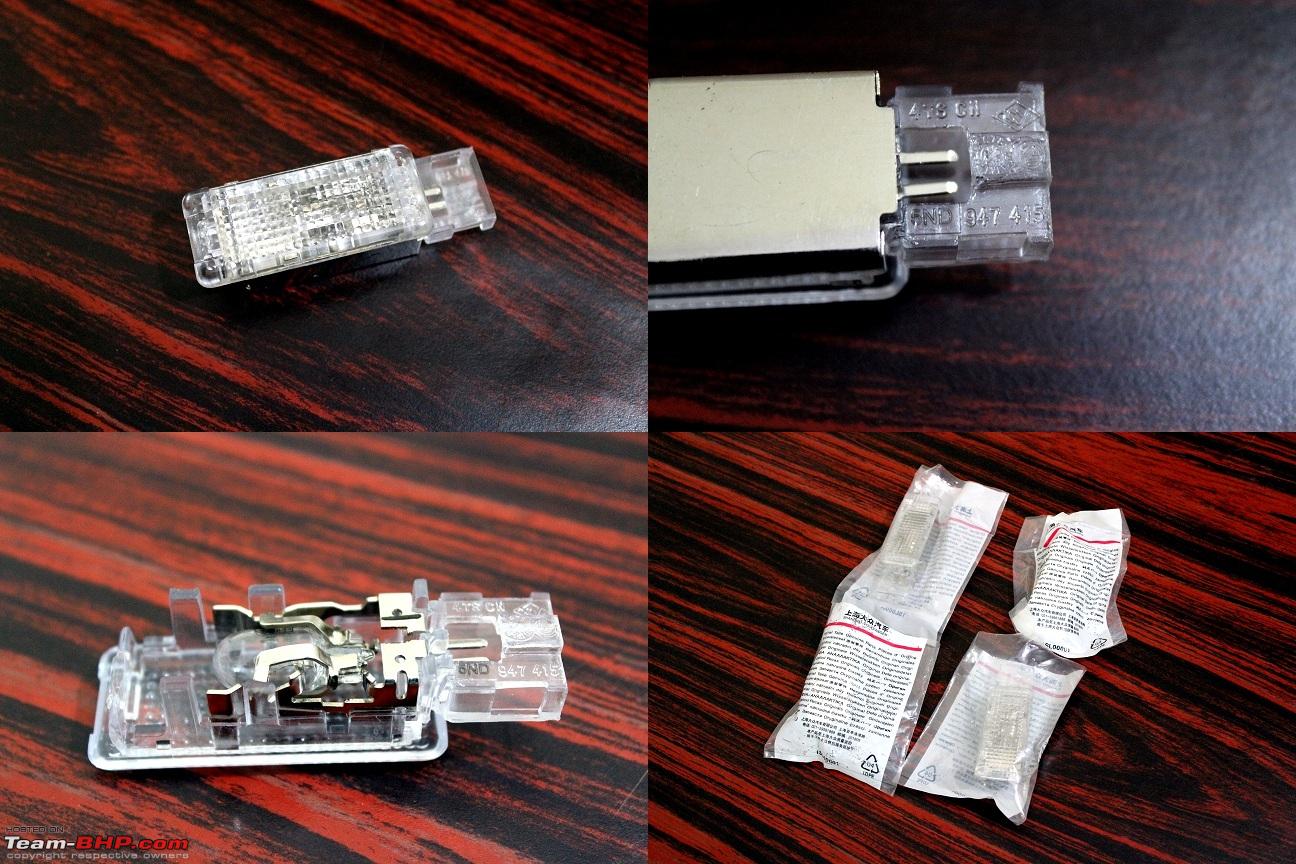
1. Footwell light:

Part number -
5ND 947 415. Qty - 4 nos., for lighting up each footwell.
2. Cable harness:

Qty - 1 no. The harness includes 4 connectors for the lights, a provision for the ground connector and one bare strip for the other lead.
3. 20 SWG cable:

Qty - 4 m. Available with your neighborhood electrical store. A pair of cables tapped from the dome light run through the driver side A-pillar and connects to the harness through a pair of luster terminals.
4. Luster terminal:

A small strip should suffice. These are also available at the local electrical shops. Took me sometime to figure out the technical name for this. Finally, Google helped me out! :)
5. W5W LEDs:
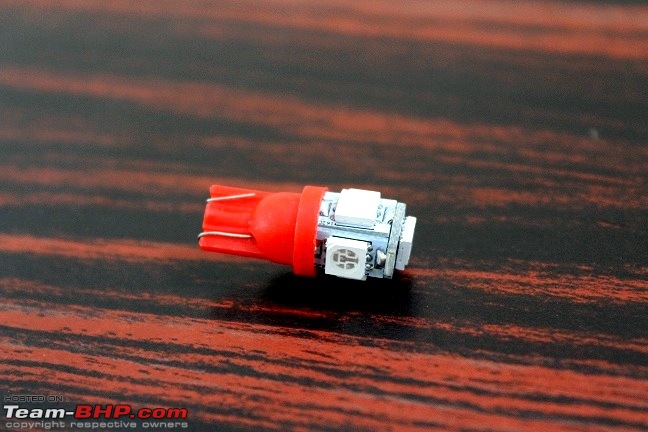
Qty - 4 nos. There are plenty of these available on eBay but please note that the cheaper imports from China are not CANBUS error free but this isn't a problem because 4 of these would consume close to 5W and the CANBUS wouldn't return any errors.
The W5W bulbs from the lamps were replaced by the LEDs (possibility of the fuse blowing up because each footwell light would consume 5W so 20W in total and the cabin light as well) and they were permanently soldered to the terminals. Soldered because the LEDs wouldn't go inside the terminals and would just pop-off.
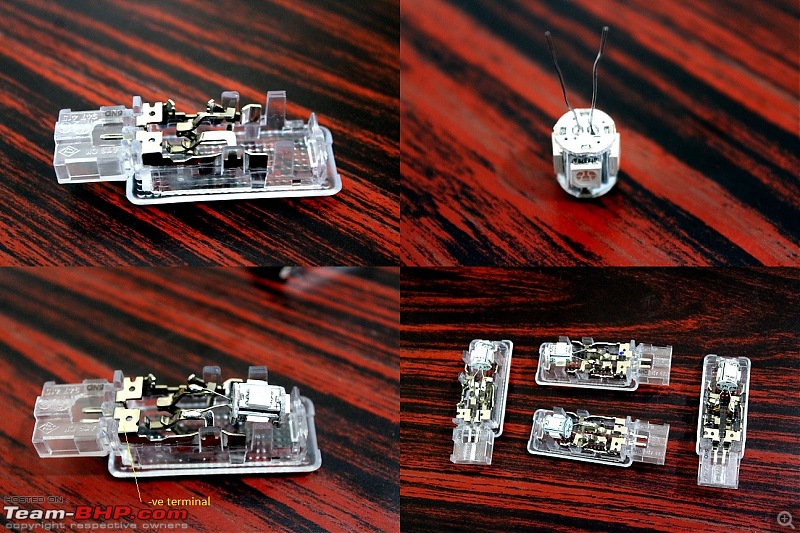
LEDs observe polarity and are usually marked as indicated in the image (top-right) above.
6. Double sided tape (3M VHB preferable).
7. Cable ties.
Tools Required:
1. Flat-tip screwdriver
2. Soldering iron
3. Solder
4. Flux
5. Prying tool
6. Hobby blade
7. Hand file
Layout:  Procedure:
1. Follow steps 1 to 3 from
DIY #1 posted above and remove the dome light.
2. Prepare the soldering iron. Using a hand file, file the bit of the iron and get rid of the old solder/dirt stuck to the tip. The tip should look bright copper in color with all the dirt removed:

Turn it on and leave it aside for 5-10 minutes.
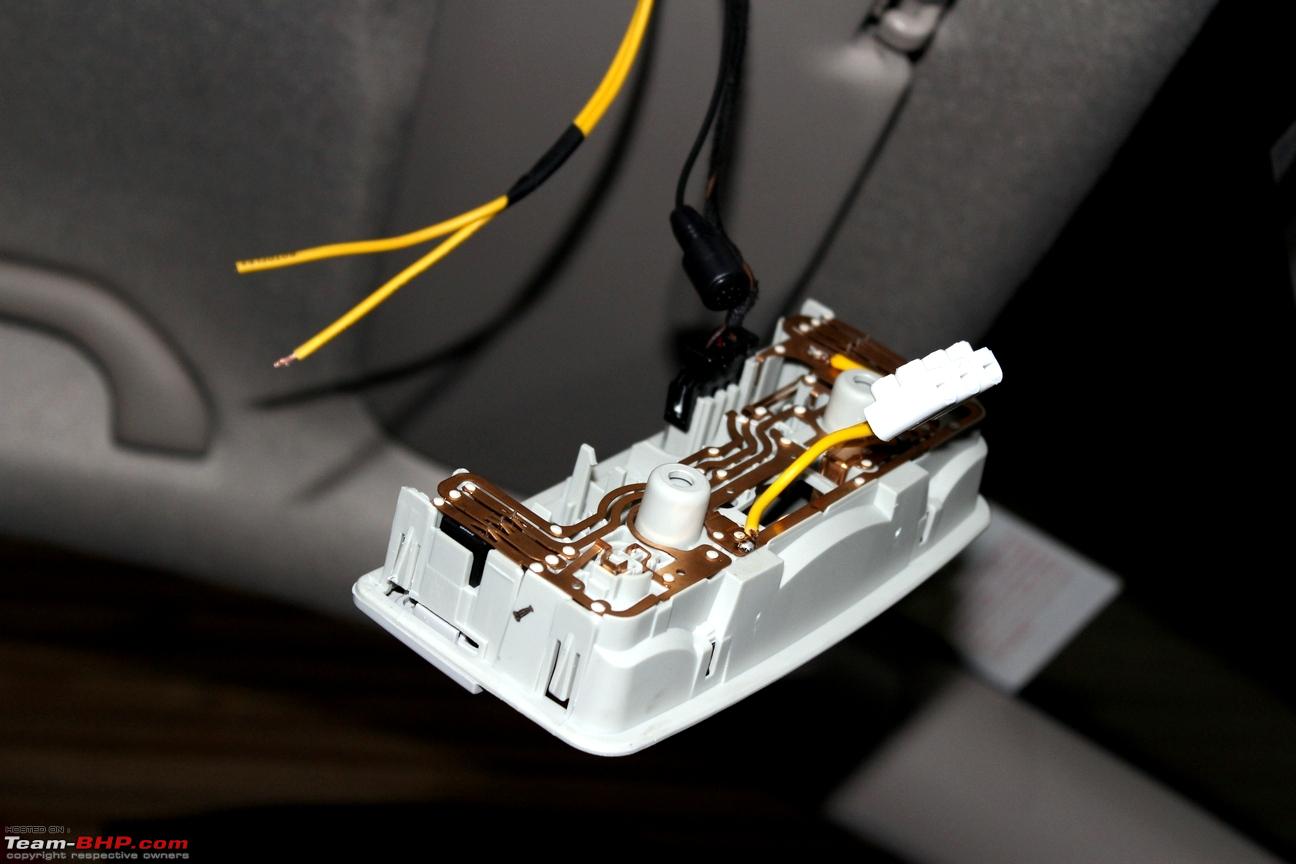
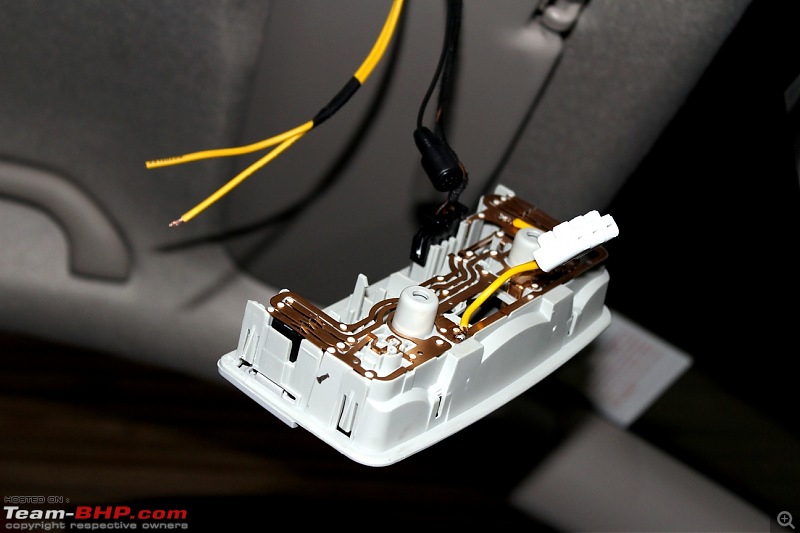
3. Using a hobby knife, scratch the copper leads of the cabin light at the locations indicated below:

4. Prepare the cables. Cut the 4 m cable into 4 parts - 2 parts of 10 cm each and 2 parts from the remaining length. Strip the ends, twist them, apply some flux and some solder on one end of the smaller cable.
5. Solder the 10 cm cables to the leads prepared in point no. 3 above and connect a luster terminal to the end.
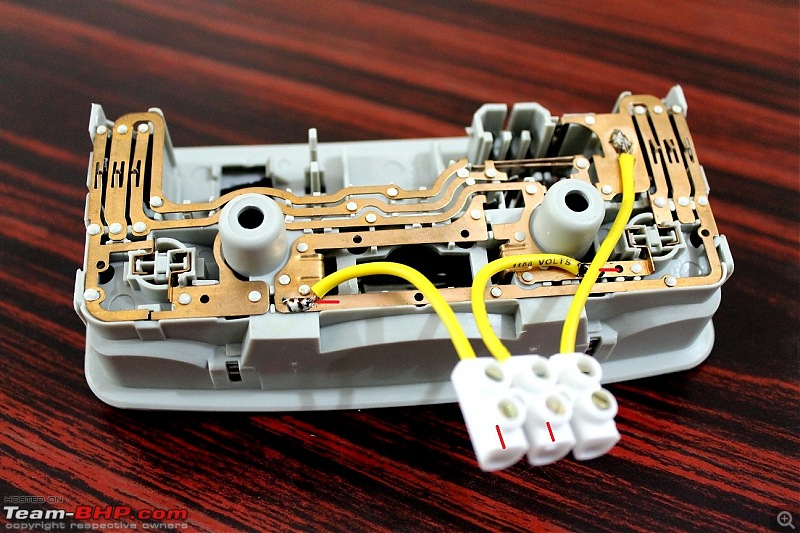
If you are wondering why I have soldered three cables here when the requirement is only two, the additional one on the top-right corner is for a later DIY which would come up shortly. The 2 yellow cables are to be connected to the terminals marked in red above.
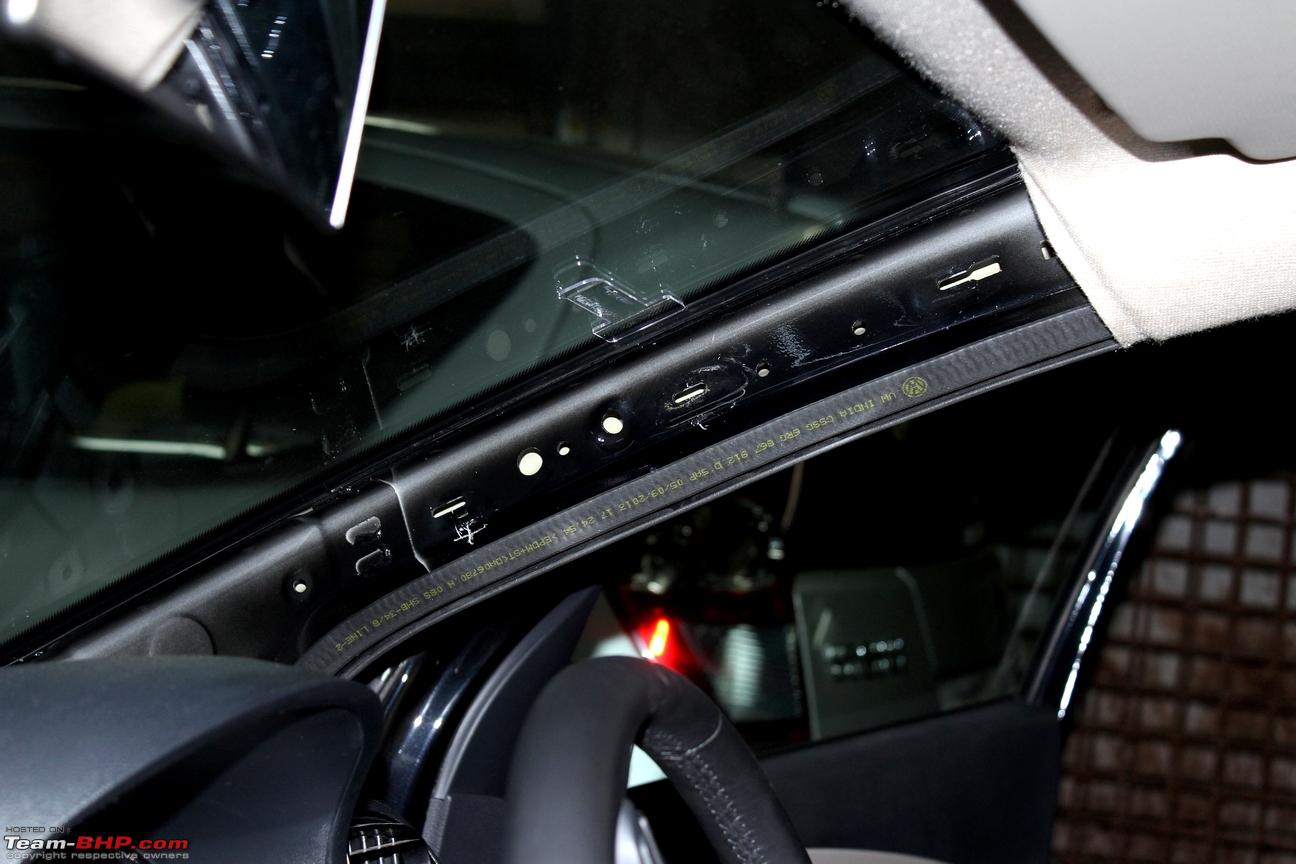
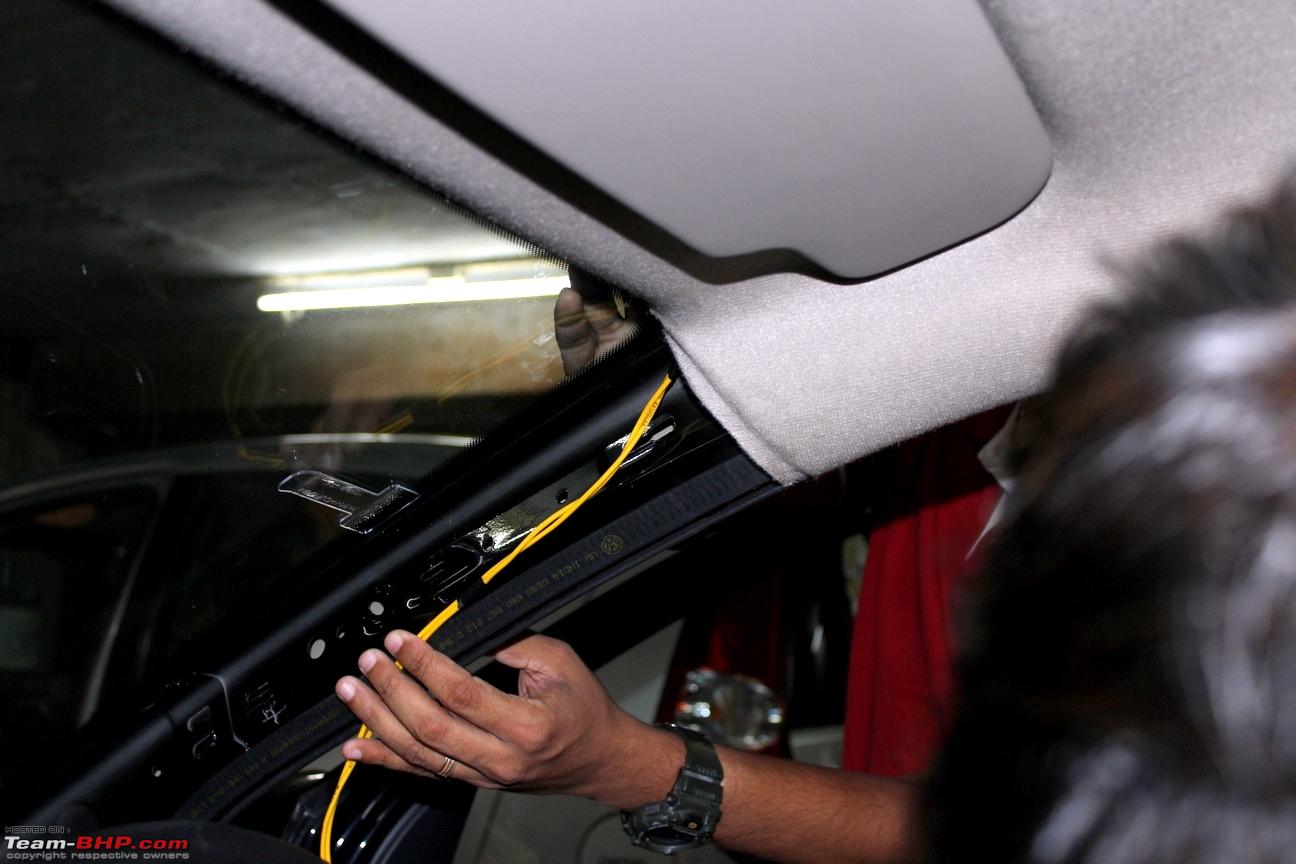
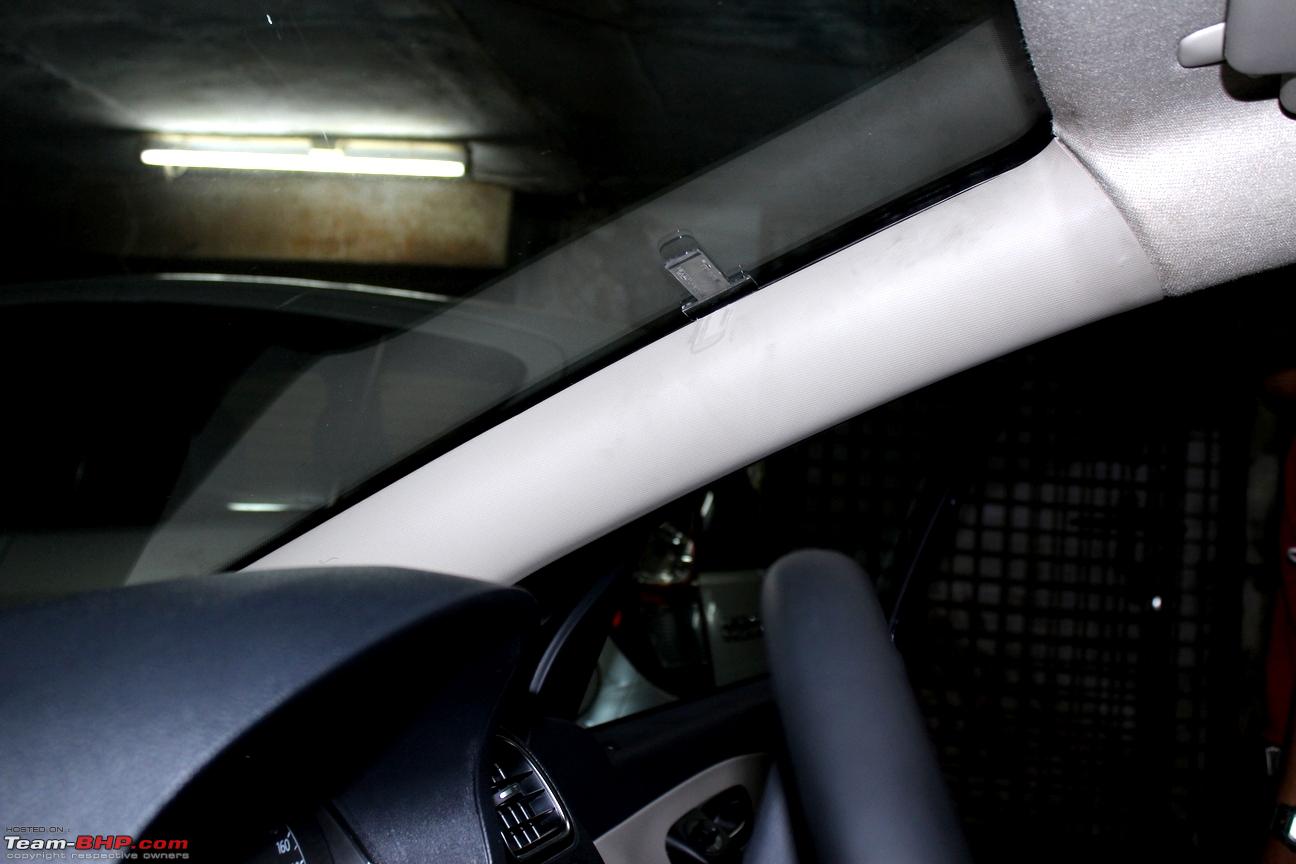
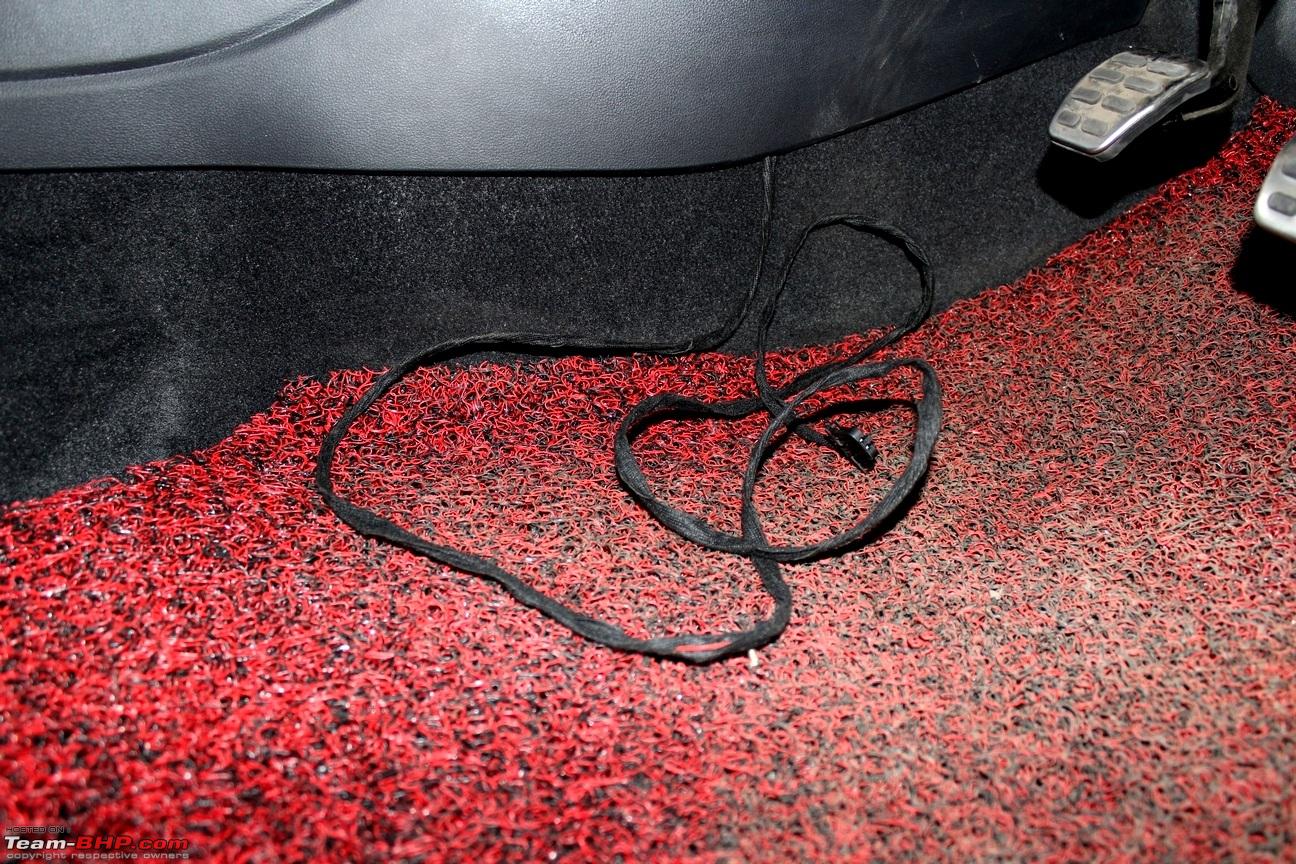
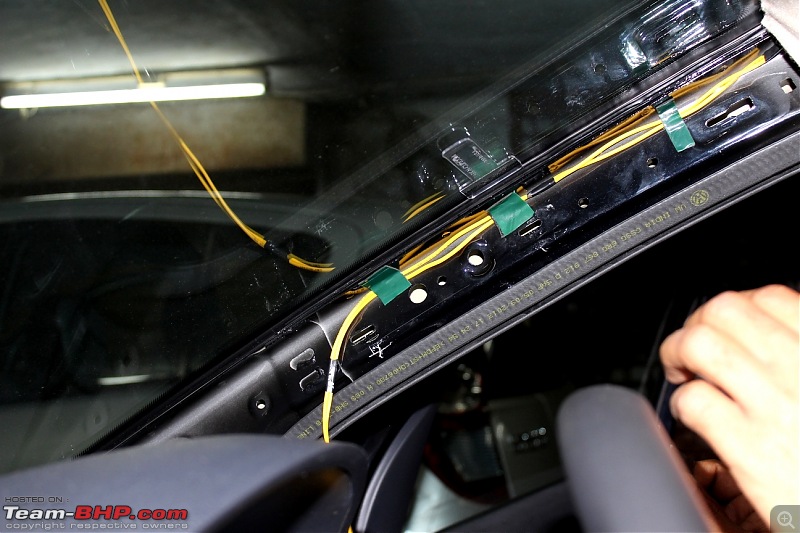
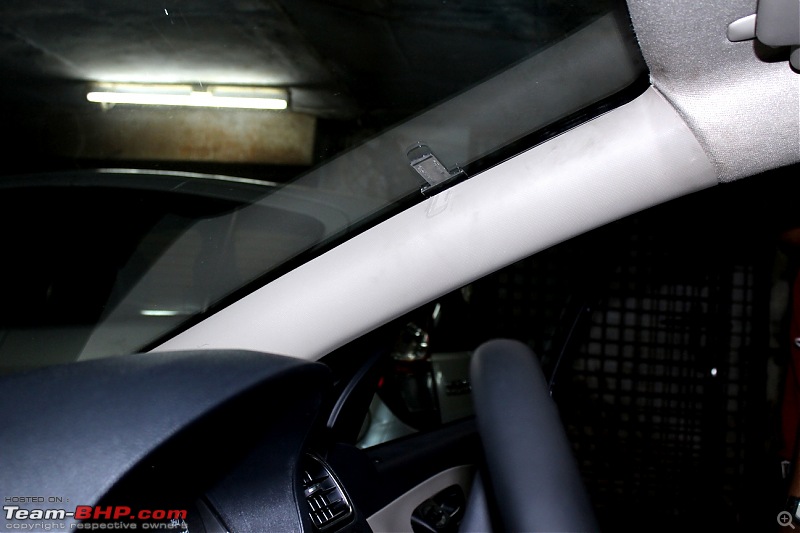
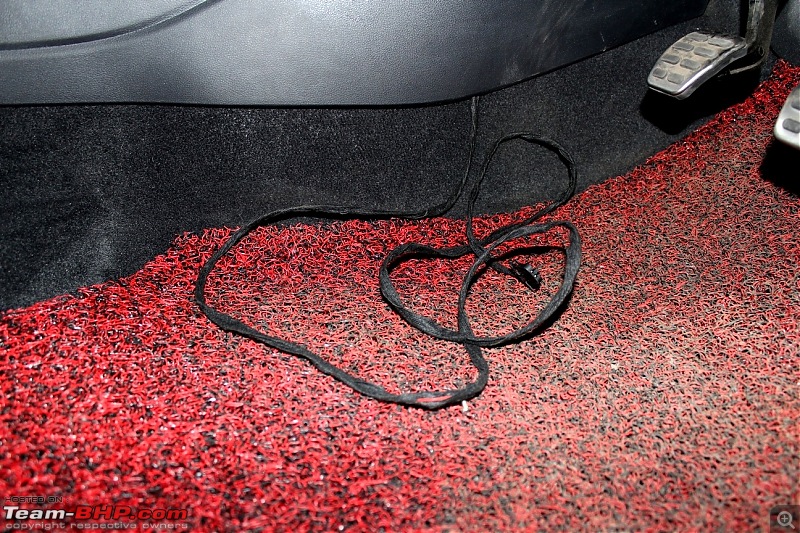
6. Pry open the A-pillar trim and run the 2 long cables from the dome light slot through the driver-side A-pillar to the area below the steering unit.

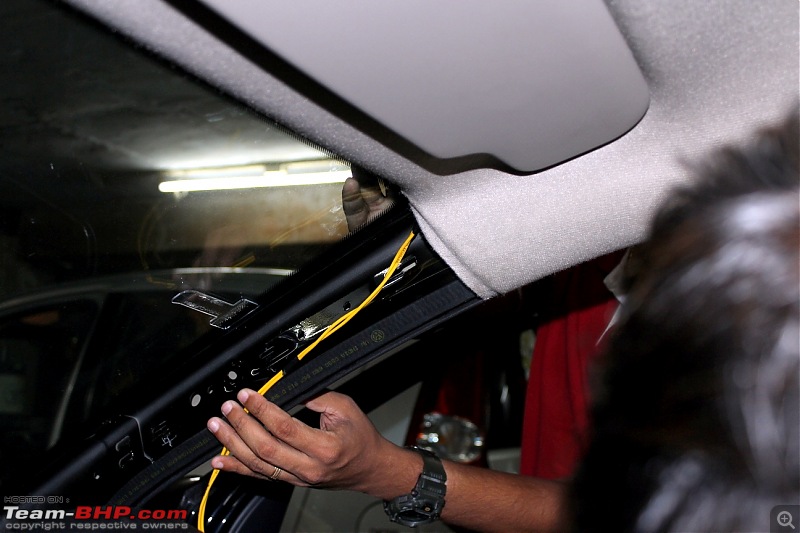
Stick the yellow cables to the A-pillar using the double-sided tape and replace the A-pillar trim:
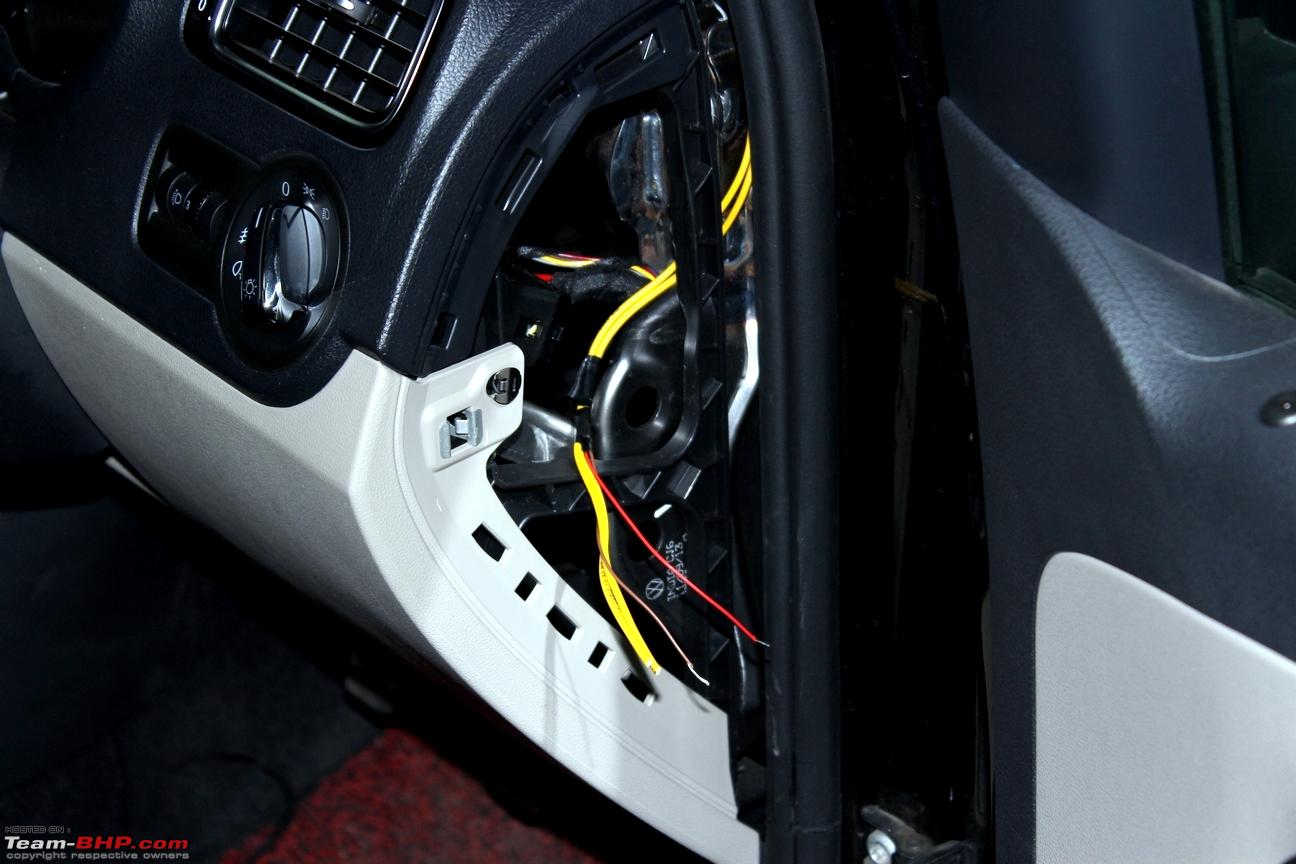
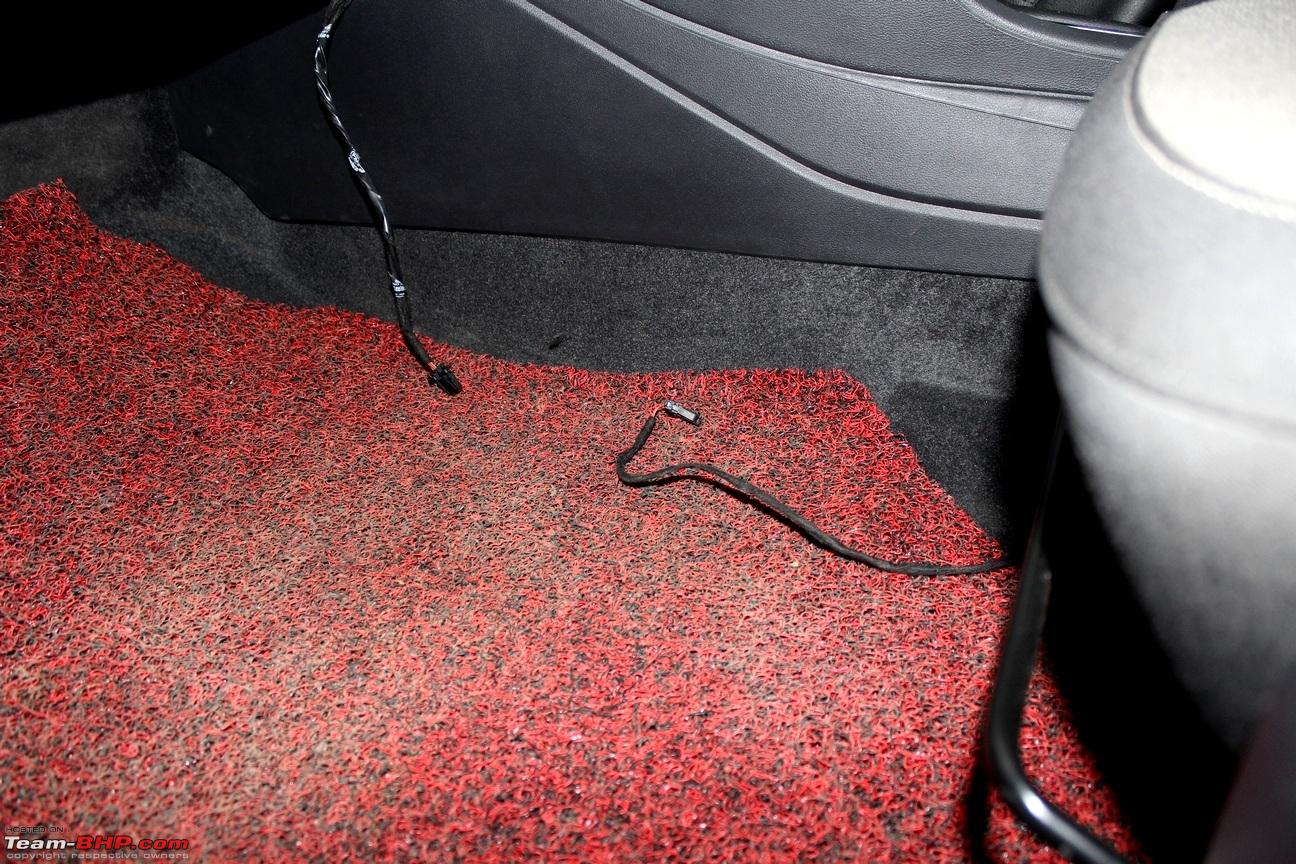
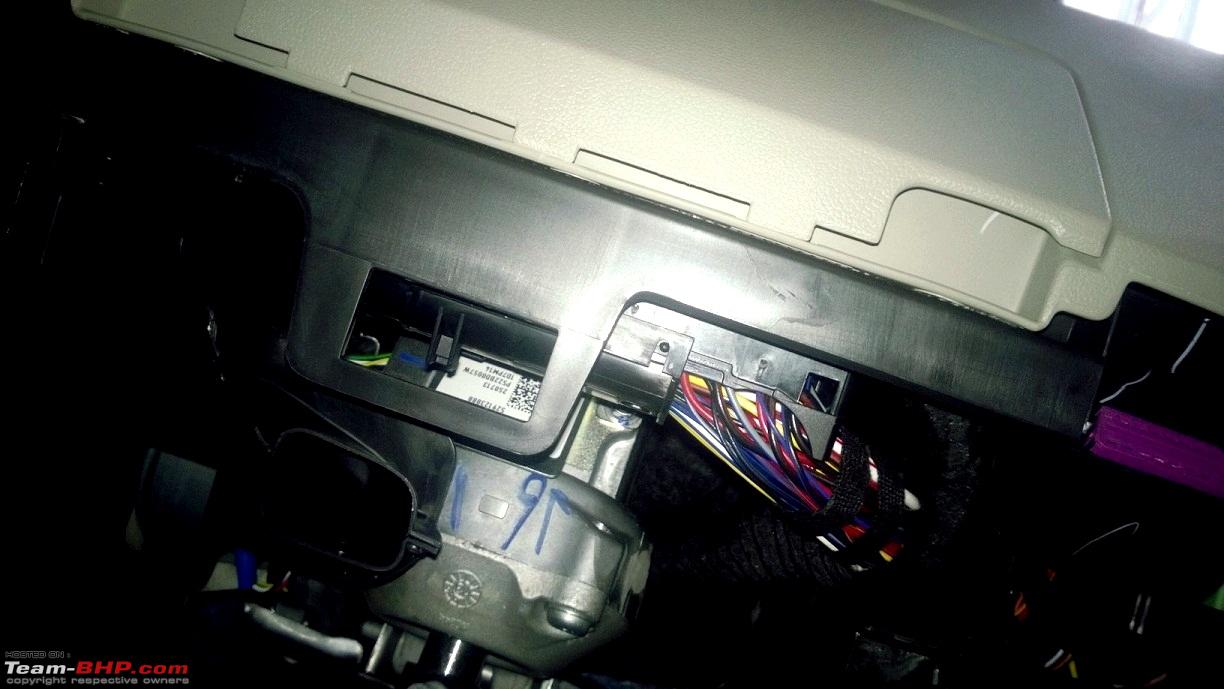
7. Pry open the flap in the dashboard towards the left of the steering unit and connect the leads of the footwell harness and the 2 nos. yellow cables to a luster terminal:


Tie the excess cables neatly using some insulation tape and tuck them in. Replace the plastic flap.
9. Route the harness towards the respective locations. To route the harness to the rear footwells, tuck them beneath the transmission tunnel flap:

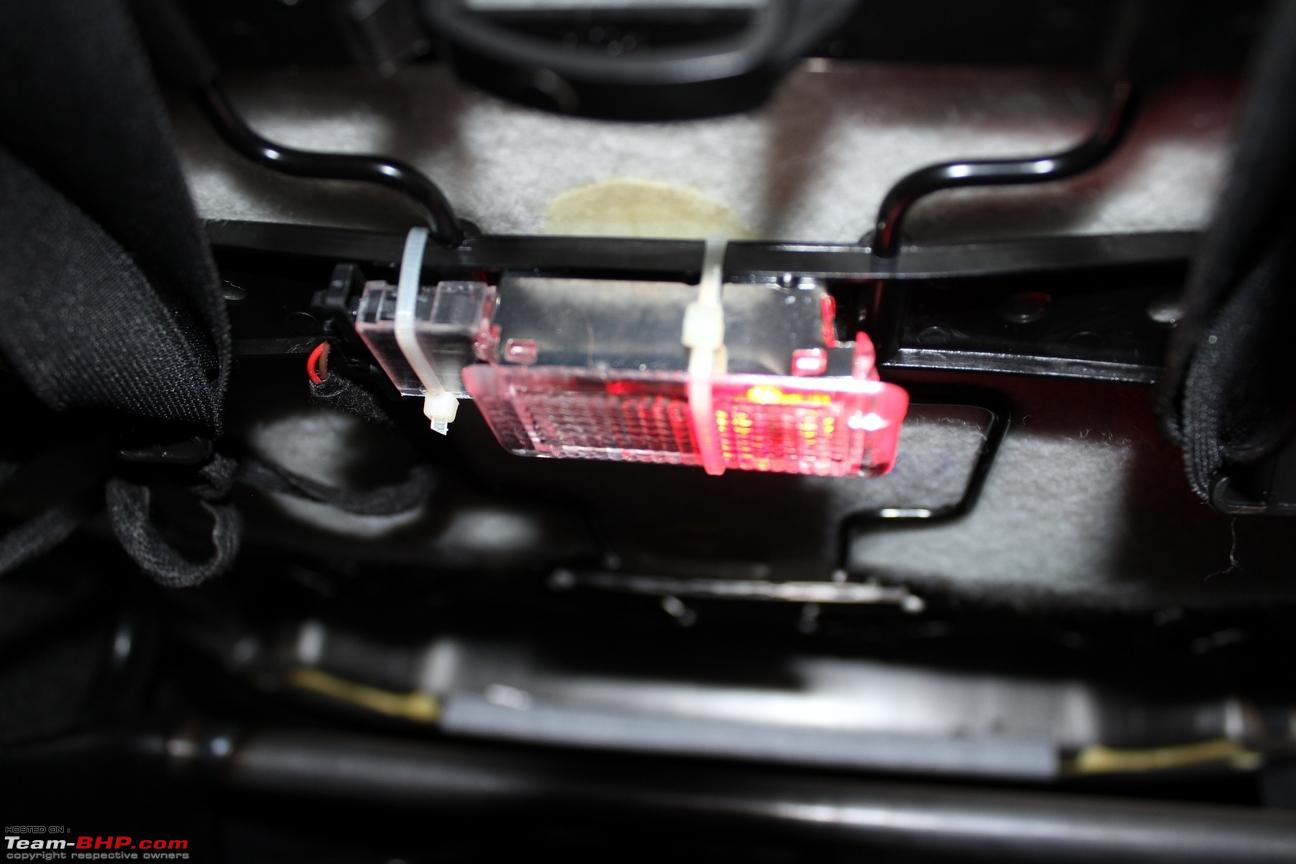
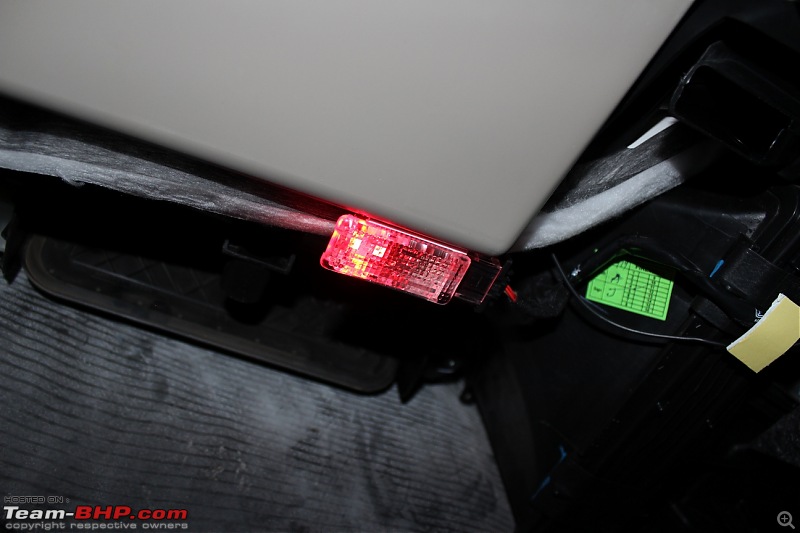
10. Connect the footwell lights to the connectors at the respective locations. The Indian spec'd Polo has only one slot for the footwell light which is for the driver side footwell:


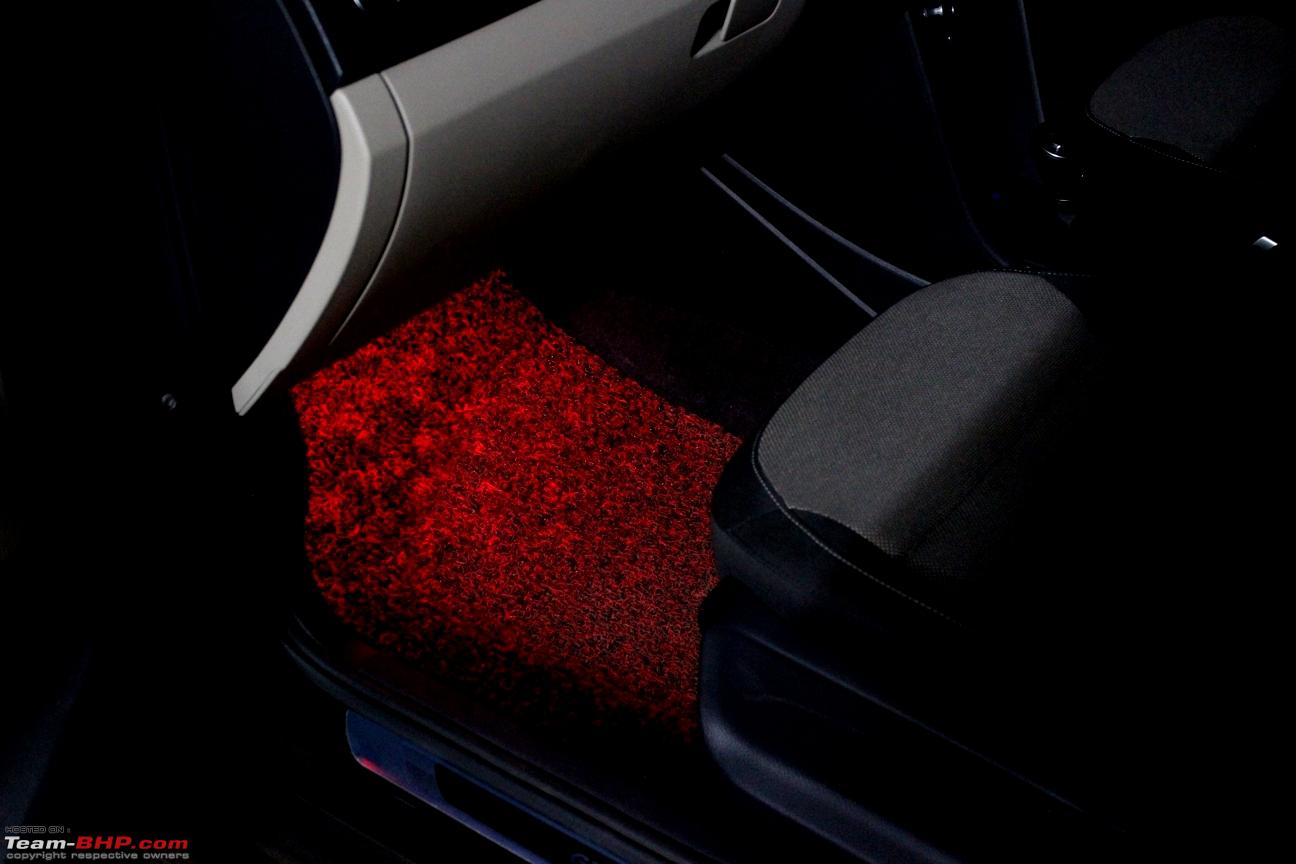
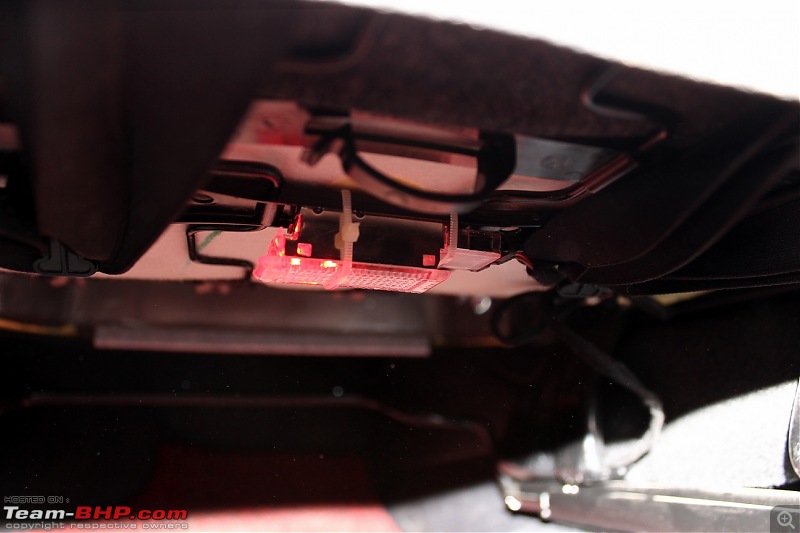
Co-driver side footwell:
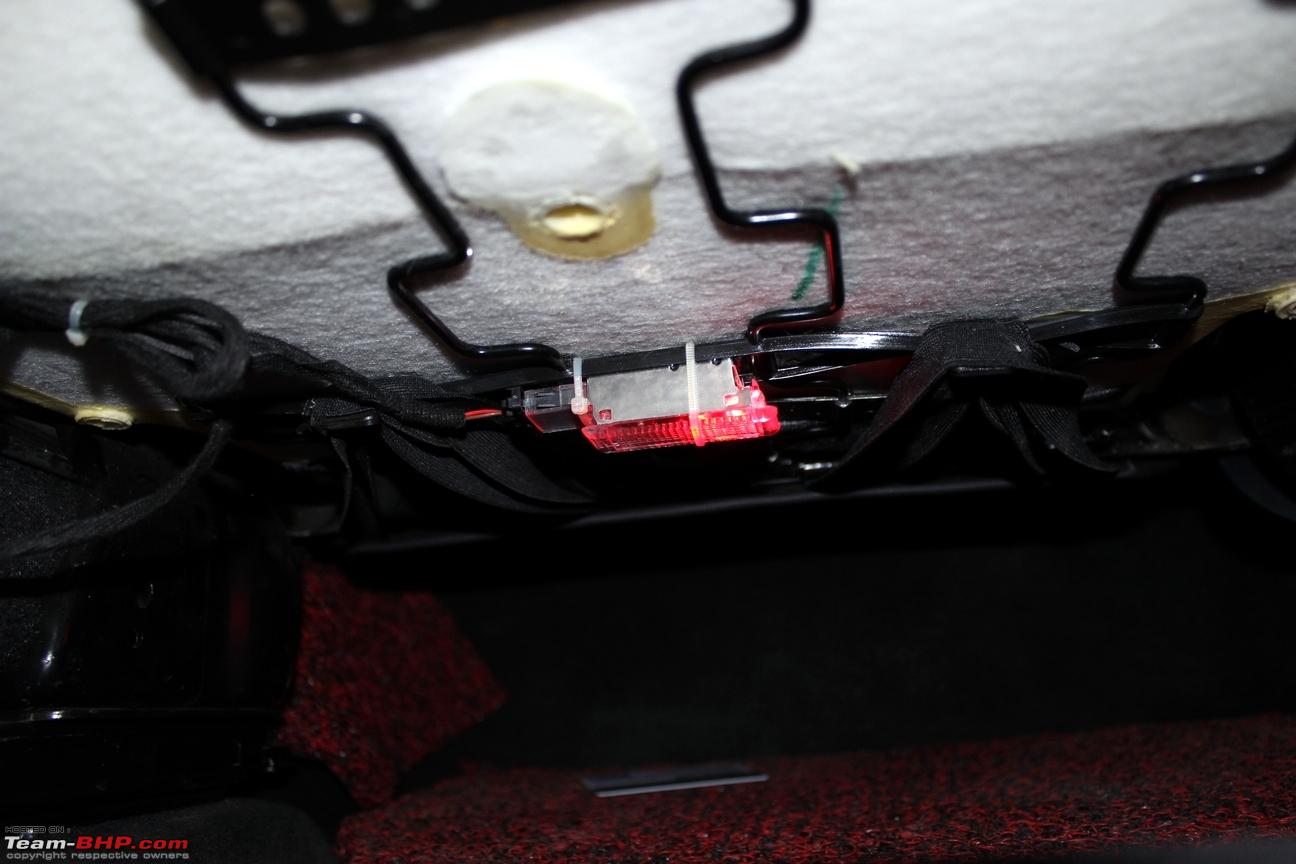
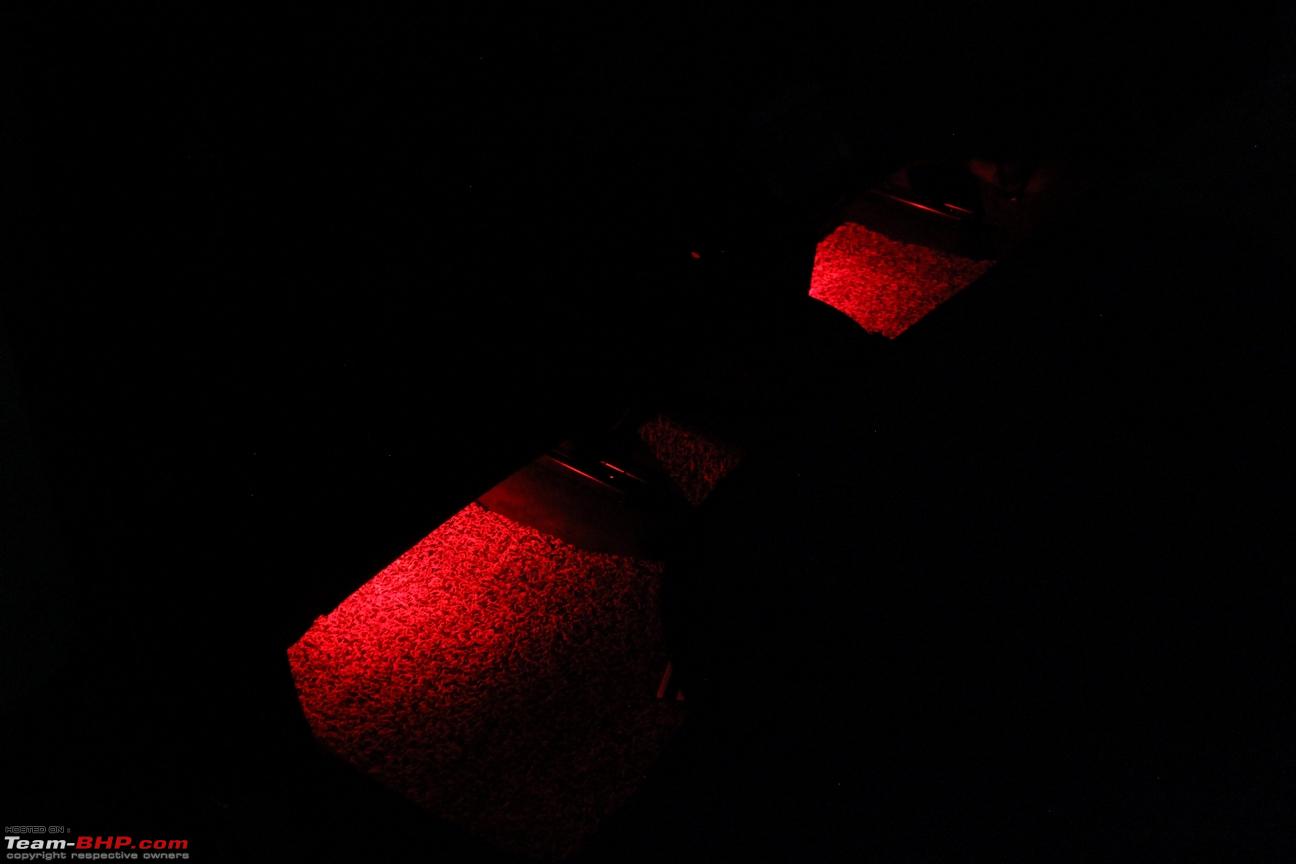
Rear footwells below the front seats:


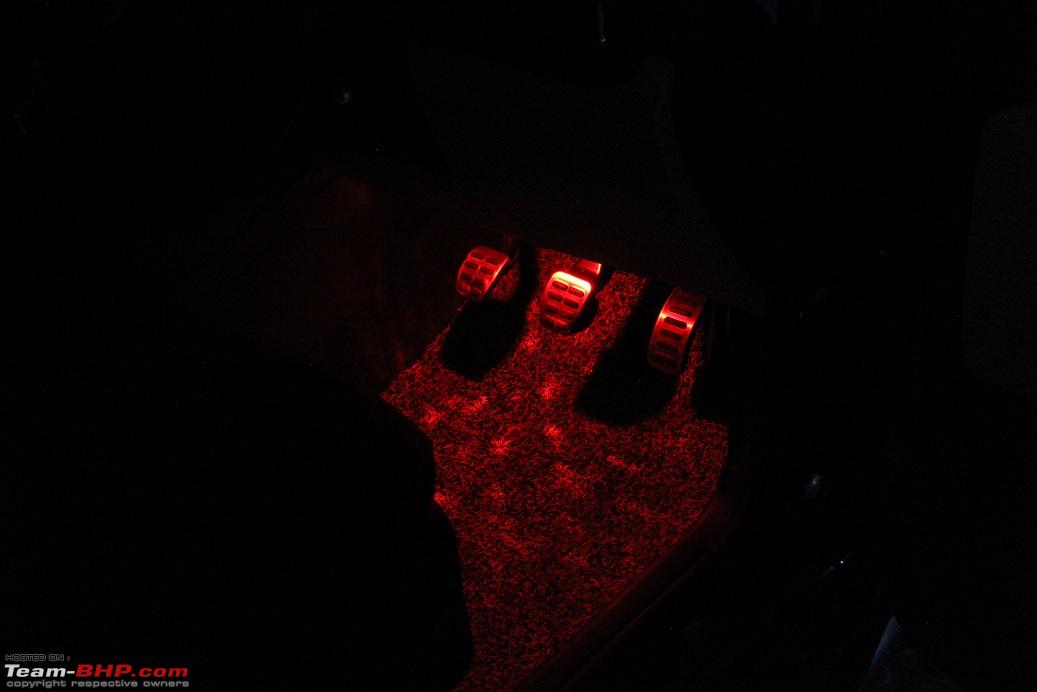
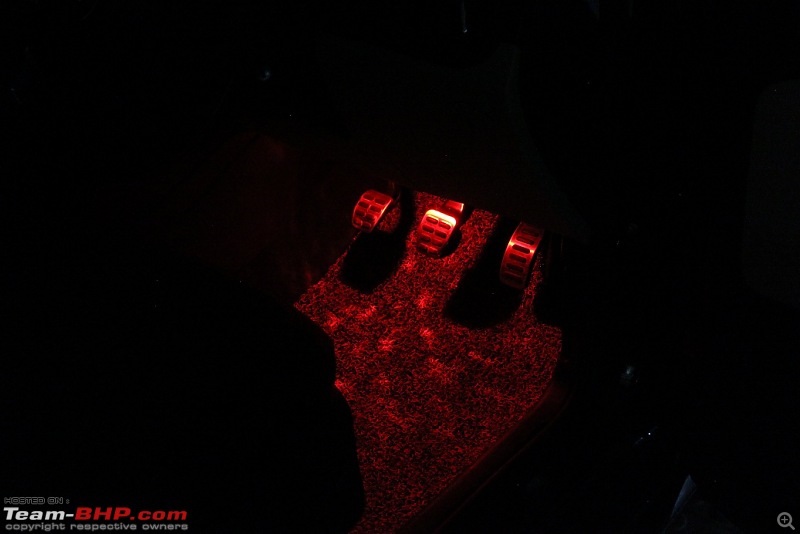
11. Test the lights using the keyfob:


My heartfelt thanks to my roomie - Moorthy for all the help, clicking some of the snaps and helping me with routing the cables and such. You rock! :thumbs up
Thanks for reading!
Thread moved from the Assembly Line to the Modifications Section. Thanks for sharing!
Is ordering through AliExpress safe? I am eyeing a few items myself but a friend told me that they may never arrive. Can we pay using an Indian Debit Card?
WoW, that's a neat and nice DIY. wonder if the i20 also has something like this. I definitely would be interested in something like this.
Quote:
Originally Posted by Gannu_1
(Post 3396629)
DIY #1: Swapping cabin light:
Plus, a slot for securing the HU microphone. The RCD-510/RNS-510 can use a wireless BT mic harness whereas some others have a wired one like the one bundled with the Blaupunkt Philadelphia 835.
5. Optional: If there is a mic harness from the HU, place it in the slot of the new cabin light:
The OEM BT mic harness should be a perfect fit for this slot. For the rest, secure it using the PU piece.
|
Very detailed write-up! Thanks!! :thumbs up
Even though this mod is mainly WRT the interior lighting as the name suggests, positioning of the mic is equally important. It increases voice clarity and also looks neat.. :)
Quote:
Originally Posted by SumitB
(Post 3413018)
Is ordering through AliExpress safe? I am eyeing a few items myself but a friend told me that they may never arrive. Can we pay using an Indian Debit Card?
|
Absolutely. I am not sure what went wrong with your friend’s purchase but all the items that I had ordered from AliExpress arrived. Here’re my experiences detailed briefly:
1. OEM Polo arm rest - did not bargain with the dealer (being the first deal I did not know it was possible), shipped through EMS, arrived a month later, limited package tracking facility, had to pay customs duties amounting to Rs. 3700 to India Post.
The detailed experience can be read here -
Link
2. Dome light - bargained, consignment shipped through DPEX, arrived a week later, proper tracking facility available, no customs duties charged.
3. Headlight Switch, 1 no. footwell light, footwell lighting harness - bargained, consignment shipped through DPEX, arrived a week later, proper tracking facility available, no customs duties charged.
4. 3 nos. footwell lights, 4 nos. red W5W LEDs, 2 nos. white W5W LEDs, one white 42mm C5W festoon LED, one glovebox light and harness - bargained, consignment shipped through DPEX, arrived a week later, proper tracking facility available, no customs duties charged.
5. Fuse tap cable - dealer sent it for free considering the stuff I have sourced from him previously, consignment shipped through China Post, tracking facility available, ETA - 1 month. Yet to receive it. :)
In short, I’ve had a fantastic experience dealing with AliExpress. All my stuff were sourced from a single dealer - I would send him the VW part number or the snap of the item, he would then refer to his factory and he would promptly send a response with the final cost inclusive of the shipping charges via DPEX. The consignments were packed with several bubble wraps/PU wrap, then placed in a box and shipped. No items were damaged during transit.
Quote:
Originally Posted by nemesis86
(Post 3413529)
wonder if the i20 also has something like this. I definitely would be interested in something like this.
|
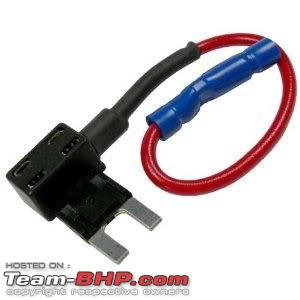
It should be doable with the i20 as well. I have seen footwell lights installed in the Ertiga with white LEDs. These operate on 12V so the easiest tapping is from the fuse box using a fuse tap cable like this:

You could connect a 3-way switch to it as well and can be enabled upon the user’s will or the keyfob activation or can be turned off. Just be careful not to leave any bare ends exposed. Use some hot glue on the soldered leads or insulation tape so that the wires are covered.
I cannot help but laugh at Vagtune's pricing (
link) for the footwell lights!

They are charging Rs. 8244 for the kit (4 lights and the harness) whereas I sourced all of them for under Rs. 2000. Daylight robbery!
Quote:
It should be doable with the i20 as well. I have seen footwell lights installed in the Ertiga with white LEDs. These operate on 12V so the easiest tapping is from the fuse box using a fuse tap cable like this:
|
Thanks a lot for this. Will explore the options for sure as I loved the footwell lights on your ride
Thank you for respond to my query. Can one use an Indian debit card to make payments on AliExpress? How does one negotiate/bargain with the seller there?
Hi Gannu - Very good findings and replacements, I have a 2011 Polo Trendline and I have been trying to find and replace Chrome Light Switch, AC Switch and AC vent (like the Highline), thanks to you I know where to look for the chrome light swich, however I am still not able to find the Chrome AC switch and the AC Vent one, do you know where I can find them. Please advice.
Quote:
Originally Posted by Gannu_1
(Post 3396851)
DIY #2: Swapping headlight switch:
This is another simple, inexpensive DIY and doesn't require any tools. Adds a bit of bling to the interiors with the chrome garnished knob.
|
Mod Note : Please quote ONLY the relevant bits of a post. Quoting a full, long post inconveniences our mobile readers.
Thanks!
Quote:
Originally Posted by Gannu_1
(Post 3396629)
DIY #1: Swapping cabin light:
This is a pretty simple DIY and a relatively inexpensive one for about 2000 INR. Not absolutely essential unlike an arm-rest or a dead pedal which is a must have but this lends an upmarket feel to the interiors of the cabin. :)
|
Gannu bhai, awesome work again! clap: Even though the first two here were simple DIY, I admire your patience to put out every steps, very informative and detailed, so much so it might push me to break my vow of not messing with the cars' electricals for a year! Rated a well deserved 5 star.
I am considering the Interior lamps swap and the Headlight switch swap. The headlight switch especially looks so out of place in a otherwise well laid out interior, are you also considering any fix for the ORVM adjusting knob/power window switches?
I am looking at a combo pack like this:
Switch combo pack. I am specifically looking for brushed aluminium look rather than the chrome one. Let me know what you think.
From your orders, looks like a Glovebox and boot lamp DIY thread is due soon - Keep it coming.
Quote:
Originally Posted by SumitB
(Post 3413761)
Thank you for respond to my query. Can one use an Indian debit card to make payments on AliExpress? How does one negotiate/bargain with the seller there?
|
Hi SumitB,
The payment options allow for an Indian debit card to be used. However the first time I did use one, got a message after a day saying payment failed and AE were asking me for documents for verification. The documents requested included passport copy, picture of both sides of the card, etc. I didn't want to go through with that option, cancelled and ordered via credit card and it worked like a charm. For transactions like these, it is always preferable to use a credit card rather than a debit card, the former offering much better protection in case of a fraudulent sale.
About bargaining, if you have zeroed in on a product, message the seller with your requirements. Like say product A listed $60 and DHL courier is mentioned at say 60$, ask him if he could send it via DHL for $100 or so. The sellers there are very proactive and you are guaranteed to get a reply within 30mins or so, if not earlier. Once the price is agreed upon, place the order(Dont pay yet) and message the seller again, they will edit the pricing for u. To quote a popular ad tag line:
Poochne mein kya jaata hai! Quote:
Originally Posted by pillaian
(Post 3413770)
I am still not able to find the Chrome AC switch and the AC Vent one, do you know where I can find them. Please advice.
|
Hi Pilliain,
The AC switches as well as AC vents are available in Aliexpress, just do a search there. Good luck with the swapping.
Quote:
Originally Posted by delta5
(Post 3414428)
are you also considering any fix for the ORVM adjusting knob/power window switches?
I am looking at a combo pack like this: Switch combo pack. I am specifically looking for brushed aluminium look rather than the chrome one. Let me know what you think.
From your orders, looks like a Glovebox and boot lamp DIY thread is due soon - Keep it coming.
|
IMO the brushed Alu. knob looks much better than the chrome one. Some of the Ventos and earlier Polos used to sport these. I saw a Cross Polo displayed at the service center with the Alu. knob, when I had taken my car for the 6-month/7500 km free checkup last month. I am not sure why the VW guys are playing around!
As for the kit, just message the AliExpress dealer and ensure that you get the switch without the
Auto provision because those come with an entirely different connector which is smaller than the one in the Polo.
Replacing the ORVM controls switch appears to be a bit tricky from what I've read so far. We need to refer to VW's service center (or an aftermarket garage like Pete's) for carrying out works like these but not sure if the VW guys would budge. Otherwise, this is quite a doable DIY job so go ahead. :thumbs up
My next mod is to install the glovebox light but I need to cut the plastic on the glovebox side since there is no slot there. I don't have a dremel either. Without a dremel, it would end up being a shabby job.
The AC switches as well as AC vents are available in Aliexpress, just do a search there. Good luck with the swapping.[/quote]
Thanks for your response Gannu, before I wrote to you I did look up on Aliexpress, the AC Switches are circular and not like the stock ones that you get on Trendline, I think the circular ones are what you get everywhere else apart from India, while searching for the AC vent I have come across the sporty chrome pedals and couple of other stuff, thank you once again for pointing out this website, I will be placing the order soon.
Gannu bhai good job, this is something I had been looking for long;
can u share the store details on AliExpress, there is a variety of rates and search by part number is not yielding any results.
Thanks.
| All times are GMT +5.5. The time now is 09:13. | |