It was a long time since I restored a Maruti 800 with my own hands in my front yard and I wanted to post the thread only after having the car done and using it for about a month. However, time has slipped away and finally, I found some time to put it to words. So, here is what has happened.
The heading poster
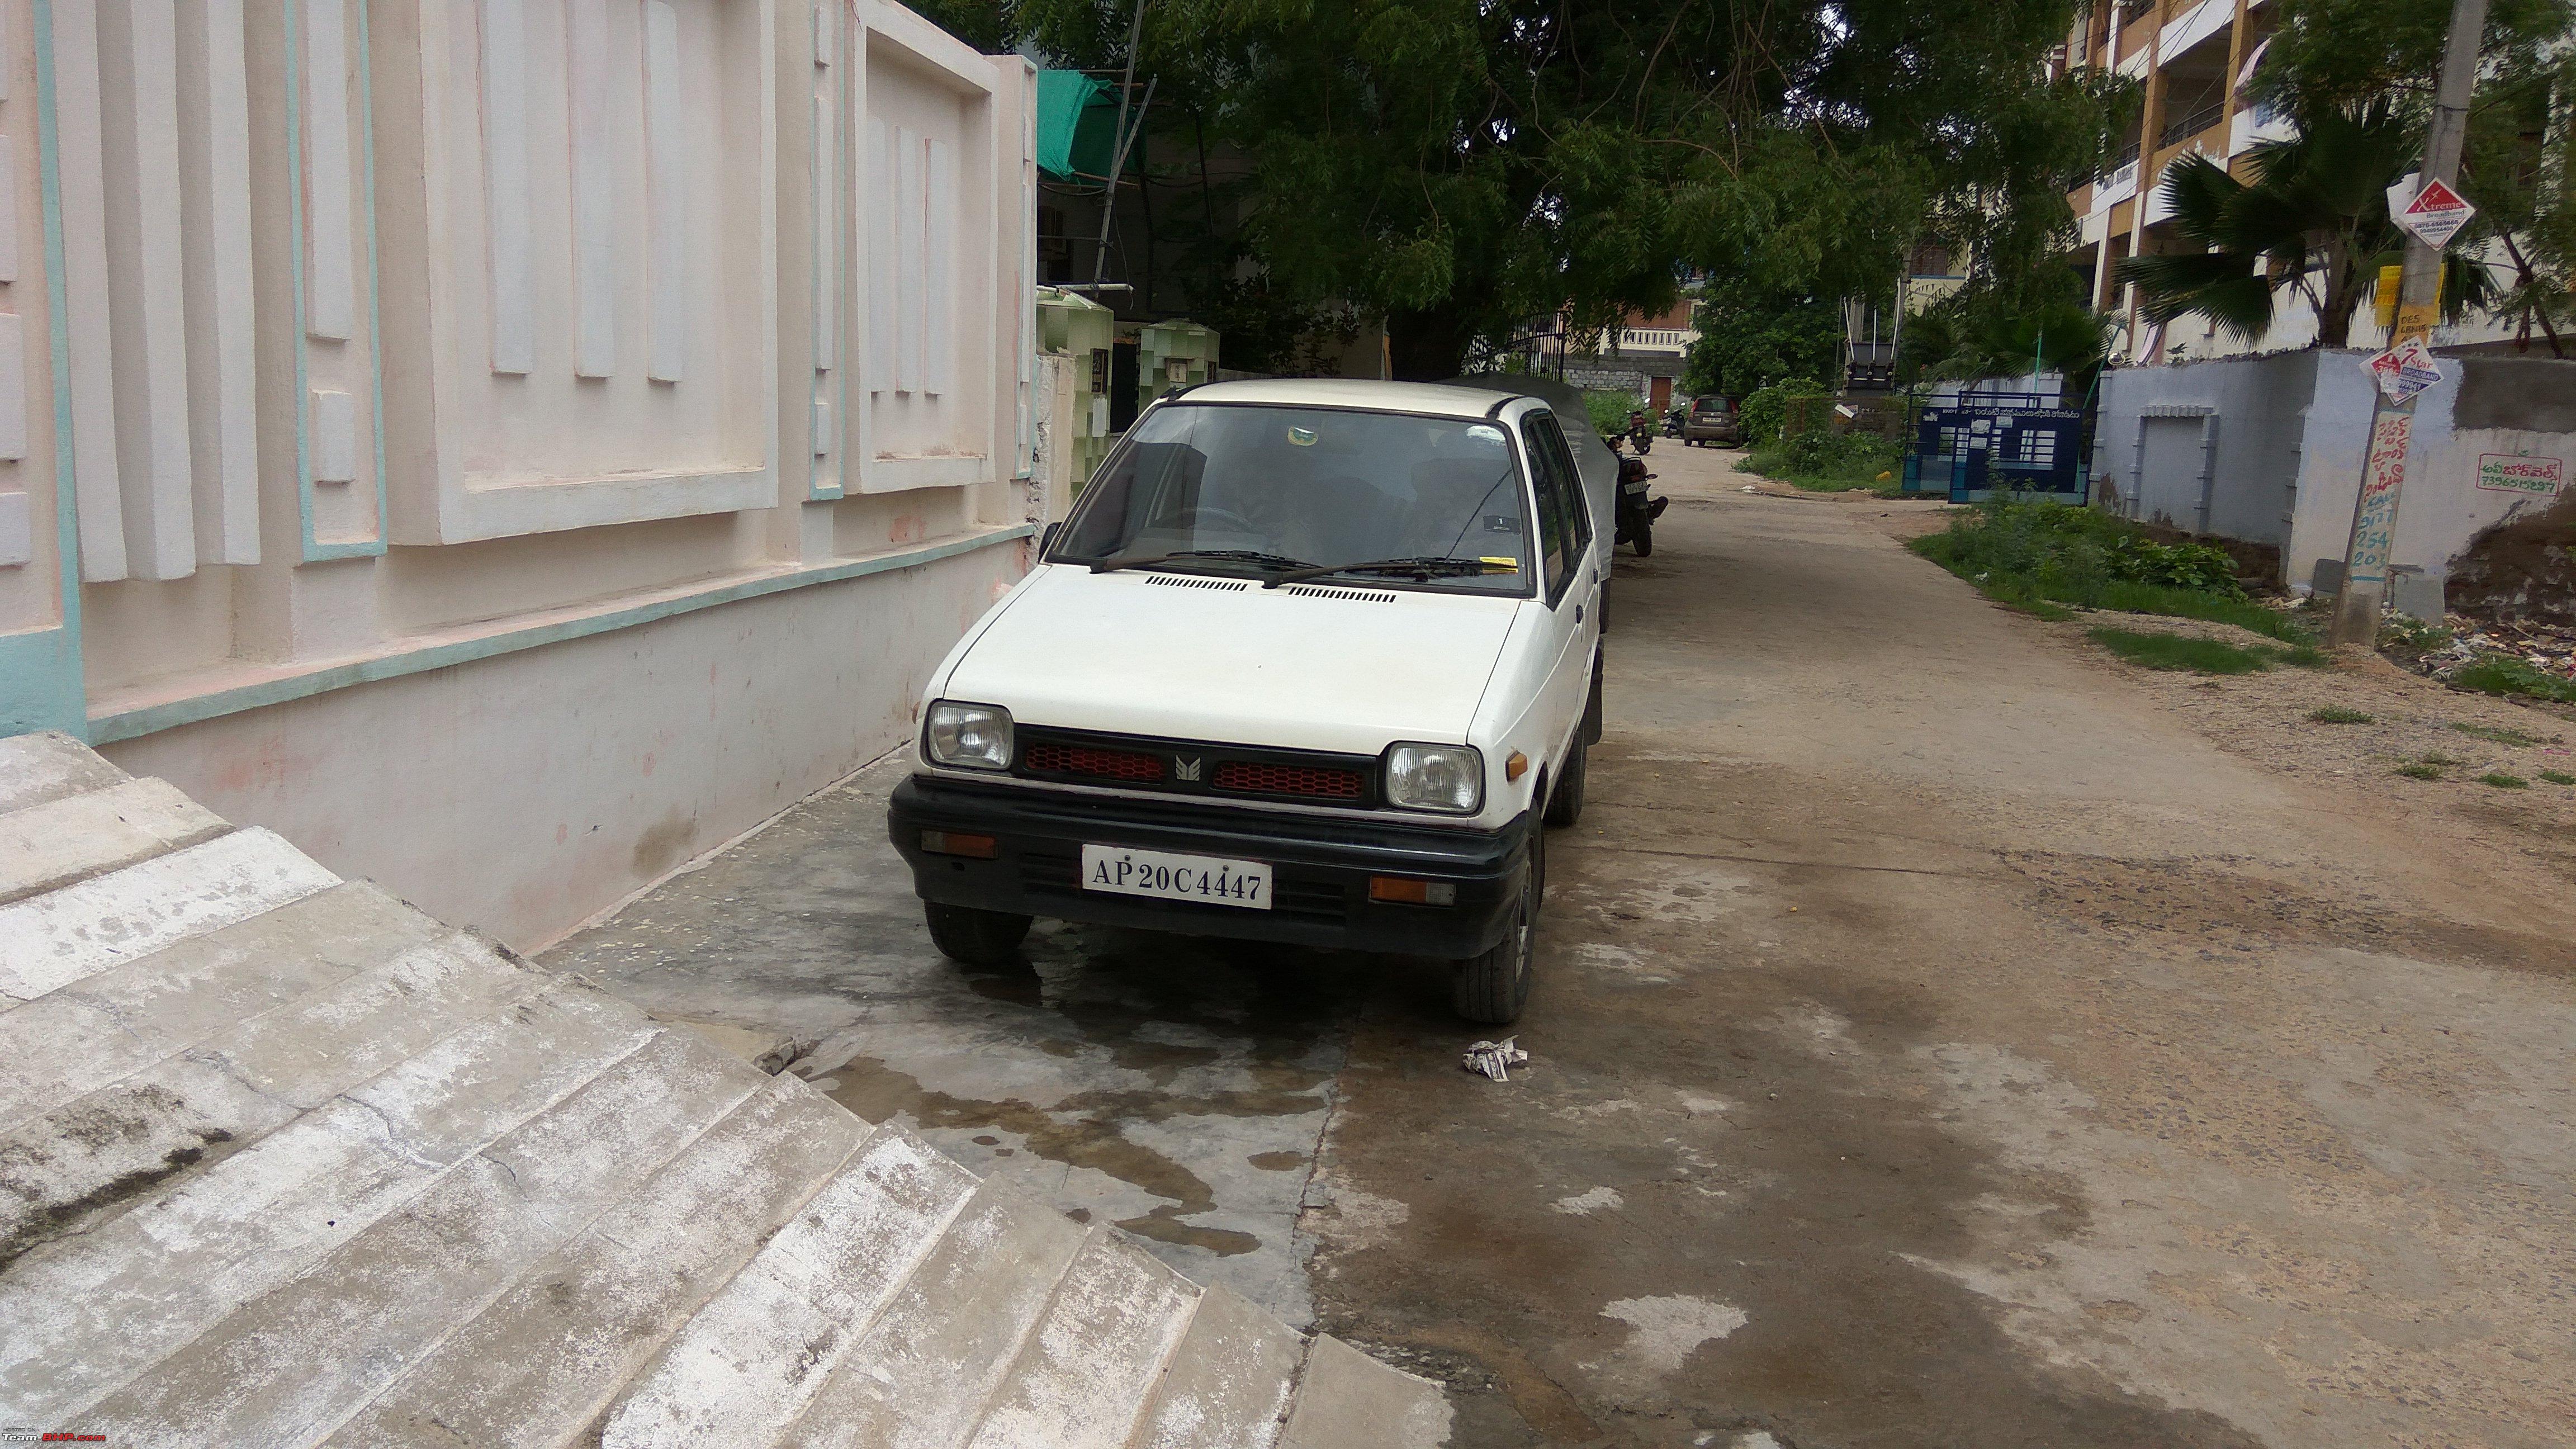
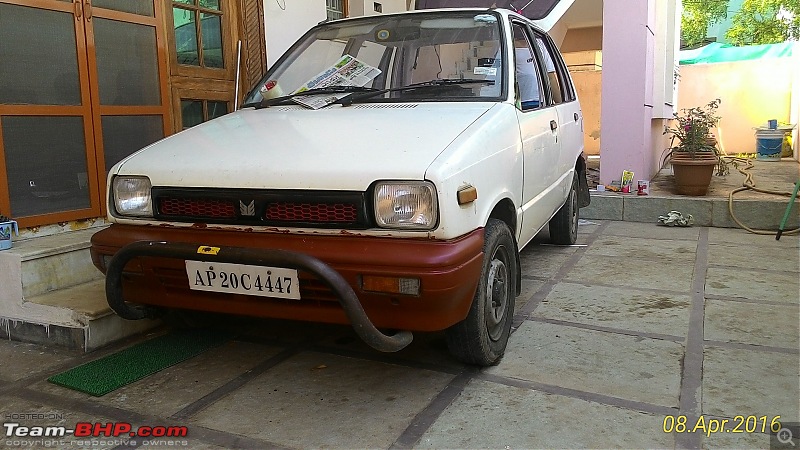
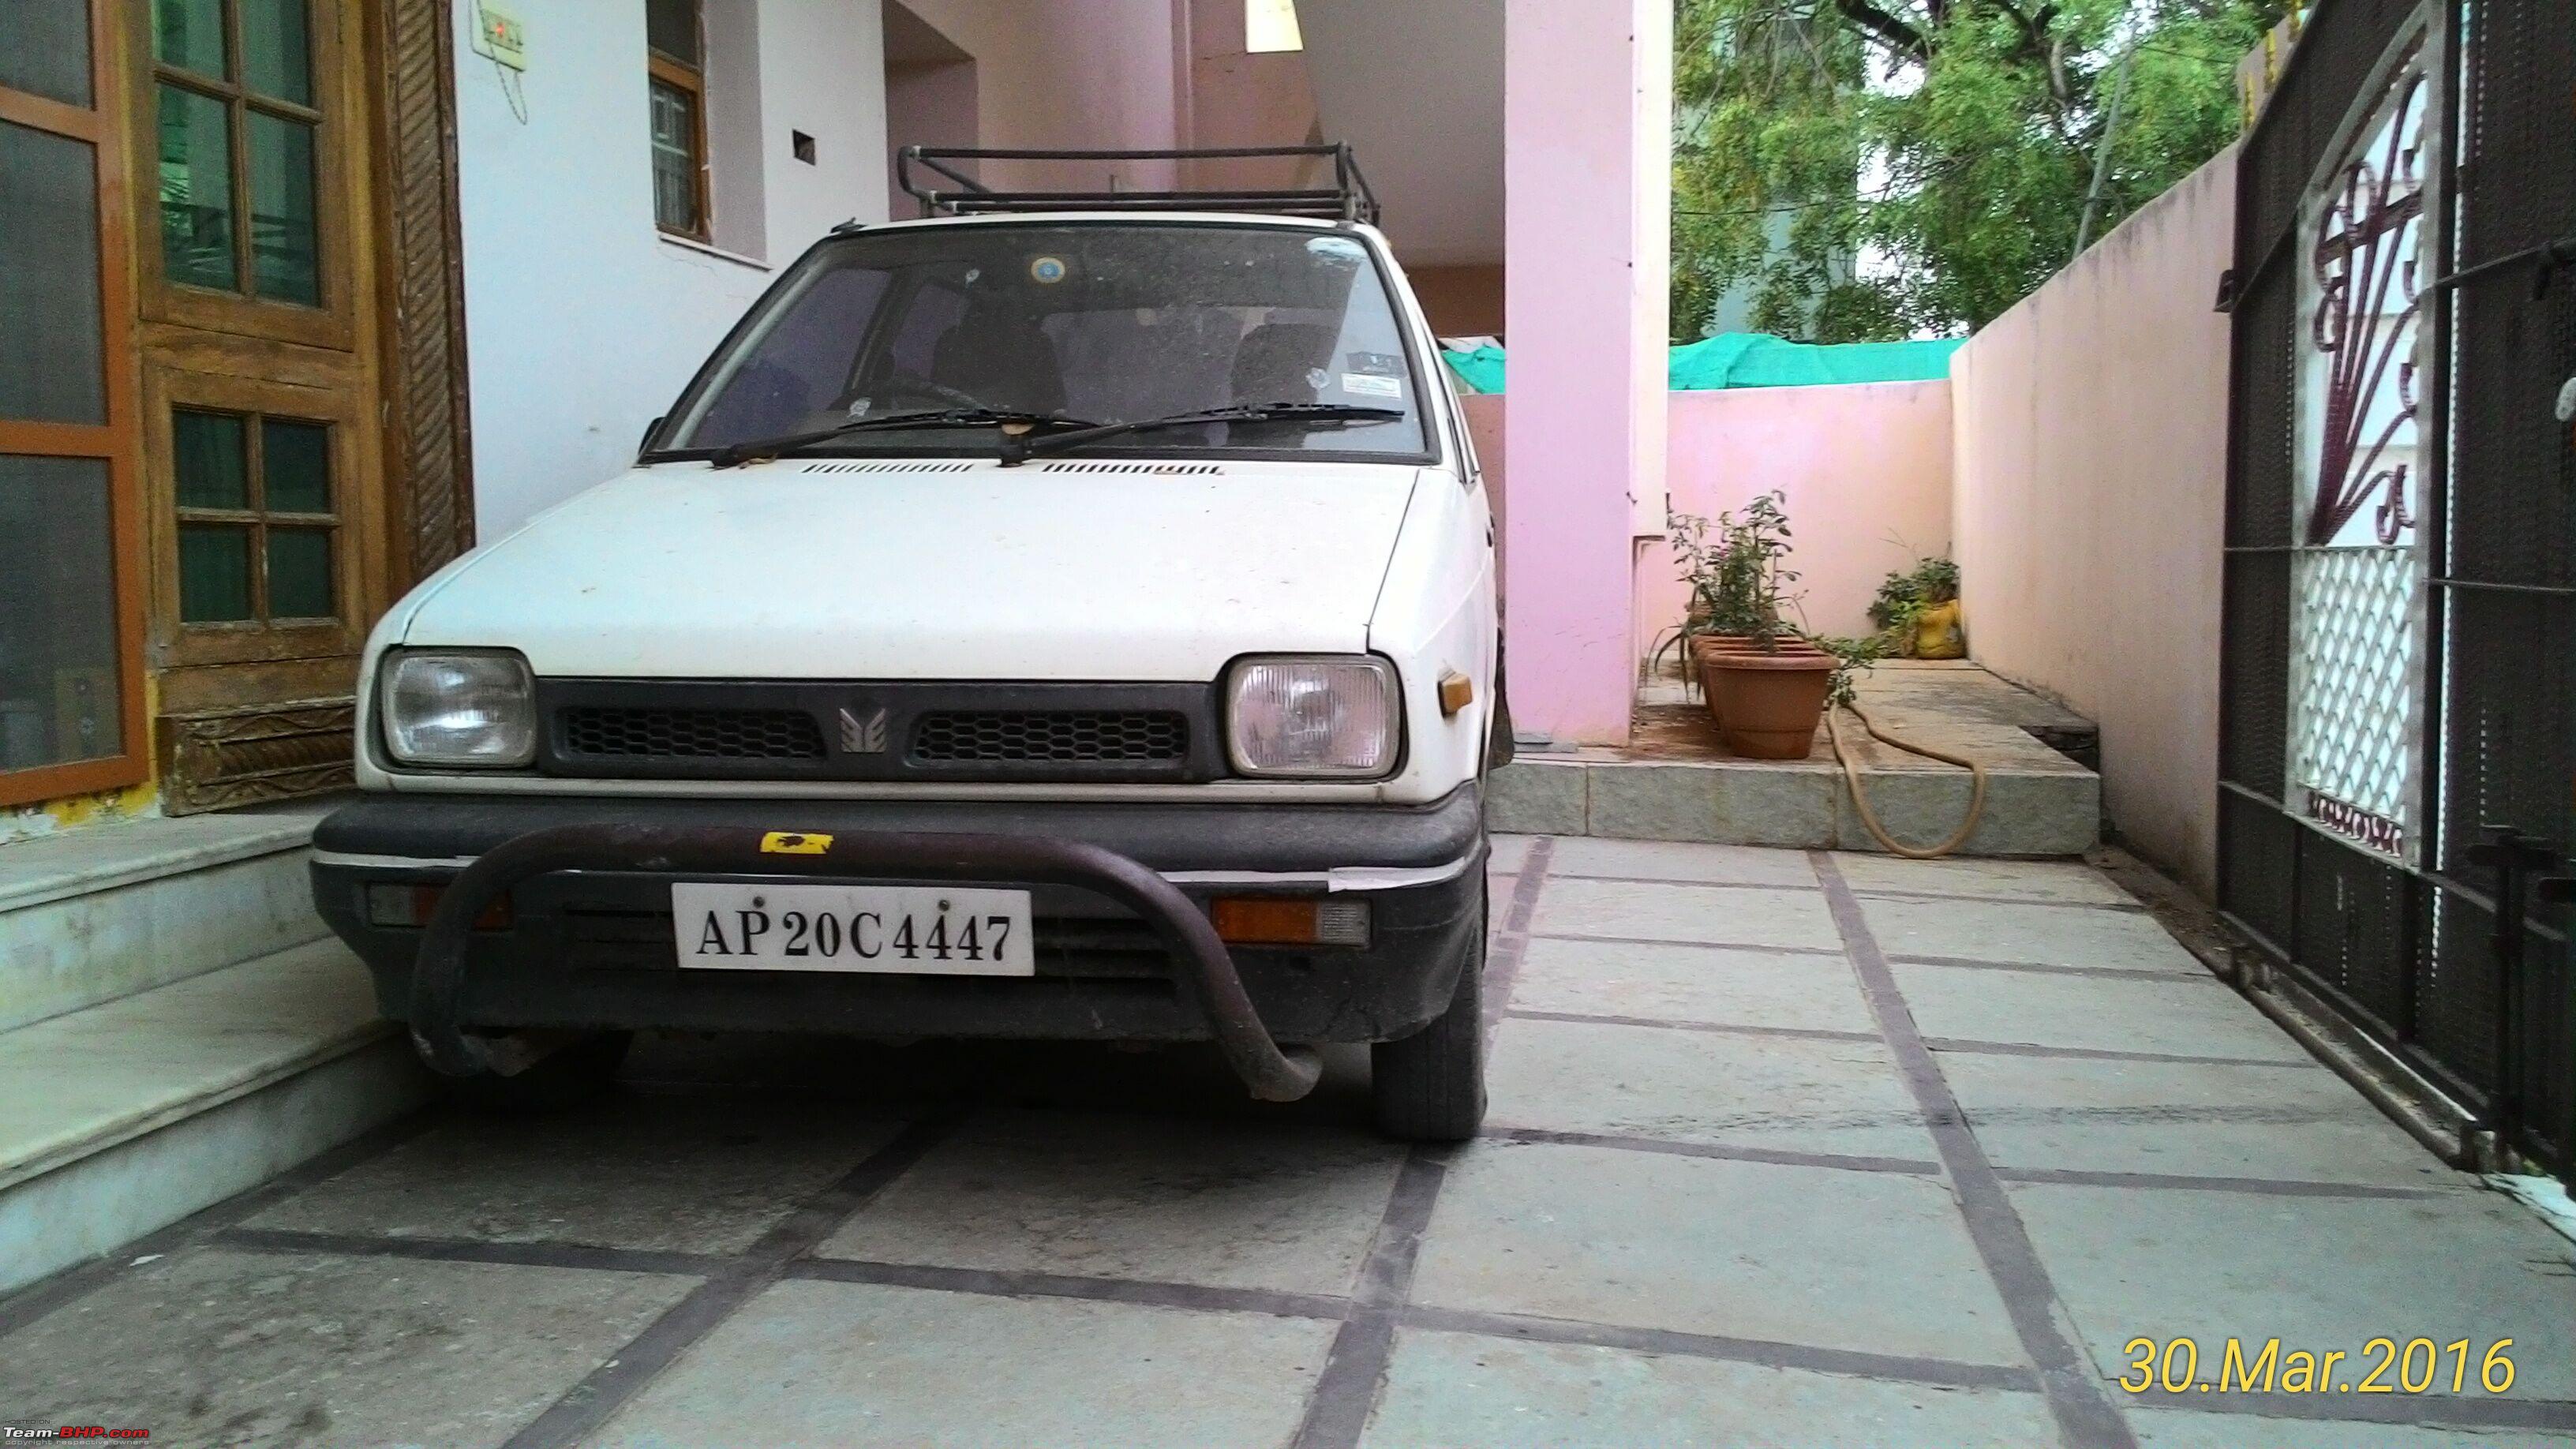
The car in question
It is a 1995 Maruti 800 that we have owned. And until the beginning of 2016, it was the only car in the house exclusively meant for highways and provisions fetching etc. It was taken out once a week and it has been VERRRY reliable. Nothing ever failed even though it hadn't seen a routine maintenance schedule. All the more impressive is I can count the number of parts replaced at the tip of my fingers. The front suspension is still original 1995 built along with most of the car. The ownership report is well documented here.
http://www.team-bhp.com/forum/long-t...uti-800-a.html
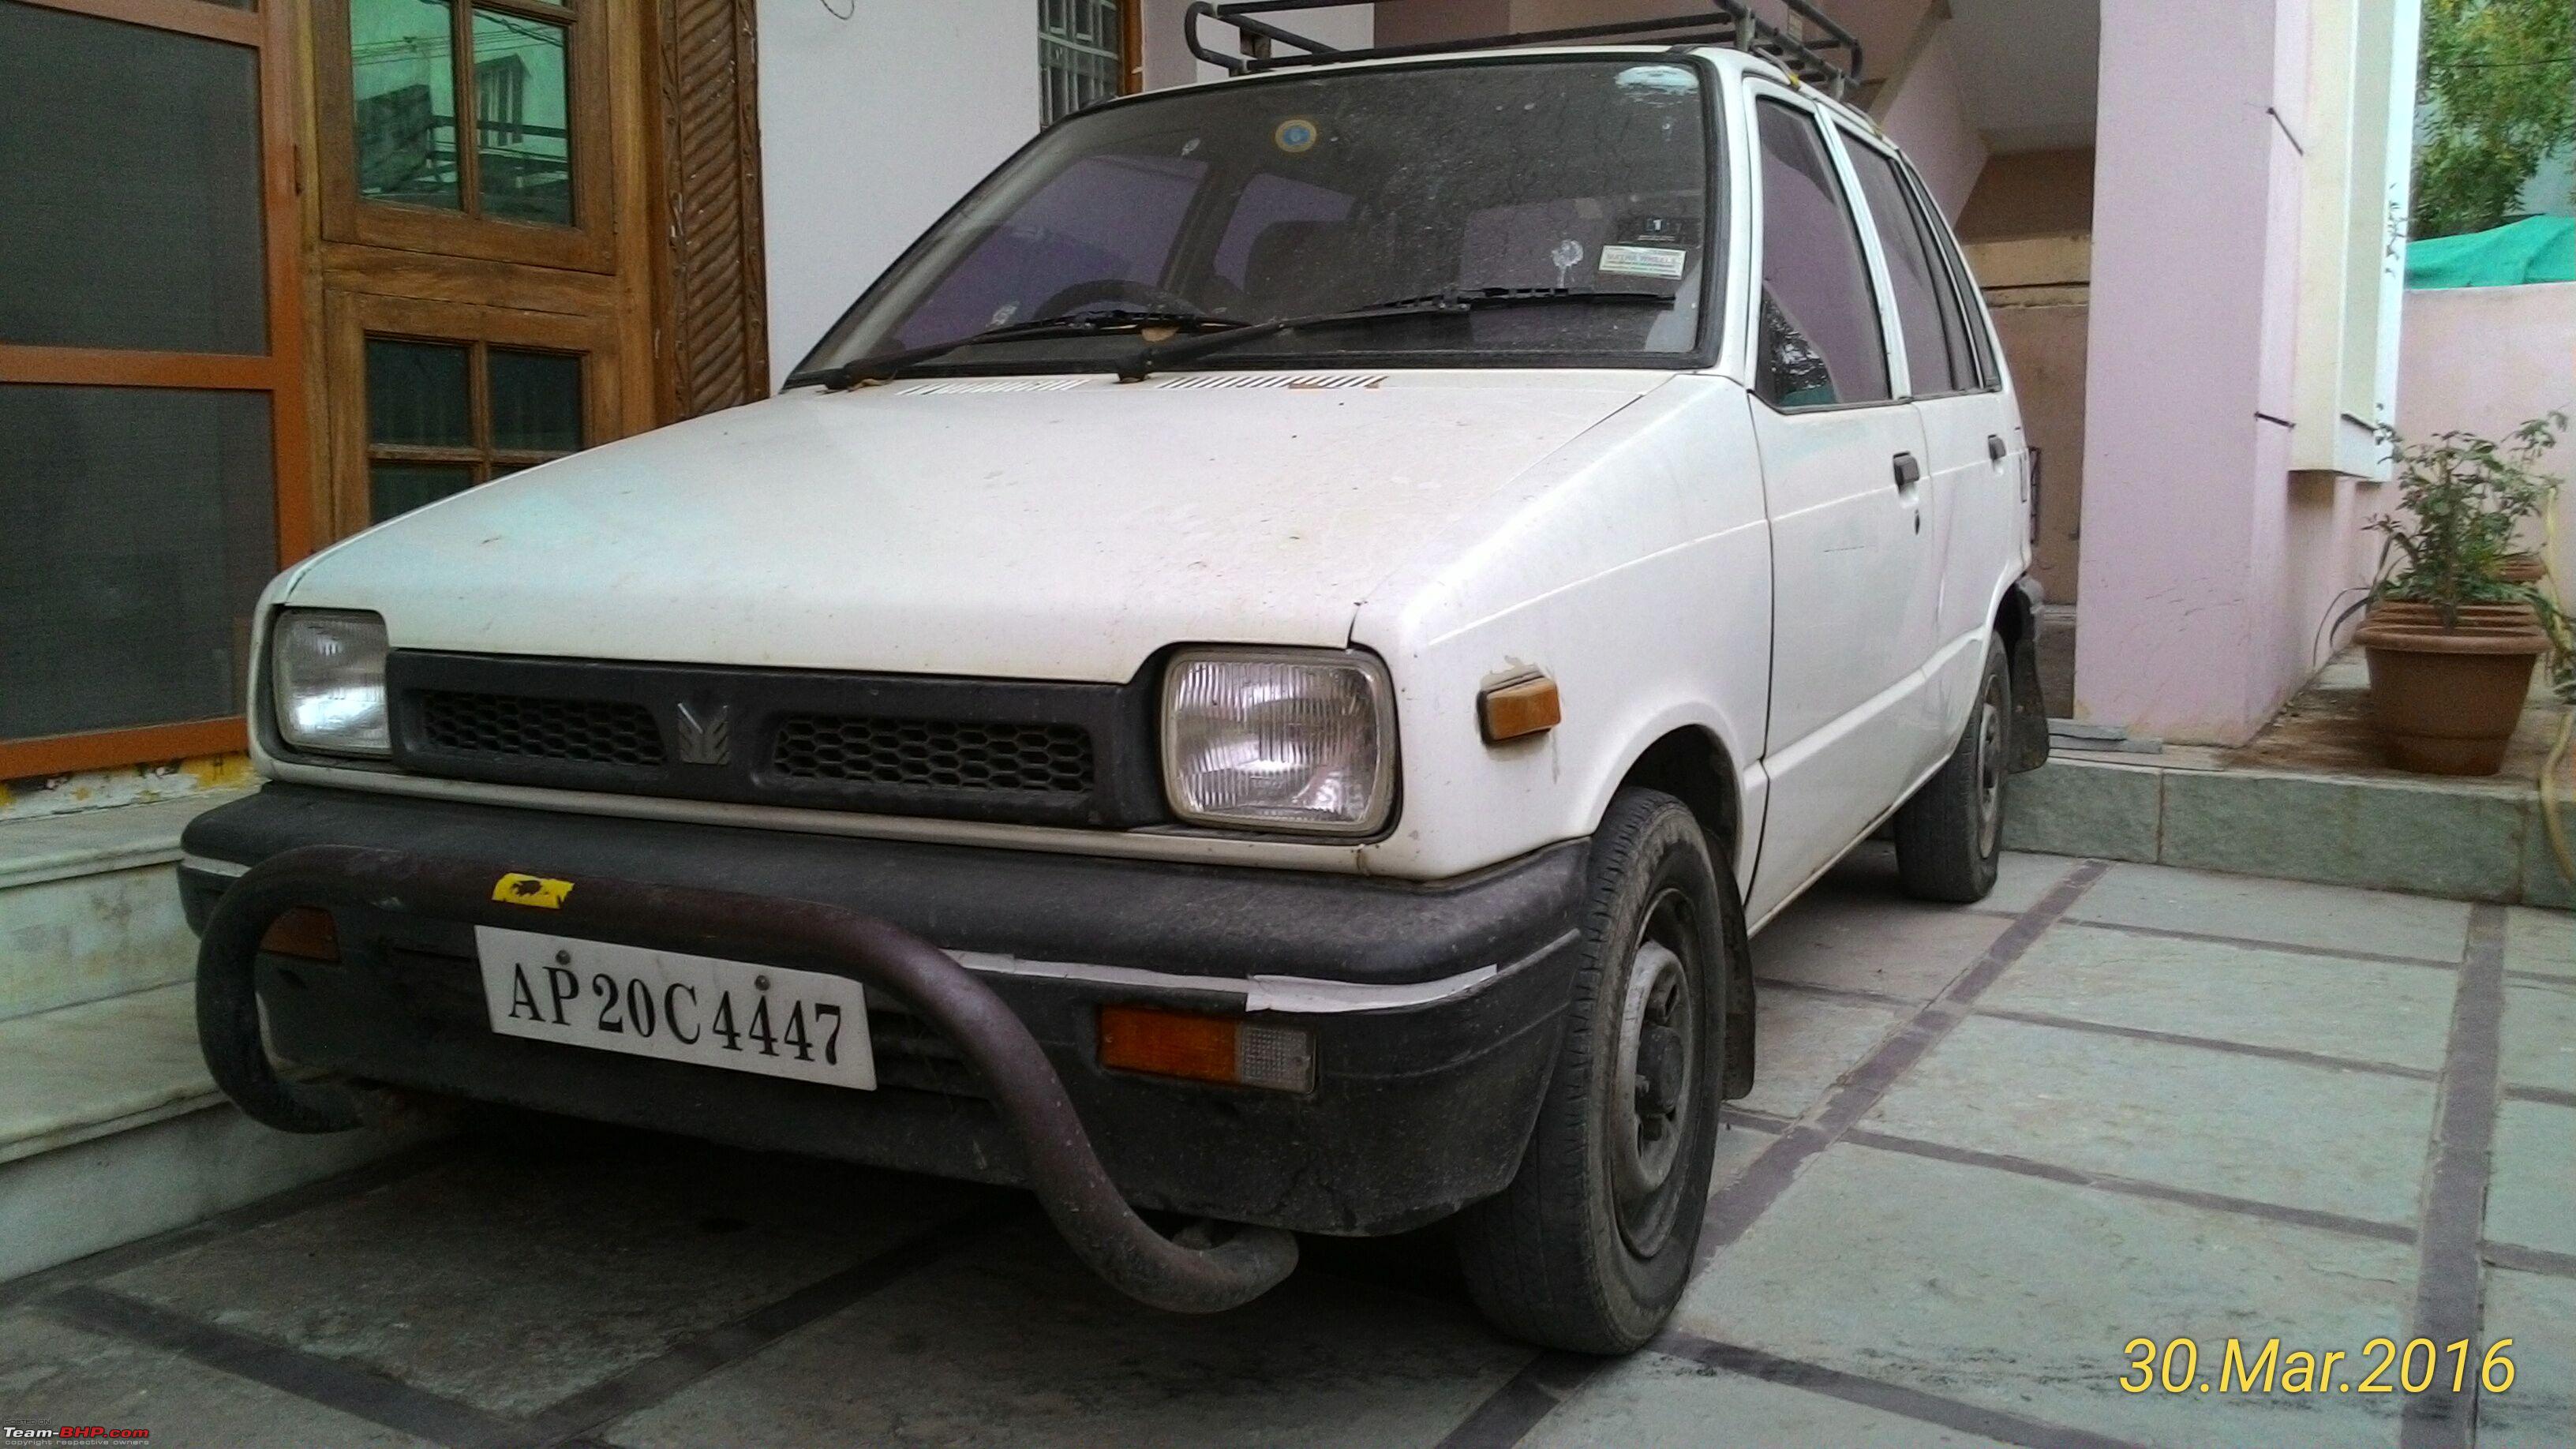
After we bought a flood damaged Hyundai Getz which I restored and we used it for a while, the keys to the maruti were handed over to me. I received it in a pitiful condition. Rust started appearing on the body work. Some plastics faded out due to the sun. It took long cranks to start the engine. I could smell petrol during normal acceleration. All in all, it was not in the best shape it could have been. And I made myself clear that I will restore the car to it's former glory and only then I will start using it. Dad was like "we will see how far he goes".
Pretty determined, I let dad go to office and bravely got the car up the front ramp of our house. Now I look back, even I feel it was stupid and quite risky. But it was worth the effort.
A look at the ramp it got up.
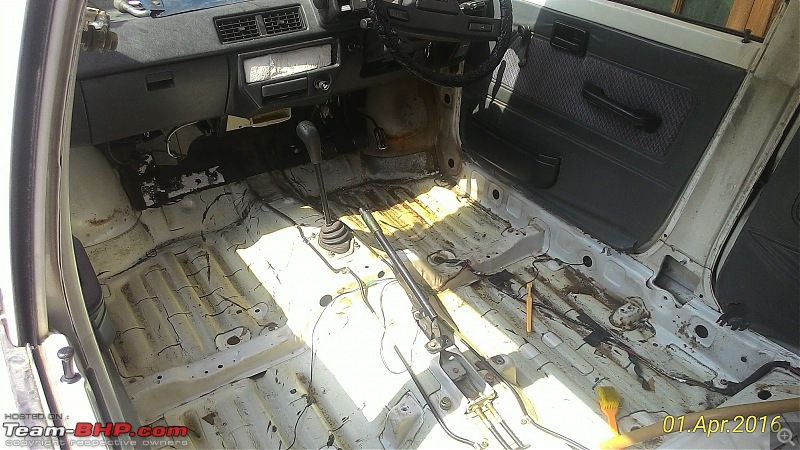
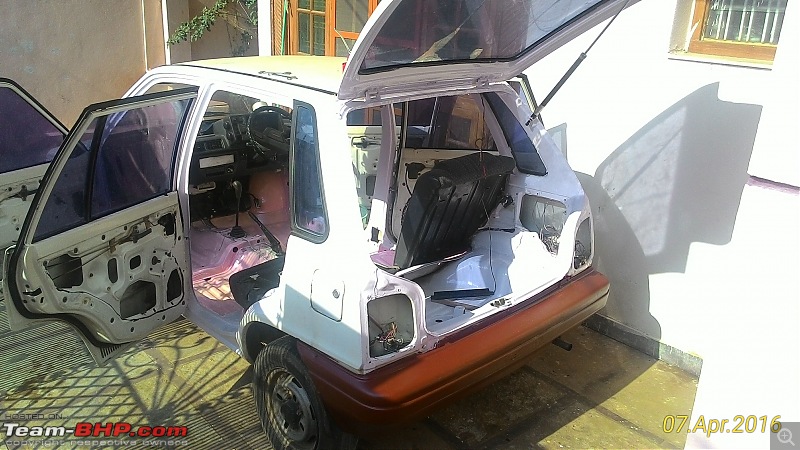
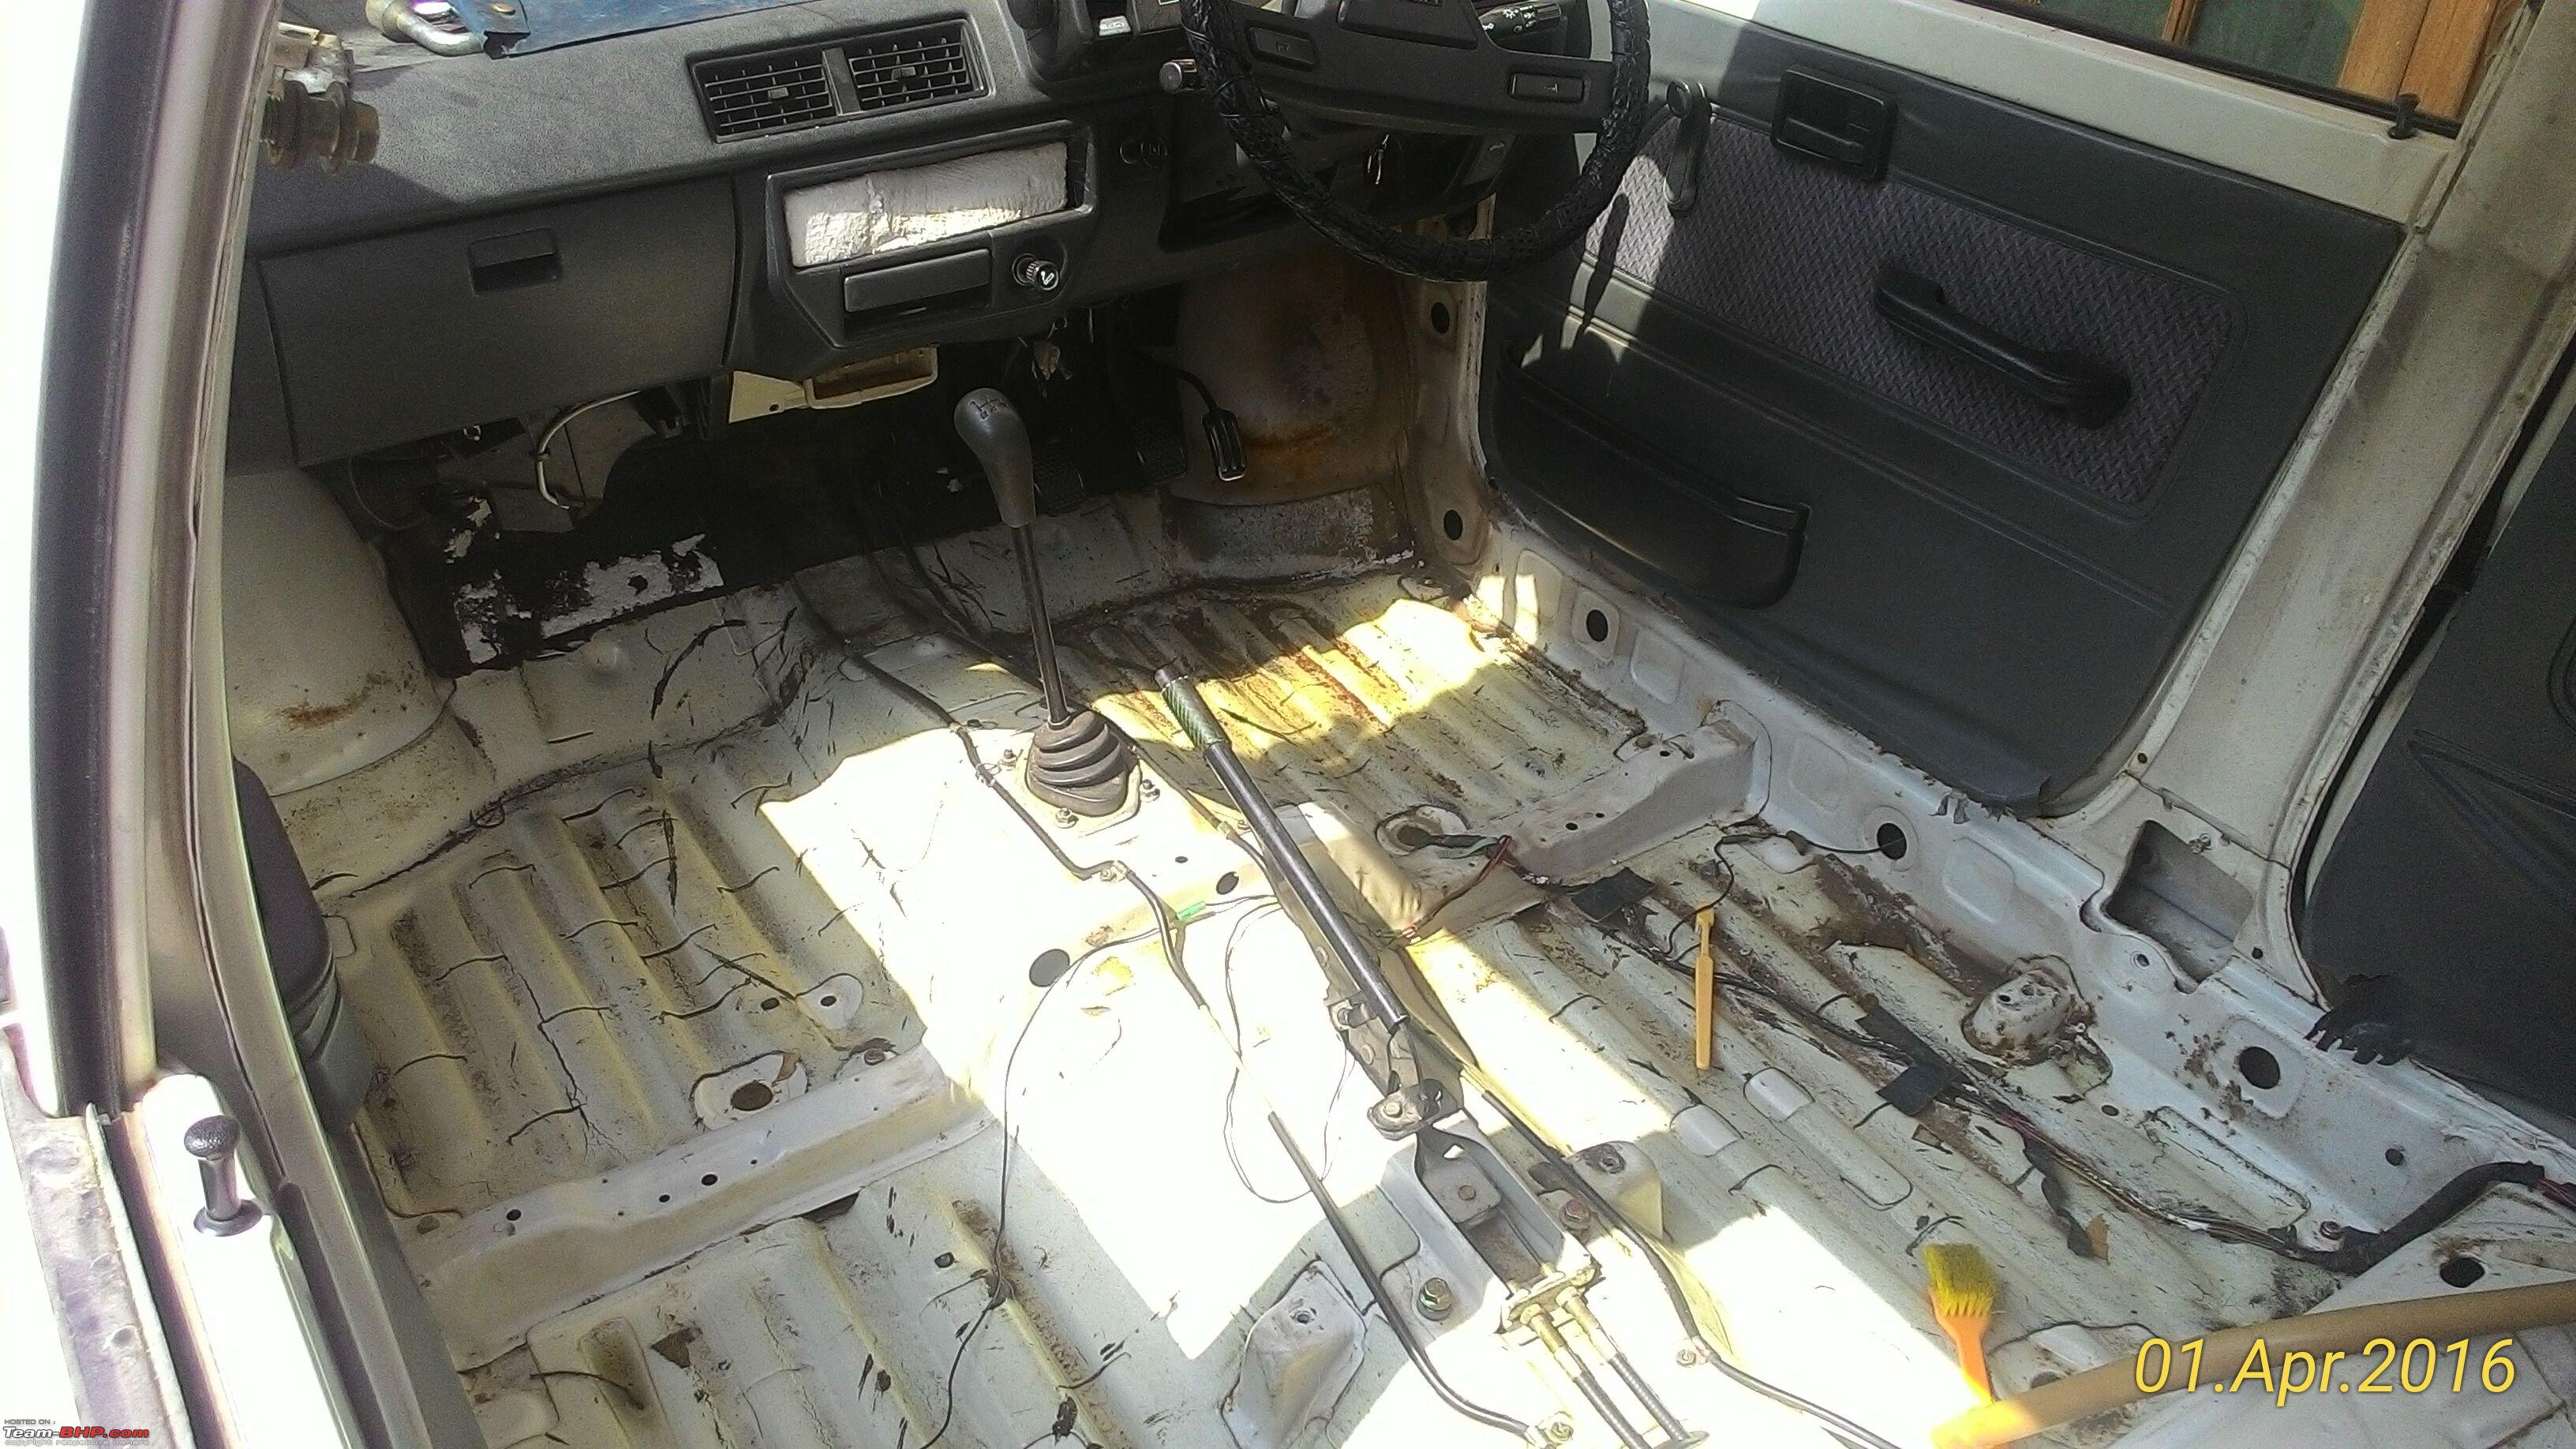
And then I started stripping down all the interiors to see the extent of rust damage. I made a decision to make my own youtube series on how to restore the car so that I could share my experiences to help others and also so that I could become more famous online

.
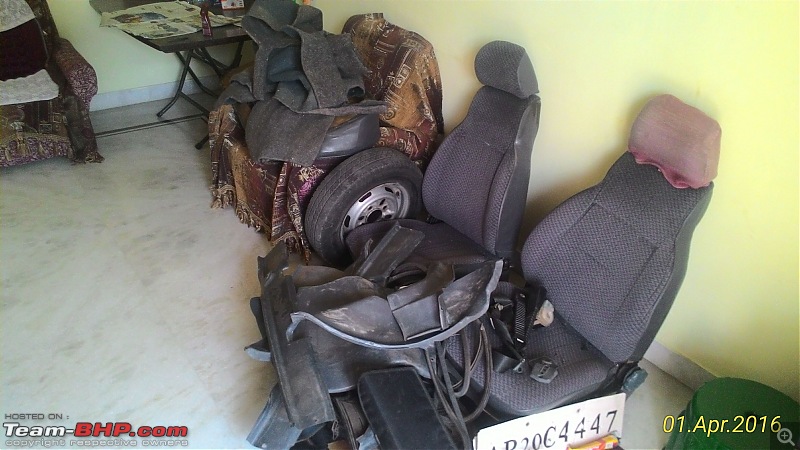
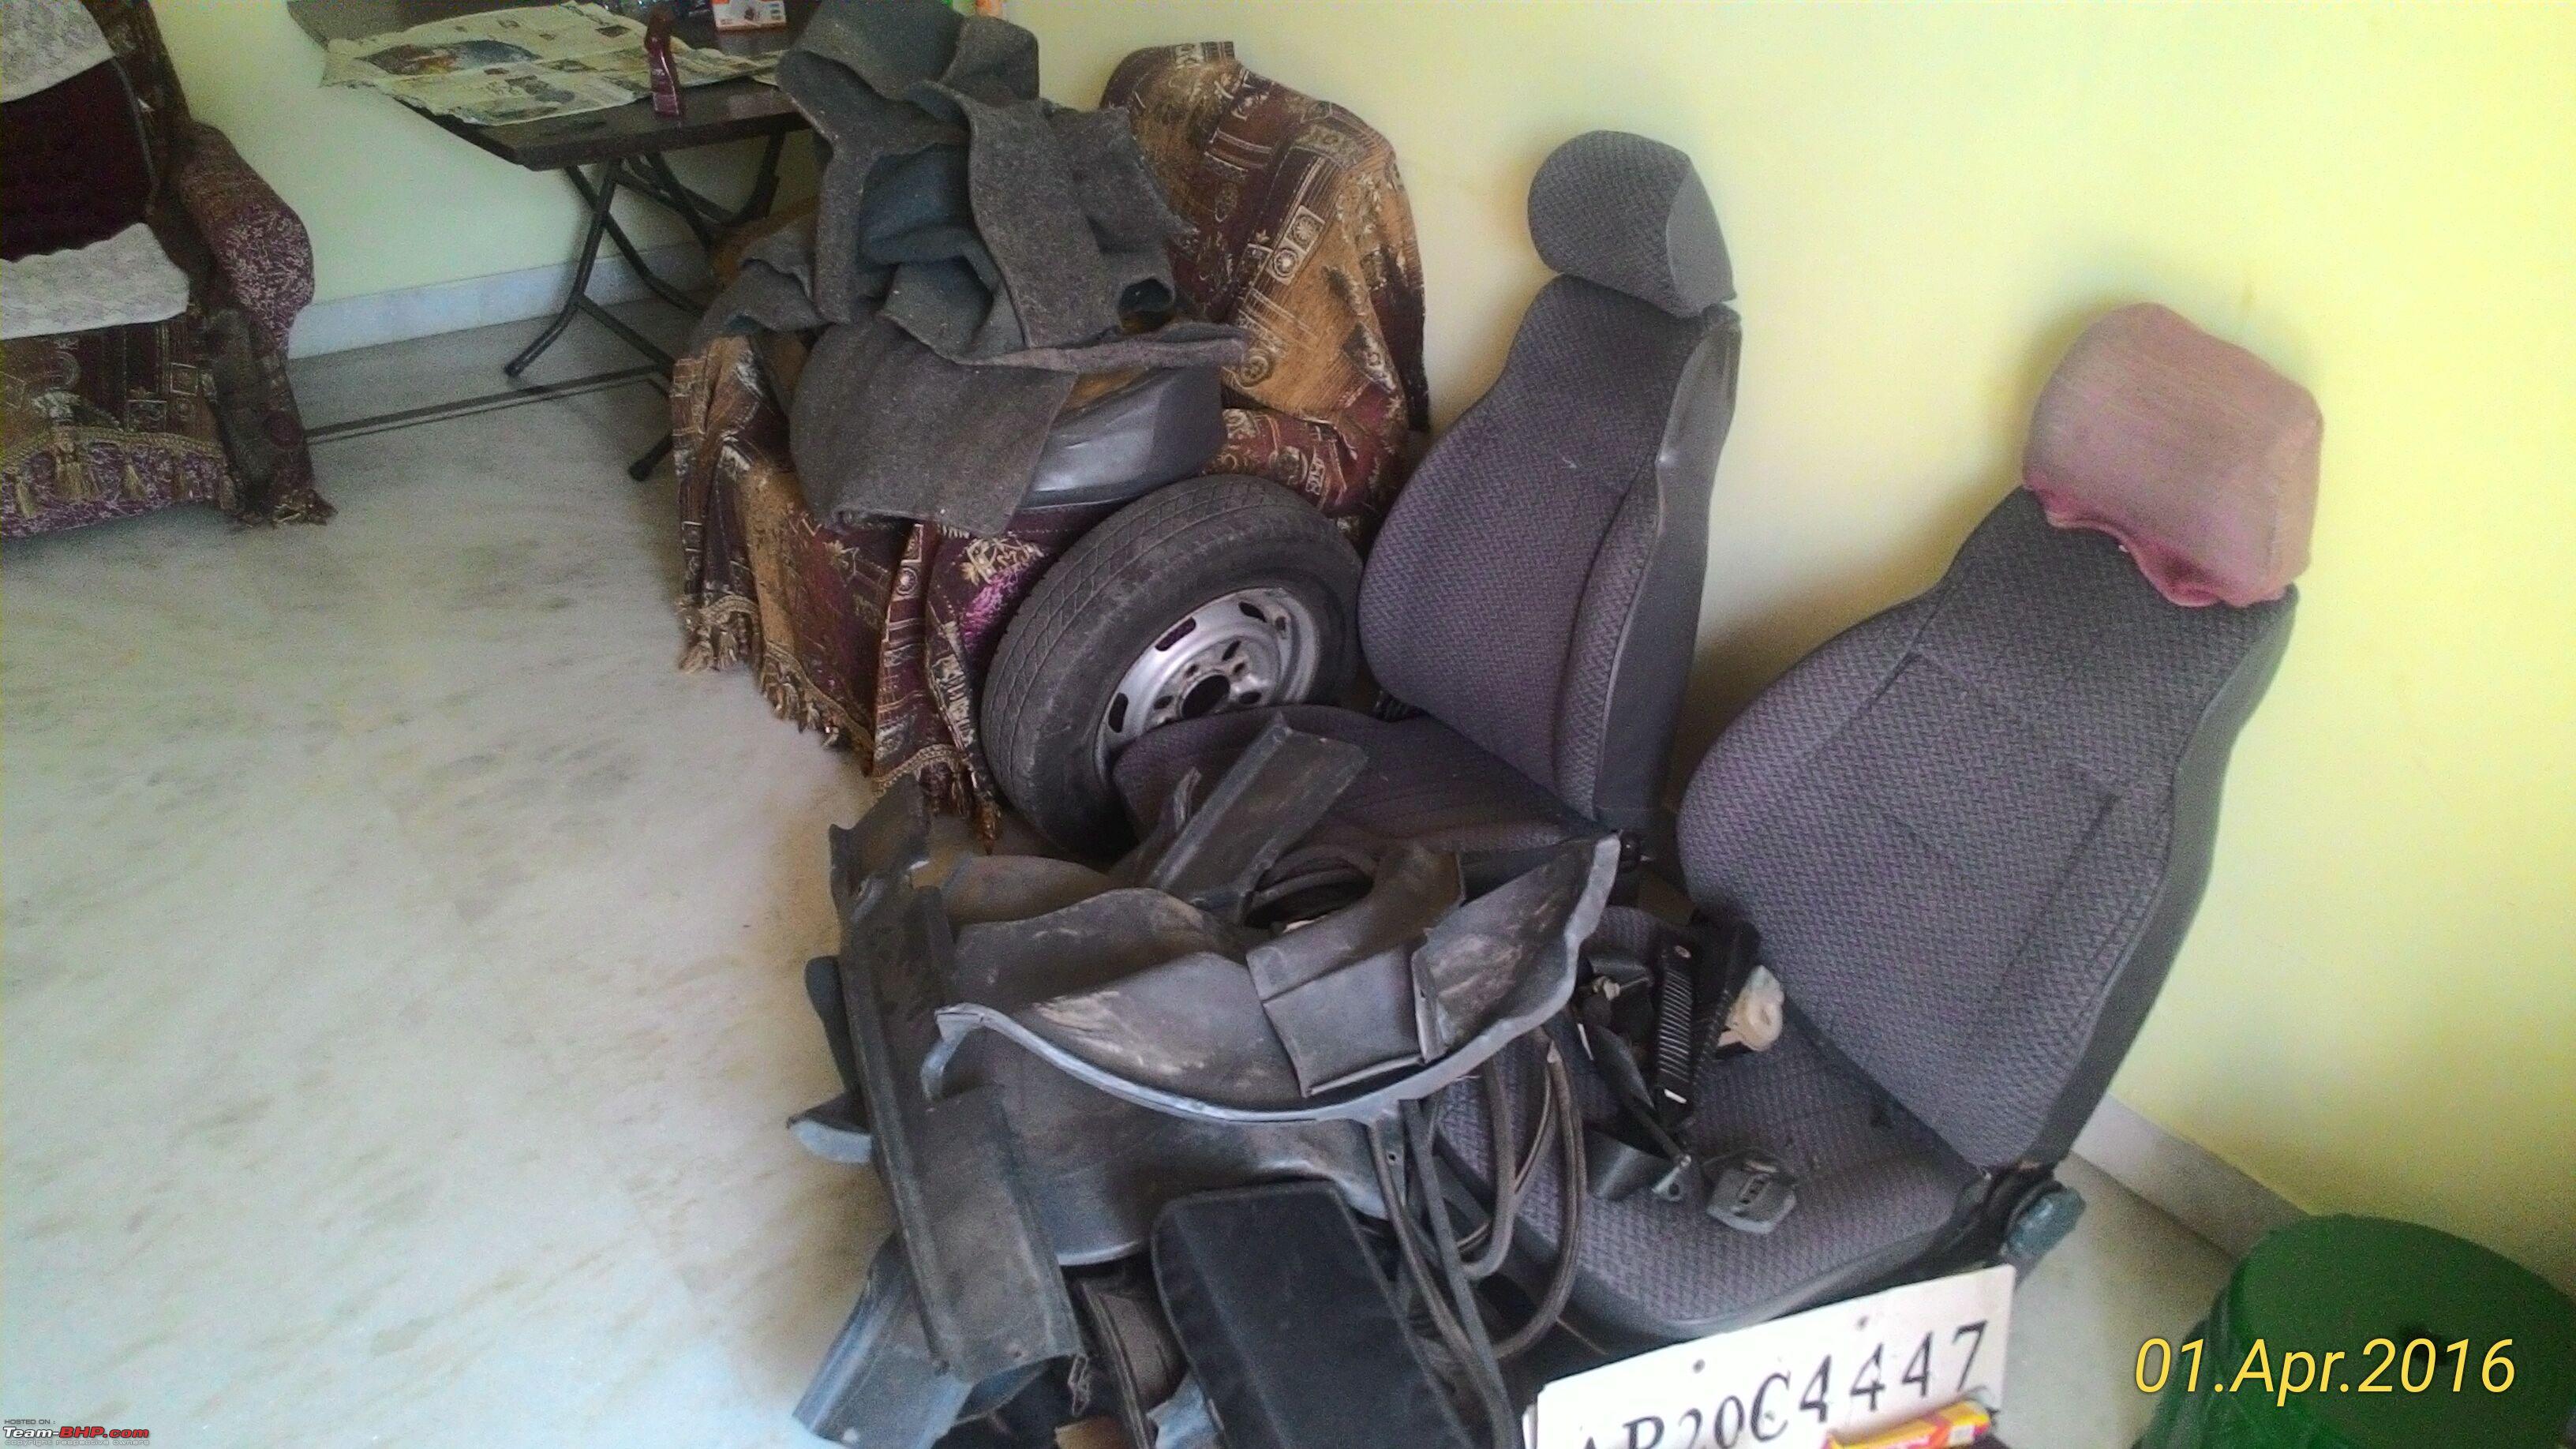
Here is the pile I have made.
Here is an original 1995 built radiator
My mom knows that there is nothing she could do to stop me. She knew that men will be men and I will do my job no matter what. Furthermore, she wanted the car to be re-conditioned so that it could be used for city runabouts. So, she too silently sat and watched as I did my work in the front yard. Here are a few pictures I have clicked before the work started.


The rust was more than I previously anticipated. Rust was cropping up at every single nook and corner of the car. And our car does not have anti-rust protection of any sort. And although the rust was not severe, I knew it would spread everywhere and 10 years down the line, I would have to add filler everywhere. But dad only bought me two spray cans of white spray to patch up the rust. Dad already disapproved of getting the car re-painted because he felt that there is no point in spending money on the car that is more than the current value of it. And I also knew that dad would not allow me to spend a lot. And I could not sleep a good night's sleep knowing that my car is full of rust. So, I went hunting and scoured a can of pink enamel paint which was bought some months earlier to paint some furniture. I knew my dad would disapprove of it. I also knew that my dad would not allow me to buy new paint either. So, as soon as he left for office, I secretly applied it so quickly so that there when he comes back home, the crime is already done and there is no point in punishing the criminal.
A look at the rust the floor was catching.
It was not that it was an instinctive decision. It was a well informed decision to paint the car using enamel paints knowing the drawbacks that it poses. That evening, dad came back home and just laughed at what I did. The next morning, he saw the paint top layer dried off and thought that my idea was not bad at all. Paint lustre is good and it seems to be coming up well. He did not tell me anything but I knew this meant a green signal. So, I went to the shop and bought a white enamel paint. I did the back of the car in white. Please note that I only did the interiors. I did not touch the exterior because I did not want to spoil the looks of it, in case anything goes wrong. I knew that the top layer of enamel paint dries off quickly but the layers underneath take upto a month to be completely dry. So, painting was the first job I did.
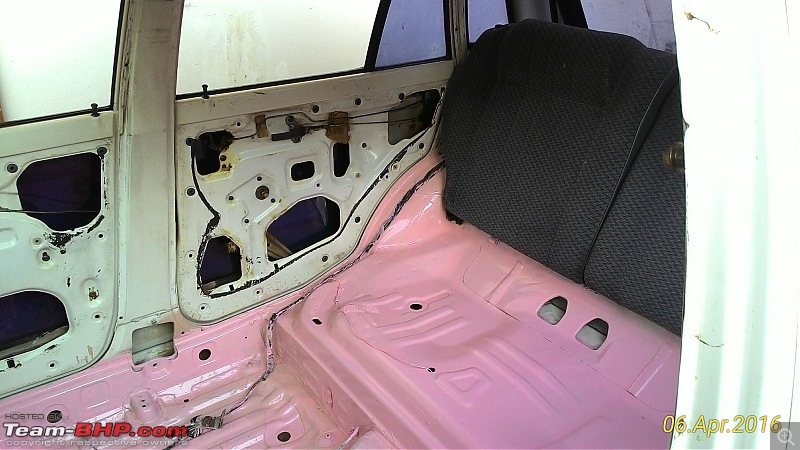
A look at the pink paint I first used
Then came the actual business of engine overhaul. Everything was in working condition except for engine overheating and smell of petrol under normal acceleration. I knew my engine water jackets must be clogged up as well as my carburetor. Dad noticed what I was doing and he was so confident that I would mess up that he repeatedly tried to delay my work asking me to do radiator or washing or something. I was hell bent on doing what I wanted to do. So, I took out the carburetor and wanted to soak in petrol. But it was big and dad was already skeptical and angry if I could fit it back on. So, I displayed some modesty and told dad that since soaking requires a lot of fluid, I will soak it in diesel because diesel is cheap. That calmed him down a bit. And then he went to office. It already started feeling strange for me to be speaking to a phone while people around me look at me with question mark faces(because I was making my own youtube series). And the time it was taking for me to finish the project was further discouraging.
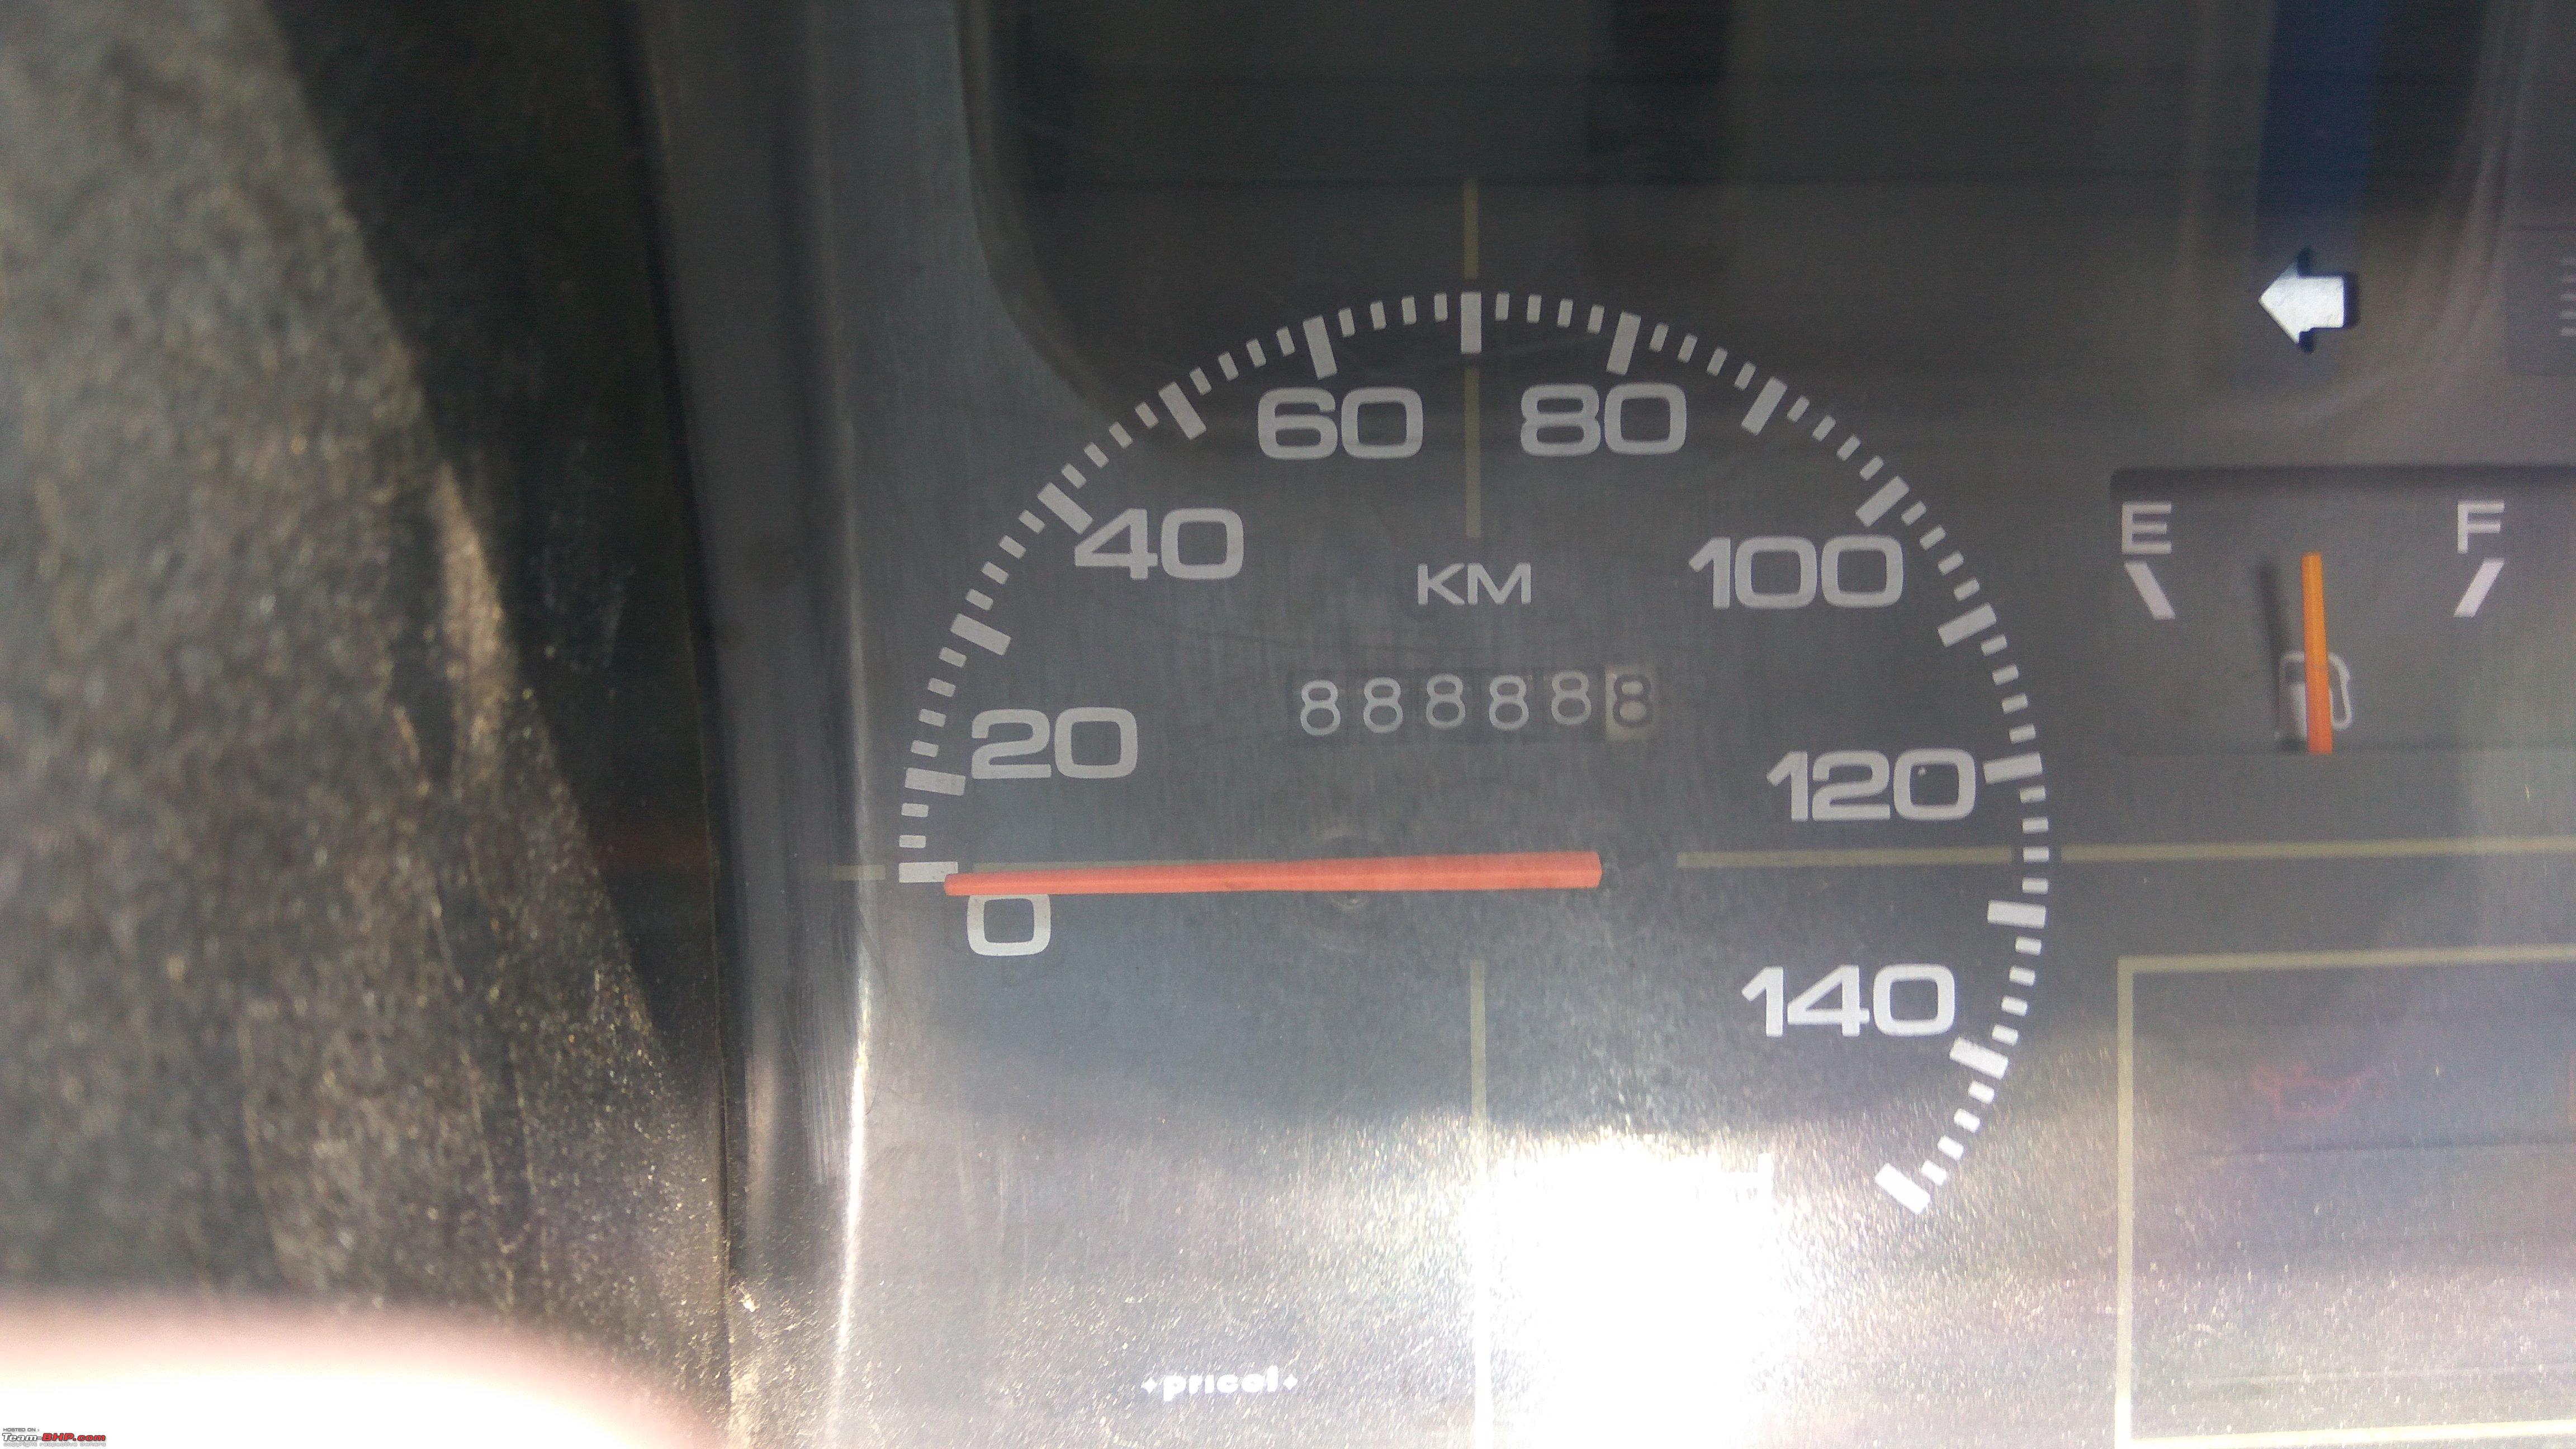
But I soldiered on and finally cleaned every part of it and got it ready. Got myself new packing. The only problem was that Maruti 800 has a double barrel carburetor. There is a primary one which works when the engine is idling or at low rpms. There is a second one which activates only when we floor it. The valve of the second hole is blocked and soaking in engine oil, spraying WD-40 or hitting with a hammer did not work. I gave up on that and fitted it back. It was already 8 days by now and parents were raising brows as to whether the project will have an end date and if the new carburetor hasn't made matters worse. I was bluntly ignoring them and I opened the engine cover to check for valve clearances and sprayed some WD-40 on the valves from the springs. That should at least clean the valves to some extent. I found out that the valve clearances was good and only that of the nail thickness and I also found alarming how tight the clearance was after 20 years of use. Does it mean that the valves were previously tightened beyond limits. That's not likely to happen and it must be japanese technology coupled with low usage of only 80,000kms of use in 20 years. So, I left it to the state.
I did the spark timing adjustment as per the manual and found out that the car was having a rough idle when cold. I applied my own logic and thought that the flywheel is mounted wrong and so I retarded the spark timing. And the results were surprising. The engine, my god, was silky smooth. A pedal became very much sensitive to inputs. Of course, it was also due to the fact that the carburetor was also cleaned up thoroughly and this is the first time I have started it. Itching for a drive, I realized that the interiors were all stripped out. The paint was still not completely dry. I could use my finger nails to create an impression in the paint.
But I was running out of patience. I knew I had the cooling system to do. I opened the pipe connecting the engine outlet to the radiator and drained all the fluid, poured water into the radiator, cranked the engine and let it run for 10 minutes and drained it. Repeated the step 3 times hoping there would be scales of coolant deposit chipping away and coming out when I am draining the coolant system. Shockingly, I found none. I concluded that it must be the bad ignition timings causing the engine to overheat. So pack up time because I was itching for a test drive. I got some 8mm thermocol roll as a sound deadening/insulation material and stuck it to the car floor with gum and put the mats back on.
Everything assembled, dad and mom were impressed and eager about the car. Dad was particularly happy about the nil vibrations that the car gave during idle. I wanted to get the car down when mom and dad wanted to keep it up and give me more time to do more hoping that I could make it brand new

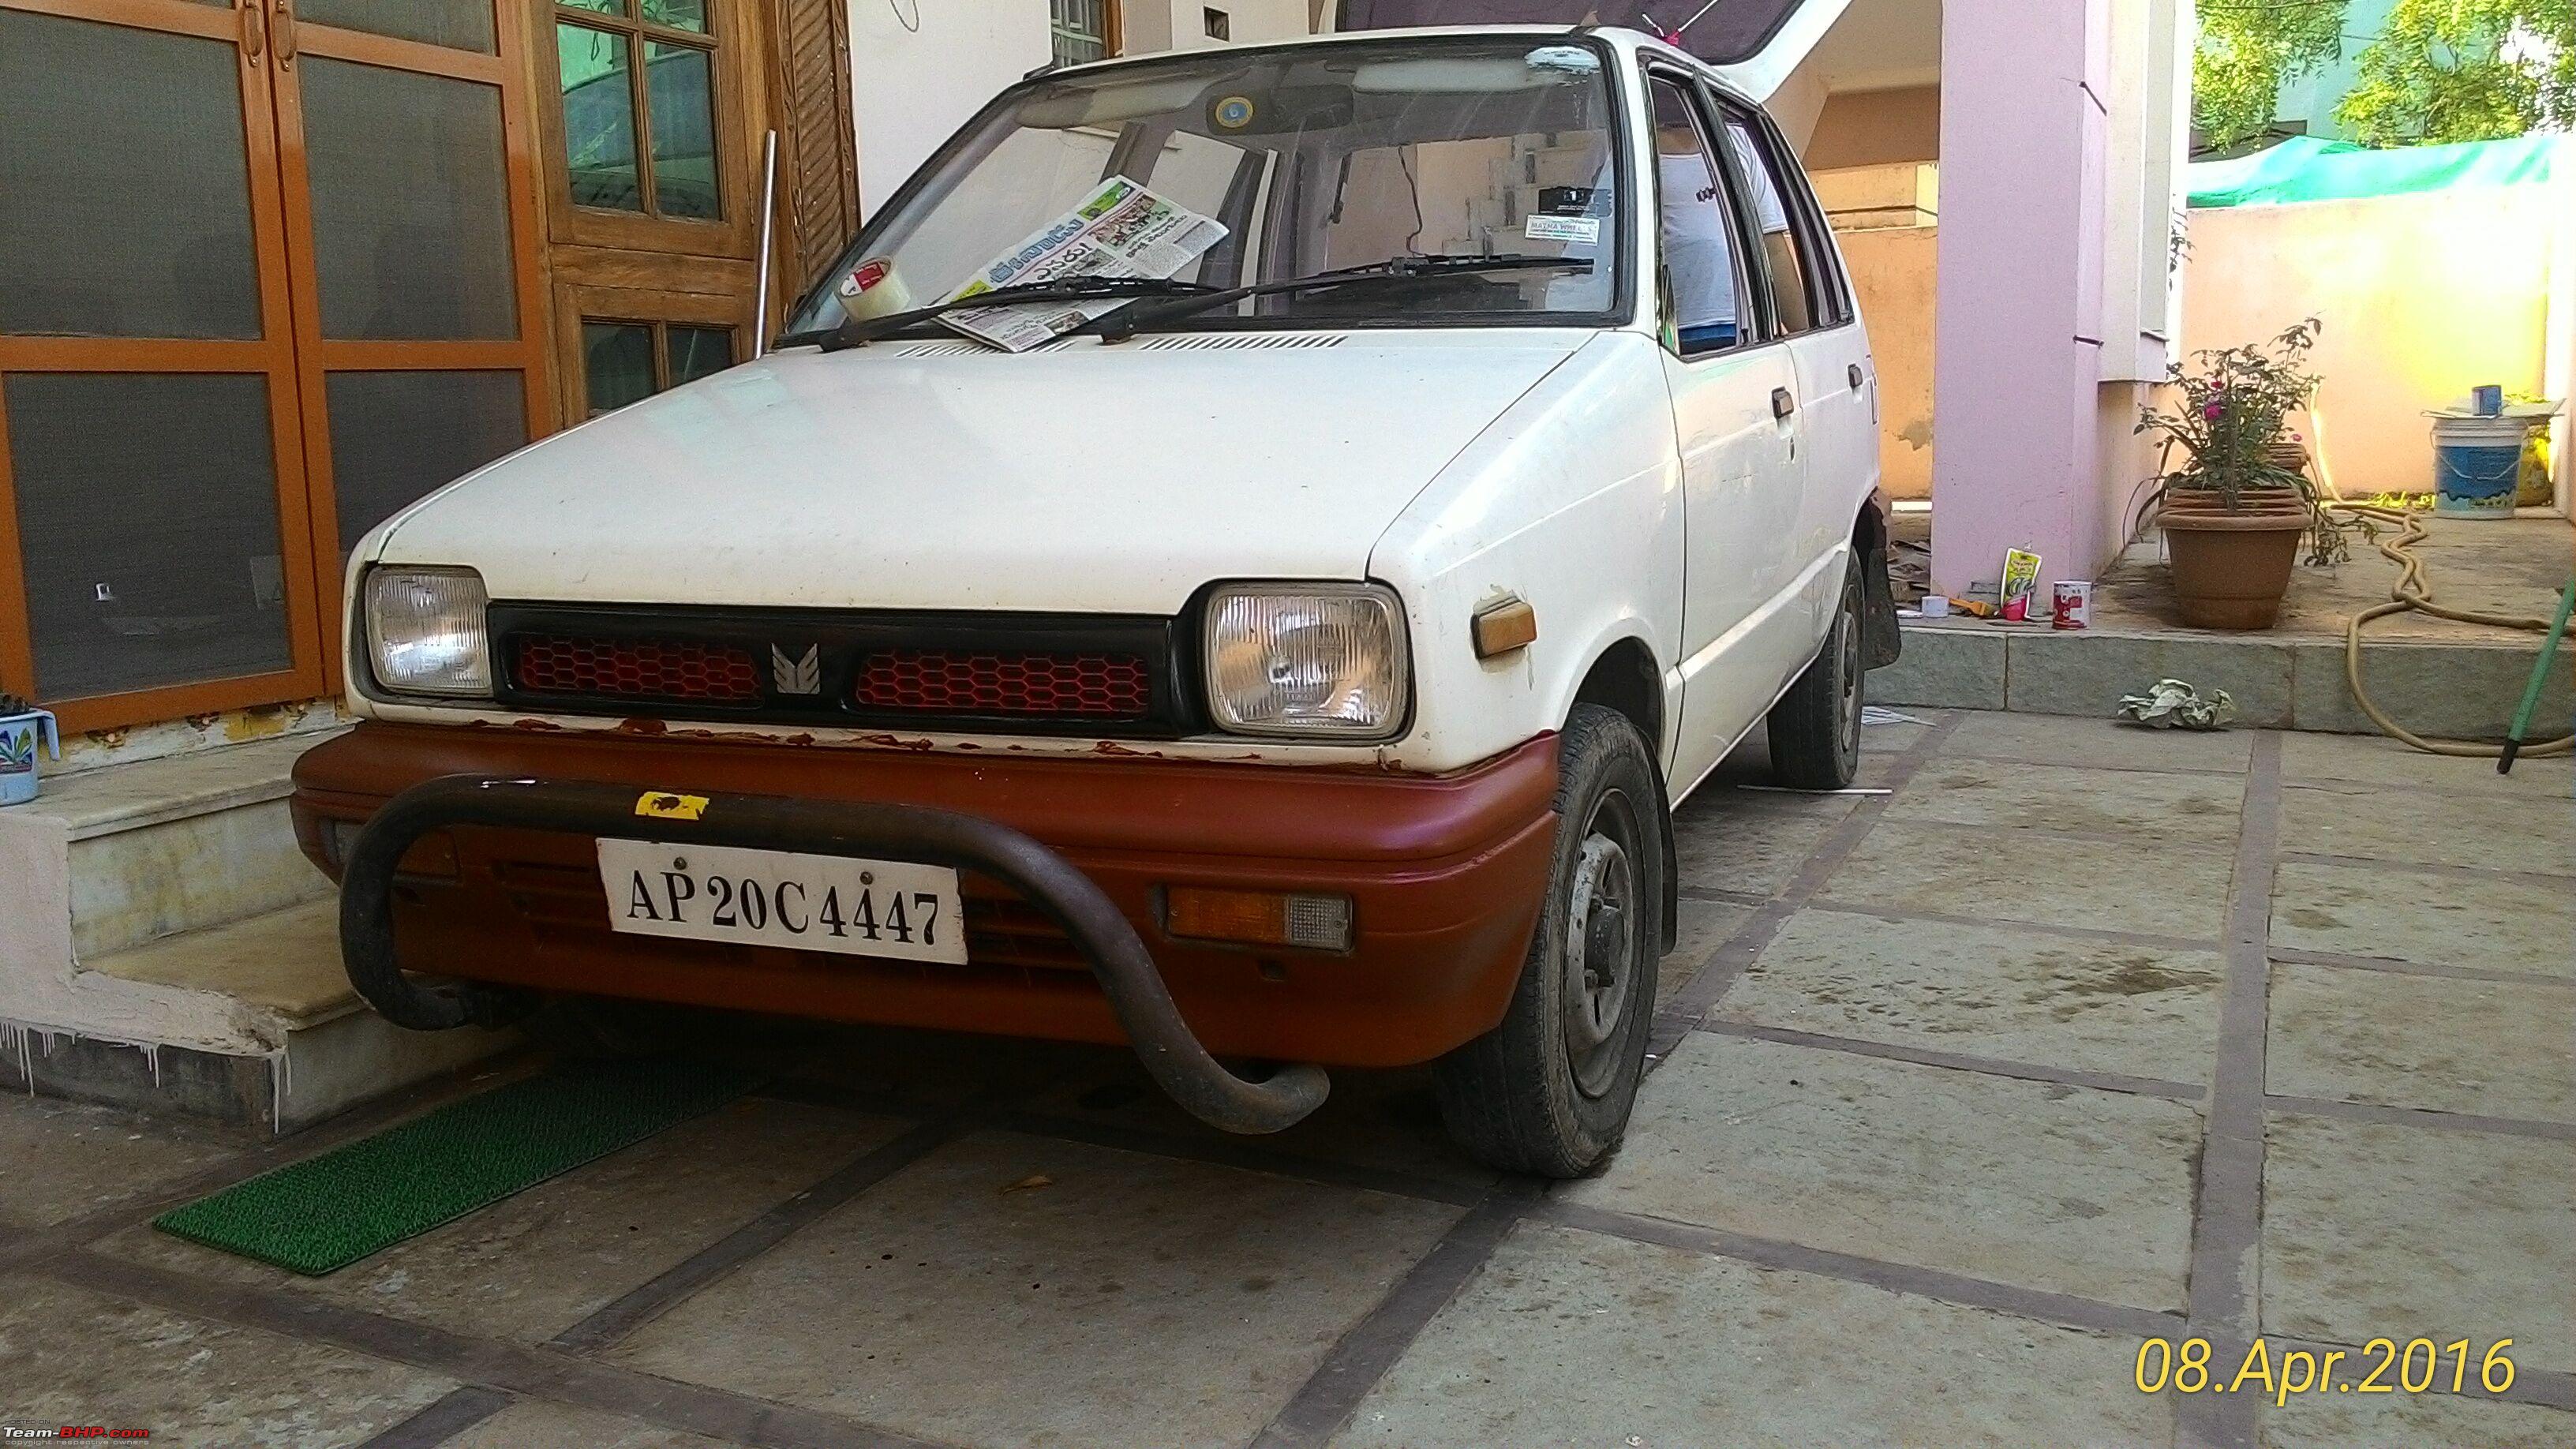
. So, on their insistence, i got a small can of black paint to do the bumpers. Before I did that, I did a small experiment where I painted the bumper with red oxide to see how coloured bumper looks like. It looked awesome. I could not stop looking at it. But dad felt that it makes the car look second hand because that's the trend these days. People are buying old cars in second hand for very cheap, adding some daring colour scheme and creating nuisance with their incompetence in driving and wrongful parking. And dad wanted the car to look dignified. So, with a heavy heart, I agreed and painted it black.
A look at the bumper in Red-oxide. Looks good. Ain't it.
The back part was painted in white enamel paint
Got the car down and it was an absolute hoot to drive. It was so fast, unbelievably fast. Maybe it was because of the ignition timing. Or maybe it was because I was using the Getz and in Getz, you don't get the feeling of acceleration whereas in Maruti, you can even feel 1 kmph change in speed. But I noticed that it was drinking petrol quite fast. I was getting 14 kmpl which was generally not the case. Maybe it was because the tuning transformed me into a hooligan. I could simply not resist zipping through the traffic because of the new found speed. Or maybe the tuning was bad itself. And carburetor tuning did not help either. I decided that it was ignition timing at fault and restored it to service manual specification. The acceleration became comparatively slow even though it is still better than before the rebuild.
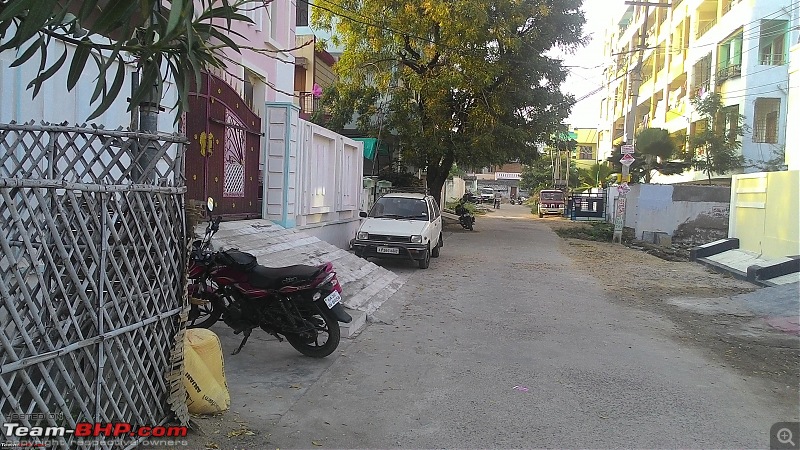
Status report
There is no longer any smell of petrol even under hard acceleration. Mileage is now close to 17kmpl in city when I mostly travel in 3rd doing 40 (a sparsely populated city). I am yet to take it on a highway. The thermocol mat helps improving the effectiveness of AC. I got the car a new set of tyres and the tyre shop guy was awestruck when he tried to remove stephney. He saluted me and told me that mine is the best maruti he has seen in his entire life. So well maintained. The car can easily outrun our mundane hatchbacks and keep up with swift and figo. The paint dried after one and half month. Until then the paint was dry but everytime I stepped into the cabin, I had the odour of paint and that was embarrassing. Now, it's completely gone. Until the paint was dry, the rubber beadings on the door would occassionally stick to the newly painted surface. Problem gone now.
So, time for the videos of restoration.


 2nd June 2016, 11:40

 (21)
Thanks
(21)
Thanks


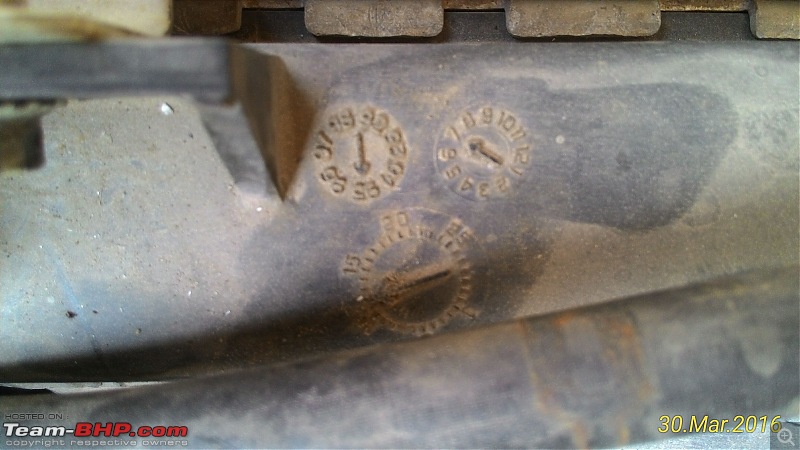
 . Specifications are as follows: Inlet valve clearance = 0.15mm (6 thou) / exhaust valve clearance = 0.175mm (7 thou), both in hot condition / dwell angle = 62 degrees / ignition timing = 7 degrees BTDC measured on the flywheel through the window in the clutch housing / spark plug = NGK BP5ES (not BPR5ES) / plug gap = 0.8mm (32 thou) / fuel pump open delivery > 900cc per minute / clutch pedal free play = 22 to 25mm.