| |||||||

 |
| Search this Thread |  948,300 views |
 29th April 2022, 20:39
| #871 | |
| Distinguished - BHPian  | Re: My Car Hobby: A lot of fiddling, and some driving too! Jaguar XJR, Mercedes W123 & Alfa Romeo Sp Quote:
https://reasonabletheology.org/five-...ines-of-grace/ Used it incorrectly. Told you before, dont trust the internet!!  Jeroen | |

|  (1)
Thanks (1)
Thanks
 |


| The following BHPian Thanks Jeroen for this useful post: | Thad E Ginathom |
| |
|
29th April 2022, 21:40
| #872 |
| Distinguished - BHPian | Re: My Car Hobby: A lot of fiddling, and some driving too! Jaguar XJR, Mercedes W123 & Alfa Romeo Sp We move from calvinism to Jeep tune up!! No problem here on the Internet. The Jeep being pretty much an 4x4 off road for both the Rednecks and the city dweller has a pretty simple maintenance schedule. There is a so called schedule A and a schedule B. The schedule B is for those owners who find themselves in dusty, city type of driving, trailer towing, hotter climates, off roading etc.   So in the Netherlands it would be fair to assume the Jeep requires schedule A. However, you just don’t know what kind of maintenance has been performed over the years. There was no documentation. From what I had seen so far, it was maintained, but probably just the bare minimum to pass the annual MOT. So I just start from scratch on any old car I get in a similar condition. Which is like I am doing here: 1) Anything requiring immediate attention (based on test drive and visuals) 2) Safety Brakes and suspension 3) New filters on everything, new spark plugs, new distributor gap, new rotor, new spark plug leads, 4) Change out all liquids 5) Everything else The reason I started on the sagging door was simple; it was really bad and if you leave it for to long, the hinge, which is welded to the chassis, will actually break off. You don’t want that. Next, as shown earlier the brakes and suspension. Replacing the various ignition components as described above is known in Jeep circles as a tune up. They sell complete kits. I know from previous experience it can make a big difference! Even though all these components might look fine, over time they do wear out and replacing them is a good starting point on any old car that you buy. My Jeep has the wonderful 4.0L six cylinder in line. Really nice engine. The spark plugs came out very easy. Again, the previous mechanic had used ceramic paste and tightened them properly. (And not overtightened them as is easily done). The spark leads have all different lengths, so you must make sure the shortest goes to cilinder 1 and the longest to cilinder 6. As is tradition I compare old with new. And basically plugged in my new cables in the same orientation as the old ones. That was mistake as I based the orientation of the distributor cap from the outside, old to new. Check the little circle shape protrusion, next to the coil connection in the middle:  When it came to fit, it would not. This little protrusion on the cap is 180o of on the old versus the new. As they say live and learn!! Took out the air filter completely, so I could look underneath. Just checking for rust. It all looked quite ok   Next the various fluids. When you get yourself a 25 year old car, the recommended fluids as per the manual might be a bit of a challenge. You won’t be able to get them anymore. You will need to revert to something newer. But always try to stay as close to the original specification as possible. i will move from mineral to semi-synthetic, but never to fully synthetic. Whereas it is pretty important to get the correct specification for your engine oil, for transmission boxes it is even more critical! Especially on automatic transmission. Get it wrong and you are likely to have big problems very quickly. These days I follow the Kroon Olie recommendations. https://www.kroon-oil.com/nl/ You punch in your licence registration number and it comes up with a recommendation on what fluids to use and also how much. About six months ago, I visited my Jaguar specialist Raymond to pick up a new shock absorber. He told me I was welcome that day, but they would have little time for me. Kroon representatives were present that day to show and teach Raymond and his staff the use of the newest Kroon Engine Flush machine. I asked if I could participate as well, no problem!! So I spend almost a day in the company of some of the Kroon oil boffins. Very impressed and since I used Kroon oil on most of my cars. First thing I did was take the Jeep for a little test drive, what with its new air filter and tune up the engine ran noticeably better and smoother. Drove it for about 15-20 minutes so the engine oil was properly warmed up. Parked it back into my garage. And here is the cool thing of working on a Jeep. For these sort of jobs I don’t need to jack it up. I have easy access to all drain plugs, the auto box, differentials and transfer case.!! Drained the warm engine oil:  Also replaced the engine oil filter. Next, I took of the sump of the automatic transmission. It does have a drain, but even so, quite a bit of fluid remains back. Inside the sump are two small magnets  Some presence of small metal shavings, nothing to worry about. You will also notice that the colour of the fluid is still very clear ATF -red. Whereas this does not mean the fluid is 100%, if it was not red, the fluid would be 100% not ok!!  Endless cleaning before everything goes back  Carefully layout the gasket and make sure the bolt holes line up. In fact I insert the little bolts with the gasket in place. Keeps everything in place and makes it easier to re-install. (Note the use of the ceramic anti-seize paste on each and every bolt!  The underneath of the automatic transmission, you can see the “brain”. You can also see the automatic transmission filter. I changed that out for a new one, obviously. Everything else looked really clean, did not touch anything.  This Jeep has a real dipstick under the hood for checking the fluid in the automatic transmission. You also use it to refill it. Always check the manual on how you check the level of the automatic transmission. On the Jeep, the fluid must be at normal operating temperature, the engine must be running at idle. And you must cycle through all position of the transmission and keep it in each position for 15-20 seconds. (E.g. from Park into Reverse, D, 1,2 etc,) then back in park and check the level. Overfilling can be as damaging as underfilling. Next, both front and rear differentials. Now on some of these Jeeps the differentials have drains, some don’t. Mine did. But it is good practice to remove the complete cover. This will allow for much better access to the gears and the housing and you can clean everything properly. No regular gaskets, just the fluid gaskets from a tube. I was pleasantly surprised by how the transmission oil looked as well as the inside of the differential.   Lots of cleaning of everything before it gets bolted back on:  Last thing I did was the transfer case. Here the only option is to drain it by means of the drain hole. And pump new fluid back in.  I had bought this little handy pump a few days earlier. Spanner mate and I had been back to the Classic Car & Restoration show, at the NEC in Birmingham. Probably my favourite classic car show. https://www.necrestorationshow.com Better yet; a small report from our last visit in 2019! https://www.team-bhp.com/forum/diy-d...ml#post4563770 This was on the 18th of May: the day the UK let go of just about all Covid restrictions. Four days later I had Covid. Luckily very mildly only. I had also bought cooling liquid. On any car that needs refreshing every couple of years as well. However, I noticed a very tiny leak on the radiator. So I have decided to replace the radiator, cooling pump and thermostat, maybe a few more hoses as well. Parts have been ordered. I will need to drain the system then anyway, so it will be part of the complete cooling system overhaul in a couple of week. Luckily, a car can still pass its MOT with a leaky radiator. I do have to put new headlight set at the front before it can pass the MOT. Not a problem. The one fluid left untouched is the hydraulic steering fluid. I am a little apprehensive about it. Not quite sure how to go about it yet. Usually, I just undo the pressure hose of the pump and have the pump discharge all fluid into a bucket. There are two problems, its a bit difficult to get at and the couplings look badly rusted. So I will tackle that another day. Steering is very good otherwise, but it does need its regular maintenance. If you glanced through the maintenance schedule, you will notice that this Jeep requires a lot of lubrication!! That is pretty old school. My Mercedes W123 has a few points, the Alfa Spider only one or two, but the Jeep still has dozens of old school lubrication points. Time to break out the grease gun!! Next up, and it is a BIGGIE: Replacing the illustrious Air Conditioning Evaporator! BIG job as you will see. As (bad) luck would have it; I had the AC completely running only last week. Yesterday my wife asked me to look at the AC on her 2015 Ford Fiesta. Stopped working completely. Long story short: It has a leaky condensor. Only slightly less work. Just about the whole front will come off. My new AC specialist friend Jack and I will replace it in a couple of weeks time. So if you’re interested in AC work on a modern Fiesta, stay tuned!! Jack says we will do it in a morning. The Jeep, working mostly by myself took probably about 16-18 hours in all! But then again he is the specialist. More to come!! Jeroen Last edited by Jeroen : 29th April 2022 at 21:48. |
|
| (18)
Thanks
|
| The following 18 BHPians Thank Jeroen for this useful post: | anandhsub, ashis89, carthick1000, DicKy, Gannu_1, IcarusMan, keroo1099, Nempuguru, PM - B, R2D2, sagarpadaki, SS-Traveller, subie_socal, Thad E Ginathom, vaasu, vb-saan, vishy76, VivekCherian |
|
30th April 2022, 01:25
| #873 |
| Distinguished - BHPian | Re: My Car Hobby: A lot of fiddling, and some driving too! Jaguar XJR, Mercedes W123 & Alfa Romeo Sp One important thing I forgot to mention. When you are draining the oil of a differential, an auto box, an engine, a transfer case, always check if you can get the filler cap of, before you drain!!! Old oil is always better than no oil!!! Jeroen |
|
| (6)
Thanks
|
| The following 6 BHPians Thank Jeroen for this useful post: | carthick1000, PM - B, R2D2, SS-Traveller, Thad E Ginathom, vaasu |
|
30th April 2022, 21:55
| #874 |
| Distinguished - BHPian | Re: My Car Hobby: A lot of fiddling, and some driving too! Jaguar XJR, Mercedes W123 & Alfa Romeo Sp On to the BIGGIE: Replacing the AC Evaporator. Lets start with the beginning. When I met with the family that owned the Jeep, prior to me buying it from them, they told me the story of the AC. They owned up, before I asked, or even tried its switch it on. They had been on a family holiday in Germany. Two adults, three kids on the rear seat. Summertime, warm. AC was on. So they were driving happily somewhere along the river Moezel when they noticed some sort of white residu sticking to the inside of the front window, near the bottom opposite the vents. They were concerned the AC was leaking and stopped at a local garage. The mechanic checked a few things and told them the AC evaporator was leaking. They were very concerned, in particular for potential health hazards for the kids. So they asked the mechanic to permanently disable it. Which he did. I had a few problems with the story. I dont think the white residue was the refrigerant leaking. The system is already filled with R134A and that is more or less colourless. Also, I dont think any compressor oil escaping with the refrigerant would cause this. Perhaps the evaporator was getting so cold, due to low refrigerant, it was icing up and blowing very cold air up to the front window, which in its turn cause condensation to freeze? I really dont know. The other problem was they did not know what the mechanic had done to the AC system to permanently disable it. When I checked, it was definitely not working. The AC Compressor would not engage. I told them replacing the AC evaporator is a huge job, requiring expensive parts and it takes a lot of time. So I used it to knock down the asking price. I was fairly confident that I could fix it, whatever the issue was. These AC Evap as they are known, do start to leak eventually. But I was hoping it might be a simpler problem. I started investigating the AC problem pretty early. I had to wait for all my brake and suspension parts. So might as well make best use of the time. The Jeep heating and AC system is pretty basic, as everything else on this car. Essentially both the heating element or core as it is known, together with the AC evaporator are inside a big plastic box. That box is also equipped with all the flaps, valves, cabin fan and actuators to control heating and cooling. The Jeep engineers thought it a great idea to hide the complete box behind the dashboard. A little schematic diagram:  All the actuators are pneumatically (vacuum) operated. All the electrical controls are simple switches and relais. The compressor is driven by a traditional clutch.  The first step in diagnosing what was wrong with my AC was to check all the electrical components. At the time I did not have the full Jeep workshop manual. Only the Haynes manual. But I got some great help from members on the Jeepforum.com https://www.jeepforum.com/threads/19...agram.4457667/ We basically checked every electrical connection and simulated the two pressure sensors operating.  The Jeep electricals being very basic, you dont need more than a multimeter to trouble shoot. I did check for OBD codes as well, but there were none. Swapped a few relais, just to see if that made a difference. Applied 12VDC direct to the compressor clutch. It engaged. Simulated the the low pressure switch closed and again the compressor clutch engaged. By this time I was fairly convinced, the AC electrical were fine. So the notion of it being an actual leak was becoming real. It was obvious that there was no pressure in the system, so most likely the German mechanic just emptied out the refrigerant. I needed someone who could help me pressure test the AC system. In the five years that we have been living here, I did not work on any AC systems. Pressure testing, vacuuming and recharging an AC system is a bit of specialised job. Requiring special tools, the appropriate gasses and knowledge. So I just googled and found an AC car specialist nearby. Only about 3 km from us. I often passed them, but it had never registered that they were AC specialist. They also did general work and MOT on cars, any make/model. So I went over. Met and spoke to the owner Jack. Very nice guy very knowledgeable. Turns out he lives on the same dike as we do, in our village, only about 600 meters east of us. Live and learn. He told me to leave the Jeep with him. He would pressurise the AC and leave it overnight. The following day I went back. The system had lost its pressure. Jack told me he did a bit of leak tracing already. He confirmed the evaporator was the problem! He did not want me to pay for his work/time. Told me to go and fix it, come back, he would pressure test it again, and if it was all ok, recharge the system. Then we could settle financially. At least the diagnosis was firm now: I needed to replace the AC Evap. So I started looking into how and what. How do you replace it, and what is needed. By then I had also gotten my Jeep workshop manual which was very useful. Also, there are endless Youtubes out there about replacing your Heater Core and AC Evap. And this is the thing. Because both of these sit inside this box, behind the dashboard, it makes sense to replace both at the same time. I also decided to replace the dryer/Accumulator. I figured the system had been open to the air for quite some time. So the dryer was likely completely saturated with moisture.  Also, when you start replacing AC components you need to replenish the compressor oil. During normal operation you can assume that the total volume of oil in the system is spread proportionally to the volume of the individual components. Replace a component, replace the correct volume of oil as well. The Jeep manual has a handy table:  I also needed the special O-rings for the AC lines and obviously the compressor oil. I also bought, at my favourite tool shop HBM as usual, a special kit for working on these kind of AC lines:  And of course, I needed a new AC Evaporator and a Heating Core. I placed one big bulk order for everything. I did quite a bit of research on the forum, my manual and the YouTube. Eventually I found these videos that were extremely useful: The first video is a two part, about half an hour each. I found it extremely useful. This guy is an excellent teacher. He does not spend time video-ing him undoing and struggling with bolts and nuts. He shows the sequence on how to take things apart and where all the bolts, nuts, pins are located and how many, where to pull and push. The second video had some great tips on preparing the heater/ac box before re-installing it. I used quite a few of his tips. The official procedure in the Jeep workshop manual is to take the whole dashboard out. Nobody does it that way anymore. The US DIY Spanner community has come up with a cool short cut. Saves at least 2-3 hours of spannering. Essentially it means you dont have to take of the Steering wheel (and airbag) and a lot of the electrical connections near the driver side. What you do is undo two nuts holding the Steering Adjustment mechanism in place. The whole steering mechanism, column, steering wheel, rake and reach mechanism then simply can be dropped down. it gives enough clearance to pull the dashboard on the passengers side away from the firewall and wriggle the heater/AC box out. But first, when you start messing with the steering wheel and the dashboard, there are some very serious safety concerns: Disable the Airbags!! An airbag going off in your face can kill you or at least will seriously harm you. This is what the Jeep manual has to say about it: 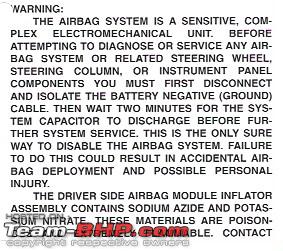 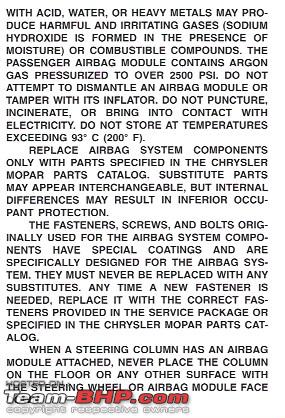 I am very reluctant and careful around airbags. So I will take both battery leads off. And I will wait at least half an hour before touching anything near an airbag. Better safe than sorry!! Spanner mate Peter was coming round to help me with this mega job. Unfortunately Peter could not make it at the last moment, so I had to do it all on my own. I have taken just a few photograph of the process of taking the Jeeps dash apart. Look at the video if you want to see it in all its detail. It involves a lot of spannering. When you use the pull the dashboard aside method only the passenger seat needs removing. I removed both just to get better access. The seats are held in place with four bolts, easy peasy to remove them. Makes for some decent legroom!!   The main reason I also removed the driver seat; it had some tears in the sidewall. Also, it needed some serious refilling! So whilst I was tackling the AC problems, my driver chair was getting fixed. I found a little car interior repair shop almost next door to Jeeppart in Vuren. Nice guy, Erik. He did a great job repairing my chair. Replaced the torn parts and refilled it very nicely. He told me he almost added 5 cm to the chair cushion!!  When you need to take so many parts off, I always put the nuts/bolts/fastners of each part in a plastic bag, label it and tape the bag to the part. Cant go wrong that way.  I put the passenger seat in the back of the Jeep and piled all the other parts, with little plastic bags holding bolts/nuts/spacers/fastners, stuck to them. When you take out a dashboard you are primarily removing bits of trim. And trim on a 25 year old car is brittle. So you need to go slowly, easy, and really check what you are doing. You dont want bits of trim lying around your workshop. If you step on it, you have a problem. So put them nowhere safe!   One of the reason this job took me so long was because of all this old trim. All of it needed some very thorough cleaning. A lot of it needed a bit of TLC. Bits had broken off. So I tried to glue and cement everything that had broken off or torn or damaged. Just takes a lot of time. The video was very good. But sometimes you get stuck. I had endless battles with the shifter knob and the center console. The Jeep manual states to push in the button on the shifter knob and pull it up and it should come of the shifter handle. I could not find a video where anybody actually does this. In the end I stood over the center console, one foot on each side and used both hands/arm to yank at the handle with all my might. Sure enough it popped off. Next was taking the centre console out. Nobody actually showed this and the manual just tells you which bolts/nuts to undo. But I got it stuck in various positions:   I must have messed around with this stupid console for 45 minutes. Tried everything, almost broke it, several times, but I could not get it out. So, I went for lunch, clear my mind. After an hour or so, I stepped back in the Jeep, looked at the console again. Took it out in the next 5 seconds, just like that!! Sometimes you just need to give yourself a bit of breathing space. Leave it alone and retry. It often works!! Lowering the complete Steering Wheel with the complete column and rack and reach mechanism completely attached worked a treat!!!   The dashboard is starting to come apart pretty good already!!  To be continued Jeroen |
|
| (9)
Thanks
|
| The following 9 BHPians Thank Jeroen for this useful post: | anivy, carthick1000, Gannu_1, IcarusMan, PM - B, R2D2, SS-Traveller, vaasu, VivekCherian |
|
30th April 2022, 23:08
| #875 |
| Distinguished - BHPian | Re: My Car Hobby: A lot of fiddling, and some driving too! Jaguar XJR, Mercedes W123 & Alfa Romeo Sp Jeep AC Evap replacement continued With all the appropriate parts of the dashboard removed, it was time to start undoing some other bits too in the engine compartment. I clamped off the two cooling lines going to the heater core and undid them. I used my fancy new AC line tools to undo the AC lines on the connection towards the AC evap and the dryer. To get better access I took away some other bits and pieces that were in the way. This is the top of dryer/accumulator. I took lots of images, just so I knew where everything was supposed to be going back into.    Here I have removed the dryer/accumulator and all that other lark. You can see the two disconnected cooling fluid lines (note the pink fluid), One AC line is still attached, the other has been removed completely as it is attached to the dryer.  The complete Heater Core & AC evap is held in place with just five bolts that stick out on the back of the box and protrude through the firewall. I had read everywhere, and you hear it in the video as well, these are 7/16” nuts. Very odd, everything else is metric on the Jeep. I don’t have these “imperial” sizes. I tried the nuts. Only to find they were just handtightened, so a metric size wrench did fine. Also, one of the nuts was missing. I was getting suspicious, this probably meant the whole box had been take out before!! Back into the cabin to undo the last bits before sliding the dashboard away. Underneath the passenger airbag compartment you see some connectors. The white one is a pneumatic connector. The green one is an electrical connection to the fan.  Those were all undone easily. So time to move the dashboard. I must admit I was a bit apprehensive about it. Really wished Peter had been there. But all the YouTubers rip out dashboards by themselves all the time. So I started gently pulling and tucking. It came a bit and then got stuck! Of course, it would get stuck on the first try. I spend about 20 minutes crawling all over this dash to try and figure what was preventing it from coming out. Eventually I found out, it was the cable from the central heating control. It control the position of the heater flap. This is it seen from underneath the dash looking up.  As per the YouTubers I had some rope handy to support the dash. With the heater control cable disconnected I could just slide it out. Just like that!!  It’s almost a sort of Sesam open; this is like a treasure trove, the Heater core & AC evap box is visible!!  With the dash sufficiently out of the way, I could easily pry out the box and here it is, finally!!! 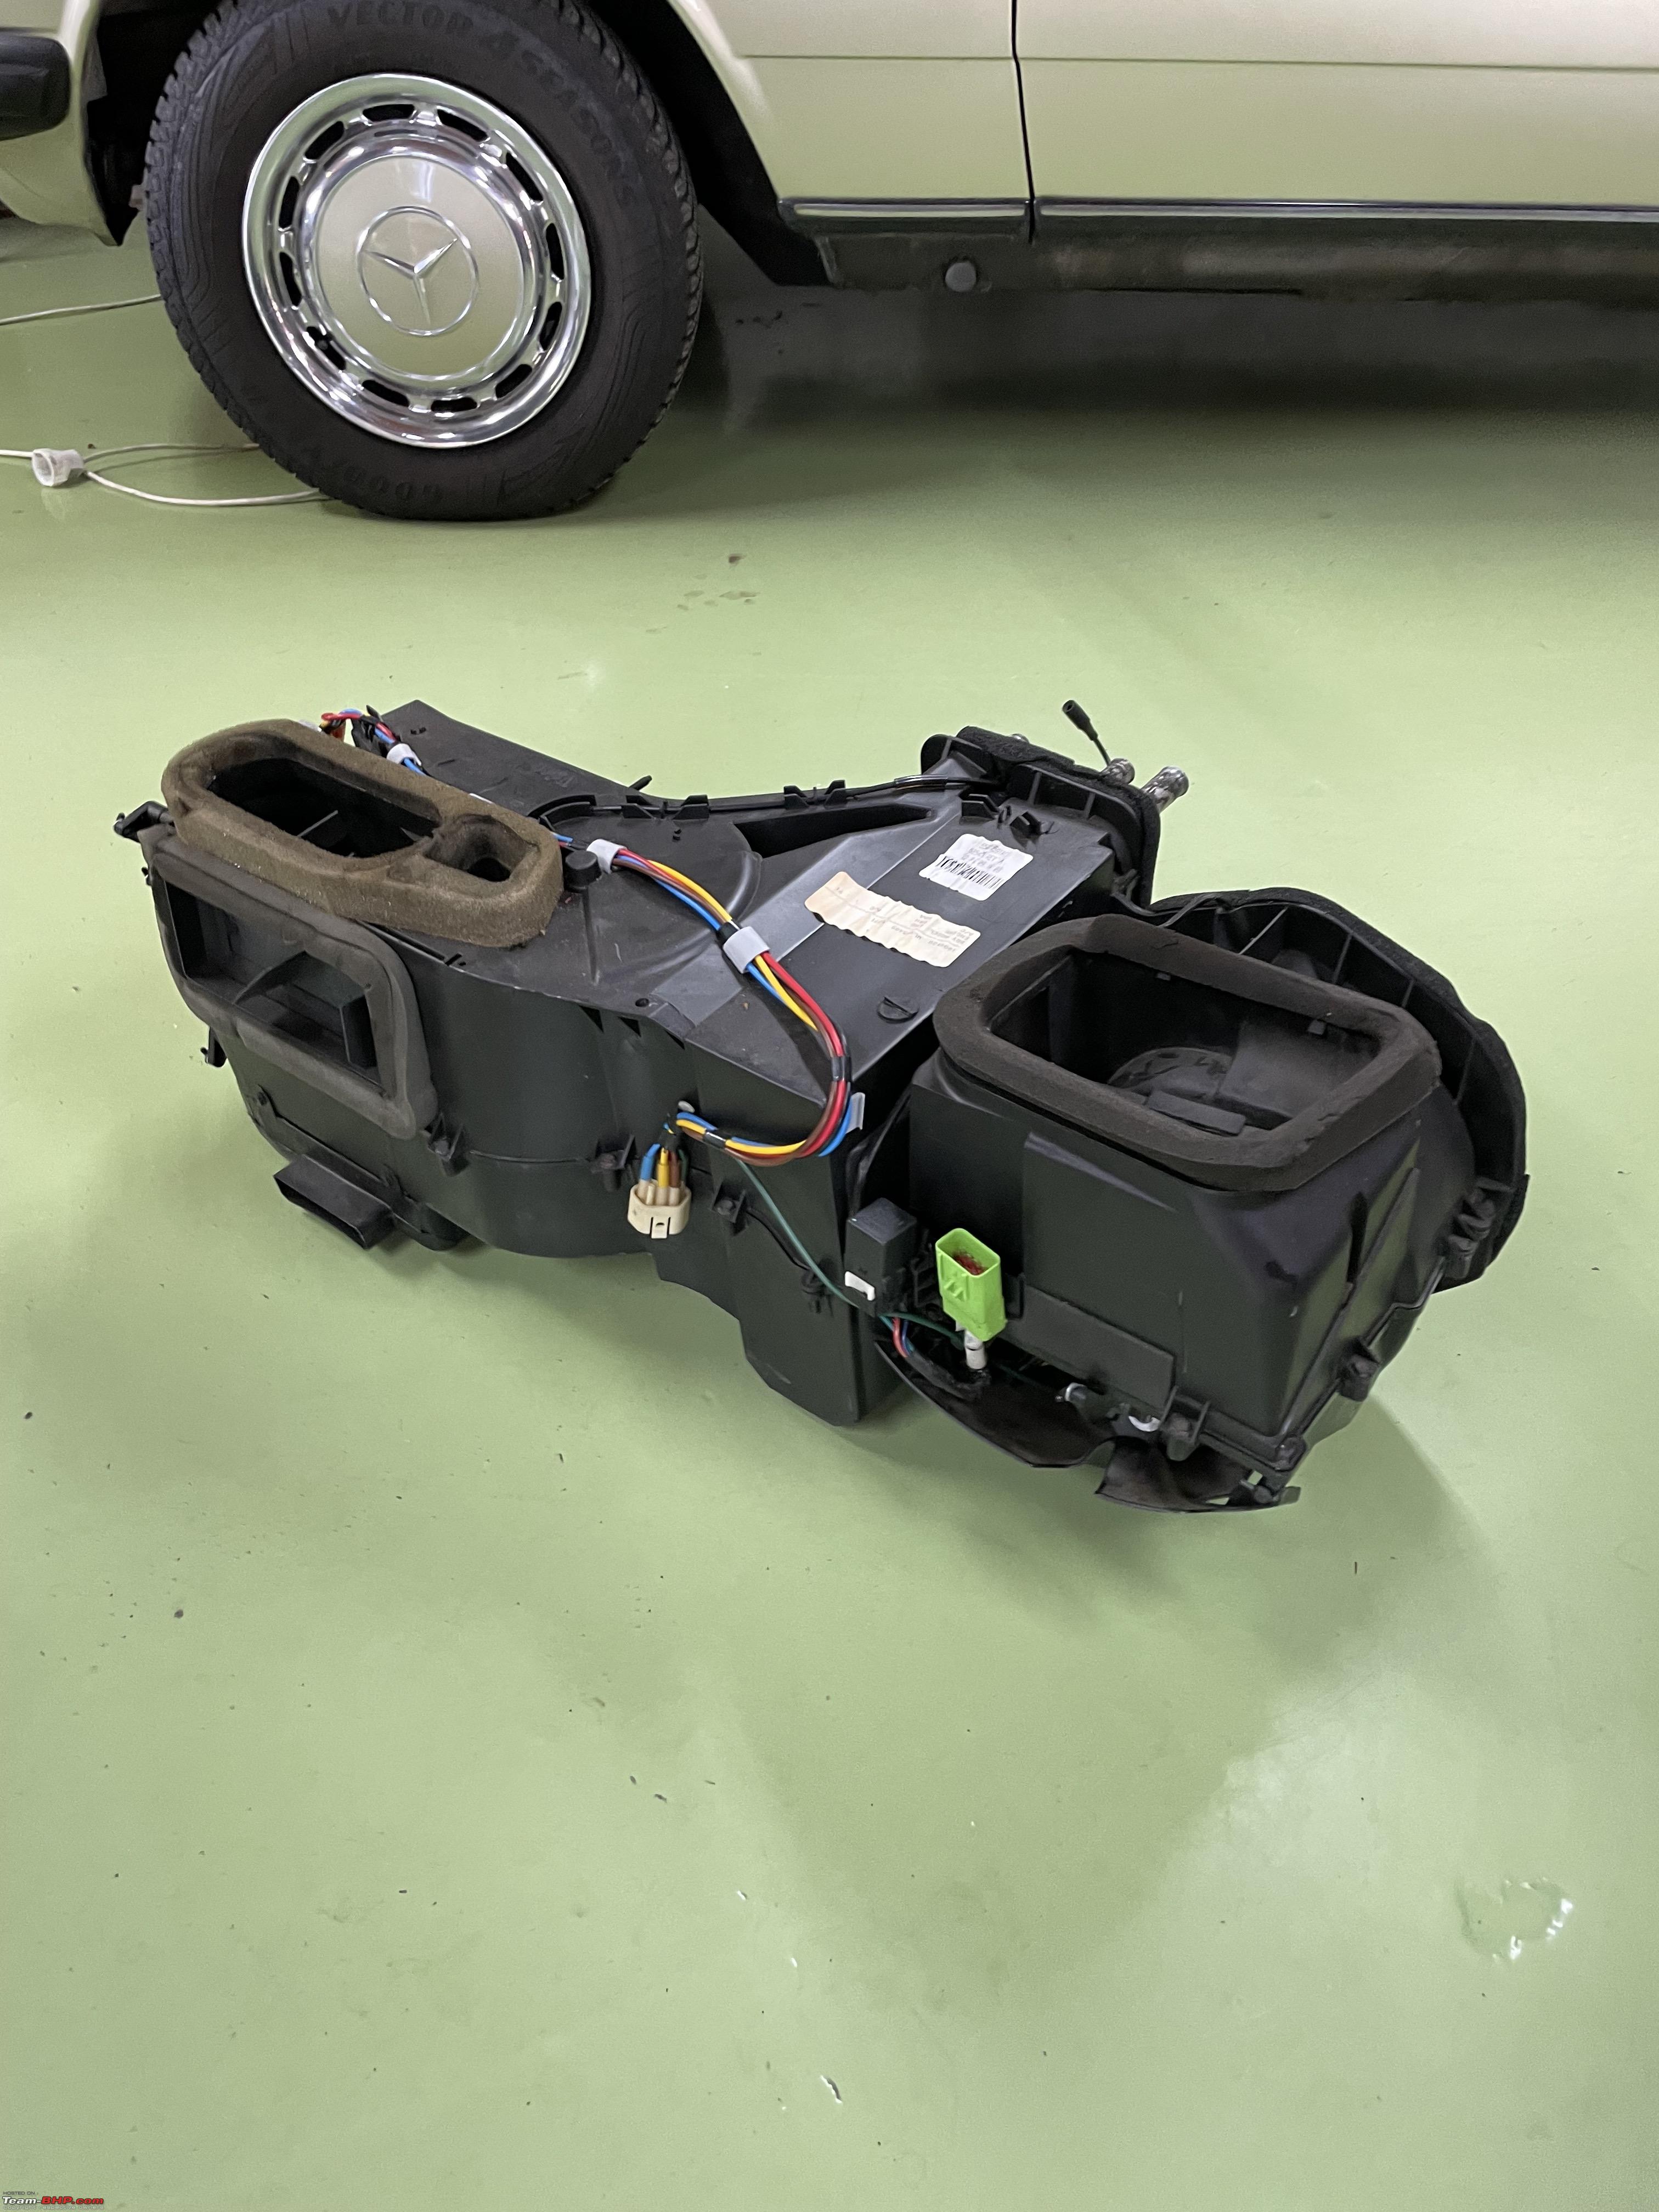 Next, you just open up this box!! You need to take the fan and its motor out, endless bolts and you have to cut through some of the foam. But then at long last the inner bits of the Heater Core and AC evap are revealed!!  In the middle across you see the AC evap and above it, sort of diagonally is the heater core. I took them both out and had a good look at them. It was very obvious the AC evap had a leak. The AC core looked pretty new and identical to the one I bought. I suspect somebody had replace the heater core not too long ago. Shame they did not replace the AC evap too. It’s really a shame, to replace the AC core you still need to go through all these steps. You still need to empty out the AC system and refill it afterwards. Seems a real shame they missed it. Anyway, makes my hobby a bit more interesting. As I was inspecting the various AC and heater bits, I realised that the Jeep does not have a heater valve that control the temperature in the cabin. There is always (hot) cooling liquid going through the heat core. And there is this flap, controlled by that cable that allows heat to pass over it and into the cabin or not. This flap (sort of a valve, but it just a flat piece of plastic, rotating along one of its outer edges) is very critical to the proper operation of both the heating as well as the AC. Here you see it from the top: 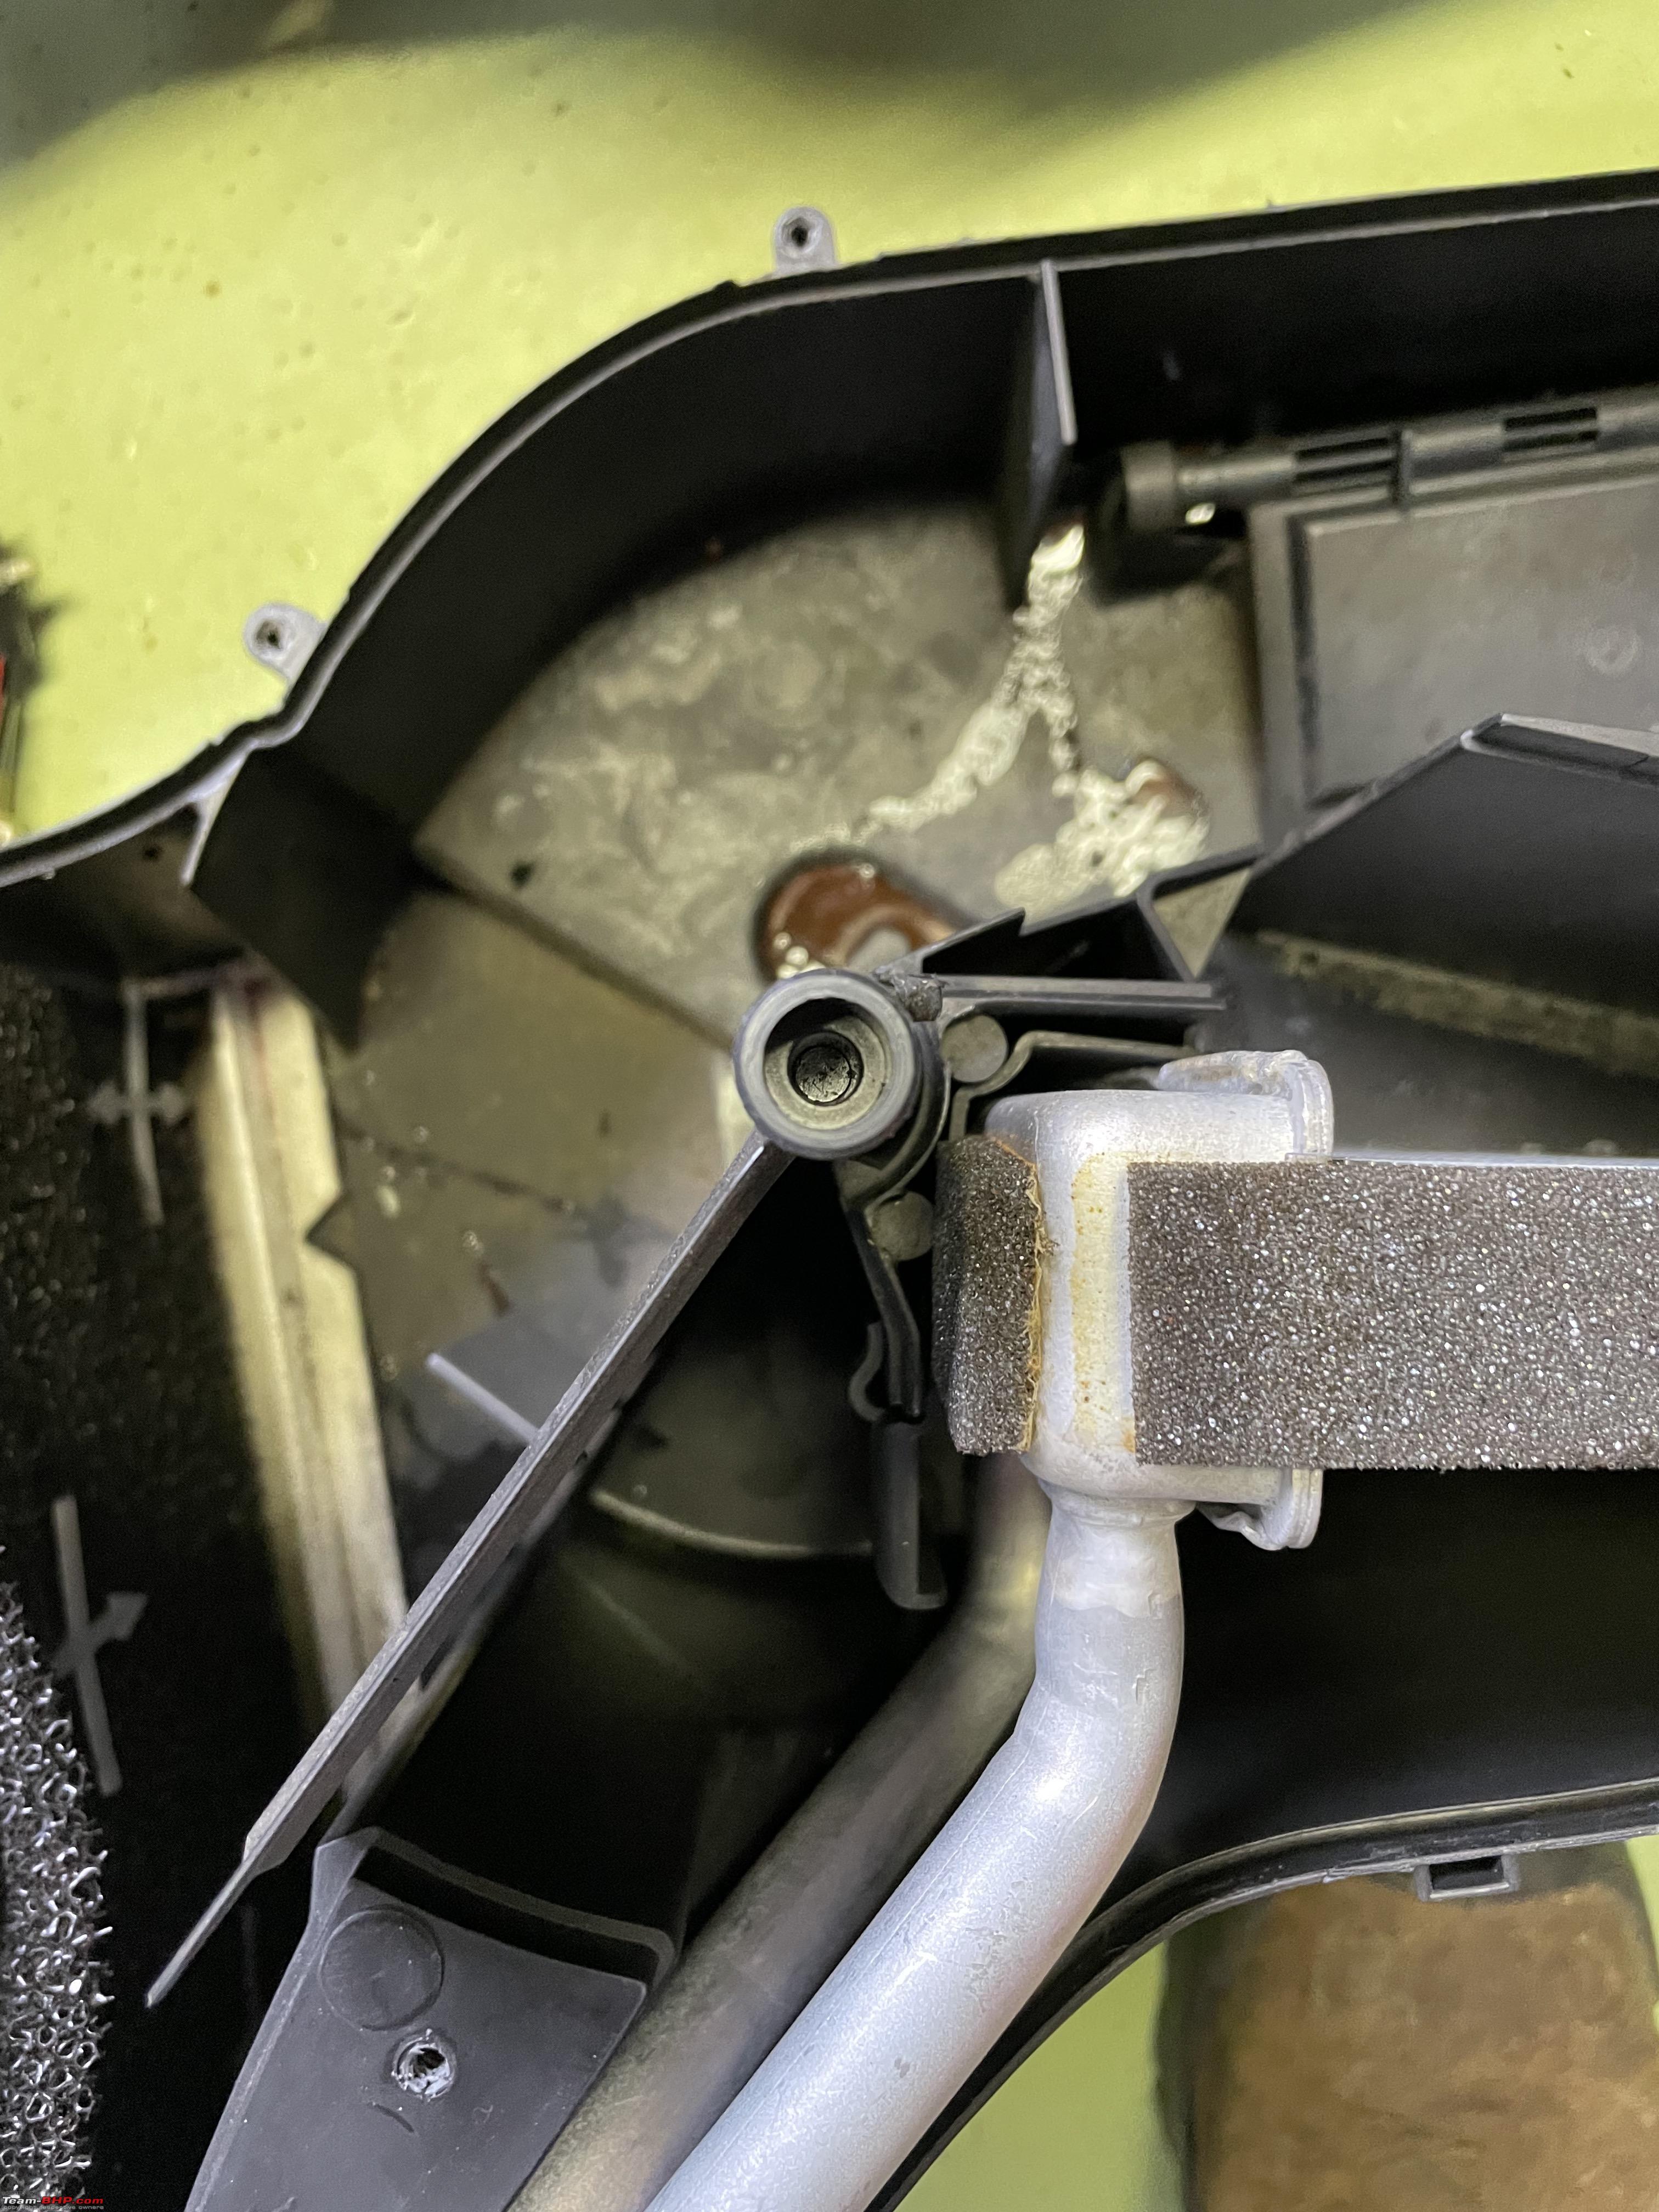 Although the heater core had been replaced, I don’t think they did a very good job of cleaning the inside of the box. It took me about an hour and a half to hose it all down, used washing up liquid to get rid of all the muck. Blow dried it all with compressed air from my shop compressor. In preparation of this job I had also bought some foam and some draught tape. If you watched the second video, you will see it comes in very handy to repair some of the foam you need to cut through. Also, both the heater core and the AC evap need to be fitted tightly back in the box. To prevent rattling but also to prevent air not passing through the heater/evap but underneath or along its sides. So quite a bit of scissor and tape work to get his all sorted:  Close up of my taping skills:  Beginning to look good!!  However, there was a problem with my new heater core. I had read on the forum and some YouTubers, that some heaters don’t fit well. The pipes need to have a very specific shape to fit properly in the box. Mine were ok. But there is bracket soldered to the two pipes. That bracket has a hole and that hole is supposed to line up with a hole in the box. The idea is you can tighten down these two pipes, preventing them from rattling. On my new heater core, the bracket was soldering in the wrong position.  I briefly considered breaking out my torch and removing the bracket and soldering it back on. But I decided that was too risky. Pouring that much heat into the heater core, might cause it to prematurely fail. So I just cut off the bracket  I decided to fill up the space with PUR foam afterwards, which will secure everything. So now it was time to put the two halves back together again. Sounds easy, but I had to redo it 5 or 6 times. As I mentioned getting that flapper valve in position is crucial. Every time I though I had it in the correct orientation when I put the two halves together. But as soon as i started tightening the bolts, the flapper valve movement became too stiff. Some very thin wire to the rescue. I used this to position the flapper valve in exactly the correct position. Then closed the two halves and yank out the little wires. Worked a treat!!  Here another tip I learned from the YouTubers; You don’t want the box to rattle against the firewall. It has some sort of gaskets, but they were all perished. He suggested to get some of these felt table/chair leg thingies from the DIY store. You can’t drill into them, but a soldering gun makes a nice hole. So I made five os these and put them on.  Putting the box back in and putting the dash and all the bits back in went very smoothly. Hooked up the cooling lines. I put the appropriate quantity of compressor oil in the AC evap, same for the dryer. Mounted the dryer and installed the various AC lines. I used new O-rings on all the connections. It is good practice to smear a bit of compressor oil on the O-rings before you snap the line back in place. I reckon I spend about 15-18 hours in all on this job. Of course, I still had to get Jack to come over and help me with the pressure test and hopefully subsequent recharging the system. Jack had sold his business shortly after I met him and he tested my Jeep. But he had phoned me to inform he. He would still be doing some AC work himself, so he was happy to help me out with the Jeep. So as I put the last bit of trim back in the Jeep I called him. He came right away. We put pressure on the system and left the Jeep for the night.   The next day Jack was back and the pressure was holding!! 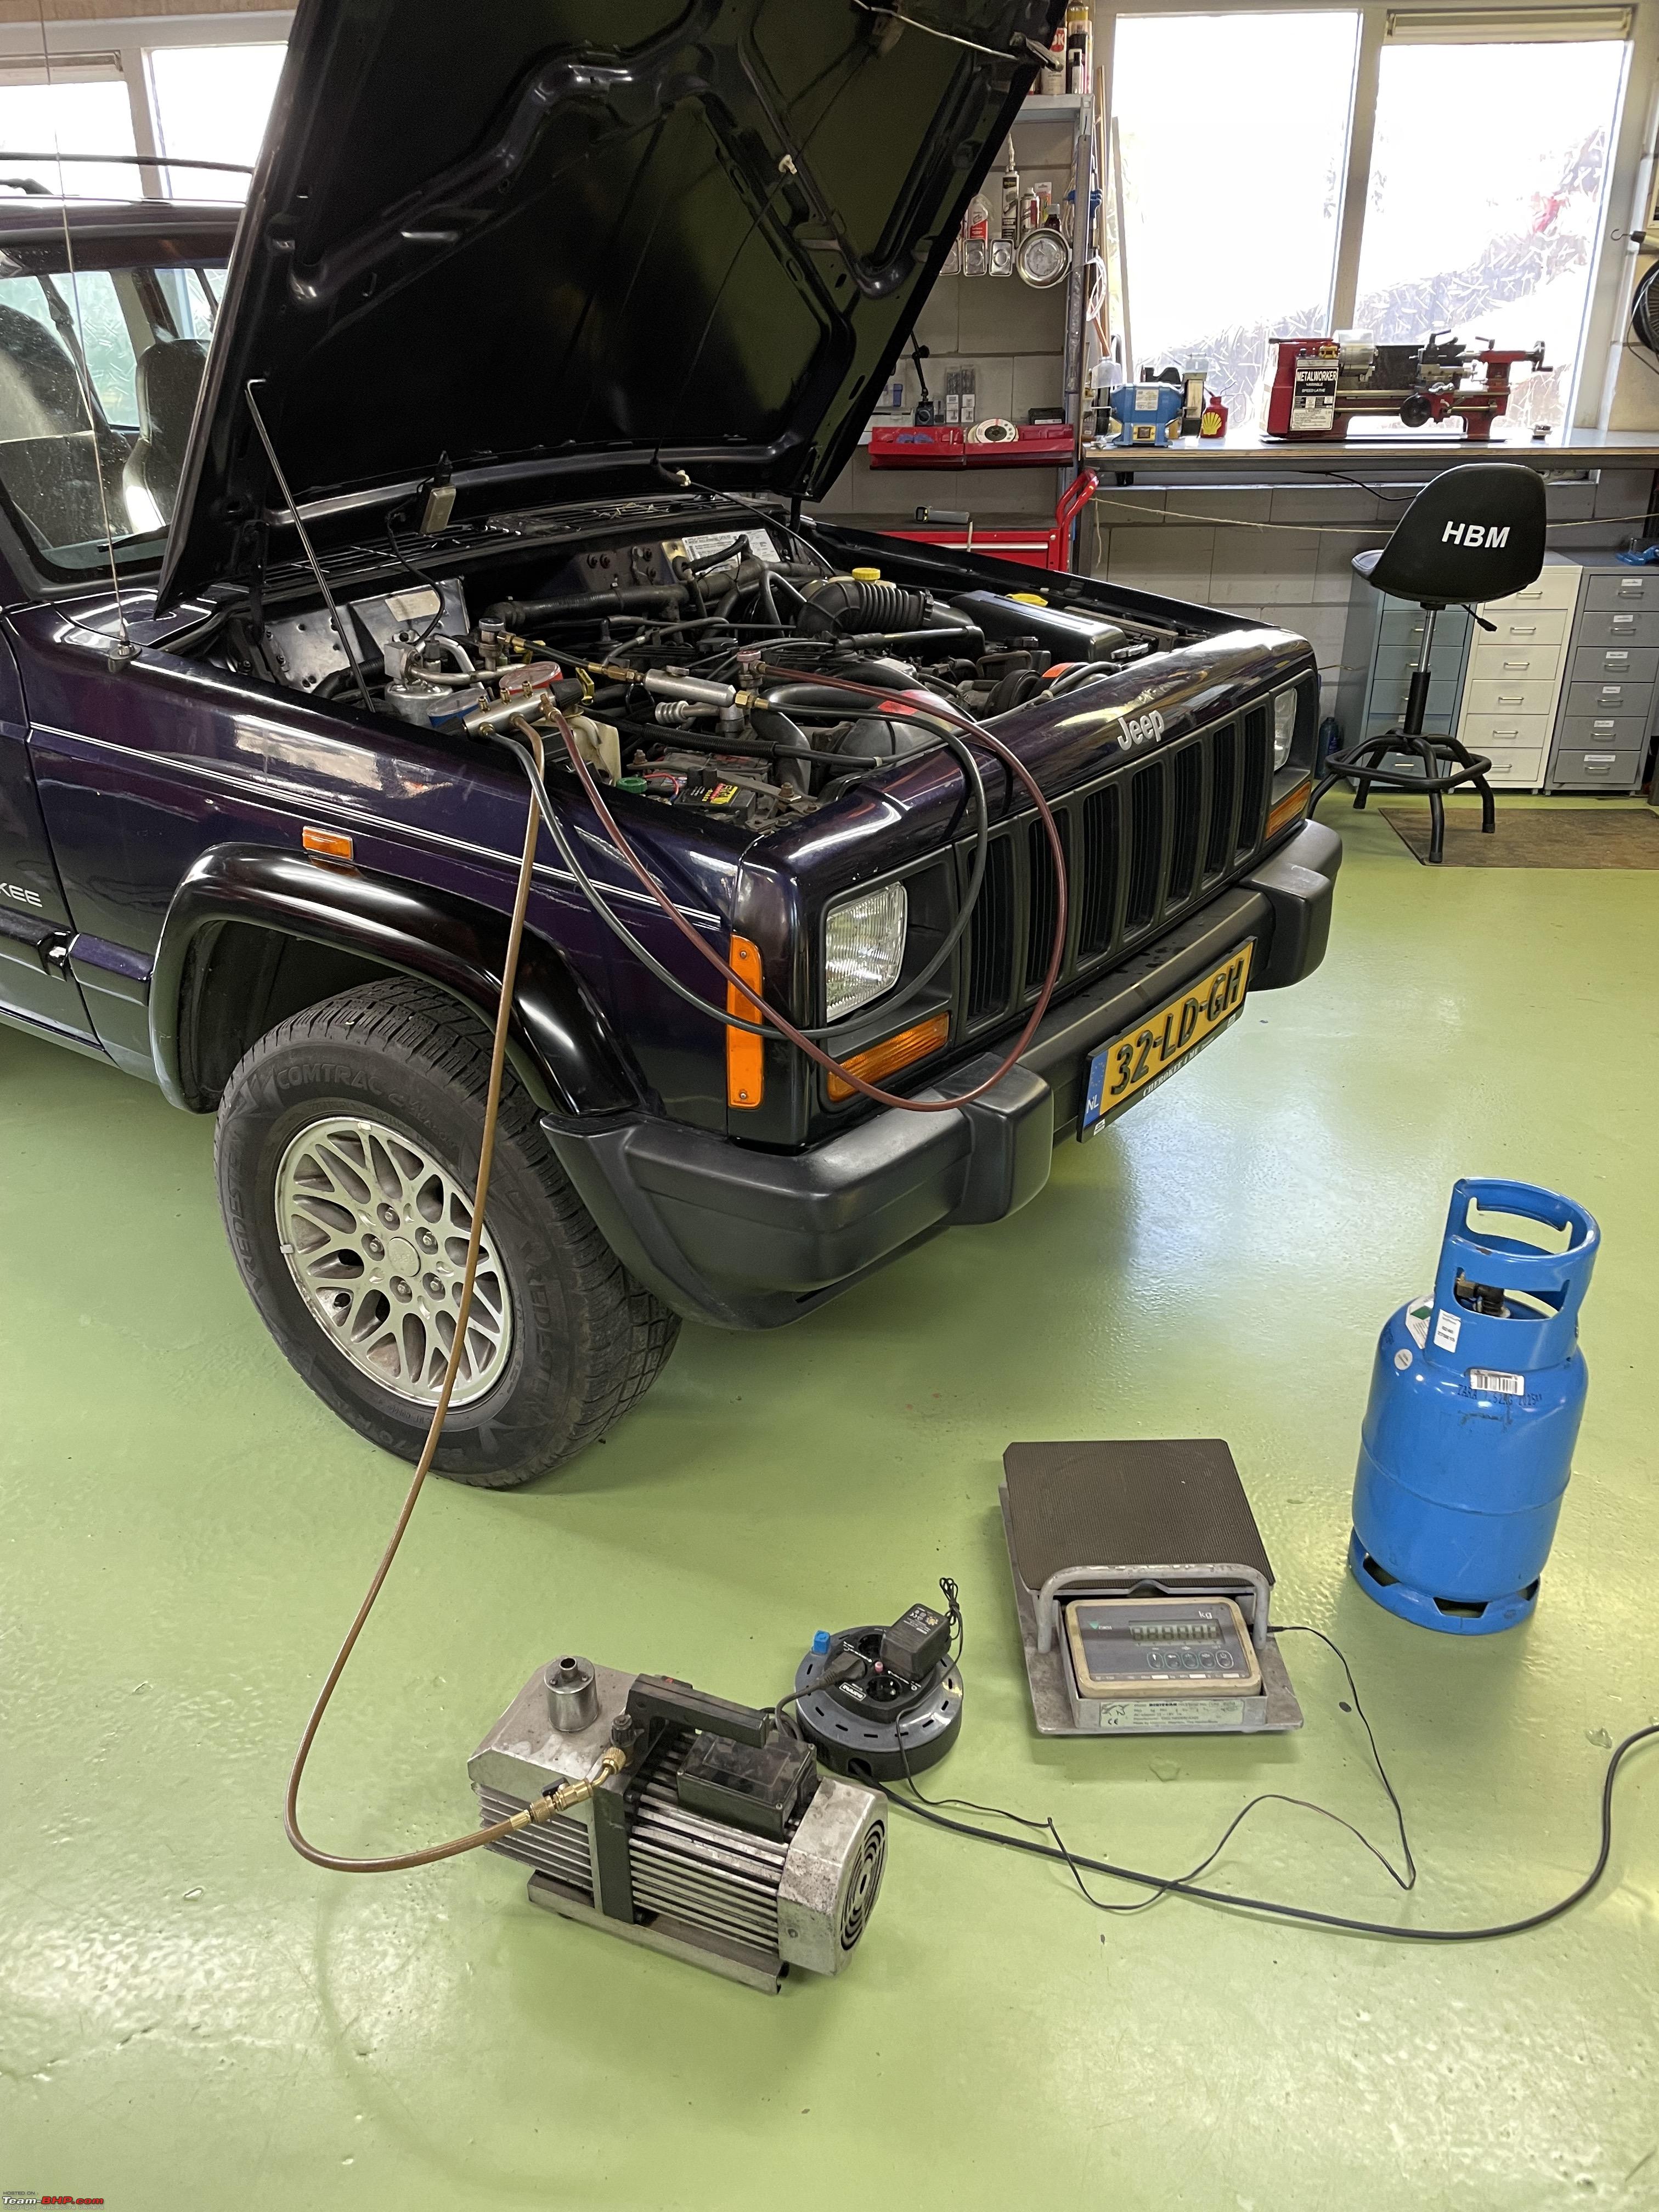 Jack brought a portable vacuum pump. The higher the vacuum the better. We let it ran for almost an hour before we started with the R134A. The refill of an AC system goes by weight. So the bottle with refrigerant sits on an accurate scale. Took another 30-40 minutes or so to properly fill the system Moment of truth; I started the engine; Everything worked. You never know if you have been fiddling around with so much stuff. Easy to dislodge say a connector. Next, I switch on the AC. Sure enough, I can hear the very distinct “click” as the compressor engages it. Within seconds I feel the air coming through the air ducts becoming cooler. Jack had brought an electronic thermometer probe:   Succes!! This AC is working again!! Very relieved, great sense of accomplishment! To be continued Last edited by Jeroen : 30th April 2022 at 23:23. |
|
| (12)
Thanks
|
| The following 12 BHPians Thank Jeroen for this useful post: | anivy, carthick1000, Gannu_1, IcarusMan, Nempuguru, PM - B, R2D2, sagarpadaki, SS-Traveller, vaasu, vishy76, VivekCherian |
|
1st May 2022, 00:08
| #876 |
| Distinguished - BHPian | Re: My Car Hobby: A lot of fiddling, and some driving too! Jaguar XJR, Mercedes W123 & Alfa Romeo Sp Replacing the Jeeps AC evap the aftermath! So the AC was working fine, right? Well yes, but there was a another problem. This Jeep has two fans behind the radiator. One is a visco coupling fan. So basically the temperature of the warm air coming through the radiator determines to what extent this radiator turns. The other fan is an electrical fan. It works in two different ways. One way is by means of an electrical thermostat on the cilinder head. Once the temperature reached 103oC the fan kicks in. The other way is when the AC compressor kicks in, this fan kicks in too. The idea being that the AC compressor puts additional load on the engine, so the engine needs extra cooling. Many make/brands have similar set ups. But here the thing: That electrical fan had never ran. I never heard it before. It is not warm enough and I havent driven the Jeep hard enough for the electrical fan to switch on as the cooling fluid reaches 103oC. And the AC compressor never worked either. So I heard this fan for the first time and it sounded horrendous. When these sort of fans, powered by little e-motors start making noises, it usually means problem with the bearings, or the brushes, or just very dirty. Sometimes any combination or all three. So time to take the fan out: Very easy. you need to undo two bolts and an electrical connector and the complete fan assembly comes out.  The problem with these assemblies is; they were never designed to be taken apart. The e-motor certainly is not supposed to be opened up. But of course, that has never stopped yours truly.  Bit of a fiddly job, but eventually I got the little bearing out. The other end of the shaft runs in a bronze bush and was fine. But this little bearing was definitely shot, brushes were fine. Bronze bush in rear outer casing: Very standard bearing; 8x22x7mm. In fact I had several of these bearings in stock. I use them in my my model engines. However, I tend to use open cage bearings as they have the least resistance. On a fan like this you want a properly dust proof /sealed version. So I quickly ordered one:  this arrived the next day. I thought I would put it all back together quickly. One of the bolts holding the motor to the frame had snapped when I tried to undo it. Completely rusted. So I had to use my very fancy milling machine to drill out the old, stuck bit  As is customary I cleaned everything very thoroughly prior to assembly. I used a bit of compressed air to blow of the dust from the brushes on the anchor plate. Big mistake I found out. What I had not realised the brushes are held in place by tiny springs. I had blown four tiny tiny springs all over my garage!! I spend about 90 minutes on my hands and knees searching for these blasted springs. Found two initially. So I tried calling a few places if somebody had these in stock. No way Jose! Decided to sleep on it. Next day I walk back into my garage and the first thing I notice is a little spring on the floor. So now I am back to 3 out of 4. Still one short. So I have another good look at this anchor plate: It must be used on different applications, using different brushes and different spring arrangements. So I take a piece of Delrin and machine a different solution with the help of regular wound spring.   this little piece of Delrin is machined to exact measurements. It hooks underneath the two protrusion on the anchor plate. I experimented a bit with different springs till I got the same feel on the brushes as with the original springs.  Cleaned the collector with my little inkt eraser. Before  After  Put the new bearing back in the casing. Needed to be properly alligned. Not easy with this construction   The worst part was getting the anchor plate back on to the little shaft with the brushes in place. Very fiddly, magnets pulling at everything you touch! I used some small wires to keep the bushes and springs in place. Once everything was aligned I could yank out the wires. (Seem to be using this trick a lot lately!)   It was tricky to get everything back together. Not easy to align everything. In the end I used one of these massive rings, from one of my toolkits to hold everything in my vise.  Once I had the whole assembly back together I decided to bench test it. Hooked it up to my 12VDC power supply Runs very smoothly. You do hear the brushes a bit on the collector. Not worried about that, that will wear in. So everything back into the Jeep and testing Another job well done!! Whilst I had the dashboard out I also did two other jobs. I had been having problems with the instrument. The Jeep has one big instrumentation pod. Now and then gauges and or lights stopped working. Completely random. It is a known Jeep Cherokee problem. The instrument pod hooks into two big connectors and is held in place with four small bolts. Over time, a little play occurs, contacts get dirty. Mostly you can solve the problem by just pushing with your hand, flat, on the glass of the instrument pod. But of course, a permanent fix is better. In order to get the instrument pod out, you need to remove some of the dashboard trim. So I decided to tackle this little job whilst the dash was still in bits in the back of my Jeep. Here you see the two connectors. I cleaned everything thoroughly with electric cleaner. checked all pins and connections. Bobs your uncle once again!  The other thing, the indicator switch was a bit wonky. It would not return to neutral after straightening up the steering wheel. I had already had a look at the switch, but it was beyond repair so I had ordered a new one. As with the instrument pod, easiest done with a lot of the trim removed. Next, a long list of odd jobs, followed by a very thorough, all seats out, spring cleaning of carpets and seats. Jeroen |
|
| (18)
Thanks
|
| The following 18 BHPians Thank Jeroen for this useful post: | carthick1000, CLIX, dailydriver, Gannu_1, gischethans, IcarusMan, InControl, N33raj, Nempuguru, PM - B, R2D2, Researcher, sagarpadaki, Sportztourer, SS-Traveller, Thad E Ginathom, vaasu, vishy76 |
|
1st May 2022, 23:04
| #877 |
| Distinguished - BHPian | Re: My Car Hobby: A lot of fiddling, and some driving too! Jaguar XJR, Mercedes W123 & Alfa Romeo Sp In between all the big jobs, I had time to do some smaller jobs as well. The list is long and goes on and on. Just about the first job I did, when I got the Jeep was to fix two small leaks in the exhaust, sorry no photographs. I just used a bit of this metal band aid around the exhaust with lots of exhaust paste around it. At some point in time I might have to replace sections of the exhaust no doubt. But for the MOT the complete exhaust system from the exhaust manifold at the engine all the way to the tailpipe needs to be free of leaks. The Cruise Control worked fine. Expect that now and then I had to push the Cruise Control On button a few times. According to the Jeep manual you can repair these switches, which are mounted on the steering wheel. I never believe those statement, so I disabled the airbags and took the switch out.  I just sprayed electro cleaner into the switch quite liberally. Waited a few minutes and then blew some compressed air through it (gently). Has been working fine ever since!! To be on the safe side I opened up the parafan. You will remember not to long ago the one on the Spider was badly corroded. Did not really show till I took it off. Also, underneath the Paravan is where leaves and muck collects, potentially clogging drains and air vents. So off it comes  I was pleasantly surprised with everything. It was bone dry, very little rust, only a bit surface roost. Virtually leaf and muck free. So just cleaned it, dealt with the rust. In order to remove the parafan you need to take the wipers off. The wipers arms were a bit rusty, and the paint had peeled off. So I also took off the wiper at the rear. Cleaned them, dealt with the rust and sprayed them all matt black. As I already mentioned the indicator stalk /switch was not working properly. I took it out, to see if I could repair it. No luck, so I got myself a new one, that I fitted when I had the dash out a few weeks later. Getting at this switch is not too difficult, remove a bit of trim around the steering wheel.  When I took the instrumentation pod out earlier, I also opened up the pod. Some of the little instrument backlit bulbs were blown. (There are 18 or so I think). Replaced all of them, for good measure.  The doorsills have these plastic bits of trim on top of them. To prevent you from scratching the paint. I noticed a bit of rust in the paint near the edges of these plastic trim bits. So I took them all off, dealt with the rust, which meant running my steel wire brushes on it, cleaning it, some filler and then spray painting it.    The trim is held in place with the usual plastic trim fastner. I have three boxes full of them, but still not the correct one. Had to get a different type, also with its own little tool  You might remember, on every car I have, I install a battery quick disconnect. So I installed one on the Jeep too. Very handy when you want to work on the car. No spanner required, you just loosen the green knob a bit.  When Martin did the pre-MOT inspection on the Jeep, one of the items he found that would fail was the left hand light unit. Its reflector had become very dull. The right one was border line. I told him I would replace both. So I got two new original Hella units from Edwin at Jeepparts. On the Jeep it is very easy to replace these units. That is in theory. You undo some 4-5 bolts and the whole grill panel drops out.  Each unit is held in place with four screws that hold the chrome trim ring.   Of course half of those screws were rusted solid, the other half just snapped off. So I had to spend quite a bit of time, sorting that out. This is how the old ones looked on the outside. The inside was less corroded, but only marginally so!  The grill itself had a problem as well. It never alligned well with the right front fender. There was a considerable gap. I investigated and had to use considerable force to whack the inner part of the fender in place by about 8-10mm. Took about an hour and half before I was happy with the new fit. Not perfect, but a whole lot better that before.  Also, the mounting studs on the grill were in poor form. Rusted and one had snapped off. So I fixed that back on with one of special kits.  Spend quite a bit of time polishing the chrome rings around the light unit. Of course, with Autosol, your trusted automotive chrome and metal polish. They don’t sell under this name anymore. I still have two tubes of the stuff though!!  As I mentioned in my first post on the Jeep, it was pretty filthy on the inside. Family car with three kids. And it showed and I don’t think they were in the habit of cleaning and mucking out their cars. Disgusting, I can’t stand a dirty car. So I had already done a bit of cleaning on the second day I owned the car. Could not stand it. But it needed a proper deep cleaning as far as the carpets and the seat were concerned. I wanted to rent one of these special “wet-carpet-vacuum-machines. They spray special cleaning fluid on to the carpet/seats, and then you hoover it up. But I needed at least three days of a decent temperature, lots of sun and preferably wind. Although these wet vacuum machine do suck out a lot of moisture, some will always be left. You really need to air out the car for a few days, doors and windows wide open, sun blasting away and a nice breeze running through the car. The night before I proceeded to take the rear seat out and put it in the back of the Jeep.  I also undid all the bolts of the passenger seat and two out of the four bolts of the driver seat. The next morning I picked up the wet-vacuum-machine with one of my other cars. Drove the Jeep out of the garage and reversed it into our drive towards the garden. Which means it is facing south towards the sun. Took all the seats out. You can see the wet-vacuum-machine behind the Jeep.  A bit bare, but excellent for carpet cleaning. 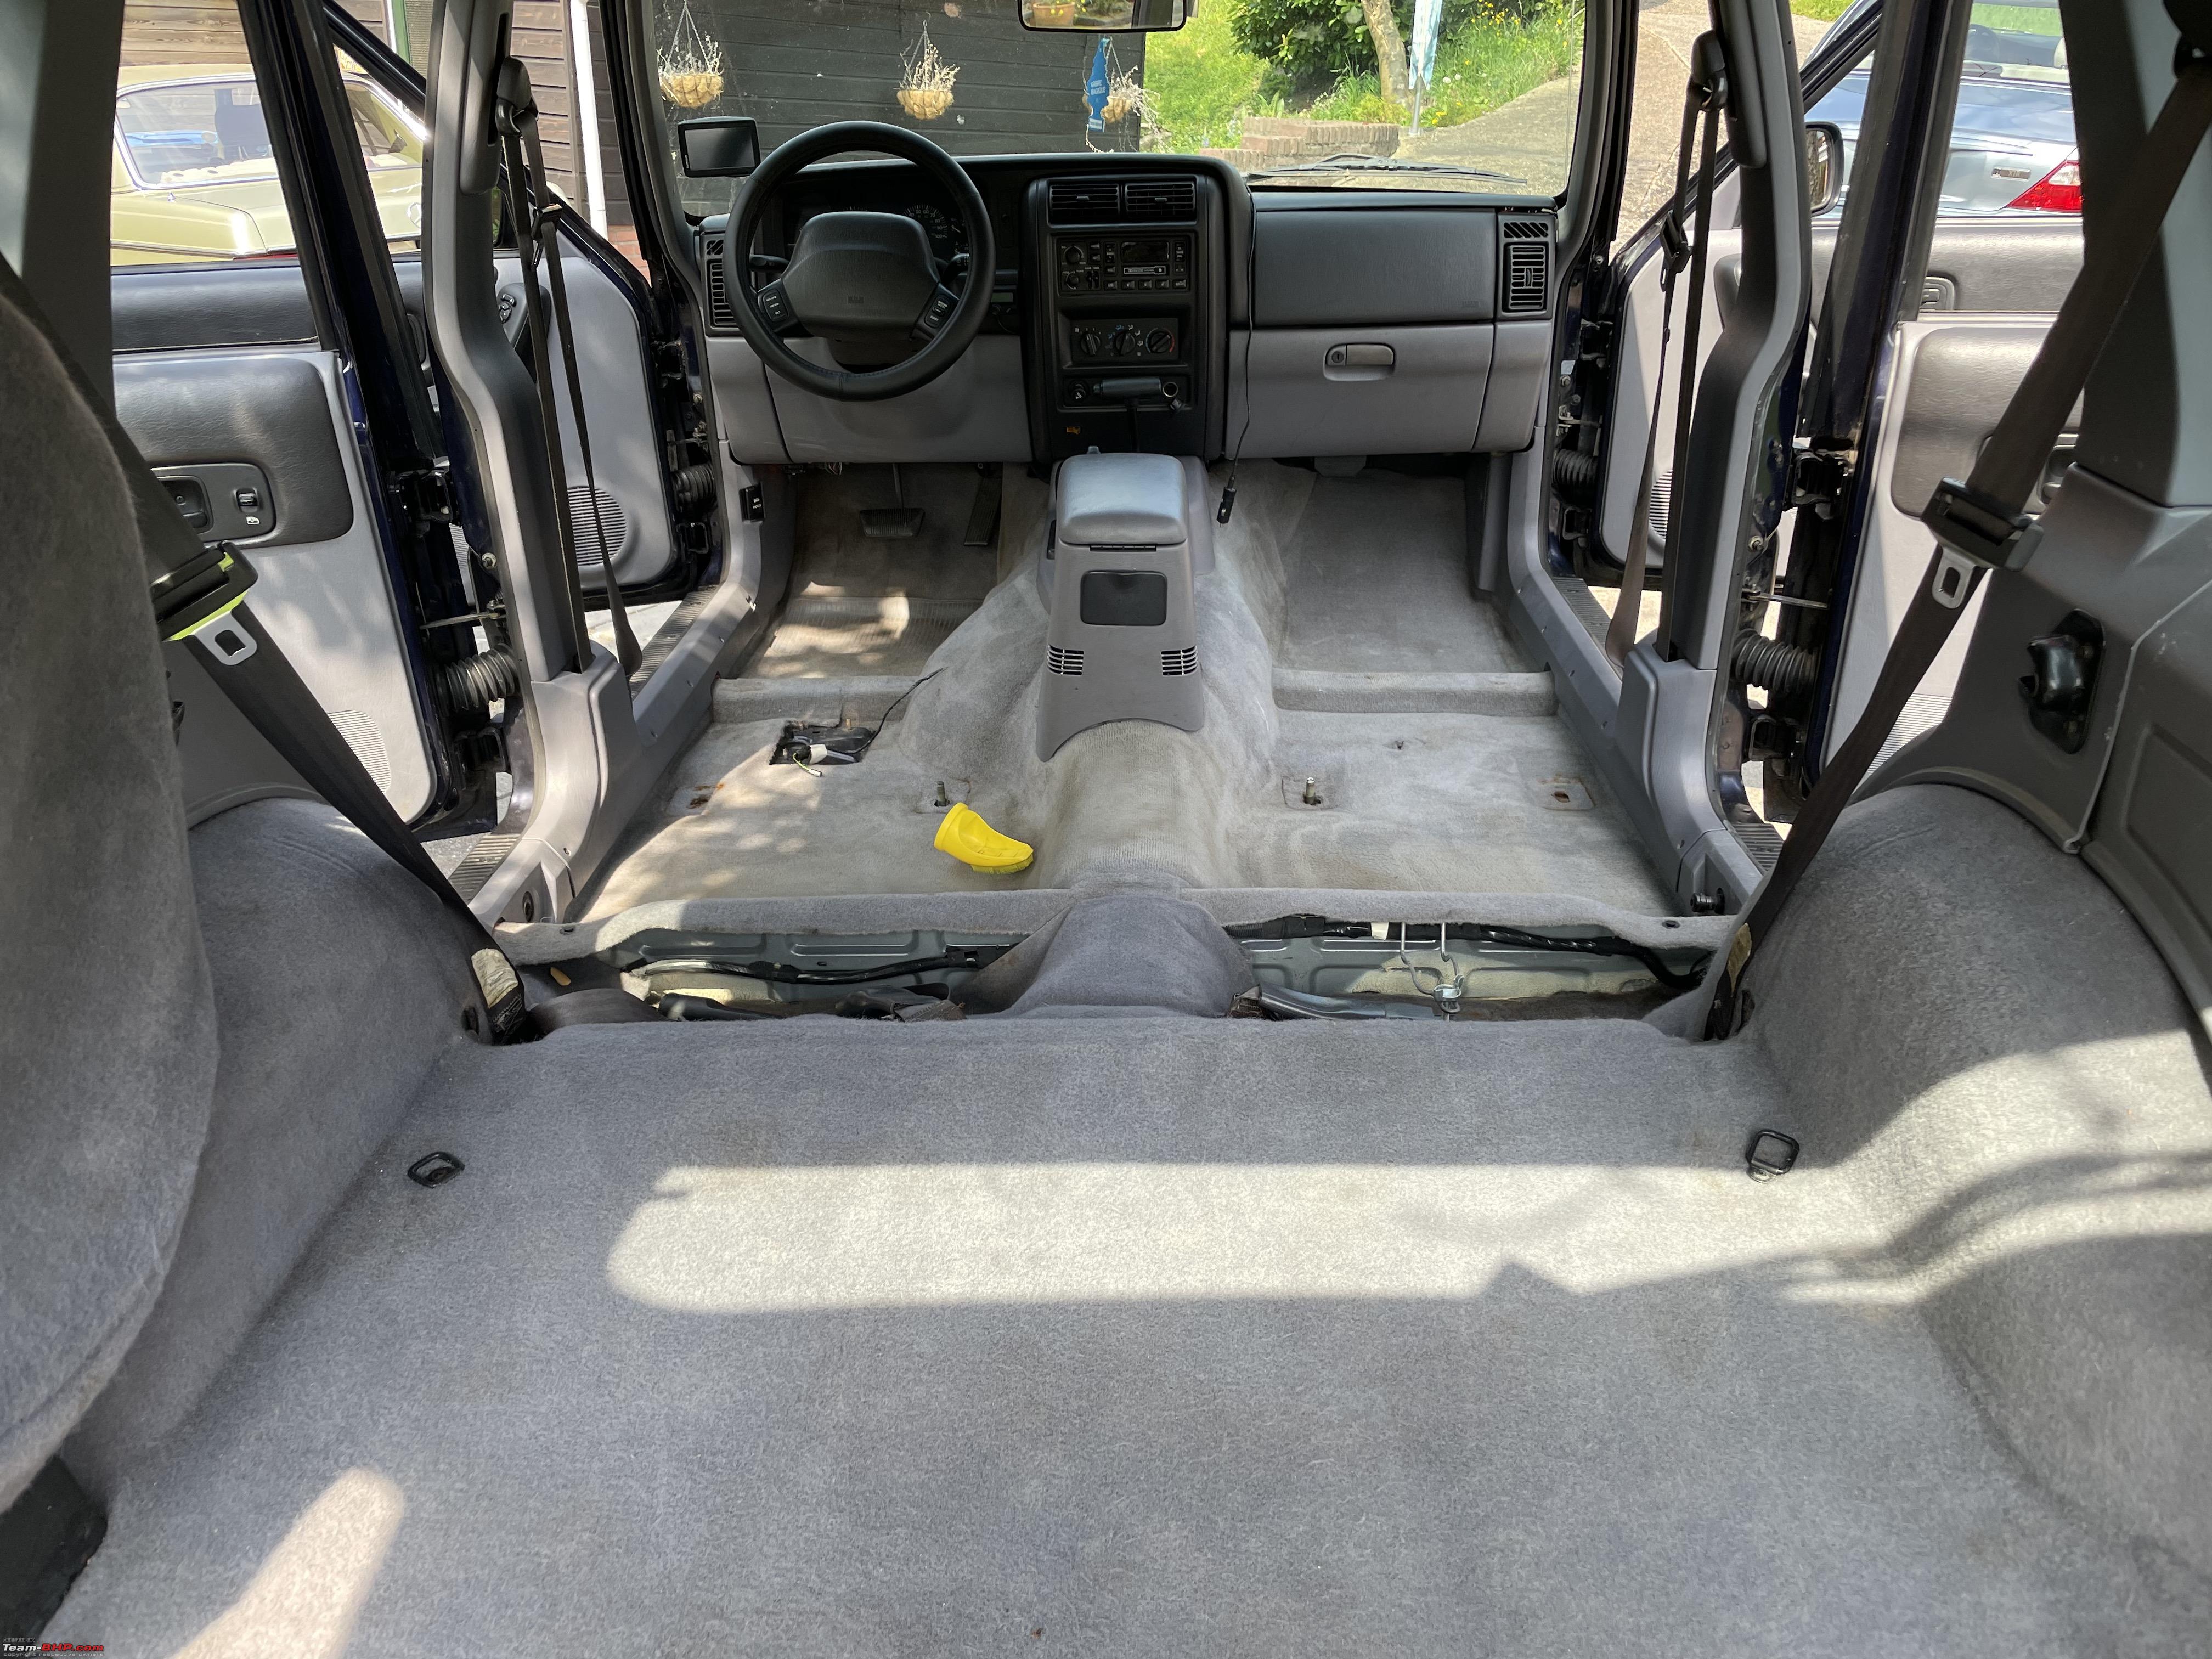 All the seats out, for easy access and thorough cleaning.  I discovered some rust (no surprise) on the driver seat mounting points. Dealt with the rust and sprayed it with some Hammerite.  Same with the tailgate closure mechanism. Very rusty, not a nice sight when you open the tailgate. So a lot of wire brushing, some filler and a proper Hammerite spray job.  It was very hard work to clean the carpets and the seat. Really back breaking type of job. I had to go over each and every square millimeter of carpet and seat multiple times. But very pleased with the end result. Bit difficult to tell from these images and I don’t have “before” images. But trust me the inside of this car was really disgusting. I also polished all the plastic trim as well.    I had the Jeep sitting out here for three days, in the sun, everything opened up. Dried out quite nicely! You might wonder about the white registration plate. Dutch plates are Yellow. This is a special plate for when I am towing a trailer. Any trailer less than 750 kilogram and no brakes is what we call an “unlicensed trailer”. It needs to carry a white registration plate with the same registration as the towing vehicle. When you pull a trailer over 750 kilograms with its own brakes, it will come with its own unique (yellow) registration plate. I am still waiting for the radiator and other parts to arrive. Tomorrow I will take the Jeep to Martin for the annual MOT. He will sort a few things as well. In the mean time I also need to do some work on the Spider. In the next 5 weeks two trips each 5 days or thereabouts are planned. I am likely to be driving about 4000 km or thereabouts. So I need to get the Spider 100% sorted. It is in good nick, obviously, but there are always some things that need doing. Jeroen Last edited by Jeroen : 1st May 2022 at 23:06. |
|
| (25)
Thanks
|
| The following 25 BHPians Thank Jeroen for this useful post: | anivy, austere_sly, carthick1000, catchjyoti, CLIX, DicKy, Gannu_1, IcarusMan, InControl, keroo1099, N33raj, Nempuguru, PM - B, R2D2, Reinhard, Researcher, sagarpadaki, sai_ace, Sportztourer, SS-Traveller, Thad E Ginathom, vaasu, vb-saan, vishy76, VivekCherian |
|
2nd May 2022, 10:27
| #878 |
| BHPian | Re: My Car Hobby: A lot of fiddling, and some driving too! Jaguar XJR, Mercedes W123 & Alfa Romeo Sp Dear Jeroen It is therapeutic to read your repair work - be it any car that you chose to work on. You have a very good prospect at starting a classic car repair shop from your mancave  |
|
| (9)
Thanks
|
| The following 9 BHPians Thank KkVaidya for this useful post: | anivy, austere_sly, carthick1000, Gannu_1, jayakumarkp, Jeroen, R2D2, Reinhard, Thad E Ginathom |
|
2nd May 2022, 10:57
| #879 | |
| Distinguished - BHPian | Re: My Car Hobby: A lot of fiddling, and some driving too! Jaguar XJR, Mercedes W123 & Alfa Romeo Sp Quote:
No way I will start a classic car repair shop. I am just about to stop my working career! I don’t mind helping out other car enthusiast. But it needs to at a hobby level only, I can do without the work stress these days. Jeroen Last edited by Jeroen : 2nd May 2022 at 11:02. | |
|
| (8)
Thanks
|
| The following 8 BHPians Thank Jeroen for this useful post: | anivy, carthick1000, Gannu_1, InControl, Nempuguru, PM - B, R2D2, Reinhard |
|
2nd May 2022, 14:58
| #880 | ||
| Distinguished - BHPian Join Date: Jun 2007 Location: Chennai
Posts: 10,987
Thanked: 26,341 Times
| Re: My Car Hobby: A lot of fiddling, and some driving too! Jaguar XJR, Mercedes W123 & Alfa Romeo Sp Quote:
Quote:
 But repair and renovation is satisfying. I did a nice, neat, epoxy repair on a sprung kitchen whisk recently. The thing is less than Rs.100, and I have thrown away several. Thing is, it is not always available, and this particular type is often not available, and is perfect for one particular task that I do every day. Honestly, though, I do not think I have the stamina for this kind of work that Jeroen is doing. | ||
|
| (6)
Thanks
|
| The following 6 BHPians Thank Thad E Ginathom for this useful post: | anivy, Jeroen, Nempuguru, Reinhard, subie_socal, vishy76 |
|
11th May 2022, 12:35
| #881 |
| Distinguished - BHPian | Re: My Car Hobby: A lot of fiddling, and some driving too! Jaguar XJR, Mercedes W123 & Alfa Romeo Sp I have often said it: American car forums are the best when you need detailled information on working on your car. Providing your car is/was available in the USA. As the USA is still the number 1 car country in the world, you are unlikely not to find an internetforum dedicated to your car/make/model. It certainly has proven true for all the cars I own. You cant compare these forums with TeamBHP. Very different content and very different audiences/members. Its great we have both! Americans love to DIY on their cars. Its in their genes! There is also a huge car DIY market catering for the every need of the Car DIY enthusiast. You can get any part or tool easily. Just ordered some more parts for my Jeep. Have a look at this website. https://www.rockauto.com Click on a brand, find your model, year, version etc and a huge list of spare parts is available to you. On my Jeeps air conditioning evaporator: https://www.rockauto.com/en/catalog/...ator+core,6768 Find different AC evap cores to choose from!! There are quite a few other websites too, it is one of many. Anyway, my Alfa Spider had a bit of steering play. When it comes to adjusting steering play I am even more nerdy then usual. I will not attempt anything unless I have gotten hold of the official procedure to adjust. On the matter of adjusting steering boxes in general: I own multiple classic cars. At some point in time, you are likely to end up with play in the steering box on any car. I am a stickler for trying to adhere to the original procedures for adjusting steering boxes. There are lots of folks, including professional mechanics who might adjust by feel and or by gut. On the steering boxes I am familiar with, you are looking for clearances that, I think, are beyond that. Which likely means they get overtightened and thus wear more over time. I.e. there is a reason so many Mercedes W123s Steering boxes has play. Everybody just sticks an Allen key in the nut and turns it a bit, till the play is gone. The official Mercedes procedures calls for checking the adjustment by means of a special torque wrench on the steering wheel. Only a few Ncm of torque. You cant feel that. But each to its own. The average classic car in Western Europe does only about 1000 miles a year. So even a poorly adjusted steering box will take a decade or so to start wearing down again. So I needed to get hold of the official Alfa Romeo Spider adjustment procedure. So I started this thread: https://www.alfabb.com/threads/adjus...r-play.710720/ Sure enough, lots of folks chiming in with excellent detailled information and I also got the official procedure. A lot of my Dutch Spider friends are on this forum too. This is an image from the procedure:  The steering box on my spider is a so called Burman steering box. Originally ZF boxes were fitted to the Series 3. Although the jury on the internet is still out on which one is better, at the time many Dutch Spideristi preferred the Burman over the ZF. It provides more accurate handling and is less prone to wear. When researching this topic, I also found that when a Burman has some play, it is likely that just about all components have play. Without taking it out of the car and disassembling it completely, the only play you can adjust is the play in the vertical axis, the so called sector gear. If you can avoid it, you do not want to take your steering box out of your Spider. It is a MAJOR job. I did it once when replacing the ZF for this Burman. You really need to have the Spider on the lift and it can be a two day job easily. I showed some photographs of spanner mate Peter and me doing this a couple of decades ago, earlier in this thread. As just about car manufacturer, Alfa too has a vast range of special tools for special jobs. But it is usually quite easy to make your own, or improvise a bit to get the same result. As long as you dont compromise on the procedure, not having the official brand tools, usually means it takes a bit longer. One guy had already made his own tools and I basically copied his. The sector gear is held in place by a small plate on top of the steering box. The plate locks in a couple of shims that determine the play on the steering box. So I made a special adaptor plate, it replaces the regular plate. So it locks up the shims and the sector gear, but has a hole in the middle, so you can check the measurements of the play.  Attached to the steering box:  If you study the original procedure, you will notice that the play needs to measured at the bottom with a 10kg force applied to the sector gear. With this special adaptor plate you can measure from the top, which is a lot easier with the steering box still in the car. I took the inlet filter and mass air meter out, to get better access. Also, I needed to be able to get in dial indicator in there too.  The playneeds to be between -0,025 and 0,050mm. My first measurements show the play was about 0,065mm. So definitely too much. Here you see my dial indicator, attached (magnetically) to the base of the air inlet filter housing base plate:  Positioned it in such a way, I could read the dial whilst rocking the steering wheel.  But before you take the readings, the procedures calls for loading up the sector gear with a weight of 10kg!! Again, Alfa has special tools. I just borrowed my wife bathroom scales. Got one of my toolbars and looked for some heavy tools. Here you see it hanging from the steering box.  This was in the toolbox:  If you read through the AlfaBB thread you will notice some very detailled advise I am getting. Initially, I got the interpretation of minimum and maximum clearance wrong. Minimum is negative. Luckily, by then I had already adjusted it to a clearance that was still within limits. I had also spoken extensively to my go to Spider Specialist Goos. He is always very good and helps out. He talked me through the procedure and gave me some shims of different sizes as parts as well as the appropriate gasket. You can see the gasket in the image showing the adaptor plate attached to the steering box. The gasket has also influence on the play. So it needs to be accounted for in the measurement set up. Once I was done, I took the Spider for a test drive. Quite the difference. There is another reason you want to be very careful with adjusting the play on these boxes; Burmans are known to develop cracks in the housing. When that happens you are done for. Goos has complete new after markets housings these days. But I hope I will never need them. I did take my Spider to Goos and had him recheck my work. It is absolutely crucial the box is adjusted correctly. Unfortunately, I dont / cant always trust myself these days, when it comes to reading/following procedures. On something as important like this, I will need a friend to help me out alongside, or get a specialist to check my work afterwards. I had also noticed a bit of play on the slave steering box. So I asked Goos to replace it when he was doing the checking. On a lift replacing the slave steering box is half an hour work. Doing it by myself means spending several hours on my back, on a concrete floor. I am getting way too old for that. Jeroen |
|
| (6)
Thanks
|
| The following 6 BHPians Thank Jeroen for this useful post: | Gannu_1, IcarusMan, s4ch, Tgo, Thad E Ginathom, vaasu |
| |
|
14th May 2022, 10:48
| #882 |
| Distinguished - BHPian | Re: My Car Hobby: A lot of fiddling, and some driving too! Jaguar XJR, Mercedes W123 & Alfa Romeo Sp Those of you that have followed this thread over the years, might recall our yearly trip to our friends Annelies and Cees who run a Bed & Breakfast in France. (https://leparadis.nl). We will usually have 4-5 Spiders with their respective crew that will meet up somewhere in the south of the Netherlands and then drive the 450 km to Le Paradis on country roads. All old friends that have undertaken this annual trek multiple times. We are staying for four nights and my wife and I will then continue for a few more days touring in the Champagne area. So we are really looking forward to it. A few weeks later, spanner mate Peter and I are off on our annual Spider drive. This time we are participating in the 12in12 Challenge. Have a look here: https://12in12.mystrikingly.com We will be driving our Spiders for 12 hours solid, trying to drive across as many Alp passes as we can! Should be great fun. Which means that in the next few weeks, with these two trips I will be driving my Spider some 4500-5000 km. My Spider has been using a bit of engine oil. Nothing that worries me yet. It shows when I come off the accelerator, blue smoke from the exhaust. That is usually an indication that the valve stem seals are on their way out. As you come of the accelerator, a vacuum is created in the cylinder and engine oil from the topsite of the engine where the camshafts are mounted on the valve will be drawn in, in the hot exhaust it partly combusts, hence the blue smoke on coming of the throttle. The higher the RPM the worse it gets. As a lot of our driving will also be done in mountainous terrain (i.e. Alps) expect a lot of very high revving coming down the mountains. My Spider friends have been complaining about my Spider spewing out blue smoke for some years now. So I thought I had better do something about it before these two trips start. I have never replace these valve stem seal before. There are two trains of thought about it. You take the cilinder head off, or you replace them with the cilinder head still in place. The first is the official Alfa procedure, the second is the unofficial way of doing it. I took my Spider back to my old mechanic friend Rolf. He features early on in this thread. He is a great mechanic, nice guy and very knowledgeable. I dont get to see him very often since we moved out of the Hague area some five years ago. But we have always stayed in touch and I usually visit his workshop once every year to catch up, have a coffee. This time Rolf was going to swap out the valve stem seals for me. Rolf moved into new premises some 3 years ago. A very nice premises they are too! When you enter it, this is what the shop floor looks like:   Rolf and his team will work on any car, any job. But they have build up quite a reputation working on Porsches, especially the electronics of Porsches. Which tend to be very reliable, until the point where they are not. Then it needs an awful lot of skill, expertise and some expert tooling to figure out what is wrong. You can wonder all around Rolfs shop, but he also has a magnificent office, where customers can sit, drink coffee, chat, read through his technical magazines and so.    The insitu replacement procedure is pretty straightforward. Remove the air filter and all inlet air pipes, remove the valve cover. Take out all spark plugs. Unbolt the bearings of both inlet and outlet cam shafts. Make sure the distribution chain stays on the correct teeth of the gear and move the cam shaft out of the way. You need to position the engine in such a way that two of the piston are in the top dead centre. On these Alfa Nord engine, the oil in the camshaft cover will be all the way up to the bottom of the bearing. So you can see that part of the valve spring assembly is actually submerged in oil. This is one of the reasons they start burning blue smoke when the valve stem seals start to go. With a vacuum in the cylinder it will literally suck in the oil!  Next, by means of a special air adaptor you pressurise the cylinder with the piston in the top dead centre. The air pressure keeps the inlet valve closed. Next compress the valve spring, remove the shims, some half moon clips and extract the seal. Pop a new one in!   Sounds easy enough. But I am very glad I asked Rolf to do it. You do need to know what you are doing. Its easy to mess up the timing of the valve gear. If the valve does drop, the idea is that the piston, which is in the top dead centre position, will prevent the valve from coming out of the guide bushing. But it might get a bit stuck. In which case you will need to remove the cylinder head anyway. So some Alfa Specialist simply refuse to use the insitu replacement procedure. Because they might end up with a very lengthy and expensive cylinder head removal procedure, whereas the customer thought it would be done in an hour and a half. So its also a bit about the mechanic (Rolf) and customer (me) trusting each other what to expect. I was very happy Rolf managed to replace all four seals in an hour and a half. But if it had gone wrong, i would have paid for the full cylinder head removal of course. Here you can see Rolf hard at work, using a special tool to press down the valve spring. With the spring depressed, you can remove two half moon clips, securing the valve in the guide. Next remove the spring and remove the valve stem seal. Here the moment where Rolf extract the seal: You can hear him say, jokingly, het is een jongen. (Its a boy!!) Here one of the old seals:  It took Rolf just under an hour and a half to replace all four seals. So I will be keeping a very close look on the engine oil level for the next couple of thousand miles. This is still a 36 year old engine/car. It could be the valve stem guide bushing are worn. The new seals should improve the oil burning somewhat, but if the stem guides themselves are worn, at some point in time the cylinder head will need to come off and be properly overhauled. Wait and see. So I drove home very happily. Next day I noticed two things. There was some oil under neath my Spider and part of the front centre grill had come undone.   When I bought this Spider, some 36 years ago, the little metal tube in the centre grill was missing completely. Spare ones are not available, you might be able to procure a complete centre grill at a ridiculous price. So I made my own. Went to a model building hobby shop, bought some aluminium tubing of the correct diameter and bent it in shape. Not easy without a pipe bender. I filled it with sand and that allows you to bent this thin aluminium tubing quite well. So it worked for 36 years. Not it just needed a bit of smarting up. Took it out, straightened it and pushed it back in. Using a very sophisticated tool to push it back in. The (wooden) end of a peg. Nice and dull, spreads the force a bit.  The oil leak was a bit more disconcerting. Over the last 18 months I have been battling it our with various very persistent oil leaks, both from the engine and gear box. In fact we had the gearbox out 4-5 times, just for that. So I was very disappointed that after all that work, it was still leaking. But then it struck me the oil leak appeared to be in a peculiar spot. Previously, I would find oil along the centre line of the car, i.e. right underneath it, or at least alway close to the centre line. This puddle of oil was almost directly underneath the door sill. So I jacked up the car to have a closer look. On the passenger side, the fuel line runs back to front just on the inside of the sill. Alfa Romeo fuel lines are made out of metal and are encased in rubber. Which is great, no rattles, well protected. However, after 36 years, the rubber casing had become brittle and was torn in a few places. Which means water ingress and that means rust and corrosion where you cant see it. When I have an oil leak and I dont know what its from I usually smell and taste a tiny bit. I could smell a very distinct fuel smell. But on an old car like this, with some earlier oil leaks and a anti-rust treatment (also oil) the fuel had mixed with various oils and leaked onto the floor. I started the engine, luckily no huge leak. Some further inspection showed that in two places the metal fuel line had corroded badly and fuel was weeping through. So the complete, back to front fuel line had to be replace. Had the Spider up on the lift with my local Alfa Specialist Goos. Yesterday I also attached the Vliegenmepper (fly-swatter), so my wifes hair will not be blown all over the place. Washed, waxed and vacuumed the Spider. All ready for France!!    Most of the parts I need for the next Jeep job have started to arrive. The radiator is leaking in two places. Only a few drops when it cools down. So far, when it is warm it holds its liquid. But of course, that is just a matter of time, at some point in the not so distant future, I will spring a leak. So it needs replacing. I will also replace the water cooling pump and the thermostat. When you order parts it is not always obvious what is included. E.g. when you order a pump is the gasket included, when you order a radiator is the drain valve included. Just to be on the safe side, I tend to order everything seperately, just in case. I order all these parts from the fantastic Rockauto.com in the USA. Most of this stuff is dead cheap. Here you see the various gaskets, radiator cap, and the cooling pump water inlet pipe. (the little black pipe).  The new thermostat  You can get different thermostat for the Jeep. Different in terms of opening temperature. When in doubt always go for the highest value!! Only go for lower values, if you live in a very hot climate, or do a lot of offroading perhaps. For normal European driving condition the warmer the cooling liquid is the better for the fuel efficiency. So I am putting the 91oC thermostat in.  A very simple cooling pump:  Impellors dont come much simpeler than this  Here my new radiator:  The Jeep radiator has a build in transmission liquid heat exchanger. The two smaller pipes are the in- and outlet. I am a little concerned with my old bits. The pipe and hose connections look pretty rusty. I hope I can get them undone without damage, or I will need to replace, parts of the, transmission cooling lines too.  The radiator came with a little drain valve attached, so I wont be needing the one I ordered separately. Not quite sure how Jeep engineers thought you would be using this drain valve. Access to it, with the radiator installed is just about impossible. So I will probably just have to pull a hose off.  With every delivery from Rockauto.com you get one of these cool car fridge magnets. I have a feeling I might get quite a collection of these over time!!  After much thinking and research and talking to my new local Jeep specialist Martin I have decided I will also replace the front crankshaft seal. It leaks a tiny bit. But that means removing the harmonic balancer. Its best to replace it as well. i will need another trip to my favourite tool shop HBM as I need a special puller. I am going to do this once I have the radiator out. In theory you can replace both balancer and seal with the radiator in place. But there is not much room, and before you know it, you might punch a hole in your (new) radiator. So I will wait till I have every parts ready and then do it all in one go. The Jeep did pass its annual APK (MOT) last week. I had one big job carried out by Martin. Both rear leaf spring shackles were badly rusted. Have a look at what Martin managed to extract. He had to use a torch to get the other one out.  I did this very job on my Jeep in the USA, It took me many days hammering and chiseling away. It can be done as DIY, but without a lift and some very heavy tooling and a proper acetylene torch, it is a very lengthy and exhausting job. Glad I left that to Martin. Jeroen |
|
| (9)
Thanks
|
| The following 9 BHPians Thank Jeroen for this useful post: | anivy, Gannu_1, IcarusMan, keroo1099, Reinhard, s4ch, Thad E Ginathom, vaasu, VivekCherian |
|
16th May 2022, 17:53
| #883 |
| Distinguished - BHPian | Re: My Car Hobby: A lot of fiddling, and some driving too! Jaguar XJR, Mercedes W123 & Alfa Romeo Sp When spanner mate Peter and I were sill heading up the technical committee of the Dutch Alfa Romeo Spider Register we had made an interesting arrangement with one of the sponsors of our club magazine. He was, and still is, one of the very reputable classic Alfa Romeo cars spare parts suppliers. We had, free of charge, a huge set of spare parts for all the different kind of Spiders. It has come in extremely handy during our various tours in the Netherlands, but especially when taking our Spiders across Europe. As I mentioned Peter and I will be doing a lot of driving in our Spiders in the weeks to come. First our annual outing to France, with our Spideristi friends. Then just the two of us to the 12in12 challenge in Italy. Especially the latter will be tough on our two little cars. Our Spiders are, of course, extremely well maintained. Still they are 42 (Peter) and 36 (mine) year old cars. Its a 50 year old Italian design, produced in Italy. Bits will fail and or fall off! For us part of the fun of touring in classic cars. We always carry some of our own spares. But with this challenge in the Alps we thought we needed some more. So we approached our old sponsor and he was more than happy to lends us all the parts we needed. The deal is we only pay for what we use. And of course, we need to make sure all the parts stay in pristine condition, so we can return everything to him, once we are done touring. This morning I went to pick up our set of new spare parts: Quite the spread:  Although all 105/115 Series Spiders are very similar, especially under the skin, there are still numerous differences. We have three cooling water pumps. We are not quite sure what is fitted. We do know there is a difference between the one on Peter and my Spider, but there are also two varieties on Peters. Next we have a brake master cilinder, clutch master and clutch slave cylinder, hydraulic hose for the clutch. couple of V-belts (one for each Spider), two thermostats (again different on Peters Spider compared to mine). A complete set of front brake pads, and rear brake pad (identical for both Spiders). A cooling fan (identical) and an ignition coil (identical). Believe it or not, but over the years we have had problems with all of these parts on different Spiders, in different parts of Europe. All of these we can replace easily, road side, if need be. I still need to sort my own parts and tools, all parts of the delicious get ready ritual for our Spider drives. Tomorrow morning we will change out the condensor on my wifes Fiesta! Jeroen |
|
| (6)
Thanks
|
| The following 6 BHPians Thank Jeroen for this useful post: | IcarusMan, Reinhard, sagarpadaki, Thad E Ginathom, vaasu, VivekCherian |
|
17th May 2022, 22:35
| #884 |
| Distinguished - BHPian | Re: My Car Hobby: A lot of fiddling, and some driving too! Jaguar XJR, Mercedes W123 & Alfa Romeo Sp Today was the day Jack and I were going to replace the AC condensor on my wifes Ford Fiesta. Unfortunately, something else came up for Jack, so we had to reschedule towards the end of next week. Luckily, I have got another little project some of you might find interesting. Between my wife, our 7-8 cars and me we also have four TomTom GPS navigation devices. Truth be told, two are really old. And two are pretty up to date devices that we tend to take with us, in different vehicle. I dont care what they say, but I have yet to meet an inbuilt navigation system, or a smart phone that can match a well set up TomTom. My wife has a 5 model 5100 and I have the 6 slightly modern version that also allows you to update maps and other stuff via WiFi. If you ever wonder which size you want, stick to the 5. With hindsight the 6 is a little to large for my liking. These are the models that still have a build-in SIM card. So you dont need to connect via your phone. TomTom new models dont do the build in SIM anymore. I guess it saves them money on the chips, but also on having to negotiate charges and roaming charges with all the operators. Initially TomTom used so called GPRS technique on Vodafone network to provide the data to the devices. I know, at the time I was responsible for Vodafone and we helped them with some software changes in our network software. My team and I were also part of their B-testers for their Traffic Information. Since, that function has become really good I find. I am not sure, but I am pretty sure these days they get a lot more traffic information than just from mobile devices out there. The traffic information on delays, queues, road closures is very accurate. However, 2G networks are being decommissioned and so in some parts of Europe this particular feature might work less well. Even so, the big problem with my wifes TomTom was the battery was on its last leg. And when that happens, it starts behaving very wonky. Switches off and on randomly. The little car charges provided by TomTom are a little underpowered. It hardly charges the TomTom, barely keeps up. So I ordered a new TomTom battery. Well, a third party battery for our TomTom. TomTom doesnt sell you spare batteries! Its detrimental to their business model of getting you to buy a new model every two/three years. On the site where I ordered they also suggested a small special tool kit, which looked useful. So I ordered that too.  First thing is to take two tiny bolts out of the bottom;  Then very gently pry around the circumference of the device with the special spatulas from the tool kit. Gently does it!!  Eventually I managed to separate the two halves. You need to undo the main flat cable and a tiny connector as well  You can see here the SIM (on the top the white thingy) and also the additional memory (red/grey thingy) I installed.  You need to remove five tiny bolts to separate the main PCB from the housing, the battery connector and a tiny speaker connector. Here is the offending part!! It was stuck down with very sticky tape.  I test fitted the new battery. Did not fit well, as the wiring was slightly different from the original. Just clipped off a few bits on the housing that held the battery in place.  Looking good!!  Next, put everything back again in reverse order. You need to make sure the PCB sits correctly in the housing and the on/off switch is positioned properly. Here you see the plastic switch on the housing and how it presses down on a tiny switch on the PCB.  The main flat cable can only be installed holding the two halves together and leaving a little gap. Just press it down. All of these tiny tiny connectors will only fit one way, the correct way. Never use force, if/when correctly positioned they will slide in smoothly.  When seperating the two halves of the housing and pressing them back again, you need to be very gently. The screen will crack when twisted!! Managed to get it all back together. Fitted the two small screws in the bottom and job done Moment of truth: Power on, and the TomTom rebooted immediately!!  Very happy with that. I am charging it for a couple of hours with a regular charger. Looks like a job well done. If you would like to replace the battery on a TomTom, or any other device for that matter, always check Youtube, just search for (device name) battery replacement. Usually there are dozens of videos out there. I also continued preparing the Spider for our tour. Which means repacking tools, parts and various other bits. I packed all the new parts in bubble wrap and put them in one box  In the boot of my Spider there is a sort of secret hiding place. Its where the jack is kept, and some bits and pieces of the emission system. But there is room to put all sorts of bits in.  I will be taking the usual towing rope, with chain and shackles. Some bottles of water (primarily to wash hands off, after a dirty job)  My usual Spider Toolkit and box with assorted small parts and some special tools  And all of this lot. Various tools, eying oil, WD40, starter spray, gloves, etc  All packed!!  Spanner mate Peter will bring some more and different tools, a hydraulic bottle jack and some fluids. While I type this I realise I forgot to add the EasyBleed kit in case we need to bleed brakes/clutch. Have to add this. Looks pretty full and that is before we have added any personal luggage. I will tell my wife she will have full use of the glove compartment! Talk about the global economy. I just noticed the country of origin on the packaging slip of my Jeep parts. Indonesia, Mexico, Taiwan, China, Israel en even the good old USA!! Remarkable.  Jeroen |
|
| (18)
Thanks
|
| The following 18 BHPians Thank Jeroen for this useful post: | anivy, Bibendum90949, hmansari, IcarusMan, InControl, keroo1099, PM - B, pun337, Reinhard, Researcher, Rocketscience, s4ch, Samfromindia, SS-Traveller, SuhairZain, Thad E Ginathom, vb-saan, VivekCherian |
|
18th May 2022, 19:28
| #885 |
| Distinguished - BHPian | Re: My Car Hobby: A lot of fiddling, and some driving too! Jaguar XJR, Mercedes W123 & Alfa Romeo Sp This morning I picked up some more parts from Edwin at Jeepparts. I now have all the parts in house for the next big job. Replacing the radiator, cooling water pump, thermostat, torsion damper and front crankcase seal. My Jeep suffers from a bit of piston slap. Not unusual at 200K miles. In fact, just about all Jeeps suffer from piston slap. Some from very early on. When I picked up my Jeep from Martin last week, after the MOT, we discussed it. He showed me a Jeep Wrangler, couple of years old, only 50K km on the clock. When we fired it up it sounded a lot worse than mine!! Mine is only noticeable when you start the engine from cold and is virtually gone when the engine is properly warmed up. I was going to replace the torsion damper anyway, but if anything I guess it will help a little bit in preventing the piston slap to get worse. My engine does not use any oil, has a good oil pressure and no unusual smoke colours coming out of the exhaust. So I am not worried. But it does leak a bit of oil on the front crankcase seal. So I will replace that, whilst I have the damper of to. Here you see both parts:   This almost looks like a solid metal pulley. It is a pulley of course, but it consists of two halves with rubber compound in between keeping the two halves together and providing the torsion and vibration dampening effect. Looks very simple, but actually quite a high tech piece of kit. I will need to get myself a different kind of puller. I have several, but this requires a special one. Yesterday afternoon I visited the exhibition Martime Industry in Gorinchem. A 12 minute ride on my bicycle. https://www.maritime-industry.nl/en/ Even though I left the merchant navy close to 40 years ago, I am still interested in what is happening, new developments and so. So whenever there are these sort of exhibitions or workshops I try to go and visit. Just showing a few images of some stuff some of you might find interesting. This one addressed mostly what we call binnenvaart which essentially means inland shipping, so on our rivers and canals. These days some of the vessels cruising on our rivers are enormous. A modern push barge could well have bigger engines installed then the oceangoing tugs I sailed on in the 80s! A lot of emphasis on green and environmental friendly equipment. So quite a few exhibitor talking and showing all kinds of electrical propulsion. Great for the environment, but very boring image-wise. I prefer Diesels!! Have a look a this; At 2100RPM, it produces 1066kW (1430HP) form 24,2liters of displacement.  A Volvo Penta D13C1. at 1500RPM it produces 296kW (370HP)  All kinds of companies were present. These guys do all sorts of (engine) maintenance and brought along some parts of some fairly large engine. Look at the size of this valve:   How about this for a piston ring?  You have to give the Americans credit; their engines always look better than the European competition. They have very bright colours, very nice paint work and chrome bits too! This is a cut away 1;1 Cummins X15. 447kW ( 600HP)    Compare the bright shiny red of the American Cummins with the boring and dull non descriptive orange/red-isch Swedish Scania  Finally, a Mitsubishi engine.635kW (852HP) at 1500 RPM  These sort of engines could be used for propulsion, power/auxiallery generation or drive pumps/compressors etc. It was interesting and I enjoyed myself. Had a little chat with some of the people on the stand. If anything, you get free lunch, free coffee/tea and unlimited drinks at the exhibition premises and many exhibitors provide the same to their visitors as well. Sort of filling up of the mind and the body! Jeroen Last edited by Jeroen : 18th May 2022 at 19:33. |
|
| (23)
Thanks
|
| The following 23 BHPians Thank Jeroen for this useful post: | anivy, aqualeo2040, carthick1000, catchjyoti, hmansari, IcarusMan, InControl, keroo1099, PearlJam, PM - B, Reinhard, Researcher, s4ch, sai_ace, shipnil, SS-Traveller, SuhairZain, Thad E Ginathom, TorqMaster, v1p3r, vb-saan, VivekCherian, ysjoy |
|