Team-BHP > Technical Stuff > DIY - Do it yourself
Register New Topics New Posts Top Thanked Team-BHP FAQ


Reply
  Search this Thread
48,415 views
Old 26th April 2017, 10:05   #1
BANNED
 
Join Date: Oct 2011
Location: Hyderabad
Posts: 12,350
Thanked: 21,411 Times
DIY: Radiator Replacement in a Maruti WagonR

My colleague owns a pre-worshipped Maruti WagonR LXi (Dec, 2003) with 81K on the odometer.

DIY: Radiator Replacement in a Maruti WagonR-screenshot_20170427025711.png

One sudden night while he was returning home from work, just a kilometer away from home, there was coolant spillage all over the windshield which made him stop the car and raise the hood to find a minor leak from the radiator top area and part of engine block area. Since it was 9 pm already also lack of mechanics around, he slowly brought the car home and parked it.

Next day morning, I go to his house to see what the issue was! It took me 30 minutes to get the correct source of the leakage. It was the radiator itself. So immediately placed an order for all the necessary parts.

Last edited by aah78 : 1st May 2017 at 23:30. Reason: Typo.
a4anurag is offline   (7) Thanks
Old 27th April 2017, 03:29   #2
BANNED
 
Join Date: Oct 2011
Location: Hyderabad
Posts: 12,350
Thanked: 21,411 Times
re: DIY: Radiator Replacement in a Maruti WagonR

Tools
  • Flat and Star Screwdriver

  • Socket set

  • Pliers

  • Jack/jack stand

  • Waste Cloth

  • Bucket to collect old coolant

______________________________________


Items needed for the DIY
  • Radiator Assembly x 1,

  • Hoses (Inlet and Outlet) x 1 (each)

  • Retaining clips x 4

  • Radiator Support mounts (Lower and Upper) x 2 each

  • MGC (Maruti Genuine Coolant) x 2 liters


_______________________________________


PROCEDURE
  1. Using jack stands, raise the front end so it is easy to access the pipes/hoses located underneath;

  2. Disconnect the negative terminal of the battery;

  3. Place a jar/bucket preferably with a wider mouth so spillage is reduced (with minimum capacity of 4L);

  4. Open the coolant drain screw located at the base of the radiator, once flow is even, slowly open the radiator cap on top which would help the draining process complete faster. Also drain the coolant from the reservoir tank too;

  5. Open the bumper by unscrewing the 4 screws on top of the bumper, one screw located in each of the wheel wells and one screw located in the recess behind the front number plate. Once all screws are out, slightly lift the bumper and pull it outwards to free from the car;

  6. Disconnect the coupler of the radiator fan and un-bolt the 4 screws that hold the fan unit onto the radiator at its rear side (rear engine bay side).

  7. Once the fan unit is free, go underneath the car and remove the Radiator outlet hose held by a clip. Carefully wriggle the fan unit out from the radiator. Come out and remove the Radiator inlet hose and pipe from radiator cap to reservoir tank too.

  8. Remove the Air filter box to facilitate easy removal of the radiator and the hose.

  9. The radiator rest actually on 4 rubber mounts held firmly by the fan unit that is fixed on the chassis by 4 bolts. As the fan unit is out already, all we need to do is lift the radiator off their rubber mounts.

  10. Once the radiator is out, place the new one in its place and reverse the above steps to complete the installation.

  11. Tighten all clips, caps and ensure the hoses are fixed tightly so leakage is avoided.

  12. Add fresh coolant as instructed at a ratio of 1 part coolant : 2 parts water. So before pouring it in we pre-mixed it to 4 litres.

  13. After adding the coolant into the system, check for any site bubbles in the system. Switch ON the engine and let it idle for a while plus touch all pipes to observe if uniform heating happening or no.

  14. Once all done, take the car out to ensure everything is working as intended or no. Also check if the fan switches ON automatically when temperature crosses the maximum value as programed in the ECU. .

Last edited by a4anurag : 27th April 2017 at 04:39.
a4anurag is offline   (8) Thanks
Old 27th April 2017, 03:58   #3
BANNED
 
Join Date: Oct 2011
Location: Hyderabad
Posts: 12,350
Thanked: 21,411 Times
re: DIY: Radiator Replacement in a Maruti WagonR

Pictures of the Job


Bumper top screws
DIY: Radiator Replacement in a Maruti WagonR-10.-bumper-removed.jpg

Car jacked up, screw located in the wheel well
DIY: Radiator Replacement in a Maruti WagonR-5.-car-jacked-up.jpg

Last screw located behind the front number plate
DIY: Radiator Replacement in a Maruti WagonR-11.-screw-behind-registration-plate-removed.jpg

Bumper Opened
DIY: Radiator Replacement in a Maruti WagonR-12.-bumper-removed.jpg

Coolant drain screw located at the base of the radiator
DIY: Radiator Replacement in a Maruti WagonR-6.-drain-screw-opened-drain-coolant.jpg

Coolant being drained
DIY: Radiator Replacement in a Maruti WagonR-7.-coolant-being-drained.jpg

Open cap for faster drain
DIY: Radiator Replacement in a Maruti WagonR-8.-open-cap-faster-draining.jpg

All old coolant collected
DIY: Radiator Replacement in a Maruti WagonR-9.-old-coolant-collected-3.9l.jpg

Old leaking radiator
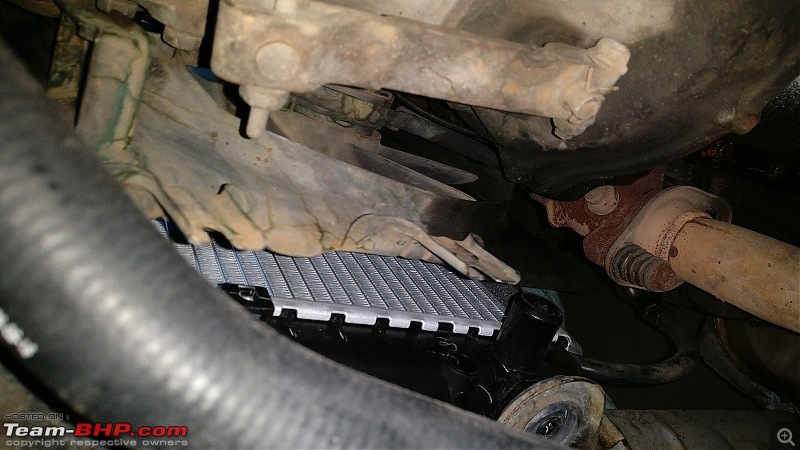
DIY: Radiator Replacement in a Maruti WagonR-13.-old-leaky-radiator-changed.jpg

Rusty insides
DIY: Radiator Replacement in a Maruti WagonR-14.-rust-inside.jpg

New radiator placed and new coolant added
DIY: Radiator Replacement in a Maruti WagonR-15.-new-radiator-placed-coolant-added.jpg

Bottom view of the radiator
DIY: Radiator Replacement in a Maruti WagonR-16.-bottom-view-new-radiator.jpg

New radiator outlet pipe fixed
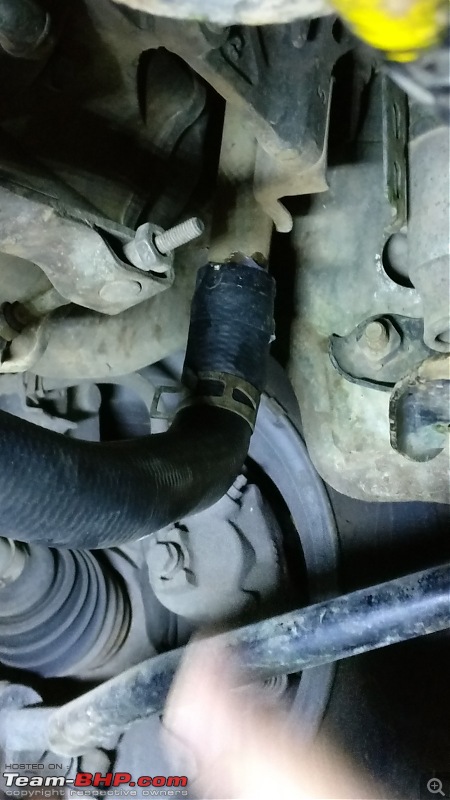
DIY: Radiator Replacement in a Maruti WagonR-17.-new-outlet-pipe-fixed.jpg

New radiator inlet pipe fixed
DIY: Radiator Replacement in a Maruti WagonR-18.-new-inlet-pipe-fixed.jpg

Radiator to reservoir tank new pipe fixed
DIY: Radiator Replacement in a Maruti WagonR-19.-radiator-reservoir-pipe-fixed.jpg

Engine Bay
DIY: Radiator Replacement in a Maruti WagonR-22.-engine-bay.jpg

Radiator mounts (Upper) - Old vs New)
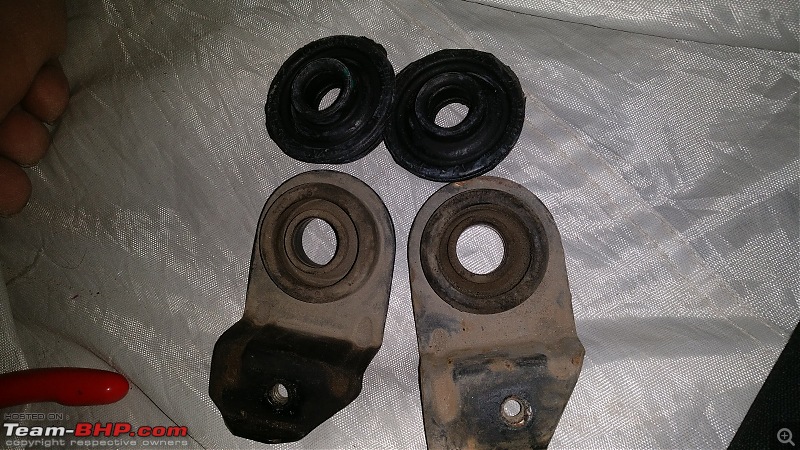
DIY: Radiator Replacement in a Maruti WagonR-20.-upper-radiator-support-mounts-old-vs-new.jpg

Inlet and Outlet pipes - Old vs New
DIY: Radiator Replacement in a Maruti WagonR-21.-inlet-outlet-pipes-old-vs-new.jpg

Radiator Assembly - Old vs New
DIY: Radiator Replacement in a Maruti WagonR-1.-radiator-old-vs-new.jpg

Pipe Radiator Inlet - Old vs New
DIY: Radiator Replacement in a Maruti WagonR-2.-pipe-radiator-inlet-old-vs-new.jpg

Pipe Radiator Outlet - Old vs New
DIY: Radiator Replacement in a Maruti WagonR-3.-pipe-radiator-outlet-old-vs-new.jpg

Radiator Mounts - Upper and Lower
DIY: Radiator Replacement in a Maruti WagonR-4.-radiator-mounts-upper-lower.jpg

List of parts with the part number and prices
DIY: Radiator Replacement in a Maruti WagonR-0.-parts-needed.jpg

Part details of the Radiator and hoses
DIY: Radiator Replacement in a Maruti WagonR-img20170217wa0001vert.jpg

Last edited by GTO : 29th April 2017 at 10:09. Reason: Typo
a4anurag is offline   (30) Thanks
Old 28th April 2017, 10:04   #4
Team-BHP Support
 
Samurai's Avatar
 
Join Date: Jan 2005
Location: Bangalore/Udupi
Posts: 25,828
Thanked: 45,547 Times

Moving out... thanks for sharing - Support Team

Last edited by GTO : 28th April 2017 at 10:04. Reason: Bump
Samurai is offline   (2) Thanks
Old 28th April 2017, 12:18   #5
Team-BHP Support
 
SmartCat's Avatar
 
Join Date: Jun 2007
Location: Bangalore
Posts: 6,427
Thanked: 42,937 Times
Re: DIY: Radiator Replacement in a Maruti WagonR

Anurag, just curious - what would have been the final bill if it was done at MASS? Inclusive of parts + labour charges + VAT?

And how many mins taken to get this done?
SmartCat is online now   (3) Thanks
Old 28th April 2017, 13:29   #6
BANNED
 
Join Date: Oct 2011
Location: Hyderabad
Posts: 12,350
Thanked: 21,411 Times
Re: DIY: Radiator Replacement in a Maruti WagonR

Quote:
Originally Posted by smartcat View Post
Anurag, just curious - what would have been the final bill if it was done at MASS? Inclusive of parts + labour charges + VAT?

And how many mins taken to get this done?
IIRC the labor was 1000 or 1100 for this job.

Time was 1 day i.e. if the car is handed over before 10am, the car would be returned the same day evening by 5 pm or 6 pm else it is next day morning at 9 am.
a4anurag is offline   (3) Thanks
Old 28th April 2017, 13:54   #7
Team-BHP Support
 
Rehaan's Avatar
 
Join Date: Feb 2004
Location: Bombay
Posts: 24,046
Thanked: 34,074 Times
Re: DIY: Radiator Replacement in a Maruti WagonR

Nice work!

Quote:
Originally Posted by a4anurag View Post
Rusty insides
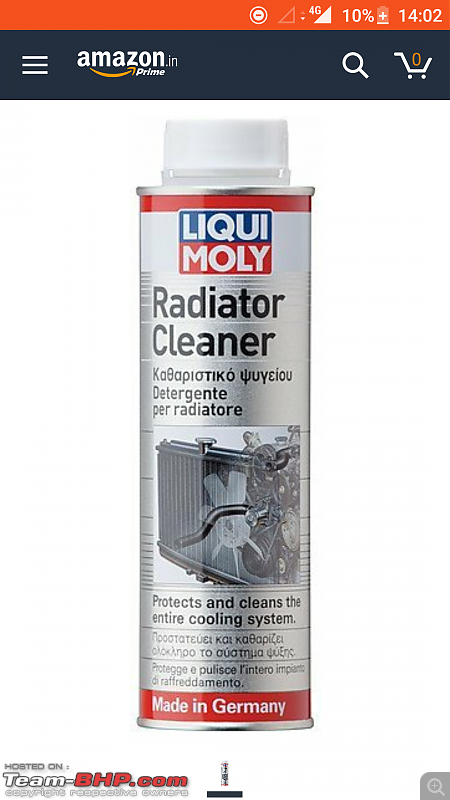
Did you do a full cooling system flush as well? This would have been a good time to do so...
Rehaan is offline   (2) Thanks
Old 28th April 2017, 14:14   #8
BANNED
 
Join Date: Oct 2011
Location: Hyderabad
Posts: 12,350
Thanked: 21,411 Times
Re: DIY: Radiator Replacement in a Maruti WagonR

Quote:
Originally Posted by Rehaan View Post
Did you do a full cooling system flush as well? This would have been a good time to do so...
Thanks Rehaan. I used this Radiator flush for the job, bought from Amazon.

DIY: Radiator Replacement in a Maruti WagonR-screenshot_20170428140230.png

Also followed this video to perform the Radiator Flush properly.

a4anurag is offline   (4) Thanks
Old 28th April 2017, 15:17   #9
Distinguished - BHPian
 
Join Date: Oct 2012
Location: Delhi
Posts: 8,100
Thanked: 50,861 Times
Re: DIY: Radiator Replacement in a Maruti WagonR

Job well done, great write up.

Just a few thoughts.

I noticed you appear to be using a simple car jack to lift the car. For proper safety you really ought to put the car on axle stands. Those scissor jacks are very unstable, better watch it, safety first!

On the test drive it is useful to also open up the cabine heater valve fully to ensure the cabin heating system gets properly filled.

the test drive should be long enough to ensure the thermostat opens. On some cars with a temperature gauge you can actually see when the thermostat opens for the first time. If not, drive for at least 10 minutes.

You might have to top up the system afterwards a bit.

Jeroen
Jeroen is offline   (6) Thanks
Old 28th April 2017, 15:43   #10
BANNED
 
Join Date: Dec 2016
Location: Jaipur
Posts: 99
Thanked: 43 Times
Re: DIY: Radiator Replacement in a Maruti WagonR

Quote:
Originally Posted by a4anurag View Post
It took me 30 minutes to get the correct source of the leakage. It was the radiator itself. So immediately placed an order for all the necessary parts.
Where was the leak? I possible, kindly share image.


Quote:
Originally Posted by a4anurag View Post
Pictures of the Job
Part details of the Radiator and hoses
Attachment 1633720
What I understood from this is that (Top+Radiator+Bottom) are one assembly and not available separately as MGP. Am I correct?

Please share the make details.

Last edited by IN-RJ : 28th April 2017 at 15:47.
IN-RJ is offline  
Old 28th April 2017, 15:44   #11
BANNED
 
Join Date: Oct 2011
Location: Hyderabad
Posts: 12,350
Thanked: 21,411 Times
Re: DIY: Radiator Replacement in a Maruti WagonR

Quote:
Originally Posted by Jeroen View Post
Job well done, great write up.
Thank you Sir. Appreciate you liked the DIY.

Quote:
Originally Posted by Jeroen View Post
I noticed you appear to be using a simple car jack to lift the car.


Quote:
Originally Posted by Jeroen View Post
On the test drive it is useful to also open up the cabine heater valve fully to ensure the cabin heating system gets properly filled.
We drove for 16 kilometers to be exact IIRC.

Quote:
Originally Posted by IN-RJ View Post
Where was the leak? I possible, kindly share image.
Please zoom in to the picture "old leaky radiator".

You can see coolant spilled around the top plastic part of the radiator assembly. It was the plastic part that gave off spilling out the coolant.

Quote:
Originally Posted by IN-RJ View Post
What I understood from this is that (Top+Radiator+Bottom) are one assembly and not available separately as MGP. Am I correct?
Yes. I presume the Top and Bottom that you are referring to are the plastic parts on the radiator unit, right?! If yes, then the whole unit is MGP available as "Radiator Assy"

Last edited by a4anurag : 28th April 2017 at 15:49.
a4anurag is offline  
Old 28th April 2017, 15:49   #12
Senior - BHPian
 
dass's Avatar
 
Join Date: May 2008
Location: Bangalore
Posts: 1,291
Thanked: 737 Times
Re: DIY: Radiator Replacement in a Maruti WagonR

Nice job, as always Anurag and thanks for sharing.

How did you determine that the radiator was beyond repair and needed a replacement? Are there any tell tale signs that made you get to this conclusion?
dass is offline   (2) Thanks
Old 28th April 2017, 15:56   #13
BANNED
 
Join Date: Oct 2011
Location: Hyderabad
Posts: 12,350
Thanked: 21,411 Times
Re: DIY: Radiator Replacement in a Maruti WagonR

Quote:
Originally Posted by dass View Post
How did you determine that the radiator was beyond repair and needed a replacement? Are there any tell tale signs that made you get to this conclusion?
The metal clips that hold the plastic parts on top were slightly battered. I guess the previous owner did fiddle with the radiator unit. Some of the clips weren't holding on the plastic part tightly.

First we tried repairing the old unit at a radiator specialist near to my workplace. The moment coolant was filled and heater was switched ON, it started leaking again.

Plus he had a long trip to his hometown the next day. Didn't want him to get stranded and later curse me. So I felt it was better to change.

Hope this clears your doubt. Lost most of the images in my old mobile else this DIY thread would have been complete. Apologies for that.

Last edited by aah78 : 1st May 2017 at 23:30. Reason: Typo.
a4anurag is offline   (2) Thanks
Old 29th April 2017, 03:37   #14
Senior - BHPian
 
sandeepmohan's Avatar
 
Join Date: Feb 2010
Location: Wellington
Posts: 3,133
Thanked: 5,443 Times
Re: DIY: Radiator Replacement in a Maruti WagonR

That is a nice DIY. It would have helped a little more if there was some way you could illustrate the removal and install process of the radiator unit.

One of the strange things about this particular generation of Wagon R is the way the water temperature meter is designed. I was driving a buddy's Wagon R once and was pre warned of the heating problem. We started driving and I noticed the water temperature climbing gradually to its usual position. After some time, it went back to the dead stop Cold position. Thats when I knew something was off and I pulled over. On checking the coolant reservoir, there was no coolant in the tank. It was dry and I had poured distilled water 30 minutes ago. Basically; the water jackets around the engine block were clogged as a result of the owner pouring tap water in to the cooling system. This resulted in excess heat build up, pressure in the system which lead to the coolant being pushed out from the reservoir over flow drain pipe (Not seen on your car). What is odd is that if there is no water in the cooling system, the water temperature meter does not show a reading. This is bad design in my opinion. You could end up seizing the engine.

Anyways; the car was eventually fixed of overheating problems.
sandeepmohan is offline   (2) Thanks
Old 29th April 2017, 13:42   #15
Senior - BHPian
 
lurker's Avatar
 
Join Date: Jun 2006
Location: Tura
Posts: 1,592
Thanked: 1,423 Times
Re: DIY: Radiator Replacement in a Maruti WagonR

best flush for these types of maruti is after flushing with radiator flush, just remove the clip from lower radiator pipe and push in a water hose into the lower radiator pipe/tube and start the engine. Tap water from hose will now be sucked into engine and circulate throughout and clean out the cooling system. Collect this water running out of the lower radiator opening and continue till clear water is seen.

Now remove hose and reattach the lower radiator pipe clip, and fill the radiator with distilled water and start engine and maybe even run around town for a few kms. Remove this also through disconnecting lower radiator tube clip or by unscrewing radiator drain screw. I prefer former method and then reconnect the tube and clip on exactly the same spot which the clip was held on tube previously. If you change that spot and place clip slightly ahead or behind the exact same old spot then there is chance of leakage.

Now refill with brand new coolant and distilled water.
lurker is offline   (3) Thanks
Reply

Most Viewed


Copyright ©2000 - 2024, Team-BHP.com
Proudly powered by E2E Networks