Team-BHP > Technical Stuff > DIY - Do it yourself
Register New Topics New Posts Top Thanked Team-BHP FAQ


Reply
  Search this Thread
61,928 views
Old 9th August 2017, 10:59   #1
BHPian
 
aayushnair's Avatar
 
Join Date: Jan 2013
Location: Mumbai
Posts: 160
Thanked: 453 Times
DIY: Engine coolant flush & change

The Anti-Freeze in my car which is now 6.5 years old wasnt changed since it last went to service at a Skoda workshop (or atleast that's what the receipt said) 3 years ago. I don't know what made me oversee this when I serviced my car (another DIY); the regular oil, oil filter, fuel filter, air filter (clean - A K&N cone), cabin filter and the sorts in April this year, luckily I was on one of my pop-up missions and noticed the weird brownish pink color in the expansion (coolant) reservoir when I was like: damn I've missed this one for long!

So this thread is purely for flushing and changing my coolant!

The research began as I wasn't too sure on how this was going to be done and whether I needed pro help, but what I found is what made this another great And satisfying DIY project.

The Skoda workshop manual for a 1.9 TDI engine showed what was needed to be done:
http://workshop-manuals.com/skoda/fa..._ii_roomster)/

The Coolant Drain Valve -

Name:  Coolant drain.png
Views: 25003
Size:  6.4 KB

The Bottom Coolant Hose -

Name:  Coolant drain1.png
Views: 25865
Size:  16.0 KB

The tools/parts needed were simple:
1. Torx set (1/2 inch and 1/4 inch)
2. Plumbers Pliers
3. Bucket
4. Lots of water
5. Drinking water
6. Coolant Flush (i used Abro)
7. New Coolant

The process to be followed (as per manual)
1. Remove the underbody protection plate (if any - this was part of the rough road package on diesel Fabias Mk2)
2. Open the coolant drain valve and allow to drain
3. Remove the coolant hose and allow to drain
4. Fill new coolant

The actual process was somewhat different if you want better results.

Note: always ensure your car engine is cool; engine coolant can be very very hot!

1. Drain the coolant from the hose and the valve
2. Use a coolant flush with a mix of water filled in after draining the original coolant.
This can also be added to the old coolant.
3. Run the car in idle up to when the engine is at optimum temperature (regular)
4. Switch on the heater and set to maximum
5. Let the car run for another 20-30 minutes
6. Drain out the coolant and coolant flush
7. Repeat the process from steps 2-6 with water until the drained water is clear (usually about 2-3 times)

Note:
1. Always ensure you give about 15-20 minutes for the engine to cool after running before draining (coolant is hot)
2. Some coolant flushes ask you to run the car for 100kms before draining
3. One can also run flowing water from a garden hose in the coolant reservoir with the engine running and drain valve open (with heater too) - this too is very efficient in cleaning out old coolant

Now I followed the above steps to drain the coolant:

The car first on Jack Stands -
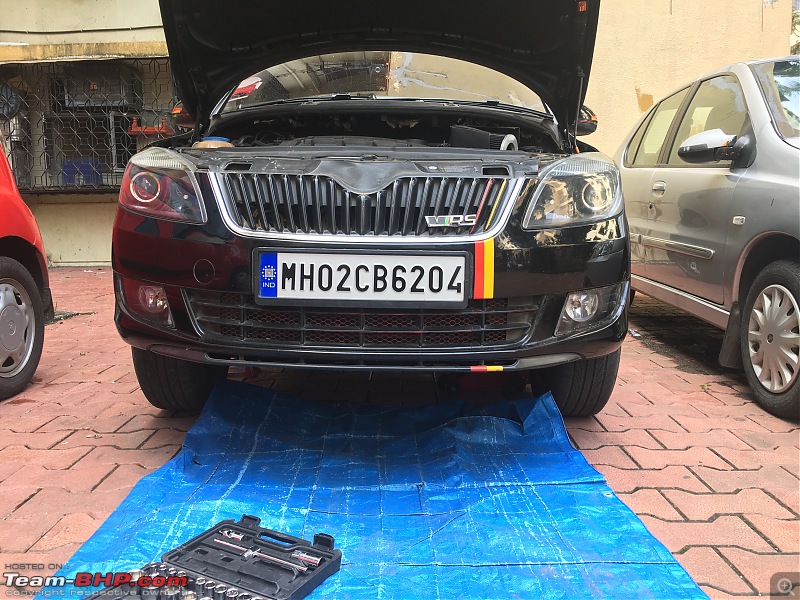
DIY: Engine coolant flush & change-img_3439.jpg

The engine protection plate off (to get this off you'll need to put your car up on jack stands, get under and remove the bolts - 1/2 inch ratchet set will do)

The engine protector plate -

DIY: Engine coolant flush & change-img_3440.jpg

Now off -

DIY: Engine coolant flush & change-img_3443.jpg

Now once the plate is off one can get under the car to see the position of the drain valves and coolant hose; problem is I couldn't find the drain valve as shown in the pic from skoda, it just aint there!

So with much deliberation and confusion I decided to continue.
Under the radiator were 2 hoses one bigger in diameter at the bottom and another just above it. The one right at the bottom was for the intercooler I removed that hose as to get access to the clamp on the bottom coolant hose.

This one is the hose from the inter cooler -
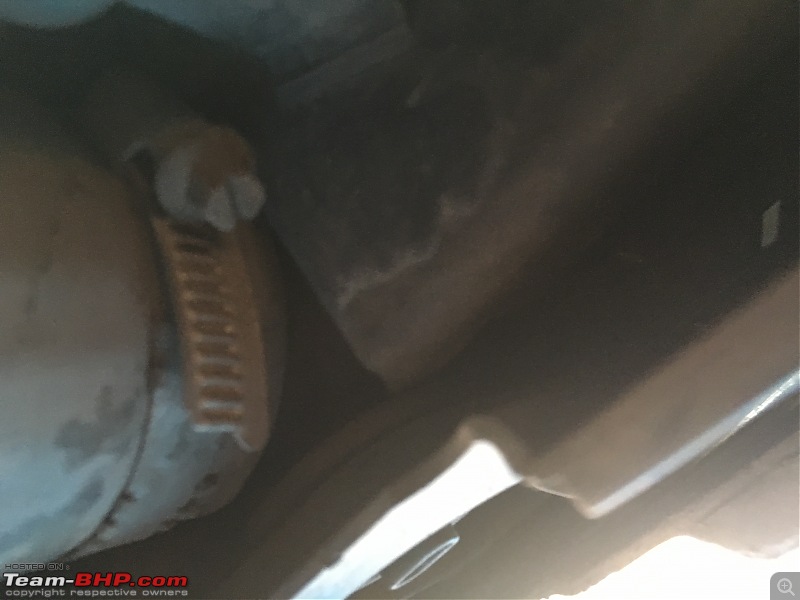
DIY: Engine coolant flush & change-img_3444.jpg

Here's a pic of the coolant being drained from the bottom coolant hose (without the drain valve)

DIY: Engine coolant flush & change-imgo_3446.jpg

From here it was simple, the second the coolant hose was off - out came the coolant in this color:
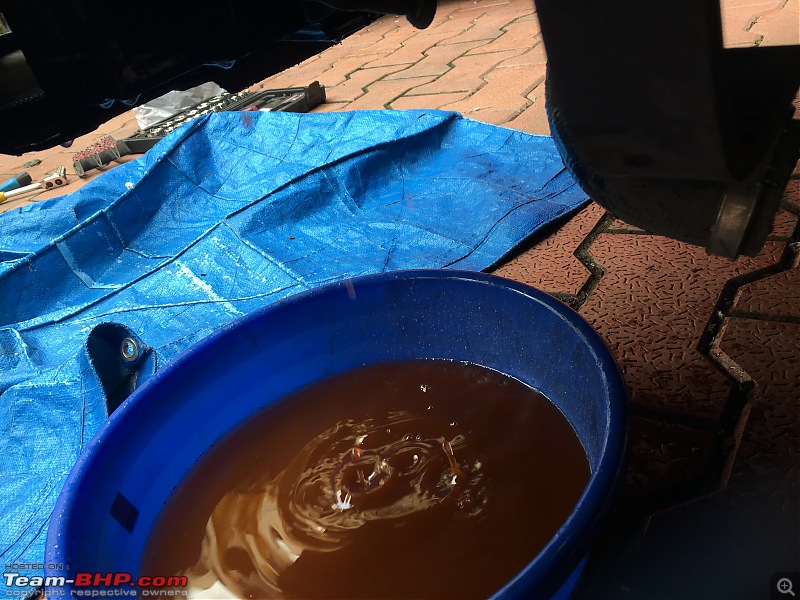
DIY: Engine coolant flush & change-img_3447.jpg

I knew it needed a lot of flushes before it was completely clear again!

I didn't have a garden hose or tap close by so I had to improvise a little with 2.5 litre bottles of water back to back.

First up was the coolant drain/flush liquid from Abro; I added this into the coolant tank with water and ran the engine for 30 minutes; with the heater (at max) on for 15 minutes.

DIY: Engine coolant flush & change-img_3449.jpg

I followed the Top-up, Run the Engine, Heater on, Switch off after 20 minutes, Let it cool down and Drain; Method 3 times.

Since I didnt have running water (you can skip this if you want) I ran the engine with the coolant hose off, feeding the expansion tank with water through 2.5 litre bottles (one after the other) I used about 5 such bottles.

Then finally another top-up and then drain which resulted in the following flush:

DIY: Engine coolant flush & change-img_3450.jpg

Now was the time to fill the reservoir with coolant; I mixed coolant in a 40/60 ratio with drinking water and filled it up to the max line.

Now the only thing is that in the manual it is mentioned that it would need 6.6 litres of coolant (mixed) but it drained only about 3 and the same with the fill and evertime it completely emptied the reservoir from both the radiator and the coolant hose.

Now the final process involved running the car a little and letting it cool off before the level of coolant stabilised; now I just topped it up with drinking water about 300ml and it's been good!

Loved every bit of this DIY, but confused about why the amount of coolant required was so little (atleast from what is mentioned in the manual). Overall I don't think I've missed anything here, as I had opened the hoses in the intercooler as well and it didn't drain any Coolant!

The coolant now is also running clean in the reservoir (the light pink color) as it is supposed to be; guess I'm overthinking this! This has been an awesome DIY!

Cheers!

Last edited by aayushnair : 12th August 2017 at 14:40.
aayushnair is offline   (26) Thanks
Old 13th August 2017, 17:37   #2
GTO
Team-BHP Support
 
GTO's Avatar
 
Join Date: Feb 2004
Location: Bombay
Posts: 70,518
Thanked: 300,706 Times
Re: DIY: Engine coolant flush & change

Thread moved from the Assembly Line to the DIY Section. Thanks for sharing!
GTO is offline   (1) Thanks
Old 13th August 2017, 20:59   #3
BHPian
 
lapis_lazuli's Avatar
 
Join Date: Feb 2012
Location: Ghaziabad
Posts: 764
Thanked: 2,856 Times
Re: DIY: Engine coolant flush & change

Excellent! Regarding not 6 liters "in", I believe, there is air in the system....keep checking regularly and top up. Only, use the same dilution and preferably distilled water.

Let the thermostat cycle many many times and only then would all the nooks and crannies get filled with the coolant. That would be 6 liters! During initial "fill" and cycling thermostat did you check and observe "bubbles" escape in reservoir? Not as elaborate as brake bleed, but still air needs to be bled out. Most cases, self bleeding as I mentioned above.

Last edited by lapis_lazuli : 13th August 2017 at 21:15.
lapis_lazuli is offline   (1) Thanks
Old 13th August 2017, 21:54   #4
Senior - BHPian
 
stanjohn123's Avatar
 
Join Date: Oct 2008
Location: TN 75
Posts: 1,345
Thanked: 1,798 Times
Re: DIY: Engine coolant flush & change

Nice DIY, but shoudnt you be filling it with Distilled water rather than drinking water ?
stanjohn123 is offline   (1) Thanks
Old 14th August 2017, 00:56   #5
BHPian
 
Join Date: Aug 2012
Location: Mumbai
Posts: 338
Thanked: 491 Times
Re: DIY: Engine coolant flush & change

Great DIY! Regarding the mismatch in coolant quantity, I would recommend that you bleed the system to remove any air through the bleeding valve, it's present in almost all modern cars. I've had a huge issue with air trapped in the cooling system resulting in overheating so take adequate care!
nishantbhatia84 is offline   (1) Thanks
Old 14th August 2017, 03:39   #6
BHPian
 
Join Date: Jul 2017
Location: Kolkata
Posts: 75
Thanked: 239 Times
Re: DIY: Engine coolant flush & change

Quote:
Originally Posted by aayushnair View Post

Now was the time to fill the reservoir with coolant; I mixed coolant in a 40/60 ratio with drinking water and filled it up to the max line.
Great DIY. Is there a particular reason for using drinking water? Normally coolants are mixed with distilled water.
hok kolorob is offline   (2) Thanks
Old 14th August 2017, 07:20   #7
BHPian
 
aayushnair's Avatar
 
Join Date: Jan 2013
Location: Mumbai
Posts: 160
Thanked: 453 Times

Quote:
Originally Posted by lapis_lazuli View Post
Excellent! Regarding not 6 liters "in", I believe, there is air in the system....keep checking regularly and top up.

Let the thermostat cycle many many times and only then would all the nooks and crannies get filled with the coolant. That would be 6 liters! During initial "fill" and cycling thermostat did you check and observe "bubbles" escape in reservoir?

Quote:
Originally Posted by nishantbhatia84 View Post
Great DIY! Regarding the mismatch in coolant quantity, I would recommend that you bleed the system to remove any air through the bleeding valve

Thanks all!

Sorry if I missed this out; I did pump (manually) the air out of the system until there were no more air bubbles coming out of the reservoir.

I had to fill in about 300ml of water after the final cycle and yes there were bubbles being let out in all cycles, but since then no top-up has been required.

Also the amount of coolant that was flushed was similar to the amount of coolant filled in; everytime! That's where my confusion started actually.

I'm going to keep a watch on the levels for sometime and keep going on the pump (no air bleed valve that I could find either).

Quote:
Originally Posted by hok kolorob View Post
Great DIY. Is there a particular reason for using drinking water? Normally coolants are mixed with distilled water.
Quote:
Originally Posted by stanjohn123 View Post
Nice DIY, but shoudnt you be filling it with Distilled water rather than drinking water ?
I wasn't able to get hold of the amount of distilled water required; hence used drinking from an aqua guard system, was told this is good enough as well.

Cheers.
aayushnair is offline  
Old 14th August 2017, 11:27   #8
Senior - BHPian
 
SunnyBoi's Avatar
 
Join Date: Dec 2006
Location: Mysore / B'lore
Posts: 1,666
Thanked: 4,111 Times
Re: DIY: Engine coolant flush & change

Quote:
Originally Posted by aayushnair View Post
Now was the time to fill the reservoir with coolant; I mixed coolant in a 40/60 ratio with drinking water and filled it up to the max line.

Now the only thing is that in the manual it is mentioned that it would need 6.6 litres of coolant (mixed) but it drained only about 3 and the same with the fill and evertime it completely emptied the reservoir from both the radiator and the coolant hose.

Now the final process involved running the car a little and letting it cool off before the level of coolant stabilised; now I just topped it up with drinking water about 300ml and it's been good!
I had the same problem; only a small part of the coolant would get out. Turns out you need to find the block drain bolt and take it off. The bottom coolant hose in my car is connected nest to the thermostat at a higher position so removing the coolant hose would not drain coolant from the block. Removing the thermostat helped to drain coolant from the head and heater core.

My experience is listed here :

http://www.team-bhp.com/forum/long-t...ml#post4225883

Quote:
Originally Posted by aayushnair View Post
Also the amount of coolant that was flushed was similar to the amount of coolant filled in; everytime! That's where my confusion started actually.
So did you drain only 3L in the last attempt and filled 3L of coolant?

In my opinion, this is what you could have done :

Quote:
Originally Posted by aayushnair View Post
I followed the Top-up, Run the Engine, Heater on, Switch off after 20 minutes, Let it cool down and Drain; Method 3 times.
Once the system contains only clean water, drain 3L of water ( from the radiator) and replace it with 3L of concentrated coolant (assuming you have 1:1 mix coolant concentrate); this way you will have a proper 40:60 mix of coolant and water. Run the engine for a while so the coolant mixes with water.


Quote:
Originally Posted by aayushnair View Post
I'm going to keep a watch on the levels for sometime and keep going on the pump (no air bleed valve that I could find either).
You can bleed as much as possible by slowly pressing the top radiator hose few times till no more bubbles come out. Check the coolant levels after few days and top up as neccesary. the coolant on my tank dipped below minimu after 500KMs and I have topped it up as necessary.

Quote:
Originally Posted by aayushnair View Post
I wasn't able to get hold of the amount of distilled water required; hence used drinking from an aqua guard system, was told this is good enough as well.
I hope you have a RO based aqua guard, else it will not be clean enough for coolant use.
SunnyBoi is offline   (1) Thanks
Old 14th August 2017, 12:06   #9
BHPian
 
aayushnair's Avatar
 
Join Date: Jan 2013
Location: Mumbai
Posts: 160
Thanked: 453 Times
DIY: Engine coolant flush & change

Quote:
Originally Posted by SunnyBoi View Post
I had the same problem; only a small part of the coolant would get out. Turns out you need to find the block drain bolt and take it off. Removing the thermostat helped to drain coolant from the head and heater core..
That's what I thought too; so I've been going crazy searching for something about my engine and I finally found it (twas sitting right in front of me actually)

DIY: Engine coolant flush & change-imageuploadedbyteambhp1502692306.311828.jpg

I missed the engine block hose, this would've resulted in a full drain. (The second pic in the diagram)

Quote:
Originally Posted by SunnyBoi View Post
So did you drain only 3L in the last attempt and filled 3L of coolant?.
The last attempt was only water; drained all of it after run-in with the heater on; and then filled her up with a coolant premix of 40:60.

Quote:
Originally Posted by SunnyBoi View Post
In my opinion, this is what you could have done :

Once the system contains only clean water, drain 3L of water ( from the radiator) and replace it with 3L of concentrated coolant (assuming you have 1:1 mix coolant concentrate); this way you will have a proper 40:60 mix of coolant and water. Run the engine for a while so the coolant mixes with water..
I'm going to check for those hoses again; and do this once more. Will update.

Quote:
Originally Posted by SunnyBoi View Post
after 500KMs and I have topped it up as necessary..
This I've done, it didn't require anymore - stayed at the same level after the first top-up (after filling her up to the max mark).

Quote:
Originally Posted by SunnyBoi View Post
I hope you have a RO based aqua guard, else it will not be clean enough for coolant use.
Yes, so I'm Good there.

Thanks a lot SunnyBoi! Appreciate the support!

Last edited by aayushnair : 14th August 2017 at 12:15.
aayushnair is offline  
Old 15th August 2017, 12:23   #10
BHPian
 
aayushnair's Avatar
 
Join Date: Jan 2013
Location: Mumbai
Posts: 160
Thanked: 453 Times

Quote:
Originally Posted by SunnyBoi View Post
Once the system contains only clean water, drain 3L of water ( from the radiator) and replace it with 3L of concentrated coolant (assuming you have 1:1 mix coolant concentrate); this way you will have a proper 40:60 mix of coolant and water. Run the engine for a while so the coolant mixes with water.
So finally after a lot of further reading and inputs from SunnyBoi; it didn't need a further drain just that the coolant was far too diluted as the coolant from the cylinder head wasn't drained (although it was flushed as the final flush was clear water).
I just sucked out (with a long pipe) the coolant in the reservoir (yes all of it) into a measuring bottle (was at 970ml).

Now the approx. Amount of coolant drained earlier was 3l; and I had filled in another 3 (in a 40:60 ratio) which was 1.2l of coolant and remaining water; to get the ratio correct (the amount of coolant required in the system is 6.6l) I added 1l of coolant (concentrated). So the overall amount of coolant in the system is approx 2.2l with the rest being water. So the ratio is back up approx to 40/60 (a little bit lesser).

I've now run the car again with the heater, will let her cool for now and then top-up with more coolant concentrate if required (no more air bubbles/gurgling from the reservoir anymore).

Thanks once again!
aayushnair is offline   (3) Thanks
Old 15th August 2017, 14:44   #11
Distinguished - BHPian
 
Join Date: Oct 2012
Location: Delhi
Posts: 8,098
Thanked: 50,830 Times
Re: DIY: Engine coolant flush & change

Nice job.

to add:

With respect to the drinking water. It's not so much about the cleanliness as well as the minerals you will find in most drinking water. The minerals are a problem as they will choke up your cooling system.

However, you have used water from a RO filter. Although it might contain some minerals, a good RO filter will get rid of most minerals, so it shouldn't be a problem.

It is good practice to check up front the quantity of cooling liquid and verify how much you drain out. You should always be able to get at least 90% out by draining on just about all engines. If it's less, you need to look for other points to drain.

On some engines you might have to remove drain plugs on the bottom of the engine block itself. Always best to try and verifiy up front through a workshop manual.

On some modern cars with electronically controlled cabin heaters, it might not be possible to manually open the heater valve. (e.g. Jaguar) So you are always stuck with some coolant liquid remaining behind. Also, when you encounter such a system you are very likely to see a substantial dip in cooling liquid levels after the refill as you start using the car and the cabin heater starts working.

So I always take a small bottle with cooling liquid along on the first drive after a flush/refill.

Jeroen
Jeroen is offline   (1) Thanks
Old 15th August 2017, 22:51   #12
Team-BHP Support
 
Join Date: Feb 2004
Location: Bangalore
Posts: 14,862
Thanked: 27,966 Times
Re: DIY: Engine coolant flush & change

Out of curiosity how do you dispose of the drained coolant?
ajmat is offline  
Old 16th August 2017, 07:22   #13
BHPian
 
aayushnair's Avatar
 
Join Date: Jan 2013
Location: Mumbai
Posts: 160
Thanked: 453 Times

Quote:
Originally Posted by ajmat View Post
Out of curiosity how do you dispose of the drained coolant?

I had collected it in a 20l can; gave it to a local garage for disposal. (That's what I had done for the old engine oil too, same mech).
In Mumbai we don't really have toxic waste collection centers (none that I know of).
aayushnair is offline   (1) Thanks
Old 3rd February 2021, 17:14   #14
Newbie
 
Join Date: Jan 2021
Location: Chennai
Posts: 12
Thanked: 4 Times
Re: DIY: Engine coolant flush & change

I also did a DIY coolant flush on my BMW X1. I unfortunately didn't take any pictures of the DIY. But it was satisfying. I didn't use RO water but I used distilled water to flush the system. I in fact didnt open any hose or the engine block drain. I just opened the radiator valve and drained all the existing coolant. Then filled it with Distilled water about 6 litres and went through the bleed procedure (heater full inside the cabin), bleeding out the air from the radiator etc. And then keep running the engine for about 30 minutes. Then when I didnt see any air bubbles, shut down the car and then let the system cool for 2 hours and then drained all the distilled water. The capacity is about 7.2 litres but it bled only 5.5 litres I think.

And the distilled water that came out was a bit dirty. So I did the same procedure with another 6 litres or so of distilled water and repeated the procedure and that came out a bit clean. It had just a hint of blue colour but mostly clear water that came out.

That told me that the entire system is now flused with maybe about 2 litres of distilled water stuck in the block or some hoses. Now, I just calculated how much of the blue BMW coolant is needed with is about 3.6litres and I put that into the coolant tank and I went through the bleed procedure. And now no air in the system, and coolant is now clean!!! For the next few trips I will be keeping an eye on the coolant temperature.

The only thing that puzzles me is that the radiator fan does not seem to switch on at all. I thought when the temperature reaches about 90Celcius it should switch on. But no. In any case, the operating temp of the BMW engine is about 92-110 or something like that. So I'll be keeping an eye for that.
rajesh5024 is offline   (1) Thanks
Old 4th February 2021, 17:08   #15
BHPian
 
aayushnair's Avatar
 
Join Date: Jan 2013
Location: Mumbai
Posts: 160
Thanked: 453 Times
Re: DIY: Engine coolant flush & change

Quote:
Originally Posted by rajesh5024 View Post
I also did a DIY coolant flush on my BMW X1.
Awesome! you described the process real well and definitely looks like it worked well.

Quote:
Originally Posted by rajesh5024 View Post
The only thing that puzzles me is that the radiator fan does not seem to switch on at all. I thought when the temperature reaches about 90Celcius it should switch on. But no. In any case, the operating temp of the BMW engine is about 92-110 or something like that. So I'll be keeping an eye for that.
It does the same thing in my car, even after long drives or short the fan comes on mostly just after switching off the car. I feel that it's probably on when required and perhaps not at full speed to maintain the temperatures at a particular level. I have monitored the temperature using VCDS (VAG com) and I've seen them hit 95, but not more and still no fan movement. But the second I switch off the car the fan comes on.

Probably a similar characteristic here as well.

All the best!

Aayush
aayushnair is offline  
Reply

Most Viewed


Copyright ©2000 - 2024, Team-BHP.com
Proudly powered by E2E Networks