| |||||||

| Search Forums |
| Advanced Search |
| Go to Page... |
 |
| Search this Thread |  71,336 views |
 2nd October 2017, 22:34
| #1 |
| BHPian Join Date: Feb 2006 Location: Bangalore
Posts: 812
Thanked: 2,453 Times
| DIY: S-Cross Headlight Upgrade to Morimoto Mini D2S Stage III Bi-Xenons 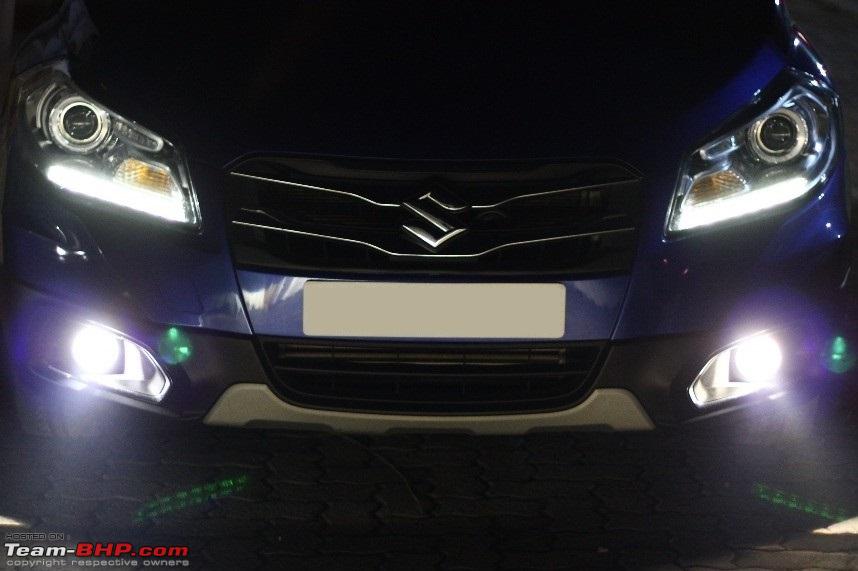 Prelude Please note, no stock wiring was cut, spliced or changed to accommodate this setup. All wiring is stock, & new wiring is plug and play. Further BHPIan Jaunthead's 1.6 has also been upgraded with the Morimoto Mini D2S 4.0. I have been running on this setup for over two weeks now. I & Jaunthead have both been on long journeys without an incident. I'd like to begin by acknowledging and thanking a few set of people who were involved in this project with me, without whom, this project would have never seen fantastic results. Acknowledgements
Then there are friends who give their heart and soul into the projects you do, for no money, no publicity but only because of passion, the heart to help and of course being as passionate in executing these DIYs.
Warning & Disclaimer DIY expertise level at the time of this DIY: BeginnerWhy Morimotos? The difficult decision making process to go with Morimotos after having invested in XP Micros recently is something many will consider as unnecessary, especially if you consider the costs involved for a first timer. Here are my compelling reasons for upgrading to Morimotos: The XP Micros, undoubtedly, is good product that fulfills the need for additional lights. But it did do one thing to me - With all the poor wiring and issues we ended up having with XP Micros, I had to take matters into my own hands to fix the problems. Further, we aren't sure how long these fog lights will last. They definitely didn't appear to be designed to be used for a very long time, only time will tell though. Considering how low they sit, wading through a medium pool of water without being careful to switch them off is going to cause trouble for sure. Light Output So far, we have done this work on two S-Cross cars - Mine (the first) and then BHPIan Jaunthead's car. One more car is in line to get these projectors installed. Here are a couple of videos from our trips. Jaunthead's car Dashcam The following two videos are from my Kerala trip captured with the cellphone camera. Its over exposed a bit but the light output in reality is phenomenal! I have used the level control and kept the low beam a bit down since these lights are quite bright and given the up and down terrain in Kerala it was apt to keep it at an angle that isn't hurting to oncoming traffic. I can easily adjust this with vertical level control High Beam Morimoto Kit Specifications
 Important Note: The Morimoto projectors are a size less than the stock projects. Thus, they are not an exact replacement or fit in the stock headlight housing. Even more important is to ensure that Morimoto projectors are mounted such that it's more or less in the exact same position as the stock projector. This is important to ensure that the throw, level & looks matches the stock. Too far ahead could also spoil the looks and more importantly, end up bumping the projector lens into the front reflectors. The kit supplied by Retro Rides came with custom brackets, but I didn't find them very useful. They are made of ACP sheet. We realized that the brackets are not good enough only after we opened the headlight and examined the mounting case inside. This was a major setback that caused us a couple of weeks delay and additional costs to design and fabricate a custom mounting that ensures the projector is aligned correctly as well as mounted securely. My car was grounded until then. :( Tools & Parts Required There is a long list of tools and parts required. Optional Spares & Tools These are not absolutely important, but some of these may come very handy during the install instead of being stuck Safety Precautions
Execution Each of these steps have been done in a particular order so as to minimize service time on the car as well as reduce surprises. Once we are in the stage of opening headlights, the project is in full throttle. We did not want to be in a situation where we open headlights and missed something basic previously. We didn't rush into anything and wanted to ensure that all parts, tools and equipment were ready to go once the headlamps are off the car. Wiring Diagram 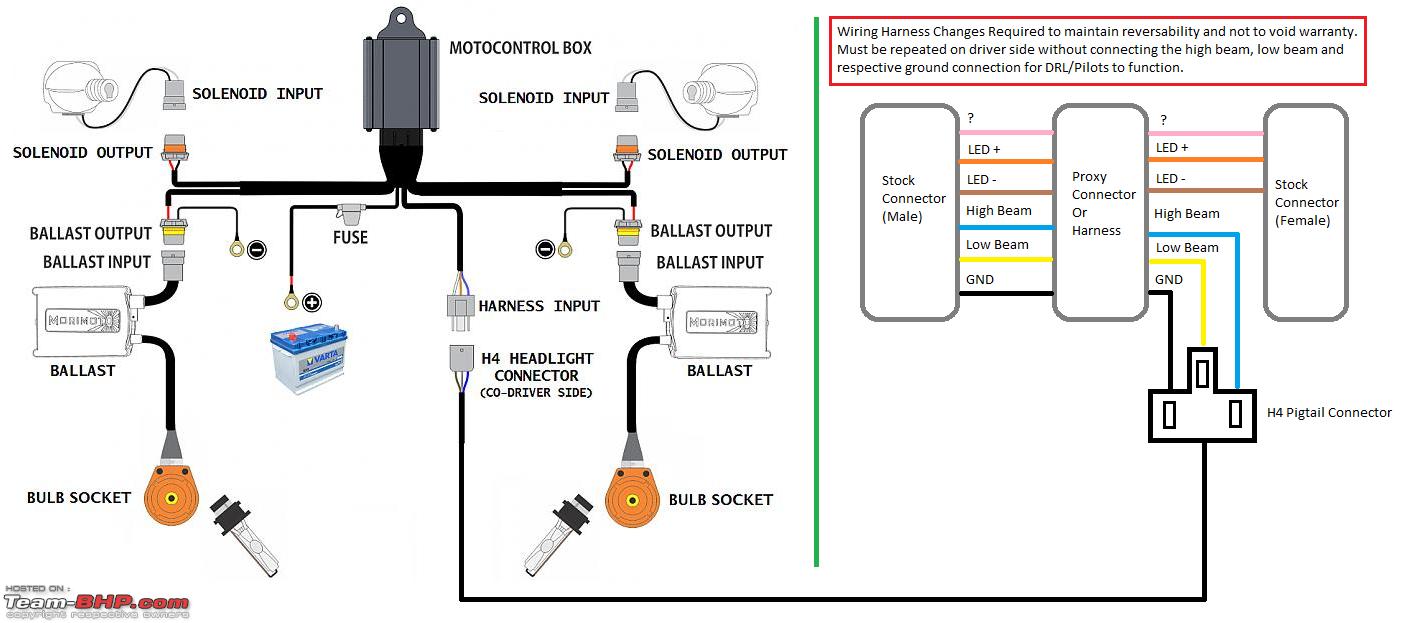 Testing the Solenoid Although Retro Rides indicated they would test the kit before shipping, this is a procedure that is best not avoided to ensure the system works as expected. You will need a 12v battery for testing the solenoid activation. I used the one in my home UPS. Preparing the Stock Wiring The headlight has 3 connectors which are: We developed a custom wiring harness to ensure no splicing of factory wires. This wiring harness is made of the same Sumitomo connectors which the stock wiring uses with the other end mated to an H4 female connector. This allows tapping of power from the stock connector without splicing the car's original wiring harness. Once this wiring harness was developed, it was true plug and play. At any given point in time, we can always go back to stock mechanism simply by removing this additional wire harness and installing a new pair of headlights. Keep in mind, a single headlight is about 17K (as of this writing) plus taxes. We were very sure we didn't want to go back to using a candle light since some of us already had very close calls and near accidents at night due to the extremely poor lighting of the alpha variant. The main projector lights + LEDs use a six pin connector (Sumitomo TS Accelerator Toyota connector. Part #s 6188-0175 & 6189-0323) which has signal wires for high beam & low beams. We need to take connections from these wires for high, low and negative and connect it to an female H4 connector. Most installers use a splice connector against the stock wiring. This is very difficult to correct later. With the custom wiring harness, we can do as we want without affecting the stock wiring harness. Sumitomo Connectors (Sourced from AliExpress) 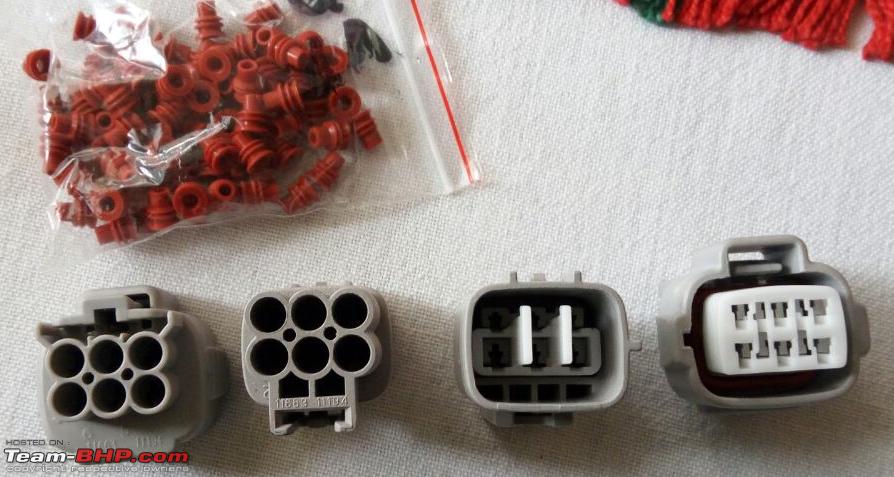 Since the alpha uses a D5S system, there is no wiring harness which is available to convert this 6 pin into a 3 pin mechanism to make it a direct plug and play and thus the need to develop a custom wiring harness to ensure no splicing of factory wires. Here's the picture of the 6 pin to H4 conversion. The custom harness behaves like an extension or a bridge between the existing wiring system allowing us to tap power from the stock wiring without splicing the stock wires. In the below picture, the green and blue marked Sumitomo connectors form the bridge, passing through just the LED pilot light connections as it is. The yellow arrow shows the MotoControl input H4 male connector which is then mated to the H4 female connector. This H4 female connector taps High, low and constant ground connections from the custom harness.  Input Connection the MotoControl The input for the MotoControl from the stock wiring should follow the pins as indicated below for each type of input connection. White - Ground, Brown - Low Beam, Blue - High Beam. Morimoto provides all of this information on their site in the user manuals PDFs for each product. 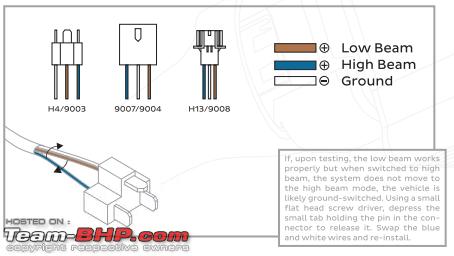 Preparing the car
Please note, in this install, the headlamp levelling mechanism will still work. Wiring & Upgrading the main headlight. WARNING: Once the headlight is opened, warranty on the headlight is lost. Removing the headlights from the car NOTE: You cannot remove the headlight from the car without removing the bumper, as some of the points where headlight is secured is under the headlight itself. There are 5 screws plus one clip which you need to remove to dislodge the headlight. To see the procedure for removing the bumpers, see this post from BHPIan KeyNote's XP Micro installation. Detach the three connectors which connect to the stock headlight, the level control motor and the turn signal. There are 5 screws and one push pin on the headlight which then, needs to be removed to detach the headlight from the body. They are illustrated as follows 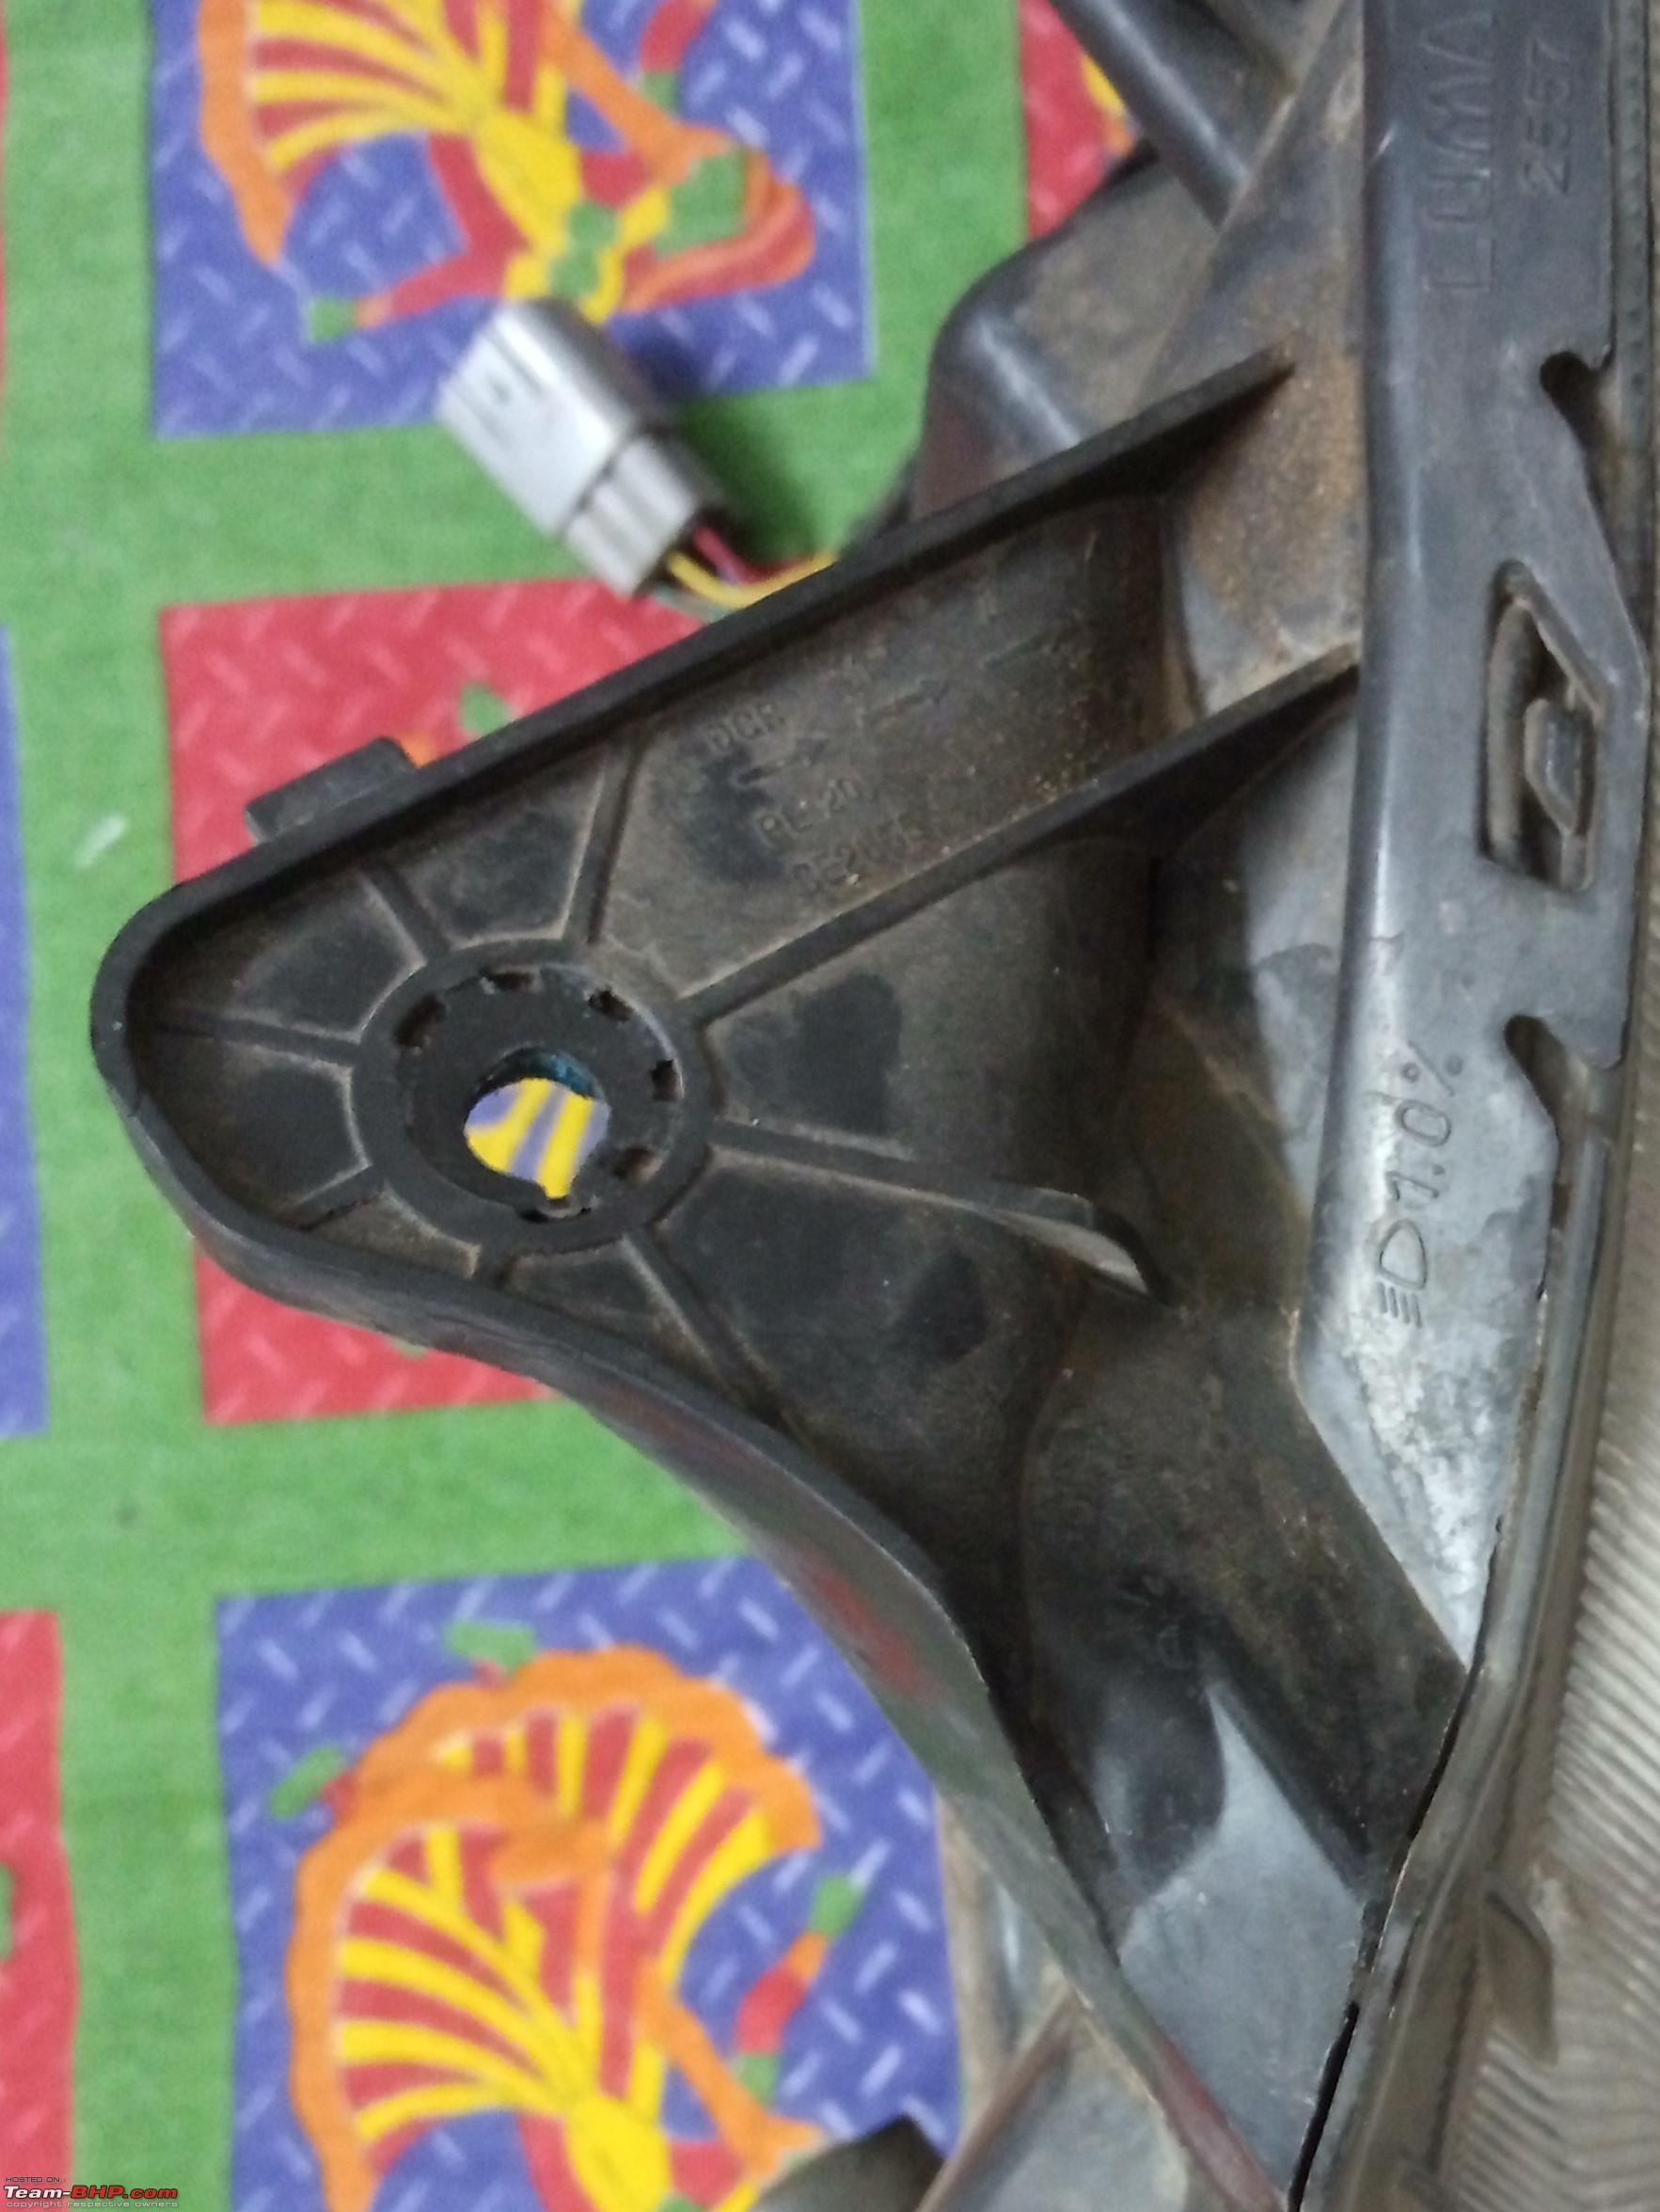 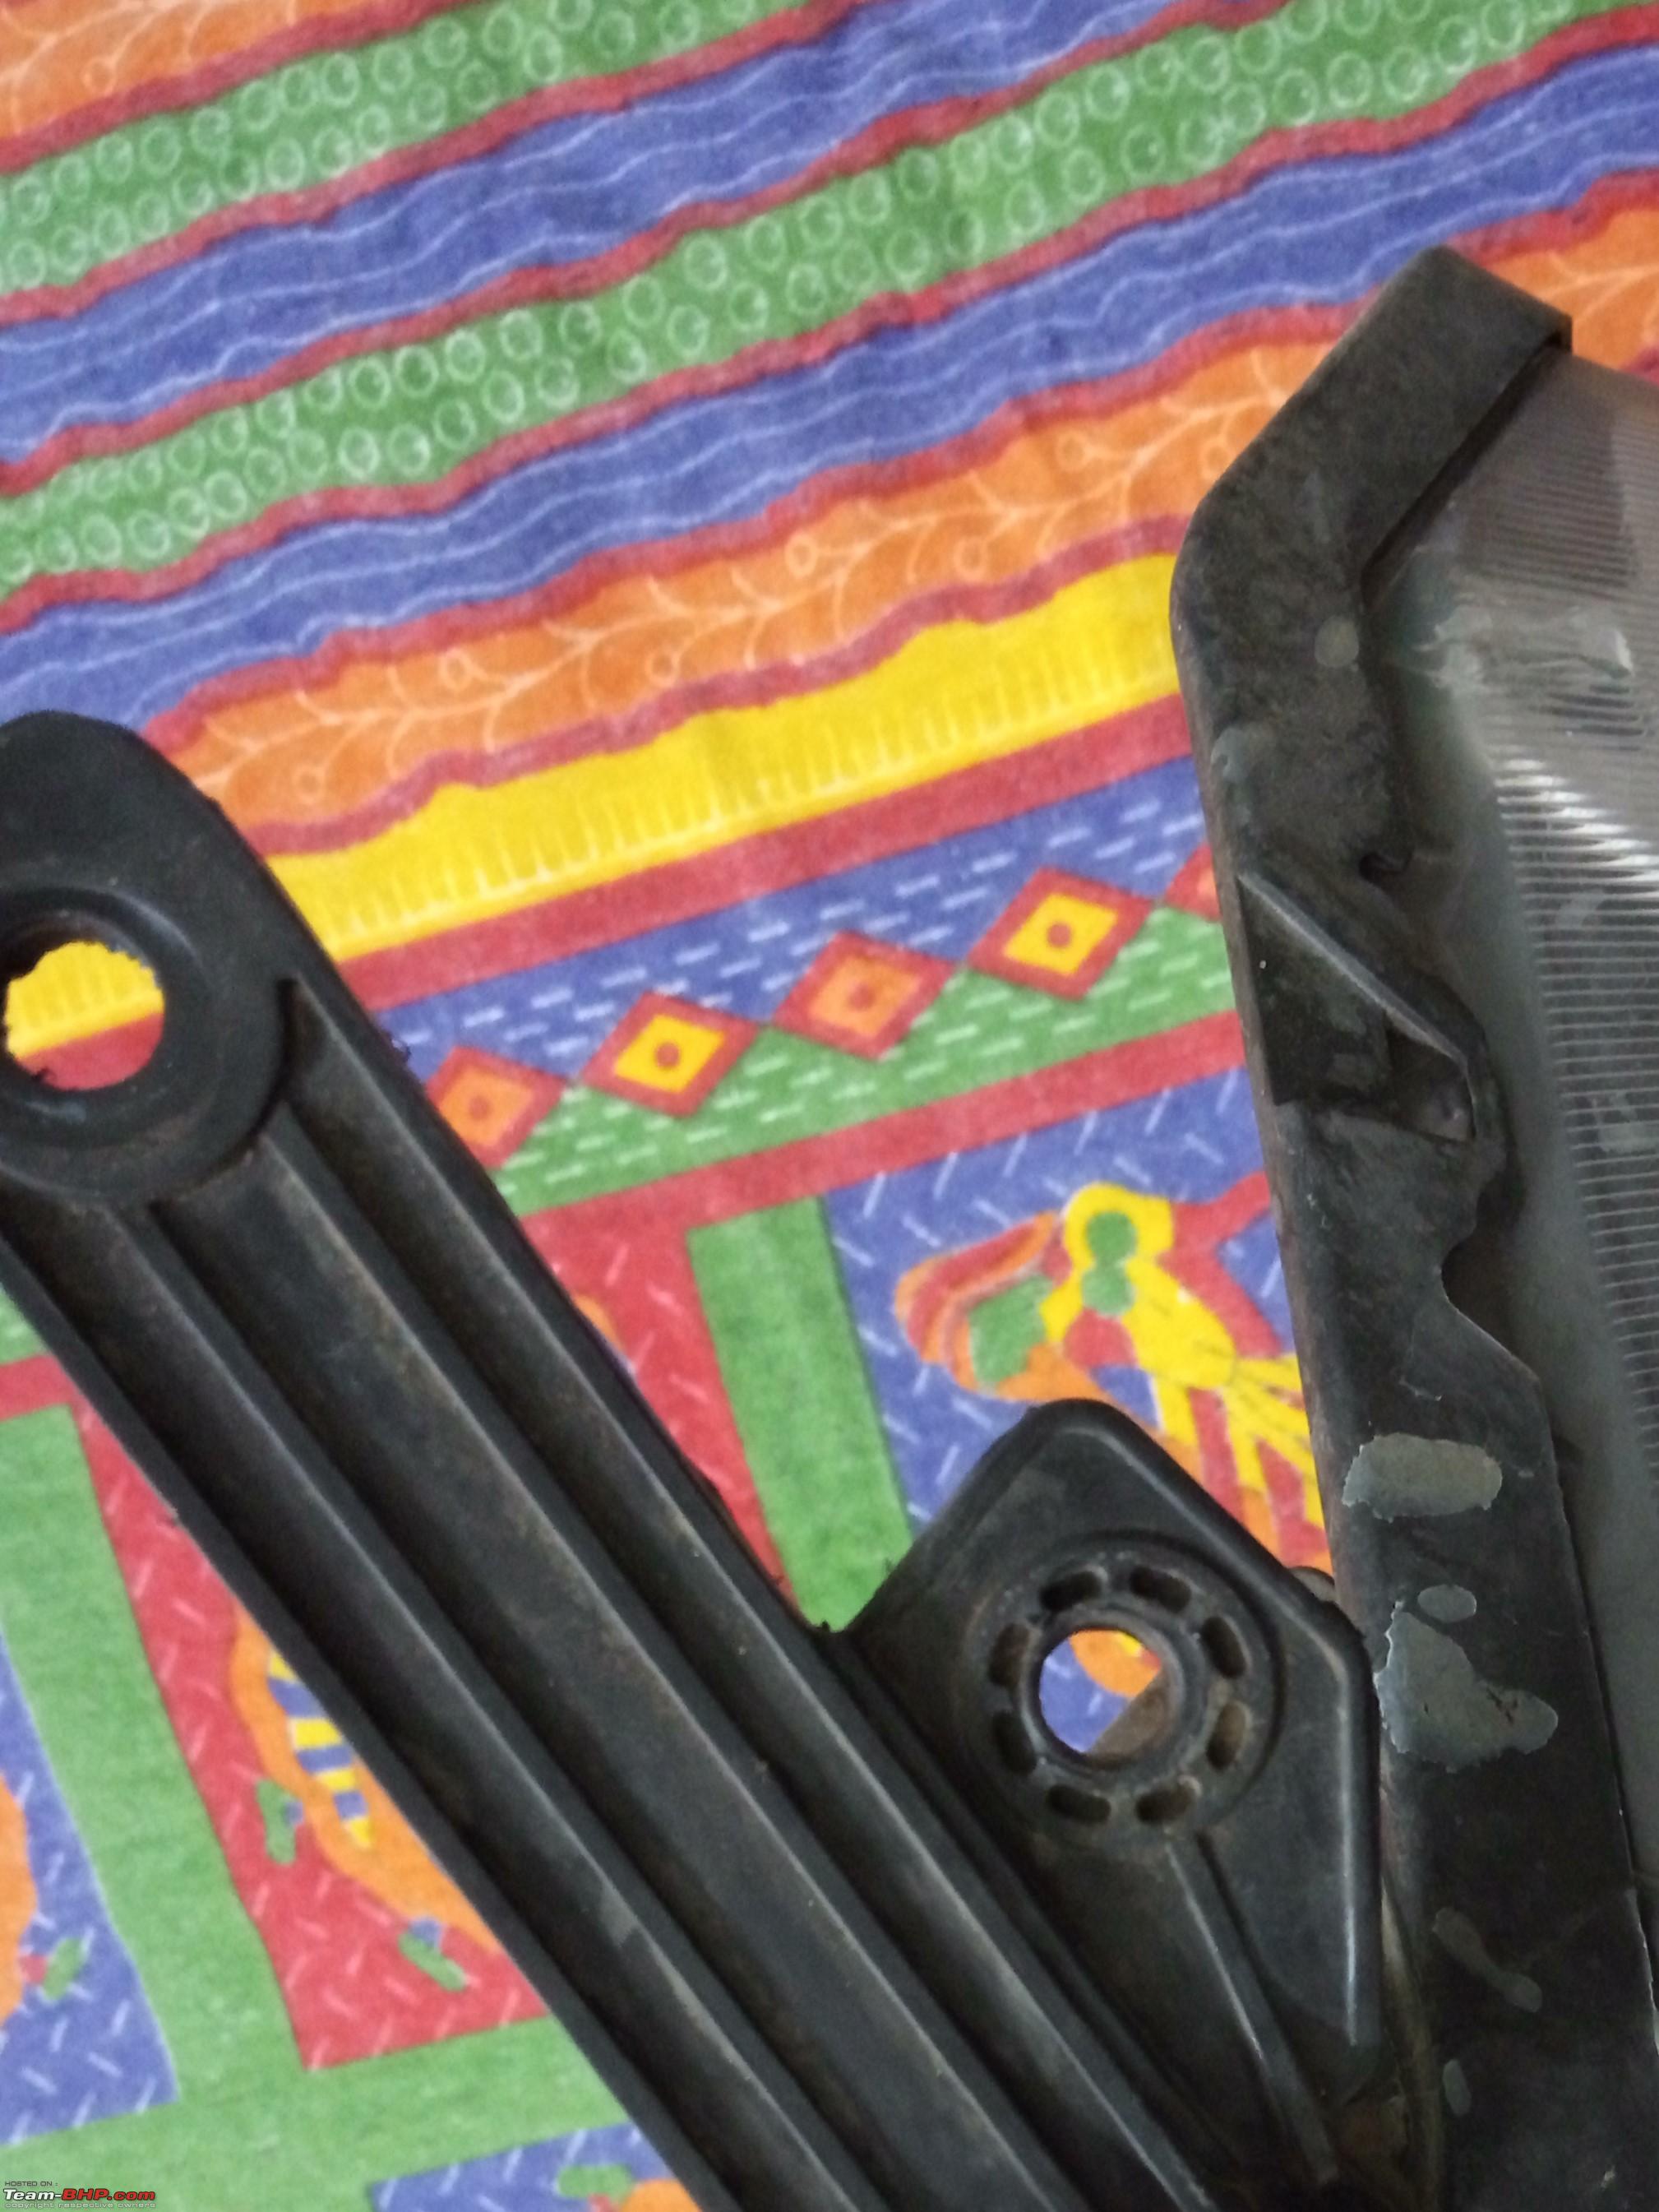  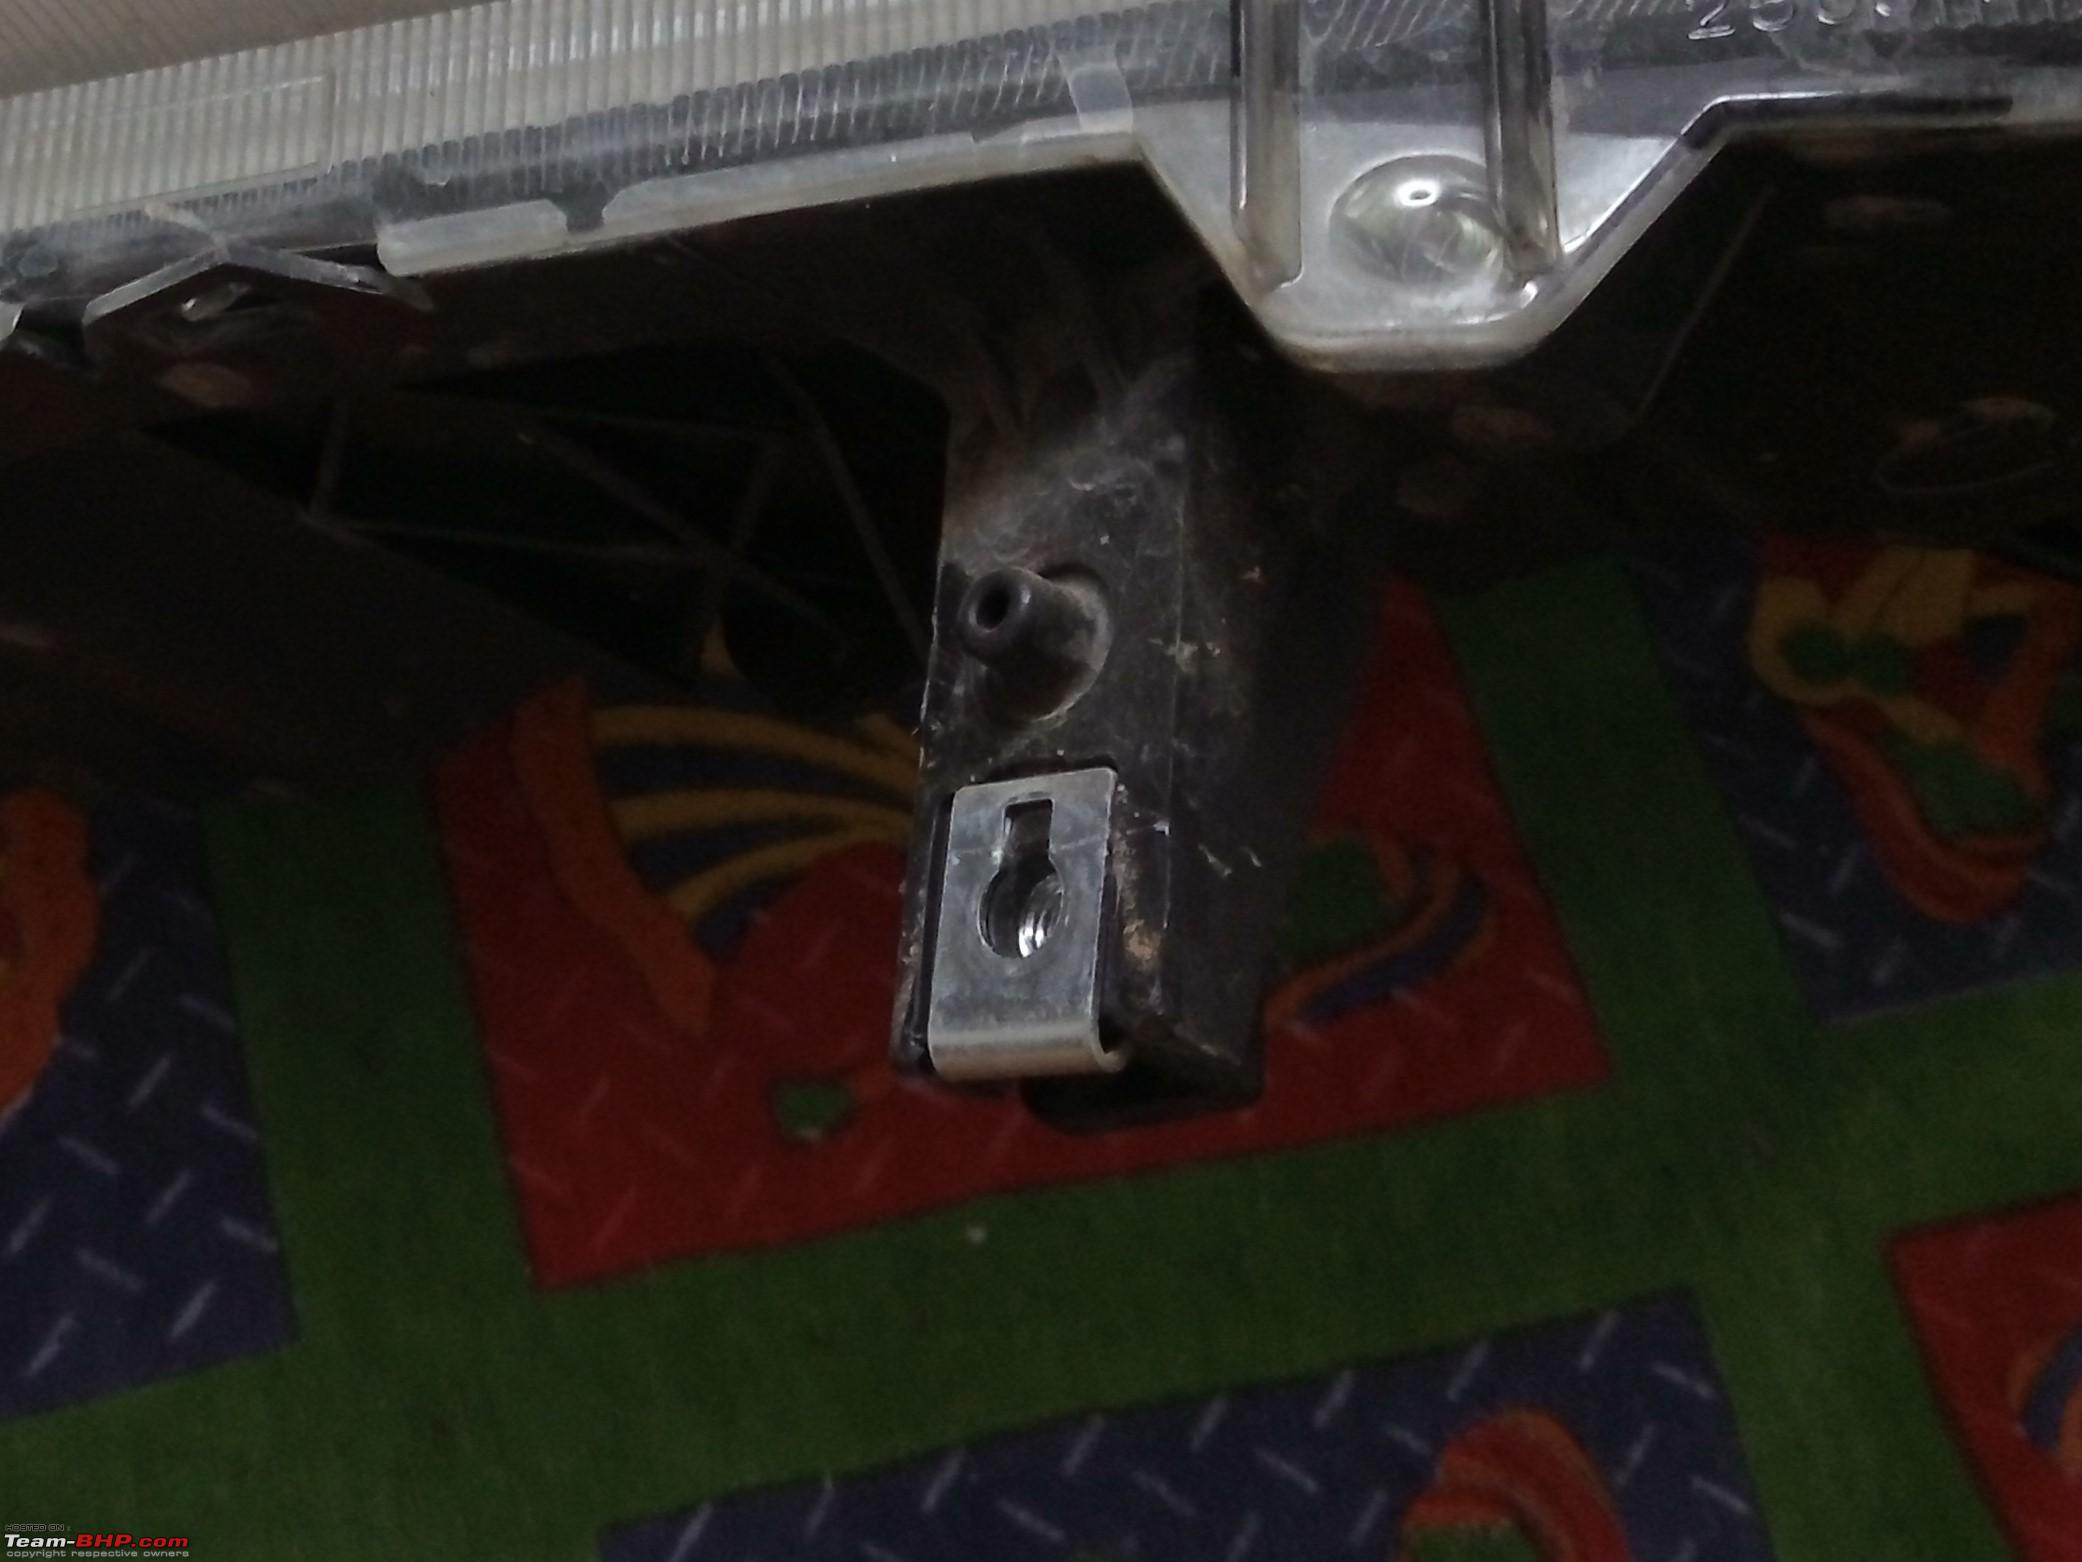 Prepare the Morimoto wiring All the connections on the MotoControl harness are labelled. Further, there is also a diagram at the back of the packaging that comes with wiring harness. 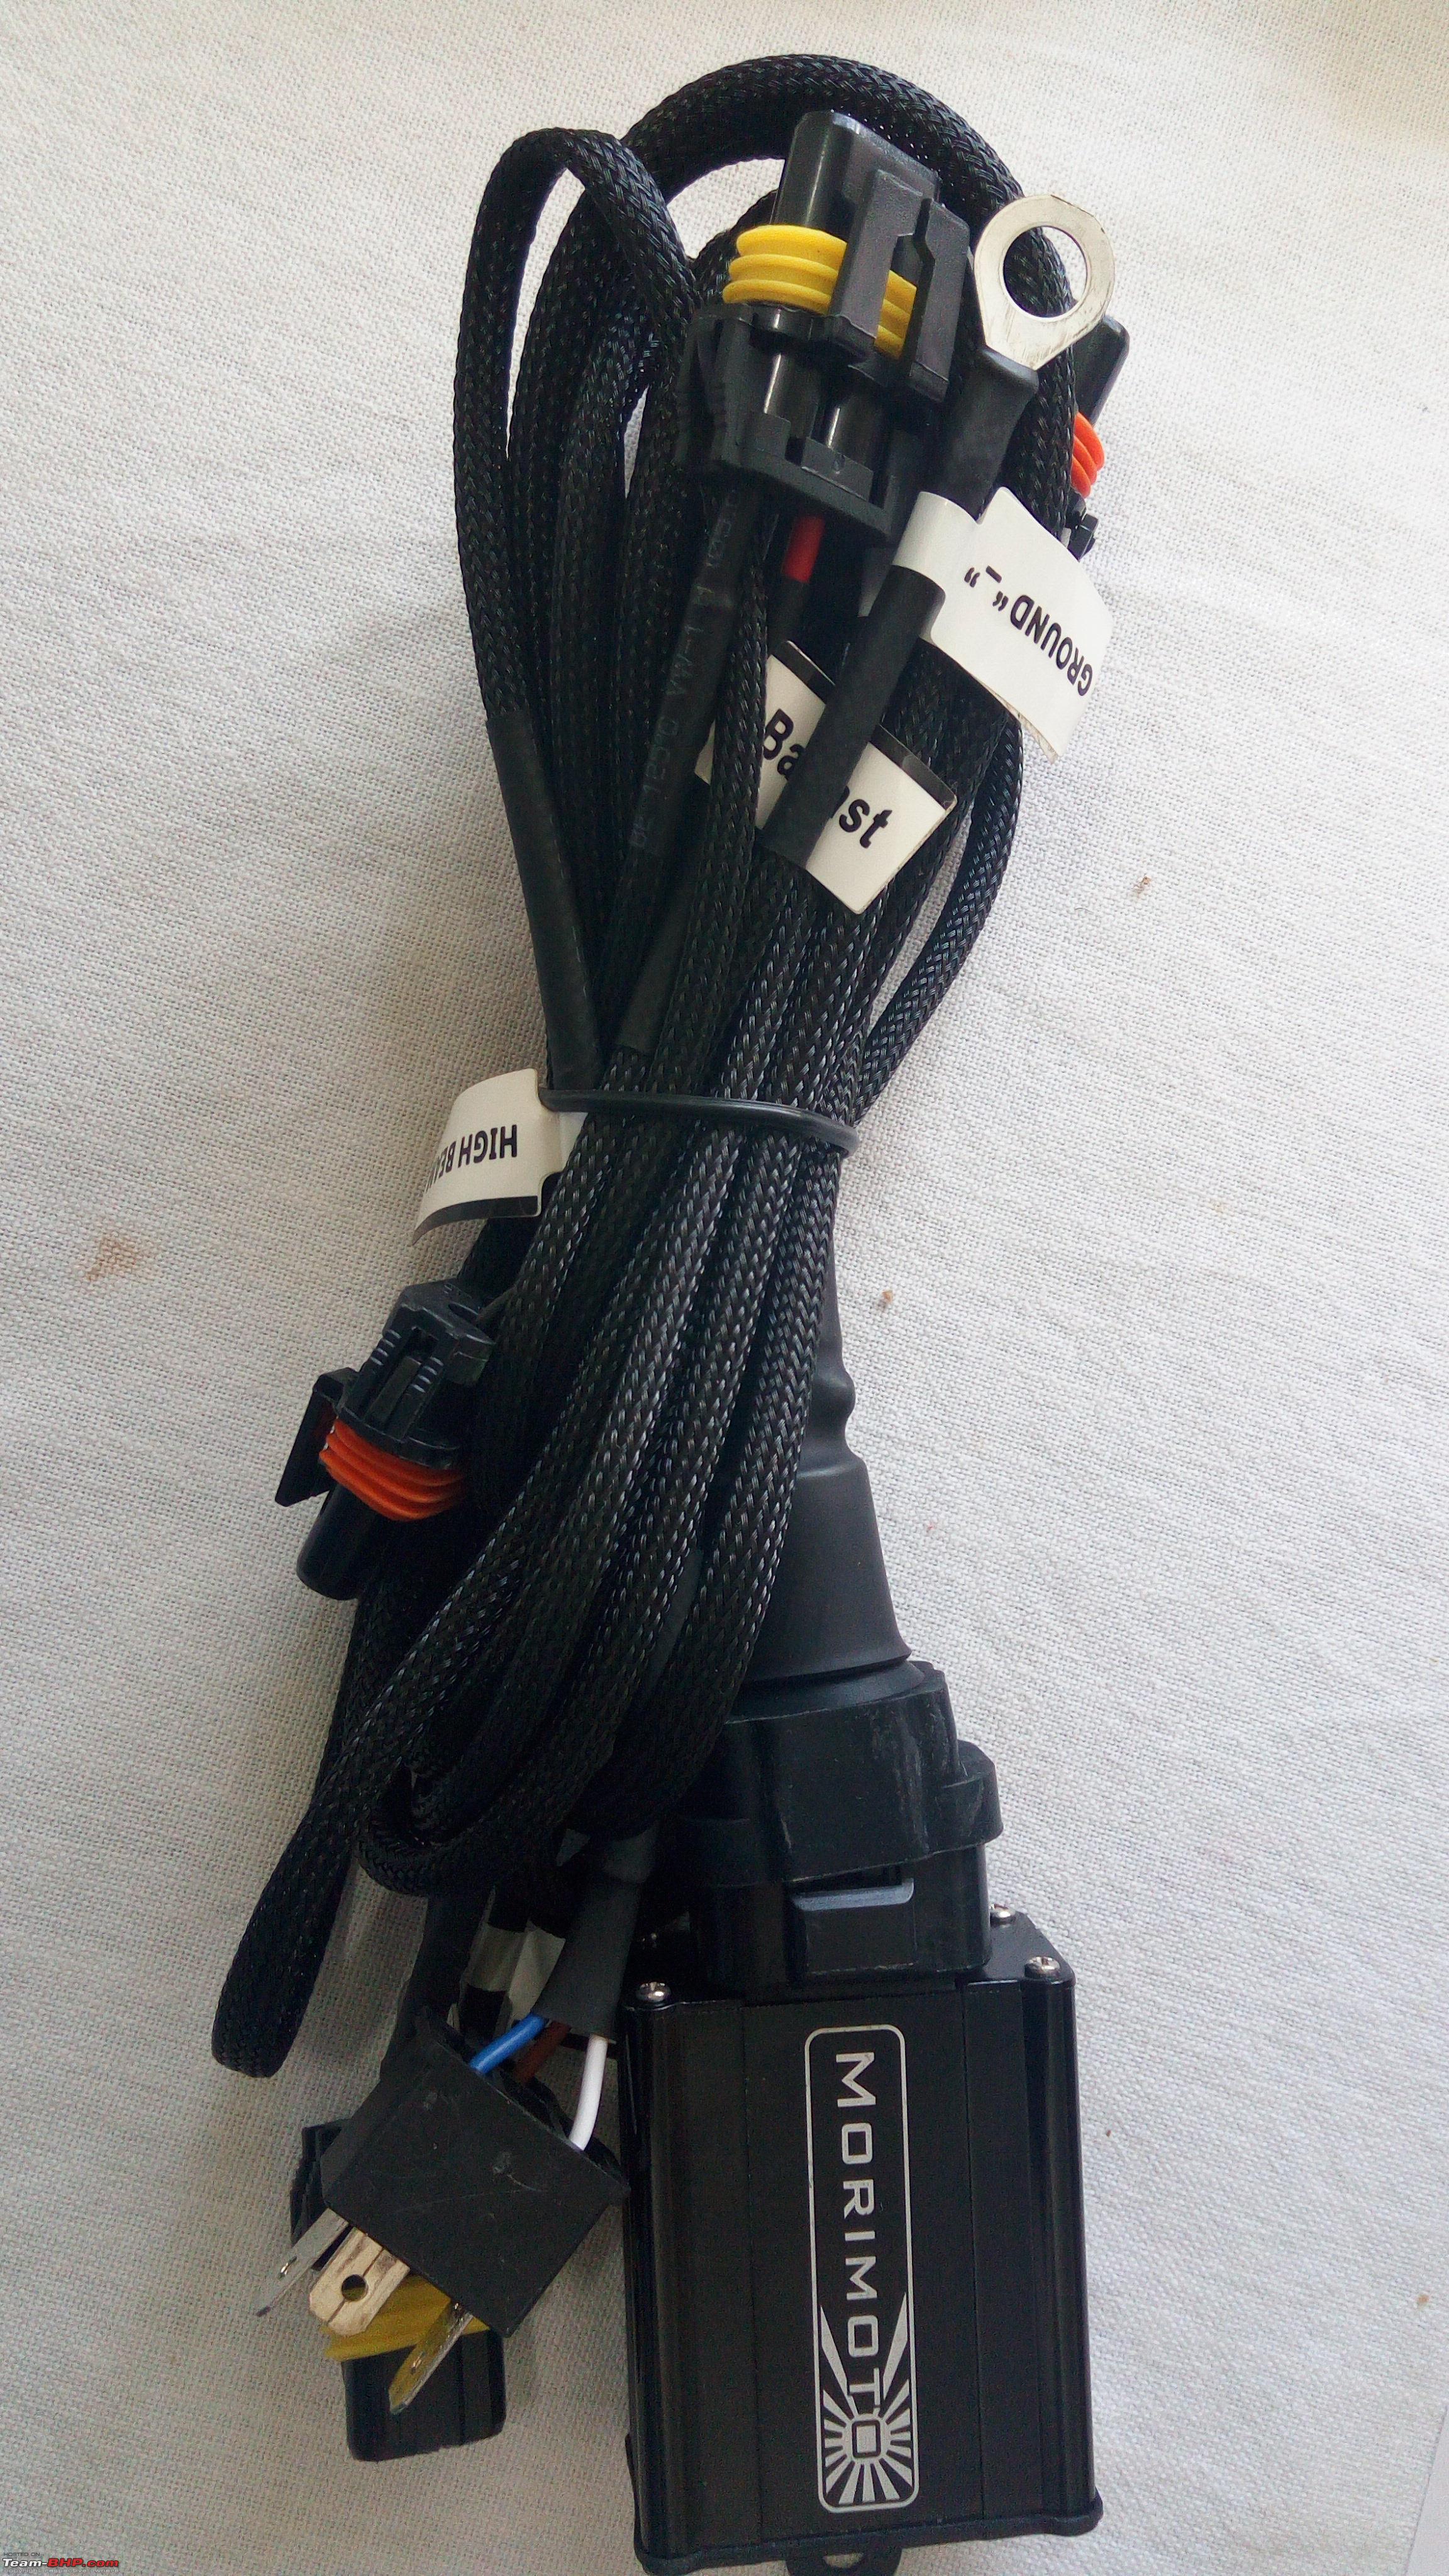 All harnesses have an input. There's only one H4 connection on the entire harness with three wires High (Blue colour), Ground (White Colour) and Low(Brown Colour). Make sure they match when you connect them up to stock wiring. There are two sets of connections with yellow rubber grommets which go into ballast. The connectors with orange rubber grommets are for the solenoids on the projectors. Two of the loops are the grounds. These must be grounded to solid metal, not any painted surface or any plastic. For the left side, you can connect it directly to the battery negative terminal. For the driver side, you need to find a good ground point. The Motocontrol itself (which is also a relay) need not be mounted to a secure point on the car, but it is best mounted such that the wires exit out of the bottom. In the S-Cross, it was difficult to find a point that allows this, so we mounted it this way on the co-driver side:  Battery Negative/Ground  Driver Side Ground/Negative Note how I sanded away from paint to get a good grounding point. You can fix the ground wire and then apply paint primer or clear coat paint to ensure a good install and insulation from elements. 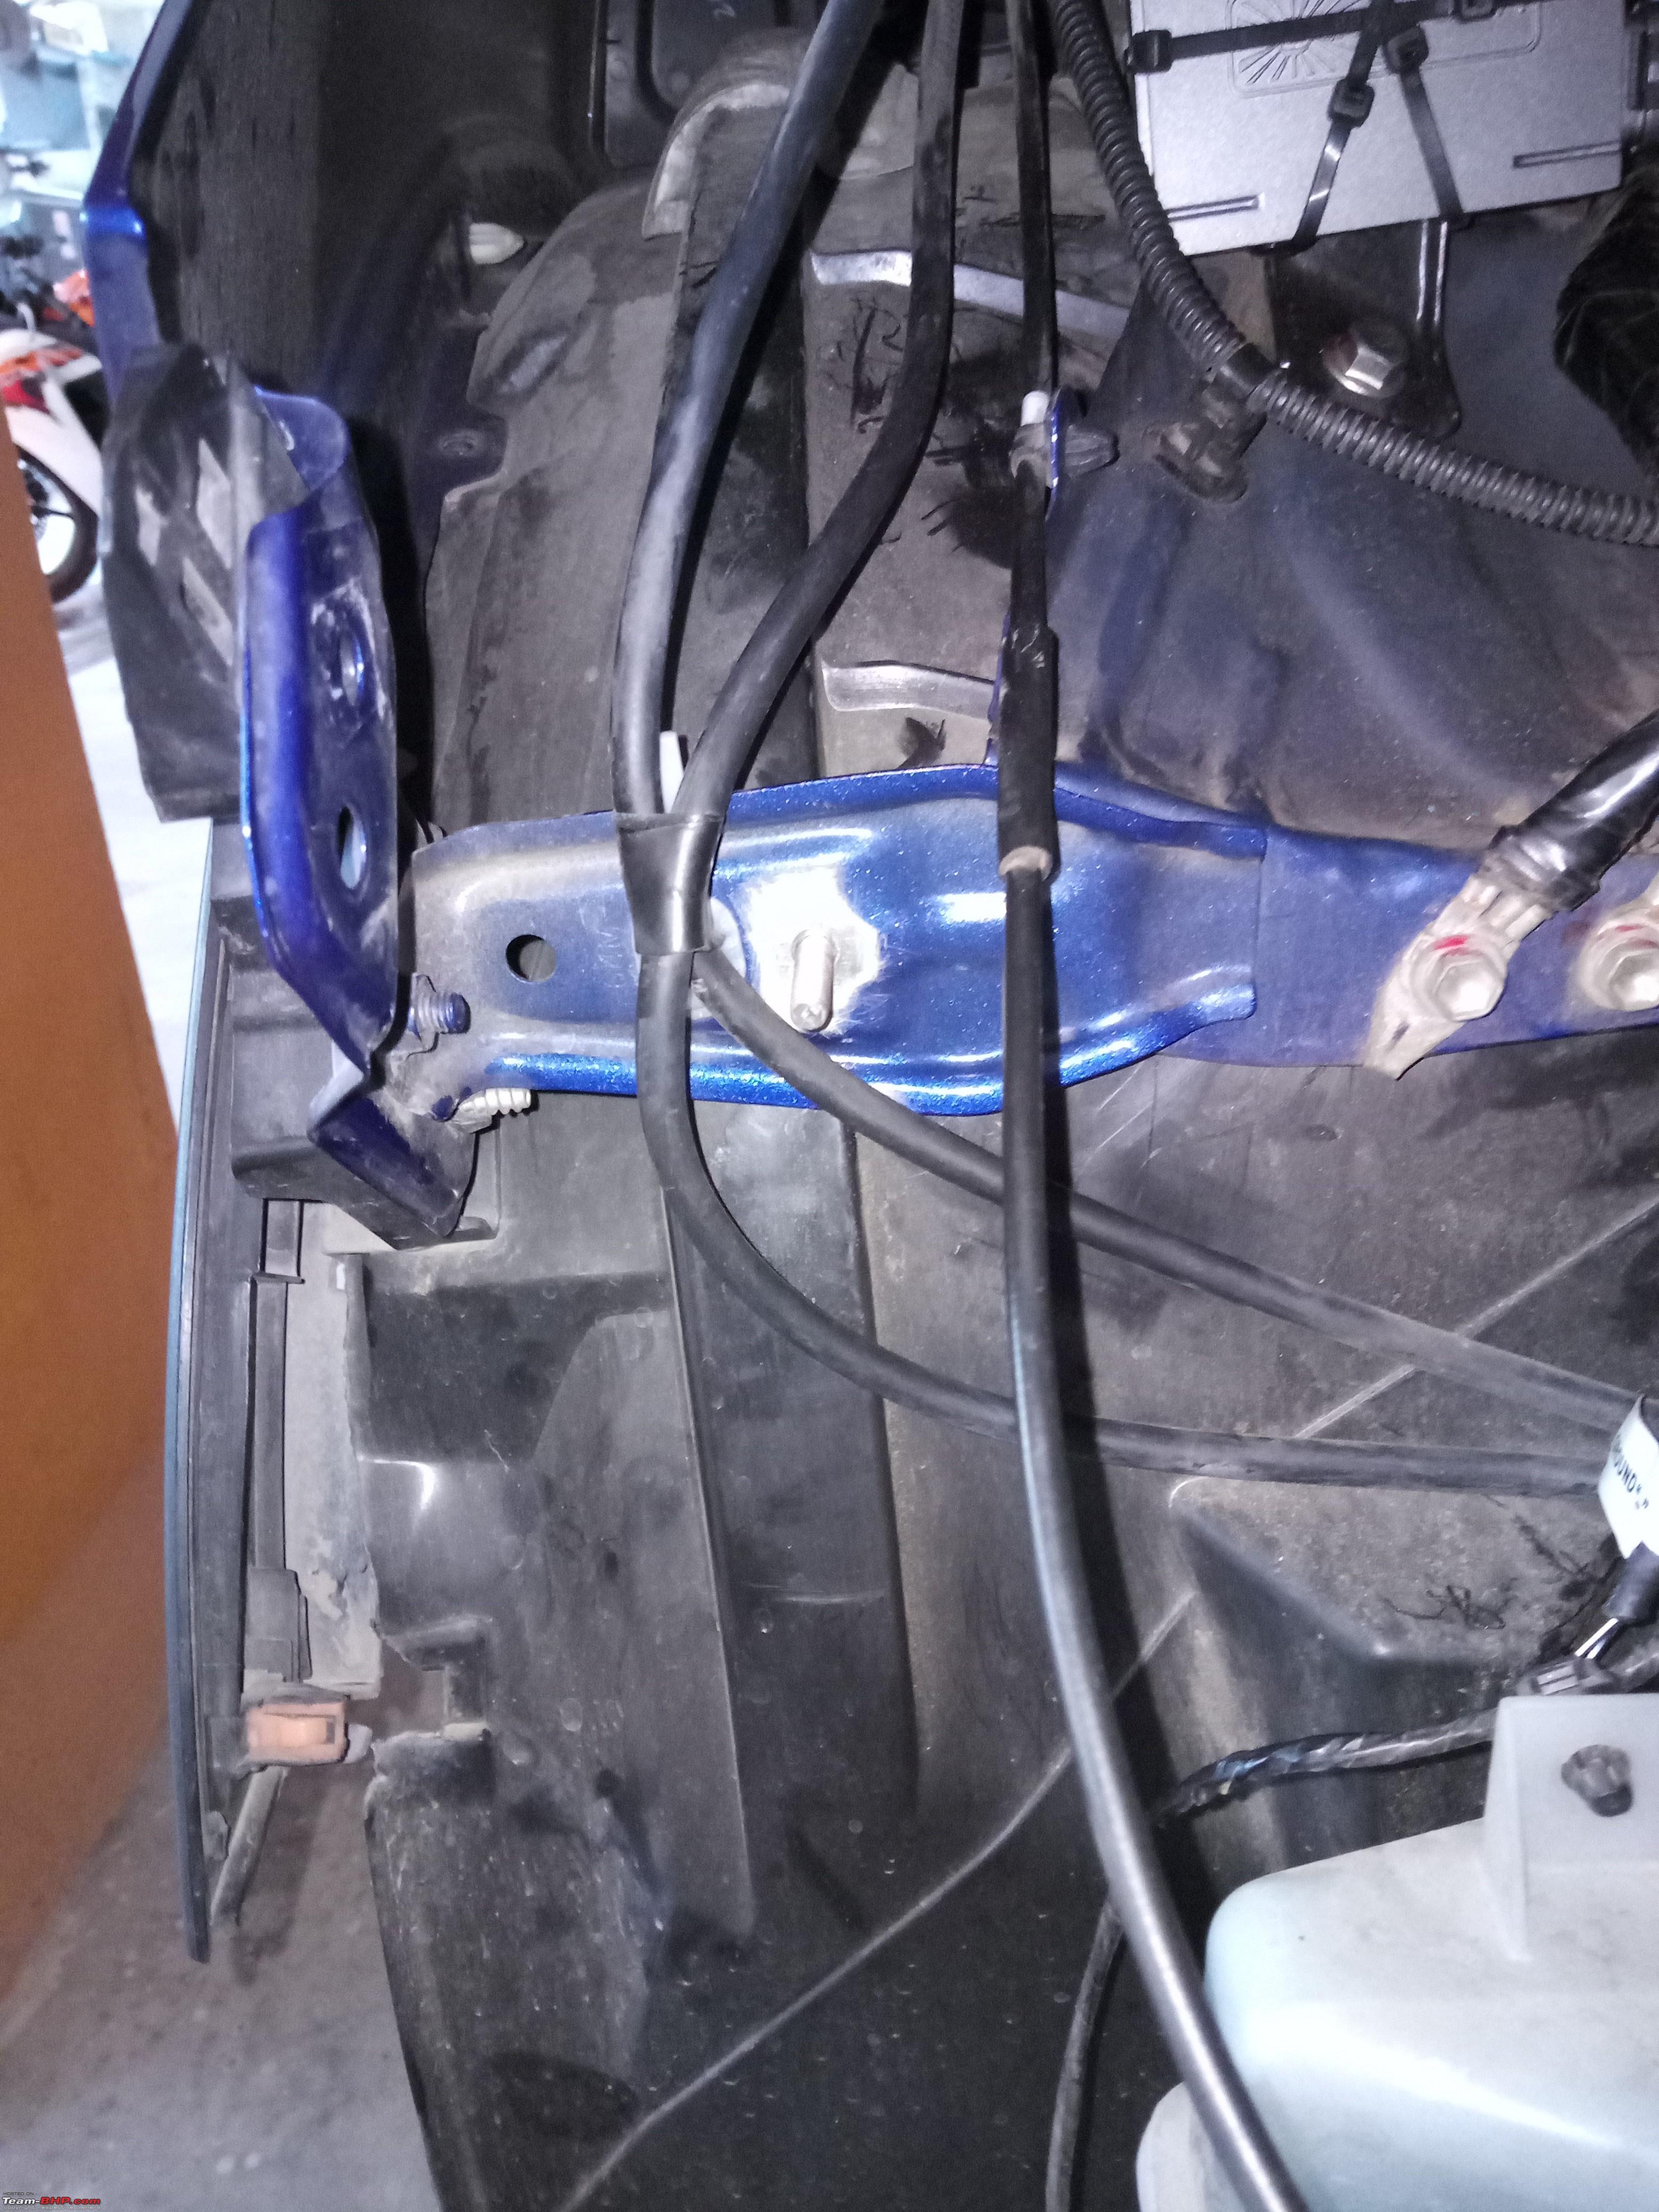 The other easy alternative is to mount the ground point to one of the securing bolts of the front of the car (as shown below). But this means that you will most likely need to use a ballast extender cable unless you manage to somehow install the ballast very close to the ground point. It's not easy considering the length of the wires are limited. 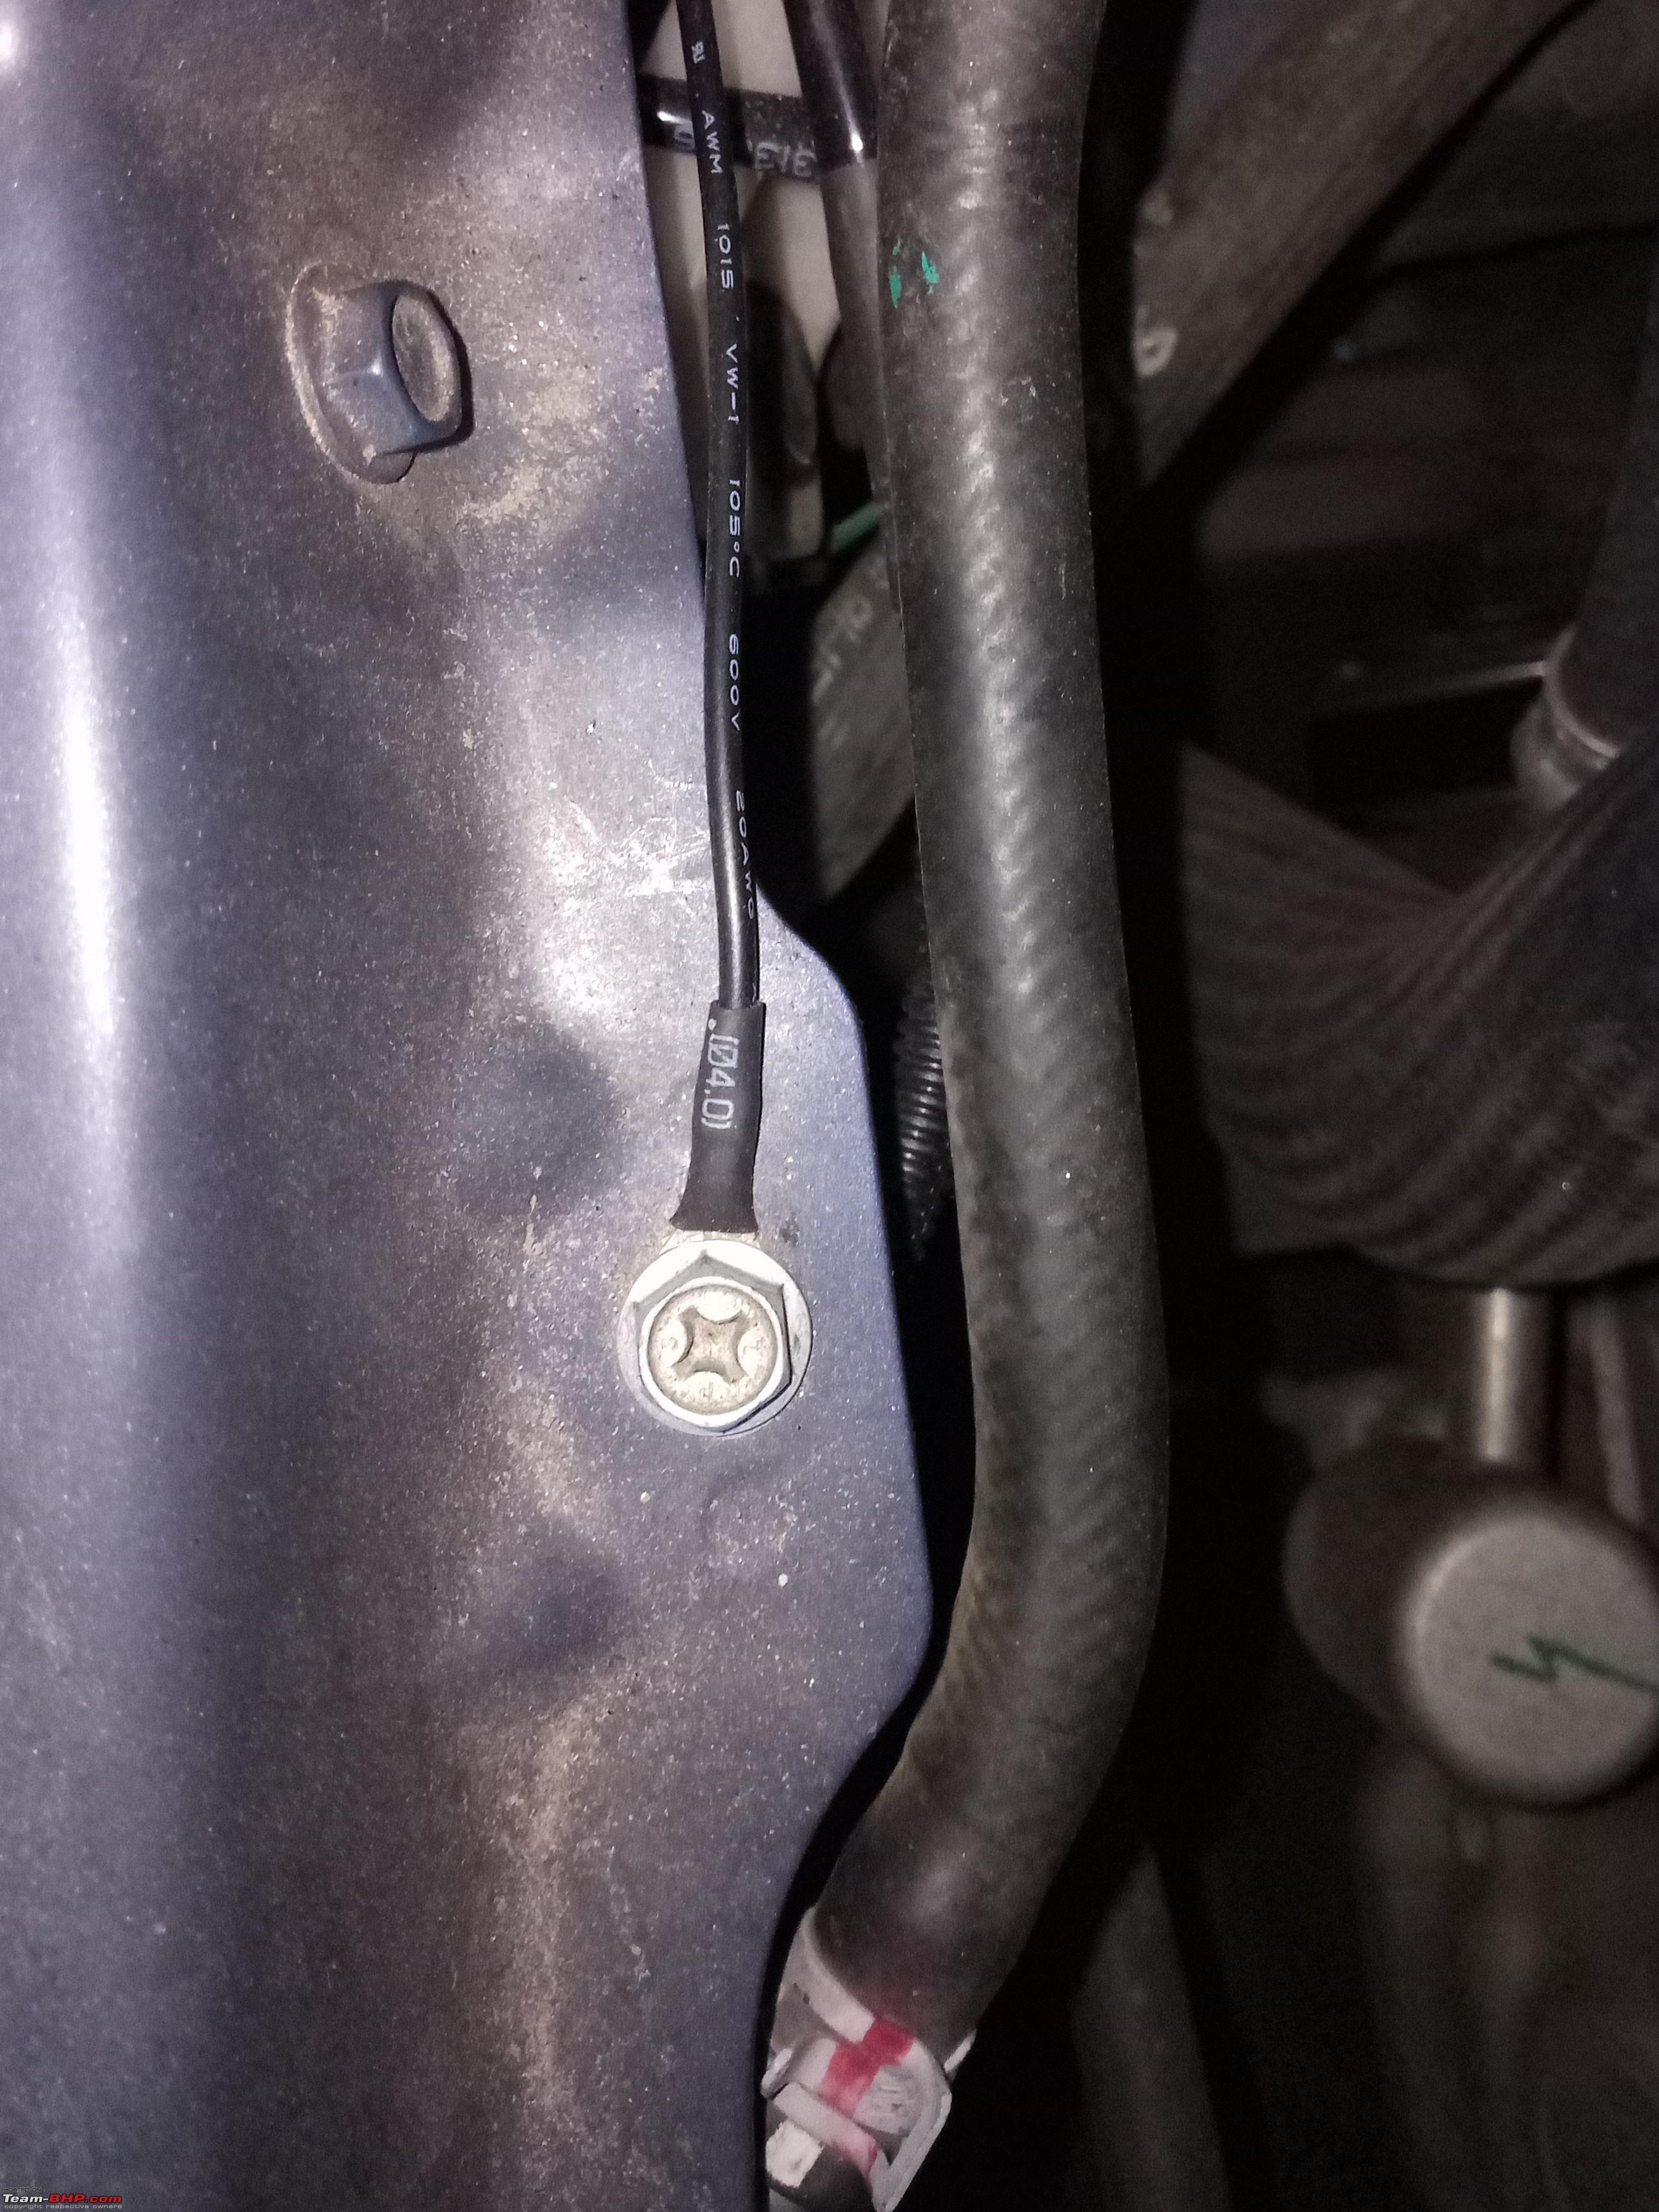 Positive Connection Last loop has an inline fuse in it which should be connected directly to the battery. 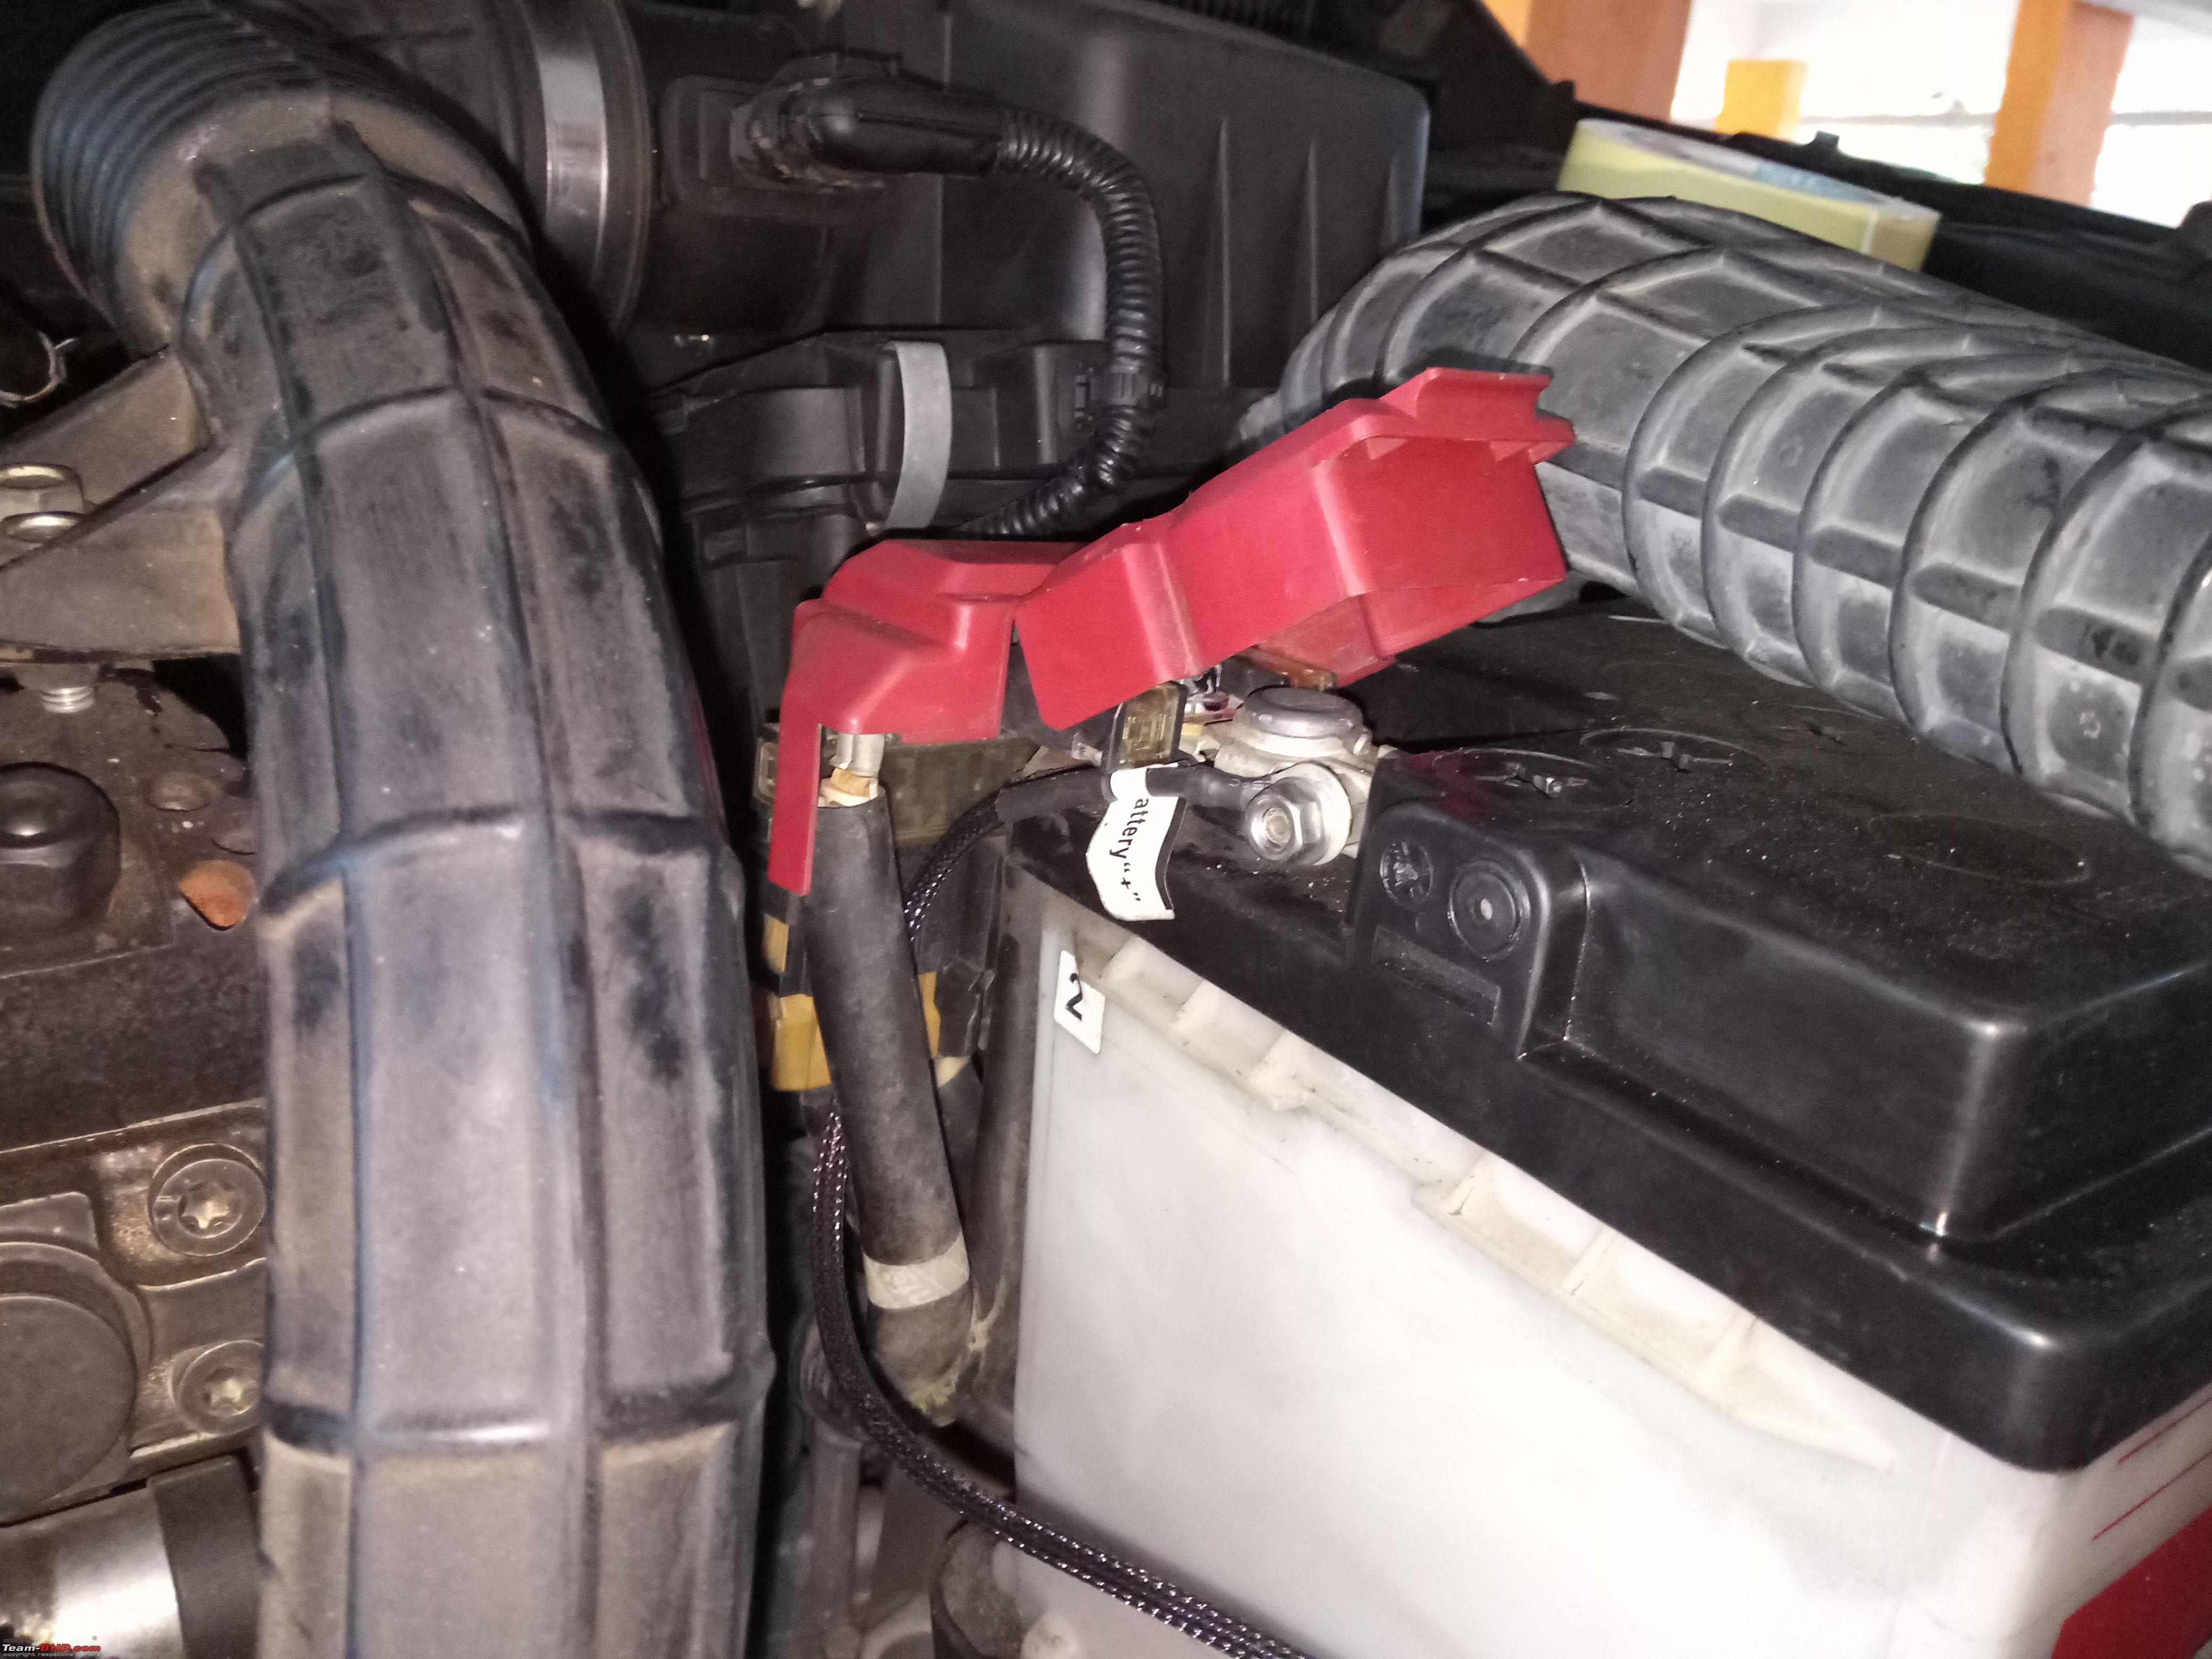 Important: Ensuring a SOLID Ground Point (Negative) Ground connection must be strong. To ensure a strong ground point, use the multimeter with the Ohms setting and Ignition switched off. Connect the black probe to the negative terminal on the battery and the other to the point or bolt where you have secured the Morimoto's ground loop. The higher the reading, the poorer the ground connection. If you manage to find a reading that is 0.4 ohms or less, then you have managed to find a very good ground point. Please note, if the ground connection is not solid, your relay will not work properly and may have a premature failure or issues such as light flicker. Testing the wiring Connect the male sumitomo connector of the custom wiring harness to the female connector of the stock wiring harness (where the headlight connector was originally attached). Next, connect the female H4 connector to the H4 male input connector of MotoControl. At this point, cross check every connection to make sure you haven't missed out anything and polarity of the wires is correct. If they aren't you will blow a fuse or relay inside the fuse box. So this step is very important. Also, do not connect the ballast and igniter at this stage. The igniter puts out 23000v when the headlights are turned on. Installing the Ballasts and Igniter Position the ballast where there is some amount of fresh airflow (ideally) because the 55W ballast can get very hot from our experience. You can secure them with zip ties or mount them with screws. In my case, the co-driver side was mounted with screws as shown below and on the driver side right next to the legs holding the ABS motor. Jaunthead preferred to mount them in the front on the chassis, but he had to use ballast extender harness on both sides to ensure the connections could be made from MotoControl.  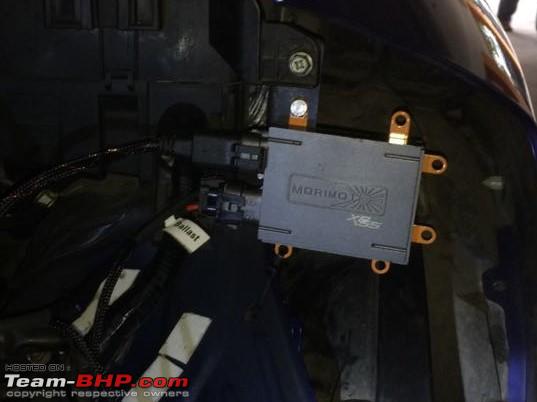 At this stage, the wiring is more or less complete with the only things remaining being the connection from MotoControl to ballast, ballast to igniter and then the bulb, which will be done after the headlights are ready. All these will be plug and play. Last edited by sudeepg : 5th October 2017 at 09:51. |

|  (30)
Thanks (30)
Thanks
 |
| The following 30 BHPians Thank sudeepg for this useful post: | a4anurag, aeroamit, blackwasp, Dennis, Dr.Naren, ForeRunner, frankmehta, glomus123, Grand Drive, GTO, HappyWheels, harsh79, jaunthead, johannskaria, kashyapz8055, Keynote, Leoshashi, Lobogris, lovetorque, maddyg, Mr_Bean, paragsachania, Prakritij, R2D2, sidhu_hs, smuniswami, sparky@home, vaasu, VCM, Vigkey |
| |
|
3rd October 2017, 11:00
| #2 |
| BHPian Join Date: Feb 2006 Location: Bangalore
Posts: 812
Thanked: 2,453 Times
| Upgrading the headlight Continued Disassembling the headlights Once the headlights are removed, open the back housing using T20 bit and torx screw driver. Then twist the cover to the left and pull it out.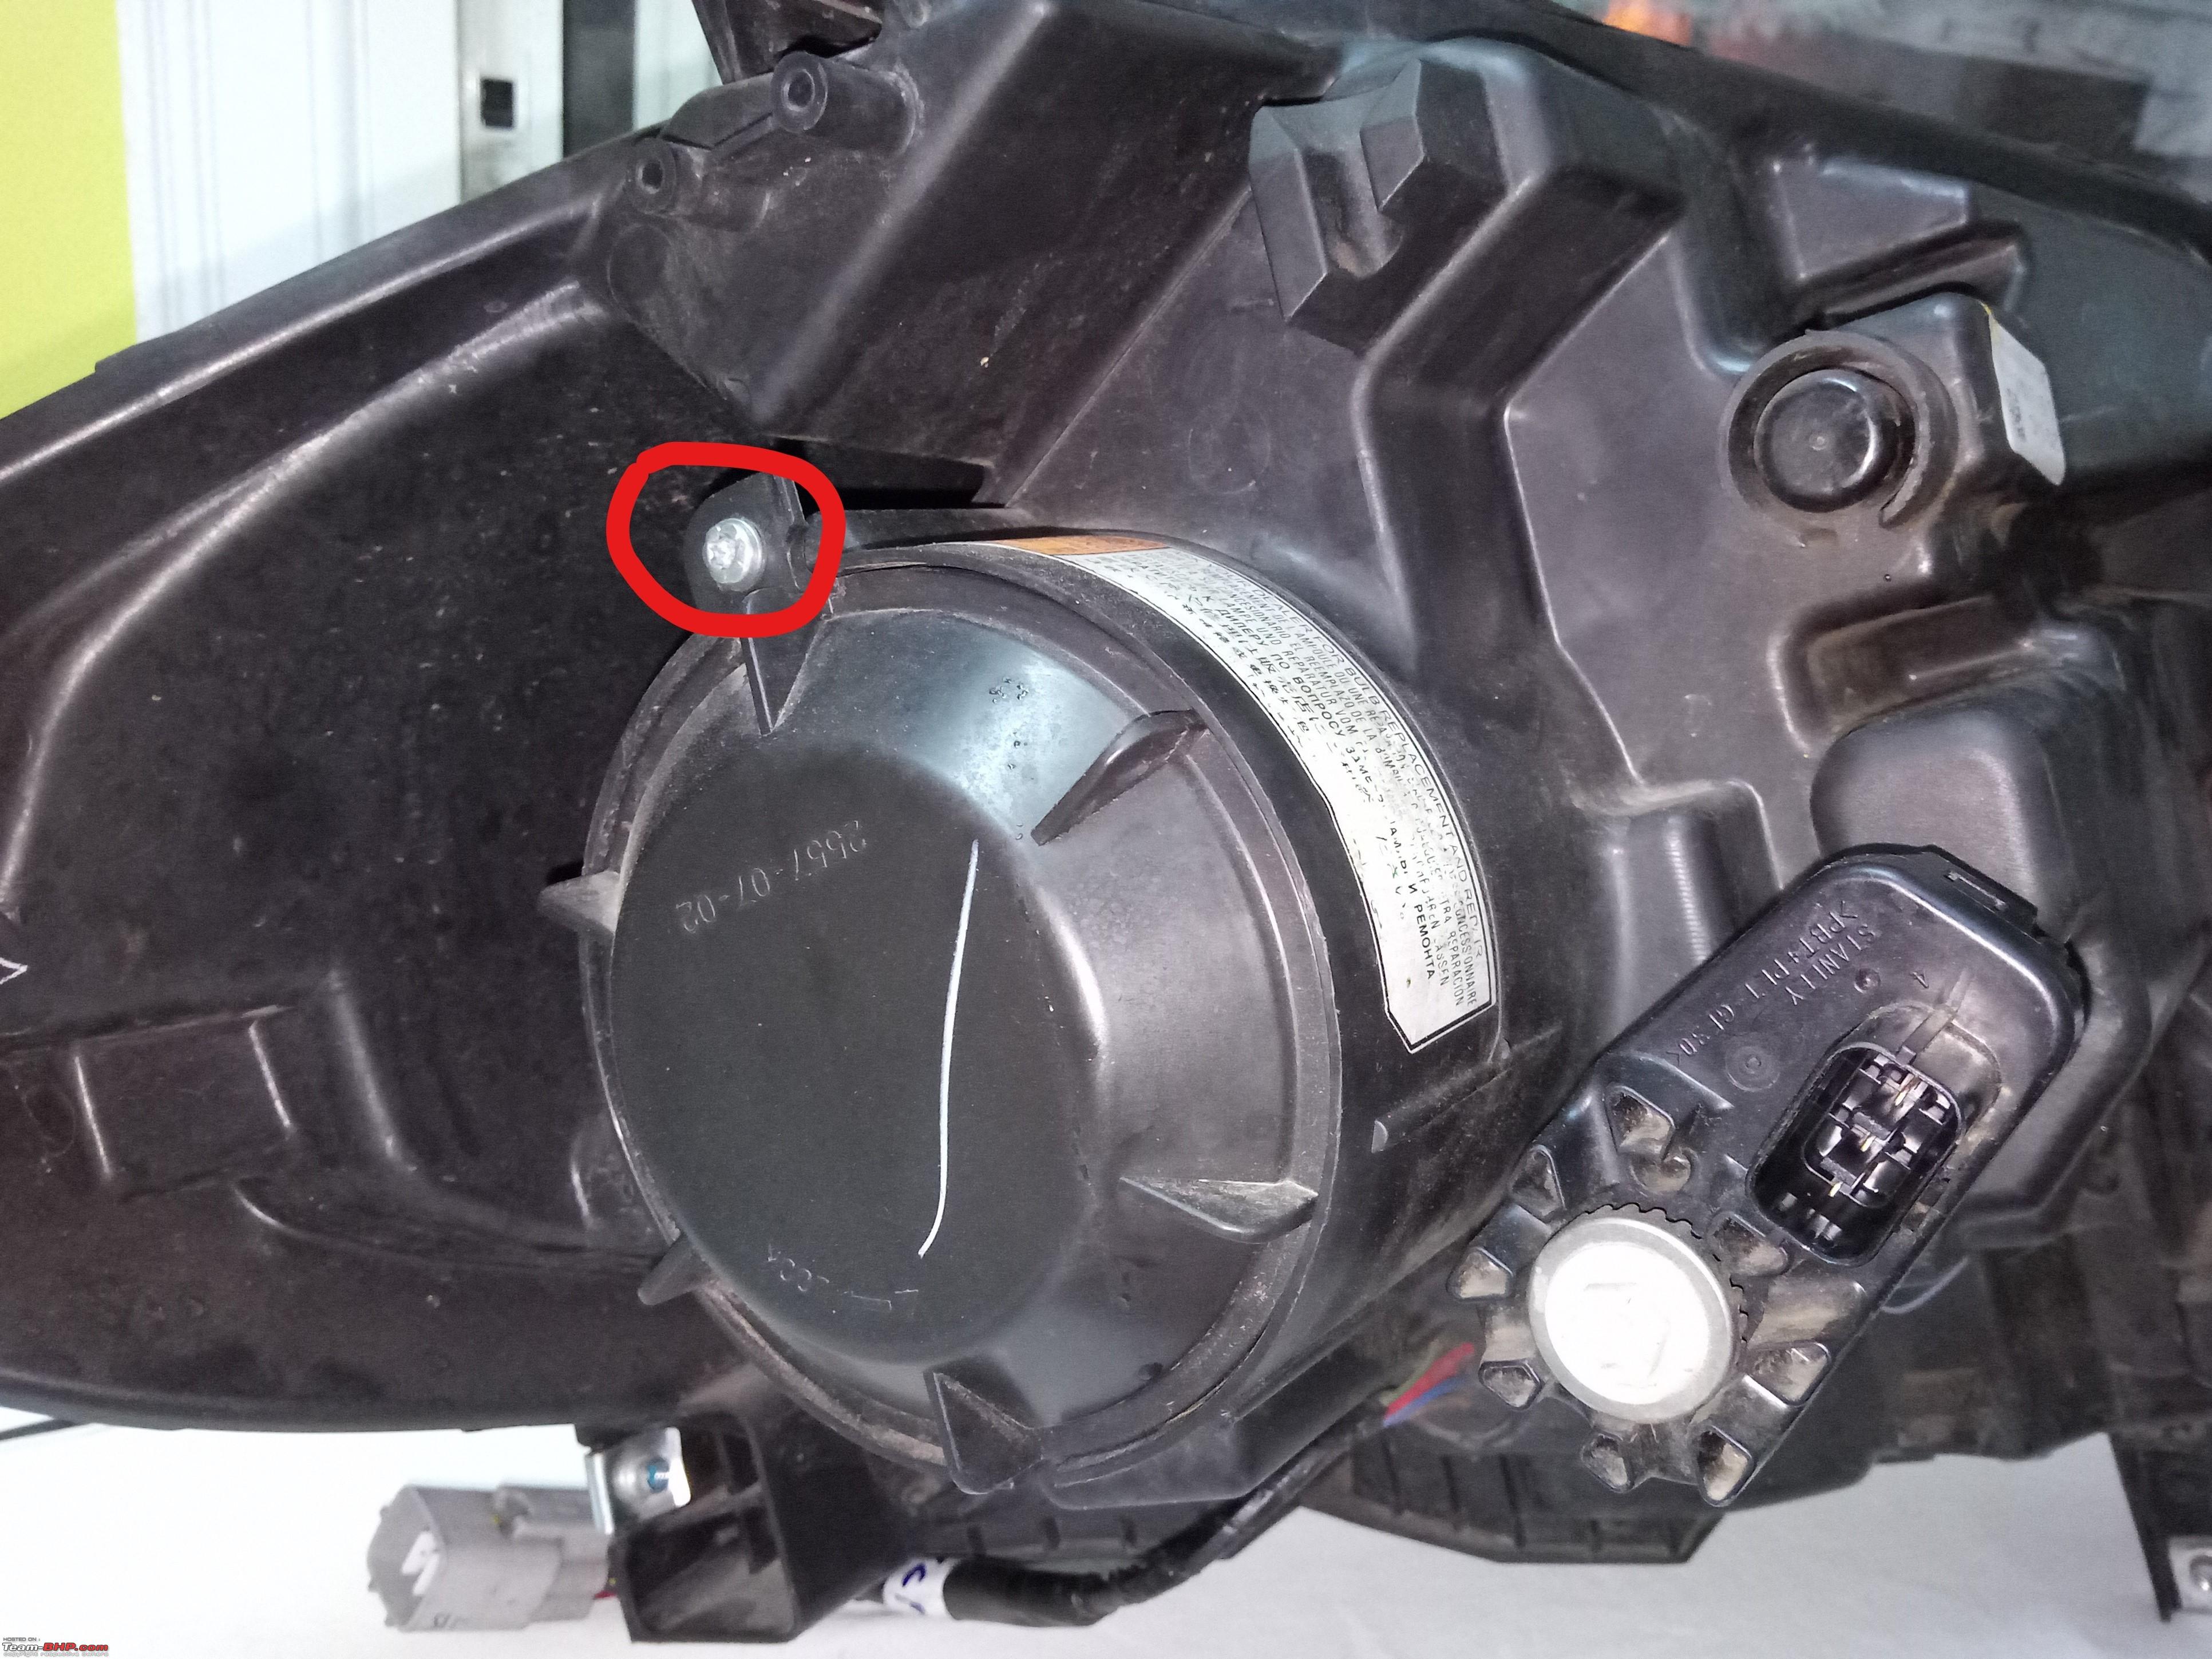 Remove the D5S Bulb Gently push the bulb a little inwards and twist counter clockwise for about 35 degrees. Then, when the bulb is free, pull out the bulb. Disconnect the power wire connector by pressing the locking switch inwards from the left. 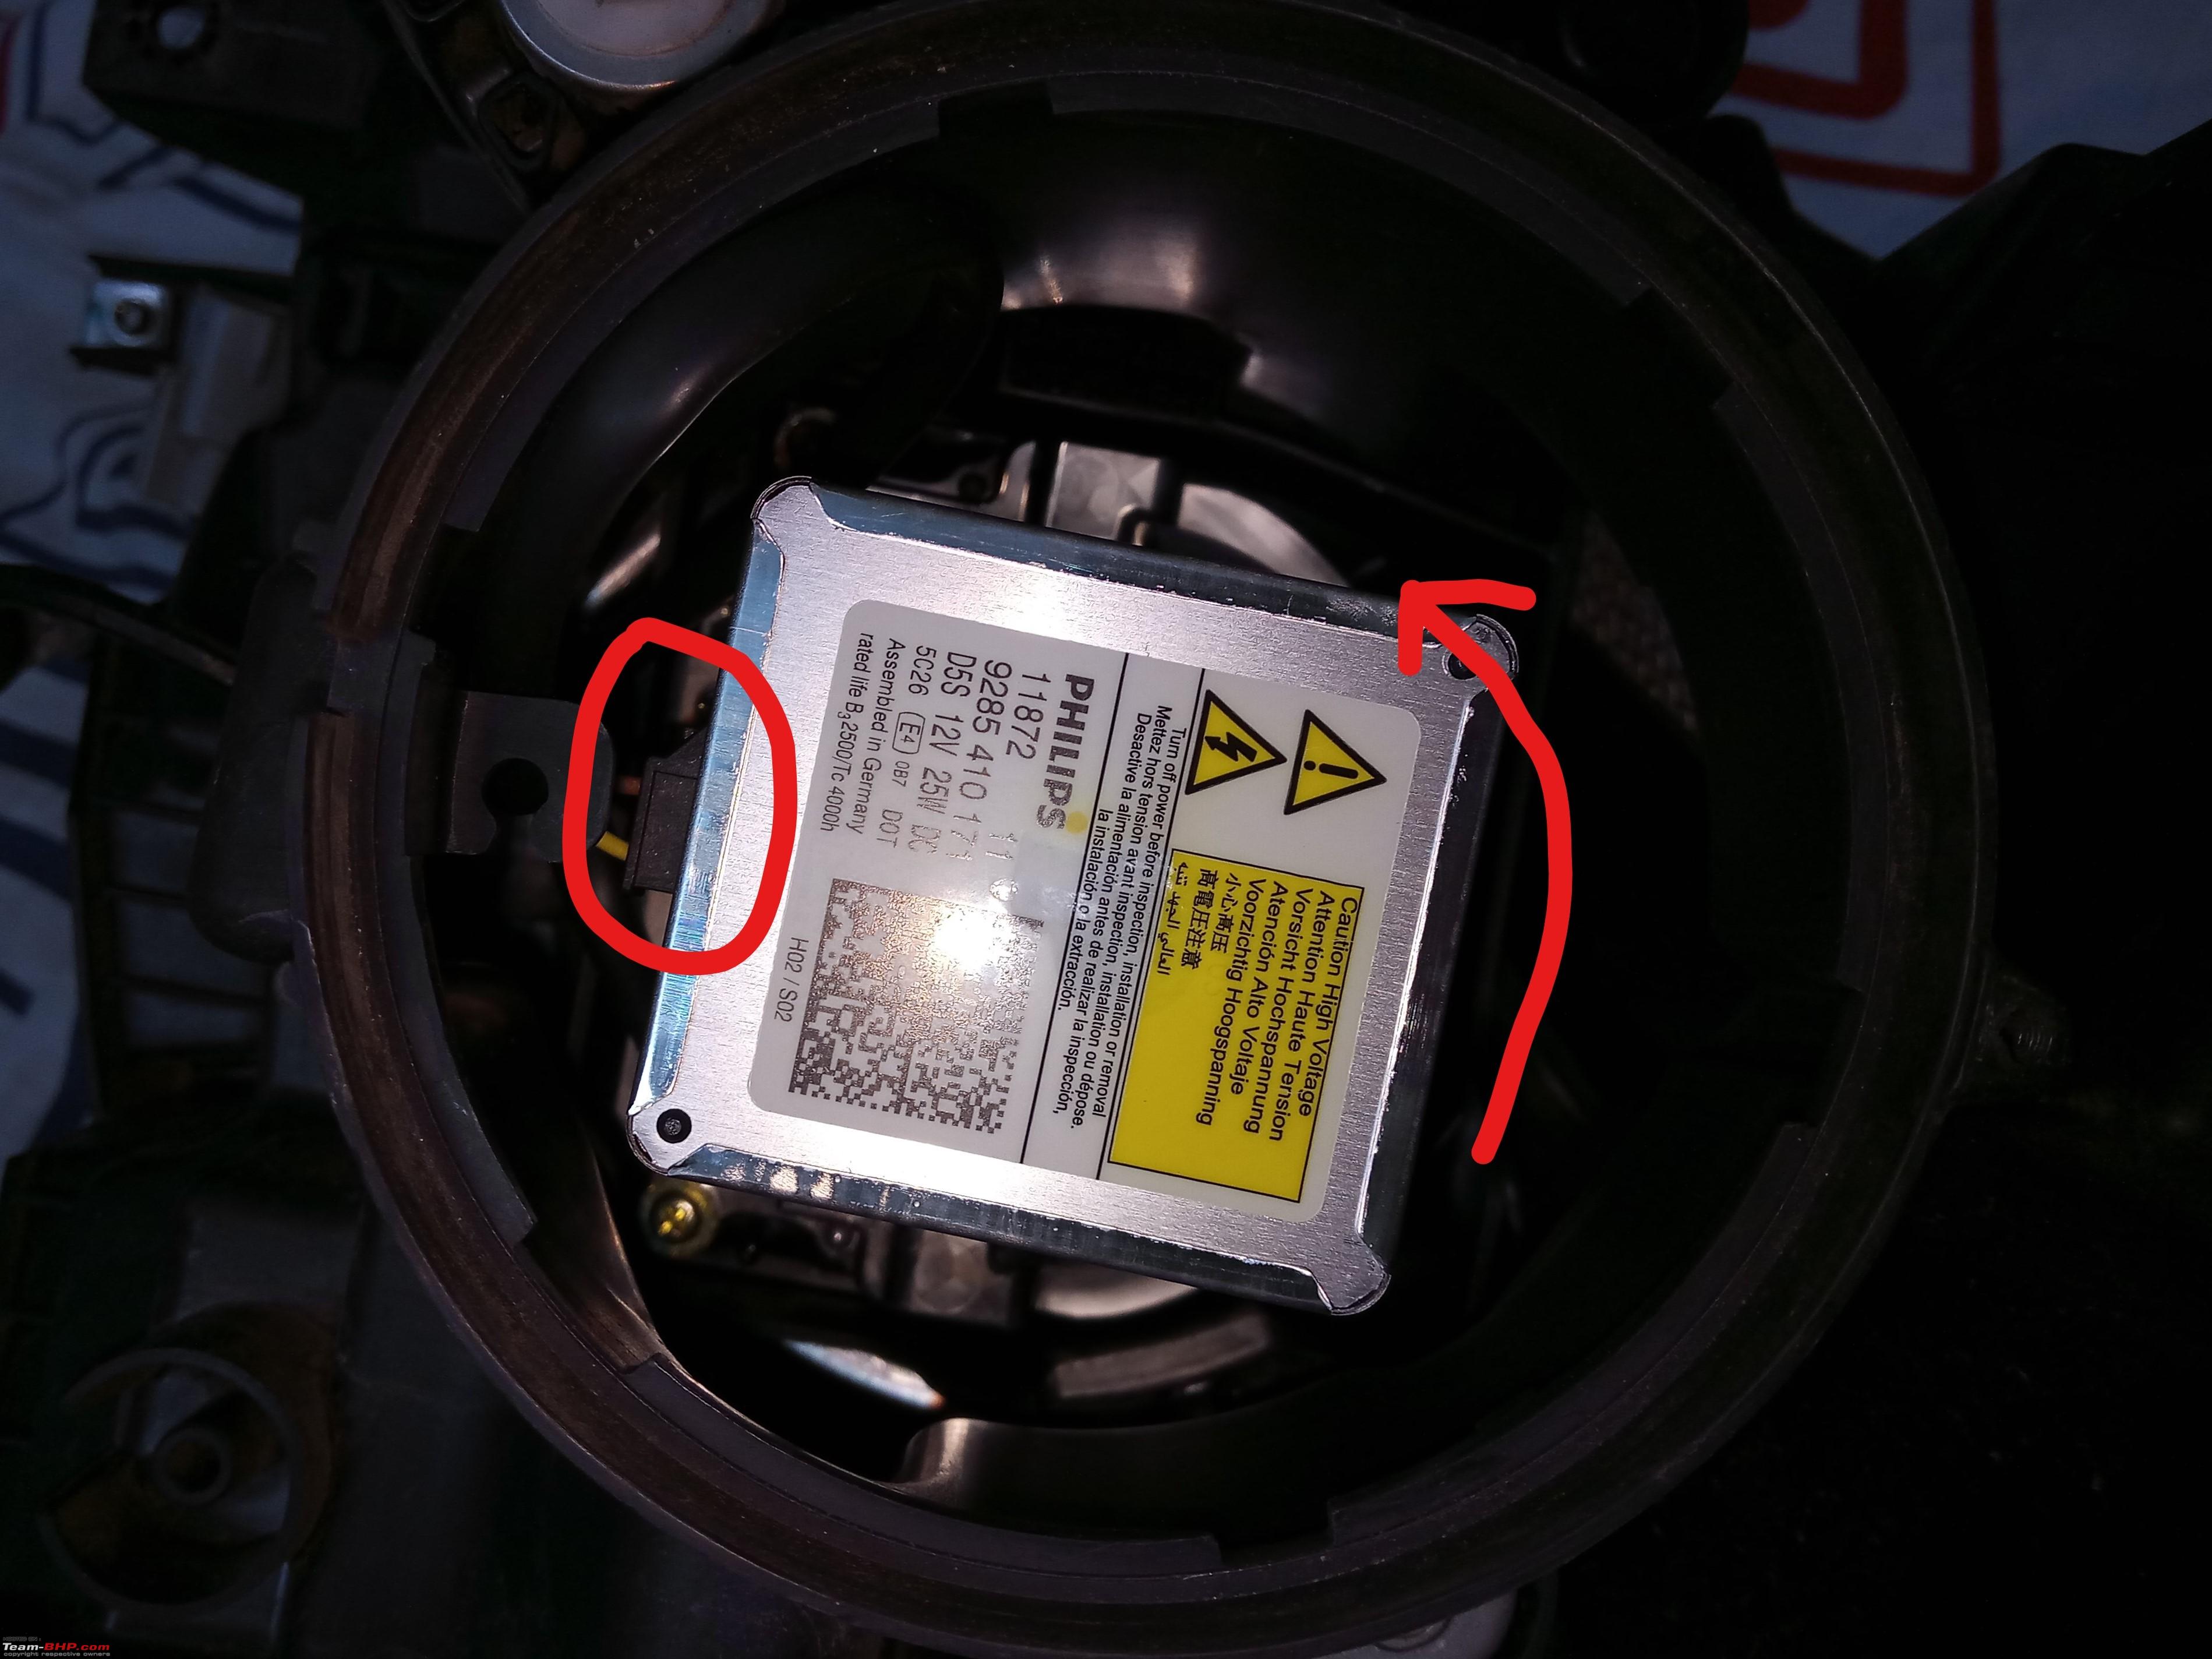 D5S Bulb 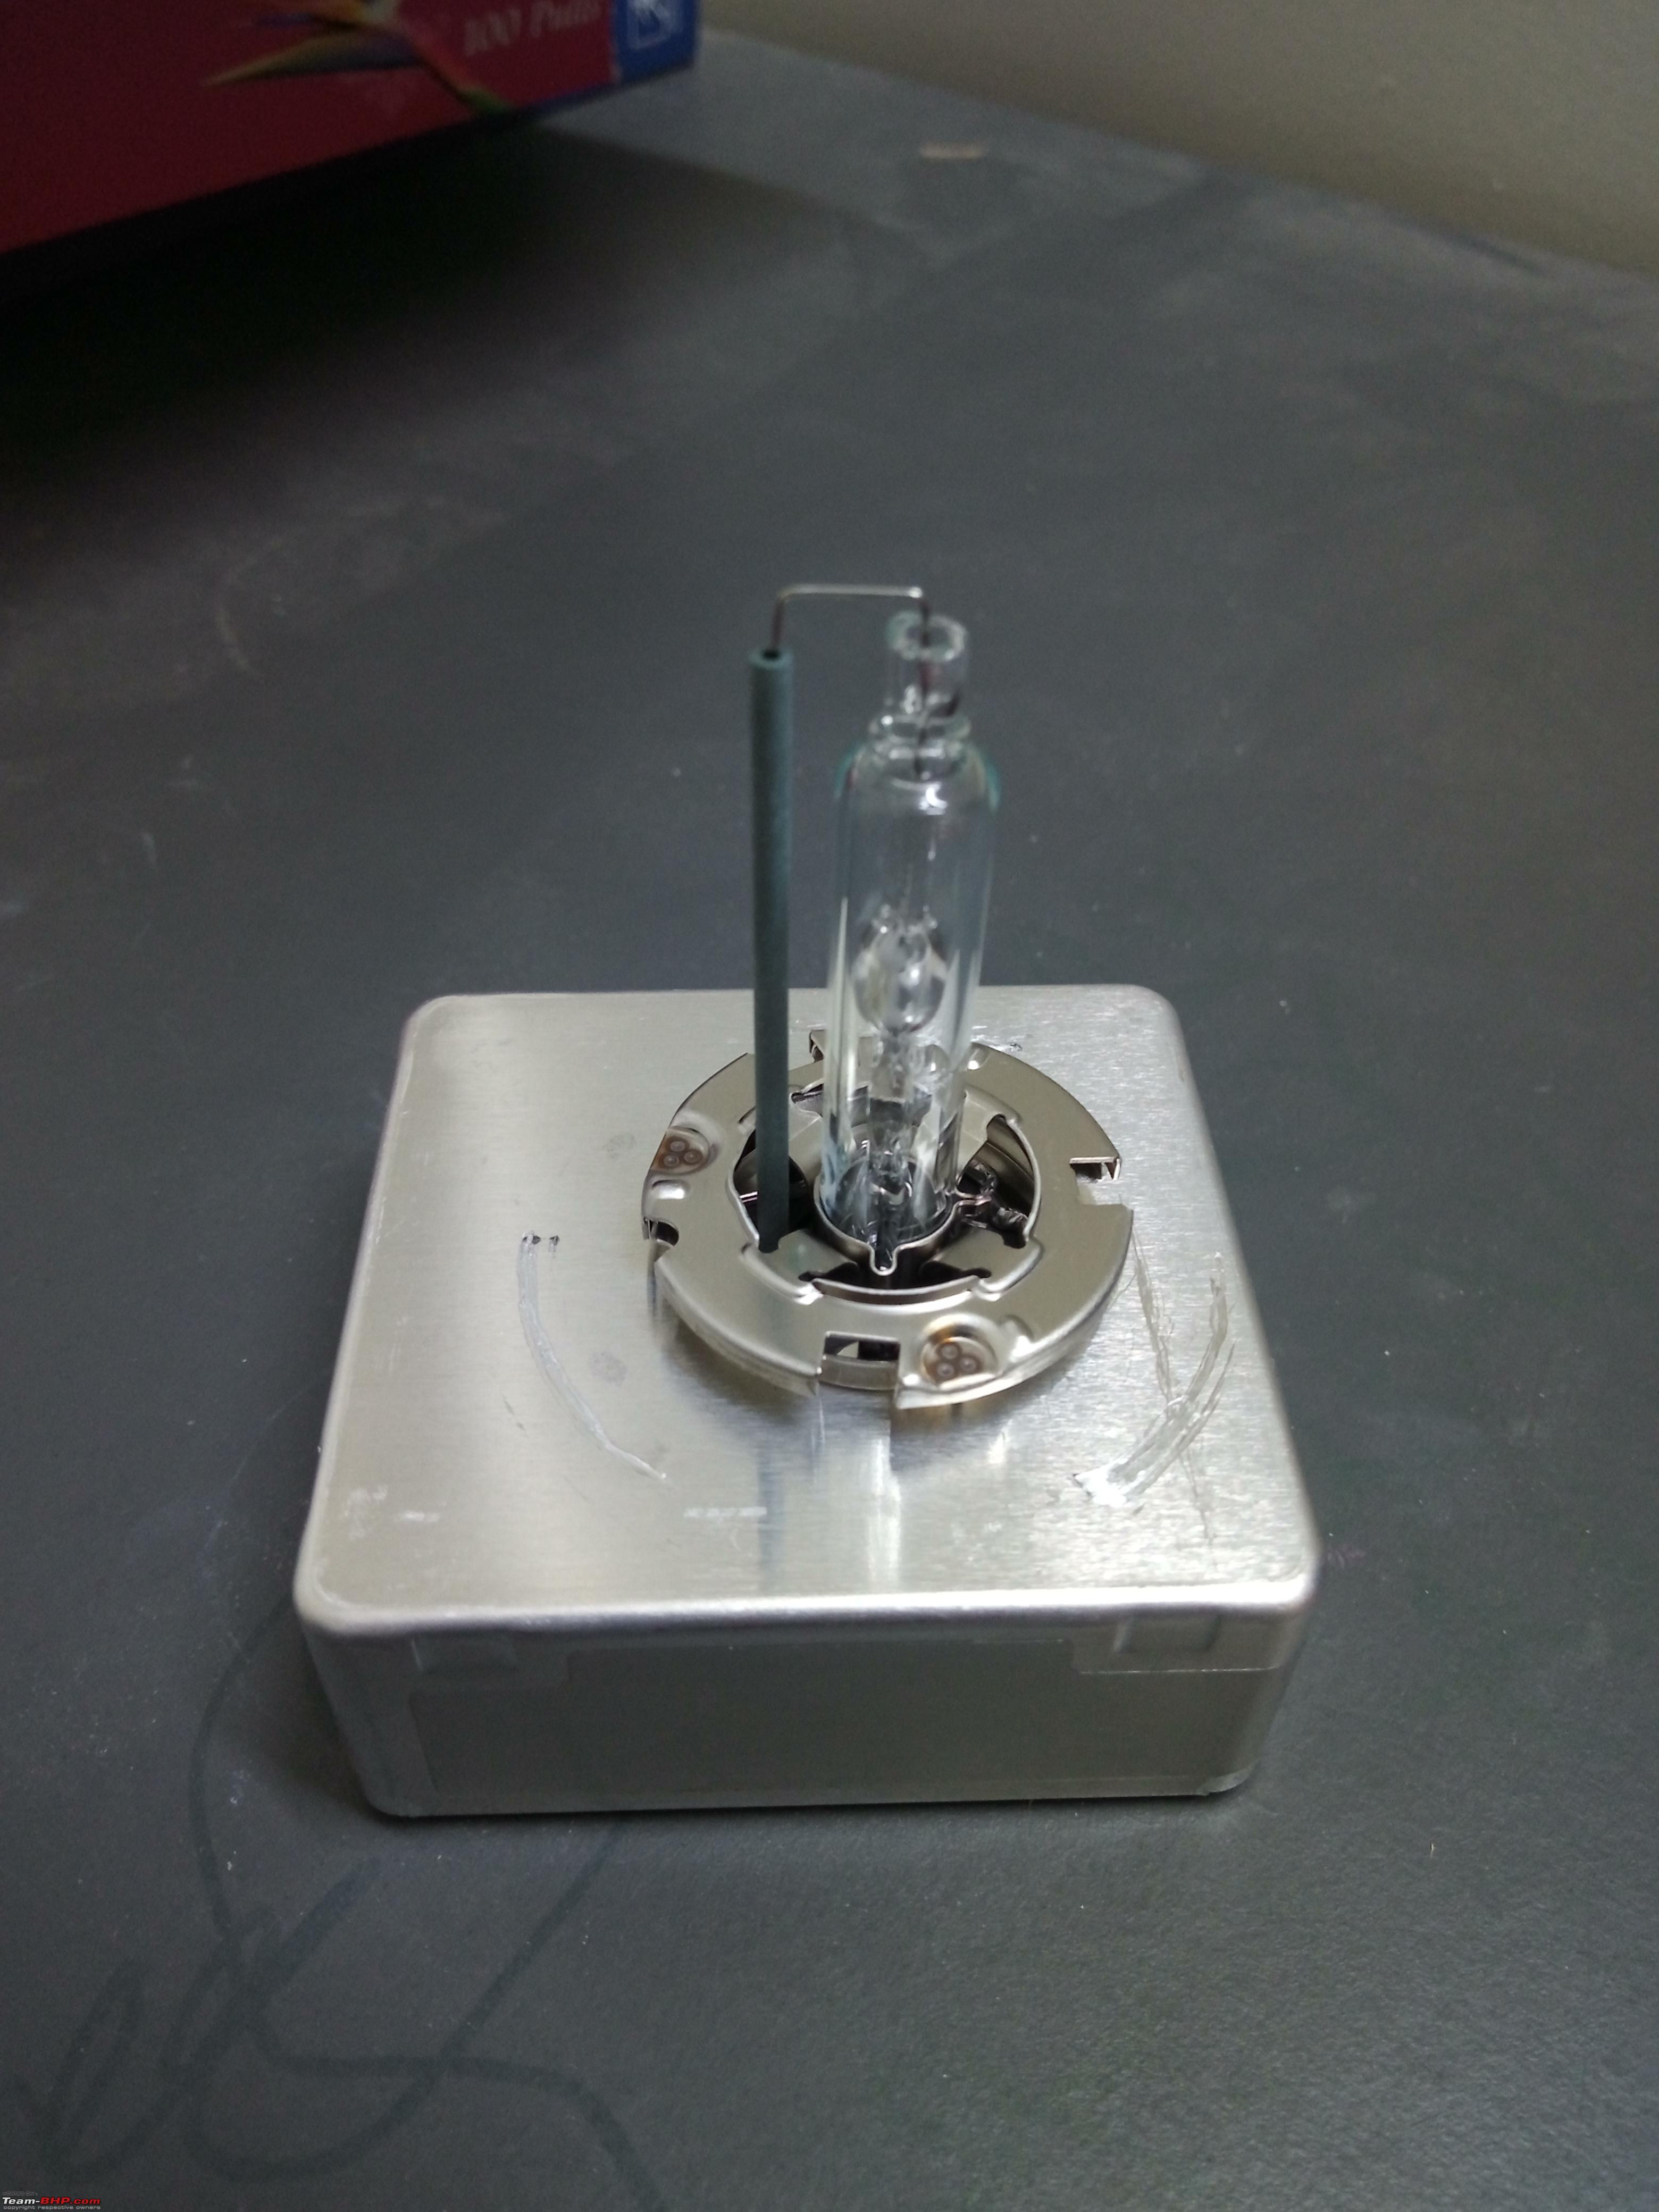 Innards of the headlight  NOTE: You will hear some scratching like sounds when twisting the bulb, but that's just fine. Remove the turn indicator bulb Simply twist the holder anticlockwise and remove it. They go in only a certain way due to the shape and size of the locking pins, so nothing much to worry there. Ensure the correct locking pins match up and then insert them in clockwise to tighten and seal. Baking the headlight The S-Cross headlights are one of the most odd shaped things I have ever seen in my life. They are not easy to handle and caution is required to ensure you don't break the plastic housing and associated things. The lights are sealed using screws and butyl rubber which can be softened only with high amount of heat. Some of you may be thinking - What about LED's? Will they be damaged with high heat? I wasn't sure but it did seems that baking the whole headlight might not be really required when the goal is to get only the butyl rubber sealant to come off. So I decided to take a two-step approach. Bake the whole headlight for about 5-7 minutes and then just heat those parts where the lens attaches to the casing. This, obviously requires more time, about 90 to 120 minutes or upwards per headlight, but I felt it was better approach. This ensures that the casing isn't too soft to handle when we try and pull it apart. The tools are absolutely essential to make this happen. NOTE: Due to the messy nature of this phase of the project, we could not take pictures since dealing with butyl and tools means sticky hands and full concentration. IMPORTANT: After you shutdown the heat gun, ensure you place it somewhere isolated from reach of small children. It takes a long time for the heat gun to cool down. Baking the headlight 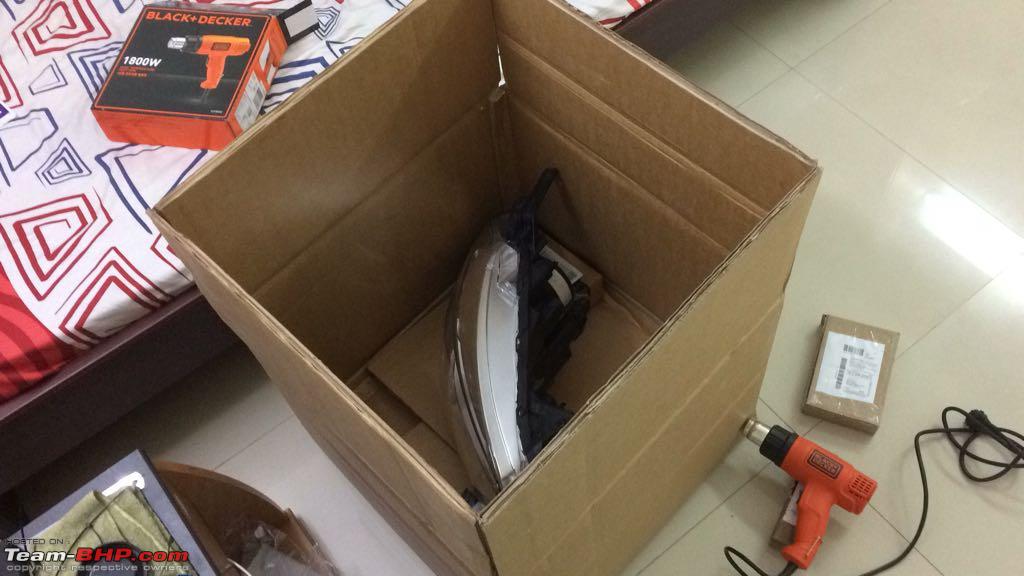 Measuring the existing projector size and positioning in the existing setup It is always helpful to understand how forward ahead the stock projector is sitting and what its dimensions are, how many screws and where all it is holding, how does the headlamp level connect etc. Take lots of pictures from all angles to ensure you have everything covered before unscrewing anything. Removing existing projector setup There are 3 screws holding the stock projector in place within its plastic casing. You will have to unscrew each of these screws. These are the vertical level control and horizontal alignment screws, which require a torx screw driver. The third cone is a ball joint which needs to be detached with a gentle push. Additionally, you will also need to remove the reflectors for the turn signal, which are secured using two additional screws. After clear lens is detached from plastic casing  You can see the LED Module for the pilots here. You will also see the incoming wires for the stock projector setup. Out of these set, only two wires will be used going forward, which are for the LED pilot lights. They are represented by a pair of green and black wires. We cut off the rest and sealed them using heat shrink tubing.  To the top left is the long screw (in red) that helps in horizontal alignment of the light beam. The long screw right behind the wires (in orange) is the level control. This moves forward and backward depending on how you use the level control switch to move the beam vertically. To the very top (in white) is the socket where the ball joint screws goes in 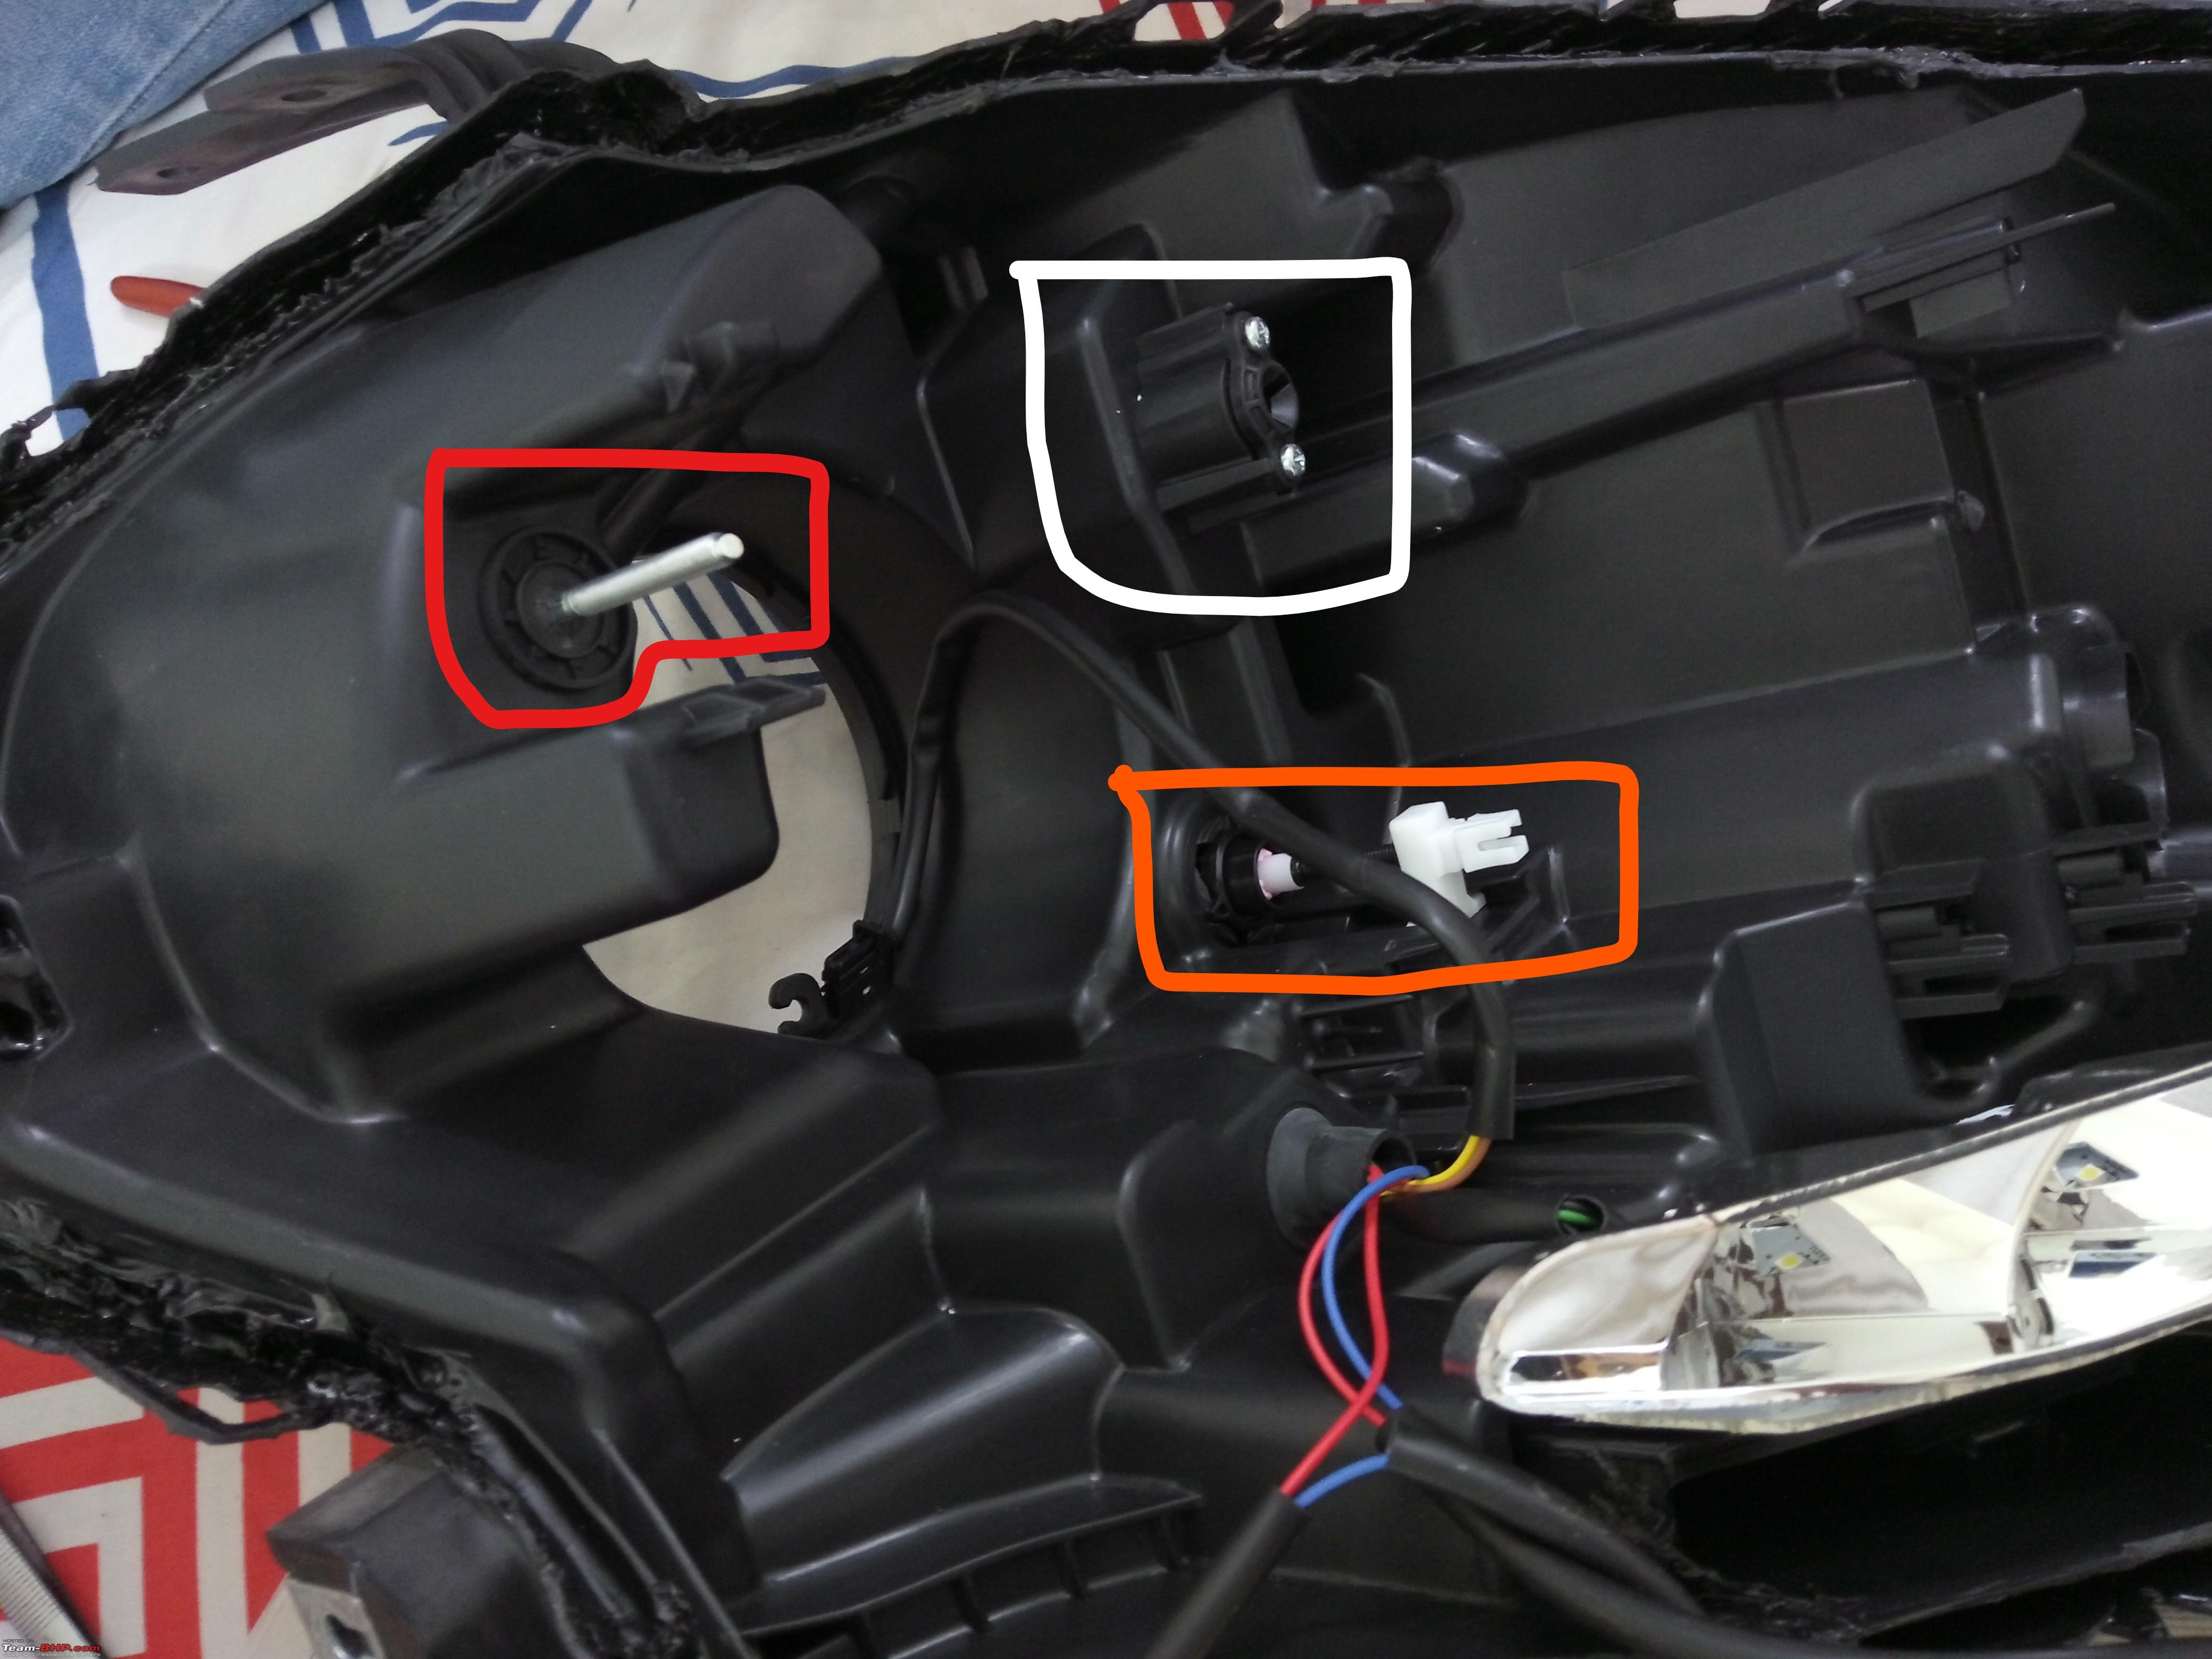 The ball joint attachment. This acts like a pivot based on which the horizontal alignment of the beam and vertical alignment works 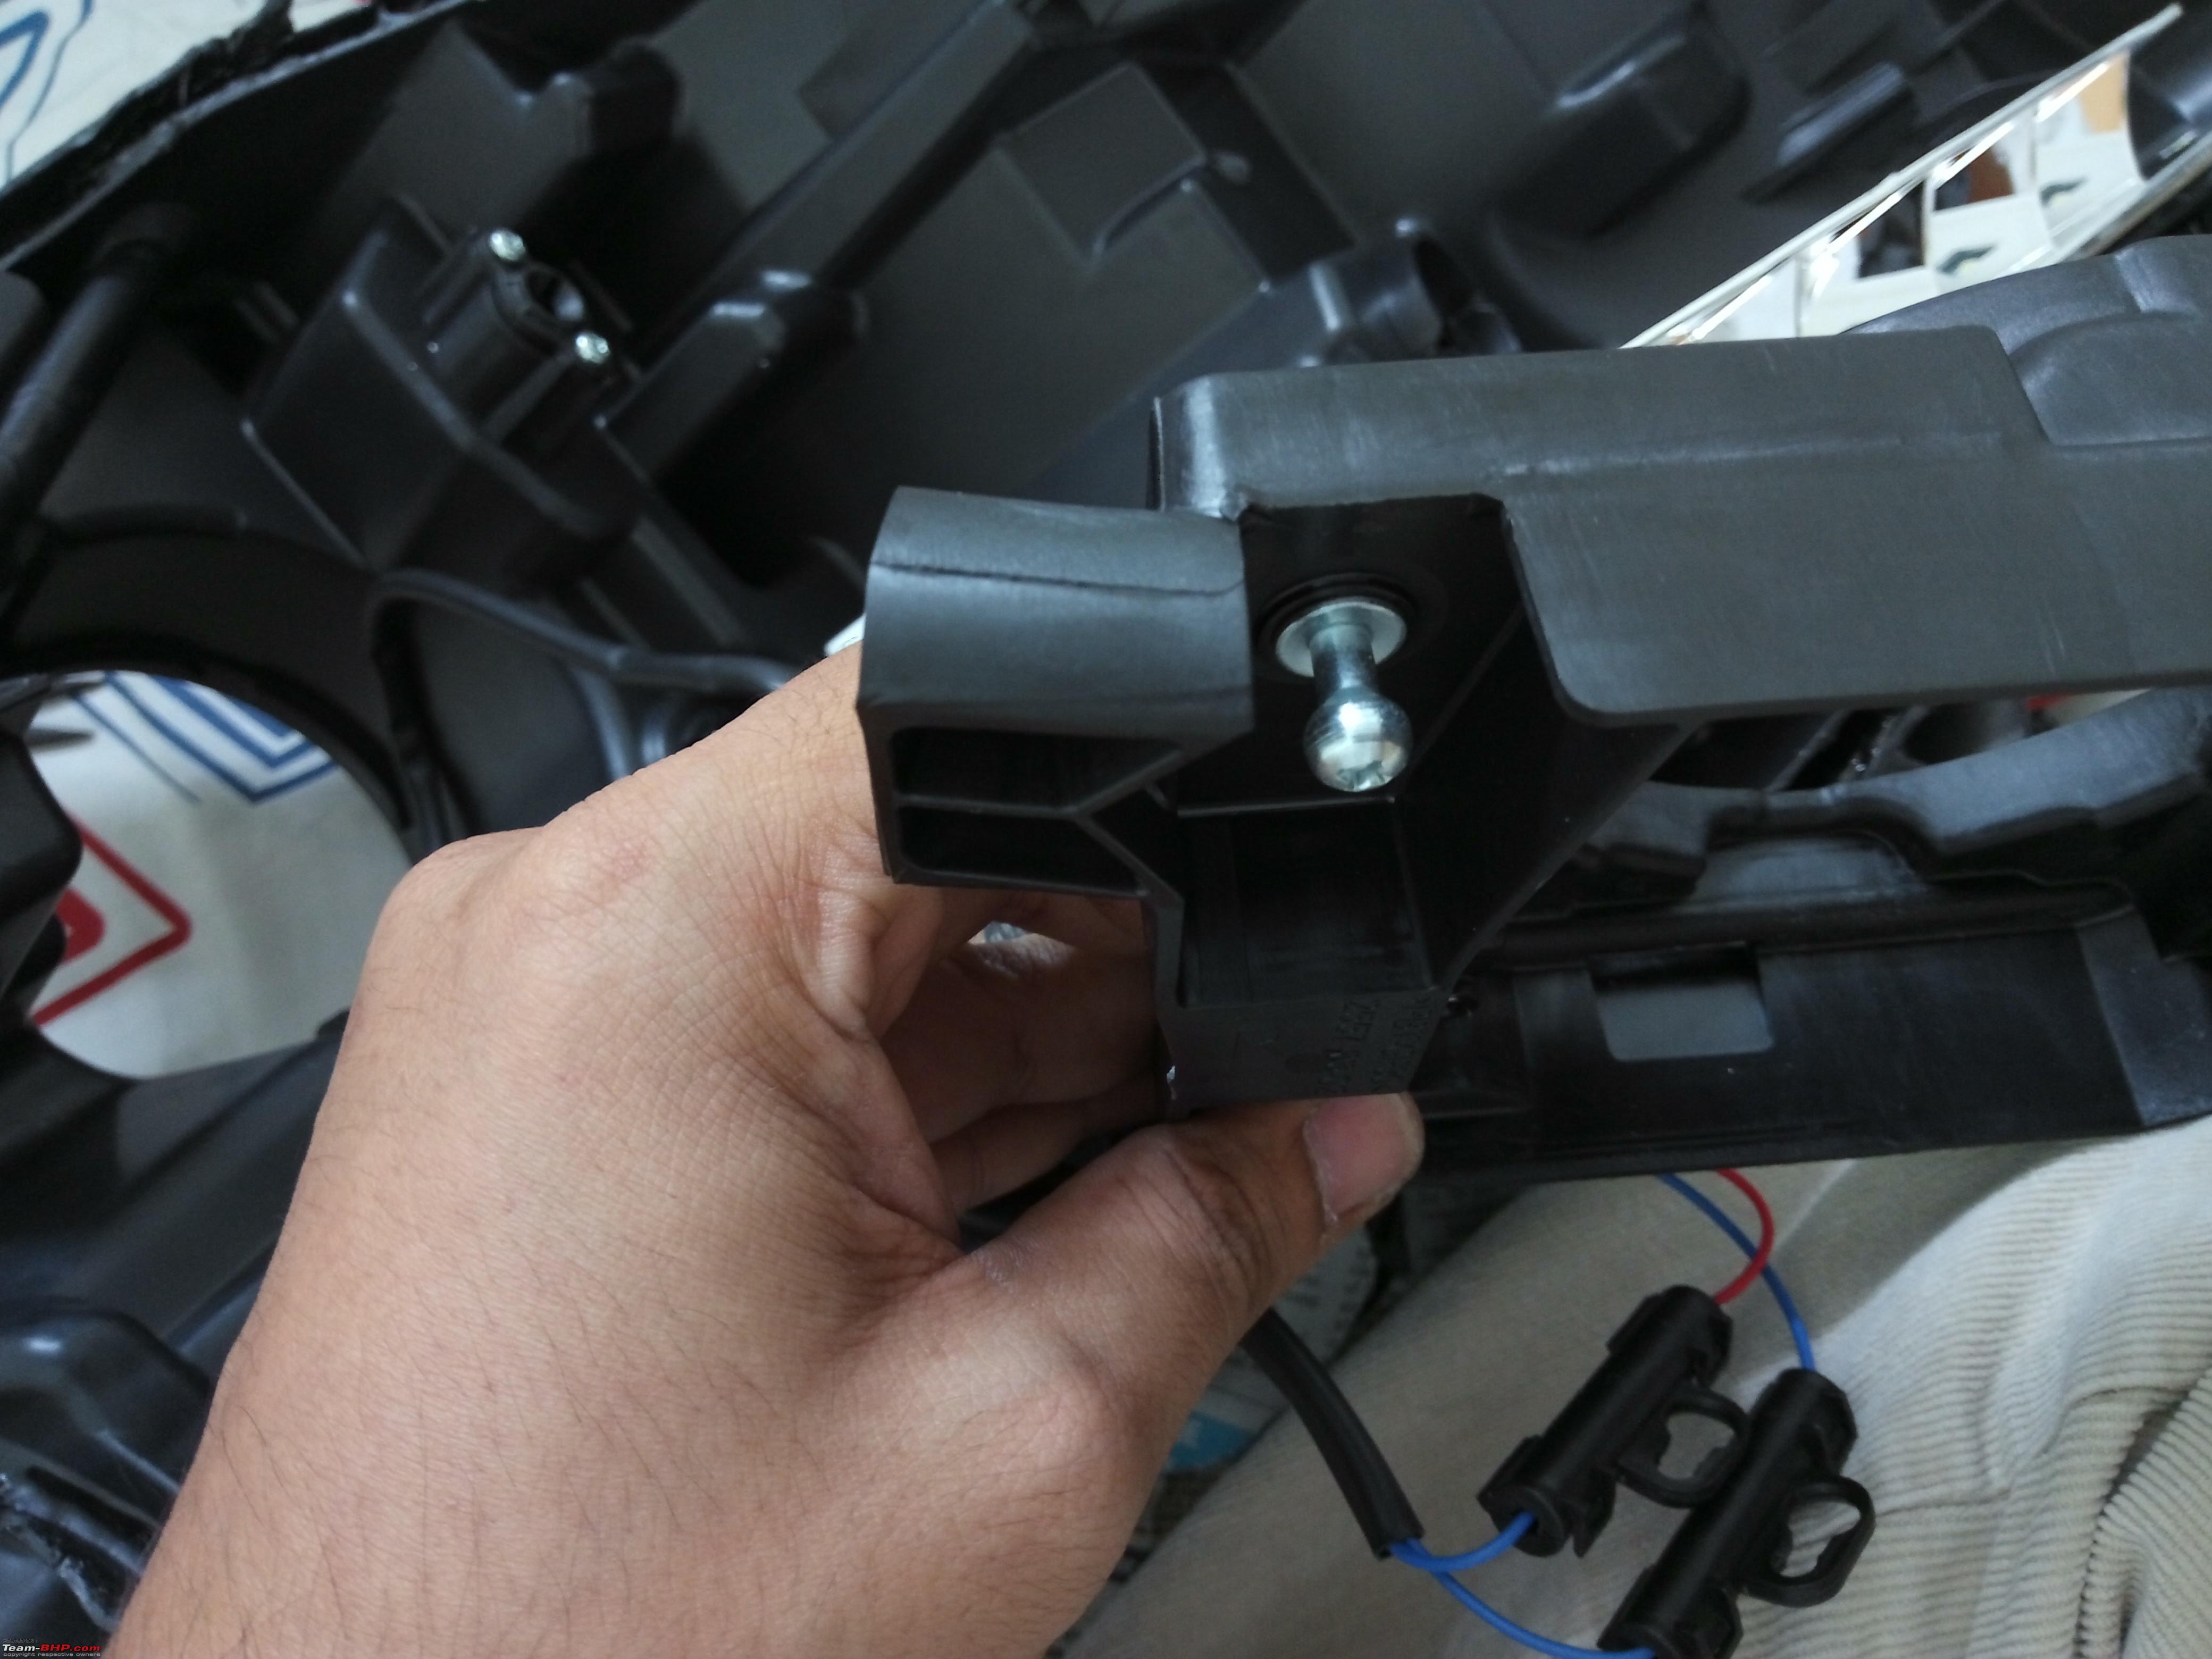 ... From another angle  That socket is where the ball joint goes in. To detach it, you will need to stick in a philips screw driver way inside and then push it outwards. This may seem like you may break it, but it won't. It will simply expand the holding plastic to dislodge the ball joint freeing up the projector holding casing. Ensure you dislodge the vertical and horizontal alignment screws before dislodging the ball joint  Stock Projector 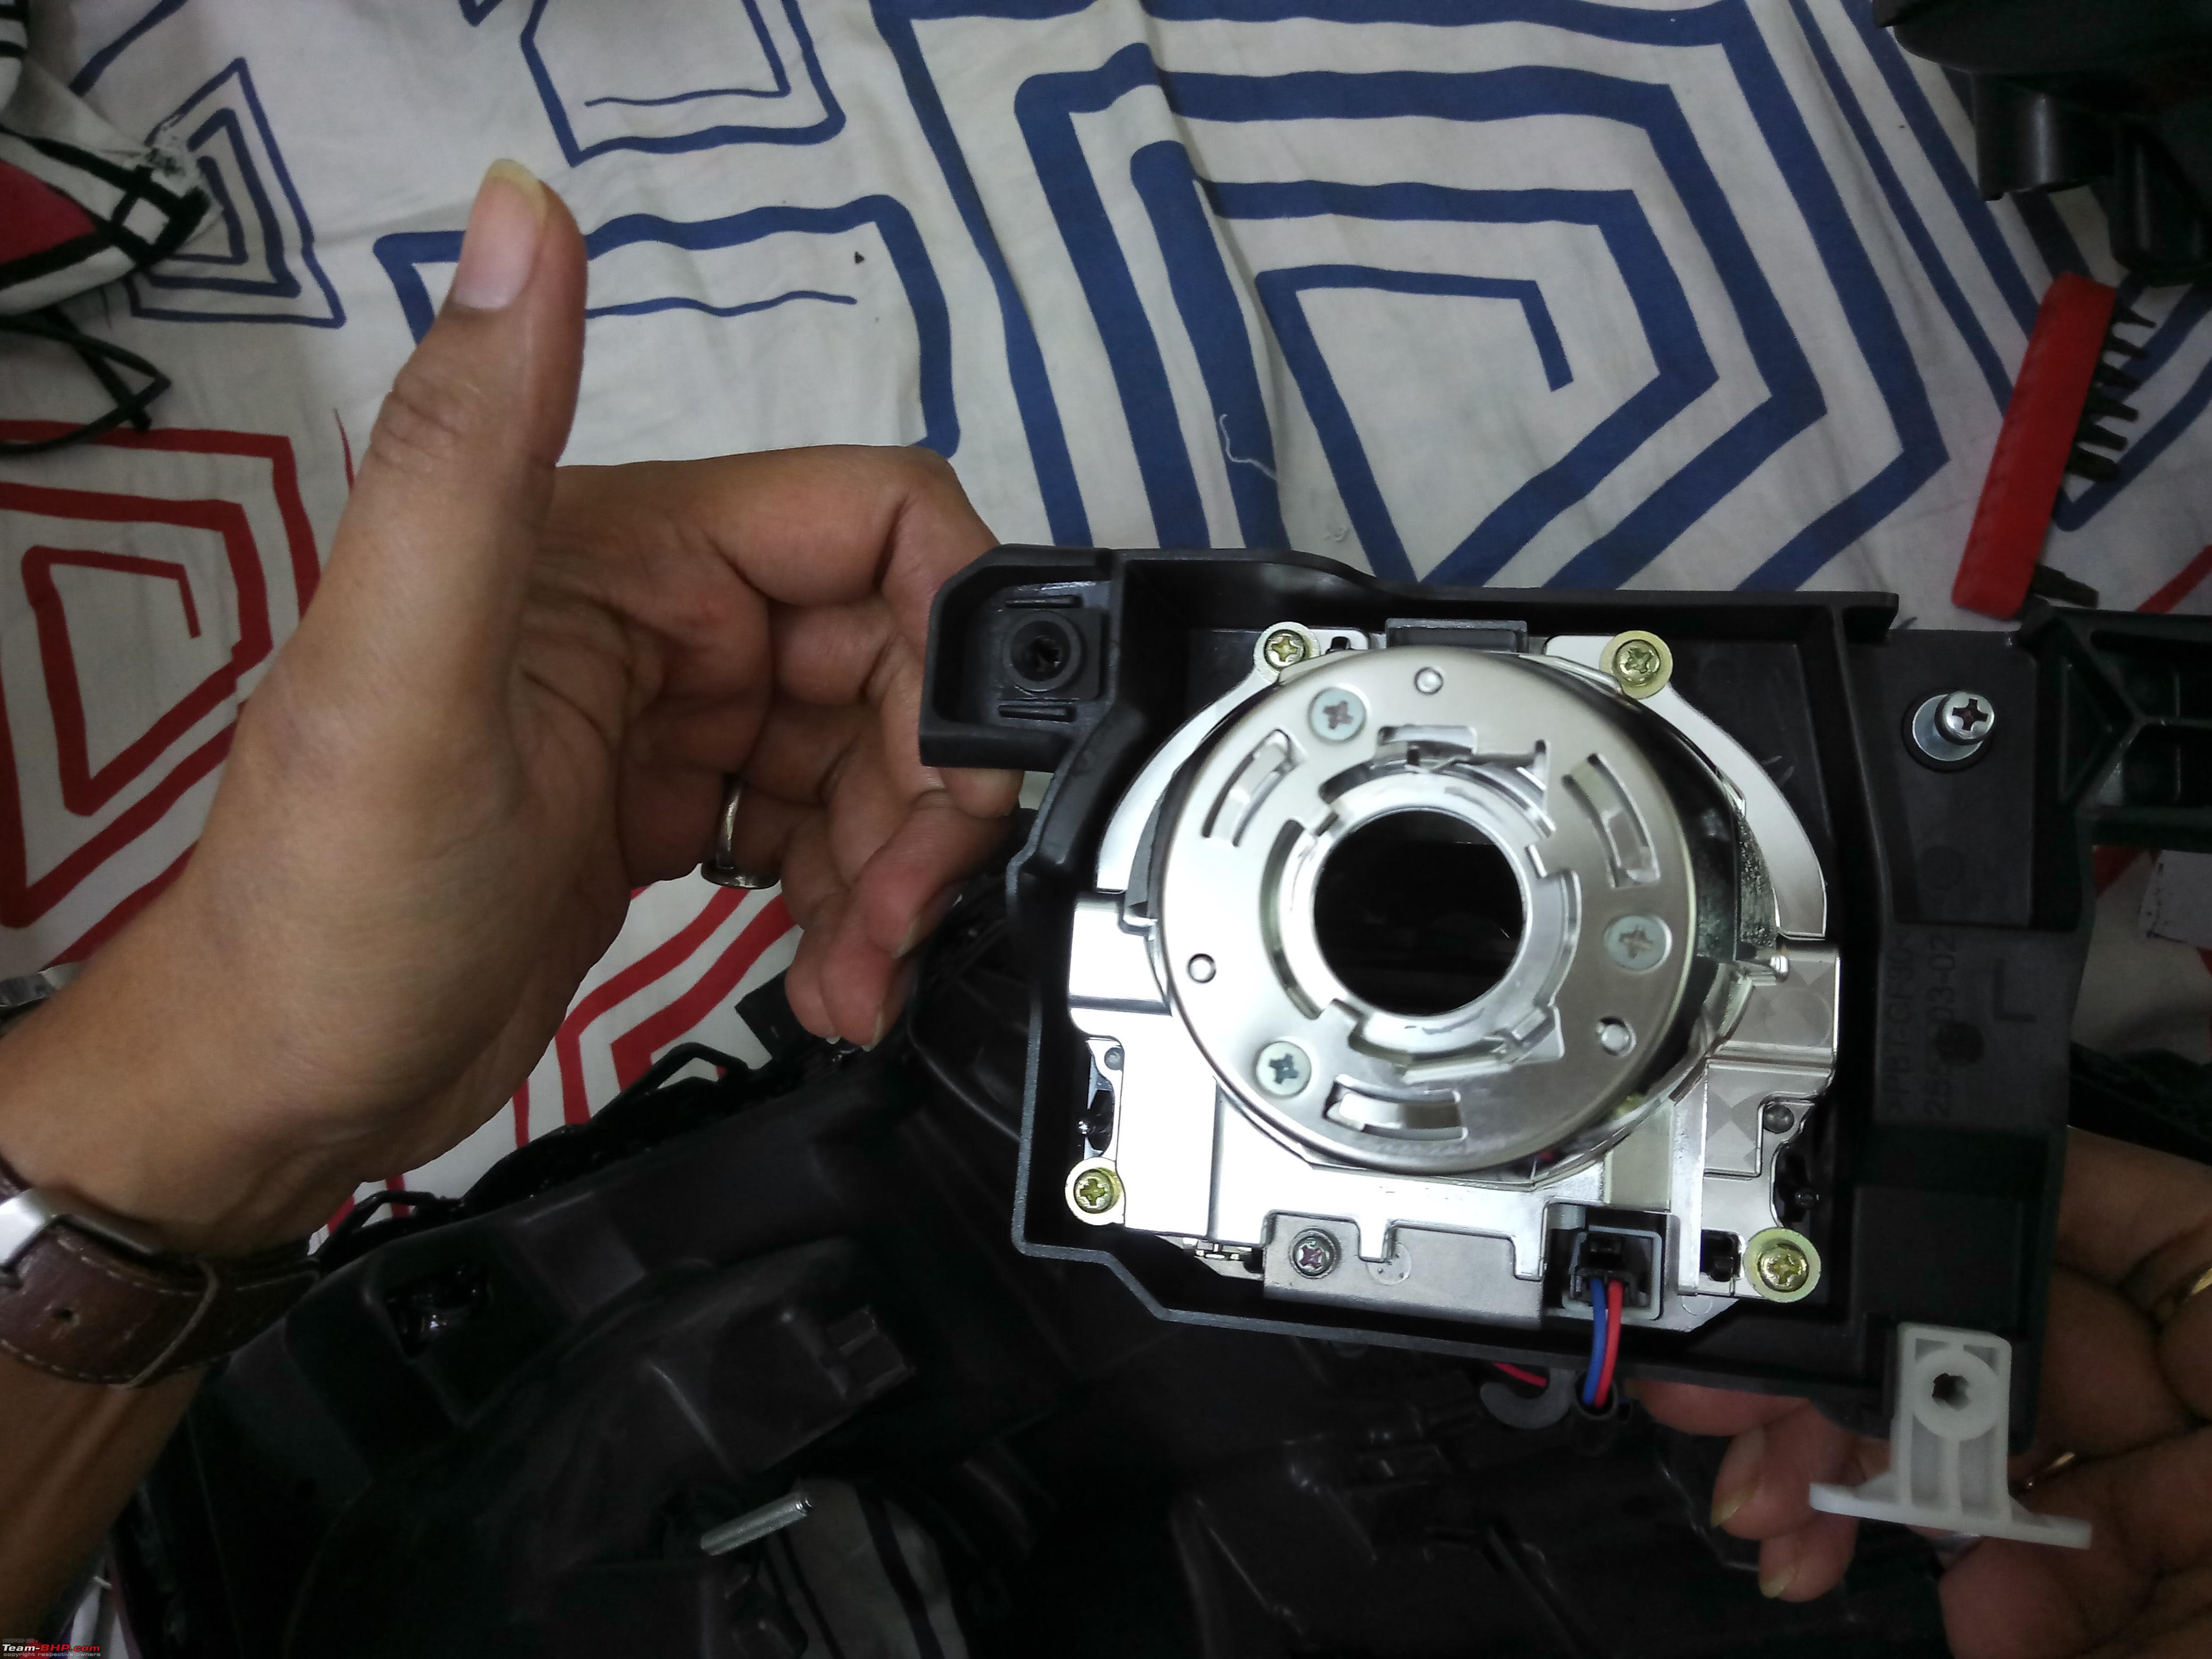 Finally, the projector casing from the other side  Mounting the Morimoto projectors As soon as we dismantled the plastic housing case for the projector, we realized that the custom brackets supplied by Morimoto were not great for ensuring a secure mount or a clean installation. We had hit a wall at this point and was a major setback. In the below picture you will see the bottom right side of the bracket won't hold the screw.  A tough decision had to be made to continue using JB Weld mounting with a crude install or make an attempt to make a better installation by designing and fabricating custom brackets. I & BHPian Jaunthead decided on the latter, but we weren't sure how we could go about it. The next week was spent designing new mounting brackets in the hope that some fabricator will mill it for us. Designing & fabricating the custom brackets The problem: The stock projector mounts on the plastic housing in 4 locations. The Morimoto install points will never align with these. Further the custom mounting brackets (Made with ACP sheets) supplied by RetroRides will place the mounts very close to the inner edge of the projector clearance hole. The Morimotos are wider than the stock projector and the side edges sit close to the plastic casing supplied with S-Cross alpha's headlights. Further, there was another problem. If you notice the plastic housing picture below, you will realize that it has a very odd shape and that the round opening through which the projector lens goes out is at the top of the casing as opposed to the center! This meant that we had to design a bracket which would ensure that the lens is centered in the opening of the casing and more importantly, also doesn't sit far ahead of the opening, rather in the same position (more or less) as the stock projector. Given that the holes in the plastic casing would not perfectly align with the Morimotos and centering them would take it right next to plastic housing screws made it difficult to fabricate a single bracket that could reliably hold the projector in place. The solution: Using computer aided designing software, I & my friend Vasi Khan designed two custom brackets (inner & outer as we call it), both connected to each other using aluminium spacers. These spacers are 5mm in height and the aluminium brackets are 3mm thick. This totals to 11mm such that it holds the projector in the same position as stock with respect to the reflector attached to the clear lens. This ensures that the projector doesn't hit the outside reflector. My wife, being a mathematics teacher chimed in with the geometry work required to align both these brackets such that the projector is in the dead center of the projector lens opening in plastic housing and also matches the depth of the stock projector. Further, we also made sure that the solenoid of the morimoto projector is at exactly 6'O clock with respect to the casing & brackets so that rotational alignment of the beam would not be much of an issue later. We then approached a professional manufacturer at Magadi Road, Bangalore to fabricate them using laser cutting. It costed us about 2400 for a set of two brackets. The inner bracket holds the morimoto projectors whereas the outer bracket secures the whole system to the plastic housing. To assemble the bracket together, we used JBWeld. To provide added strength and hold the projector in place as well as for better heat dissipation & vibration resistance, we added a bit of MSeal phataphat to the inner sides of the casing Custom Bracket Design by Vasi 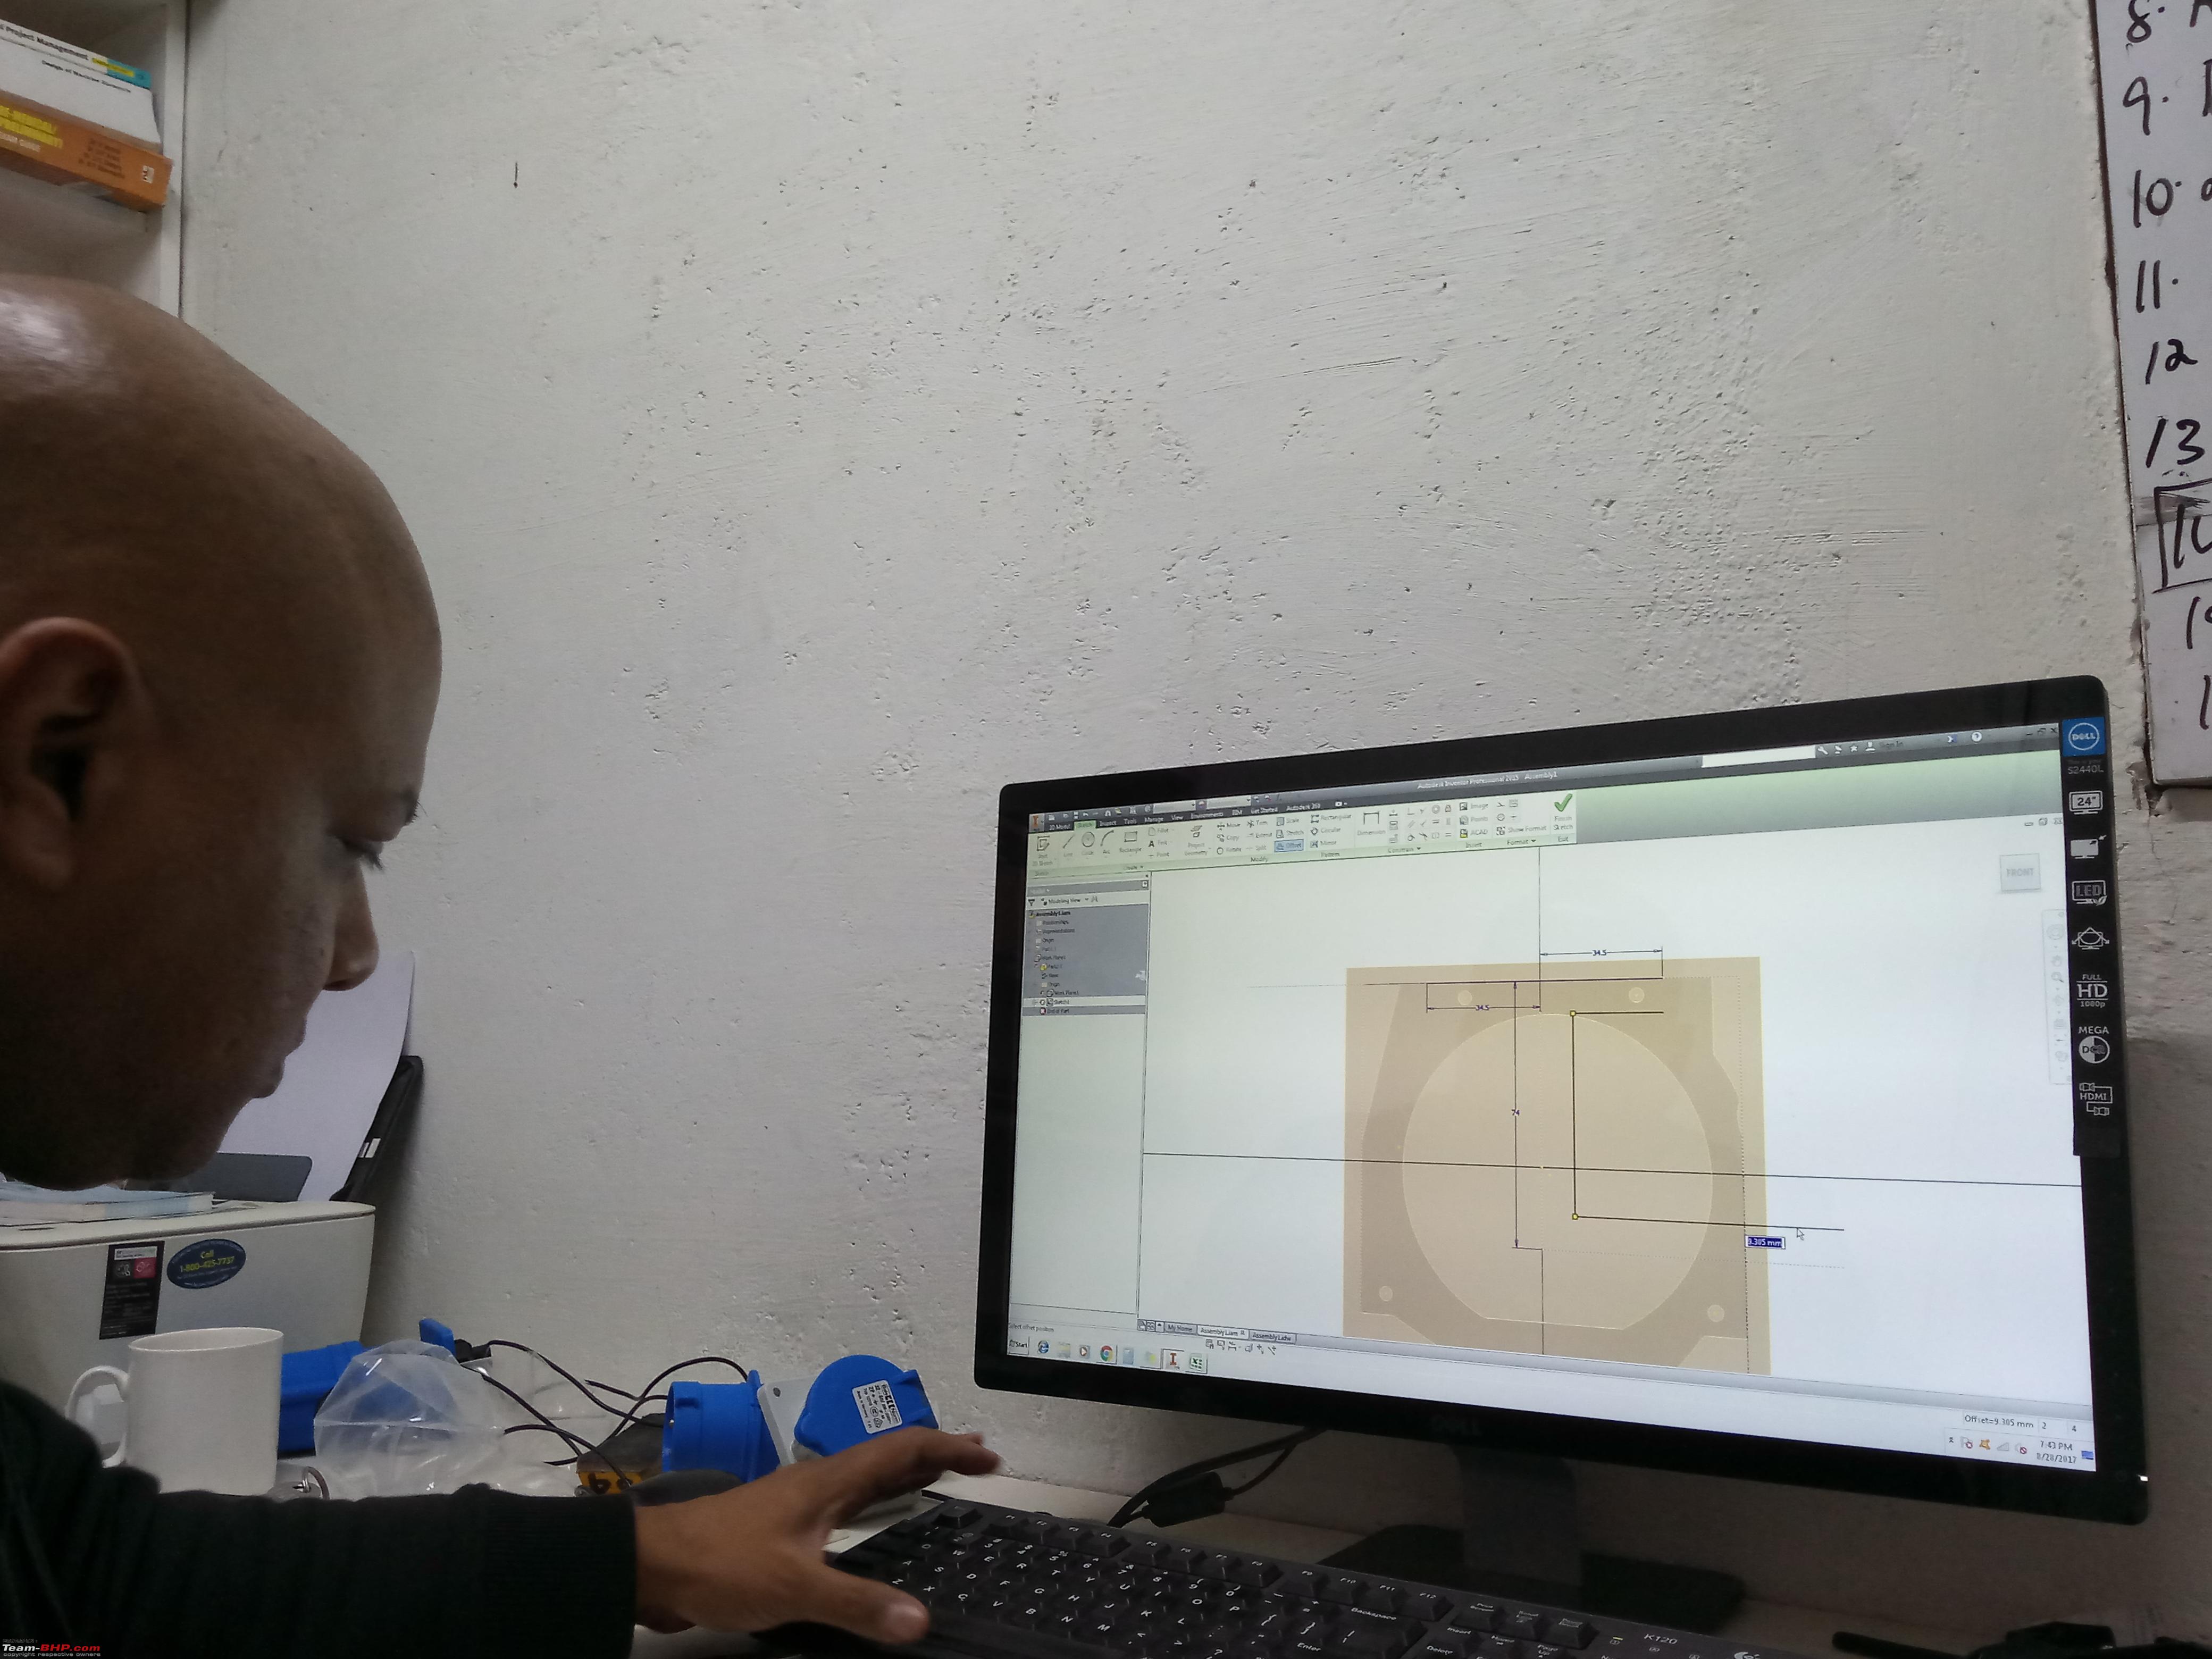 Custom brackets  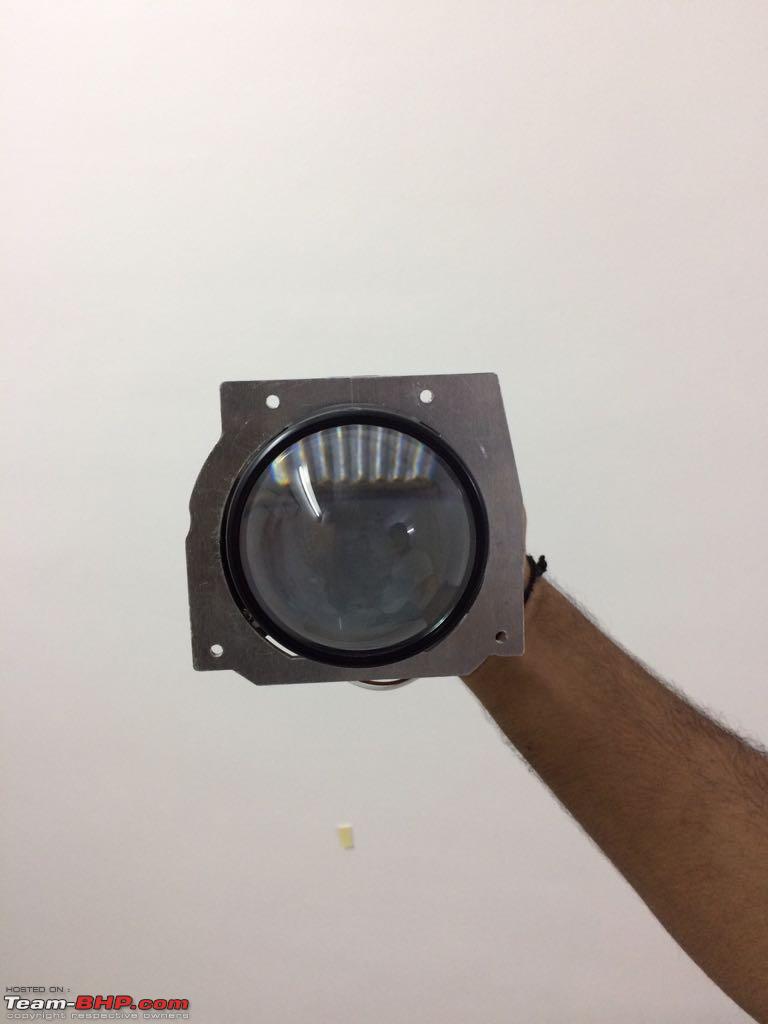 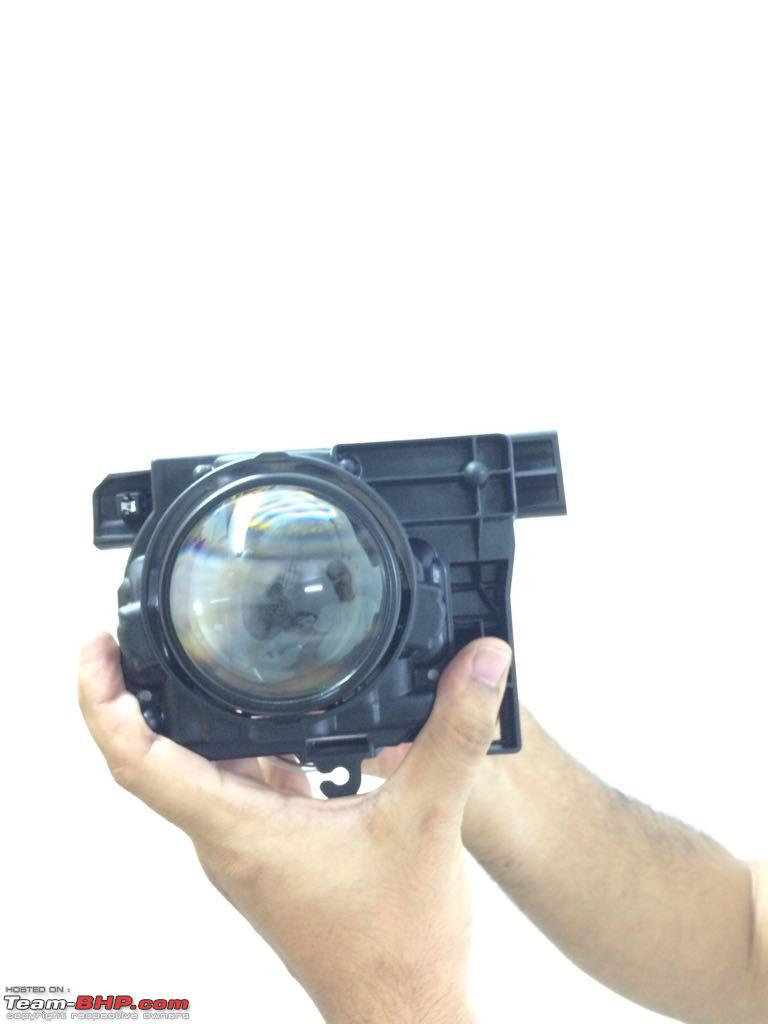 Testing:
Alignment of lights Horizontal and Vertical controls Tightening the vertical control will pull the light inside causing it to dip downwards. Similarly tightening the horizontal control will pull it outwards from the center. Take care not to loosen it too much so that the plastic casing comes off the thread. Since the projector is in dead center, very little adjustment will be actually required. 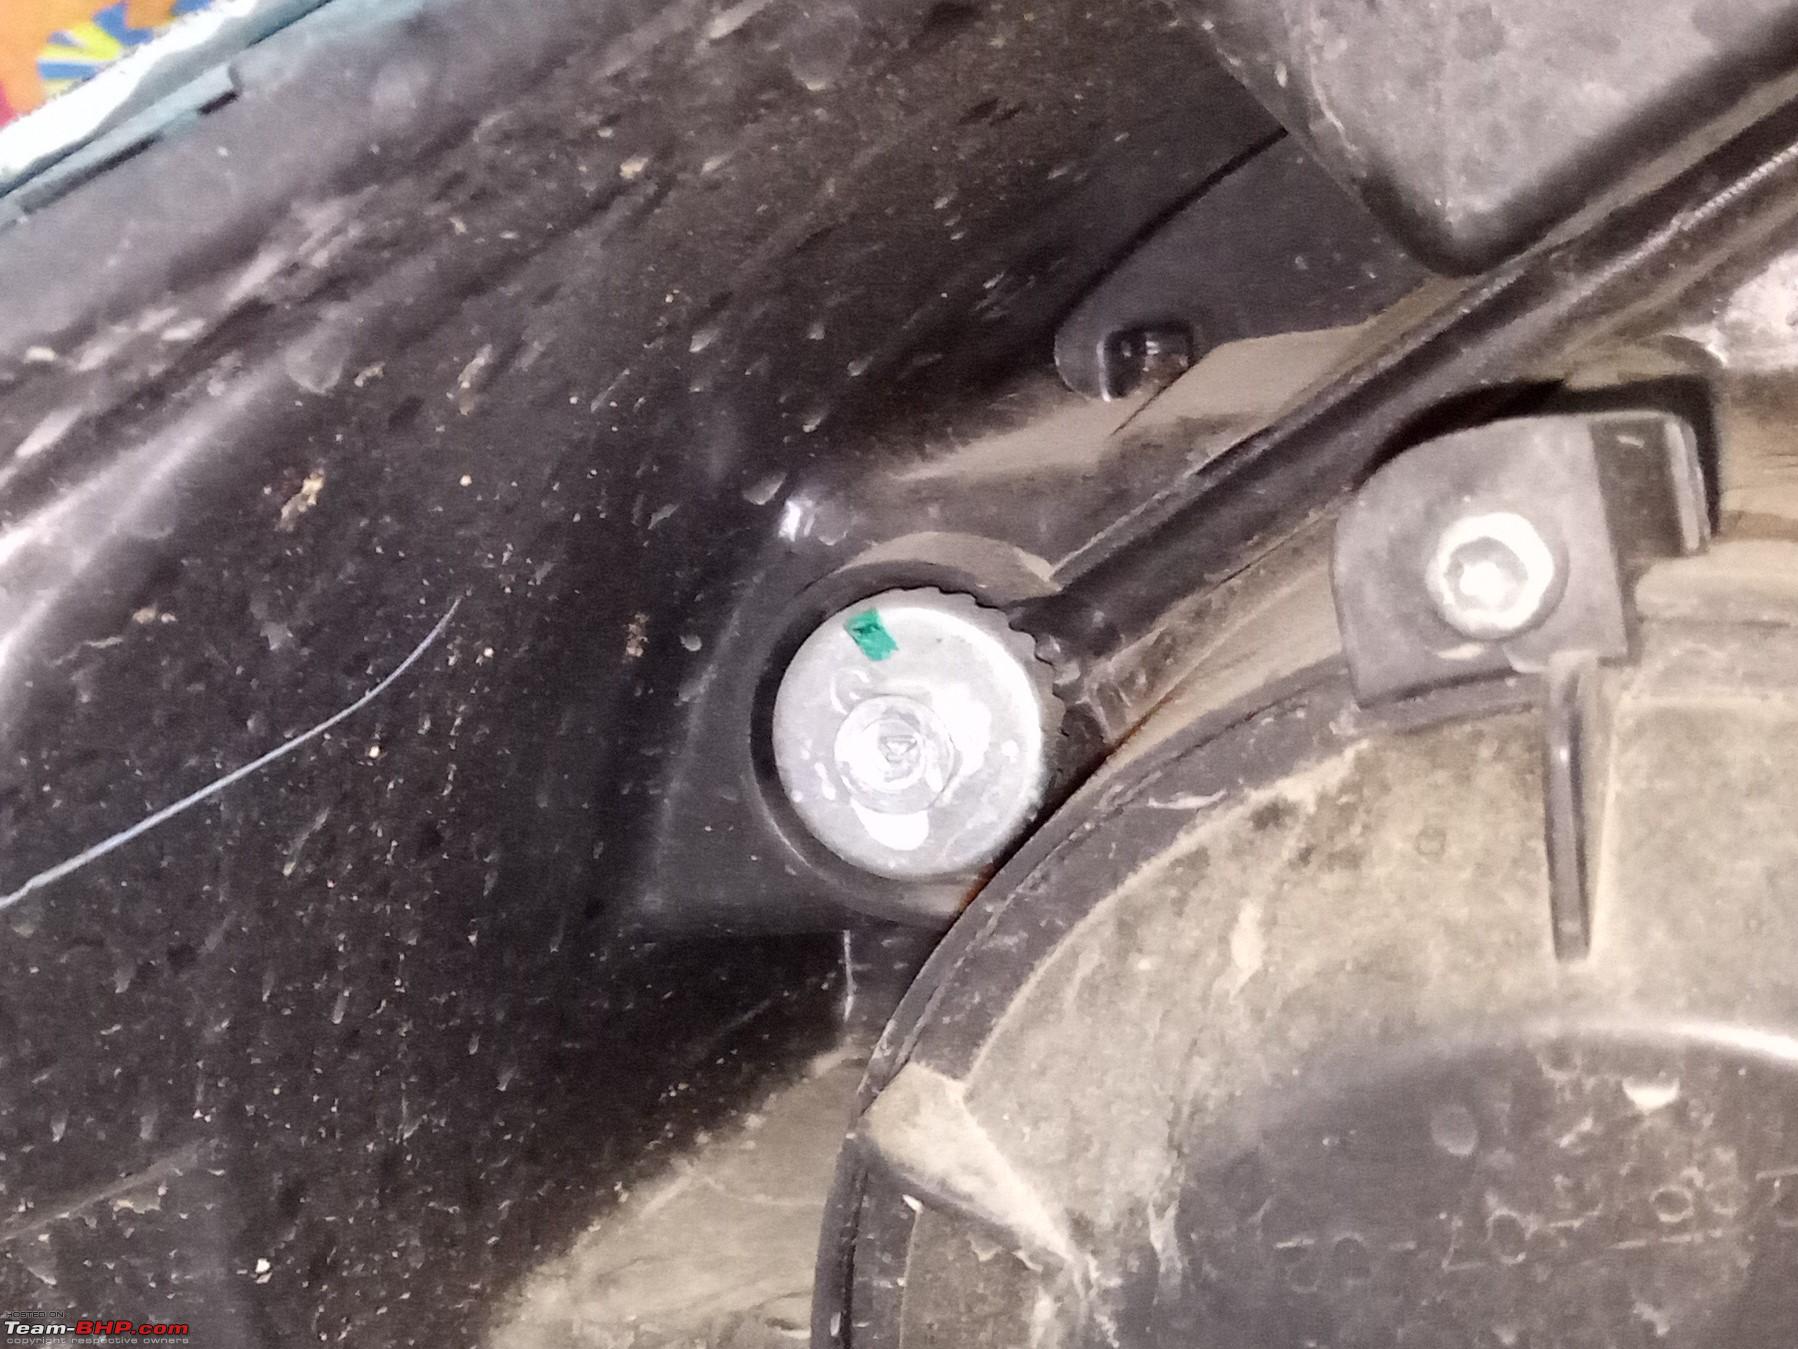  Re-sealing of lights Before resealing the headlight clear lens with the housing, clean the clear lens innards using air blower, then alcohol swabs and microfiber cloth. There’s bound to be dust inside so clean it gently without smudging or scratching the clear lens. The channels might have the remnants of the stock glue which is perfectly fine. These will ensure a good seal when we put new butyl in. Take out the butyl sealant reel, take a small strip to begin with, gently stretch it and place them inside the channel. Cut away the excess. Some locations may need some extra glue so cut out small pieces from the reel and fill the channel properly. Take care not to use too less of the glue. Less glue will result in an improper seal and moisture will creep in eventually. More glue means another job after the assembly is resealed. When butyl is warm, it is easy to pick the excess using a butyl ball made from excess butyl. Once the entire channel is filled, take out the heat gun and heat the channels on the low-heat/speed mode by holding the heat gun from a distance. Holding it too close will melt the plastic so be careful. The key is just enough heat and time to melt the glue so it becomes less viscous but doesn’t flow readily. This process may be time consuming but do take ample time to ensure that the heat is evenly spread to the glue. About 10 minutes tops. Now would be a good time to wear a pair of silicone gloves! After the channel is heated sufficiently, take the clear lens, insert it into the channel and press it so all the edges are mated properly. Ensure that the edges have been pressed into the channel - some force may be required at the corners. Some glue may come out while pressing but that’s fine. This is also a good time to put the screws holding the plastic casing to the clear lens back into their respective positions. These screws will pull in the clear lens and help hold the projector in place. Routing igniter wire and solenoid wires Unfortunately, the Morimoto kit which we bought doesn't come with a dust cap or cover integrated. Apparently this was the case for moderator Gannu_1, but we were not so lucky. The Morimoto site says the diameter of this wire sleeve is 10mm and therefore we drilled a 11mm hole in the back case of the headlight and fed the wire through that hole. This was no easy task because the connectors were 18mm in size and wouldn't go through the hole. To work around this, I ended up de-pinning the connector pins (and also broke a couple of locking pins in the connector. Thankfully, I had bought a lot of spare since I expected this to happen). End Result?  Final Touches & Clean-up Final Results After we had a major setback, I & Jaunthead had literally very low expectations from this DIY, but the output from mine and Jaunthead's car are below. We feel the rotational alignment is off by a millimeter, but the reality is that the projector is sitting 100% at 6 O'clock on the bracket and casing. The projector is also in dead center of the casing. We see no reason why this should happen. Further, the wall in the picture is slightly tilted, the car isn't 100% perpendicular to the wall since we were constrained on space. For what we have gone through and what we achieved, this is beautiful. Further although not apprehensive about fogging, we were not sure about what to expect. I am happy to report that during my trip to Kerala, we encountered a lot of heavy rain. The car was pressure washed several times and there has been no fogging at all! Further, the car has become more enjoyable at night, the feeling of having something new and better feels great and also gives me a "all new" feeling at the moment.   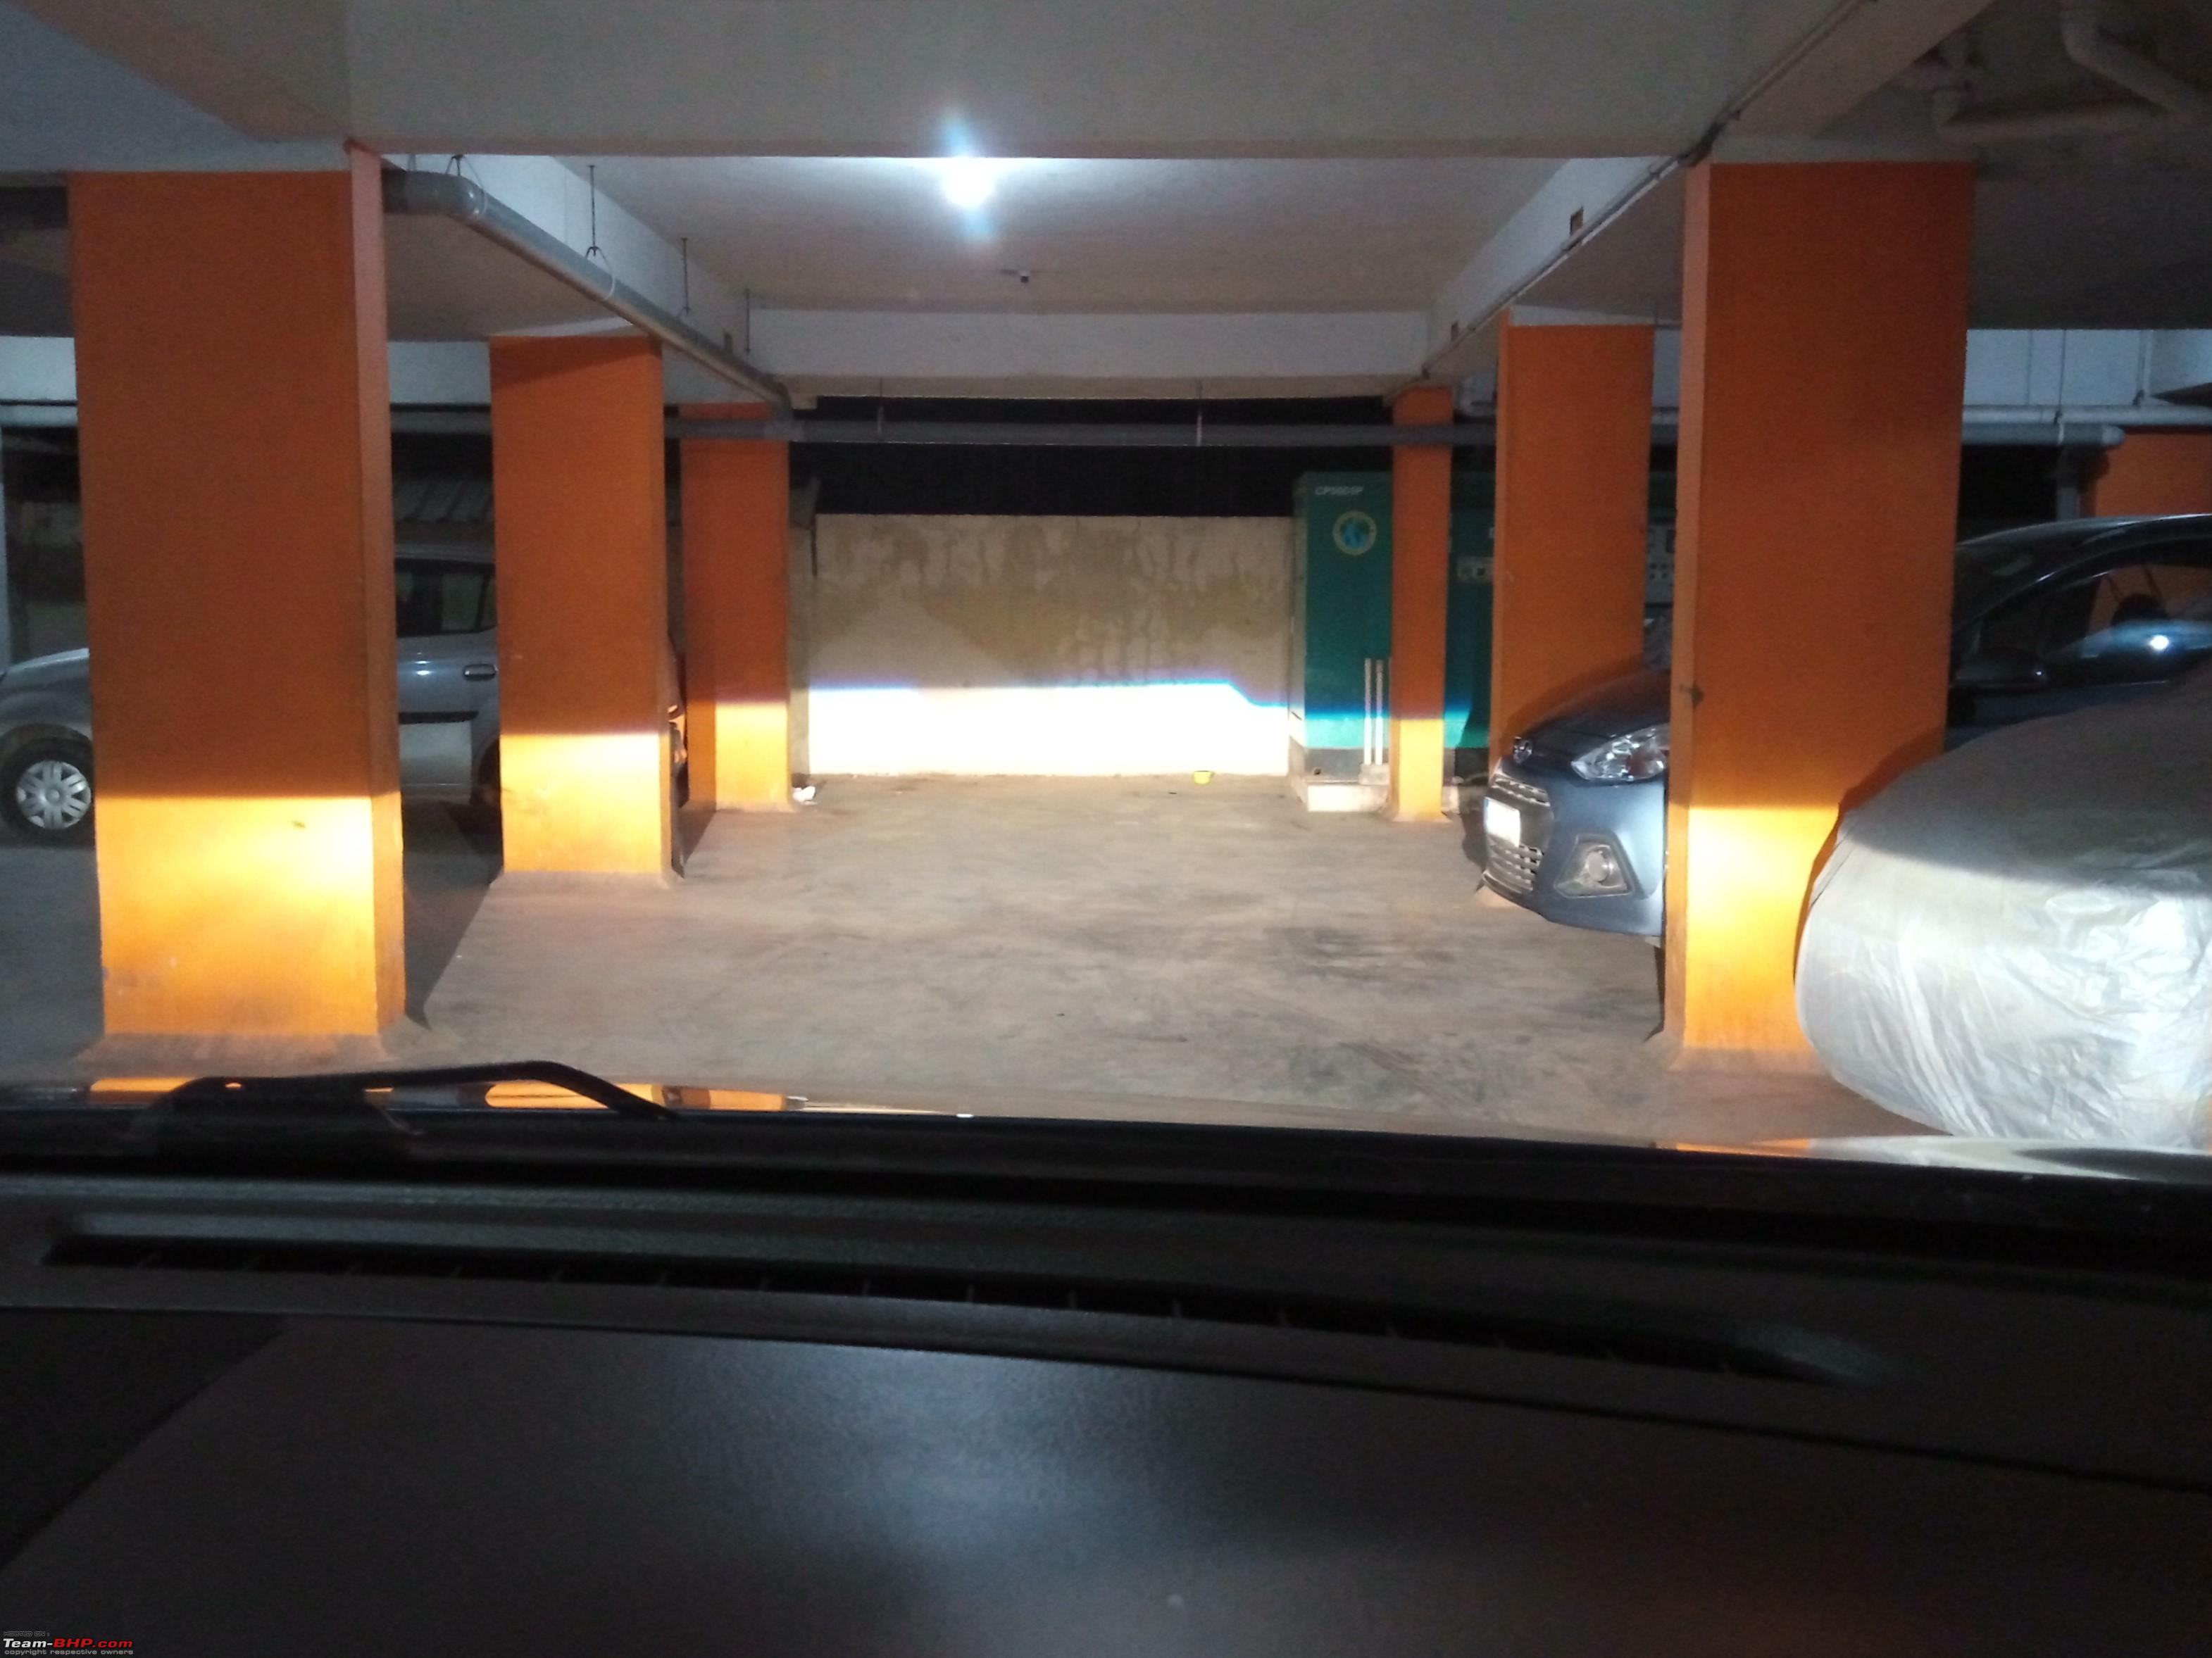 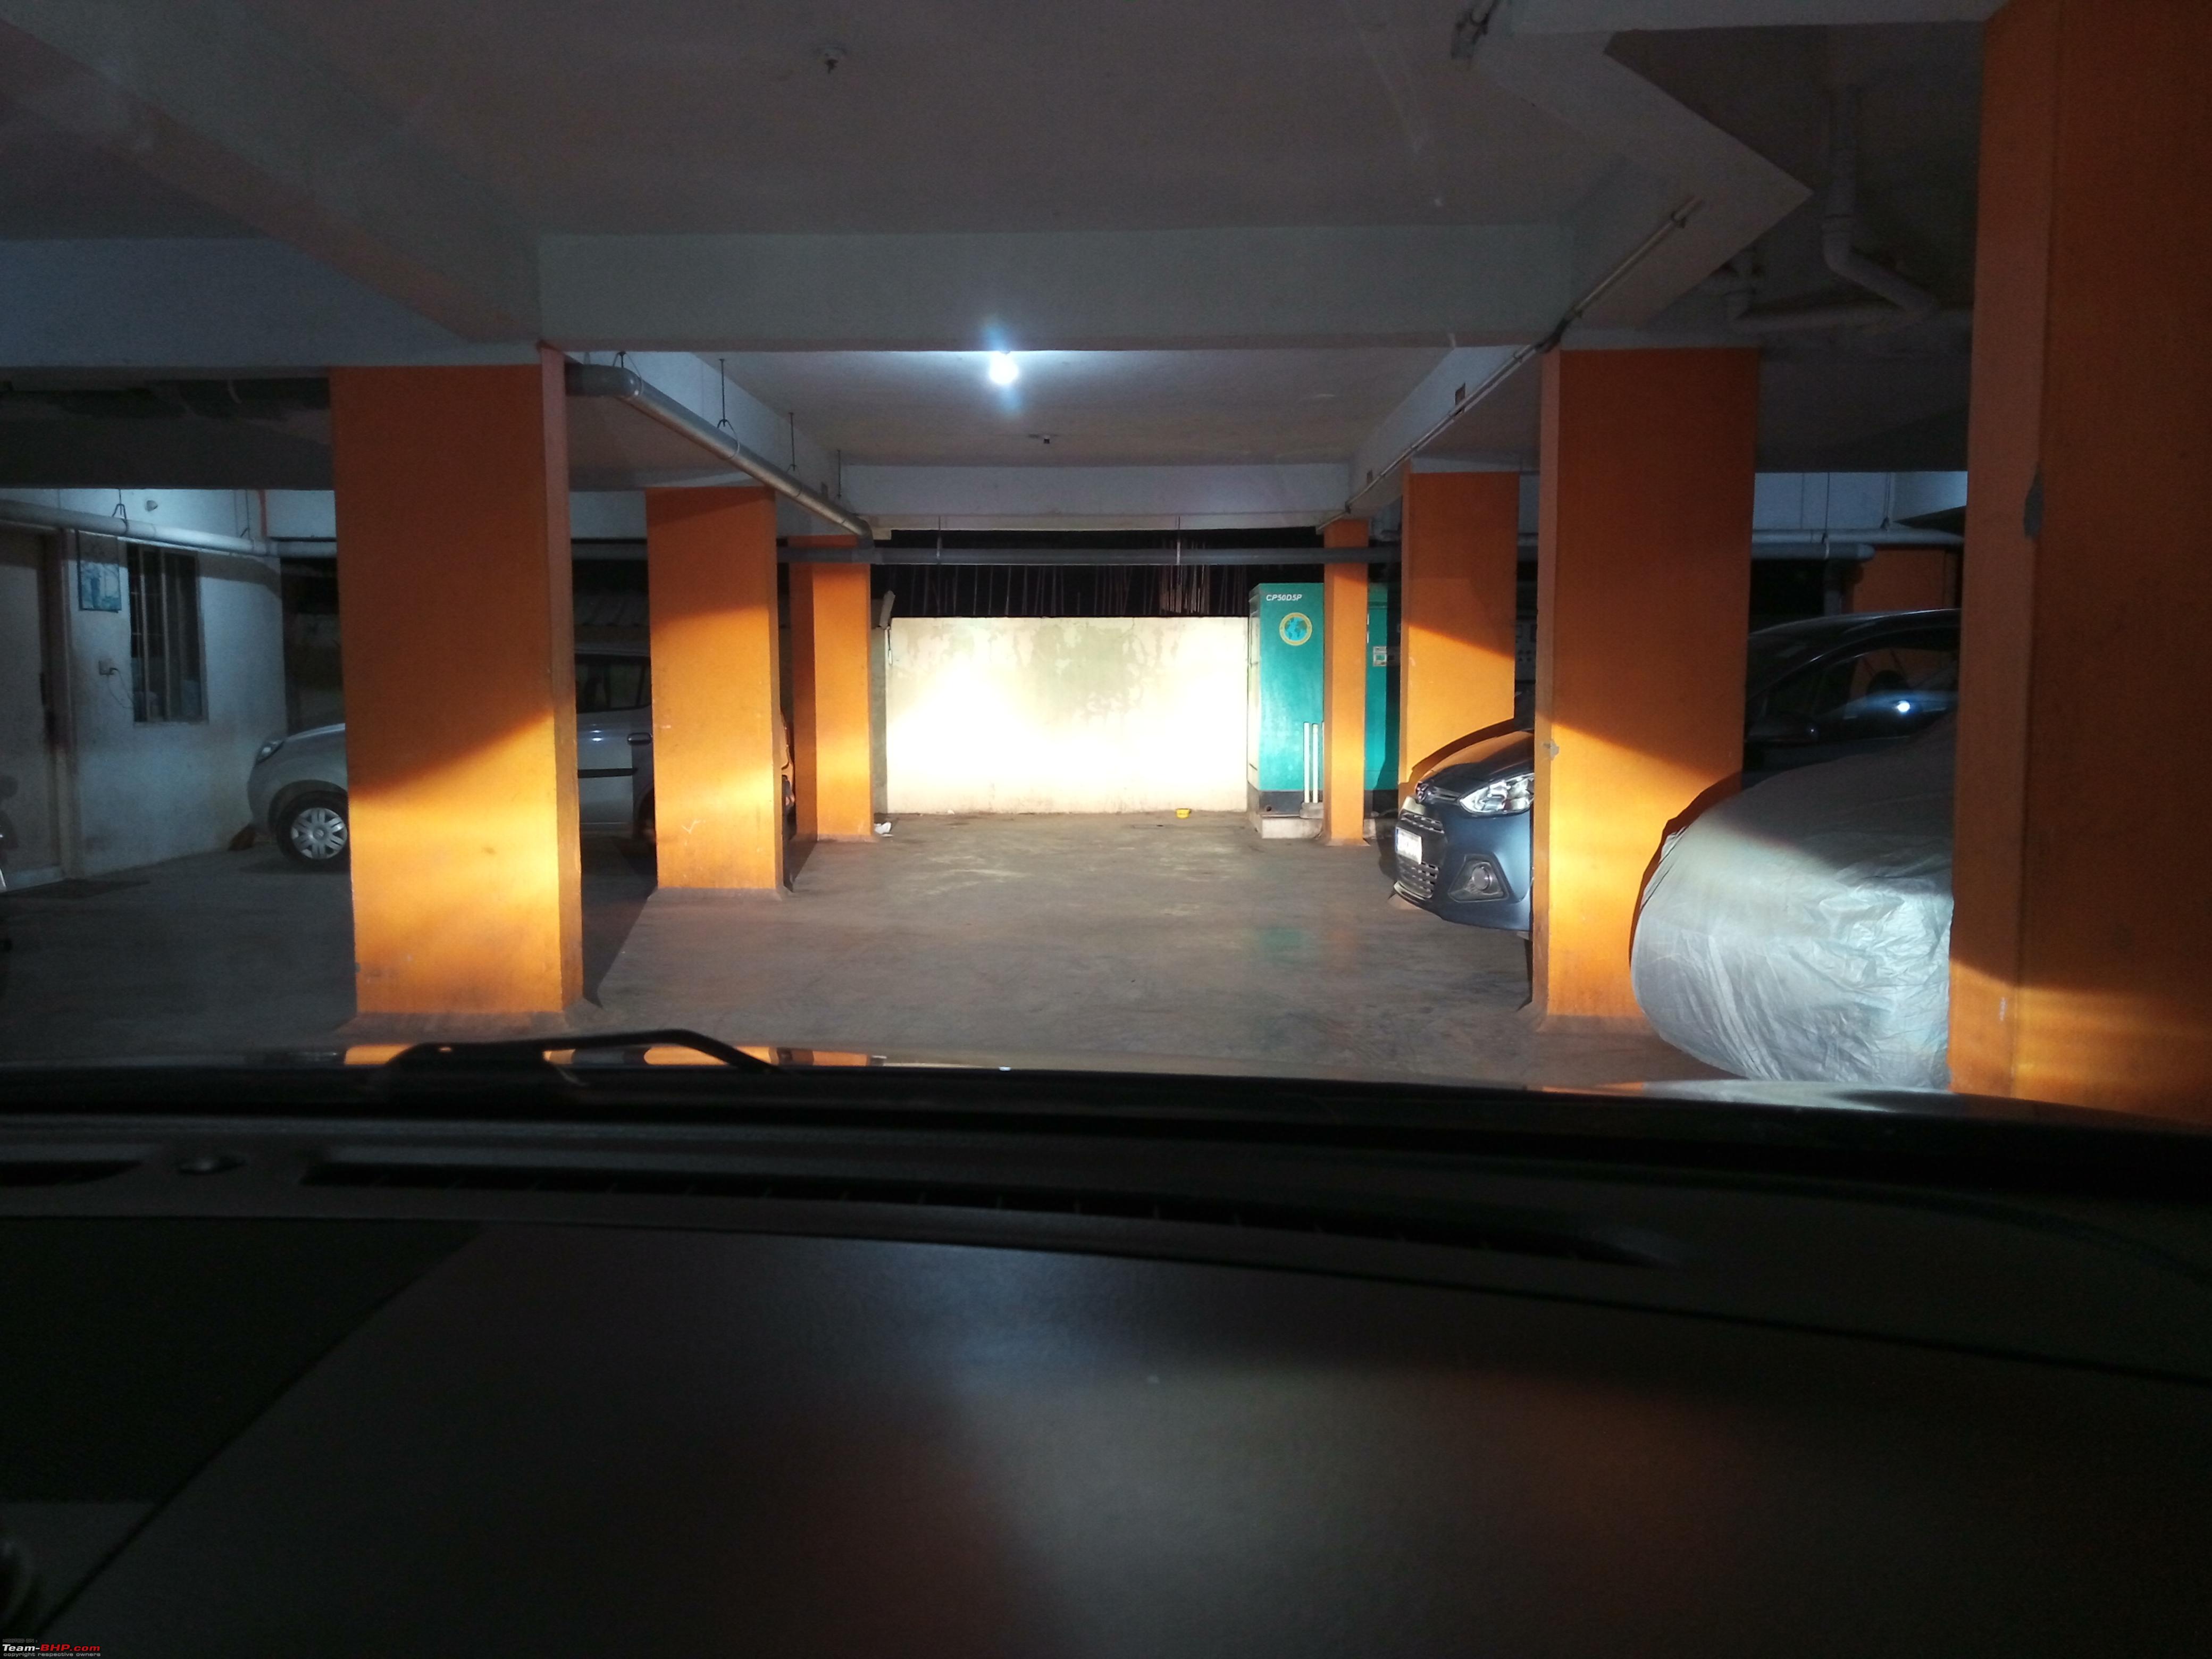  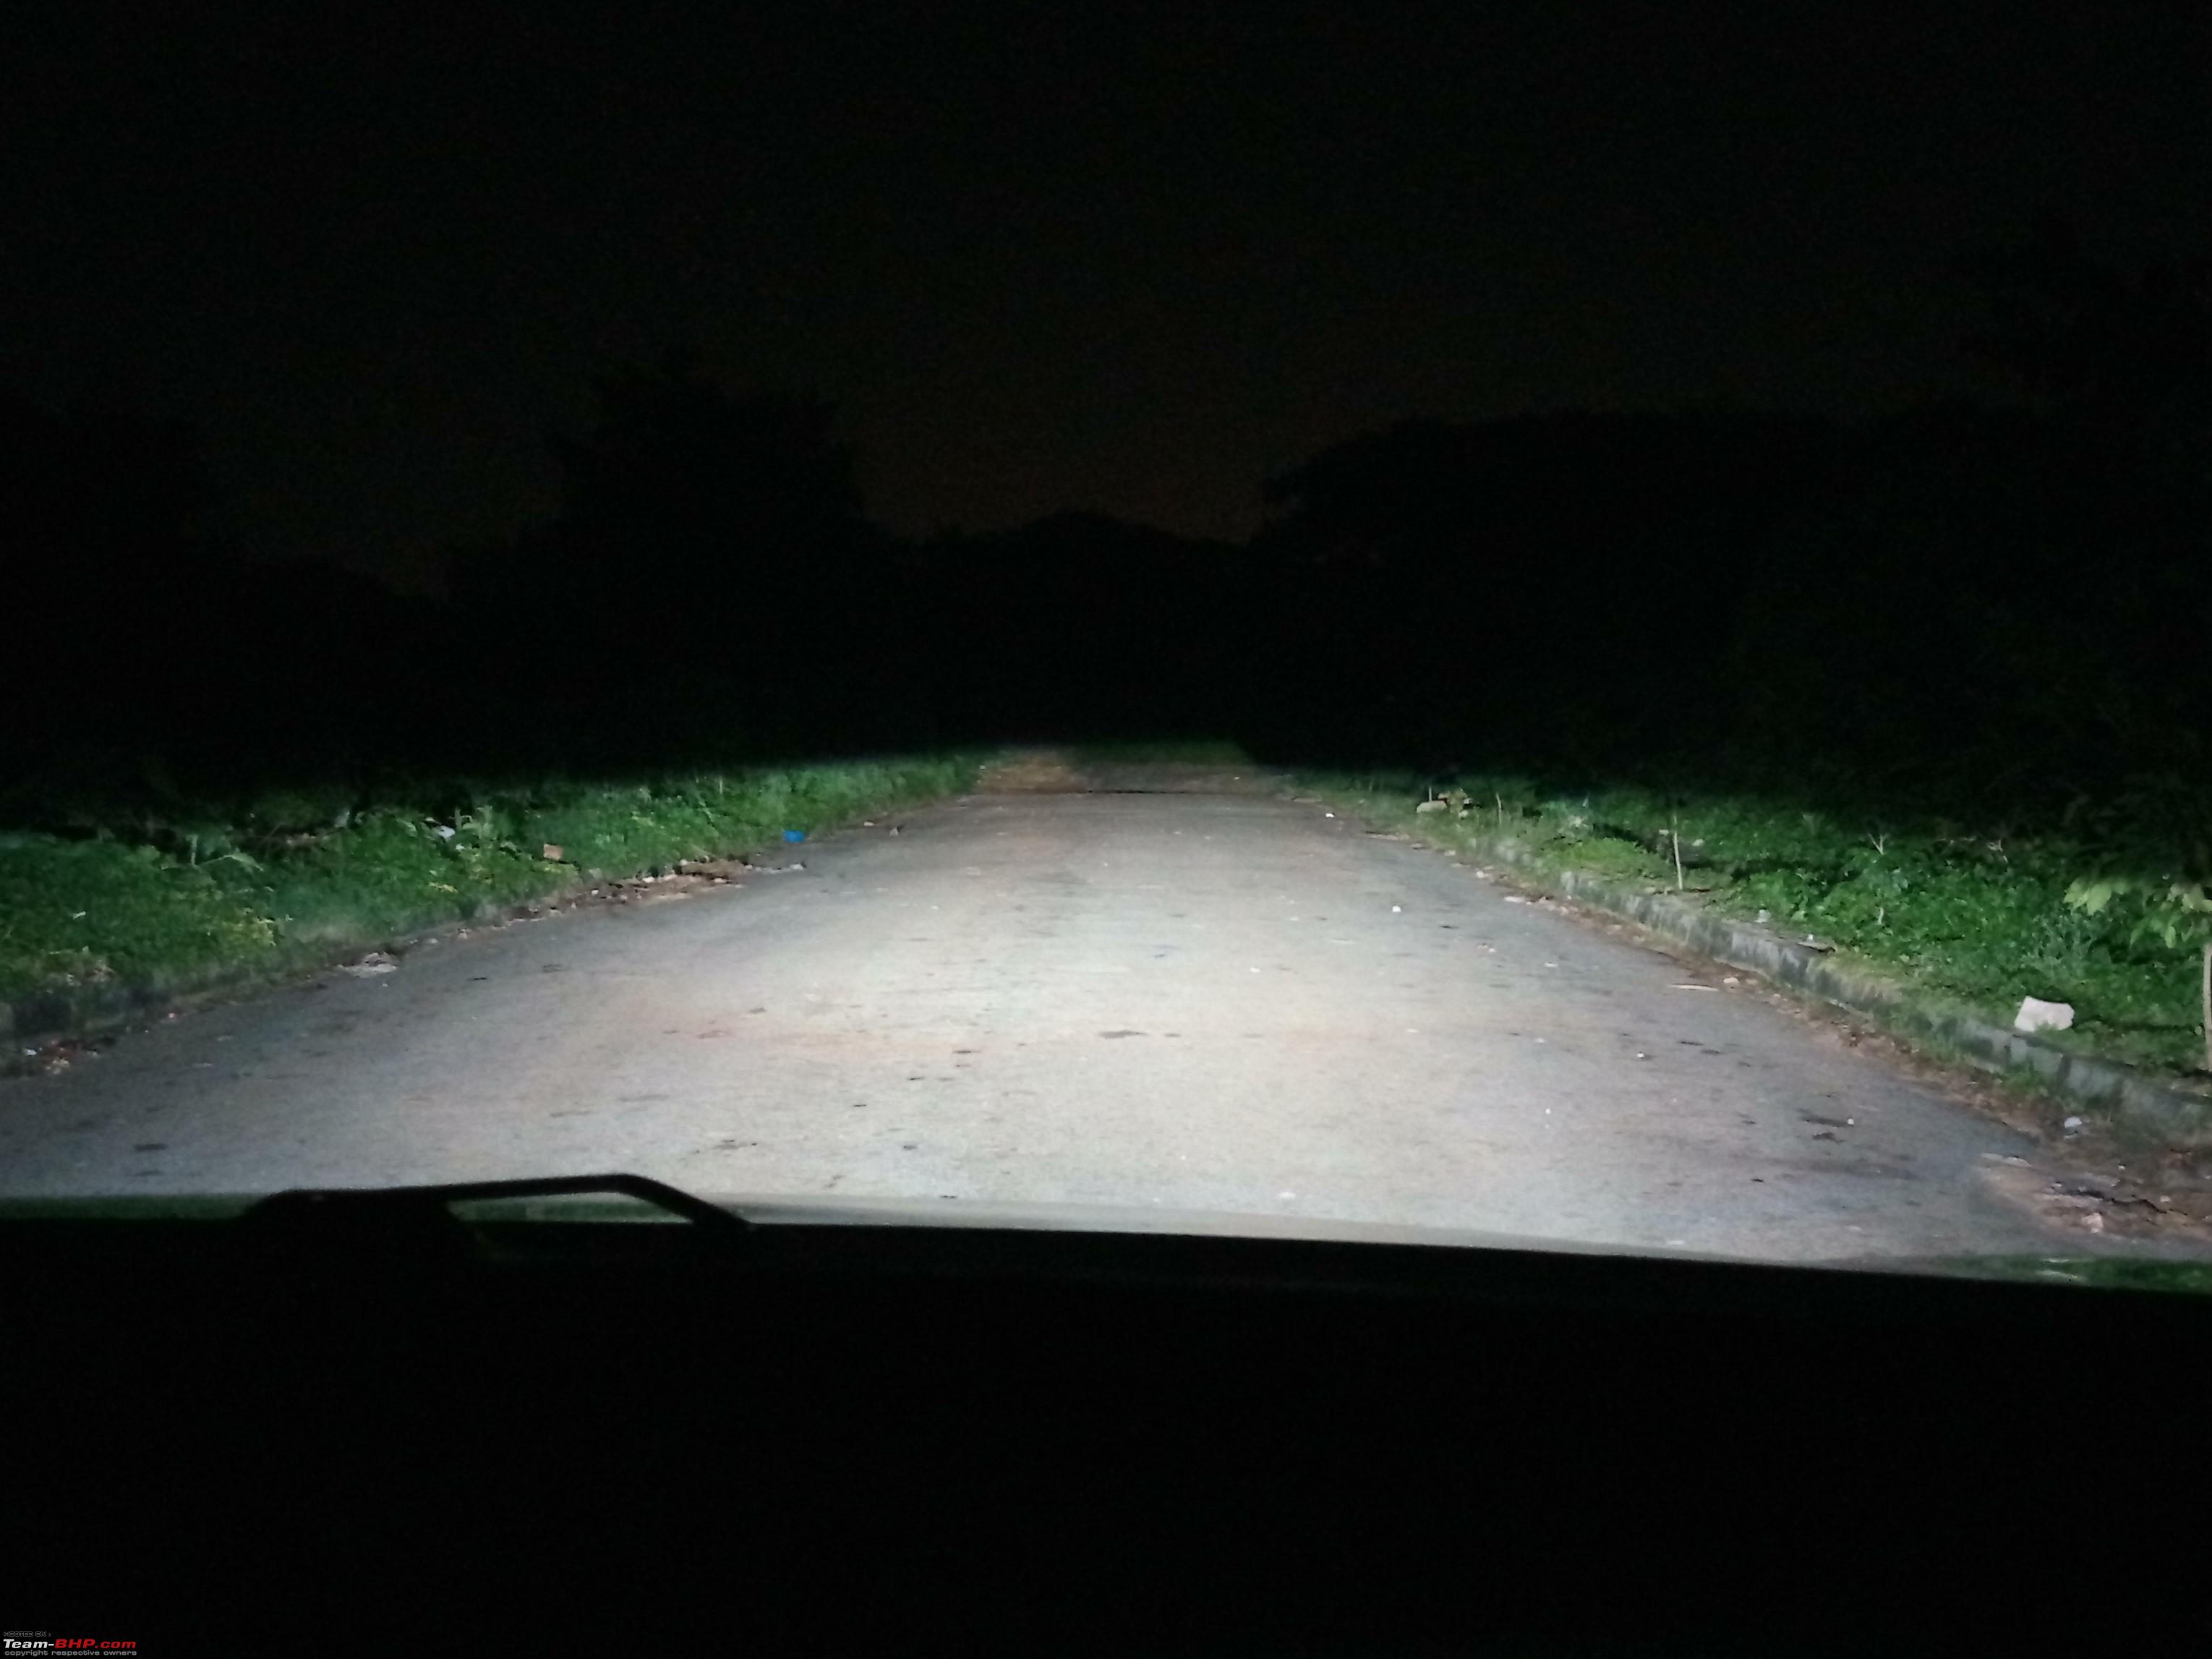 As a reference, to see the stock headlight output in S-Cross Alpha, please view this post from BHPian KeyNote Alpha stock Headlight A couple of videos from recent trip Please excuse the engine sound and rattling, my phone holder's condition has deteriorated and my dashcam has been sold to a friend External View - Notice any difference? 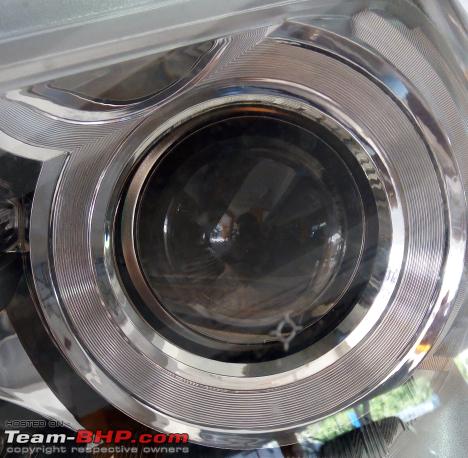 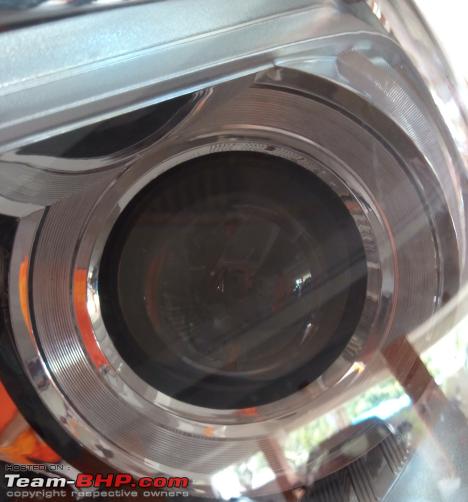 Additional Credits Our S-Cross group: For all the motivation you guys showered and endless conversations, although I was terribly irritated with some of the issues during this DIY time. Our small WhatsApp group of S-Cross owners is unique, fun filled and always supportive. Thanks guys! Trivia During this DIY period, I also upgraded my S-Cross horns to the ones from Creta. I really like them because they are very useful for highway drives. They are loud and audible from a distance and it was clearly felt this time. When I got them, I realized that they don't use pin type connectors, instead they use water proof connectors. Off I went hunting for them on AliExpress and got them to make a custom harness to use with the new horns. You can hear them in the videos. I had also sourced Image Dynamics Speakers from U.S when my colleague was travelling. They were on sale at a good deal. I got these installed too and the sound quality has improved by a huge margin. Special thanks to BHPIan and my friend lovetorque for helping me in another DIY for damping the doors. 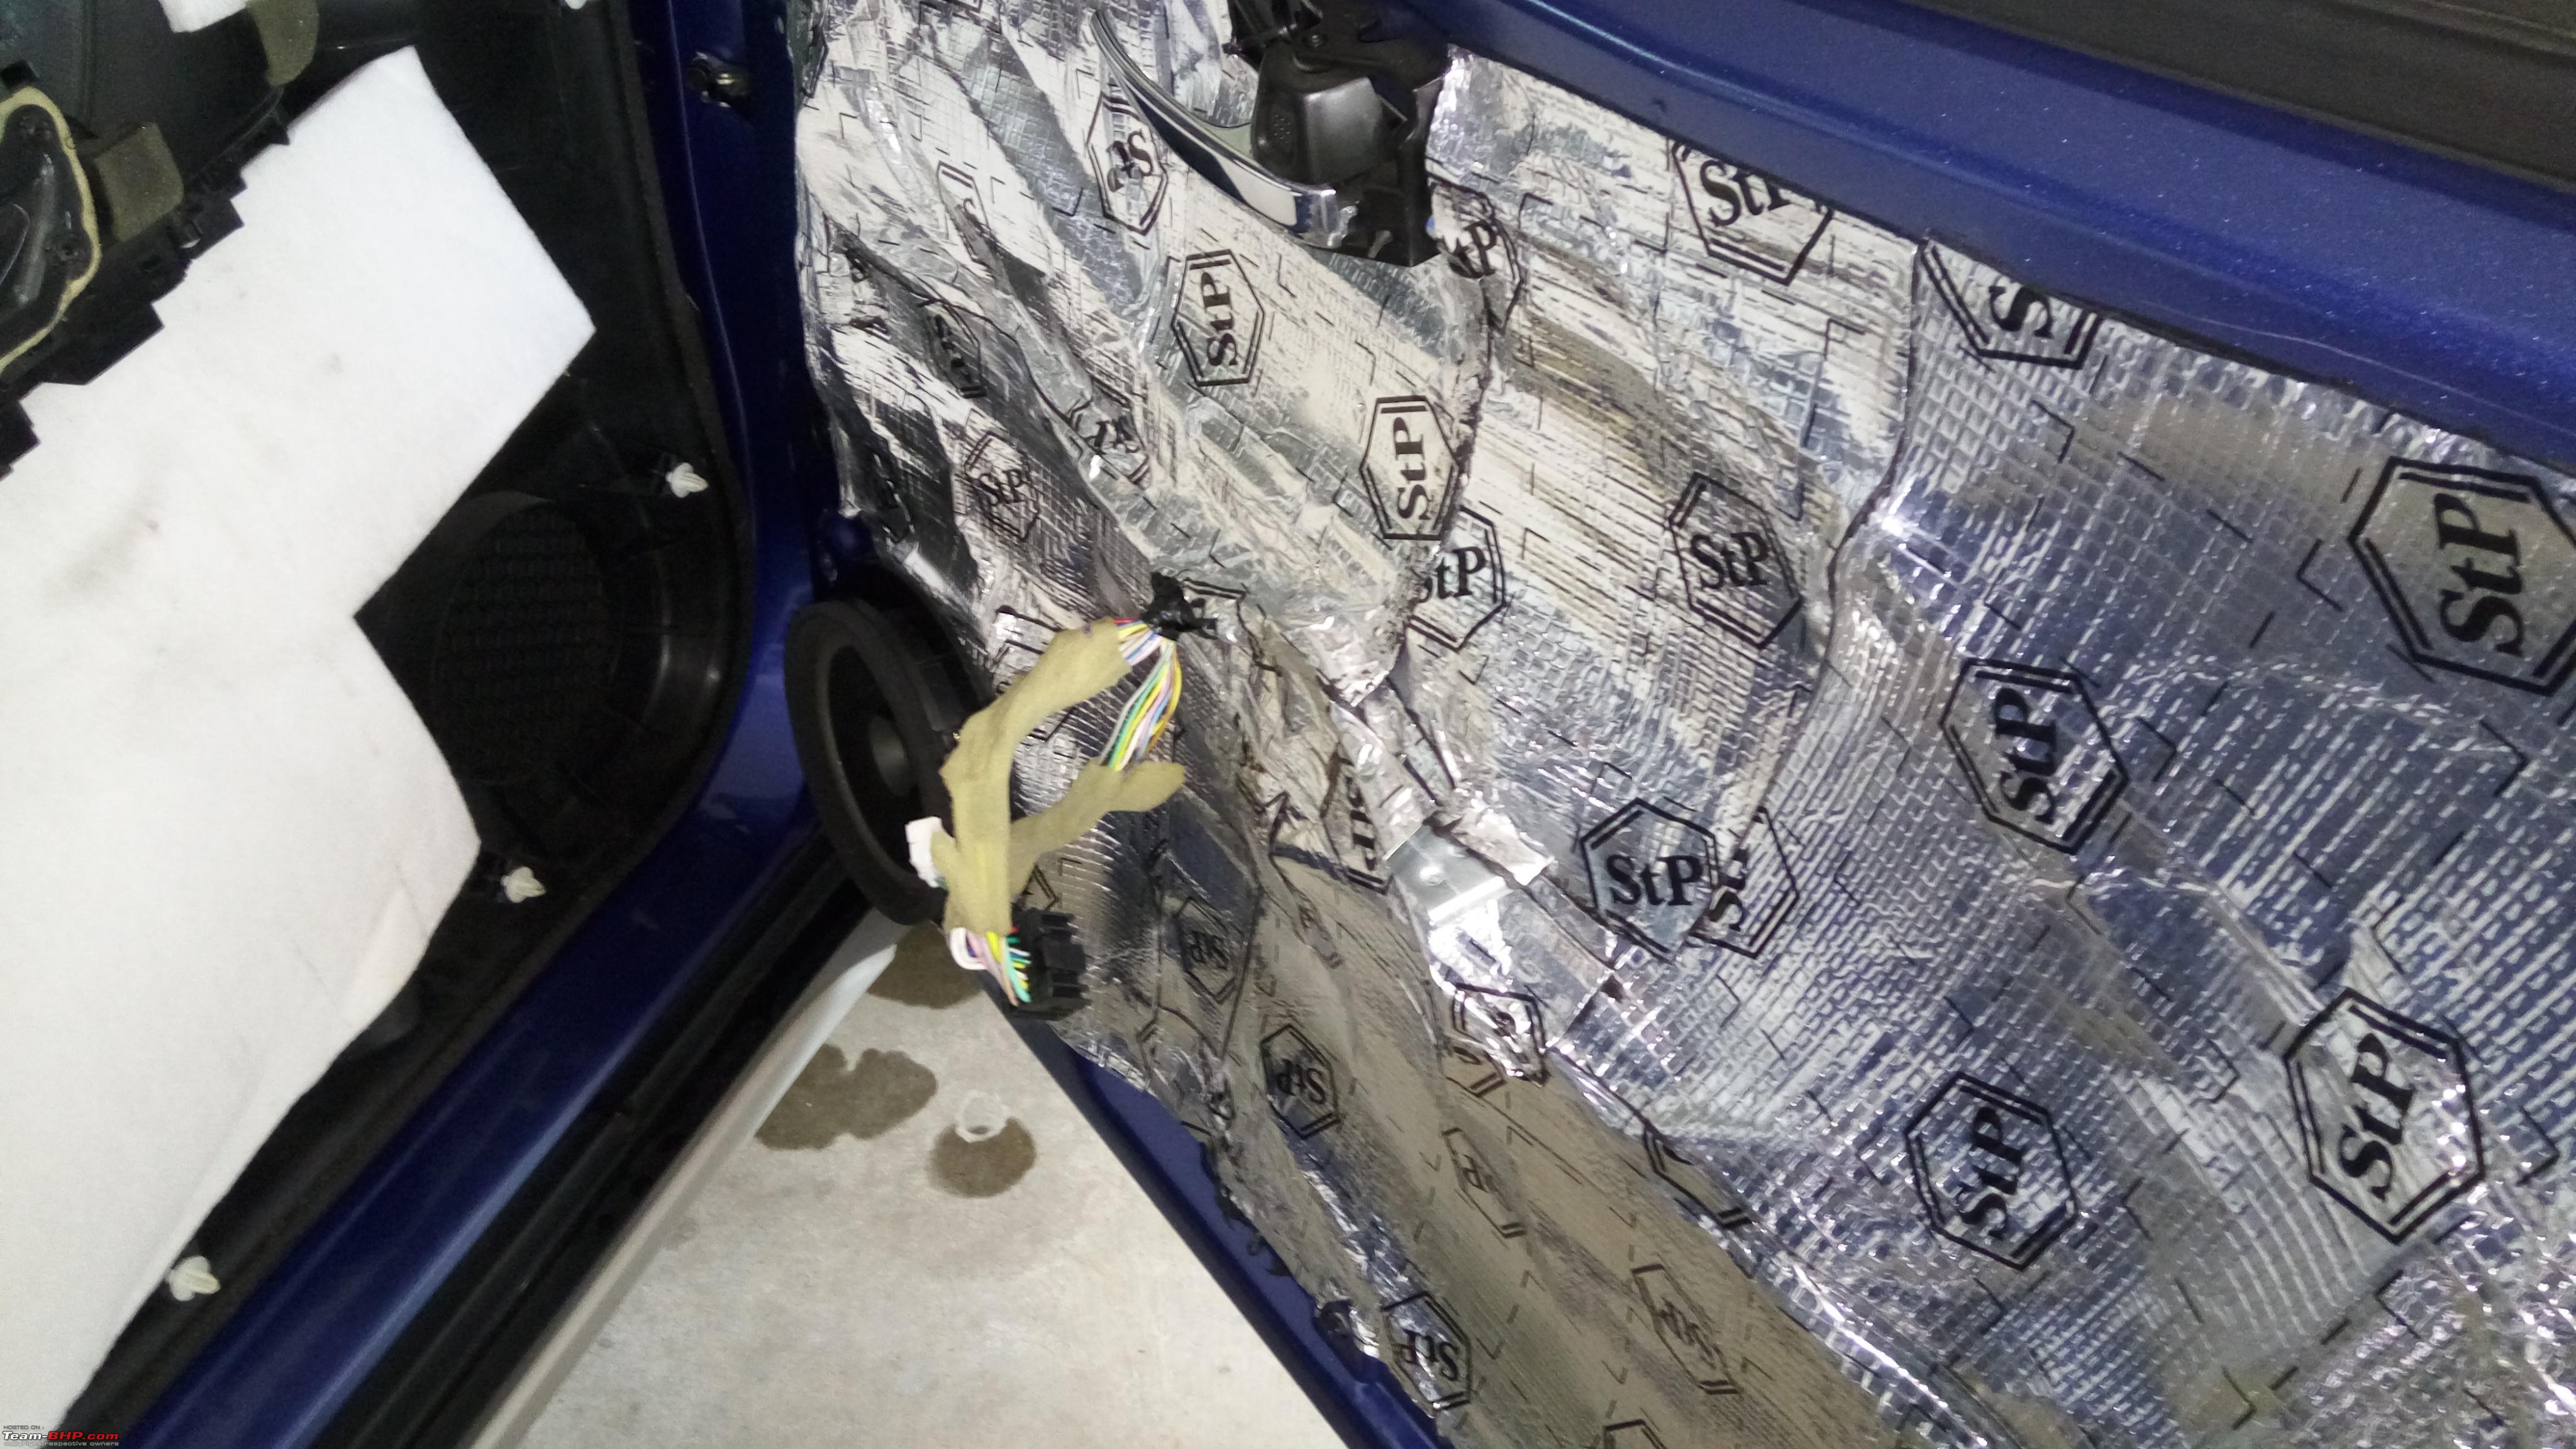 Last edited by sudeepg : 5th October 2017 at 10:27. |
|
| (31)
Thanks
|
| The following 31 BHPians Thank sudeepg for this useful post: | a4anurag, aeroamit, amrutmhatre90, audioholic, benzinblut, blackwasp, cn.vishnu, Dennis, ForeRunner, GTO, HappyWheels, harsh79, hikersoul, jaunthead, johannskaria, Keynote, Leoshashi, Lobogris, lovetorque, maddyg, paragsachania, Prakritij, procrj, rakesh_r, sidhu_hs, sukiwa, Turbanator, vaasu, VaibhaoT, Vigkey, VMC |
|
3rd October 2017, 11:14
| #3 |
| BHPian Join Date: Feb 2006 Location: Bangalore
Posts: 812
Thanked: 2,453 Times
| Setbacks during the DIY Bulb Installation Issues Problem: The bulbs have slight pin type extensions on both sides which makes it hard for the lock nut to go through. The lock nuts which ship from US have the inside of the lock nut notched out a bit to accommodate those pins. Ours didn't!Bulb Retaining Springs Problem: The springs also had the same issue. They are supposed to have un-hindered movement with the pins on the bulb when pushing the spring down with locking nut, but they brushed past the pins and would make it difficult to engage the lock nut. Almost everyone hates the springs that precede the lock nut.Removing Right Hand Projector Problem: One of the bolts holding the right hand projector was lodged deep inside a cavity like area under the headlamp. Our torque wrench wouldn't reach there easily and we had no extender. Also one of the torque screw drivers that could do the job had broken and wouldn't engage the bolt to unscrew it.Stripped Screws on the Projector Headlamps Problem: When I was removing the screws holding the projector, I used my newly acquired BOSCH power drill/screw driver set. Of the 5 screws, 4 of them came out successfully but the fifth one, lodged deep inside a cavity failed to turn. I believe I didn't apply enough force and it twisted the head, stripping it off.Matching Screws For Securing Projector Problem: Since we had made custom brackets, we had never thought of finding matching screws to mount the new projectors. The stock ones are 1.5 inches long and weren't compatible with the custom brackets. Even with a lot of searching on S. P. Road, I could not find good ones in time for my install. The ones I had were tight but not as good as the stock screws. We thought of cutting the stock screws to match size, but we didn't have the correct tool. We did eventually find the correct screws for Jaunthead's install.Rubber Grommets Availability It was very hard to find a rubber grommet that met our needs. The wiring harness did not come with a grommet or the back cover (it does in some cases). We had to custom make a rubber grommet to ensure it fits perfectly. BHPian KpZen helped with this, but then we eventually found another solution to the lack of a drill bit that could make a large enough opening in the back caseLocking connector broken during de-pinning Earlier, I outlined the need to de-pin the water proof connectors to fix the rubber grommet. One of the actions there was to de-pin the wires from the connector. To de-pin the wires from the connectors, we need to remove a red insert, which is essentially a pin locking mechanism in the connector. While pulling out the red insert it came out without drama on the first connector, but on the second one, the lock pin snapped! I could have used the connector as it is since the pins would still mate, but the need to get it perfected as much as possible drew me to changing the connector itself. Igniter Wire Connectors De-pinned for easy install 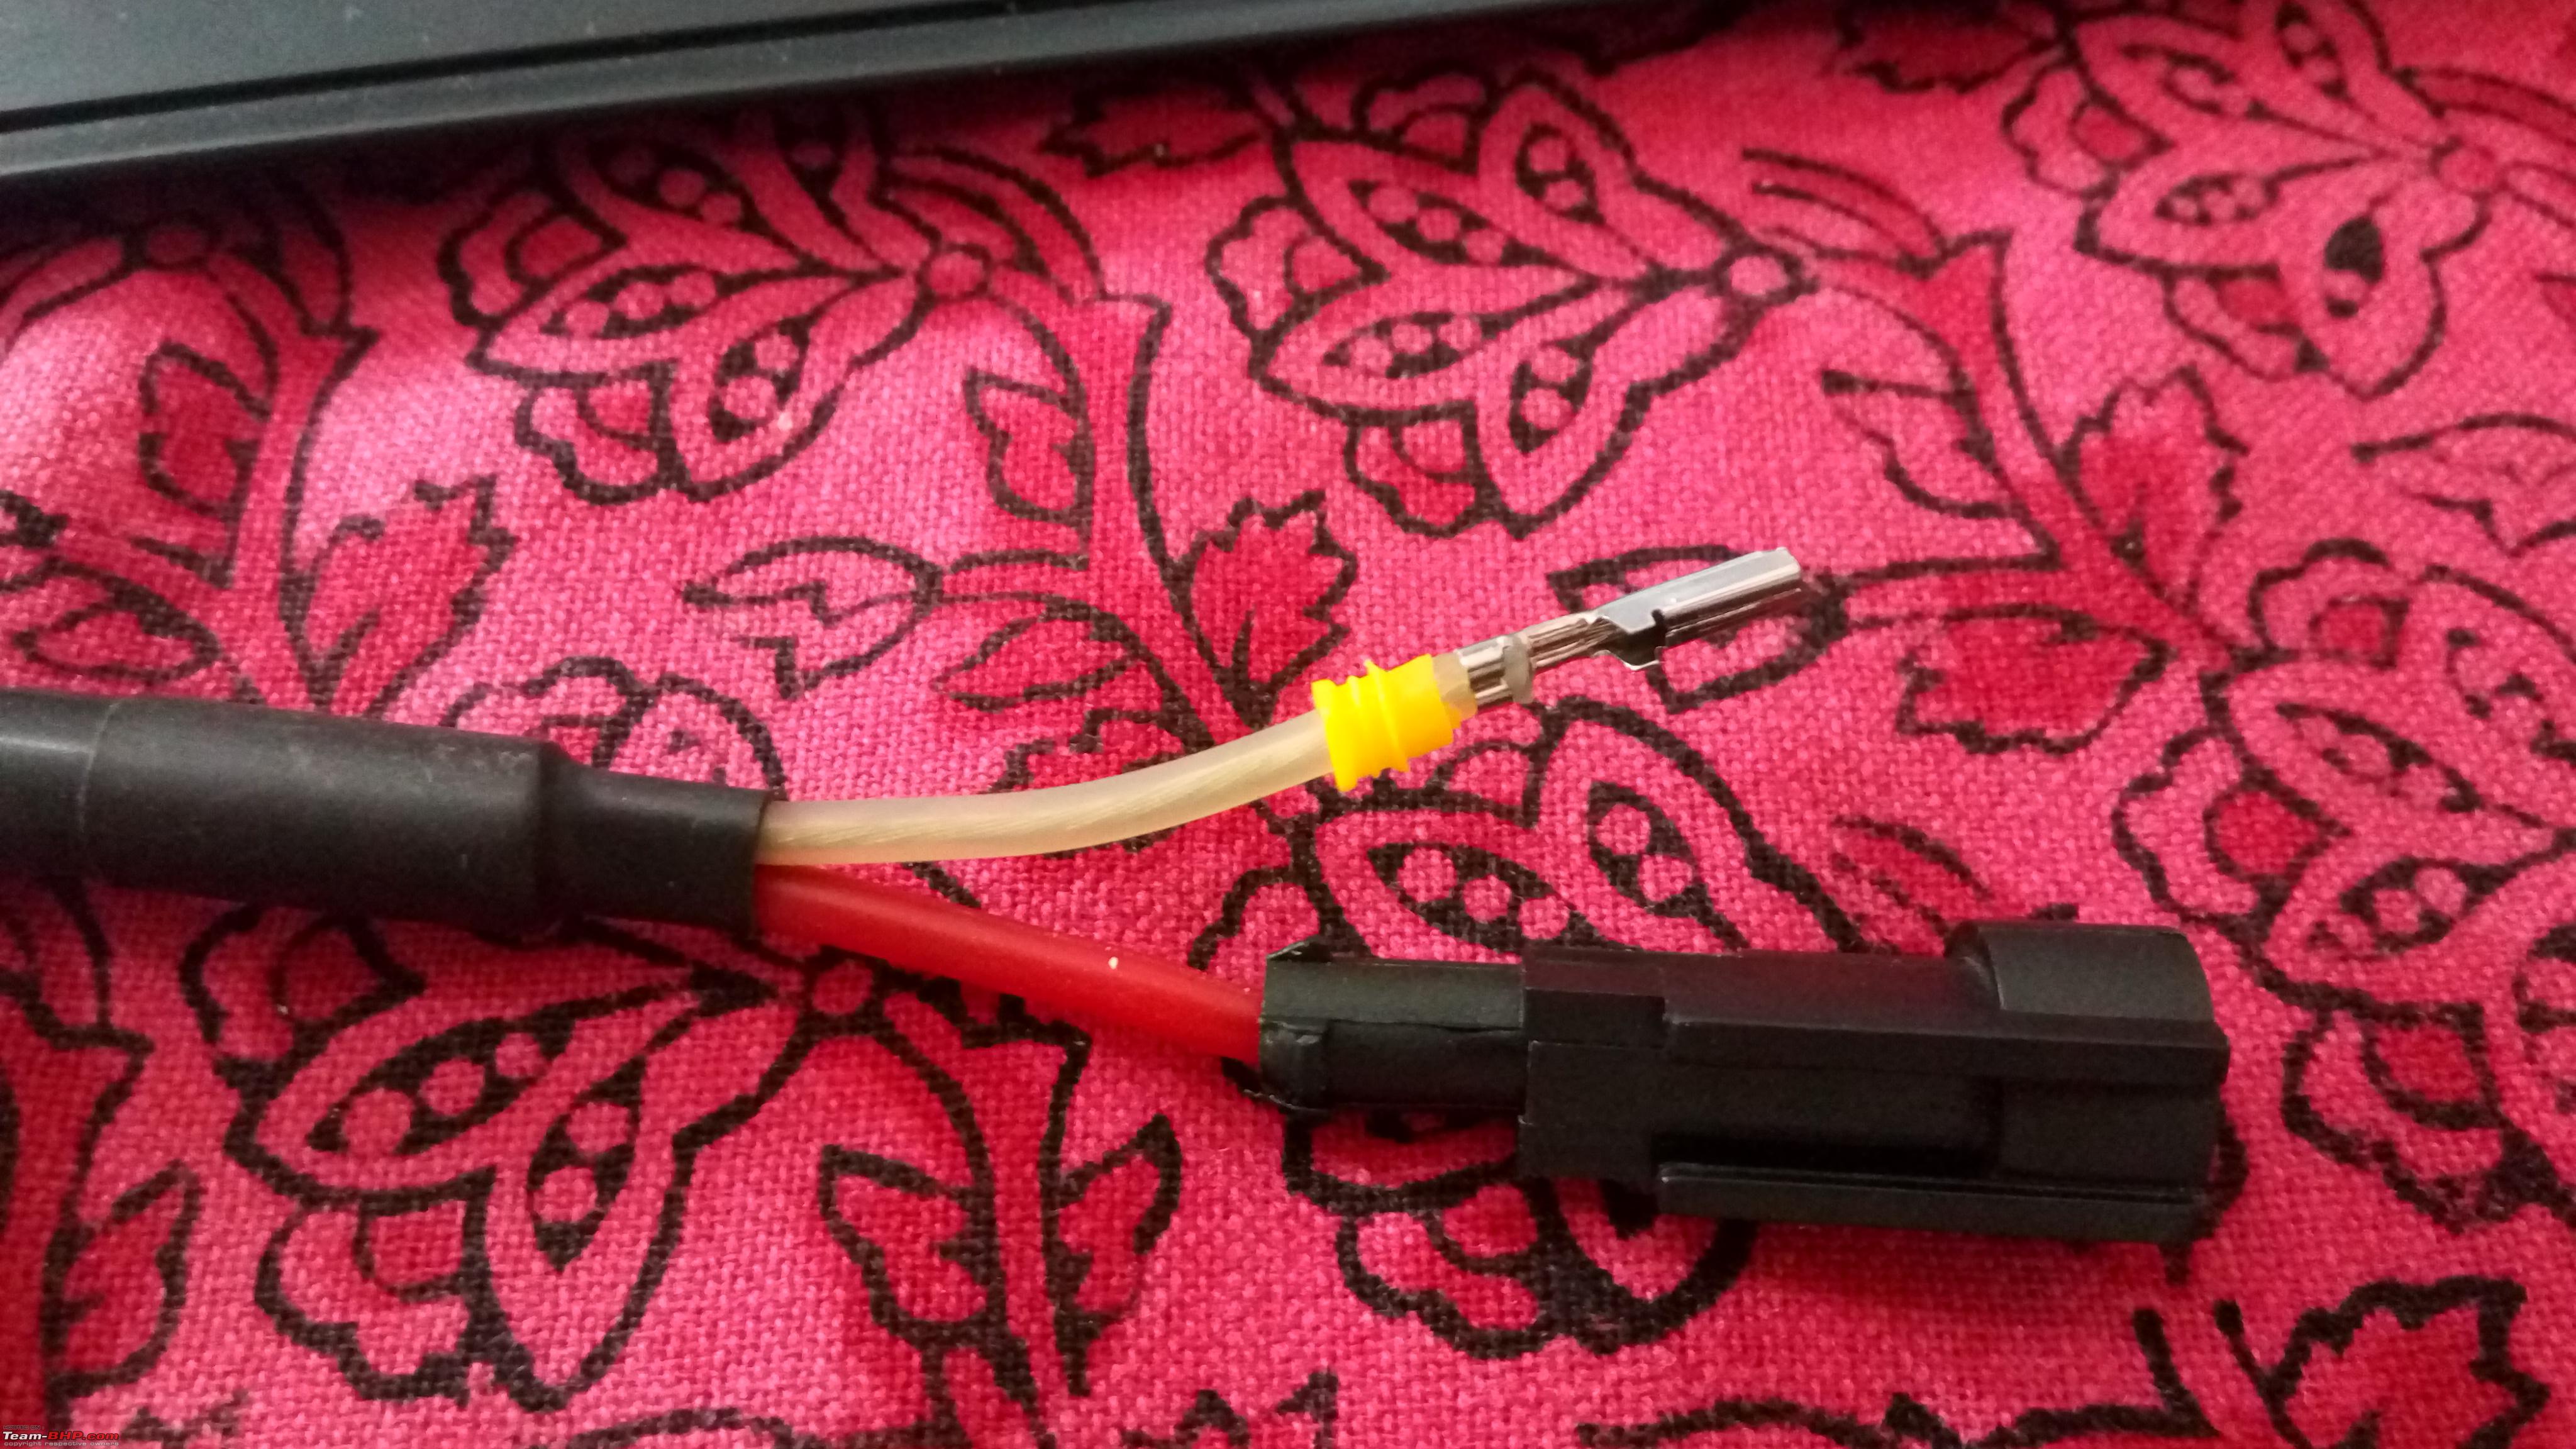 Learnings from this DIY
Securing Ballast The zip ties I bought weren't of good enough length to secure the ballasts. BHPian Jaunthead came up with this simple solution: Essentially chain them up together to form a larger tie. 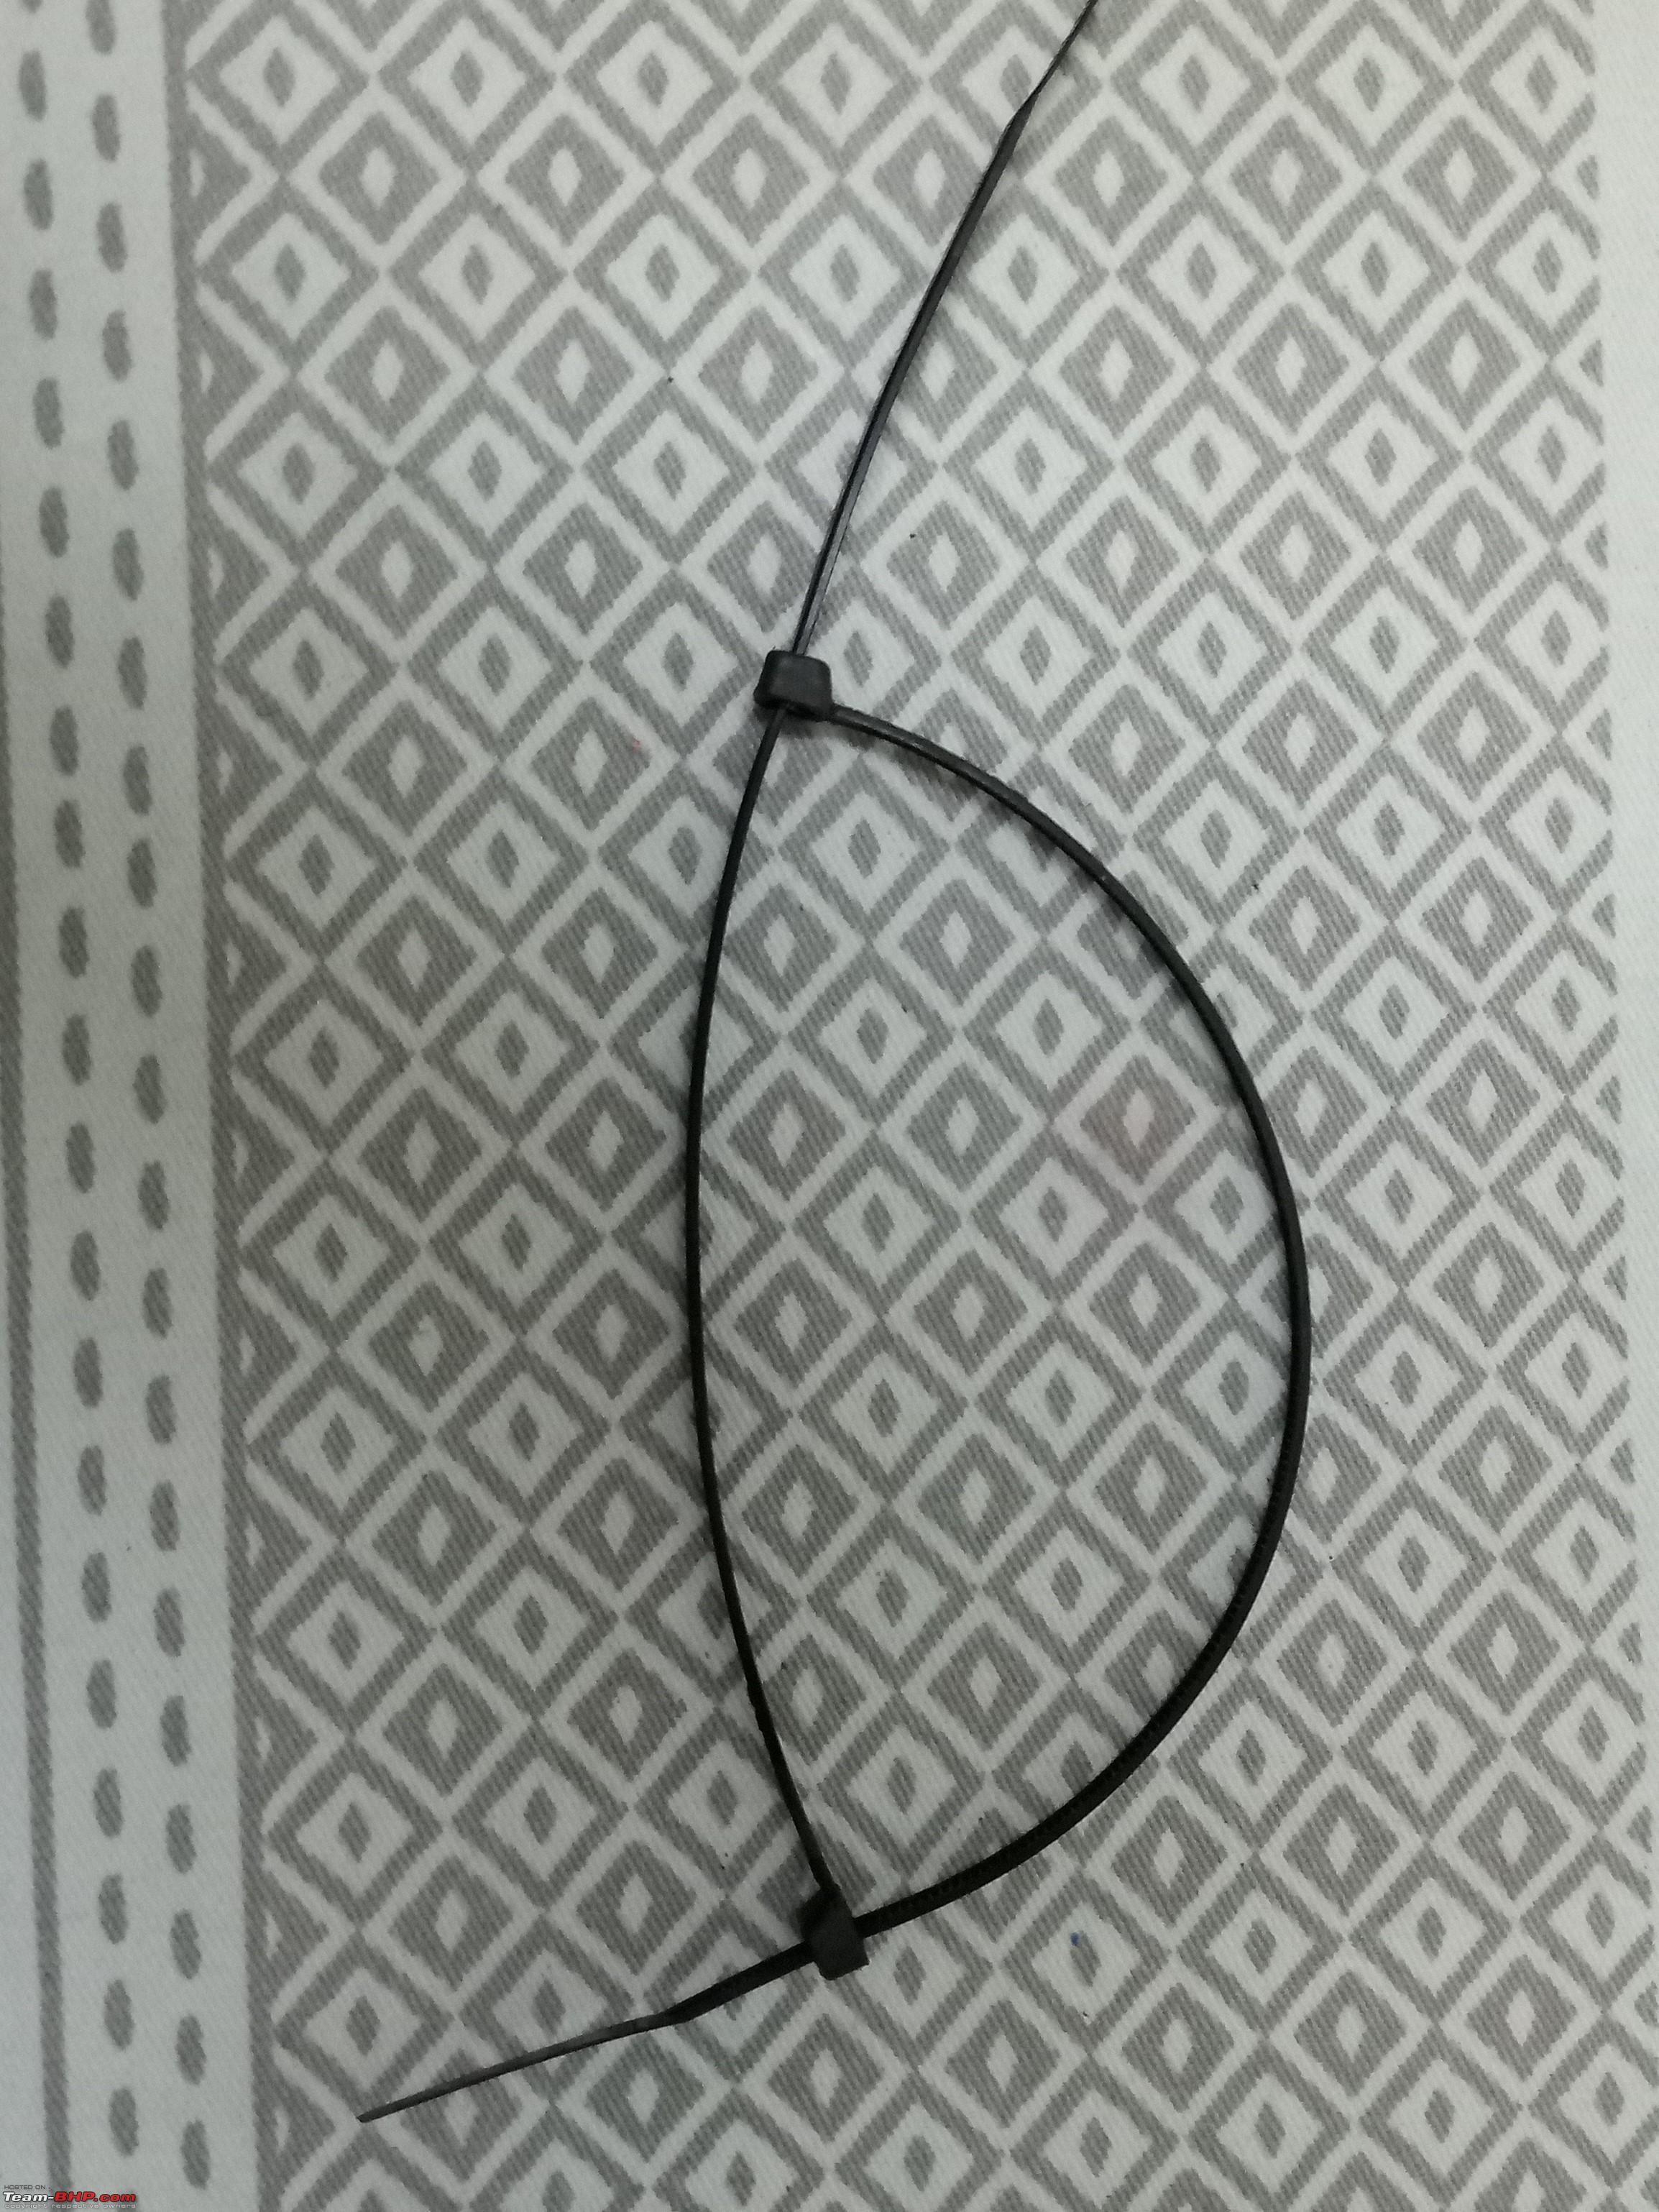 Last edited by sudeepg : 4th October 2017 at 10:42. |
|
| (29)
Thanks
|
| The following 29 BHPians Thank sudeepg for this useful post: | a4anurag, amrutmhatre90, Arun.K, arvind71181, audioholic, BLACKBLADE, blackwasp, cn.vishnu, Dennis, Dr.Naren, ForeRunner, GTO, HappyWheels, jaunthead, johannskaria, kashyapz8055, Keynote, Latheesh, Leoshashi, lovetorque, paragsachania, R2D2, sidhu_hs, sukiwa, vaasu, VCM, Vigkey, yesyeswe, _nitink_ |
|
3rd October 2017, 17:53
| #4 |
| BHPian Join Date: Feb 2006 Location: Bangalore
Posts: 812
Thanked: 2,453 Times
| re: DIY: S-Cross Headlight Upgrade to Morimoto Mini D2S Stage III Bi-Xenons Now here comes the best part. After all of this, Morimoto released a 35W D5S bulb which makes the upgrade in S-Cross as simple as a bulb change! It costs $400 though, as expensive as the D2S 4.0  But that said, it cannot beat the width and throw of the D2S 4.0 projector. I am not aware of anyone who has used them, but it might be just worth it D5S Bulbs From Morimoto The S-Cross 2.0 comes with LED headlights, so no issues there either, hopefully. Last edited by sudeepg : 4th October 2017 at 08:24. |
|
| (18)
Thanks
|
| The following 18 BHPians Thank sudeepg for this useful post: | a4anurag, audioholic, benzinblut, blackwasp, Dennis, Dr.Naren, drhoneycake, GTO, hikersoul, jaunthead, kashyapz8055, Keynote, Leoshashi, lovetorque, paragsachania, R2D2, sidhu_hs, Turbanator |
|
6th October 2017, 07:57
| #5 |
| Team-BHP Support  | re: DIY: S-Cross Headlight Upgrade to Morimoto Mini D2S Stage III Bi-Xenons Thread moved from the Assembly Line to the DIY Section. Thanks for sharing! |
|
| (3)
Thanks
|
| The following 3 BHPians Thank Aditya for this useful post: | GTO, jaunthead, sudeepg |
|
6th October 2017, 09:05
| #6 |
| BHPian Join Date: Feb 2006 Location: Bangalore
Posts: 812
Thanked: 2,453 Times
| re: DIY: S-Cross Headlight Upgrade to Morimoto Mini D2S Stage III Bi-Xenons One additional information regarding the beam alignment which I forgot to mention is that there is a crosshair symbol on the front of the headlight right where the beam is projected from. If the crosshair is in center of the circular beam, then it is also a good indicator that the alignment of the headlight is very good. |
|
| (4)
Thanks
|
| The following 4 BHPians Thank sudeepg for this useful post: | a4anurag, GTO, jaunthead, sidhu_hs |
|
6th October 2017, 10:23
| #7 |
| BANNED Join Date: Oct 2011 Location: Hyderabad
Posts: 12,350
Thanked: 21,411 Times
| re: DIY: S-Cross Headlight Upgrade to Morimoto Mini D2S Stage III Bi-Xenons Finally the thread is live.  Phew what efforts man!! Wish I was with you guys during the install. Rating 5*****. This is one of the best and detailed DIY ever documented on the forum and done on the S-Cross. I know whom to trouble when I upgrade the headlights from Halogen projectors to HID on my Creta.  Last edited by a4anurag : 6th October 2017 at 10:31. |
|
| (5)
Thanks
|
| The following 5 BHPians Thank a4anurag for this useful post: | GTO, jaunthead, kashyapz8055, pritanshchandra, sudeepg |
|
6th October 2017, 10:40
| #8 |
| BHPian Join Date: Apr 2016 Location: Bangalore
Posts: 99
Thanked: 408 Times
| re: DIY: S-Cross Headlight Upgrade to Morimoto Mini D2S Stage III Bi-Xenons Great job with the writeup Sudeepg. We all have been waiting for this. I was disturbed by the poor lighting of Scross Aplha HLs as much as Sudeep and some other friends from the Scross group. My wife one day asked while on the road if the HLs were even on(They were on high beam actually). They are that poor. I wanted an upgrade but didn't have the know-how to pull it off. I would open the hood and check the HLs, read online but that is all the progress I made. The whole idea of DIY was to a do a clean and better install compared to the patchwork done by some of the installers in the market. Then one day Sudeep guru starts talking about Morimotos and posting wiring diagrams in our Whatsapp group. His ideas made a lot of sense and I jumped in post haste. My main goal was to learn as much as possible from Sudeep. And he was kind enough to accept my apprenticeship. Not only did he do that but he treated me like a partner in crime during the DIY for which I will always be thankful. Having said that the amount of time and money Sudeep has spent personally on planning, debugging issues, buying tools and equipment(to which I hardly made any contributions) is simply phenomenal. He knew since his install was the first one, the roadblocks would be bigger, tougher. But he made sure my install was perfect. Post install of the lights I have been on a trip myself and the lights have performed very well. The car's ability to navigate at night has enhanced. Maintaining daytime like speeds is easier. Thanks Sudeepg for your efforts. This was an experience I enjoyed thoroughly. |
|
| (5)
Thanks
|
| The following 5 BHPians Thank jaunthead for this useful post: | a4anurag, Dennis, GTO, headers, sudeepg |
|
6th October 2017, 10:58
| #9 |
| BHPian Join Date: Aug 2015 Location: Bangalore
Posts: 243
Thanked: 997 Times
| re: DIY: S-Cross Headlight Upgrade to Morimoto Mini D2S Stage III Bi-Xenons Let me start by saying "This is the MOTHER of all electrical DIY's" and you guys have pulled it off extremely well. Hence rating a well deserved 5***** Hearty congratulations and kudos for executing such a complicated upgrade so efficiently.  Although you guys had the moral support in many forms, this would NOT have been possible without sheer determination and love for MORE light for the crossover. You have captured every possible detail that went into the making of this install and will be extremely useful for folks who want to try and go for similar set up in future - but with a disclaimer "this DIY is NOT for the faint hearted" Last edited by Keynote : 6th October 2017 at 10:59. |
|
| (3)
Thanks
|
| The following 3 BHPians Thank Keynote for this useful post: | GTO, jaunthead, sudeepg |
|
6th October 2017, 11:19
| #10 |
| BHPian | re: DIY: S-Cross Headlight Upgrade to Morimoto Mini D2S Stage III Bi-Xenons Just when I was about to put up a query for the weak projectors on my 1.6, you come up with this. All threads were focussing on enhancement via the fog lamp route but I wanted something for the Headlamp directly. Thanks. Will be of great help indeed. Last edited by benzinblut : 6th October 2017 at 11:21. |
|
| (1)
Thanks
|
| The following BHPian Thanks benzinblut for this useful post: | sudeepg |
|
6th October 2017, 12:13
| #11 | ||||
| BHPian Join Date: Feb 2006 Location: Bangalore
Posts: 812
Thanked: 2,453 Times
| Re: DIY: S-Cross Headlight Upgrade to Morimoto Mini D2S Stage III Bi-Xenons Quote:
Quote:
Quote:
Quote:
| ||||
|
| (4)
Thanks
|

| The following 4 BHPians Thank sudeepg for this useful post: | a4anurag, InControl, jaunthead, Keynote |
| |
|
6th October 2017, 12:41
| #12 |
| Distinguished - BHPian  | Re: DIY: S-Cross Headlight Upgrade to Morimoto Mini D2S Stage III Bi-Xenons Very well written thread. Thanks for sharing S-Cross Alpha has very poor lighting, thanks to 25W projector setup. Many owners have gone with fog lamps route as the headlights are very expensive and not an easy affair to retrofit after market projectors. But there is no substitute to a good after market projector like Morimoto Mini D2S 4.0. The projector has very good and intense hot spot and more than enough width. Driving at night should be effortless now. Also that rotation alignment being off by small margin doesn't matter even 1 percent on road. The output videos are just brilliant. Cheers! |
|
| (2)
Thanks
|
| The following 2 BHPians Thank Dr.Naren for this useful post: | jaunthead, sudeepg |
|
6th October 2017, 14:27
| #13 |
| Senior - BHPian Join Date: Apr 2008 Location: Bangalore
Posts: 2,774
Thanked: 1,272 Times
| Re: DIY: S-Cross Headlight Upgrade to Morimoto Mini D2S Stage III Bi-Xenons Wow! Just W-O-W!! Hats off Sudeep! For the courage to do what has not been attempted by you before, your diligence with the install & perseverance in the wake of many difficulties and road blocks that you encountered and in the end achieving the result you were waiting for - you sir deserve a long, slow, standing applause! The write up is very amateur-friendly and anyone who was hesitating to go ahead with the install or this experiment till now, will have this thread for reference with the minutest of details and issues explained along with pics. Kudos to a job done well and also the safety that comes with the added illumination on your night drives. Last edited by abhinav.s : 6th October 2017 at 14:28. |
|
| (1)
Thanks
|
| The following BHPian Thanks abhinav.s for this useful post: | sudeepg |
|
6th October 2017, 15:16
| #14 |
| Distinguished - BHPian Join Date: Jun 2012 Location: BengaLuru
Posts: 5,658
Thanked: 19,398 Times
| Re: DIY: S-Cross Headlight Upgrade to Morimoto Mini D2S Stage III Bi-Xenons Thats the most professional headlight upgrade I have come across here. Especially the bracket part. That will ensure you will have the alignment as good as stock and wont have to remove the assembly to make changes. I didnt even glance the cost part of it, but whatever you have spent is definitely worth it. Are you retaining the fog light jugaad or reverting back to stock? |
|
| (2)
Thanks
|
| The following 2 BHPians Thank audioholic for this useful post: | Leoshashi, sudeepg |
|
6th October 2017, 16:53
| #15 |
| BHPian Join Date: Nov 2009 Location: Bangalore
Posts: 503
Thanked: 518 Times
| Re: DIY: S-Cross Headlight Upgrade to Morimoto Mini D2S Stage III Bi-Xenons Awesome install man. These projectors have come a long way, since I had first tried them. The light output looks exceptional. |
|
| (1)
Thanks
|
| The following BHPian Thanks rbp for this useful post: | sudeepg |
|