Team-BHP
(
https://www.team-bhp.com/forum/)
One of the most used components in a car, especially in india, well, after the horn obviously, are the brakes. And the most commonplace where service centers make their money are replacing the brake pads. It’s not that big of a job and it can save you a load of time and money in the process. It’s a simple 30min job that can be done with common household tools and no specialty tools are required.
TOOLS REQUIRED
1. tire iron
2. A jack
3. Ratchet or spanner
4. 10mm attachment/10mm spanner
5. A C-Clamp
6. New Brake pads/ new caliper pins
7. Caliper grease/ Silicone grease
8. Waste cotton rags
9. Toothbrush/ wire brush
10. Something to blow the brake dust off
11. Gloves and a mask are recommended
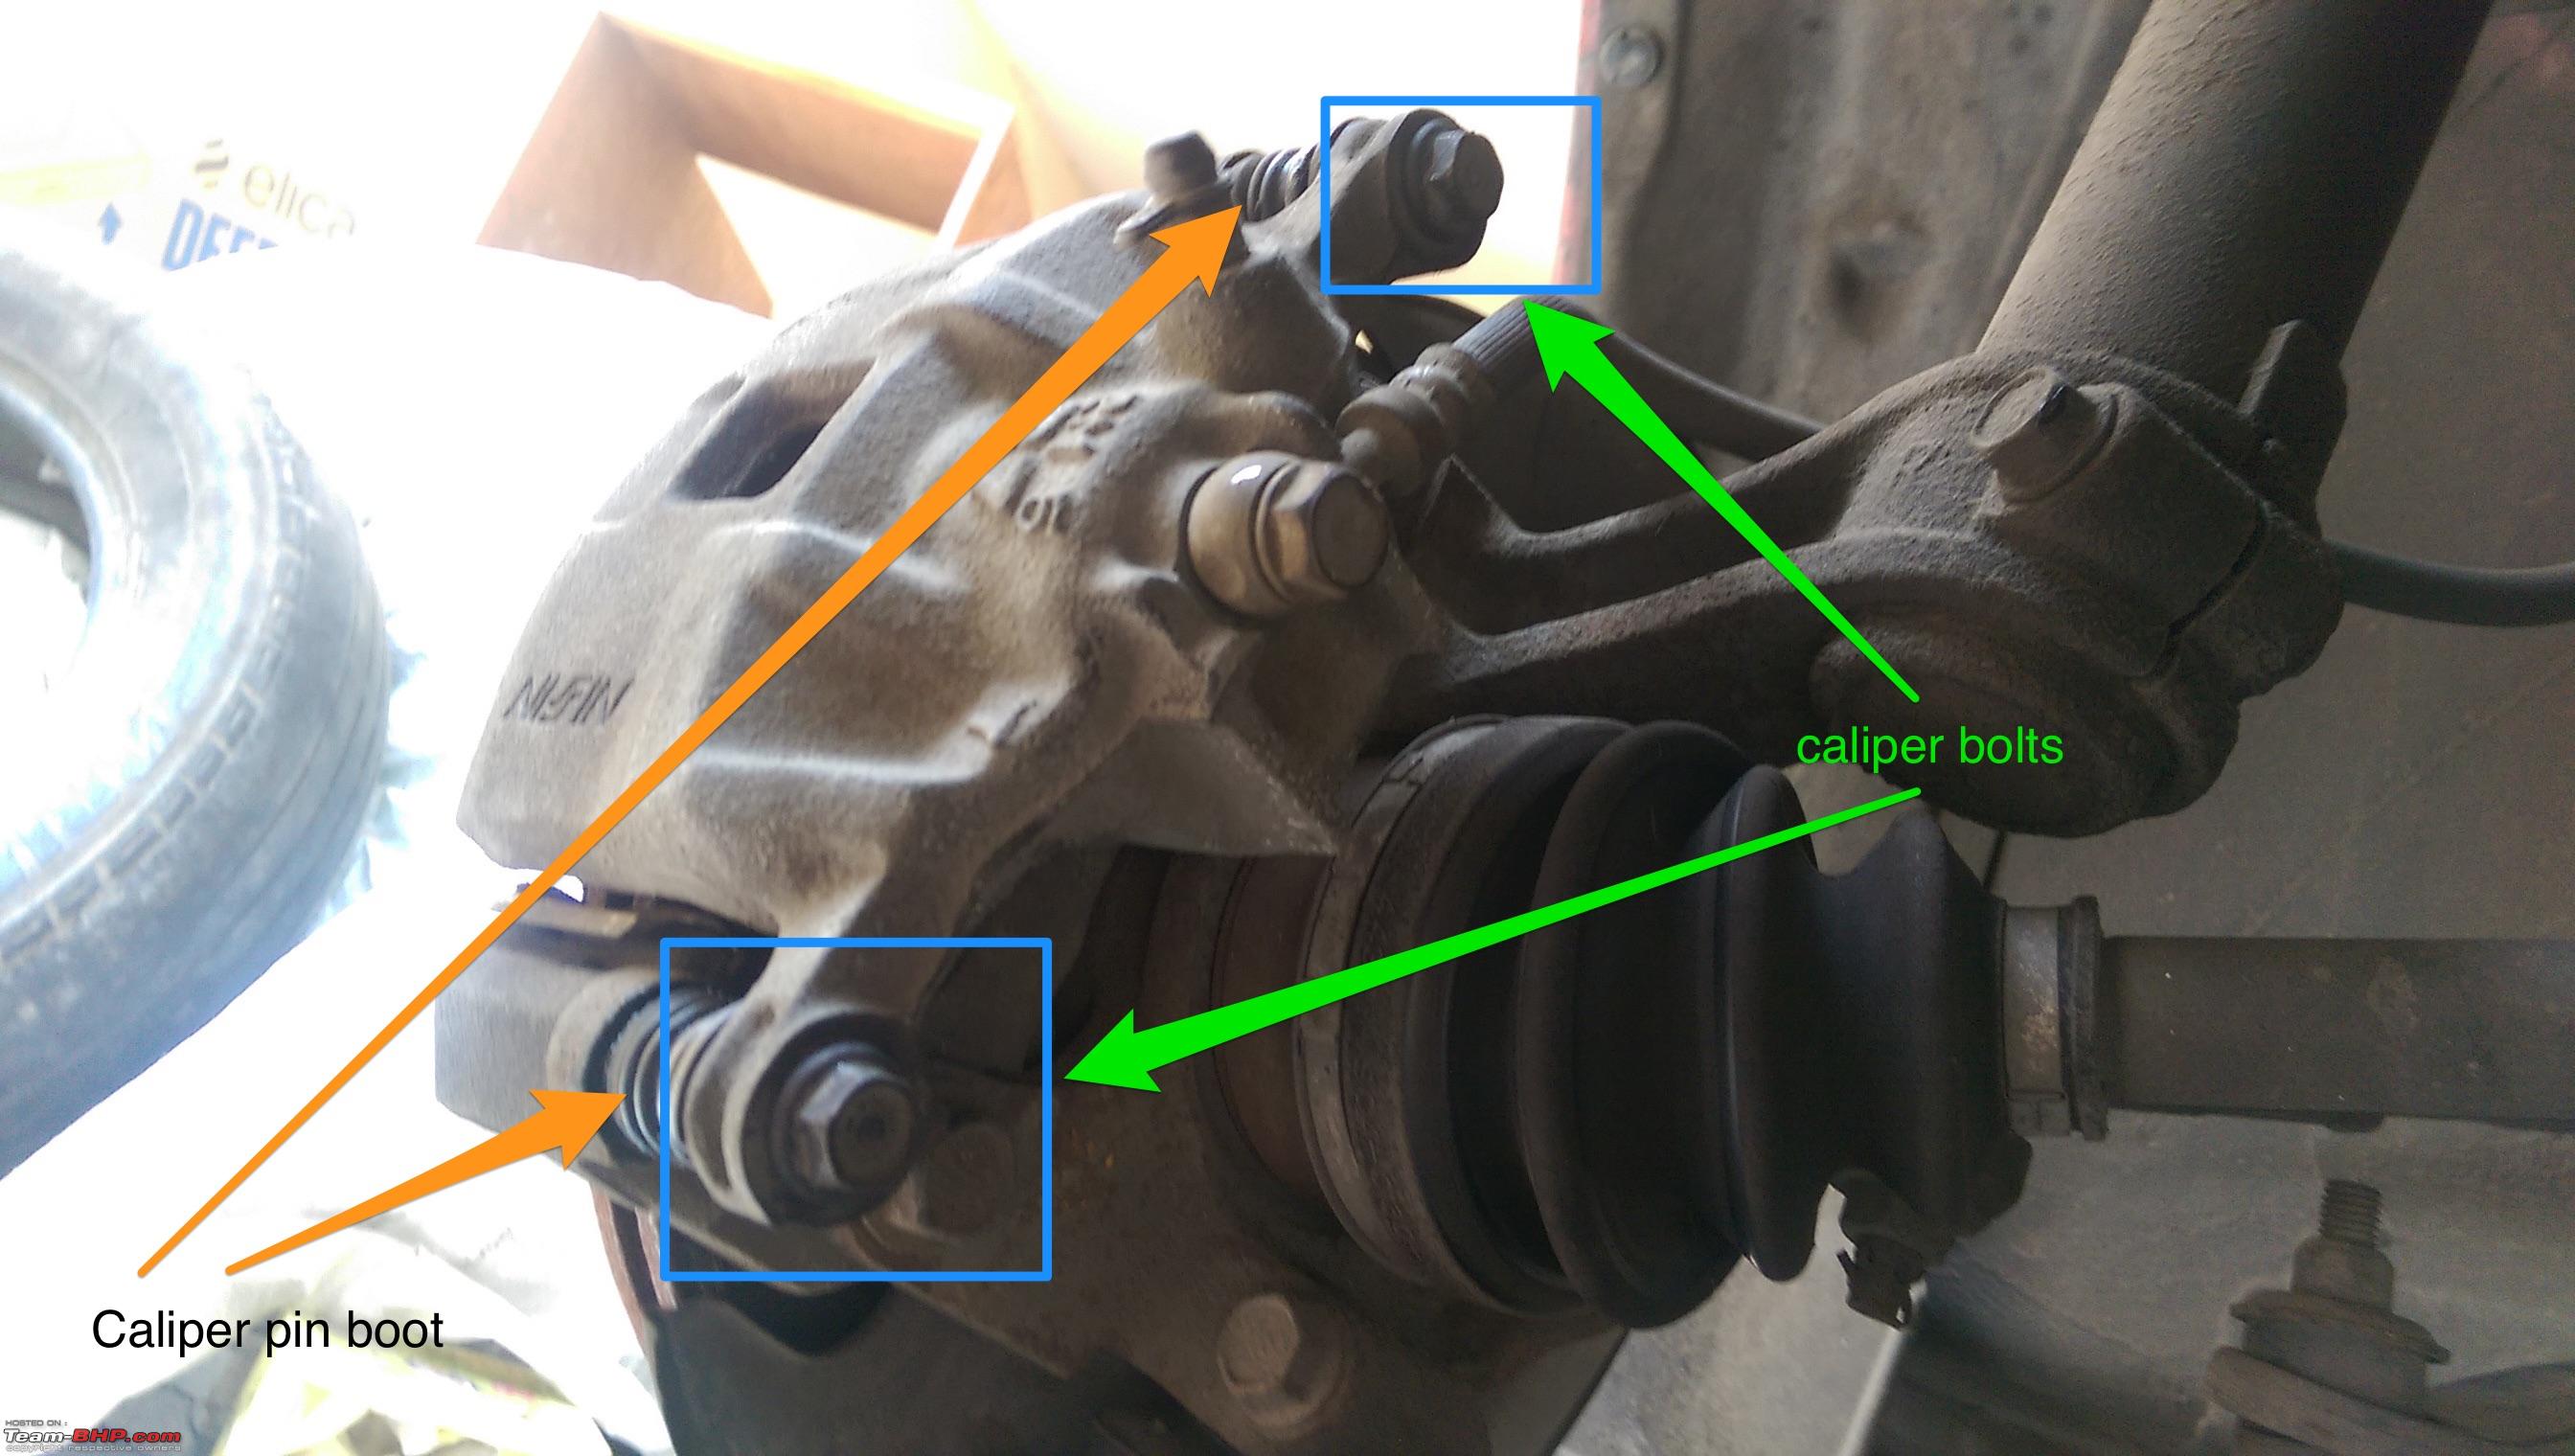
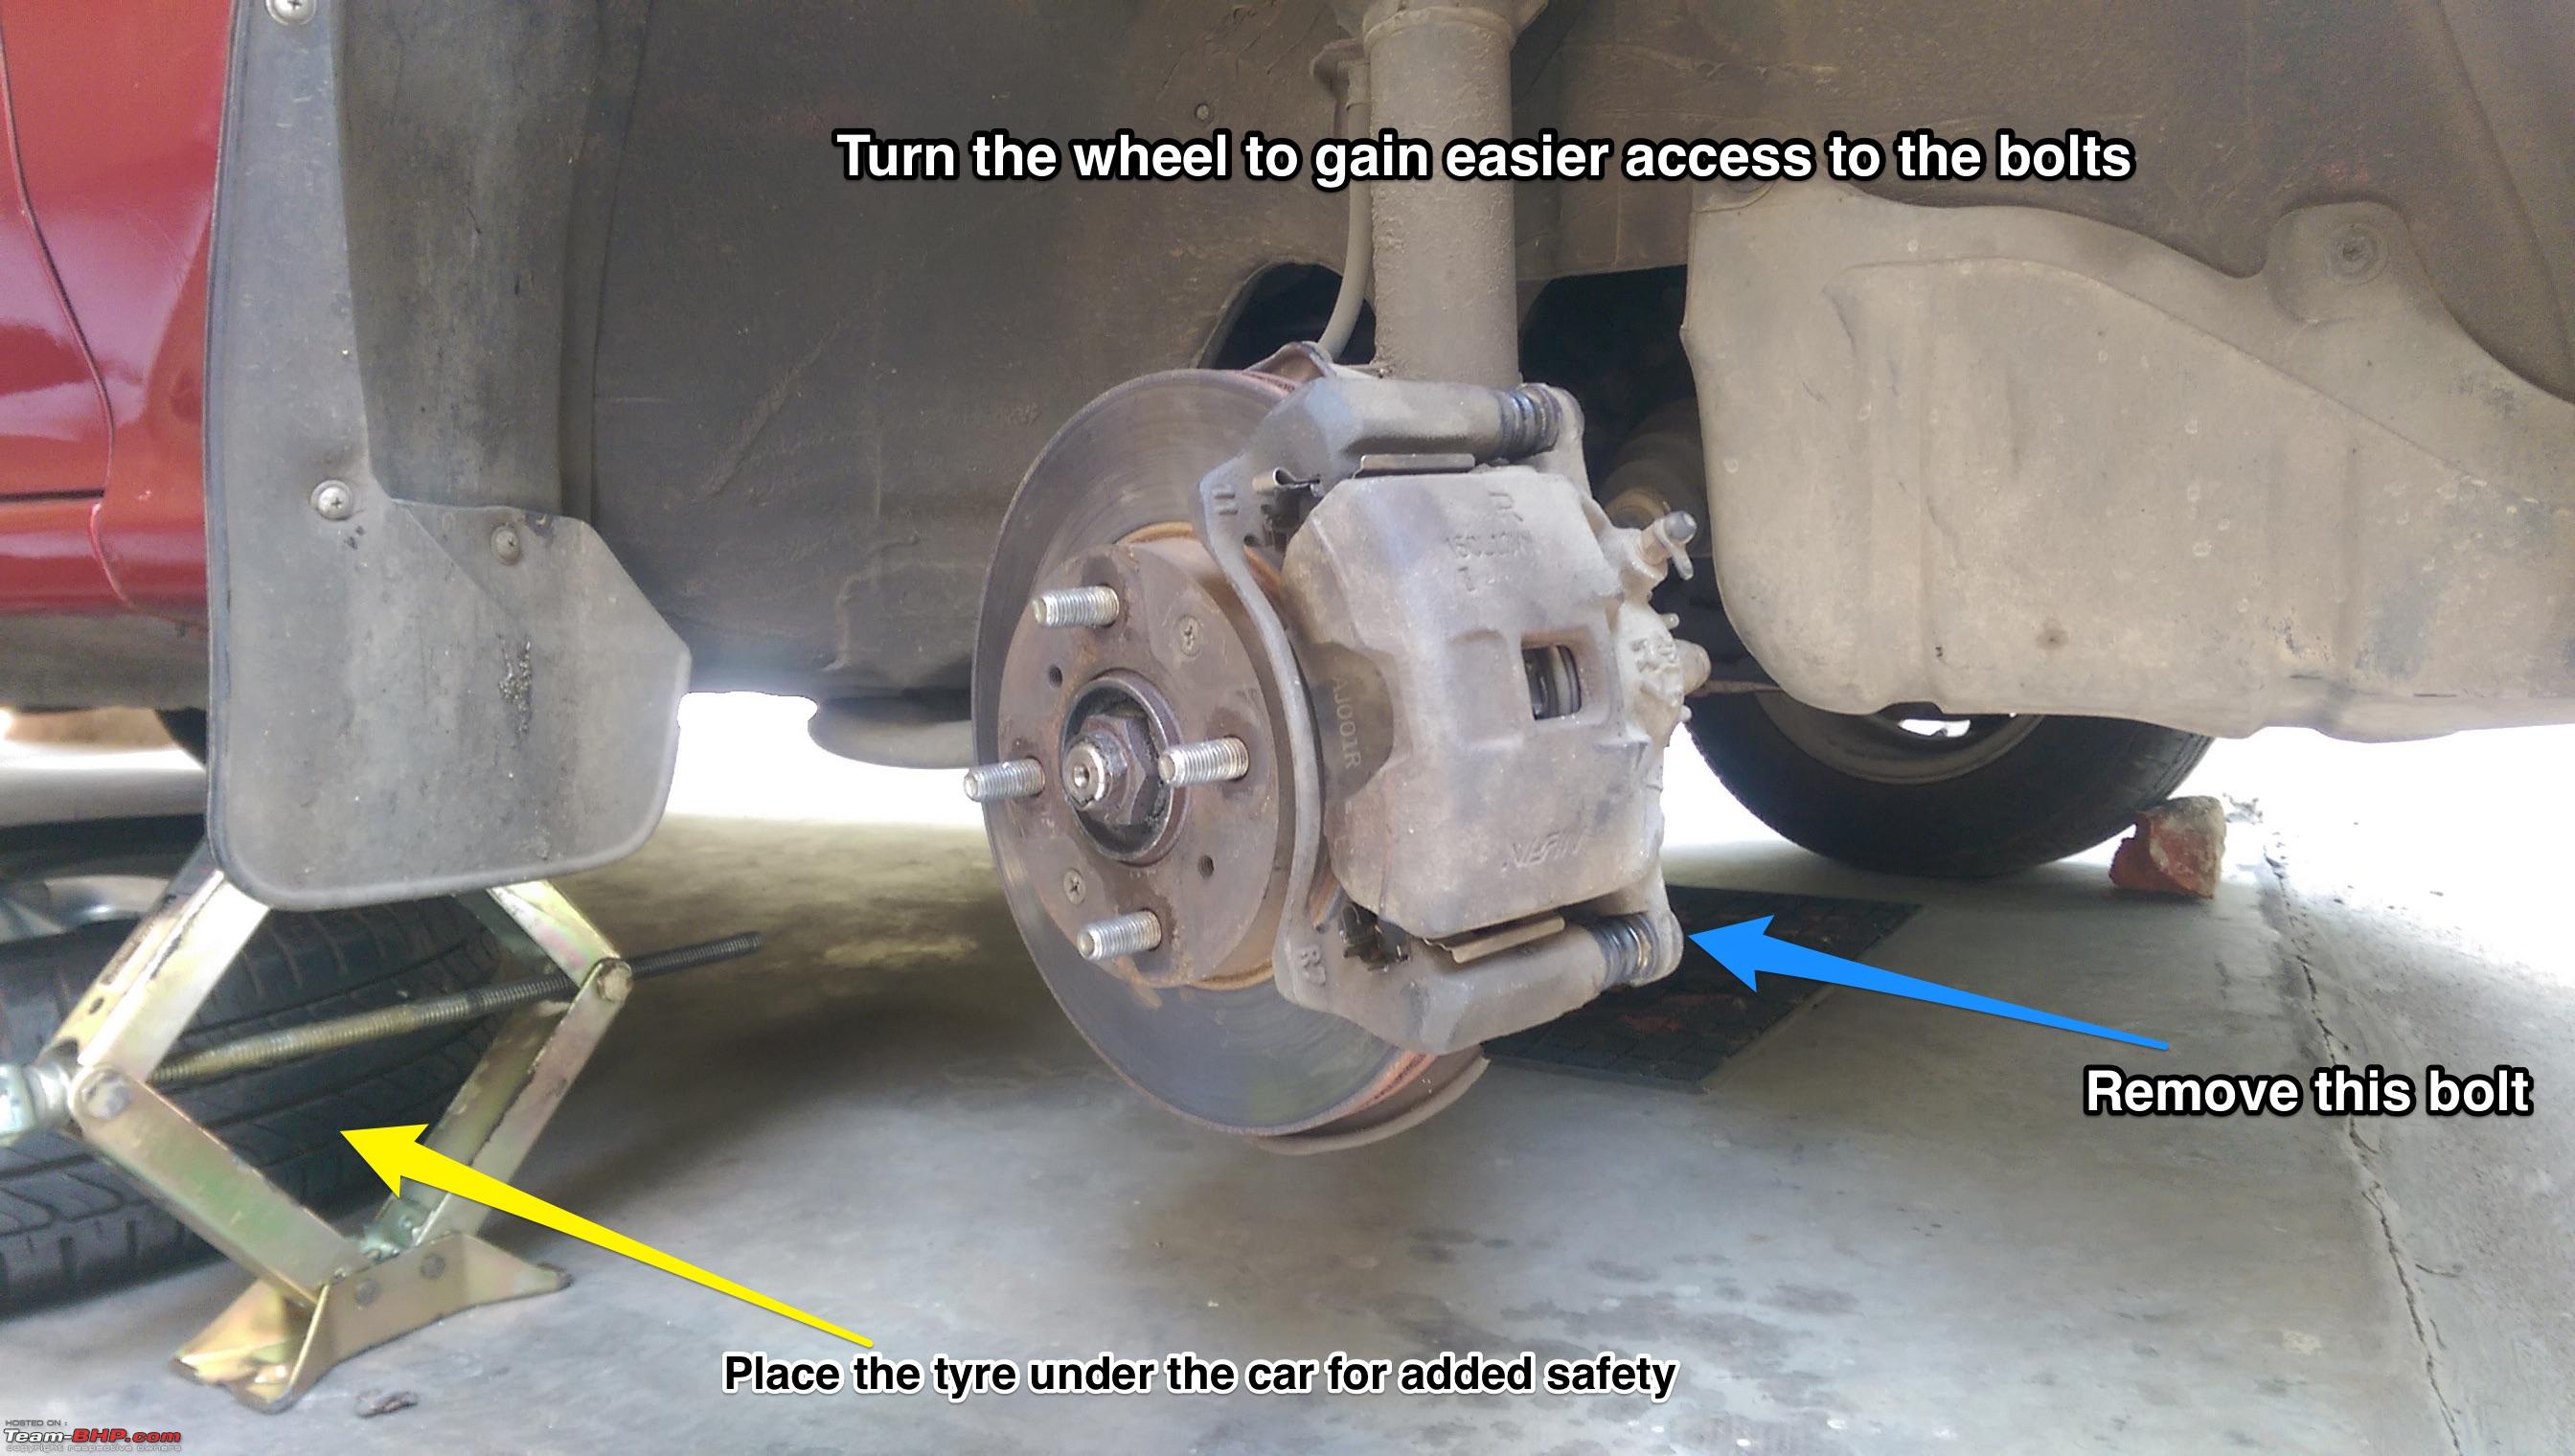
Turn the steering towards the side that’s going to be worked on, to give you easy access to the bolts behind the brake caliper.
Loosen the lug nuts, jack the car up and remove the wheel.
Place the wheel under the car for added safety.
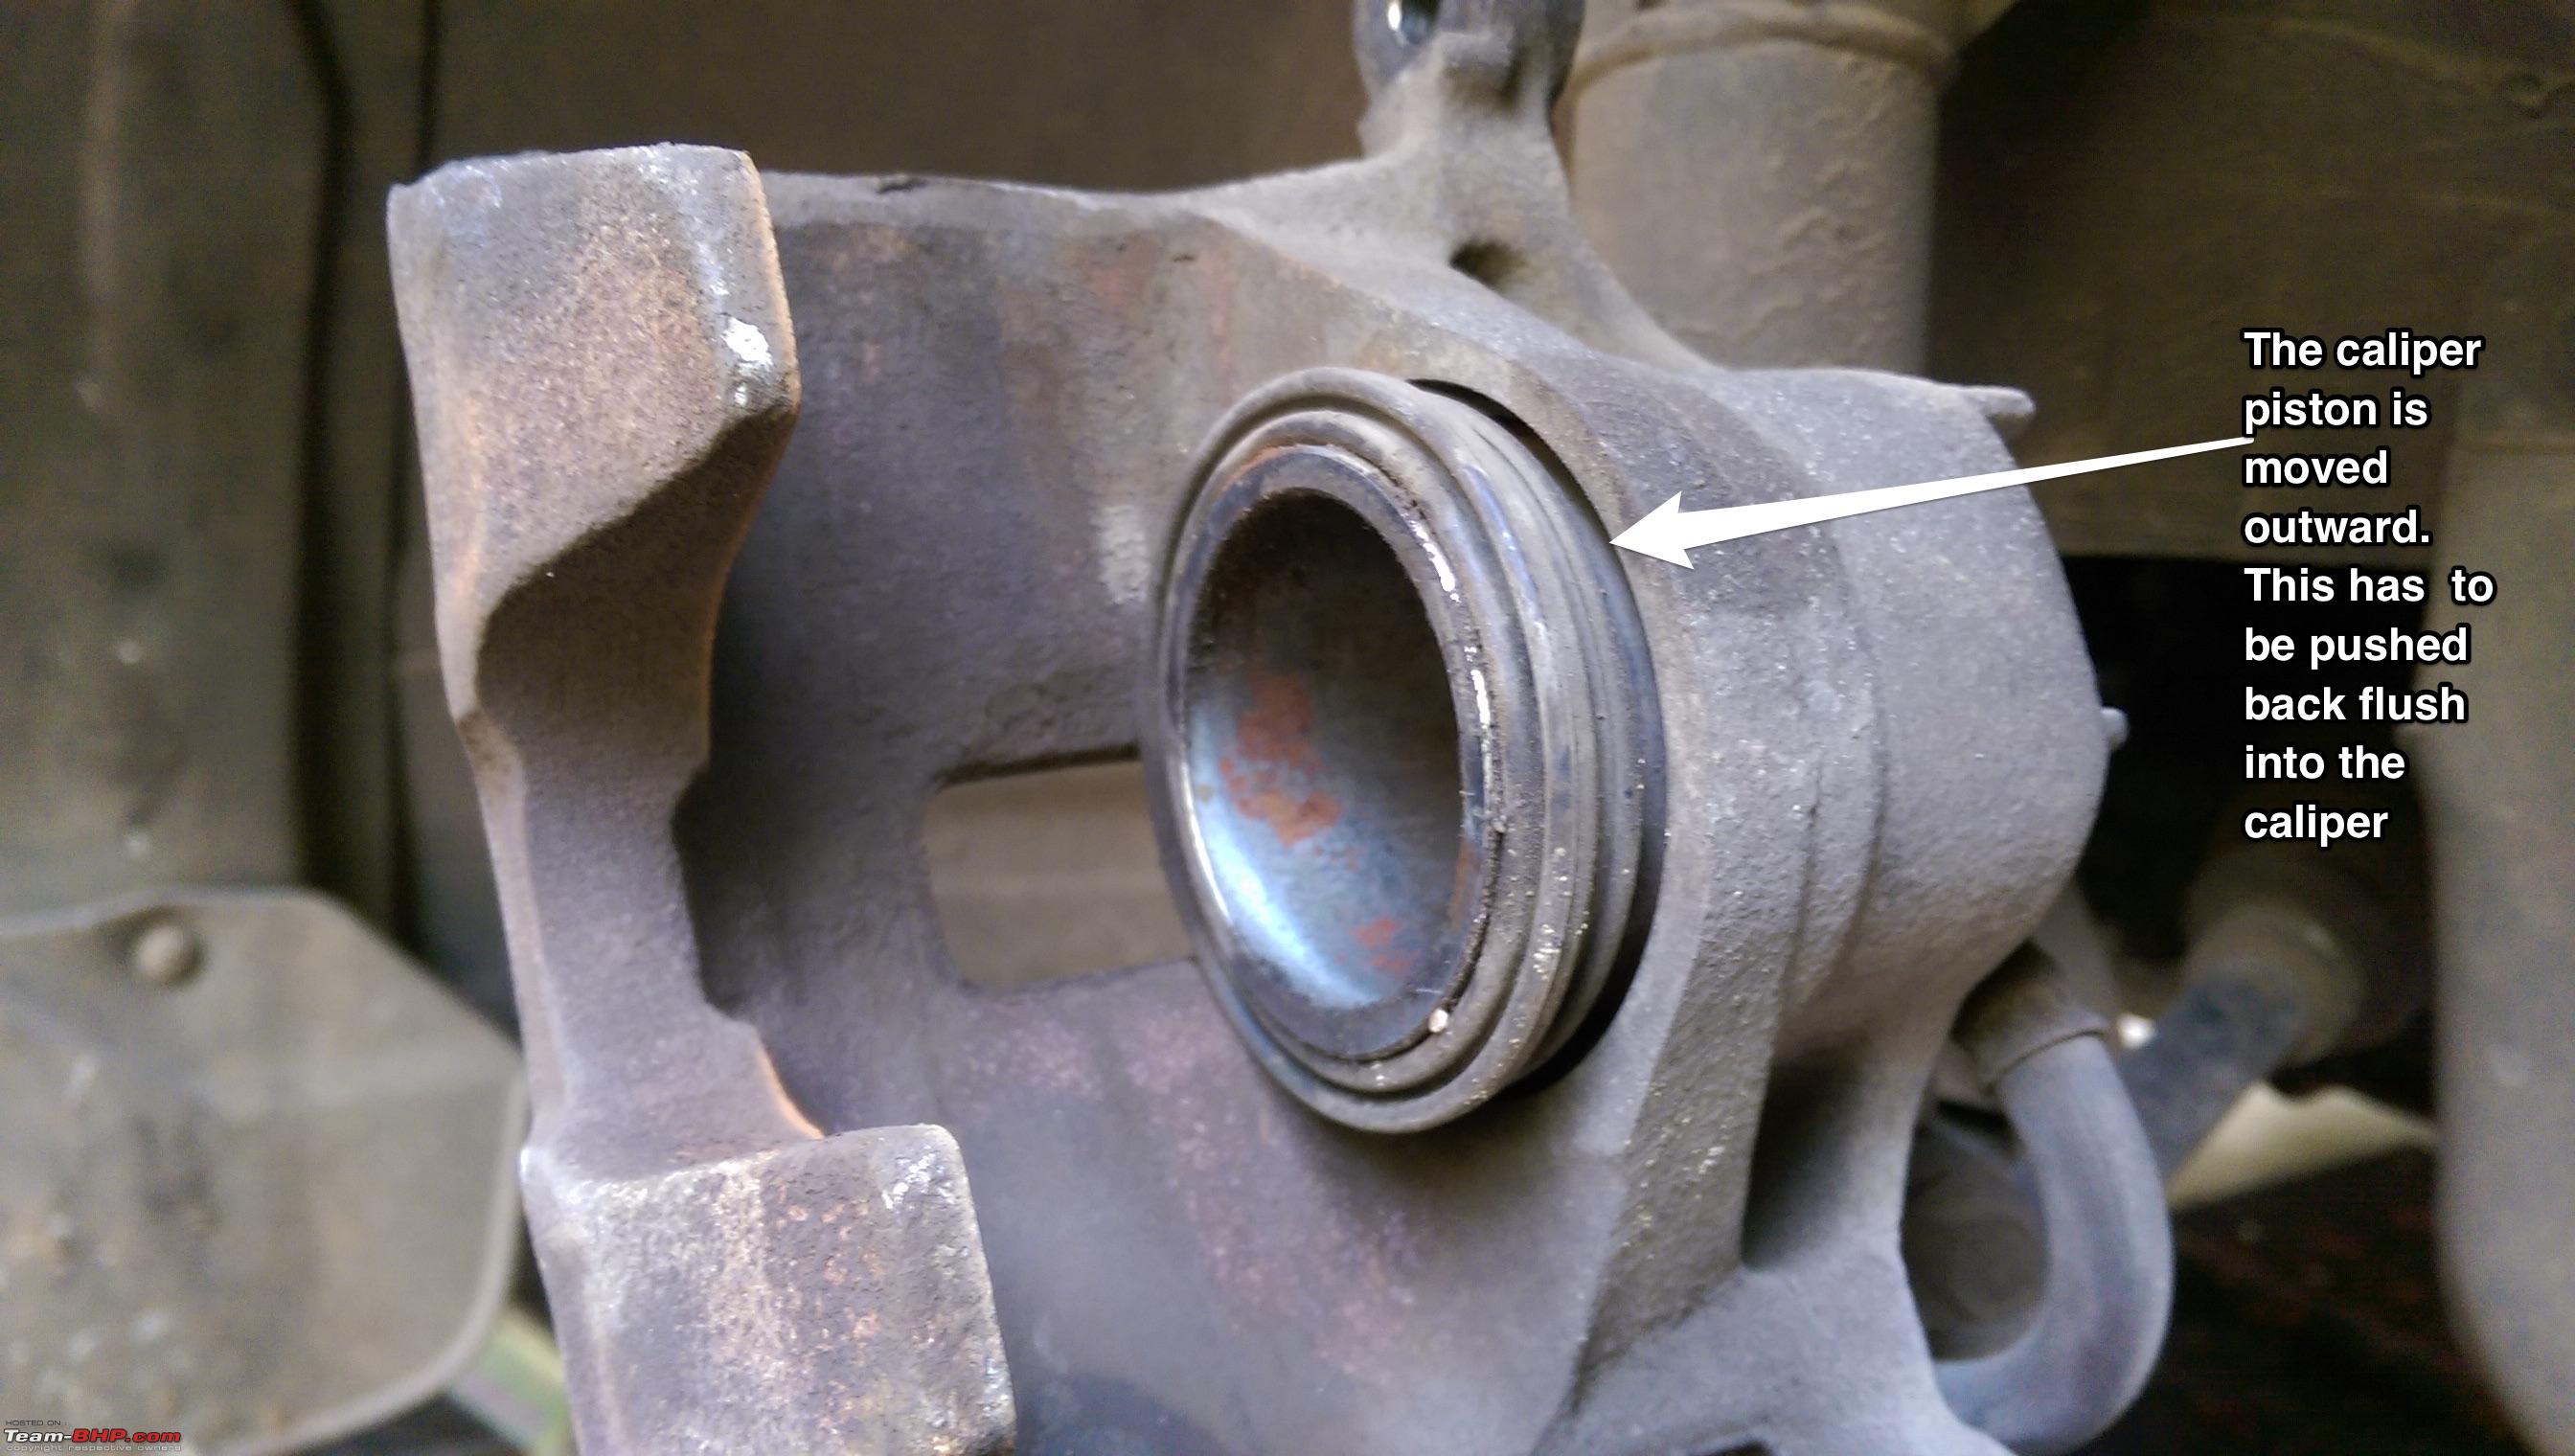
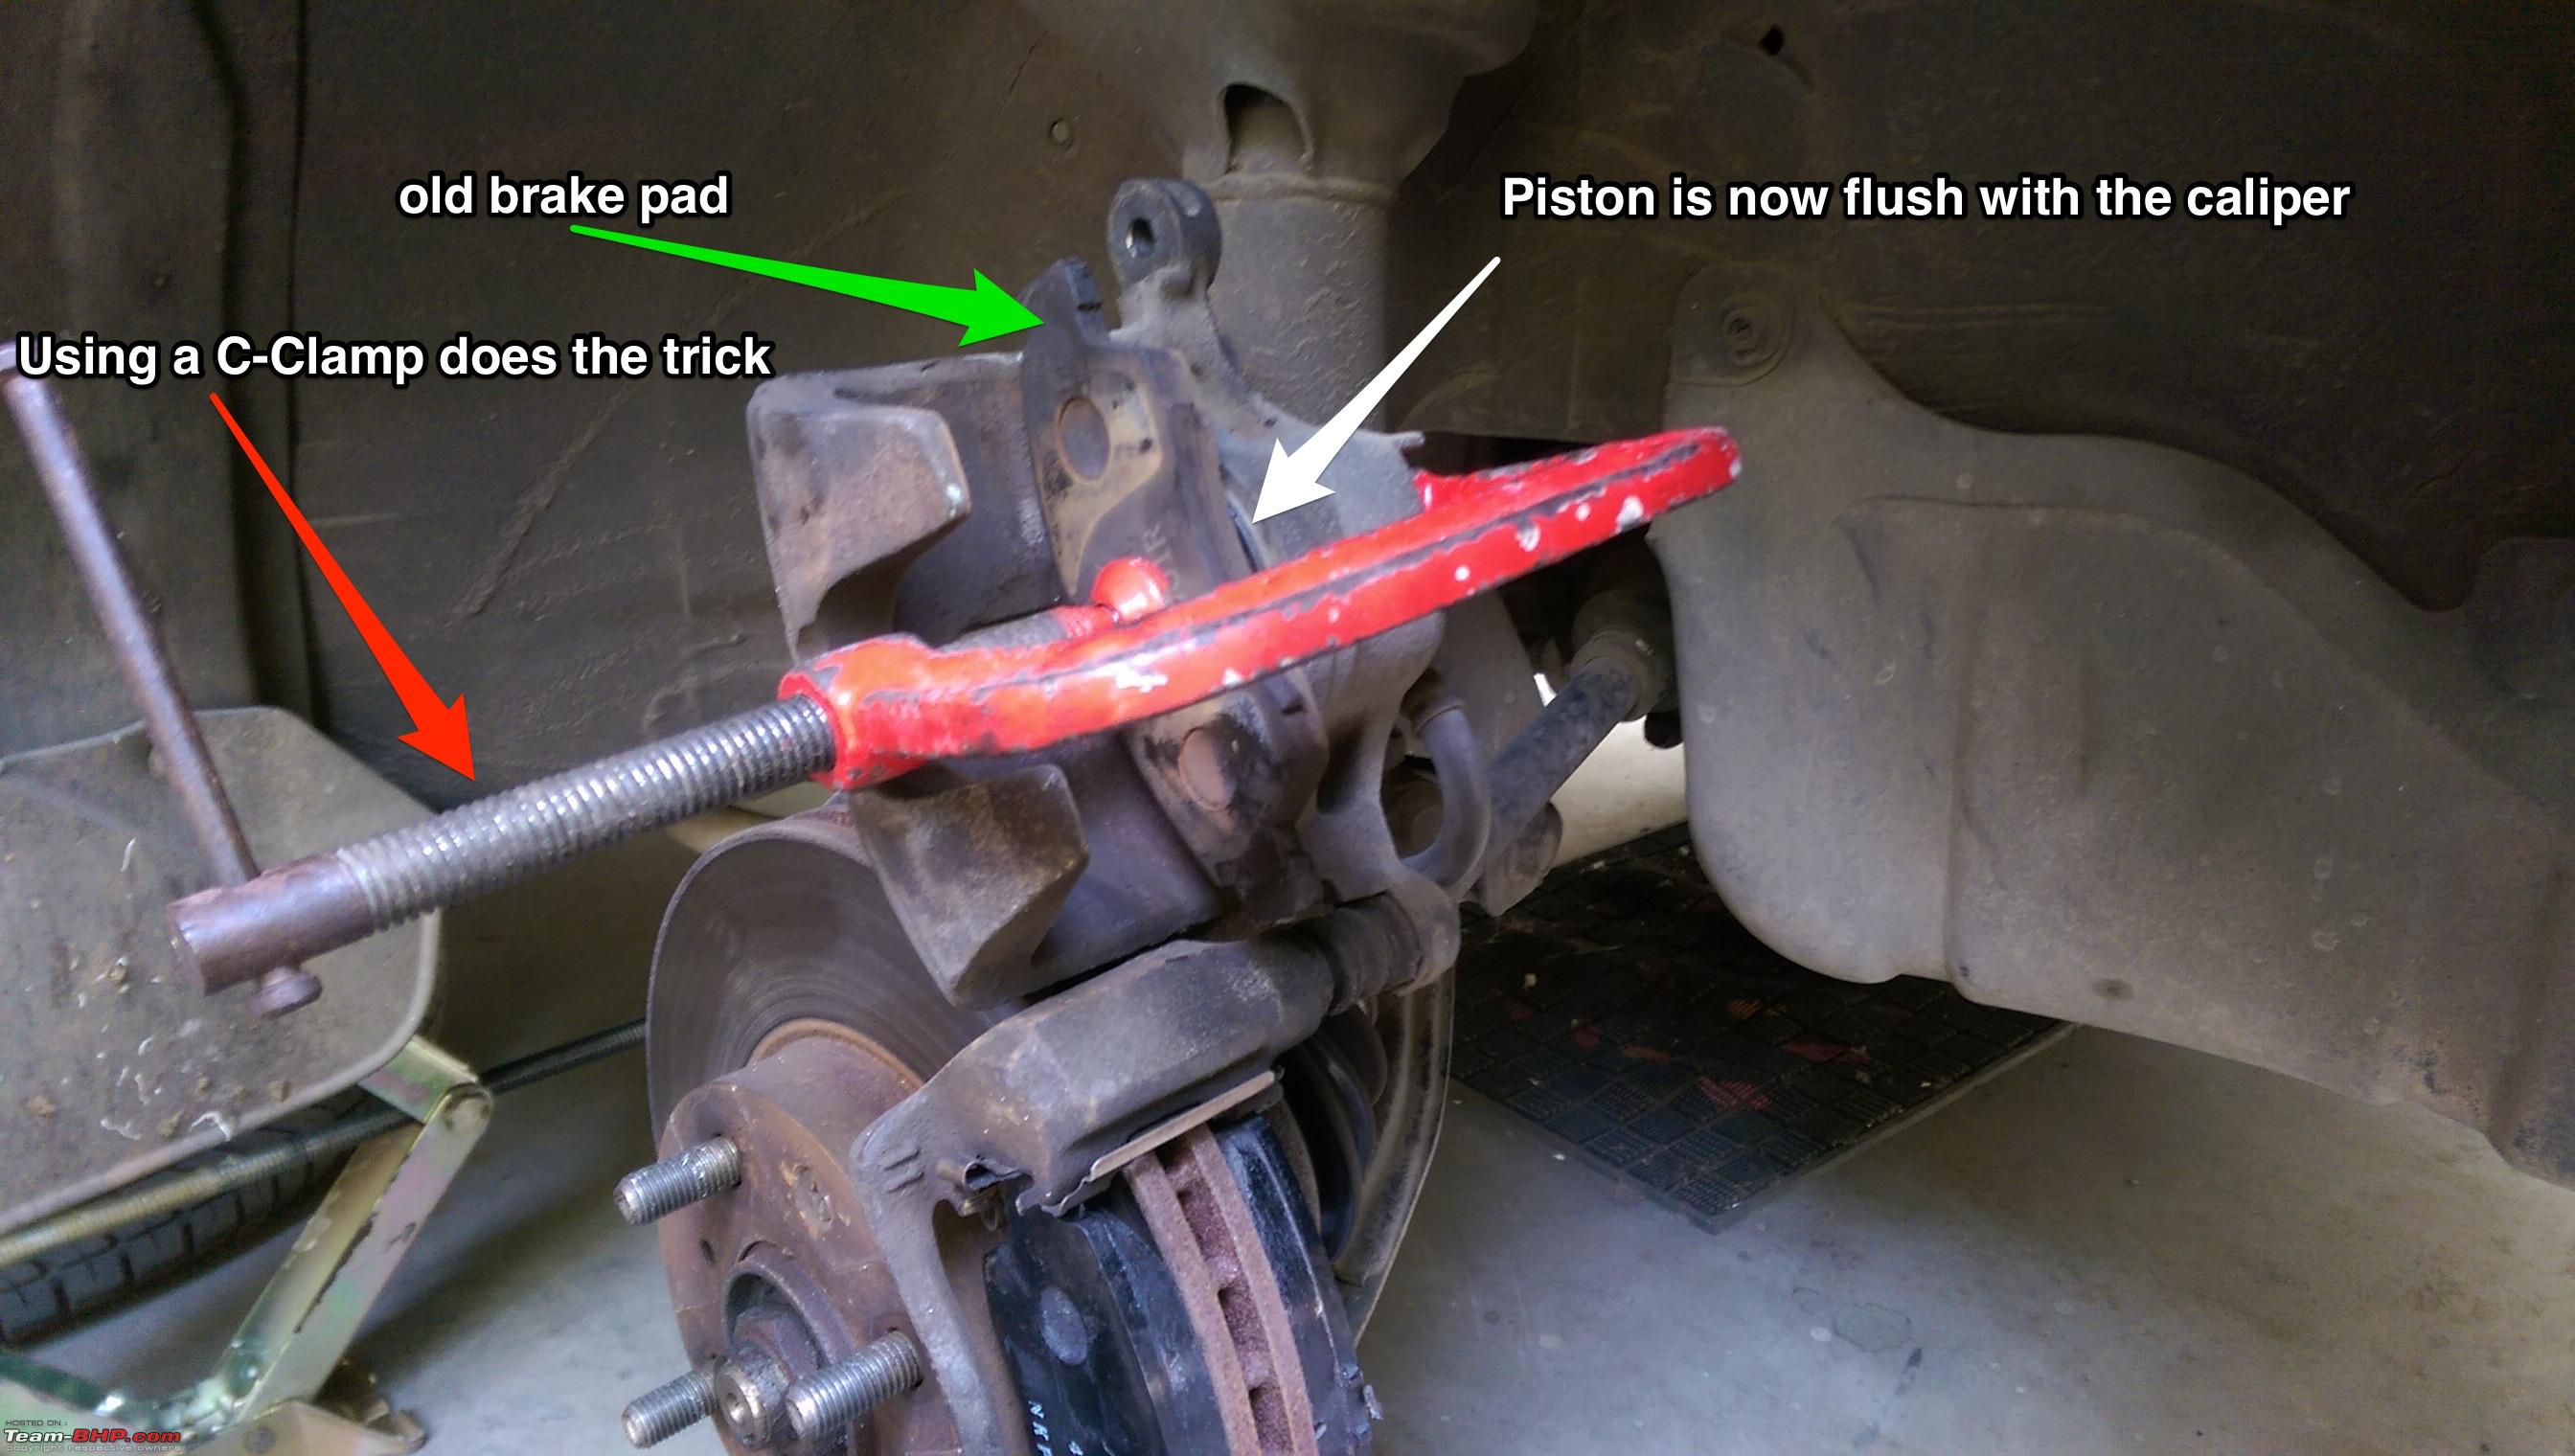
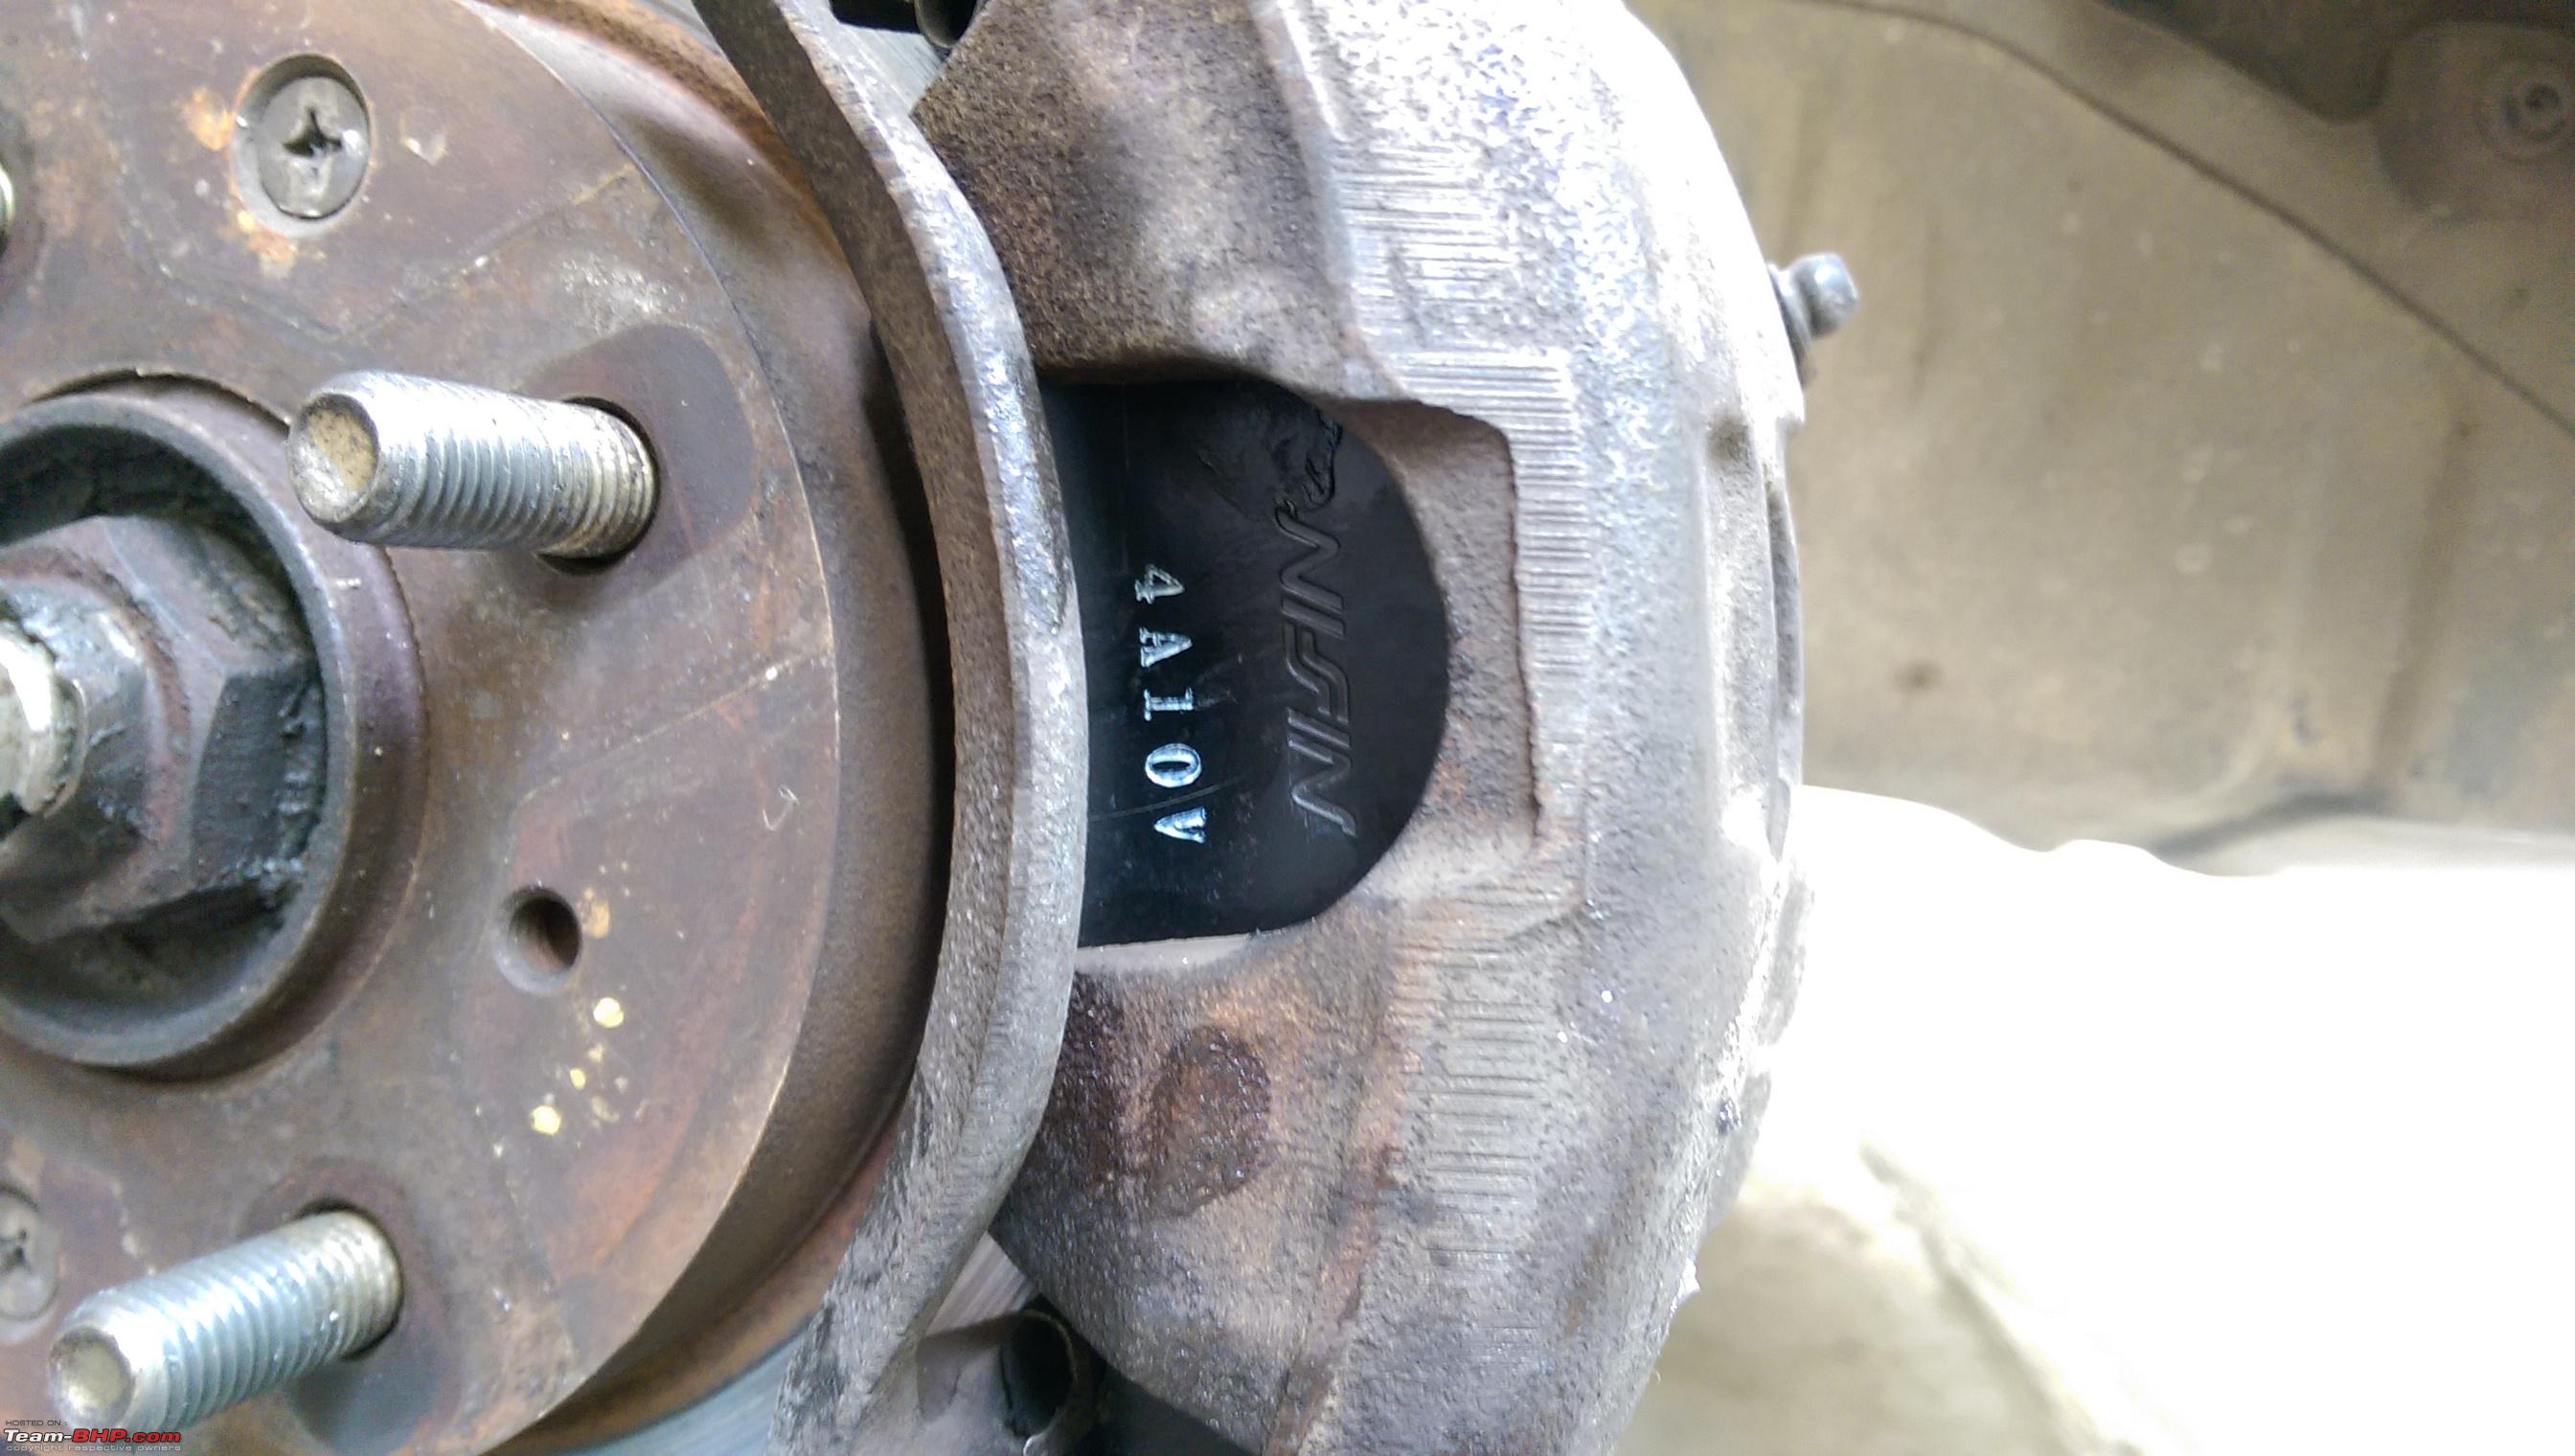
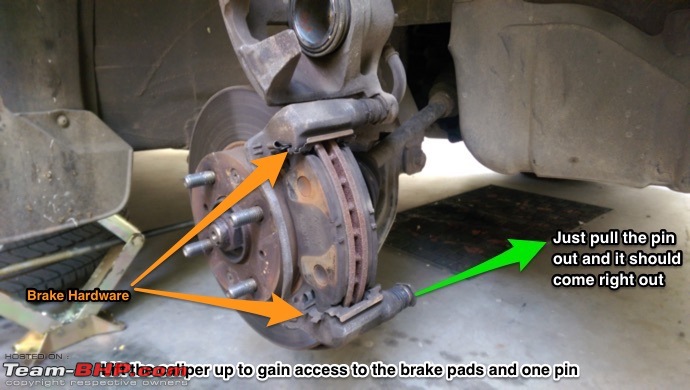
Loosen the bottom bolt of the caliper and lift the caliper upwards to gain access to the brake pads, remove the pads and clean all excessive brake dust and dirt from the caliper and surrounding regions. In order to get the piston back into the caliper, use the old brake pad as a support structure and with the help of the C-Clamp, push the piston back into the caliper. Remove the bottom Guide pin and its rubber boot and clean all the old grease and dirt using a cotton rag. Inspect for wear. Replace them if necessary. In my case, the caliper pins were badly worn and I have placed an order for the same, but they haven’t arrived yet. Don’t forget to take out all the brake hardware, clean them, apply a smidget of grease on them and fix them back so that the pads can move freely within the caliper assembly.
The whole point of a caliper guide pin is to allow free movement of the caliper to and from the brake disc. This is what allows the caliper and the pads to move to freely when you put your foot on and off the brake. Now, With a worn out, or say, a pin without any lubrication, what will happen is, that it will lead to uneven brake pad wear. For instance the inner pad would be all the way to the backing plate while the pads in the front would have enough meat left for another 10k, or the pads remain stuck to the rotor because the pin wont let the pads to release hence leading to faster brake wear and resulting in you having to splurge more of the green stuff on new pads, discs and fuel.
Most FNG guys don’t really care to use silicone or caliper grease. They just use the same cheap bucket of regular grease that they apply everywhere else. Now what happens when regular grease is applied to the pins is that the rubber boot will start to brittle out much faster, plus this regular grease is not resistant to the heat levels of caliper grease or silicone grease and will often just vanish leaving the pins without any lubrication. Silicone grease ensures that the rubber boot remains in good condition for extended periods of time and can tolerate heat much better. So even if it takes an extra effort to procure caliper grease, it’s worth it in the long run to go out of you way and purchase some.

Turn the steering to the side you are working on, jack up the car and remove the wheel. This will open up some more room to work a bit more comfortably.

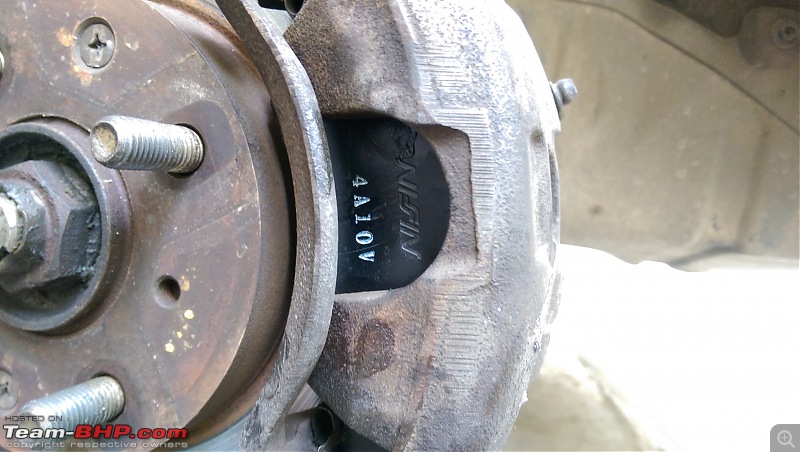
Although I’ve removed only one bolt in the image ive attached below, I did remove the other bolt too, completely taking the caliper off from its mount. If you are to do this, support/ hang the caliper in such a way that the brake lines are not under tension. Doing this, I was able to get both pins out simultaneously

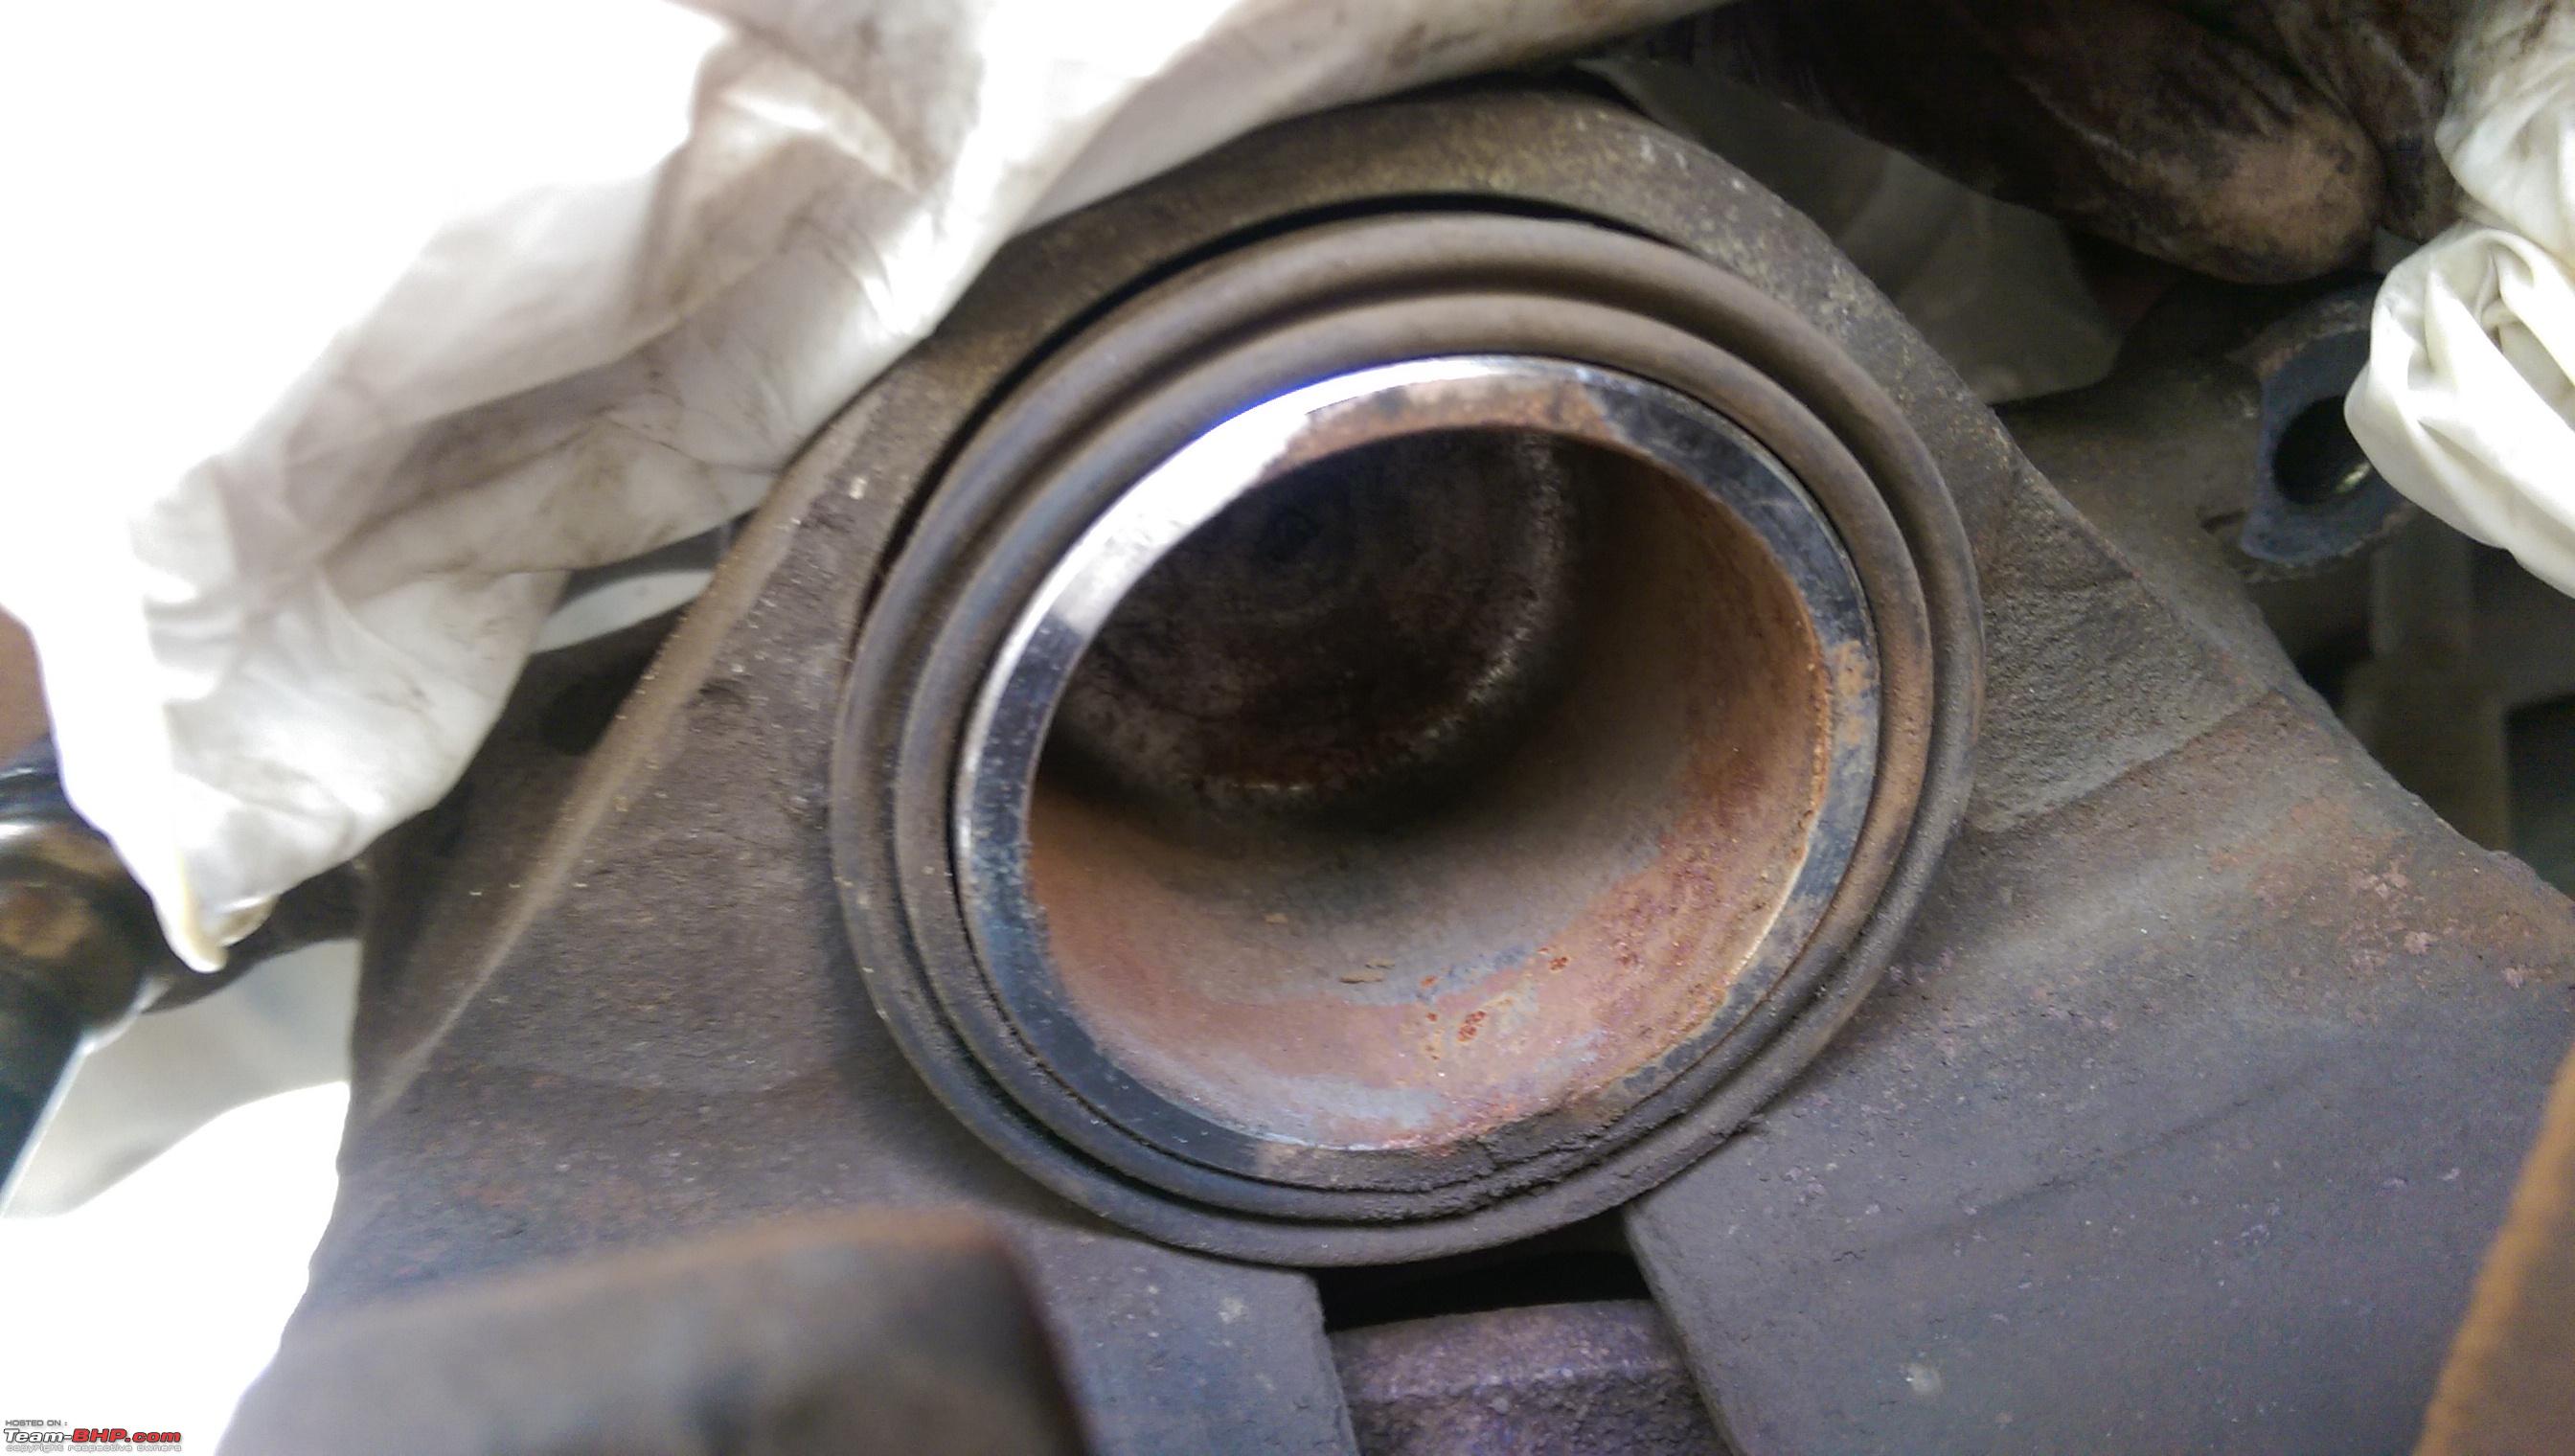
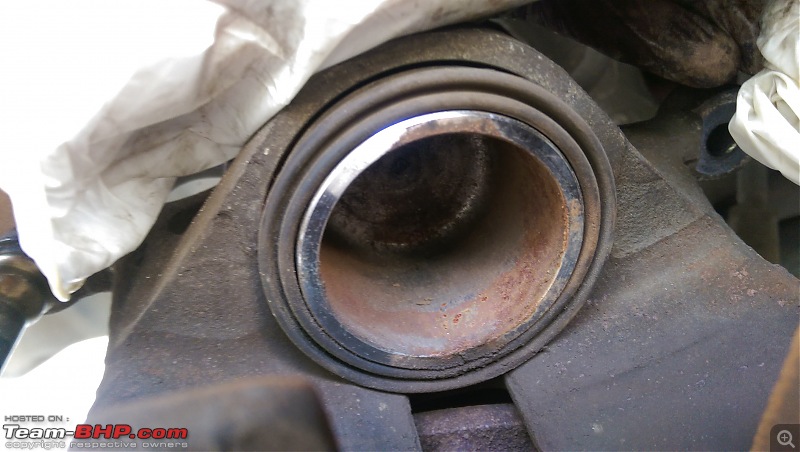
There is some amount of surface rusting in the caliper piston which seems normal. Just some sandpaper would work wonders, as this surface is not the surface that will affect the movement of the piston. I did have the caliper pistons replaced a couple of years back when there was some rust on the outer side which could hinder the movement of the caliper piston. The worst being your brakes being jammed on since the caliper piston cannot move back into the caliper.
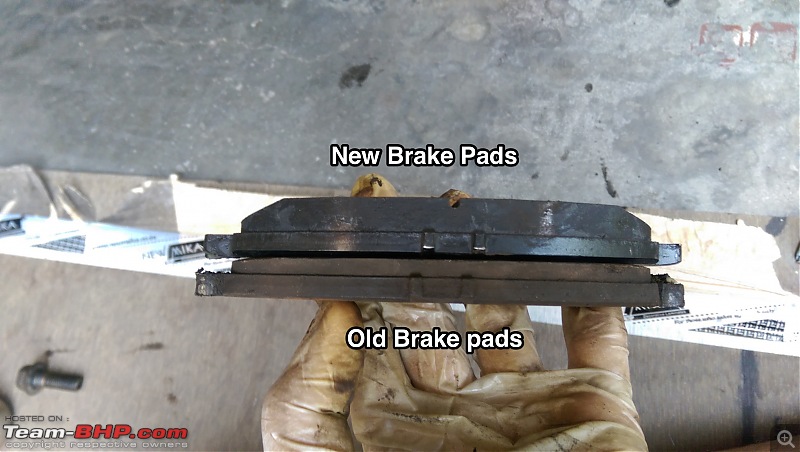
The old pads that I replaced do look like they have some life left in them, and they do. The truth is that the pads had lost their initial bite point and somehow I felt that the car didn’t brake like the way it should. Prior to this, I did clean the pads with some sandpaper and emery sheet, but it didn’t help at all.
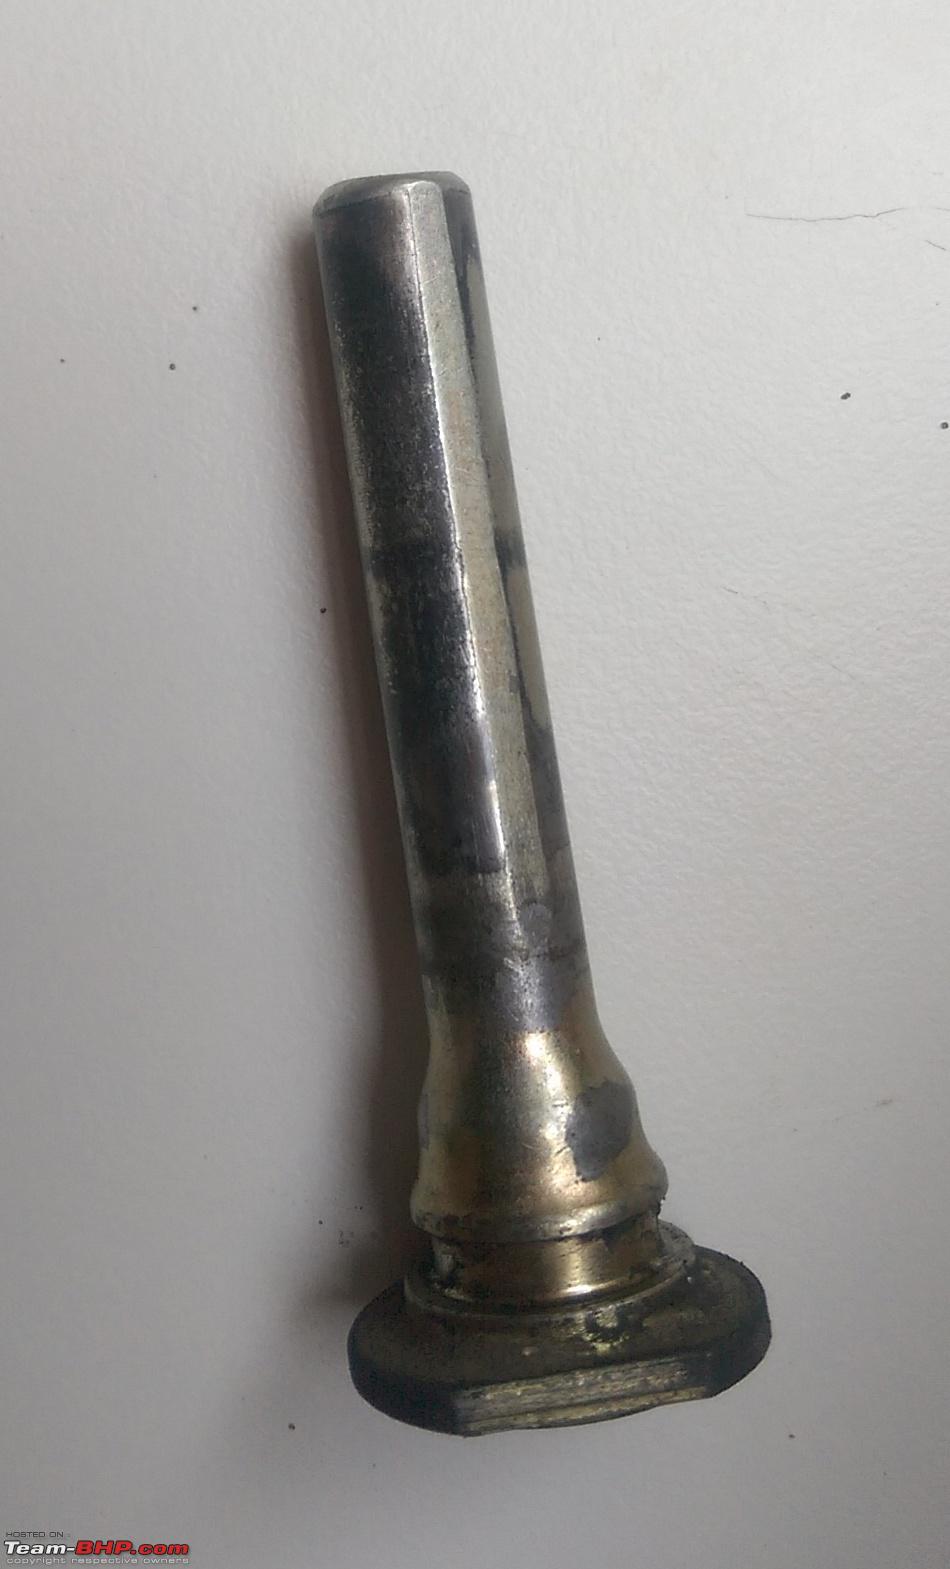
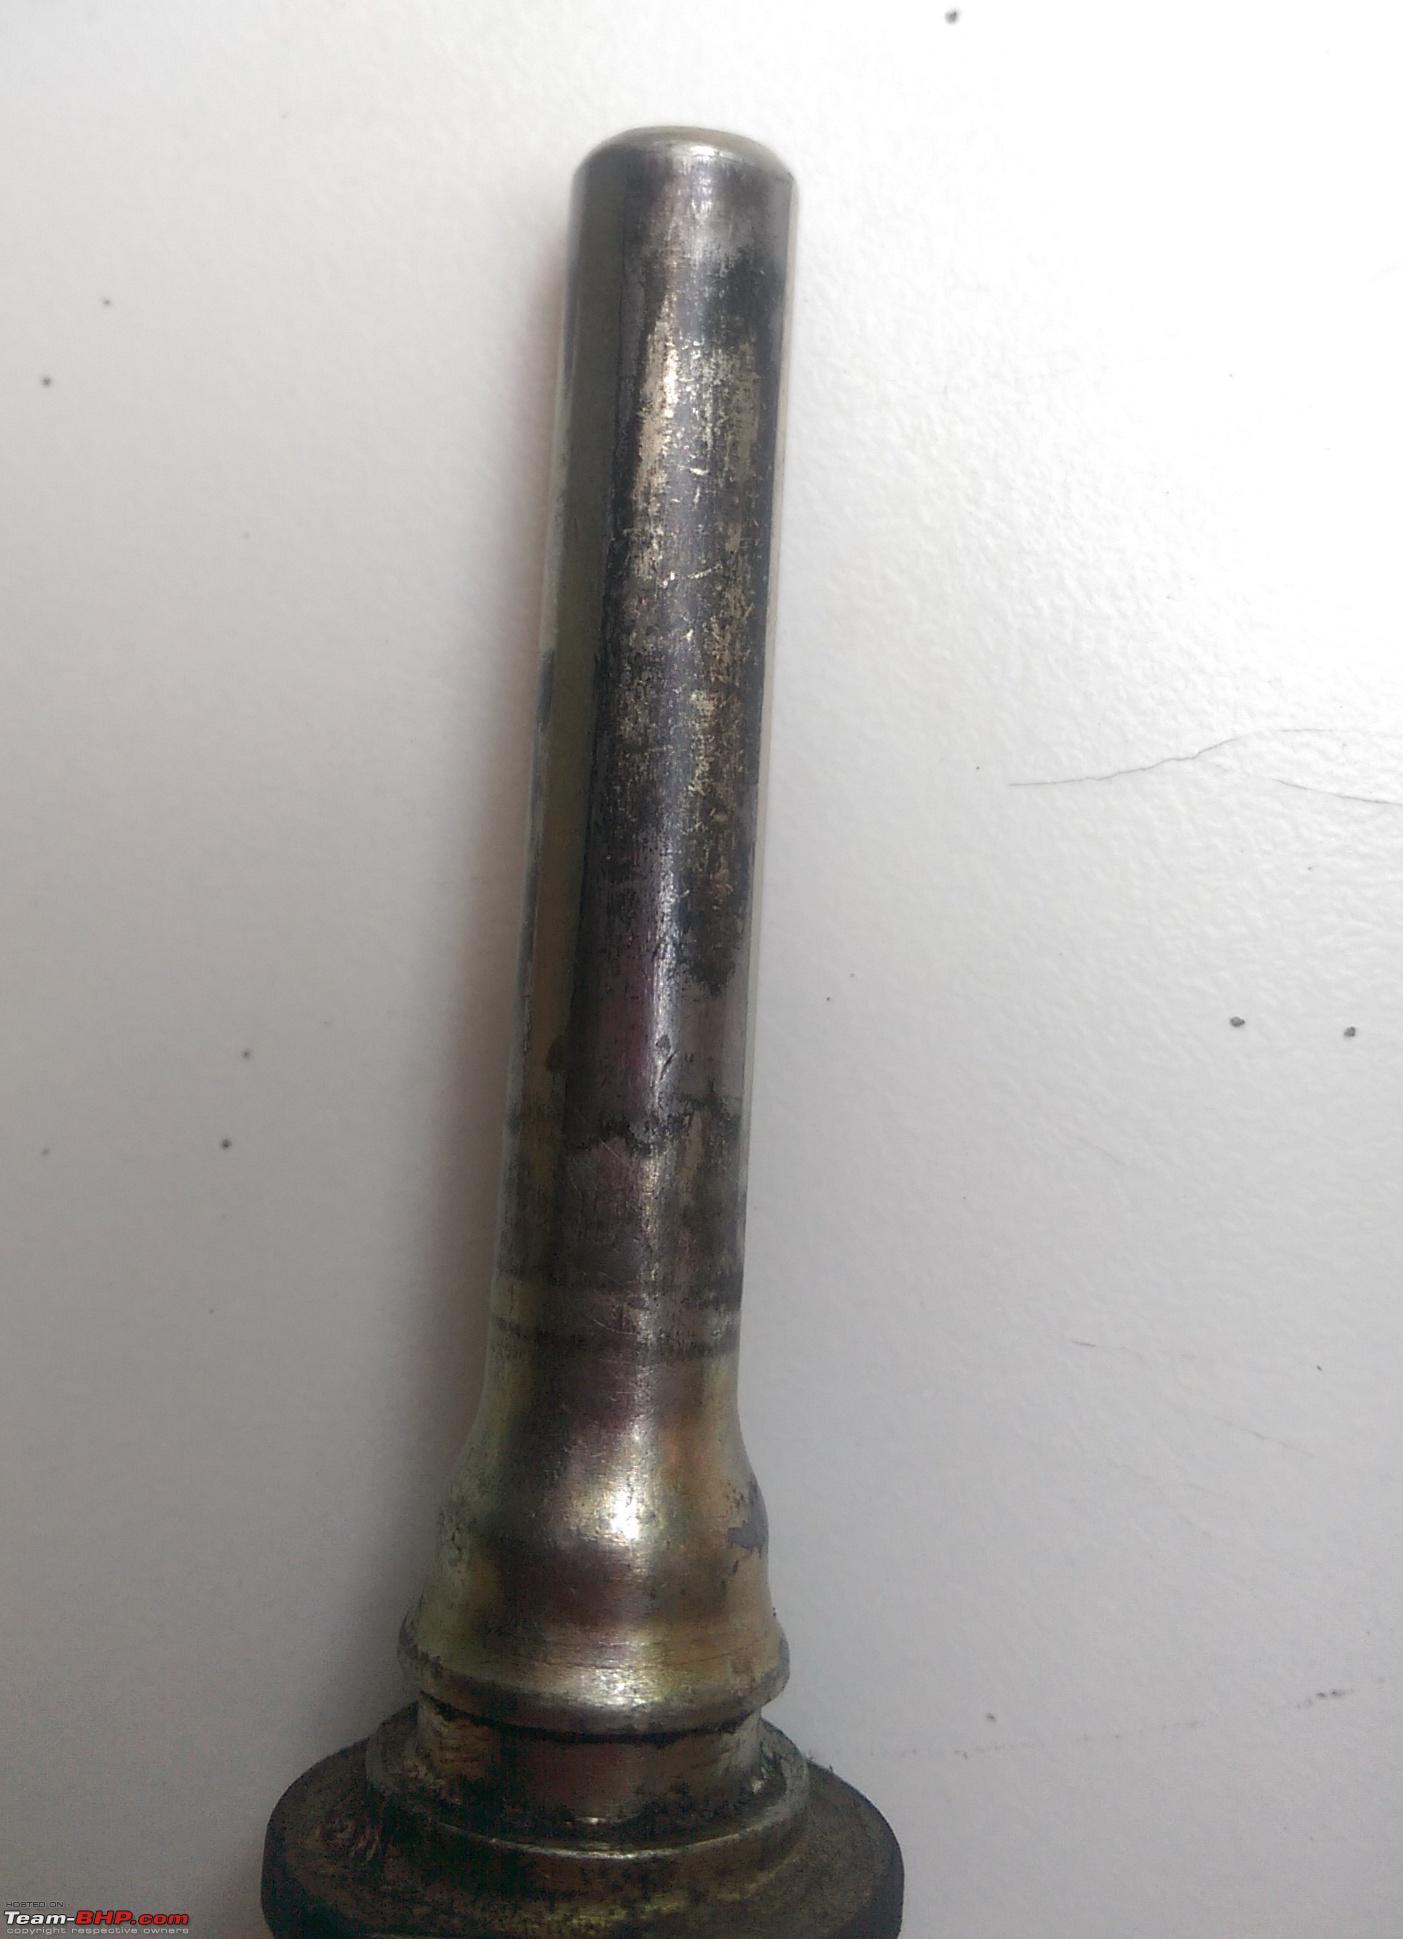
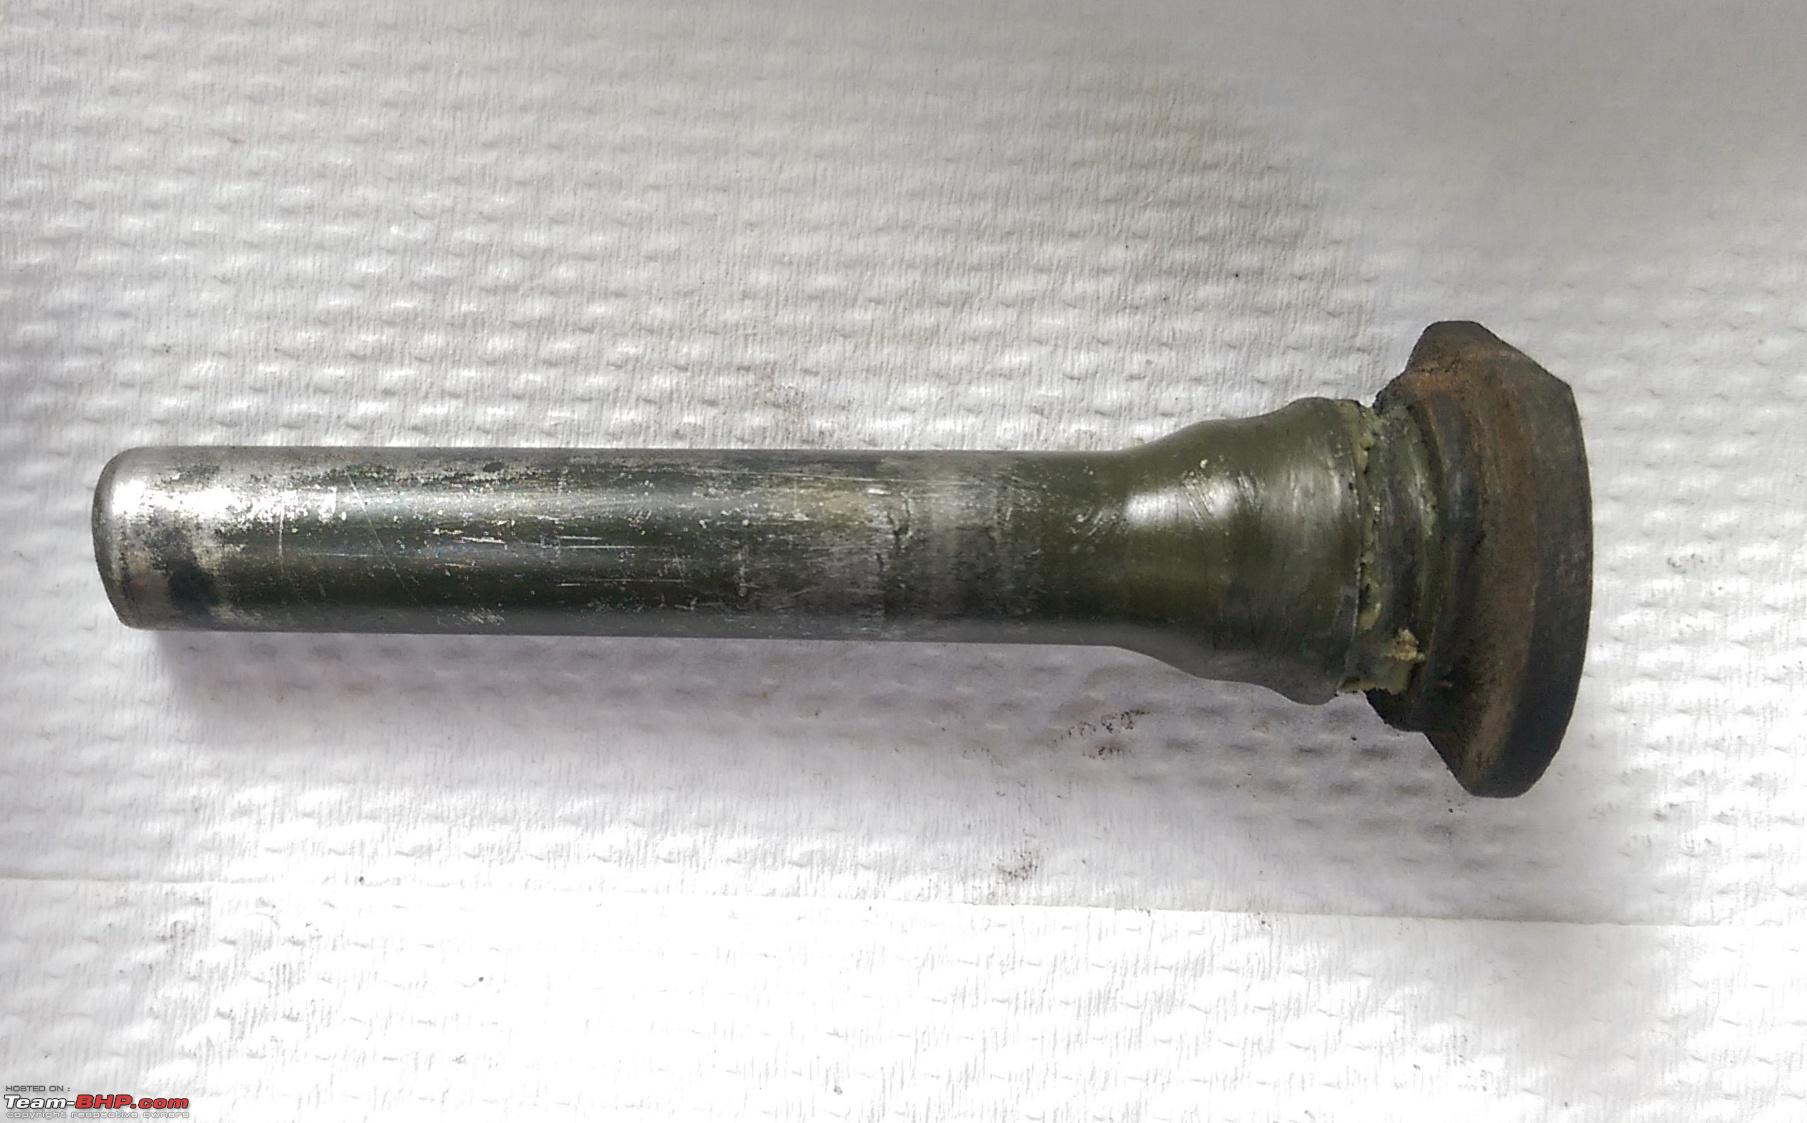
What a worn out caliper pin looks like this. (Mine are destroyed, but any black scarring is signs of wear and should be replaced)


I decided to get rid of the old pads since I wasn’t happy with them after cleaning them. So in went the new pads after all the brake hardware and caliper pins were cleaned and adequately lubricated. And all it takes for the piston to be pushed back in, is one of the old brake pads and a C clamp.

Brand new brake pads! clap:
Do the same for the other side and you should be all set to munch more miles in true BHP fashion. If your car is equipped with rear disc brakes, then you might have to work twice as hard, not neglecting them in the process. Here’s till you wear out the next set of pads. Drive safe!:D
Thread moved from the Assembly Line. Thanks for sharing.
Thanks for sharing. A couple of additional thoughts/ comments.
The caliper bolts really ought to be tightened with a proper torque wrech to the correct value. Quite a few manufacturers recommend only using new caliper bolts and not to re-use the old ones. Workshop manual will tell you the torque values and whether new bolts are required.
Jeroen
Thanks for the DIY mate but looking at the way the car was supported gave me the shivers.
But here's a request to ALL T-BHPians who perform any maintenance service(s) that require the vehicle to be raised and 2 or more wheels taken off. Please use JACK STANDS!! A normal jack with a tyre placed underneath the body does not suffice. Jack stands are inexpensive and a great investment in safety.
And @Jeroen's advice is spot on, please consult your service manual. In some cars, parts like caliper bolts, seals, rubber boots, washers etc are not meant to be reused. Buy them from your ASC or other spare part shop before you begin i.e. do your homework. Always use a torque wrench to torque the caliper bolts & wheel nuts after refitting. Remember, torque values can be off by a significant margin if old bolts have threads that are rusted or damaged in any manner.
A tip to those owners whose cars have rear disc brakes - some brake pistons need to be turned anti-clockwise or clockwise AND pressed inwards simultaneously so they retract. Please consult your service manual.
Quote:
Originally Posted by One:1
(Post 4327505)
One of the most used components in a car, especially in india, well, after the horn obviously, are the brakes. And the most commonplace where service centers make their money are replacing the brake pads. Its not that big of a job and it can save you a load of time and money in the process. Its a simple 30min job that can be done with common household tools and no specialty tools are required.
|
Thanks for the nice DIY!
Had a question regarding Brake calipers:
supposed I am replacing the front brake calipers, do I need to replace the brake pads along with them or can the existing slightly worn pads be used with the new calipers?
Quote:
Originally Posted by superutp
(Post 4452402)
Had a question regarding Brake calipers: supposed I am replacing the front brake calipers, do I need to replace the brake pads along with them or can the existing slightly worn pads be used with the new calipers?
|
Yes you can reuse the old pads provided they are of the min required thickness and are not glazed or damaged. Why are you considering replacing the calipers?
Quote:
Originally Posted by R2D2
(Post 4452697)
Yes you can reuse the old pads provided they are of the min required thickness and are not glazed or damaged. Why are you considering replacing the calipers?
|
Thanks for the reply. The brake pads in question are only 2k kms old so I guess thats as good as new.
Regarding the replacement, it turns out that the Cruze has a chronic problem of caliper pin rattle and despite attempting to repair it, the rattle over rough/bad roads keeps coming back. Chevrolet said that since its wear and tear the warranty cannot apply. They tried to repair it but it was fine for around 2 months but it came back. The terrible roads in Mumbai dont help either.
Quote:
Originally Posted by superutp
(Post 4452730)
Thanks for the reply. The brake pads in question are only 2k kms old so I guess thats as good as new. Regarding the replacement, it turns out that the Cruze has a chronic problem of caliper pin rattle and despite attempting to repair it, the rattle over rough/bad roads keeps coming back. Chevrolet said that since its wear and tear the warranty cannot apply. They tried to repair it but it was fine for around 2 months but it came back. The terrible roads in Mumbai dont help either.
|
You don't need to replace the calipers.
Just replace the caliper pins and if necessary the boots. Make sure to use a caliper pin grease not any general grease as it will affect the rubber boots. Much like your CV joint boots if brake boots tear or are punctured there go the caliper pins.
Quote:
Originally Posted by R2D2
(Post 4452734)
You don't need to replace the calipers.
Just replace the caliper pins and if necessary the boots. Make sure to use a caliper pin grease not any general grease as it will affect the rubber boots. Much like your CV joint boots if brake boots tear or are punctured there go the caliper pins.
|
Thanks for the suggestion. However, the last time I took it to Chevrolet they were adamant that it can be changed and had to get lathe work done to get it fit properly. they said the only option was to replace the caliper.
I wonder now with the lathe work done if the pins can be replaced?
Quote:
Originally Posted by superutp
(Post 4455412)
Thanks for the suggestion. However, the last time I took it to Chevrolet they were adamant that it can be changed and had to get lathe work done to get it fit properly. they said the only option was to replace the caliper. I wonder now with the lathe work done if the pins can be replaced?
|
If the pins are rusted they can be cleaned using a wire wheel. If they are pitted they need to be replaced. If the piston(s) is pitted or rusted it can be replaced too. Almost every part of the brake caliper assembly can be replaced separately that includes the piston, bleeder valve, shims and even rubber parts i.e. boots, O rings, washers and seals. However the only time to replace the caliper is if the piston bore/cylinder is scored badly.
Get a second opinion. Have a good FNG check your calipers and repair/replace as necessary.
Very often I get this charged for my Swift. What is the frequency of this cleaning and greasing should be done? It costs anywhere between 400 to 600 Rs depending on the authorized workshop
Quote:
Originally Posted by blorebuddy
(Post 4486580)
Very often I get this charged for my Swift. What is the frequency of this cleaning and greasing should be done? It costs anywhere between 400 to 600 Rs depending on the authorized workshop
|
Your car owners manual will specify the interval.
If this is not mentioned, get the calipers, pads and pins checked during the annual service for correct operation.
Ideally you should have the pins lubed when you get the brake fluid flushed i.e. about once in 2-3 years or 20-30K kms.
Good DIY, just one question which silicon lube did you use and where did you buy it from?
Just one tip : use copper grease on pads back and bolts
Quote:
Originally Posted by DeepakMenon
(Post 4489283)
Good DIY, just one question which silicon lube did you use and where did you buy it from?
Just one tip : use copper grease on pads back and bolts
|
Thank you DeepakMenon. Just walk into any lubricant shop and ask them for silicon grease. Not many will have it, but they will guide you to someone who does. What i used was some generic silicone grease, not the best.
What i didn't realise at that time was that i could have just walked into any MGP store and asked for caliper grease which is around 20INR a packet :Frustrati
yes, copper grease. ill keep that in mind. Any idea where i can get that in india?
| All times are GMT +5.5. The time now is 23:40. | |