Team-BHP
(
https://www.team-bhp.com/forum/)
Car :
Chevrolet Sail UVA (Oct-2013 VIN)
Kms - 98,500Kms (4 yrs, 8 mths)
Topic Related point - Never removed air flow plumbing till date other than replacing air filter element, never felt the need to (FE/Pickup was decent).
After reading through few threads in TBHP including this thread, I decided to take the plunge. First I wanted to blank and see its effects and then move to a larger and labor intensive solution involving removing entire air flow hoses, pipes, inter-cooler, inlet manifold, etc.
My DIY Story
Time Taken - 90 Mins
Car - Sail UVA Tdci (1.3 DDis aka MJD engine) Oct2013 (BS 2/3/4 Unknown.!!)
Place - Comfort of home
Basic Tools - Spanner set(s), Screwdriver (philips & minus), Rachet & Socket set with extension rod *MUST*
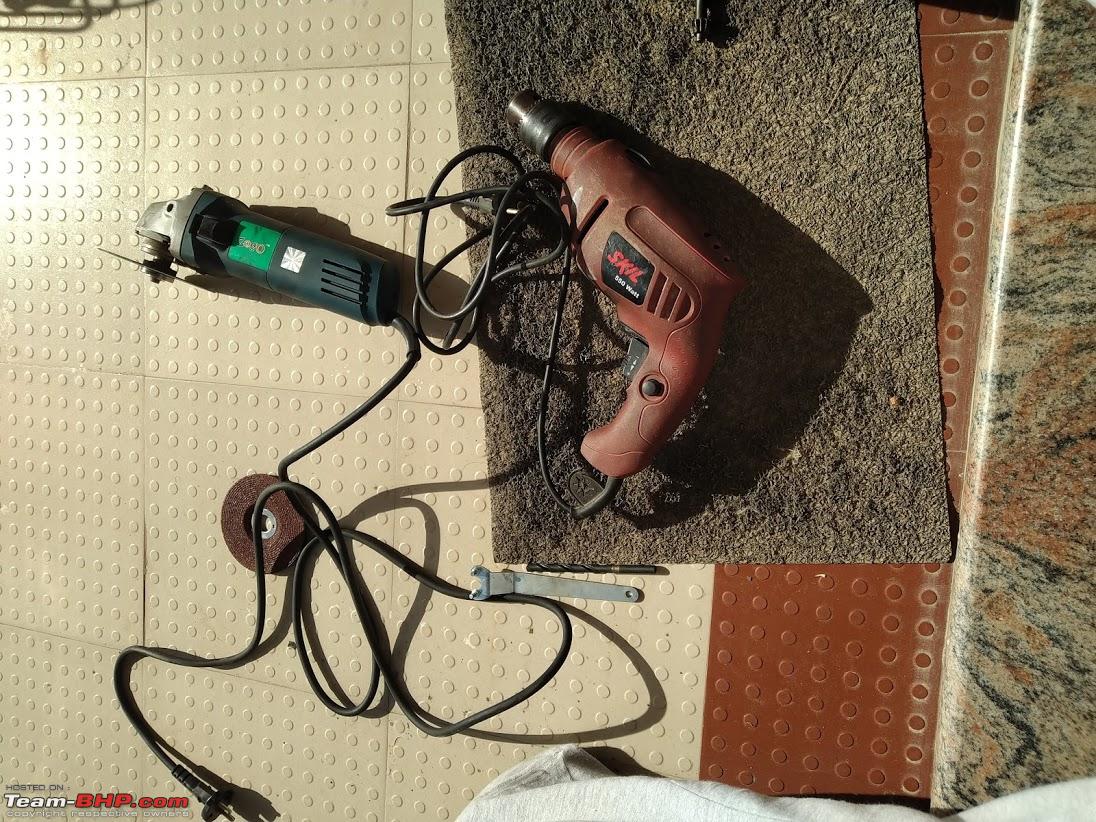
Power Tools - Angle grinder (cutting & grinding wheel to make a blank), Drilling machine with metal drill bits
For blank - any steel plate (<2mm preferred)
Step 1 : *Level - Easy* Prep Work...
Disconnect Battery, Coolant tank, Inlet Air Hose (rubber), Common Rail Power supply/sensor
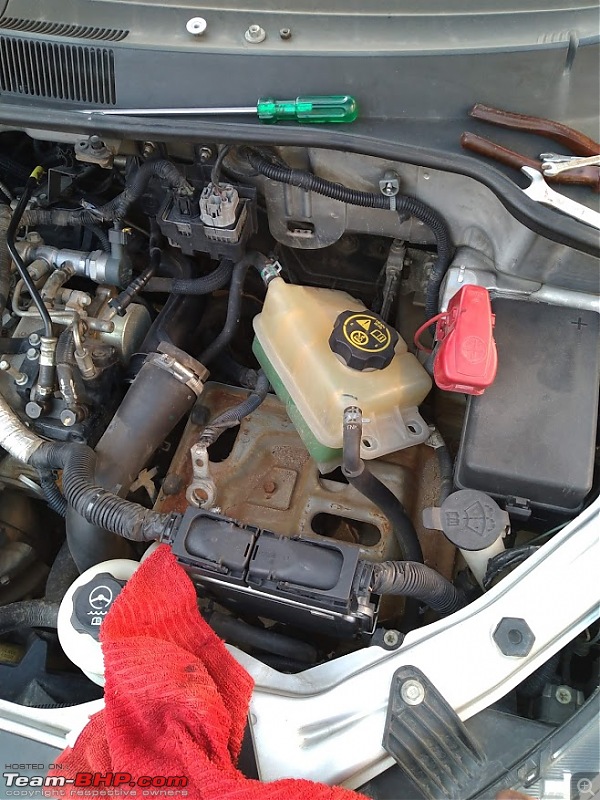
Note - sludge deposition noted in inlet hose, expect much worse ahead
 Step 2 : *Level - Medium* Making Way...
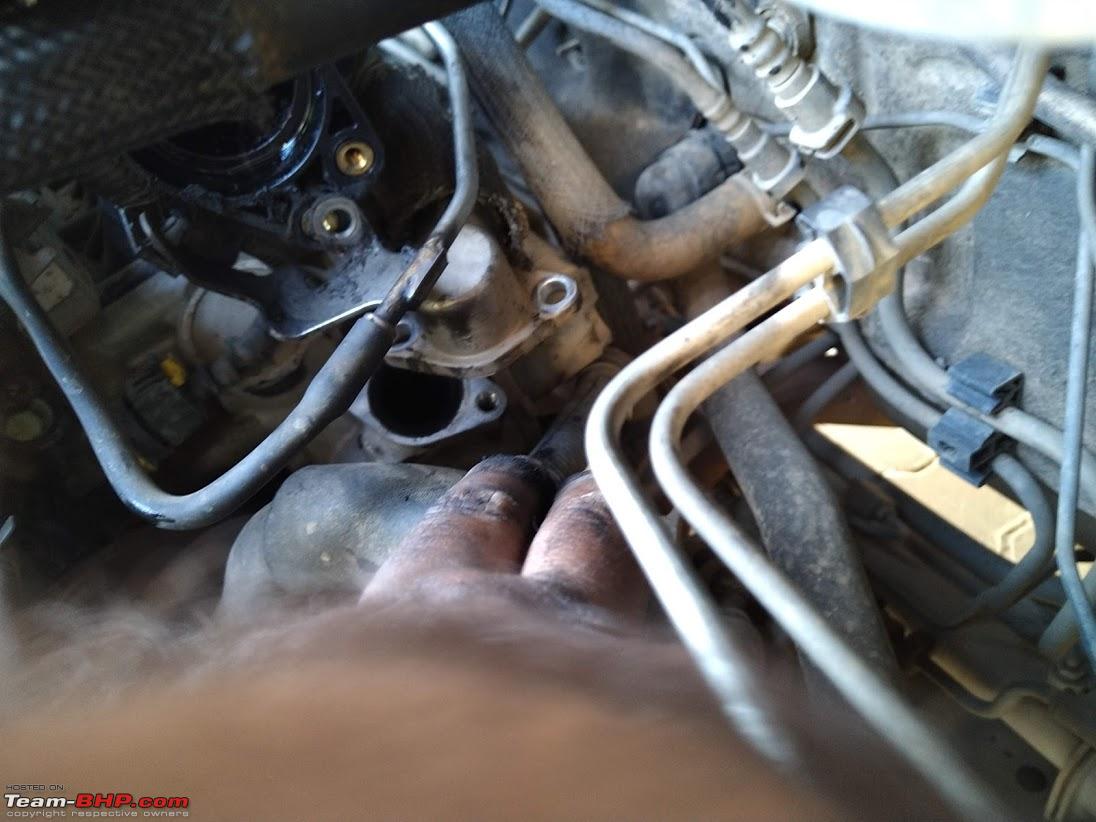
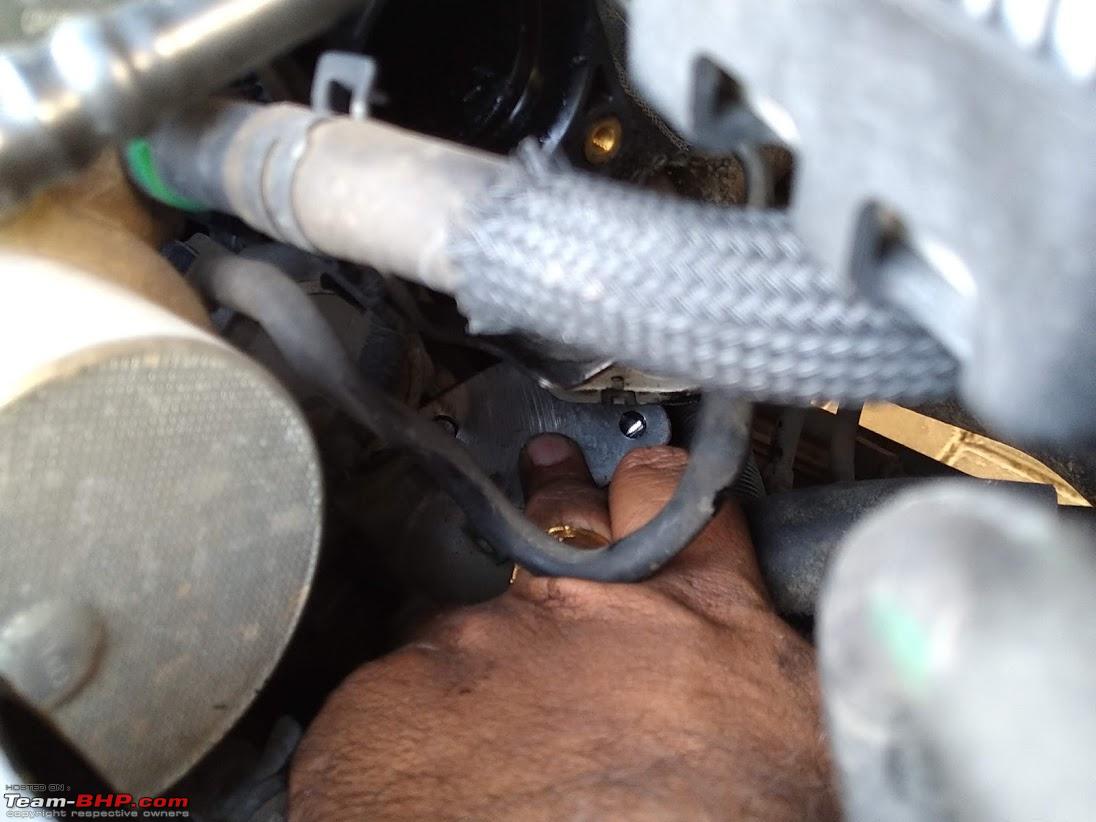
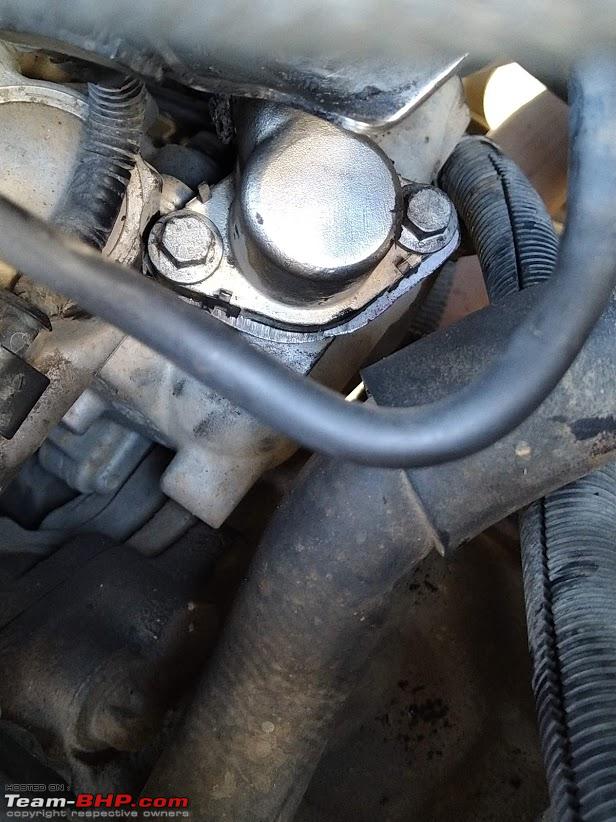
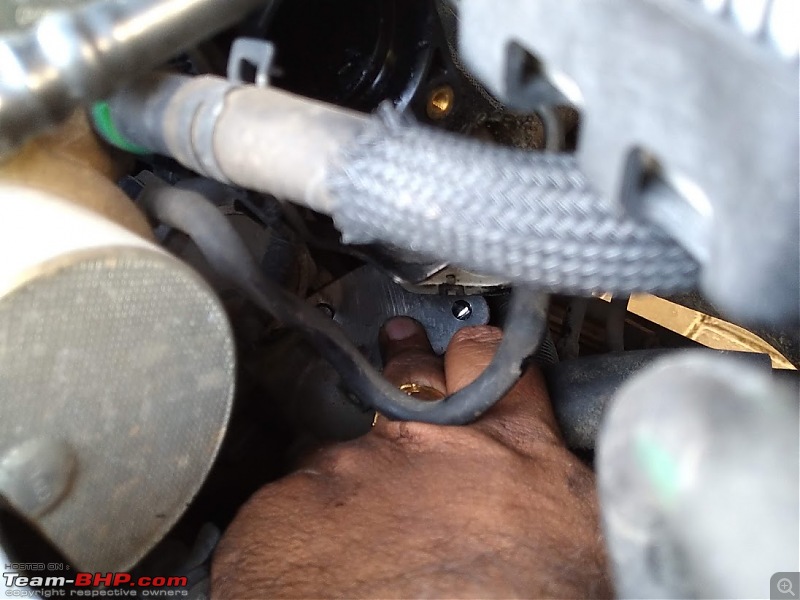
Things get little difficult from now on, the rubber hose from Intercooler goes into a Plastic pipe which is connected to inlet manifold by 2 nuts. One is visible, 2nd is frankly invisible and you need to use your fingers to assume its head position and remove/refit. Take care not to drop the nut of spanner inside the bulk head area, you had it!!

Close up of the invisible nut location

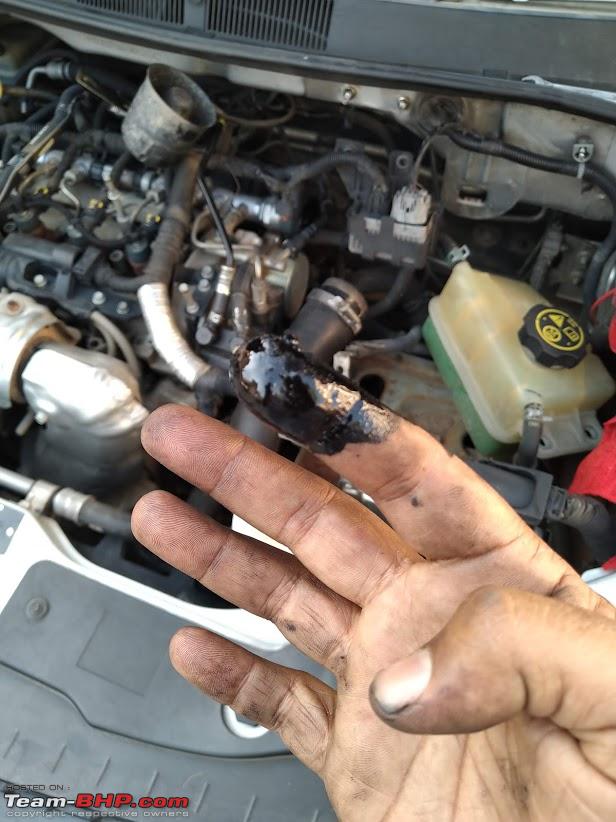
Note - Sludge was oozing/puddled up at BDC of the inlet manifold entry point, I was getting worried and decided to stick my finger to see the extent of damage.
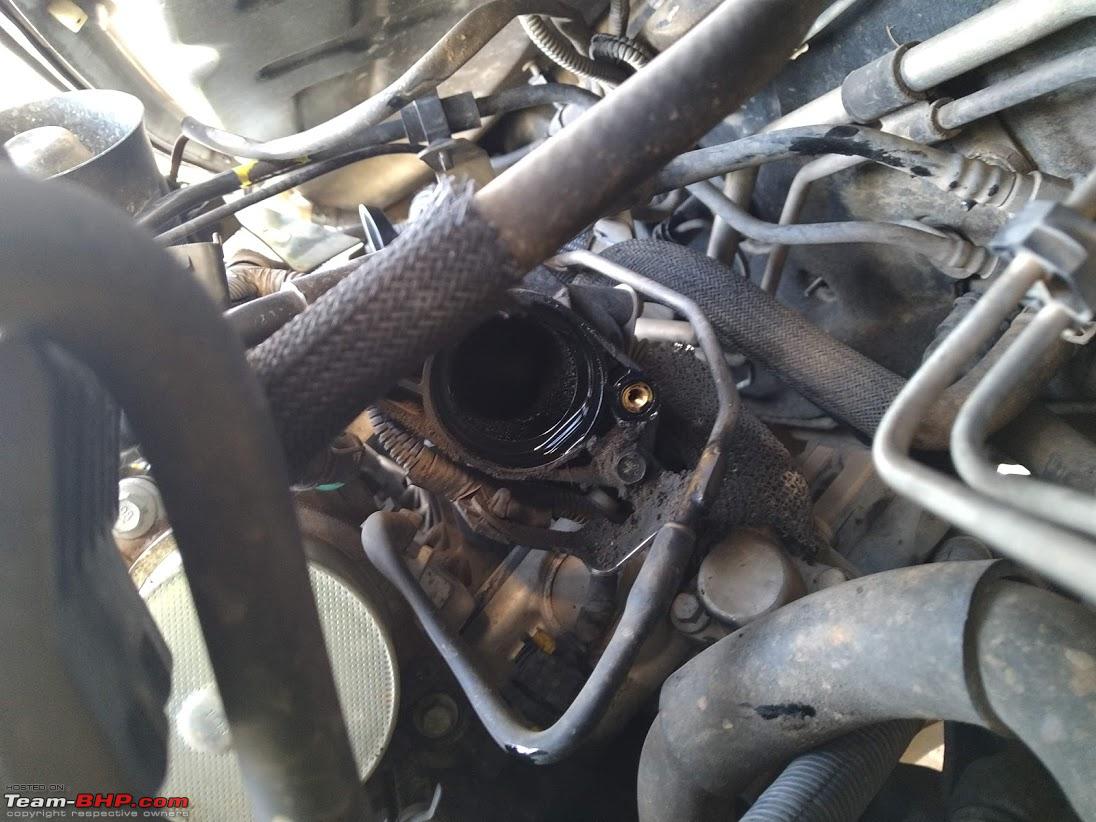
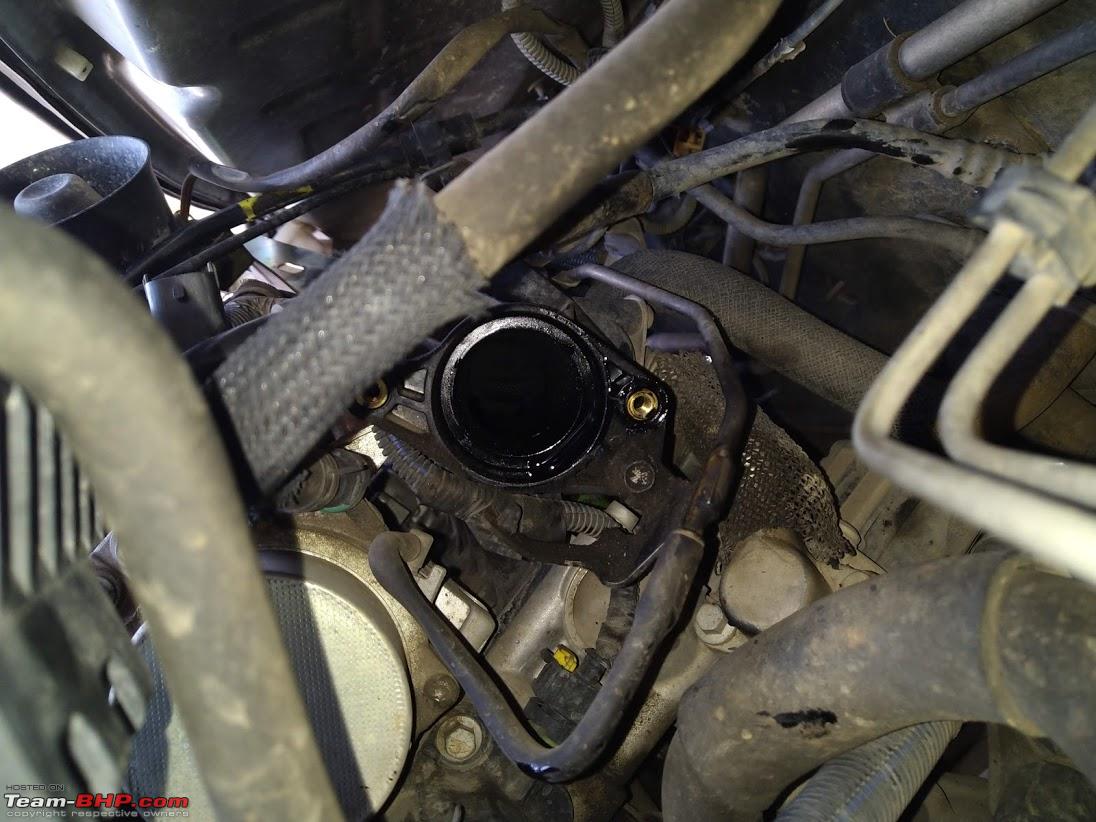
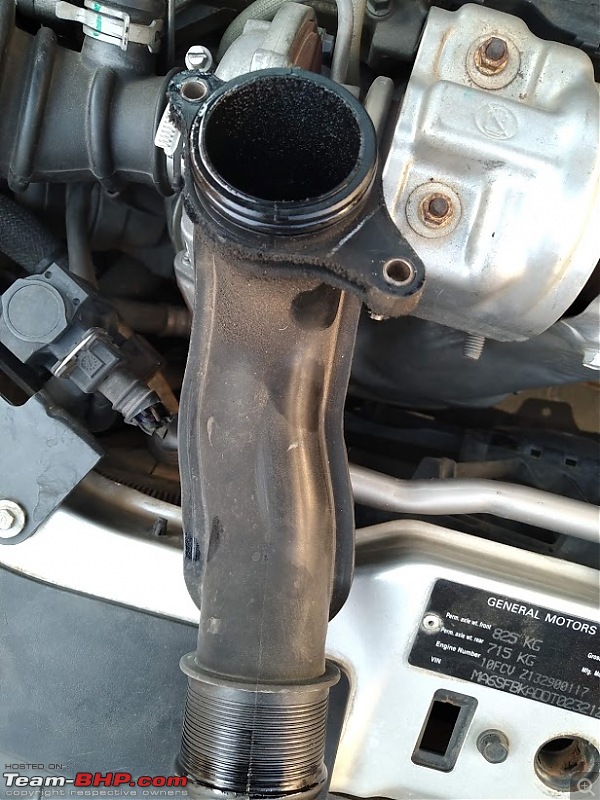
 Step 3 : *Level - Difficult* Finding Ground Zero...
Things get very tight for space now. Once the Plastic bend pipe is out of way you can see the EGR outlet port for the first time. Its visible in the top pics. You will need the extended rachet/socket to carefully (NOTE - SUPER CAREFULLY) remove the 2 bolts holding the aluminium bolts in place. Once they are removed, you need to flex the metal bellow+pipe out of the way to make place for the blank.
 Step 4 : *Level - Medium* Metal works...
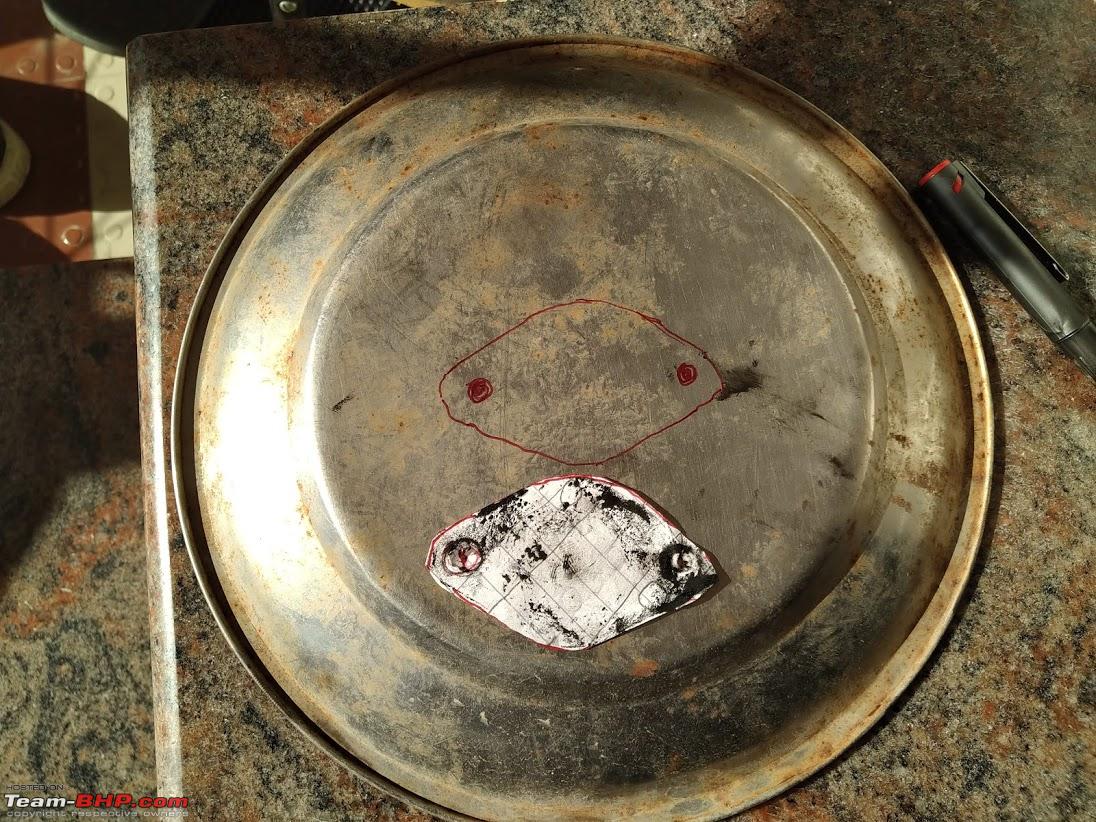
Making the blank is a unscientific job and I DONT have steady hands. A Metal worker can make the blank look cool, my output is just functional.
I used a piece of paper and pressed it against the bottom flange and the dust and carbon resulted in a crude shape, which I converted to a hand sketch trace and then onto a unused Stainless steel plate which once did duty in my house hold crockery now transferred to base of a kitchen garden pot.


Be careful while using power tools, before you know it you can loose a eye or a finger.

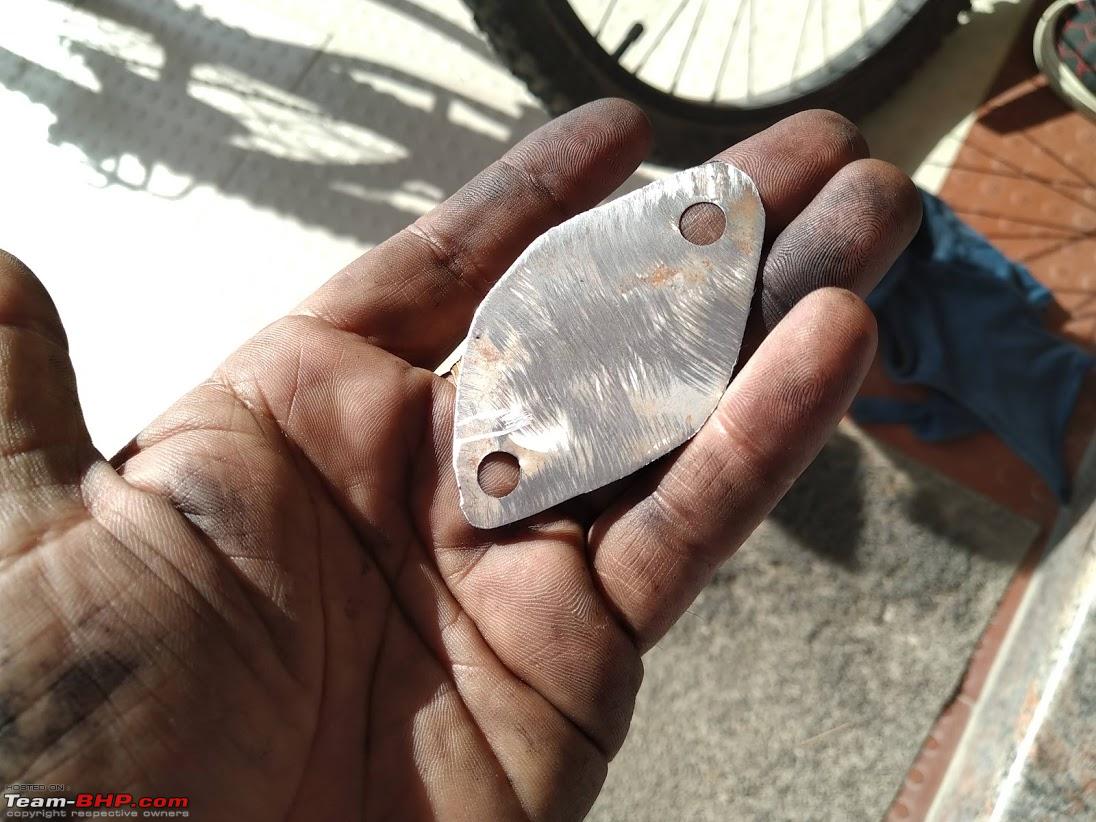
Blank ready, ensure its de-burred and grinded off.

Check the alignment of holes and oversize the bolt holes to allow a bit of nudging and shoving. I had to..!
Refit Bellow - Good luck with this step, It took a lot of sweat and back breaking work to get this refit.
 Step 5 : *Level - Medium* Refit everything back...
Take care while putting back the Mr.Invisible bolt of the plastic inlet manifold bend. Rest should fall in place.
PS - I successfully broke the common rail power sensor lock clip :Frustrati but its not something new for me, will take care of it later.
*END of DIY*
After this cross your fingers and turn the key on, see if it starts. I packed some snacks and few bottles of water and went on a 20Km test. Oh, and its good to have a ELM237 OBD-II scanner and a app like Torque Pro (Paid version).
Initial observations - umm,none!
Slowly opened her up, bit by bit, in all of the gears. Switched off and restarted after a 10-15 min drive. I could sense a very "pronounced" driveability improvement.
As expected EGR error was seen in scanner.

But top RPM went up from 5000 to 5100RPM and coolant stays below 70'C.

More in next post...
My Take on this DIY
1) Coolant sees lesser temp which is a byproduct of exhaust gases passing thru EGR.
2) Surprise to see max RPM go up a bit.
3) As experienced by many others, low end torque goes up a bit, now this couldnt have come at a better time. My O.E.M clutch (98K kms) is slowly fading and juddering. Suddenly it is smoother and that teeny-weeny bit of extra oomph is giving some extra juice to my end-of-life clutch set.
4) Especially with AC, I can feel a pronounced improvement in 1st & 2nd gear crawl speeds.
5) Engine revs a bit more freely and in-gear accelerations are noticeable better.
6) The WHINE is back! Very noticeable from 1800RPM onwards.
7) None of my Chevy Sail UVA "Invoice, Owners manual, RC Book, Boot door" mentions if it is a BS2,3,4,5!! So I have no clue if the check engine light will come on or not, have put in 120Kms after the mod, at various speeds and no sign of the check light yet. Even if CE light comes on, I am just going to check it in OBD app and delete it until it becomes a bother.
At the end of this exercise only one thing was evident to me. The following are in *URGENT* need of a thorough once over.
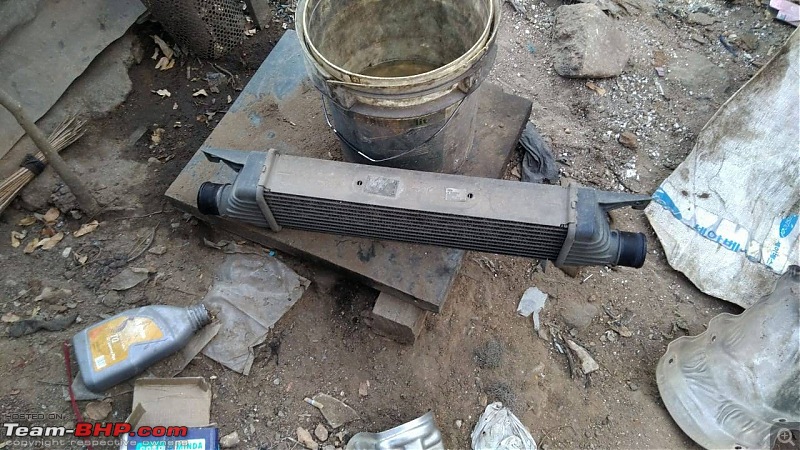
1) Intercooler (remove/flush/degrease/refit)
2) Inlet manifold (remove/flush/degrease/refit)
3) All Air Flow hoses and pipes (remove/flush/degrease/refit)
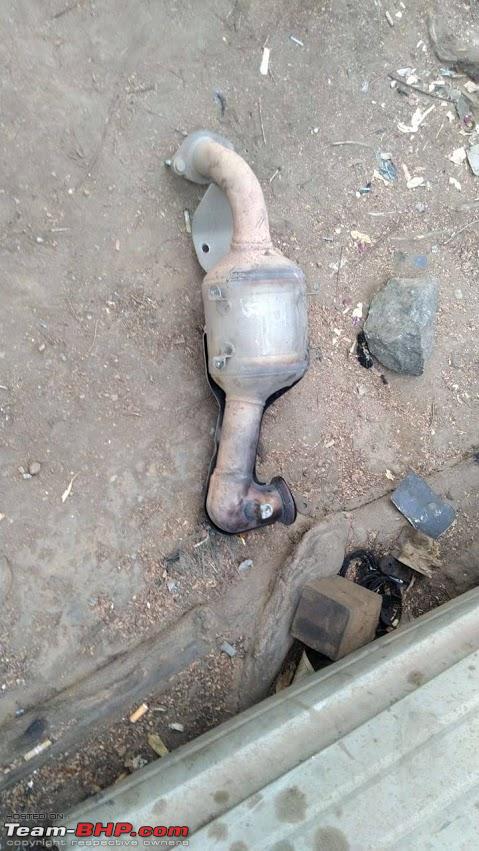
4) Cat-Con (remove/flush/degrease/refit)
I will update once these are done.
Quote:
Originally Posted by svsantosh
(Post 4556446)
......... The following are in *URGENT* need of a thorough once over.
1) Intercooler (remove/flush/degrease/refit)
2) Inlet manifold (remove/flush/degrease/refit)
3) All Air Flow hoses and pipes (remove/flush/degrease/refit)
4) Cat-Con (remove/flush/degrease/refit)
I will update once these are done.
|
I was out of town for a few days and I entrusted my mechanic to carry out the above. All I have are these pics from him, and sadly he chickened out from removing the inlet manifold because the common rail may need to be removed. I had strongly discouraged him from touching any critical part without my presence.
1) IC - Overhauled! Gummy deposits were found and after a flush with air water & a acid+water mix wash its as good as new.
2) Inlet Manifold - Not removed, but he could remove the inlet flange (sort of) which I could not remove for want of Torx screwdriver. He was able to soft-scrape out lots of sludge and slurry from as far as a hack saw blade could go deep. Sadly I dont have much idea about how much muck came out, but it sounds positive.
3) Hoses and pipes - cleaned
4) CatCon - This was also a revelation! After multiple and multiple attempts of water & air the box was cleaned up. Mechanic says he never expected the catcon to be so clogged up.
Bottom line, at the end of this small exercise the car feels much much lively and the new car oomph is definitely back on. The engine is very silky smooth and idling noise and running noise is much smoother now. I feel from next oil change onwards its time to experience full-synth.


Quote:
Originally Posted by svsantosh
(Post 4556412)
....After reading through few threads in TBHP including this thread, I decided to take the plunge..
|
And the 90 minute DIY was totally worth it...
Three Tank fulls, very different driving conditions and habits and traffic conditions. Now I can comfortably claim my average has increased from 18.5Kmpl to 20.5Kmpl. I have never experienced 20+ in my Sail UVA till date, I usually drive with a medium to medium-heavy foot, never a sedate driver.
PS - For those who are really interested to do this, see if your diesel pot has a Electronic Solenoid for the EGR. I just unplugged the solenoid connector (and wrapped it in masking tape) in my neighbors 2011 Punto (1.25Lac Kms on ODO) and hes totally grinning each day for the last 1 week.
For those who have a manual EGR activation system like my sail, be ready to take some risk and get your hands dirty. :D
@svsanthosh, I am not sure, but I think yours should be a BS3 engine. To the best of my knowledge, the BS4 EGR comes with an EGR cooler that uses the coolant to keep the EGR cooler. Again to the best of my knowledge, if you blank/unplug a BS4 EGR, the CEL would come up. Thus the reason, why people blank EGR with a small hole to minimize the gases going into the engine.
Hence going via the ECU to do an EGR delete via wolf/code 6/pete's is one way to get EGR off without CEL on BS4 engines
The muck that you see should be from the oil from the piston blowby. The gases passed from EGR settles on this oil to create the black muck. Since you have a mechanic handy, it would be very useful to get an oil catch can, that can catch the oil from reaching the intercooler / turbo, thus keeping them dry. (google/youtube for oil catch can videos)
Quote:
Originally Posted by govigov
(Post 4578752)
...if you blank/unplug a BS4 EGR, the CEL would come up.
|
Yes, I just delete it once in morning & evening and carry on. Totally worth the 20 seconds to get it deleted.
Quote:
Hence going via the ECU to do an EGR delete via wolf/code 6/pete's is one way to get EGR off without CEL on BS4 engines
|
I am ok with the CEL, am not ready to spend for the intended purpose for now.
Quote:
The muck that you see should be from the oil from the piston blowby. The gases passed from EGR settles on this oil to create the black muck. Since you have a mechanic handy, it would be very useful to get an oil catch can, that can catch the oil from reaching the intercooler / turbo, thus keeping them dry. (google/youtube for oil catch can videos)
|
One always learns new things in TBHP :thumbs up
Am totally getting this idea done, thanks a ton!
Quote:
Originally Posted by govigov
(Post 4578752)
The muck that you see should be from the oil from the piston blowby. The gases passed from EGR settles on this oil to create the black muck. Since you have a mechanic handy, it would be very useful to get an oil catch can, that can catch the oil from reaching the intercooler / turbo, thus keeping them dry. (google/youtube for oil catch can videos)
|
The oil is not from the piston blowby but from the turbo oil seal. Direct injection engines rely on this oil to lubricate the intake valves to a certain extent.
Delete the egr if you wisht to, but don't install a catch can.
Quote:
Originally Posted by interc00led
(Post 4579088)
Delete the egr if you wisht to, but don't install a catch can.
|
Hmm. If I read your post correctly,
1. The muck that you see in the EGR is from the turbo oil seal and not from piston blowby.
2. The oil from the piston blowby is used for lubrication of the intake valves.
Is that accurate?
Your post is one of the few posts that say why not to install a catch can. I would definitely be interested in more reading material on the above points.
Thanks for sharing svsantosh! Moved your posts and the relevant responses to a dedicated thread.
Quote:
Originally Posted by govigov
(Post 4579153)
Hmm. If I read your post correctly,
1. The muck that you see in the EGR is from the turbo oil seal and not from piston blowby.
2. The oil from the piston blowby is used for lubrication of the intake valves.
Is that accurate?
Your post is one of the few posts that say why not to install a catch can. I would definitely be interested in more reading material on the above points.
|
1.The muck is soot + oil. Without soot you won't find the intake manifold plugging up.
2. It's the oil from turbo, oil vapor from the piston blowby is is sent back to the oil sump by an oil separator. 1.3mjd also has one.
Would disabling the vacuum modulator disable the EGR too? I had trouble with the EGR on my car and was advised to remove a specific hose of vacuum modulator in case of any EGR issues in future to prevent the car from going in limp mode. I was told that it's for bypassing EGR, and would have no adverse effects on the engine.
Quote:
Originally Posted by wrongturn
(Post 4581309)
Would disabling the vacuum modulator disable the EGR too?
|
Yes. Remove the pipe and blank it to prevent the pipe from drawing in air.
I have a question or two.
The Swift Diesel's user maintenance chart shows EGR cleaning at around 30K and 70K IIRC. If this schedule is followed, do we still have to pull everything out and clean?
Do other diesel diesel vehicles have this cleaning as part maintenance schedule?
Quote:
Originally Posted by wrongturn
(Post 4581309)
Would disabling the vacuum modulator disable the EGR too? I had trouble with the EGR on my car and was advised to remove a specific hose of vacuum modulator in case of any EGR issues in future to prevent the car from going in limp mode. I was told that it's for bypassing EGR, and would have no adverse effects on the engine.
|
Quote:
Originally Posted by a4anurag
(Post 4581323)
Yes. Remove the pipe and blank it to prevent the pipe from drawing in air.
|
I think pulling out the vacum hose will lead to limp mode too.
I tried it on my diesel Aspire and wish it was that easy, but it leads to CEL and limp mode.
Quote:
Originally Posted by interc00led
(Post 4580567)
1.The muck is soot + oil. Without soot you won't find the intake manifold plugging up.
2. It's the oil from turbo, oil vapor from the piston blowby is is sent back to the oil sump by an oil separator. 1.3mjd also has one.
|
Is there any oil separator already built in all the modern diesel engines in India?
Quote:
Originally Posted by tharian
(Post 4581467)
I think pulling out the vacum hose will lead to limp mode too.
I tried it on my diesel Aspire and wish it was that easy, but it leads to CEL and limp mode.
|
Not true for all the cars, my Xylo has the 2.2L mHawk engine which is used by mahindra in a lot of it's cars like Scorpio, XUV 5OO etc. It is a BS4 engine and I've been driving with vacuum hose disconnected for a while now, no issues at all.
May be it wasn't the right hose that you disconnected.
| All times are GMT +5.5. The time now is 14:40. | |