| |||||||

 |
| Search this Thread |  72,235 views |
 26th June 2020, 12:12
| #1 |
| BHPian | My experience with Car Care products; How I Ceramic-Coated my Vento at home Caution : Long post Disclaimer : This write up is totally based on my experiences over months or years with the products that I have purchased from the market as per availability and requirement. There is no association with any brand or seller. I have included the prices for most of items that I have written about so that if someone wants to buy or plan to buy such a product, they can be prepared for it. Intro : Usually people write up ownership reviews of their vehicles. But I have taken a different path and decided to write an ownership review and journey with some external car care products. Mine is a 2017 Vento TDi Manual Transmission, bought in 2018 May. I chose the Carbon Steel color as I liked dark color cars for their wet look when maintained properly & I was pretty sure that I’d maintain it well. The car met with an accident in the later months of the same year. So some denting work was done on the right side doors and they were repainted. The right fender, front bumper and parts of rear quarter on the right side were repainted. All this was done at the ASS. Since day 1, the car was never washed by a third hand except my two hands. It was never detailed by outsiders except by the showroom guys before delivery and the ASS after the accident repair paint job. I even refused the complimentary car wash at the ASS that’s given in the 6 month check-up, 1 Year service and 2 Year service. I’ve been pretty careful with the paintwork (Engine too), used proper and safe wash techniques, never wiped it with dust, took as much care as I can to avoid swirls and scratches. Yet certain circumstances are unavoidable, specially for regularly used cars. Fine layer of dust settles on the car within 1 hour of washing it. People run their fingers along the panels. Some people when they find little dust on the car start to write their names, their lover’s names, phone numbers, draw hearts, draw designs and what not ! The worst part is the trunk. People find it as a support and do all kinds of mischievous things on it – put their bags on it, books, pads, use the surface as a support for writing. Once a person scratched the paint on my cars trunk by using it as a support for placing his exam pad on it and writing something. Some people just rest their backs on the car instead of standing straight ! As long as the car is at home, it’s parked inside. Our parking is not completely closed, but is open with ceiling above. When it’s out, not every shop/restaurant will have a cellar parking or a spacious parking, so the above issues are inevitable. I still took reasonable care in choosing a parking spot for my car. Of course, I avoid placing my keys in the hands of a valet driver for obvious reasons, but when I do, I request him in a soft voice and a respectful vocab to kindly take care of her. Coming to protection, I have been applying Collinite 845 Insulator wax since the 1st day (Yea, delivery was in the afternoon. Evening I washed and applied the wax) that the car has come home. I will talk about this later in this post. After the first day wash, with Collinite 845 applied. Notice the Collinite bottle on the left top corner of the photo  The Wet Look that I was talking about :  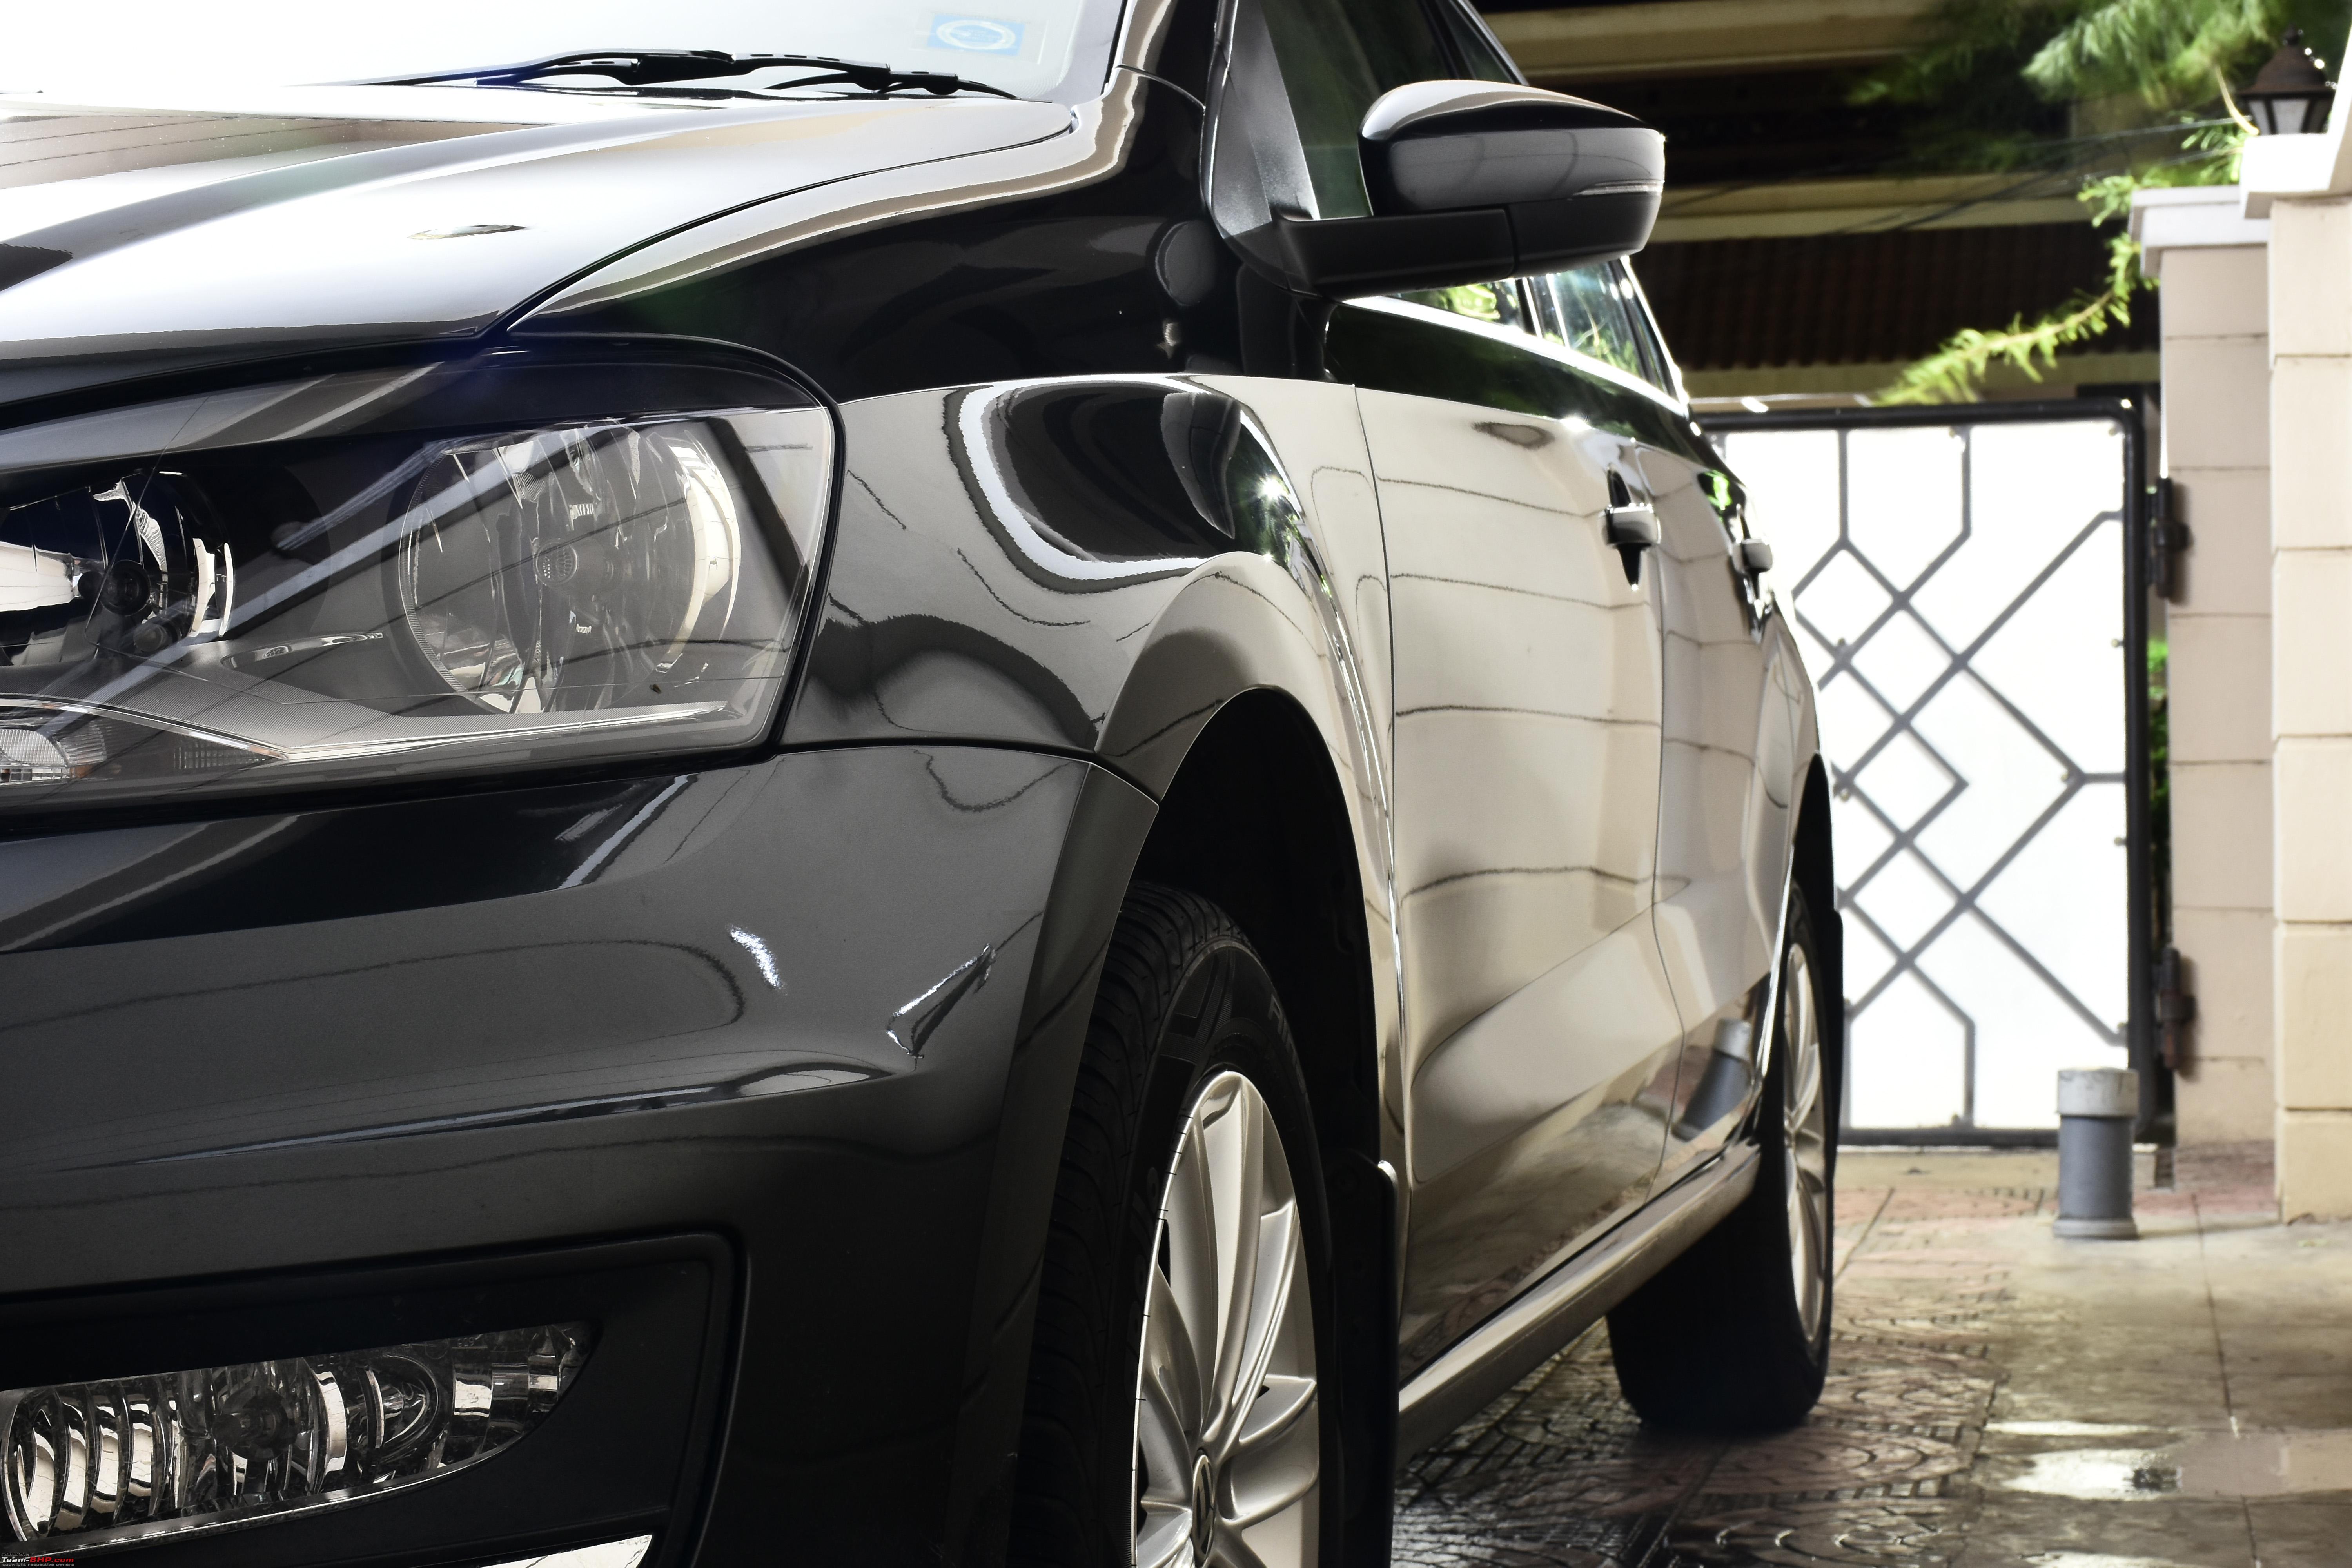  My Equipment – I have been quite interested in keeping our cars clean since I was very young. So, I have tried various products, failed many a times and learnt through my failures quite a bit. I’m still learning and will keep doing that. As time progressed, I collected some equipment over years that I’ve been using to wash my car regularly. This is a short list of stuff that I have been using with a short review of each. Bosch AQT 35-12 Pressure Washer : Bought it for Rs.8k and been using this since 3 years. The pressure is sufficient and never felt low for washing my car. I bought an extension hose of 6 meters for about Rs.1000, making the total length of the hose 12 meters. With this, I don’t have to move the machine here and there while washing. Pressure washing surely does remove most of the dust and dirt on a dry car. So while rinsing, the risk of scrubbing the dust becomes very less and so does the risk of inducing swirl marks. It helps a lot when the car is very dirty. I chose this over its rival Kaercher as Bosch has service centers in India and the spares are cheap. Kaercher’s spare extension hose, for example, costs as much as their basic pressure washer.  Notice the total length of hose with extension, can easily run to the other side of car without moving the machine :  Foam Lance for Bosch AQT Series : This is a cheap foam lance($23.2) that I bought from AliExpress. It has MJJC Print on the bottle provided and the lance itself is made of metal (Brass ?) and it is very heavy, indicating great durability and quality. Well, it lived without an issue for 3 years and counting. The foam it produces is also thick and good. It screws to any standard plastic cool-drink/soda bottle that we find in the market. I think this is as good as the expensive ones out there (MTM Foam cannon($80), etc). The quality of foam depends on many other aspects too, like pressure, hard/soft water, soap concentration, dedicated foam soap. Also fits our normal cool-drink pet bottles  Thick foam on my car, with 3M shampoo   Foaming on the Jetta  Bosch GBL 620 Professional Air Blower : As the name suggests, I bought this air blower to blow dry the car. Its air output is very good. It is heavy and it needs one to get habituated to the weight distribution while using it for long periods (Even minutes). I stopped using this to blow dry the entire car as it makes a very loud noise (unhappy neighbors). I now use it only to push the water out of crevices and to dry the wheels. It makes drying wheels an easy job. I sometimes use it to just blow the peripheral unstuck dust that accumulates a day after washing the car. It works great to blow off dust from the engine bay.  This side is heavier due to the presence of motor causing asymmetric weight distribution :  Kaercher WD 3 Wet and Dry Vacuum Cleaner : As the name suggests, this is a vacuum cleaner and is from Kaercher. It is an import from Germany. Kaercher makes some really high quality products. Their vacuum cleaner is no exception. WD3 is the base model available in India. It is good enough for most of the domestic applications. It comes will all necessary attachments and has storage for them around the machine itself. Suction power is good and makes car interior vacuuming a breeze. I chose Kaercher over other brands as it has no complaints in reliability of vacuum cleaners and its spares too are reasonably priced.  3M Automotive Car Shampoo : I bought 1 Liter bottles of these long ago when there were offers on Amazon. The label says PH Neutral. I use this shampoo in the foam cannon and it creates very thick foam, given the concentration is high. I only use the shampoo when the car is super dirty. And when I do, I use it only with the foam cannon and not in the bucket. For weekly washes, I do not use the shampoo. Just pressure washing the car coated with Collinite 845 removes all the dust. So, these shampoo bottles are just lying around. But having one is safe anytime.  AmazonBasics Microfiber Cloths : These are the cheapest microfiber cloths available online in India. Buying a pack of 36 or 48 makes each piece cost around Rs.15 to Rs.20, depending on the offer available. And these cloths are very frequently on such offers. They are small (12”x16”), thin, absorbent, and come in 3 colors in the pack (Yellow, Blue, White). They work well for the price. They lose their plushness rather soon, but at that price, they are worth the money. I use a plush(fresh) one for rinsing the car. They remain plush as long as they are not wringed. Frequent wringing will drastically bring down their softness and plushness. As they lose their plushness, I demote them to other purposes like to clean door jambs or to wipe the wheels. Wiping off waxes usually reduces the cloths life and absorbency. So, I use these cloths for such purposes. These cloths work great for household purposes too. 12" scale for size reference 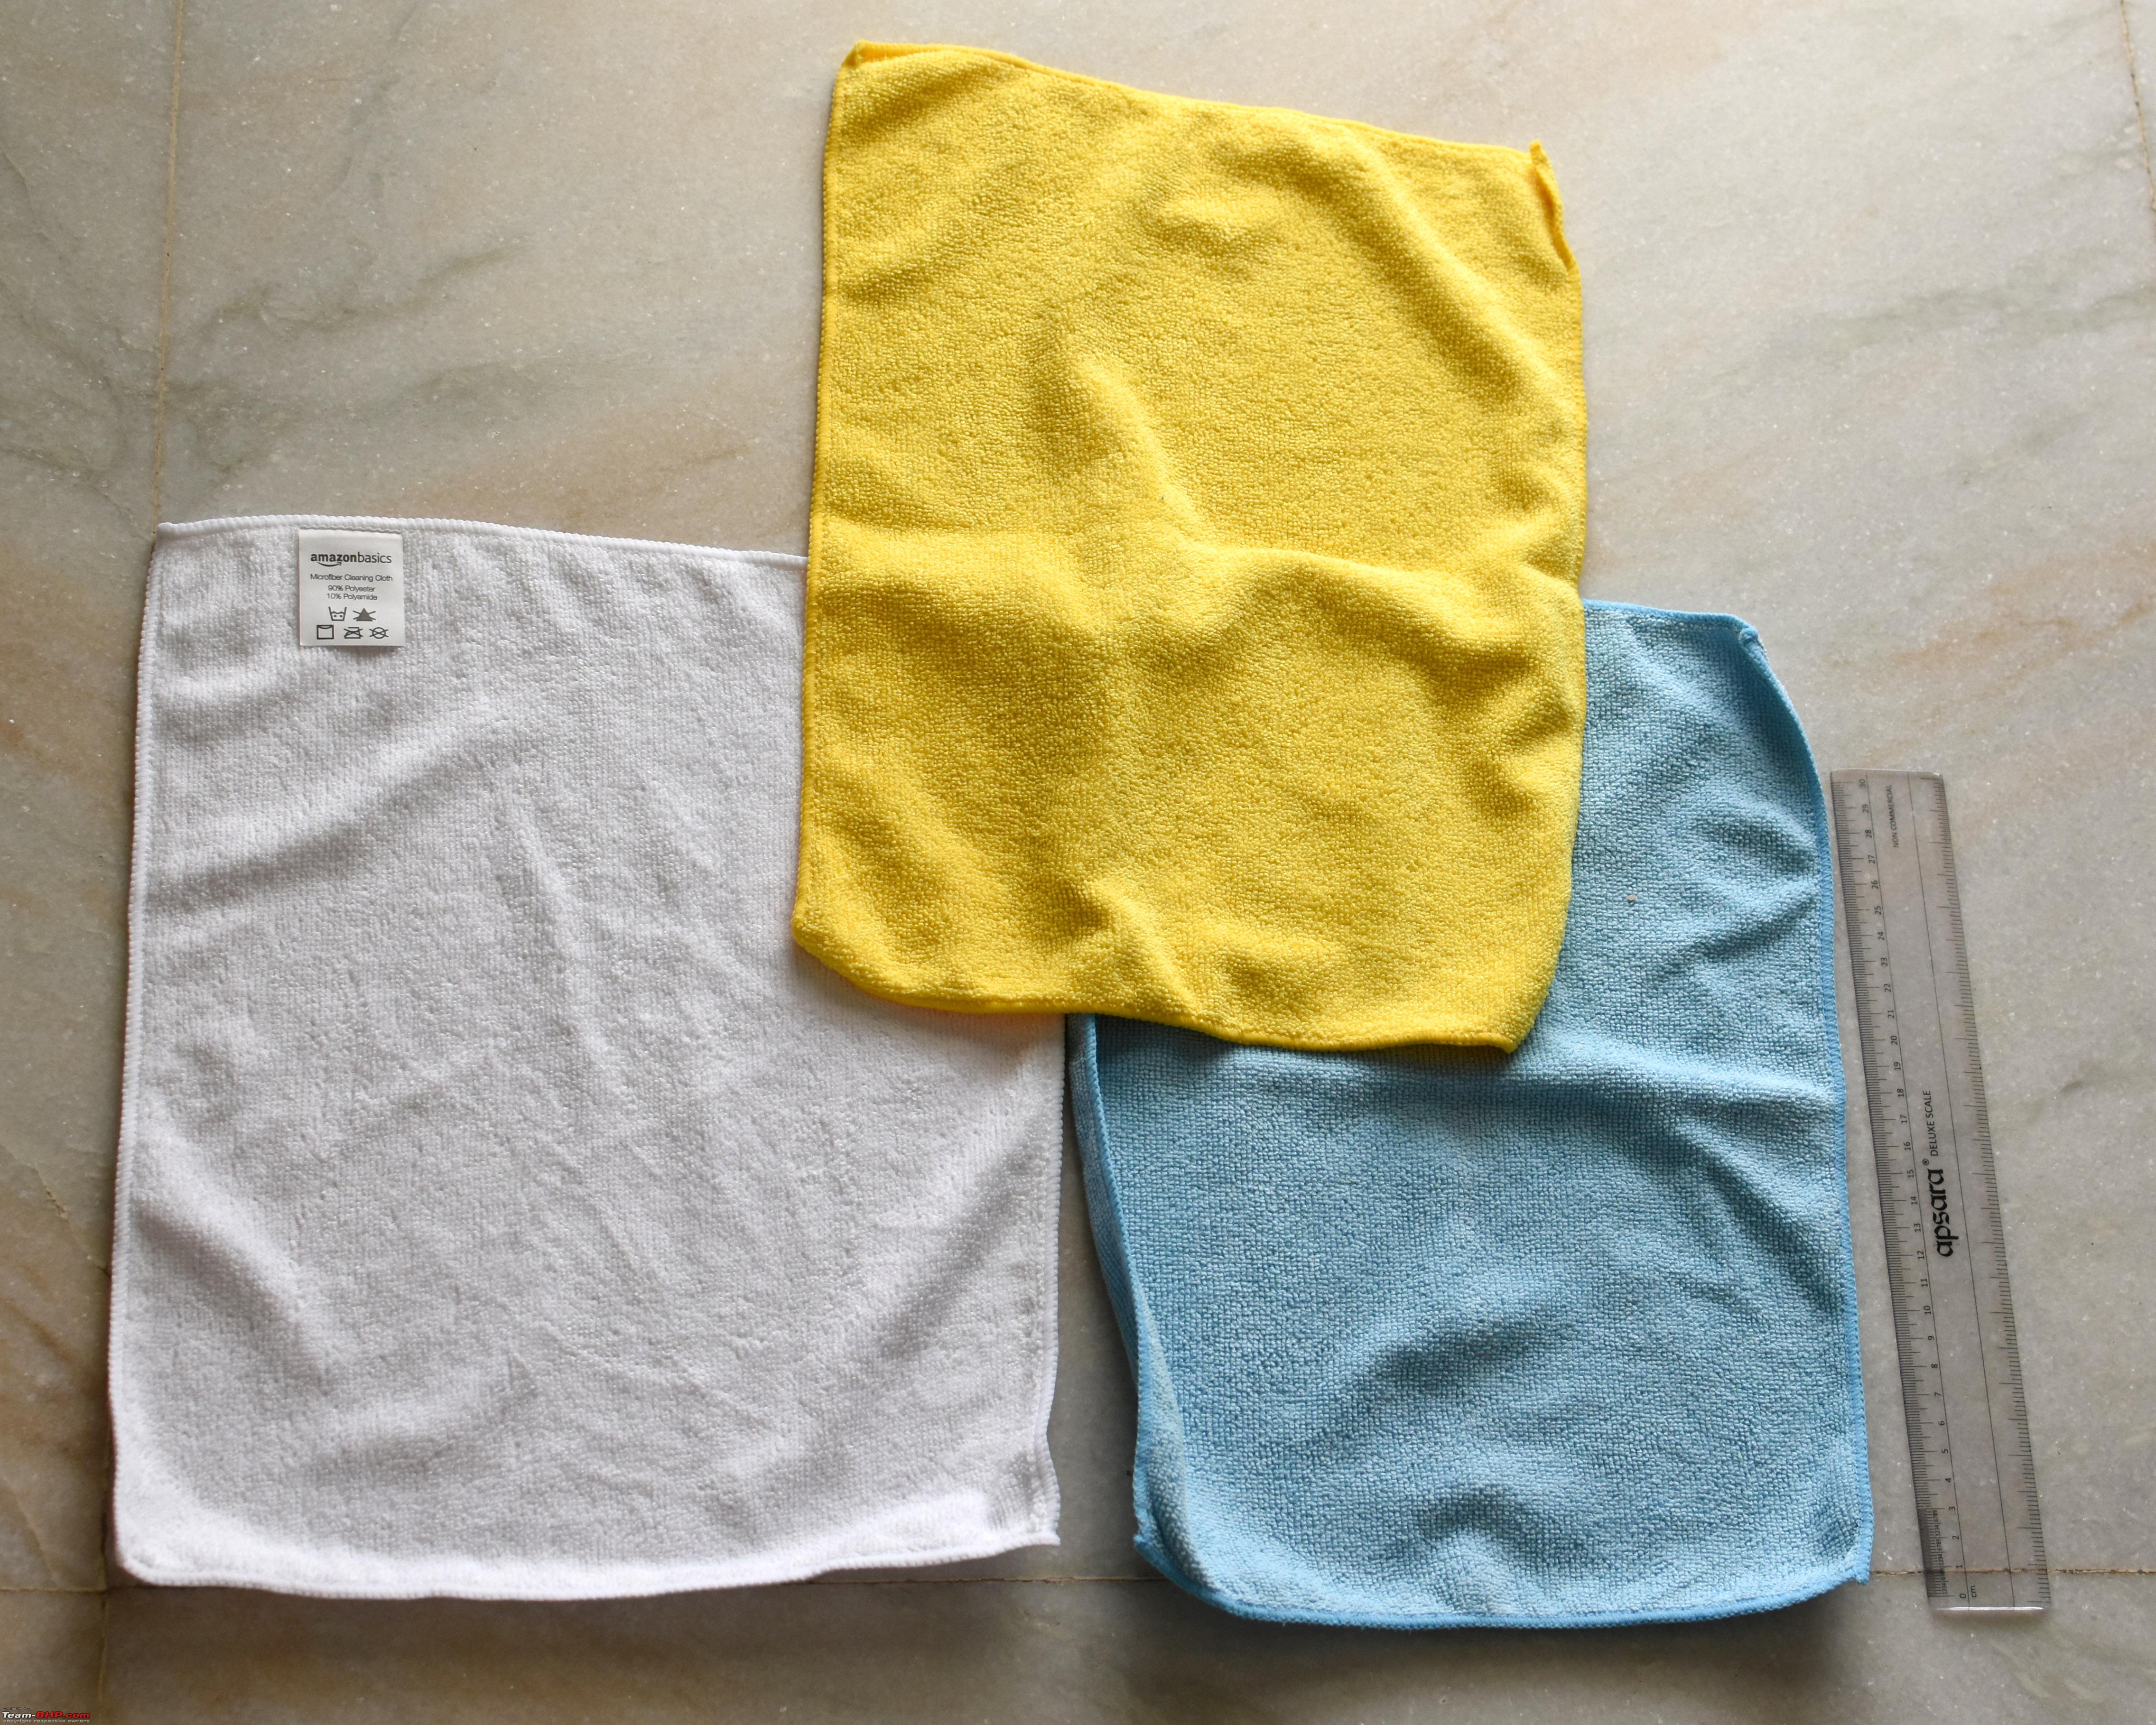 Make sure to remove these tags and wash with cold water before first use.  3M Microfiber Cloths : These cost around Rs.130 to Rs.150 each when bought in packs of 4 on Amazon. They are larger and thicker than the AmazonBasics microfiber cloths. They come only in Yellow color. They absorb a reasonable amount of water. I earlier used to use them to dry the car after washing. Now I’m using them to wipe on and off the Quick Detailer after drying the car, or to dry some of the minor areas of the vehicle which I don’t cover with the dedicated drying towels. The 3M ones are much thicker which I couldn't capture in the photo:  This wearing out happens even with the Amazon ones : 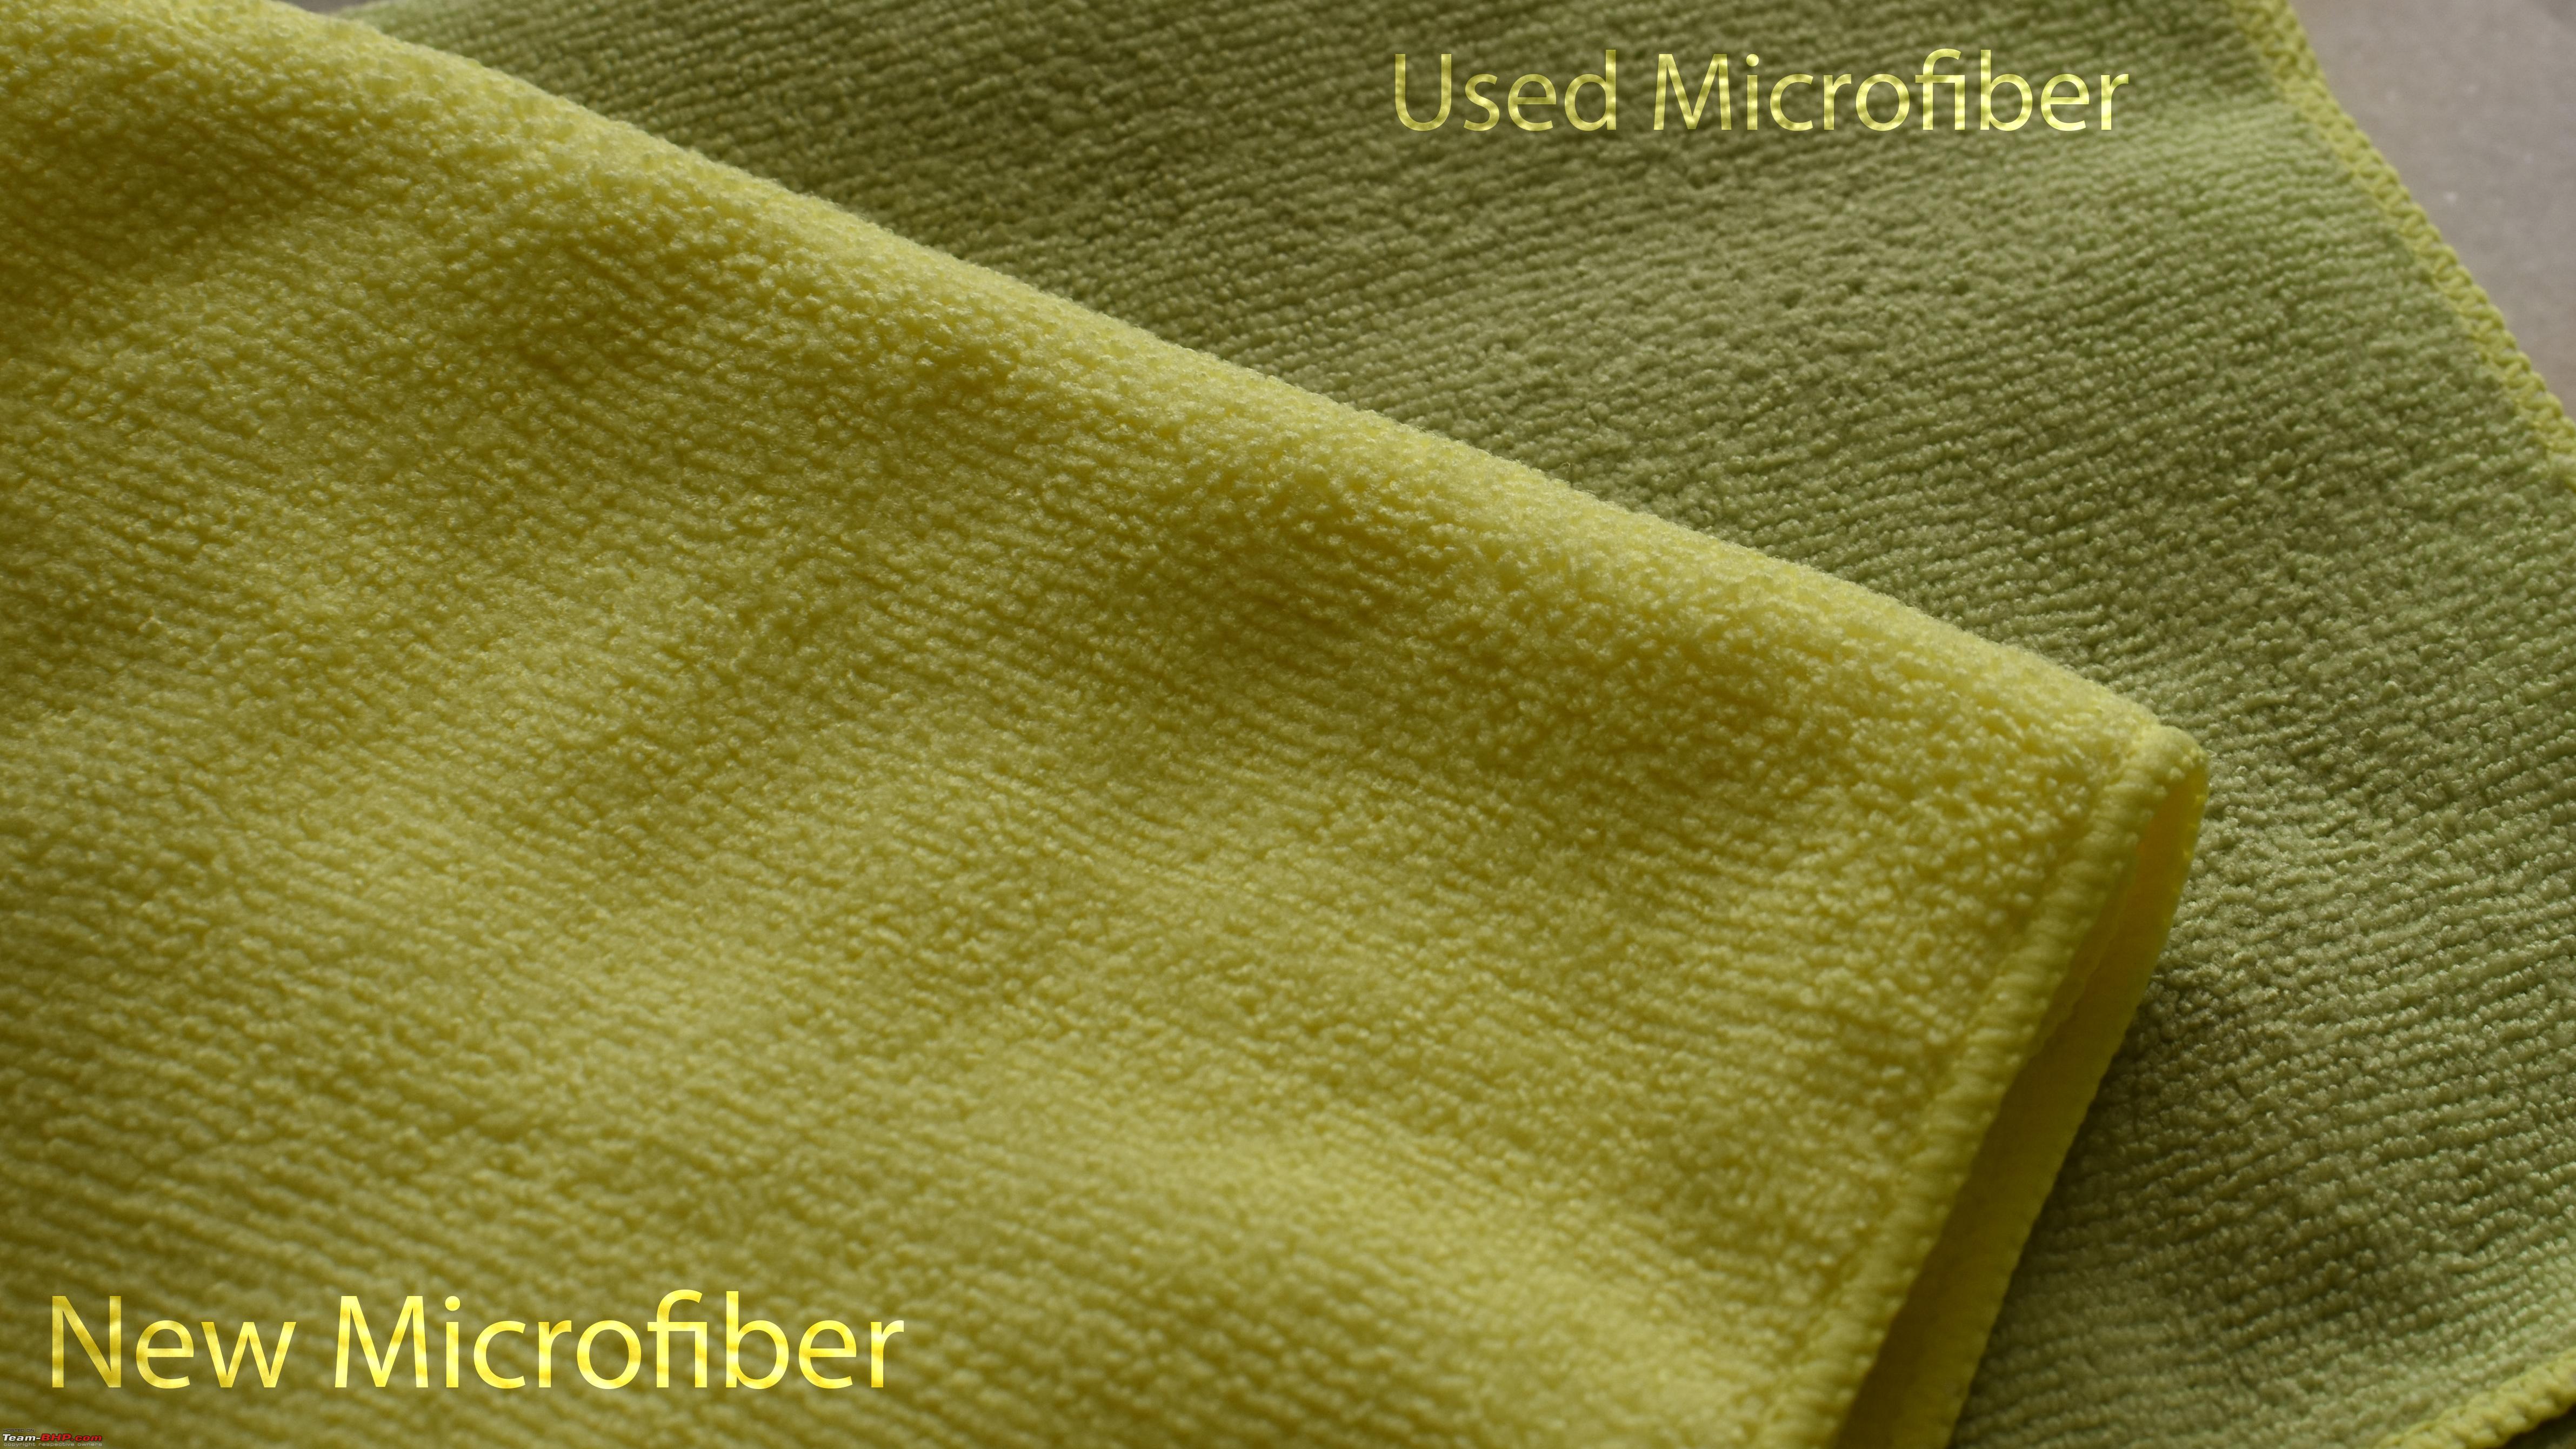 Gyeon Silk Dryer : This is the most expensive (Rs.2500) microfiber towel that I have. It is more expensive than the towel I use to wipe my body, haha. It is a dedicated drying towel and I bought the larger sized (70cmx90cm) one. It also comes in a smaller size (50cmx55cm) at Rs.1300. The towel dries the car very quickly. I haven’t used the towel on a car which doesn’t have a wax/sealant. But when I used it on my car which was coated with Collinite, it just absorbed every drop of water. I didn’t even have to wipe the towel. I just place it, drag it once and the panel is done ! I didn’t use it many times, but will start using it more regularly. I typed the "Silk Dryer' text. Towel comes with Gyeon branding. 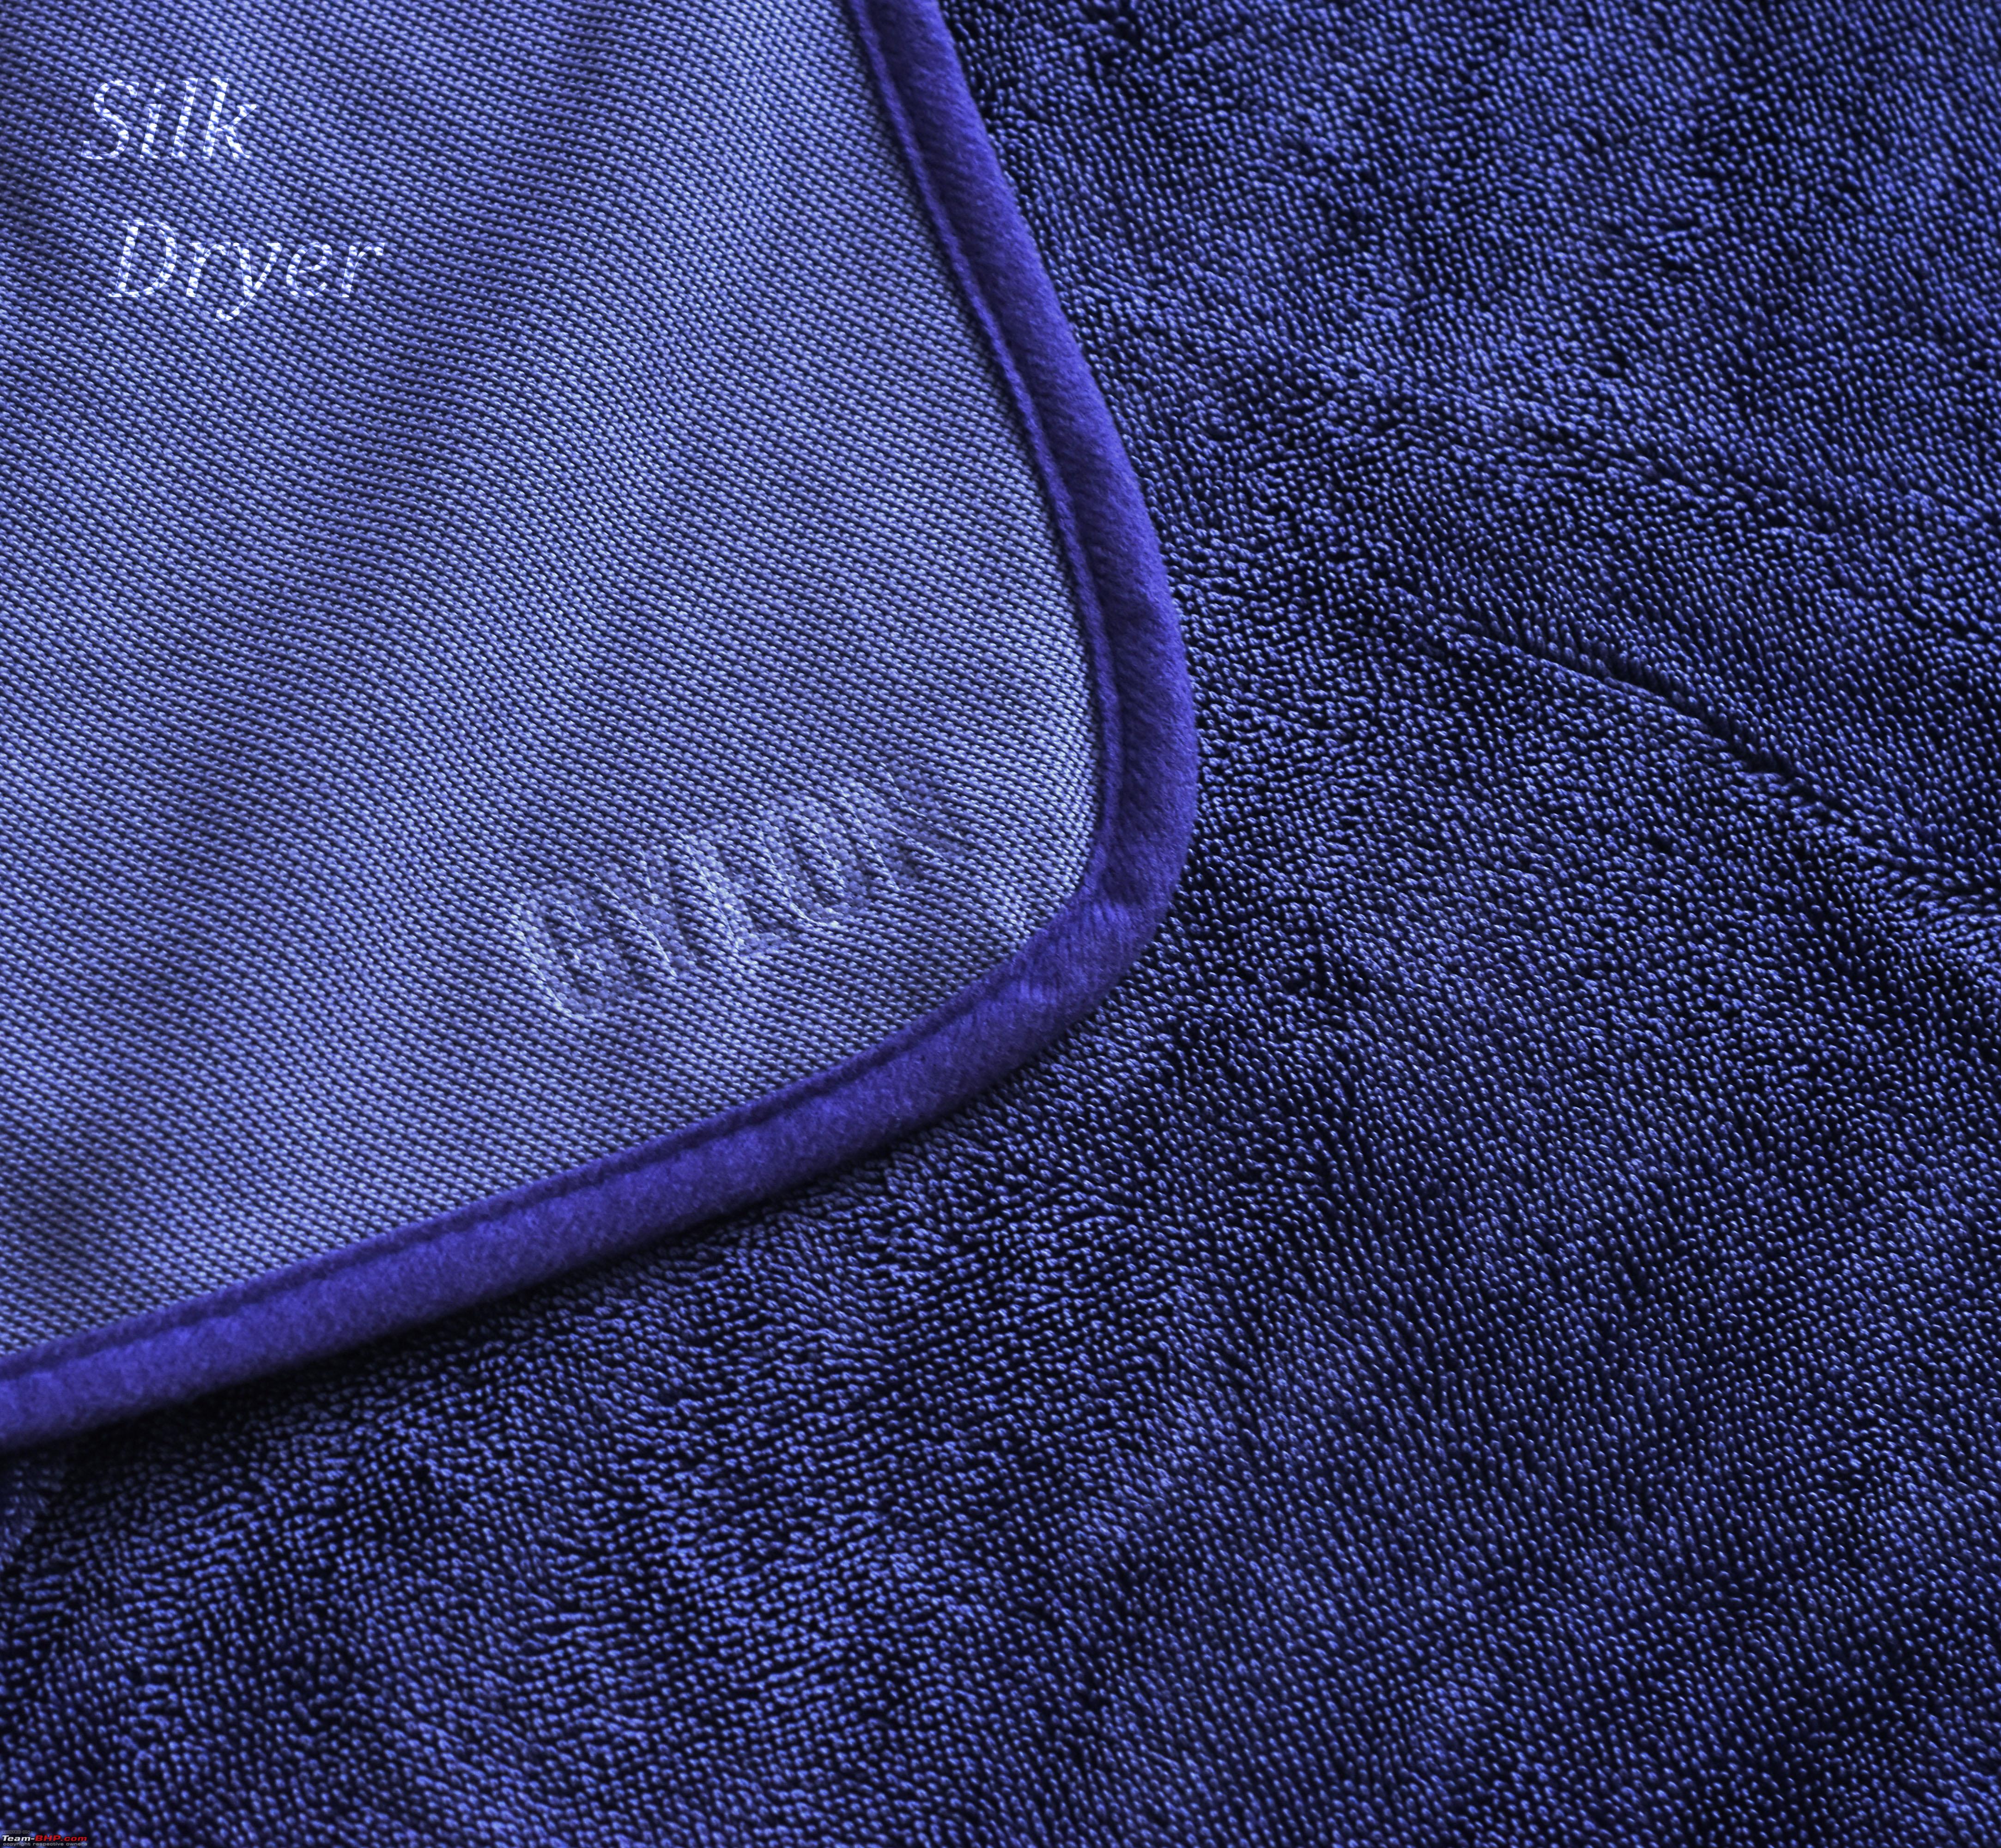 Gyeon Soft Dryer : This is the microfiber drying towel that I use now a days. It comes in a single large size (60cmx80cm) at the price of the small silk dryer. It works really well once it is primed with some water. In comparison to the Silk Dryer, it isn’t great, but it itself is a good towel. One towel can dry the entire car barring the bumpers. It works great on uncoated cars. I used this towel to dry my car when I stripped off the wax to apply the ceramic coat, and it dried the car rather well. I was shocked and didn’t expect it to work like that. I typed the "Soft Dryer" text. Towel comes with Gyeon branding. 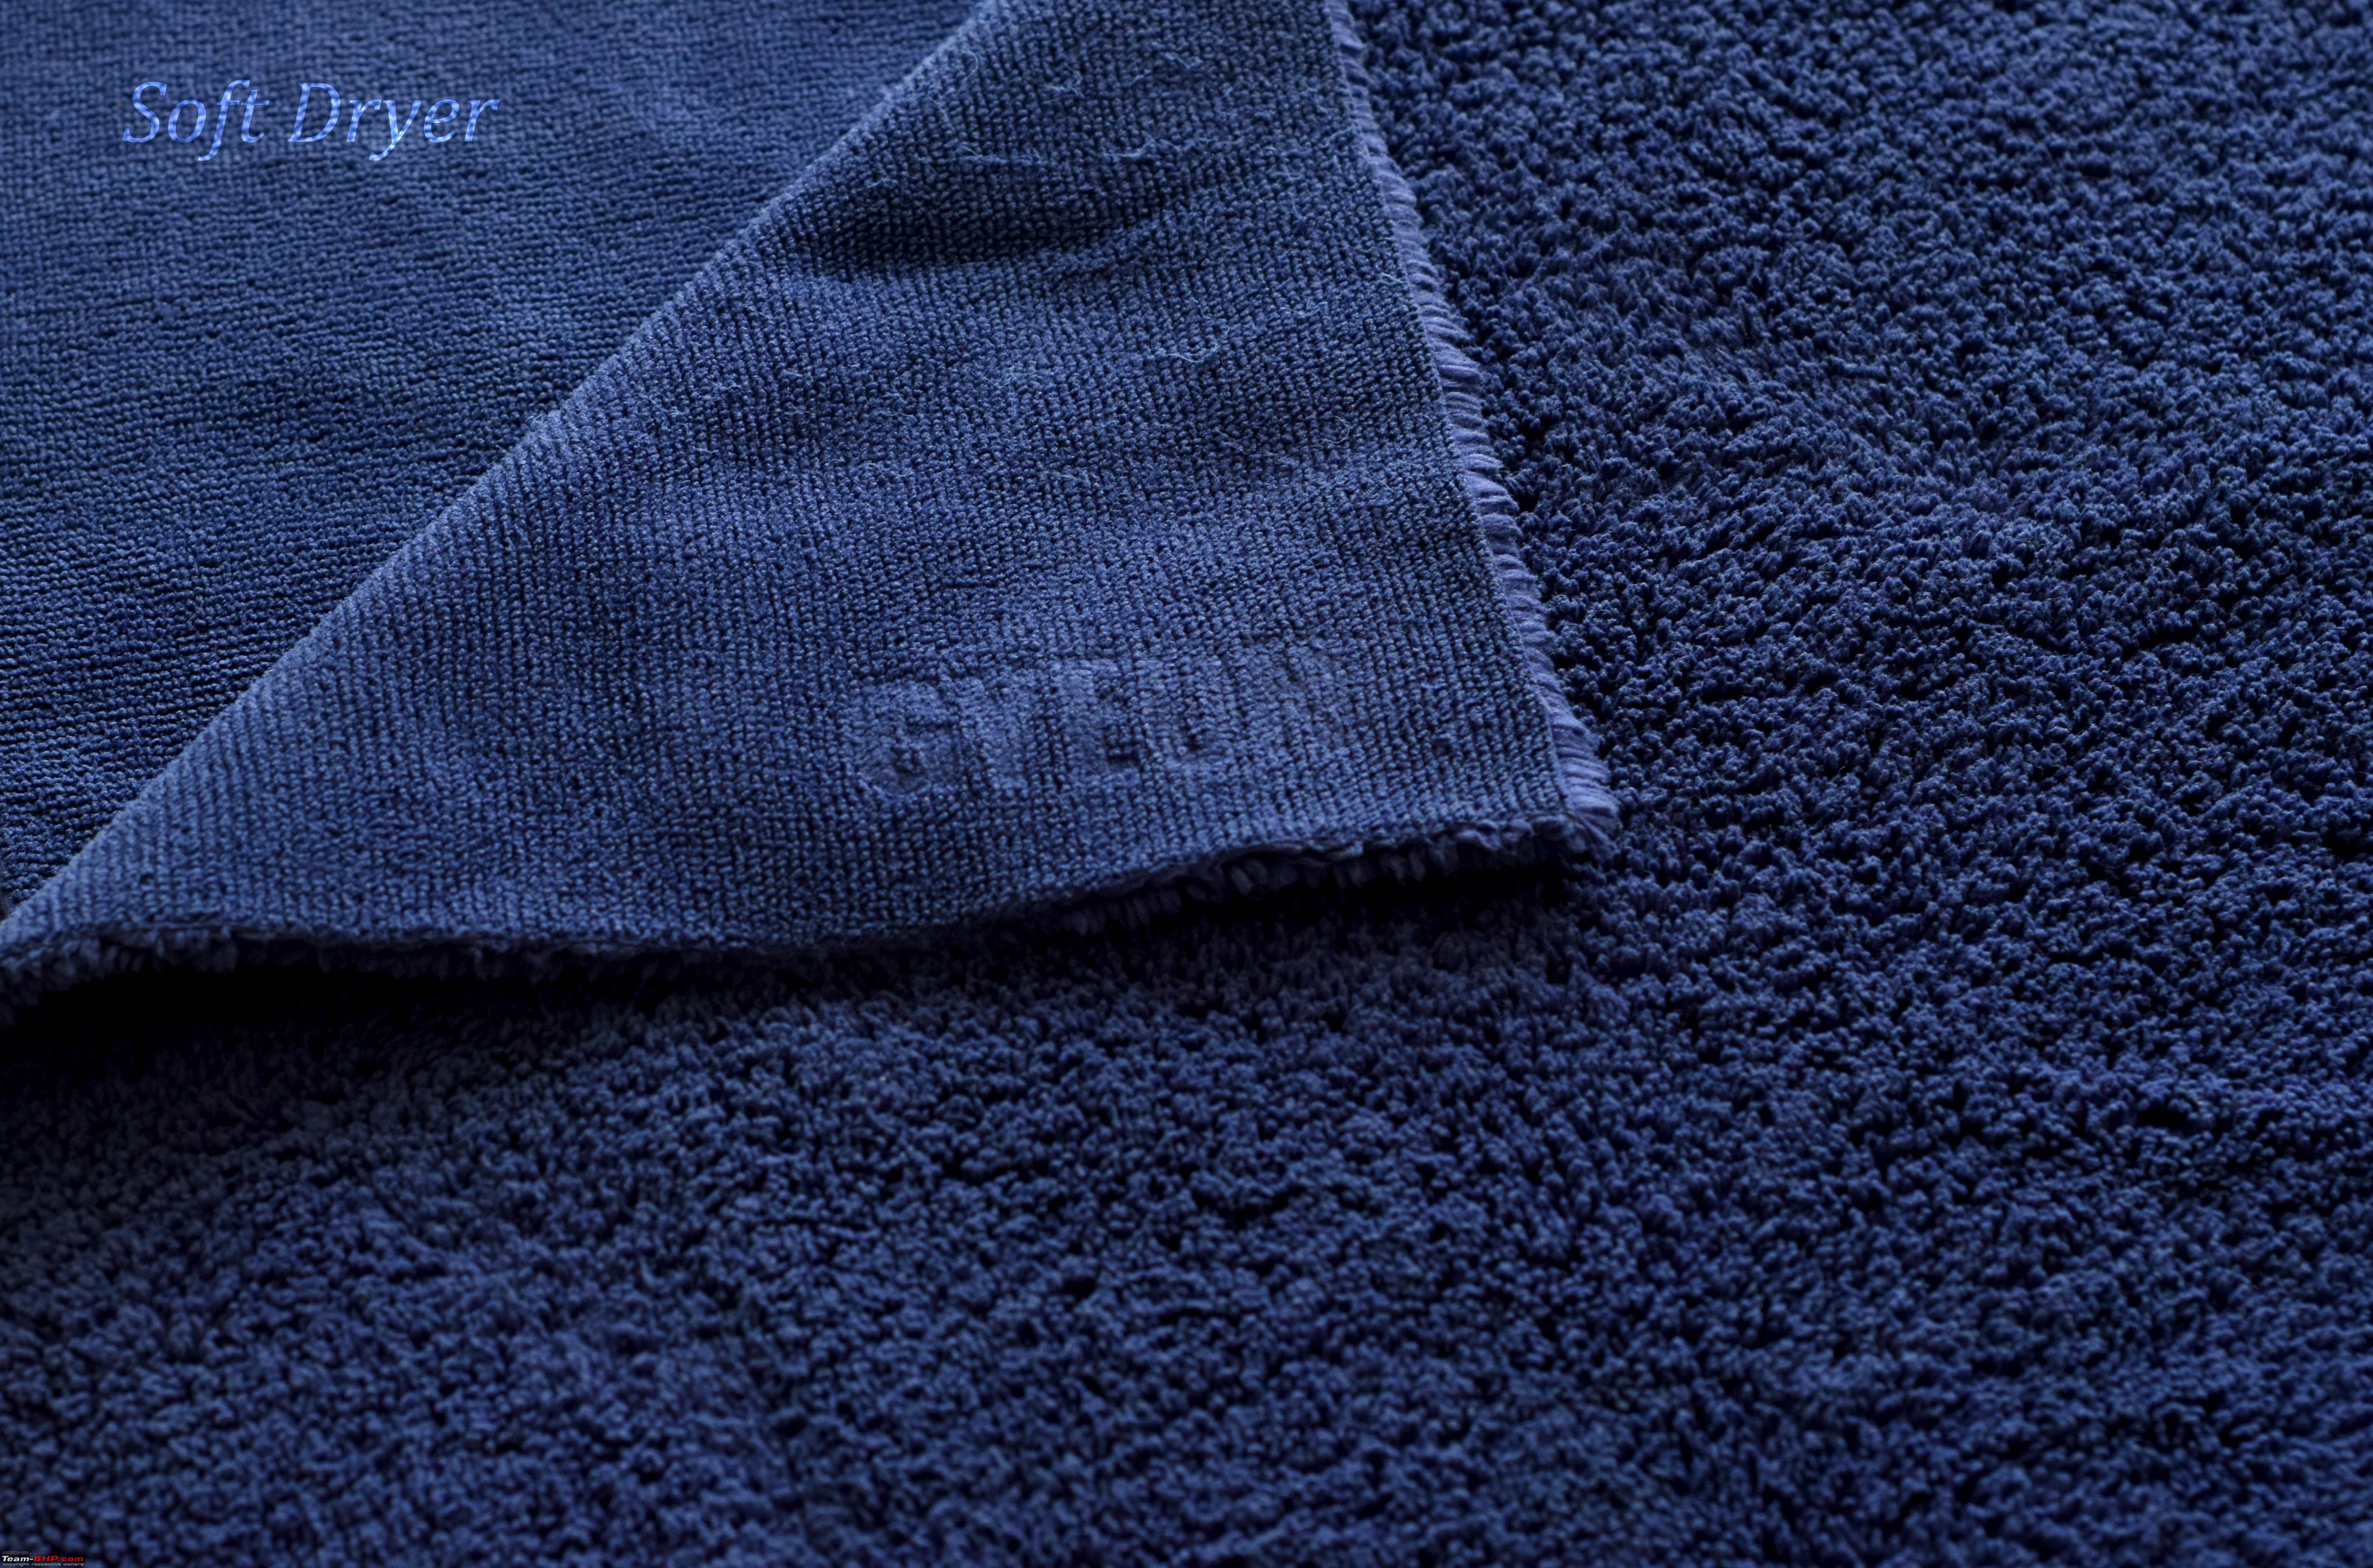 Gyeon Waffle Dryer : I bought this towel for drying the windows and windshield after washing. This towel too comes in two sizes and is relatively cheaper than the other two (Silk, Soft dryers). I bought the larger one (60cm x 80cm) for Rs.1200. I must admit that the larger one is too big to use only for the glass. I always end up using only 1/4th of the towel for the glass. People say it can safely be used on paint, but I rarely used it on paint. The smaller one (60cm x 40cm) costs Rs.800 and if I had a chance, I definitely would have gone back and bought the smaller one. The silk is largest of all 3 varieties. 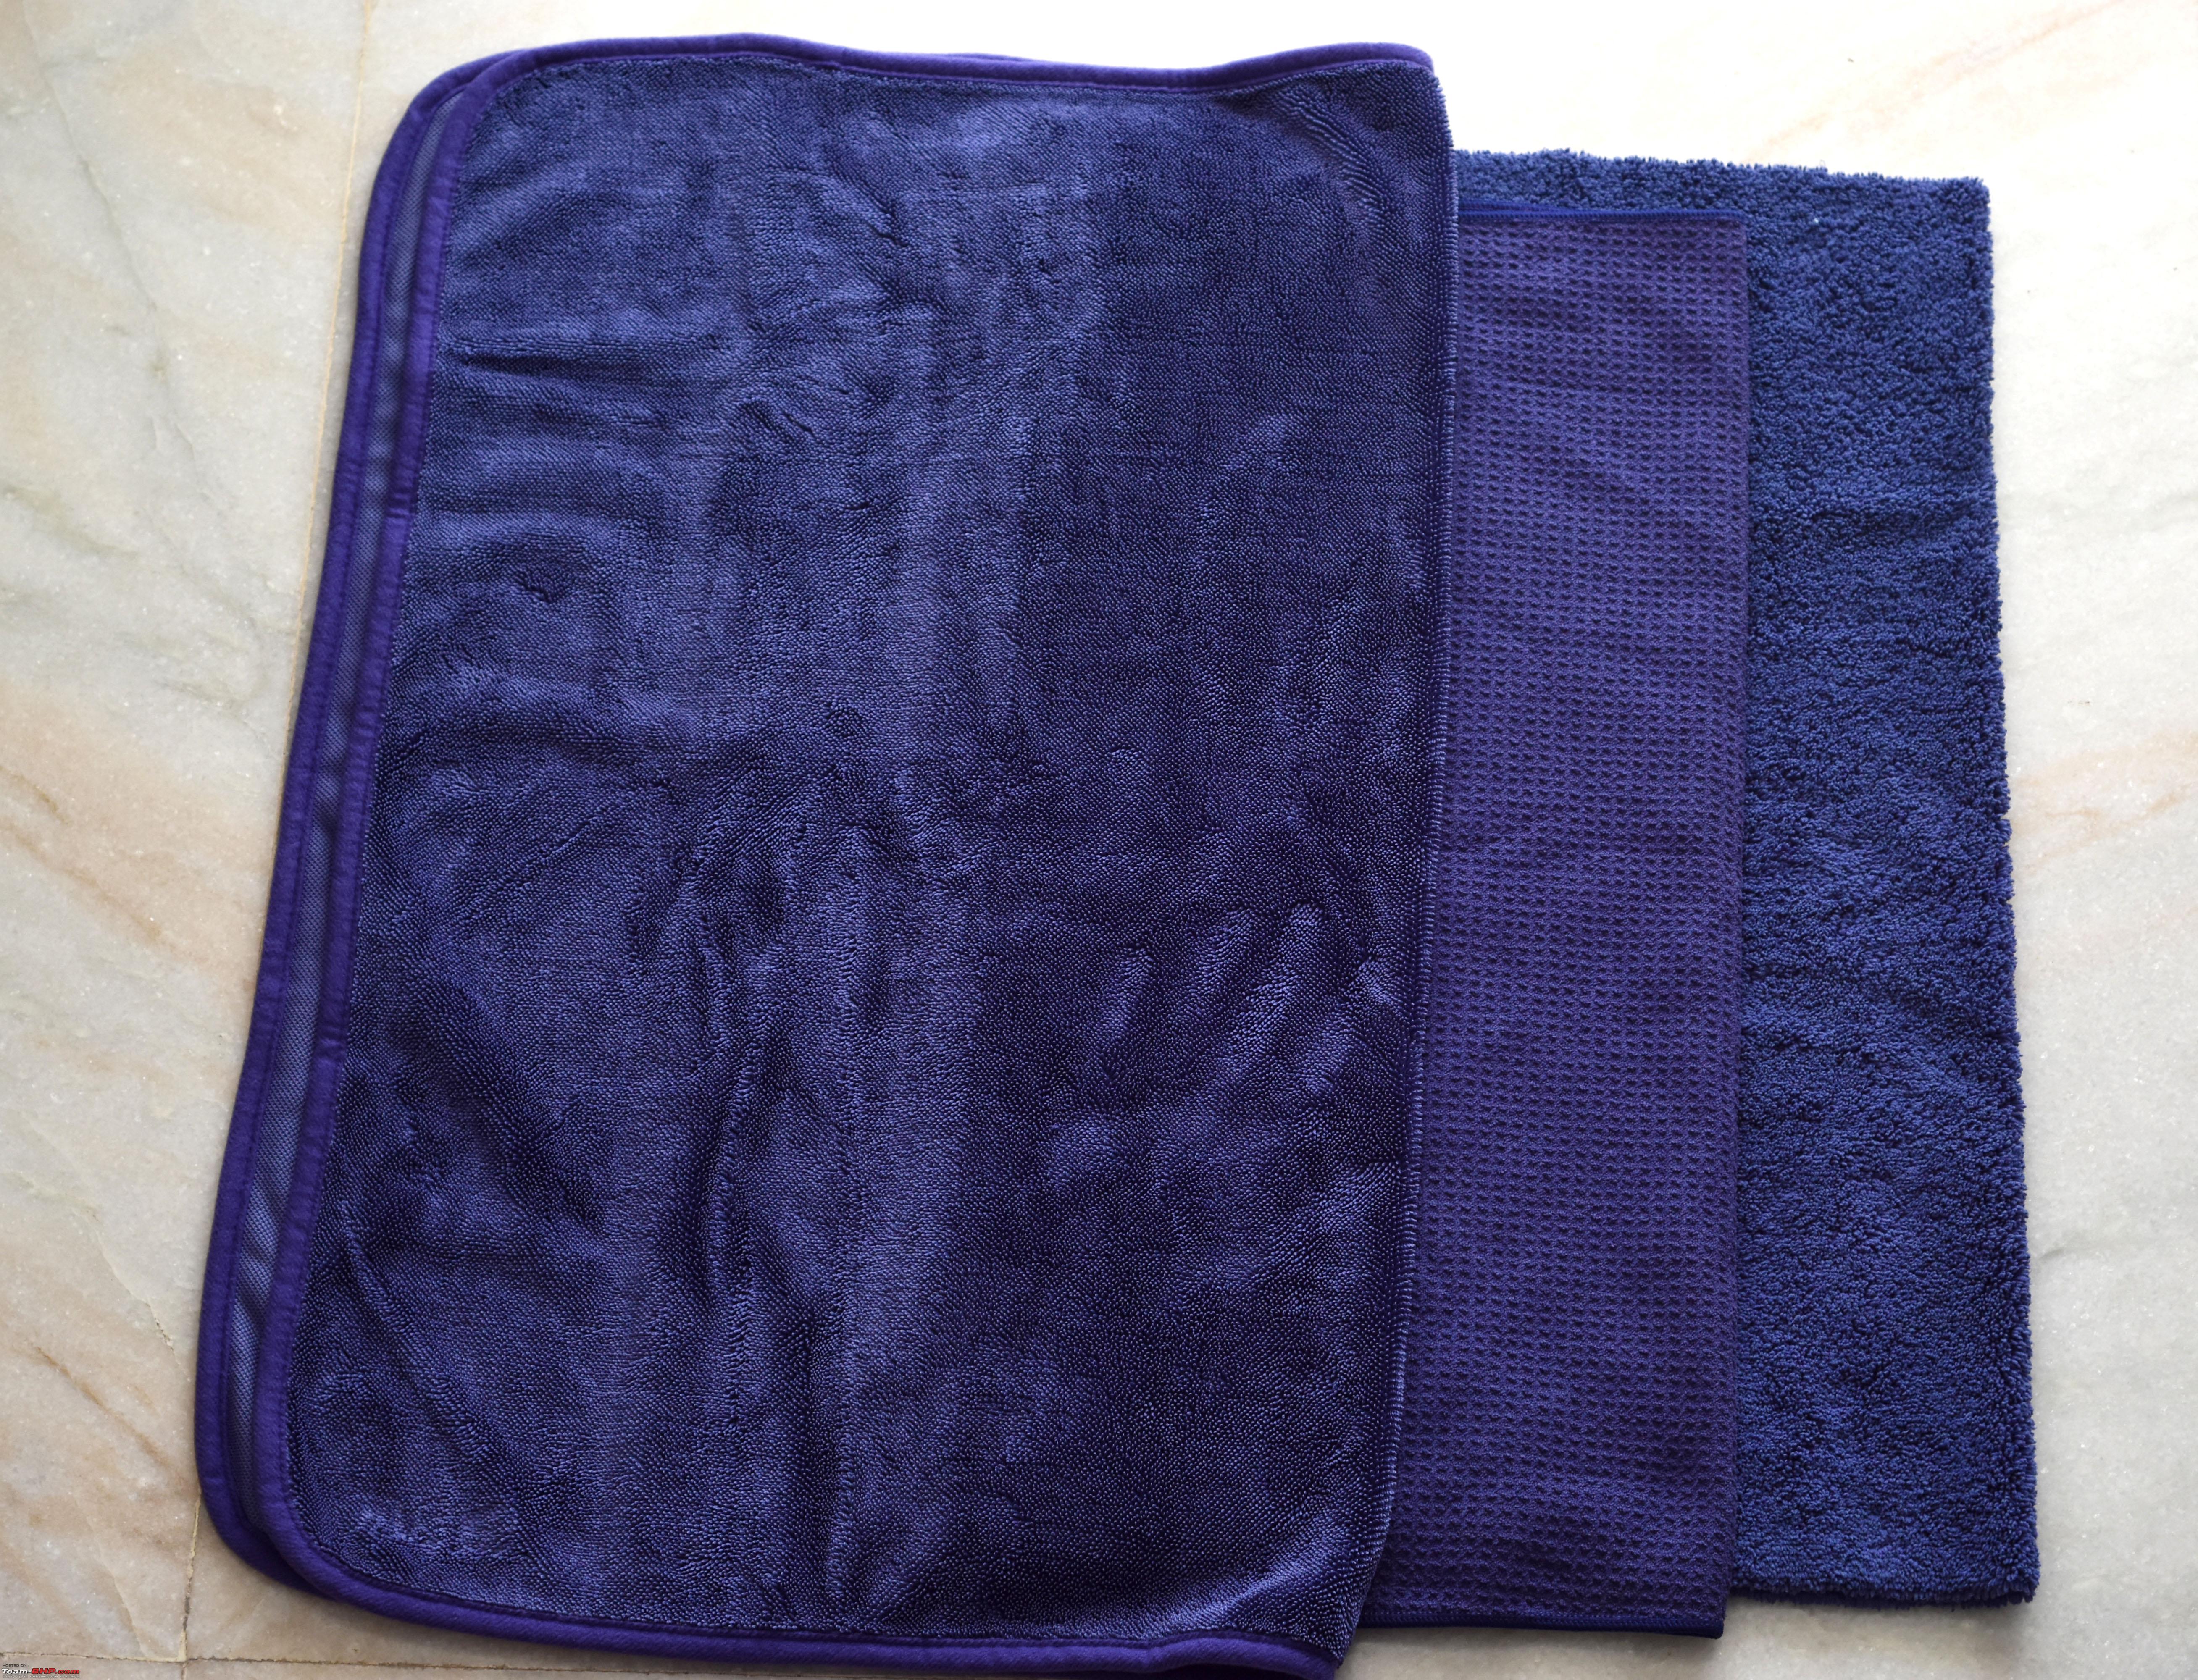 A picture to show the differences between the 3 towels. 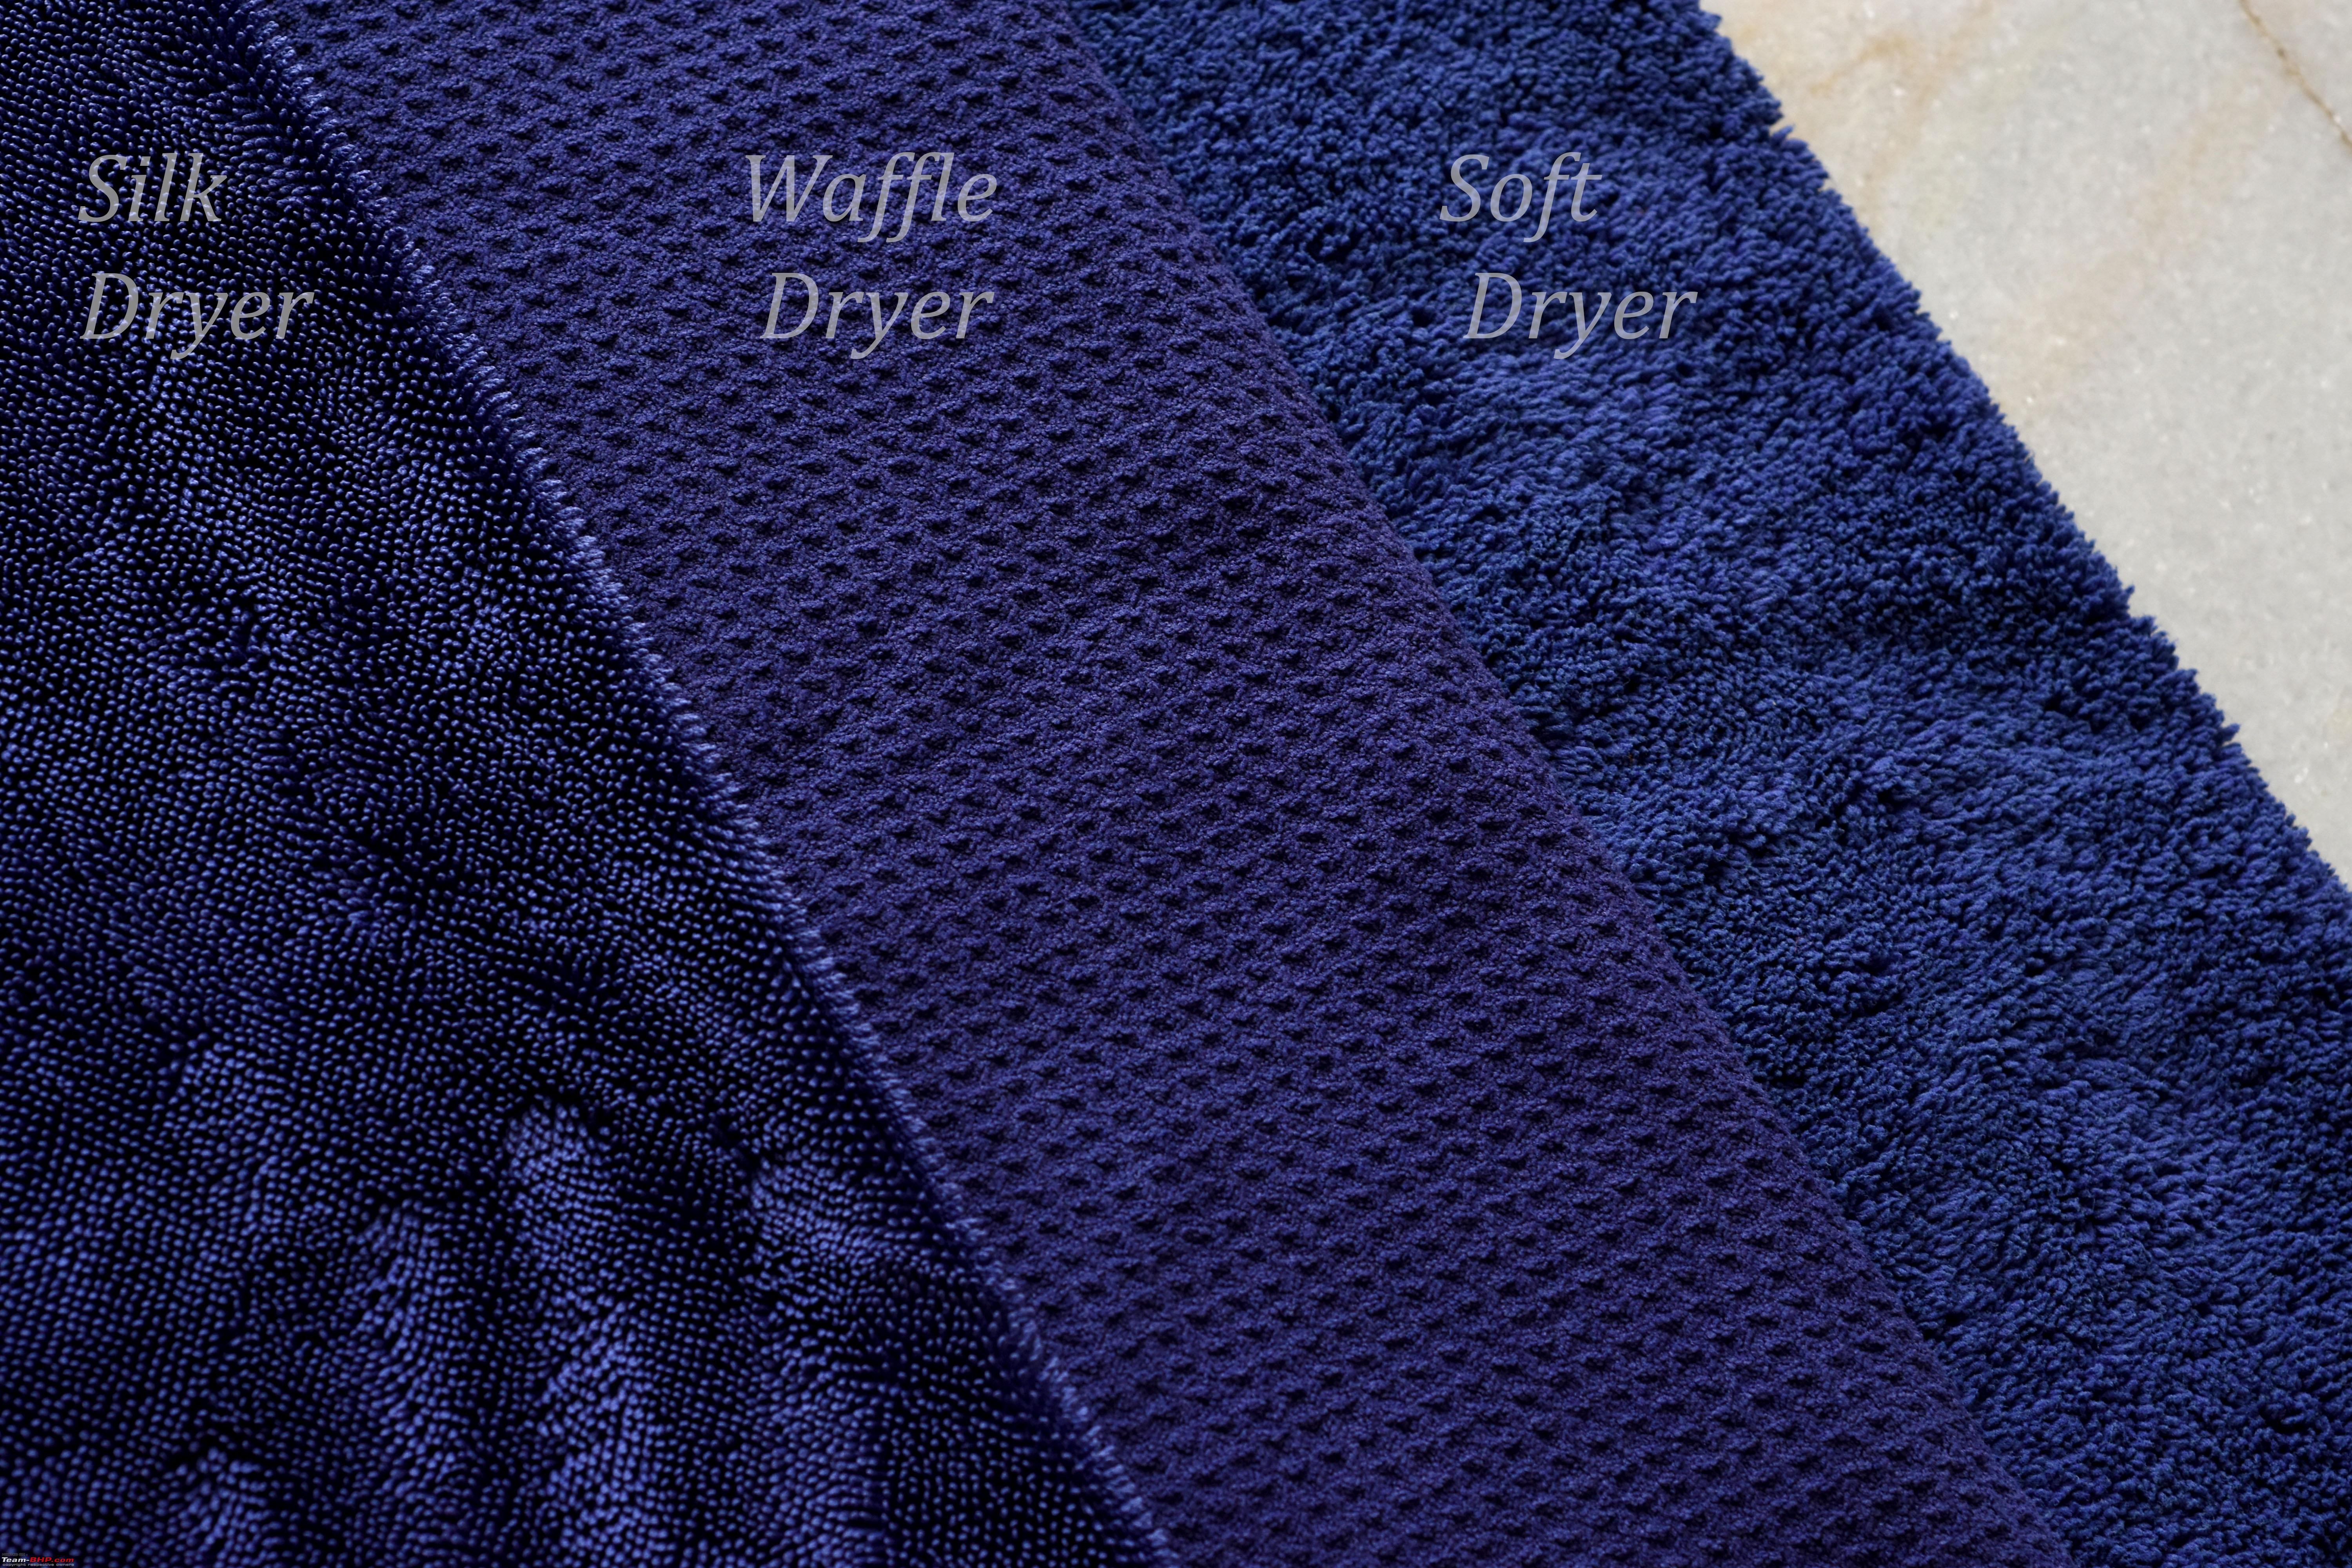 I always felt - Instead of buying a Soft Dryer and a Waffle Dryer, I should have bought myself another Silk Dryer ! Foam Applicator : Now, this is where I did some serious cost-cutting and did my own foam applicators. I bought some yellow foam blocks from the Kirana shop, which cost about Rs.10 per piece. I cut it up into slices, like how a sponge cake / ice cream family pack is cut. Now each slice of that foam block is an applicator pad by itself ! Each applicator costs less than Rs.3. Even if I drop one on the ground while using, I can just go and get another slice (applicator) and it won’t hurt my pocket. I used these only to apply Collinite 845 on the car and they do a marvelous job. Does it scratch the paint or put Swirls ? Well, I have been using this method for the last 2 years on my Vento and there were minimal swirls, which might just have resulted due to other causes. I make even thinner slices for wax application. The right most fat one in the picture works good to apply tire shine (Perl in my case)  Clay Bars and Clay Towel : Claying is a process where a specially made automotive clay is taken and scrubbed (if I may use that word), on the paint of the car, to remove any “bonded contaminants”. Its motion is aided by a lubricant. The lubricant can be a specific clay lubricant or just soap water, anything that reduces friction between the clay and paint, to prevent scratches. In, India when I searched online for automotive clay bars 2 years ago, I did not find many. So ordered 2 generic clay bars from AliExpress for $2.66 each and a clay towel for $9.66. They last a long time and I haven’t used even one clay bar completely till now. The towel works just fine and in my experience is less abrasive than clay and causes less marring. The clay bar tends to "Melt / leak" and take shapes like a super thick semi-solid if left for long periods. It can still be used normally by kneading.  Some generic branding :  Bosch GPO 12 CE Polisher : This is a rotary polisher from Bosch, costing thrice the price of a generic polisher found in the market. I bought this one 3 years ago, when I wanted to try to polish our old car (Honda City 2005 EXi). Dual Action polishers were not available online at that time, and even if they were, they would cost thrice the price of this Bosch polisher. It’s a powerful polisher and needs ones’ time and commitment to understand its nature. It came with no accessories, so again had to purchase a backing plate online. Had a set of 3 foam pads of different cutting abilities delivered from China, through AliExpress. 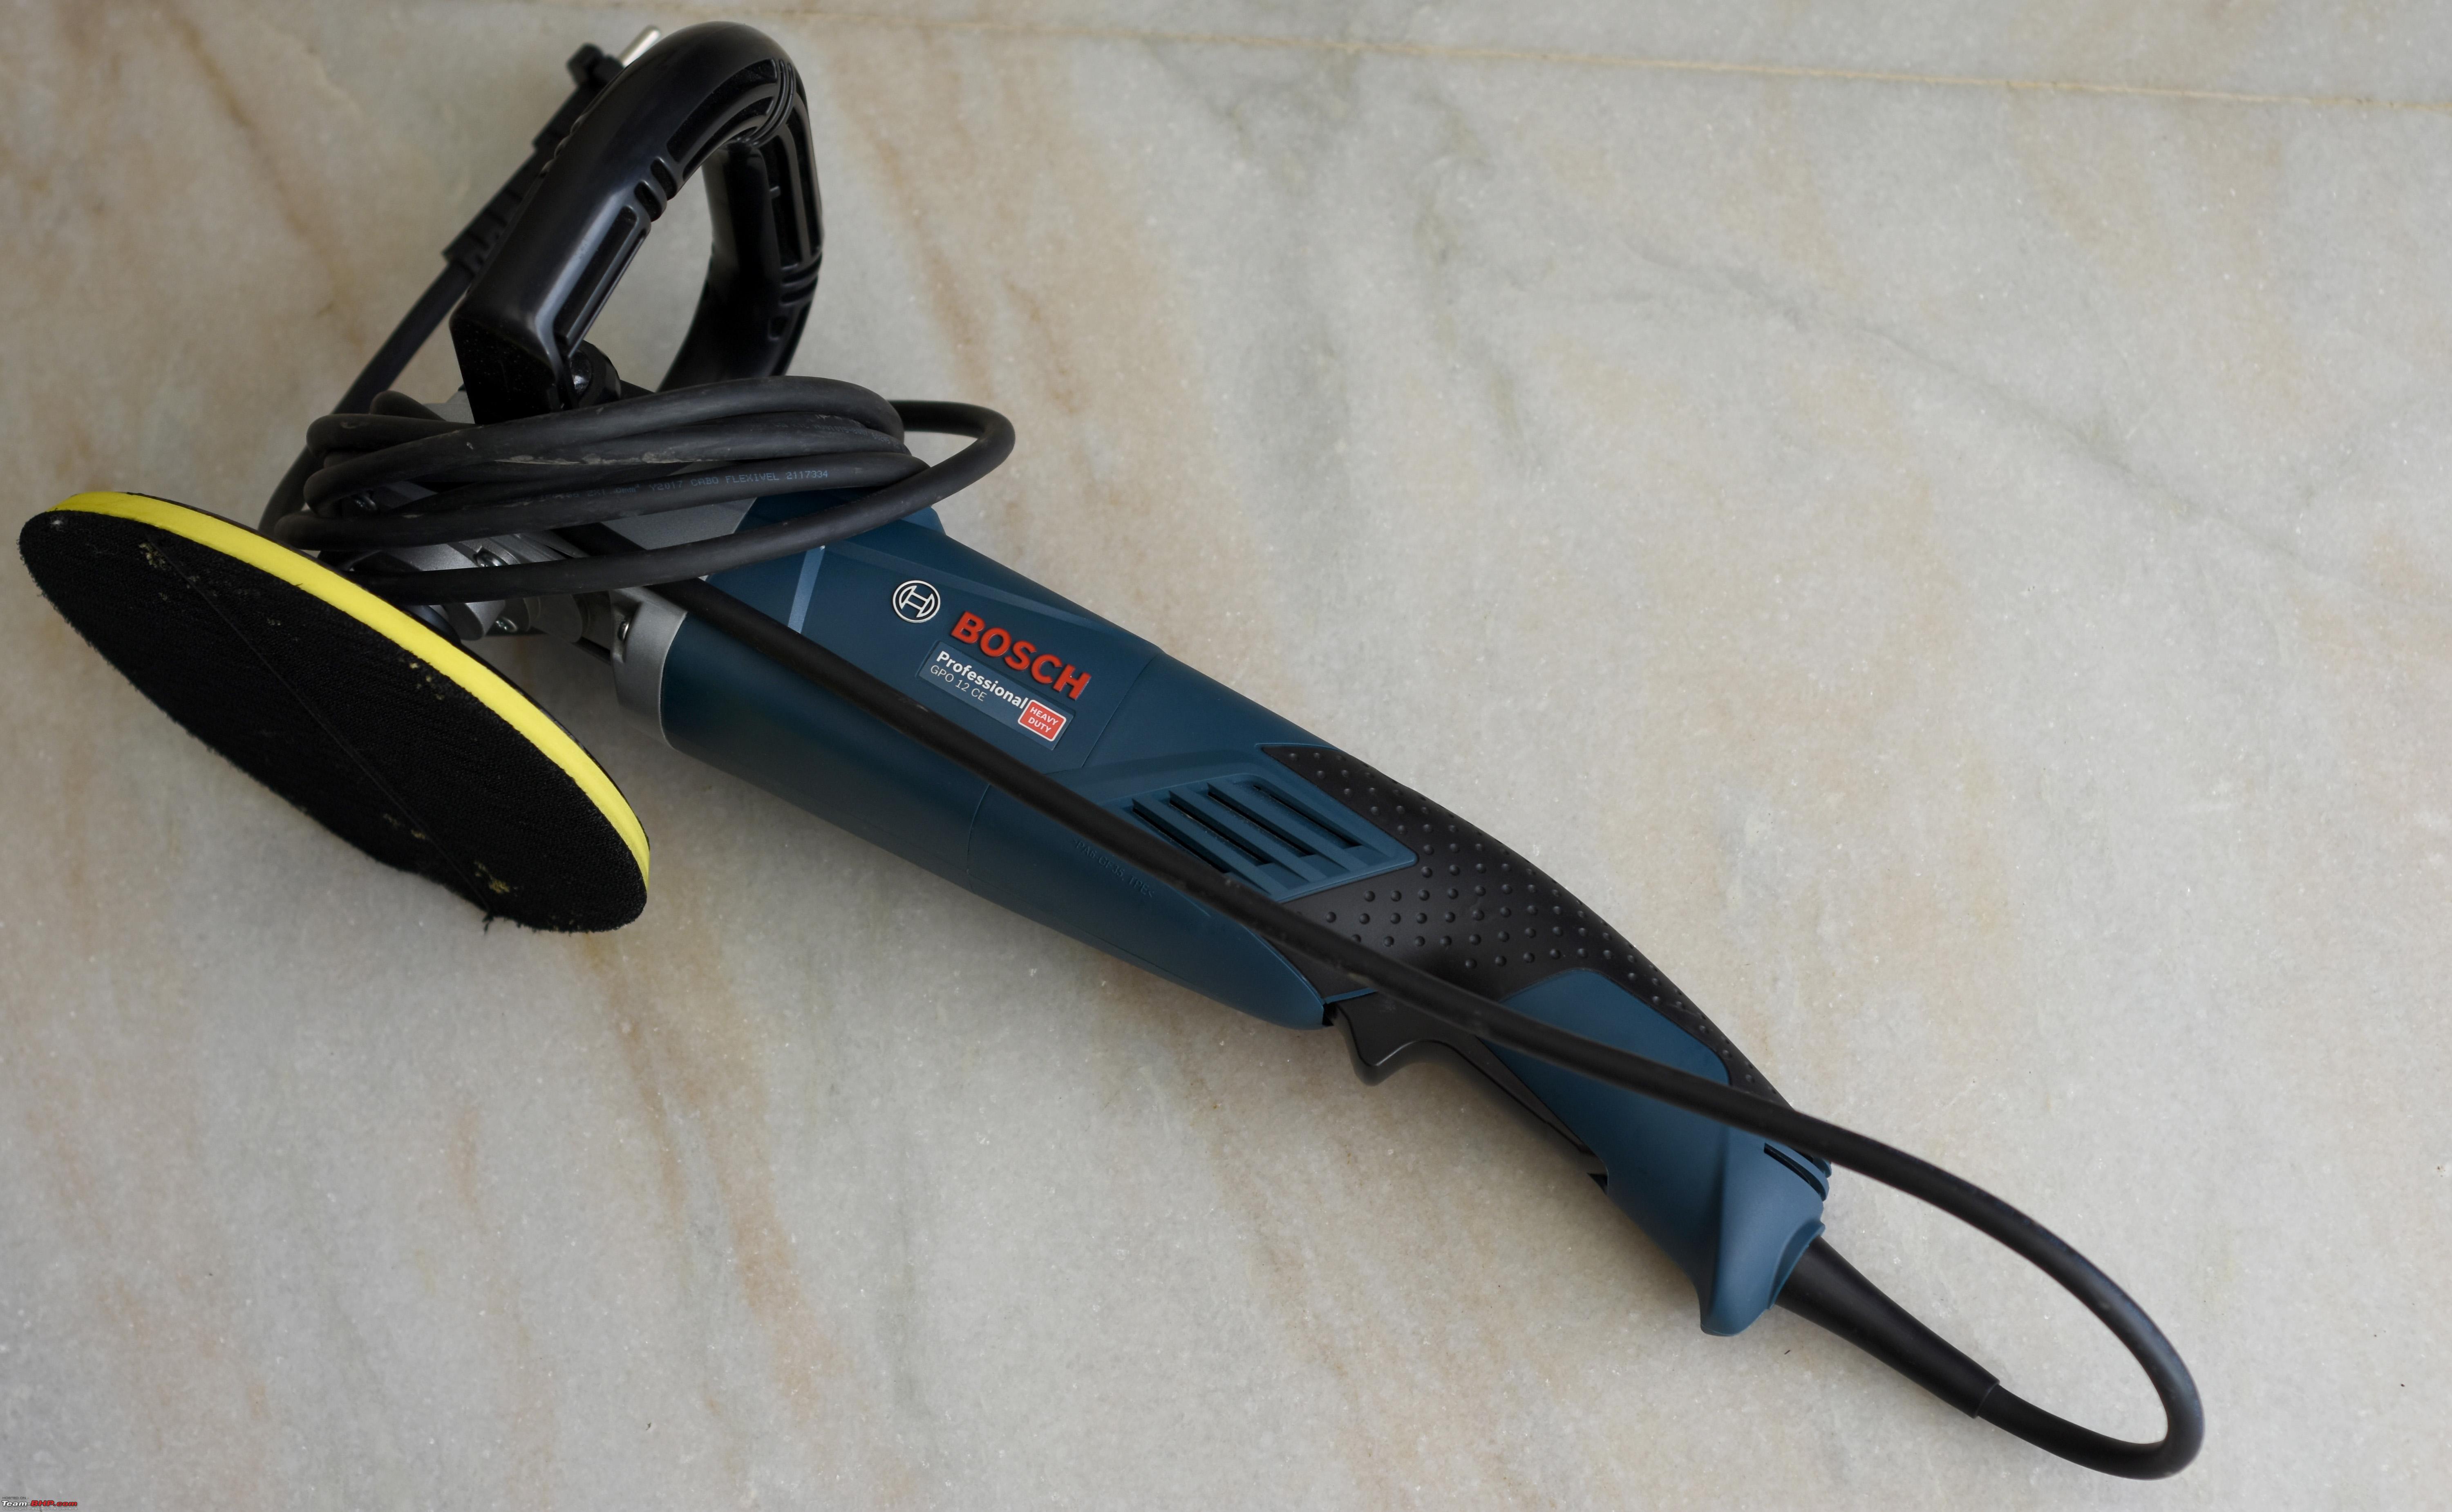  These are the generic foam pads I ordered off AliExpress. The Orange one is the most aggressive, Black one is least aggressive and blue one is like medium aggressive.  CarPro 500 ml Empty Spray bottles : I bought 6 of these for Rs.280 each and I’m glad I bought them. Now the prices have sky-rocketed to Rs.400 each. Well, the bottles are sturdy and stable, just like any 500ml CarPro bottle. They’re dark in color so I believe it is like a protection from sunlight. The spray heads are of superb quality and the nozzle can be adjusted as per our requirement for the output, from a stream of liquid to a very fine mist. I have been using them for a year now and have had no problems. I’ve even dropped the bottle from a reasonable height and it sustained the drop. A spray bottle is an absolute requirement if one wants to use a Quick Detailer or APC. On left - The spray bottle, On right - ECH20 Bottle  Sonax Cockpit spray – Sport Fresh : This product claims to clean and maintain all plastic components in the car’s interior and claims to retain the matte surface and texture. It has a citrus flavored fragrance. It is made in Germany and cost me Rs.564 for 500 ml on Amazon. Coming to its performance, the fragrance is quite strong so, I have to work with doors open while applying this product to the interiors. I apply it using a microfiber cloth. It does give a nice, decent look to the interiors and the finish lasts for a reasonable time. The spray head of this bottle is by far the highest quality one I have ever used. 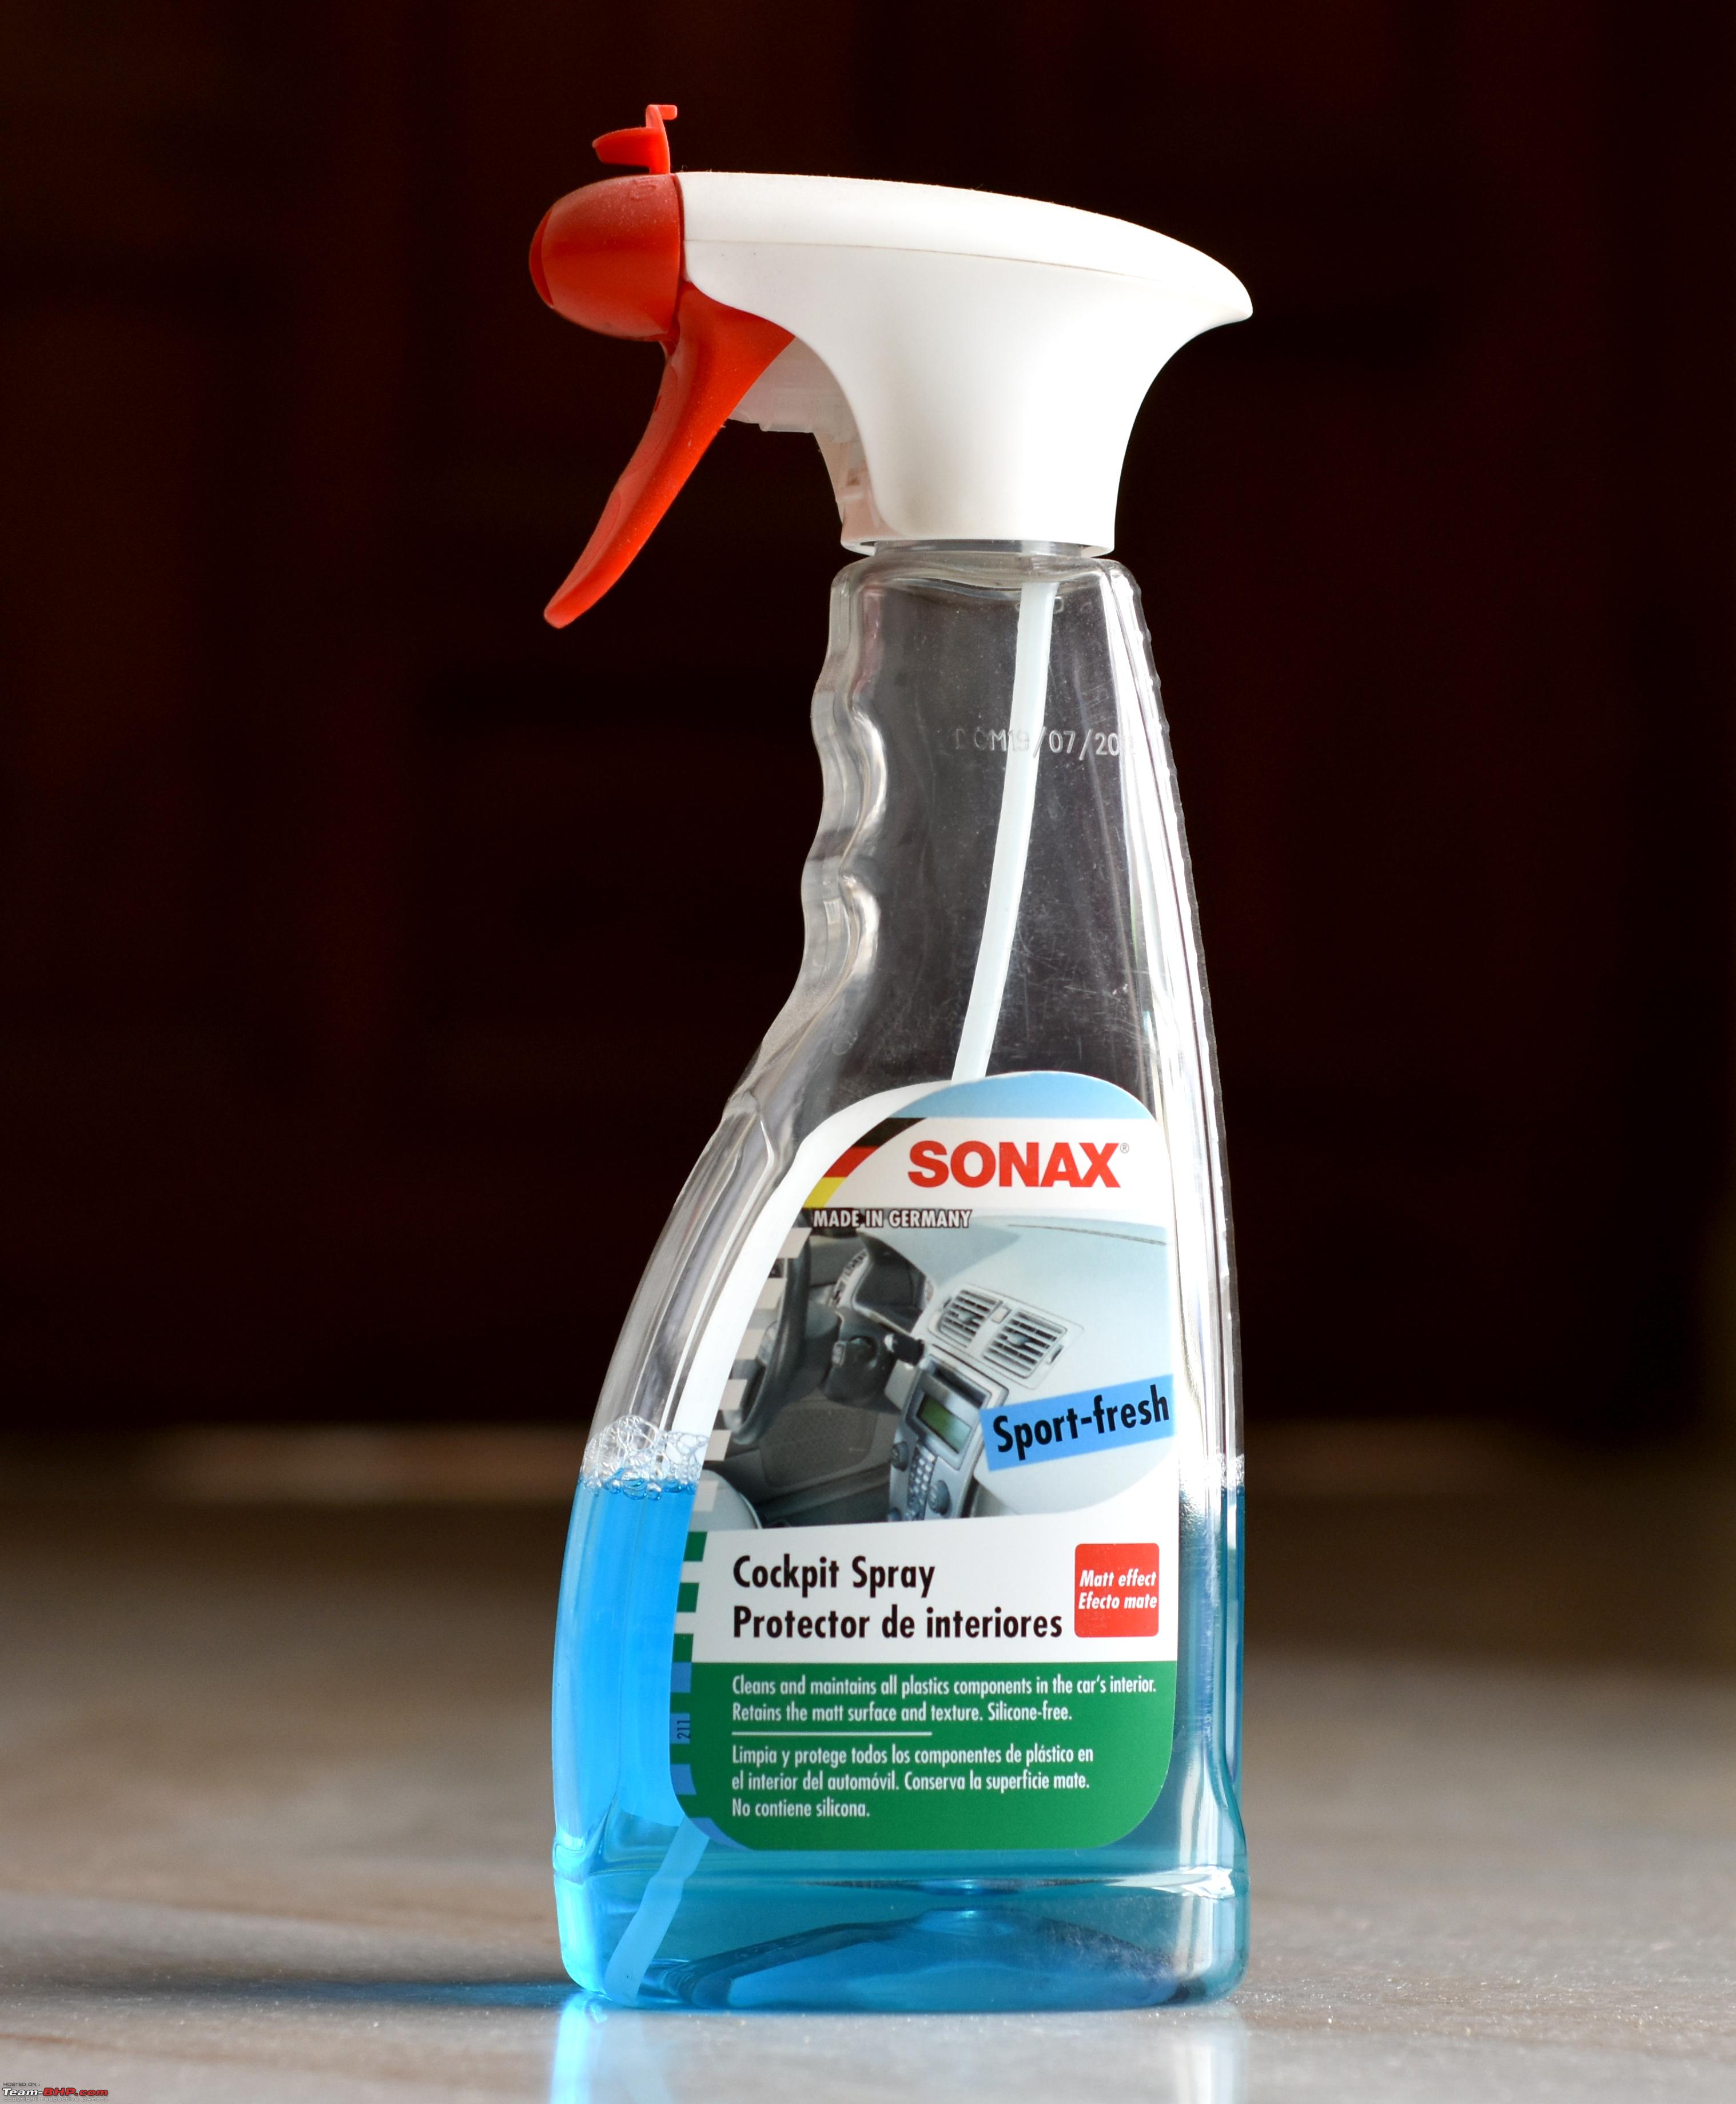 Last edited by saisailendra : 26th June 2020 at 17:18. |

|  (74)
Thanks (74)
Thanks
 |
| The following 74 BHPians Thank saisailendra for this useful post: | 2himanshu, A.M., AAJ148, Abhinav_2502, Akib Khan, akshay81, akshye, anandhsub, anshuman1117, Artyom, Ashutosh_kumar, AtheK, CarManMotorcycl, car_guy1998, CrAzY dRiVeR, Dani7766, deepfreak15, digitalnirvana, Divya Sharan, Dr.AD, Flyer, Fuldagap, Gannu_1, GTO, guyfrmblr, hmansari, HsekarK, InControl, IndigoXLGrandDi, KURU, Leoshashi, Livnletcarsliv, manas_270, Mistakenguy, MJ144, neerajdan, nitinkbhaskar, NPX, papr23, PM - B, quickdraw, R2D2, rajesh1868, RavenAvi, Ravi Parwan, Reinhard, Researcher, Rudra Sen, sachin_cs, sad:), samay300, Samfromindia, sandx, sanyog26, saur95, shancz, Simhi, somspaple, Sreejith V, svkndv, Tassem, Thanos-VV, The Great, Thermodynamics, The_Outsider!, TOINGPOING, Tpsdhiraj, TROOPER, vaish9925, viXit, Vyas, warrioraks, whitewing, yogiii |
| |
|
26th June 2020, 12:16
| #2 |
| BHPian | re: My experience with Car Care products; How I Ceramic-Coated my Vento at home Meguiars Gold Class Leather Cleaner And Conditioner : This is a leather cleaner that I have purchased with great expectations to clean the leather (Artificial) seats of my car which picked up some stains and dark coloration on the drivers’ seat. It smells awful. It did work but the effort that I had put in scrubbing the seats was too high. I don’t know how much it protects the surface as there is no method that I am aware of, to test it. I would not throw it away, but maybe use it rarely. 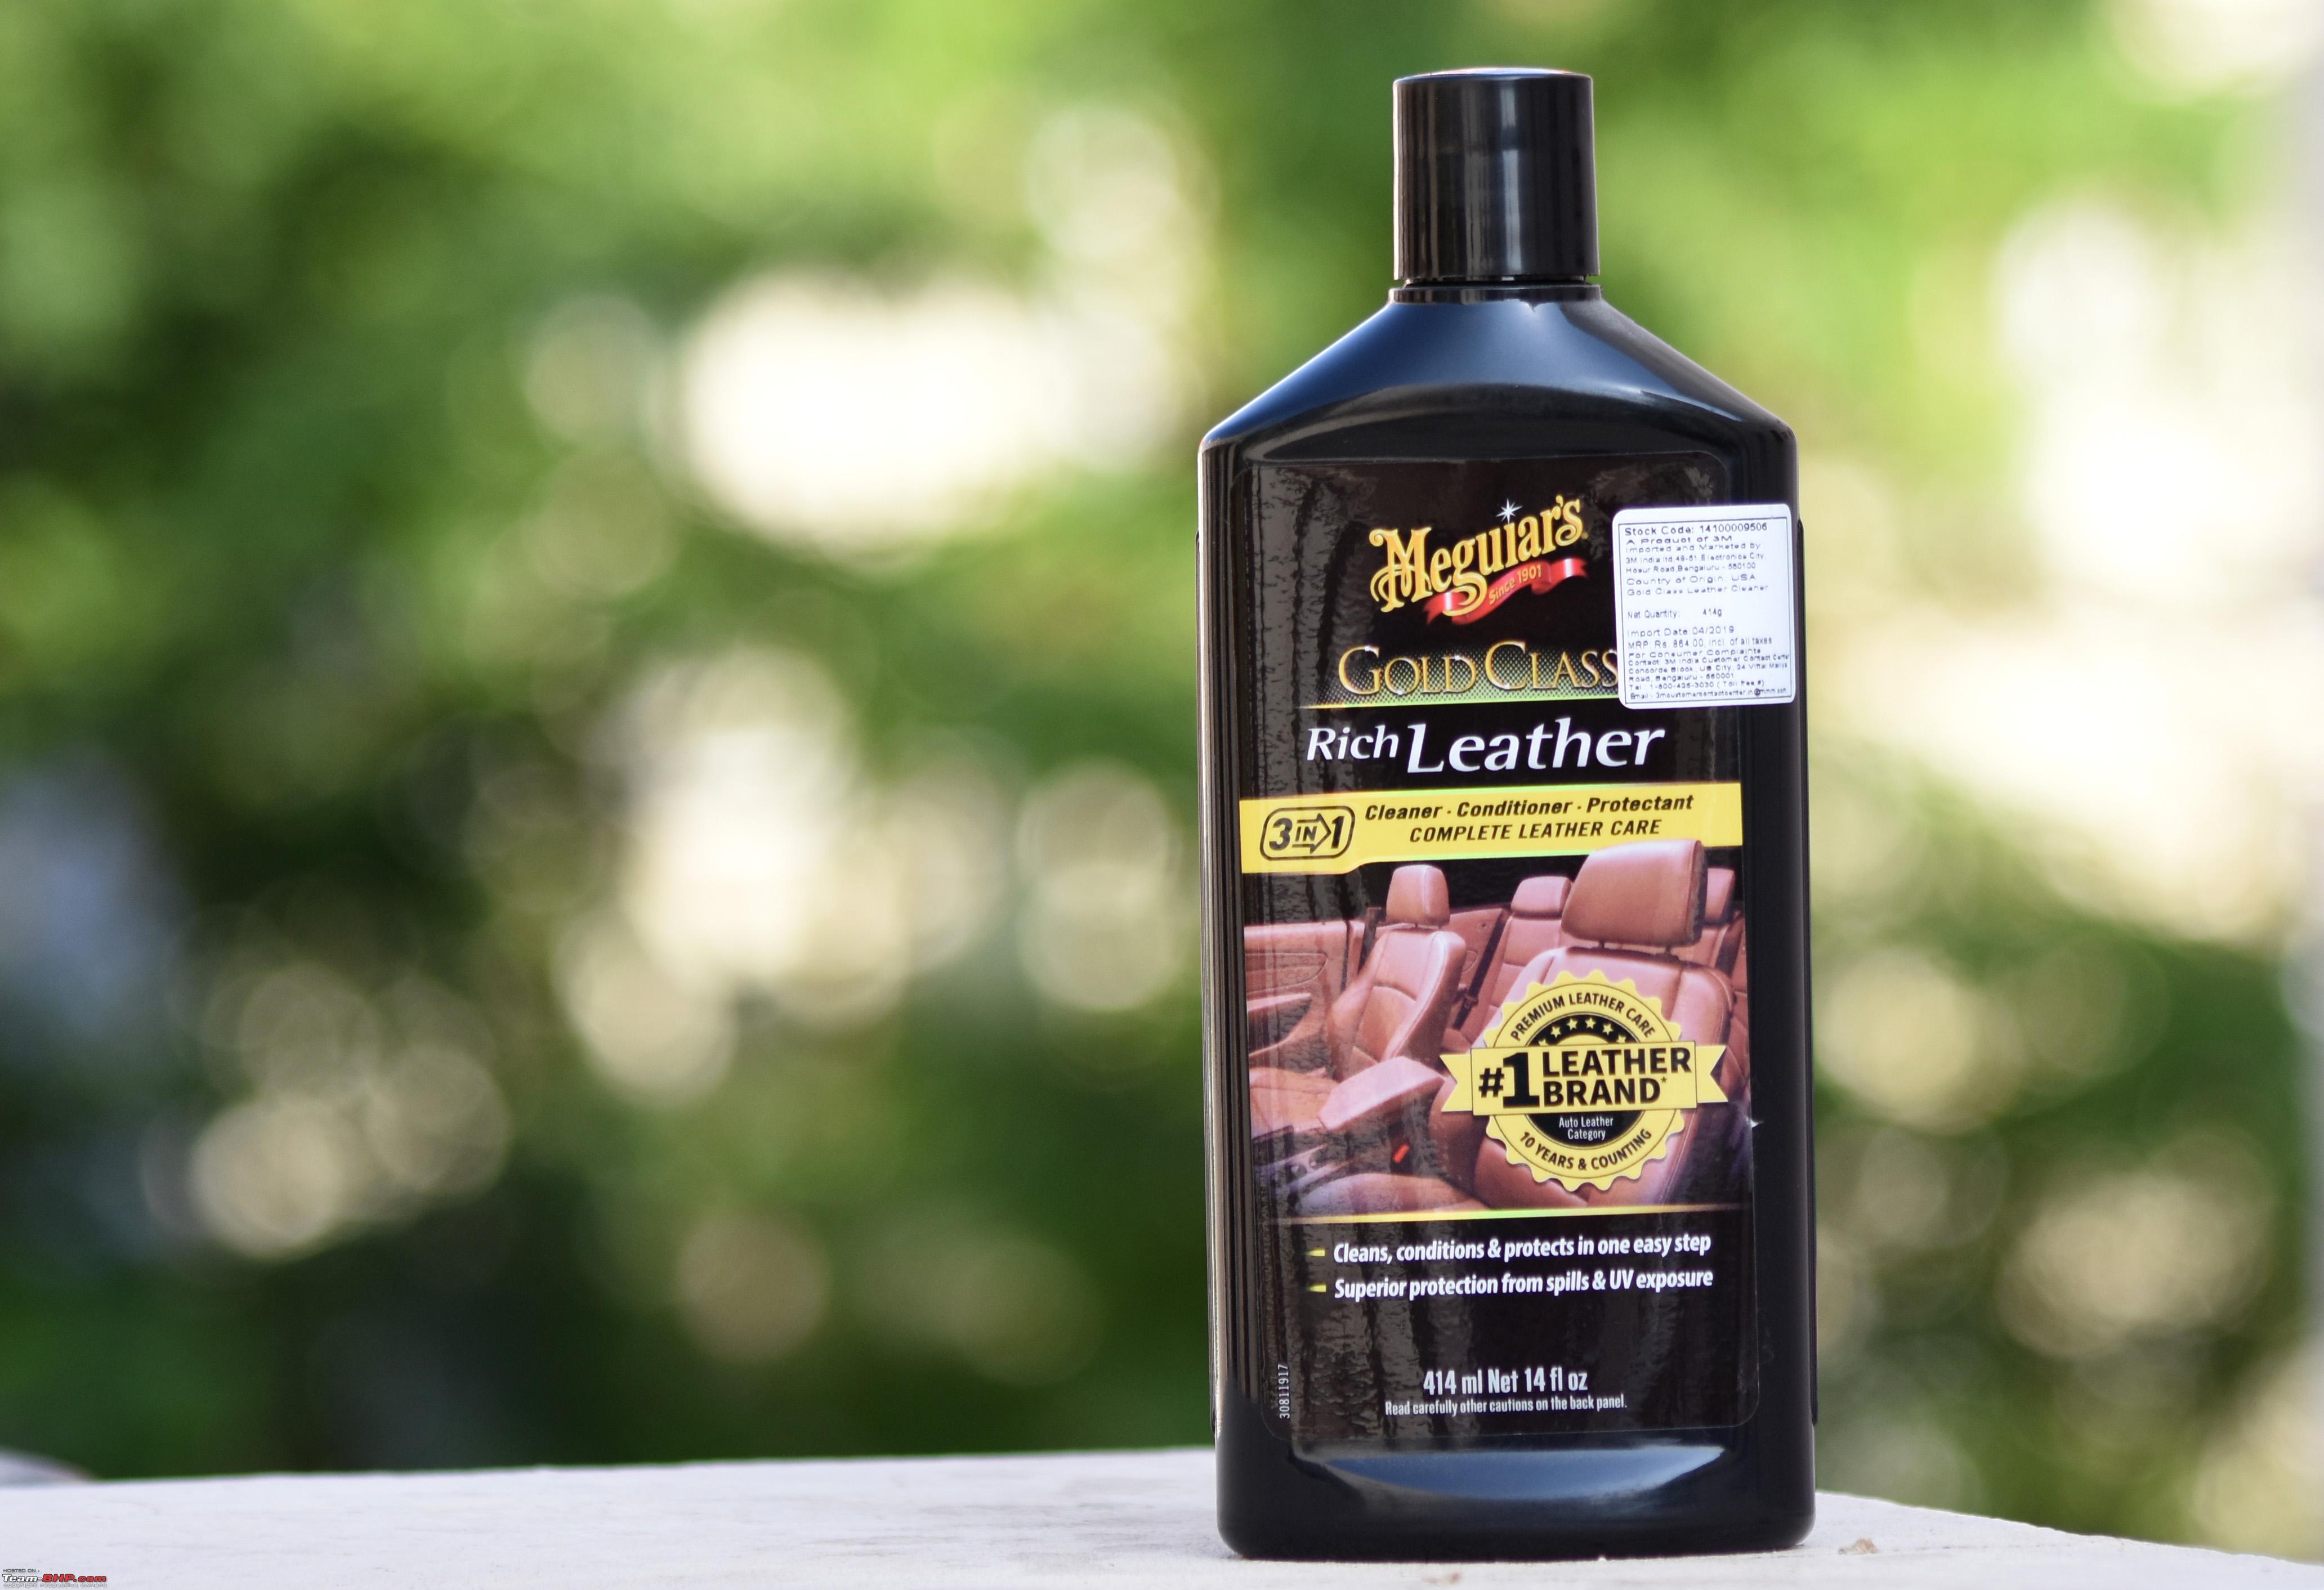 Meguiars Hot Rims Wheel And Tire Cleaner : This works quite well to clean the wheels and tires. The difference is more evident on the wheels. I’ve used this only once on my wheels and once on Jettas wheels and then sprayed Gyeon WetCoat on my wheels. So, didn’t get a chance to use repeatedly. I still have more than half bottle left. It does clean all the brake dust off wheels and makes them shine very well. The product is potent. It doesn’t turn purple or anything when it comes with contact with iron. Simply put, it is a good wheel cleaner. The spray head sprays the liquid in form of a foam.  Collinite 476 S Double Coat wax : This is the traditional hard wax that Collinite offers us. It comes in a traditional metal tub and is off-white colored. I use this wax rarely because of its relative difficulty in application and removal. It also gives a reasonably good gloss to the surface, but is not greater than Collinite 845. It does create a superb hydrophobic surface. It is known to be highly durable and resistant against detergents. But simply because of ease of use and higher depth of color on dark vehicles, I prefer Collinite 845 to Collinite 476 S. I rarely apply this wax to areas like trunk or bumpers, which might be at a risk of continuous exposure to rain water in our building. One can will last a very long time. A living Legend. Claims 1 Year of Protection (scenarios change in our weather though) 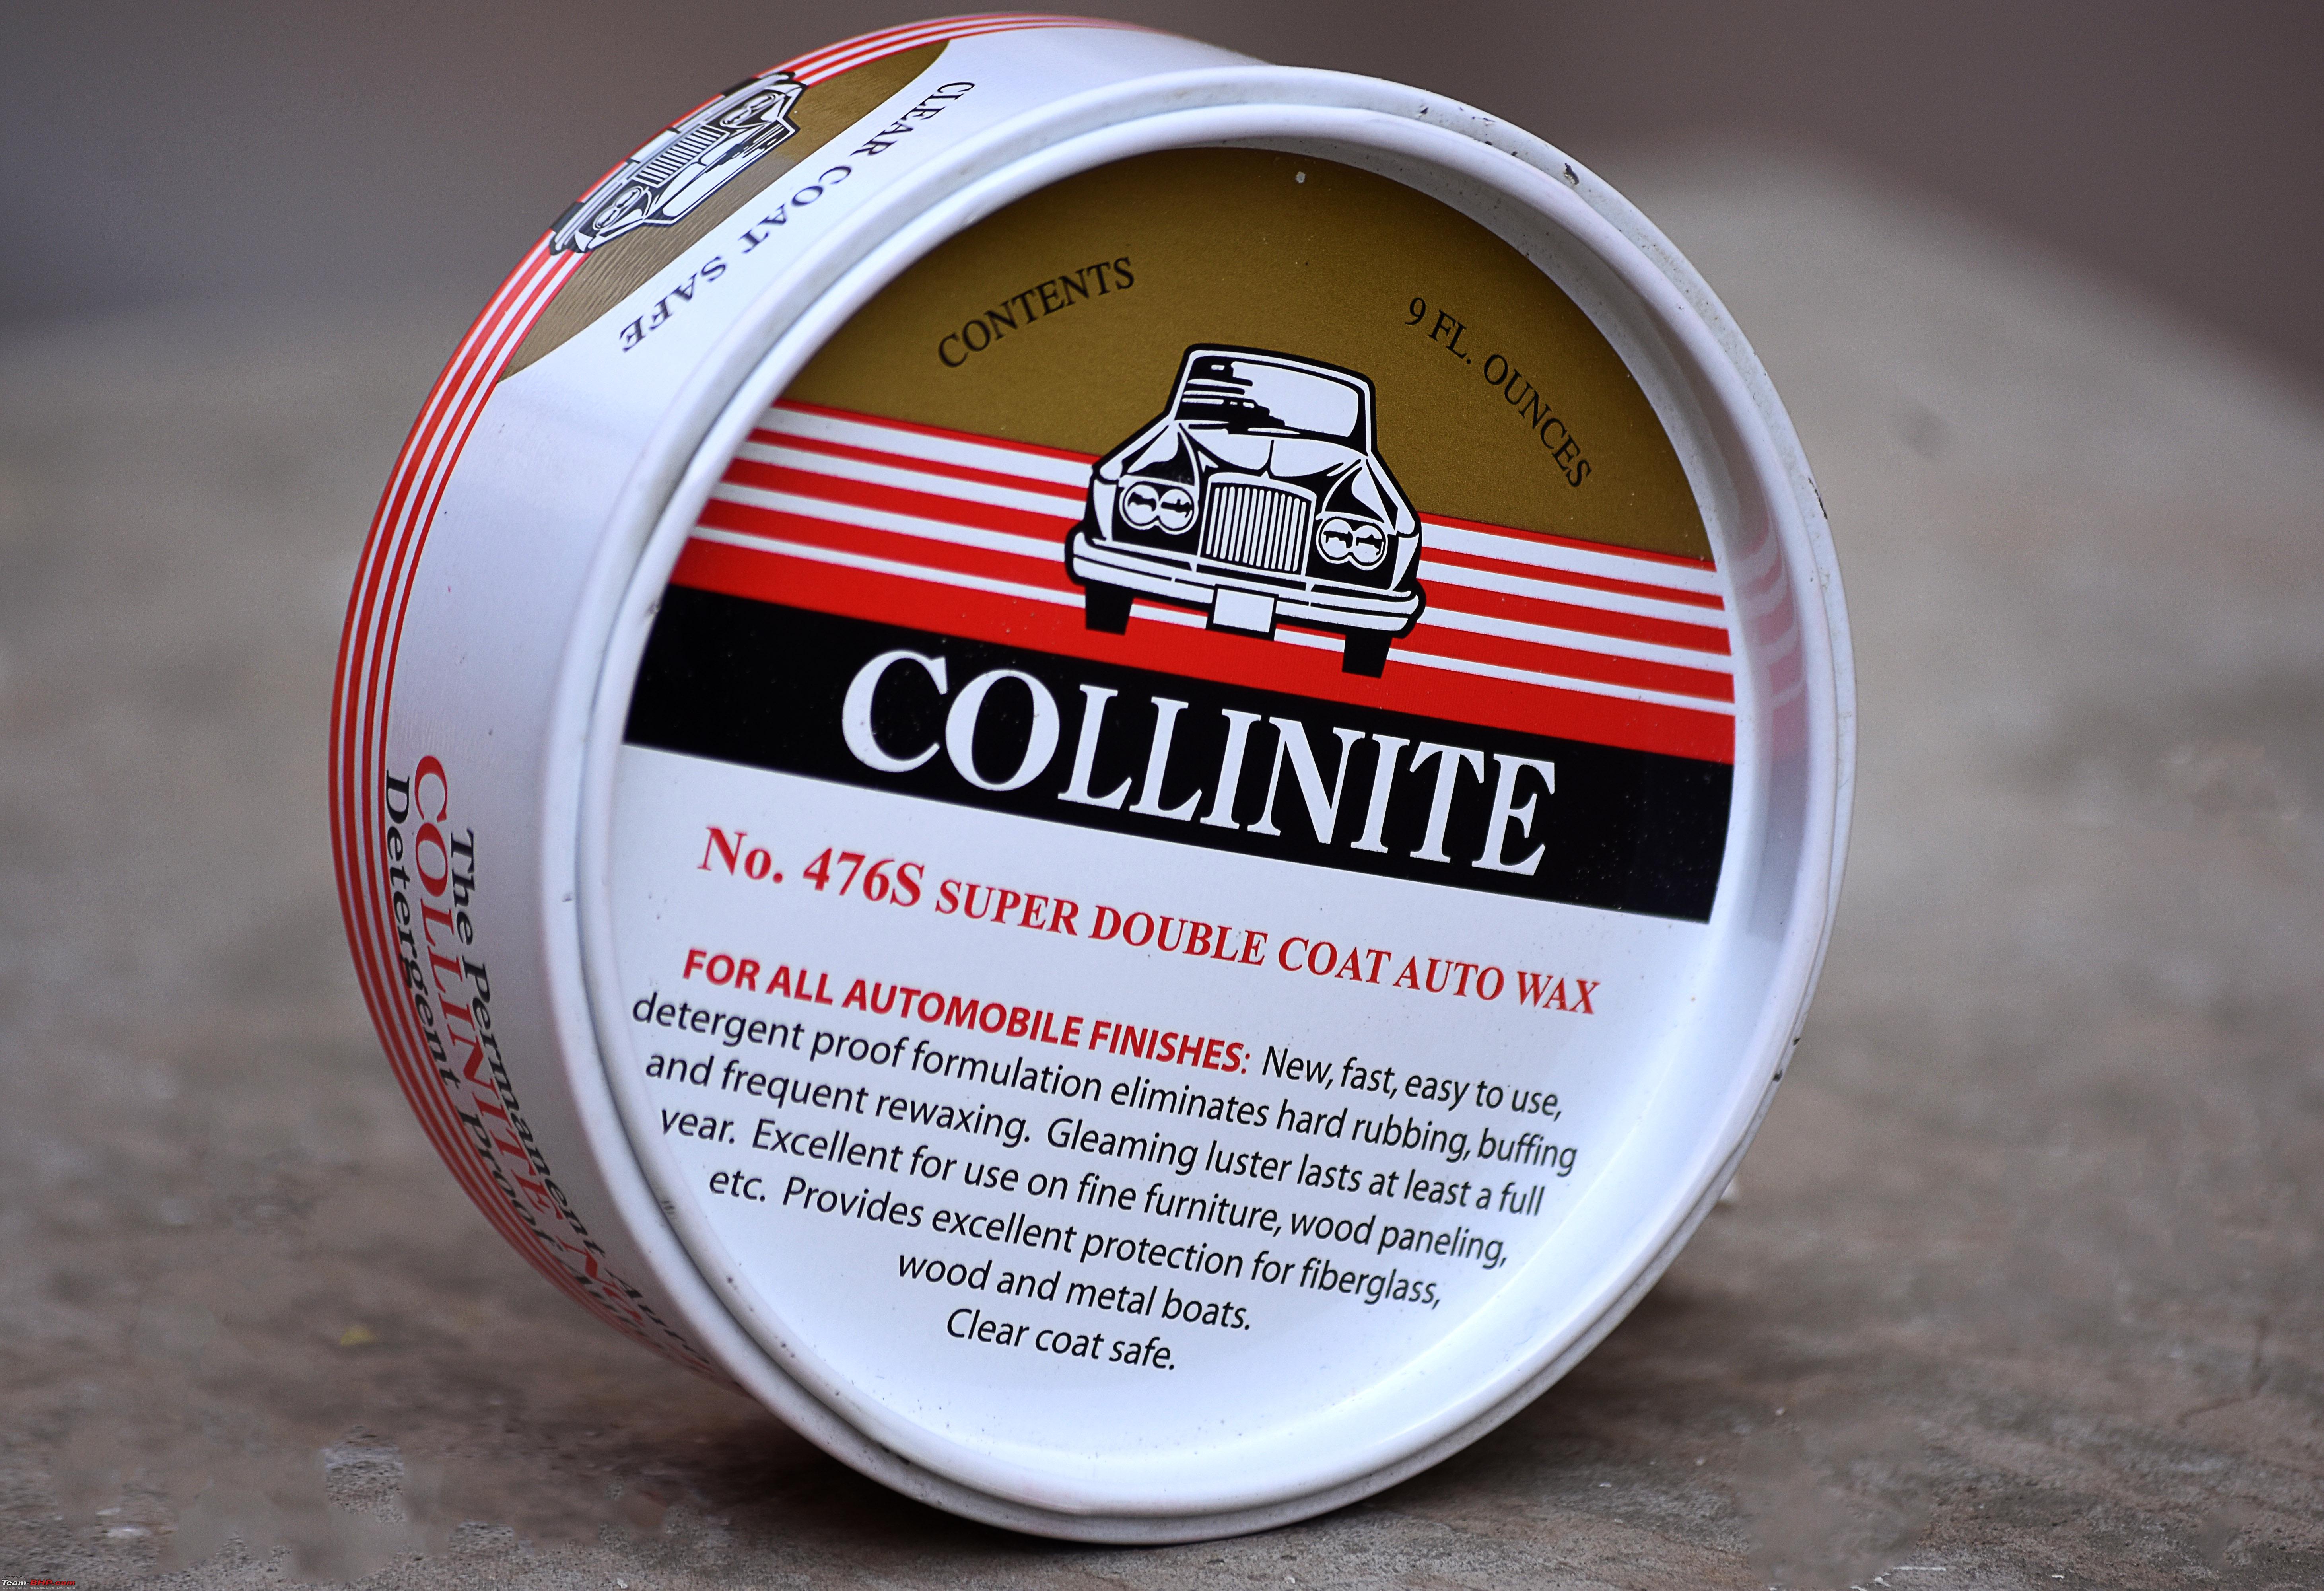 One needs super strong nails to open the lid. I keep a little screwdriver nearby for the purpose.  AmazonBasics Short Tire Brush : This brush , I bought for Rs.300 but now the price seems to have come down. It is a useful product, but needs some time to get habituated to it. We can easily brush the sidewall of the tire with this brush, but brushing the contact patch and trying to scrub the tire by placing the brush between the tire and wheel arch could be challenging and risky, because the brush is fat. The bristles of the brush divide at the ends (like split ends). Do I regret purchasing it ? Nope. My hand for size reference  The split end bristles 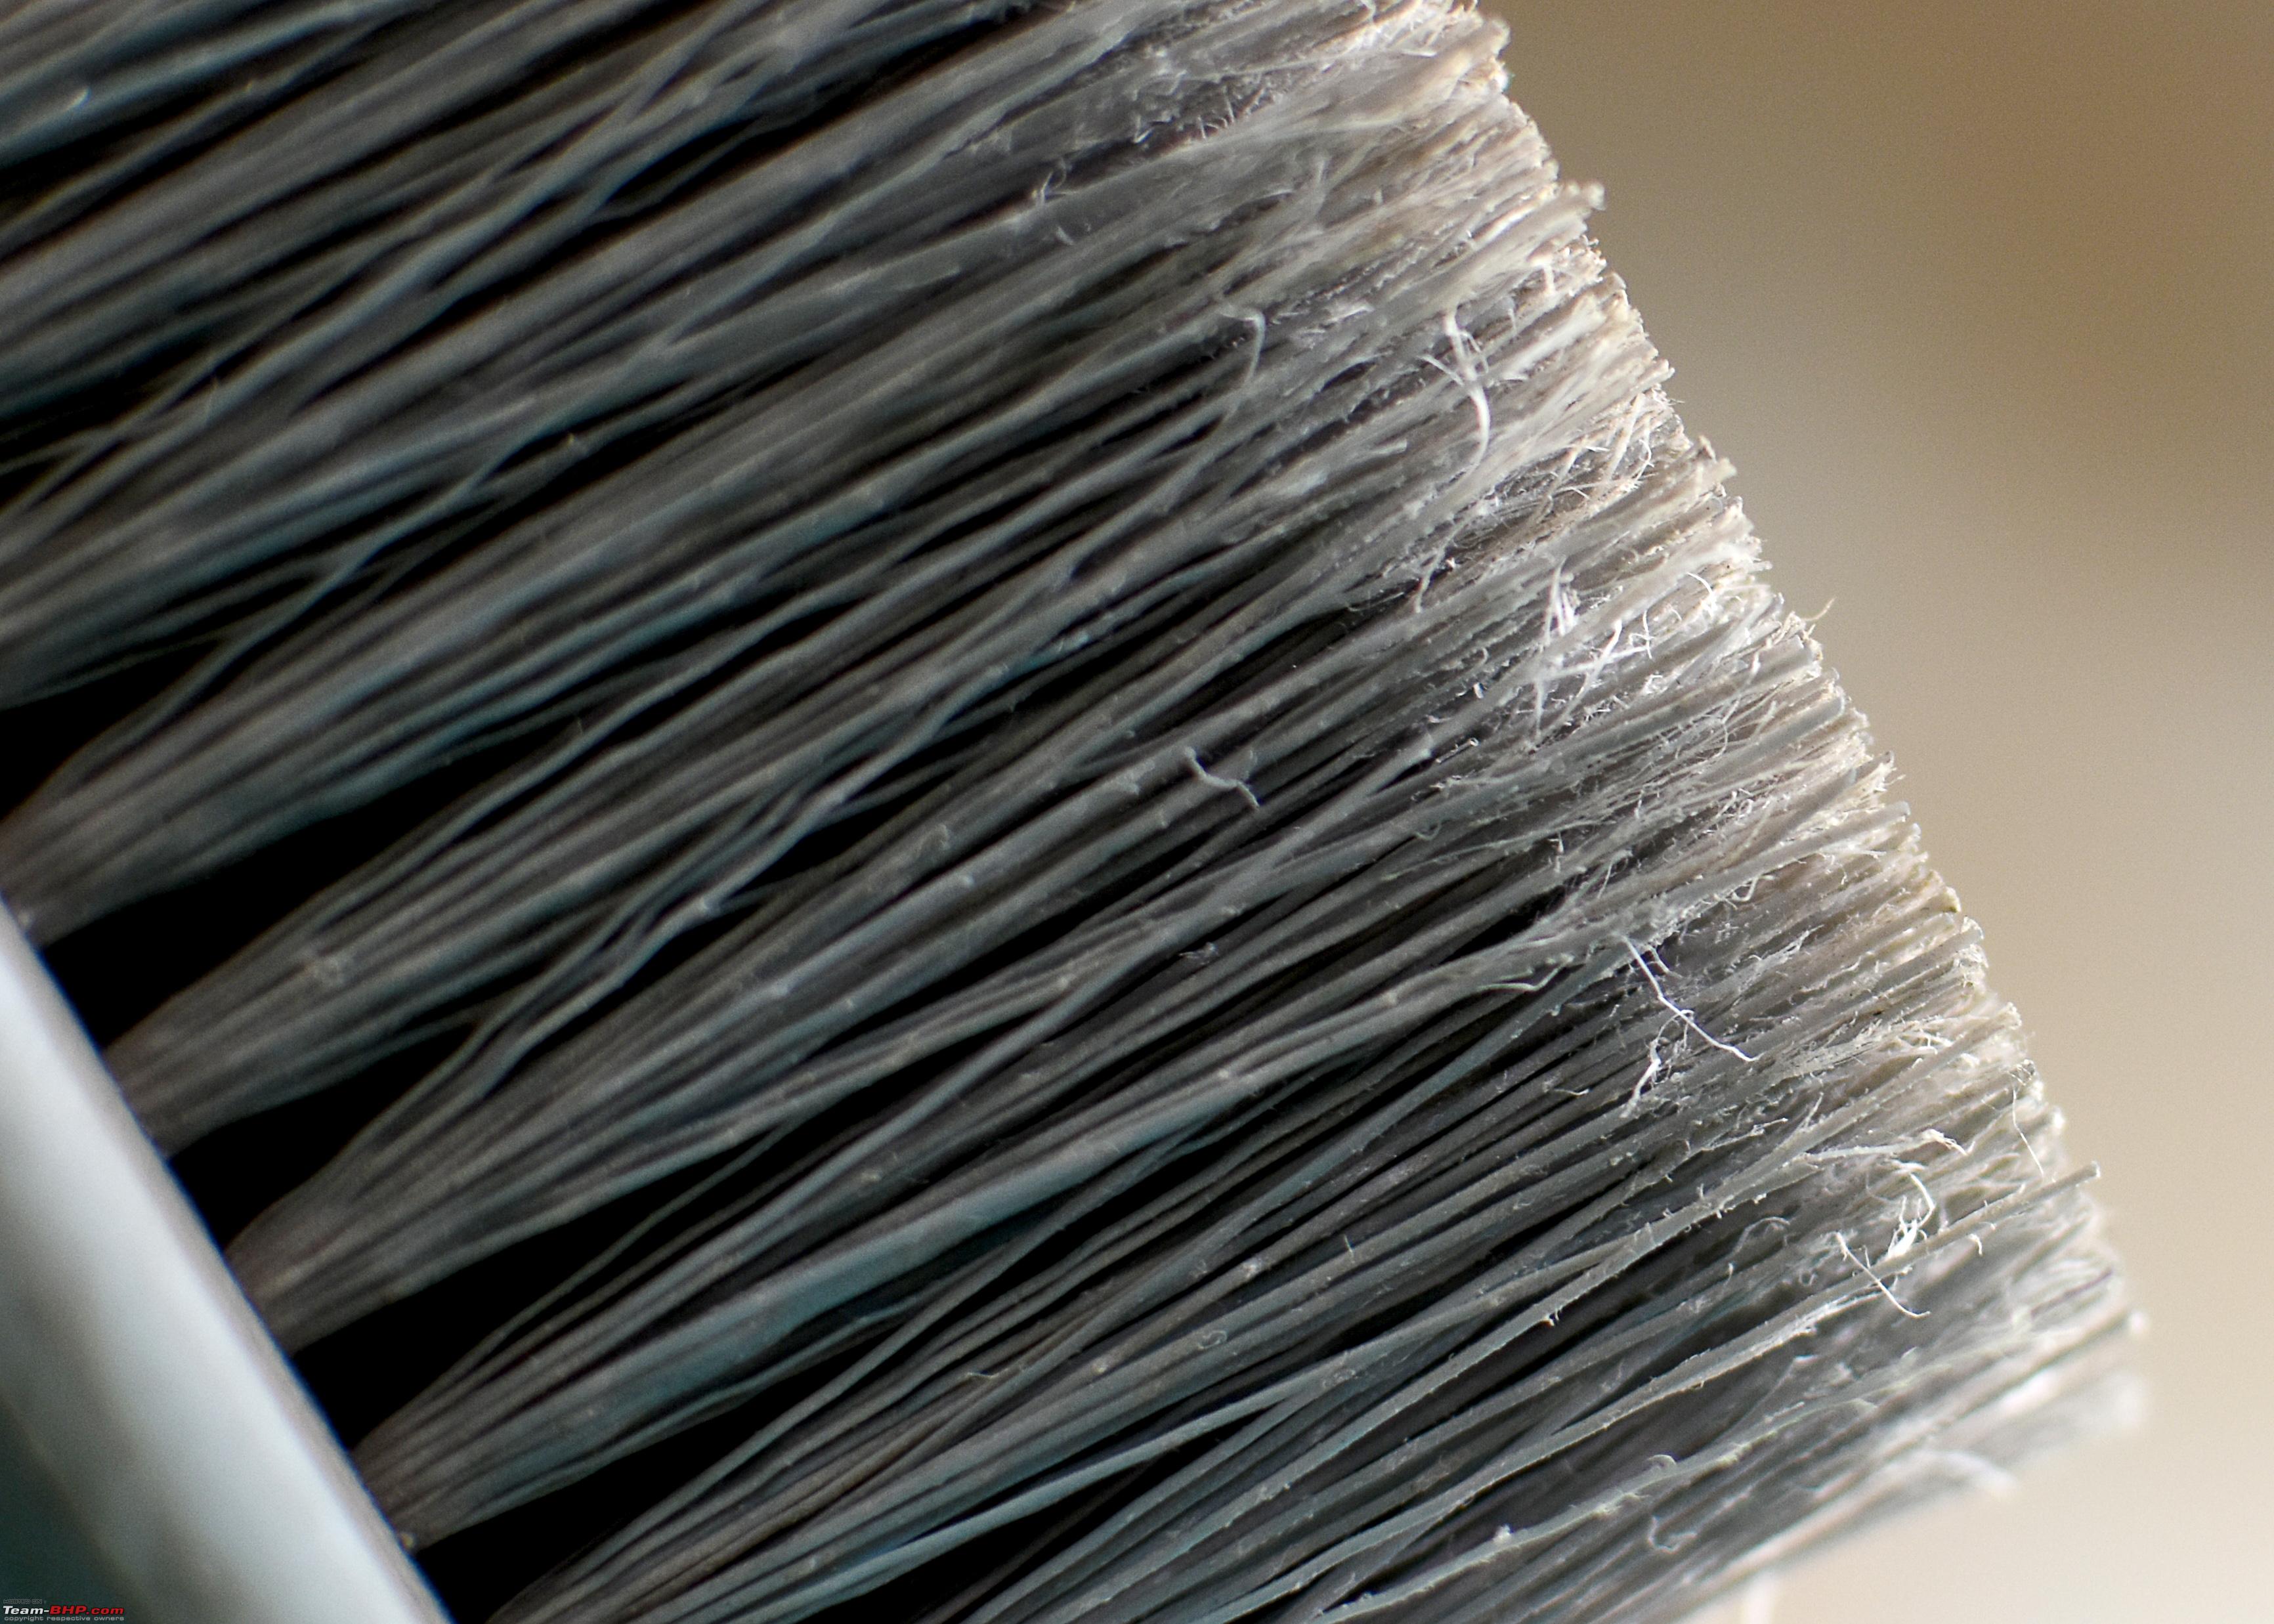 Chemical Guys Honeydew Air Freshener and Odor Eliminator: Bought this for Rs.517 for 120ml. I leave the spray bottle in the door storage space in my Vento and use it once in a while when I feel like using it. It gives a nice fragrance. The fragrance is more like Bubblegum flavor ice-cream. It lasts not more than 5 minutes in the car. I spray it in the passenger foot-well so that the fragrance circulates the entire car through the AC inlet there. It did not seem to cause any harm like creating bad odors after few days through the AC vents. It is an air freshener with a good fragrance that will last not more than few minutes. 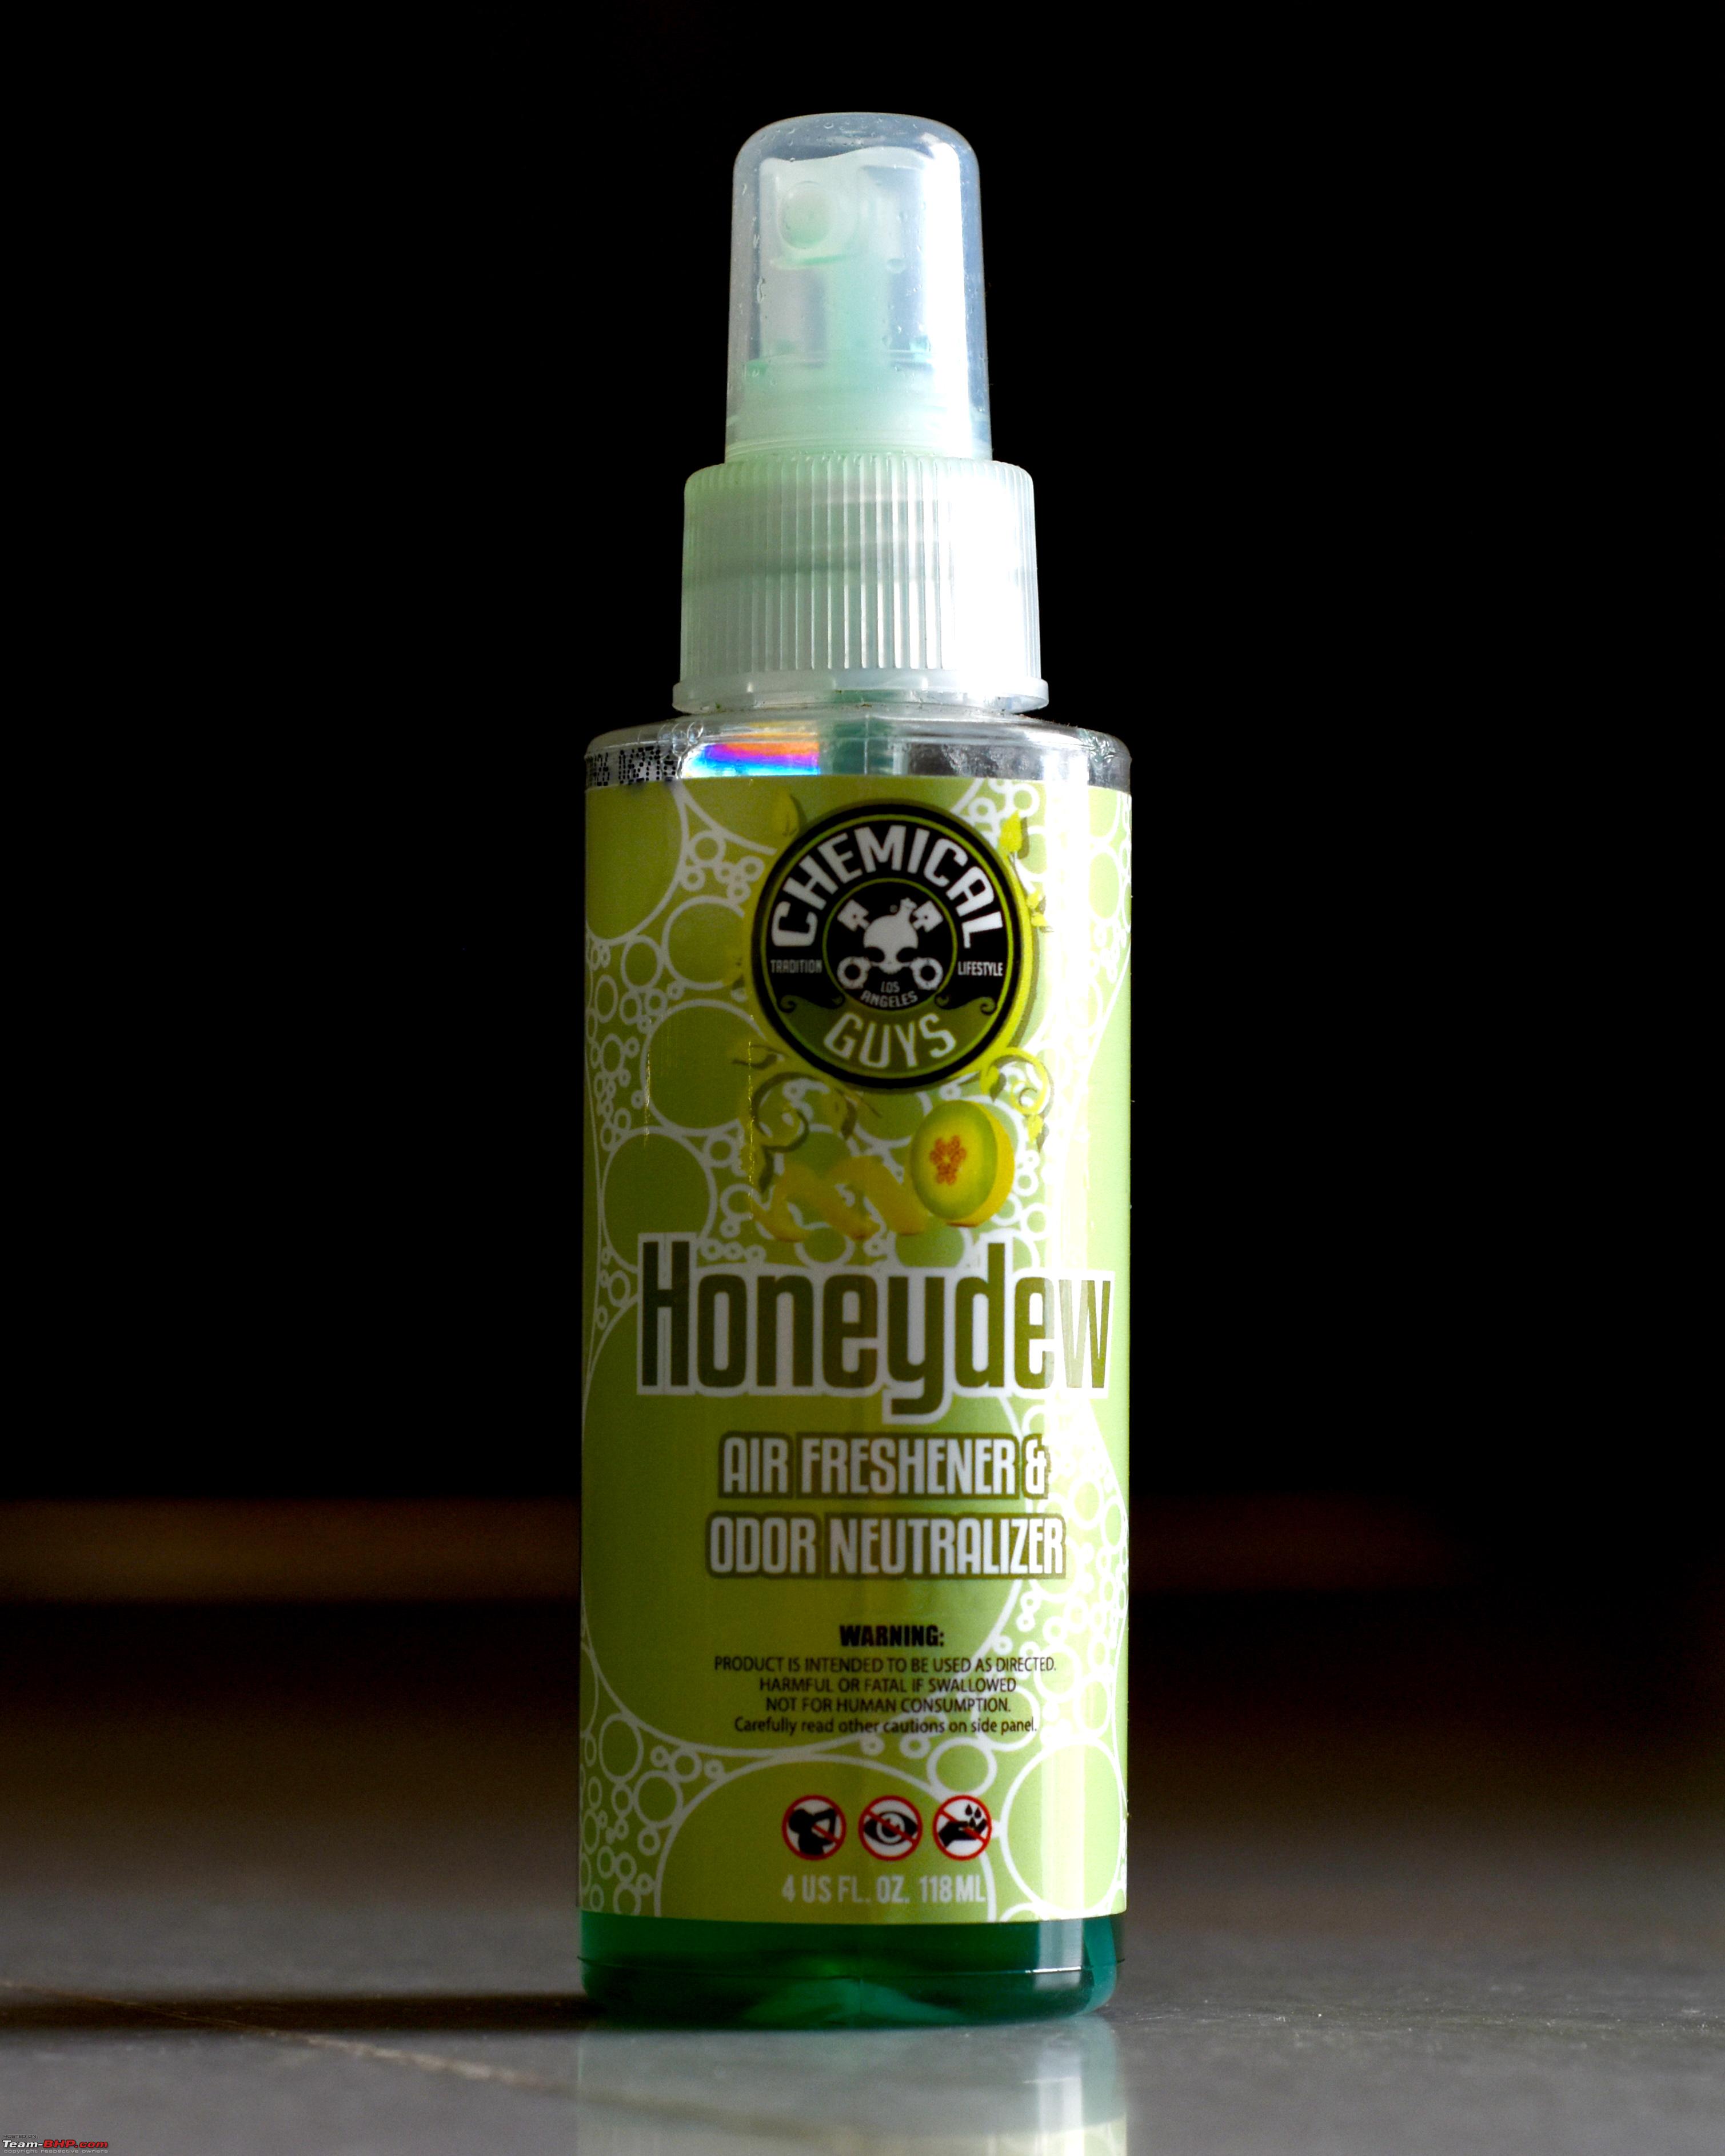 Now coming to the newer stuff, which made my life super easy : Demineralized Water : This is the water we get in battery shops. It costs Rs.20-25 per liter. I usually keep a 5 Liter can at home. This is very useful to dilute concentrated solutions. It can also be used to dilute soap in the foam lance to give better foam. Collinite 845 Insulator Wax : I have been using this wax since 4 or 5 years. The bottle has a child proof cap. We need to press the cap and rotate it to open. No need to press to close. It comes in a paste like consistency. In our Indian weather, it usually ends up being liquid, which is good. If it isn’t like a liquid, I shake it or put it in a mug of hot water for a minute or two and it melts to a nice liquid consistency. It smells like Mortein/Hit insect repellant spray. It would be very economical to have it brought from the US to India by a friend. One bottle goes a long way. Coming to application, I take one of my cheap home-made applicator pads and place the pad at the opening of the bottle which is upright. Then I hold the pad with one hand, bottle in the other and then just shake the bottle once up and down, so that the wax touches the foam pad. It’s like how we take paint thinner with a cloth from its bottle, or how women take nail polish remover into a cotton swab. First time I do it at 2-3 spots so that the pad is primed. Then once is enough for half panel. Doing this gives the minimum amount of wax on the applicator pad and prevents wastage of product. And this product is to be applied as thin as possible. I usually apply wax to the entire car, wait for 2-3 minutes (sometimes takes more time to dry), do the swipe test and then with an AmazonBasics microfiber cloth, I remove the wax. Rarely, when I repeat the application too soon, like within 1 week, I notice there are high spots occurring on the bonnet. Nothing to worry if this happens as they will be gone after a wash or two. Not even once did this wax disappoint me with respect to the finish it gives to the car. It just makes the cars color deepen, saturate. It gives the Wet Look and a super slick(smooth) feel to the surface. There had always been more dust accumulating in a day immediately after applying the wax. But this is not the case after the first wash. The wax performs very well. The water beads like crazy. Washing the car is a breeze and so is drying. It doesn’t damage the plastics or trims. I apply this wax once a month or sometimes twice, if I want to have that super wet look. The wax that gives a super deep finish and a wet look to the paint surface : 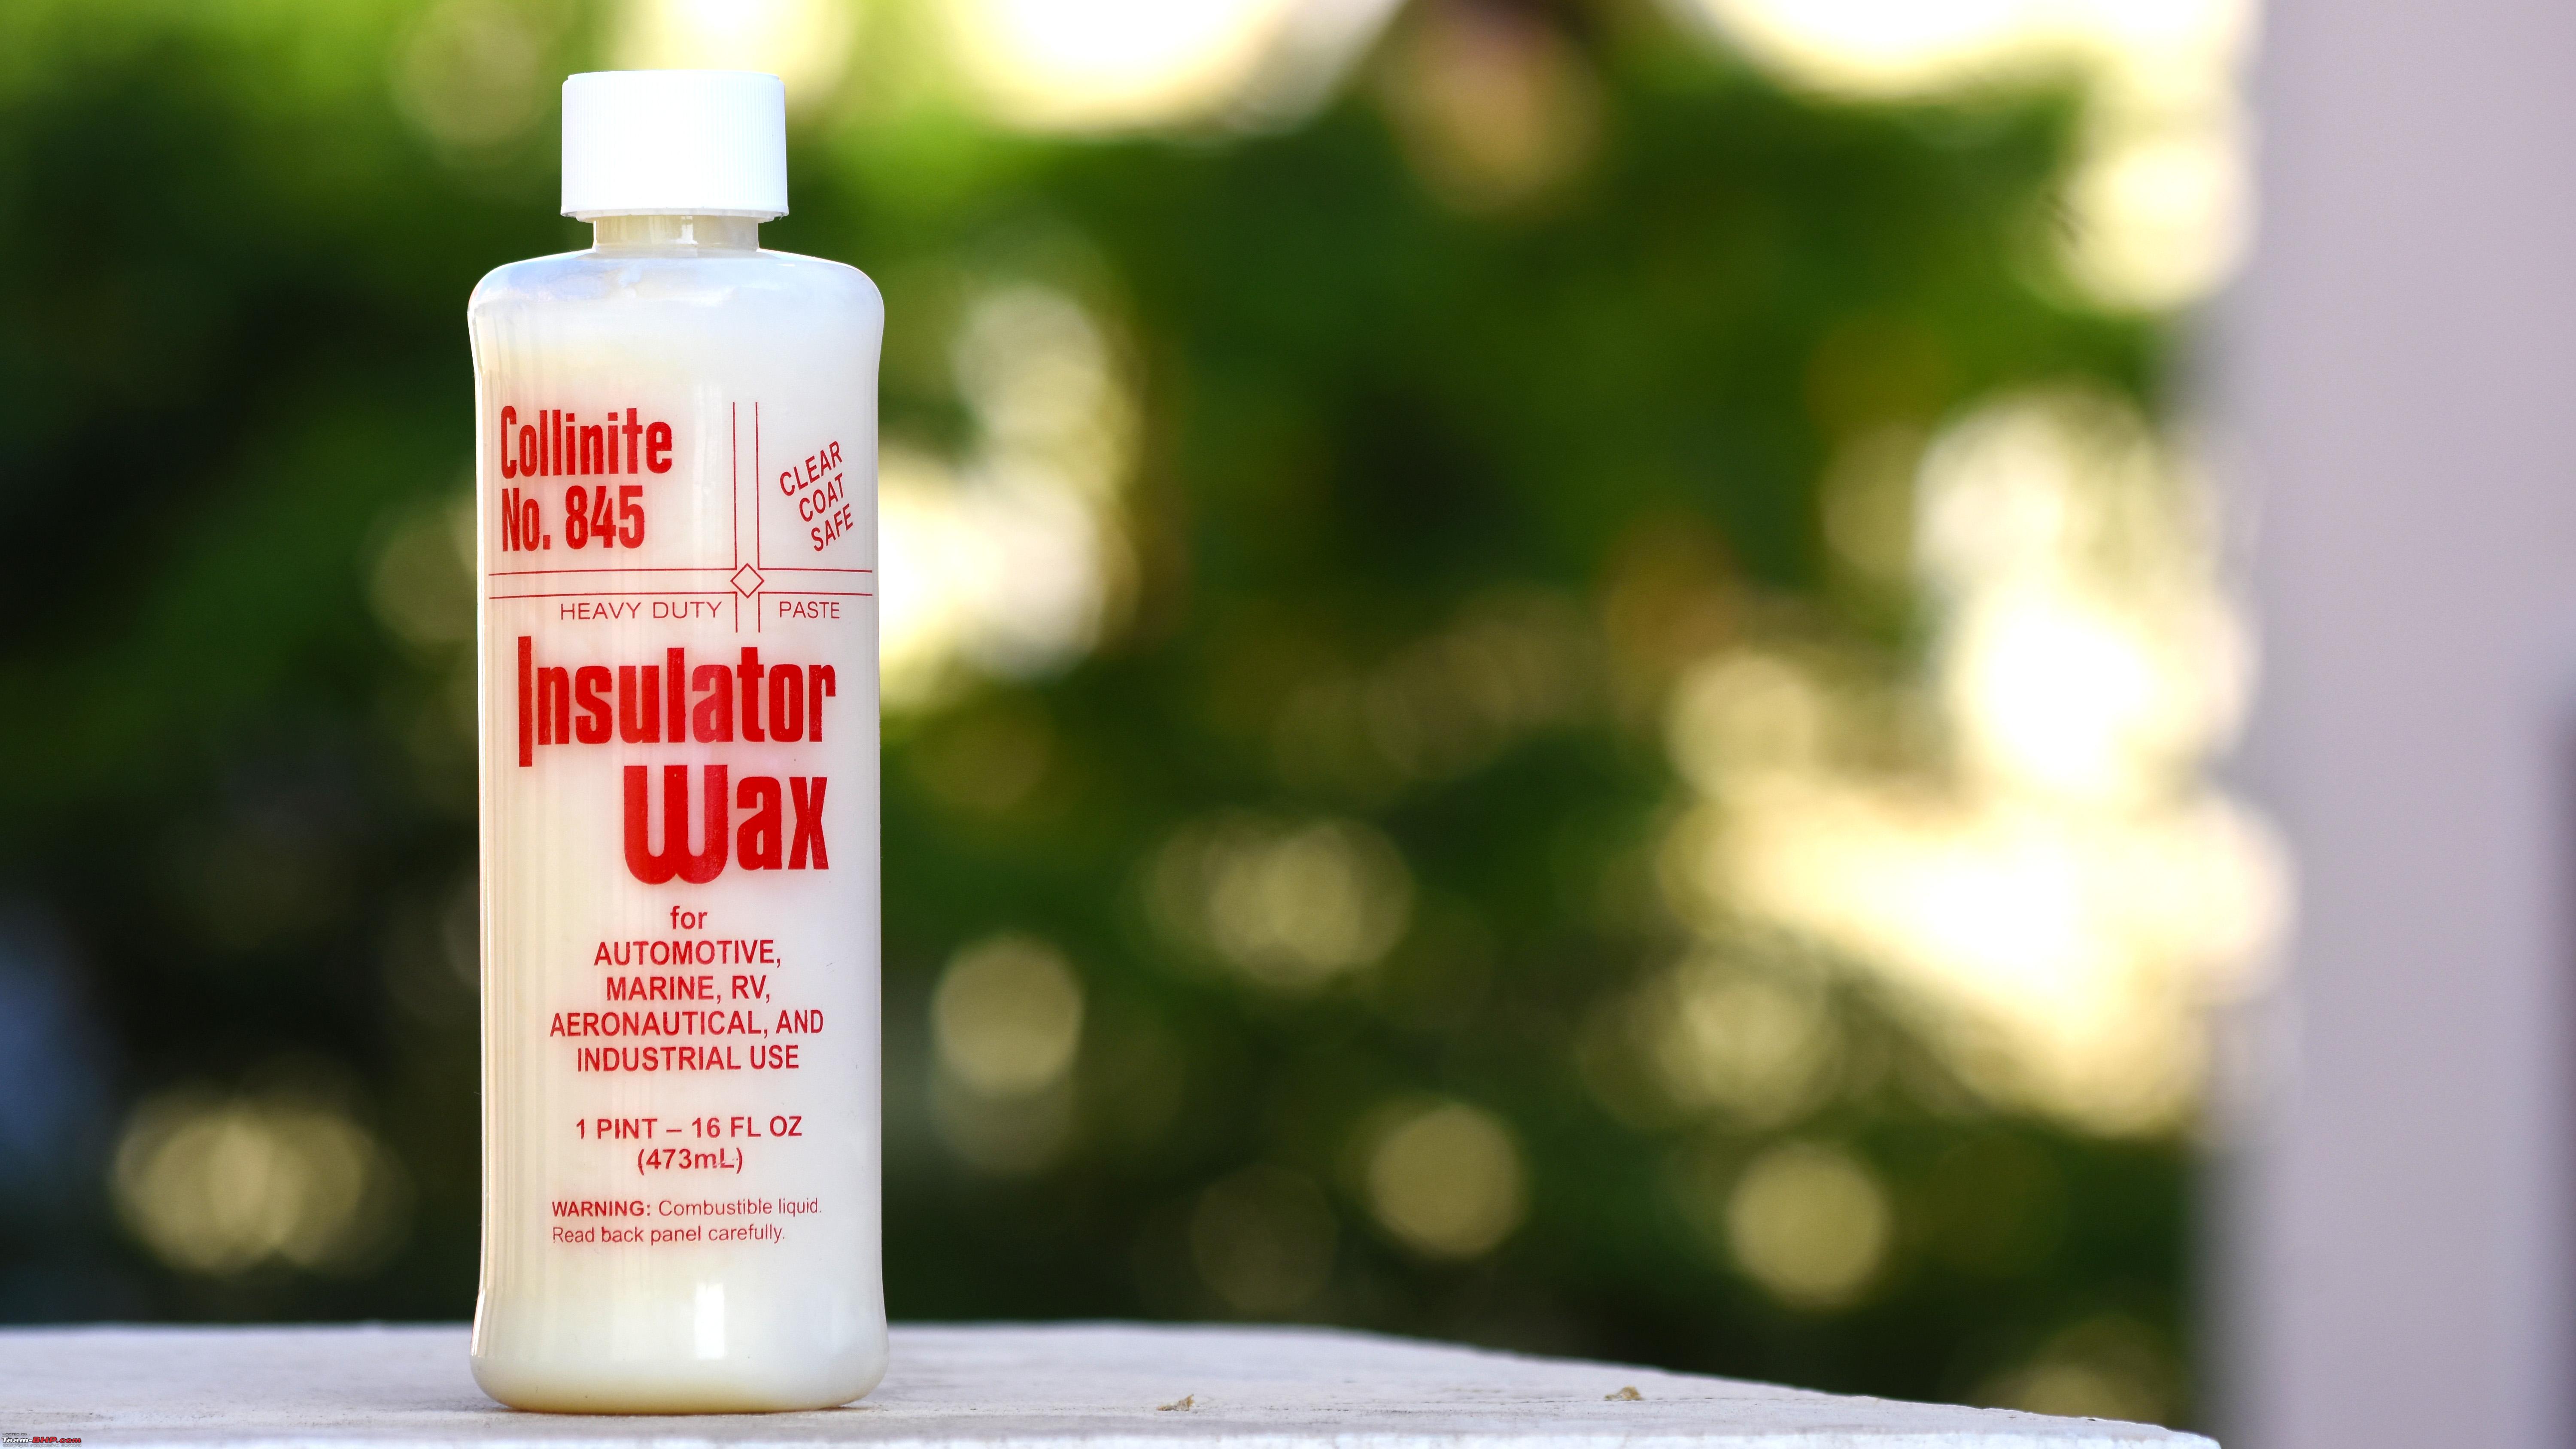 CarPro ECH2O : This is a concentrate by CarPro that can be diluted to be used as a waterless wash or rinseless wash or quick detailer or clay lubricant. It has a scent to it and liking it or not is totally subjective. I personally have no issues with the fragrance. This liquid is an all-purpose magic liquid for me. I primarily use it as a quick detailer at a dilution varying between 1:20 and 1:25. After washing the car, I spray this on the panels and wipe it off. It removes any water marks that are left while drying the car and gives a brilliant shine and a slick feel to touch. It works wonders on the glass. I stopped using Colin after using ECH2O on glass. It makes the glass look very clean. I also use this to wipe off my wheels after washing the car. I’m not a fan of rinseless wash or waterless wash, so I didn’t do that. Well, why is this my all-purpose magic liquid ? Because I also use this for household purposes. It can be used to shine everything. Everything includes but not limited to – fridge, microwave exterior, glass windows, mirrors, tiles, marble floor(be careful as it makes the floor slippery), TV, monitor screen, phone screen, study table top, decorative crystal pieces. I just spray it and wipe it clean on all these. I recently tried it on the interiors of my car, and it as usual did its job flawlessly. There is no hard rule for the dilution ratio for these household jobs. I usually spray by QD (Quick Detailer) ratio, but recently tried 1:100 for marble floor (Spray and wipe after sweeping) and it did the job absolutely fine. The icing on the cake is its price. It costs about Rs.1300-Rs.1400 per 500ml. But this 500 ml makes 10 L at a dilution of 1:20, making each liter cost Rs.130 – Rs.140. It makes 12.5 L at a dilution of 1:25, making each liter cost Rs.105-Rs.110. And these last really long, thus making the whole proposition very economical. It gets more economical if we get the stuff in bulk or larger bottles. One Liter and 500 ml bottles of ECH2O side by side. My all rounder concentrate 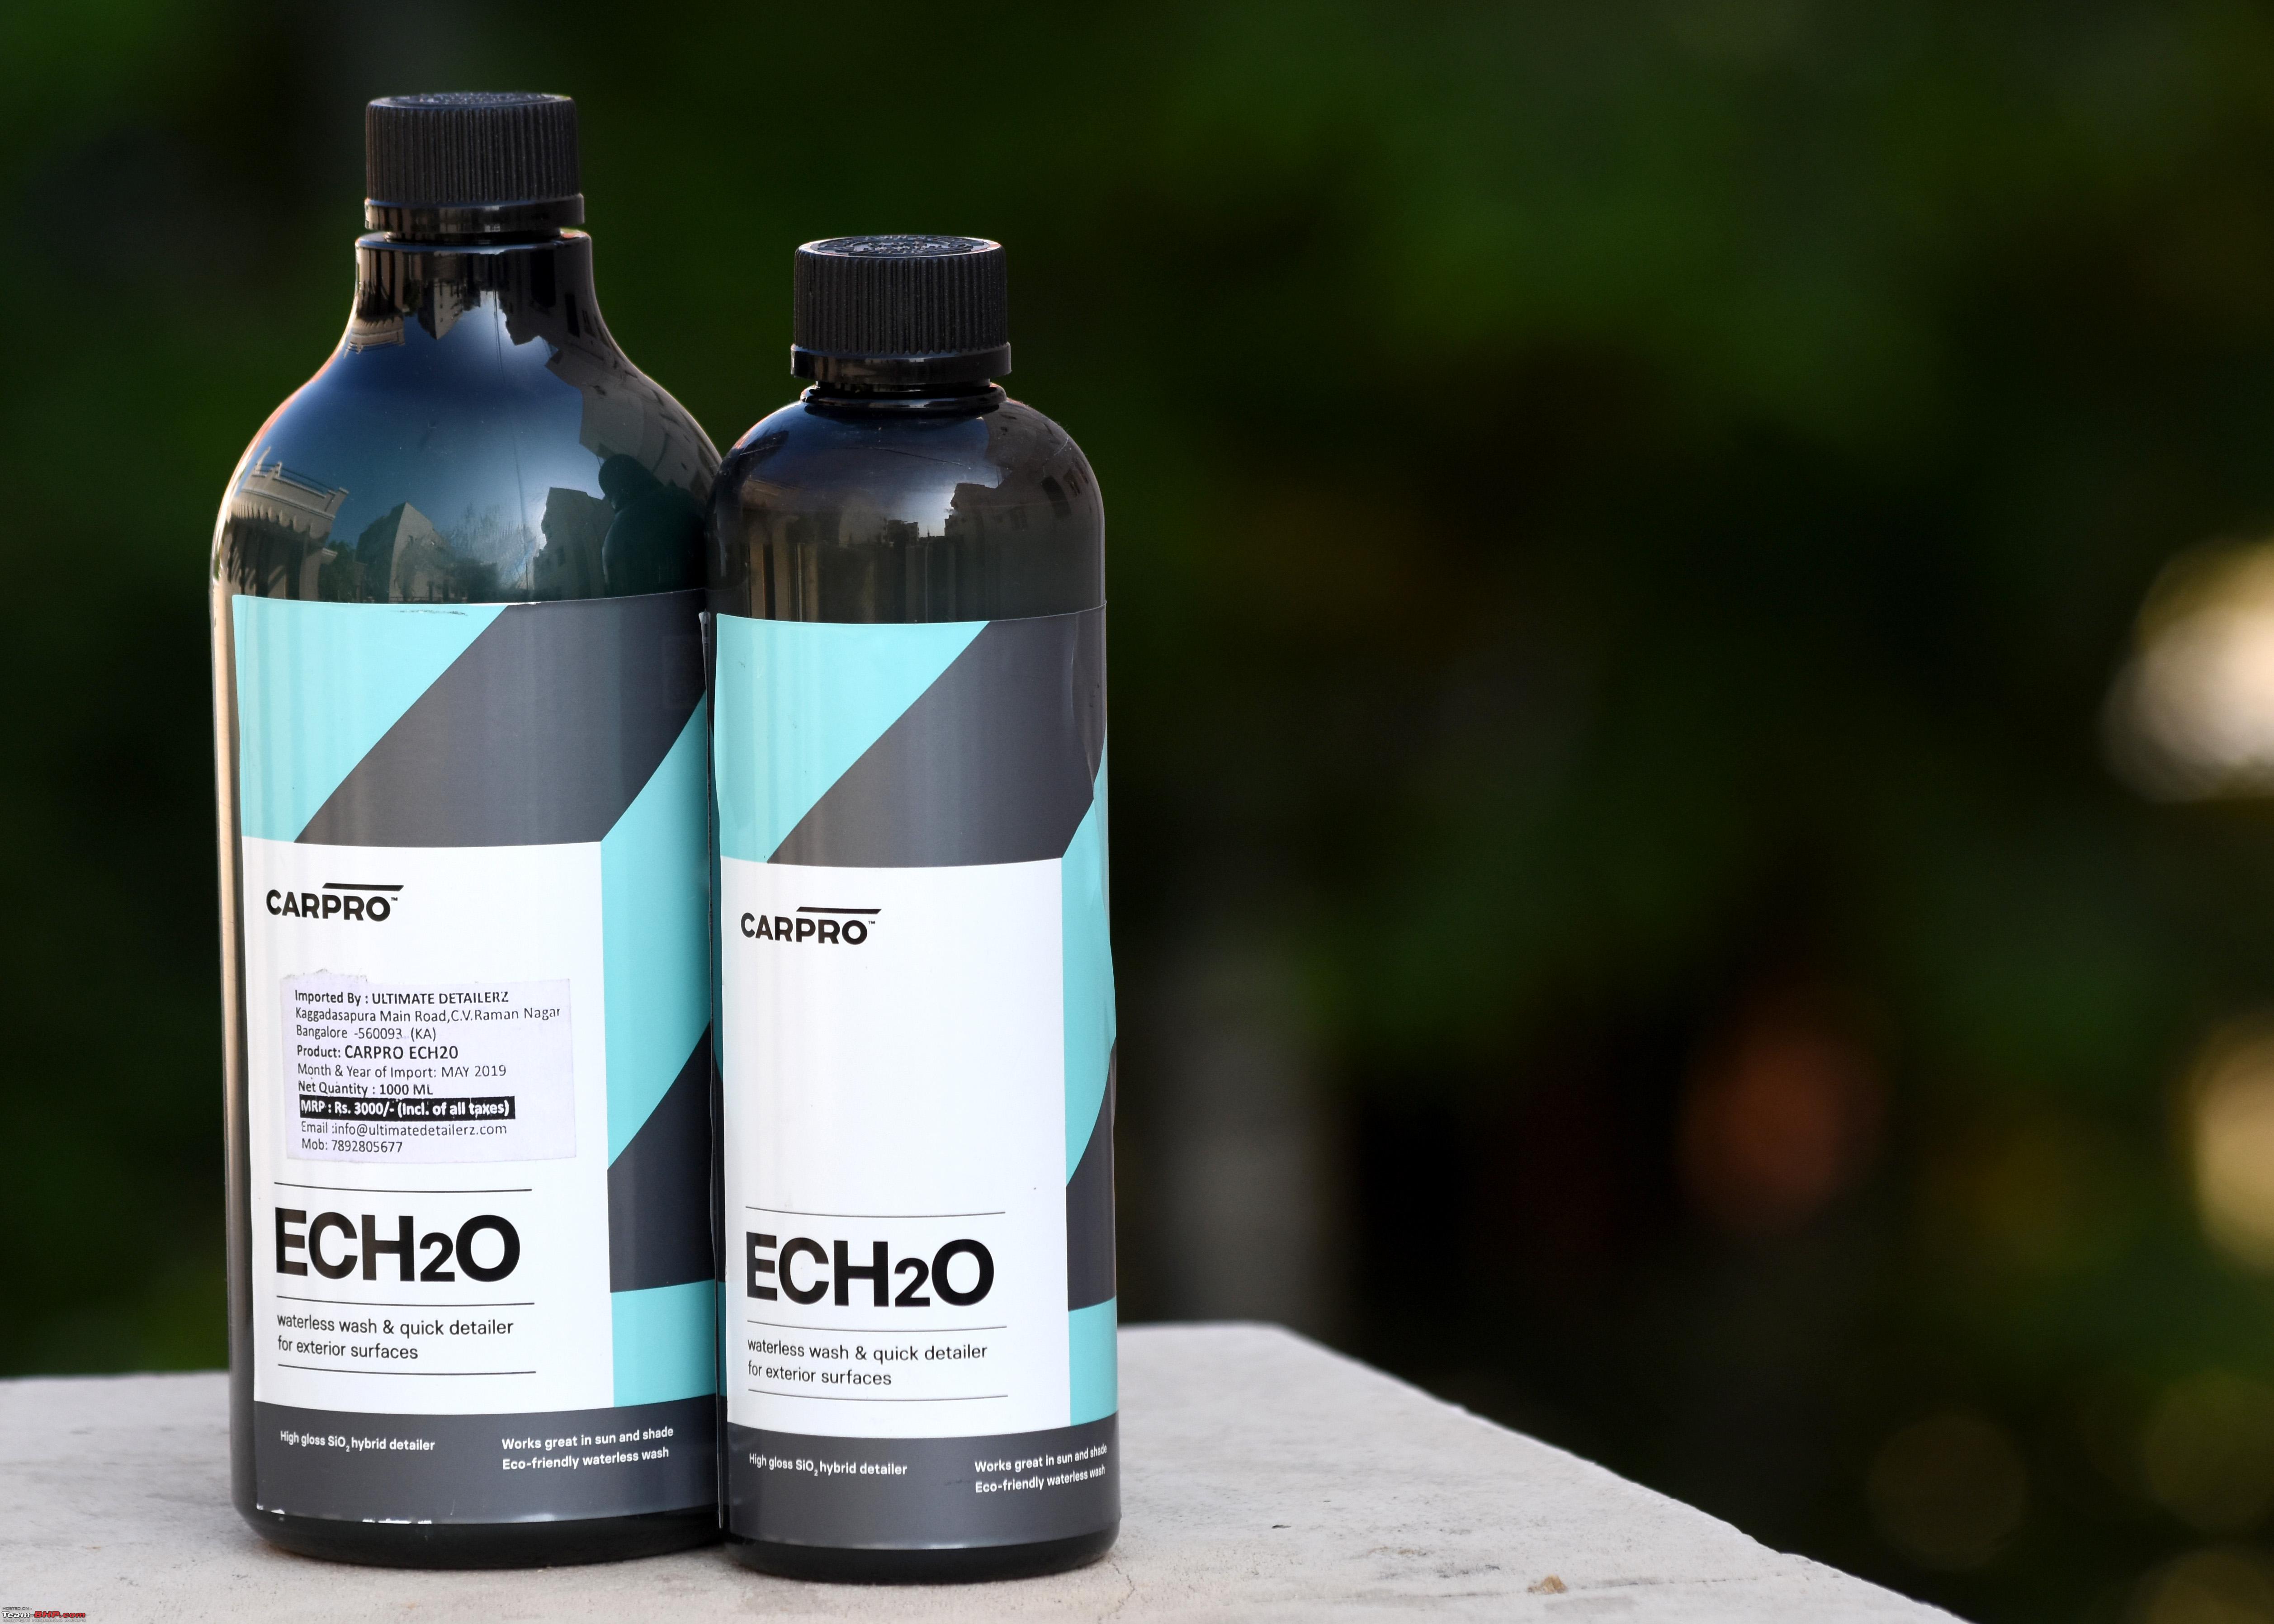 CarPro Multi X : This is an All-Purpose cleaner concentrate. I bought this a year ago for Rs.1090 for 500 ml. It is strong and very effective at cleaning surfaces. I use it at a concentration of 1:10 and that did all the jobs that I’ve thrown at it. It can clean wheels, tires, interior and anything. To give a fair idea of how powerful it is – spraying this 1:10 diluted solution and working the product with a microfiber cloth will remove many waxes in the market including Collinite 845. If the wax is not gone in the first round, it surely will disappear in the second pass. So, it is a powerful cleaner. CarPro recommends a lighter dilution for interiors, but I have not tried a lighter dilution. It removes interior stains cleanly. I used this product to strip my car off Collinite to apply the ceramic coat. One thing to keep in mind is that, after using this product, we must rinse the surface thoroughly with water (Wipe if interiors). I did use this on the leatherette seats in our Jetta, and they’re fine. It too makes 10 L of solution at a dilution of 1:10, thus making the price of each Liter Rs.110 - 120. This comes in a white bottle in a slightly different shape than other CarPro products. Very strong. Very effective.  Gyeon WetCoat: This is a spray on – rinse off silicon sealant. Application is quite simple. After washing the car, we spray once or twice on the upper portion of the panel and rinse it off with a pressure washer. That gives water repelling properties to the panel and also makes the panel a little glossier and smooth. Recently, I did read on some forums and saw in some YouTube videos, people experimented with different application methods. I too tried and they work. Instead of rinsing off directly from a wet panel, wiping with a cloth to dry is one option. This option needs more microfiber cloths. The second option is wiping the product with a damp cloth on a wet surface and then rinsing off. The main advantage I found with this product is, it gives hydrophobic nature to areas which we can’t reach or which are too cumbersome to coat. I used these on my wheels and the water beads off on the wheels. Combined with the air blower, my drying time for wheels substantially went down. The product is rather expensive (I bought a liter for Rs.2500 last year) and may cause streaks if used improperly. But it surely works well. The durability is good as long as we don't hit it with soaps and so the usage of product over time is low. Easy to use spray sealant : 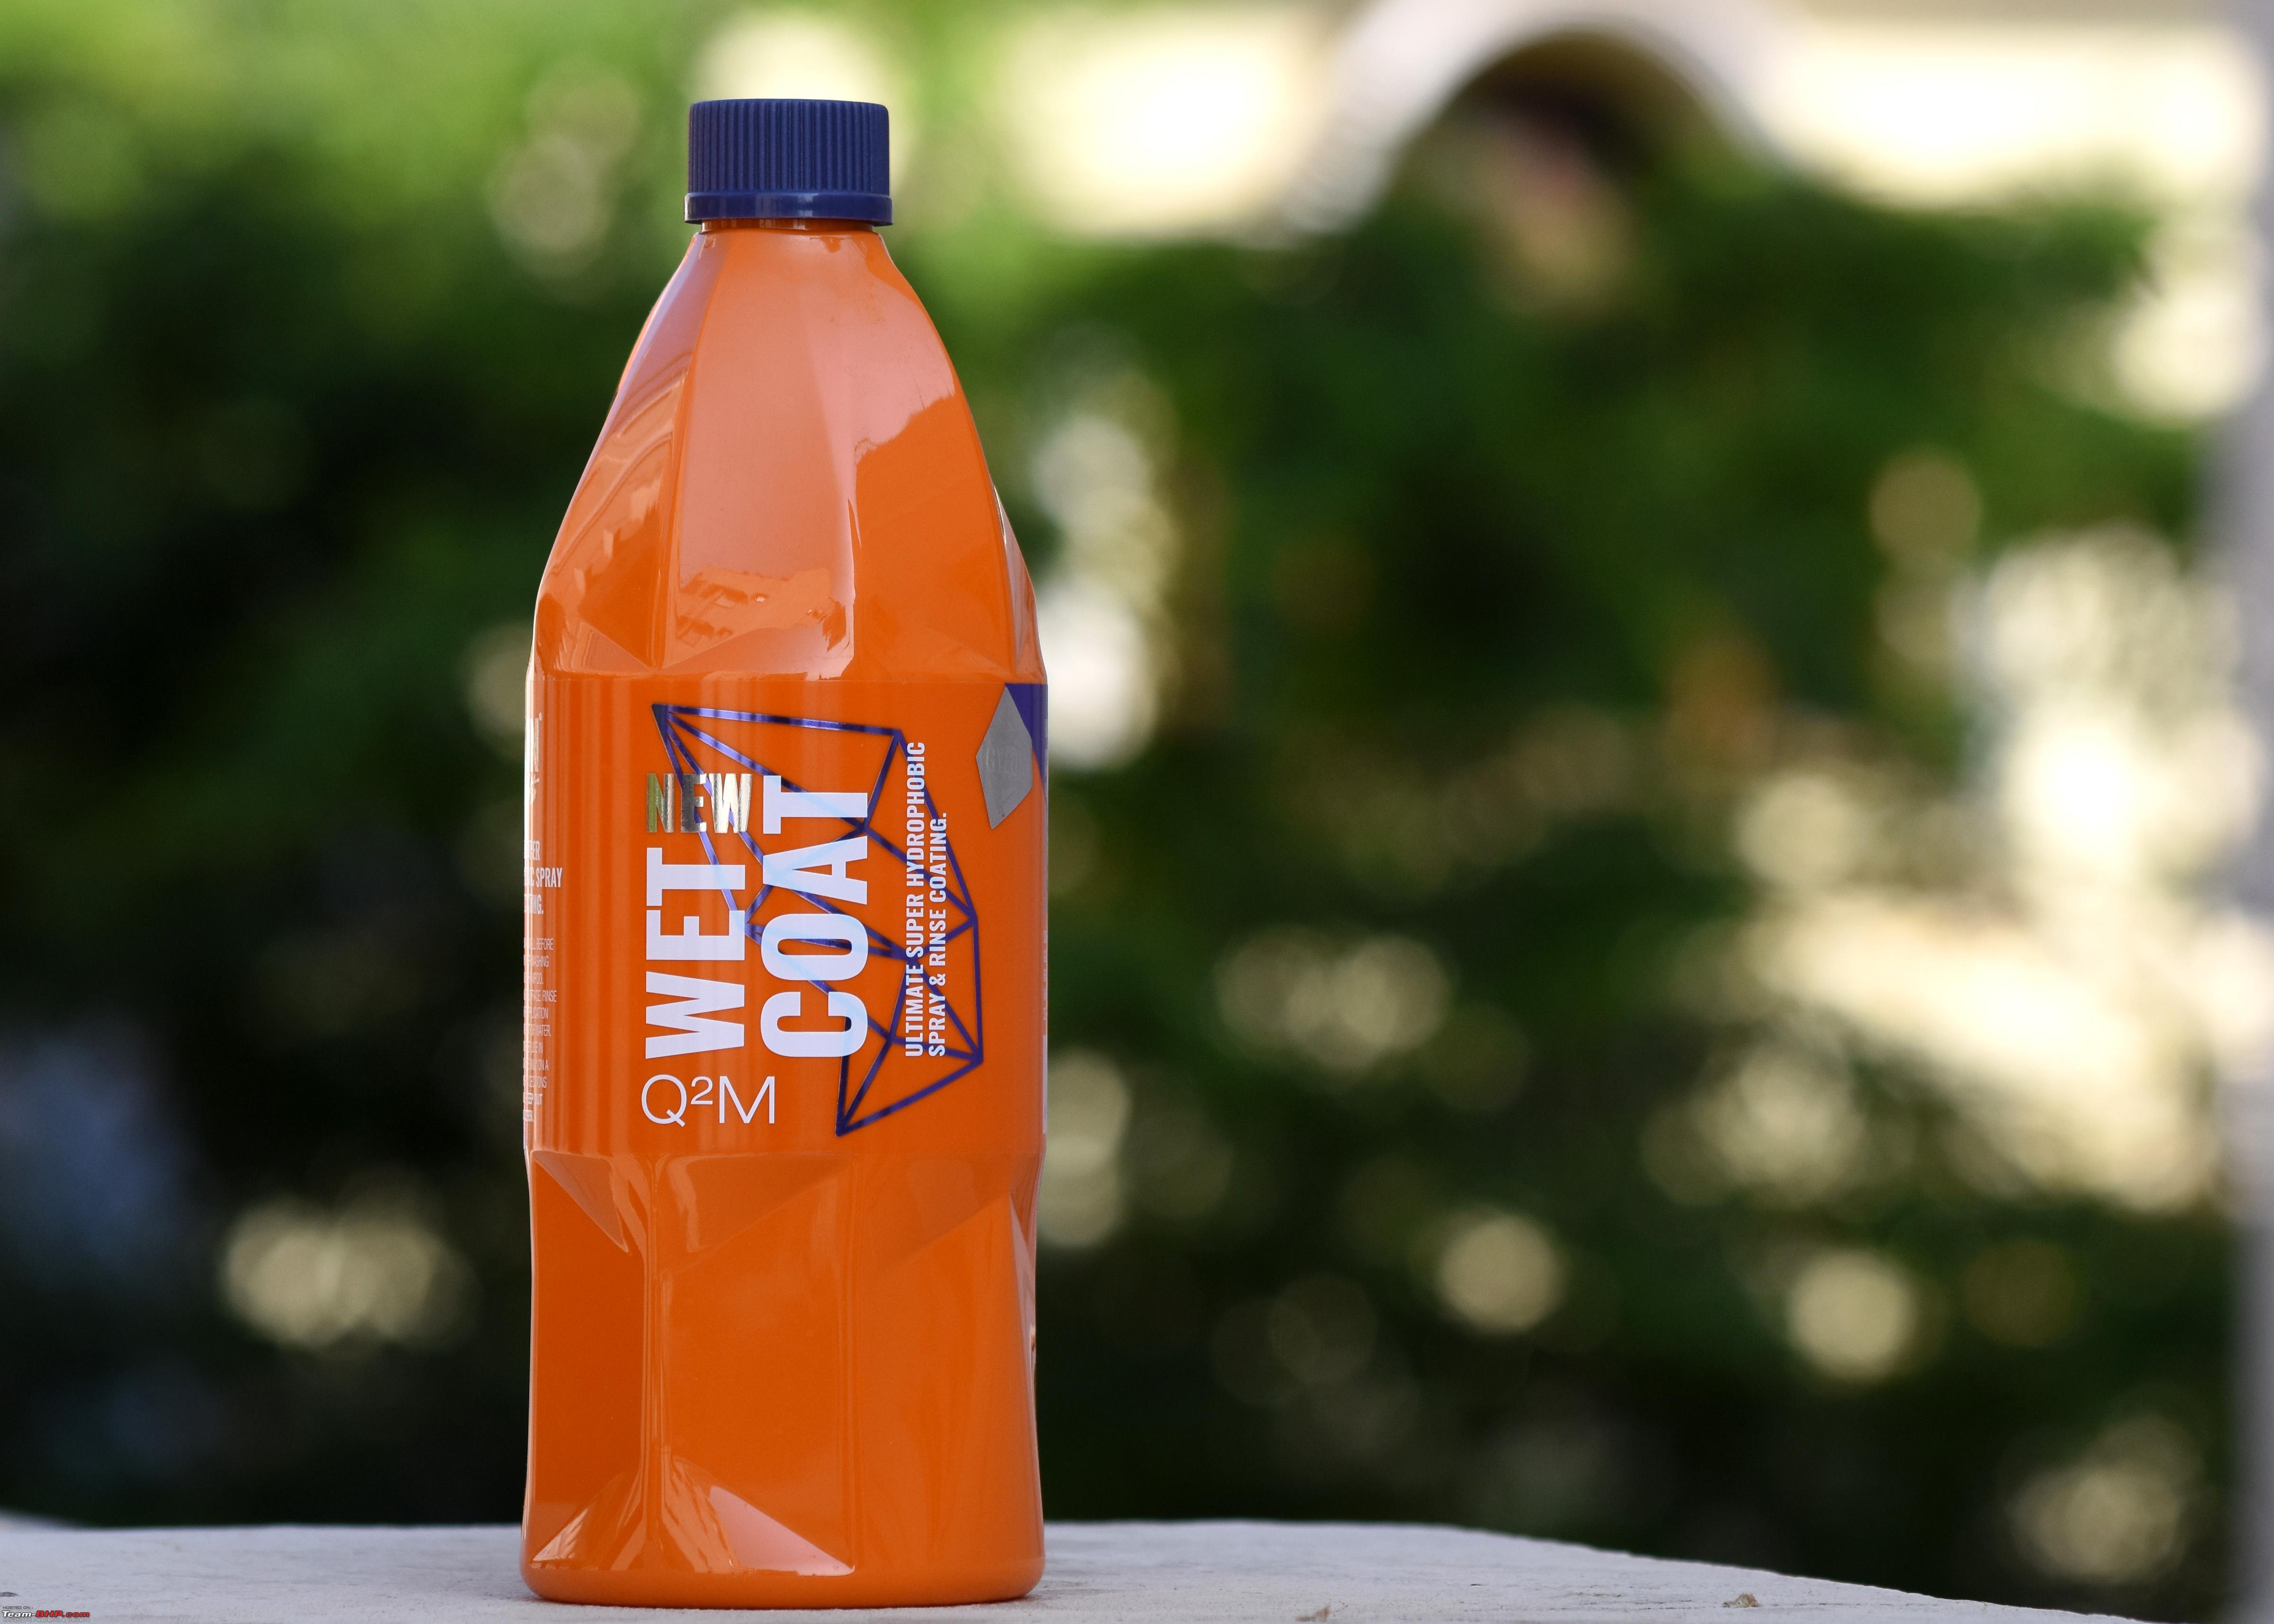 CarPro Perl: PERL is CarPro’s abbreviation for Plastics, Engine, Rubber, Leather. So this product can be applied to these areas. I primarily use it as a tire shine. It also is a concentrate and can be diluted. CarPro suggests a dilution from 1:1 for tires, 1:3 for external plastics to 1:5 for interiors. I only tried 1:3 and 1:1. 1:3 worked well for tires and felt a bit strong for interior plastics. 1:1 makes the tires shine very well. Some guys on YouTube suggest using it neat(undiluted) on tires, but I think it just consumes more product. There is a very minute difference between 1:1 and 1:3 for tires and I would happily use 1:3 for tires, which makes it more economical. This product too, a little goes a long way. Perl can also make the exterior black plastics like the mud-guards which fade with time, look black again. I bought a liter bottle for Rs.2499 last year and have almost half bottle untouched and another 250 ml of 1:1 solution. So, it definitely will last a very long time. I usually make a thicker foam applicator pad (Like how I mentioned above), and use it for applying this. Recently I bought a henna applying brush for Rs.12 and tried to apply Perl to tires with that. It took more time, but the outcome was great. 1 L bottle of Perl. 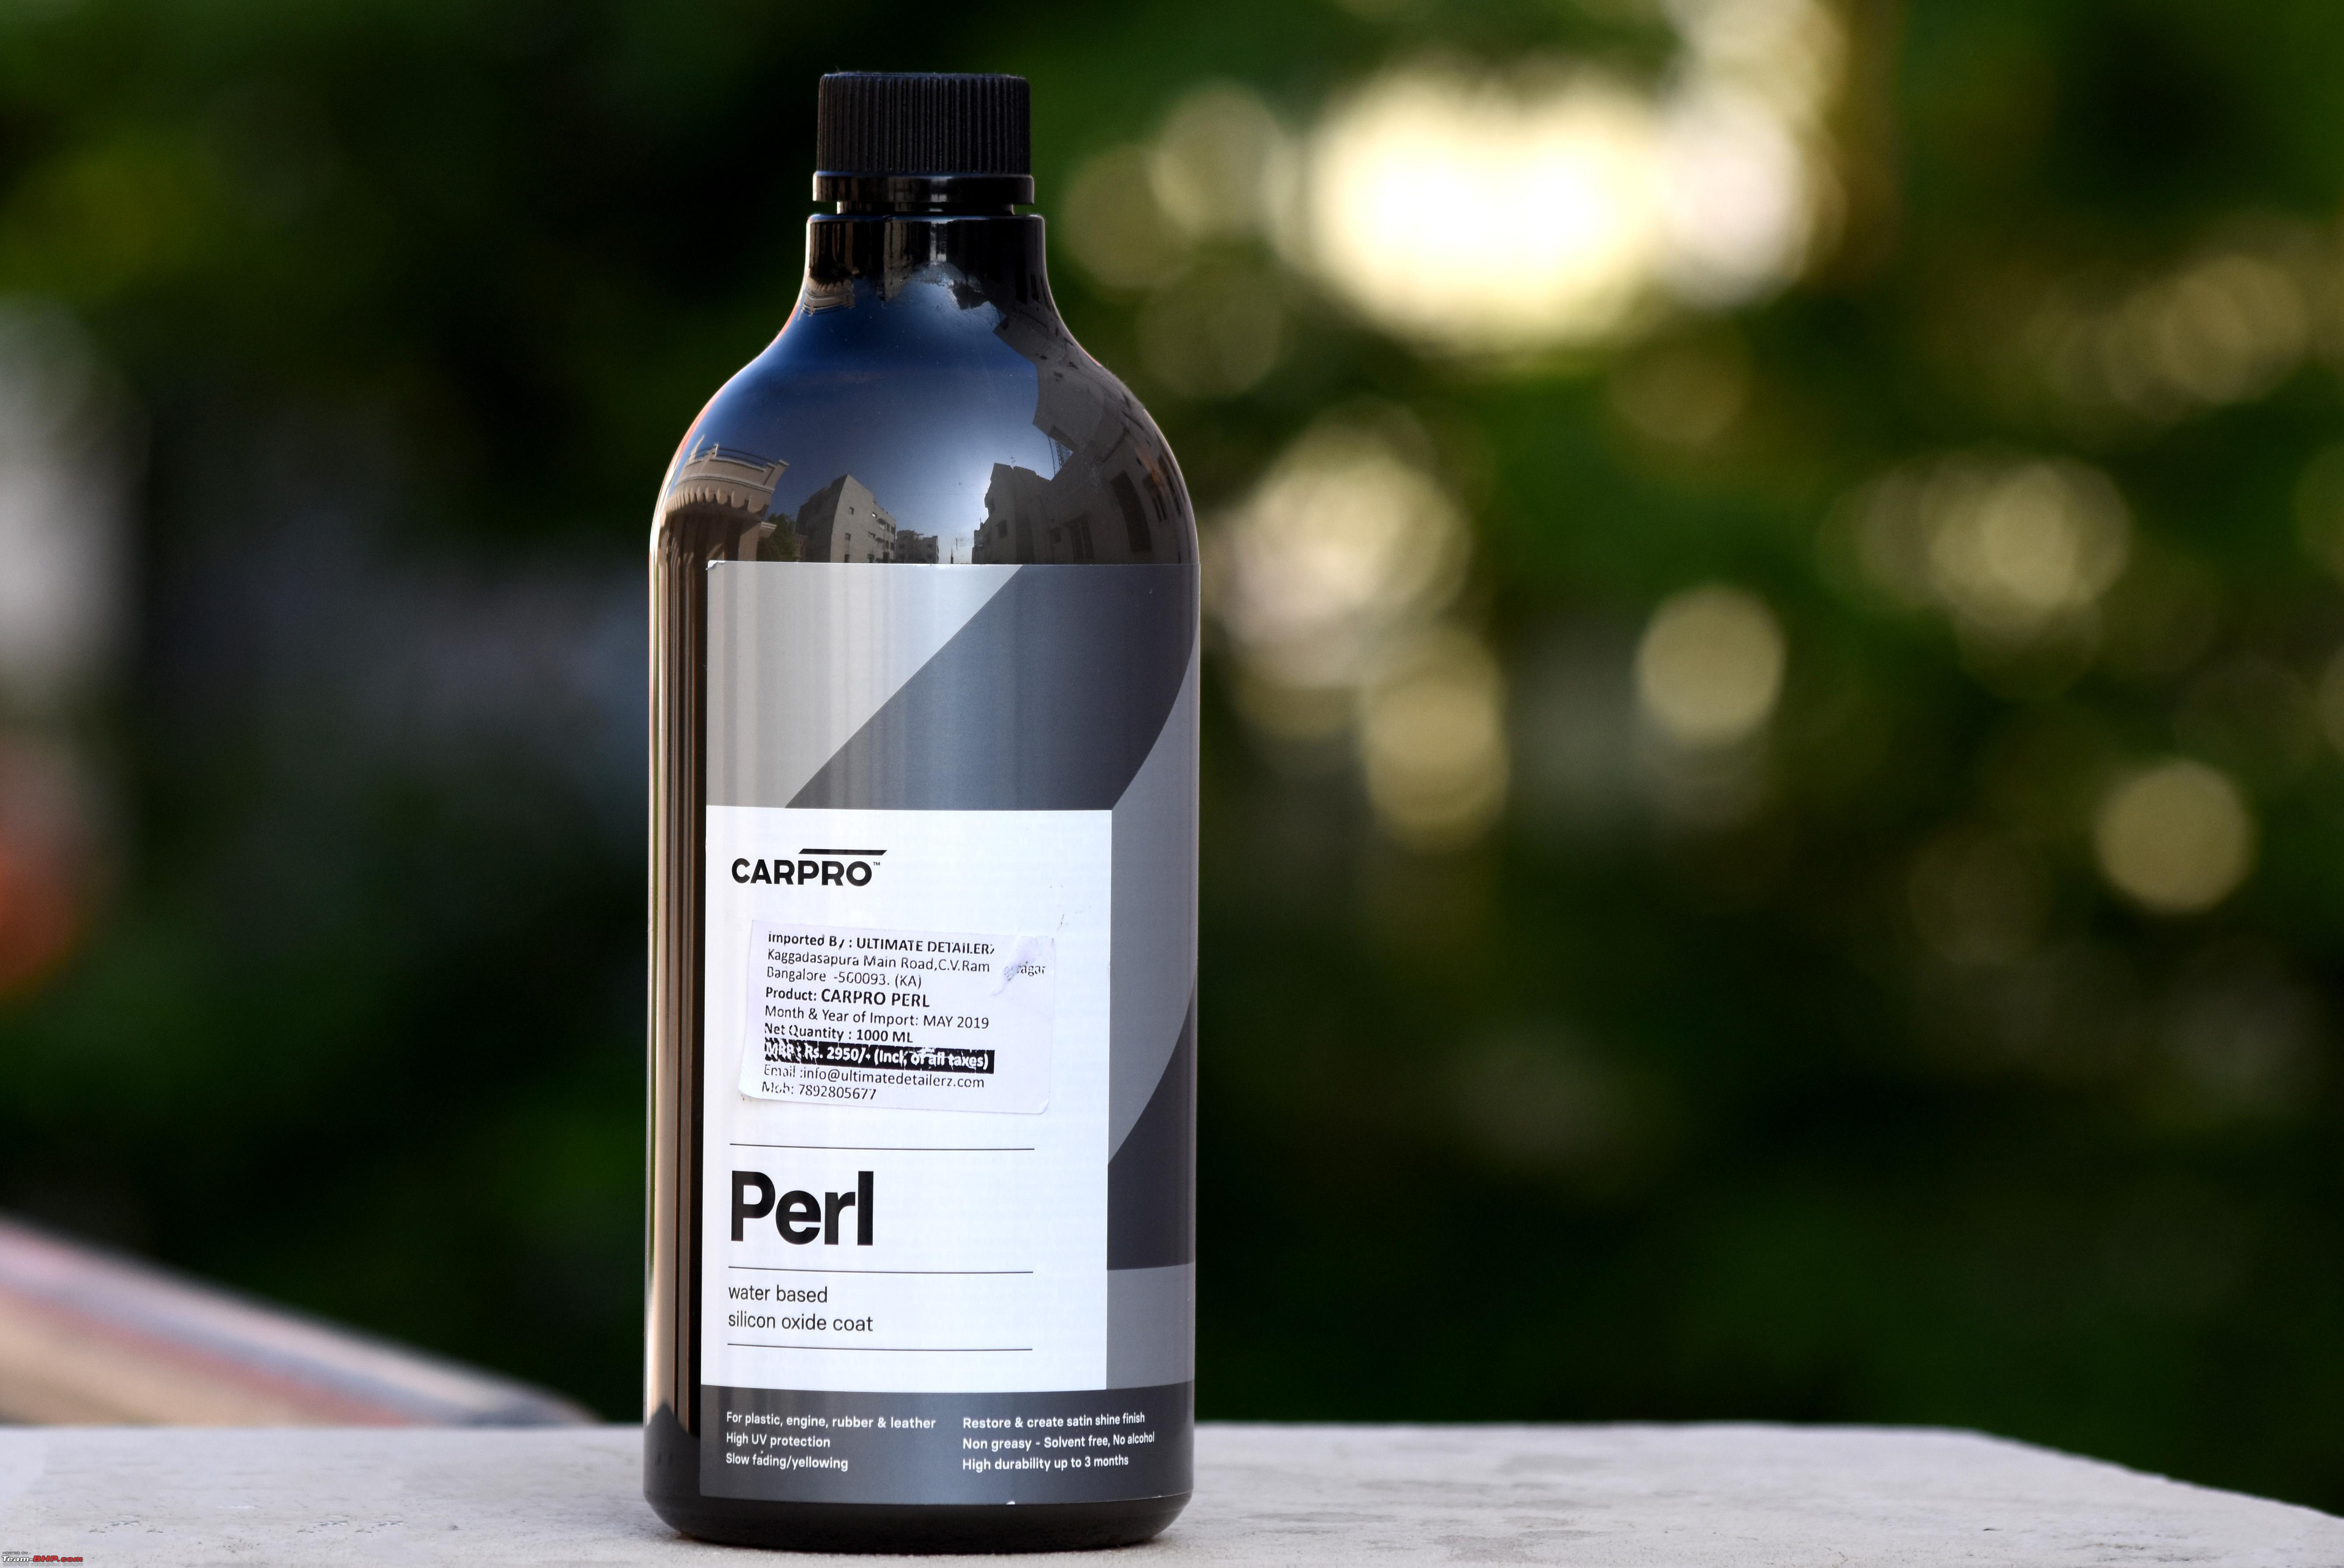 Perl applied on our Jetta tire at 1:3. 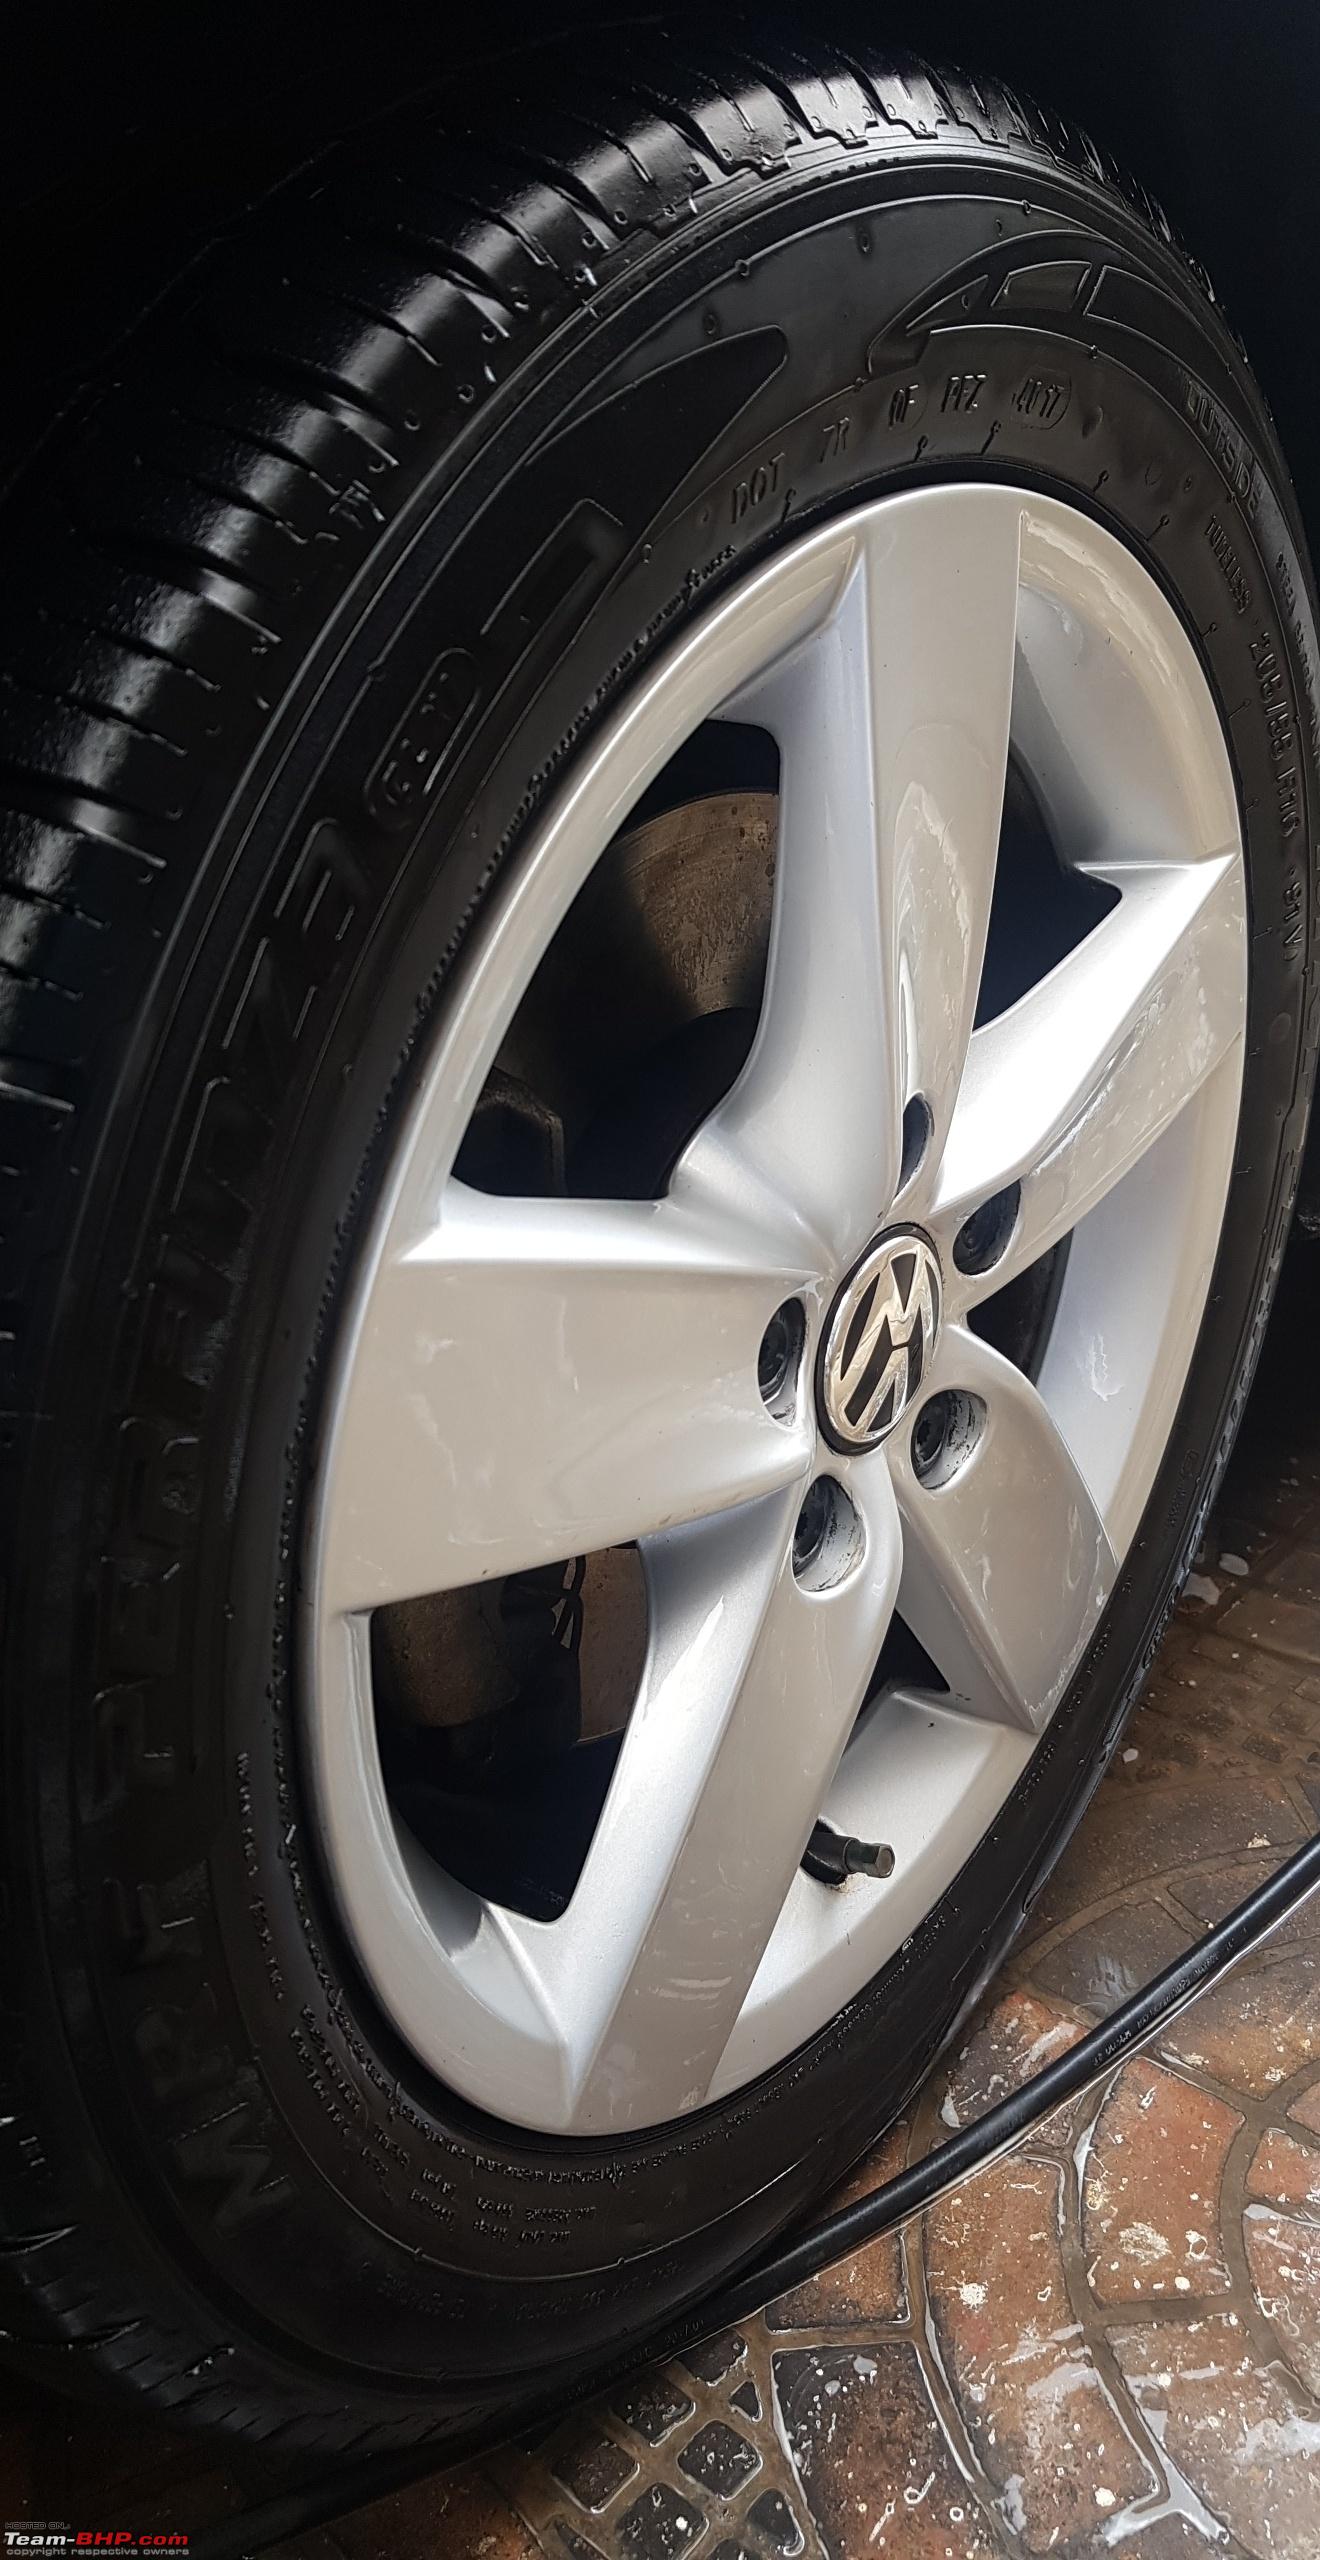 Perl on my Vento tire at 1:1.  A different angle of perl applied on Vento tire at 1:1. 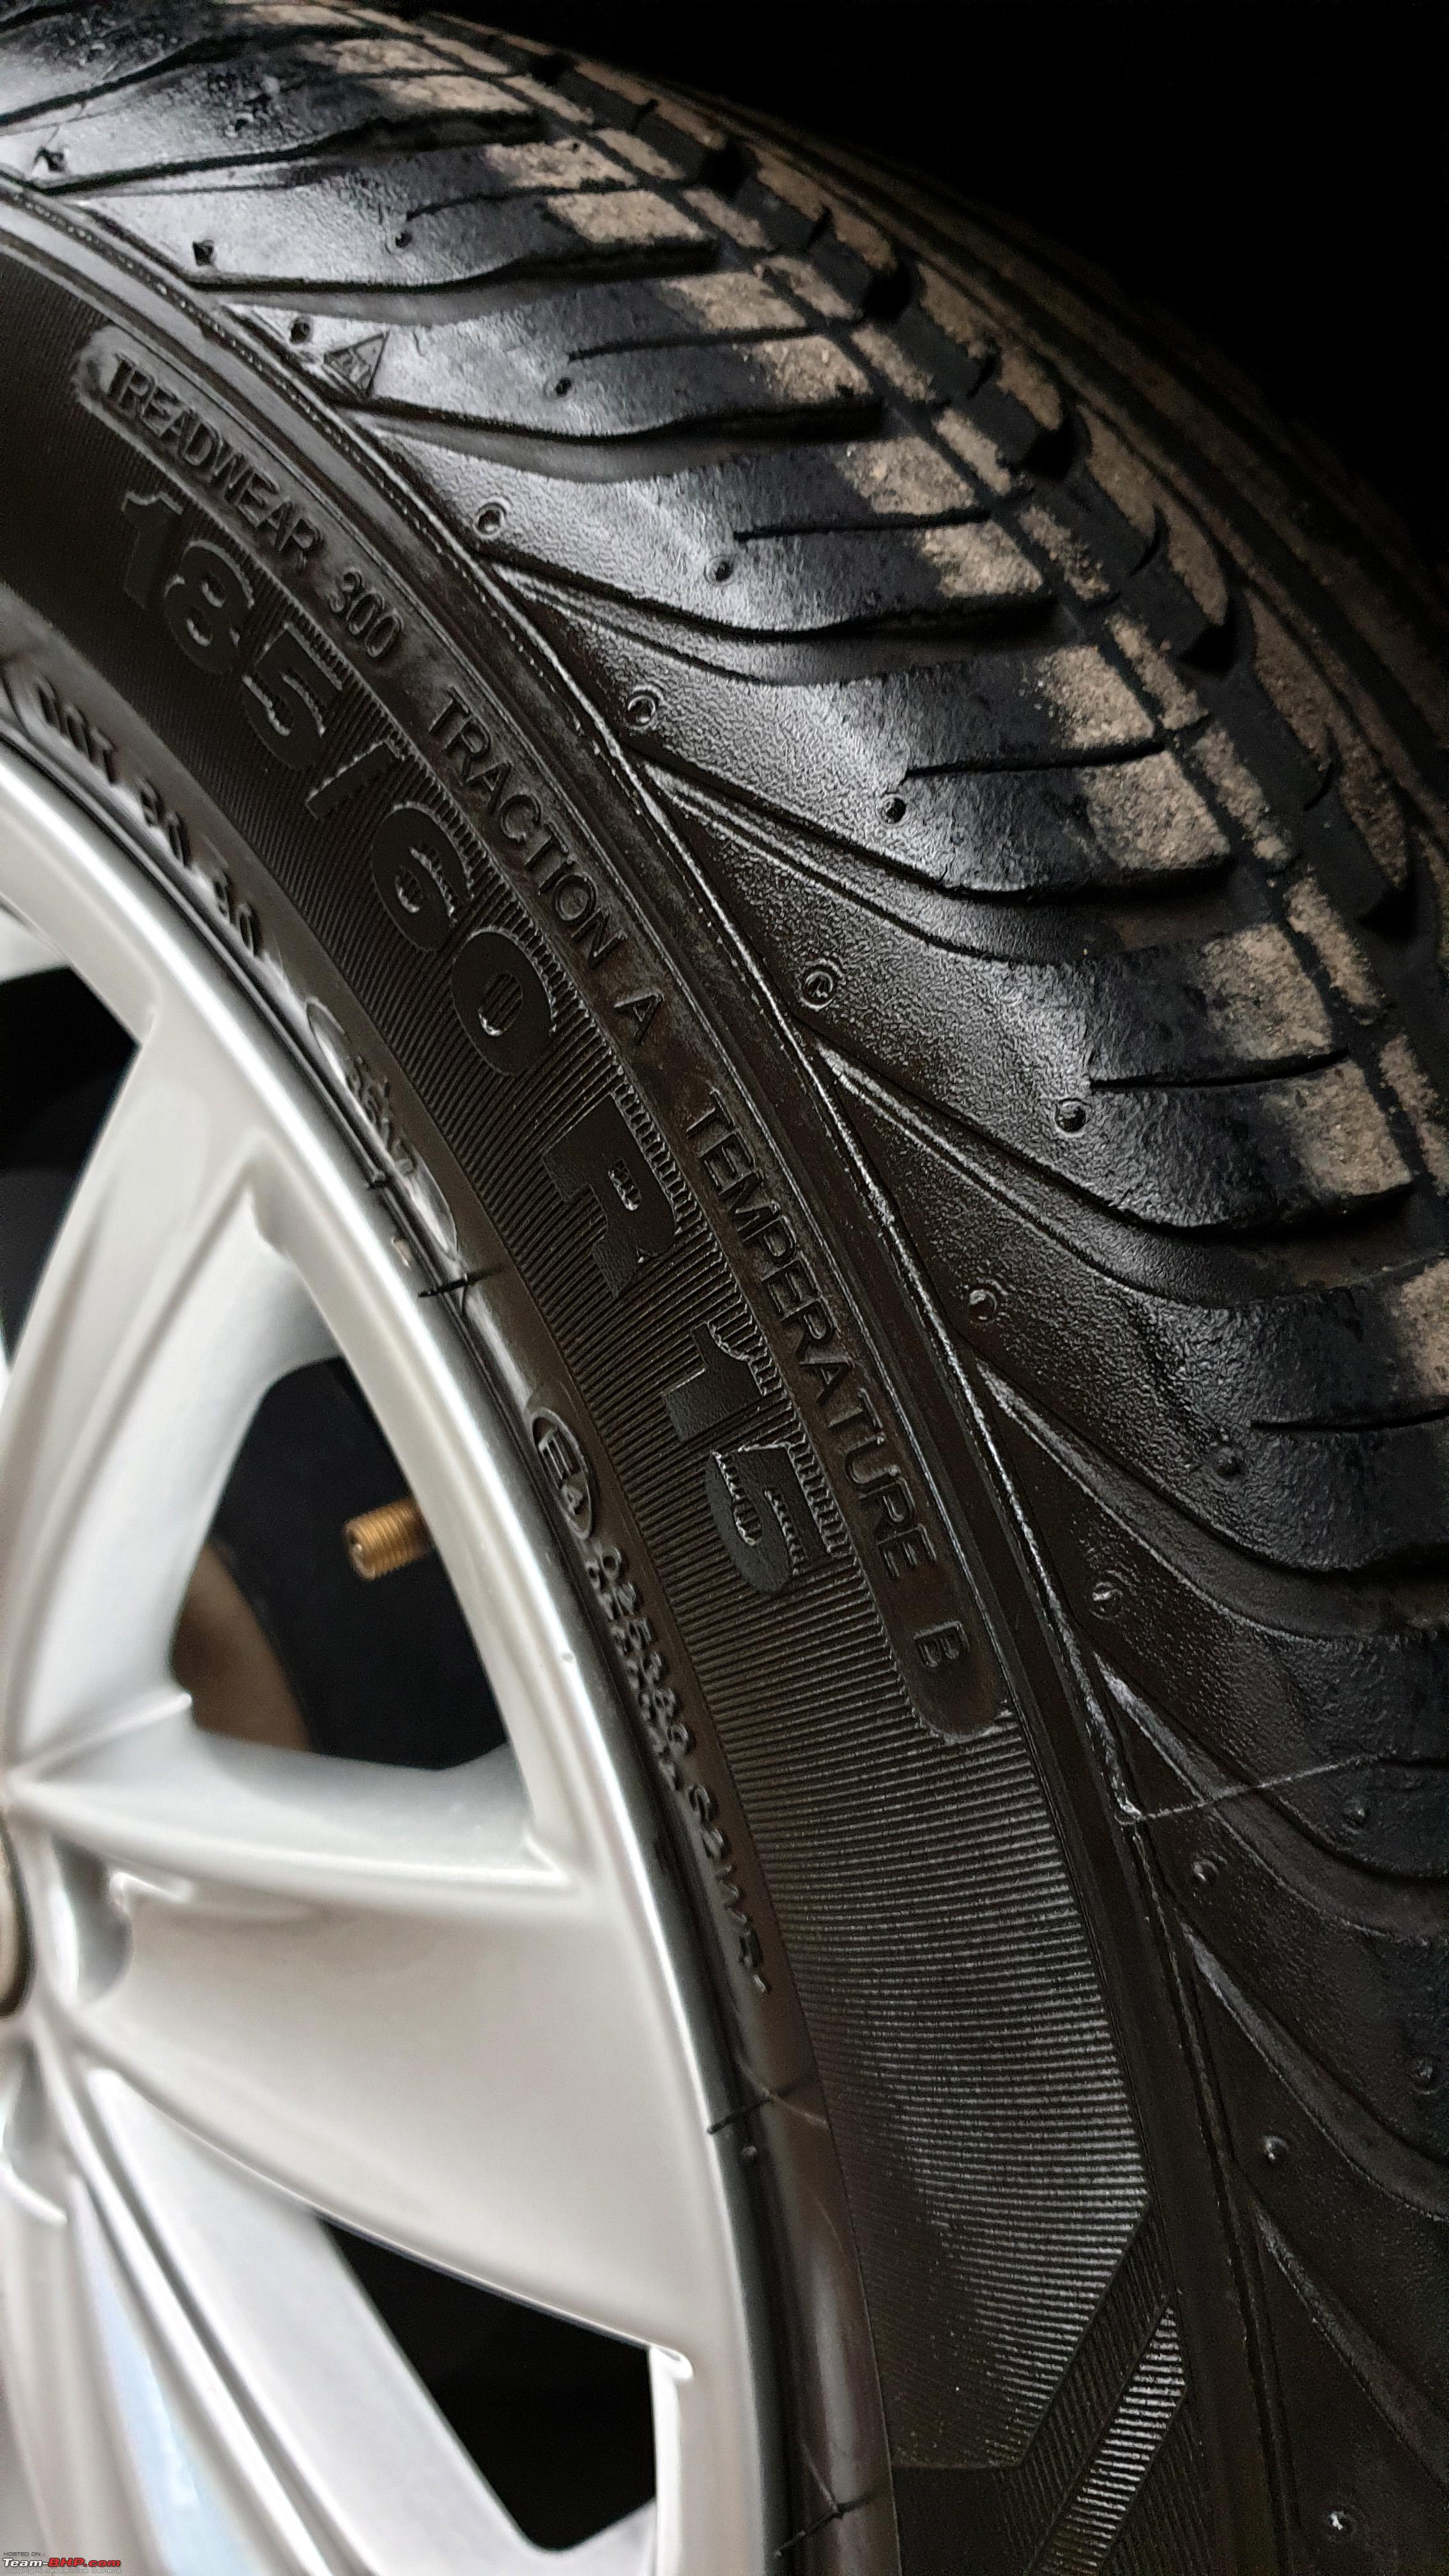 Last edited by saisailendra : 26th June 2020 at 17:38. |
|
| (70)
Thanks
|
| The following 70 BHPians Thank saisailendra for this useful post: | 2himanshu, 2TR-FE, A.M., anshuman1117, ash22, Astraholic, Batfreak, batish, CarManMotorcycl, car_guy1998, CrAzY dRiVeR, digitalnirvana, Divya Sharan, Dr.AD, Dr.Vikas, DrANTO, fiat_tarun, Flyer, Gannu_1, GTO, guyfrmblr, HsekarK, InControl, Invariance, isandy, JHS, keroo1099, Klub Class, lemedico, Leoshashi, Livnletcarsliv, manas_270, Mistakenguy, MJ144, mpksuhas, myavu, Myth_sx, nalinsaxena23, neerajdan, nitinkbhaskar, octane1002, papr23, PM - B, R2D2, RavenAvi, Researcher, Rudra Sen, RWD, sai_ace, Samfromindia, sanyog26, saur95, Sheel, Simhi, Sreejith V, tanaysn, Tassem, Thanos-VV, The Great, Thermodynamics, The_Outsider!, TOINGPOING, torque18, TorqueTwist, TROOPER, v1p3r, vaish9925, yajaman99, yogiii, zurura023 |
|
26th June 2020, 16:06
| #3 |
| BHPian | The Ceramic Coating The Ceramic Coating : Well, I have used these products as per the necessity for the last 2 years and wanted to try a ceramic coating. I did not want to go to the professional detailer to get a 2 step paint correction and a professional coating because
So, the next step was to enter the rabbit hole and explore each of these products on forums and YouTube. After watching a video from a channel called “Car Craft Auto Detailing”, I decided to go ahead with CarPro CQuartz Lite. Car Craft Auto Detailing is a channel run by an Australian auto detailer named Sandro who really seems to be passionate about the job he does. He is a premium auto-detailer and gives his frank opinions about products. He is a notch higher than other detailers online, in my opinion, because he is given products(Pads, polishes, compounds) for testing which are not yet released into the market by companies. His videos are really informative and worth watching. Well, after watching the videos, the conclusion was that, CQ Lite is comparatively more difficult to apply, but was much durable than CanCoat. So, I decided to go with CQ Lite. I will share the details of the products I used and method I followed. Steps :
Coating Features and Characteristics: Now that I have decided on CQ Lite, let me just mention the features and details about the product as mentioned in the product page.
Items Needed :
The IPA based spray I used to remove polishing oils or other chemicals, leaving a clean paint surface. CarPro Eraser.  CarPro CQuartz Lite. 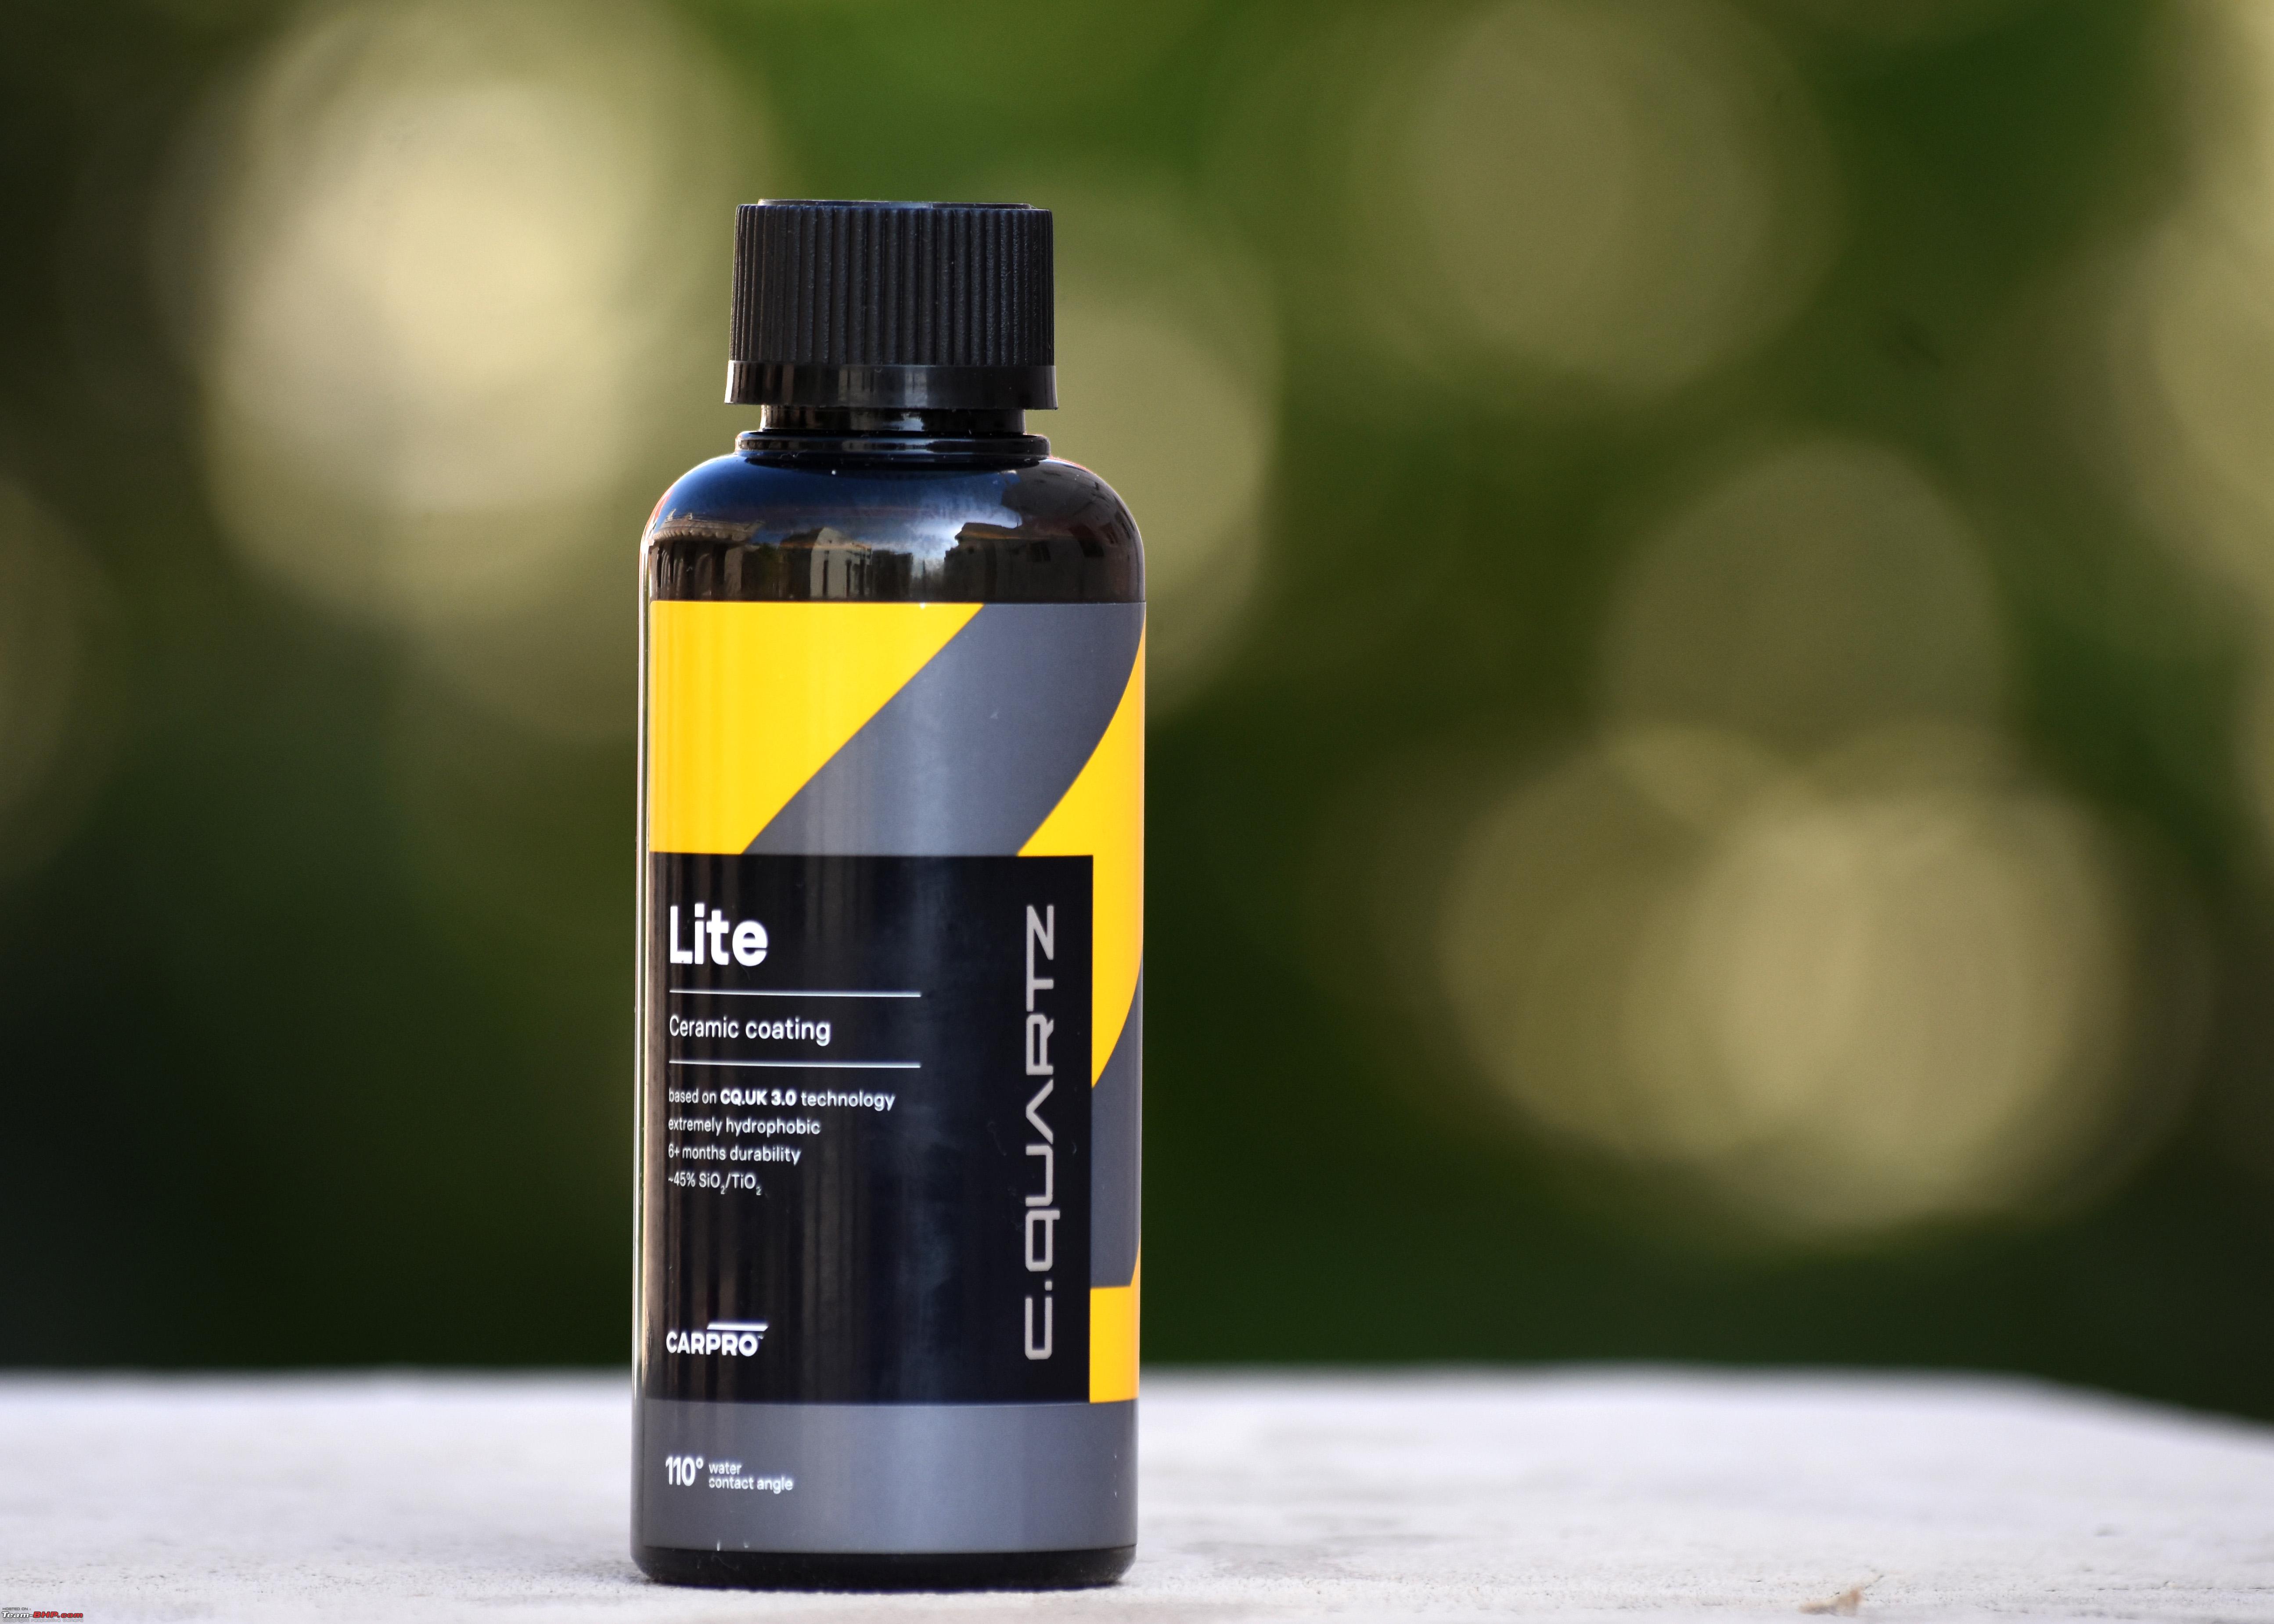 A closeup of information on the front side of the bottle.  Cq Lite beside ECH2O 500 ml bottle for size comparision. 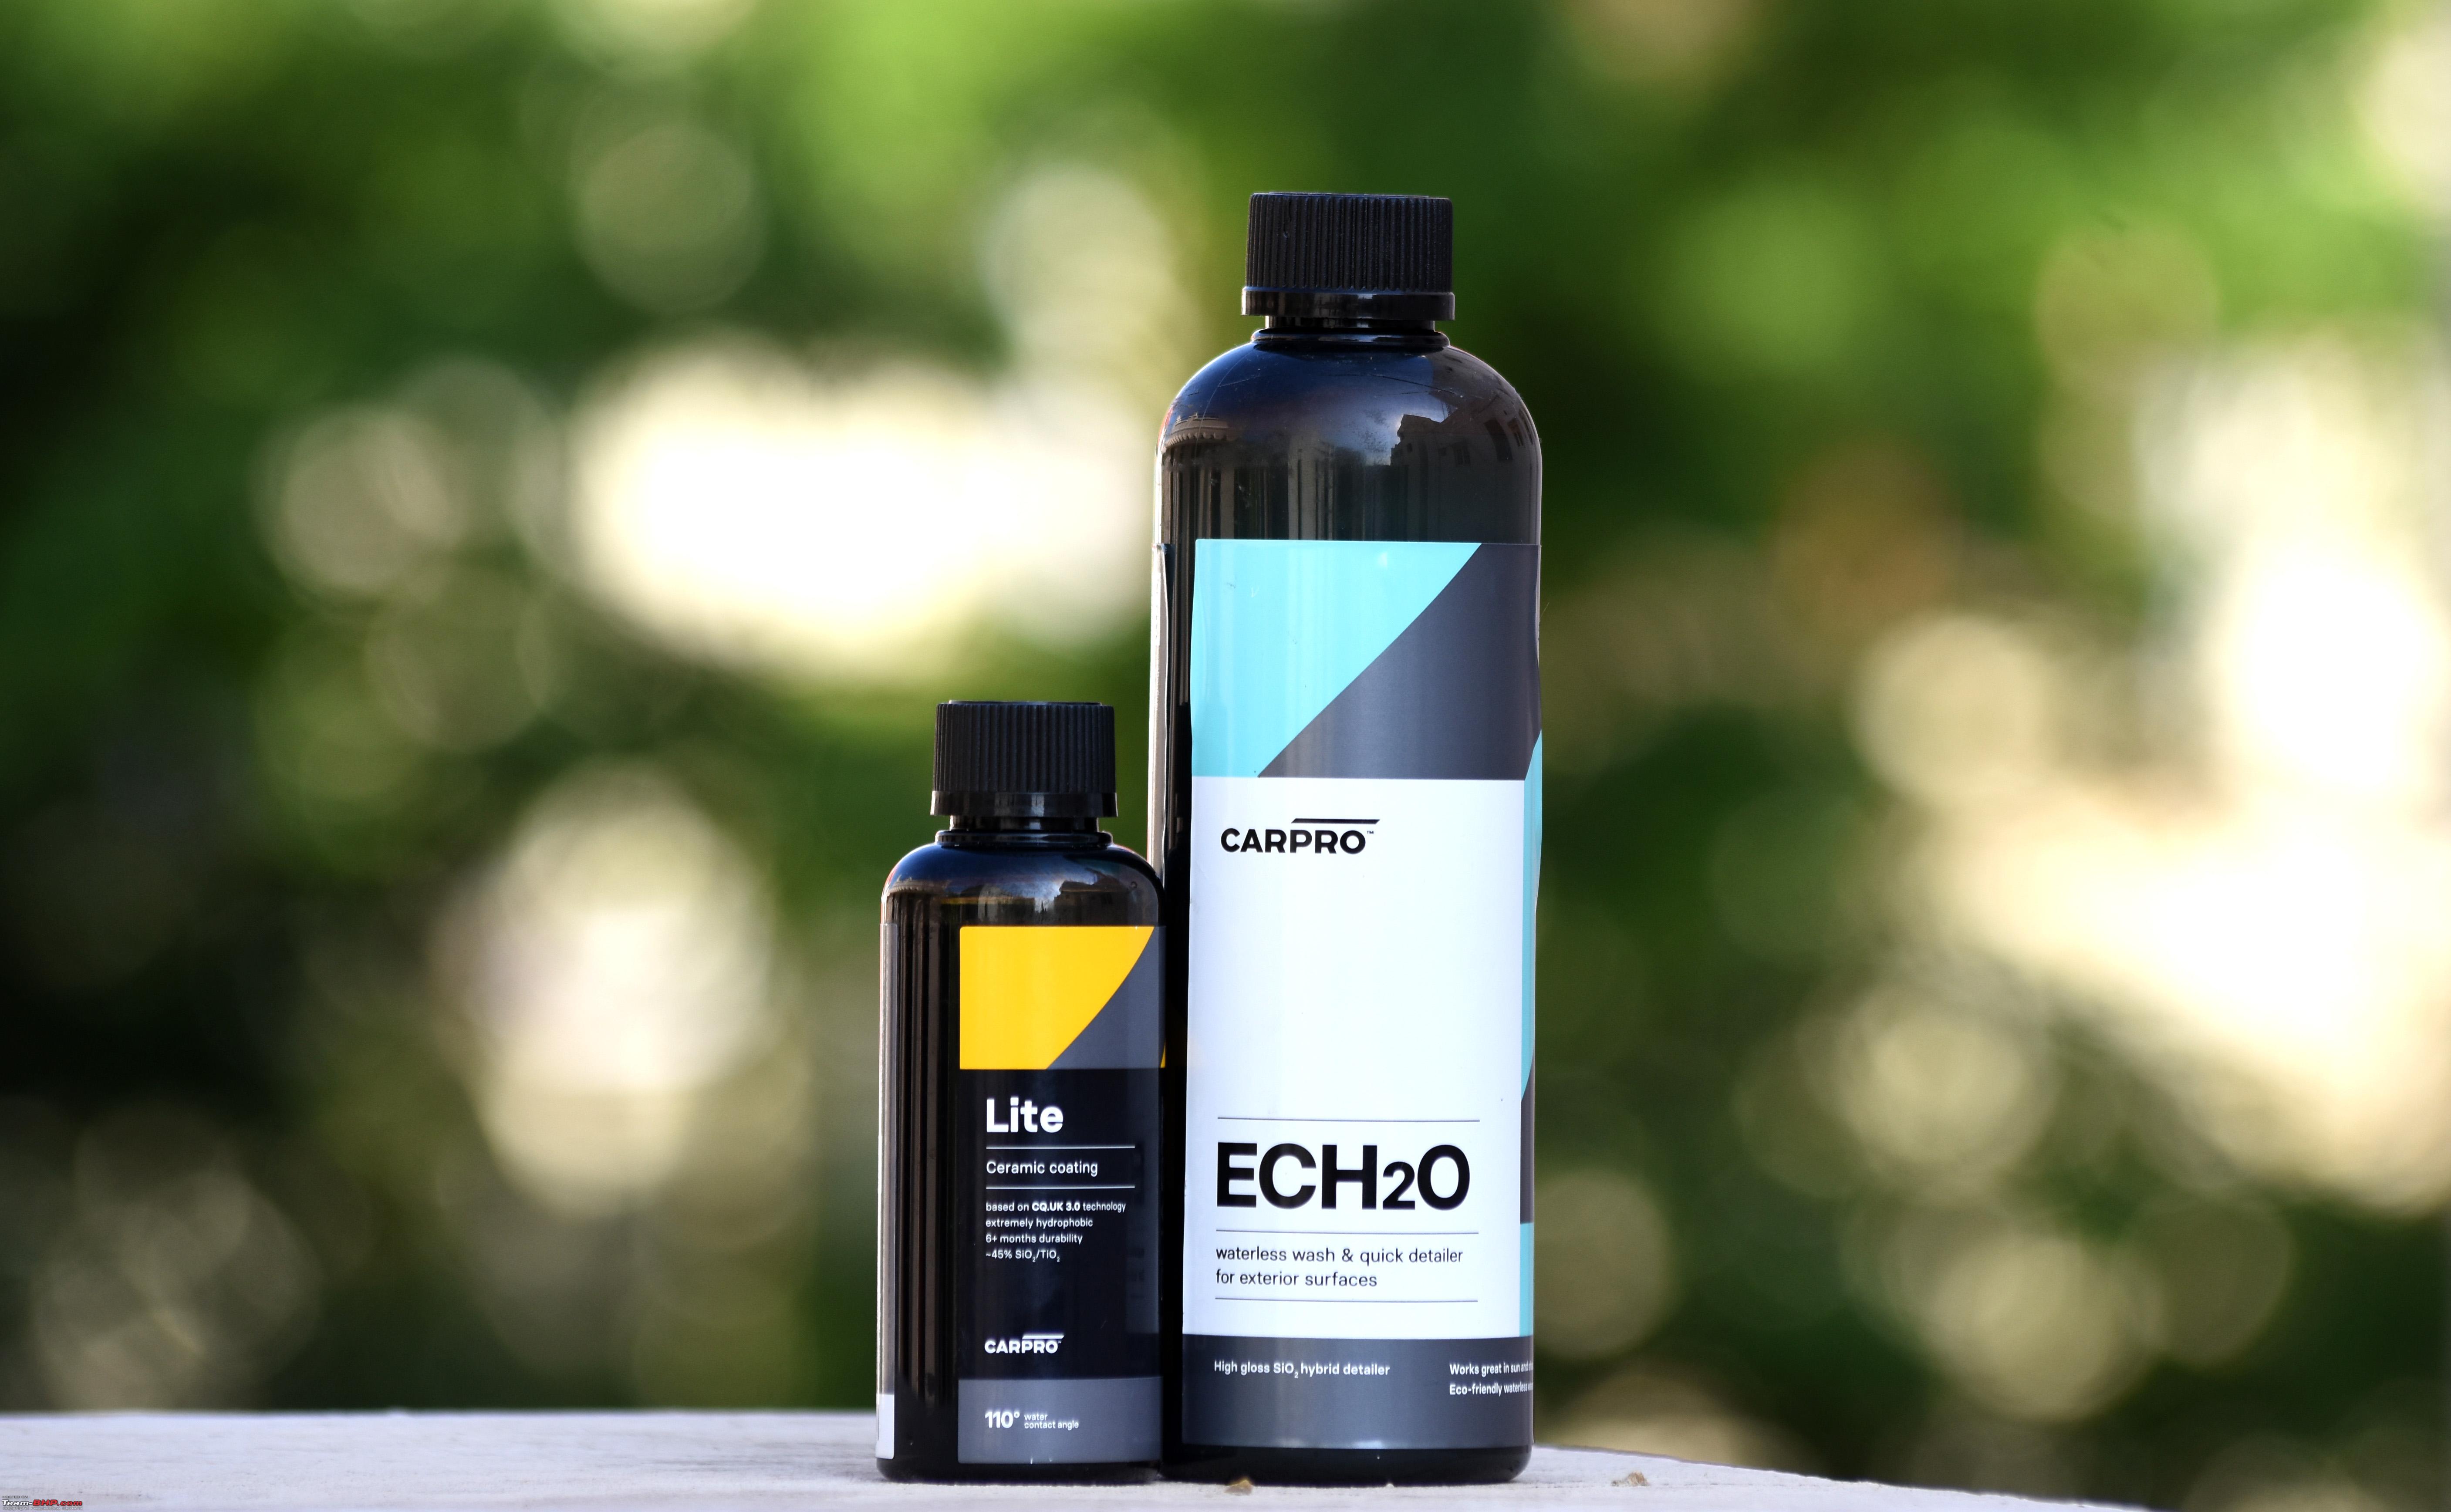 The Gyeon Applicator Block which is hard on this side, soft on the other. 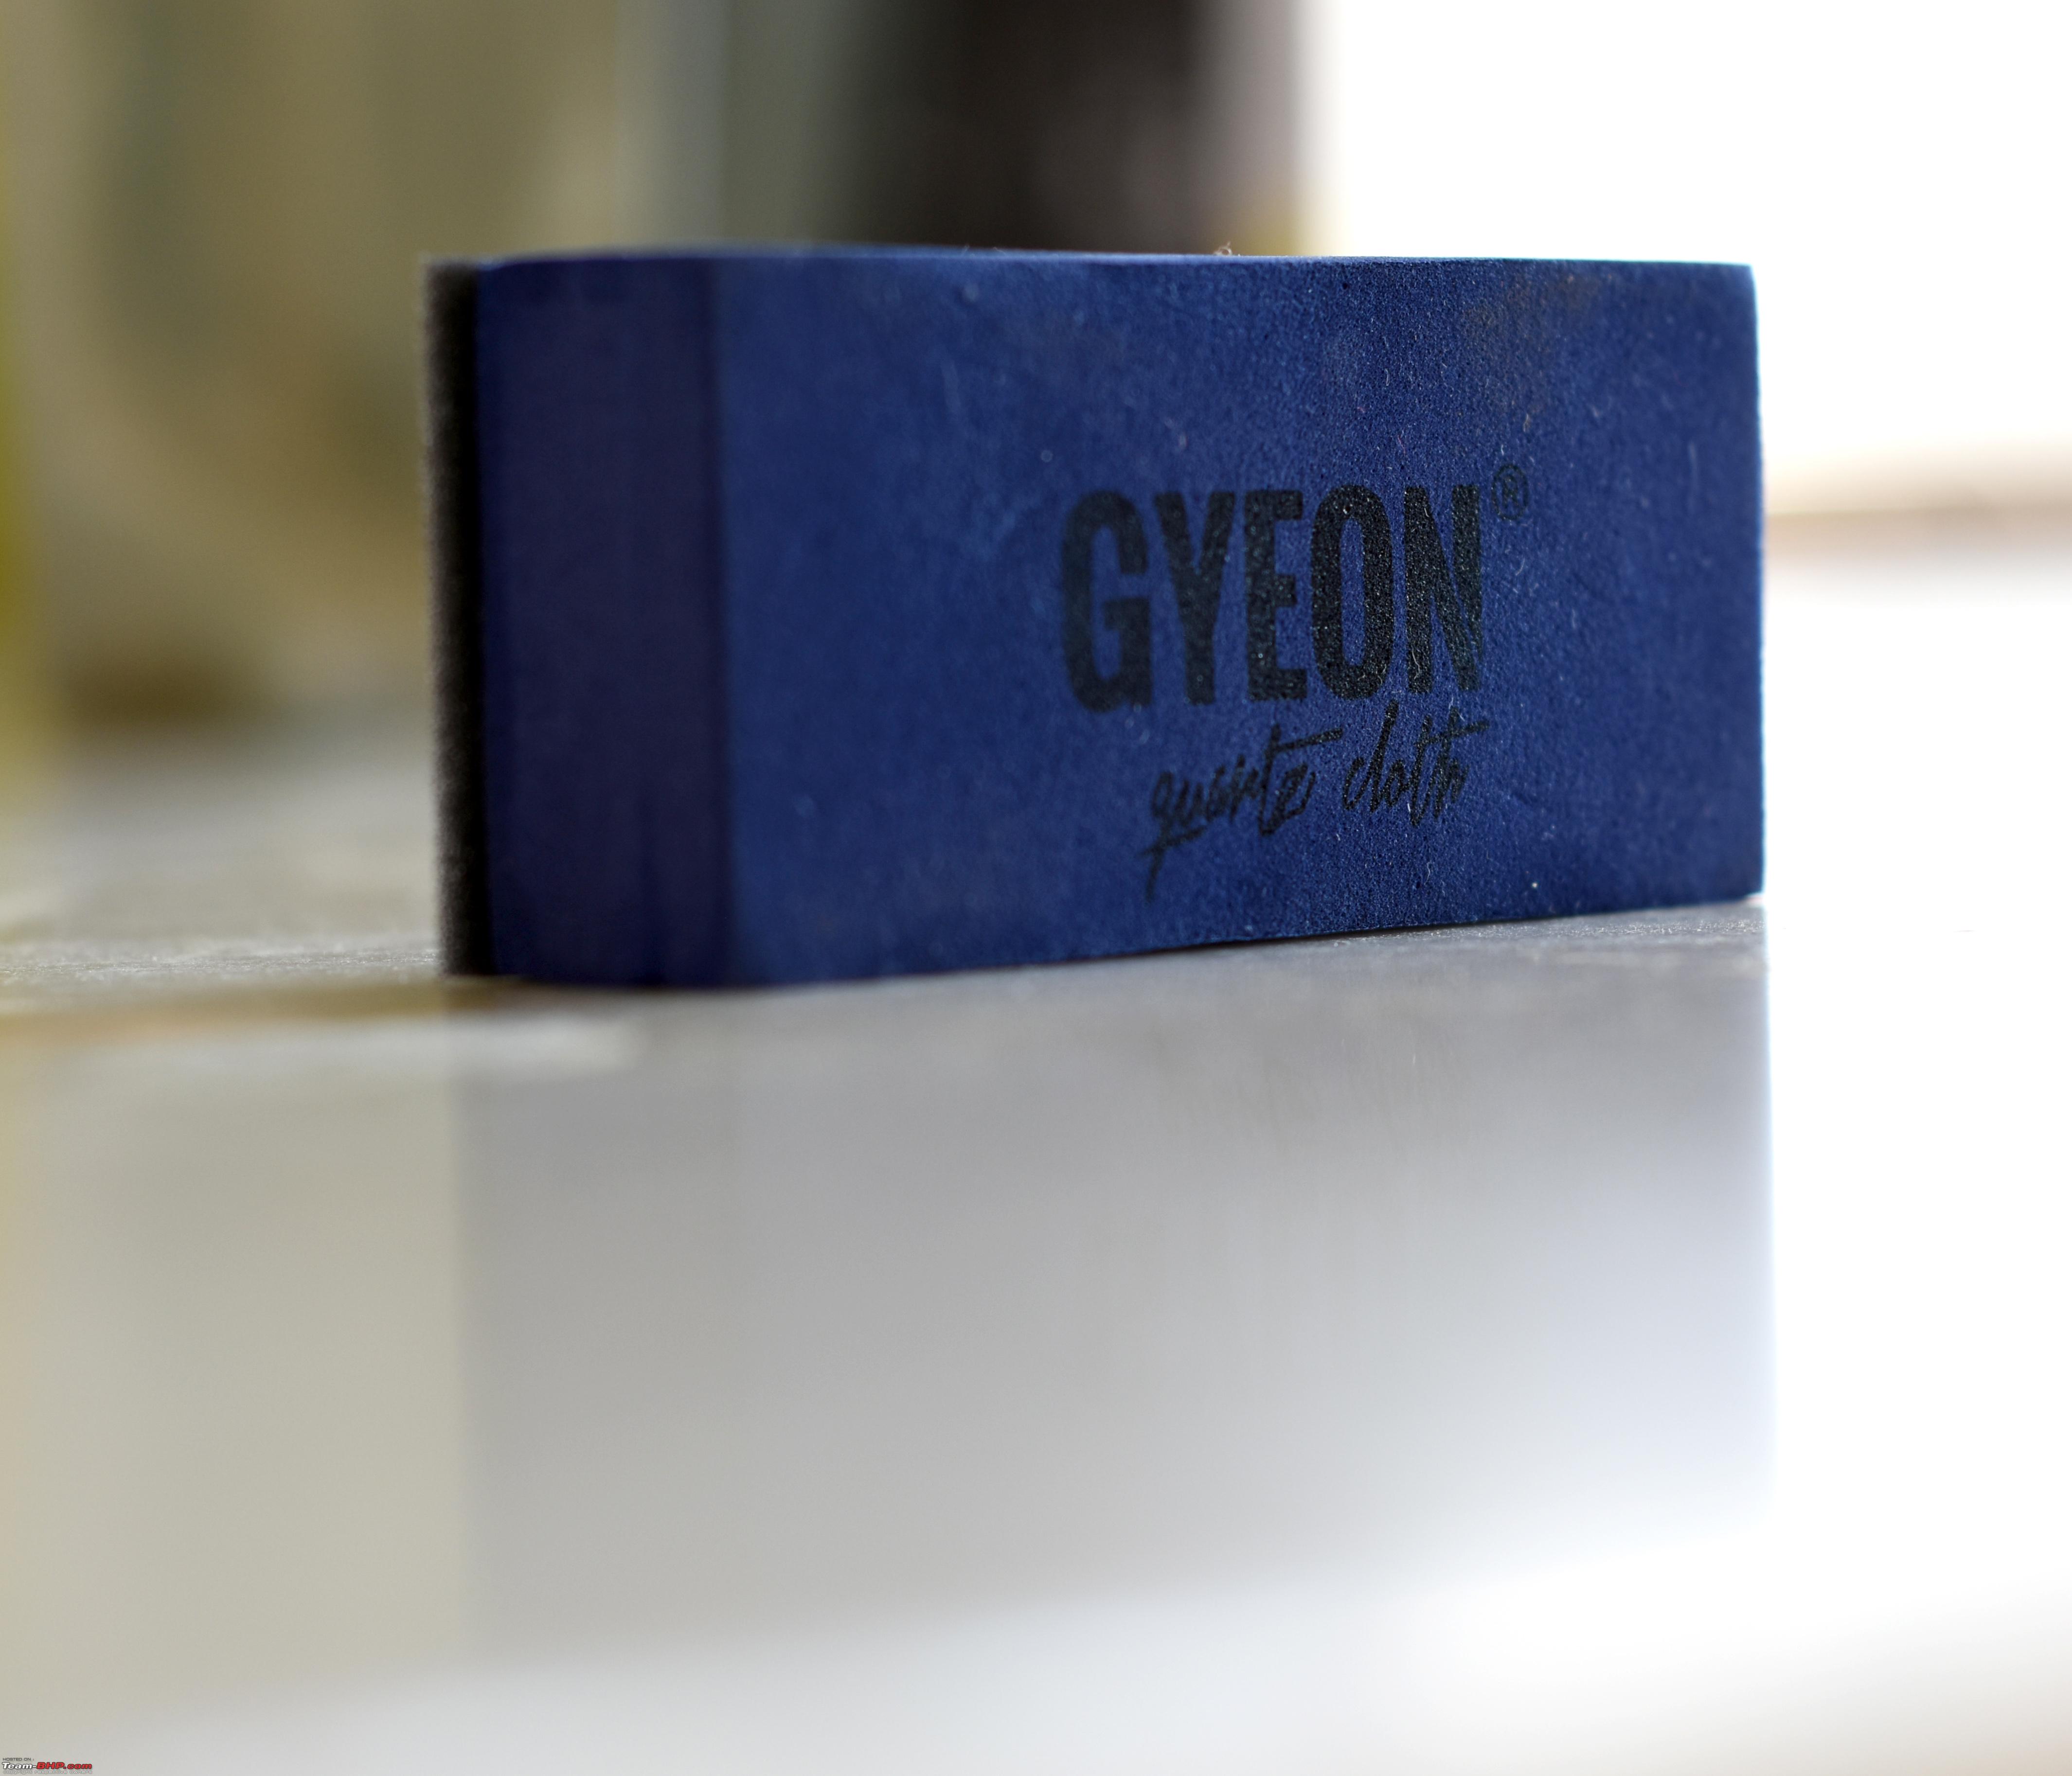 The size of the block is comfortable to be held by hand. The thin dark grey part is soft, the violet color part of block is hard. 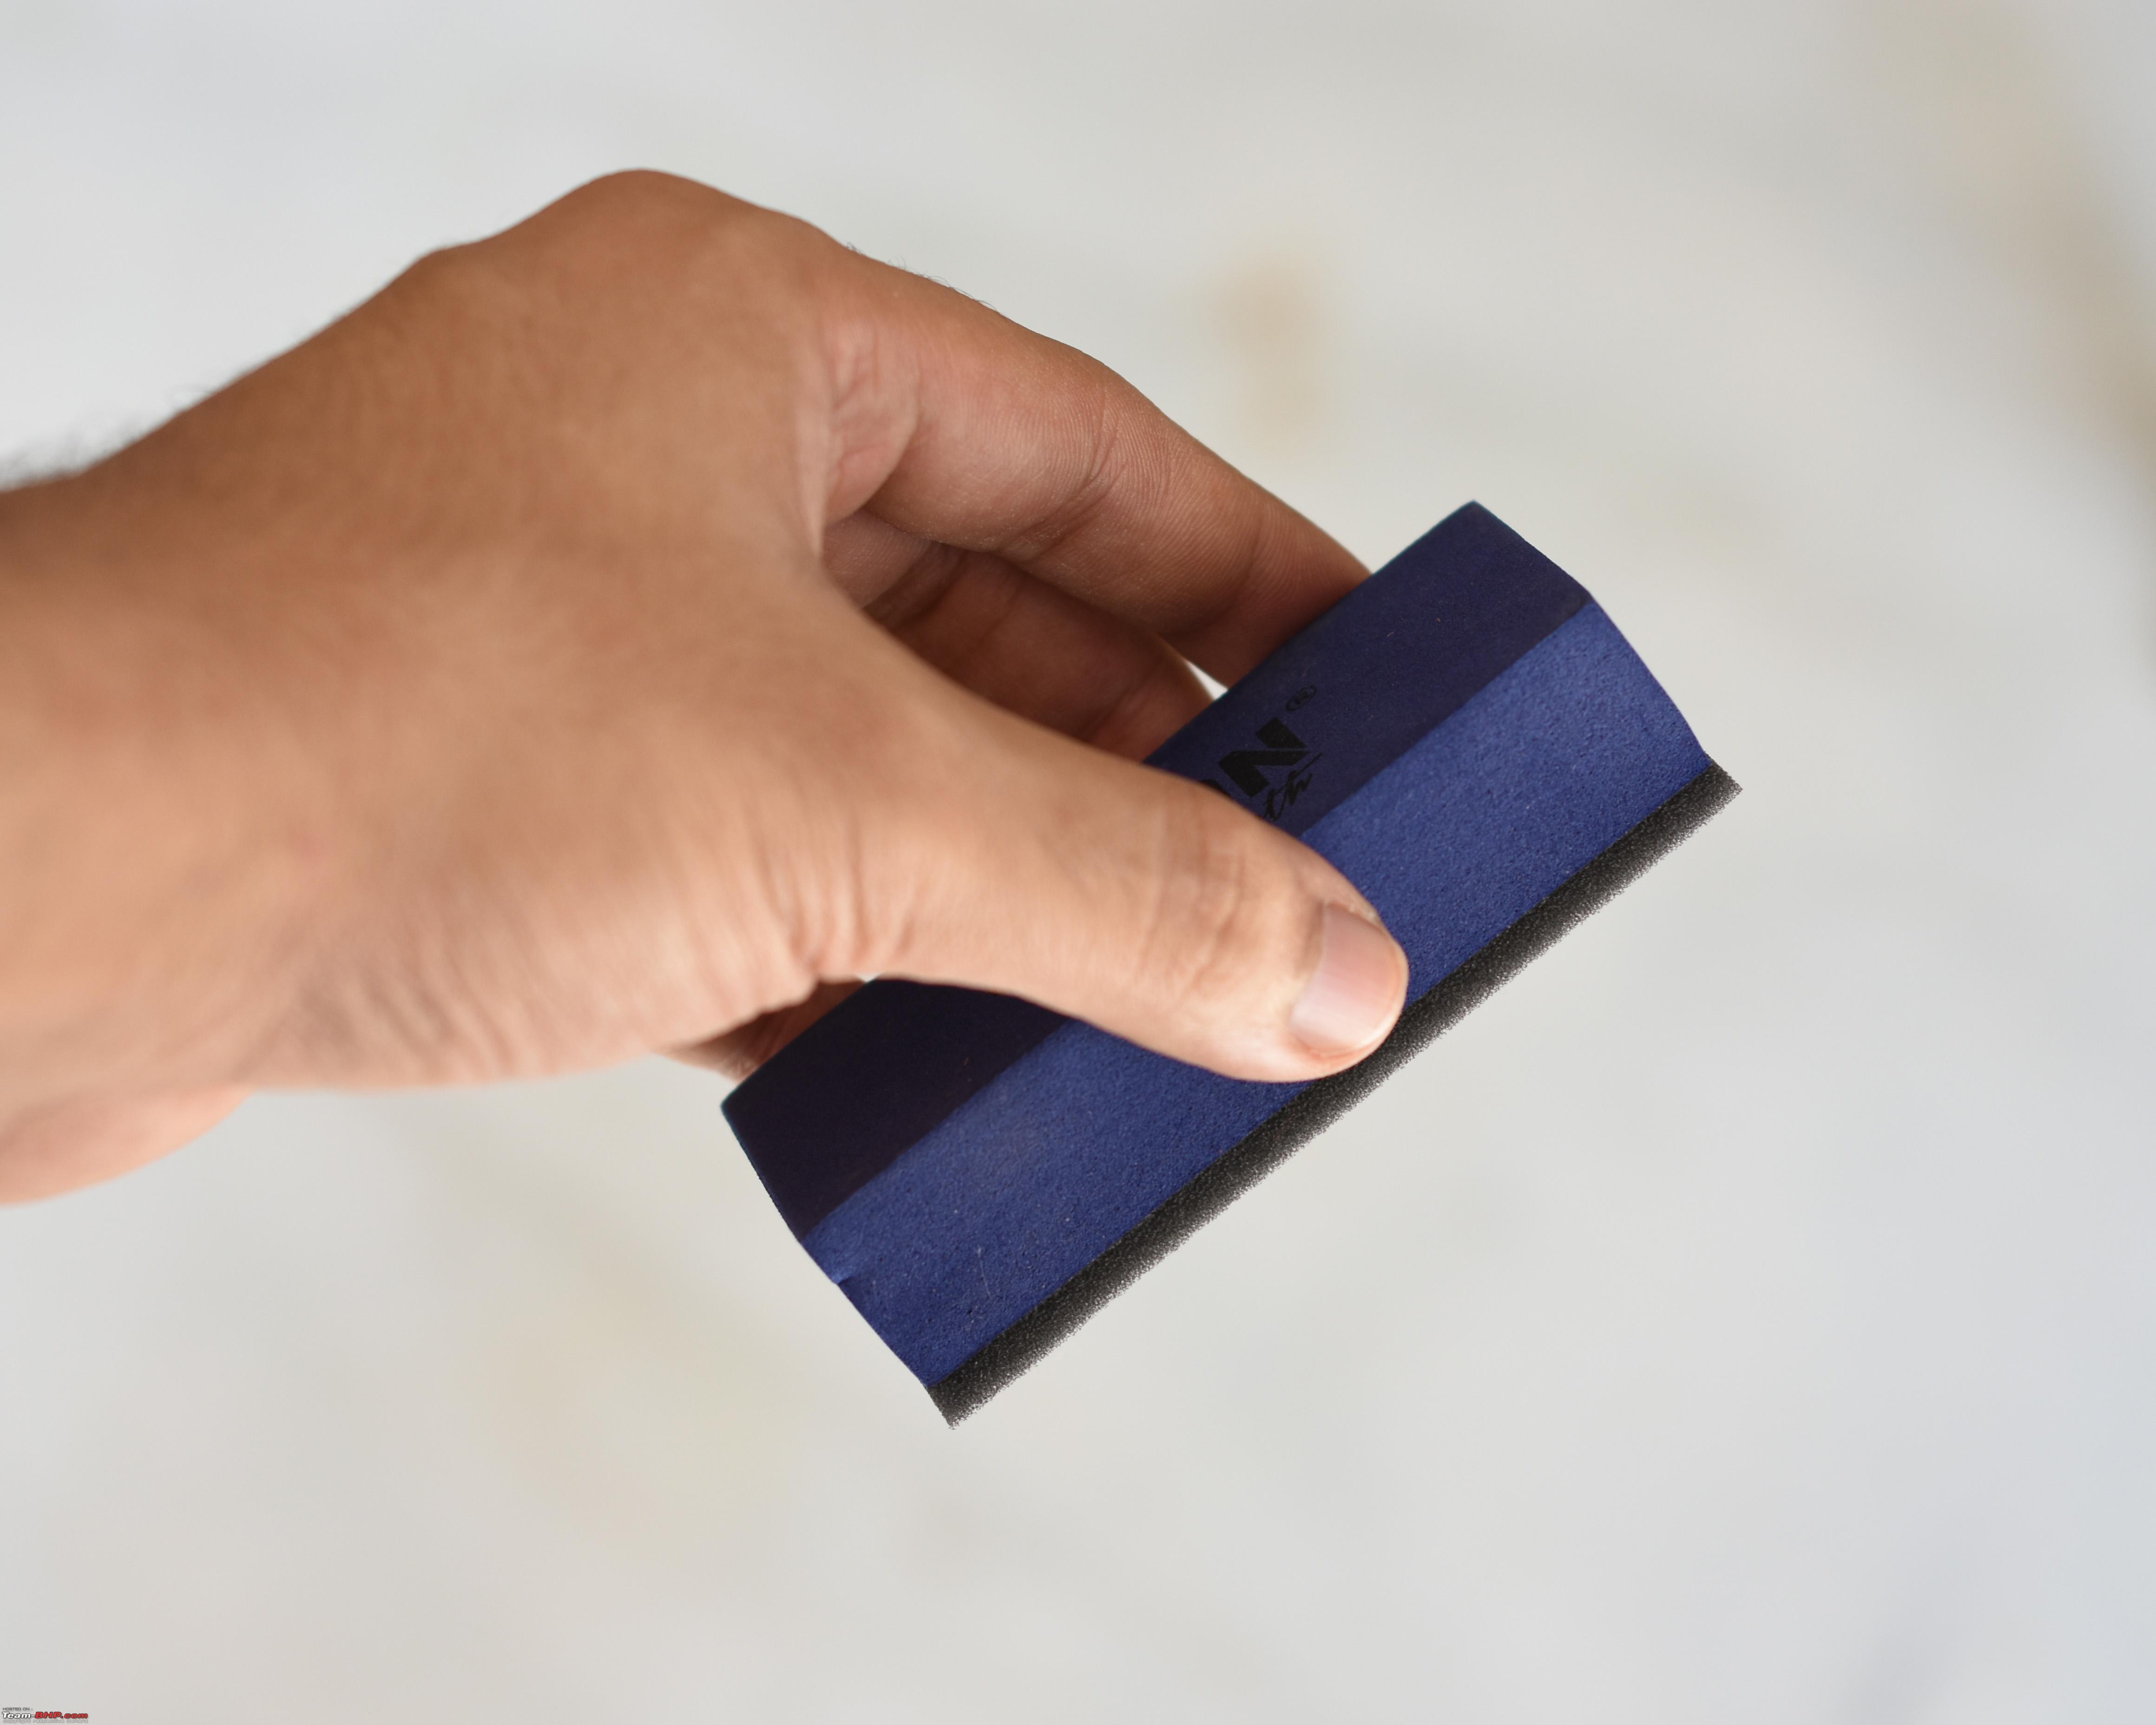 The Gyeon Suede Cloths are thick and feel high quality. They have Gyeon branding on them like other Gyeon towels. 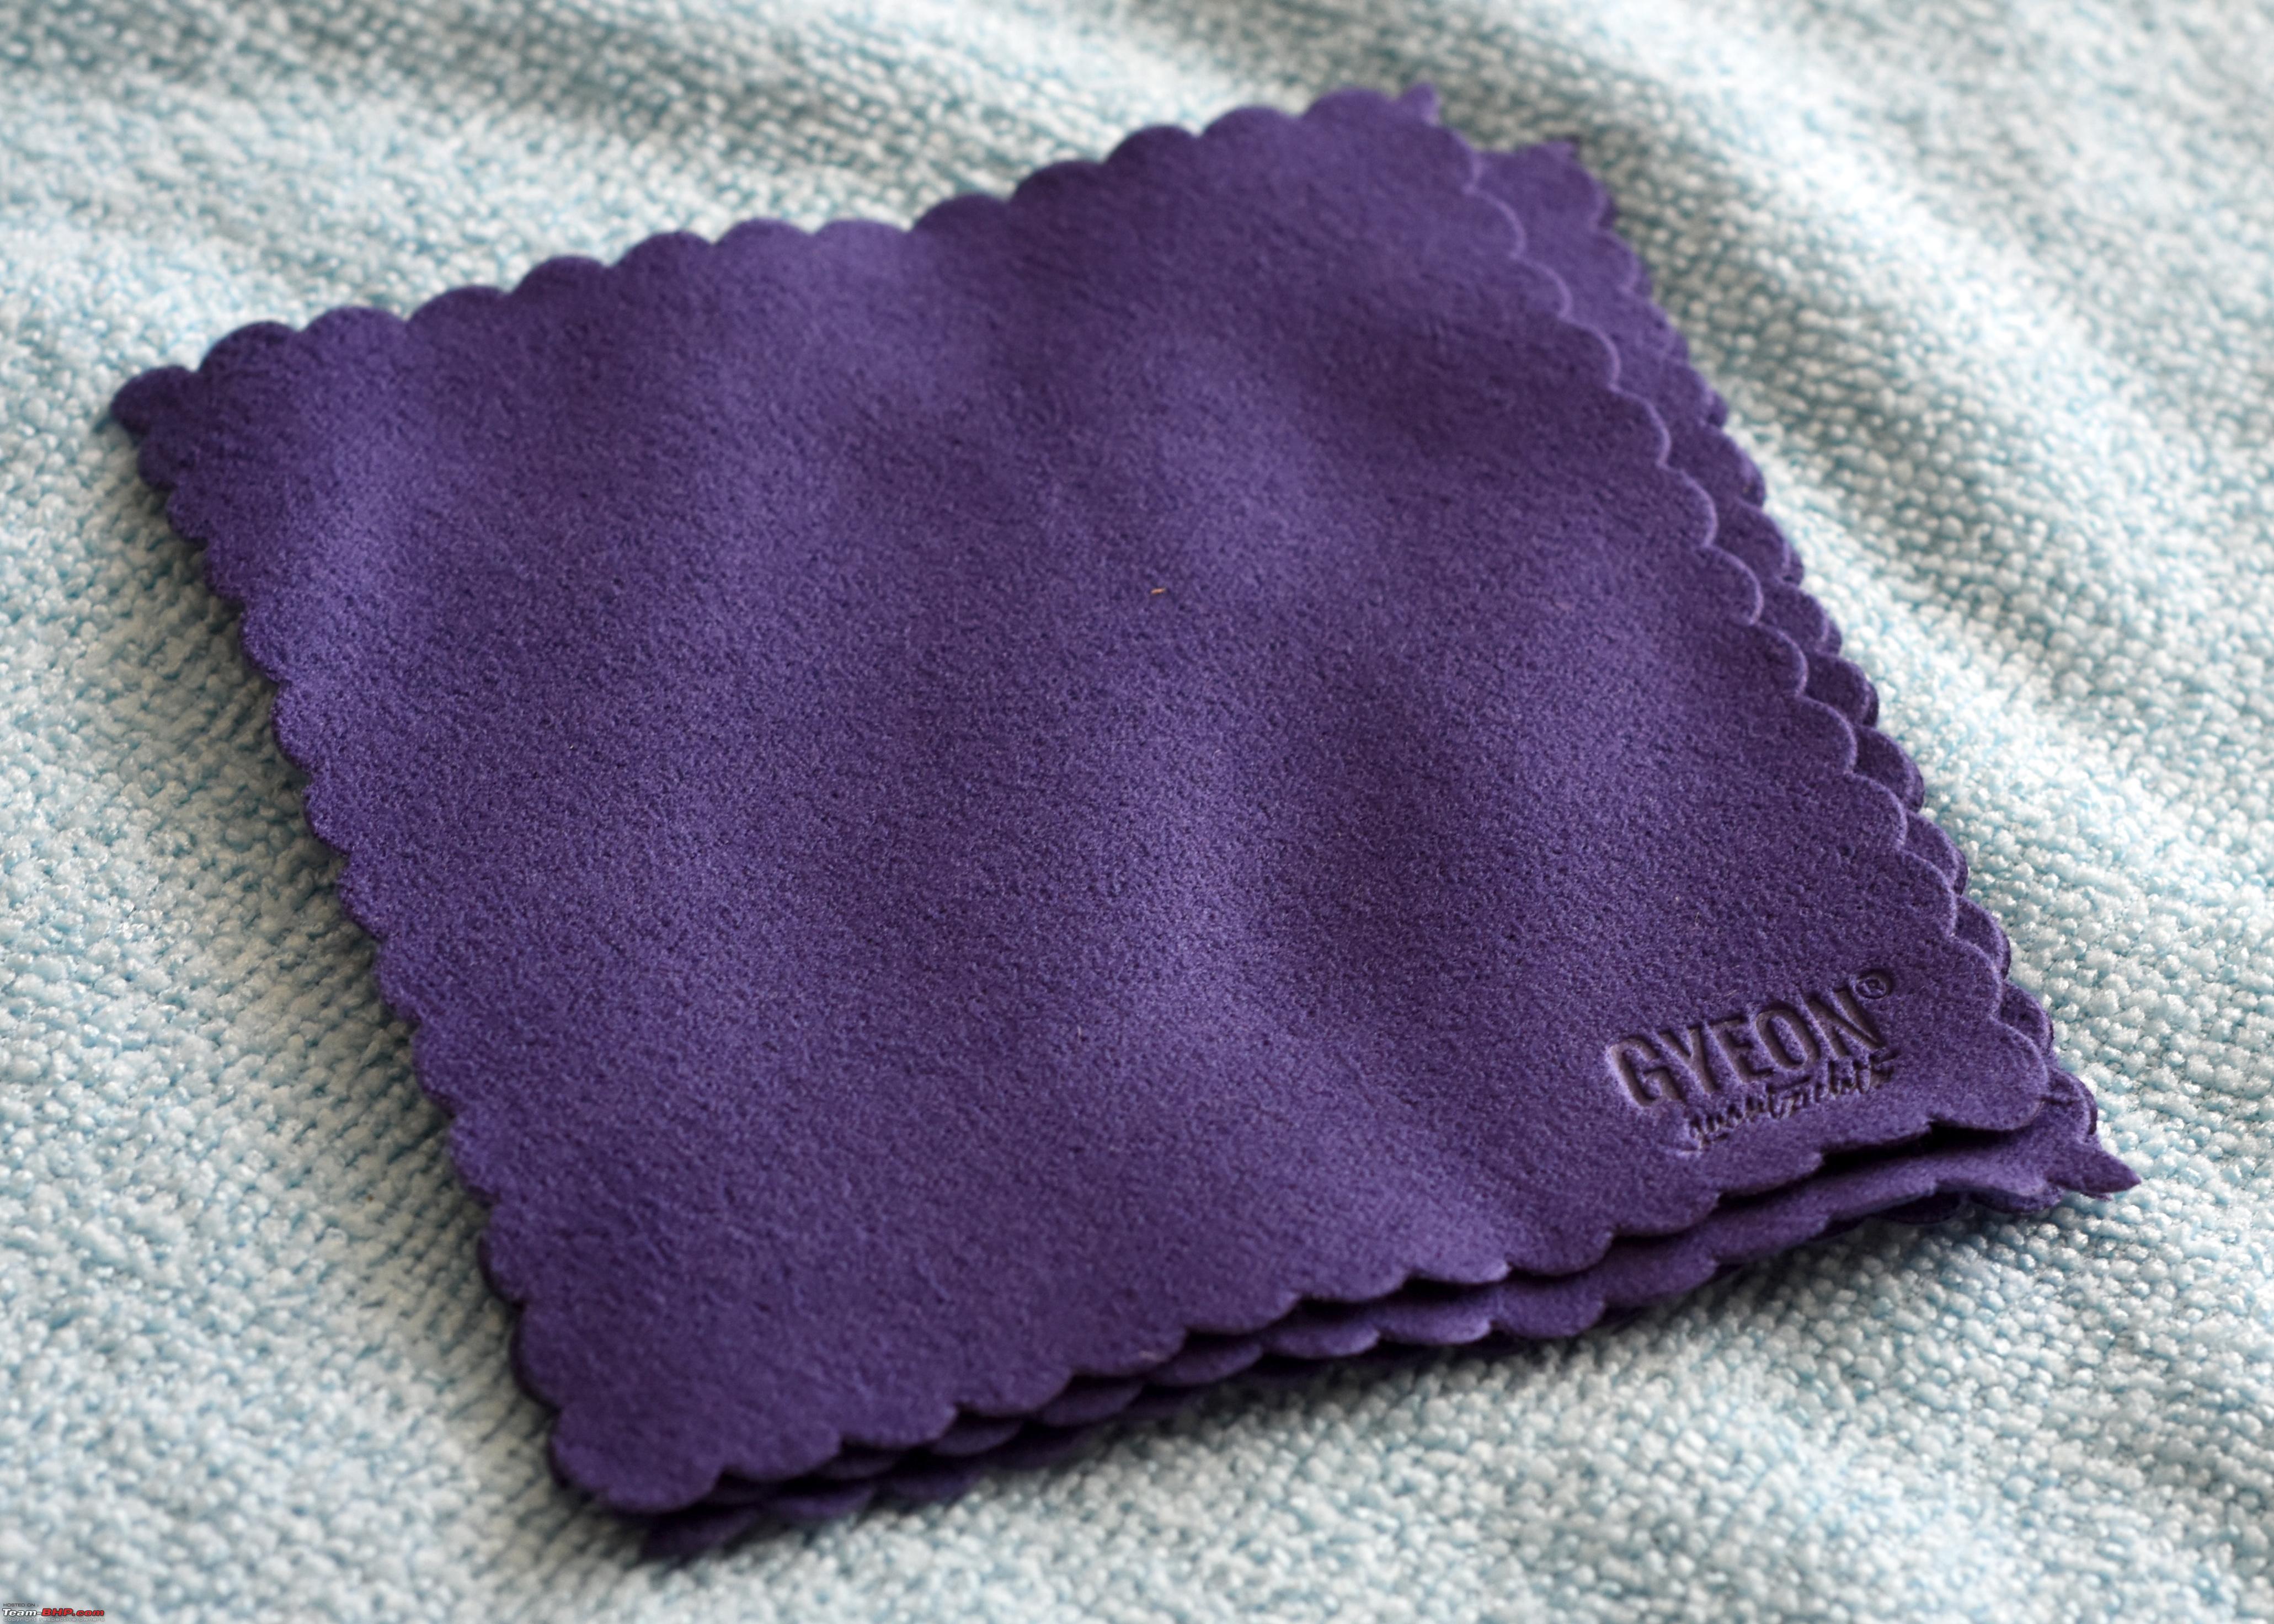 The size of the cloth complements the size of block. Both work very well together. 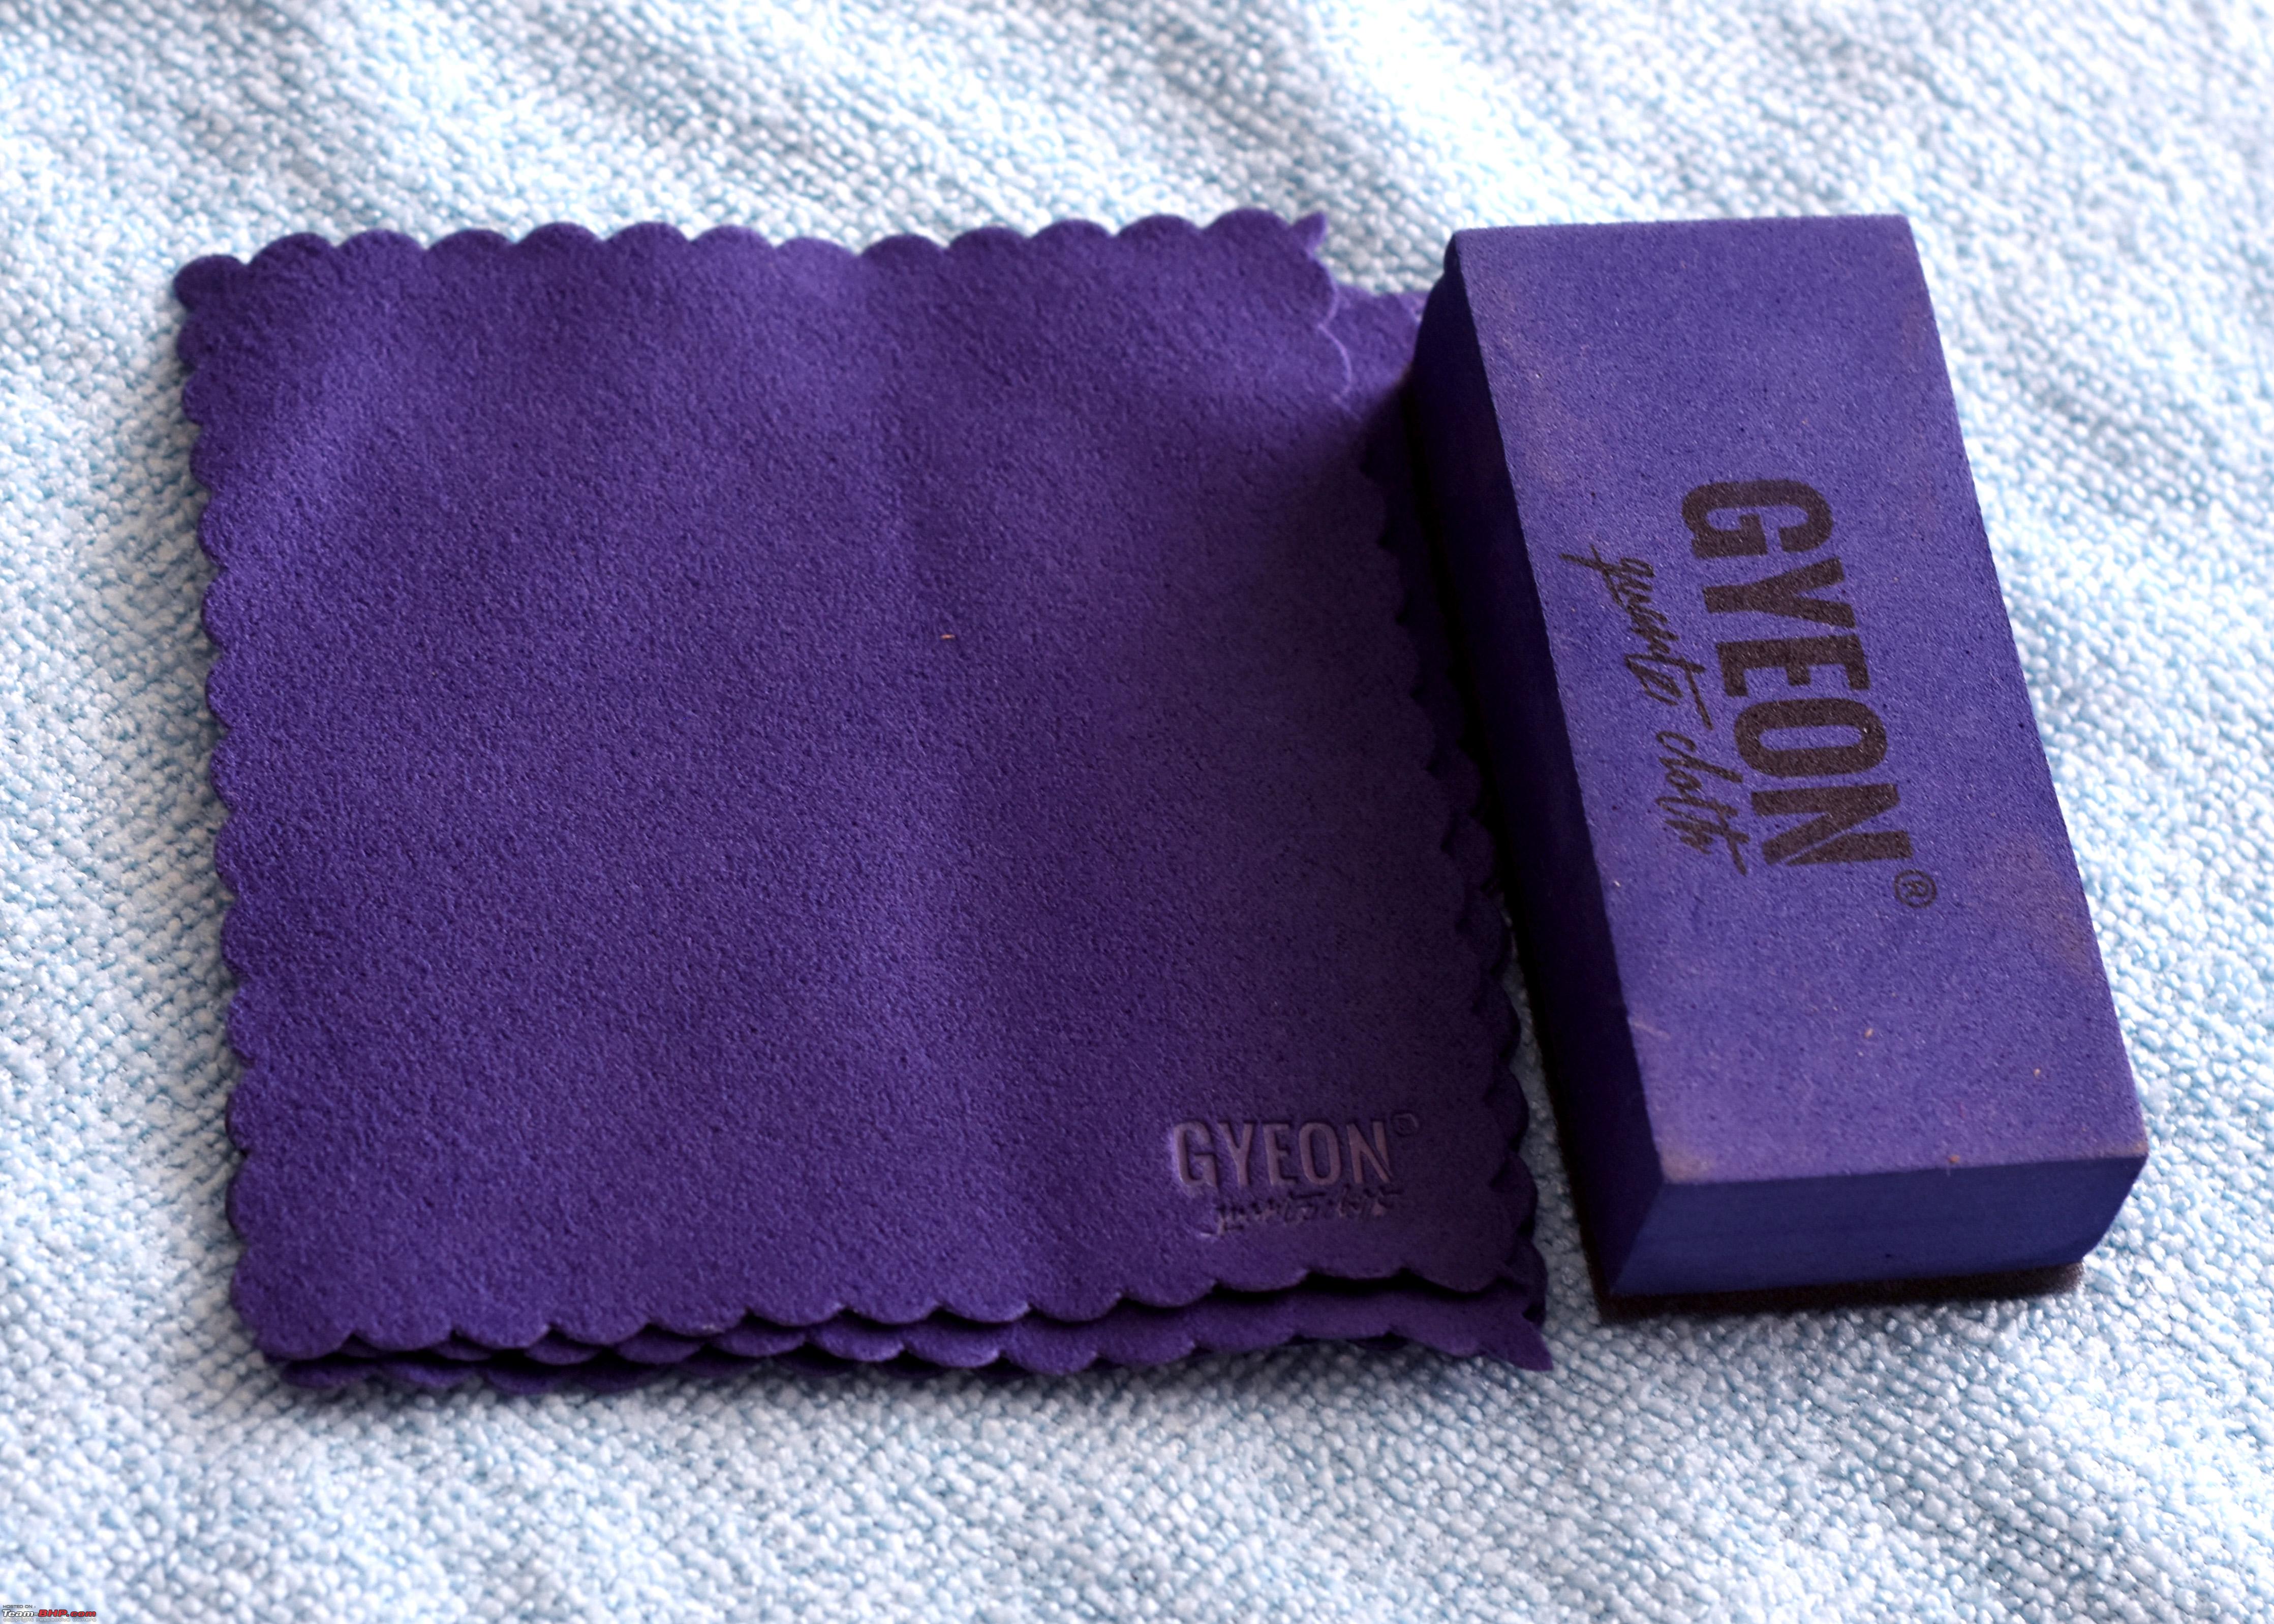 The temporary topper coat spray sealant.  CQ Lite and Cure bottle together for size comparision.  The product claims maximum gloss and very little durability. This is applied only as a temporary protection till the main coating cures. We want the product to be gone quickly as the main coating is superior in all aspects. 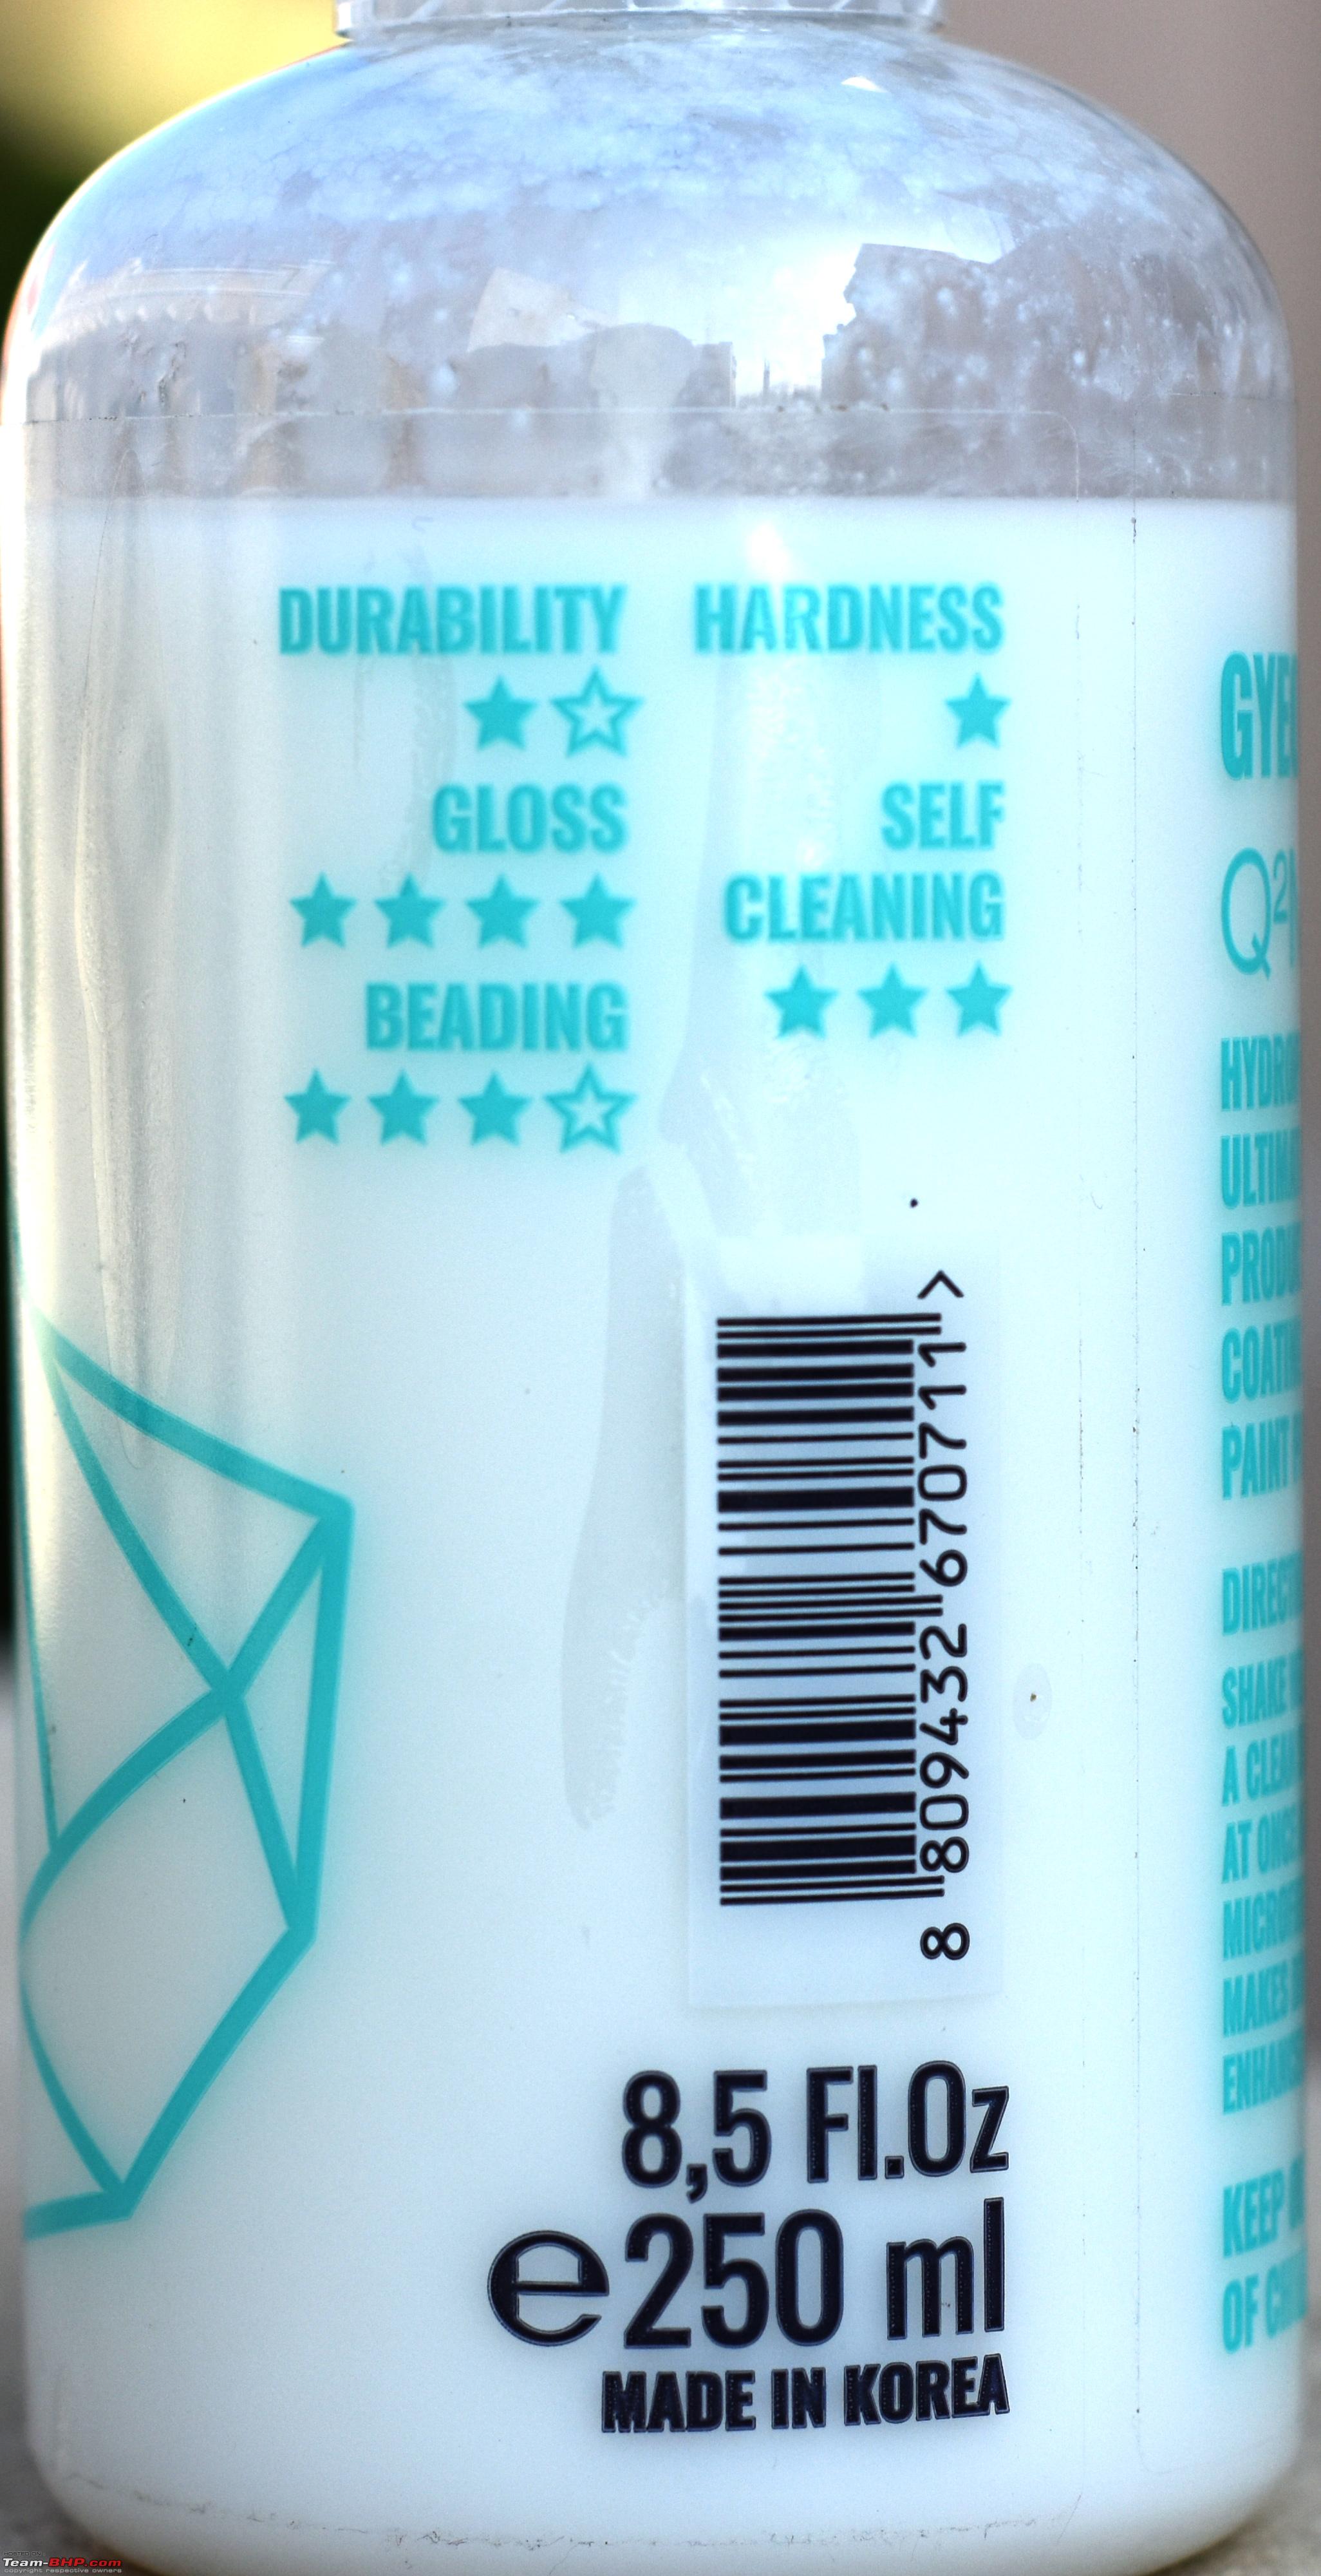 Problems and Limitations : Problem : Ceramic coating for an enthusiast like me, is a big thing given the amount of money, time and effort that goes into the whole project. Spending so many hours at the car will irritate parents and family which will invite reasonable amount of trouble. Sol : Divide the project into days. Problem : There is no closed parking and dust finds its way onto the paint in a very short period of time. The lane behind our house is a busy one with reasonable movement of vehicles throughout the day. Sol : Coat the car in the night, when traffic movement is minimum and so the amount of dust in air is less. Problem : Monsoons have just started and it’s raining frequently. The droplets of water may come in contact with the paint before coating cures as we had a partially covered parking. Sol : Just pray God. Preparation : The basis of a successful ceramic coating is proper paint preparation. The paint should be free of any waxes, sealants, and bonded contaminants. Then it should be free of swirl marks, and have a nice shiny surface for the best bond and look. Visual assessment of my Paint : My paint was having a nice layer of Collinite 845 and had very minor swirl marks. The bonnet and trunk had “Random deep scratches” as the detailers call them. In simple words, they are scratches which are deeper than swirl marks, not crossing deeper than the clear coat. So to remove them needs more than polishing i.e. compounding. The process of stripping off wax and claying : First thing to do was to strip off Collinite. To do that job, I chose CarPro MultiX, diluted a little bit stronger than 1:10. I don’t know the exact ratio, but I just put a little more MultiX (Maybe a capful) in the spray bottle which had 1:10 solution. I washed and rinsed the car with water, sprayed MultiX liberally all over a panel, took a microfiber, agitated the surface and then rinsed off with water. This cleared the layer of Collinite effectively. I did this panel after panel. The next step was to clay bar the car. So, I used my ECH2O as a clay lubricant, used the clay towel and did the job of clay barring (Or should I say toweling) the car. I did both the MultiX step and Clay bar step panel by panel over a period of 3-4 days, for 2 personal reasons
I did not do the chemical contamination with Iron removers or tar removers because I didn’t have them and I didn’t want to buy them for this one time use. The Process of Addressing defects : Once the car was entirely done with claying, the next step was to address the swirls and scratches. The whole point of a consumer DIY ceramic coating is to make the process easy. CarPro themselves don’t emphasize on polishing the car on their website before applying CQ Lite as it is a “User Friendly” product. But I wanted do as much as I could to have a good looking car without taking it to a professional detailer. So, I used the Meguairs Ultimate Polish to polish the car. I used my hand at intricate and small areas like the bumpers, below handle bars, etc. I cut a microfiber into small pieces to do this polishing. It was a tedious process and made me exhausted quite quickly. The rest of the car, I polished with the Bosch GPO 12 CE polisher and a polishing foam pad which was least aggressive, with Meguiars Ultimate Polish. I know a rotary is too powerful a tool for amateurs and for polishing, but in India, the base prices of Dual-Action Polishers are starting at Rs.27k – 30k ! So, I had no choice but to use the rotary (Bought it for about Rs.10k, 2-2.5 years ago). I have been very careful with the rotary, used a very fine polishing pad, used a speed setting of only 1, maximum 1.5, did only one panel at a time and took hours of breaks before starting another panel, checked the temperature of the pad regularly and so on. The orange one is the most aggressive foam pad among the three I have. The black one is the least aggressive. I used the black pad to polish my car. Pic for comparison.  The results were great. The swirl marks were gone  . No rotary holograms were produced. The Random deep scratches were present and not corrected by the pad-polish combination. I had a more aggressive pad, but did not want to go for the two stage. So, I just let them be. Probably using Meguiars Ultimate compound with the same pad would have done the job too, but I didn’t have that compound and I already spent way past my limit buying other required items for the coating. . No rotary holograms were produced. The Random deep scratches were present and not corrected by the pad-polish combination. I had a more aggressive pad, but did not want to go for the two stage. So, I just let them be. Probably using Meguiars Ultimate compound with the same pad would have done the job too, but I didn’t have that compound and I already spent way past my limit buying other required items for the coating. I took a short video of before and after. These pictures are captured from the video : Before polishing : 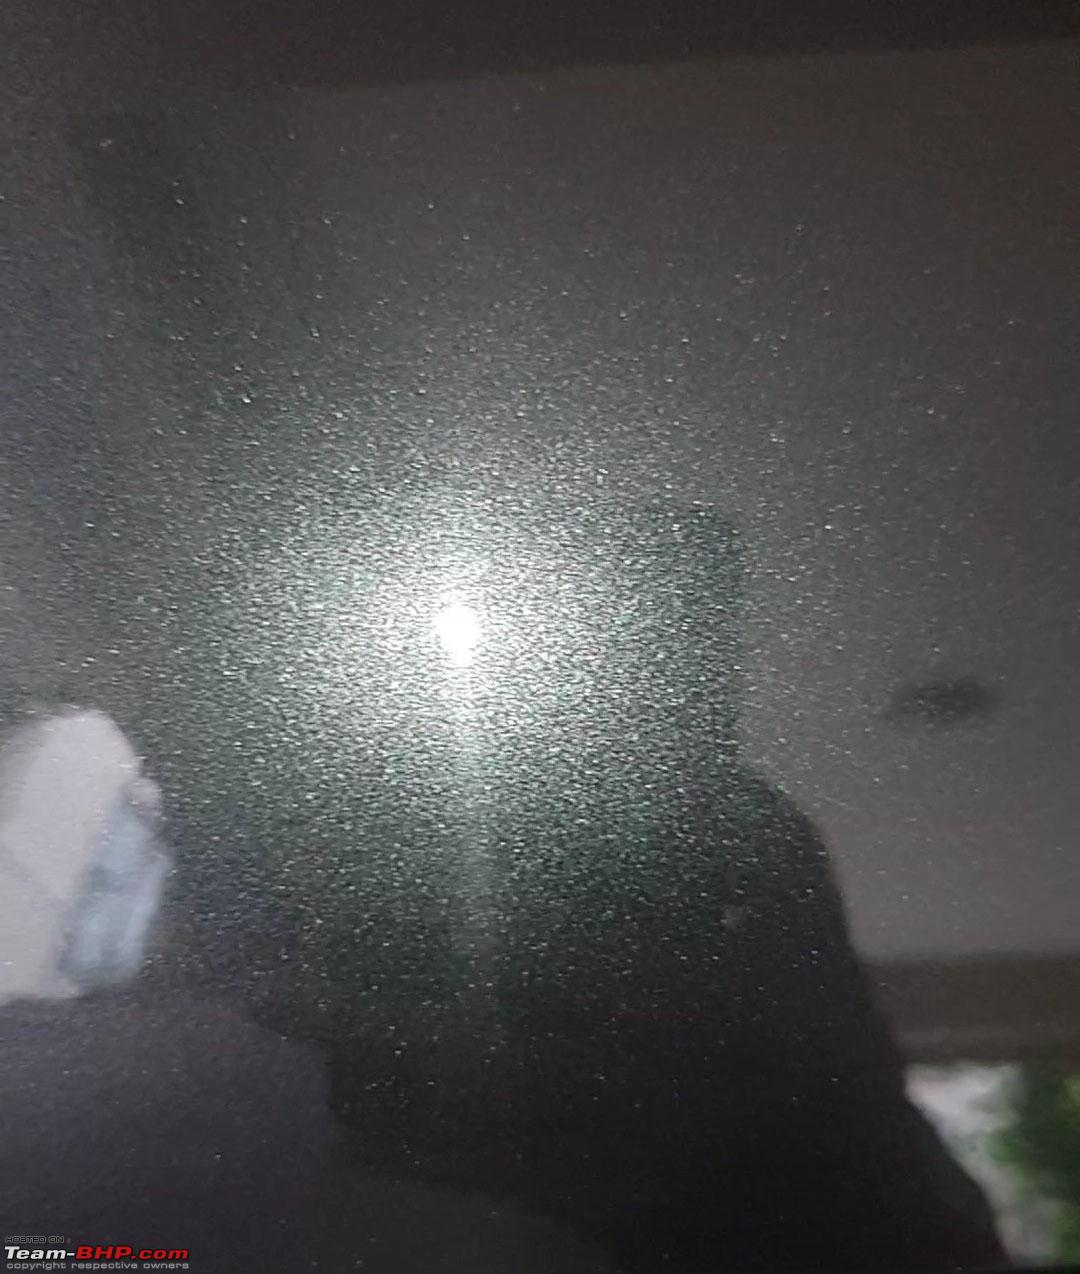 After Polishing. Notice that the haze is gone. I used my phones LED to check the paint after correction. Dedicated inspection lights are too expensive for me. 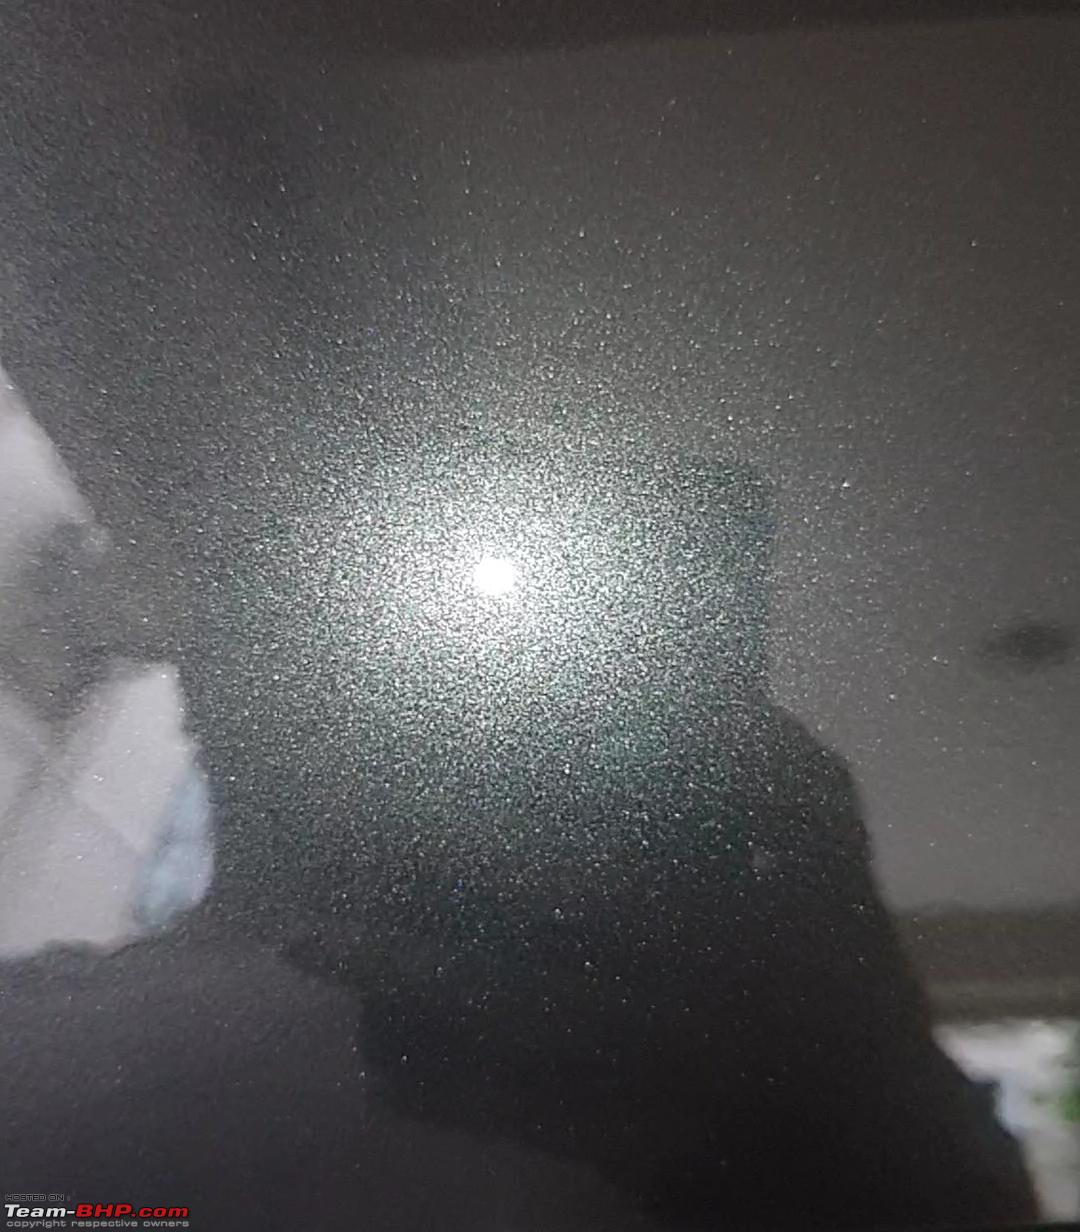 Well, one can completely skip this step of polishing, if their paint is reasonably good or if one doesn’t have the patience to get done with this, and it’s totally fine (For these lite coatings). Once the polishing stage is over, it is recommended to wipe the panels with Isopropyl Alcohol (IPA) solution so that the paint is completely free of any chemicals or polishing oils that the polish or compound have left on the paint. After this is done, the coating can be applied to the paint. Since I did panel after panel, day after day, there was some dust on the panels which were done on the first days. So, I decided to give the car a wash and then go with the IPA wipe. I gave the car a thorough foam wash and dried it on the night that I decided to coat the car. I haven’t used MultiX or clay barred the alloys. I just washed them properly and made sure they were dry. Coating : Finally the night has come. The car washed and dried. The sky clear of clouds (temporarily). I had the main bottle of CarPro CQ Lite, Gyeon Applicator Block, Gyeon Suede Cloth and a few microfiber cloths ready for the job. But before the coating was applied, a final step was pending and that was to wipe down the car with an IPA based solution. I used CarPro Eraser in this case since sourcing a bottle of pure IPA would be time taking. So, I sprayed each panel with the solution, wiped it off with a microfiber. After wiping the product, it evaporates without leaving any streaks on the paint, well that is what it is supposed to do. The CQ Lite bottle is larger in real life than seen in pictures. It also has a child proof bottle cap. Opening the cap shows the opening of bottle lined by a protective silver color sticker with one end extended for us to pull. Pulling that sticker exposes the hole through which we can pour drops of the precious product on our suede/microfiber applicator. The child-proof bottle cap which needs to be pressed while twisting to open. The pictorial directions are clear. 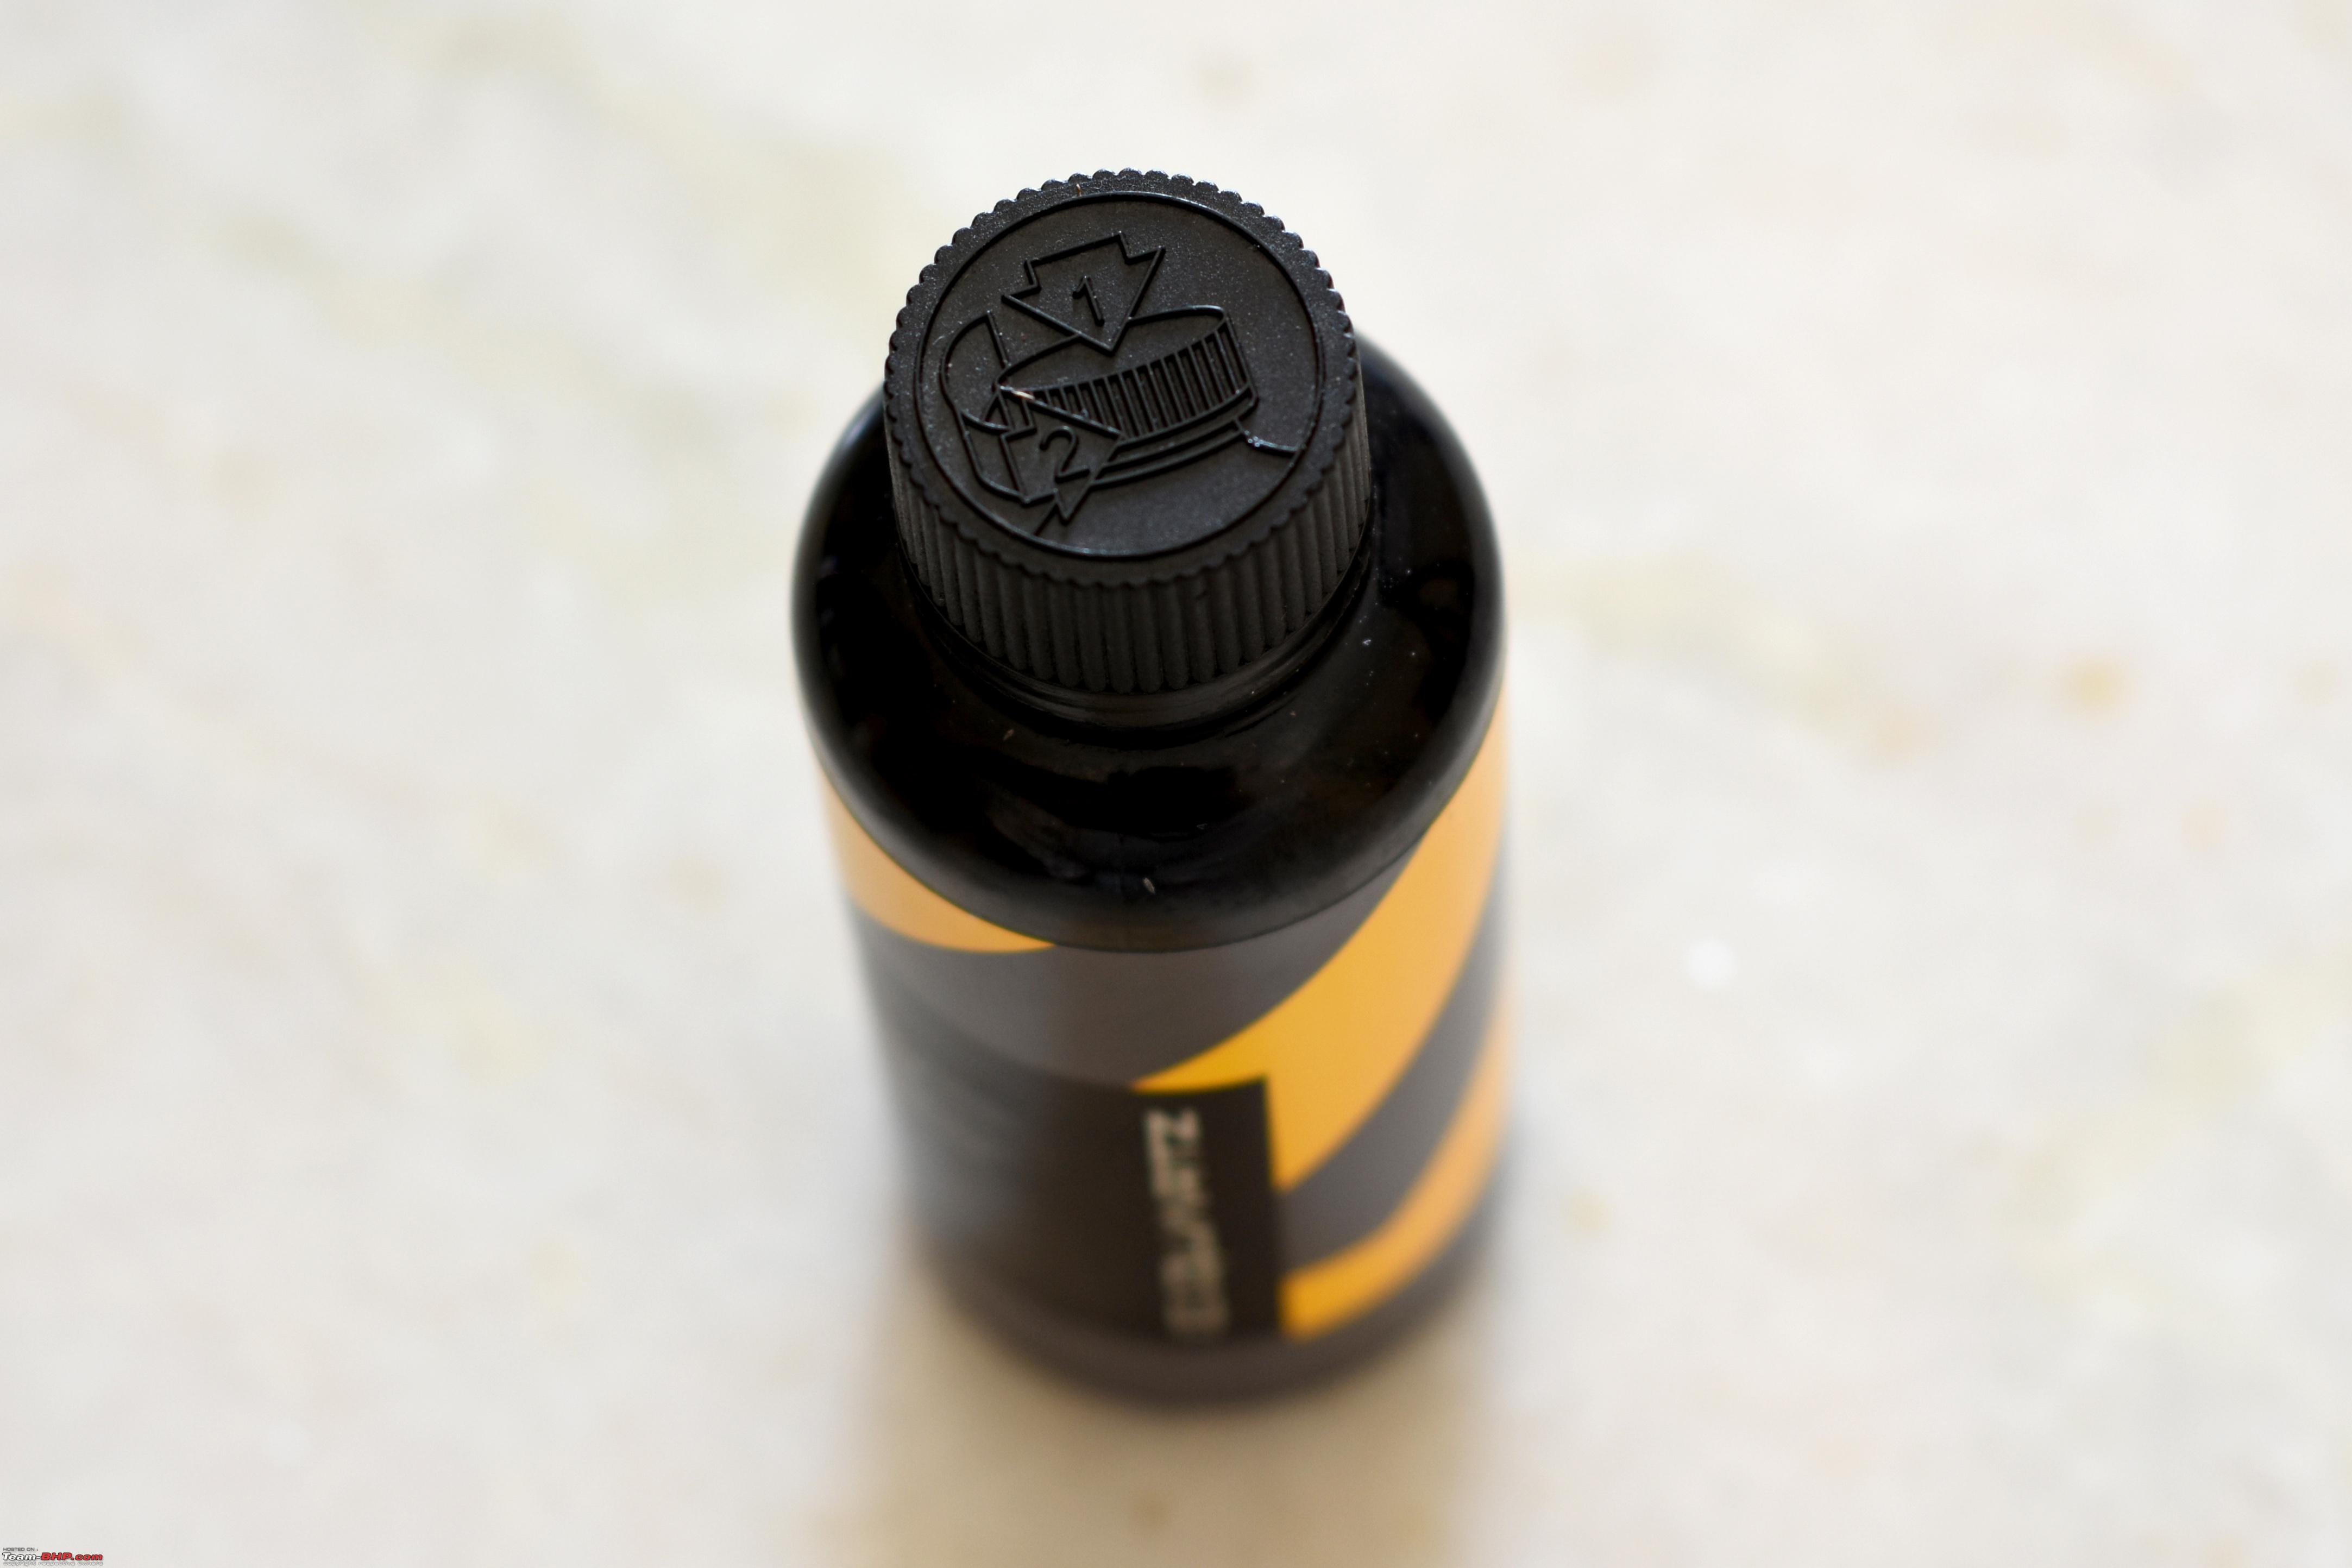 The protective sticker with a small extension that lacks adhesive. No problem pulling this one. 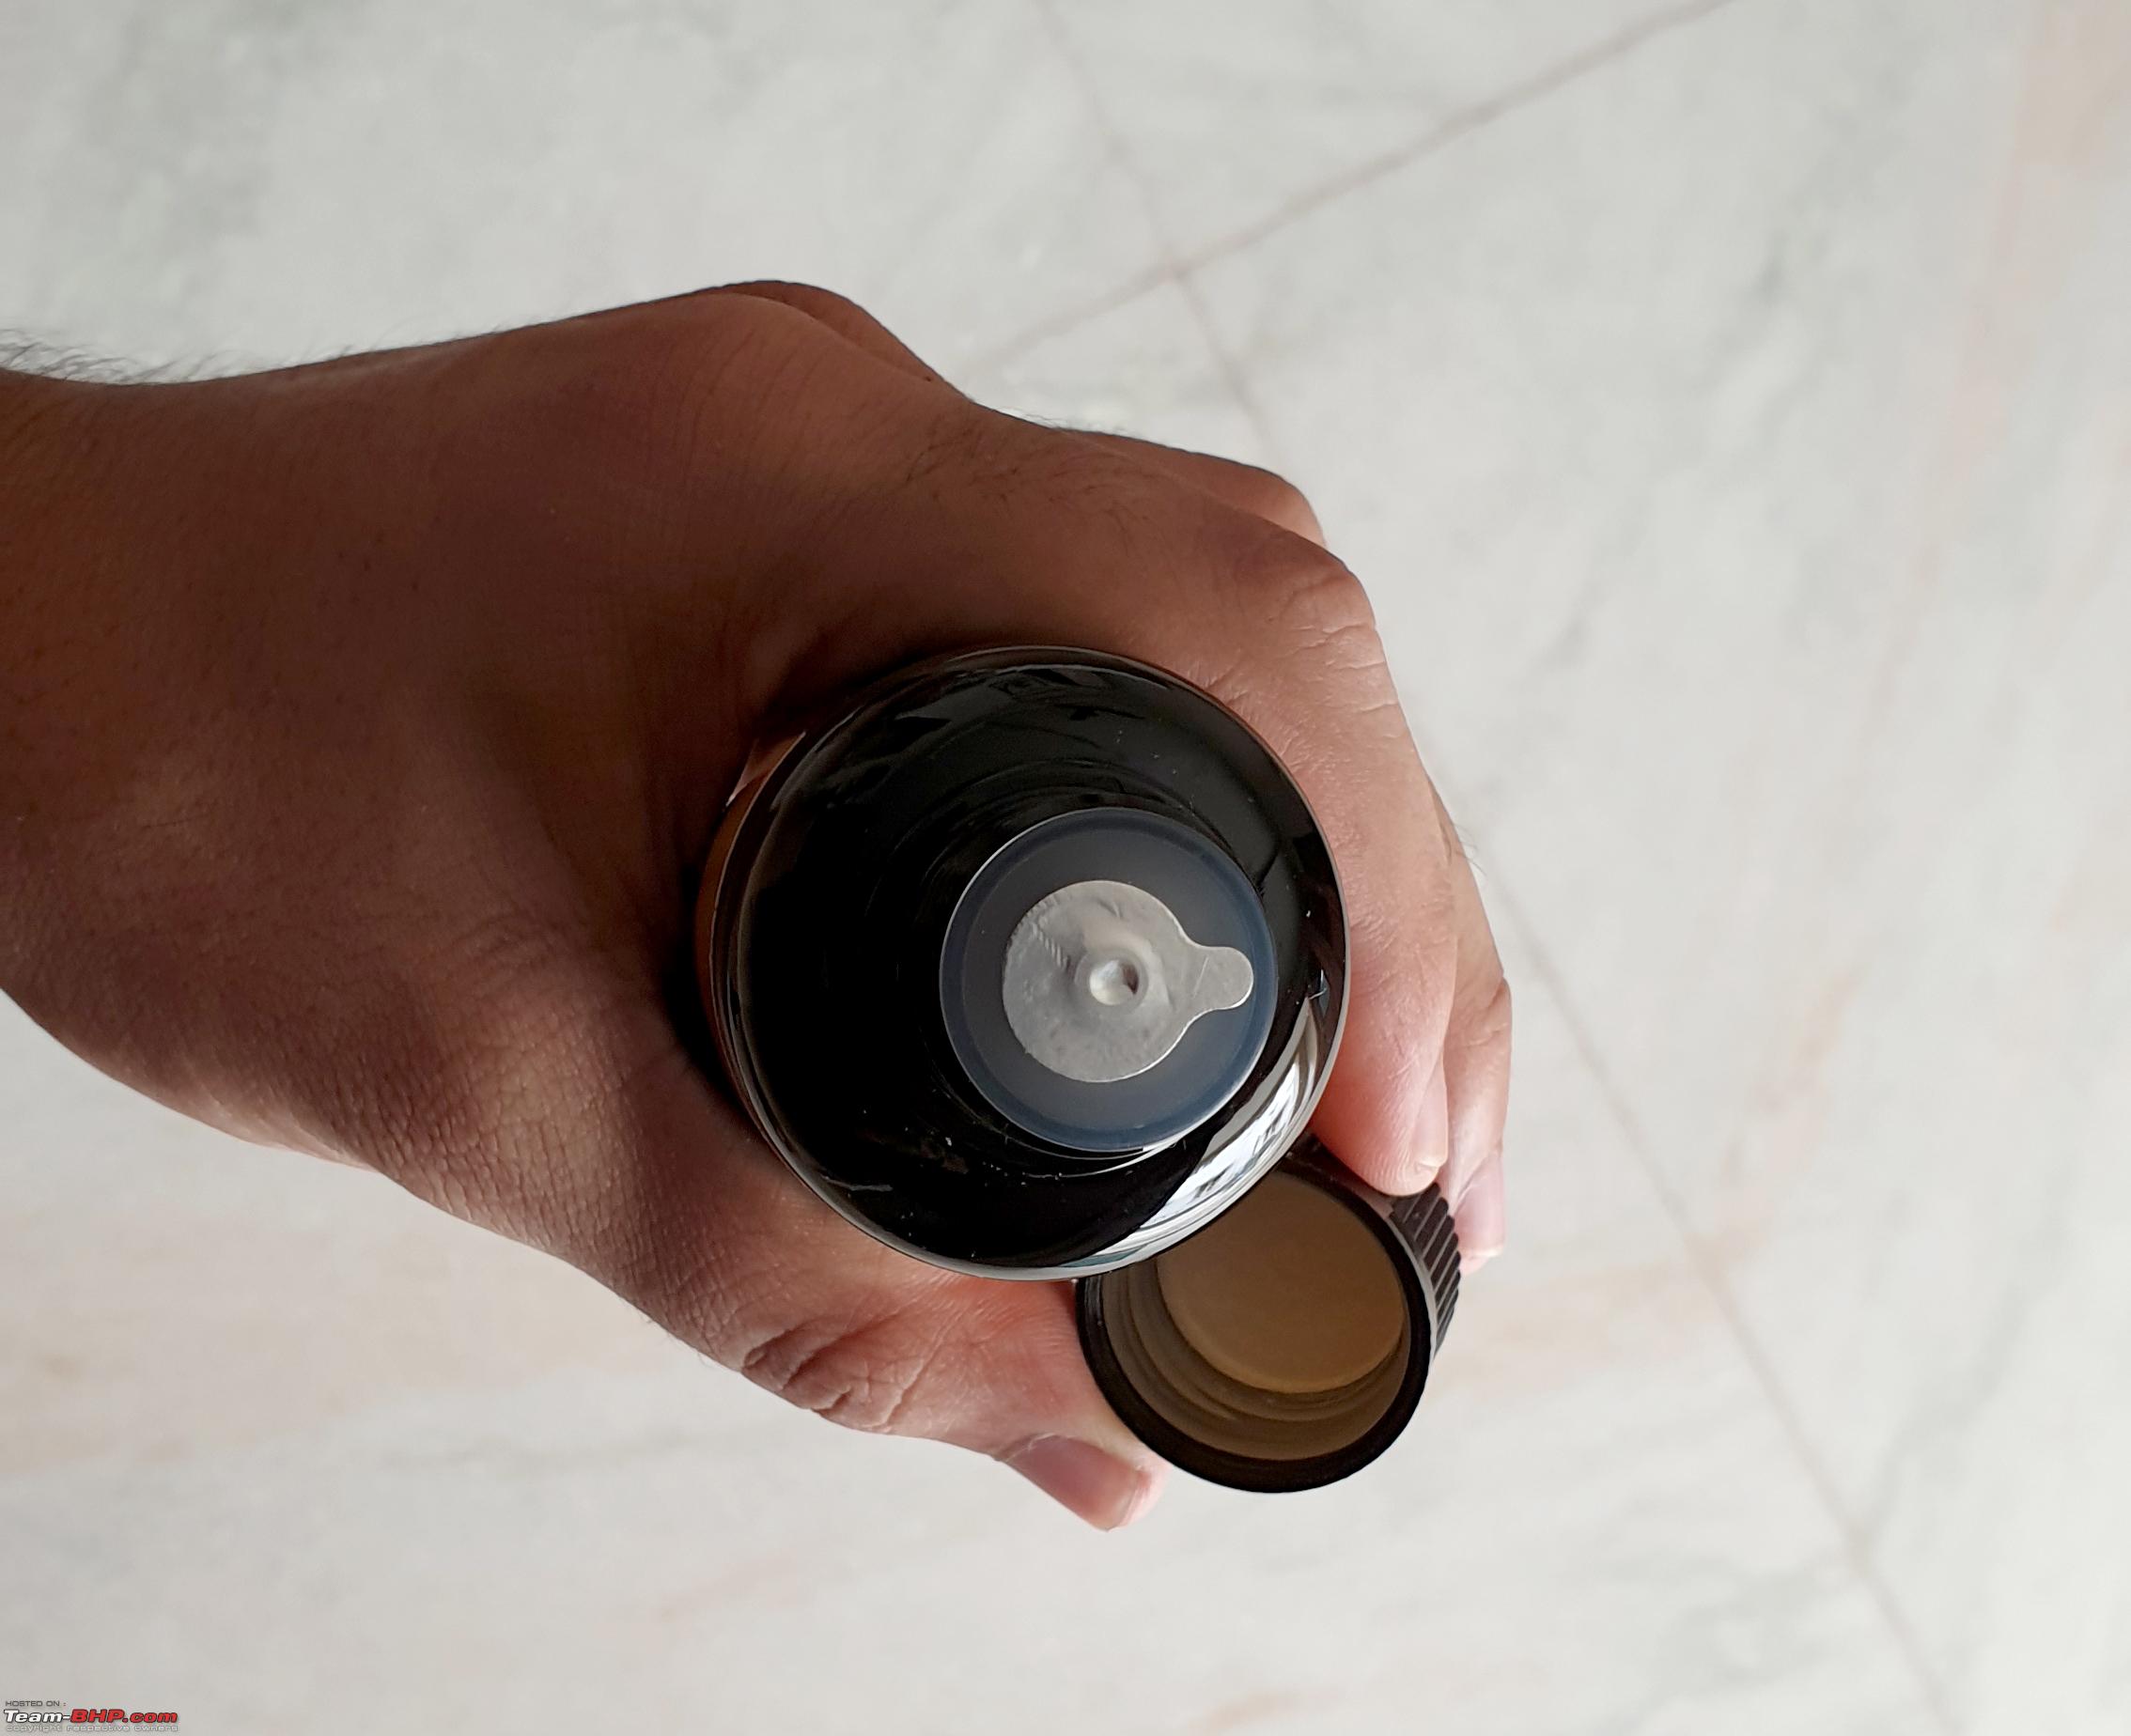 The dropper style opening of the bottle. This pic was taken after a week of applying the coating. Notice that the coating crystallized at some places.  To start with, I poured around 10 – 12 drops of the product on my suede applicator and started application on the bonnet. From the second section onwards only 5-6 drops were enough. The weather was cool and humid. So the product was not drying very quickly, it was rather friendly and forgiving. I did the recommended 2ft x 2ft sections and wiped off immediately. The microfibers used to wipe the product off, acted a bit strange. Some of them were smooth all the time while some of them were too tacky (Sticky), forcing me to change them frequently. The product has a very strong odor of solvents. It smells like the Kores whitener we used to get in two separate bottles, a decade ago. It is recommended to wear personal protective equipment like gloves and a mask. The odor could cause some discomfort if the person is sensitive. And if it is a closed space, then PPE becomes mandatory. There were heavy winds and so came the dust to make my work harder. Coming to the coating, I took less than an hour to complete the process. I didn’t watch the exact time, but it is just an estimate. I spent more time changing towels and wiping the accumulated dust off every panel before coating it. Not having to wait till the coating “flashes” is a boon, which makes application easier than the other professional grade coatings. I did coat the windows and rear glass. The coating is more difficult to buff off on glass. The suede applicator does not dry quickly, so there is peace of mind and no need to change it frequently like the microfiber buffing cloths. The applicator block and suede applicator surely made the entire process very pleasant. Using them, one can cover a reasonable space with fewer drops of product and in less time. For tight areas like behind the door handle, I folded the suede applicator and used it with my hand. The winds scared me but it fortunately did not rain that night. It drizzled few minutes (1-2), but that did not come in contact with the car. After this first coating was done, when I looked at the bottle, I was shocked to see that very little quantity of the product was used. Notice the level of product, very little has been consumed. This is after coating the car once, excluding wheels and door jambs. 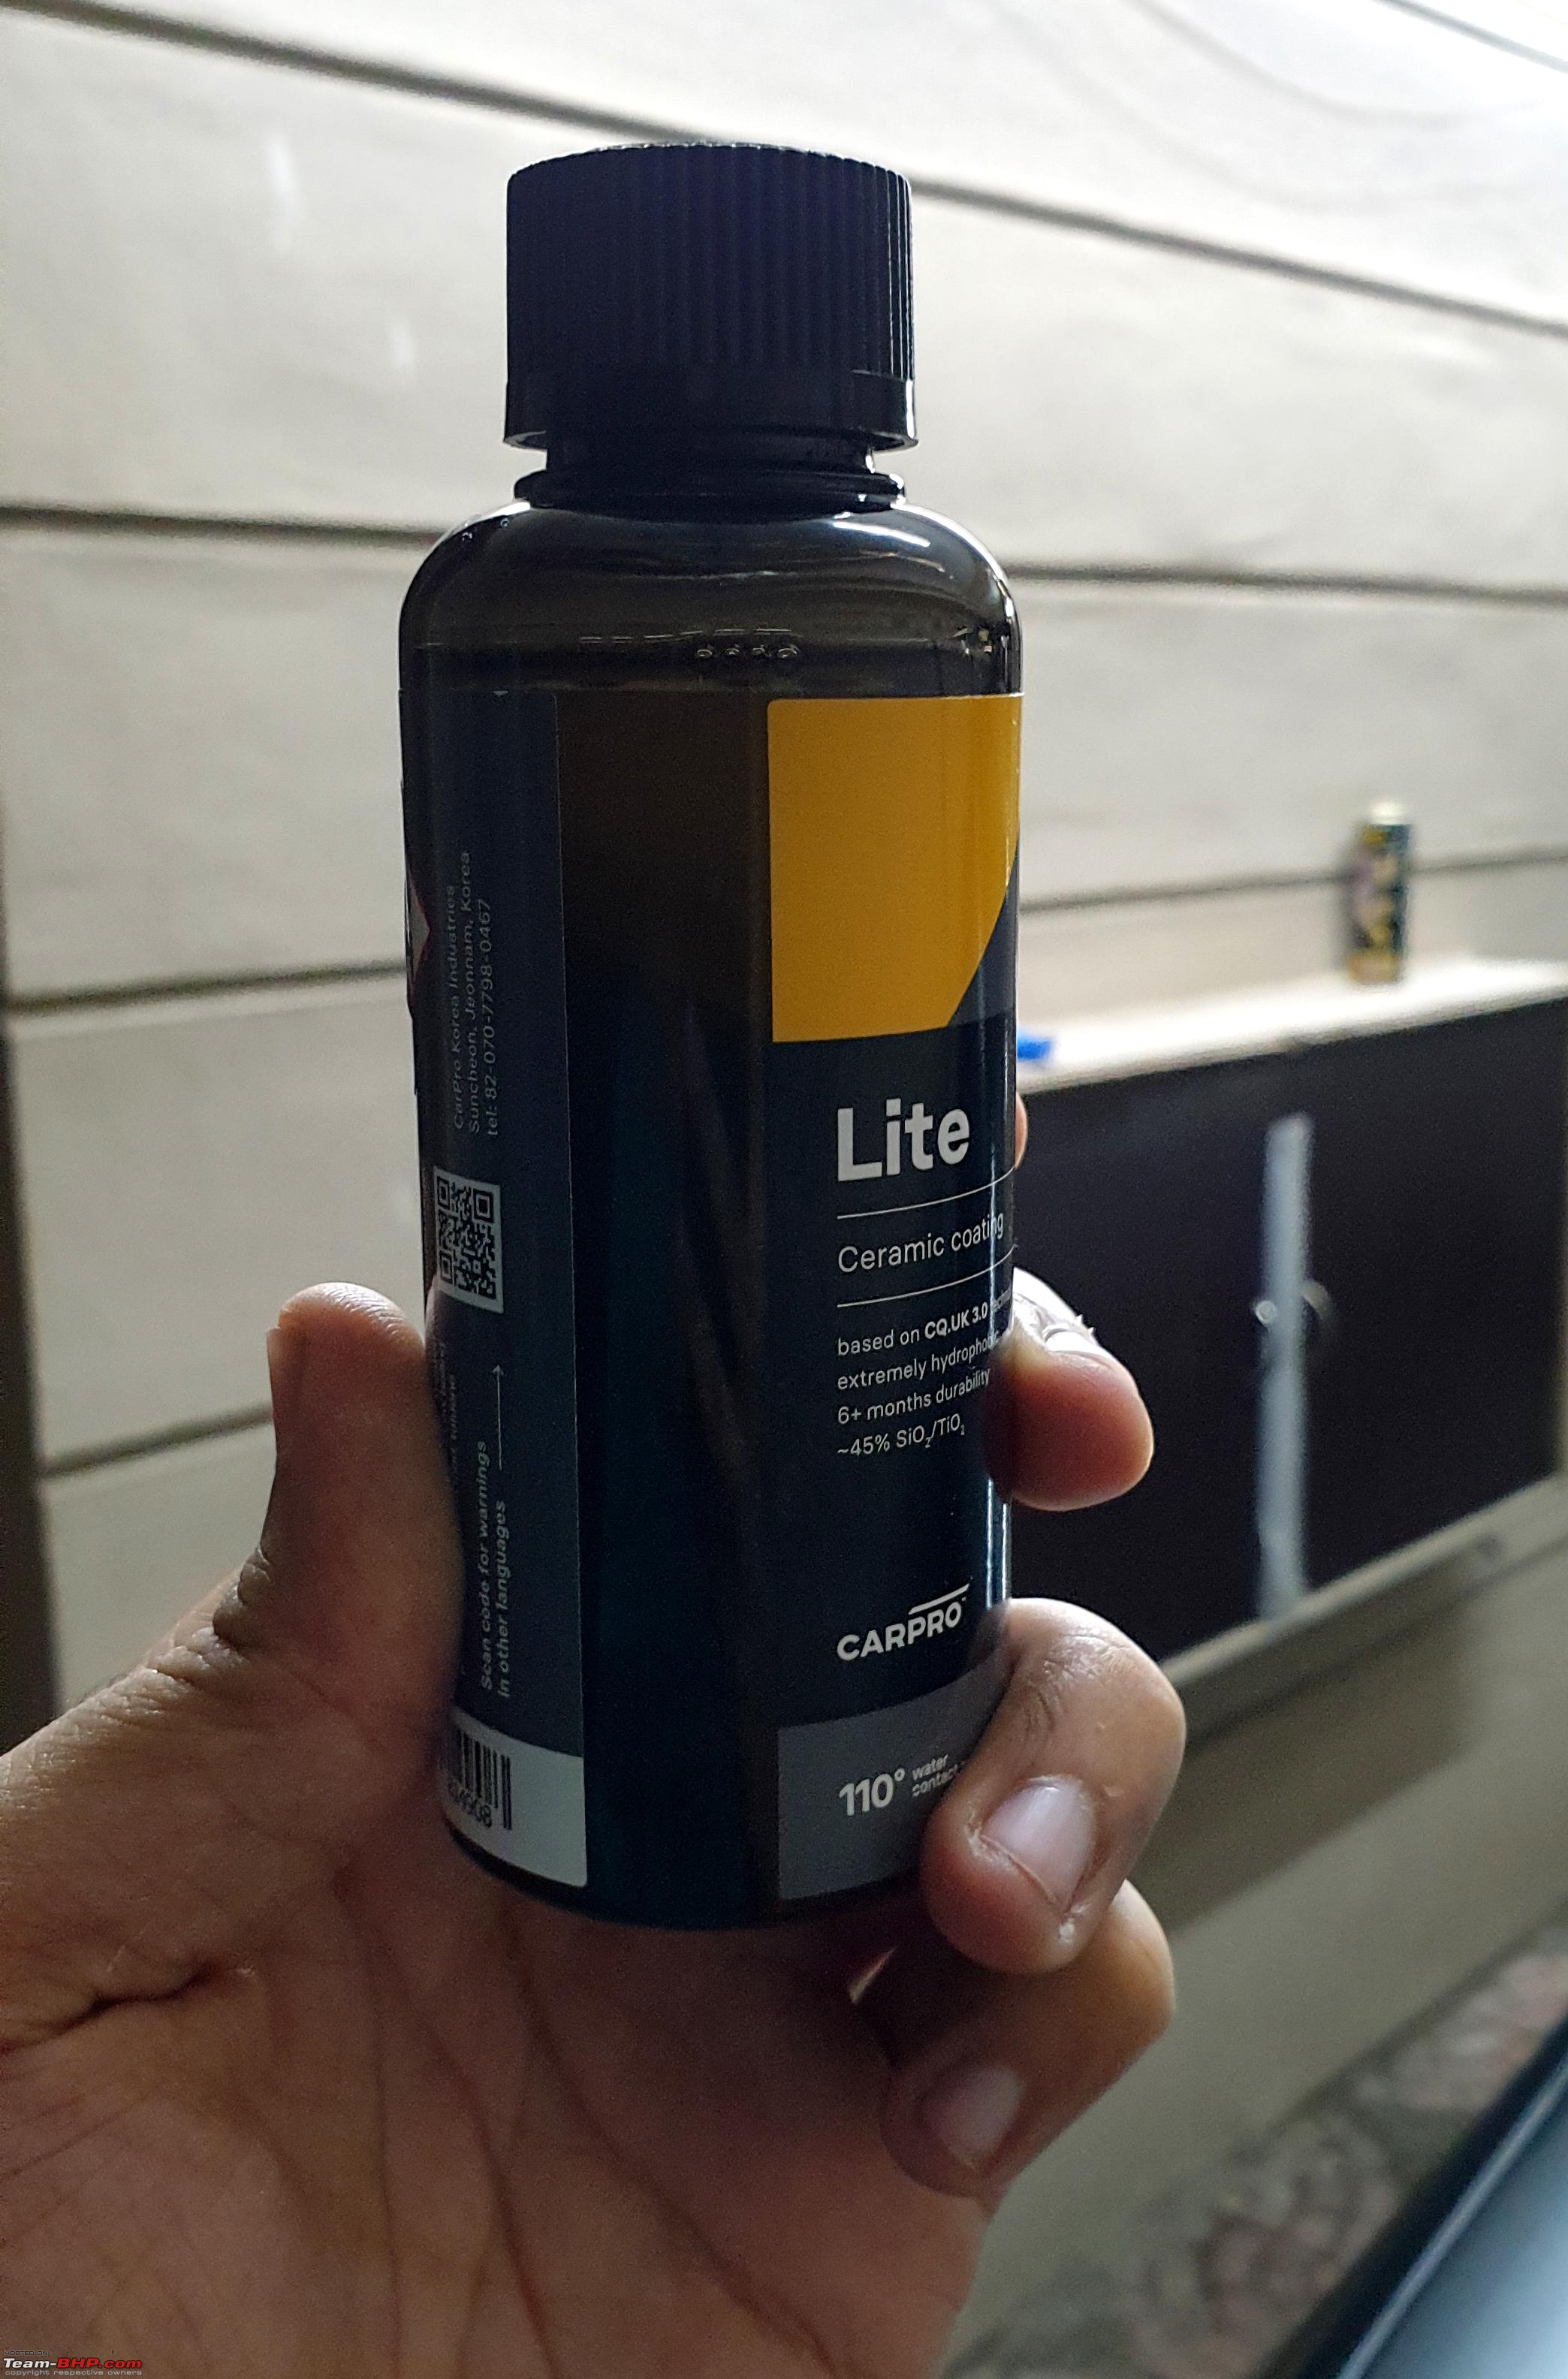 The strong solvent smell from the CQ Lite bottle reminded me instantly of this whitener. No, I did not use this whitener for purposes other than what it is intended to.   I applied a second coat after 2 hours and it went on well. The headlights and tail-lamps were covered as well. After the car body was done, I took a small piece of cut microfiber and applied the coating to the chrome lining and plastic bits in front of the car. To my surprise, the coating literally made the black plastic in front of the car look like brand new. It looked “restored”. After this was over, I sprayed the left side wheels with CarPro Eraser and applied a coating with the small cut piece of microfiber. I didn’t spend much time on the wheels and just coated them rather quickly and yet they look fabulous. I was totally done for the night at 2 A.M and so rested. The next morning, I applied the coating to the door jambs and the right side wheels, after wiping with CarPro Eraser, again using the small cut pieces of the microfiber. The level of product in the bottle after 2 complete coats on the cars paint and windows & 1 coat on door jambs and wheels.  I did not take pictures of the car the night I coated it. I took a video on my phone, from which I later extracted these images. Because of low light, there was quite some noise in the video and since I extracted the images from the video, they are not very clear. So please excuse me for the noise and lack of clarity in the images. All these are after the first layer of coating. These pictures were minimally edited / mostly untouched to give viewers a fair image of how the car looks. 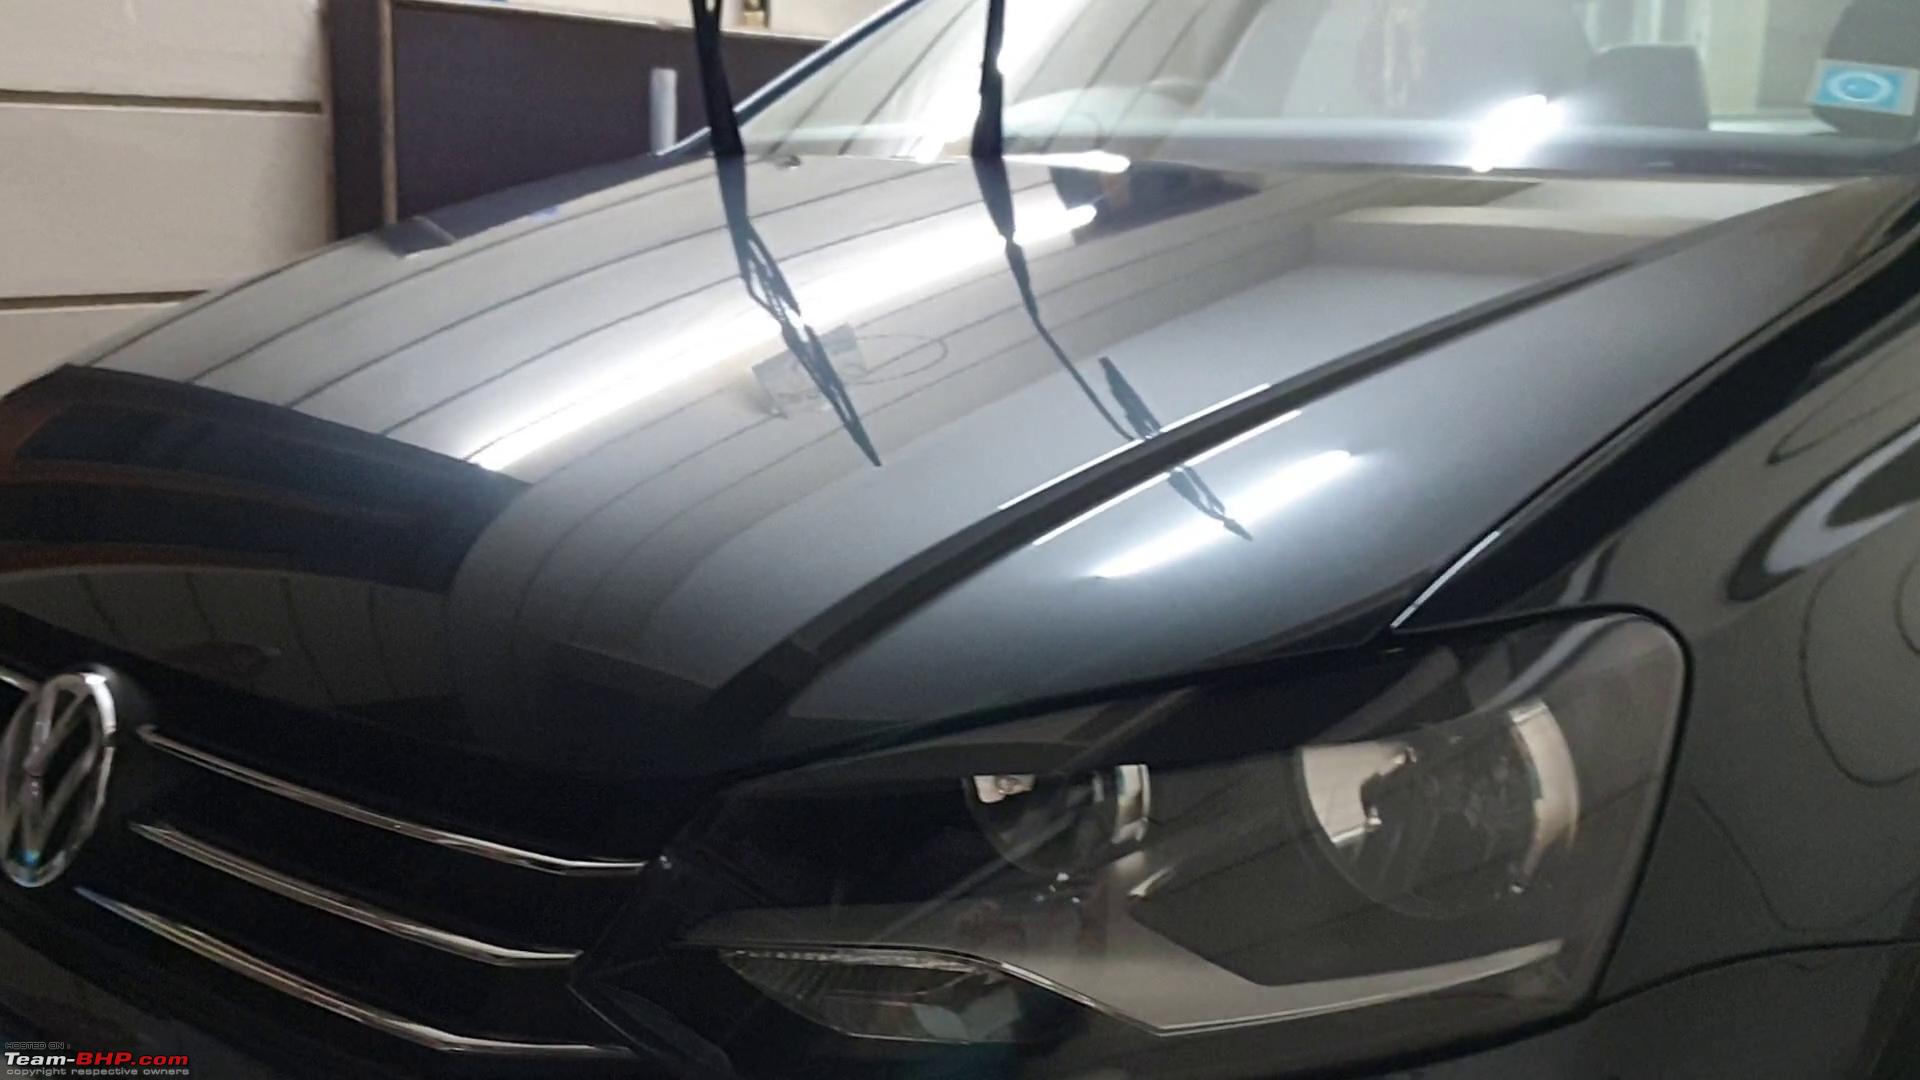  I left the trunk open for practical reasons. 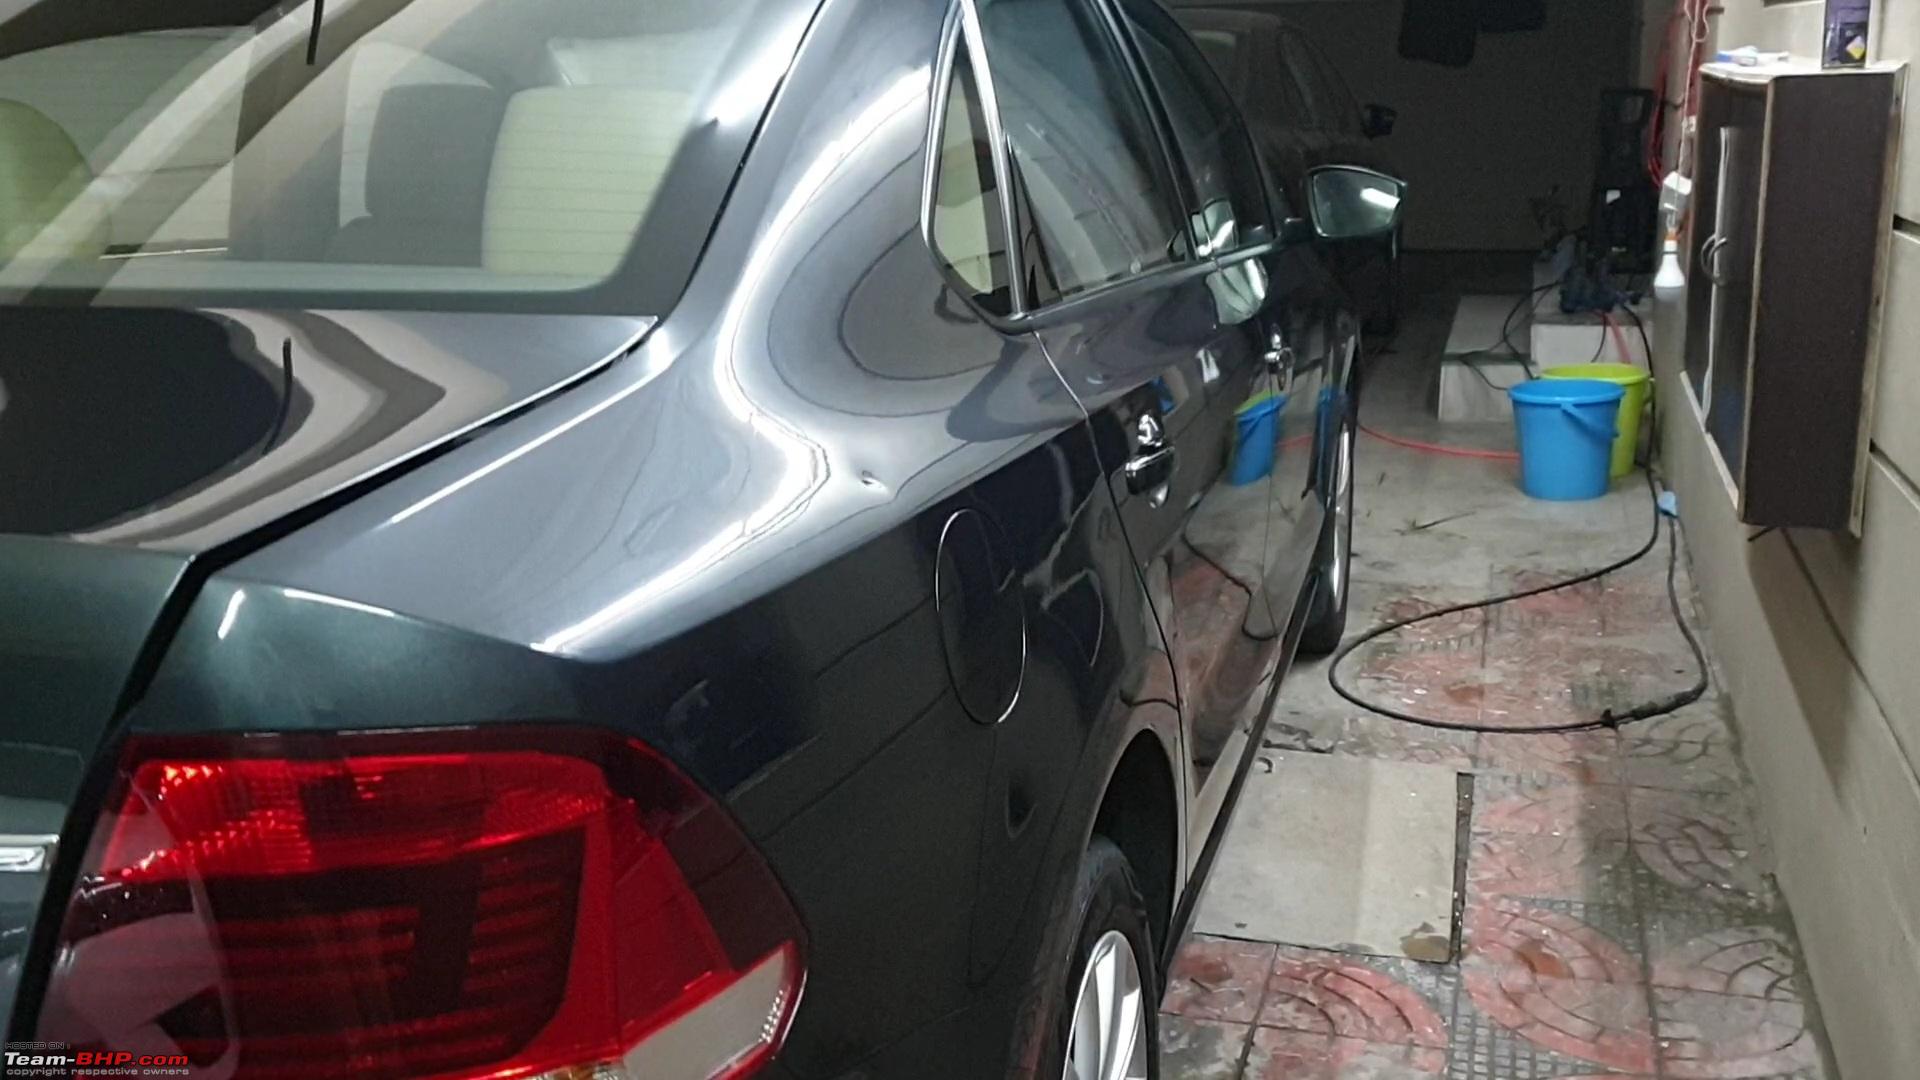 Reflection of water and floor on the bumper   This pic came out really blurry as I was moving quite fast in the video at that time. 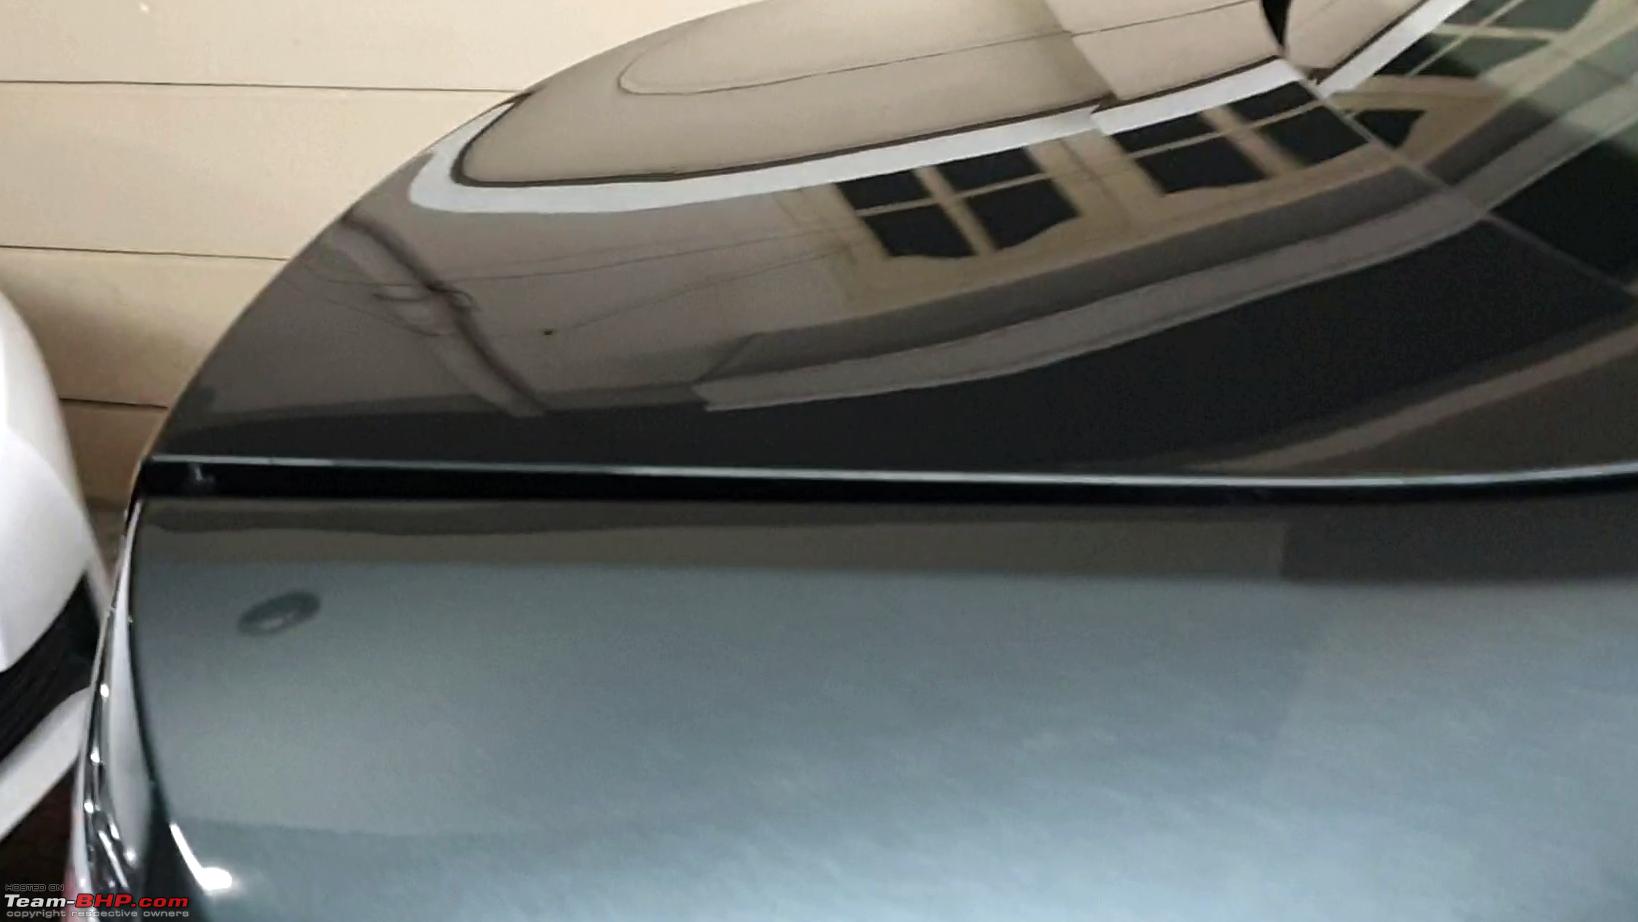 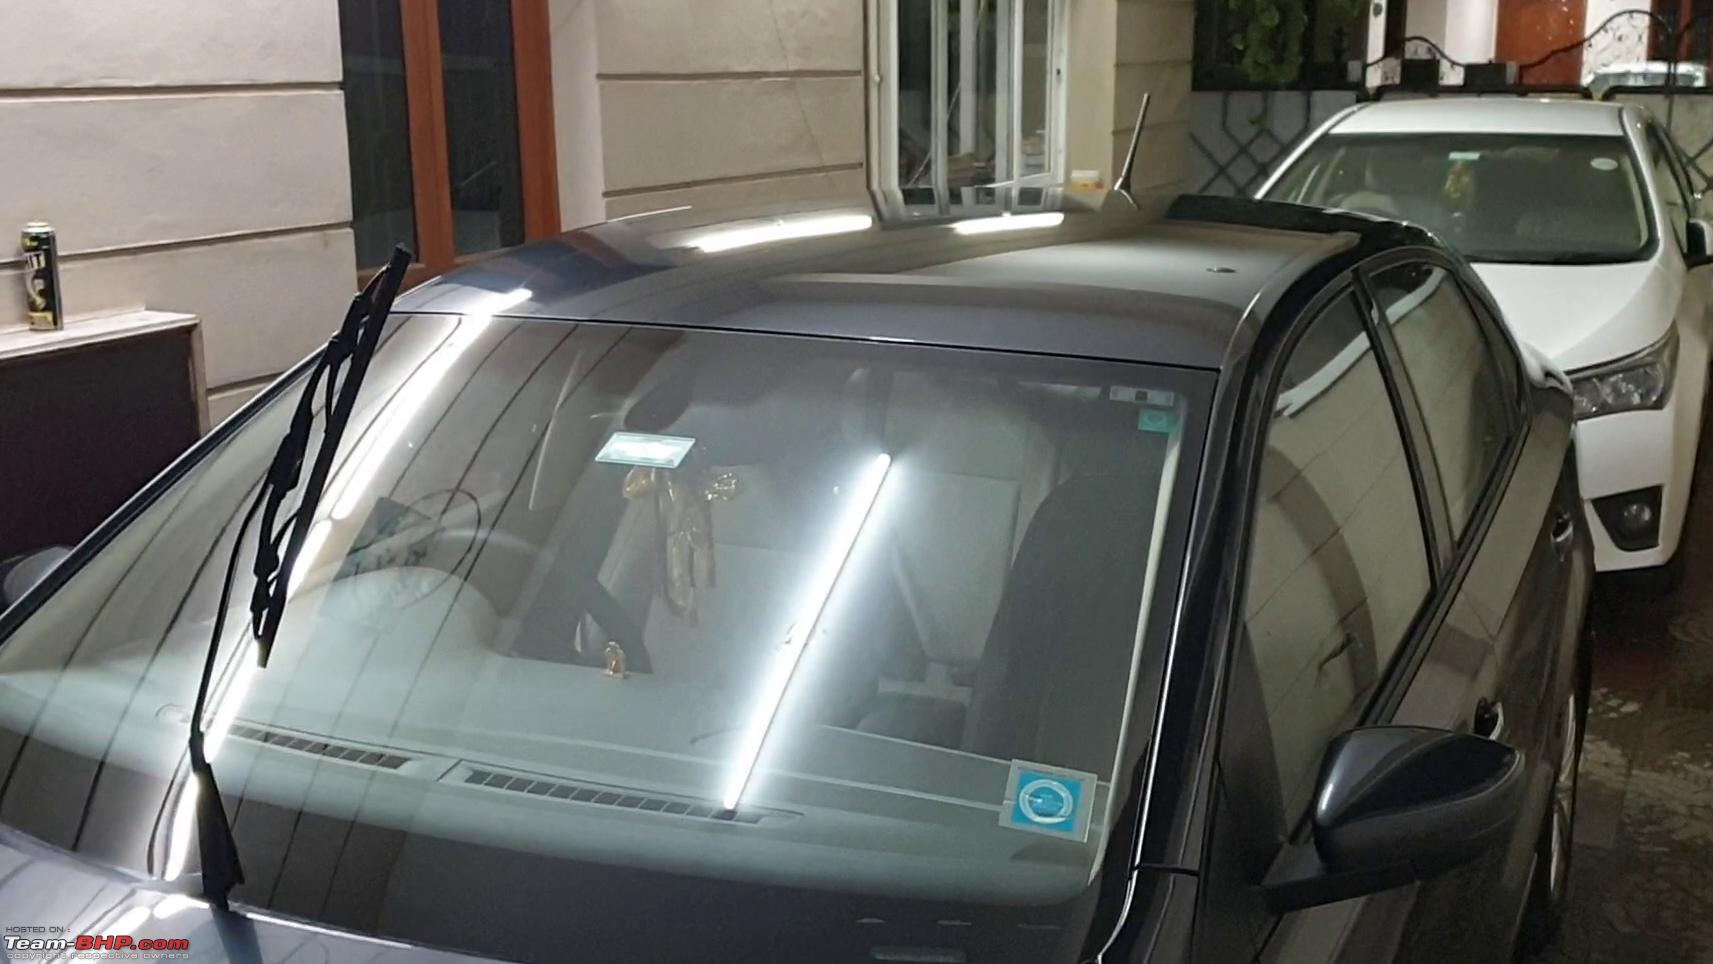 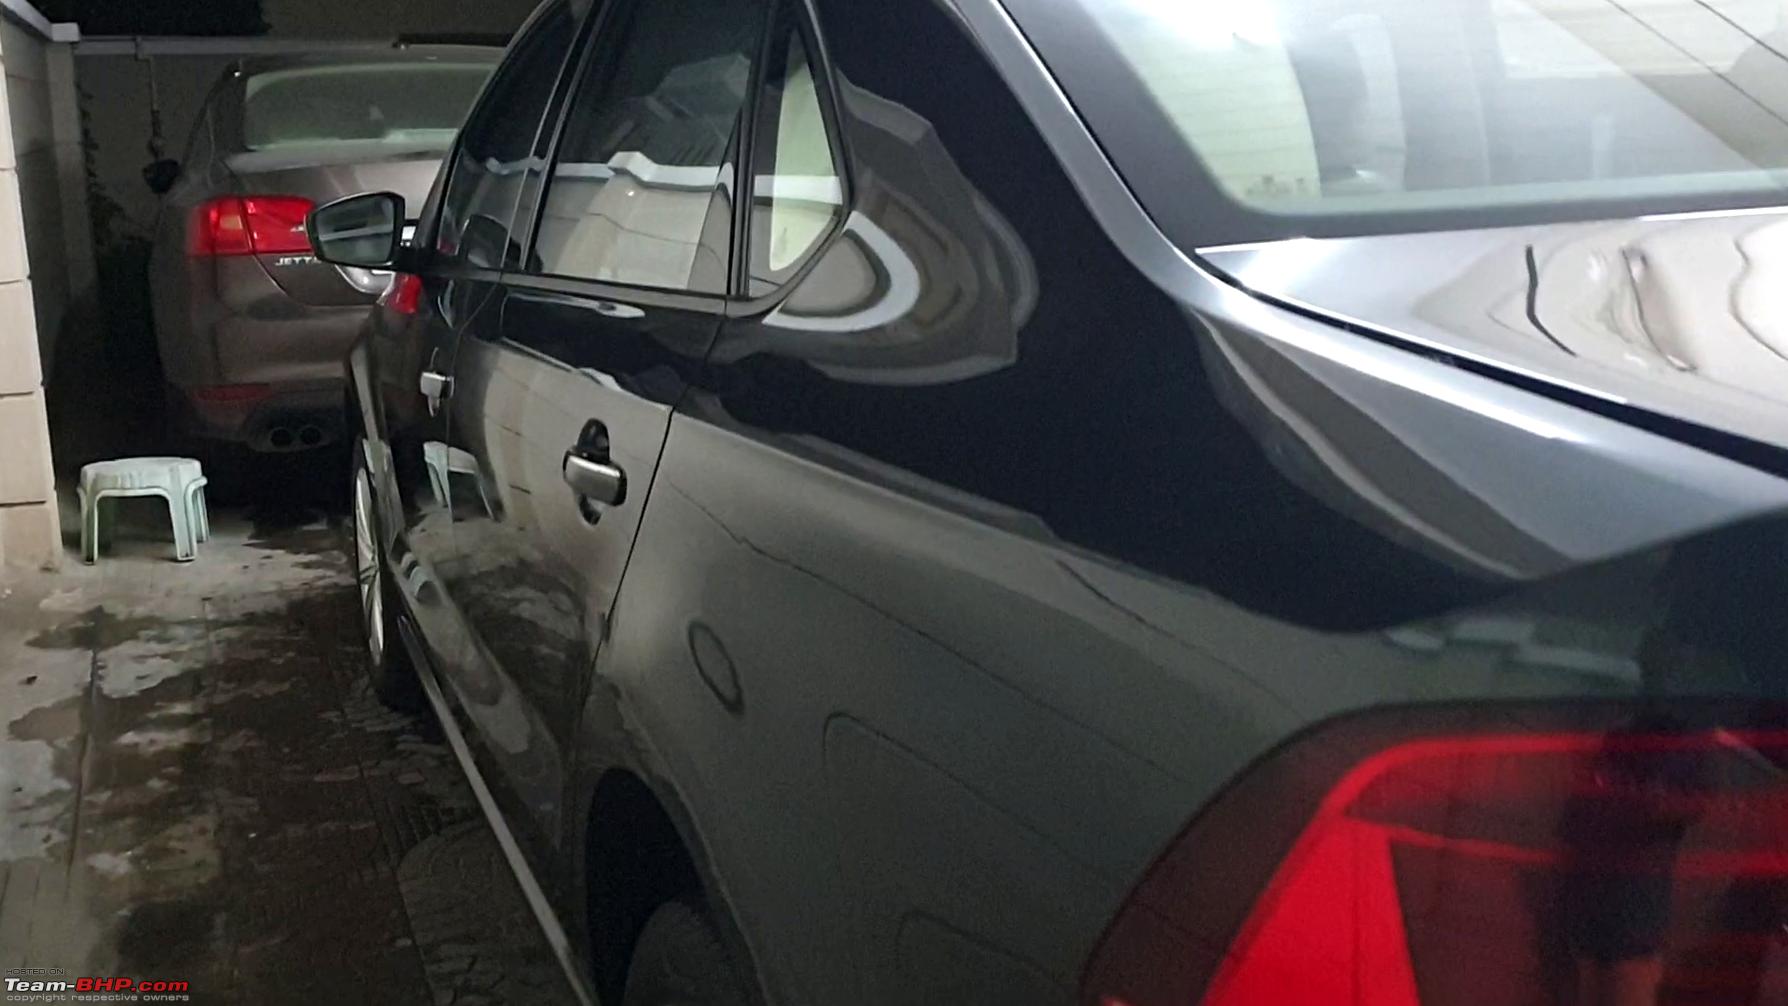 Pic of tire coated with Perl and wheel coated by CQ Lite, the next morning. 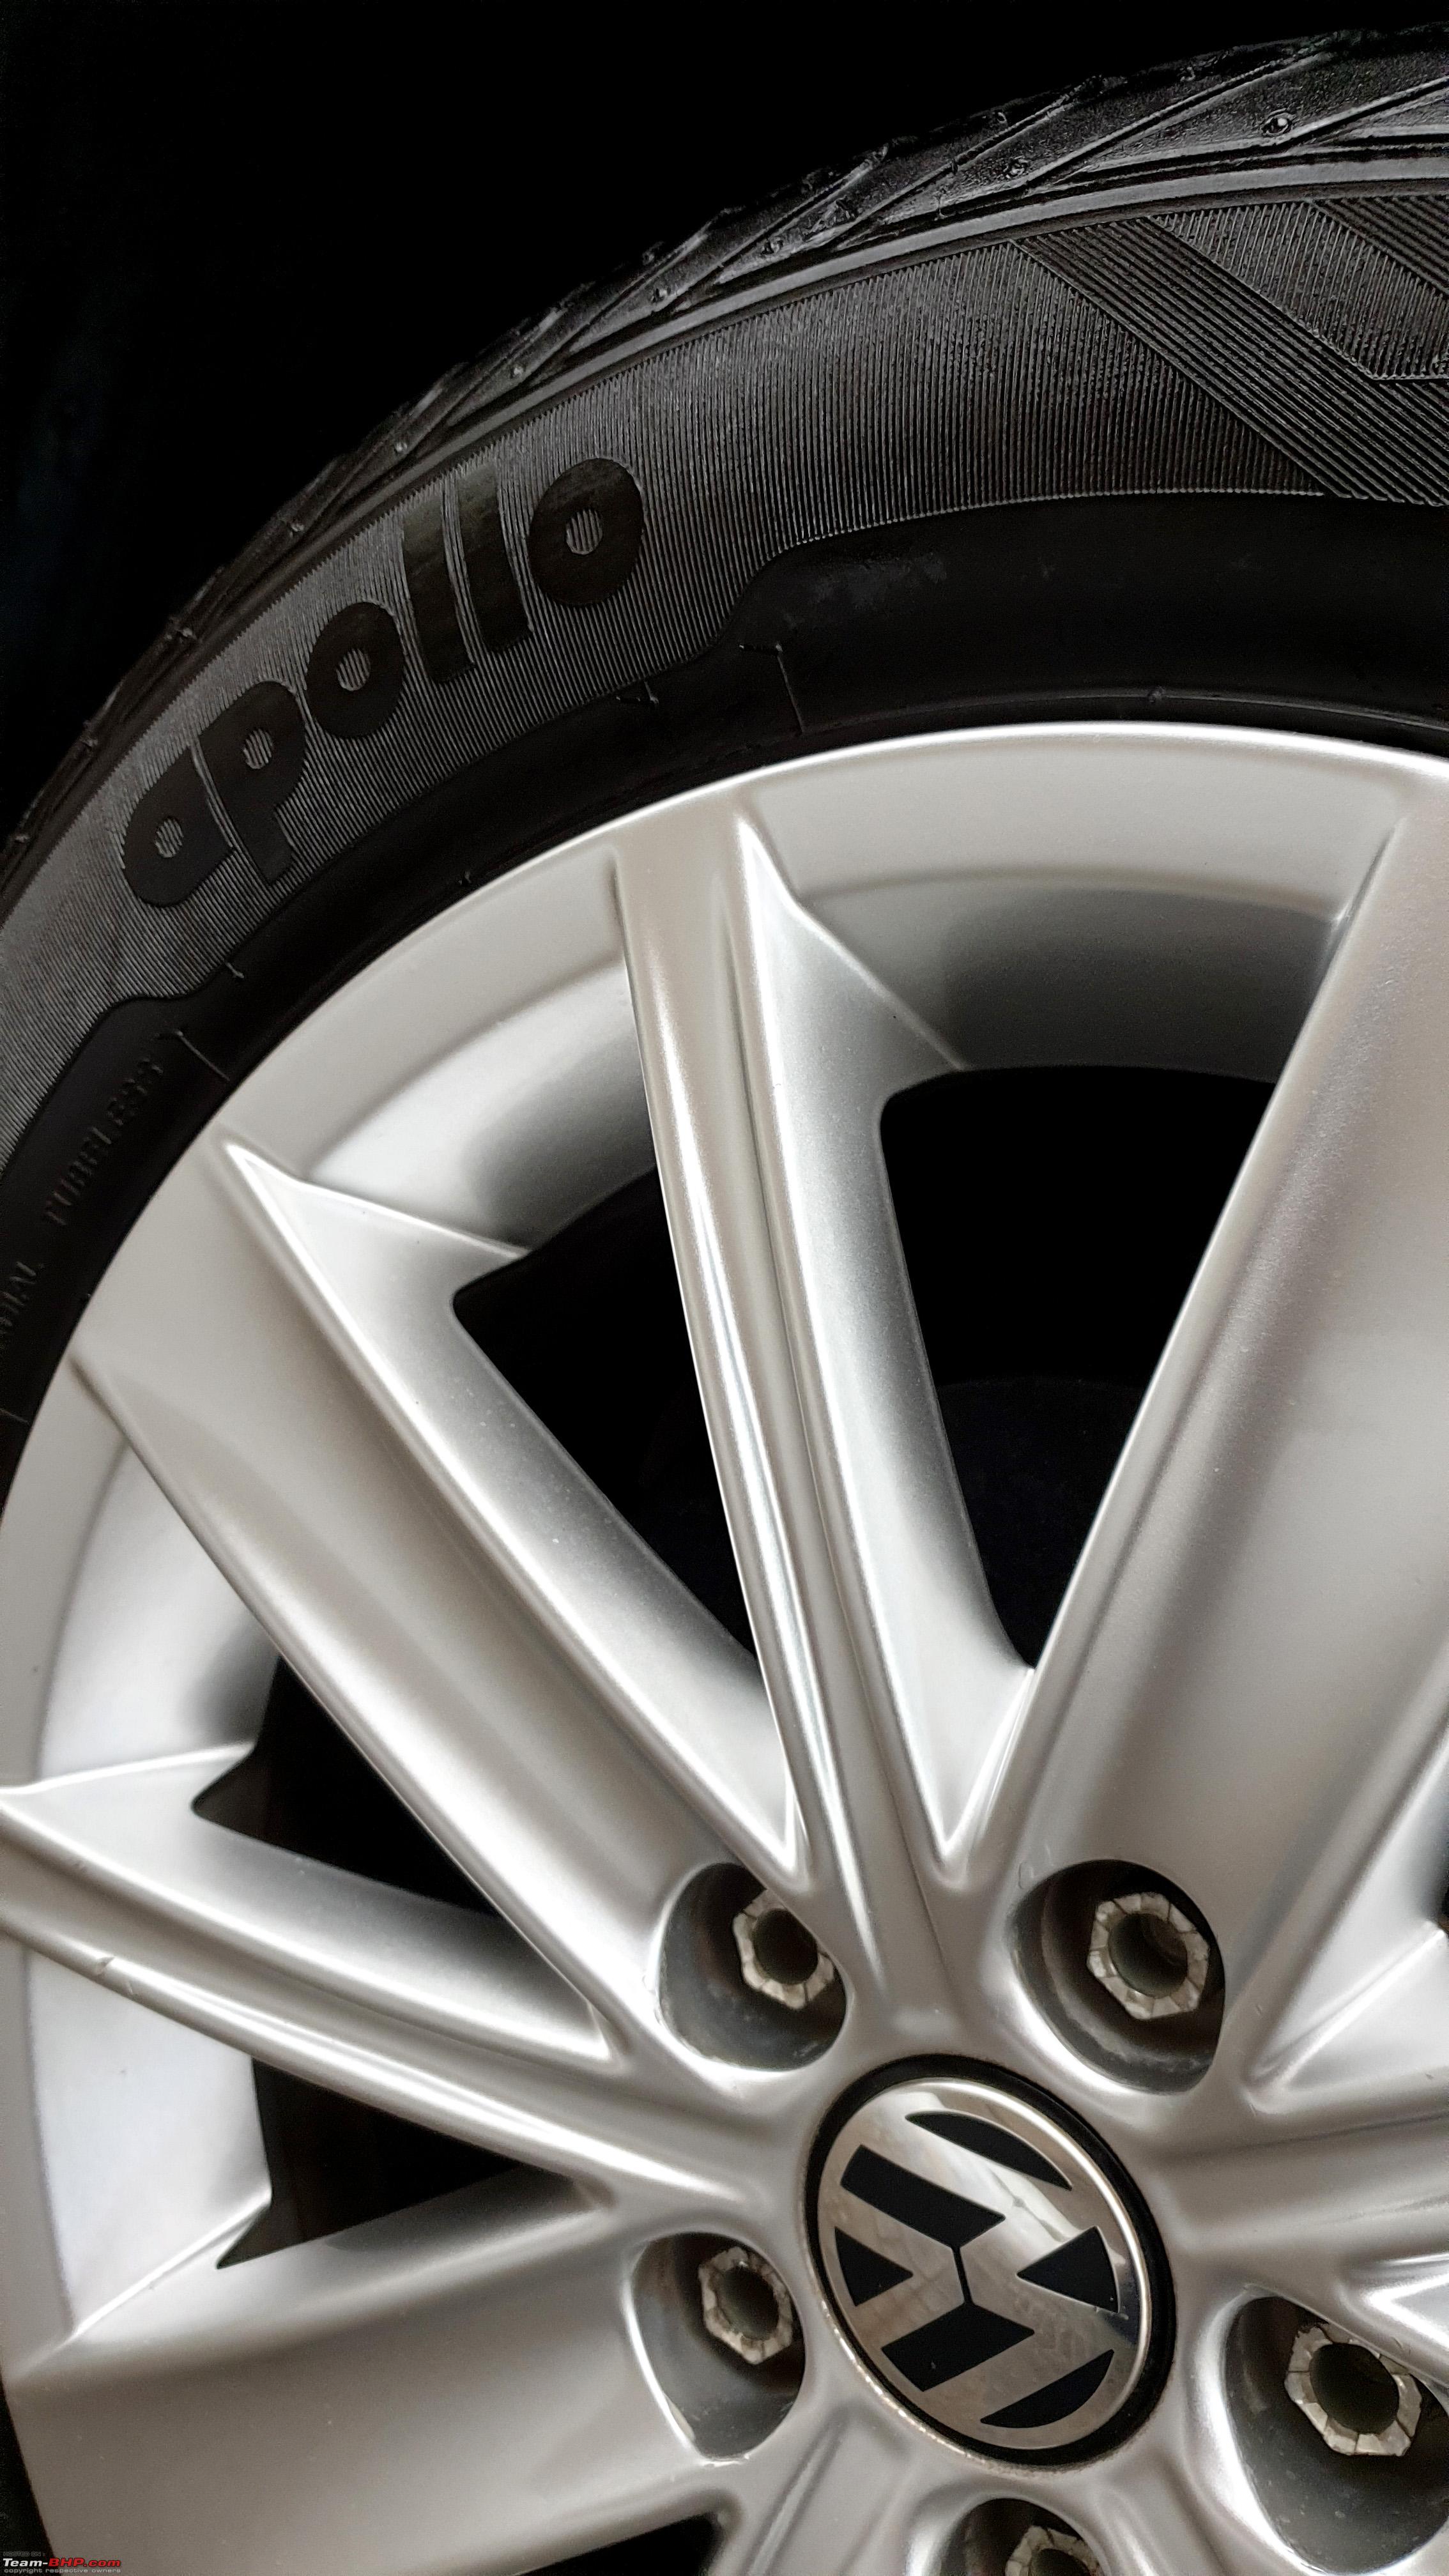 The evening of second day, it started to rain reasonably heavily. So, I then went and applied a super thin layer of Gyeon Cure which is a very thin sacrificial layer on top of coatings to prevent water spotting before the coating cured. Gyeon Cure is inferior to the original coating w.r.t. durability and protection. I had no intention of buying Cure at such a high price (Rs.2100 for 250 ml), but the risk of rains forced me to do so. And it has been helpful. It is expensive, but really needed a very little quantity to apply to the entire car. High Spots : In areas where the excess coating is not buffed off properly, the coating dries and solidifies, forming a high spot. I had one such spot on my rear glass, near the brake light. It was whitish and dried up. I tried Eraser, also tried re-applying the coating and buffing off, with no result. This rather made me happy making me believe that the product is tough. It is an area that is not very visible, so I’m not worried much about it. To prevent such spots on the paintwork, one must have keen observation, patience and good lighting while applying the coating. Notice the high spot in the picture.  Protection : I have not yet washed the vehicle after applying the coating, so I can’t really comment on the water behavior. But as far as I noticed, the water just slides off instantly if poured in a streamline flow and beads quite well, when sprayed on. I went for a drive and there was one tiny dried bird bomb (poop) on the bonnet which I noticed when I parked at a supermarket. Well, it just didn’t stick to the bonnet and simply detached as soon as it was fiddled with, which is a good sign.  Last edited by saisailendra : 26th June 2020 at 18:13. |
|
| (60)
Thanks
|
| The following 60 BHPians Thank saisailendra for this useful post: | 2himanshu, A.M., anandhsub, Batfreak, car_guy1998, CrAzY dRiVeR, deepfreak15, digitalnirvana, Divya Sharan, Dr.AD, DrANTO, Ertigiat, Gannu_1, Grr7, GTO, guyfrmblr, HsekarK, InControl, Invariance, JHS, keroo1099, kutts, Latheesh, lemedico, Livnletcarsliv, manas_270, Mistakenguy, Mustang Sammy, Myth_sx, nalinsaxena23, neerajdan, nikhn, PapaKiloSierra9, PM - B, R2D2, rajesh1868, RavenAvi, Ravi Parwan, Reinhard, Researcher, robincsamuel, samaspire, samay300, Samfromindia, sanyog26, saur95, Simhi, Slick, Sreejith V, Tassem, Thermodynamics, The_Outsider!, TOINGPOING, TROOPER, v1p3r, vaasu, vaish9925, Venkygupta, viXit, warrioraks |
|
26th June 2020, 16:21
| #4 |
| BHPian | re: My experience with Car Care products; How I Ceramic-Coated my Vento at home Next things I plan to try : ONR Wash and Shine : Optimum No Rinse is a favorite of many enthusiasts and detailers. It is a tad cheaper then ECH2O. Going by its reputation and reviews, I decided to give it a try. Would not do a rinse-less or water-less wash as I personally don’t like to do so. But will use it on glass or after wash. It was delivered today and by the looks if it, it looks less viscous than CarPro ECH2O. Will share more about this product after using it for a while. Just arrived - ONR Wash and Shine. 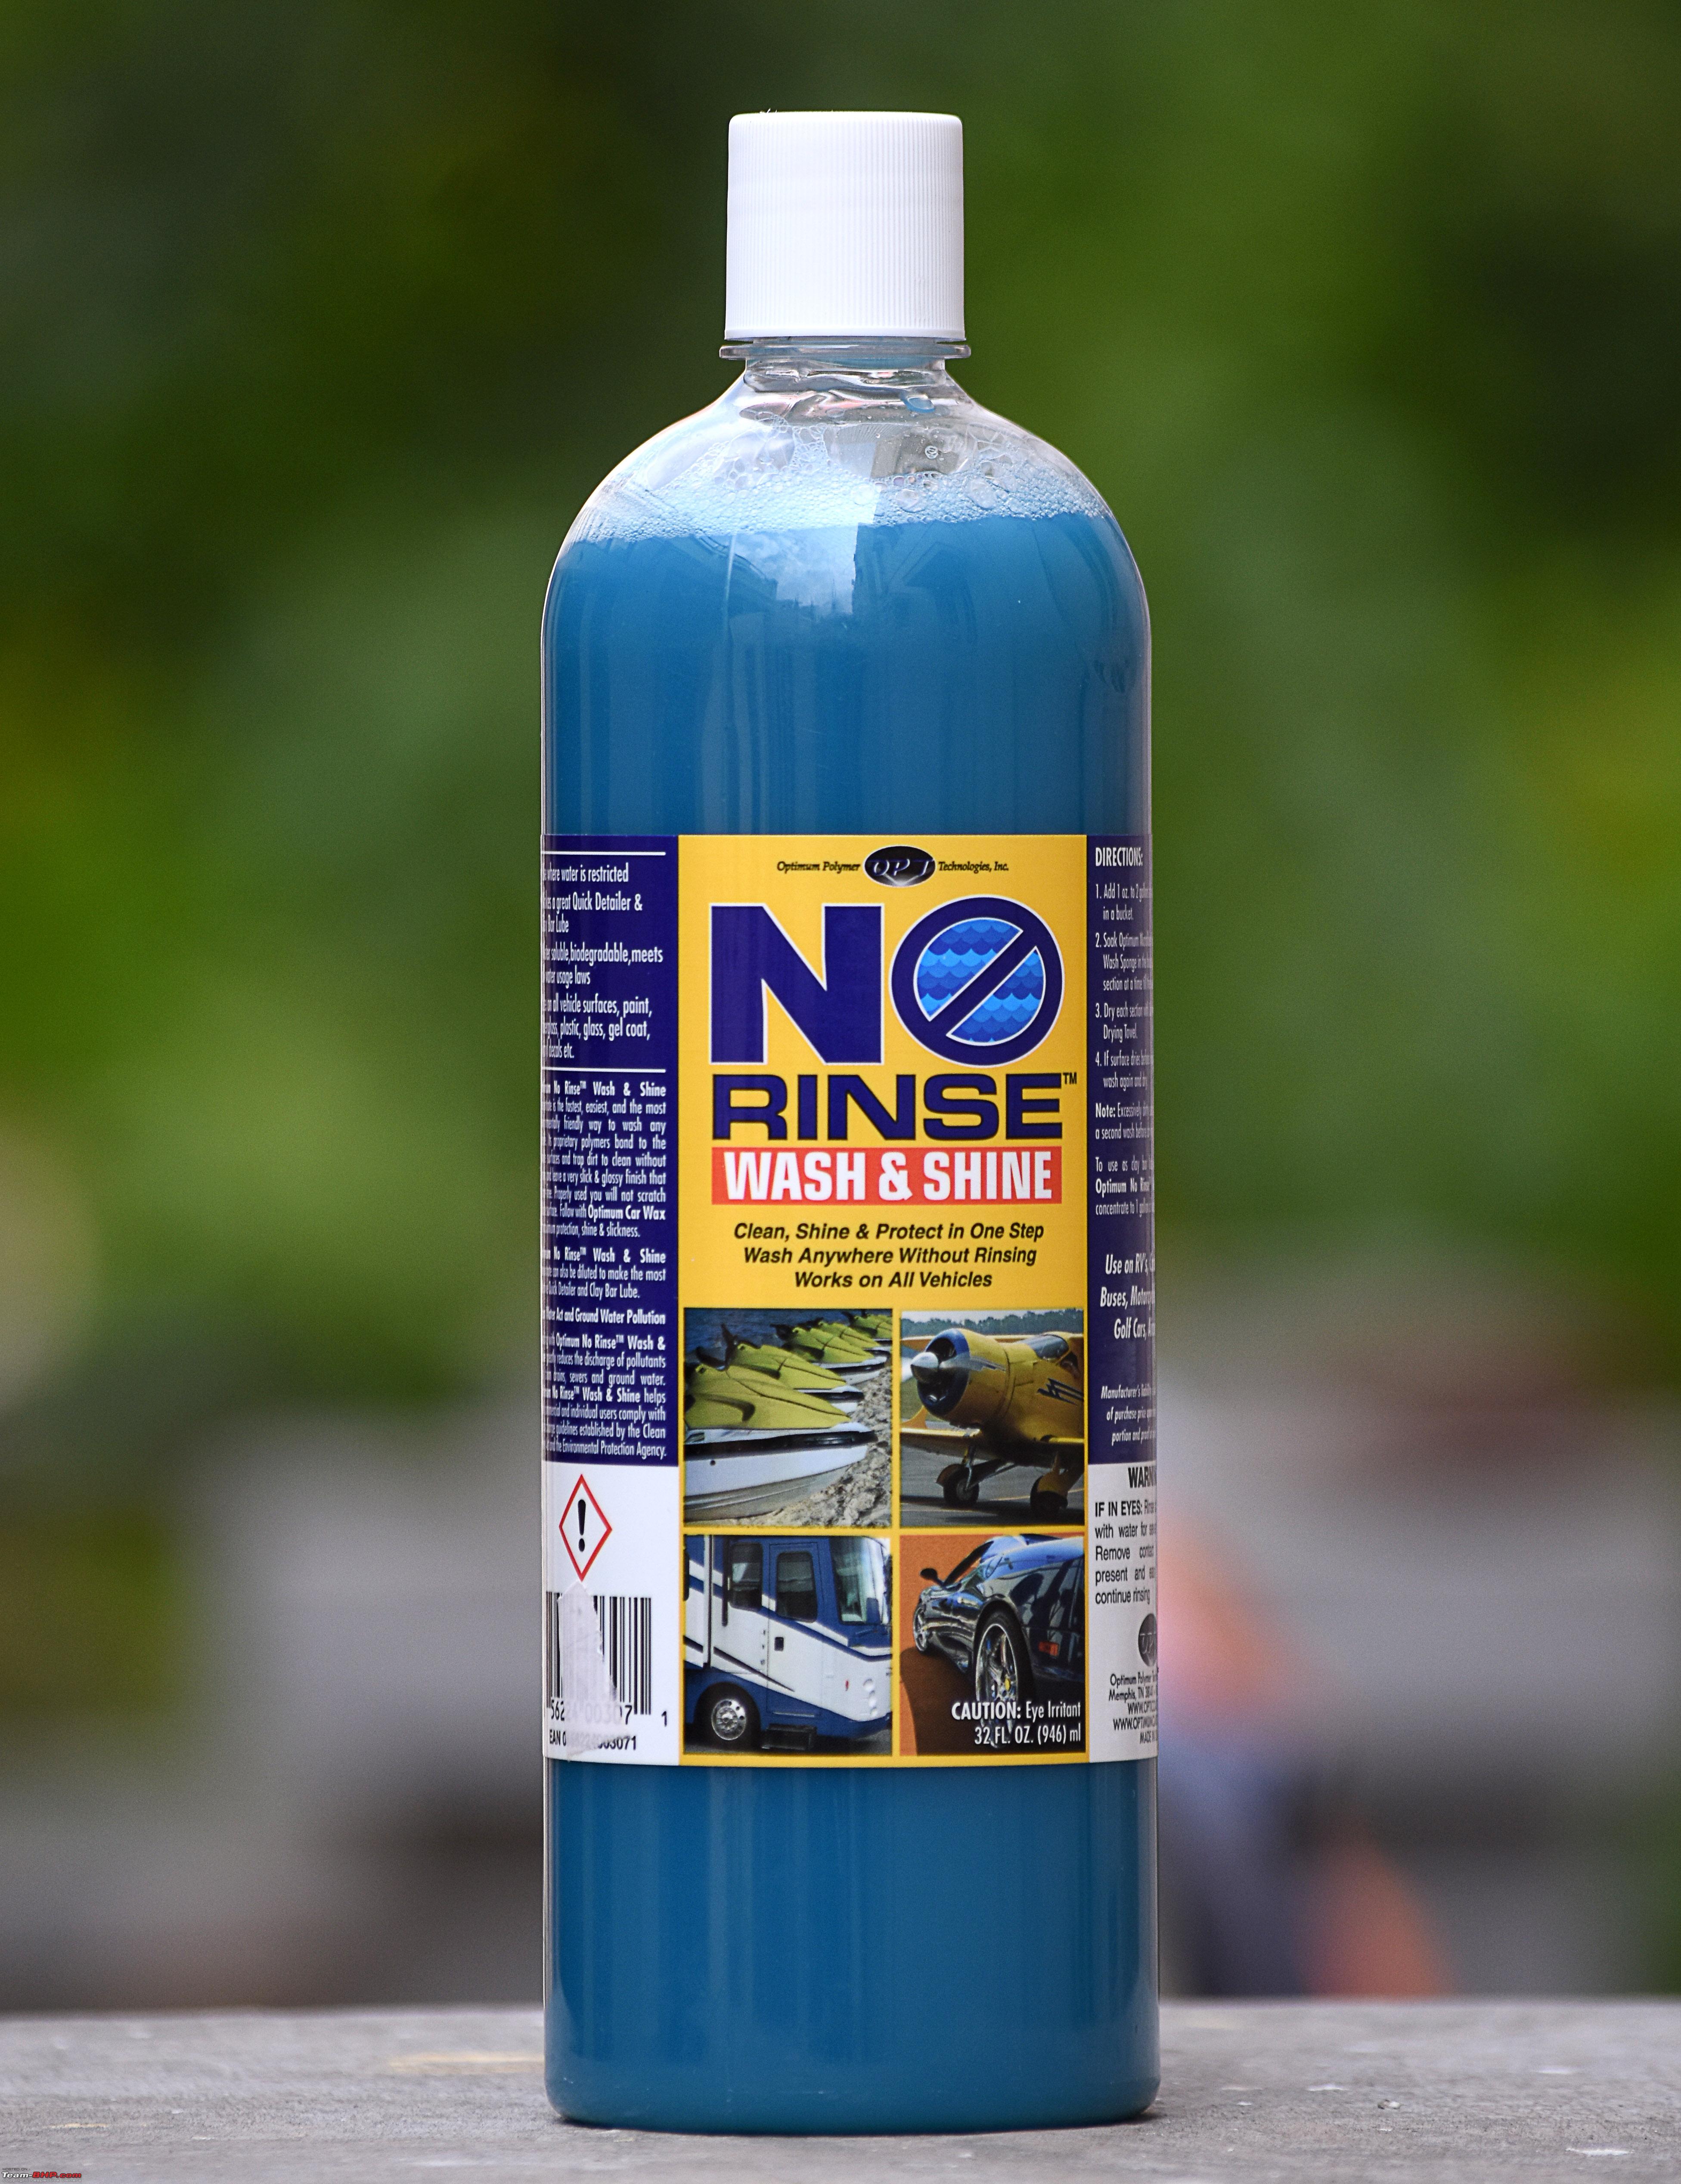 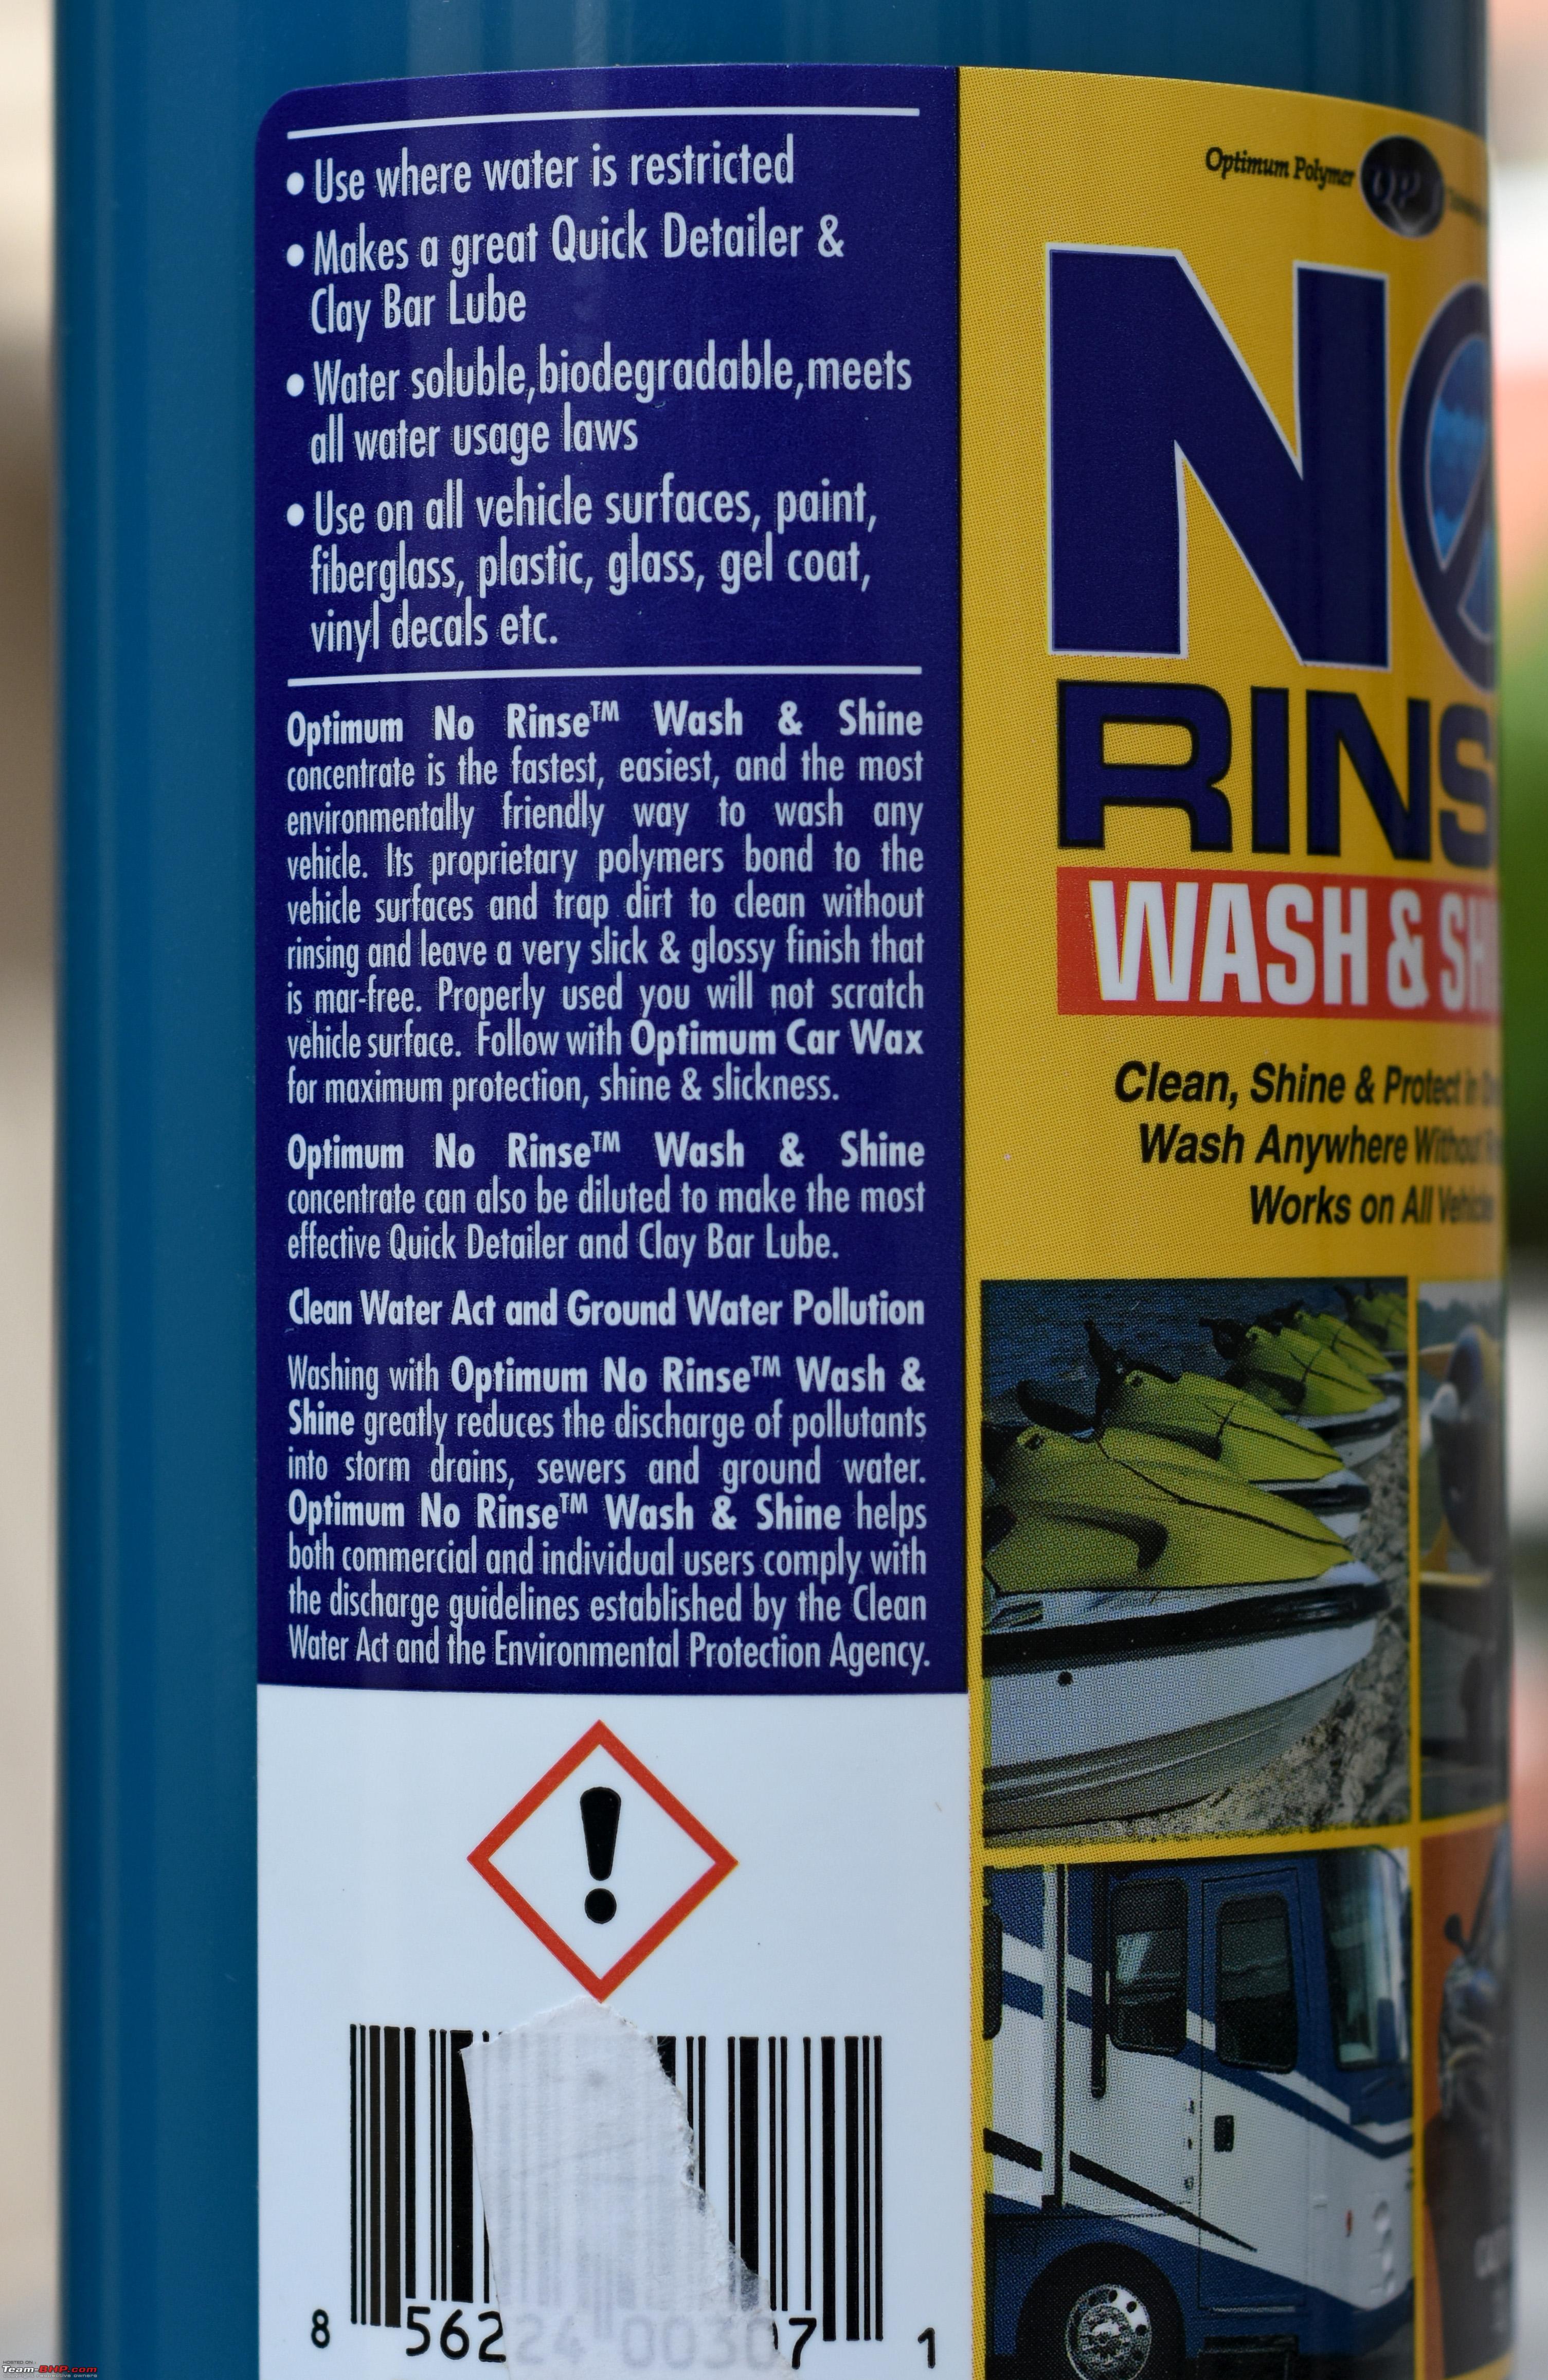  Pump Action Spray Bottles : These are the spray bottles of various capacities like 500 ml, 1 L, 1.5 L, 3 L, 8 L and so on, that are generally used to spray fertilizers or pesticides in the agricultural lands. The smaller ones are used in maintenance of gardens. They work by air pressure which is pumped by hand. They are made in India, so the import duties and all are absent, making them quite affordable. The nozzles are made of metal (Brass?) and so are quite durable. I plan to use these bottles to spray diluted solutions of ECH2O or ONR after washing the car. The main advantages I see with these are - They are pressurized without use of electricity. They don’t use motors, so no noise. They spray a fine mist of product, so are economical. They save the pain of pulling a spray gun trigger repeatedly. Shaving Cream Brush: The synthetic ones cost around Rs.55 and work well to dislodge the dust in the interiors. I will try using one to apply Perl to the tires. The bristles are very soft and won't hurt the interior surfaces if used to dislodge dry dust specks.  ECH2O + Gyeon Cure : This combination is talked about commonly over the internet. Except they talk about using CarPro ECH2O along with CarPro Reload. Reading online enlightened me that CarPro Reload and Gyeon Cure are same in all characteristics including the smell, application, consistency, color, etc. So, since I bought Cure and I don’t plan to use it alone, I decided to add it with ECH2O in my spray bottle. I added about 15 ̴ 20ml in my 500 ml bottle of 1:20 ̴ 25 concentration of ECH2O. It does give a reasonable shine. But I’ve used it only once and so should see how it works in the coming weeks. Other products that I have used : Motomax Protectant Spray : This I bought before trying out CarPro products. It is a good product, comes in small bottles and has a light fragrance to it. It can be used on wheels, interior plastics, exterior plastics. It works okay, not as effective or durable as Perl. But does its job. 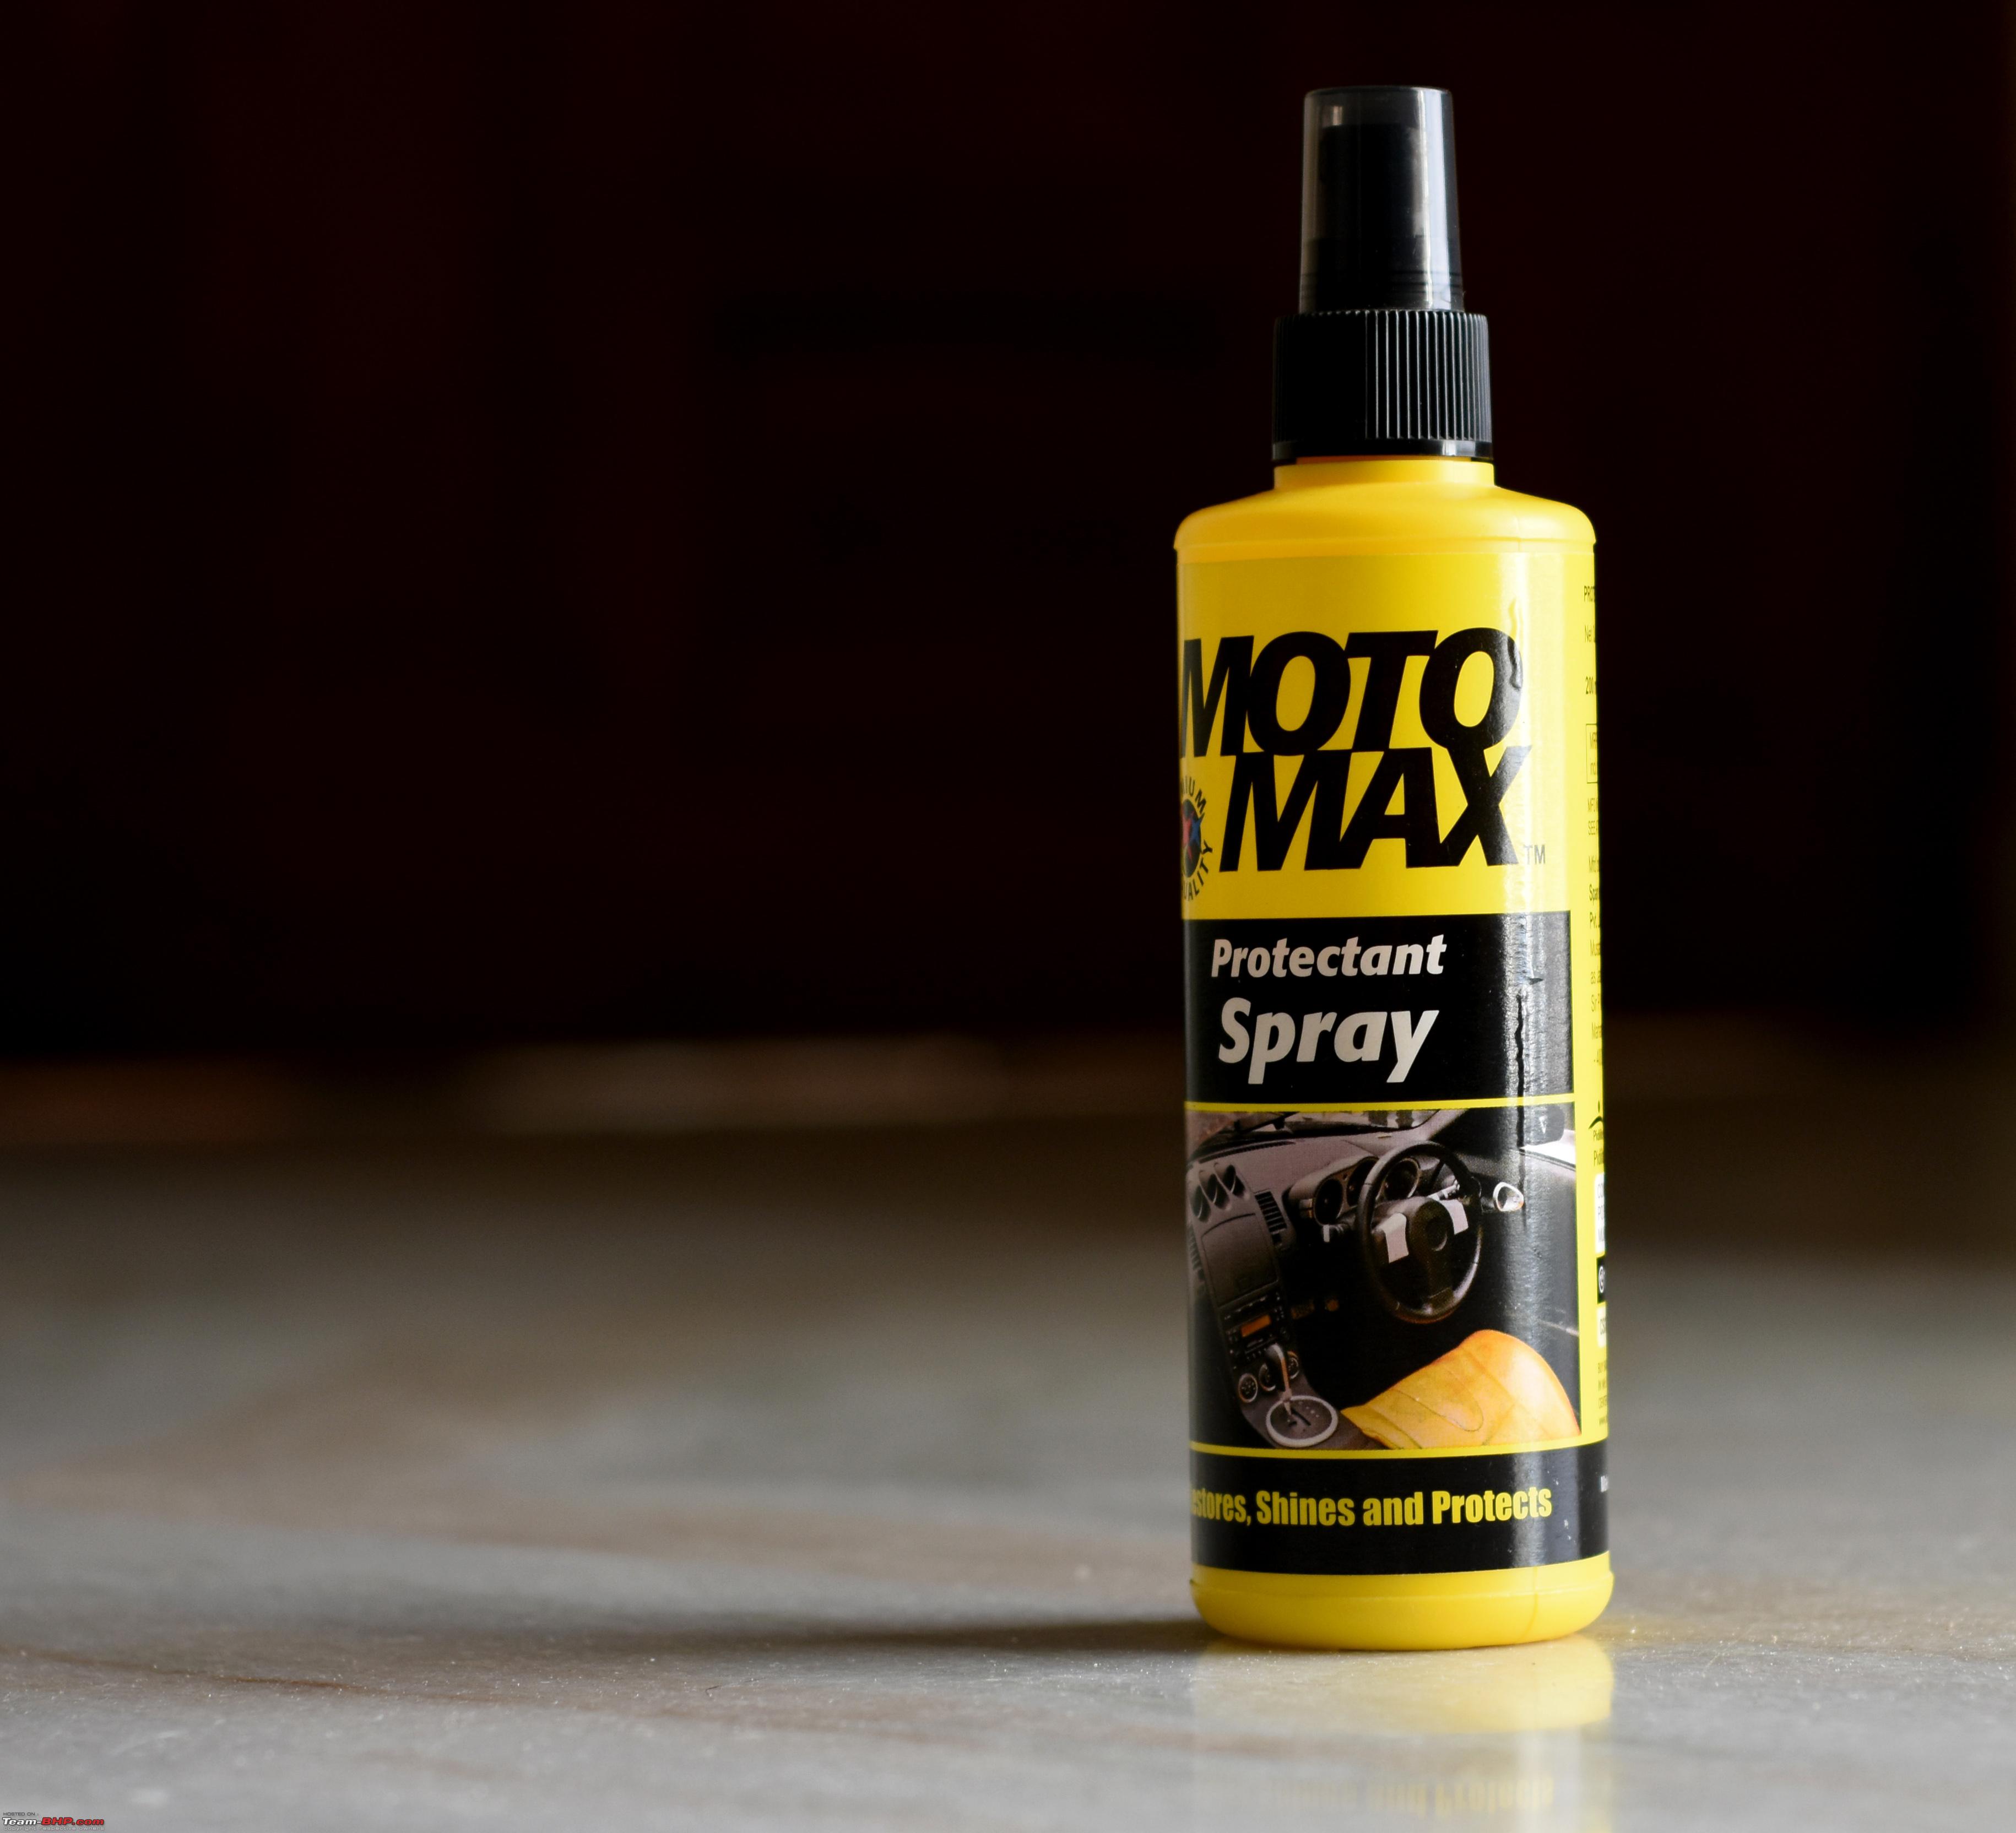 3M Tire Dresser : Bought this on Amazon, before I used Perl. I almost never touched it again after trying Perl. It’s spray head did not work properly since Day1, so this factor too limited my usage of this product. It does make the tire darker and gives some shine, but not to my liking. 3M Scotchbrite Sponge Wipes : These are the little square cellulose wipes sold by 3M scotch brite. They absorb huge amounts of water for their size. I used to use these 2-3 years ago to remove majority of water from the surface of the car. This would make drying the car an easy process. I used these on the old cars of the house, which we sold off now. If one doesn’t bother much about slight scratches or swirls, don’t want to spend too much on microfibers and want a tool to dry the car quickly, then these are the ones to use. These come in packs of 3 or 5. Scotchbrite works better than other brands. I tried other brands too. 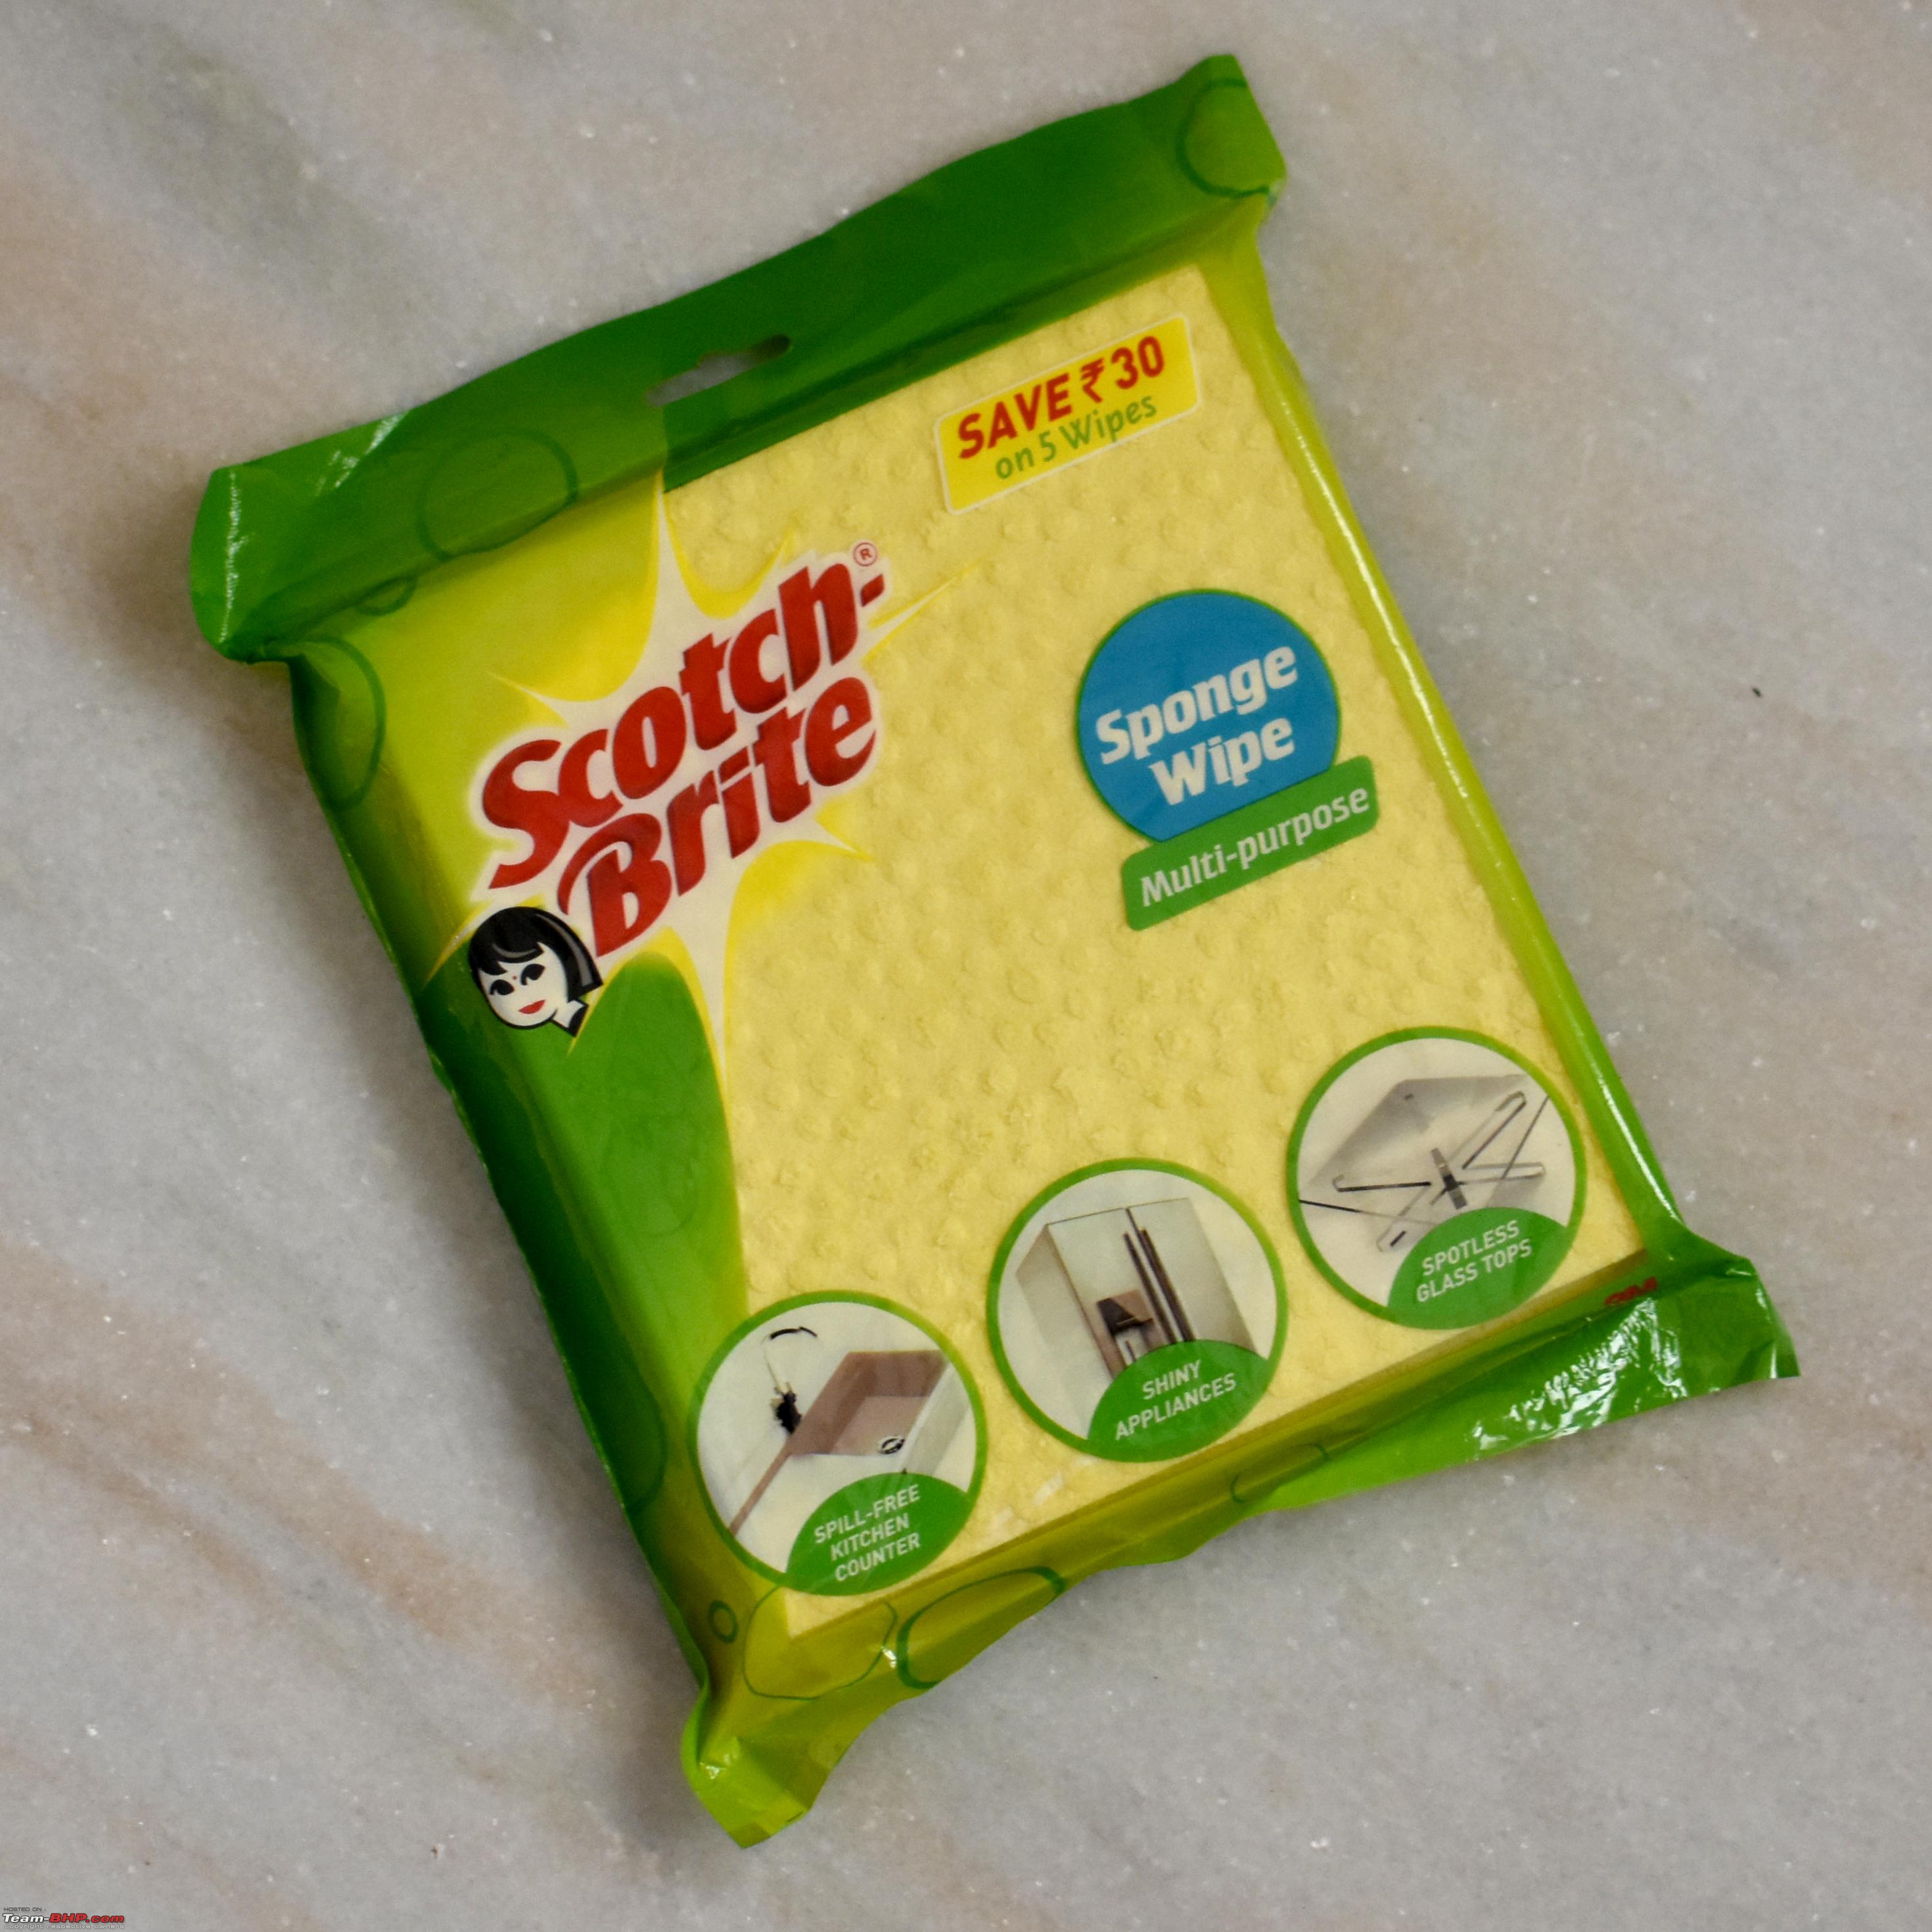 Microfiber Wash Mitts : I bought one or two of these generic wash mitts, but didn’t use them a lot. I shifted to using the AmazonBasics microfiber cloth, folded once or twice for rinsing the car. It felt more convenient to me that way and it is subjective. An Amazonbasics microfiber, folded twice, perfectly fits my hand, becomes thick and soft because of 4 layers. Perfect substitute of microfiber wash mitts. I use it folded in half on the roof of the car. 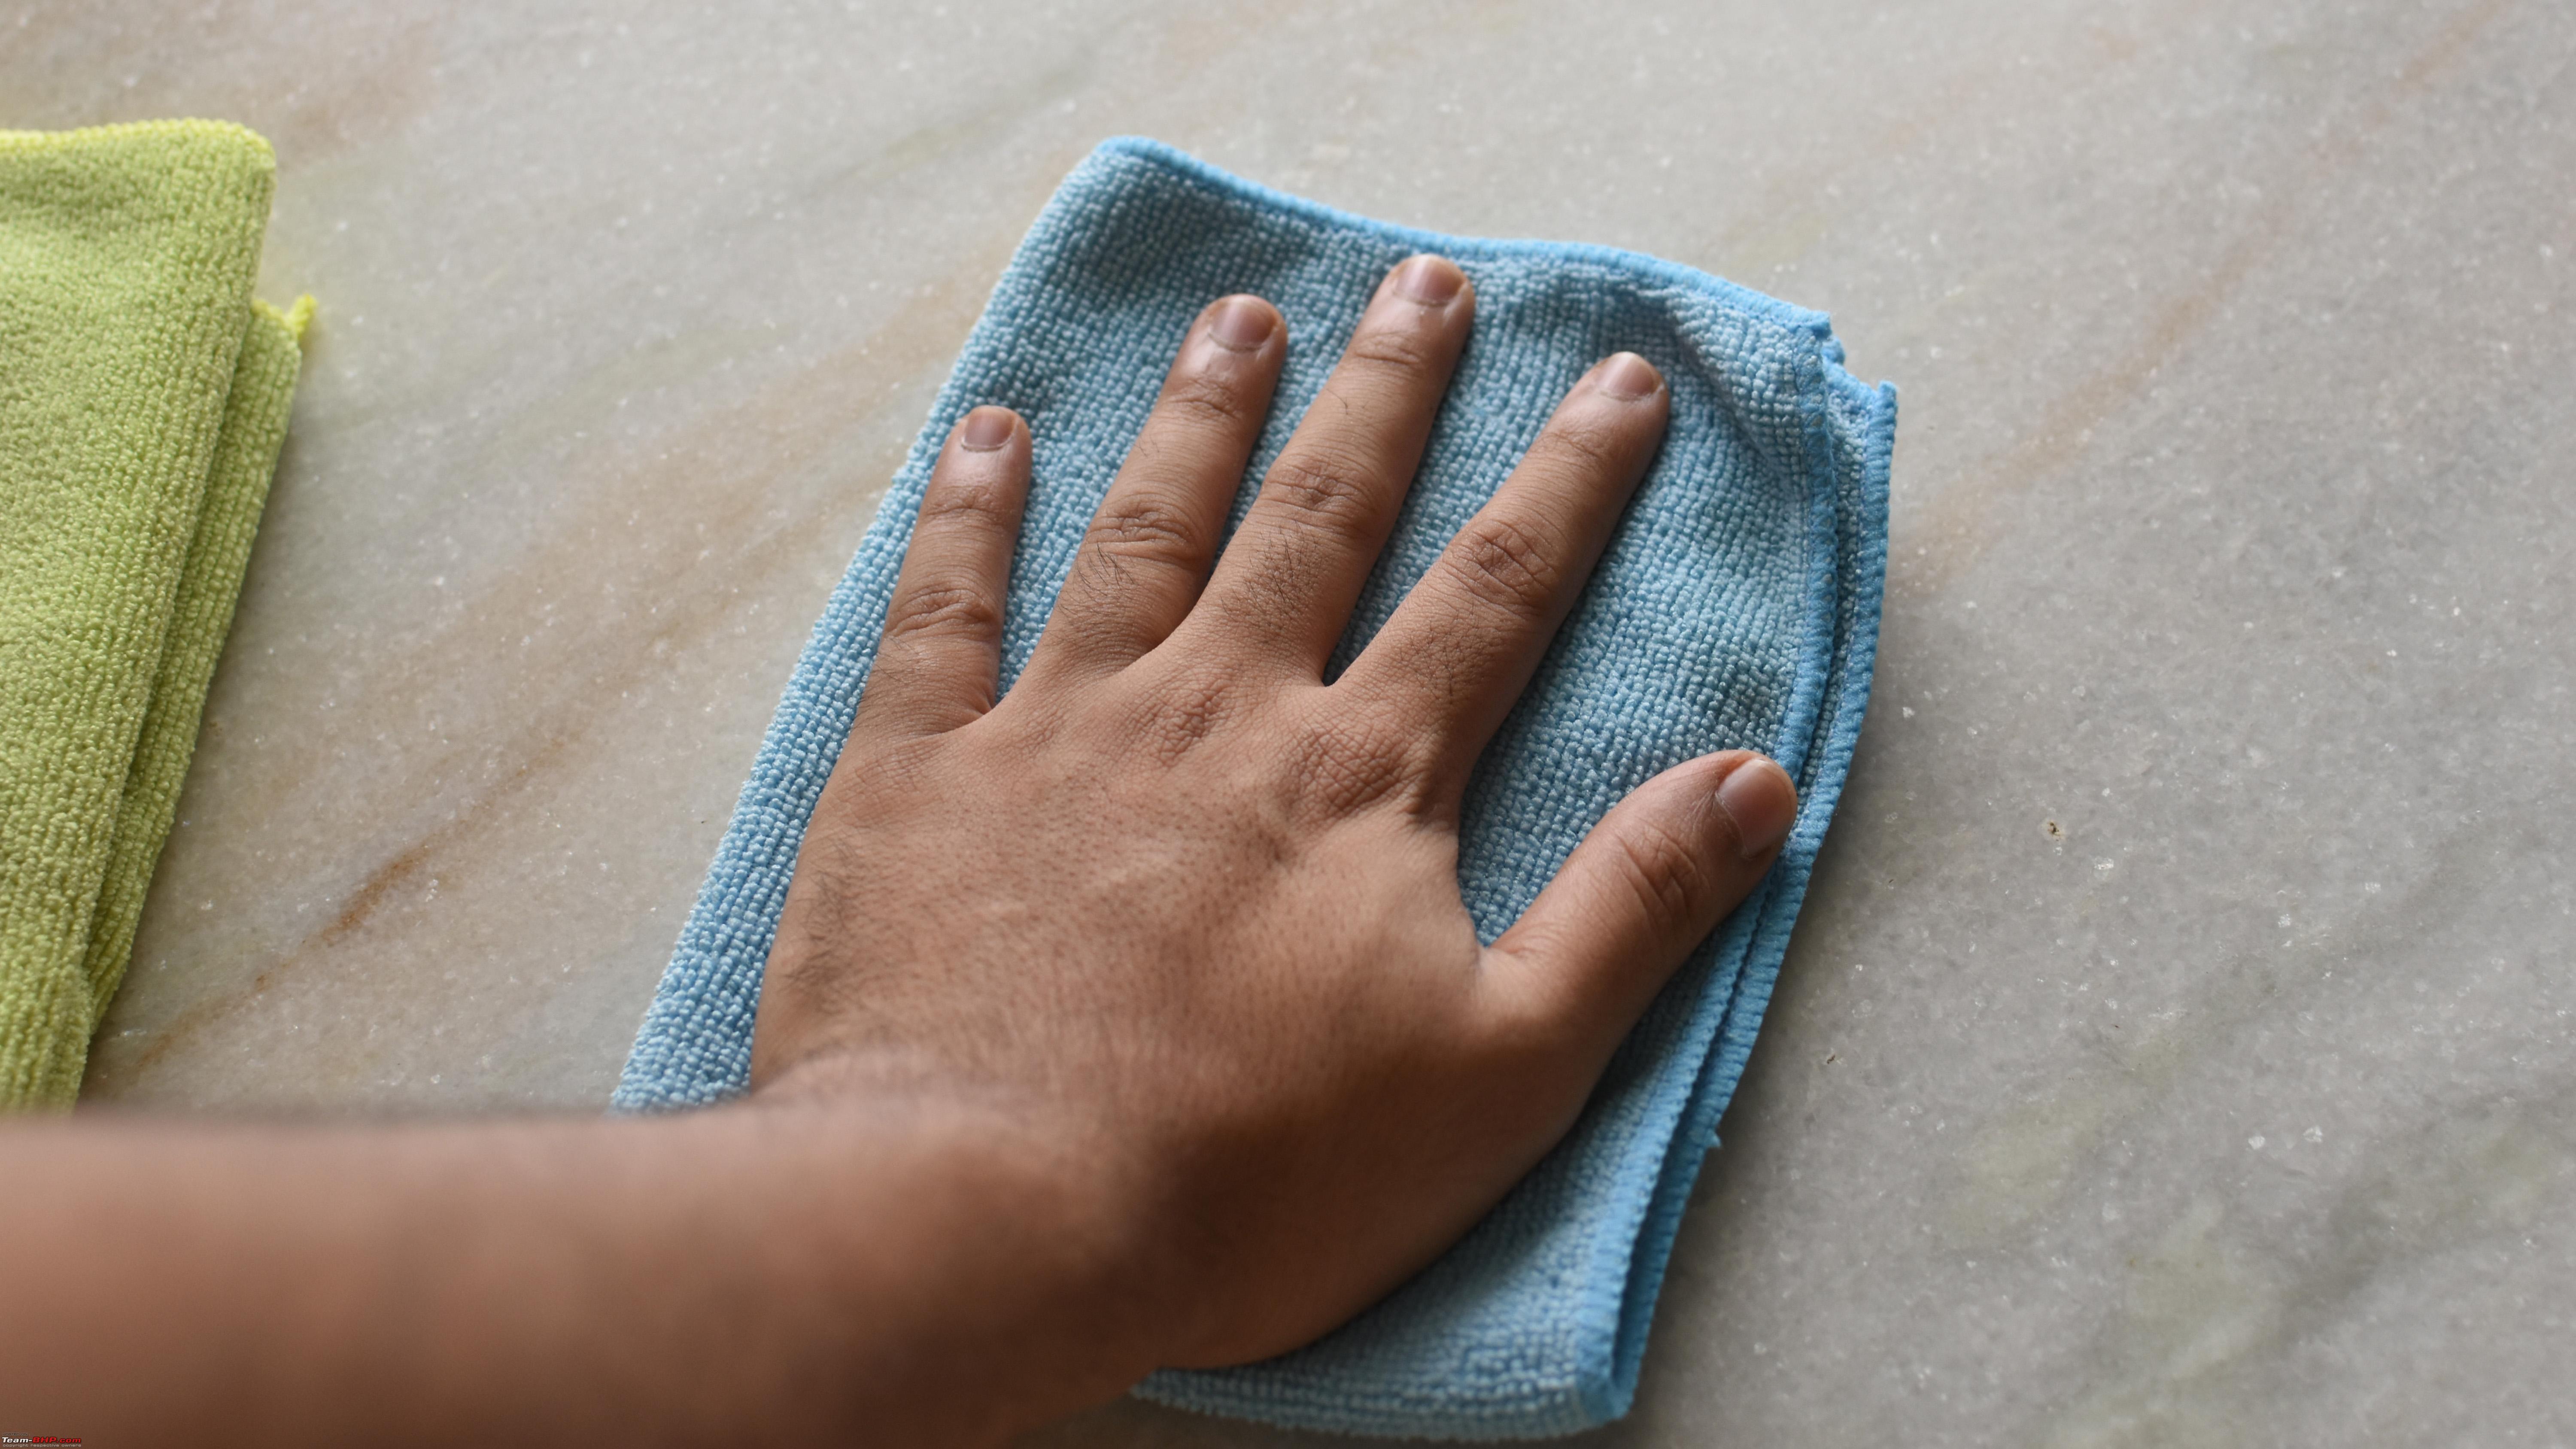 Vim Drop : Haha, this was the soap I used to wash the tires before I bought Meguiar’s Hot Rims and MultiX. It’s cheap, works well, removes most of the dirt off the wheels and tires, when scrubbed reasonably, of course. On a scientific or marketing level, they say, this can dry out the rubber and cause premature wear. So I would avoid this if I have some premium tires, but for normal ones, I don’t think it’ll cause a huge difference with respect to tire life as long as we rinse off the soap properly. It works best with the cheap (Rs.10 ̴ 15) foam “duster” which we get in the market. Trustworthy Vim Drop  Colgate Slim Soft Charcoal Tooth Brushes : These brushes have insanely soft bristles. I use these to clean around the lug nuts in the wheels, where other tools wouldn’t reach. I use a dry one sometimes to gently dislodge any dust specks in the interior while vacuuming. These also work great to scrub interior fabrics with MultiX to remove stains. If you want to use these, make sure you are very gentle as they can cause scratches on plastic and paint if handled roughly. I rarely use these to apply Perl to tires in the patterned areas. Lastly, my wash methods : This totally depends on the amount of dust and dirt present on the car. If there is just light to moderate dust that accumulated on the paint over days and no mud, I would rinse off the dust with the pressure washer first. Almost all of the dust will be gone with the pressure washer. Then I would very gently wipe the car with plain water and the Amazonbasics microfiber, dipping the cloth often in water. I don’t use the “two bucket method” if the car is clean. It just adds a huge amount of strain on my back. This is if my car had a nice coat of collinite or similar products on it. If it’s a totally naked paint without any wax/sealant/coating, then I would surely add some shampoo to the bucket and follow the two bucket method. Once this is done, I rinse the car off with clean water. This rinsing, I do with mug and bucket or a hose pipe if I did not use shampoo. If I used shampoo, I would rinse with the pressure washer. I use the drying towels to dry the entire car coarsely/crudely/roughly, just so that majority of water is removed. The final fine wipe down is done with a different microfiber ± Quick Detailer. The glass gets a wipe down with a different microfiber with quick detailer (ECH2O). If there is heavy dirt or dried dirt like after a drive through the rains, then I use the foam lance and foam the car. I let it sit, and rinse the water off with the pressure washer. Then, depending on soap left, time available, I either foam the car again or add the shampoo to the bucket. Foaming the car or adding the shampoo to bucket, I wipe the foam / soapy water with the microfiber and then rinse the soap off again. The drying part is same. In both the cases, while wiping the car with the soapy or watery microfiber, I make sure to dip it in the bucket after every 2 wipes, sometimes after each wipe too. The water must be dripping from the cloth. These methods worked well for me. These methods must be modified as per the condition and requirement and there are no hard rules as such to be followed. So, do experiment with these things till you find a nice sweet method which is both safe on your car and physically comfortable to you. Coating the windshield with Collinite 845 : I tried this, not once but several times. The result is that, when I drive against the sun, I see holograms of the remaining wax (Waxing marks), no matter how thoroughly I buff it off. It disappears after washing once or twice though. Water beads and slides off very well which makes cleaning the windshield very easy during car washes. During light rains, the water beads and stays there if the drops are small. If the drops are heavy or if the rain is moderate, then the drops slide off cleanly when the car is stationary. While driving at city speeds, the drops won’t move up as the speeds are not enough. But at highway speeds, the rain water simply moves upwards by the force of wind, without sticking to the windshield. All these are spectacular scenes to watch ! The issue comes with wipers. Wipers will clatter while wiping on a freshly coated windshield. After a few washes, I found that the wiper clatter disappeared, yet the hydrophobic nature of glass remained as it was. I didn’t re-apply the wax many times. A few times in the beginning months was enough. In the rain, another spectacular scene is that, after driving at slow speeds in the rain (City speeds in traffic), when I apply brakes at a signal or so, the water that accumulated on the roof at once flows on the windshield quickly, since it won’t stick to the paint surface due to collinite. Don’t worry about safety, the water flows off the windshield within a second and never created an obstruction to my vision. The same happens on the rear glass even with light acceleration when starting from a signal or in traffic. These don’t happen while driving at reasonable speeds like above 50 kmph as the water is pushed away by the wind and there is no chance of stagnation on the roof. Coming to tires, the pressure washer if used regularly, will keep them looking good and clean. If they’re too muddy or dirty, I just scrub them with the APC (MultiX) and rinse them off. But it’s been a really long time since I spent time scrubbing tires on my car. The wheel wells are taken care of by the pressure washer. Wheels : I wipe the wheels after every wash. Volkswagens collect a huge amount of brake dust and the wheels tend to become very dirty if not washed regularly. So after almost every was, I wipe them clean and dry. I keep a microfiber for them separate and use ECH20 to aid cleaning them. They usually end up shiny. I always curse VW for giving me the 10 spoke alloys because it is more work. I personally like the 5 spoke alloys on the Jetta as they look simple, neat and are easy to clean and dry. I do the interior vacuuming work depending on the requirement and there is no specific interval as such. I wipe the interior plastics once in a month with the Sonax Cockpit Spray. I find them dusty anytime, I’ll just quicky wipe them with ECH2O. It works well. All this was with the regular use of Collinite. I do not know how these methods will change with the car being coated with CQ Lite. There are several other brands of products in the market, but the availability in India seems to be a problem. The availability of these brands online, combined with their high quality is the reason why I chose them. The concentrated solutions might sound expensive, but if we work up the costs after dilution, they are real Value for Money. A bonus : For ECH2O and ONR, I have compiled a table showing the required quantities of product to be added to 500 ml, 1L, 2L & 5L of water for few common dilution ratios. I did round off 2-3 values to the closest one. So it is not 100% accurate, but is rather practical. I made a separate column for hard water in certain cases and added 20% to the original value, as suggested by a company representative of ONR on a forum. There is no hard water column for QD as I suggest using DM water for that purpose, for best results. Please play around with these as well. A weaker solution might as well work effectively and will save more money. [ATTACH=Ech2o, ONR Dilutions.docx]2021457[/ATTACH] [ATTACH=Ech2o, ONR Dilutions.pdf]2021458[/ATTACH]  I hope this write-up is of some help to the readers giving you a little view of how various products are, from an enthusiasts’ perspective and experience. Happy detailing ! Last edited by saisailendra : 26th June 2020 at 18:46. |
|
| (142)
Thanks
|
| The following 142 BHPians Thank saisailendra for this useful post: | --gKrish--, .sushilkumar, 2himanshu, Aafaq, ACM, advenk999, akash_v12, amrit_bareta, anandhsub, anantpoddar, anshuman1117, Archie_27, arjithin, Arreyosambha, Ashutosh_kumar, AtheK, Avinash_R, batish, BigBrad, bj96, blackwasp, CarManMotorcycl, car_guy1998, Cffyy, chaostheory, CrAzY dRiVeR, cryptex, damodar, dealer, debashishsen26, deepfreak15, deep_behera, Desmosedici, digitalnirvana, Divya Sharan, Dr.AD, Dr.Vikas, DrANTO, dr_davis97, el lobo 6061, EuroMachine, fangface, fiat_tarun, Gannu_1, GrammarNazi, Grr7, GTO, guyfrmblr, Highh5, HKP, HsekarK, InControl, isandy, janakiram_m, jav, jithin23, jnanesh, jothishX, Keeleri_Achu, knan, kraken, kushagra452, K_Drive, Latheesh, lemedico, living_fossil, Livnletcarsliv, longhorn, ManasN95, manas_270, McLaren Roxx, Mistakenguy, Motard_Blr, MoTo_meister, murthy_p, Mustang Sammy, Myth_sx, nalinsaxena23, neerajdan, NewUser123, nikhn, OrangeCar, Paavan Shetty, papr23, PM - B, R2D2, raihan, rajesh1868, ramnaresh_2000, RavenAvi, Ravi Parwan, Researcher, rulerofsun, RWD, sachin_cs, samaspire, samay300, Samfromindia, sandx, sanyog26, sarathlal, satvik4134, saur95, sgm, sharktale, Sheel, SidR, Simhi, somspaple, soulfuel, Sreejith V, SS80, sub.g84, suhas_raj, Swapnil4585, tanaysn, Tassem, Thanos-VV, The Great, thecarguy, Thermodynamics, thewhiteknight, The_Outsider!, TOINGPOING, toroid, Torque250, TorqueTwist, Tpsdhiraj, TROOPER, TS09SRITOG, Turbo roast, v12, v1p3r, vaasu, vaish9925, vattyboy, Venkygupta, viXit, VLPBLR, vsaravind007, Warwithwheels, ZedMae |
|
27th June 2020, 07:50
| #5 |
| Team-BHP Support  | Re: My experience with Car Care products; How I Ceramic-Coated my Vento at home Thread moved from the Assembly Line to the DIY Section. Thanks for sharing! What a thread! Going to our homepage today  . I respect your attention-to-detail (pun intended). It shows in your approach, how your car looks, how you've written this thread and the pictures. If you were in Bombay, you'd be my new best friend and I'd come see you (with my car . I respect your attention-to-detail (pun intended). It shows in your approach, how your car looks, how you've written this thread and the pictures. If you were in Bombay, you'd be my new best friend and I'd come see you (with my car  ) every weekend. ) every weekend.Thank you again for this fabulous thread. |
|
| (46)
Thanks
|
| The following 46 BHPians Thank GTO for this useful post: | --gKrish--, 2himanshu, A.M., advenk999, amrit_bareta, Archie_27, Ashutosh_kumar, Astitva, AtheK, avaneesh., Carking97, digitalnirvana, Divya Sharan, Dr.AD, DrANTO, InControl, jnanesh, kaush666, klgiridhar, Leoshashi, nitinkbhaskar, octane1002, Paavan Shetty, PrasannaDhana, rajesh1868, ramnaresh_2000, RavenAvi, Researcher, sachin_cs, saisailendra, Samfromindia, satvik4134, Sree, suhas_raj, Swapnil4585, Tassem, TOINGPOING, Tojo_GotBhp, TorqueTwist, Torque_Curve, TS09SRITOG, Turbohead, vinay5795, viXit, warrioraks, Warwithwheels |
|
27th June 2020, 09:34
| #6 | |
| BHPian | Re: My experience with Car Care products; How I Ceramic-Coated my Vento at home Quote:
We can be best friends even by being in different cities. Divided by Cities, United by Team-BHP. | |
|
| (23)
Thanks
|

| The following 23 BHPians Thank saisailendra for this useful post: | avaneesh., Carking97, digitalnirvana, GTO, guyfrmblr, HsekarK, klgiridhar, kushagra452, nalinsaxena23, RavenAvi, sachin_cs, satvik4134, sharktale, Sree, suhas_raj, sureshkishore, TOINGPOING, Tojo_GotBhp, TorqueTwist, TS09SRITOG, vinay5795, viXit, Warwithwheels |
|
27th June 2020, 09:51
| #7 |
| BHPian Join Date: Feb 2020 Location: Bangalore
Posts: 277
Thanked: 1,757 Times
| Re: My experience with Car Care products; How I Ceramic-Coated my Vento at home I only have 1 question. When are you selling your car? If you do, send me a DM. I would blindly buy a car which is literally pre-WORSHIPPED to this extent! Last edited by Sheel : 27th June 2020 at 15:00. Reason: Minor typo. |
|
| (7)
Thanks
|
| The following 7 BHPians Thank nagr22 for this useful post: | klgiridhar, Paavan Shetty, sachin_cs, saisailendra, sanyog26, SS80, TOINGPOING |
|
27th June 2020, 11:14
| #8 |
| BHPian Join Date: May 2020 Location: Bengaluru
Posts: 582
Thanked: 1,598 Times
| Re: My experience with Car Care products; How I Ceramic-Coated my Vento at home My kind of post. I am reading it bit by bit to grasp as much I can. The satisfaction of coating one's own vehicle is an out of the world experience. I am itching for it and as of now just trying to maintain the current ceramic coat with Carpro Hydr02 which is a Top Coat. Here is the post for its application ( https://www.team-bhp.com/forum/modif...ml#post4810681 (CarPro Hydr02 Silica Spray Sealant) ) Once the base coat starts showing signs of wear and tear I will do the coating myself. With the coating on I would highly recommend the EchO2 as against ONR since it has silica content. ONR is an excellent product and I use it diluted 1:16 in a 500 Ml bottle which is kept in the driver side door to clean any unwanted spots or anything light while travelling. ONR fragrance is exceptional and as a product its really good. I hope they come up with an ONR solution which has Si02 which will be awesome. I would advise using Gyeon Bathe+ washing shampoo which has Si02 in it and enhances the hydrophobicity to a great extent. For a ceramic coated vehicle a ph neutral shampoo should be used as against a ph balanced one. Ph neutral car shampoo leaves no residue/oils on the paint which can mask the ceramic coat properties. Turtle has also come with a similar product (Ceramic wash and wax) but if you talk about value for money then Gyeon Bathe+ will give you more washes per bottle. Last edited by Artyom : 27th June 2020 at 11:32. |
|
| (3)
Thanks
|
| The following 3 BHPians Thank Artyom for this useful post: | GTO, saisailendra, TOINGPOING |
|
27th June 2020, 11:34
| #9 |
| Team-BHP Support | Re: My experience with Car Care products; How I Ceramic-Coated my Vento at home saisailendra the detailing you have done at home is insane. I had to check whether it was really DIY. lol. In the early days like you I used to experiment with a lot of products and many which I use today. I'm curious to know how you like the ONR liquid vs the ECH2O. I switched to ECH2O from ONR as ONR wasn't easily available and Mohsin (Ultimate) keeps ECH2O so its easier to get. The difference I wasn't able to make out and both are good but I don't have back to back comparison at the same time of both. Cheers and happy detailing. That Vento looks awesome and the effort in detailing and documenting is another level. |
|
| (7)
Thanks
|
| The following 7 BHPians Thank Vid6639 for this useful post: | GTO, HsekarK, RavenAvi, saisailendra, saur95, Thermodynamics, TOINGPOING |
|
27th June 2020, 12:00
| #10 |
| BHPian | Re: My experience with Car Care products; How I Ceramic-Coated my Vento at home Very well written and documented. The car looks great and absolutely spotless. How come you haven't tried Sonax BSD?I find it amazing and now during the monsoon i have coated my windshield with it,i don't need to use my wipers most of the time. |
|
| (2)
Thanks
|
| The following 2 BHPians Thank scorpian for this useful post: | saisailendra, TOINGPOING |
|
27th June 2020, 12:22
| #11 |
| BHPian Join Date: Jan 2009 Location: Bangalore
Posts: 47
Thanked: 71 Times
| Re: My experience with Car Care products; How I Ceramic-Coated my Vento at home Awesome post, Saisailendra. Thank you so much for sharing. As GTO and others said, shows how much you lover your car and attention to details. There is a treasure trove of information and info on products. I am going to bookmark this and will keep coming to this thread. |
|
| (2)
Thanks
|
| The following 2 BHPians Thank zensure for this useful post: | kraken, saisailendra |
| |
|
27th June 2020, 12:29
| #12 |
| BHPian Join Date: Dec 2009 Location: Hyderabad
Posts: 536
Thanked: 224 Times
| Re: My experience with Car Care products; How I Ceramic-Coated my Vento at home I am literally dumbstruck! I have no words seeing the efforts put in maintaining the car and writing this post. I can only say - you would either kill me or jump off a cliff if you see my car. (Hope it doesn't come to that) |
|
| (4)
Thanks
|
| The following 4 BHPians Thank unoczar for this useful post: | bordeaux, saisailendra, satvik4134, TOINGPOING |
|
27th June 2020, 12:43
| #13 | |
| BHPian Join Date: May 2020 Location: Bengaluru
Posts: 582
Thanked: 1,598 Times
| Re: My experience with Car Care products; How I Ceramic-Coated my Vento at home Quote:
In my experience procuring Carpro Products was little difficult as against Optimum ones. Procuring ONR should not be an issue since the distributor for Optimum and OptiCoat is from Bangalore. ONR comes in 2 versions ONR Regular (Blue colour), ONR Wash&Wax (Green colour) The blue stuff is for regular cleaning and has no waxes so it won't give you any shine or protection so to say. The green stuff has Carnuba wax infused hence shine and protection. For ceramic coated vehicle use ONR(Blue) as its recommended not to use any Waxes since it masks the properties of the coating For non coated vehicles use the green one as it will give a nice shine to the paint. Ech02 is recommended for coated vehicles to give a layer of Sio2 protection to the existing coating but can be used on non coated vehicles as well without any issues. Comparing ONR(Green) and EchO2 I found ONR to be more durable on non coated cars and Echo2 is more durable on coated cars primarily due to the ingredients of the product(Wax vs Silica) Comparing ONR Blue and Echo2 is like comparing apples to oranges and in this case its Echo2 which will win hands down. Last edited by Artyom : 27th June 2020 at 12:46. | |
|
| (1)
Thanks
|
| The following BHPian Thanks Artyom for this useful post: | saisailendra |
|
27th June 2020, 13:17
| #14 |
| BHPian Join Date: Oct 2012 Location: Chennai
Posts: 802
Thanked: 3,394 Times
| Re: My experience with Car Care products; How I Ceramic-Coated my Vento at home I also dabble in detailing myself but it would be maybe 25% of what you do. What a thread! Read the whole thing like it was some gripping fiction novel and now though I detailed my car just 2 weeks ago and it has not been driven at all (hello lockdown 2.0 Chennai), I have this insane urge to just go clean, compound, wax and polish it again. Couple of questions though, 1) how do you deal with the tiny stones stuck in tyre grooves. They annoy me no end. 2) does the vento have piano Black interiors? If yes how in Gods green Earth do you keep those dirt and fingerprint magnets clean? 3) have you used the Amazon basics baffle weave cloth? I used to only get the 3m ones but these are half the price and work just as well. |
|
| (2)
Thanks
|
| The following 2 BHPians Thank Stribog for this useful post: | InControl, saisailendra |
|
27th June 2020, 13:19
| #15 |
| BHPian Join Date: Apr 2019 Location: Nagercoil
Posts: 26
Thanked: 63 Times
| Re: My experience with Car Care products; How I Ceramic-Coated my Vento at home As another person who shares your paranoia of getting scratches/ swirl marks on our beautiful paint jobs, this thread has really motivated me to get off my bottom and start working on that perfect shine. This thread is a treasure trove of information for people like me suffering from mild OCD. Though time limitations have got me thinking about paint protection films. If I opt for one of those, I feel that I need not worry about scratches and swirl marks. 3m says on their website that their PPF can be treated with polishes and other products just like normal paint. I would really appreciate hearing the different views and opinions on usage of paint protection films over usage of traditional wax, polish et cetera. |
|
| (1)
Thanks
|
| The following BHPian Thanks dr_davis97 for this useful post: | saisailendra |
|