Team-BHP > Technical Stuff > DIY - Do it yourself
Register New Topics New Posts Top Thanked Team-BHP FAQ


Reply
  Search this Thread
83,831 views
Old 20th August 2020, 22:05   #91
Distinguished - BHPian
 
Thad E Ginathom's Avatar
 
Join Date: Jun 2007
Location: Chennai
Posts: 10,990
Thanked: 26,379 Times
re: DIY: Metal model engine building UPDATE: build complete (page 16)!

Plenty more capability before you reach the limit, then.
Thad E Ginathom is offline  
Old 22nd August 2020, 22:08   #92
Distinguished - BHPian
 
Join Date: Oct 2012
Location: Delhi
Posts: 8,080
Thanked: 50,653 Times
re: DIY: Metal model engine building UPDATE: build complete (page 16)!

After I was done with the lights in my garage and the W123 I returned back to Debbie.

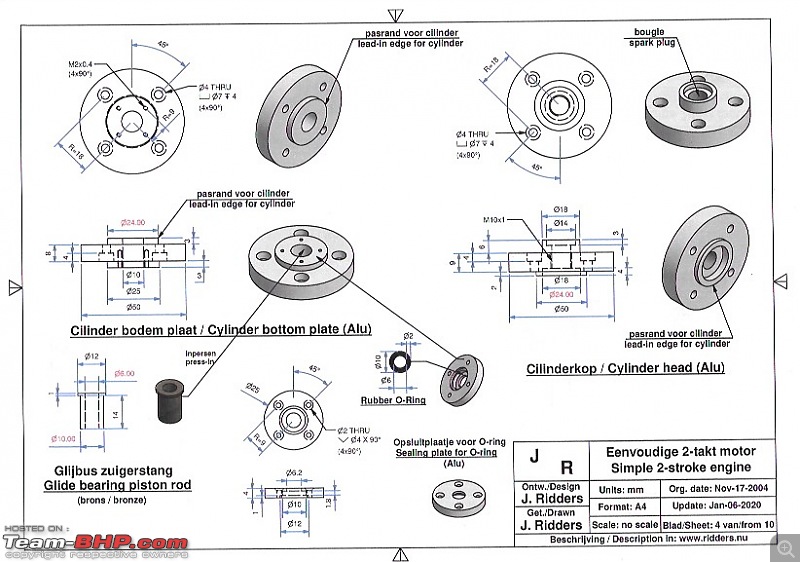
Next parts; The cylinder bottom plate and the cylinder head:

DIY: Metal model engine building UPDATE: build complete (page 16)!-debbie-sheet-4-cyliinder-plate.jpeg

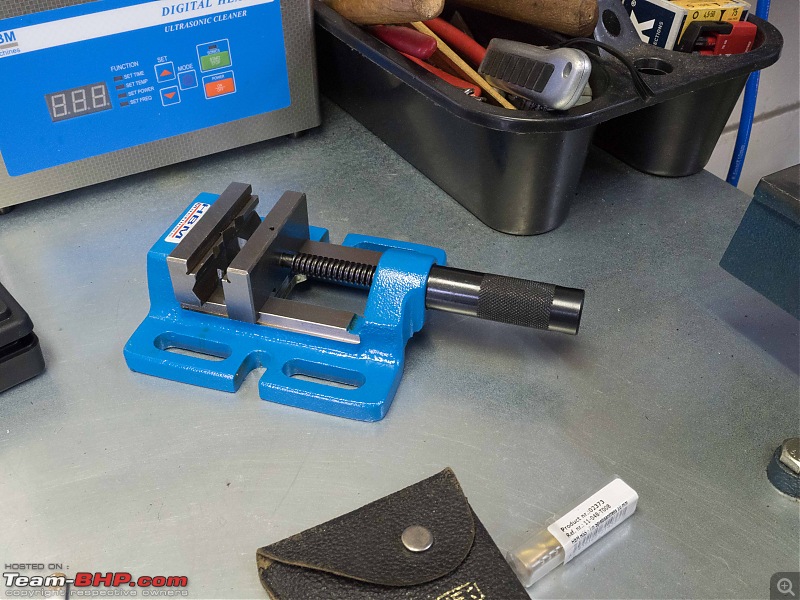
I have one piece of aluminium I will be using to cut both these parts from. I also managed to get a new larger machine clamp:

DIY: Metal model engine building UPDATE: build complete (page 16)!-p8220017.jpg

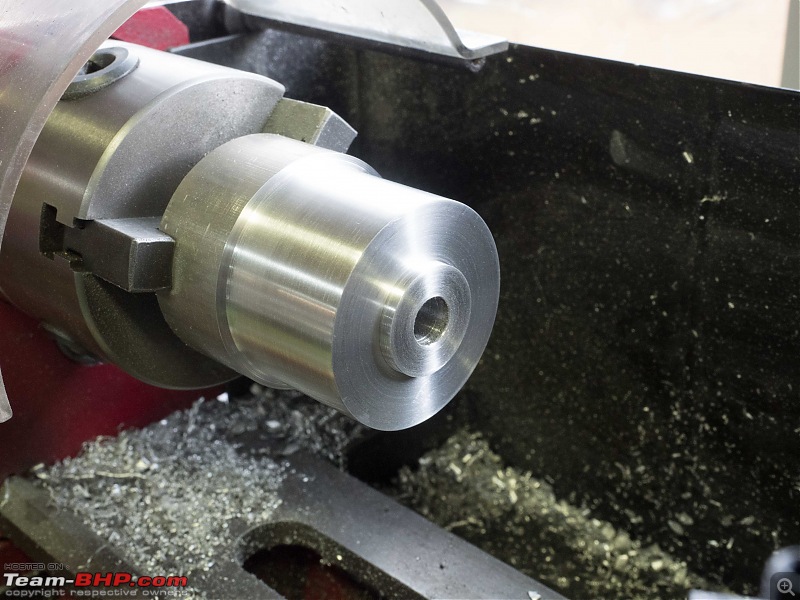
First thing facing and correct diameter and a precise hole of 10mm. (Drilled and reamed to perfection)

DIY: Metal model engine building UPDATE: build complete (page 16)!-p8220015.jpg

This is the side that will face the cylinder.

DIY: Metal model engine building UPDATE: build complete (page 16)!-p8220018.jpg

I decided to have a go at facing this piece off. Only to find that with the diameter of the piece and the length required sticking out on the blade, it would not fit.

Had to use a different set up first:

DIY: Metal model engine building UPDATE: build complete (page 16)!-p8220019.jpg

Then with the long blade all the way in. It went all really well:

DIY: Metal model engine building UPDATE: build complete (page 16)!-p8220020.jpg

Up to the point where somehow something did not go well and I had a bit of a problem: The blade duck in, pulled the whole piece out of the chuck.

DIY: Metal model engine building UPDATE: build complete (page 16)!-p8220021.jpg

Not quite sure why. The cutting was really going well. Maybe everything got to warm/hot and the blade started to bind up. Anyway, I managed to get everything back up and managed to part it eventually.

So only one side is finished. I want to get the cilinder head as well, as i still have the remaining stock sitting in the lathe.

But this lines up really well.

DIY: Metal model engine building UPDATE: build complete (page 16)!-p8220023.jpg

The lead-in edge is perfect. No movement at all.

DIY: Metal model engine building UPDATE: build complete (page 16)!-p8220024.jpg

Pretty happy with this

DIY: Metal model engine building UPDATE: build complete (page 16)!-p8220025.jpg

Next I will have a go at the cylinder head. I will first do the outside, making the connection for the spark plug.

Jeroen
Jeroen is offline   (3) Thanks
Old 22nd August 2020, 22:34   #93
Distinguished - BHPian
 
Thad E Ginathom's Avatar
 
Join Date: Jun 2007
Location: Chennai
Posts: 10,990
Thanked: 26,379 Times
re: DIY: Metal model engine building UPDATE: build complete (page 16)!

Very nice. Was the accident scary? Glad all is well.

Joe Pie has an interesting recent video on why stuff that may seem secure in a 3-jaw chuck might actually not be.
Thad E Ginathom is offline  
Old 23rd August 2020, 12:28   #94
Distinguished - BHPian
 
Join Date: Oct 2012
Location: Delhi
Posts: 8,080
Thanked: 50,653 Times
re: DIY: Metal model engine building UPDATE: build complete (page 16)!

Quote:
Originally Posted by Thad E Ginathom View Post
Was the accident scary? .
No not at all. One minute I am happily parting away, the next this. Just a bit of a crunching sound, that’s it. The lathe cuts out, so not a big thing at all. One thing though; Blondihacks in one of her video’s on parting suggests to always wear a full face mask when parting. I have taken her advice and very glad for it too.

Because when these parting blades break, bits might scatter all around. On this occassion the blade was fine. It had come out of the holder, sort of twisted, but I could just put it back in and it worked fine again.

Jeroen
Jeroen is offline   (1) Thanks
Old 24th August 2020, 00:12   #95
Distinguished - BHPian
 
Join Date: Oct 2012
Location: Delhi
Posts: 8,080
Thanked: 50,653 Times
re: DIY: Metal model engine building UPDATE: build complete (page 16)!

Horrible weekend weather wise. We were supposed to go out today and meet my sister and visit the Dutch open air museum. But the weather was horrible, so we cancelled and will try again next week.

So time for some more machining!

As I still had the original stock in the lathe I continued with the cylinder head. On the outside it requires the bits to hold the spark plug.

18mm and as luck would have it, one of my wobbler-bugger-up-pieces made a good template for the outside diameter

DIY: Metal model engine building UPDATE: build complete (page 16)!-p8230001.jpg

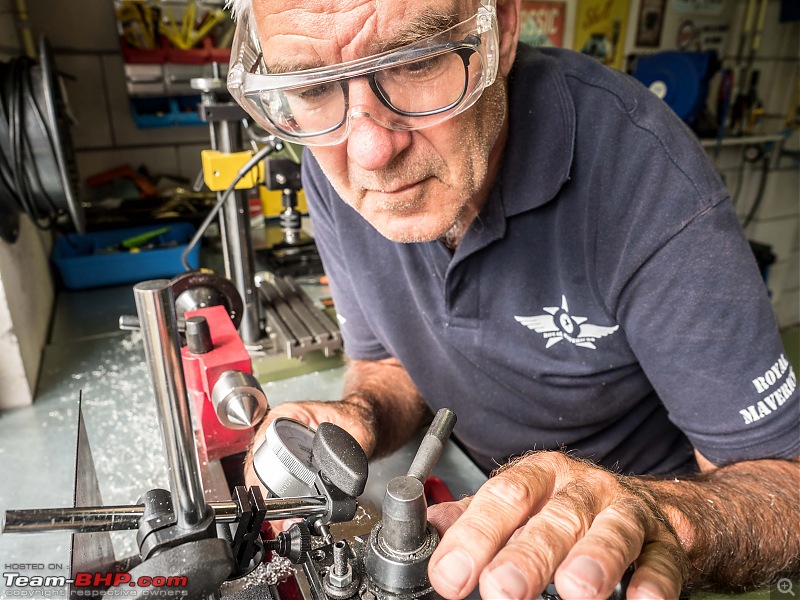
A bit more sophistacation was required to cut the inside diameter. Boring bar and micrometer to the rescue.

DIY: Metal model engine building UPDATE: build complete (page 16)!-p8230002.jpg

This is hard work and takes a lot of concentration!

DIY: Metal model engine building UPDATE: build complete (page 16)!-p8230003.jpg

Steady as she goes

DIY: Metal model engine building UPDATE: build complete (page 16)!-p8230006.jpg

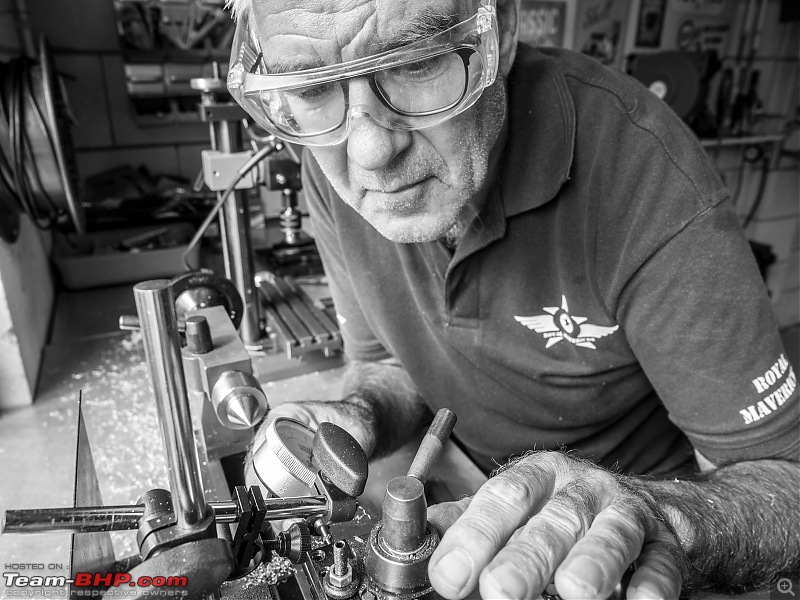
Our RPS chapter summer time challenge has the theme of “man at work” this year. I have not yet taken a single image and the deadline is looming. But I think these might do!!

I like the B&W version too!

DIY: Metal model engine building UPDATE: build complete (page 16)!-p82300062.jpg

This time the parting went perfect. Either I am getting better or more lucky on this. Probably a bit of both!!

DIY: Metal model engine building UPDATE: build complete (page 16)!-p8230015.jpg

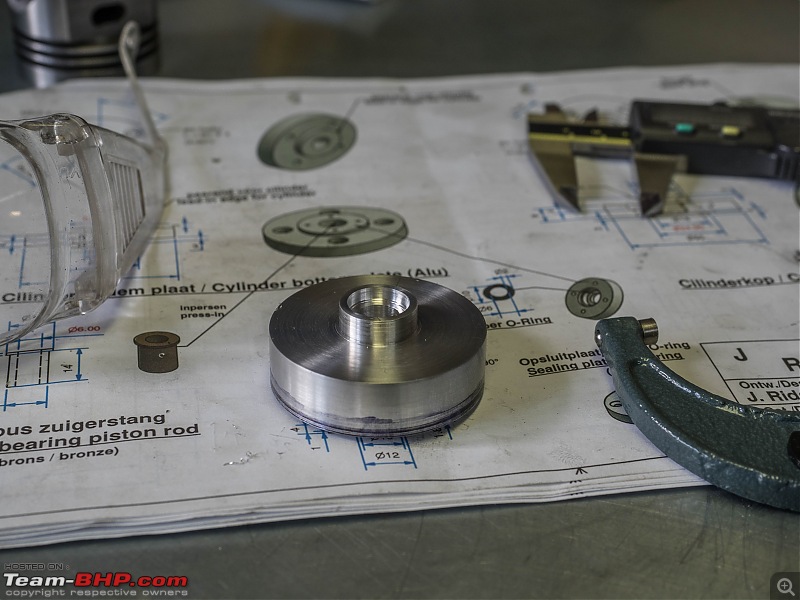
All done. A little bit of more machining on the other side of the bottom plate and all finished!

DIY: Metal model engine building UPDATE: build complete (page 16)!-p8230016.jpg

DIY: Metal model engine building UPDATE: build complete (page 16)!-p8230018.jpg

DIY: Metal model engine building UPDATE: build complete (page 16)!-p8230019.jpg

DIY: Metal model engine building UPDATE: build complete (page 16)!-p8230020.jpg

Last bit to be finished; the lead-in edge for the cylinder of the cylinder head

DIY: Metal model engine building UPDATE: build complete (page 16)!-p8230021.jpg
Attached Thumbnails
DIY: Metal model engine building UPDATE: build complete (page 16)!-p82300102.jpg  

DIY: Metal model engine building UPDATE: build complete (page 16)!-p82300103.jpg  

DIY: Metal model engine building UPDATE: build complete (page 16)!-p8230011.jpg  

DIY: Metal model engine building UPDATE: build complete (page 16)!-p8230012.jpg  


Last edited by Jeroen : 24th August 2020 at 00:17.
Jeroen is offline   (2) Thanks
Old 24th August 2020, 03:57   #96
Distinguished - BHPian
 
Thad E Ginathom's Avatar
 
Join Date: Jun 2007
Location: Chennai
Posts: 10,990
Thanked: 26,379 Times
re: DIY: Metal model engine building UPDATE: build complete (page 16)!

Nice work, nice photography!
Thad E Ginathom is offline   (1) Thanks
Old 24th August 2020, 13:42   #97
Senior - BHPian
 
Join Date: Jul 2009
Location: Calcutta
Posts: 4,668
Thanked: 6,217 Times
re: DIY: Metal model engine building UPDATE: build complete (page 16)!

Quote:
Originally Posted by Jeroen View Post
Up to the point where somehow something did not go well and I had a bit of a problem: The blade duck in, pulled the whole piece out of the chuck.
There are two operations which we are wary of - parting on the lathe, and tapping (not thread milling) on the VMC.

Sometime back you had asked me about the advantages of the upside down parting blade. Controvertial subject, with everybody having a different opinion, so did not want to answer. Now that you have faced it yourself, here goes.

The parting blade is long and thin = not very strong, so it breaks or shatters quite easily. And it works with practically no side clearance. Chips fall on the blade, and also the blade heats up and expands while the work away from the cutting edge starts cooling down , and it tends to jam, and then something bad happens. So upside down blade with lots of coolant hopefully washing chips away from the tool, and keeping everything cool. The rear toolholder is a collateral benefit - removes the operator from direct line of fire.

Parting is the final operation. If something goes wrong, all that work and material is lost.

Sutripta
Sutripta is offline   (2) Thanks
Old 24th August 2020, 14:07   #98
Distinguished - BHPian
 
Join Date: Oct 2012
Location: Delhi
Posts: 8,080
Thanked: 50,653 Times
re: DIY: Metal model engine building UPDATE: build complete (page 16)!

Thanks. I am getting a bit better at parting.

As the saying goes, it is what it is, I have no other options. In theory the upside down might work, but as I mentioned before, but I got some very strong recommendation not to. Especially on a little hobby lathe like mine.

If I get everything right the parting is actually pretty much a non event. But you need to get everything right. Very sharp blade, correct height, rotation and feed speeds, as much rigidity as you can have. (Which in my case always means working as close to the chuck as I can.

Yesterday last parting operation went very fine. You can hear/feel if it goes well! I wish I had made a video!

Jeroen
Jeroen is offline   (1) Thanks
Old 24th August 2020, 17:32   #99
Senior - BHPian
 
Join Date: Jul 2009
Location: Calcutta
Posts: 4,668
Thanked: 6,217 Times
re: DIY: Metal model engine building UPDATE: build complete (page 16)!

^^^
Upside down on rear toolpost. It will tend to lift the rear of the saddle, but generally it is gibbed to counteract that, unlike the front. Weight also helps.

Sutripta
Sutripta is offline  
Old 28th August 2020, 14:34   #100
Distinguished - BHPian
 
Join Date: Oct 2012
Location: Delhi
Posts: 8,080
Thanked: 50,653 Times
re: DIY: Metal model engine building UPDATE: build complete (page 16)!

I have not been able to spend much time on Debbie this week. Hopefully a bit work this weekend.

I did manage to make a list of all the various bolts I need, and also two more taps. Managed to get it all yesterday during a bicycle trip that took me past one of the big DIY centre where I can buy bolts per piece.

DIY: Metal model engine building UPDATE: build complete (page 16)!-img_0305.jpg

I managed to get all of them except some M2 bolts I need. I will go through my boxes with old bits. I might come across some. These M2 bolts are for the exhaust, so just about the last bit to be added, when everything else is fitted and works well. (which is still a long way off)

The two WD40s are just to add to the workshop collection of various lubricants.

Earlier my workshop soldering was cancelled, but they are trying to put together a new one. End of September. Me and another gent from my Dutch model forum have both enrolled. They only need 6 participants, so hopeful this will go through! Fingers crossed!

I also had to buy some simple drawing stuff, templates, compass etc. I will be making some simple paper templates for the drilling. Easiest way to get the various holes positioned correctly.


Jeroen
Jeroen is offline   (3) Thanks
Old 28th August 2020, 23:25   #101
Senior - BHPian
 
Join Date: Jul 2009
Location: Calcutta
Posts: 4,668
Thanked: 6,217 Times
re: DIY: Metal model engine building UPDATE: build complete (page 16)!

Quote:
Originally Posted by Jeroen View Post
I did manage to make a list of all the various bolts I need, and also two more taps.
...

I also had to buy some simple drawing stuff, templates, compass etc. I will be making some simple paper templates for the drilling. Easiest way to get the various holes positioned correctly.
M4 and M5 are fairly common. Surprised that those were not present in you existing tap and die set.

Remember the advice about junk!

Paper does not hold dimension well. But if that is the route you are going use single matt polyester.

Sutripta
Sutripta is offline  
Old 29th August 2020, 11:52   #102
Distinguished - BHPian
 
Join Date: Oct 2012
Location: Delhi
Posts: 8,080
Thanked: 50,653 Times
re: DIY: Metal model engine building UPDATE: build complete (page 16)!

Quote:
Originally Posted by Sutripta View Post
M4 and M5 are fairly common. Surprised that those were not present in you existing tap and die set.
They are present, both in regular and Metric Fine. But the problem is these are all single taps. Which means in relative shallow holes (4-5mm) they don’t produce much thread at all at the . (Apart from the quality of the thread).

My set of dies and tap as shown in my car fiddling thread has served me well over many years working on my cars. Which means they tend to be used to fix existing thread (seized, rusted etc), rather than having to produce complete new threads.

Quote:
Originally Posted by Sutripta View Post
Remember the advice about junk!
The two new sets combined cost 1/3 of the price of my complete set of M3-M12 dies and taps, regular and fine! So if there is a correlation between quality and price, it appears as I will have made a massive quality jump on this purchase!

Quote:
Originally Posted by Sutripta View Post
Paper does not hold dimension well. But if that is the route you are going use single matt polyester.
I am not concerned. I will be using it for the various holes in the cylinder, which means it all takes place in a small circle of only 50mm diameter.

Jeroen
Jeroen is offline  
Old 29th August 2020, 12:18   #103
Senior - BHPian
 
Join Date: Jul 2009
Location: Calcutta
Posts: 4,668
Thanked: 6,217 Times
re: DIY: Metal model engine building UPDATE: build complete (page 16)!

Quote:
Originally Posted by Sutripta View Post
Remember the advice about junk!
Quote:
Originally Posted by Jeroen View Post
The two new sets combined cost 1/3 of the price of my complete set of M3-M12 dies and taps, regular and fine! So if there is a correlation between quality and price, it appears as I will have made a massive quality jump on this purchase!
I meant (for now) the layout and marking tools, not really the taps.

Quote:
Originally Posted by Sutripta View Post
This I cannot overemphasise - for measurement, layout and marking tools get the best you can afford. In these items the world is awash with junk now. If you go through any of the catalogues you'll find a very wide price difference of seemingly identical items. Ask yourself why. Not everything can be accounted for by 'brand tax', price gouging, or country of manufacture.
Quote:
Originally Posted by Sutripta View Post
Suggest you get some basic things like V Blocks (sizes to match expected work), 123 blocks (both in pairs), Compass, Jenny, calipers (I prefer firm joint over spring), a carbide tipped scriber, marking block, and odds and ends as you need them. Once again, don't pick up junk.

Your old taps were most probably carbon steel, not HSS.
Good quality nuts are generally hard. Will blunt a carbon steel tap in no time. Most screws/ bolts are normally not that hard (essentially because there is more material involved, which costs money) so carbon steel dies get by.

For printing out templates, suggest you print out a full paper scale (both axes) and check out scaling.

Sutripta
Sutripta is offline   (1) Thanks
Old 30th August 2020, 22:15   #104
Distinguished - BHPian
 
Join Date: Oct 2012
Location: Delhi
Posts: 8,080
Thanked: 50,653 Times
re: DIY: Metal model engine building UPDATE: build complete (page 16)!

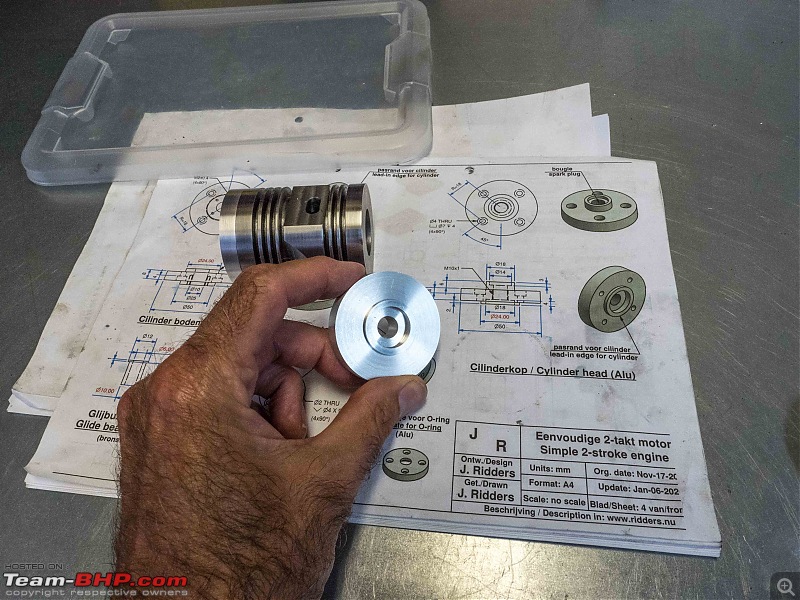
Finally managed to get some work done on Debbie. Finished turning the cylinder head.

Measurements are pretty exact and the finish is pretty good too!

DIY: Metal model engine building UPDATE: build complete (page 16)!-p8300106.jpg

DIY: Metal model engine building UPDATE: build complete (page 16)!-p8300107.jpg

Next I will be drilling the various holes and threading some of them

DIY: Metal model engine building UPDATE: build complete (page 16)!-p8300109.jpg

Jeroen
Jeroen is offline   (3) Thanks
Old 30th August 2020, 22:46   #105
BHPian
 
Akash.D's Avatar
 
Join Date: Jun 2020
Location: JRH
Posts: 67
Thanked: 435 Times
re: DIY: Metal model engine building UPDATE: build complete (page 16)!

Excellent thread Sir. Since you have already spent some money in getting the tools, why not get a face milling cutter as well? The surface quality should drastically improve.
Akash.D is offline  
Reply

Most Viewed


Copyright ©2000 - 2024, Team-BHP.com
Proudly powered by E2E Networks