Team-BHP > Technical Stuff > DIY - Do it yourself
Register New Topics New Posts Top Thanked Team-BHP FAQ


Reply
  Search this Thread
83,940 views
Old 24th September 2020, 20:47   #121
Senior - BHPian
 
Join Date: Jul 2009
Location: Calcutta
Posts: 4,668
Thanked: 6,217 Times
re: DIY: Metal model engine building UPDATE: build complete (page 16)!

Delrin insulator - Problem will be the temperature.
Pure Teflon is quite expensive, soft, and not easy to machine. Better temperature resistance, but nowhere near ceramics.

Sutripta
Sutripta is offline   (2) Thanks
Old 26th September 2020, 21:15   #122
Distinguished - BHPian
 
Join Date: Oct 2012
Location: Delhi
Posts: 8,100
Thanked: 50,856 Times
re: DIY: Metal model engine building UPDATE: build complete (page 16)!

Well I managed to to get the second attempt wrong as well. This time I had the diameter just about perfect. And I decided to drill for the piston rod. This is a M6. I made a mistake by drilling with a 5,9mm, and was just about to ream it to 6mm.

Wrong again. Inside the piston its inside M6 thread and I should have drilled at 5mm. These days I keep making these sort of simple mistakes.

DIY: Metal model engine building UPDATE: build complete (page 16)!-p9240011.jpg

So I ordered some more round bar and I was hoping it would arrive today. But it was not to be. Oh well, I can always start on the piston rod tomorrow.

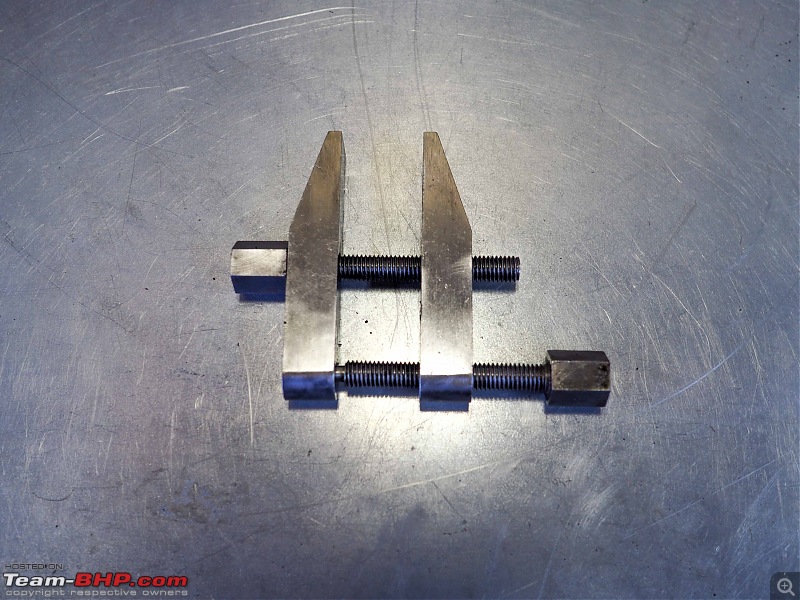
I did manage to complete a very different job, quite well: I cleaned up my old machinist clamp I made at naval college. Took a pneumatic wheel brush to it, some oil and it looks great again!

DIY: Metal model engine building UPDATE: build complete (page 16)!-p9240014.jpg

Jeroen
Jeroen is online now   (4) Thanks
Old 27th September 2020, 15:36   #123
Distinguished - BHPian
 
Thad E Ginathom's Avatar
 
Join Date: Jun 2007
Location: Chennai
Posts: 11,005
Thanked: 26,439 Times
re: DIY: Metal model engine building UPDATE: build complete (page 16)!

I love that little clamp. I've often meant to buy one (or two): it's great to know that you made this one.

I have a large wooden example of the same thing, made for woodwork. It came with a house that I moved into which had been unoccupied for years and still contained quite a lot of old "rubbish." What was not rubbish was the small carpenter's workshop with a proper bench, including vise. Not many tools, but a few odds and ends. And space for me to build my jeweller's workbench in the corner.
Thad E Ginathom is online now   (1) Thanks
Old 27th September 2020, 20:40   #124
Distinguished - BHPian
 
Join Date: Oct 2012
Location: Delhi
Posts: 8,100
Thanked: 50,856 Times
re: DIY: Metal model engine building UPDATE: build complete (page 16)!

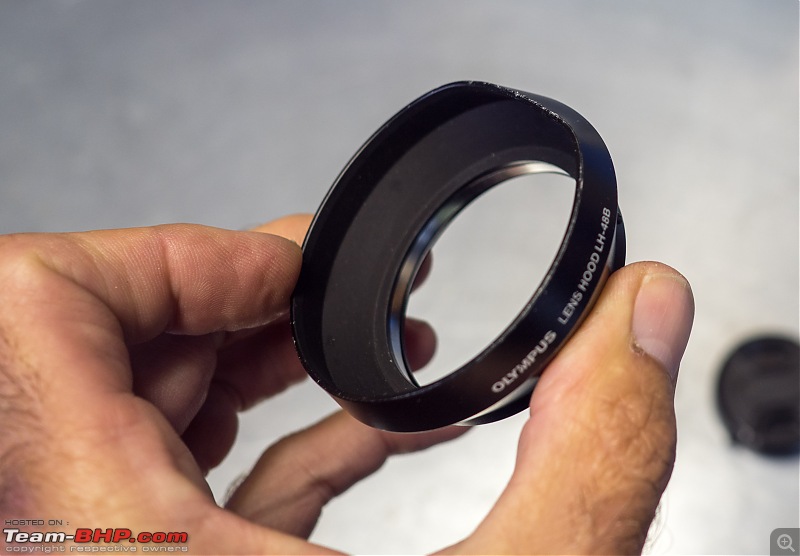
Horrible weather this morning as I got up. So I decided to spend the day in my workshop working on Debbie. As I walked over I managed to drop my camera. Always a bit of a fright. But the camera was ok. Only the sun hood was a bit dented, luckily this one is metal, instead of the usual plastic. Which would have just shattered!

DIY: Metal model engine building UPDATE: build complete (page 16)!-p9270005.jpg

Nothing a machinist in training can’t fix!:

Found a piece of round bar, roughly the same diameter and gently tapped it back into shape:

DIY: Metal model engine building UPDATE: build complete (page 16)!-p9270006.jpg

As good as new:

DIY: Metal model engine building UPDATE: build complete (page 16)!-p9270007.jpg

Next onto the piston road. I had a piece of regular steel 10mm 450mm long. The piston rod is 6mm round, 78mm long

DIY: Metal model engine building UPDATE: build complete (page 16)!-p9270008.jpg


Off we go, turn turn turn

DIY: Metal model engine building UPDATE: build complete (page 16)!-p9270009.jpg

But again, I made a mistake and I had a problem. The mistake I was to take the diameter of the piston rod from the drawing. I should have taken it from the glide bearing I made earlier. And it’s just over 6mm. Also, I noticed a considerable amount of taper along this relative short length. (Almost 0,2mm across 100mm length.

So I ended up spending most of the day, aligning my lathe. Blondihacks has a very good video on this very topic. But still way out of my league.

I decided to go for the old trusted trial and error. At least Blondihack taught me there are two kinds of allignement issues; Torque of the base of the lathe or the tailstock not alligniging properly to the head stock.

I check the first by trying different shims underneath the lathe base, taking a cut and see if anything changed. After several tries I did not see any change. Still the same error. So I decided to have a go at the tailstock. It does have an adjustment, but it is very crude. You also need to take the tailstock off the lathe to adjust it. Which meant endless back and forth to get it right. I must have spend easily 4 hours on fixing this. But it is within 0,02mm now across 100mm.

I quickly finished turning the piston rod and threaded both ends

DIY: Metal model engine building UPDATE: build complete (page 16)!-p9270012.jpg

DIY: Metal model engine building UPDATE: build complete (page 16)!-p9270011.jpg

Took quite a bit of polishing to ensure the piston rod fitted smoothly through the glide bearing:

DIY: Metal model engine building UPDATE: build complete (page 16)!-p9270014.jpg

All done, one part. Almost a full days work. But that did include fixing my camera’s sun hood, producing this part once wrong, fixing the lath, re-producing this part correctly and a lot of cleaning up!

DIY: Metal model engine building UPDATE: build complete (page 16)!-p9270013.jpg

Jeroen

Last edited by Jeroen : 27th September 2020 at 20:42.
Jeroen is online now   (4) Thanks
Old 29th September 2020, 12:23   #125
Distinguished - BHPian
 
Join Date: Oct 2012
Location: Delhi
Posts: 8,100
Thanked: 50,856 Times
re: DIY: Metal model engine building UPDATE: build complete (page 16)!

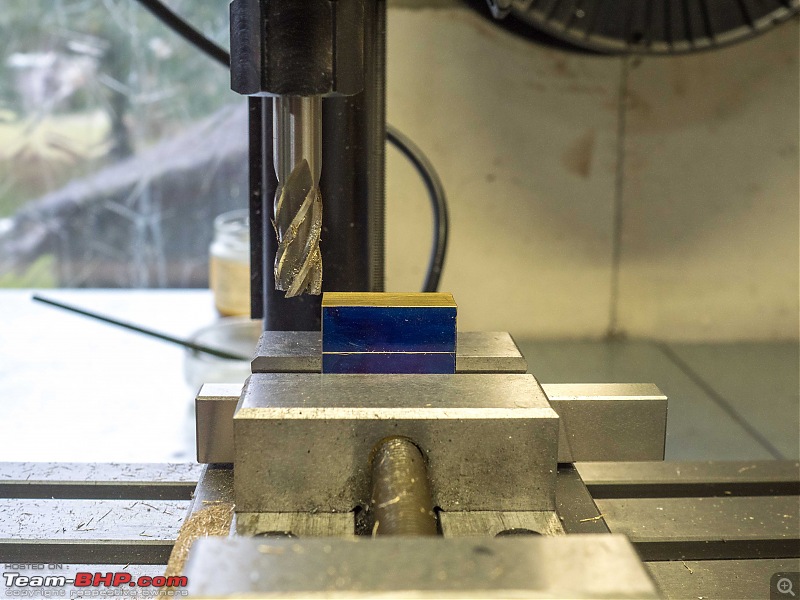
Yesterday I started on the Fork. Quite a simple part. Cut off a piece

DIY: Metal model engine building UPDATE: build complete (page 16)!-p9280006.jpg

Into the mini mill, to make it square and the overal correct dimensions

DIY: Metal model engine building UPDATE: build complete (page 16)!-p9280007.jpg

DIY: Metal model engine building UPDATE: build complete (page 16)!-p9280008.jpg

Done, now to drill and ream the hole for the steel pivot and to mill the inside of the fork. I don’t have a 5mm reamer, or the respective drill. So another trip to HBM this morning

DIY: Metal model engine building UPDATE: build complete (page 16)!-p9280009.jpg


I will need to order the three ball bearings soon. As far as I can tell, the most important criteria will be as low friction as possible. So I might just go for very simple open cage ball bearings. Or maybe just with a very simple dust cover.
Jeroen is online now   (3) Thanks
Old 29th September 2020, 17:20   #126
Distinguished - BHPian
 
Thad E Ginathom's Avatar
 
Join Date: Jun 2007
Location: Chennai
Posts: 11,005
Thanked: 26,439 Times
re: DIY: Metal model engine building UPDATE: build complete (page 16)!

Quote:
Originally Posted by Jeroen View Post
Found a piece of round bar, roughly the same diameter and gently tapped it back into shape ...
For just one year I went to a school where I did metalwork. I didn't achieve much, but it was a dream compared to the years of woodwork, where I achieved nothing! I remember someone bringing a dented sports cup to the teacher. The classroom was well-equipped, and had the strakes and hammers for silversmithing. He took a hammer, and (to my eyes) smashed it three or four times. The dent was gone. And I was impressed.

Had similar experience a decade or so later, when I had a friend who was a pro silversmith. Used to visit his workshop. He always seemed to smash stuff into shape, but hey, it went into shape, exactly as he intended.

Such impressive skills. Closely related to those of the skilled car-body workers, too.
Thad E Ginathom is online now   (3) Thanks
Old 29th September 2020, 20:30   #127
Senior - BHPian
 
Join Date: Jul 2009
Location: Calcutta
Posts: 4,668
Thanked: 6,217 Times
re: DIY: Metal model engine building UPDATE: build complete (page 16)!

Quote:
Originally Posted by Jeroen View Post
Also, I noticed a considerable amount of taper along this relative short length. (Almost 0,2mm across 100mm length.

So I ended up spending most of the day, aligning my lathe. Blondihacks has a very good video on this very topic. But still way out of my league.

I decided to go for the old trusted trial and error. At least Blondihack taught me there are two kinds of allignement issues; Torque of the base of the lathe or the tailstock not alligniging properly to the head stock.
For such a small lathe unlikely to be base levelling problems

Shifting the tailstock is an accepted method of generating a taper. Be careful though, the taper varies depending on the position of the tailstock.

For accuracy checking, machine a 3 collar testbar turned between centres. The chuck will introduce its own errors.

Checking accuracy/ setup is the first thing one does with any new machine tool. You didn't do it for the lathe?

Sutripta
Sutripta is offline  
Old 30th September 2020, 12:40   #128
Distinguished - BHPian
 
Join Date: Oct 2012
Location: Delhi
Posts: 8,100
Thanked: 50,856 Times
re: DIY: Metal model engine building UPDATE: build complete (page 16)!

Quote:
Originally Posted by Sutripta View Post
Checking accuracy/ setup is the first thing one does with any new machine tool. You didn't do it for the lathe?
It was never a problem. I have machined longer pieces with no taper. So I am not sure why all of a sudden this starts showing up. But of course it could be due to a number of reasons along the way.

I must admit I am seriously underwhelmed by how Sieg designed the adustment of the tail stock. Basically one bolt holds the base plate in place against the body. In order to undo that bolt you need to take the tailstock of the lathe.

It doesn’t really allow for small corrections. It is endless hit or miss. In the end I got it working ok. I might see if I can come up with some modification so I can adjust it a bit easier next time.

The new material for the piston arrived yesterday, I am off for the rest of the week, so I hope to be making some good progress.

Jeroen
Jeroen is online now   (1) Thanks
Old 3rd October 2020, 11:16   #129
Distinguished - BHPian
 
Join Date: Oct 2012
Location: Delhi
Posts: 8,100
Thanked: 50,856 Times
re: DIY: Metal model engine building UPDATE: build complete (page 16)!

Yesterday I finished the fork of Debbie!

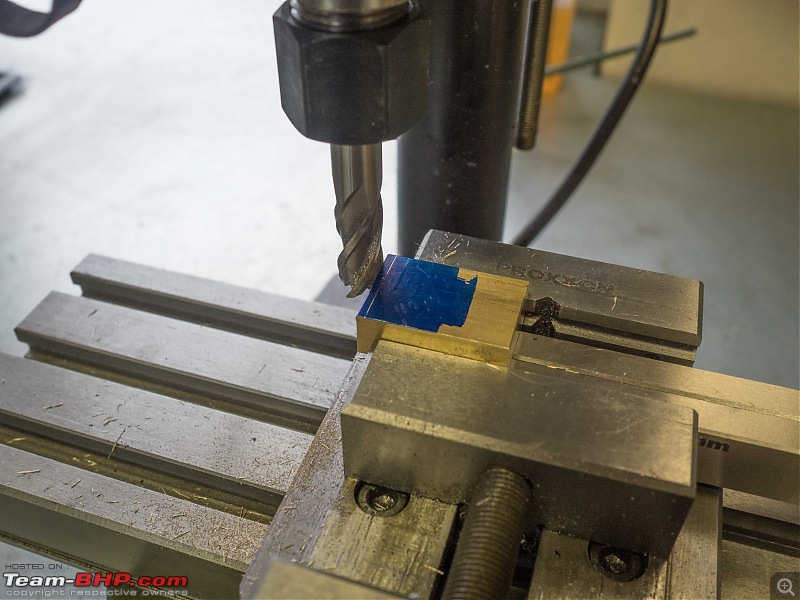
Fairly straight forward job on the mini mill:

DIY: Metal model engine building UPDATE: build complete (page 16)!-pa010003.jpg

DIY: Metal model engine building UPDATE: build complete (page 16)!-pa010004.jpg

When I fitted it to the piston rod, I noticed a problem, it is a bit crooked:

DIY: Metal model engine building UPDATE: build complete (page 16)!-pa010005.jpg

At closer examination I think I did not do a particular good job on cutting the thread on this rod. Not sure why, but it is not straight. So I will have to redo the complete rod. Oh well, its hobby!

Also, I redid the piston. This time I managed to get all the dimension correct!

DIY: Metal model engine building UPDATE: build complete (page 16)!-pa010006.jpg

Parting these days is a none-event! I am getting quite confident at this. Mind you, this sort of cast iron is pretty easy to machine to start with, but still. Good for morale to finish a job successfully.

DIY: Metal model engine building UPDATE: build complete (page 16)!-pa010007.jpg

DIY: Metal model engine building UPDATE: build complete (page 16)!-pa010008.jpg

Before I undertake the second attempt on the rod, I want to fix this problem with the tailstock once and for all. I am going to make a few adjustment bolts in the base.

Jeroen
Attached Thumbnails
DIY: Metal model engine building UPDATE: build complete (page 16)!-pa010009.jpg  

Jeroen is online now   (2) Thanks
Old 3rd October 2020, 12:01   #130
Senior - BHPian
 
Join Date: Jul 2009
Location: Calcutta
Posts: 4,668
Thanked: 6,217 Times
re: DIY: Metal model engine building UPDATE: build complete (page 16)!

Quote:
Originally Posted by Jeroen View Post
When I fitted it to the piston rod, I noticed a problem, it is a bit crooked:

Attachment 2062367
Put the rod back on the lathe and measure. Might be an optical illusion.

The die and die holder - adjustable?

Sutripta
Sutripta is offline  
Old 3rd October 2020, 12:13   #131
Distinguished - BHPian
 
Join Date: Oct 2012
Location: Delhi
Posts: 8,100
Thanked: 50,856 Times
re: DIY: Metal model engine building UPDATE: build complete (page 16)!

Quote:
Originally Posted by Sutripta View Post
Put the rod back on the lathe and measure. Might be an optical illusion.

The die and die holder - adjustable?
No, it’s really crooked I am afraid. Just a basic die and die holder, not adjustable. I will probably make a die holder I can use on the tailstock. But again, first fix the tailstock properly!

Jeroen
Jeroen is online now  
Old 3rd October 2020, 14:51   #132
Distinguished - BHPian
 
Thad E Ginathom's Avatar
 
Join Date: Jun 2007
Location: Chennai
Posts: 11,005
Thanked: 26,439 Times
re: DIY: Metal model engine building UPDATE: build complete (page 16)!

Aged 16, my one piece of lathe work (might still have it somewhere): a plumb Bob. It's knurled and quite nice. Thread passes through a small part that screws into the body.

It doesn't hang straight.

I guess I didn't drill the hole concentric to the body.

It's quite nice apart from being useless!
Thad E Ginathom is online now  
Old 3rd October 2020, 15:21   #133
Senior - BHPian
 
Join Date: Jul 2009
Location: Calcutta
Posts: 4,668
Thanked: 6,217 Times
re: DIY: Metal model engine building UPDATE: build complete (page 16)!

Quote:
Originally Posted by Thad E Ginathom View Post
Aged 16, my one piece of lathe work (might still have it somewhere): a plumb Bob. It's knurled and quite nice. Thread passes through a small part that screws into the body.

It doesn't hang straight.

I guess I didn't drill the hole concentric to the body.

It's quite nice apart from being useless!
First drill the hole, then turn the body.
Useless? No. Find use. Use it to prove that something which is actually vertical isn't.

Sutripta
Sutripta is offline   (1) Thanks
Old 4th October 2020, 22:32   #134
Distinguished - BHPian
 
Join Date: Oct 2012
Location: Delhi
Posts: 8,100
Thanked: 50,856 Times
re: DIY: Metal model engine building UPDATE: build complete (page 16)!

Yesterday I started on the modification for the tailstock

Everything had to come off:

DIY: Metal model engine building UPDATE: build complete (page 16)!-pa030001.jpg

The tailstock needs aligning across the lath (for milling) and along the lath (for drilling). As far as I can tell, the height is ok.

It has a stupid one bolt that holds the base to the tailstock itself. You can only get to that bolt after you have taken the complete tailstock of the lathe.

So I decided I would go for four M5 bolts on the corners of the base. That should give me enough room to get it alligned along all axes.

Small problem as my tap was not long enough to thread right through the base. So I had to drill the M5 hole and a large hole, partially, to accommodate the tap.

DIY: Metal model engine building UPDATE: build complete (page 16)!-pa030002.jpg

Drilling was done on my mini mill, with a bit of effort as I had to move the tailstock around for each hole. Aligning with a square, good enough.

DIY: Metal model engine building UPDATE: build complete (page 16)!-pa030003.jpg

The end result:

DIY: Metal model engine building UPDATE: build complete (page 16)!-pa030004.jpg

Not the prettiest, but pretty will have to come later. I want to see if I can this lathe running true!

A little old trick I remembered from yersteryear. You can do a half decent allignement by clamping a small feeler gauge between two centres!

If it sits like this, your allignement is pretty good in all 3-axis.

DIY: Metal model engine building UPDATE: build complete (page 16)!-pa030005.jpg

DIY: Metal model engine building UPDATE: build complete (page 16)!-pa030006.jpg

Obviously, not good enough to do proper turning, but it is a good starting point.

Same with the alignment of the tailstock along the length of the lathe. Checked it by running a micrometer along it on the support.

DIY: Metal model engine building UPDATE: build complete (page 16)!-pa030007.jpg

Just to get it all in the ball park. next I spend many hours fiddling. The problem is getting both allignements correct. I can do one, but not both. Which would mean I would have to do a re-allignement every time I go from drilling to turning or vice versa. I will have to try some more tricks.

I also noticed some other small problems on the carriage. So took that off and apart as well;

DIY: Metal model engine building UPDATE: build complete (page 16)!-pa030008.jpg

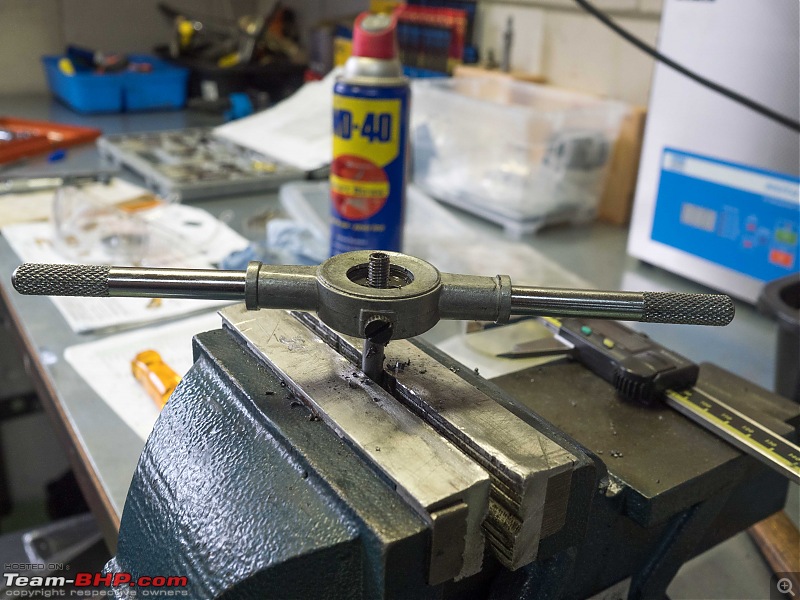
In between I have managed to make a die holder. I want to rule out any new mishaps on the thread on the piston rod.

More to come

Jeroen
Jeroen is online now   (3) Thanks
Old 5th October 2020, 17:07   #135
Distinguished - BHPian
 
Thad E Ginathom's Avatar
 
Join Date: Jun 2007
Location: Chennai
Posts: 11,005
Thanked: 26,439 Times
re: DIY: Metal model engine building UPDATE: build complete (page 16)!

Super. Jeroen

How did the Dutch make partition walls before drywall/plasterboard? In Britain, thin pieces of wood were nailed horizontally to the wood supports, with a little gap between each one. Why am I saying this? Because, in English, those pieces of wood are called lath. The machine tool has an e: lathe. Just curious: what do you call the lathe in Dutch?

So many languages: so many small differences!

(If you knock down or make a hole in one of those lath-and-plaster walls, you may even find horse hair that was mixed into the plaster!)
Thad E Ginathom is online now  
Reply

Most Viewed


Copyright ©2000 - 2024, Team-BHP.com
Proudly powered by E2E Networks