Team-BHP > Technical Stuff > DIY - Do it yourself
Register New Topics New Posts Top Thanked Team-BHP FAQ


Reply
  Search this Thread
58,294 views
Old 10th September 2020, 12:27   #16
BHPian
 
Artyom's Avatar
 
Join Date: May 2020
Location: Bengaluru
Posts: 582
Thanked: 1,599 Times
Re: DIY: Hard-wire your Dash Cam without expensive hard-wire kit

Quote:
Originally Posted by Tassem View Post

Best part is, all of this looks so OEM! Have had this setup in the current car for 3 years now with zero issues.
Can you please share the links where to buy all this stuff. Will help a lot.Thanks
Artyom is offline  
Old 10th September 2020, 15:49   #17
Distinguished - BHPian
 
BoneCollector's Avatar
 
Join Date: Apr 2011
Location: BIHAR
Posts: 3,202
Thanked: 10,814 Times
Re: DIY: Hard-wire your Dash Cam without expensive hard-wire kit

Quote:
Originally Posted by Reinhard View Post
Thanks, glad you liked it. Yes - I envy the twin sockets in the Brezza, Venue etc.
Brezza has 2 12V sockets, one in front and one in boot. Mine has 2 in front as I had installed one for my requirements. Link (Operation Khoj: Maruti Vitara Brezza ZDi+)

DIY: Hard-wire your Dash Cam without expensive hard-wire kit-img20170423wa0006.jpg
BoneCollector is offline   (1) Thanks
Old 
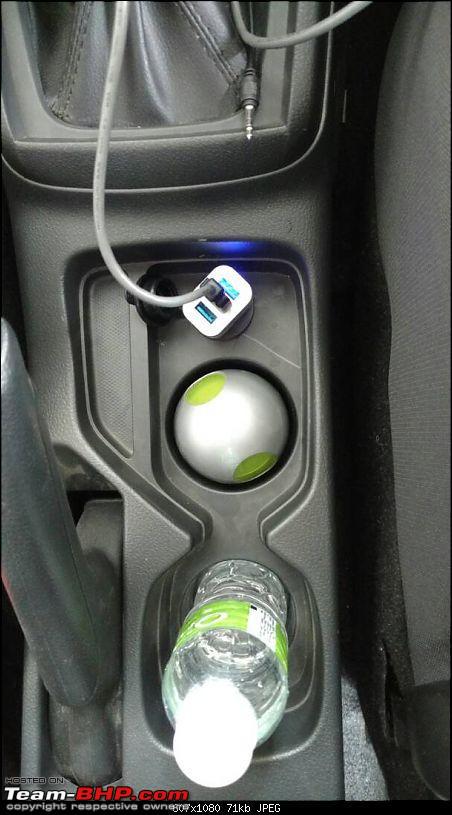
10th September 2020, 15:53   #18
Distinguished - BHPian
 
Reinhard's Avatar
 
Join Date: Nov 2010
Location: Pune
Posts: 4,854
Thanked: 17,732 Times
Re: DIY: Hard-wire your Dash Cam without expensive hard-wire kit

Quote:
Originally Posted by BoneCollector View Post
Brezza has 2 12V sockets, one in front and one in boot. Mine has 2 in front as I had installed one for my requirements
Ah ok. I have 2 in the Nexon too. One in the console, 1 at the shoulder of the rear seat. I for some reason was under the impression that Brezza also has 2 dedicated ports in the front. Now a little less envy!
Reinhard is online now  
Old 11th September 2020, 14:56   #19
Senior - BHPian
 
Jaguar's Avatar
 
Join Date: May 2006
Location: Bangalore
Posts: 1,208
Thanked: 2,546 Times
Re: DIY: Hard-wire your Dash Cam without expensive hard-wire kit

Quote:
Originally Posted by Tassem View Post
And to that point, I've hardwired all the accessories in my car. However, instead of using the DC converter, I added additional 12V cigarette lighter ports behind the dash.

I even have the below port inside my glove compartment so that my HDD can be easily connected to my HU without any dangling cables. Also helps the passengers connect and play their music via the 3.5mm jack.
Do you have links to these items? Getting good quality ports from amazon.in is a pain.
Jaguar is offline  
Old 11th September 2020, 21:47   #20
BHPian
 
Tassem's Avatar
 
Join Date: Sep 2009
Location: Bangalore
Posts: 608
Thanked: 1,429 Times
Re: DIY: Hard-wire your Dash Cam without expensive hard-wire kit

Missed posting links in my previous post. Here are the ports I use:

12V Power Port:

https://www.aliexpress.com/item/4000034939277.html

3.5mm/USB extension port:

Rectangular: https://www.aliexpress.com/item/4000385295683.html

Round (The one I have): https://www.aliexpress.com/item/32821067087.html

Switches:

https://www.aliexpress.com/item/4001111276710.html

Control Unit (Optional):

https://www.aliexpress.com/item/32913043943.html

Charger: (I have 5 of these. They're awesome)

https://www.amazon.in/gp/product/B0774J8C72/

Hope this helps.
Tassem is offline   (2) Thanks
Old 24th November 2020, 02:15   #21
Newbie
 
Join Date: Mar 2019
Location: PUNE
Posts: 4
Thanked: 5 Times
Re: DIY: Hard-wire your Dash Cam without expensive hard-wire kit

Quote:
Originally Posted by Reinhard View Post
Ah ok. I have 2 in the Nexon too. One in the console, 1 at the shoulder of the rear seat. I for some reason was under the impression that Brezza also has 2 dedicated ports in the front. Now a little less envy!
Your DIY are really encouraging ones. Recently I installed Akaso V1 dashcam in my Nexon but used the 12V socket to power up, as it doesn't comes with hardwire kit. Will be looking out to try doing hardwiring soon I missed this rear 12v socket in April 19 manufactured Nexon Petrol XZ+ . Was looking out for a DIY to install this power socket near the parcel tray for rear cabin light as SC won't install the socket. I checked with Rudra motors in Wagholi, Pune.

Last edited by Chetan_Rao : 24th November 2020 at 09:27. Reason: Punctuation
Falcon91 is offline   (1) Thanks
Old 24th November 2020, 10:52   #22
Distinguished - BHPian
 
Reinhard's Avatar
 
Join Date: Nov 2010
Location: Pune
Posts: 4,854
Thanked: 17,732 Times
Re: DIY: Hard-wire your Dash Cam without expensive hard-wire kit

Quote:
Originally Posted by Falcon91 View Post
Was looking out for a DIY to install this power socket near the parcel tray for rear cabin light as SC won't install the socket. I checked with Rudra motors in Wagholi, Pune.
It will be a simple DIY if you want to go through. High level summary -
  1. Procure the Tata OEM 12V socket from boodmo.com
  2. Run a good quality copper wire with proper shield from the ACC fuse (tap) in cabin towards the rear parcel shelf's side edge. (run it along & inside the RHS lower edge plastic trims). Its better to run it on the RHS since the fuse box is also on the same side. This way your socket will be on the RHS also, instead of the boot-light. But that is OK I think.
  3. Drill a hole in the parcel shelf holder & fix the 12V socket.
  4. Connect the wire coming from fuse tap to the +ve of the socket.
  5. Connect the -ve pin of the socket to any nearby body point with existing nut/bolt etc.

Last edited by Reinhard : 24th November 2020 at 10:58.
Reinhard is online now   (1) Thanks
Old 26th November 2020, 13:16   #23
Senior - BHPian
 
Jaguar's Avatar
 
Join Date: May 2006
Location: Bangalore
Posts: 1,208
Thanked: 2,546 Times
Re: DIY: Hard-wire your Dash Cam without expensive hard-wire kit

Quote:
Originally Posted by Reinhard View Post

Hard-wiring without a hard-wiring kit!


(In summary - we'll make our own hard-wiring kit by sourcing the key component of a hard-wiring kit, at a fraction of the price!)

All we want to achieve is to get a 5V DC supply from a 12V fuse in the car. So we simply need to find a step down converter. Here's the key item in our project. A simple PCB assembled circuit that can convert a 6V-24V DC input into a steady 5V DC output upto 3 Amp load. Best part is - the output is via a pre-soldered USB socket!
I did something similar but instead of the PCB, I used a Motorcycle Mobile Charger
Internally it is the same but now we have a solid enclosure for the PCB with better mounting options, for pretty much the same cost.
DIY: Hard-wire your Dash Cam without expensive hard-wire kit-bikeusbcharger.jpg
Jaguar is offline   (5) Thanks
Old 26th November 2020, 13:37   #24
Distinguished - BHPian
 
Reinhard's Avatar
 
Join Date: Nov 2010
Location: Pune
Posts: 4,854
Thanked: 17,732 Times
Re: DIY: Hard-wire your Dash Cam without expensive hard-wire kit

Quote:
Originally Posted by Jaguar View Post
I did something similar but instead of the PCB, I used a Motorcycle Mobile Charger
Thats perfect! In fact now I wish I had thought of this earlier. I had never paid attention and didn't realize such a simple device for bikes is available. Thanks for sharing this on the thread - everyone will have this better yet economical option easily accessible now.
Reinhard is online now  
Old 28th November 2020, 01:25   #25
Newbie
 
Join Date: Mar 2019
Location: PUNE
Posts: 4
Thanked: 5 Times
Re: DIY: Hard-wire your Dash Cam without expensive hard-wire kit

Quote:
Originally Posted by Reinhard View Post
It will be a simple DIY if you want to go through. High level summary -
  1. Procure the Tata OEM 12V socket from boodmo.com
  2. Run a good quality copper wire with proper shield from the ACC fuse (tap) in cabin towards the rear parcel shelf's side edge. (run it along & inside the RHS lower edge plastic trims). Its better to run it on the RHS since the fuse box is also on the same side. This way your socket will be on the RHS also, instead of the boot-light. But that is OK I think.
  3. Drill a hole in the parcel shelf holder & fix the 12V socket.
  4. Connect the wire coming from fuse tap to the +ve of the socket.
  5. Connect the -ve pin of the socket to any nearby body point with existing nut/bolt etc.
Thank you so much I placed the order of 12v power socket on boodmo and fuse tap adapter from Amazon. Eagerly waiting for first DIY
Falcon91 is offline   (1) Thanks
Old 10th March 2021, 10:44   #26
BHPian
 
viXit's Avatar
 
Join Date: Apr 2020
Location: Hyd
Posts: 804
Thanked: 2,876 Times
Re: DIY: Hard-wire your Dash Cam without expensive hard-wire kit

Quote:
Originally Posted by Tassem View Post
Two of these are direct to battery with their own switch, while 2 are controlled via a relay triggered by the ACC port so that they only come on when the vehicle is on. 4 extra 12V outlets along with two stock ones for a total of 6. One Independent fuse for each. I then added hi[gh quality USB chargers to these.
Could you pls share more pictures of the buttons and switches. Was this a DIY or did you have it installed professionally?
viXit is offline  
Old 5th September 2022, 09:58   #27
Distinguished - BHPian
 
Reinhard's Avatar
 
Join Date: Nov 2010
Location: Pune
Posts: 4,854
Thanked: 17,732 Times
Re: DIY: Hard-wire your Dash Cam without expensive hard-wire kit

Completed the installation with a 70MAI Lite2 dashcam with the same process & equipment in my Polo GT TSI1.2. Ah yes - acquired an 8.5K Kms run spanking shiny white specimen last week. A car I always wanted to own, finally . Just when it seemed impossible in this life!

So now - I have all 3 cars running 70MAI dashcams with this buck converter USB based invisible wiring setup. Two of these are in use for over 2 years with excellent performance and 0 issues whatsoever already. I'd say this meets my expectations for sure & makes the DIY approach that much more enjoyable.

Last edited by Rudra Sen : 5th September 2022 at 15:56. Reason: Edited
Reinhard is online now   (2) Thanks
Old 8th November 2022, 16:59   #28
BANNED
 
Join Date: Sep 2009
Location: Bangalore
Posts: 160
Thanked: 23 Times
Re: DIY: Hard-wire your Dash Cam without expensive hard-wire kit

@reinhard - I got 70mai pro plus dual cam installed with help of a nearby shop while was getting the seat covers changed.

1. He has placed it right behind the rearview mirror. Guess that won't be of use and needs to be moved. Is the sticker reusable?. What is the best place to keep it - in front of driver / below rearview?

2. The display screen is too tiny. Is it possible to extend it...maybe use my own phone (running its app) as a larger display or get a dedicated display?

Haven't yet connected to phone and setup - waiting for micro sd card delivery.
vjoy3 is offline  
Old 8th November 2022, 17:57   #29
Distinguished - BHPian
 
Reinhard's Avatar
 
Join Date: Nov 2010
Location: Pune
Posts: 4,854
Thanked: 17,732 Times
Re: DIY: Hard-wire your Dash Cam without expensive hard-wire kit

Quote:
Originally Posted by vjoy3 View Post
@reinhard - I got 70mai pro plus dual cam installed with help of a nearby shop while was getting the seat covers changed.
1. He has placed it right behind the rearview mirror. Guess that won't be of use and needs to be moved. Is the sticker reusable?. What is the best place to keep it - in front of driver / below rearview?
Generally that's the best place to install a dash-cam. Gives best frontal coverage with center mounted symmetric field ahead. And - it is invisible to the driver, so no obstruction while driving, other than the IRVM itself.

No the double sided tapes are generally not reusable, they get damaged while removing. But 3M rectangular tape patches are available generally, that do the job well. Most accessory store guys will have them (they use them generally to mount HID ballasts). Request them a bit and you'll get a pair. Cut it to size. But again - why?!
Quote:
Originally Posted by vjoy3 View Post
2. The display screen is too tiny. Is it possible to extend it...maybe use my own phone (running its app) as a larger display or get a dedicated display?
Haven't yet connected to phone and setup - waiting for micro sd card delivery.
Yes - the display is tiny, and its purpose is anyway not really to view any videos. Mainly to change settings on-the-go without having to connect the phone app.

Yes - the phone app is good & you can view the camera vision in it. But again its very small while driving & dangerous to look at it while driving. Why exactly do you want to extend the display? For viewing while the car is parked - the 70Mai app is good. You can browse, view, download and save all recorded clips on your phone wirelessly. Or you want the extension for any other purpose?
Extension display is not available for pretty much any dashcam.
Reinhard is online now   (1) Thanks
Old 9th November 2022, 12:04   #30
BANNED
 
Join Date: Sep 2009
Location: Bangalore
Posts: 160
Thanked: 23 Times
Re: DIY: Hard-wire your Dash Cam without expensive hard-wire kit

Quote:
Originally Posted by Reinhard View Post
Why exactly do you want to extend the display?
Or do you want the extension for any other purpose?
Extension display is not available for pretty much any dashcam.
Was hoping to use this dashcam with front and rear views can double up as a 360 cam for my old war horse
vjoy3 is offline  
Reply

Most Viewed


Copyright ©2000 - 2024, Team-BHP.com
Proudly powered by E2E Networks