Team-BHP > Technical Stuff > DIY - Do it yourself
Register New Topics New Posts Top Thanked Team-BHP FAQ


Reply
  Search this Thread
110,103 views
Old 16th December 2008, 12:20   #1
Team-BHP Support
 
benbsb29's Avatar
 
Join Date: Nov 2006
Location: Brisbane
Posts: 9,968
Thanked: 13,209 Times
Benny's first DIY : LEDs on an Ikon

Before i get started, would like to shout out a big THANK YOU to badboyscad, who was the inspiration behind this, and also was kind enough to answer all my queries, no matter how silly they were.

This being my first DIY, i wanted to get started with something which was relatively simple, before i ventured into something a little more challenging. I had initially planned to make my Pulsar as the whipping boy for my antics with LEDs, before starting out on my car, but ended up starting out on the car itself.

I managed to fix blue LEDs to the cabin light in my car. Steps explained below:

Gently remove the cabin light holder, by applying pressure to the regions as depicted by the arrows in the pic. I initially assumed it would be a difficult process to remove the holder, but its fairly simple in operation.

Benny's first DIY : LEDs on an Ikon-img_3499.jpg

Once you remove the holder, you will find the translucent cover which is held by 4 clips to the holder. Push these inwards to remove the cover. Unfortnately, i didnt click any pics to show this step, but i can add this later.

Remove the cylindrical bulb, and keep safely just in case you ever feel like going back to it.

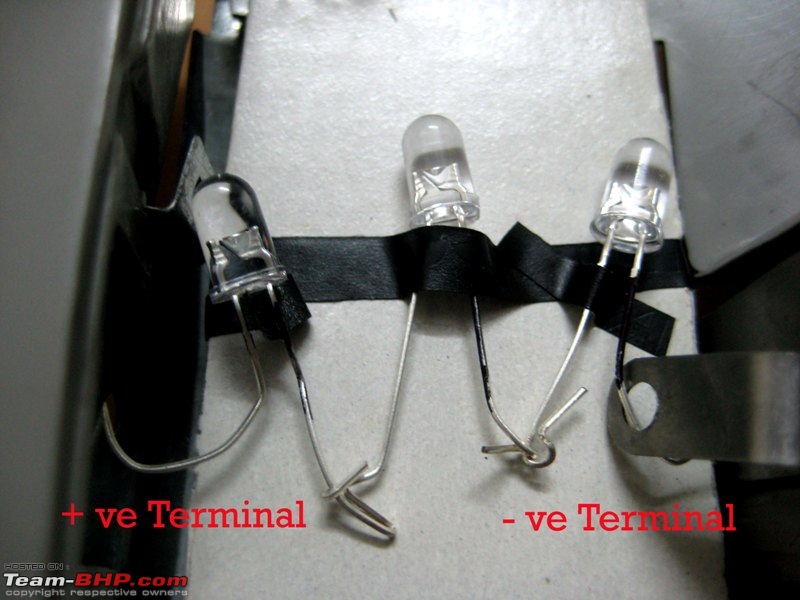
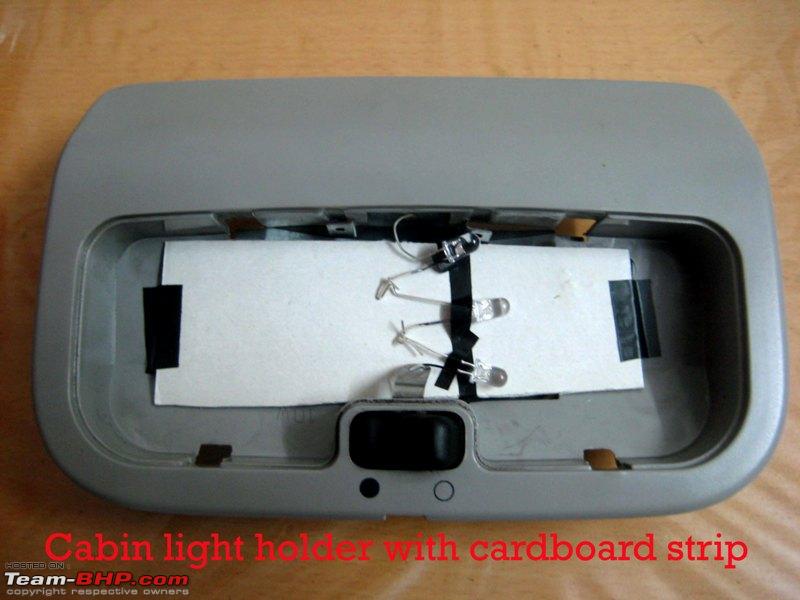
Connect the LEDs in series. I used 5mm Blue LEDs. To have a neater set-up you could solder the joints together, and add sleeves to the legs of the LED, but i chose to keep it rather simple for starters. The shorter leg is the cathode, while the longer leg is the anode.
Benny's first DIY : LEDs on an Ikon-img_3487.jpg

Name:  IMG_3486.jpg
Views: 8388
Size:  66.0 KB

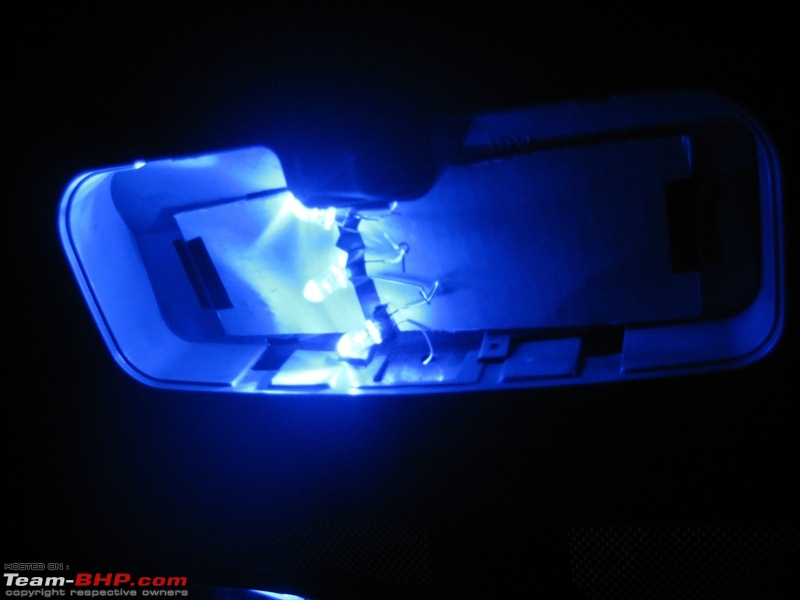
Since i was using 3 LEDs in series, i chose not to use a resistor in this arrangement. I used a cardboard strip to form a base on which i taped down the LEDs using simple insulation tape. This keeps them from running all around the place. Connect the anode and cathode of the series arrangement to the appropriate ends in the holder, and you're good to go.

Benny's first DIY : LEDs on an Ikon-img_3489.jpg

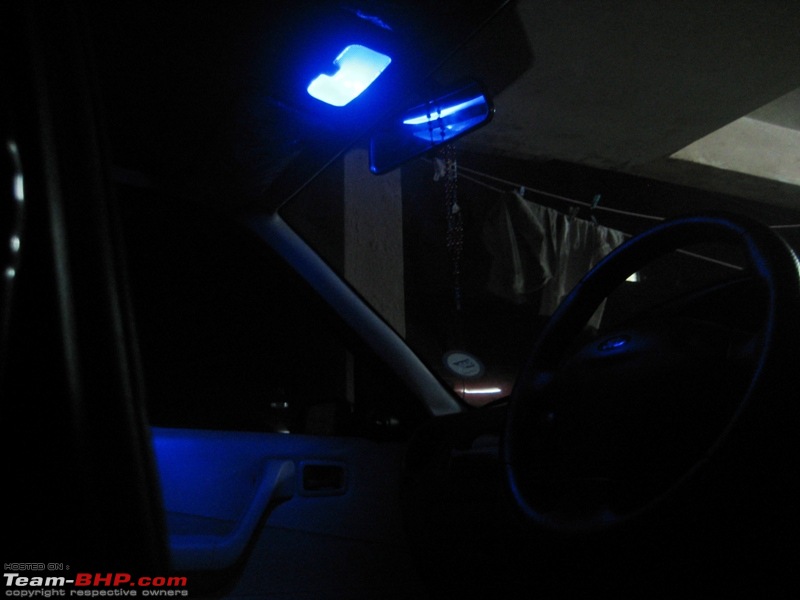
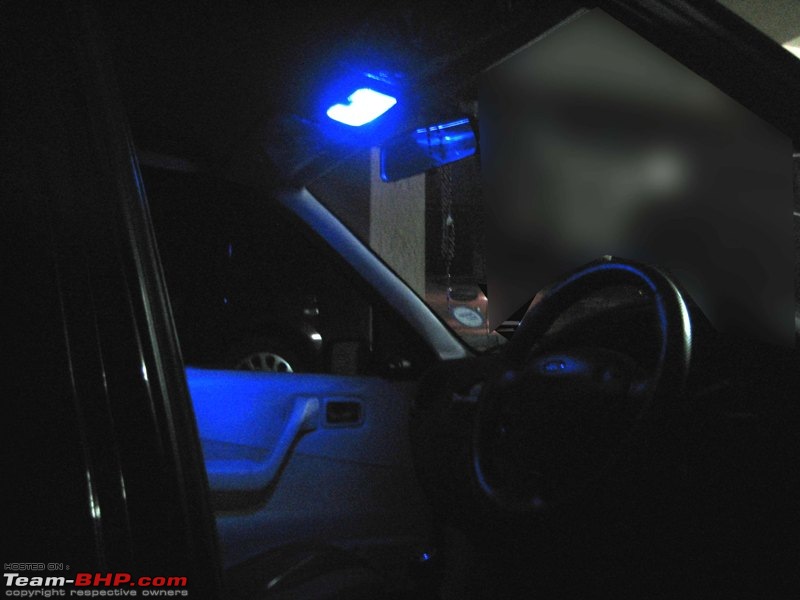
Turn on the light switch, and revel in the cool blue light.

Benny's first DIY : LEDs on an Ikon-img_3492.jpg

Benny's first DIY : LEDs on an Ikon-img_3493.jpg

Benny's first DIY : LEDs on an Ikon-img_3494.jpg

Benny's first DIY : LEDs on an Ikon-img_3495.jpg

Benny's first DIY : LEDs on an Ikon-img_3496.jpg

Benny's first DIY : LEDs on an Ikon-img_3497.jpg

P.S. I did not file the LEDs to obtain a uniform glow. I wanted them as bright as possible. As of now, since i have the LEDs pointing to only one direction in the casing, most of the light emitted from them are directed towards the passenger section. I plan on having another series set-up in parallel to this to get light to the driver's side as well.

I may even consider having white LEDs in future, which was my original choice.
benbsb29 is online now   (2) Thanks
Old 16th December 2008, 12:31   #2
Distinguished - BHPian
 
condor's Avatar
 
Join Date: Jun 2006
Location: Speed-brkr City
Posts: 15,864
Thanked: 16,013 Times

Benny, want to see this in the car. It's looking attractive .. and giving me ideas. Wonder how would a full -fledged PCB based set up work like ?
condor is offline  
Old 16th December 2008, 12:39   #3
Senior - BHPian
 
badboyscad's Avatar
 
Join Date: Feb 2007
Location: TN
Posts: 1,511
Thanked: 477 Times

@benny: glad that you got it done. i sincerely suggest that you buy a soldering iron and start to solder the components. Also, file the LEDs and bend them to focus the light downwards instead of sidewards.

As suggested by condor, you can try out full fledged bread board setup. You can use 9 to 15 LEDs(3 per series with a resistor).
badboyscad is offline  
Old 16th December 2008, 12:49   #4
Team-BHP Support
 
benbsb29's Avatar
 
Join Date: Nov 2006
Location: Brisbane
Posts: 9,968
Thanked: 13,209 Times

Quote:
Originally Posted by condor View Post
Benny, want to see this in the car. It's looking attractive .. and giving me ideas. Wonder how would a full -fledged PCB based set up work like ?
Let me know when you wanna catch up and see the car. It hasnt happened in a long time since we started planning.

Quote:
Originally Posted by badboyscad View Post
@benny: glad that you got it done. i sincerely suggest that you buy a soldering iron and start to solder the components. Also, file the LEDs and bend them to focus the light downwards instead of sidewards.

As suggested by condor, you can try out full fledged bread board setup. You can use 9 to 15 LEDs(3 per series with a resistor).
Who said i didnt get a soldering iron? I tried the white LEDs soldered together with a resistor, but it didnt work. i then decided to try the crude approach. I did bend the LEDs downwards, but since they are in the left side of the holder, they emit light more to that side. Will filing them prevent them from being focussed?

Will try the board setup soon.
benbsb29 is online now  
Old 16th December 2008, 13:40   #5
Senior - BHPian
 
suman's Avatar
 
Join Date: Sep 2005
Location: Kolkata
Posts: 4,589
Thanked: 279 Times

Hey benny, neat job

What next - underbody neons & FFE ?
suman is offline  
Old 16th December 2008, 13:48   #6
Senior - BHPian
 
esteem_lover's Avatar
 
Join Date: Jul 2006
Location: Madras/Py
Posts: 7,556
Thanked: 502 Times

Didn't know you were the night club type.
Good job benny, when are you doing that to my car ?
esteem_lover is offline  
Old 16th December 2008, 14:00   #7
Distinguished - BHPian
 
condor's Avatar
 
Join Date: Jun 2006
Location: Speed-brkr City
Posts: 15,864
Thanked: 16,013 Times

Quote:
esteem_lover : .. when are you doing that to my car ?
guess, the next time he wants to try something new !
He can always work on his own car at his leisure !
condor is offline  
Old 16th December 2008, 14:15   #8
BHPian
 
Join Date: Jul 2005
Location: Mumbai (MH-01)
Posts: 852
Thanked: 247 Times

What next? D-I-Y underbody neons?
salilpawar1 is offline  
Old 16th December 2008, 14:22   #9
Senior - BHPian
 
Lukeskywalker's Avatar
 
Join Date: Feb 2006
Location: Bangalore
Posts: 1,397
Thanked: 1,243 Times

Wow!! Someone seems to have a lot of free LED time on his hands.
Great job.
I'll ask the standard question:
How much did the 'setup' cost you?
May I stand in line behind E_L?
Lukeskywalker is offline  
Old 16th December 2008, 15:58   #10
Team-BHP Support
 
benbsb29's Avatar
 
Join Date: Nov 2006
Location: Brisbane
Posts: 9,968
Thanked: 13,209 Times

Quote:
Originally Posted by suman View Post
Hey benny, neat job

What next - underbody neons & FFE ?
Quote:
Originally Posted by salilpawar1 View Post
What next? D-I-Y underbody neons?
I'm not really a fan of the underbody neons, but am thinking in terms of changing the color of the speedo display, as well as the backlit switches for the power windows.

Quote:
Originally Posted by esteem_lover View Post
Didn't know you were the night club type.
Good job benny, when are you doing that to my car ?
Actually, this was supposed to be white LEDs which i had planned, but owing to some issues switched to using blue ones. Hence the night club effect.

Quote:
Originally Posted by condor View Post
guess, the next time he wants to try something new !
He can always work on his own car at his leisure !
Dont scare away possible bakras, Condor!

Quote:
Originally Posted by Lukeskywalker View Post
Wow!! Someone seems to have a lot of free LED time on his hands.
Great job.
I'll ask the standard question:
How much did the 'setup' cost you?
May I stand in line behind E_L?
Thanks Hari. This set-up including just three LEDs cost me Rs.6/-. cheers: Not including the cost of the soldering iron and stuff as i didnt do any soldering here.
benbsb29 is online now  
Old 16th December 2008, 16:05   #11
Senior - BHPian
 
vikram_d's Avatar
 
Join Date: Jul 2006
Location: Bangalore
Posts: 2,427
Thanked: 1,185 Times

PCB type cabin lights are already available in the market in different LED configurations.

I guess the aim behind this exercise was to DIY.
vikram_d is offline  
Old 16th December 2008, 16:13   #12
Distinguished - BHPian
 
theMAG's Avatar
 
Join Date: May 2006
Location: Avon, CT
Posts: 7,217
Thanked: 1,807 Times

Quote:
Originally Posted by vikram_d View Post
PCB type cabin lights are already available in the market in different LED configurations.

Sir Galahad,

Those are expensive enough for us poor salaried types to consider going to Benny's house for a 6 bucks LED solution!

Last edited by theMAG : 16th December 2008 at 16:16.
theMAG is offline  
Old 16th December 2008, 16:20   #13
Senior - BHPian
 
esteem_lover's Avatar
 
Join Date: Jul 2006
Location: Madras/Py
Posts: 7,556
Thanked: 502 Times

Quote:
Originally Posted by theMAG View Post
Those are expensive enough for us poor salaried types to consider going to Benny's house for a 6 bucks LED solution!
Thats only the material cost. You still do not know his labour cost.
esteem_lover is offline  
Old 16th December 2008, 17:11   #14
Senior - BHPian
 
rjstyles69's Avatar
 
Join Date: Sep 2006
Location: Bengalooru..
Posts: 4,343
Thanked: 842 Times

Aye aye so Benny Boy goes blue. Looks cool and dink chik what next ?
rjstyles69 is offline  
Old 16th December 2008, 17:13   #15
Team-BHP Support
 
benbsb29's Avatar
 
Join Date: Nov 2006
Location: Brisbane
Posts: 9,968
Thanked: 13,209 Times

Quote:
Originally Posted by vikram_d View Post
I guess the aim behind this exercise was to DIY.
Quite right, and not leaving out the price benefit as well. When i enquired at one accessory shop, he quoted something in terms of hundreds. Therein was born the desire and urge to DIM : Do It Myself.

Between this is just a beginning.
benbsb29 is online now  
Reply

Most Viewed


Copyright ©2000 - 2024, Team-BHP.com
Proudly powered by E2E Networks