Before I start off I'd like to make clear that this is not my original design.
This mod has been extensively researched and done by others before me, especially member a l l a n of the E90Post.com forums.
Also, the M3 SMG knob has a different wiring configuration. It has a 10-pin connector, as opposed to the M5 SMG knob's 6-pin connector. People have installed the M3 knob too but this isn't it.
So here goes.
I have the STEPTRONIC automatic transmission in my 335i. I wanted a manual but I didn't win the argument with my wife. Anyways, BMW says the auto transmission is faster than the manual - so that's a win.
This tranny comes with a fairly decent shifter but when the funky looking M5 SMG knob was matched by other enthusiastic people, I had to have it.

You have to make a wiring harness for this one. Lots of soldering and connecting is involved but the plus side is there's no cutting of vehicle wires. Just plug & play to make it easily (relative term) reversible.
The wires that you order below already have the contacts mounted onto them. All you have to do is make sure you insert them correctly in the male & female connectors. There is no seperate connector for power, but you can probably use a connector from an old computer power-supply if you really want to.
These are the parts you need to order -
BMW P/N: Selector lever handle SMG - SCHWARZ : 25 16 2 282 750 - BMW M5 / M6 SMG Knob - 1 no.
BMW P/N: Selector lever boot - SCHWARZ : 25 16 7 548 041 - E90 shift boot for knob - 1 no.
BMW P/N: Universal socket housing uncoded only in conjunction with - 6 POL. : 61 13 6 909 058 - Female connector for female terminal - 3 nos.
BMW P/N: BUSHING CONTACT - 0,2-0,5MM : 61 13 0 005 197 - Female connector for female housing - 16 Nos.
BMW P/N: Universal pin terminal uncoded only in conjunction with - 6 POL. : 61 13 6 913 365 - Male connector for male terminal - 2 nos.
BMW P/N: Pin-contact - 0,2-0,5MM2 : 61 13 0 005 198 - Male connector for male housing - 10 nos.
BMW P/N: Snap-in receptacle 2.5 with cable - 0,5-1,0MM2 : 61 13 0 007 449 - Female circular receptacle - 3 nos.
BMW P/N: Circular contact 2.5 with cable - 0,5-1,0MM2 : 61 13 0 007 452 - Female circular plug - 3 nos.
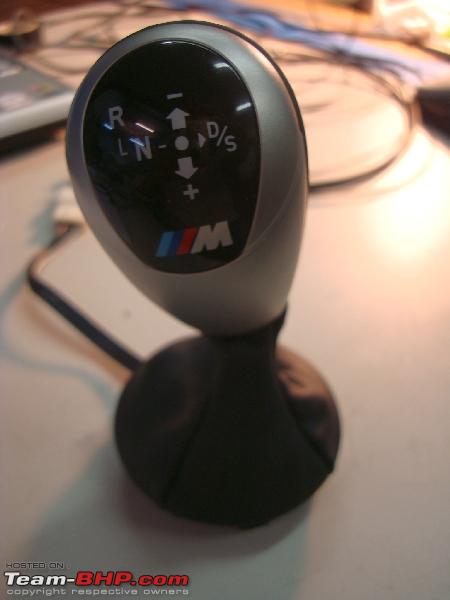
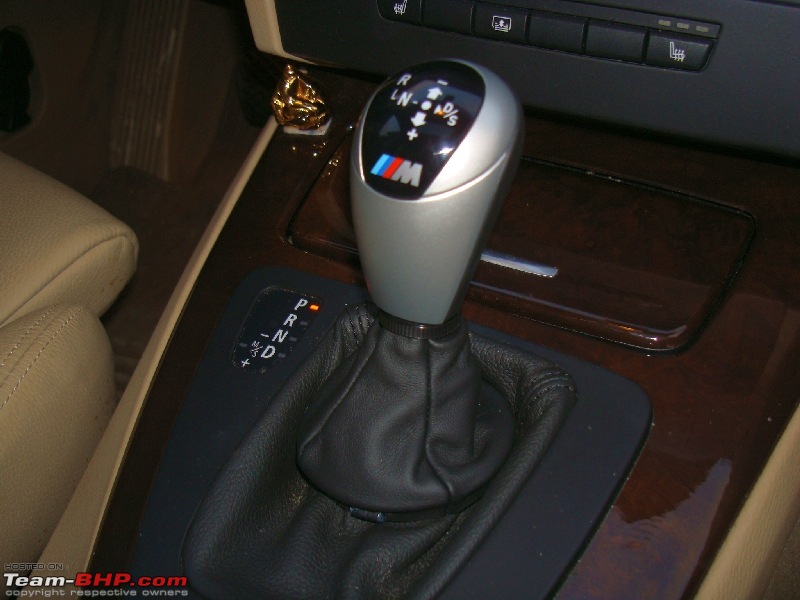
This is the knob I'm talking about
:

It has a different
shift-boot, which is matched to the M5's center console. To match it your car, you will need to cut (the plastic ring off) and sew the knob onto your existing shift-boot, or have it sewn onto another shift-boot. BMW Performance has a nice alcantara shift-boot for the automatic. I just bought another leather one, in case I feel like reverting to the old knob.
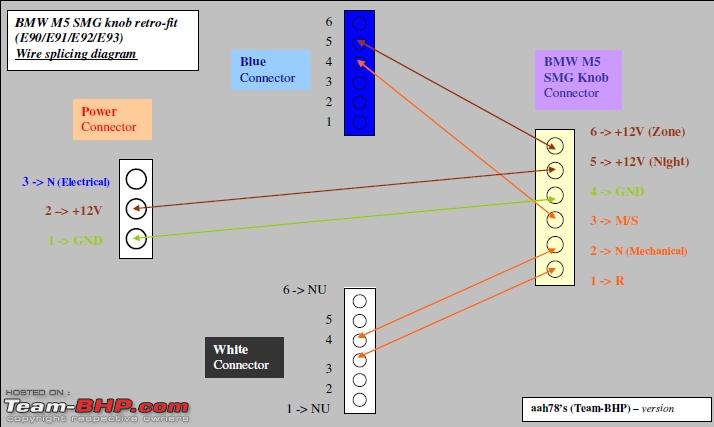
Wiring diagram  The Mr. Blue & Mr. White mystery
The blue & white connectors are actually both blue in colour! The reason for naming them blue & white will be shown later (No there's no reference to Reservoir Dogs, and there's no Mr. Pink around).
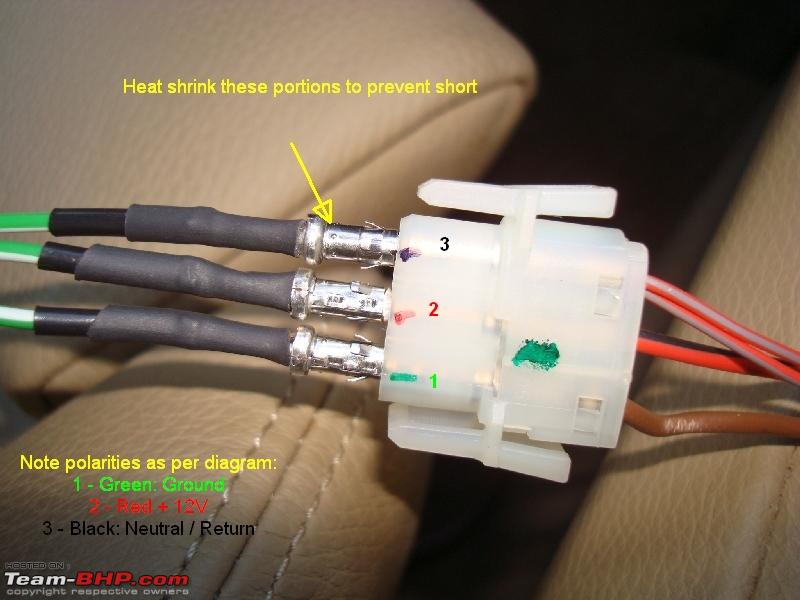
Power wires differentiated 
As you see from the wiring diagram, there's going to be a lot of inter-mingeling between wires & connectors.
You first need to insert the male wires in the male connectors and female wires in the female connectors (please note that pins 1 & 2 of the White connector are unused - no wires go in these positions).
Then you need to splice and solder wires (or have them soldered by someone else). Soldering makes a solid joint. Use heat-shielding to cover up the soldered places. Also, it's always good to tag / mark the wires - so you know that the correct end goes to the correct connector. Use a multimeter to ohm-out your connections so that you verify your connections before & after soldering.
[Don't just twist the wires together and cover them with electrical tape. Eventually either the wires are going to come apart and short somewhere, which you really don't want happening.]
Here's another take on the wiring diagram:
M5 pin 1 <----> White pin 3
M5 pin 2 <----> White pin 4
M5 pin 3 <----> Blue pin 4
M5 pin 4 <----> Power pin 1
M5 pin 5 <----> Power pin 2
M5 pin 6 <----> Blue 5
Wires prepped and ready for soldering  Finally soldered
After you've verified the connections, now we can start working on the car.
Remove original knob 
You need to yank it out - don't pull. Just hold it tightly and give it a solid yank - it'll pop right out.
Remove boot 
It's held together by tabs, just feel around with your fingers and you'll find them easily.
Remove the PRND plate 
Again, release the tabs and the plate will pop out - it has two connectors below, so don't pull it out yet.
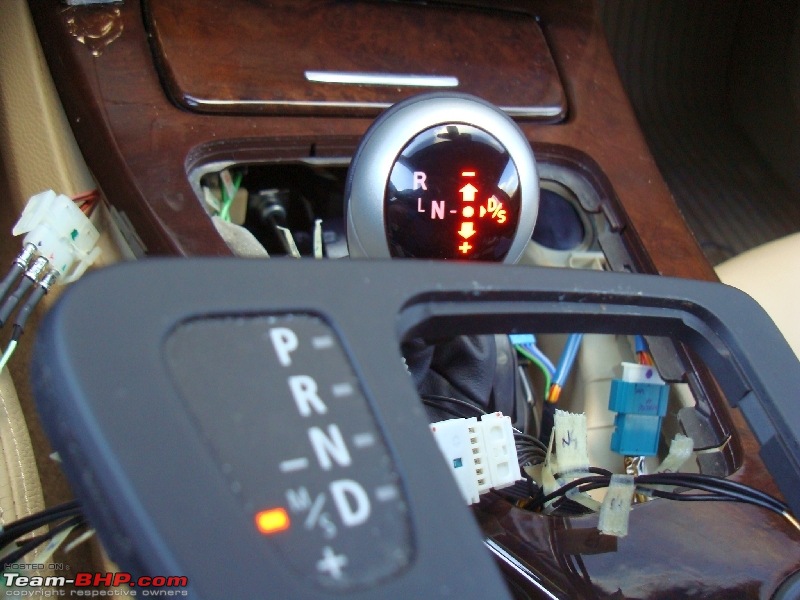
Ahaa - there they are 
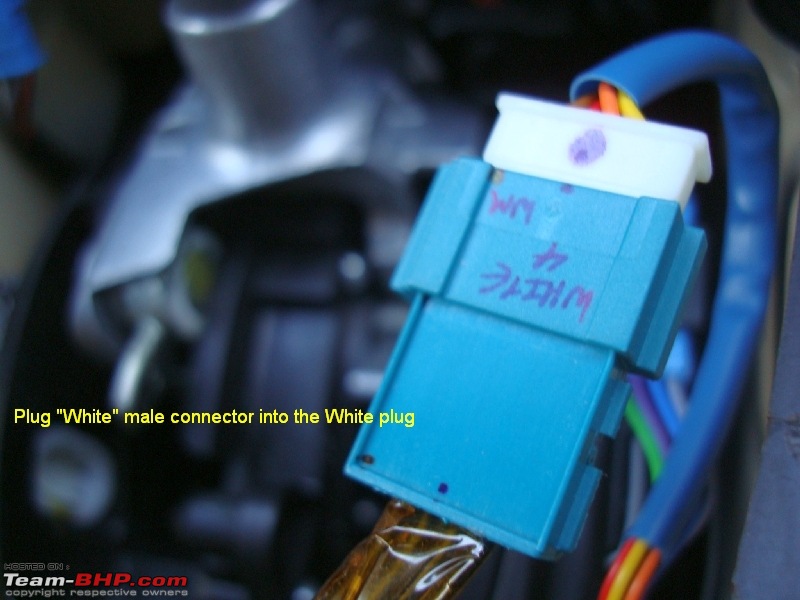
These are the blue & white slots. Your
Blue connector goes into the left (blue) slot, and your
White connector goes into the right (white) slot.
Unplug both of them to remove the PRND plate  Remove i-Drive knob
It's easy - just put a screw driver or something under it and it'll pop out.
Remove wooden trim 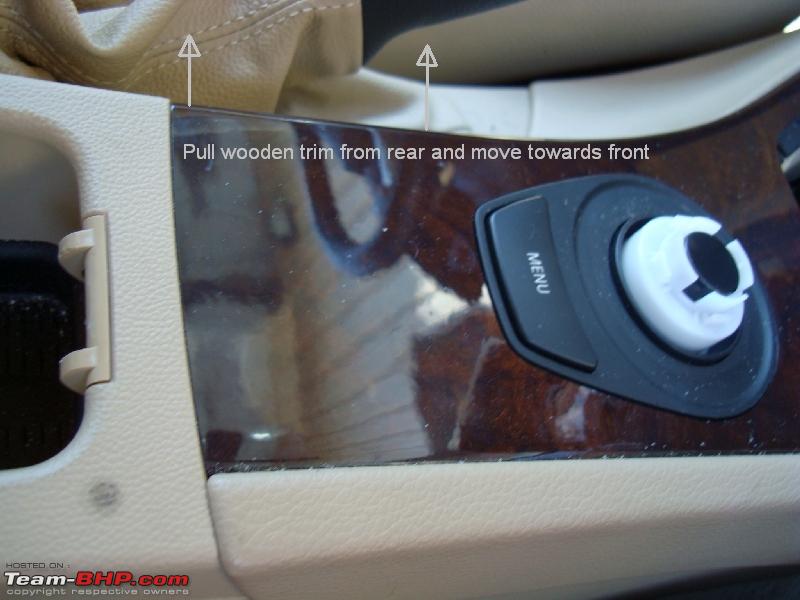

Time to get the wooden trim out. It's tough so be sure your fingers aren't greasy as you'll need a lot of grip and force, all the time making sure you don't break or chip the wood.
You don't need to remove it entirely - leave the front end in.
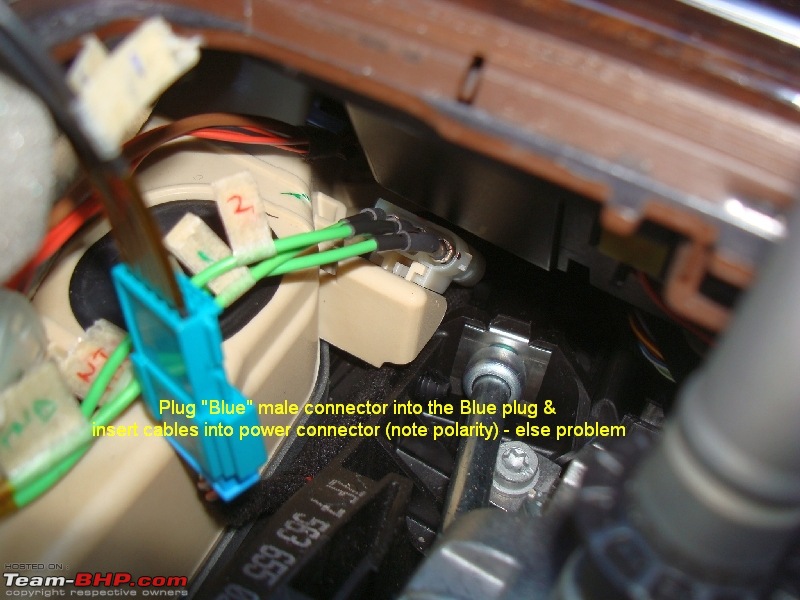
Putting in connectors - note polarity of the Power plug 


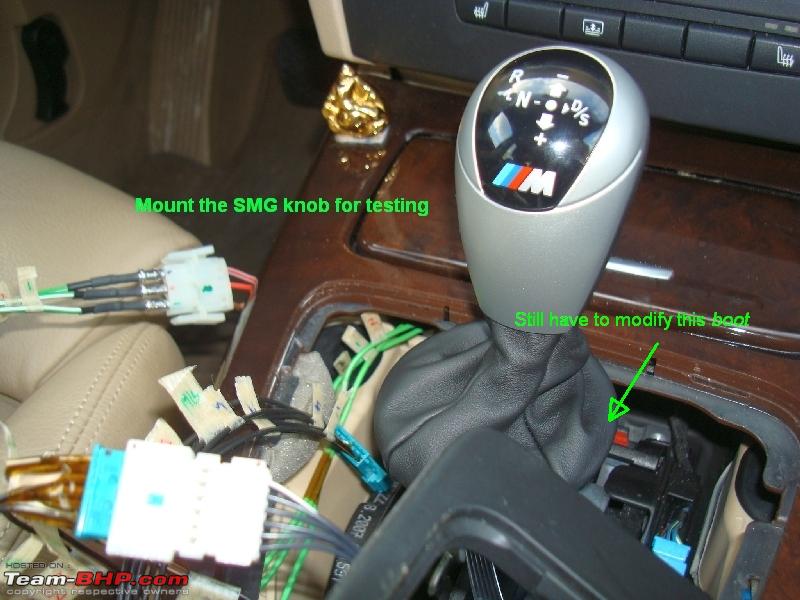
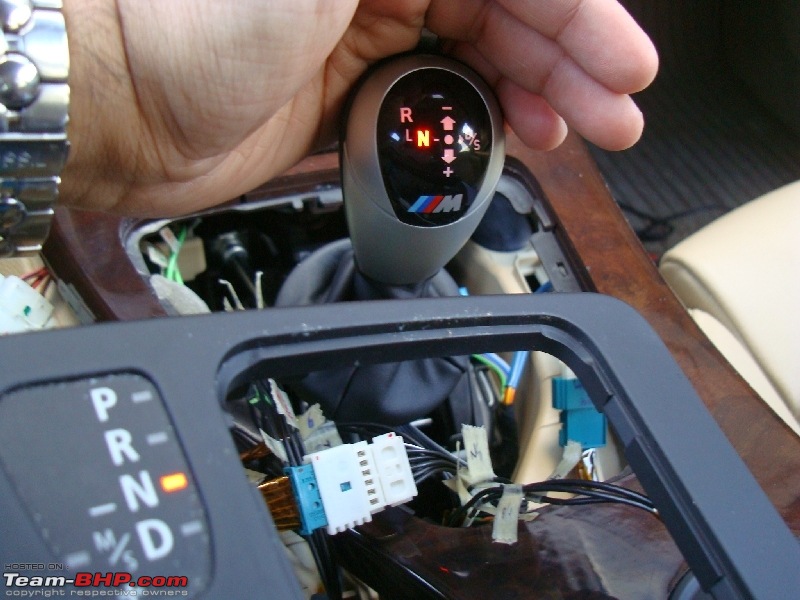
 Mount knob for testing - check lights, etc.


 Route wires so they don't interfere with the mechanism
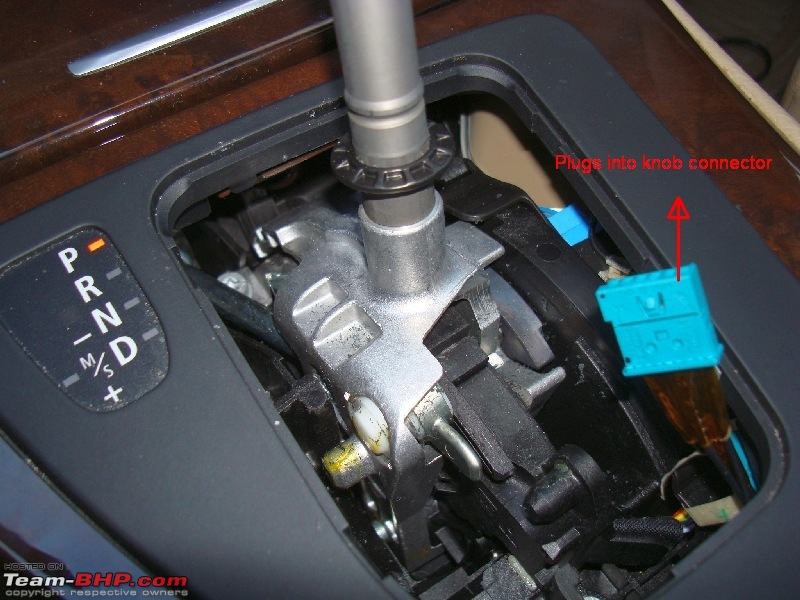
The last connector plugs into the knob's connector.
Testing mounts 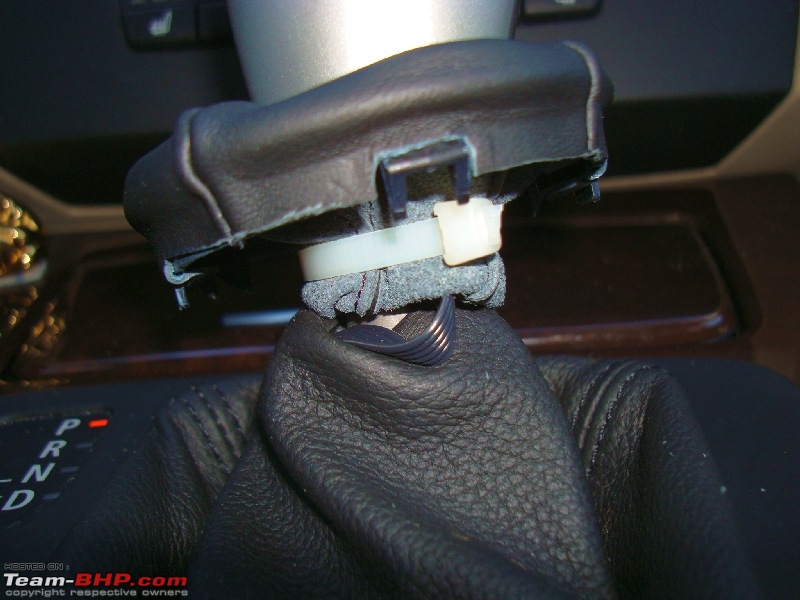
Connections are done. I'd been driving around with the knob attached in the last picture for a while but I've got it sewn on now.
One warning - since this knob is designed for a SMG tranny, it doesn't have a shift-disengage button, which means that you need to press the brake to move it out of Park. Also, the car can be thrown into Park from Reverse while in motion...
The ambient LEDs on the knob are fairly
light in daytime but are perfectly lit in the evenings / dark.
When you shift into R, N or D/S the LEDs are excessively bright, which is fine during the day but it's distracting at night. Maybe some resistors or pots in series with the wires will take care of this - haven't tried it yet.
There isn't a separate LED for the drive / D position.
Just a few hours well spent.


 15th May 2010, 05:52


 (3)
Thanks
(3)
Thanks