Team-BHP
(
https://www.team-bhp.com/forum/)
Hi All,
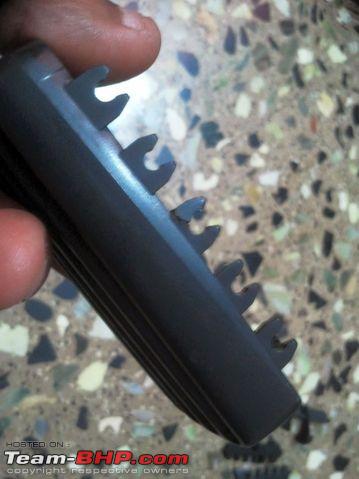
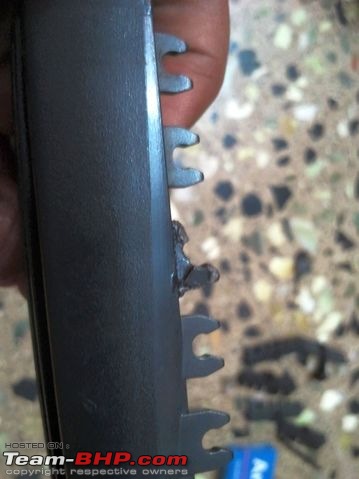
I have put the guide in PUG but its useful for any car. When I bought this car the louver adjustment broke in 2 A/C control vents. One from the Co driver side and other one from the center A/C control. I tried numerous method before and this is the best and outlast original A/C vent. Even if you buy a new one it will break within 2 years of usage. Why? Its because of one critical design flaw. There is no strengthening on the sides of "C" clips also called as support lugs. The other and main contributing factor is the plastic rod which clips in the "C" clamp. Its not rounded rather its oval due to the poor molding process. This causes the clip to expand beyond its tolerance value and breaks at the base of the clip.
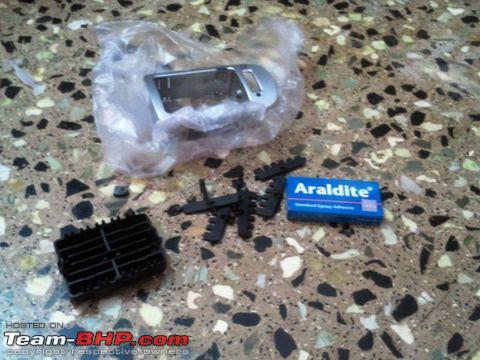
Procedure:
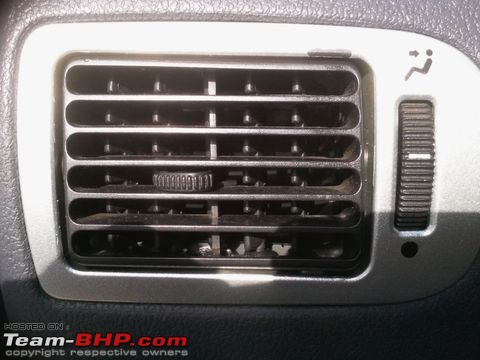
1. Open the louver control with the help of screw driver it will pop out.
2. It fixed in three parts. Gently remove the flow control knob by opening the lugs with the help of the screw driver. You must be very careful it will break easily. Even if you break dont worry it can be fixed back by silicone sealant.

3. Now you need to open the vane (black grill). It may look press fit but its not. On one side you will see a metal pin with a plastic bush. Take a punch or 2~4mm steel bit, place over the pin and punch it with a hammer slightly. You can even push out without hammer. Once its out of the seating push the both ends of the grill evenly. It will come out.
4. I tried with feviquick and these materials does not stick with feviquick and breaks very easily.
5. Be careful when you fix you can easily reverse the position. Once Mseal is set you cant reverse again. Make a quick dry run before applying resin.
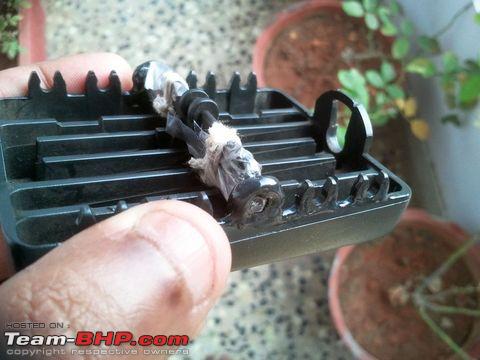
6. Wrap a piece of plastic cover with grease coated on the stems and tie with a piece of string. Refer pic.
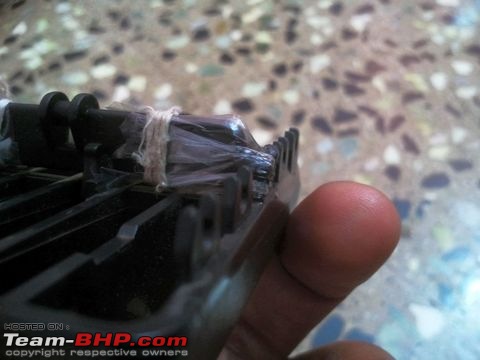
7. Take a small portion of M seal. Mix well. Make it cylindrical by rolling between the hands. The thickness can be 3~4 mm not more. If its thick then it will obstruct during assembly.
8. Place it over the stem and press firmly to take the shape. Cut off the excess with a knife and shape it. The Purpose of plastic cover is to protect the stems being bonded from the adhesive.
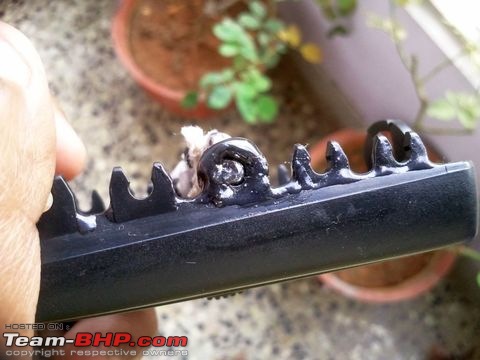
9. Now take 1:1 ratio of Araldite and make a thin coating over Mseal. Put a dab of araldite on the other clips as shown in the pic "end result".
10. Leave 12 hrs atleast for setting. Place between two books and the control knob should be facing down and should touch the floor.
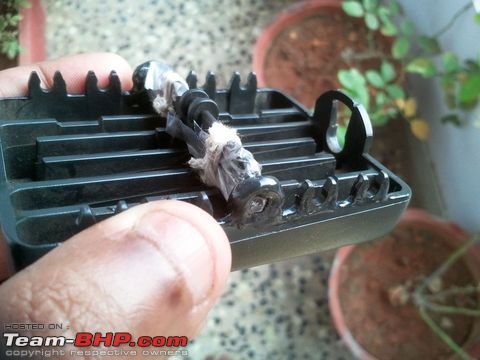
11. Next day remove the thread and cut the plastic cover near the end of the stem using a knife .Reassemble all the parts and fix it in the car.
Regards,
Vijay
Hi Vijay,
Thanks for sharing; I'm certain it will be of help to many others. We've spaced out your paragraphs (for easier readability) and also inserted the pictures inline with your text content.
Thanks vijay for sharing this DIY with us. I too have similar problem in my WagonR and will follow this DIY very soon.
PS - Is your car also a Maruti?
Thanks for this very useful post Vijay..
@blue volt: Car is Fiat Palio. See the vents carefully.
Thanks Vijay for the great DIY. My Polo's front right vent's louvers broke yesterday. Tried Feviquick and it did not work. Will try your method (MSeal + Araldite) over the next week end.
Last week I need to fix the other two vents. In the central vent 5 clips were broken and fixed back successfully with the same stock tightness. It will last for the lifetime of the car. I have saved almost Rs 3000 and there is no guarantee the new vent will last for couple of years.
Regards,
Vijay
Vijay, you need to open a Fiat workshop :D You should post that clock guide you sent me as well and have a single DIY thread
Thanks bottle. I am planning to start my own workshop at some point of time lol: exclusively for fiat.
To open the clock cluster you need to start from removing the A/C control knob. Its a clip type. Then use philips screw driver and remove the center A/C control. Next part is the black trim on the speedo cluster. No need to strip entire trim. Remove the trip adjacent to the clock. You can see one philips screw. Remove that along with the two exposed screws in the bottom. Now you can remove the clock.
Regards,
Vijay
The A/C vent of my Bolero (vlx, 2011) is broken. Is there a way to replace it, or do I have to pony up the money for the entire dashboard ?
I live in Chennai.
Any leads/pointers would be appreciated.
Thanks
Shyam
The vent itself can be ordered as a spare, no need to buy the whole dash. 15 minutes job (max) if one has the right tools.
Spike
As Spike mentioned, the vent can be changed individually.
IIRC, its called 'Louvers Assy' or something.
Will cost you somewhere around ~300-500 bucks.
Yes. But if you ask dealer to replace it, labour will be Rs 600 or Rs 900. I have replaced all mine in last 7 years and 1 of the replaced ones is now broken again.
| All times are GMT +5.5. The time now is 04:35. | |