| |||||||

| Search Forums |
| Advanced Search |
| Go to Page... |
 |
| Search this Thread |  26,536 views |
 7th December 2022, 17:55
| #1 |
| BHPian | Dji Mini 3 Pro Review | The Best Nano Drone DJI MINI 3 PRO  Pros:
Cons:
Prelude: I do a lot of travel photography. I normally capture more photos than videos and mostly shoot with either the Canon or the Nikon equipment I have. I have a Go Pro too which I have used it occasionally to shoot some videos clips during my past trips. Less videos in DSLR’s because, it requires me to carry a tripod and a gimbal always to obtain shake free, stabilized footage. I do have a very good tripod but not a gimbal that can carry the weight and balance the DSLR + lens setup I own. (Well, will need to upgrade to a mirrorless camera soon). Shooting handheld videos for a long time with heavy camera gear is not easy and very strenuous. The Travel Junkie: To make my travel experiences more alive, it is only in the recent past that I began to shoot some videos full time during my trips and utilize my Go Pro well. Believe me, it turned out to be an excellent fun filled activity to capture the action live and carry back pleasant memories from the trips. This is when I thought of making travel videos more interesting by introducing another dimension from a flying camera and bring in different perspectives from aerial views and spice up the videos. This is the point where my search for a drone began. if you are still wondering as to what made me go in pursuit of a drone, check out the below footage I shot: Shot on Samsung Galaxy: The Search beings: With no prior experience of flying or using drones, I wanted to experiment and play around before investing on a drone. So out of curiosity, I initially purchased a toy drone that had a camera at MBK shopping center in Bangkok, Thailand. The Toy Drone: 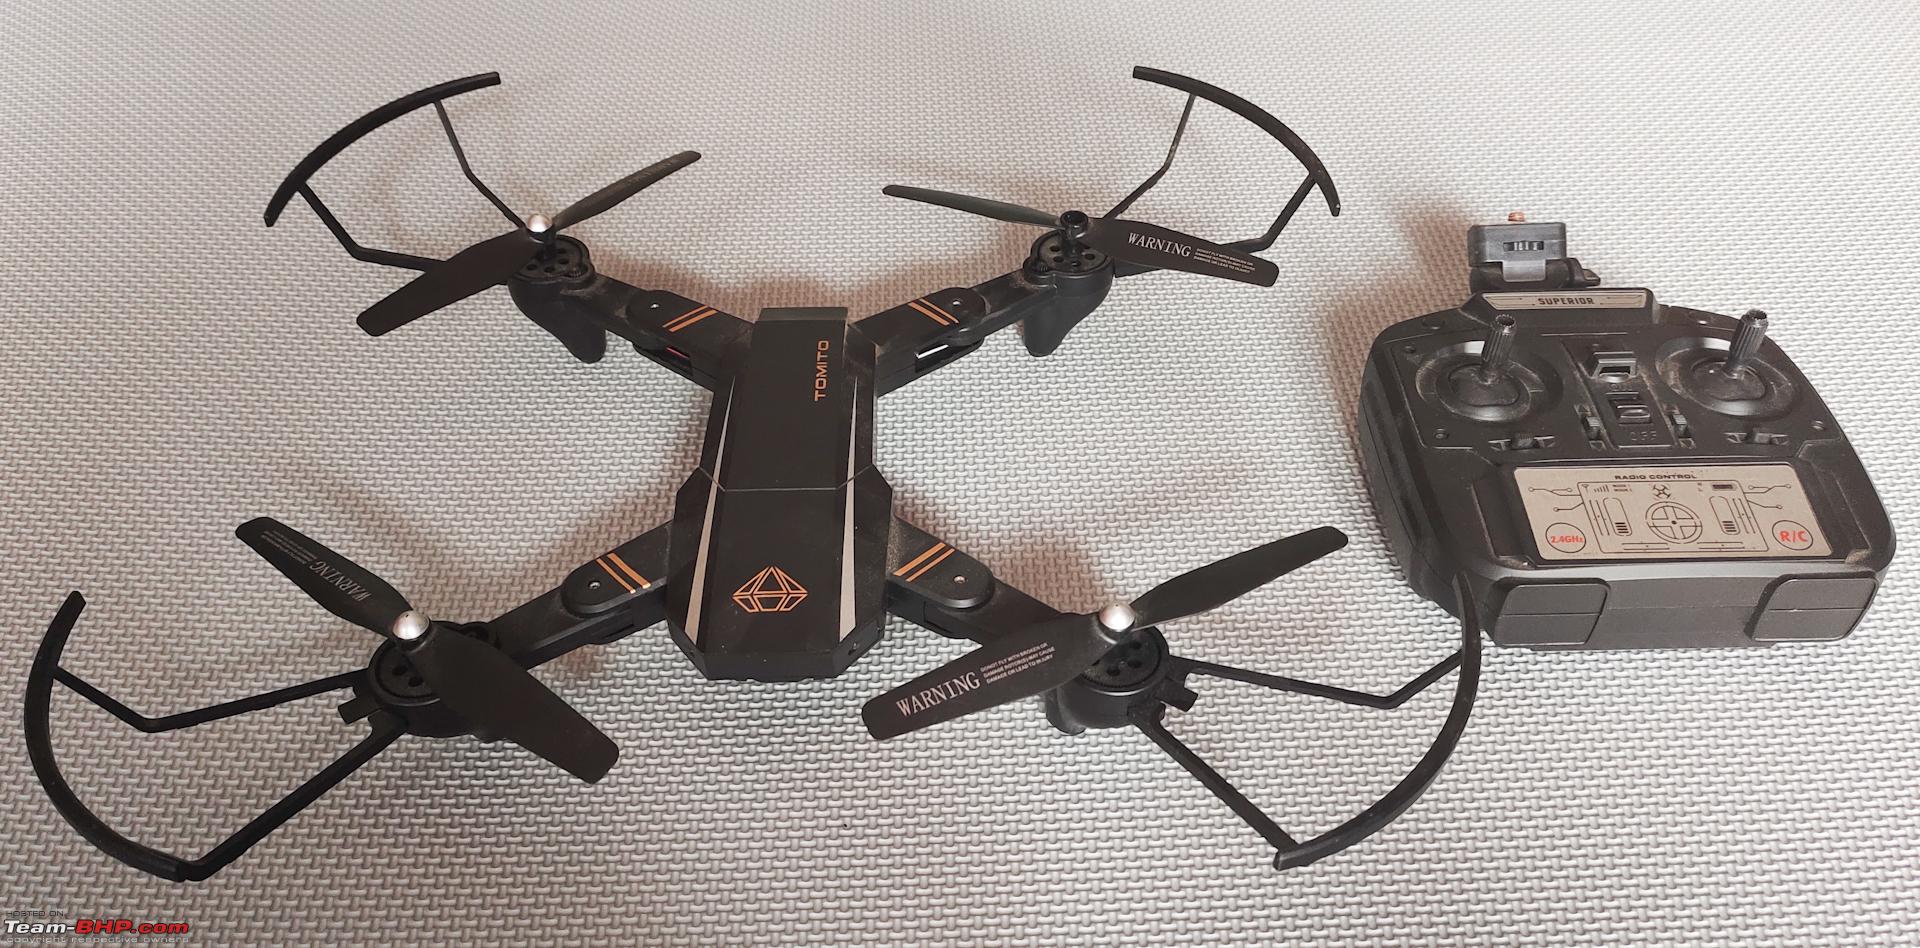 The drone was a replica of DJI MAVIC and came with a remote controller. The flight time was less than 6-8 minutes on full charge and controlling it was very difficult and required special skills as it swayed and moved all over the place during its flight even after trimming down its pitch, roll and yaw movements. Flying it was a big challenge and the entire 5 minutes used to get consumed in an effort to keep it stable or let it crash against the obstacles. The video quality from the 480p camera was pathetic and trash. However, it gave me an idea of how drones work. Hello Tello:  This is when I made my next move and purchased a DJI Tello in Singapore. This to me was very beginner friendly and fun to fly. Very light, compact and stable with decent 720p HD recoding capabilities and a flight time of 10-11 minutes. I learnt a few basic moves and started enjoying it with the Tello FPV. Although it could not fly very high and handle winds of any sorts, it was for me, still a good one to start with. The third party app for Tello was much better than the plain vanilla app from Dji. Experience with Tello:  The transmitted video feed over Wi-Fi was choppy and unusable sometimes even with slightest interferences because the Tello could not record any videos onboard. So, I decided to improve the quality and paired it with a portable Wi-Fi range extender and a Bluetooth Amkette EVO game controller. It did work and things improved to some extent and I could stretch and cover more ground. However, the video quality was no match to the cameras I owned and I found it to be still jittery at certain times even with improved signal strength. So, I only used it to educate myself and pick up the skills needed to fly a drone. At this point I really felt the need to purchase a good quality drone and the hunt began. What Next? Deciding on which drone to buy depends completely upon what it is going to be used it for. Well, in my case it was definitely for recreational purposes and for making travel videos or Vlogs. Based on their availability in India, my research and requirements I shortlisted the below drones and I was also looking for something that was affordable, portable and compliant with the drone flying rules and regulations. Drones short-listed:
Evaluating the choices made:
And the Winner is: DJI MINI 3 PRO, as it ticked all the boxes and most likely will travel around the world with me. The Air 2S and AVATA do exceed the limits and breach the 250 grams mark and thus come under the scanner. So had to knock them off the list. Having said that, I was forced to narrow down my options and pick the DJI MINI 3 PRO as winner despite having some apprehensions about it because, MINI 3 PRO was a half-baked product when it was launched, with many issues and complaints related to connectivity, range and a few software malfunctioning problems, reported by reviewers and people who initially bought it. While DJI was silently working on to improve the quality of the product behind the scenes and proactively resolving the issues reported by people around the world with fixes through firmware updates, I constantly kept tabs on DJI official site and YouTube reviews and waited patiently till things became stable. At the time when I decided to take the plunge, all critical issues had been ironed out through multiple versions of firmware updates. That gave me the confidence and eventually was reason for me to pick this little master as a winner. Finally, for a beginner like me, the pros outweighed the cons and so I went ahead with my decision to buy one for myself. Below are the pics of the mighty mini in flight: 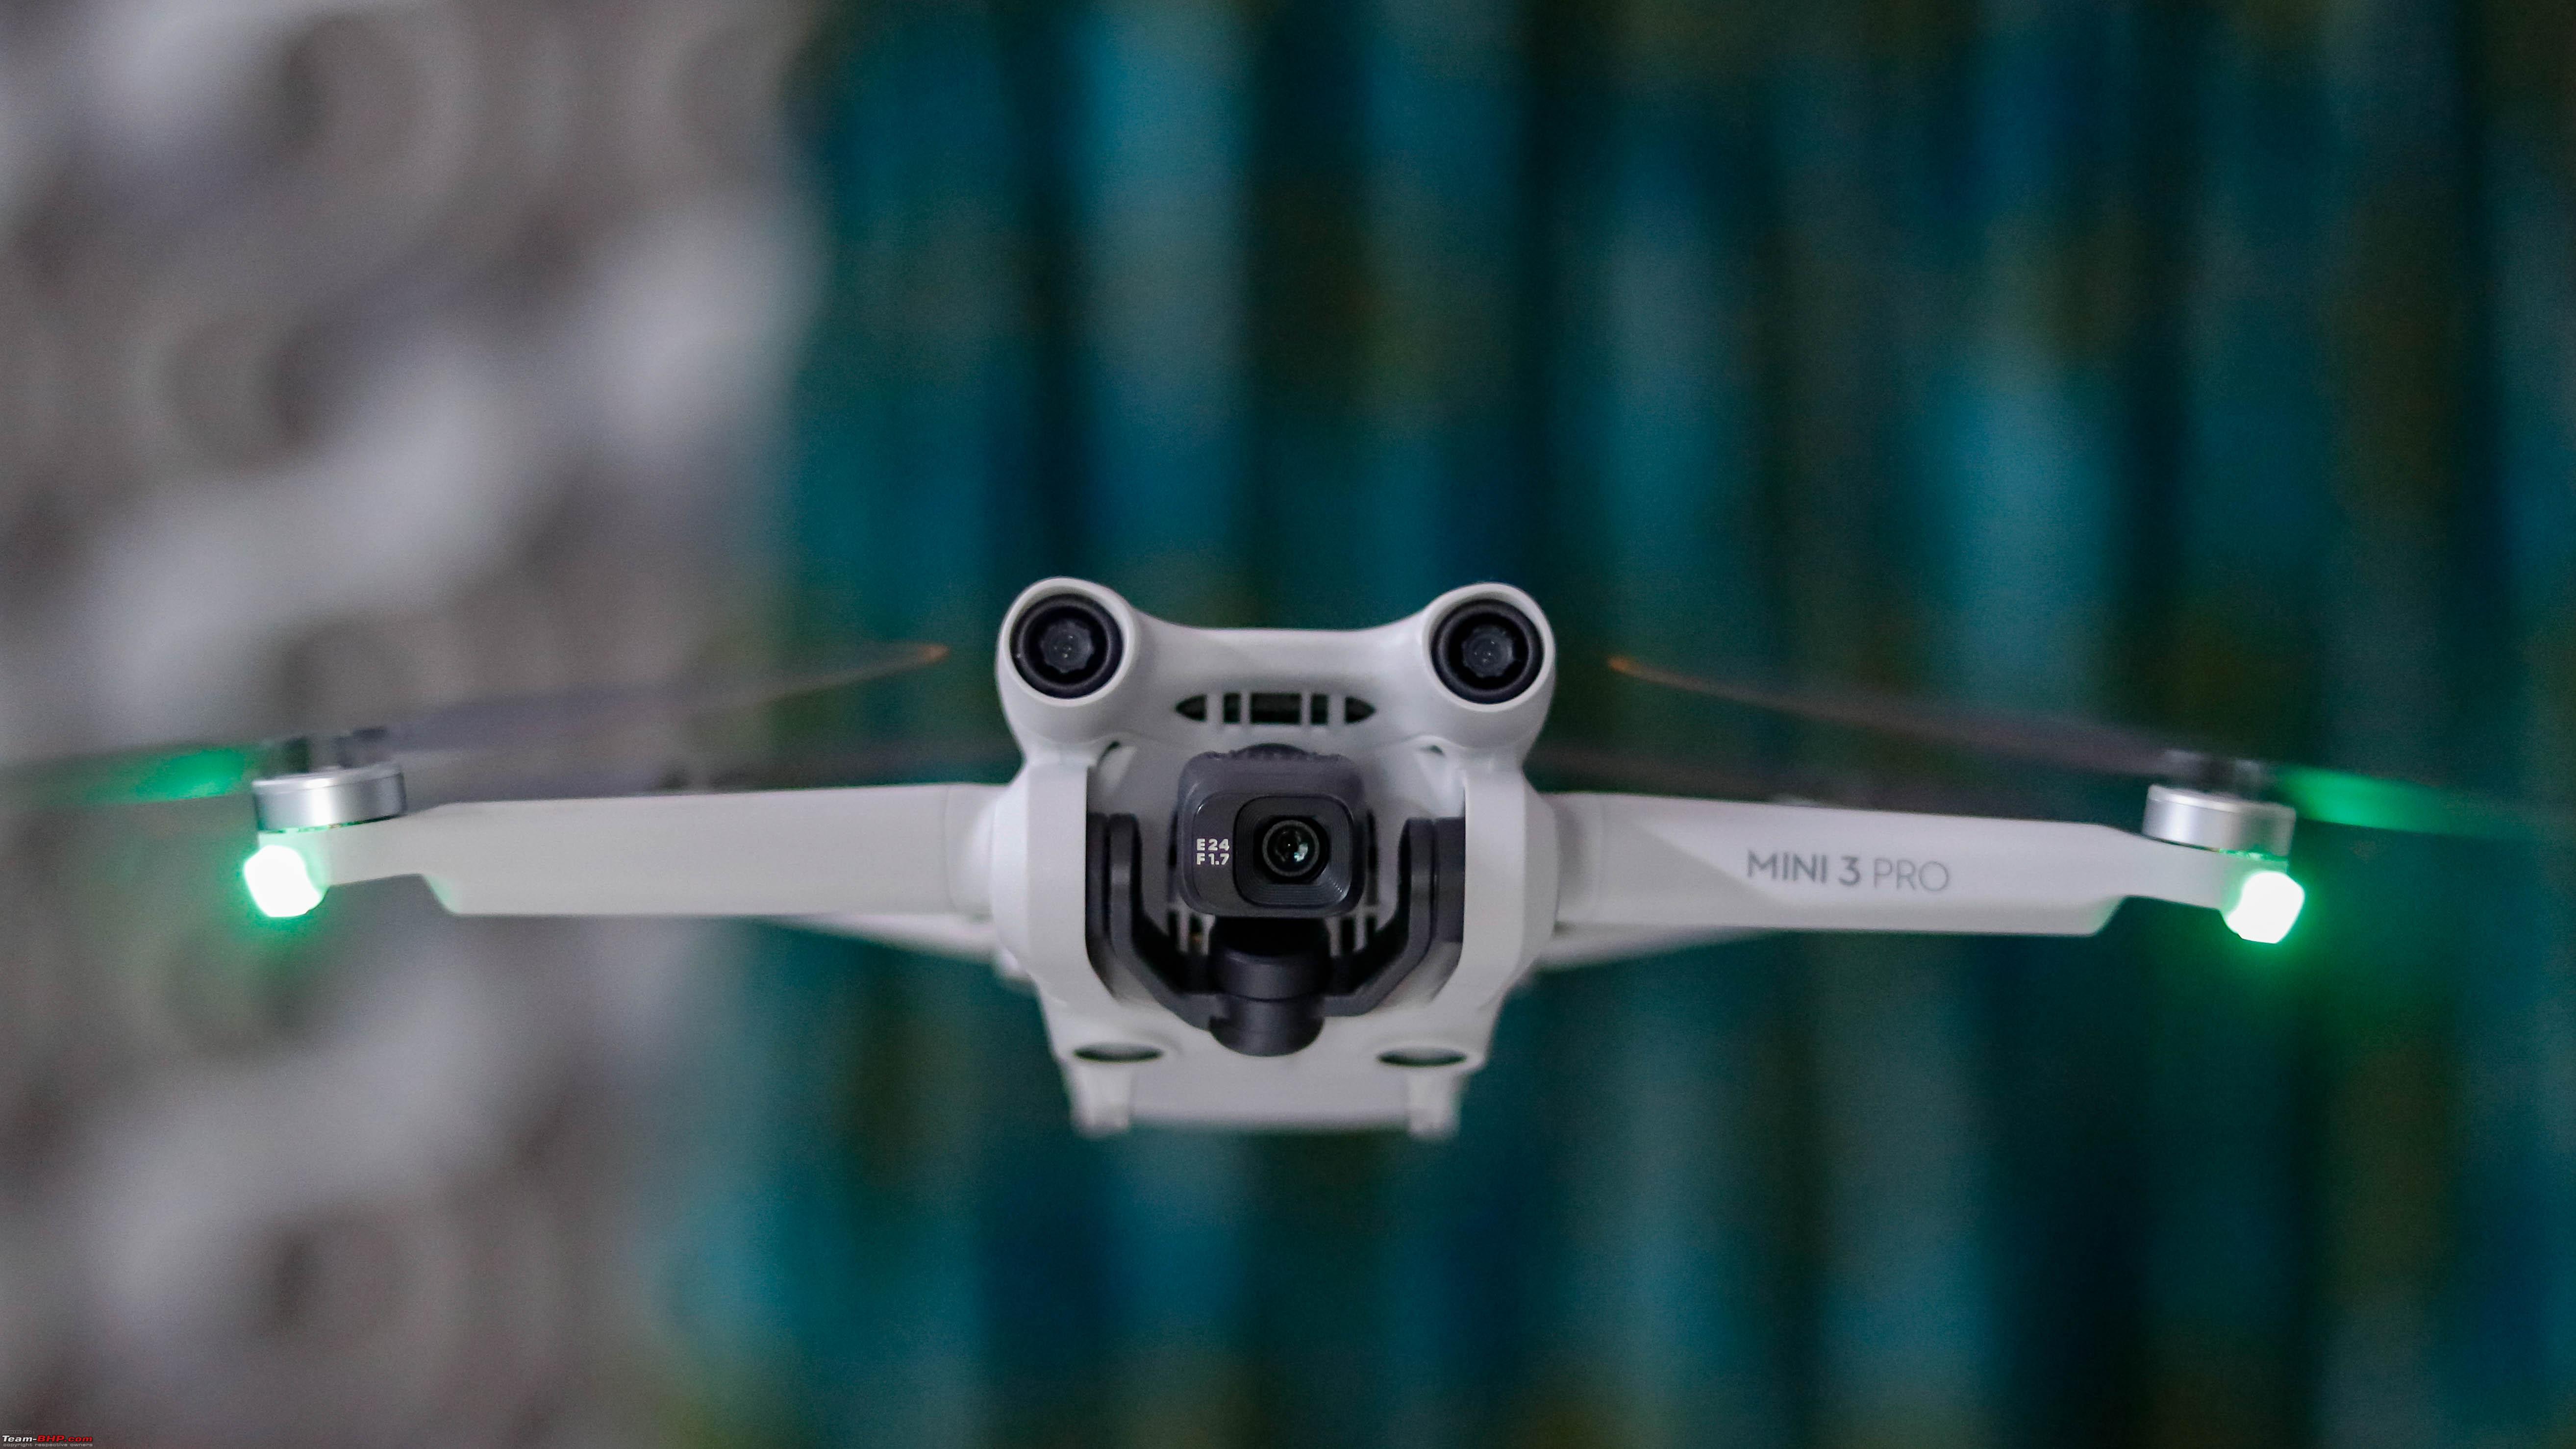    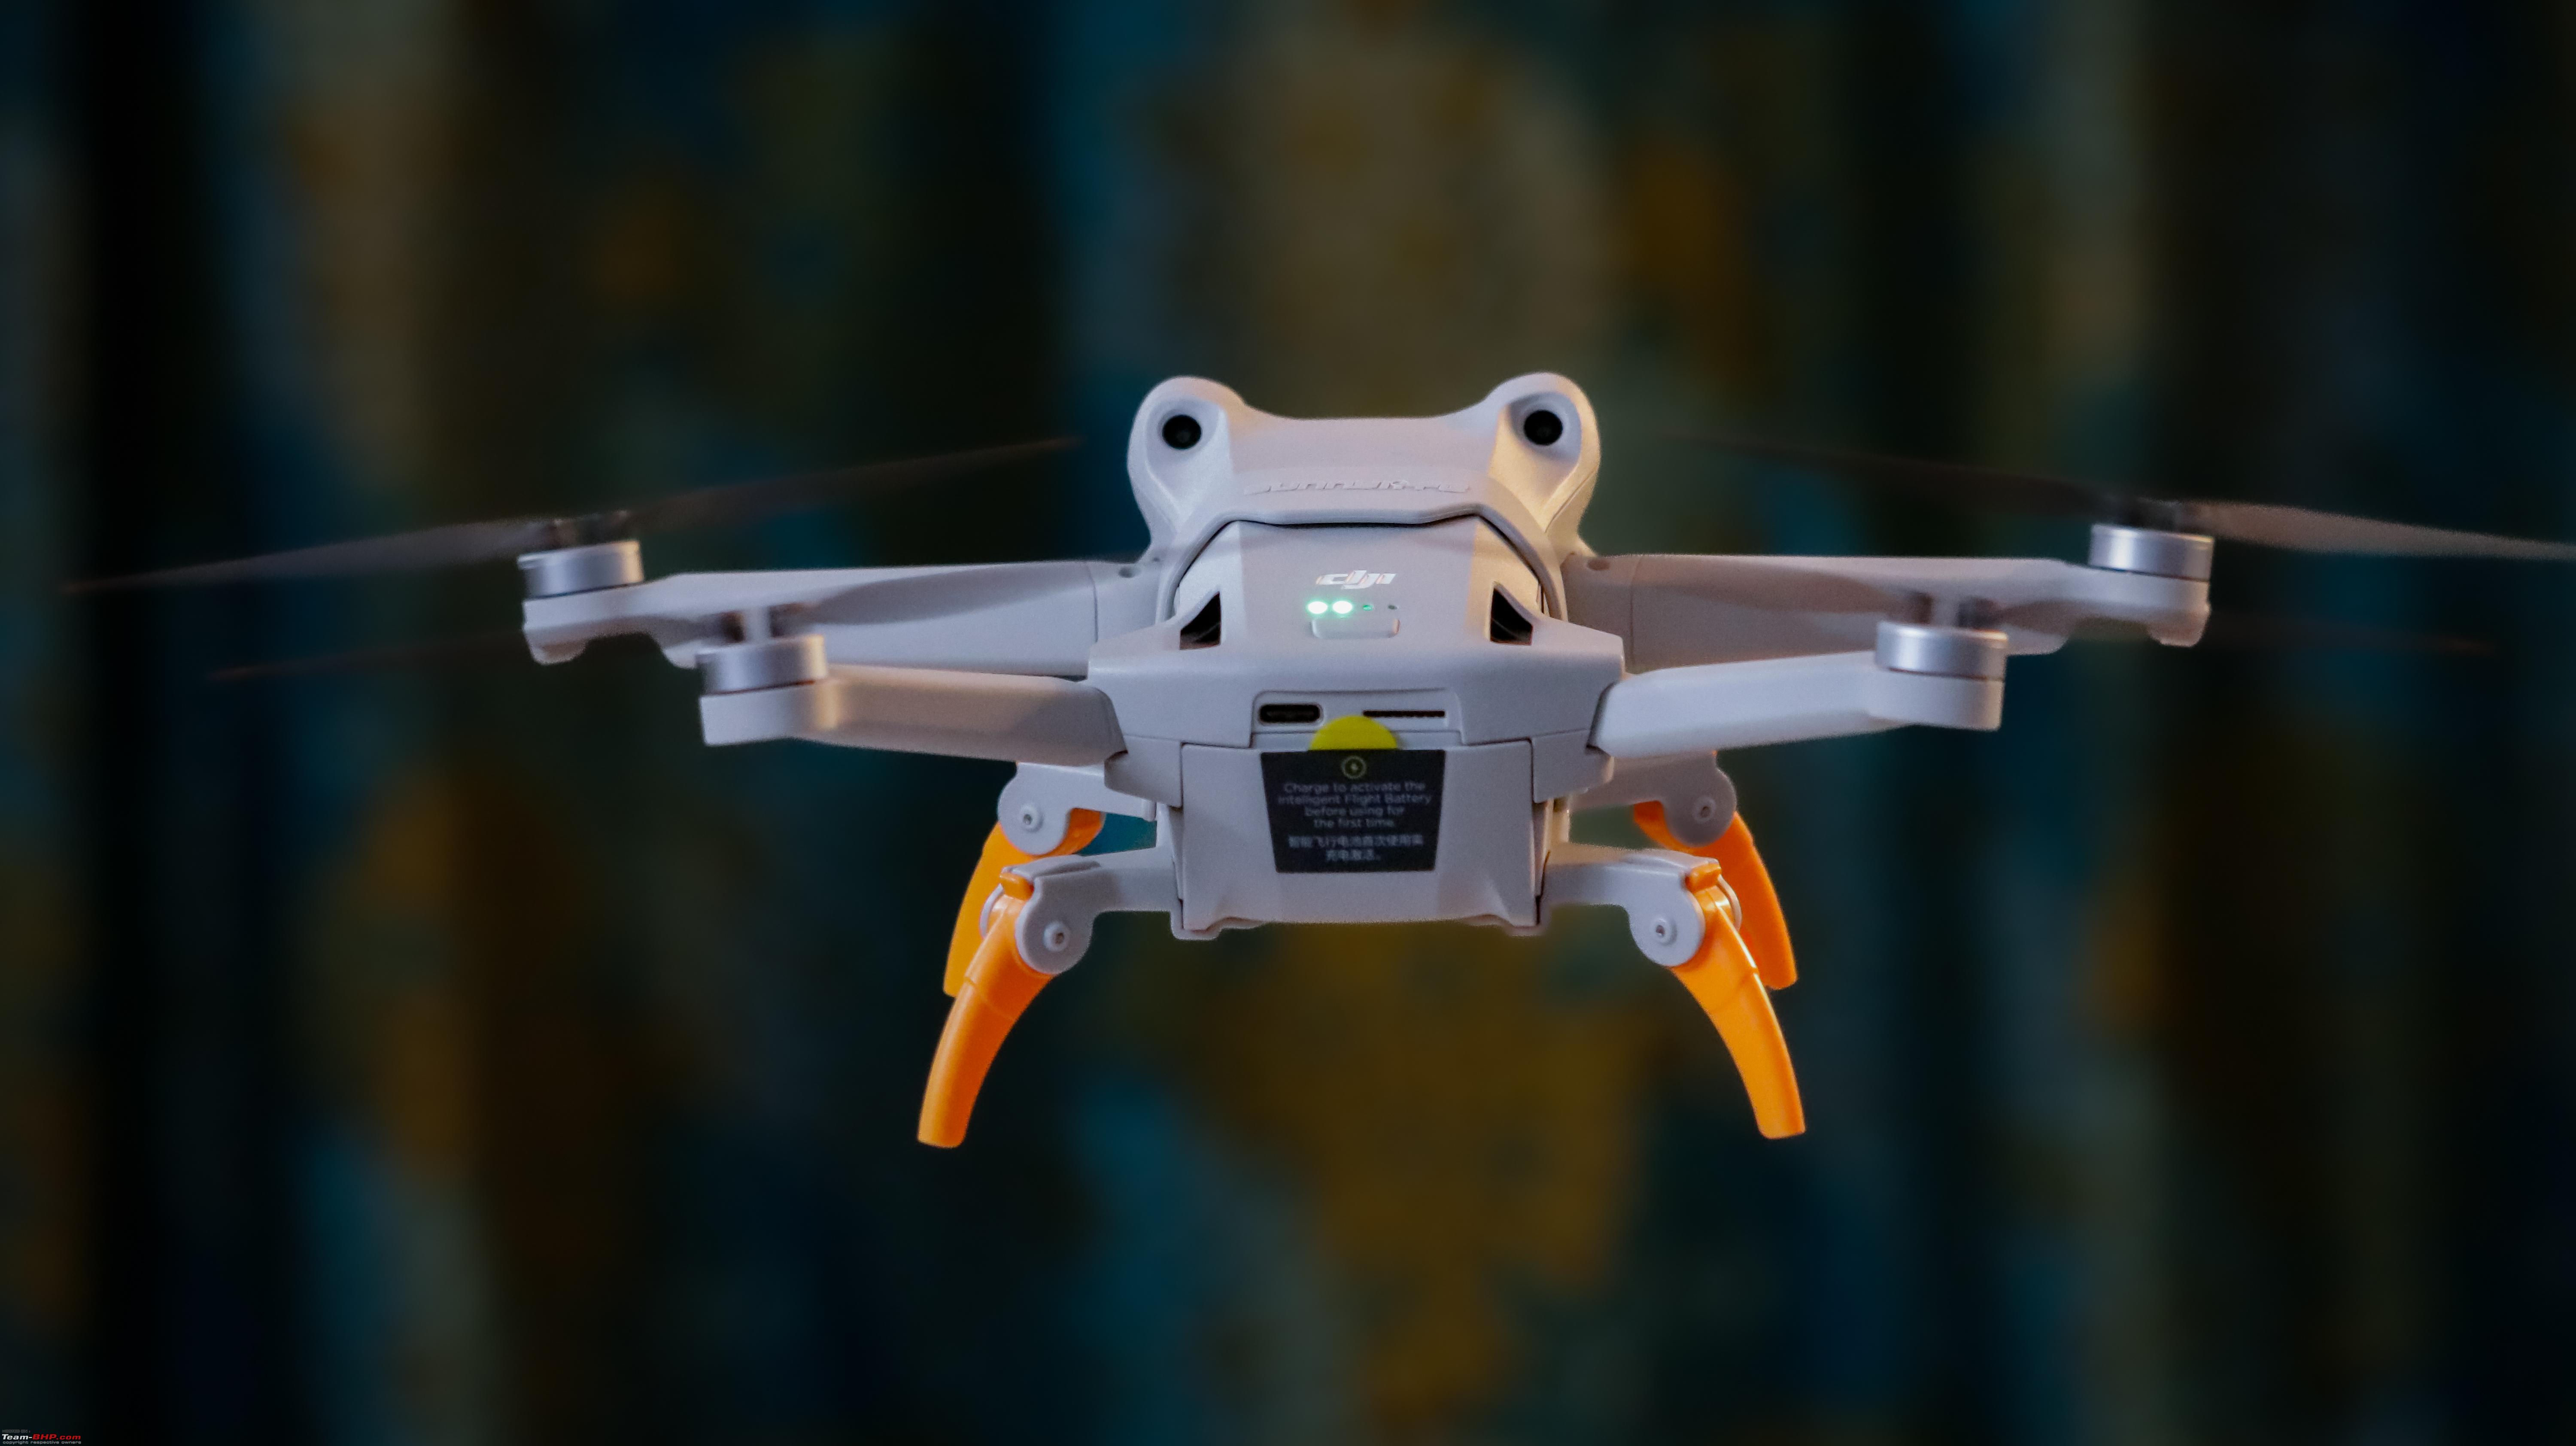 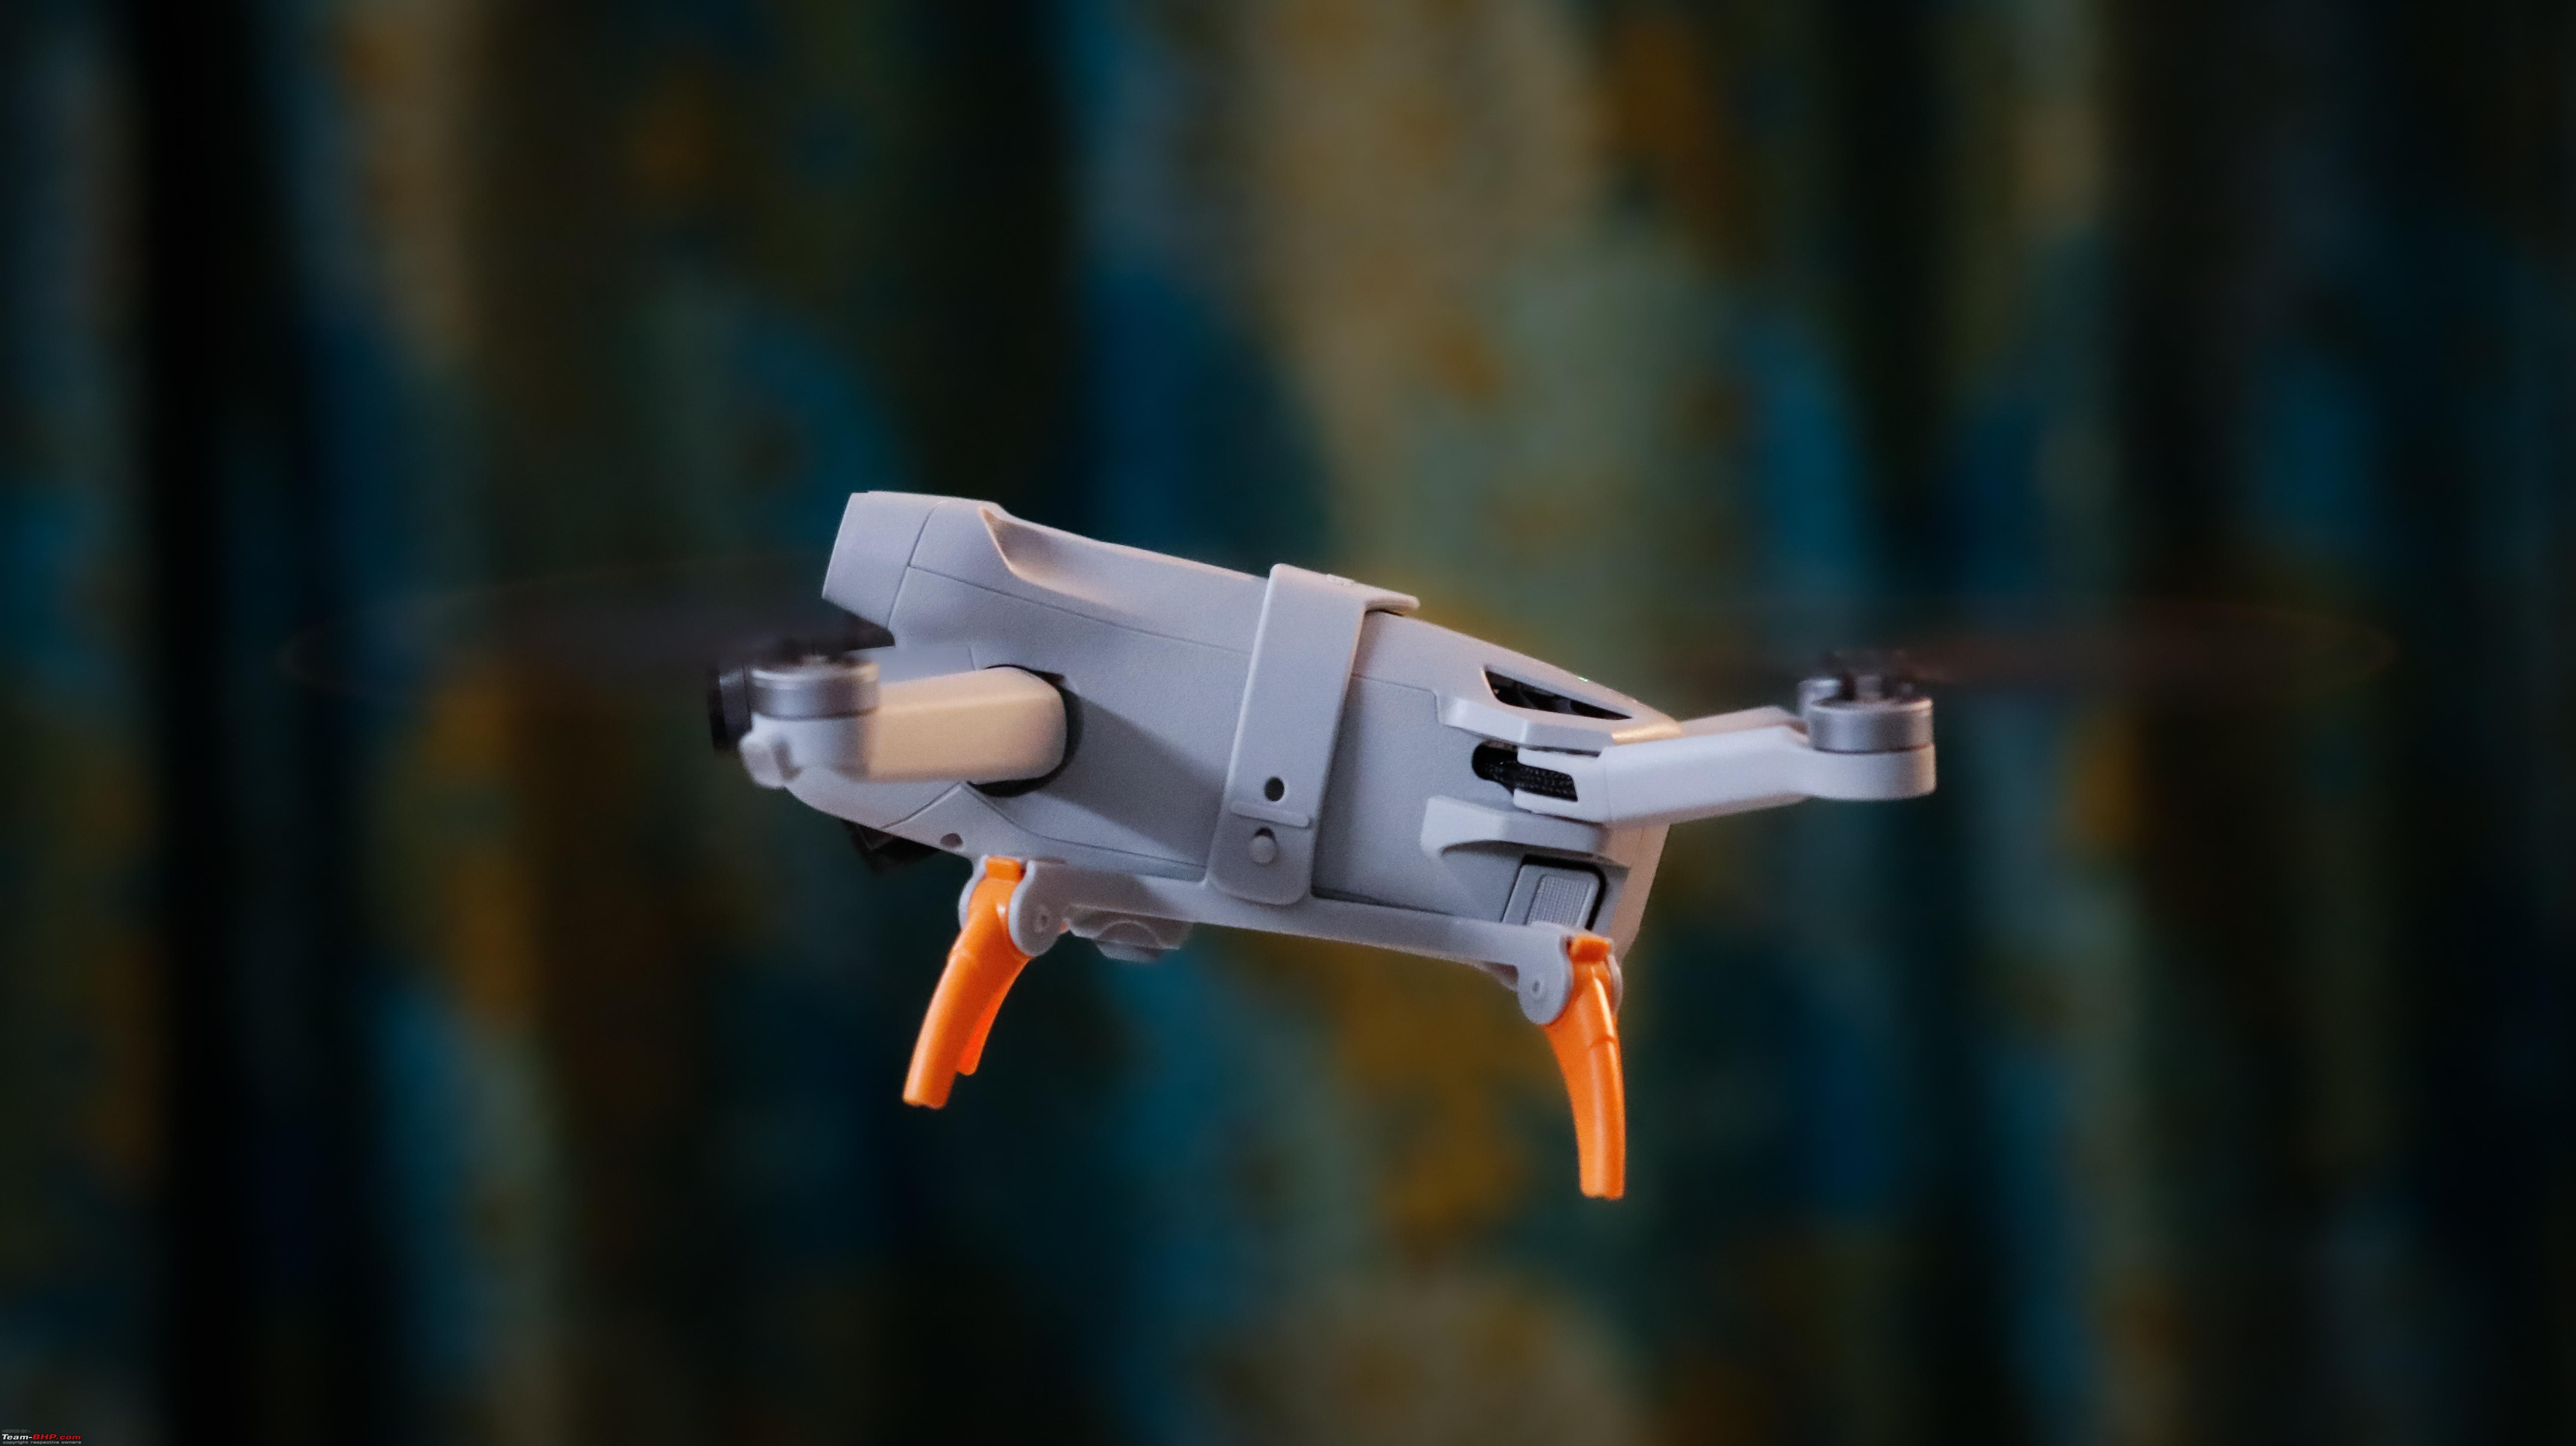    Where to buy? Online, Offline or Overseas? My next step was to decide clearly on where to buy the drone. Except Mini-2, which was available on Amazon and other online Platforms for a reasonable price, the prices of all other drones were too high in the online market. I did check the prices in grey markets as well. The prices quoted were very high and exorbitant for the drones that I was looking for (125K for mini 3 pro and 140K for Air 2S) and they were ready to sell them only for a tad lesser than the online retail prices. After a lot of bargaining, they were ready to offer the AIR 2S for a price of 125K and Mini 3 pro for 115K in Bangalore. Though it sounded like a very good deal, I still backed off because I very well knew that they were a lot cheaper in other countries. Since my travel was around the corner, I mustered all the courage and decided to bring it from overseas despite strict restrictions in India. Finally bought it @ DJI Official Store in Australia:  I had recently been to Australia for a month on an official trip and bought the drone in the DJI official store at Melbourne for a killer price along with a ton of accessories. As a part of giveaways and some promotional activity at the DJI official store on that specific day, I was given 50 dollars’ or more worth of accessories like memory card, 42-watt car charger, launch pad and a tempered glass pack for the controller completely free. The Australian dollar had hit the rock bottom and the prices were the cheapest. I did save some money from per diem and purchased it. Translating it to INR, it was around 86k for the Drone + Fly more plus combo kit and a Lipo bag (Lithium polymer carry case for batteries). In addition to these I did purchase other third-party accessories like the propeller guards, extra set of filters, lanyard, and the fully customizable hard carry case specifically designed for Mini 3 pro from D1 Labs. Total cost was close to a lakh. Below are some pics from the Dji official store:       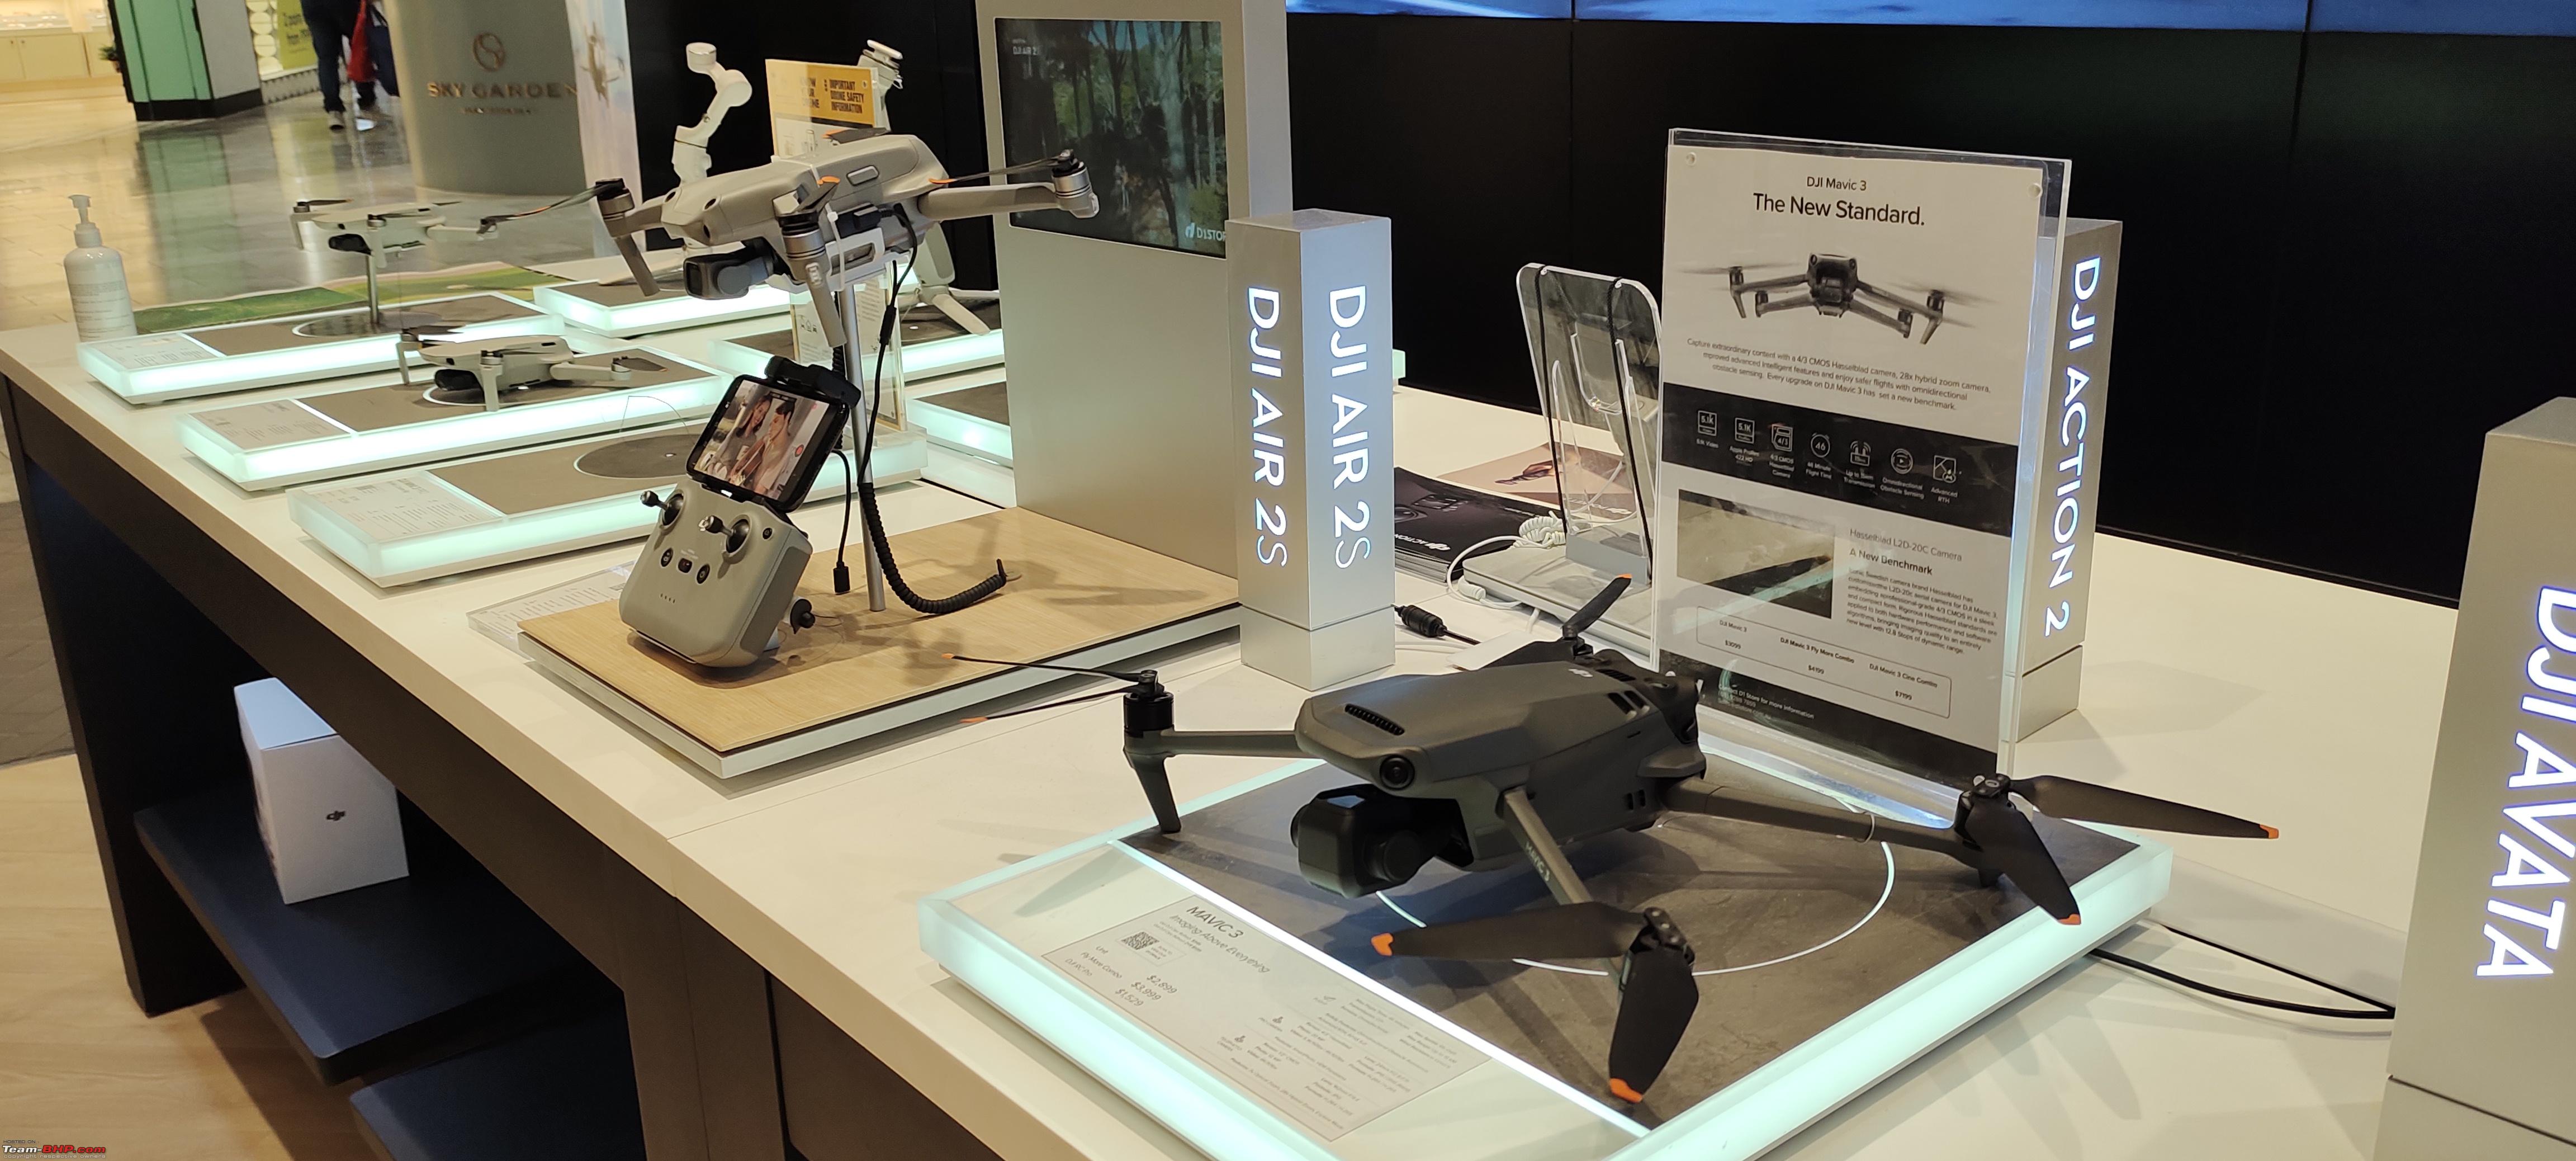       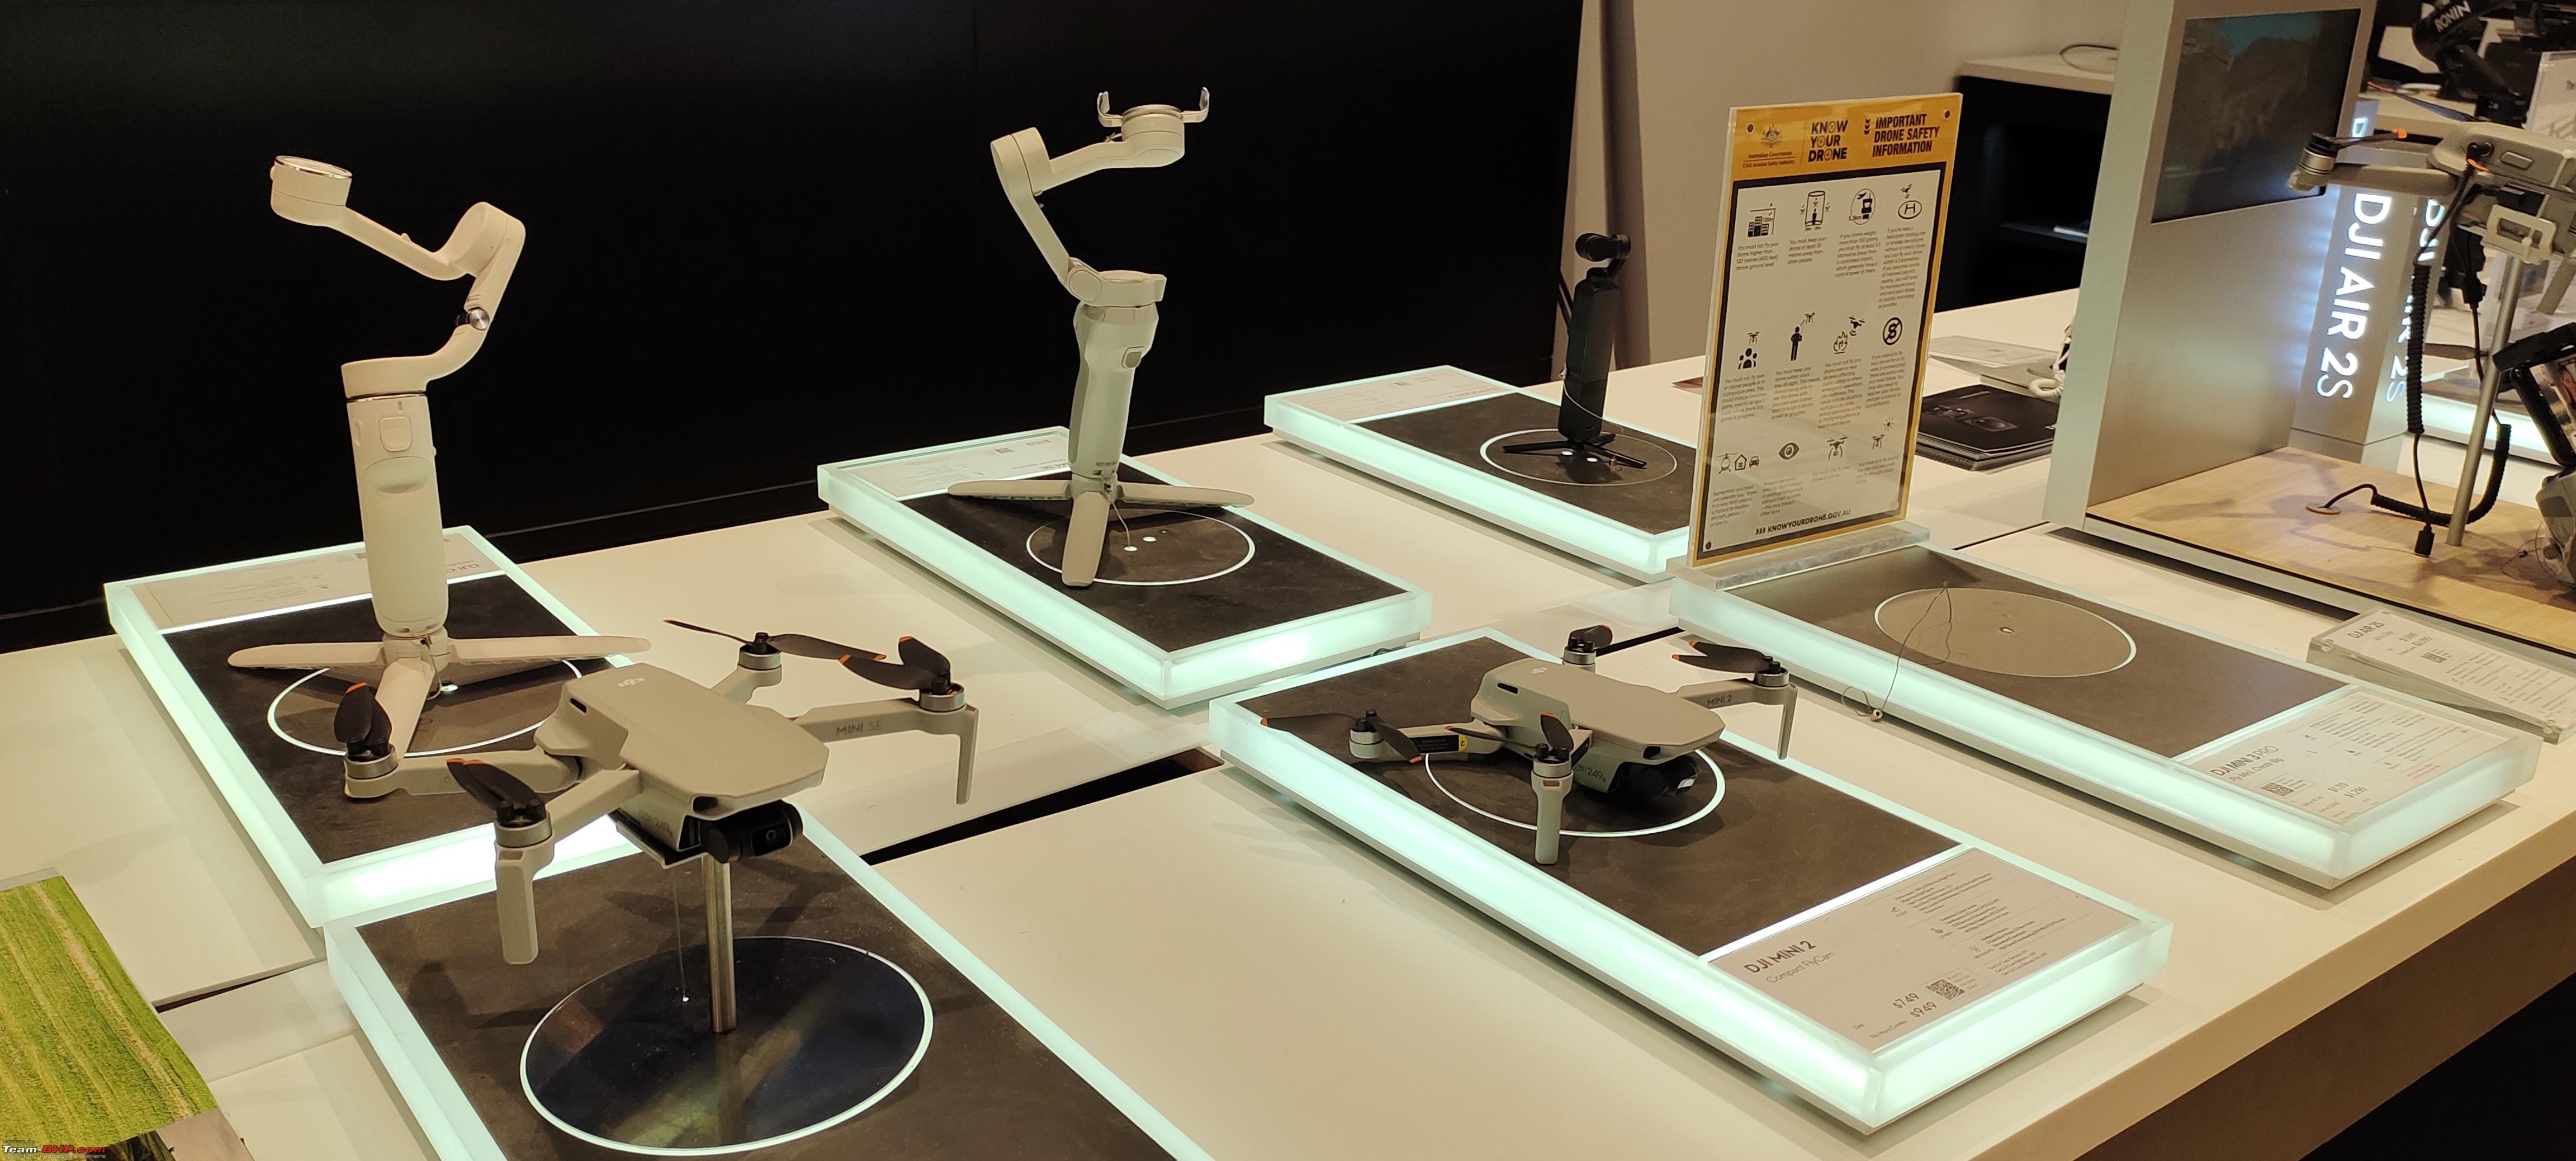  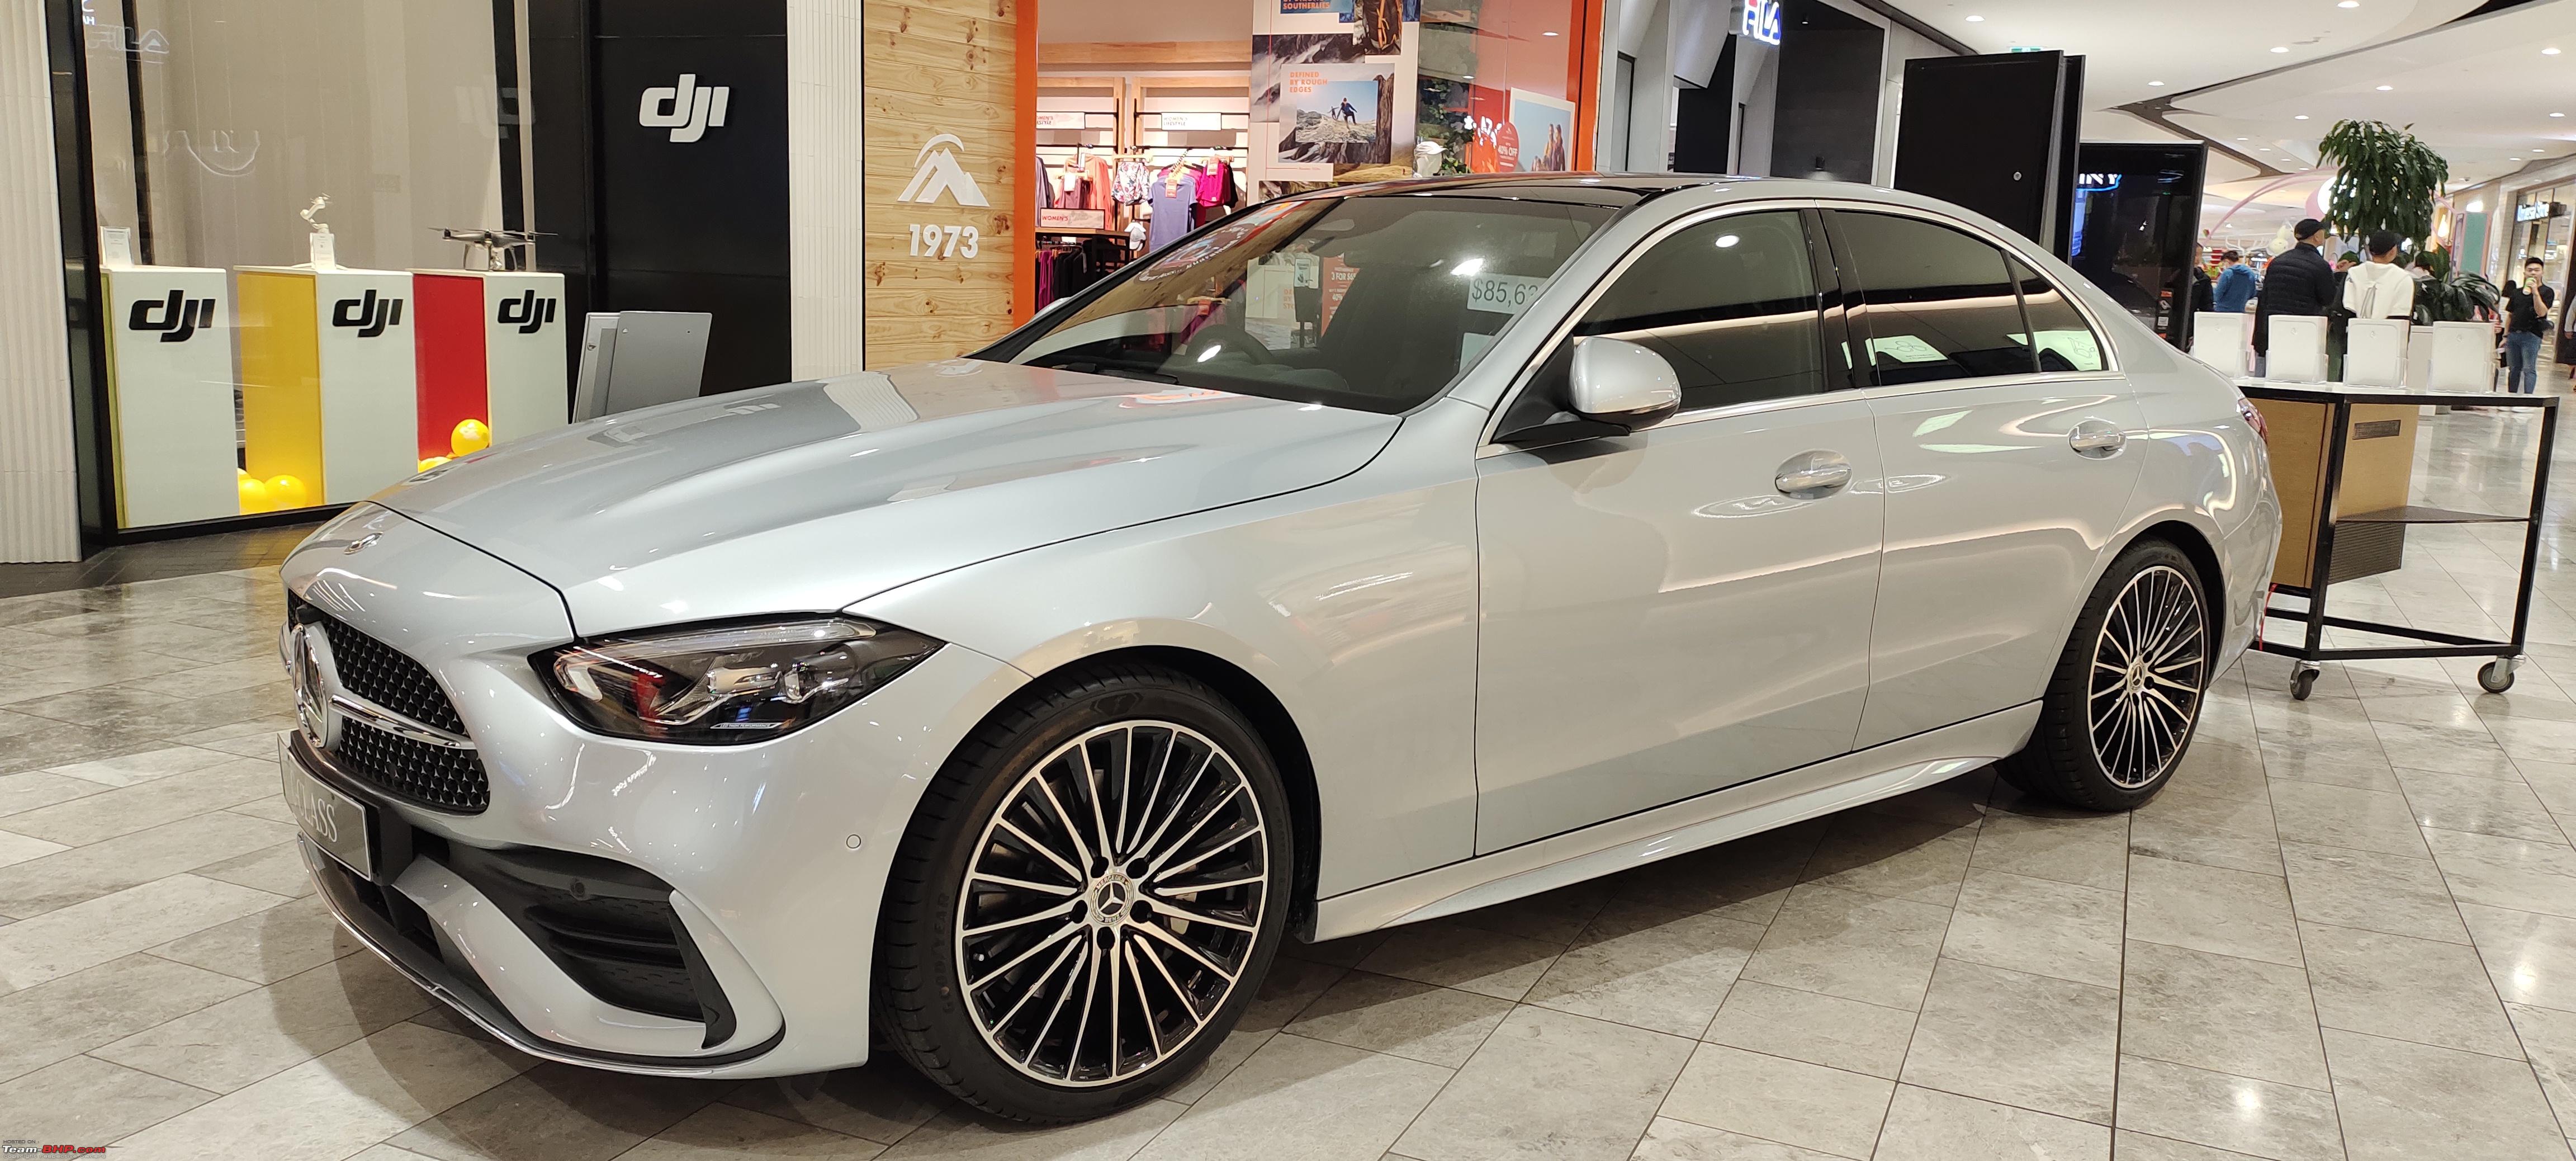 (TRS) Tourist Refund Scheme: On my return journey back to India I did file for GST reversal on the online TRS (Tourist refund scheme) portal 12 hours before going to airport and uploaded all the bills and obtained the QR code to save the time and skip the queue as it generally tends to get overcrowded during transits and TRS won’t be approved for passengers having less than 30 minutes for boarding. Advantage of online registration is that, it gives a QR code and speeds up the entire process and when at the counter a scan on the code does show up all the uploaded information on their screens and saves a lot of manual data entry time. The only condition was that a minimum of 300 dollars had to be spent in the same store or chain of stores having the same ABN (Australian Business Number), to qualify for TRS and for purchases above 1000 dollars, passport details are mandatory and should appear on the bills and the goods bought requires a mandatory check by an Australian border security officer before TRS is approved. My purchases had met all their conditions and requirements. The queue at Sydney airport was very long and I requested a few passengers ahead of me to allow me as I had to board the flight in 60 minutes. Few of them obliged and few didn’t. Somehow, I managed to reach the counter in 15 minutes or so, took it to an officer at the TRS counter who scanned the QR code, verified the bills I had uploaded against the products and asked me to produce the original physical copy of the bills along with the goods purchased, my passport for verification and my credit card and approved it and told me to not bring it back to Australia for which I nodded yes. The entire process took around 20-25 minutes (starting from waiting in the queue to coming out) and I finally collected the GST refund acknowledgement slip along with the original bills and saw that it was approved for 10k and happily headed towards boarding gate. I am still awaiting the refund or reversal, which normally would take around 45+ days from the day it is processed. Overall cost to me would be 90K after I receive the GST amount back in my forex card. Last edited by Amyth Prabhakar : 11th December 2022 at 07:26. |

|  (35)
Thanks (35)
Thanks
 |
| The following 35 BHPians Thank Amyth Prabhakar for this useful post: | AdityaDeane, aeroamit, arjunsatheesh, arpanjha, Avikbrio, A_Abhiraam, brownkaiser, CEF_Beasts, dailydriver, digitalnirvana, fluidicjoy, gauravanekar, GTO, InControl, izzikio_rage, KarthikK, matrix1984, Maverick_4662, Old_Salt, PearlJam, ph03n!x, PM - B, pun337, ruzbehxyz, saikarthik, Samfromindia, sbanerjee, shyamg28, Silverfire, SRISRI_90, supertinu, swiftnfurious, TSIboy, vsrivatsa, yashg |
| |
|
7th December 2022, 18:34
| #2 |
| BHPian | re: Dji Mini 3 Pro Review | The Best Nano Drone My Complete review: The box packs:  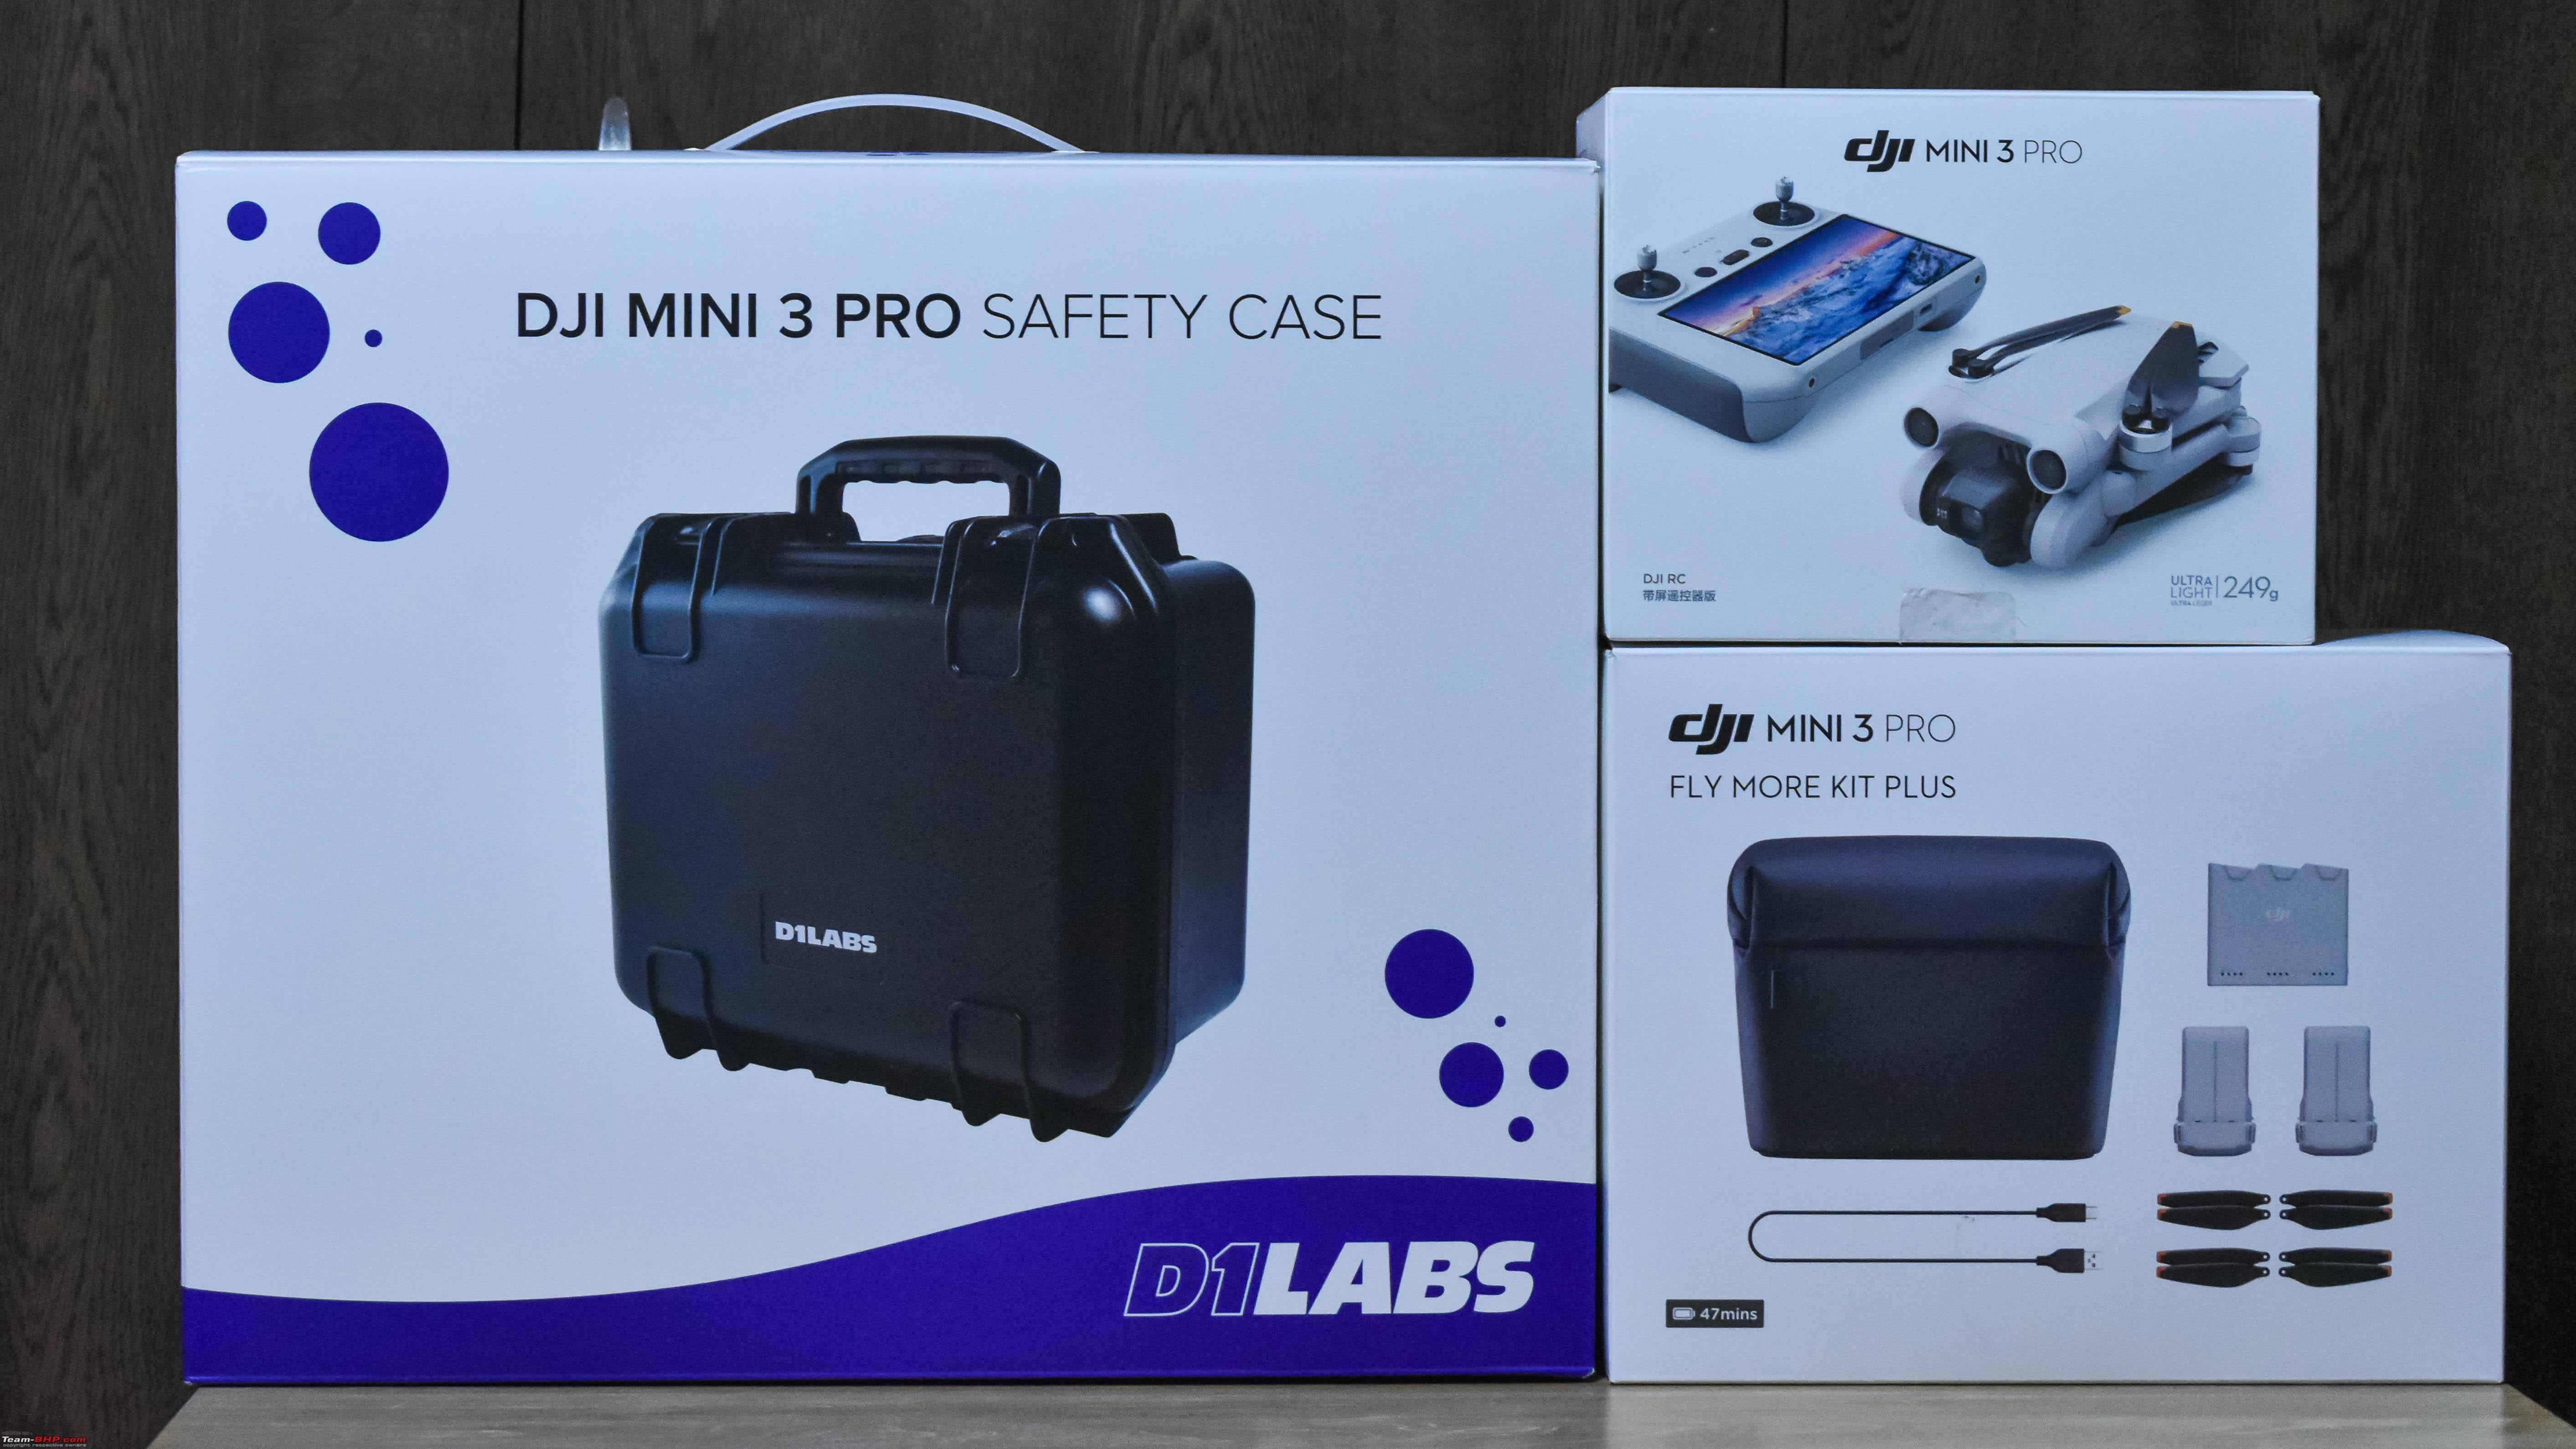 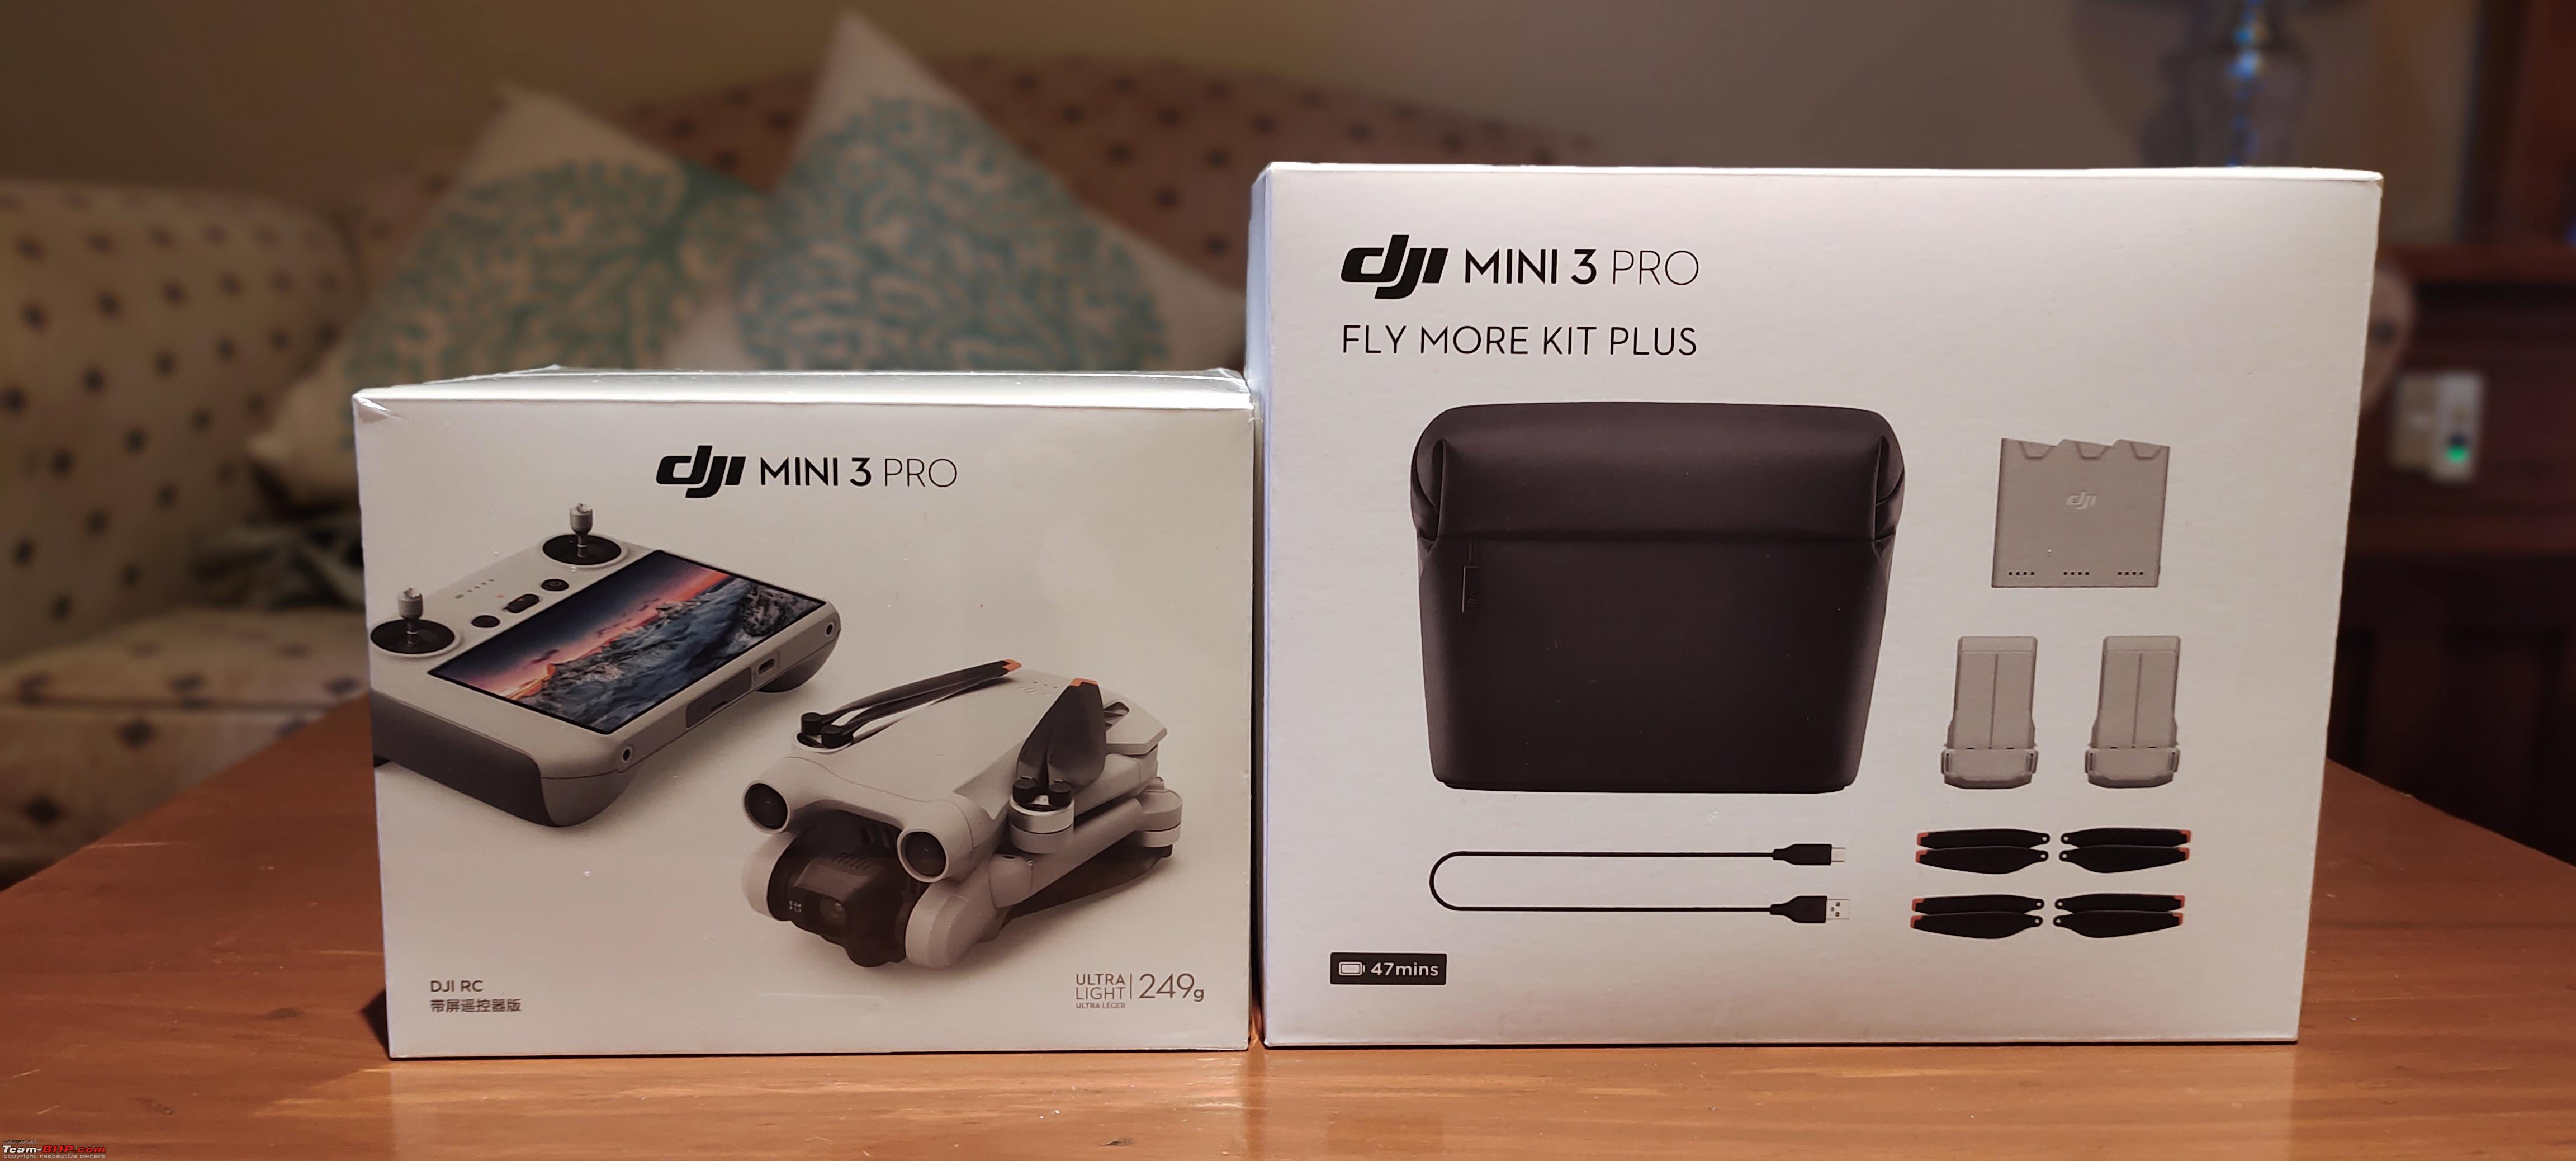  Design and Build quality: The MINI 3 PRO has been designed completely from the scratch and it is just not a facelift from its predecessor. It looks compact and aggressive with a new stance and has become more mightier in terms of features and has carved a niche for itself as a flagship model in the mini-series line up. It gets a new light weight body with an aerodynamic tilt, crafted out of ABS plastic and houses the 3-way obstacle detection sensors at the front, back and bottom and the battery compartment at the rear. There are no top and side facing sensors to prevent it from crashing against obstacles on the sides and top. The gimbal is attached to the body frame in the front and holds the camera and allows it to tilt, pan and rotate. The body frame is ingeniously chiseled at the front top to not block the camera and allow it to capture low angle shots when tilted up. Large air vents are located behind the gimbal for quick heat dissipation. The rotor arms can be twisted in and out in any order, open wide away from the body and gives more rotation space for the propellers. The delicate propellers are longer, spins more efficiently, produces less noise and more thrust. The overall build quality is average, neither too cheap nor too robust and strong. It lies somewhere in between those two extremities and weighs less than 250 grams. With the propellers and arms folded in, it is just the size of a smart phone and can be easily carried everywhere. 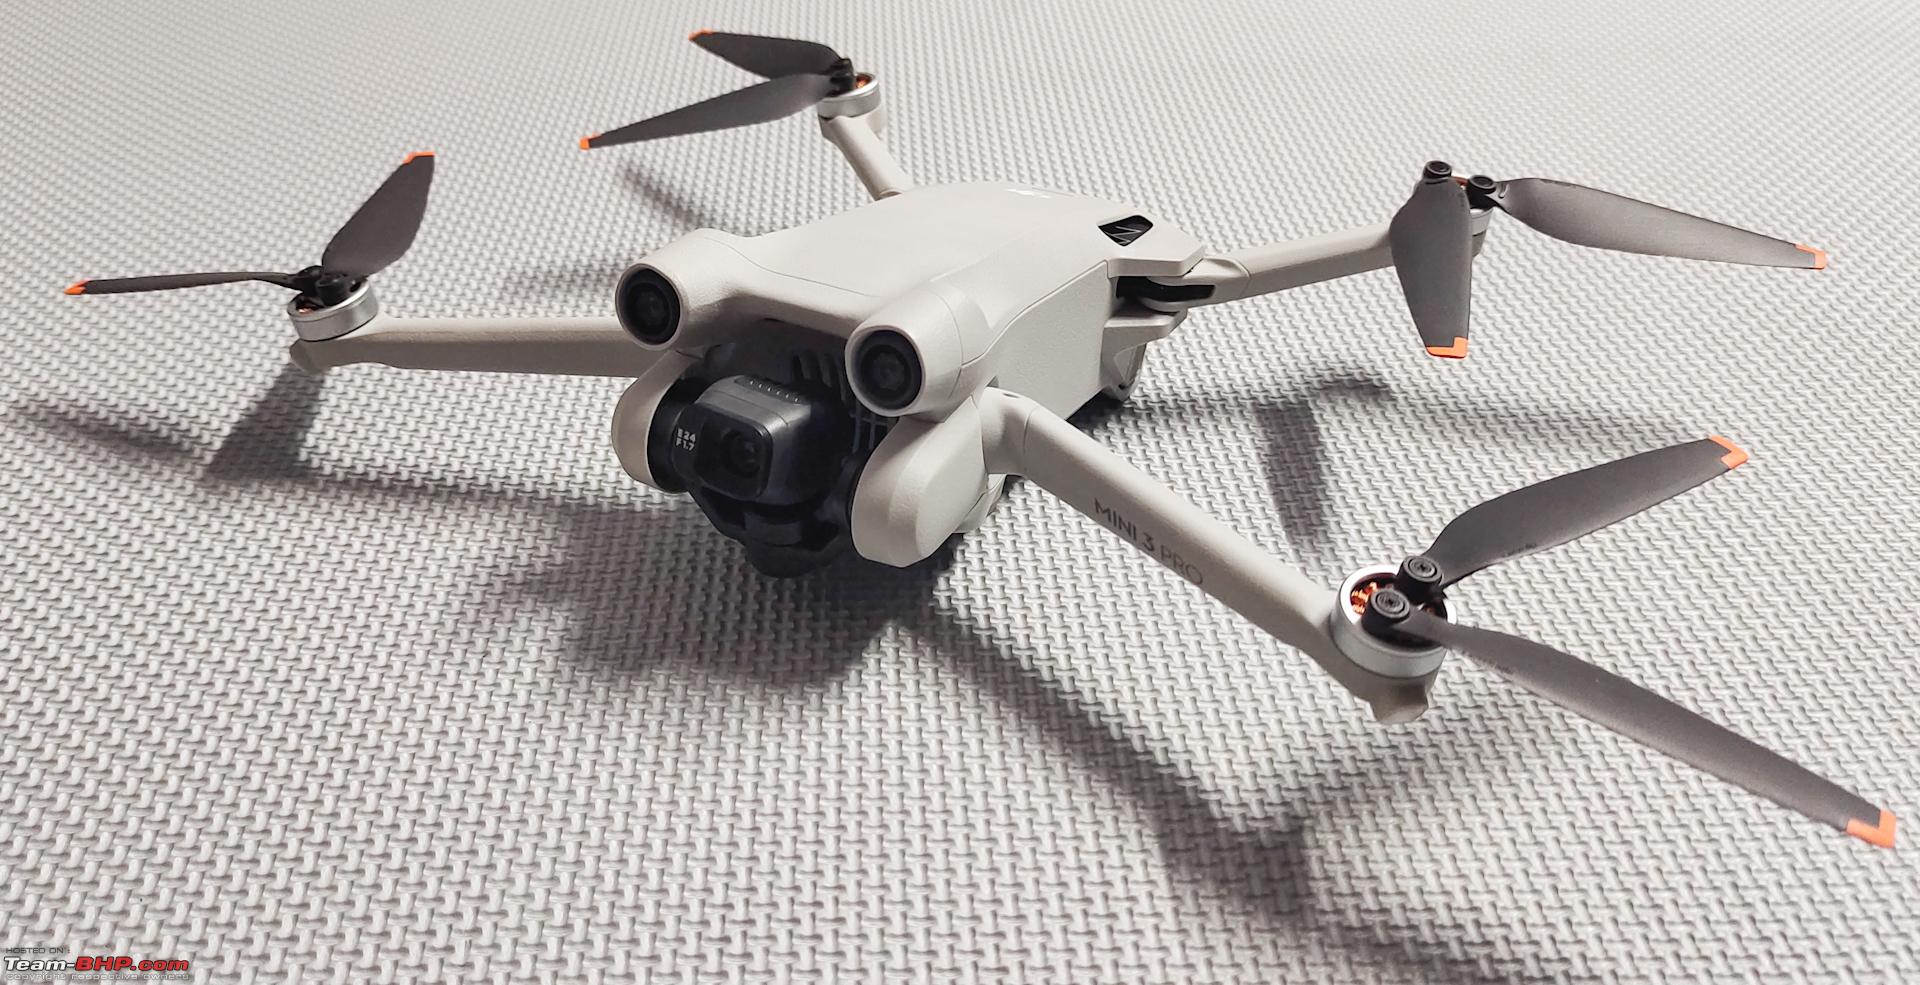 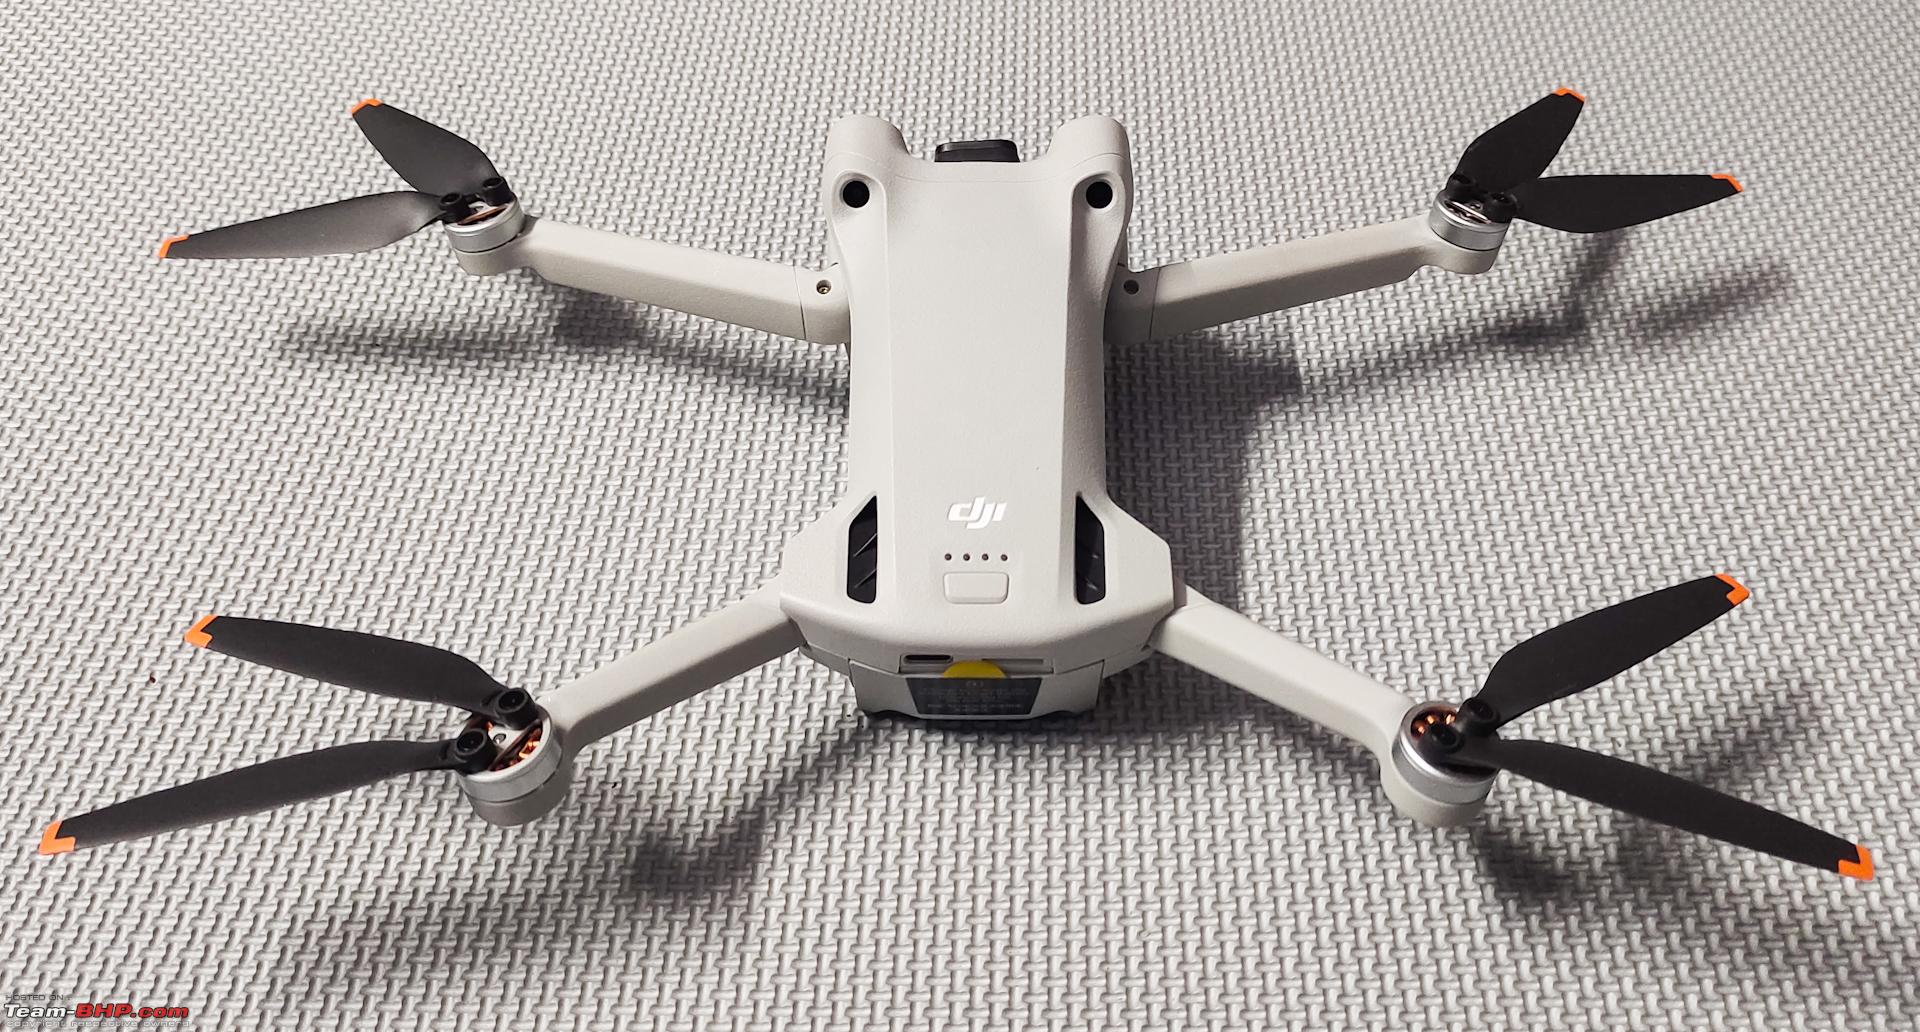 The front camera and the front obstacle detection sensors. The rear obstacle sensors are placed just behind the front sensors. 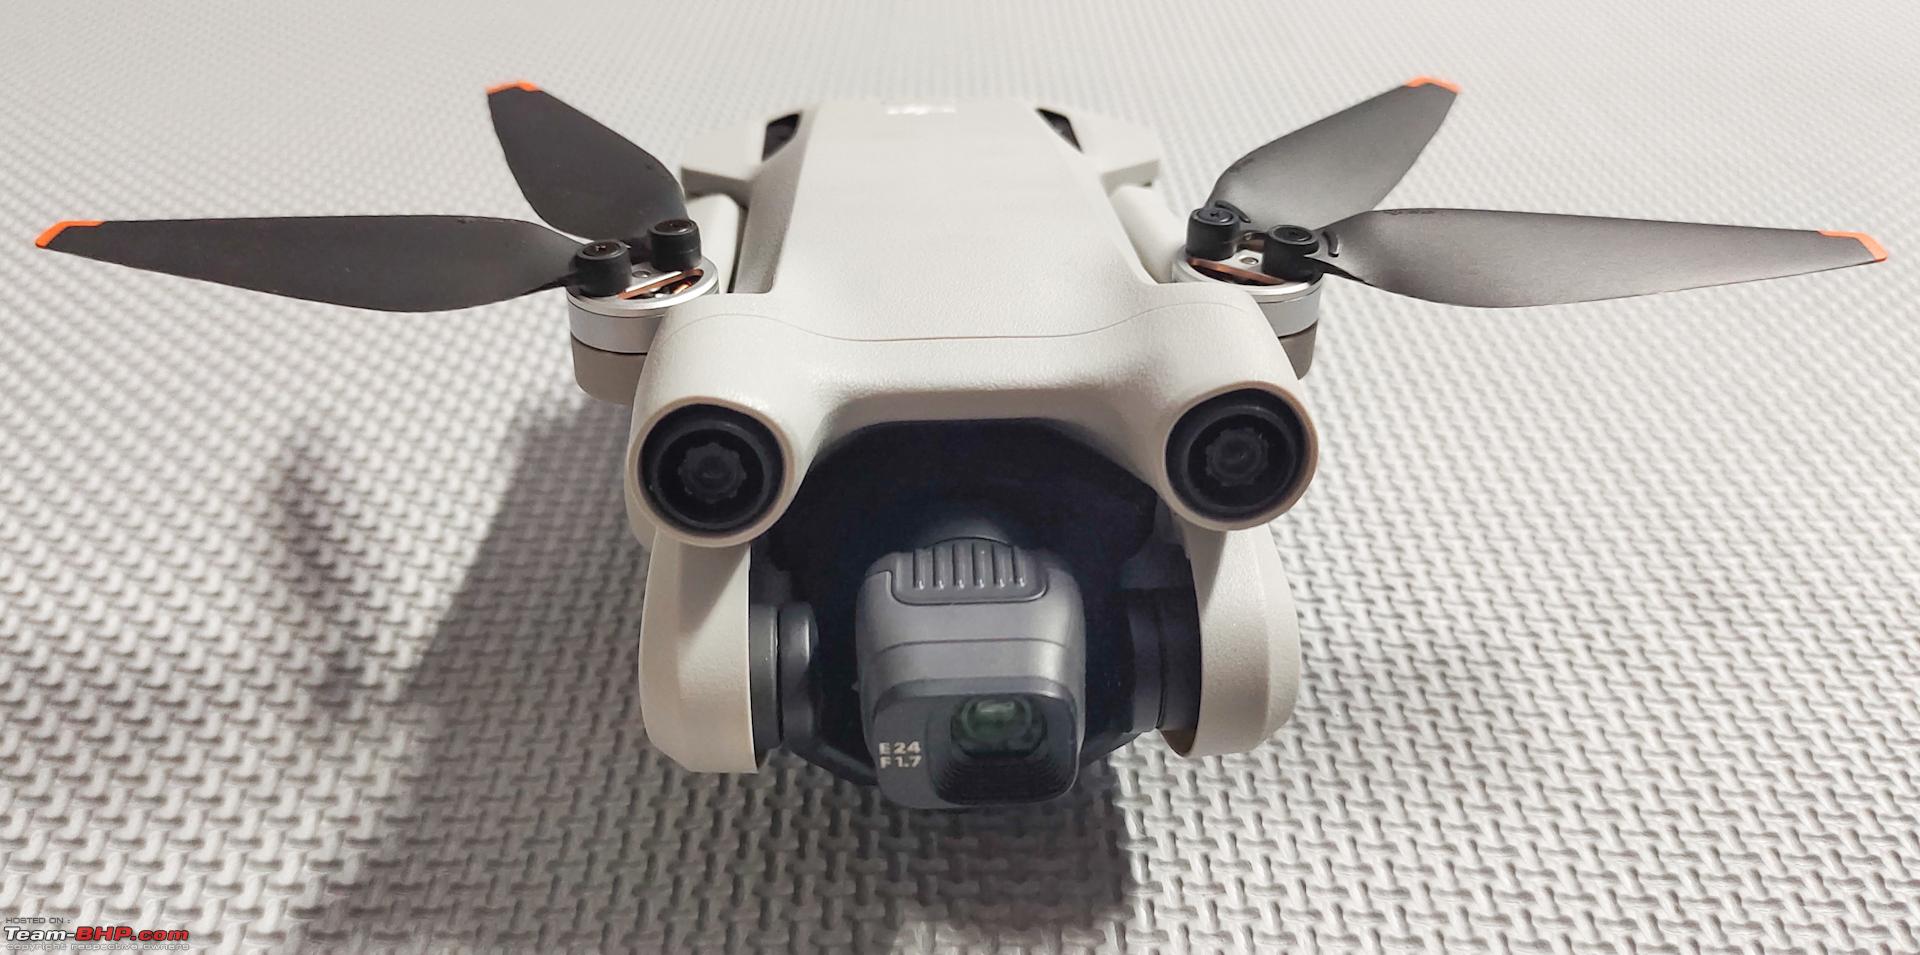 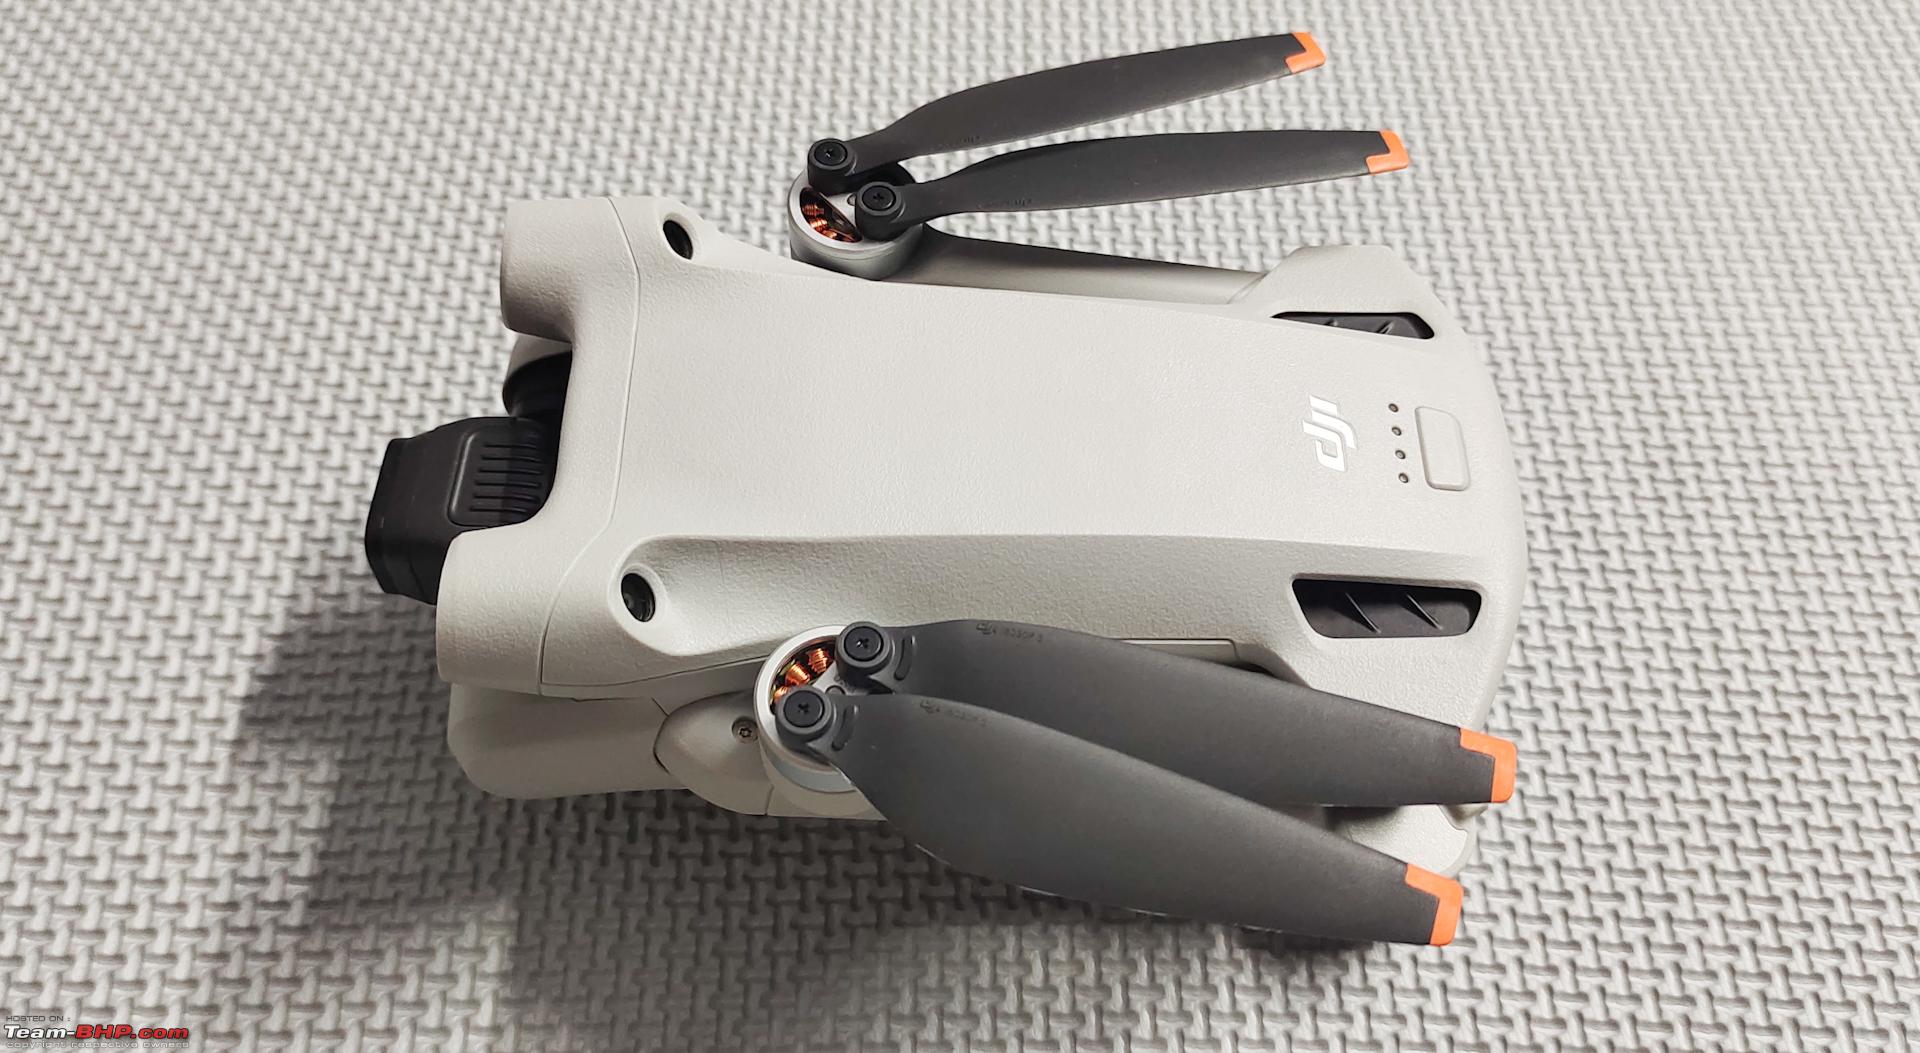  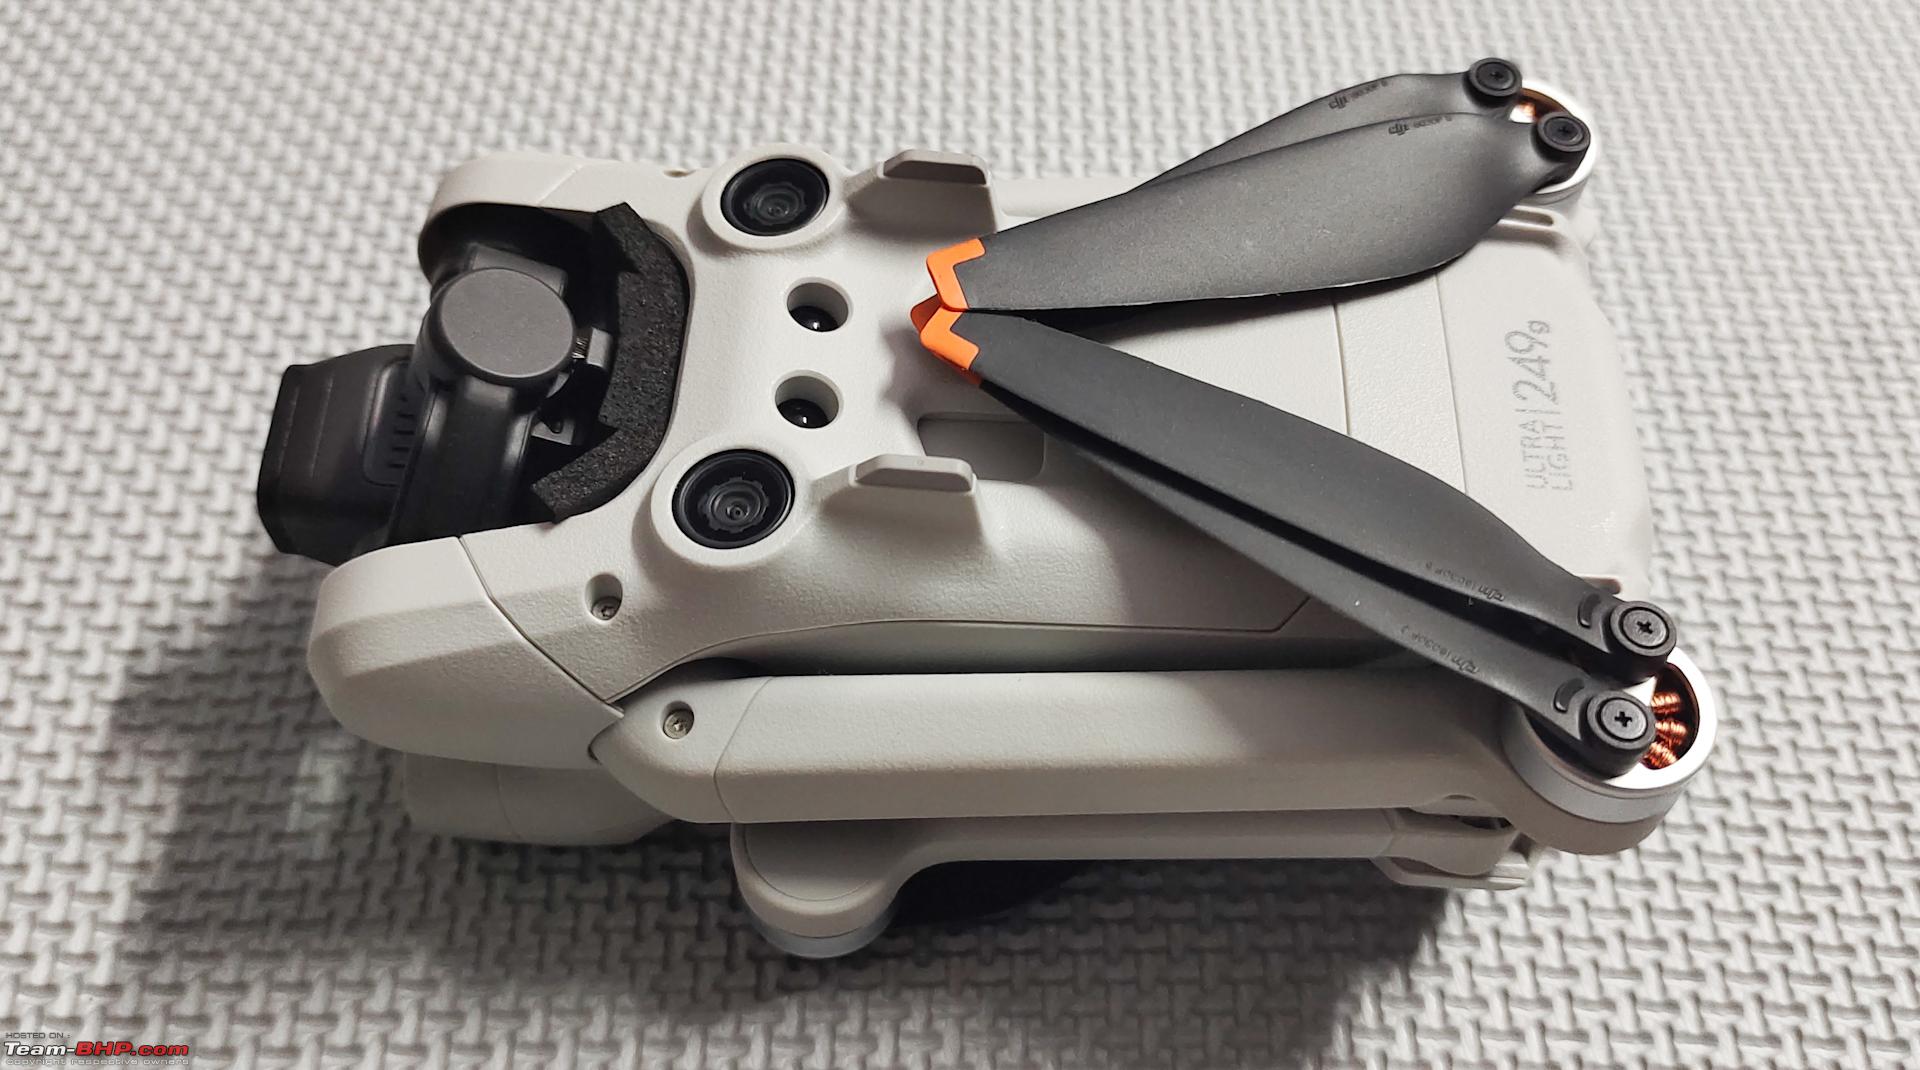 Protective cover for the Gimbal and the camera.  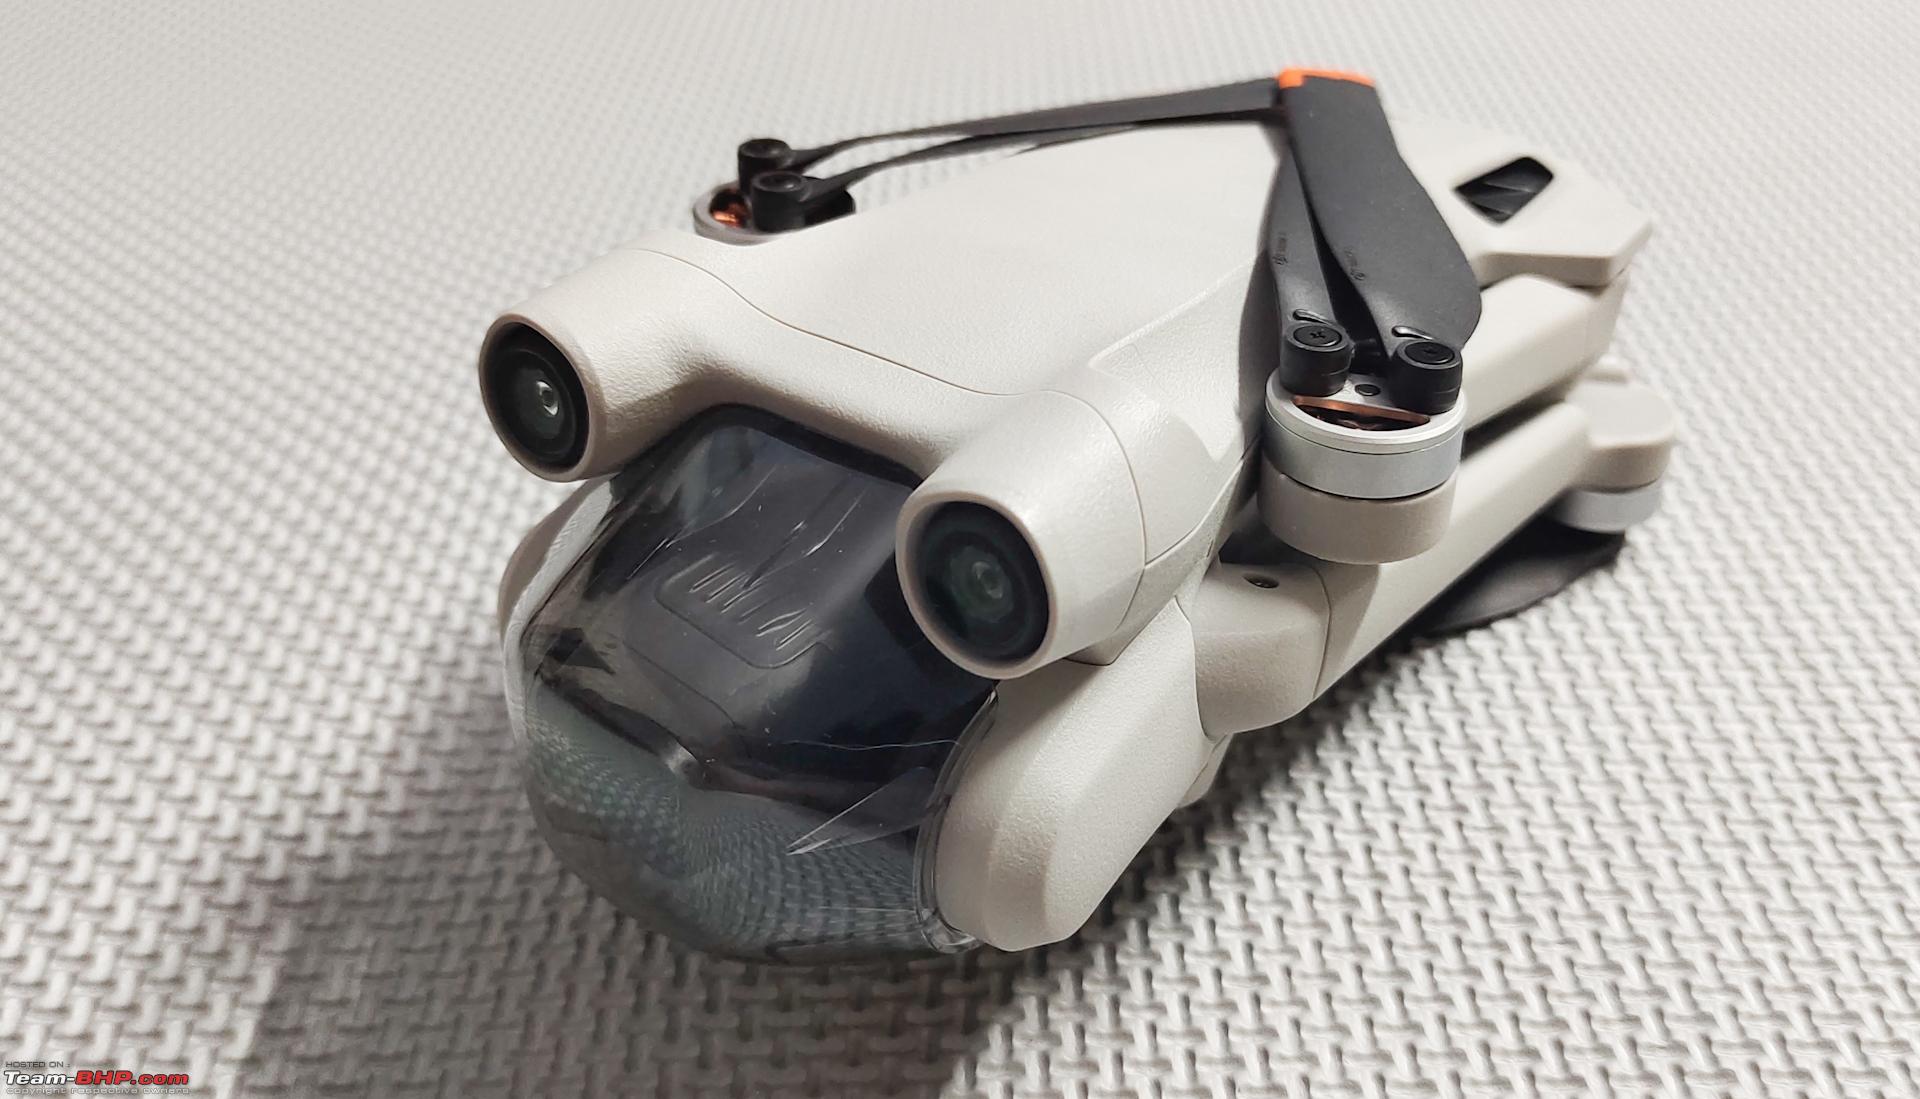 IR sensors, Vision positioning system and the Downward facing obstacle detection sensors:  The power button on the top. A simple push of the button just displays the battery level. Keeping it pressed for 3 seconds and releasing it powers on the drone.  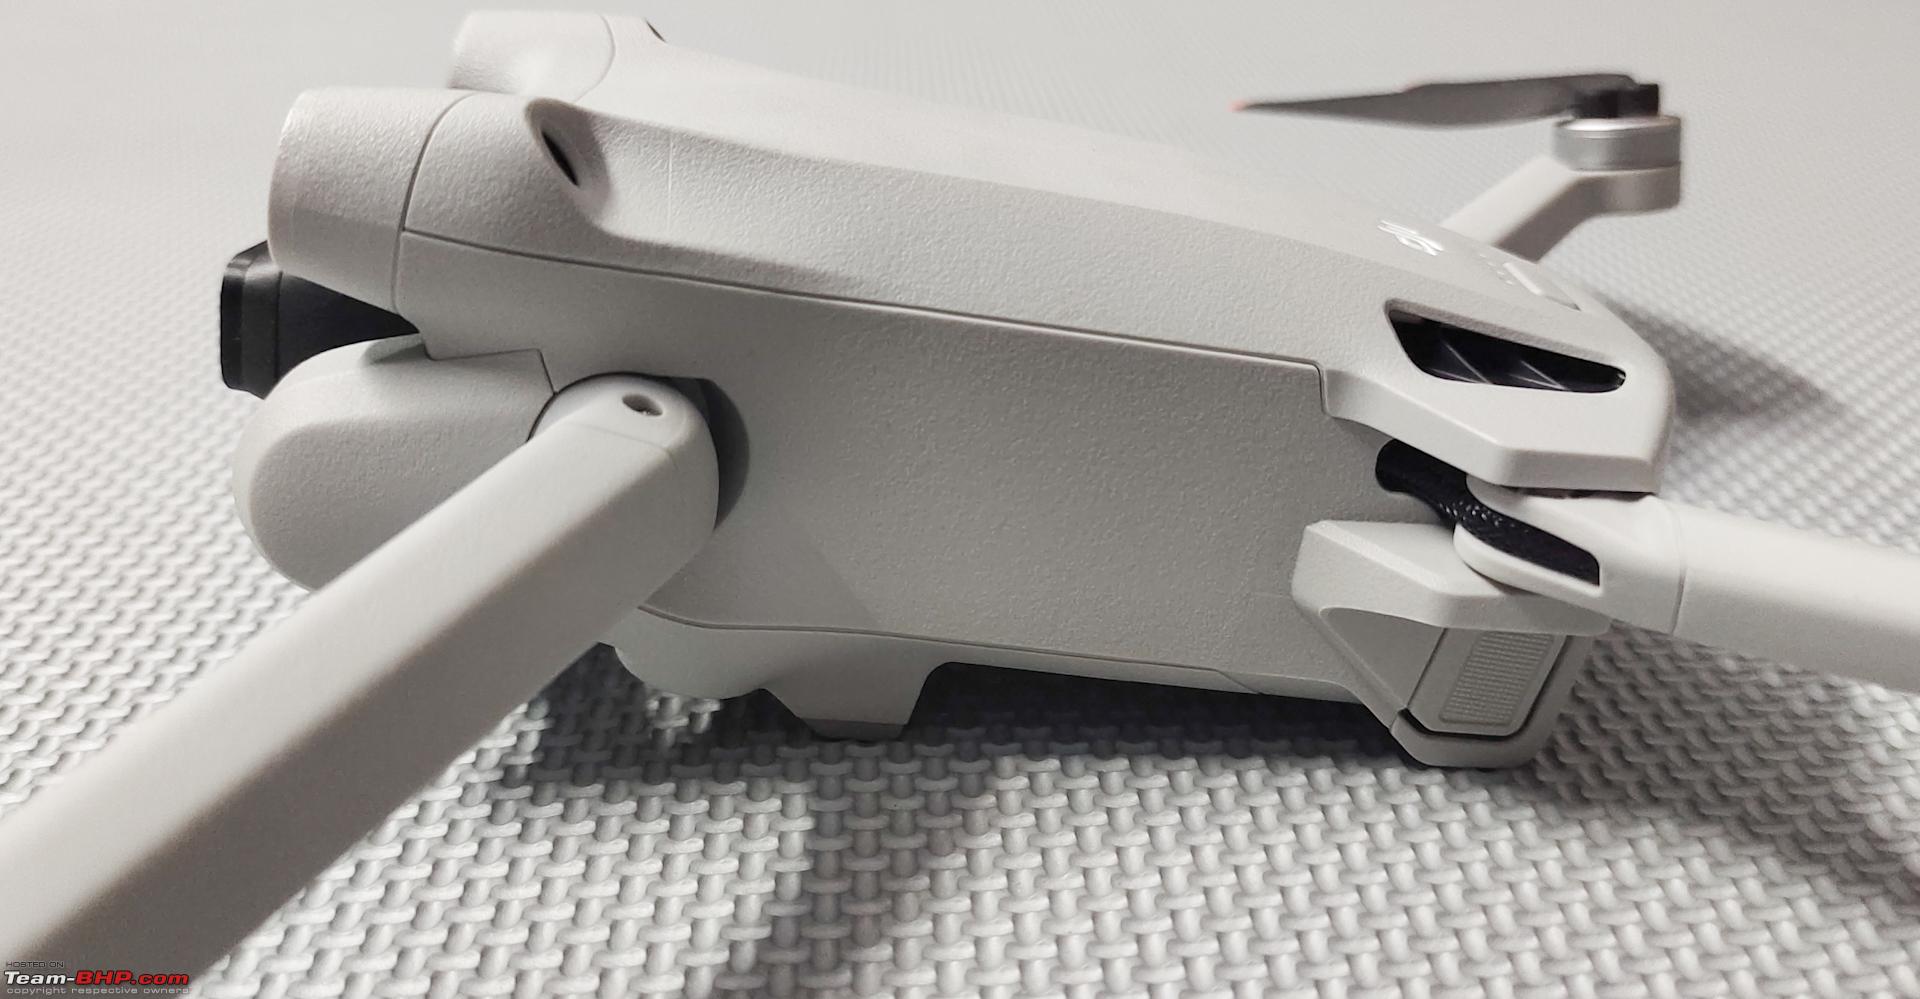 The Gimbal and Camera: The high-quality camera on the drone flaunts a new 1/1.3 inch or 0.8-inch Quad Bayer sensor with dual native ISO (100 and 500) and sports a wide-open f/1.7 fixed aperture lens having 24mm (full-frame equivalent) angle of view, suitable for shooting in both day and low light conditions. The camera outputs 4K 30 fps HDR and 4K 60 fps video footage directly out of the box with no digital crop or compression and shoots True 12 MP photos. It also does shoot 48 MP photos. The camera is mounted on a gimbal with 3 axis stabilization which can also rotate the camera 90 degrees vertically to shoot content for social media platforms. The lens is thoughtfully designed with a bayonet mount at the front and gives an option to easily swap the lens protector with a custom filter. The gimbal is very versatile and work in either landscape or the portrait mode. It can tilt the camera up by 60 degrees and down by 90 degrees in landscape mode for capturing unique low angle shots. Both Auto and PRO modes are available along with ISO and shutter priority. The PRO or manual mode, offers full control of the camera settings and other parameters. 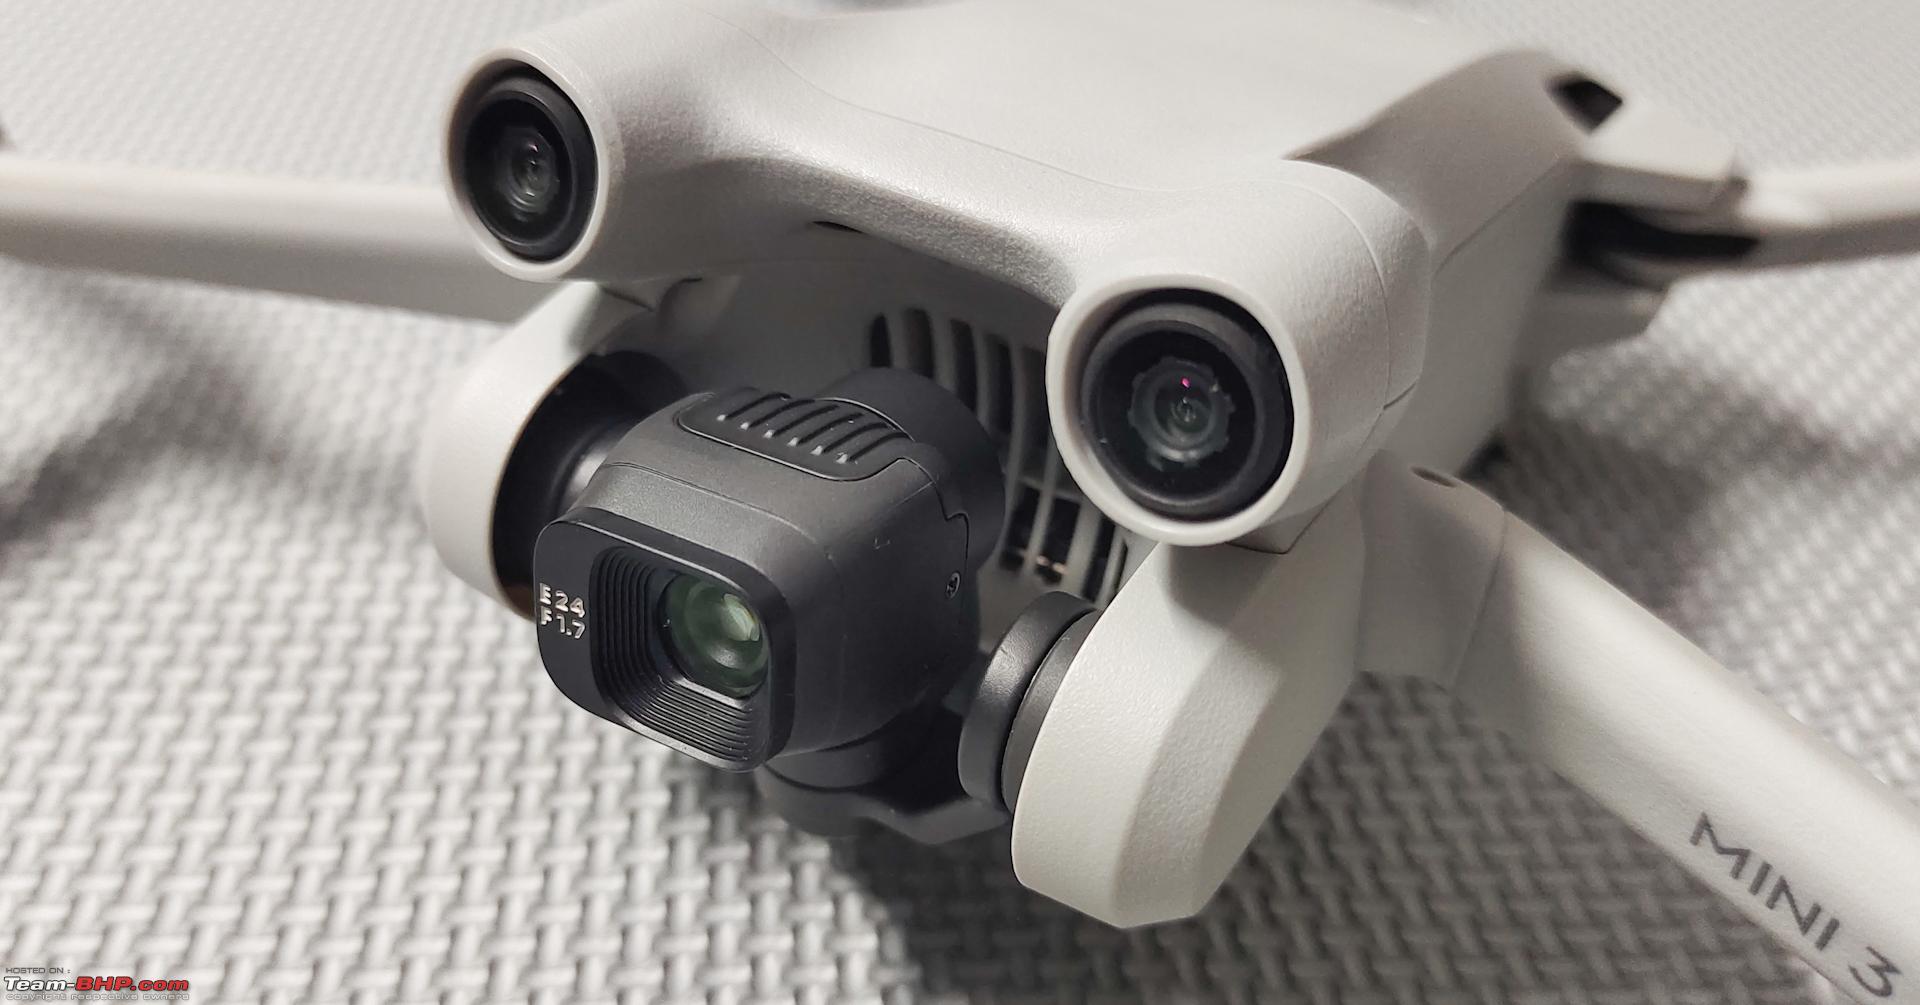 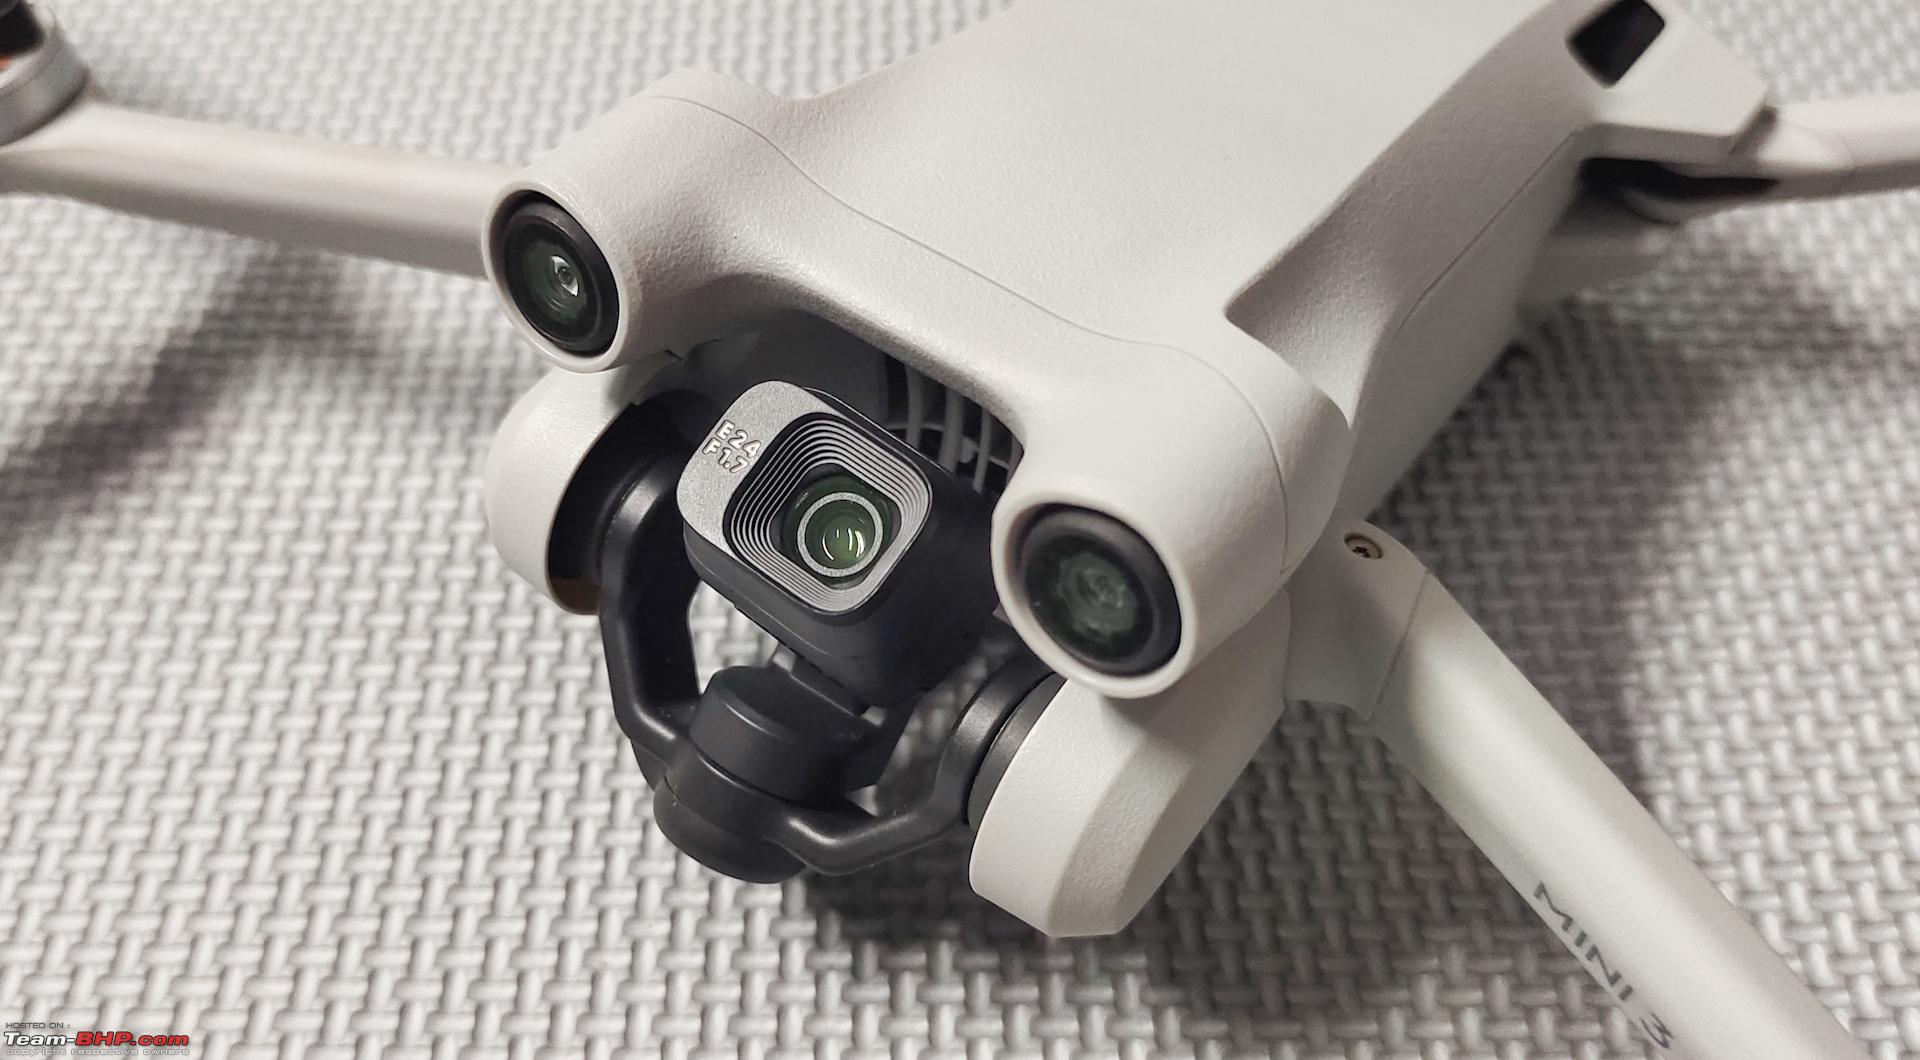 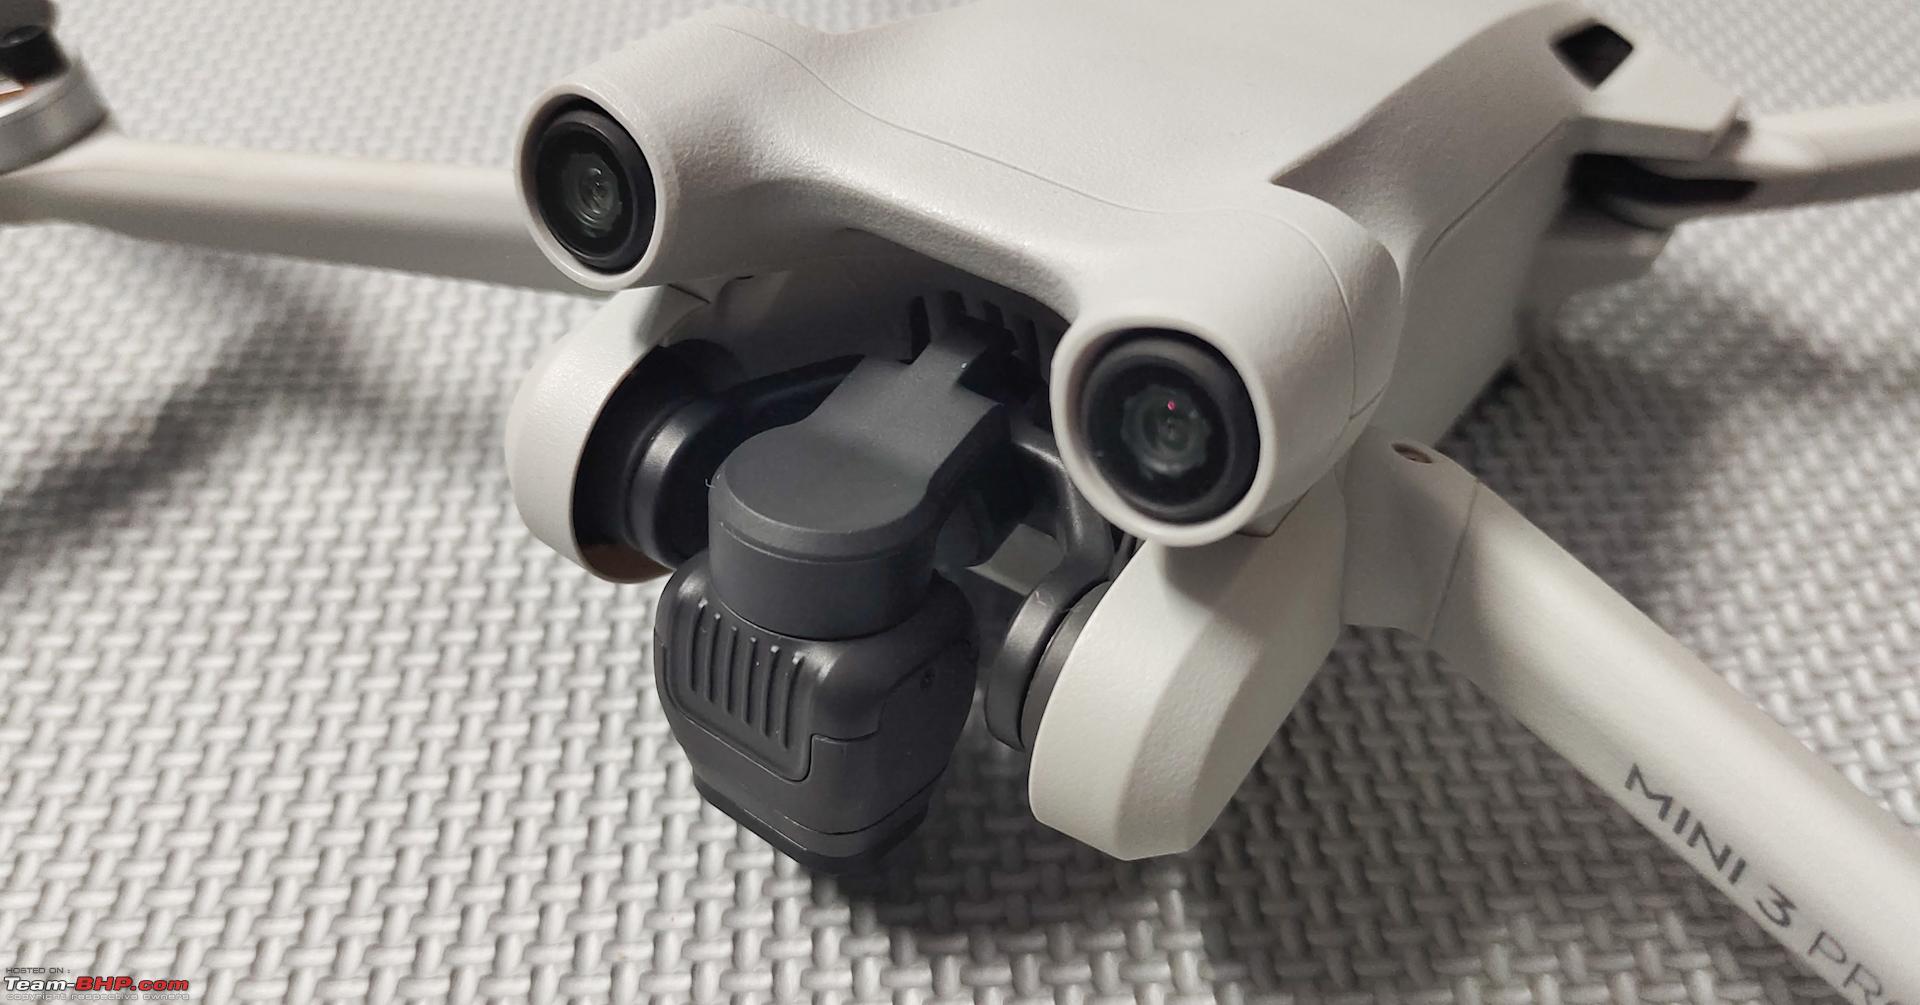 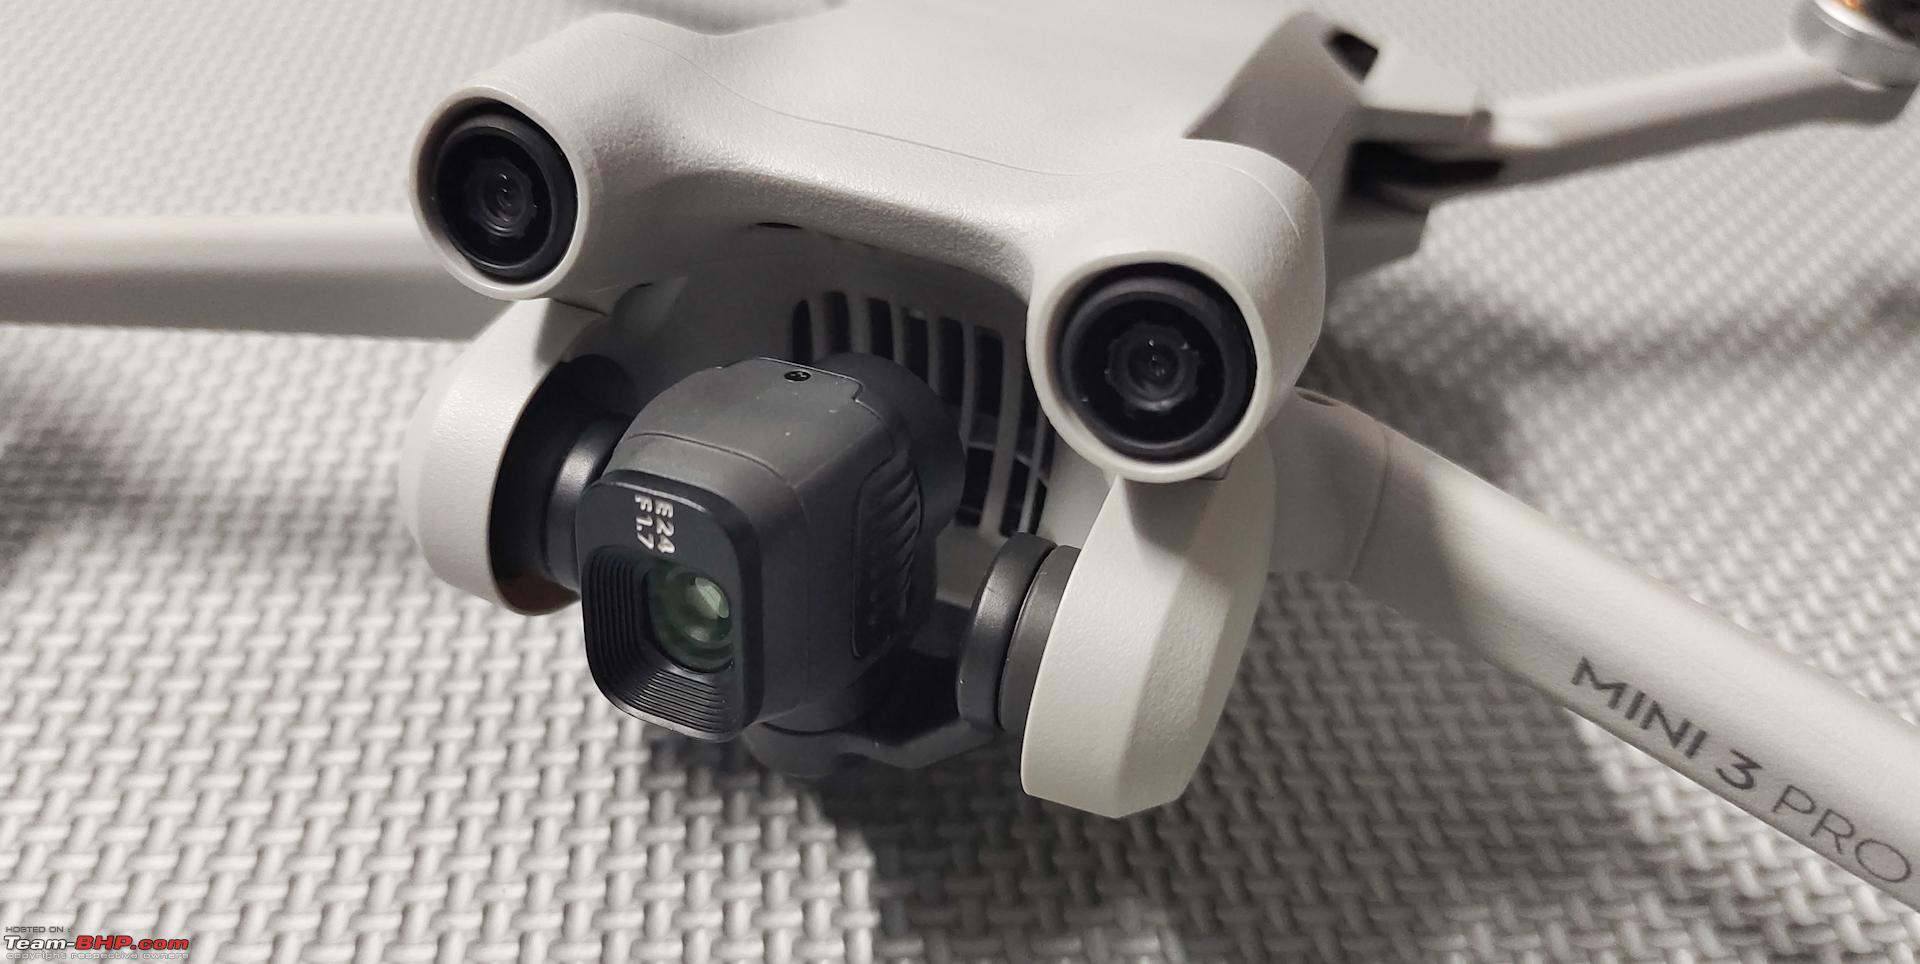 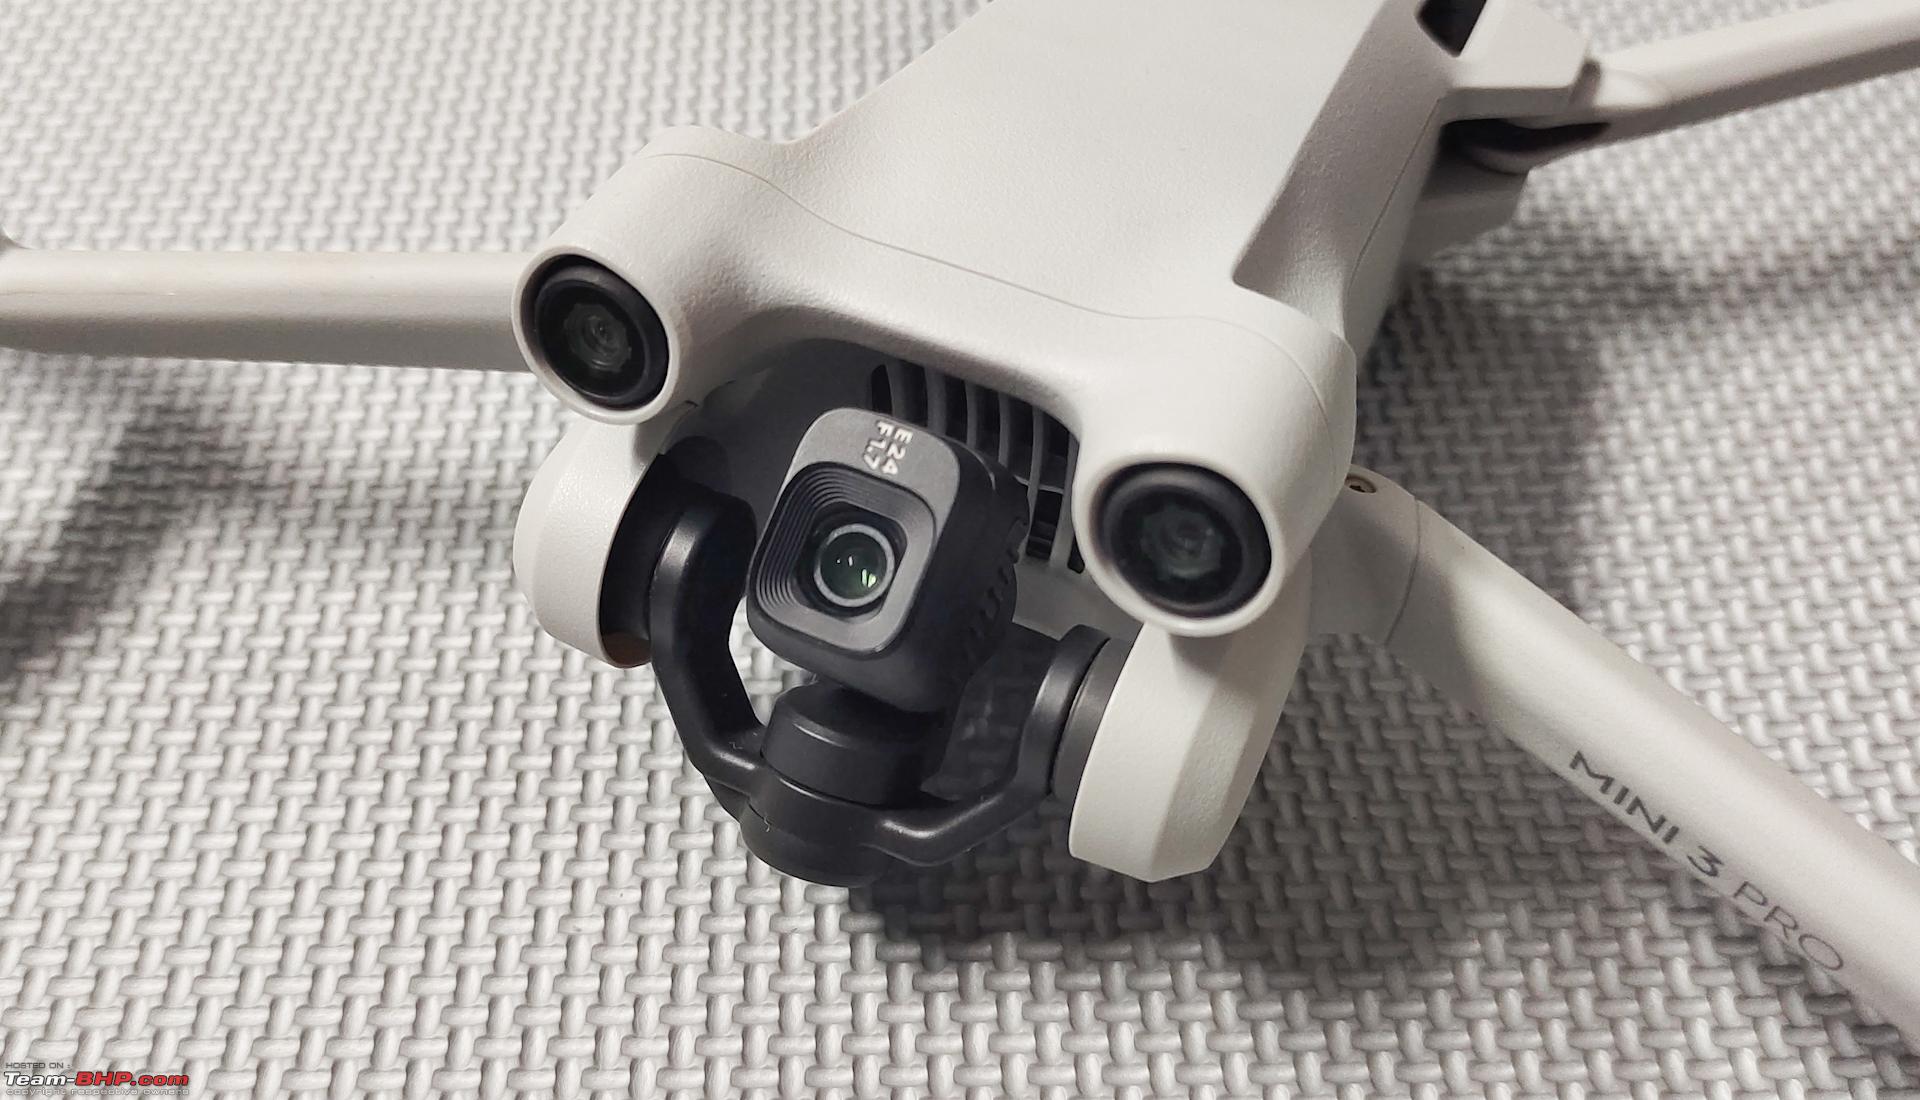 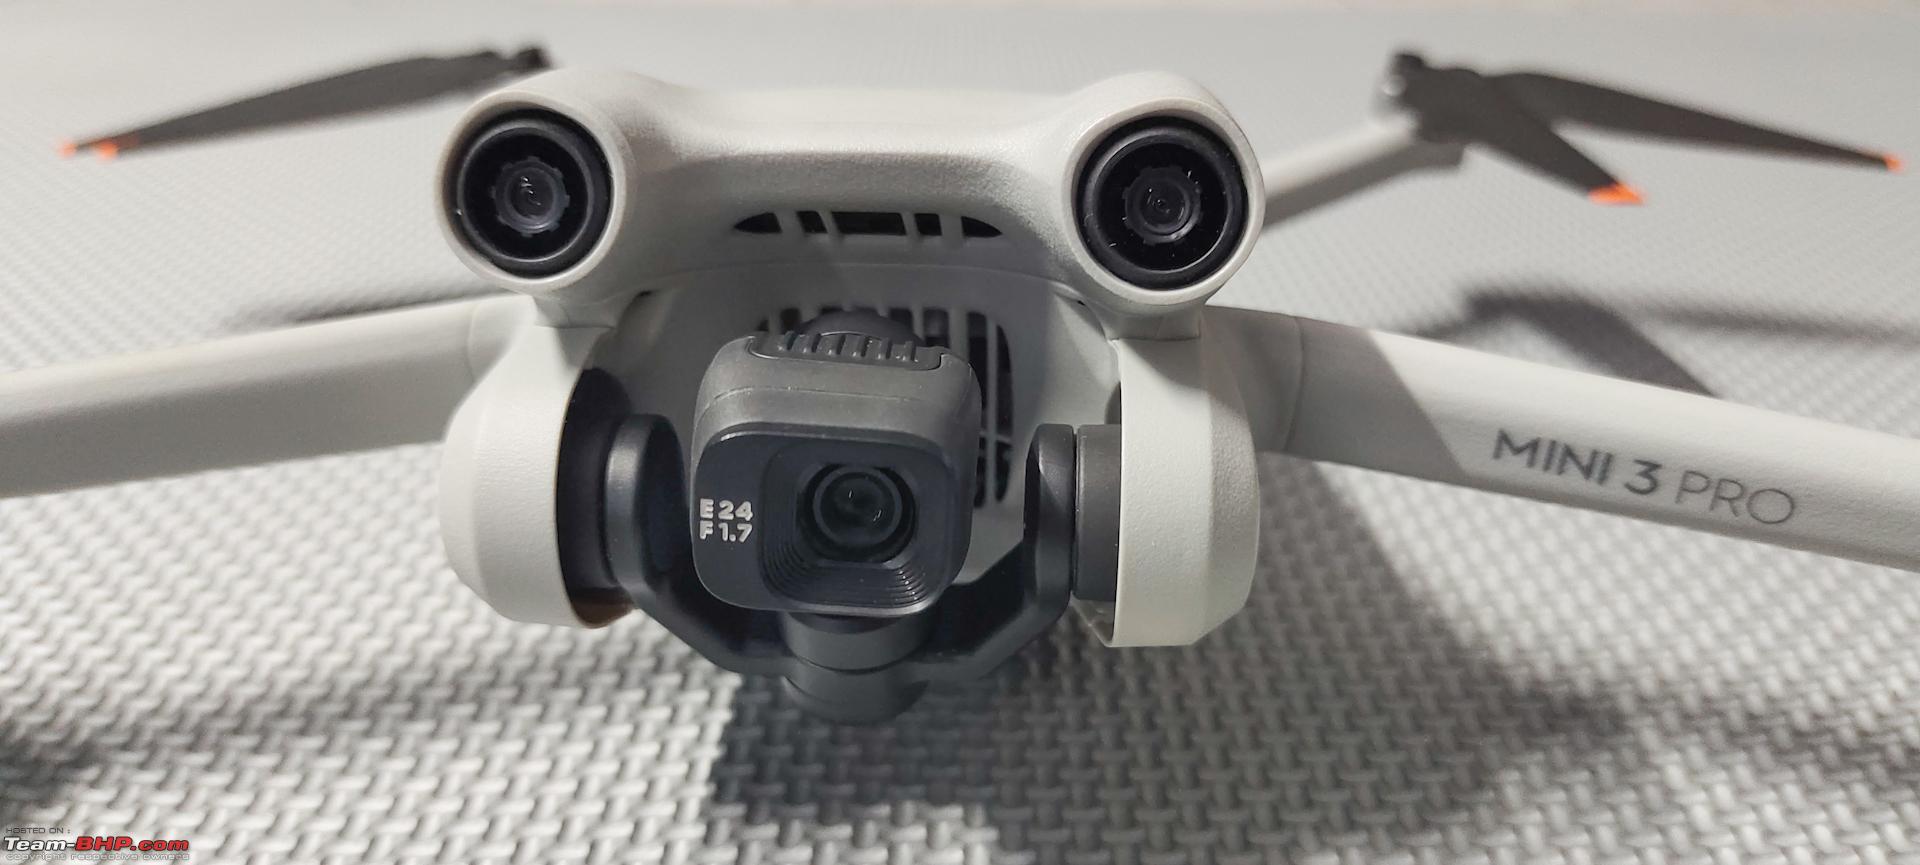 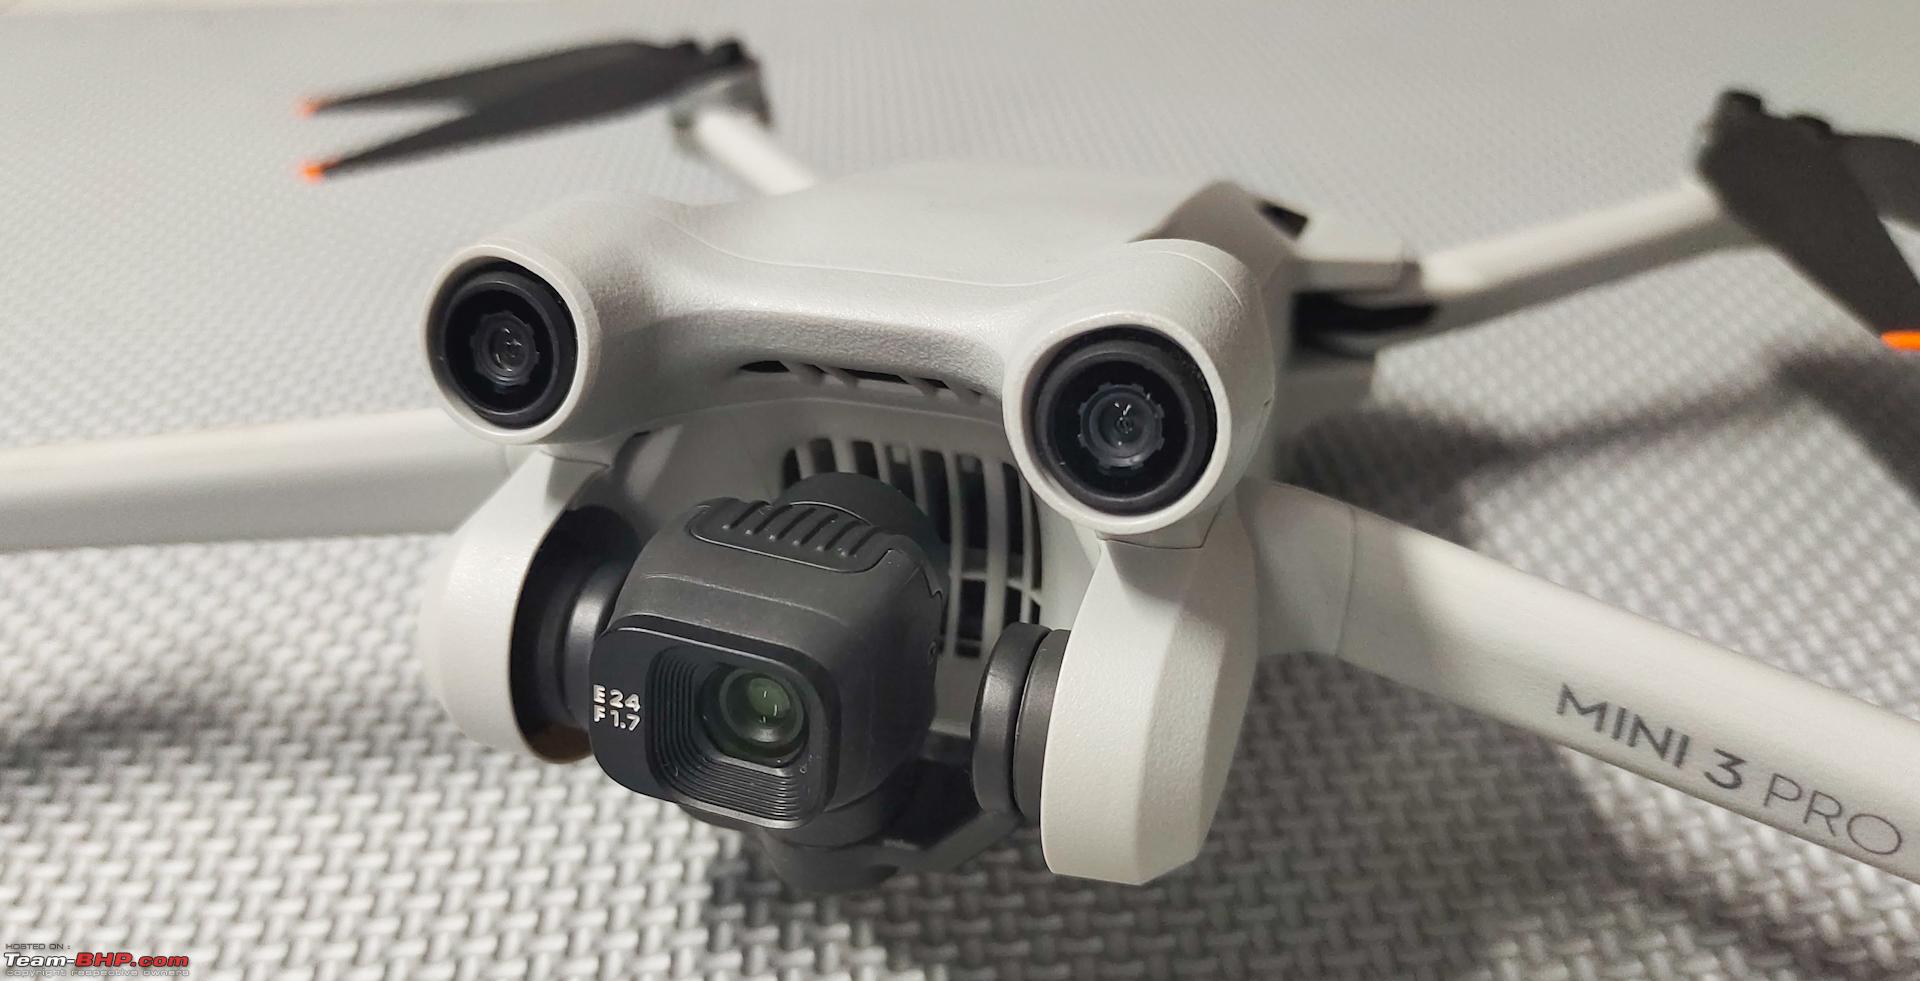 Video Format, Encoding, Resolution and Frame rate: Videos can be recorded either in .MP4 or .MOV format and encoded in a higher bit rate of up to 150 Mbps using either the H.264 or H.265 compression formats. There are various resolutions, ranging from Full HD 1080p to Ultra HD 4K and multiple frame rates, ranging from 24 fps to 60 fps, available for video recording. 120 fps for Slow-Motion is available only when recording videos in Full HD 1080p. Photo Format and Resolution: Photos can be shot in JPEG or DNG RAW or (JPEG + RAW) formats and in either 12 MP or 48 MP. Picture Profiles: There are two color profiles, Normal and D-CineLike and are applicable only to videos and not photos. The Normal color profile captures colors in 8-bit and outputs a bright vivid and saturated footage. It is more than enough for social media but lacks the details intended for professional quality work. D-Cinelike is a flat or a neutral color profile, captures more colors and supports 4K 60 fps recording in 10-bit color depth and is great for color grading in the post. It gives more room to bring out the best color shades and more details without any banding. It is mostly targeted towards professionals. Video and Photo Quality: Below are the videos that I shot. Sorry, my editing skills are very poor. Please do bear with me. Quick Shots: One that was shot after an early morning walk in an open field. Shooting videos in Automatic Mode: Any camera, when used in automatic mode, isn’t really flexible and does not give any room for adjustments and so is the case with the camera on the mini 3 pro. It doesn’t produce any exceptional quality footage directly out of the box and the settings require a bit of tweaking to extract the best out of the camera. By default, the camera shoots in normal color profile, which records videos in is 8-bit color depth and at a higher bit rate of up to 150 Mbps and does output a decent looking footage with good sharpness and color treatment which DJI calls it as HDR. The camera lens has a very wide opening, an aperture of f/1.7 which makes a lot of light available to the sensor. To control the influx of light entering the camera and to compensate for the exposure component, it automatically increases the shutter speed to insane levels, like about 1/3000th of a second or more sometimes under bright day light. The high shutter speed is not favorable for video recording as it removes the motion blur and makes the videos look choppy. It just doesn’t stop there. Panning the camera with high shutter speed introduces judder in the video footage. Making rapid movements also adds to this and spoils the overall quality of the footage. The judder effect becomes very prominent while panning or while making orbital and circular movements and results in out of focus and blurry videos as the focus continuously shifts during the moves. It is quite noticeable even when making manual gimbal tilts. There really is no escape from this while capturing videos in the automatic shooting mode. There are a lot of factors that affects this and can be minimized by choosing the right combination of frame rate, resolution, pan angle, focus point and shutter speed. Smooth and steady inputs from the controller also reduces this effect. Keeping the focus locked on to an object while panning also reduces the judder effect to some extent and the best way to do this is to use the Focus tracking modes or the fully automated Quick and Master shots which outputs footage with less jerky movements. The jitteriness is not seen while making simple moves like forward, backward, up, down, left and right as most of the scene stays in focus for a longer time Auto Focus Issue: The auto focus is quite cranky and does not work correctly always. It gets little confused sometimes and this could be either due to a wide-open lens having a smaller depth of field or due to a software glitch. I am not sure of the exact reason but sometimes during the flight, it suddenly loses the focus. Noticed this happen a few times, mostly during the automated flights where there was a lot of movement and also during normal operations a couple of times when the camera was in auto focus mode. It kept hunting for focus and finally acquired it after some time. It is not easy to check if what it is shooting is in sharp focus or not on a small RC screen and it becomes evident only when played on a bigger screen. This normally happens if there any objects closer to the camera before the flight, especially while taking off from the ground. The auto focus system acquires focus on objects closer to it and upon take-off never bothers to automatically refresh or readjust the focus to point to the new scene until the yellow focus square is tapped on the controller screen or the shutter button is half pressed. The auto-focus system in the camera should be able to automatically readjust itself and acquire the focus as the drone moves closer or away from the the subject. However, in the case of mini 3 pro it is not consistent. This is definitely not an expected behavior from the auto focus system. A quick solution to this is to always point the drone towards infinity or on far off objects and get the focus to lock onto it before take-off to ensure the whole scene looks tac sharp. The other way to get everything in sharp focus is to wait for the drone to take off and then tap on the focus square on the screen before making any further moves. It behaves more or less like a single point focus on DSLR cameras and not like a continuous AF system although it is. Tapping the focus square on the screen brings things back in sharp focus. This behavior is not persistent but intermittent. It works perfectly sometimes and on some occasions it fails miserably. So, it is a hit or a miss and Auto focus is definitely wonky and not reliable and it is best to avoid it. Gimbal: The gimbal does its job to keep the camera stable. However, very slight shakes do creep in when flying against the winds and is noticeable during the playback which of course can be fixed in post. Quick Shots: The auto mode offers several intelligent shooting options like Master shots, Quick shots, Focus tracking, Hyper-lapse, slow motion and Panorama. The quick shots include Dronie, Rocket, Circle, Helix, Boomerang and Asteroid. It is an excellent feature to get cool looking footage. The only downside to this is that, it is not fully autonomous when used in urban areas because of the lack of side and top facing sensors. It requires the pilot to monitor the flight and manually hit the brake or the pause button if it encounters an obstacle in the flight path and stop or abort the mission midway to prevent accidents. The same applies to the Master shots as well. It is best to use quick and master shots in a wide-open space, that is free of obstacles for best results. Master Shots: The master shots are nothing but a series of few quick shots along with a few other moves in a pre-programmed trajectory that are stitched together to create a short 2-minute footage and is quite useful when shooting in a small-time frame. It offers some nice templates along with music for editing and sharing on social media. The master shots automatically detect the type of scene and subject when activated and works in either the portrait, landscape or proximity mode. Each mode differs by the type of maneuvers it accomplishes. The portrait mode gets enabled when shooting people, the landscape mode as the name says, gets enabled when shooting landscapes and the proximity is mainly for closer objects. The height, width and distance the drone flies to capture the scene can be set to either small, medium or large depending on the area in which it is used. Annoyingly, both Quick and Master shots are defaulted to FHD 1080p 30 fps recording. It needs to be manually switched to either 2K or 4K to record videos in higher resolution. Focus Track: The Focus tracking suite offers, Active Focus Track with Trace and Parallel, POI and Spotlight. Active Track: Trace and Parallel The Active Track works very well by tracking the moving subjects and can be used in a variety of situations. In Trace mode, it locks on to the subject and can be used to follow a person, a moving car, a boat moving on water or while hiking, cycling etc. It can be setup to follow from behind or track from the front during which it flies in backward direction to keep the moving subject in focus. Irrespective of the direction of follow mode, it gives freedom to control the altitude and gimbal angle. The good thing about this is that, even if it loses track of the subject, due to subjects moving fast or if the subject disappears behind obstacles, it hovers and waits for the subject to re-appear in the scene and then continues to follow back again or if it can detect the subject even slightly between the obstacles then it just assumes the subject is present and will continue to follow. Just amazing!  The parallel tracking mode can be used to track subjects from sideways at a constant distance and an angle. The drone files automatically and parallel to the moving subject and keeps it in the frame. This mode should be used with caution as there are no side facing sensors. Spot Light: The spotlight mode is more flexible and can be used for tracking both moving as well as static subjects. It locks on to the target and keeps it in focus at the center of the frame and tracks it like a spot light and it can be used for a parallax shot as well. If used with moving subjects, it automatically makes all the necessary moves to keep the subject in focus at the center of the screen. It also allows the pilot to manually move the drone all around the static or moving subject and keeps the target in the center of the frame by automatically adjusting drone rotation and gimbal angles. Point of Interest: The POI or the Point of interest is for making the classic orbits around the subject. The direction and speed can be set and it automatically circles around a subject and allows the pilot to dynamically control the height and gimbal and it can also be used to circle or orbit around a moving subject to get unique shots. Digital Zoom 2x zoom can be achieved when shooting in 4K, 3x when shooting in 2K and 4x when shooting in Full HD 1080p resolution. However, since it is not lossless zoom, the video quality deteriorates and should preferably be used when shooting in higher resolutions like 2K or 4K. Do these modes ever fail? The intelligent fly modes work well in most of the situations and does fail occasionally when it cannot clearly identify and make a distinction between the subject and its background. This happens normally when the background is too busy or if the subject moves very fast with erratic movements or when in low lighting conditions. Intelligent Flight Modes Recording capabilities: The intelligent flight modes are capable of outputting up to 4K 30 fps HDR footage because of the dual native ISO (100 and 500). Direct HDR output is available only when shooting in certain resolutions like 1080p 24/25/30/60 fps, 2K 24/30 fps and 4k 24/30 fps and not in higher frame rates like 48/50/60/120 fps under 2K and 4K resolutions. The slow motion at 120 fps is available only when recording in FHD (1080p) The Panorama is indeed a nice feature and shoots pictures in multiple angles and directions and stitches them together to produce different looking shots like the 180 degrees view, 360 degrees sphere etc. The Hyperlaspe is a time lapse in motion and gives several pre-set options like course lock, way points, circle and free movement to capture unique perspectives. Irrespective of the resolution (2K or 4K), the Master shots, the Quick shots and the Active Focus track can shoot only up to 30 fps and not beyond that. Manual Mode: This is where things start to get very impressive and interesting. Manual Mode + ND/PL-ND filters + Shutter priority or ISO priority + 10-Bit D-CineLike makes an excellent combination for aerial photography. The PRO mode gives full control of the camera and when used along with ND filters gives the best possible results while shooting videos. Footage looks a lot better and smooth when shot in manual mode and with ND filters, as the filters cut down the light by a few stops, depending on the strength of filter and allows to set the shutter speed as per the 180-degree shutter rule and gives a smooth & fluid transition between the frames. Both Shutter and ISO can be kept constant or made dynamic to adapt to the scene. With shutter priority set, it keeps the shutter constant and changes only the ISO in small increments of 10 based on the changes in the lighting conditions in the scene and adjusts the ISO to get an even exposure during the shoot. With ISO priority set, it changes only the shutter speed automatically in small increments to balance the exposure. D-Cinelike captures more colors in 10 bit, records videos in a flatter or a neutral color profile by preserving the highlights, mid-tones and shadows and outputs a dull looking and washed-out footage and gives complete freedom to color grade in post processing to bring out the best details and high dynamic range without any banding. Focus Peaking: The Auto focus is quite not reliable and it is best if avoided completely. A tap on the AF button on the RC screen toggles between Manual and Auto focus modes. The manual focus offers focus peaking which shows what is in sharp focus and what is not by highlighting the subjects in red during the day and in white during night times. It also provides a slider to adjust the focus to desired level to bring everything in sharp focus. The slider can be moved to bring nearby objects or objects at infinity in sharp focus. This is analogous to adjusting the focus ring manually on a DSLR camera. This when setup and dialed to intended levels behaves like a continuous auto focus system or fixed focus and works well. Photos: The mini 3 pro has a 12 Megapixel sensor and by default it can capture crisp, clear and sharp RAW photos in true 12 Mega-pixel. The photos can be shot in either auto or manual mode and in different aspect ratios (16:9 and 4:3) and formats like JPEG, RAW or JPEG + RAW. Since the sensor is a Quad Bayer type, it can be used either as default 12 MP or 48 MP. The 48 MP photos are artificially created through a technique known as demosaicing. The demosaicing algorithm can reconstruct 4 pixels from a single large pixel through interpolation, by placing a virtual color filter over the sensor and thus can artificially increase the effective number of pixels in a photo. The opposite of demosaicing is pixel binning where 4 pixels are grouped together to form 1 large pixel as in the case of 12 MP. Some features like Auto Exposure bracketing (AEB), burst mode and HDR are not available when shooting in 48 MP. The 12 MP photos can be shot with either 16:9 or 4:3 aspect ratio, whereas the 48 MP can be shot only in 4:3 ratio. The autofocus works by focusing at infinity to keep most of the scene in focus and it tends to slightly overexpose but that can be fixed by adjusting the metering slider on the screen. It also supports spot metering. The focus can also be set to any part of the scene manually, just by tapping or moving the focus square towards the point of interest on the RC screen. The small sensor provides a good depth of field and tends to keep most of the scene in sharp focus. However, because of the large aperture, some areas do appear soft and can be noticed only during pixel peeping and not otherwise. The 48 MP, packs more pixels together, adds more details to the photo and is ideal for shooting in day time or in good lighting conditions. With increase in ISO, the quality deteriorates and makes the whole image look grainy and noisy. It is totally unusable for night shooting unless there is good lighting. On the other hand, the 12 MP photos look better both during day and low light conditions, and even with high ISO. There isn’t much difference between the artificially created 48 MP and the real 12 MP photos. 12MP photos, in fact looks more natural and it is more than sufficient for social media platforms. There are limitations of the small sensor and the overall image and video quality is nowhere near to the modern full frame mirrorless or DSLR cameras. The DJI RC controller: 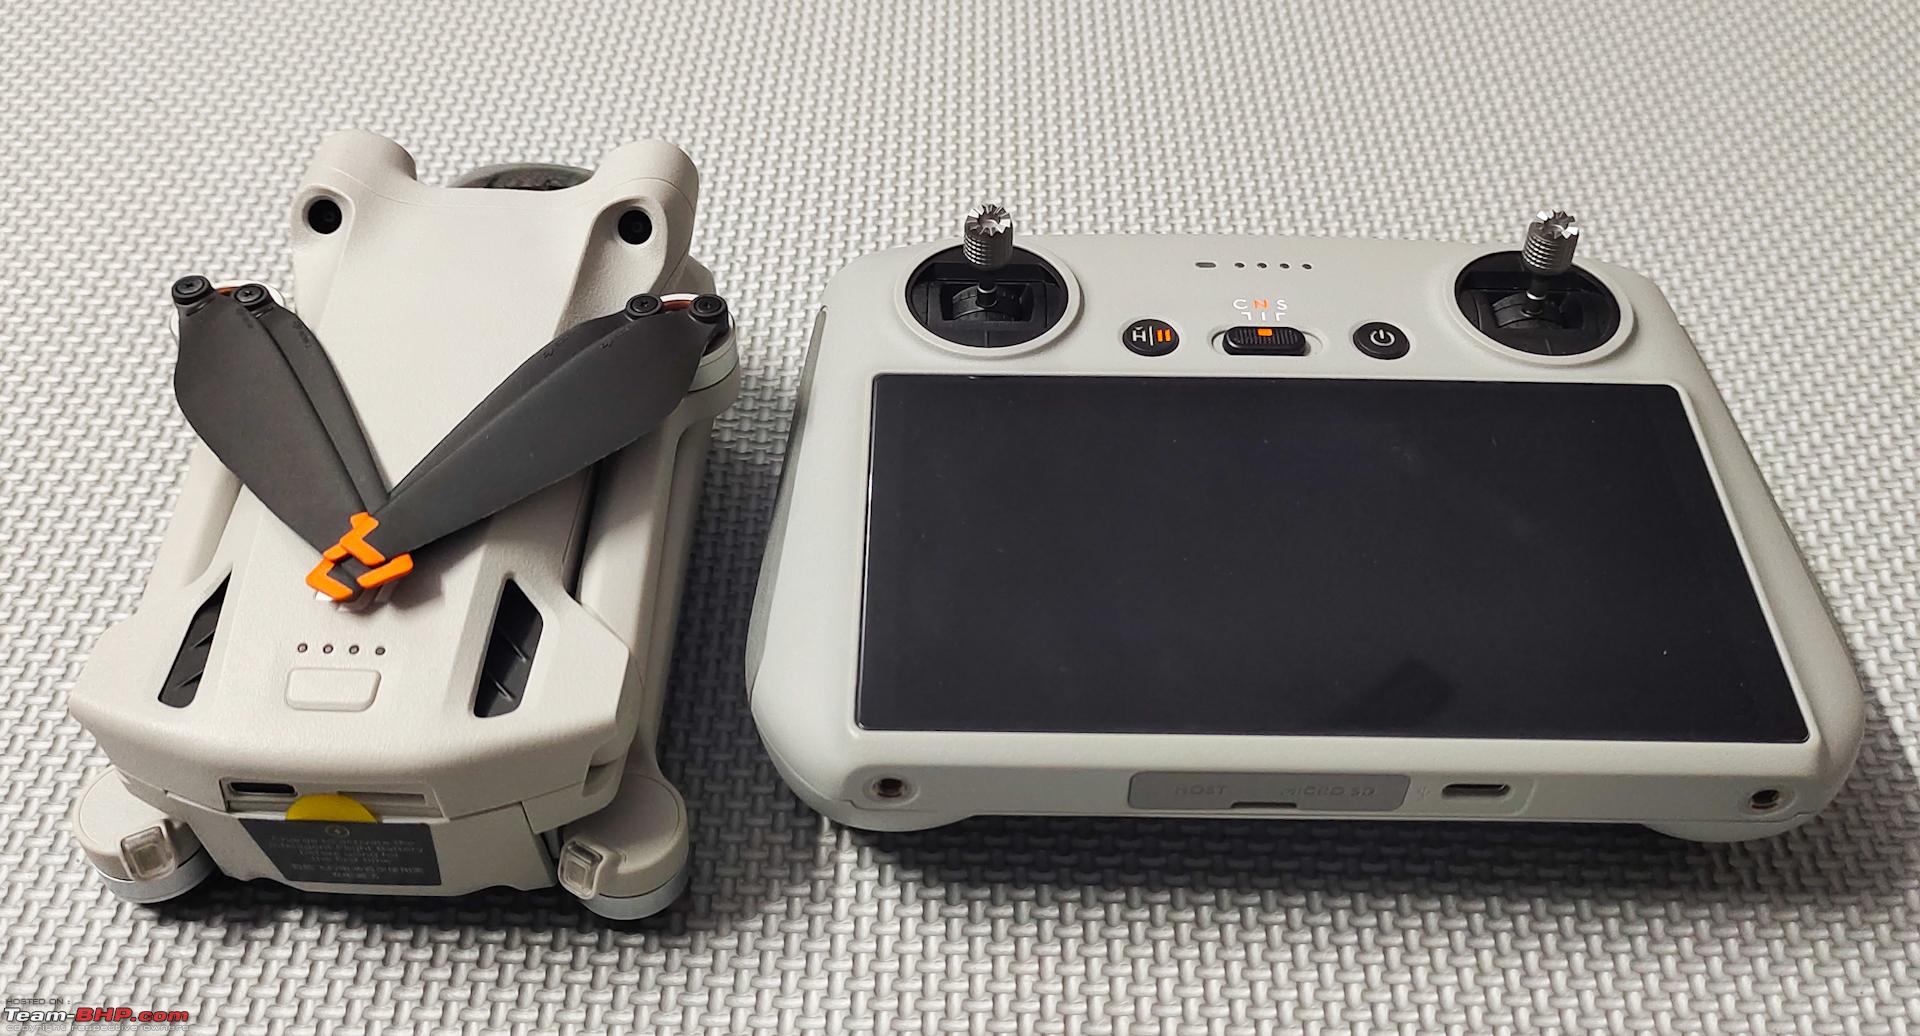 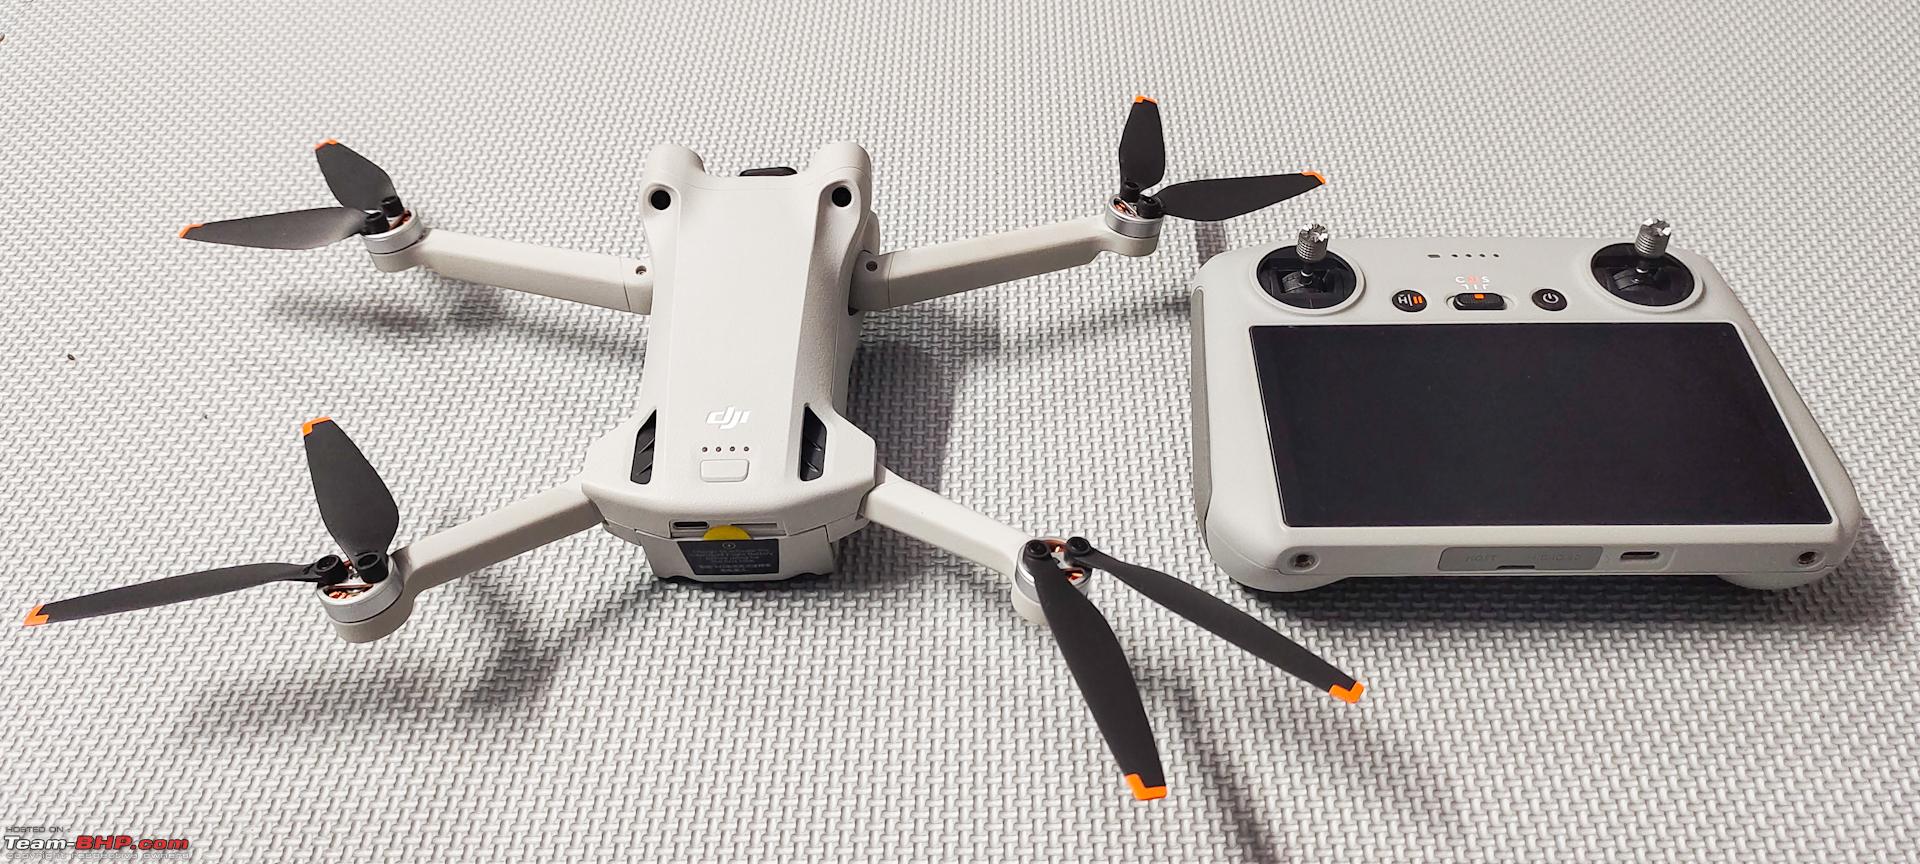  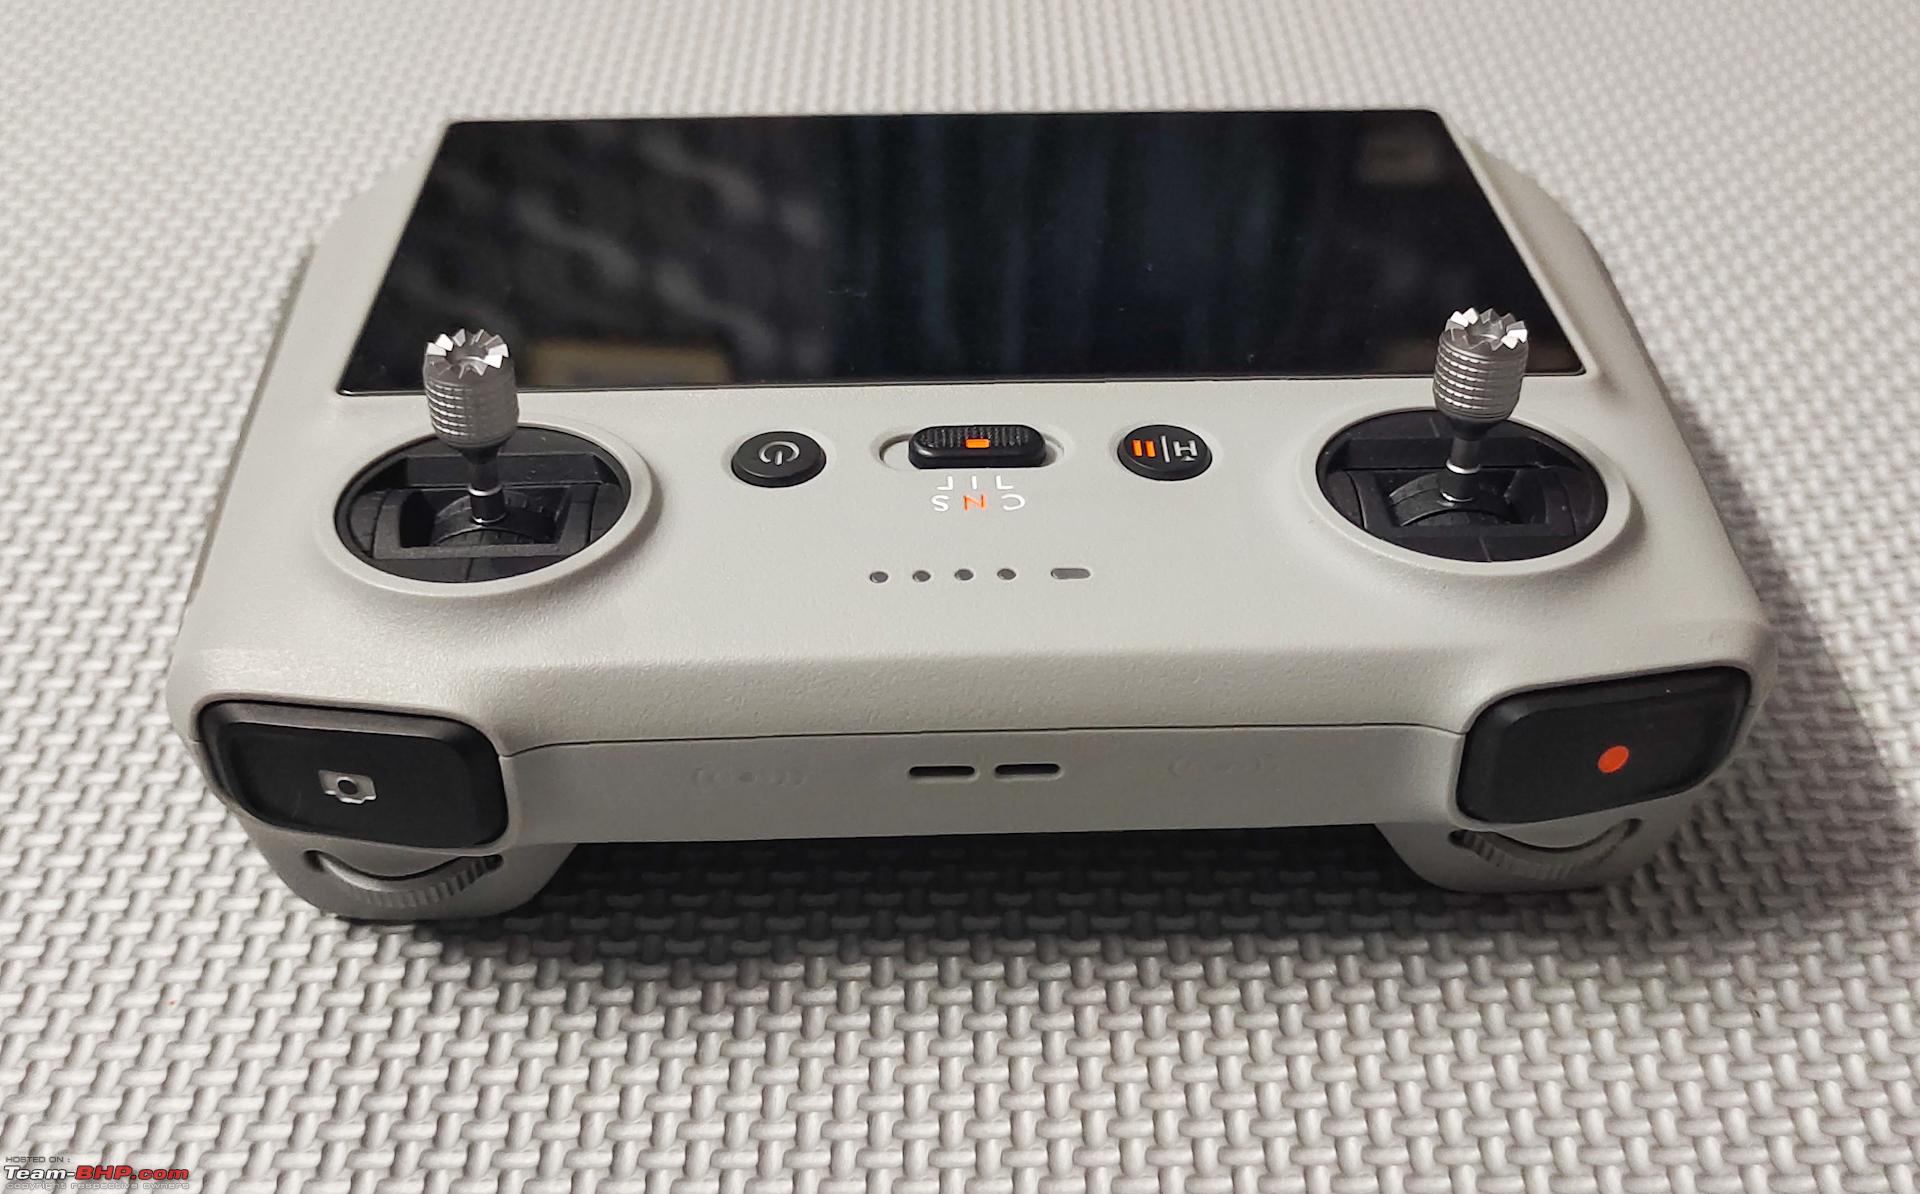 The drone is paired with the new DJI RC controller that comes with an integrated Full HD (1080p at 30 fps) 5.5-inch-wide display screen having 700 nits of brightness. It runs on android and the DJI fly app come pre-installed in it and thus eliminates the phone from the equation and makes piloting the drone easier and smoother than ever before. The brightness levels never go down like the way it does on phones. However, it is not sufficient enough under the direct sunlight or even during the day for that matter. Without a shade it is difficult to see the live feed and needs to be managed by changing the viewing angles as the whole screen has a glossy and reflective finish. The DJI RC controller is ergonomically designed with dual antennas which are hidden and is a good fit for both amateurs as wells as professionals. Beginners will benefit from getting started and how to fly lessons along with some useful tips and it allows enthusiasts and professionals to manually customize settings to match their tastes and preferences. DJI RC is equipped with very responsive dual spring control sticks for smooth and precise operation and has a good battery life and it lasts for 3+ hours on full charge. The joysticks, and physical buttons for speed selection and return to home/brake/pause are located on the top of the screen and two customizable buttons are located underneath the controller and can be mapped to a specific functionality. There is also a slot provided below to place the control sticks safely. The gimbal control wheel is on the left and can be used to control the gimbal pitch angle and and the zoom control wheel on the right which can be used to zoom in or out. The video record button is just above the gimbal scroll wheel on the left and shutter button is just above the zoom wheel on the right. It uses state of art OcuSync 3.0, a sophisticated wireless transmission technology, which establishes a highly reliable and strong connection between the controller and the drone and uses separate sub-channels within the frequency band for streaming real time video and for transmitting control signals and thus is more resilient and less susceptible to interferences and signal drops. It mostly uses OFDMA and FHSS and transmits signals in FCC mode in India if I am not wrong. It operates in the dual band (2.4 and 5.8 GHz frequency channels) and automatically switches between the frequency channels, depending on where the signal strength is the strongest and provides very good connectivity for long distances of up to 12 kilometers in ideal conditions with zero interference but not in real world conditions though. The signal does drop and occasionally break when flying behind lot of interferences like trees, buildings etc. The 12 km range looks gimmicky and DJI mostly uses it for advertisement purposes. In reality, it is not possible to achieve that distance even in open areas with zero interference because a number of things could go wrong especially when the drone is not flying in the line of sight and the batteries will definitely get depleted half through the flight if flown for such a long distance of 12 km and the drone may never return back. I have not experimented with this and I am guessing the transmission range would be around 1-2 kilometers in urban localities and may go up to 5 km in wide open areas with no interferences. I have rarely flown it beyond 500 meters from the take off point and there really is no need to take it beyond that distance unless it is absolutely necessary to do so. If it can fly 1 or 2 km with no signal loss whatsoever, I guess it is more than sufficient for majority of the scenarios. Also flying it out of the visual line of sight is against the drone flying rules and regulations. With the latest firmware update, the drone broadcasts information like the height it is flying at, the distance from the base take-off location, the speed in which it is flying etc. Although nobody here in India cares about all these as much as they do in US and other countries, it is better to not break the rules as it increases the chances of losing the drone. DJI RC supports manual selection of either 2.4 GHz or 5.8 GHz frequency bands for transmission as well. DJI RC supports both FPV and follow through display modes. The new DJI RC now supports the DJI MAVIC 3 and AIR 2S models as well. The DJI RC controller has an onboard storage of 4 GB and has a separate memory card slot for screen recording and it can be done at a low resolution of 720p and comes handy during crash investigations and also while creating flight tutorials. The battery Pack:    There are two battery packages available, the Normal Intelligent and the Intelligent Plus and they do keep the drone airborne for a good amount of time. However, the real-world flight times, available from the batteries, are way lower than what is advertised on the them, even under normal conditions. Standard Batteries: The standard battery weighs about 80 grams and has a rated capacity of 2453 mAh and takes about 40-45 minutes to charge when connected to 30-watt/65-watt USB Type-C adapter or charger. Flight time available from the Standard Batteries: Under normal conditions, the maximum flight time available for usage from a standard battery, on full charge, with continuous recording is only 22 minutes. This includes both the take-off and landing times. So, the maximum effective time, available to record good footage is around 15-20 minutes only and the remaining 2-3 minutes of time will have to be utilized in retrieving the drone back for a landing operation. If not, RTH (Return to Home) gets activated automatically and it begins to fly back to the home point and will begin to auto land. The Plus Batteries: The plus batteries are packed with more cells and have the exact same dimensions as that of standard batteries. They weigh more and has a rated capacity of 3850 mAh and takes about 55-60 minutes to charge when connected to 30-watt/65-watt USB Type-C adapter or charger. It also pushes the overall weight of the drone above the 250-gram mark and goes up to 300 grams. Flight time available from the Plus Batteries: Under normal conditions, the maximum flight time available for usage from an intelligent plus battery, on full charge, with continuous recording is only 30-33 minutes. This includes both the take-off and landing times. So, the maximum effective time, available to record good footage is around 25 minutes and the remaining 5 minutes of time will have to be utilized in retrieving the drone back for a landing operation. If not, RTH (Return to Home) gets activated and it begins to fly back to the home point and will begin to auto land. Low battery behavior: If the safety features (RTH, Hover, Descend) are disabled, the controller beings to beep if the battery power falls below 80% and alerts the pilot to fly the drone back home with a warning message. Since this is only a warning, it can be ignored or dismissed and the flight operation can be continued for a few more minutes. With safety features (RTH, Hover, Descend) enabled, the controller displays a prompt on the screen asking for confirmation to fly back with a 10 second count down timer. If no action is taken, RTH gets activated and the drone beings to ascend to the preset height and beings to fly back. If the battery percentage falls below critical levels, the controller beings to beep loudly and displays a message with a countdown asking for a confirmation to land. Irrespective of what action is taken, it begins to auto land in its current position after the countdown and this can be very dangerous especially if the drone is far away from the home point or flying over water etc. So always keep an eye on battery percentage while flying and use it effectively. Also, it is better to wait until the home point is updated before taking it far for fail safe return to home. The other factors that impact the battery life: Flying in high altitudes and high winds consumes more battery power and strains the battery heavily and reduces the overall flight time to half. 15 minutes in case of standard battery and 20-22 minutes in case of Plus size battery. Tested it at 65 meters above the ground level and this is the reality. Filming in 4K 60 fps does drain the batteries lot faster than expected. Activating or flying in sports mode continuously, does turn off all the sensors and drains the normal battery in less than 10-11 minutes and the plus battery in less than 15 minutes. So, use sports mode with caution. The Plus goes over the Limit: With the Intelligent plus batteries the overall weight goes beyond 250 grams and mandates a registration. Charger and charging the batteries: Two-way Battery charger provided in the fly more kit charges the batteries in sequence and not in parallel and takes several hours to charge the batteries unless a 30 watt or a 65-watt fast PD charger is used. The DJI 30-watt fast charger is not a part of the kit and has to be bought or purchased separately. It takes almost 2 and half to 3 hours to charge all the batteries to their full capacity with a 65-watt or a 30-watt fast charger. An 18-watt charger, will take an eternity to fully charge the batteries. Wind Resistance and Wind Handling Capabilities: The drone is rated to handle Level 5 winds, which means to say that it can withstand wind speeds of up to 38.5 kmph. However, with a very small footprint and being a sub-250-gram drone, it does struggle and wobble even in slight breezes and goes off track more often than the heavier drones. The rotors spin faster, whizz louder and tilts in the direction of the wind to counter the forces exerted by wind and balances itself quite well especially considering its size and weight. The drone does all it can to hold its position using the GPS and even makes an effort to come back to its hovering point and height if it gets pushed by the winds without any input from the controller. Flying it in winds speeds of more than 40 kmph, requires more piloting skills and with sudden gusts greater than 40-45 kmph it gets easily pushed in the direction of the wind and can potentially crash against an obstacle if there is one even with sensors on. Seeing the branches of a tree sway gives an indication of how strong the wind is and what it can do to this little machine and does not give the confidence to take it high and far. Not that it cannot fly, it is just riskier to do so and higher it flies, greater will be the need to handle more stronger winds and in such windy situations, it heavily strains the gimbal and pops up alerts and high wind warning messages on the RC screen and overloads the battery to extreme levels as the propellers require more power to stay up there to fight the wind and it becomes very challenging to fly in such windy conditions. The safe zone to fly this drone according to me is about 60-70 meters high from the ground level and can be flown higher if the environment around supports it with no or mild winds. The drone is designed to handle headwinds better than winds blowing from sideways and the maximum tilt angle it can achieve is 25 degrees and if the wind speed is more than what the tilt can handle, it is difficult to retrieve it back even in sports mode and may fly away and not return back. So, it is better to be safe than sorry and not push it too hard. It is not good at handling cross winds and there is a limit to what it can handle and resist the wind power by tilting itself to a maximum of 25 degrees in the direction of the wind, beyond which, it will just fly away. Very strong winds blowing from underneath the drone can flip/turn the drone upside down, causing the motors to shut off immediately and lead to a fatal crash. Pro Tip: Do not fly it when it is too windy. Every time it rocks and bounces in the air, it gives heart attacks. The drone is designed to handle head winds well, and if at all there is a need to fly in high winds, it is better to fly always into the wind so that it can effortlessly fly back even if something goes wrong. More Stability with the Plus Battery: It does handle the winds slightly better with the plus battery as it makes it heavier by a few grams more and flying it in sports mode, makes it slightly more stable as it gets more power to fight the air. UAV Forecast App: I use UAV forecast app to check the conditions before take-off. The maximum speed the drone can withstand or handle can be entered in the app as input and based on the actual weather conditions and wind speeds at various heights, it tells whether it is good to fly or not. It is always better to check the weather forecast, wind speed and also the direction of the wind before take-off for complete peace of mind during the flight. If the weather looks non-conducive at the ground level it is better to not fly the drone at all and get into an uncomfortable situation.  Do not take the risk: Since there is no DJI support of any kind in India, not even warranty, it is better to not take any risks. There are several YouTube videos showing people testing and flying the mini 3 in extreme conditions and conveying that it can withstand winds higher than the rated capacity. Yes, it might survive. But is it really worth doing such things? Most of them would either be a paid promotion or they would have signed up for a DJI care refresh program in which case, they would get a replacement drone free of cost if it crashes. In India, if something goes wrong, it is as good as throwing the money down the drain. How Does it Fly: The drone responds almost instantaneously with no lag to controller inputs and flies very smoothly and silently and can climb up to 400 feet. The hum from the propellers isn’t too loud and can hardly be felt or heard if it is a few feet above. It is very easy to setup and a breeze to fly with no learning curve and with a lot of built-in safety features it is even easier to handle. The new RC controller and the drone come paired and nothing else needs to be done to set them up. The display on the controller is super crisp and sharp with 700 nits of brightness. The DJI fly app automatically connects to the aircraft and enters into the camera view. The aircraft, re-centers the gimbal, takes a few seconds to connect to the satellites and updates the take-off or home point and gets ready to fly. With the push of the take-off button in the fly app, the drone, raises up to the waist height or a meter high in the air, stabilizes and levels itself and hovers at the take-off point and waits for inputs from the pilot. It can also be hand launched or launched manually by pulling the control sticks down and towards each other at 45 degrees. It levels itself parallel to the ground and flies straight as long as there are no or less winds. It is optimized for forward movement and handles headwinds better and when the cross winds kick in, IMU and GPS sensors detect the push and the lateral shift due to winds and calculates the tilt angle to counter the wind force. To resist the wind, it revs up the motors on either the left or the right side depending upon from where the wind is hitting the drone. If the wind pushes the drone from the left, the drone flies by tilting itself to the left by an angle that is calculated by the IMU sensor and if the wind pushes it from the right, then it flies by tilting itself to the right at an angle decided by the IMU senor. The sensors work to bring the drone back to the position and height it was in before the push and can handle a maximum tilt of 25 degrees to either left or right beyond which it gives up and drifts off in the direction of the wind. The drone has large vents behind the gimbal to dissipate the heat faster. It makes use of the air flow from the propellers to cool itself down. The drone does heat up a lot when it sits stationary as there are no inbuilt cooling fans unlike the more expensive drones like the Mavic 3. Intelligent Fly Modes: There are various built in intelligent fly modes like the Master shots, Quick shots, Focus tracking, Hyper-lapse and panorama and is a real boon for the amateurs with no prior experience in flying drones. The intelligent modes capture the scene by making all the pre-programmed cinematic moves and creates a short, edited, good-looking footage, along with music and makes it instantly available to share on the social media. Speed Modes: It can be flown in 3 different speeds. Cinematic, Normal and Sports. The slowest is the cinematic and the fastest is the Sports mode. Cinematic mode produces a very stable and smooth footage. Sports mode is not meant for beginners as it turns off all the safety sensors. The sports mode is geared towards very seasoned pilots and action lovers and meant for filming high speed aerial action sequences. The drone does fly really fast and also drains the batteries faster. Sports mode is very valuable and helpful in flying and maneuvering in strong winds as the motors supply more power to the propellers and provide better acceleration to fly through the winds. The Normal mode is kind of middle ground and is ideal for flying in most of the normal scenarios. Last edited by Amyth Prabhakar : 11th December 2022 at 07:01. |
|
| (37)
Thanks
|
| The following 37 BHPians Thank Amyth Prabhakar for this useful post: | 2himanshu, AdityaDeane, aeroamit, audioholic, Avikbrio, bblost, brownkaiser, deerhunter, denzdm, digitalnirvana, fluidicjoy, gauravdgr8, GTO, izzikio_rage, Jeash.vk, JS Kwt, KarthikK, LoneRidder, mail2sekh, MotoBlip, NewUser123, NitSat, PGNarain, ph03n!x, pun337, quickdraw, ritesh_44, Roy.S, saikarthik, Samfromindia, shyamg28, spindoc, tharian, TSIboy, valapad, xsrahul, Yash390 |
|
7th December 2022, 18:52
| #3 |
| BHPian | re: Dji Mini 3 Pro Review | The Best Nano Drone Safety: APAS 4.0 The drone is equipped with 3-way, binocular vision, obstacle detection sensors. They work only in the normal and the cinematic mode in real time. They are automatically disabled when flying in sports mode because the drone doesn't get enough time to sense, detect and process. The forward, rear and downward-facing sensors have a wide field of view and enables the APAS 4.0 (Advanced Pilot Assisting System version 4.0) to accurately detect and avoid obstacles in the flight path. There are no side and top facing sensors to prevent it from crashing sideways or against the top and have to be really careful when flying indoors or in tight spaces. Although there are no side facing sensors, there is an option to disable sideways movements. It comes handy in tricky situations and very helpful when flying between obstacles or through narrow gaps. The obstacle detection system is not failsafe and does not work well if surface area of the objects are very small. Things like twigs, electrical lines, internet cables etc. are not always recognized by APAS. It is not completely reliable and it is better to always keep an eye on the drone and fly within the line of sight for a safer experience. APAS modes: The APAS can be set to either bypass or brake and can also be completely turned off. Setting it to bypass mode will cause the drone to intelligently choose a new path around an obstacle which in turn may lead to other risks as there are no side and top facing sensors and is not a suitable option for all situations. Brake on the other hand, will cause the drone to stop and hover in front an obstacle and allows the pilot to take control of it and is more ideal and reliable for all situations. The APAS does work very well even in complex environments provided the drone is flying in either the cinematic or normal mode and there is enough time to process the surroundings and the environment. One thing to note here is that the sensors cannot detect and recognize objects with very small surface areas like thin wires and twigs of tree etc. and will surely crash into it. Had a near miss experience. APAS disabled: The processor in the Mini 3 is not fast enough to handle task intensive work loads simultaneously and is the reason as to why some of features get disabled when shooting in higher resolutions and frame rates. The APAS + Obstacle sensors gets disabled when shooting in 2K or 4K resolutions having frame rates of 48,50 and 60 fps. It also gets automatically turned off when the sports mode is activated. RTH: Return to Home RTH works only if the home point is setup and registered. Home point is generally the initial take-off location, however it can also be updated on the fly to point to a different location. The RTH gets automatically activated either during a signal loss from the controller or during low battery situations. When it gets activated, the drone automatically ascends to the preconfigured altitude and flies safely back to its initial take off location using GPS. It can also be manually activated or triggered during emergency situations with a press of a button on the RC. Home point can also be updated to a new location during the flight and helpful when the pilot’s location is dynamic and changes from the initial take off point. In such a scenario, the drone flies back safely to the new updated position. Hover: The drone just hovers in its current location instead of flying back to the initial take off point. Descend: The drone just lands in its current position. Do we really need the Fly More Combo: My answer to this would definitely be a big “YES” especially for a beginner drone pilot like me.
My Final Thoughts: Is Mini 3 PRO worth all the hype?
When not to buy Mini 3 PRO: If the requirements are to fly the drone very high up in the air and get the best video and image quality, get more flying speed and shoot in hostile environments and very windy locations then please look elsewhere as this is not the one for you. I would suggest AIR 2S or the DJI MAVIC 3 series as they bigger, better, heavier, sturdier and more stable and can handle wind like a tank in the air. MAVIC 3 CLASSIC: DJI has recently released a stripped-down version of MAVIC 3 CINE at an affordable price and have named it as MAVIC 3 CLASSIC. AVATA: Also having the DJI AVATA as the secondary drone can add unique creativity to videos. No Time to fly?? Haven’t yet got the chance to take it on a vacation with me since the day I bought it. Have been just testing and getting accustomed to it. Will post some videos from my upcoming trips soon. Accessories: Here are the accessories which I purchased: Hard Case for MINI 3 PRO: This is exclusively made for MINI 3 PRO with custom cut foam to accommodate the drone along with all its accessories. It is layered and has fully customizable compartments. The drone, the RC and all the other accessories fit perfectly in the cutouts. The top lid has a soft foam interior and keeps everything safe and secure. The hard outer shell is water proof, shock proof, dust proof, pressure and temperature resistant and gives a double layered protection to the drone and extremely useful while travelling. 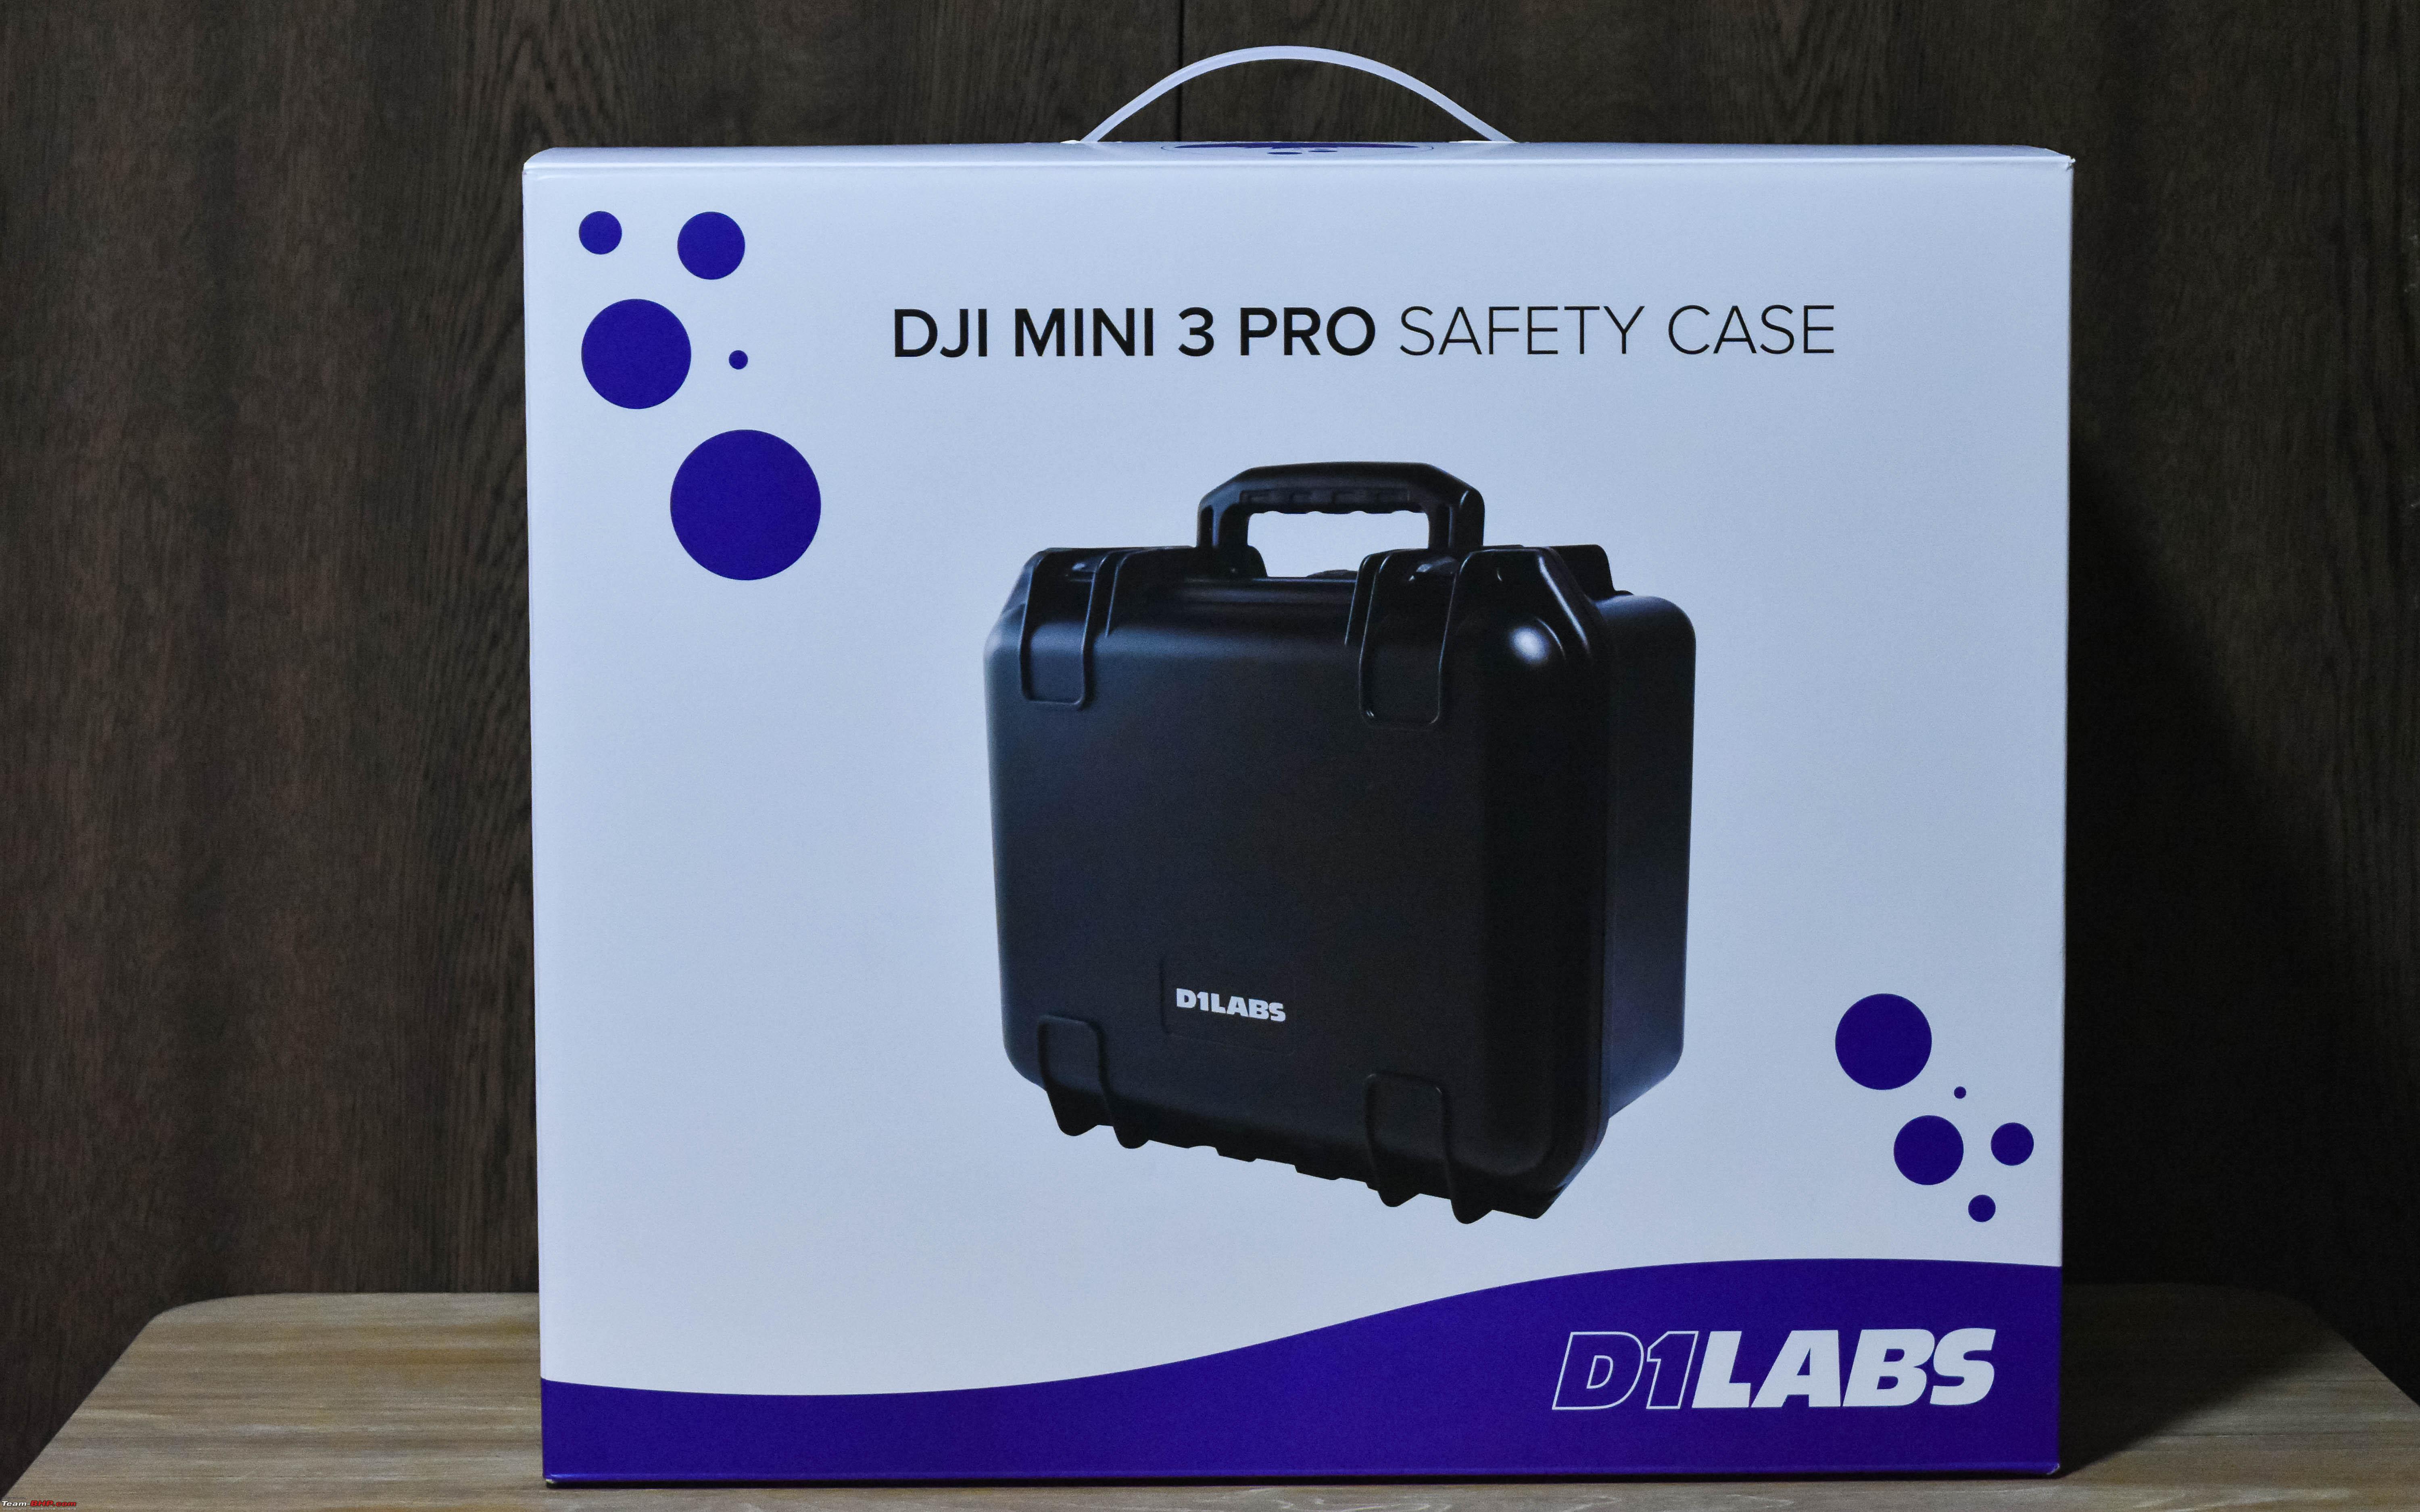  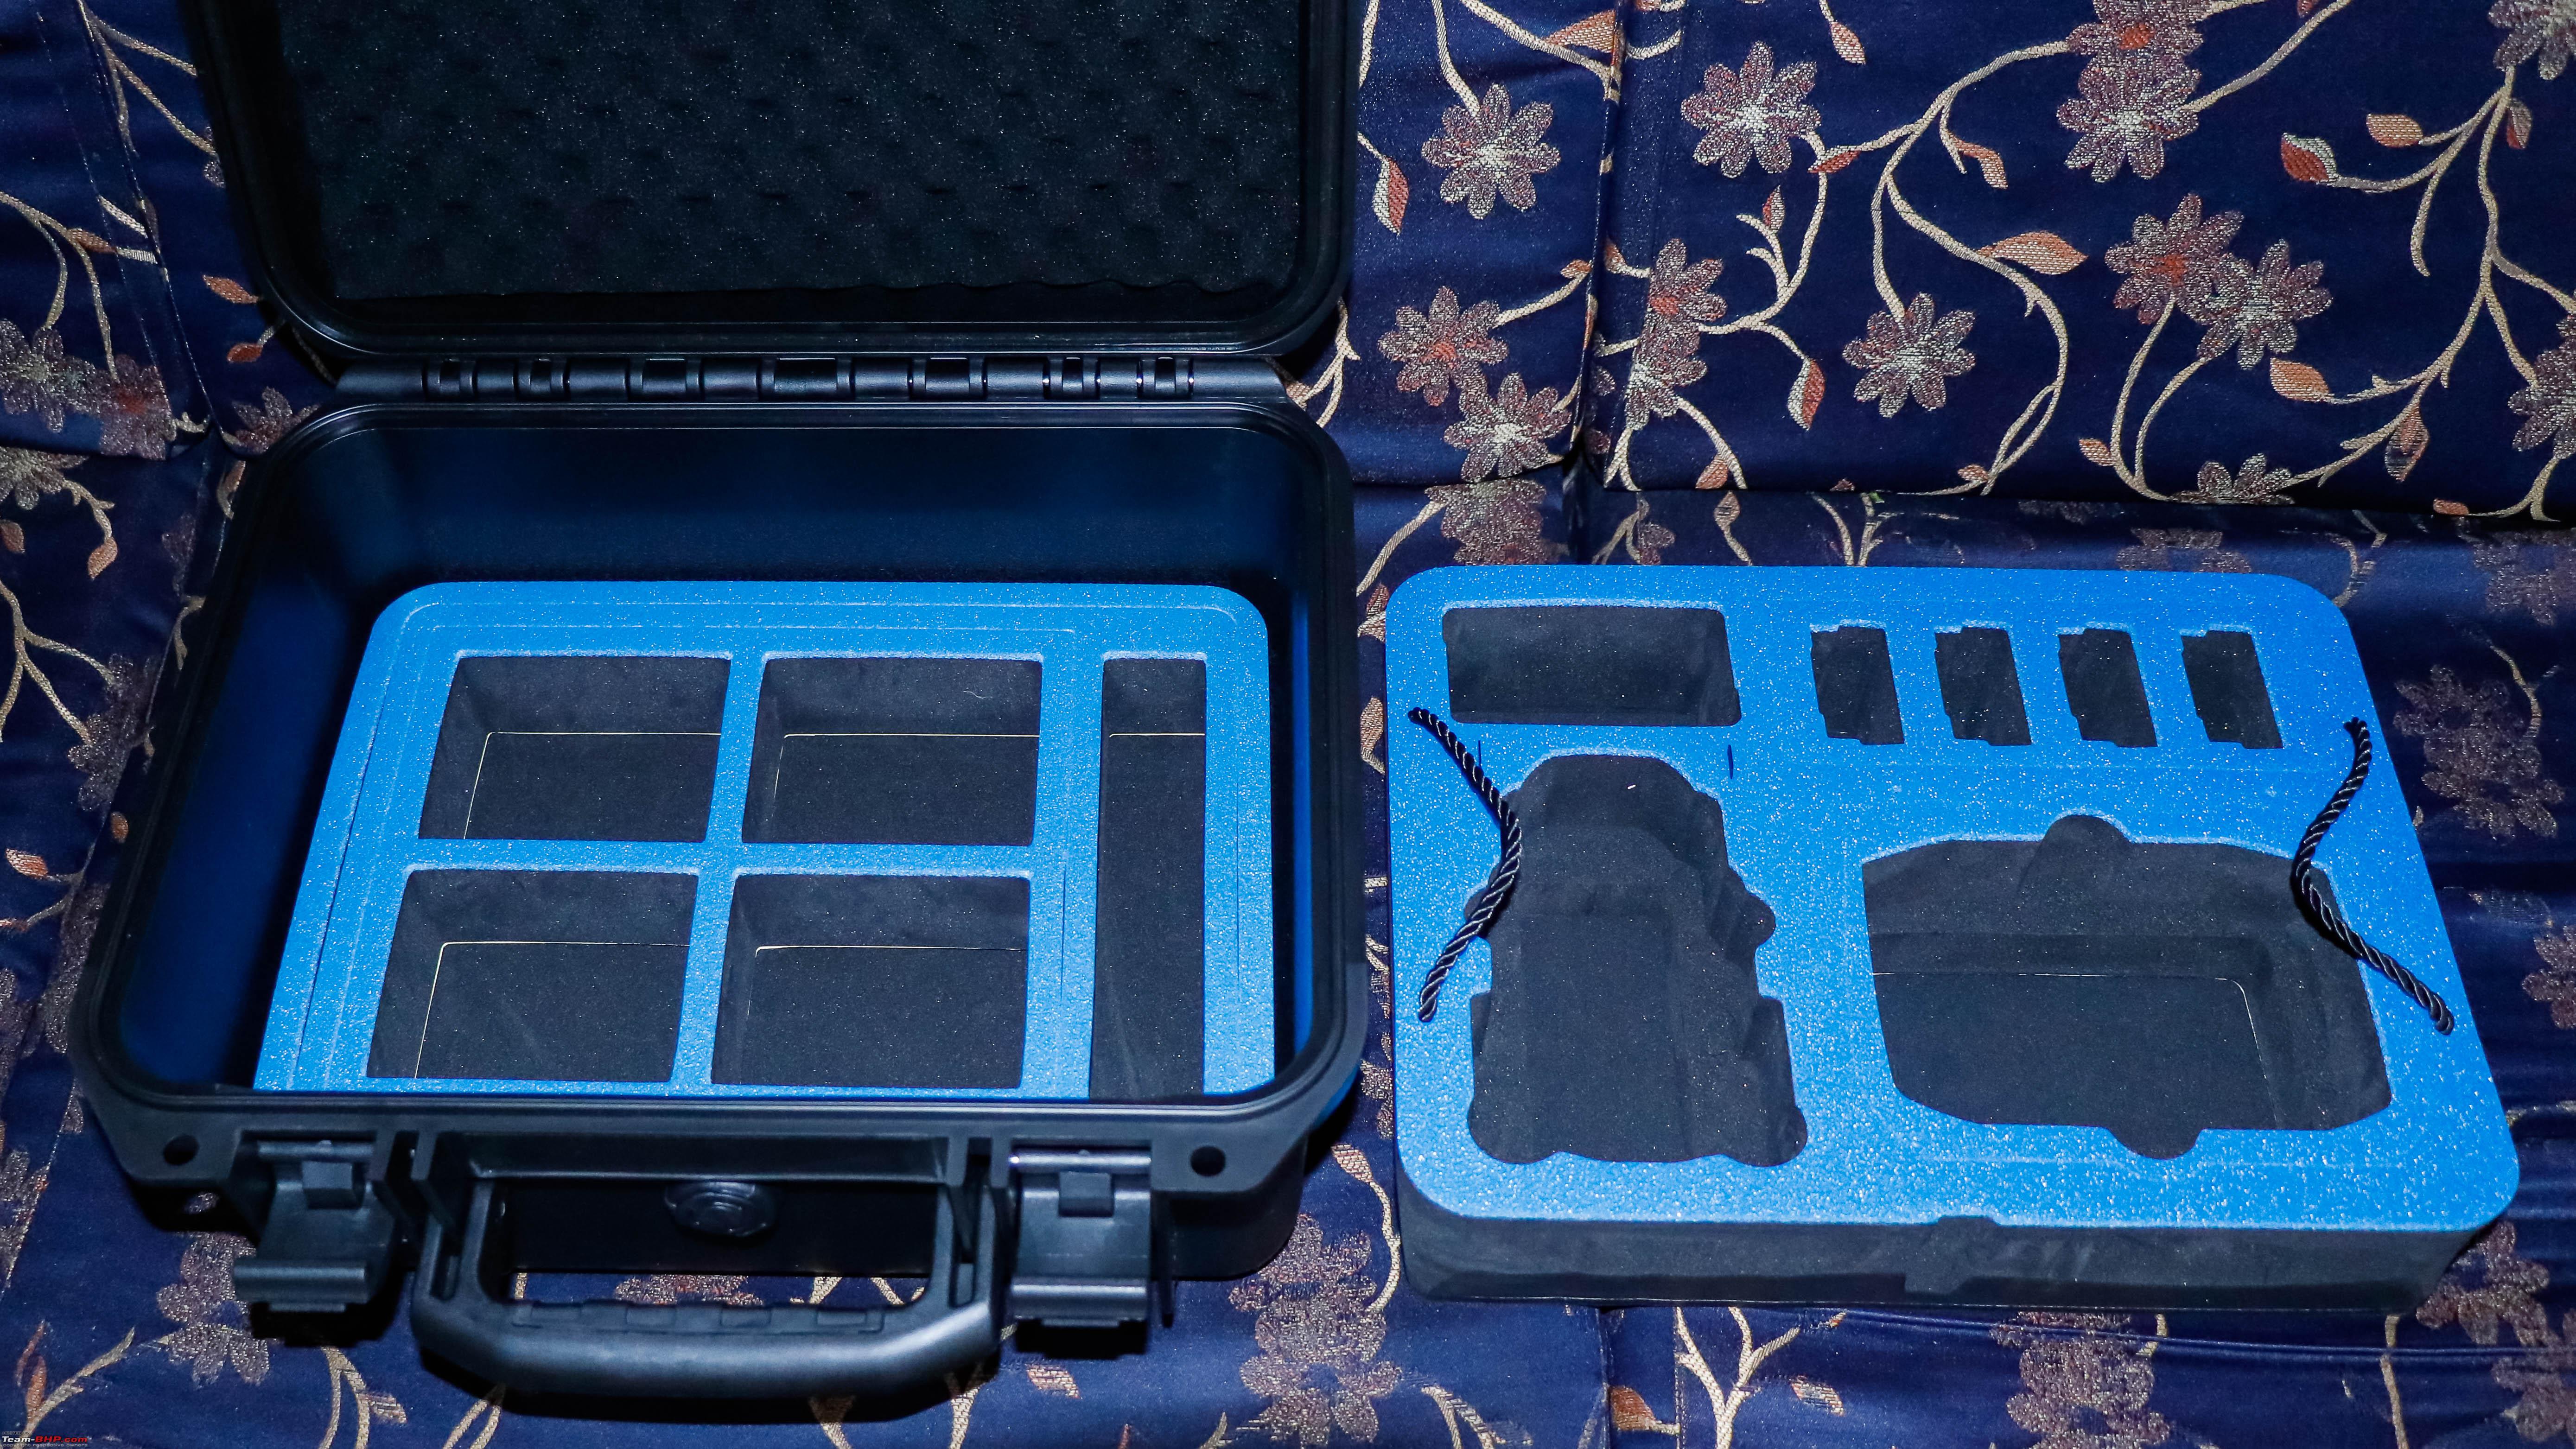  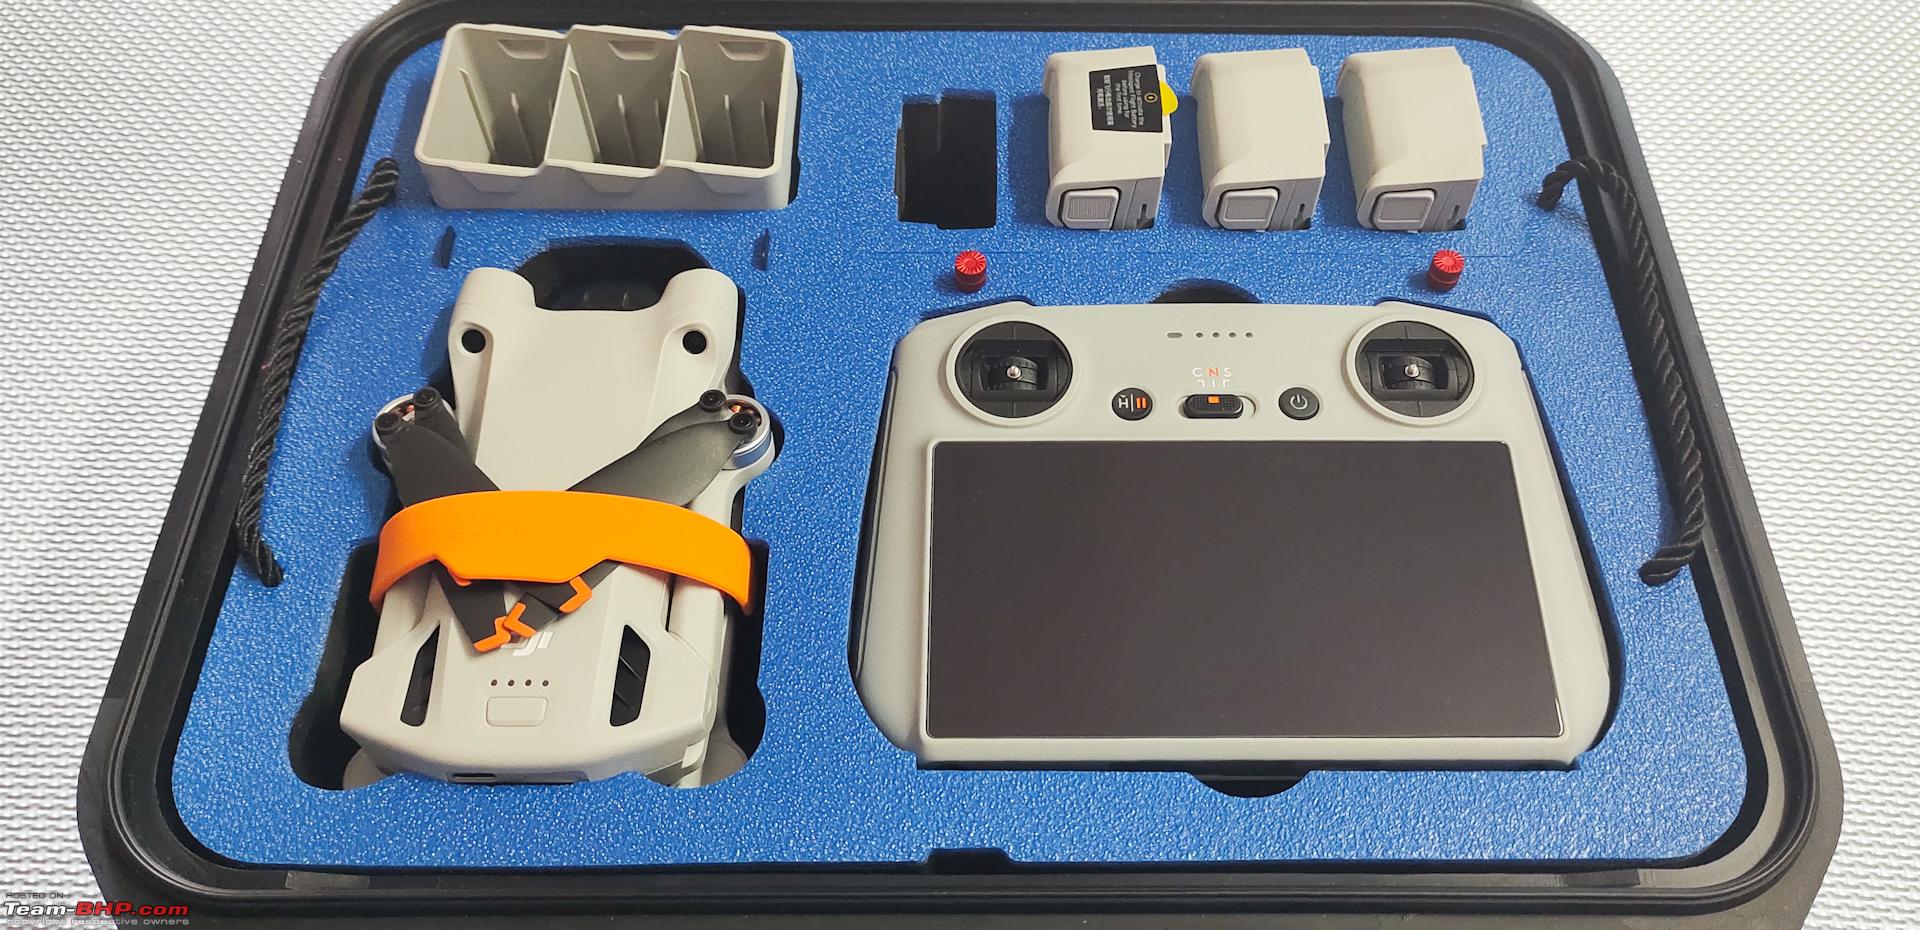 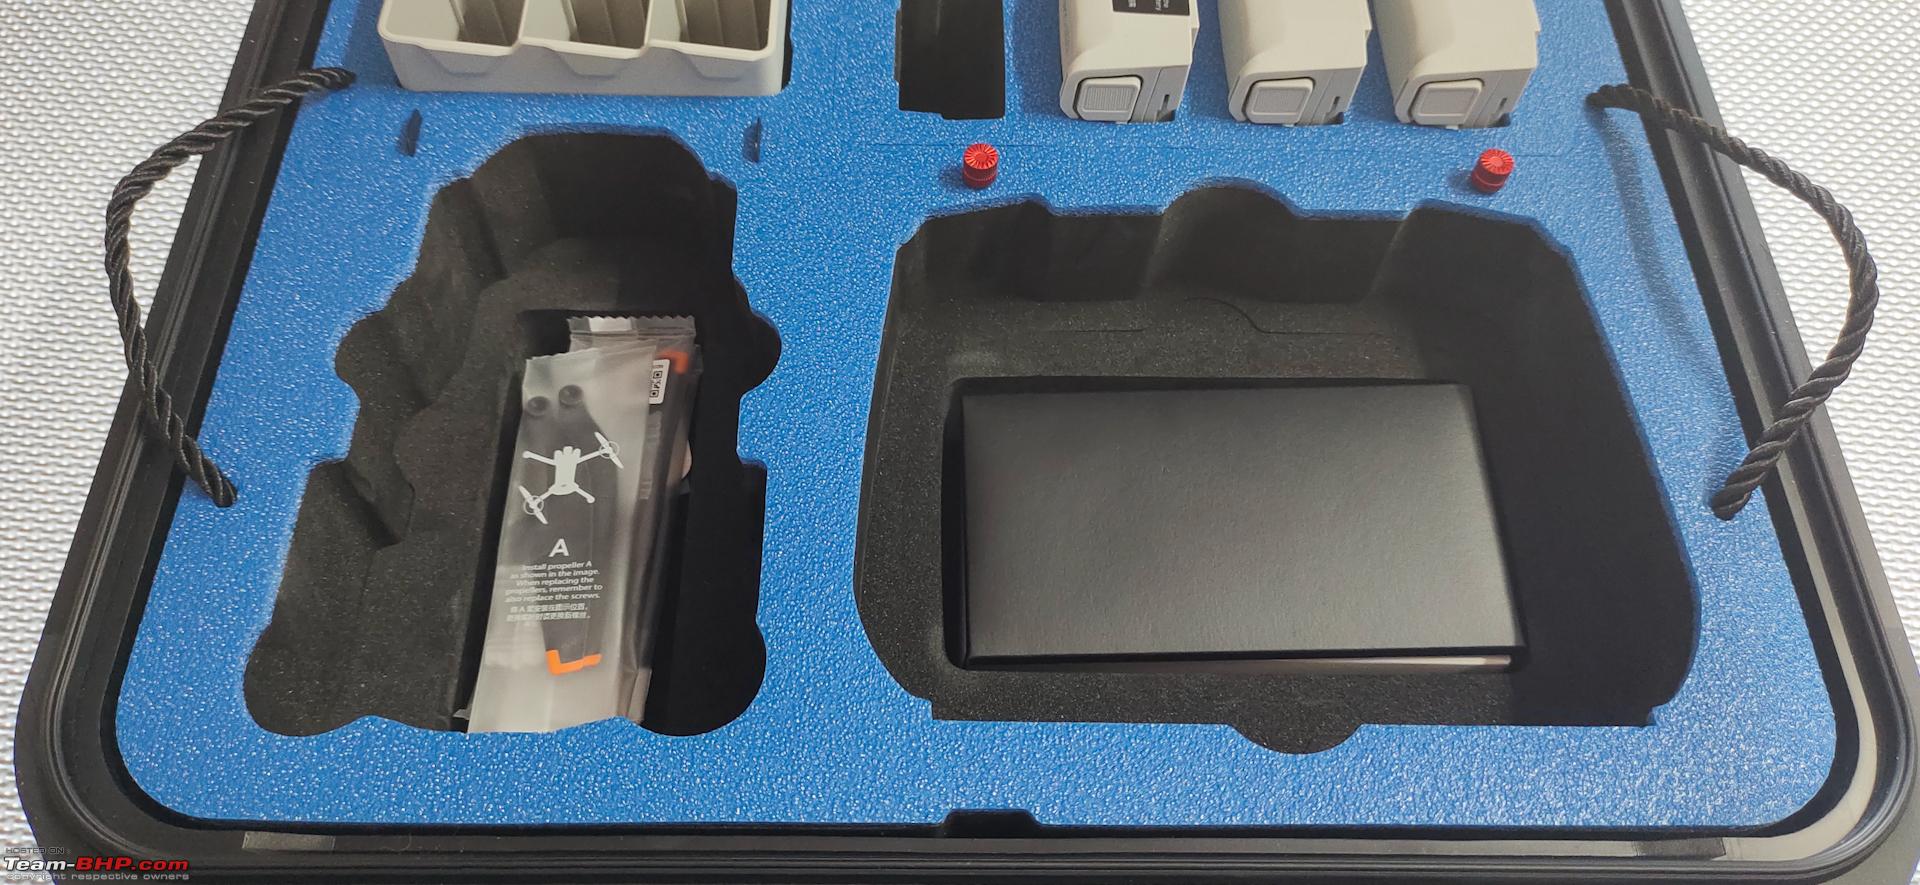   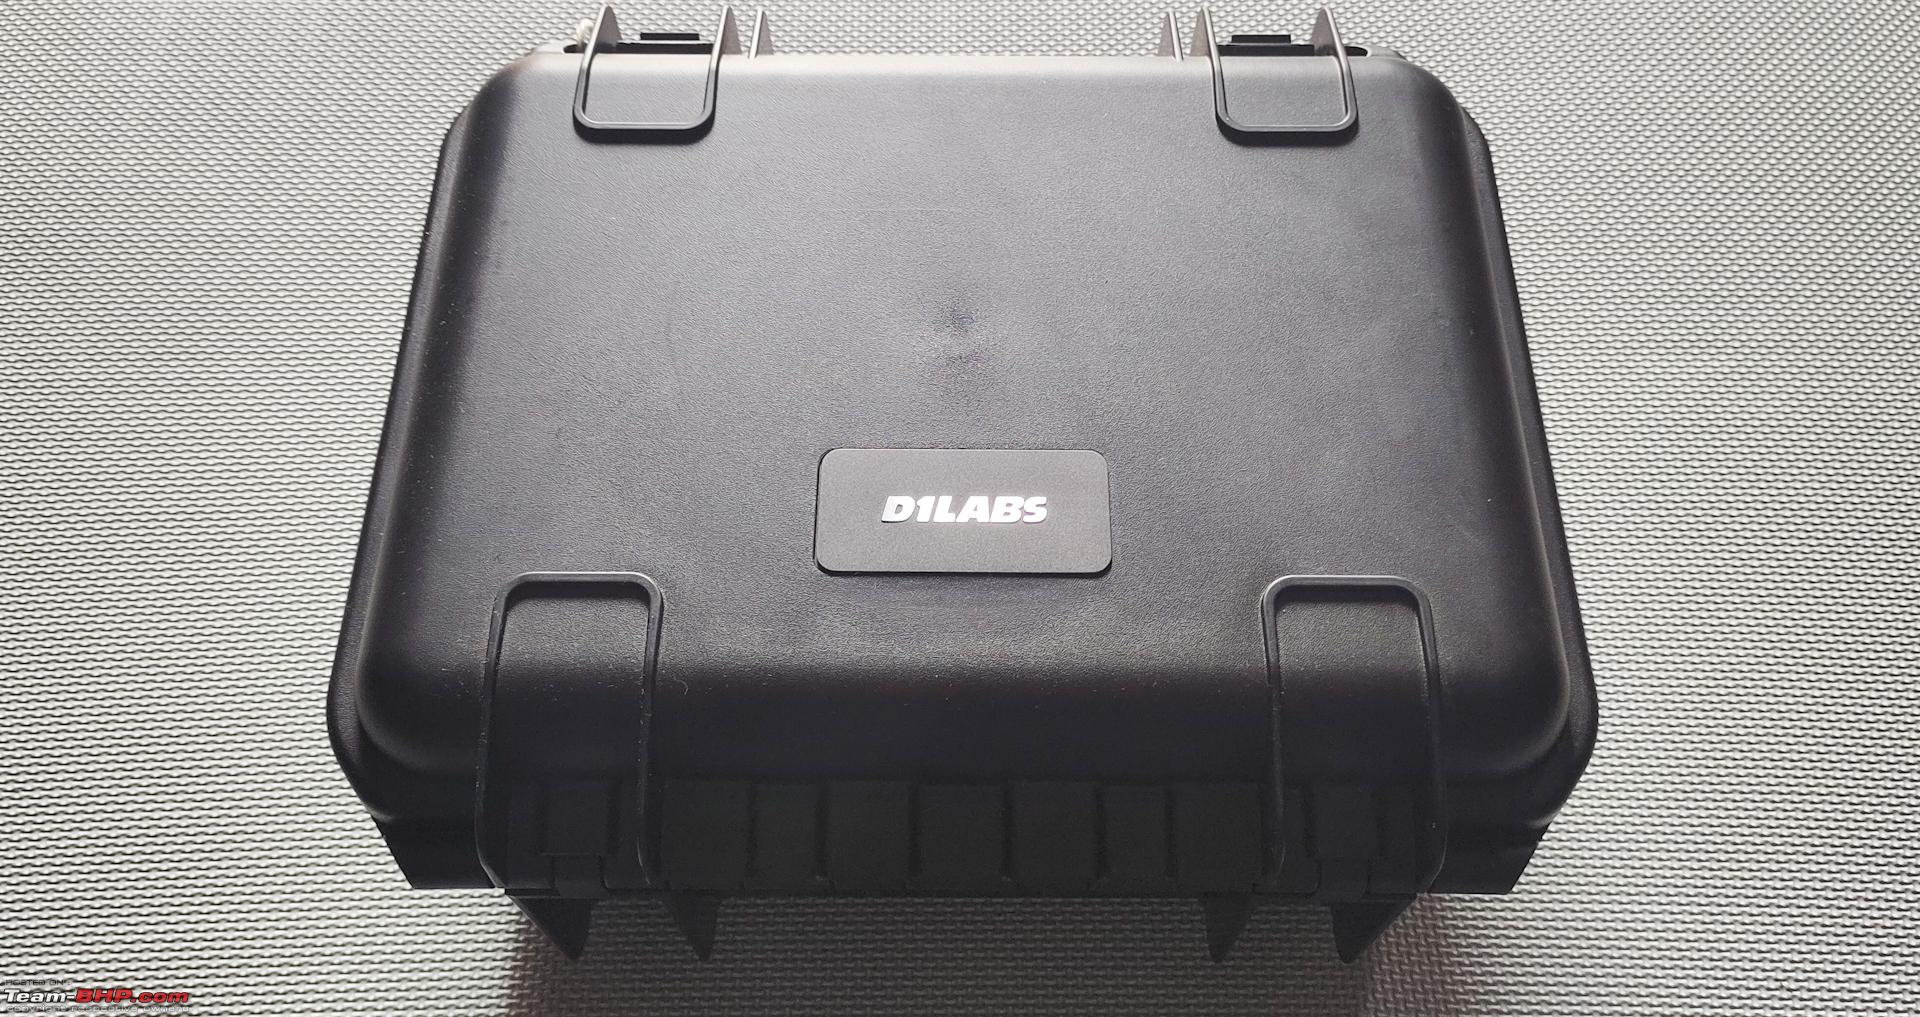 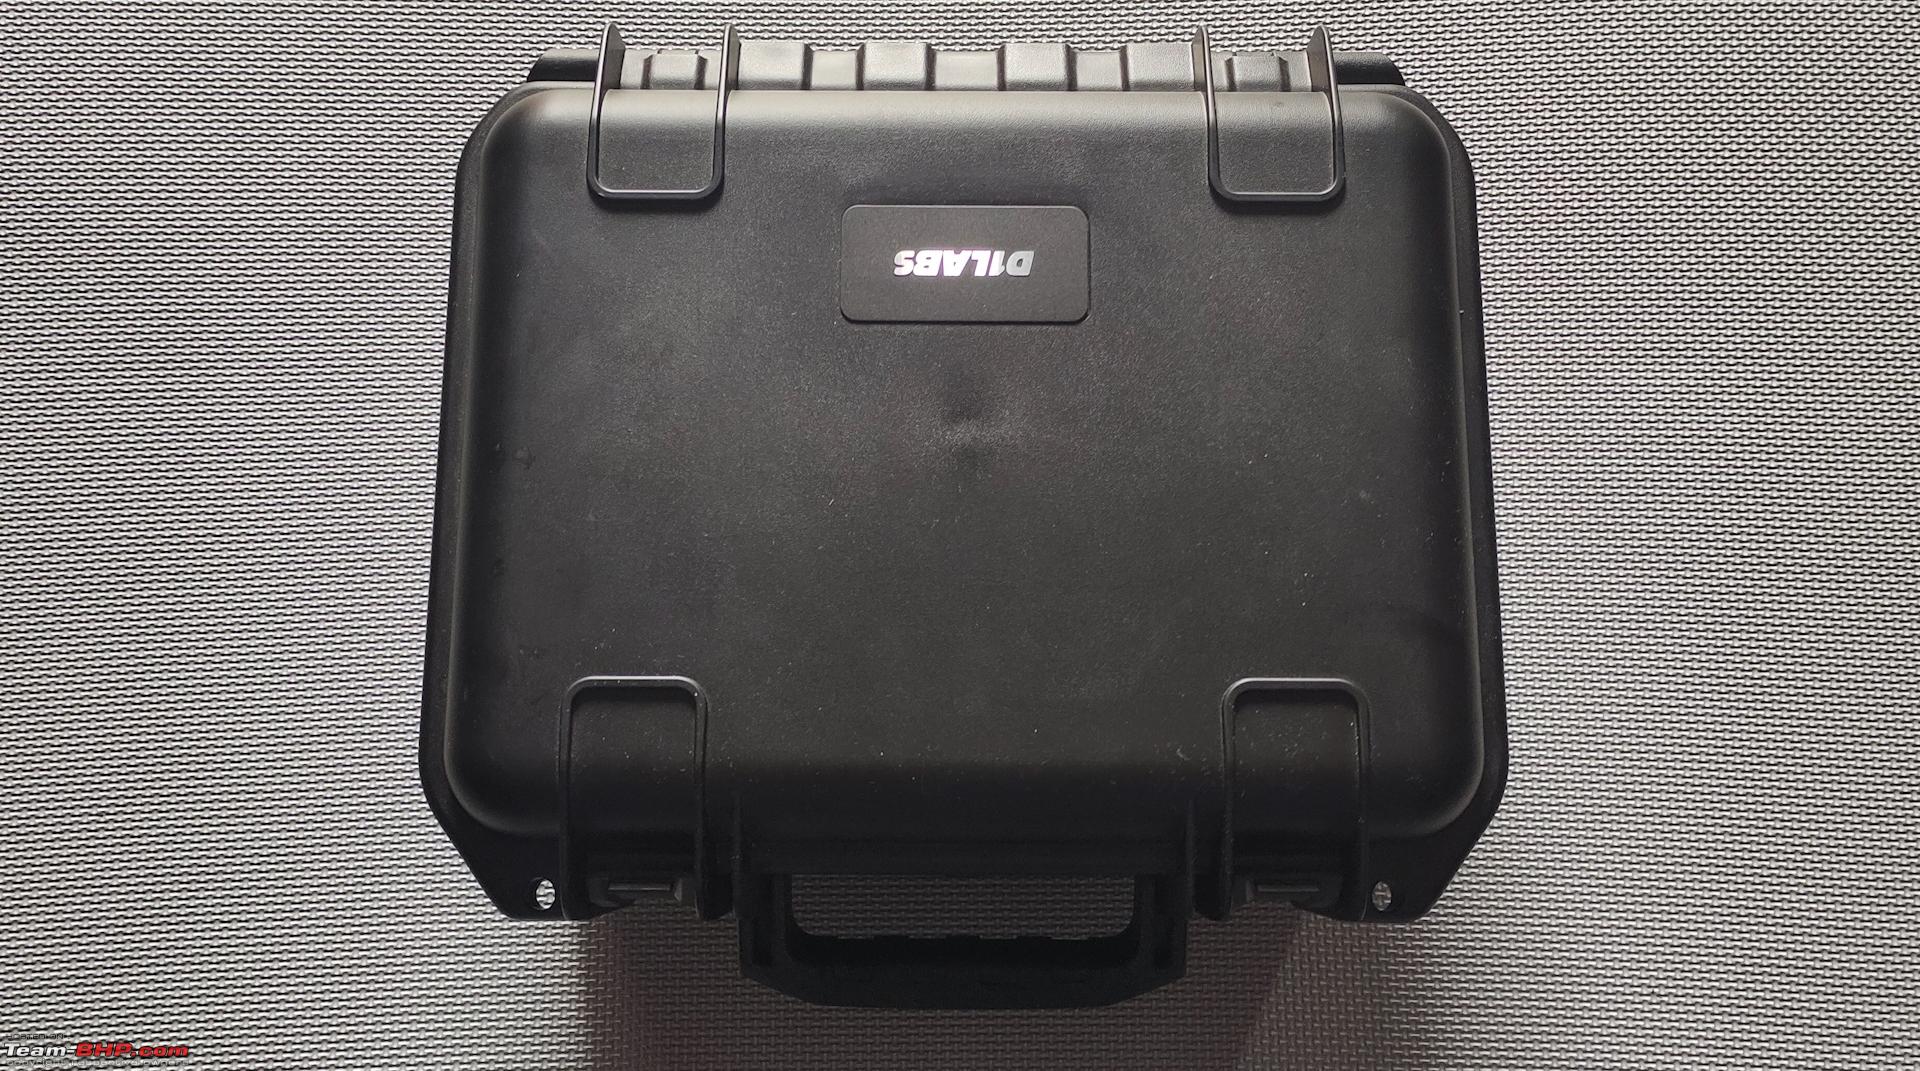 DJI AND FREEWELL ND FILTERS: Both the DJI and the FREEWELL ND filters are made out of superior quality optics and the coatings on the glass makes them resistant to dust, oil and scratch. They easily snap on to the lens with a twist and helps to cut down light entering the camera. Since they are neutral in nature, they do not introduce any color shifts. The filters keep the overall weight within the legal limits when installed and do not strain or hamper the gimbal operation in anyway. Filters are required to get most out of the camera on the MINI 3 PRO. The fixed strength ND filters weigh about 0.7 grams or less. The All day filter pack consists of 6 filters of varying strength and includes ND4,ND8,ND16,ND32,ND64 and ND1000. The circular or the variable ND filters are slightly heavier than the fixed strength filters. They weigh about 1.5 grams and consists of two VND filers. The 2-5 stops represent ND4 to ND32 and 6-9 stops represent ND64 to ND512 and they are more than sufficient to cover almost all lighting scenarios. The advantage of the VND is, it can be dialed up or down to the desired strength depending on the intensity of light and doesn't have to be frequently replaced with a different filter unlike the fixed strength ND filters. Have been using them for all my shoots and haven't seen any degradation in the video quality so far. In fact the quality has improved with the usage of ND Filters. All filters do come in a nice case. 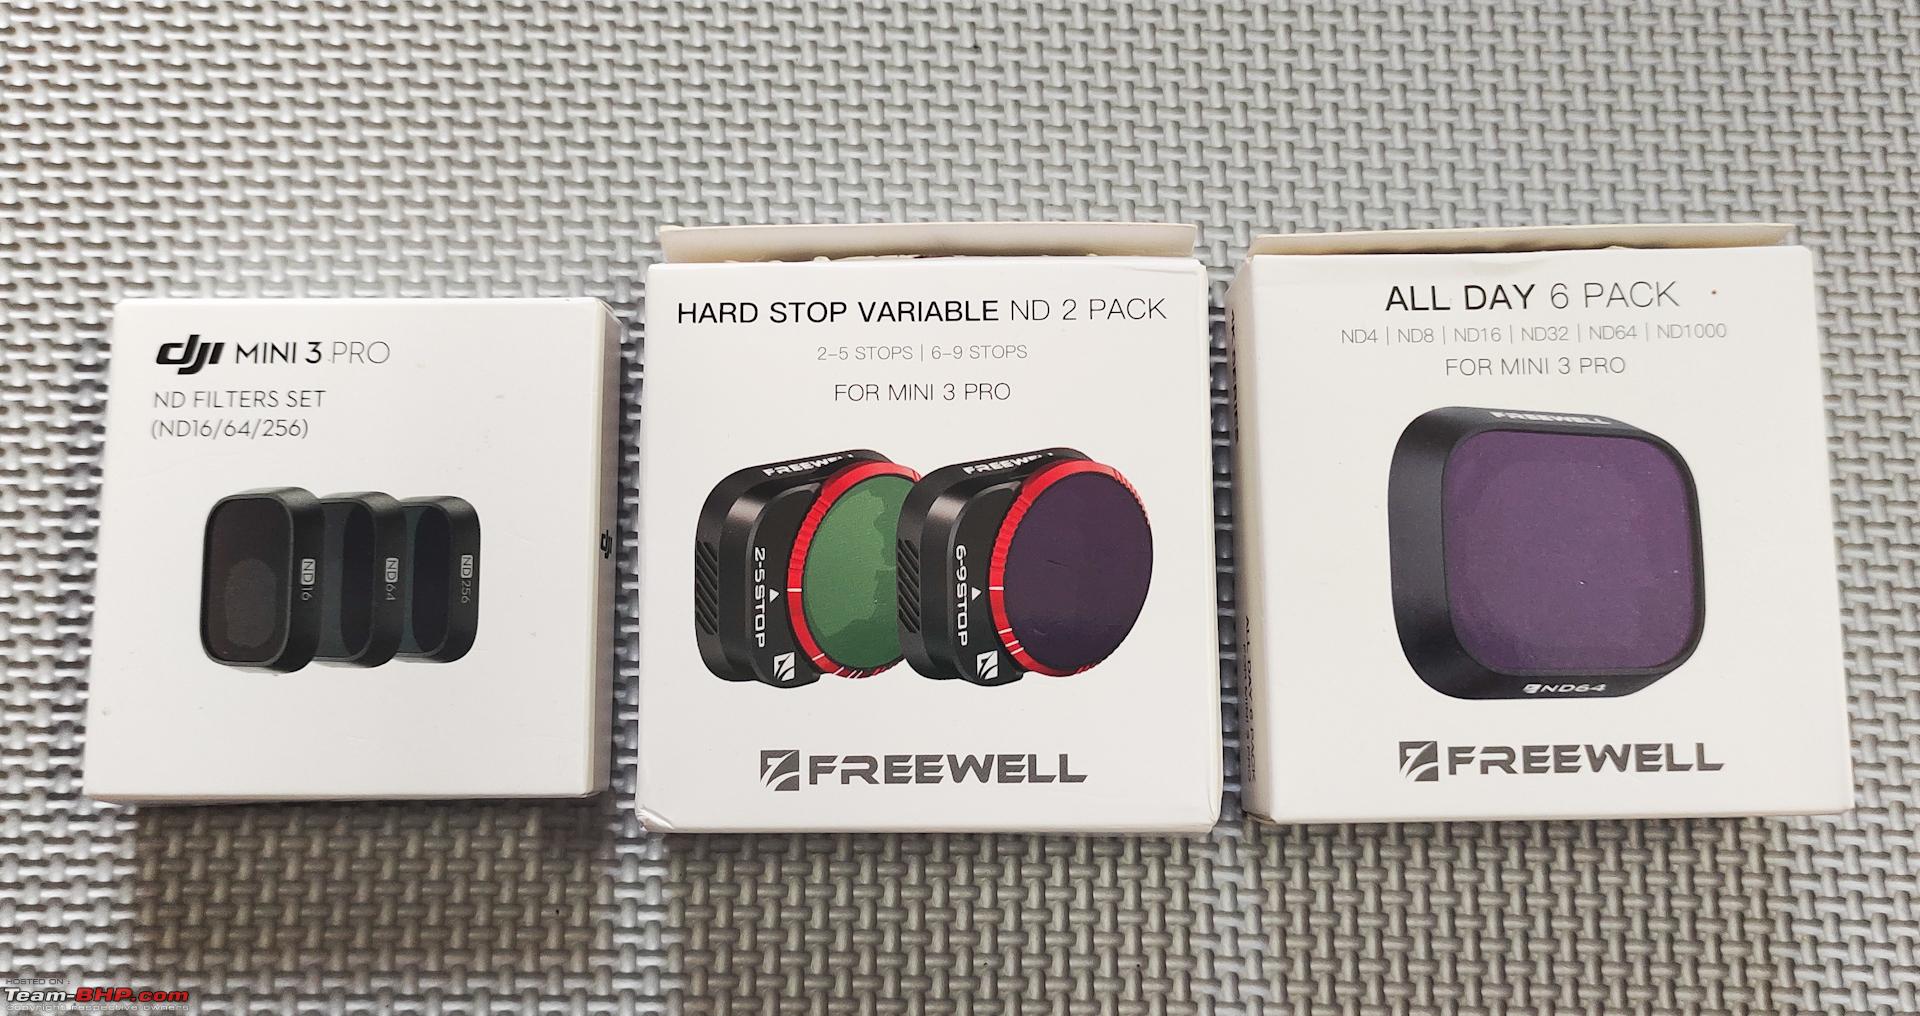 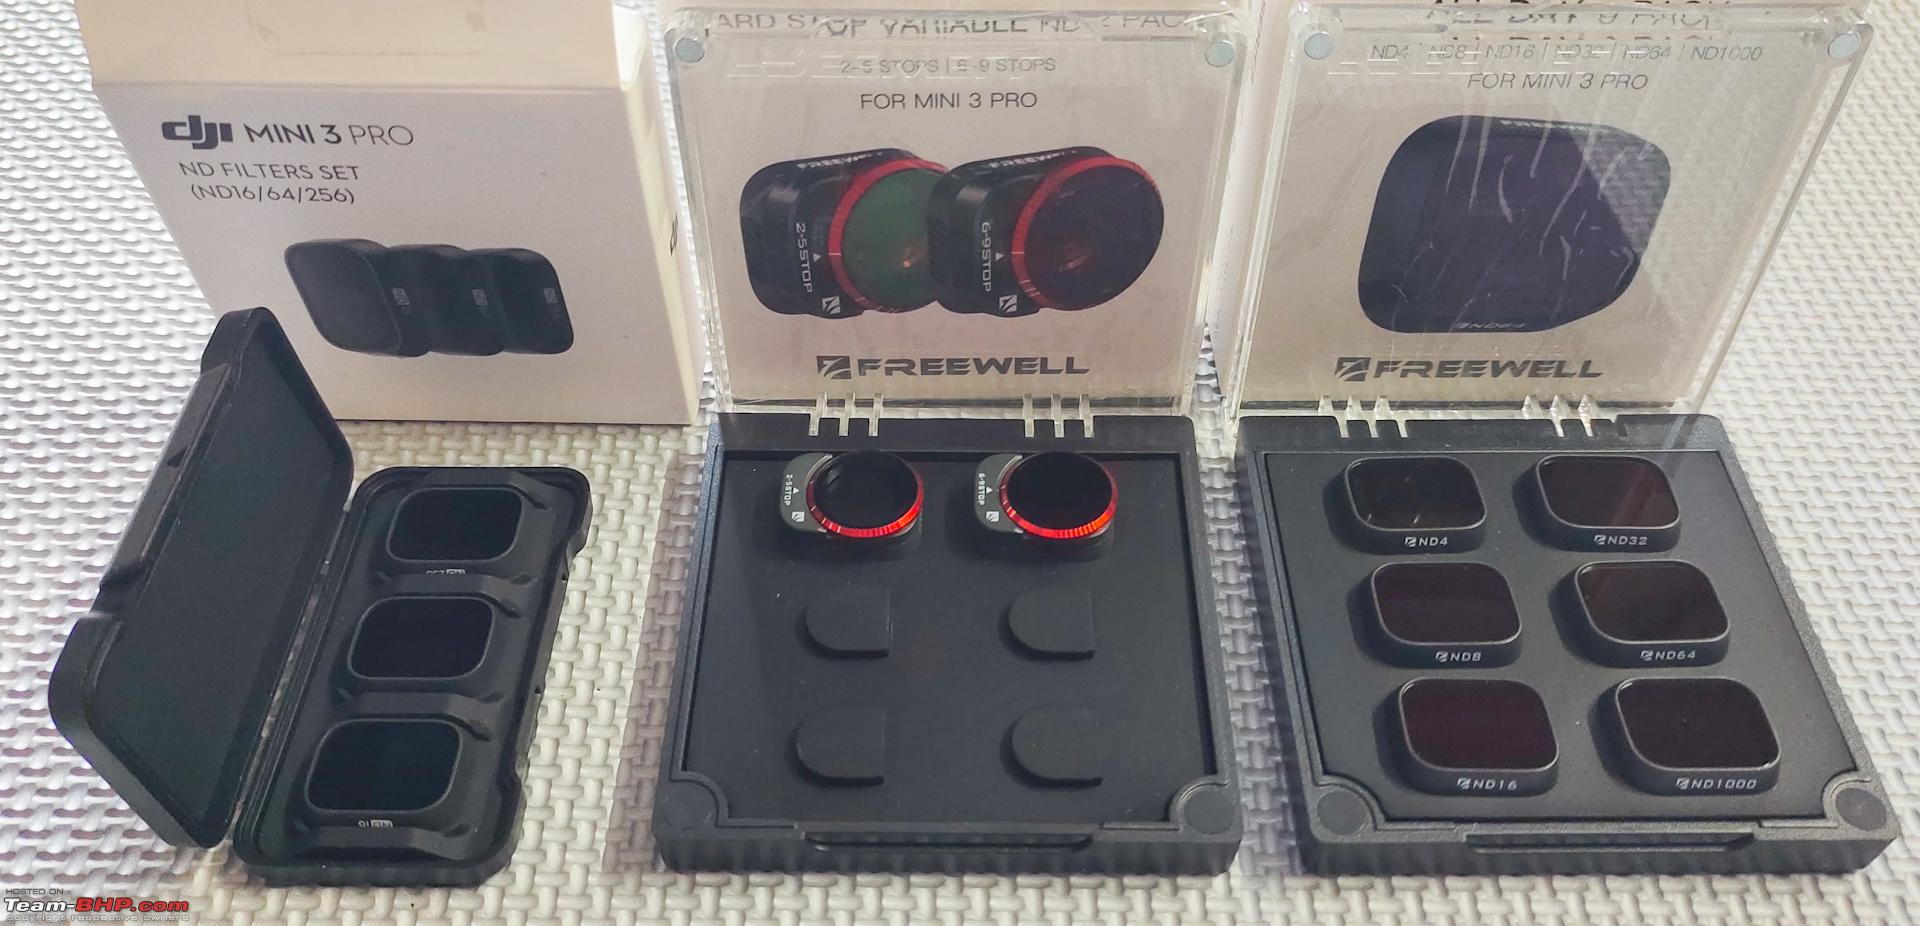 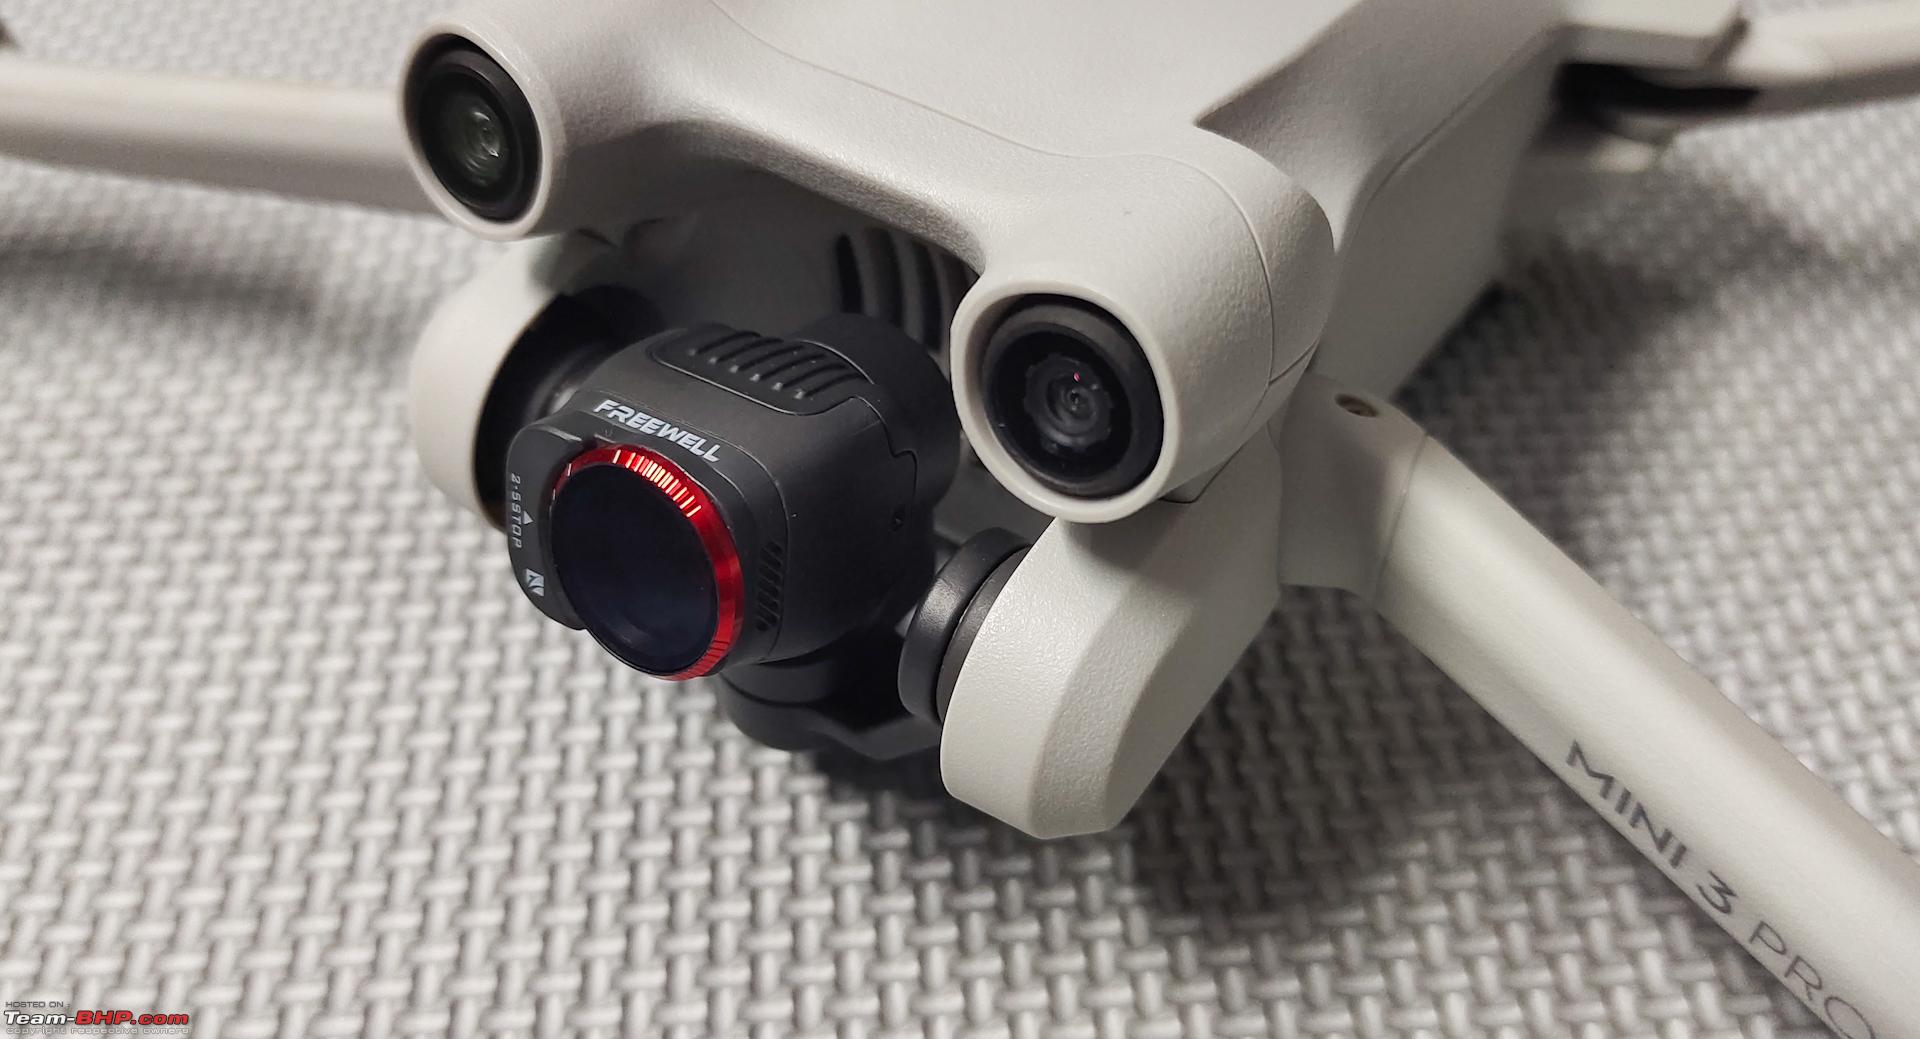 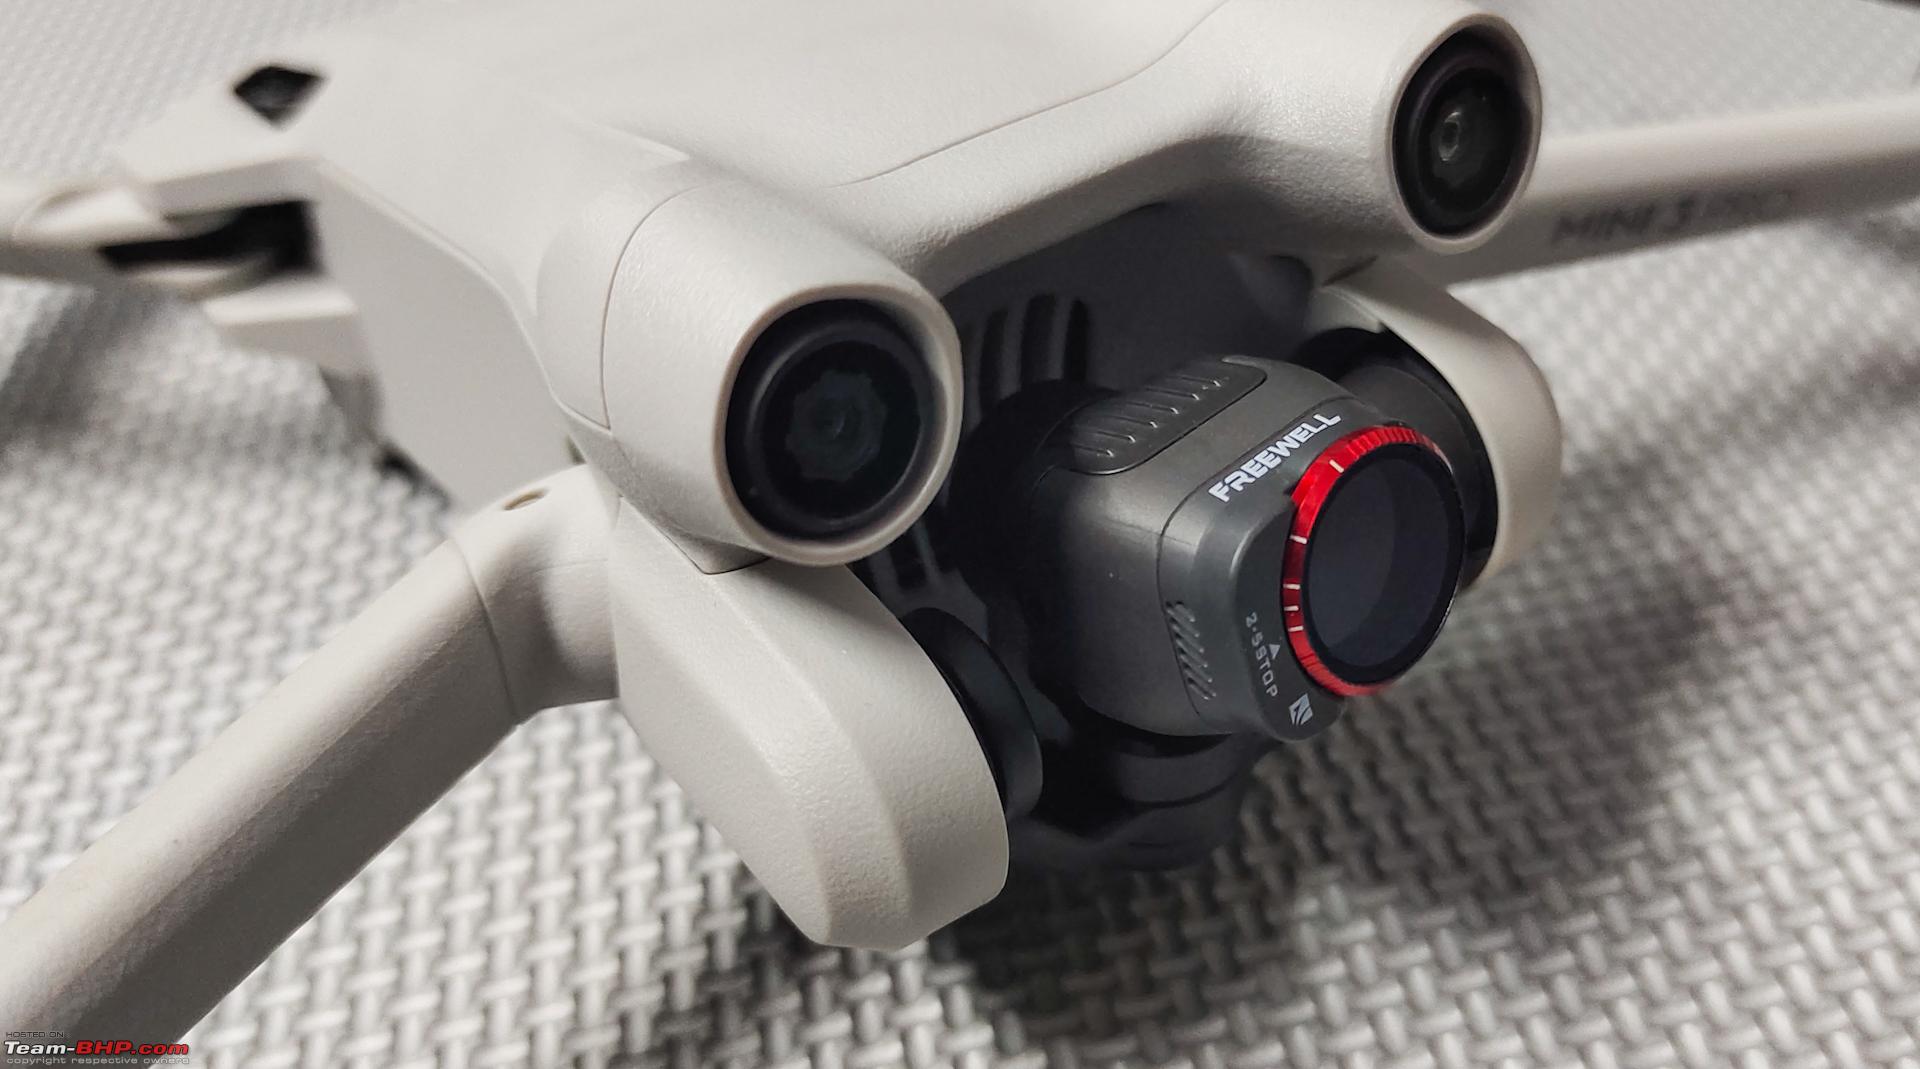  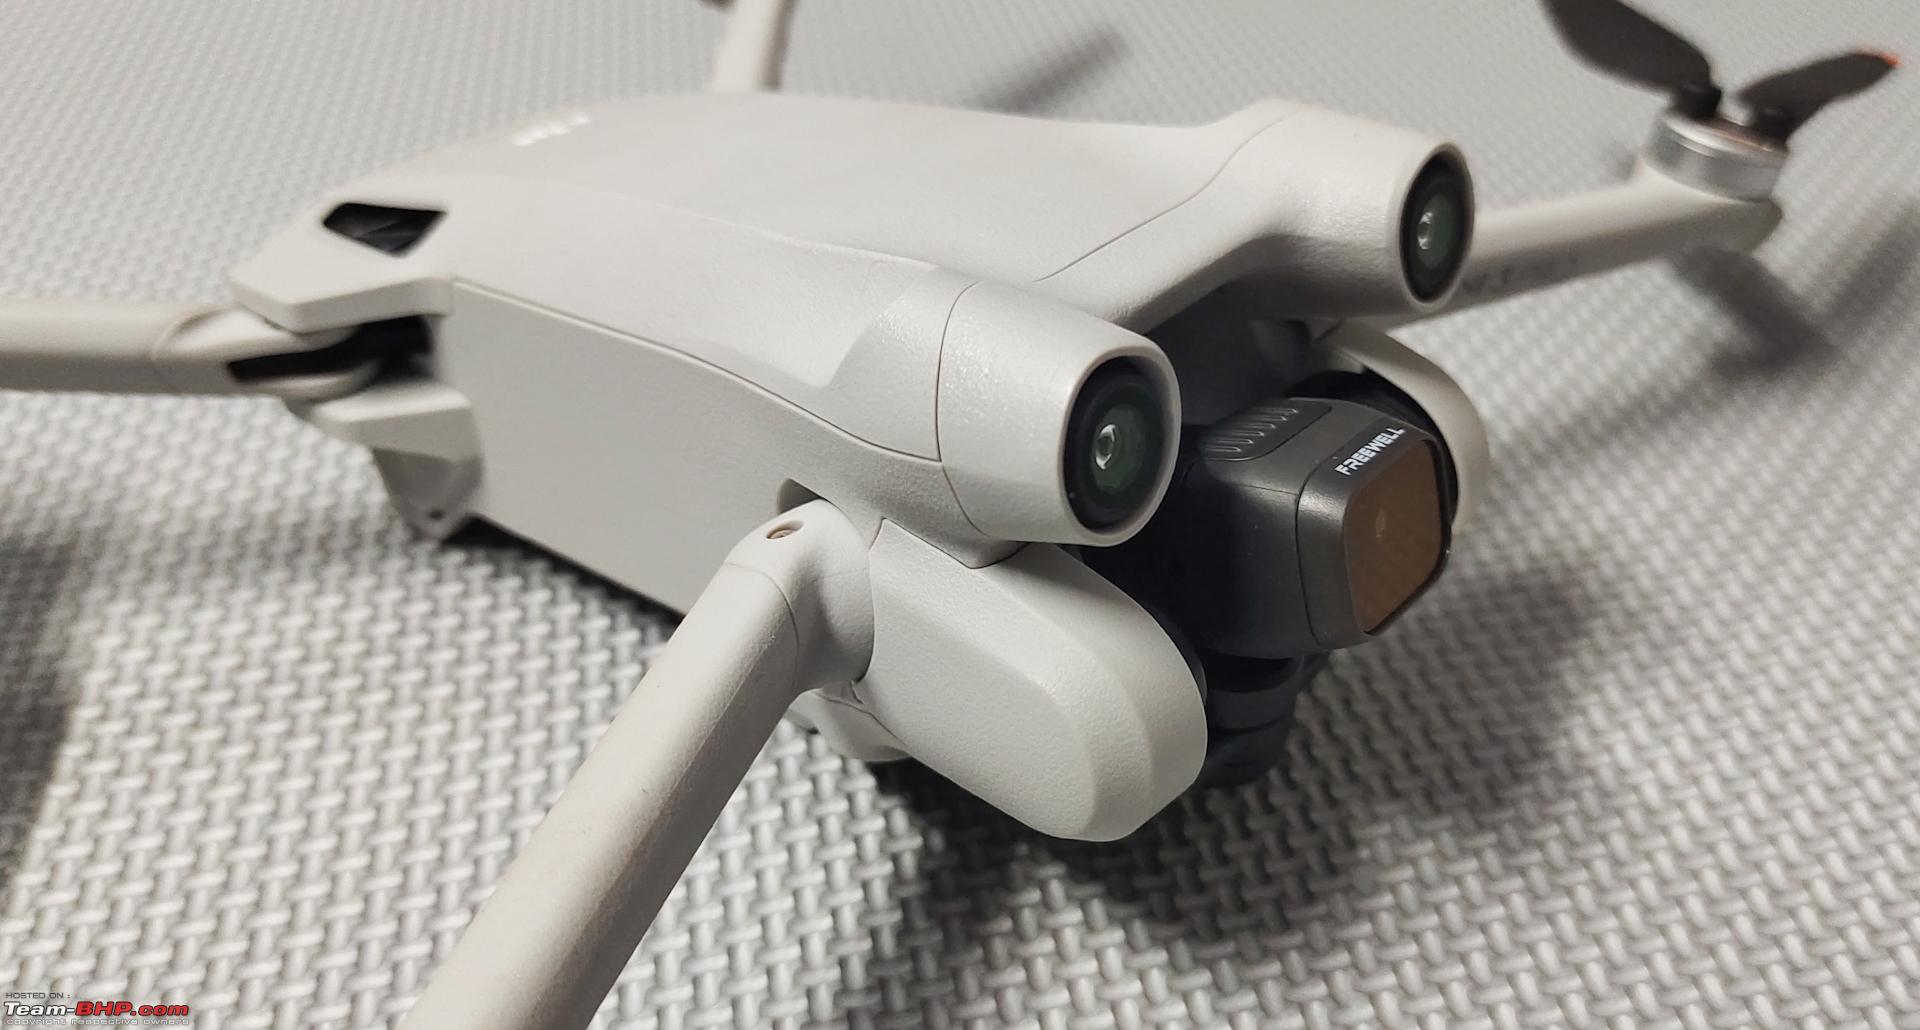 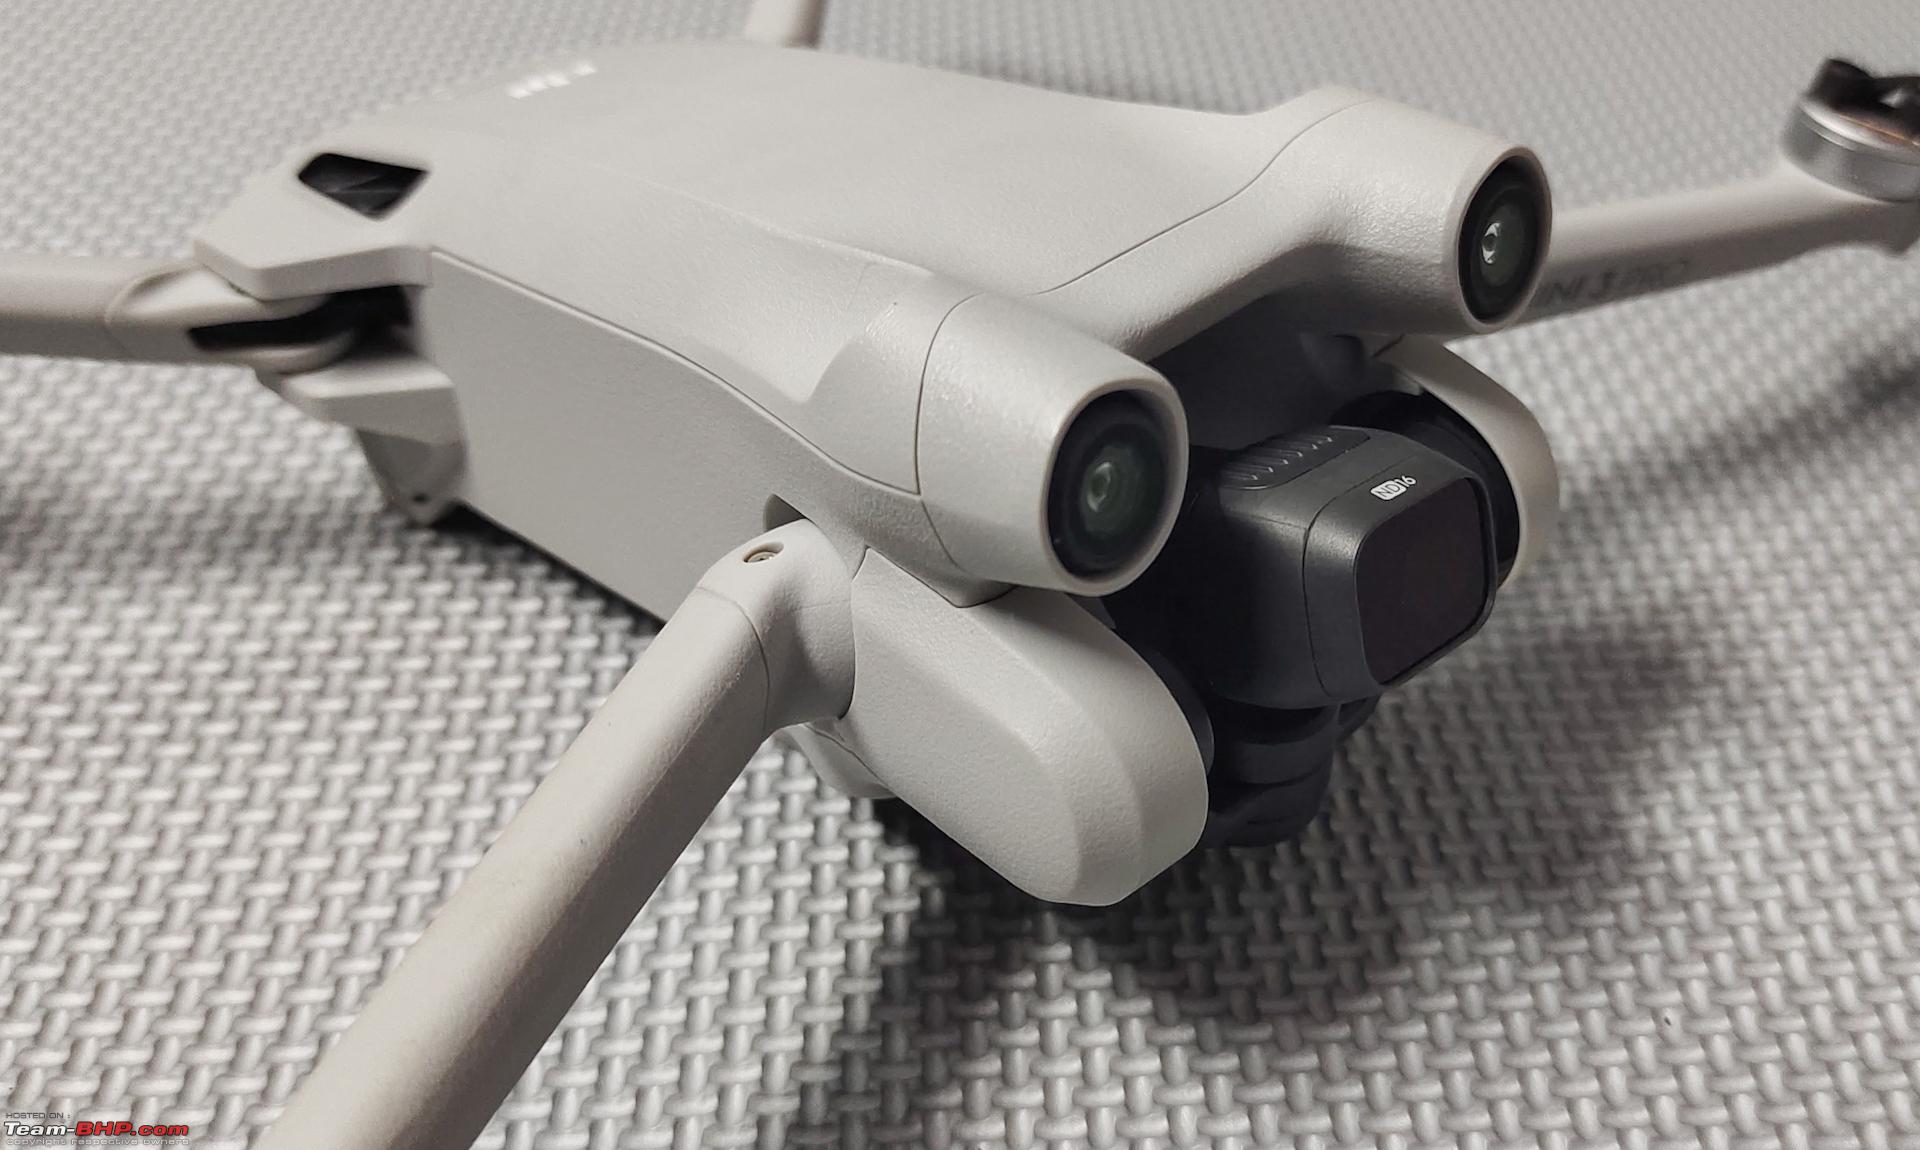 SPIDER FEET LANDING GEAR: The drone rests on the battery at the rear and two short legs in the front and has a very low ground clearance. The landing gear raises the drone up by a few centimeters and protects all the sensors located underneath the body. The Spider legs are very light and sturdy and useful when taking off from the ground or from uneven surfaces. It does not alter or affect the performance of the flight in anyway. However, it weighs about 3-4 grams and does breach the 250g limit when installed. 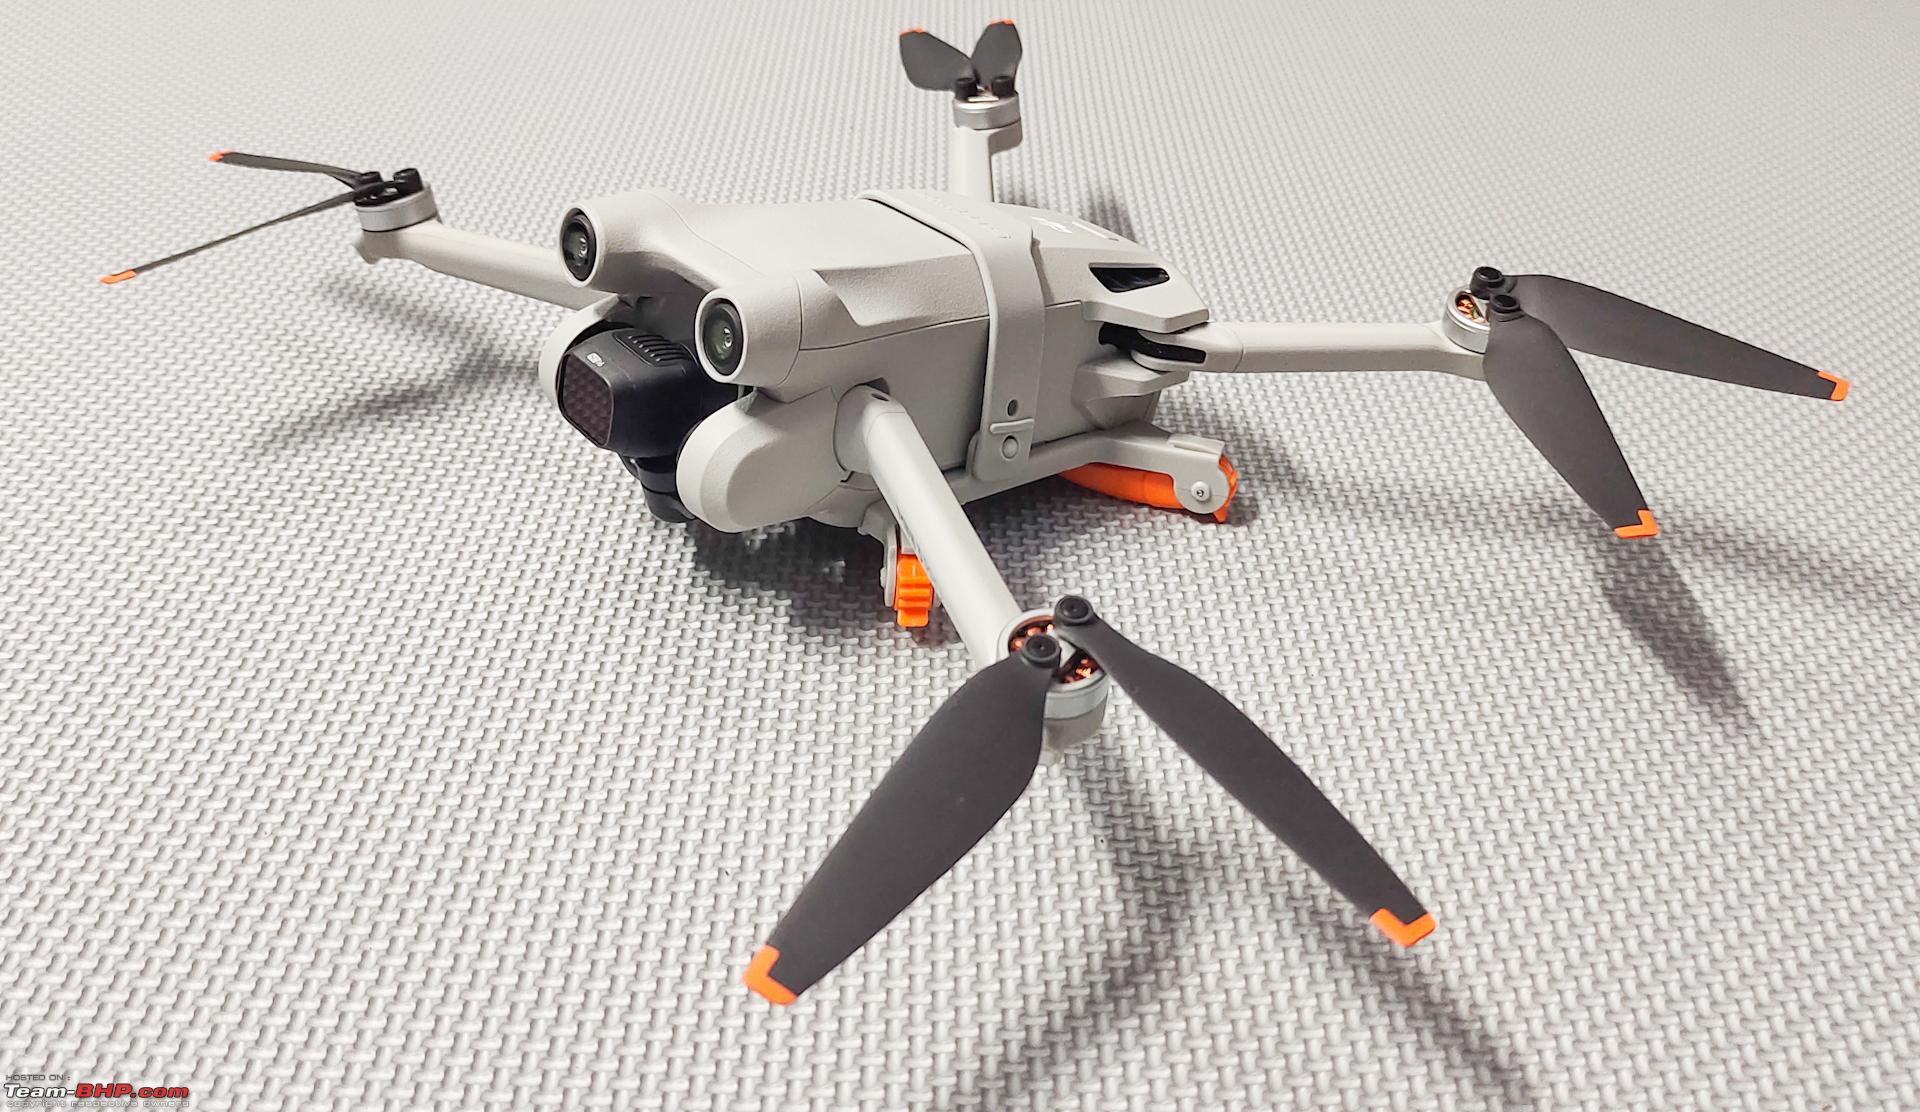 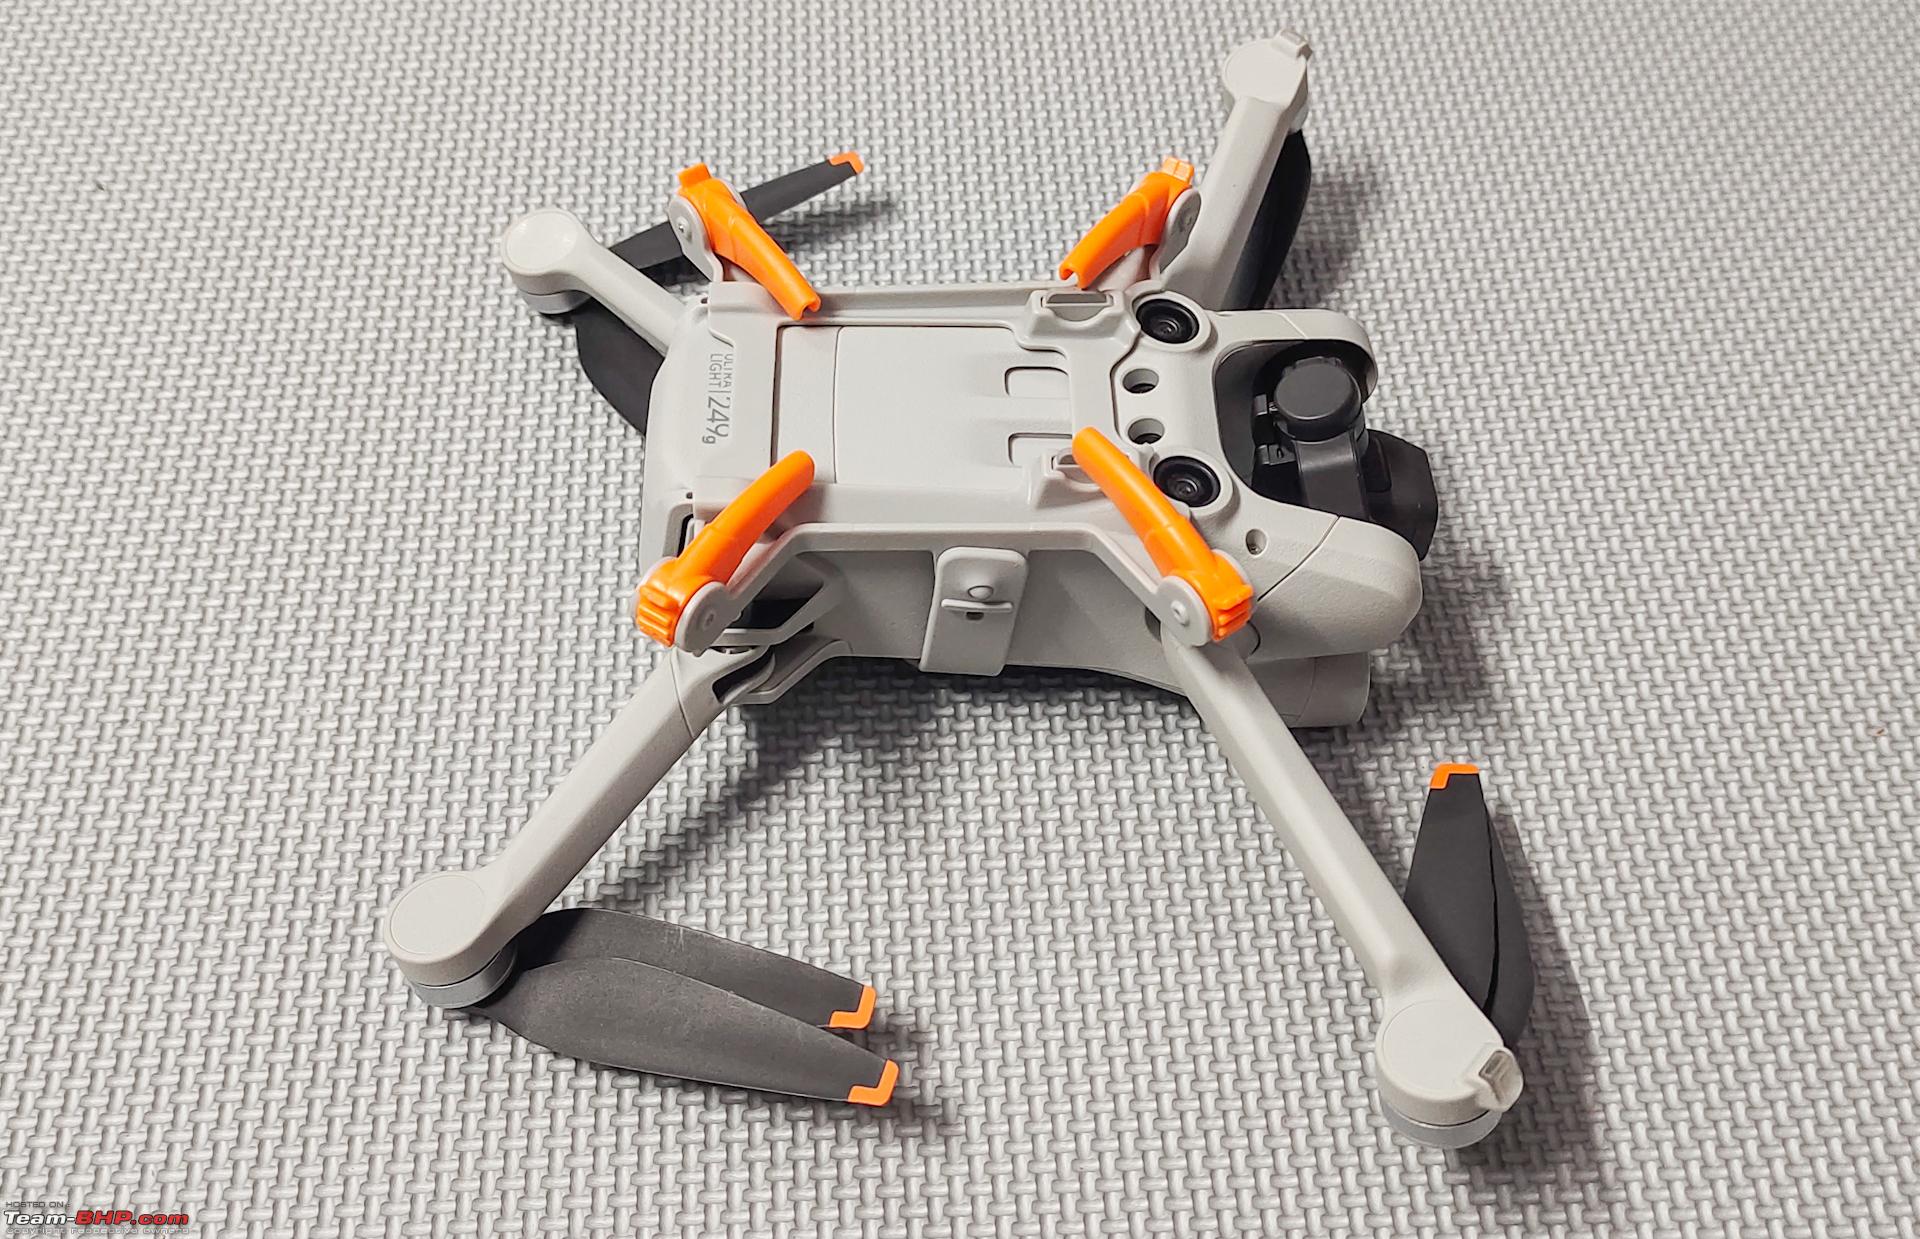 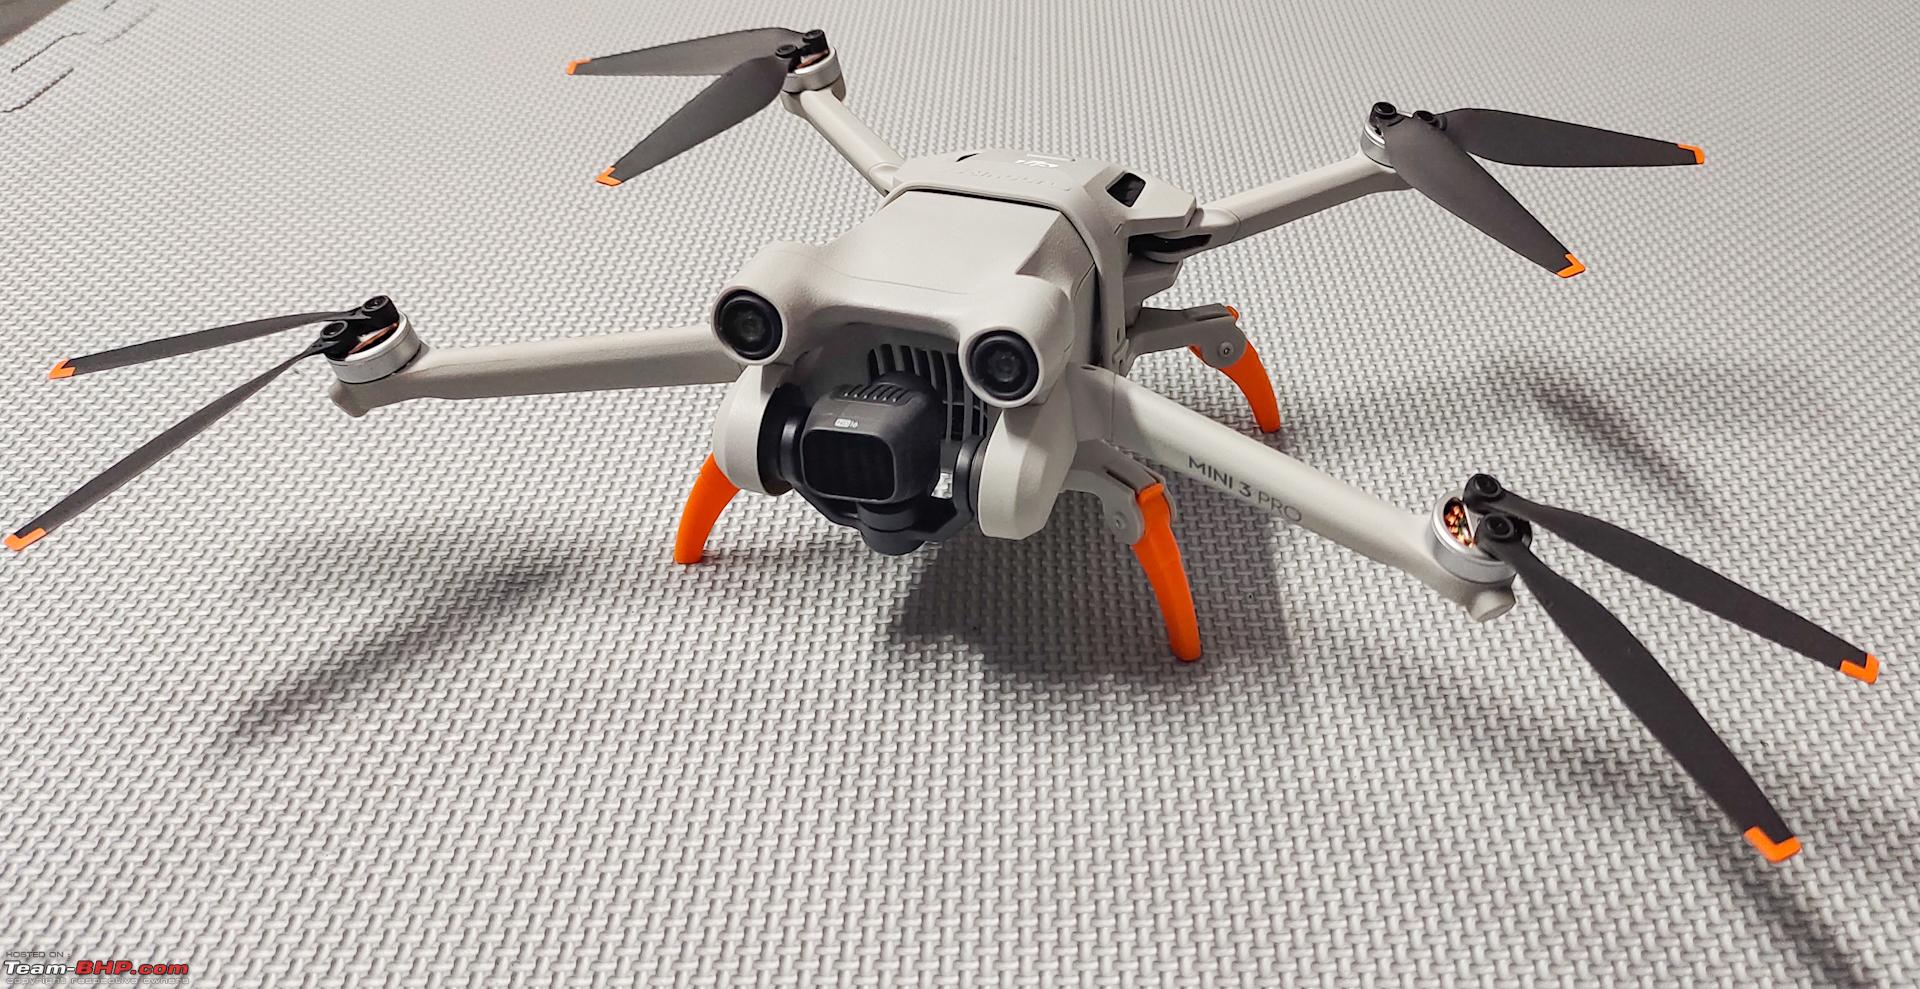 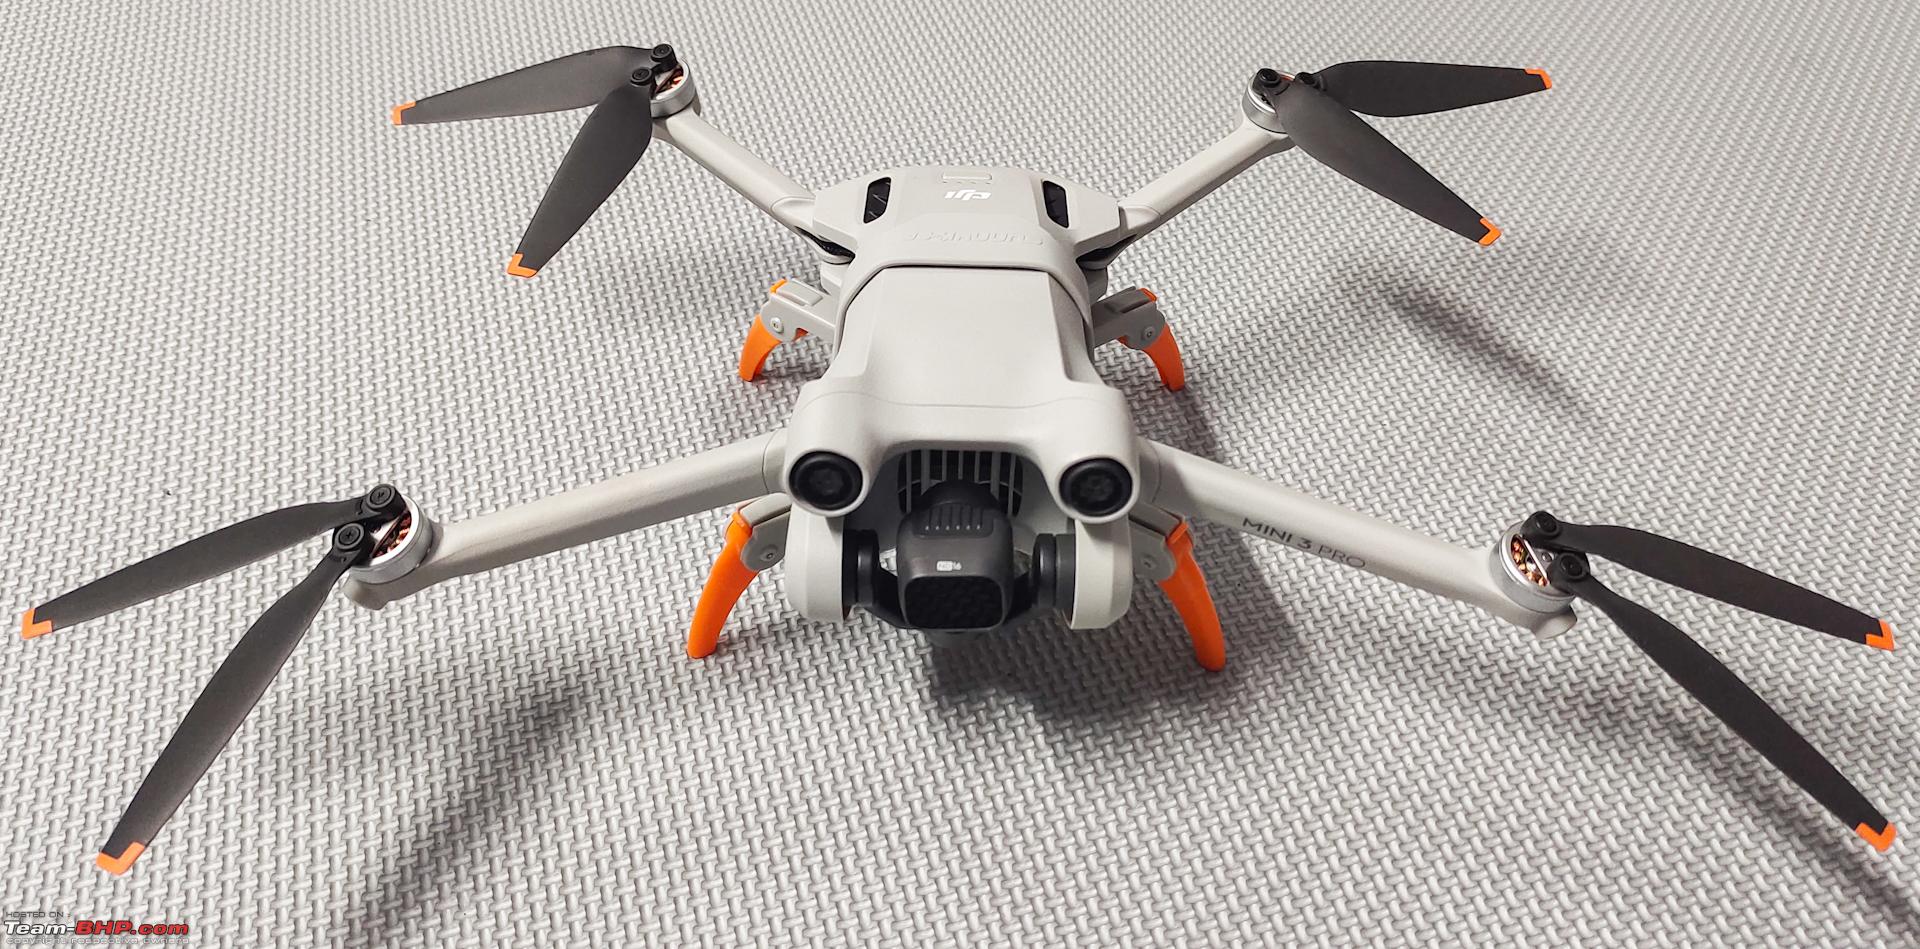  Foldable Landing Gear: Just another landing gear. 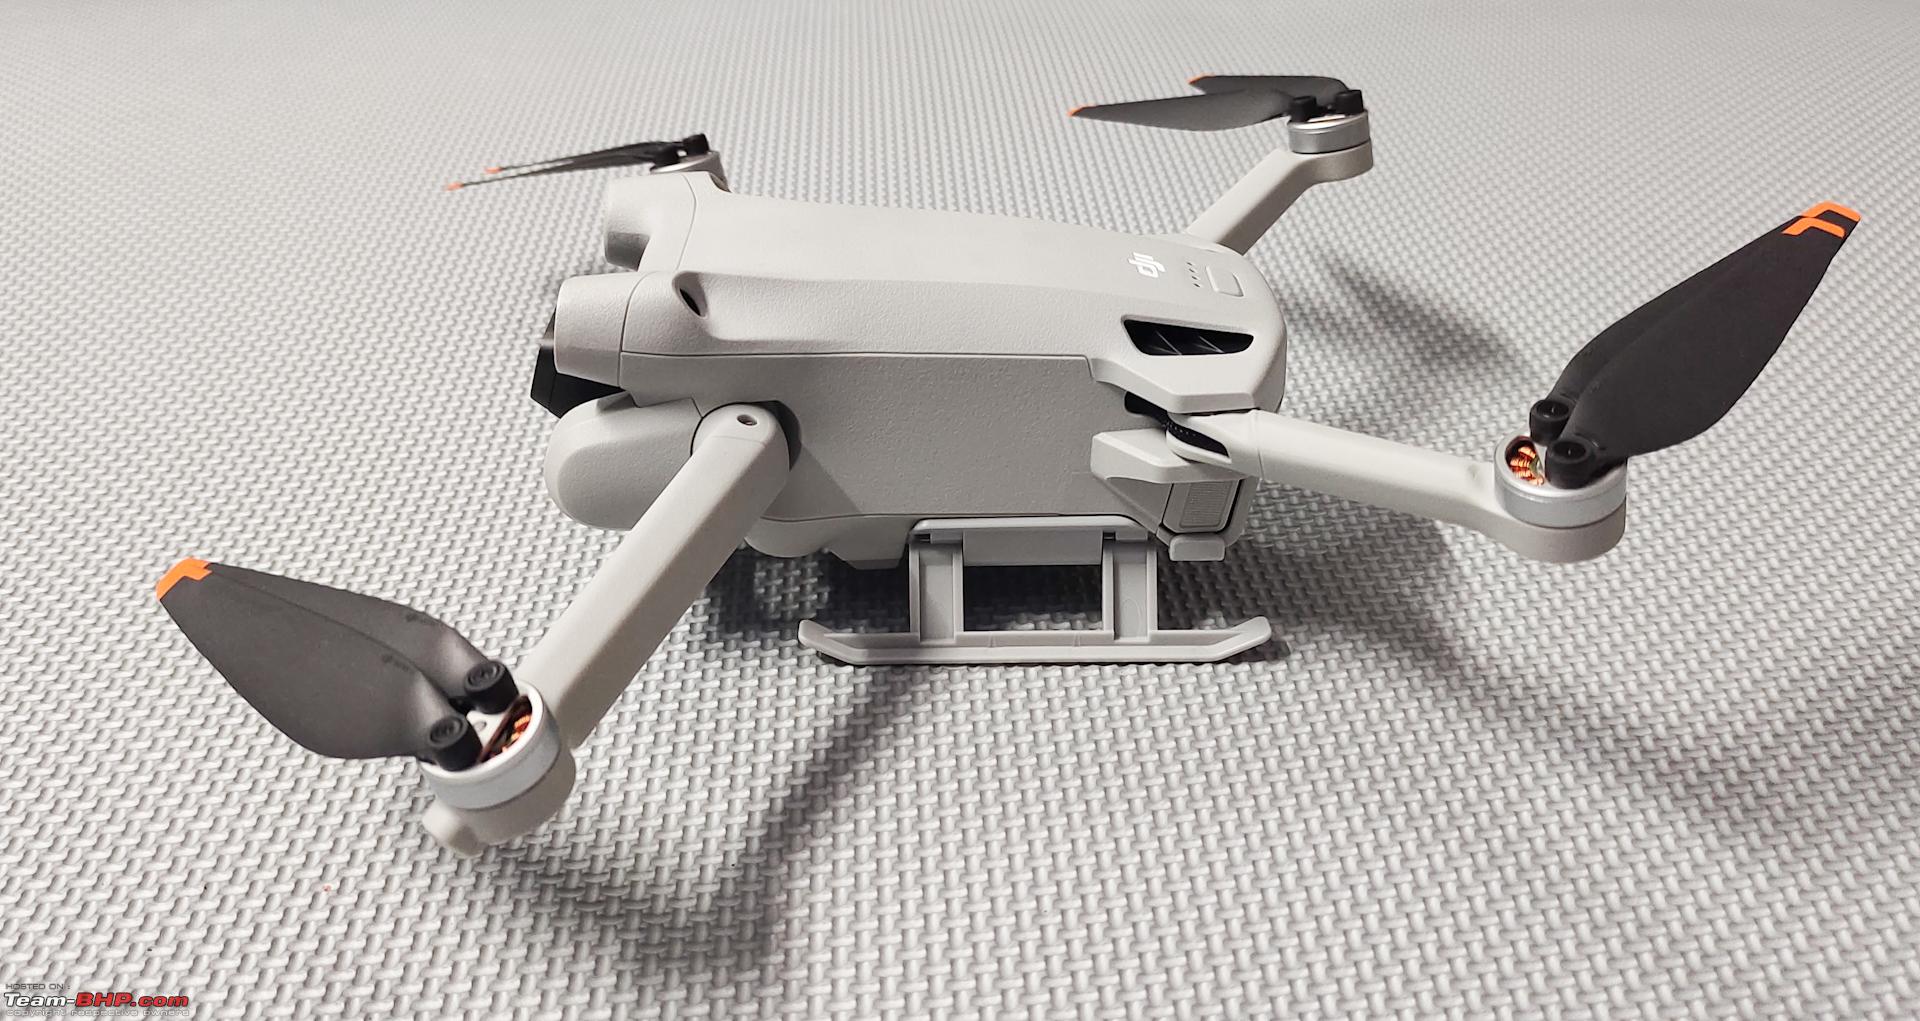    Propeller Guard: It is light and strong and prevents the propellers from getting damaged when flying in tight spaces. Installing additional accessories like these does push the weight over 250 grams and may affect the flight performance. 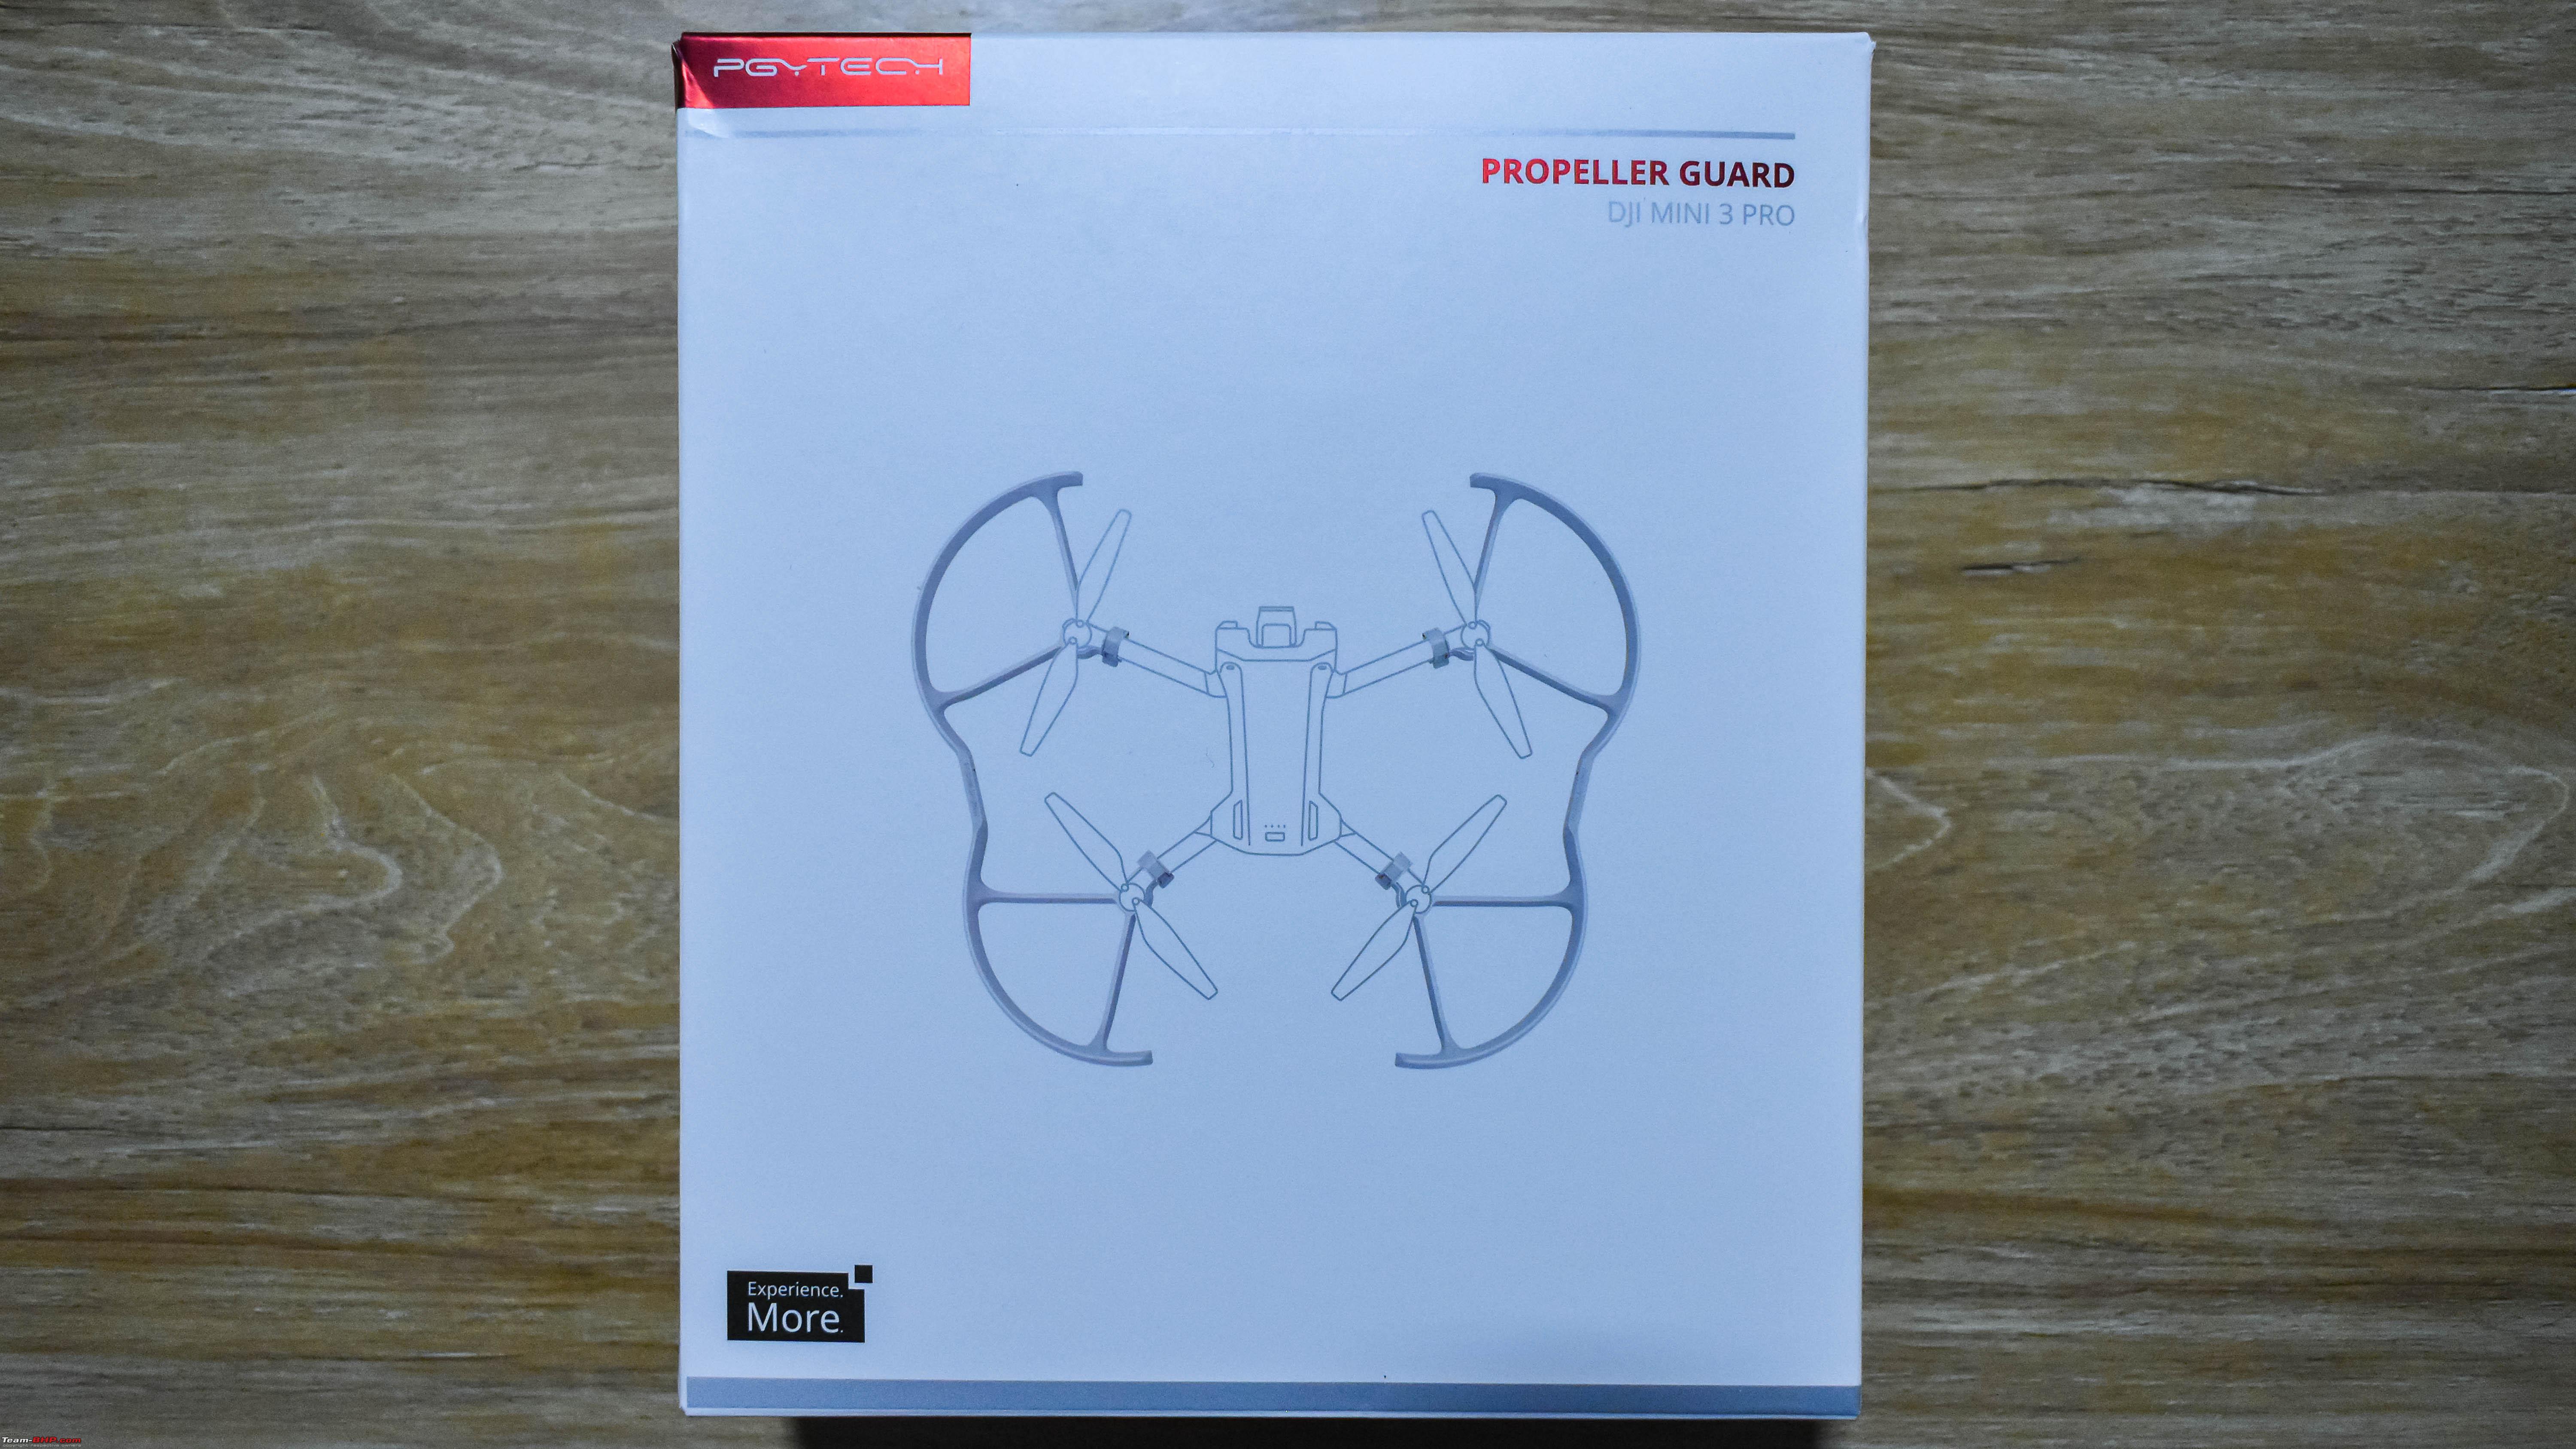  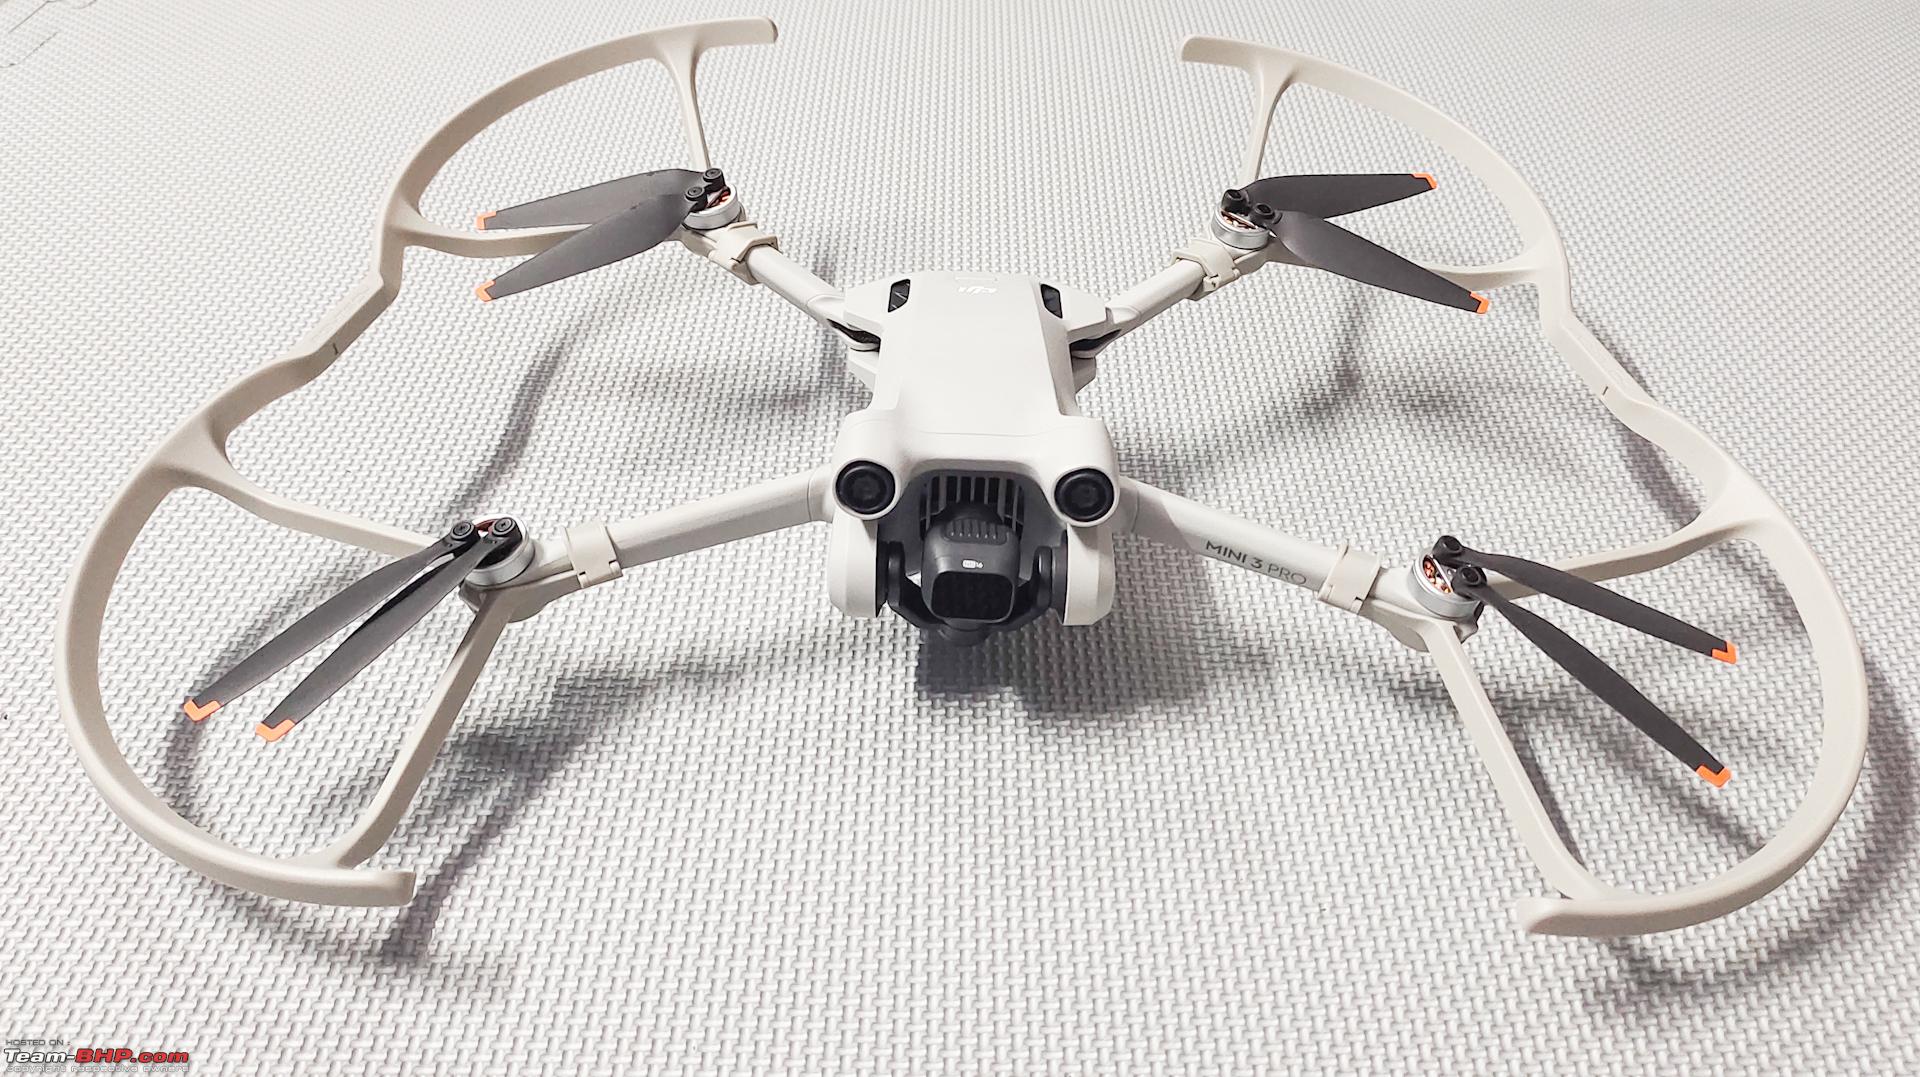 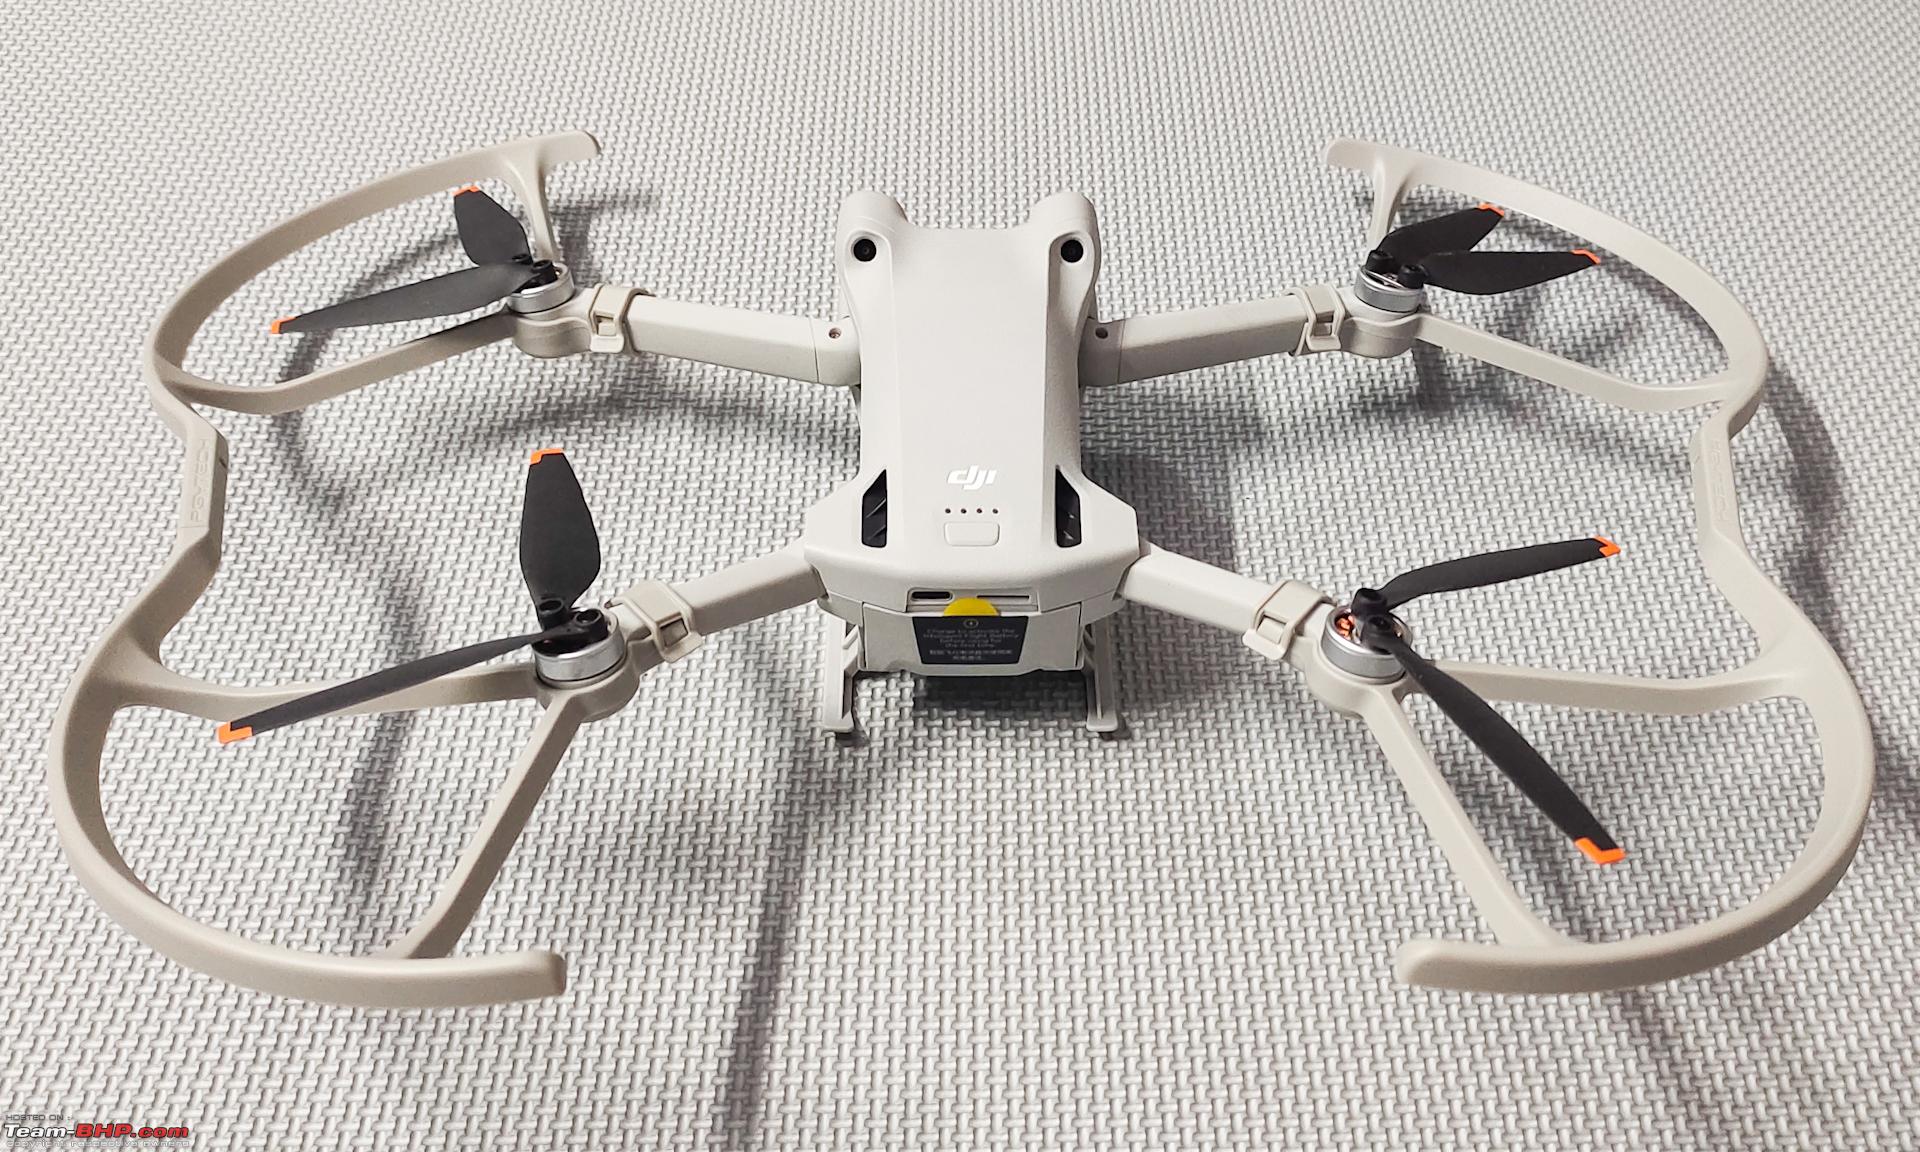 Last edited by Amyth Prabhakar : 10th December 2022 at 20:16. |
|
| (23)
Thanks
|
| The following 23 BHPians Thank Amyth Prabhakar for this useful post: | AdityaDeane, Ashutosh, audioholic, brownkaiser, digitalnirvana, fiat_tarun, GTO, izzikio_rage, kung_foo_fanta, LoneRidder, mail2sekh, MotoBlip, PGNarain, ph03n!x, ritesh_44, Roy.S, saikarthik, Samfromindia, shyamg28, TSIboy, valapad, warrioraks, Yash390 |
|
7th December 2022, 22:52
| #4 |
| BHPian | re: Dji Mini 3 Pro Review | The Best Nano Drone FLY MORE KIT COMBO: The Fly More Plus Kit includes two additional batteries, 2 extra set of propellers along with screws, Two way charging hub, a flat USB Type-C cable, manuals and a shoulder bag for carrying the Mini 3 pro along with the remote. The plus batteries do weigh more than the standard intelligent battery and does take the overall weight of the drone beyond 250 grams. The plus kit costs more than the standard fly more combo kit and is legally available only in a few selected countries. 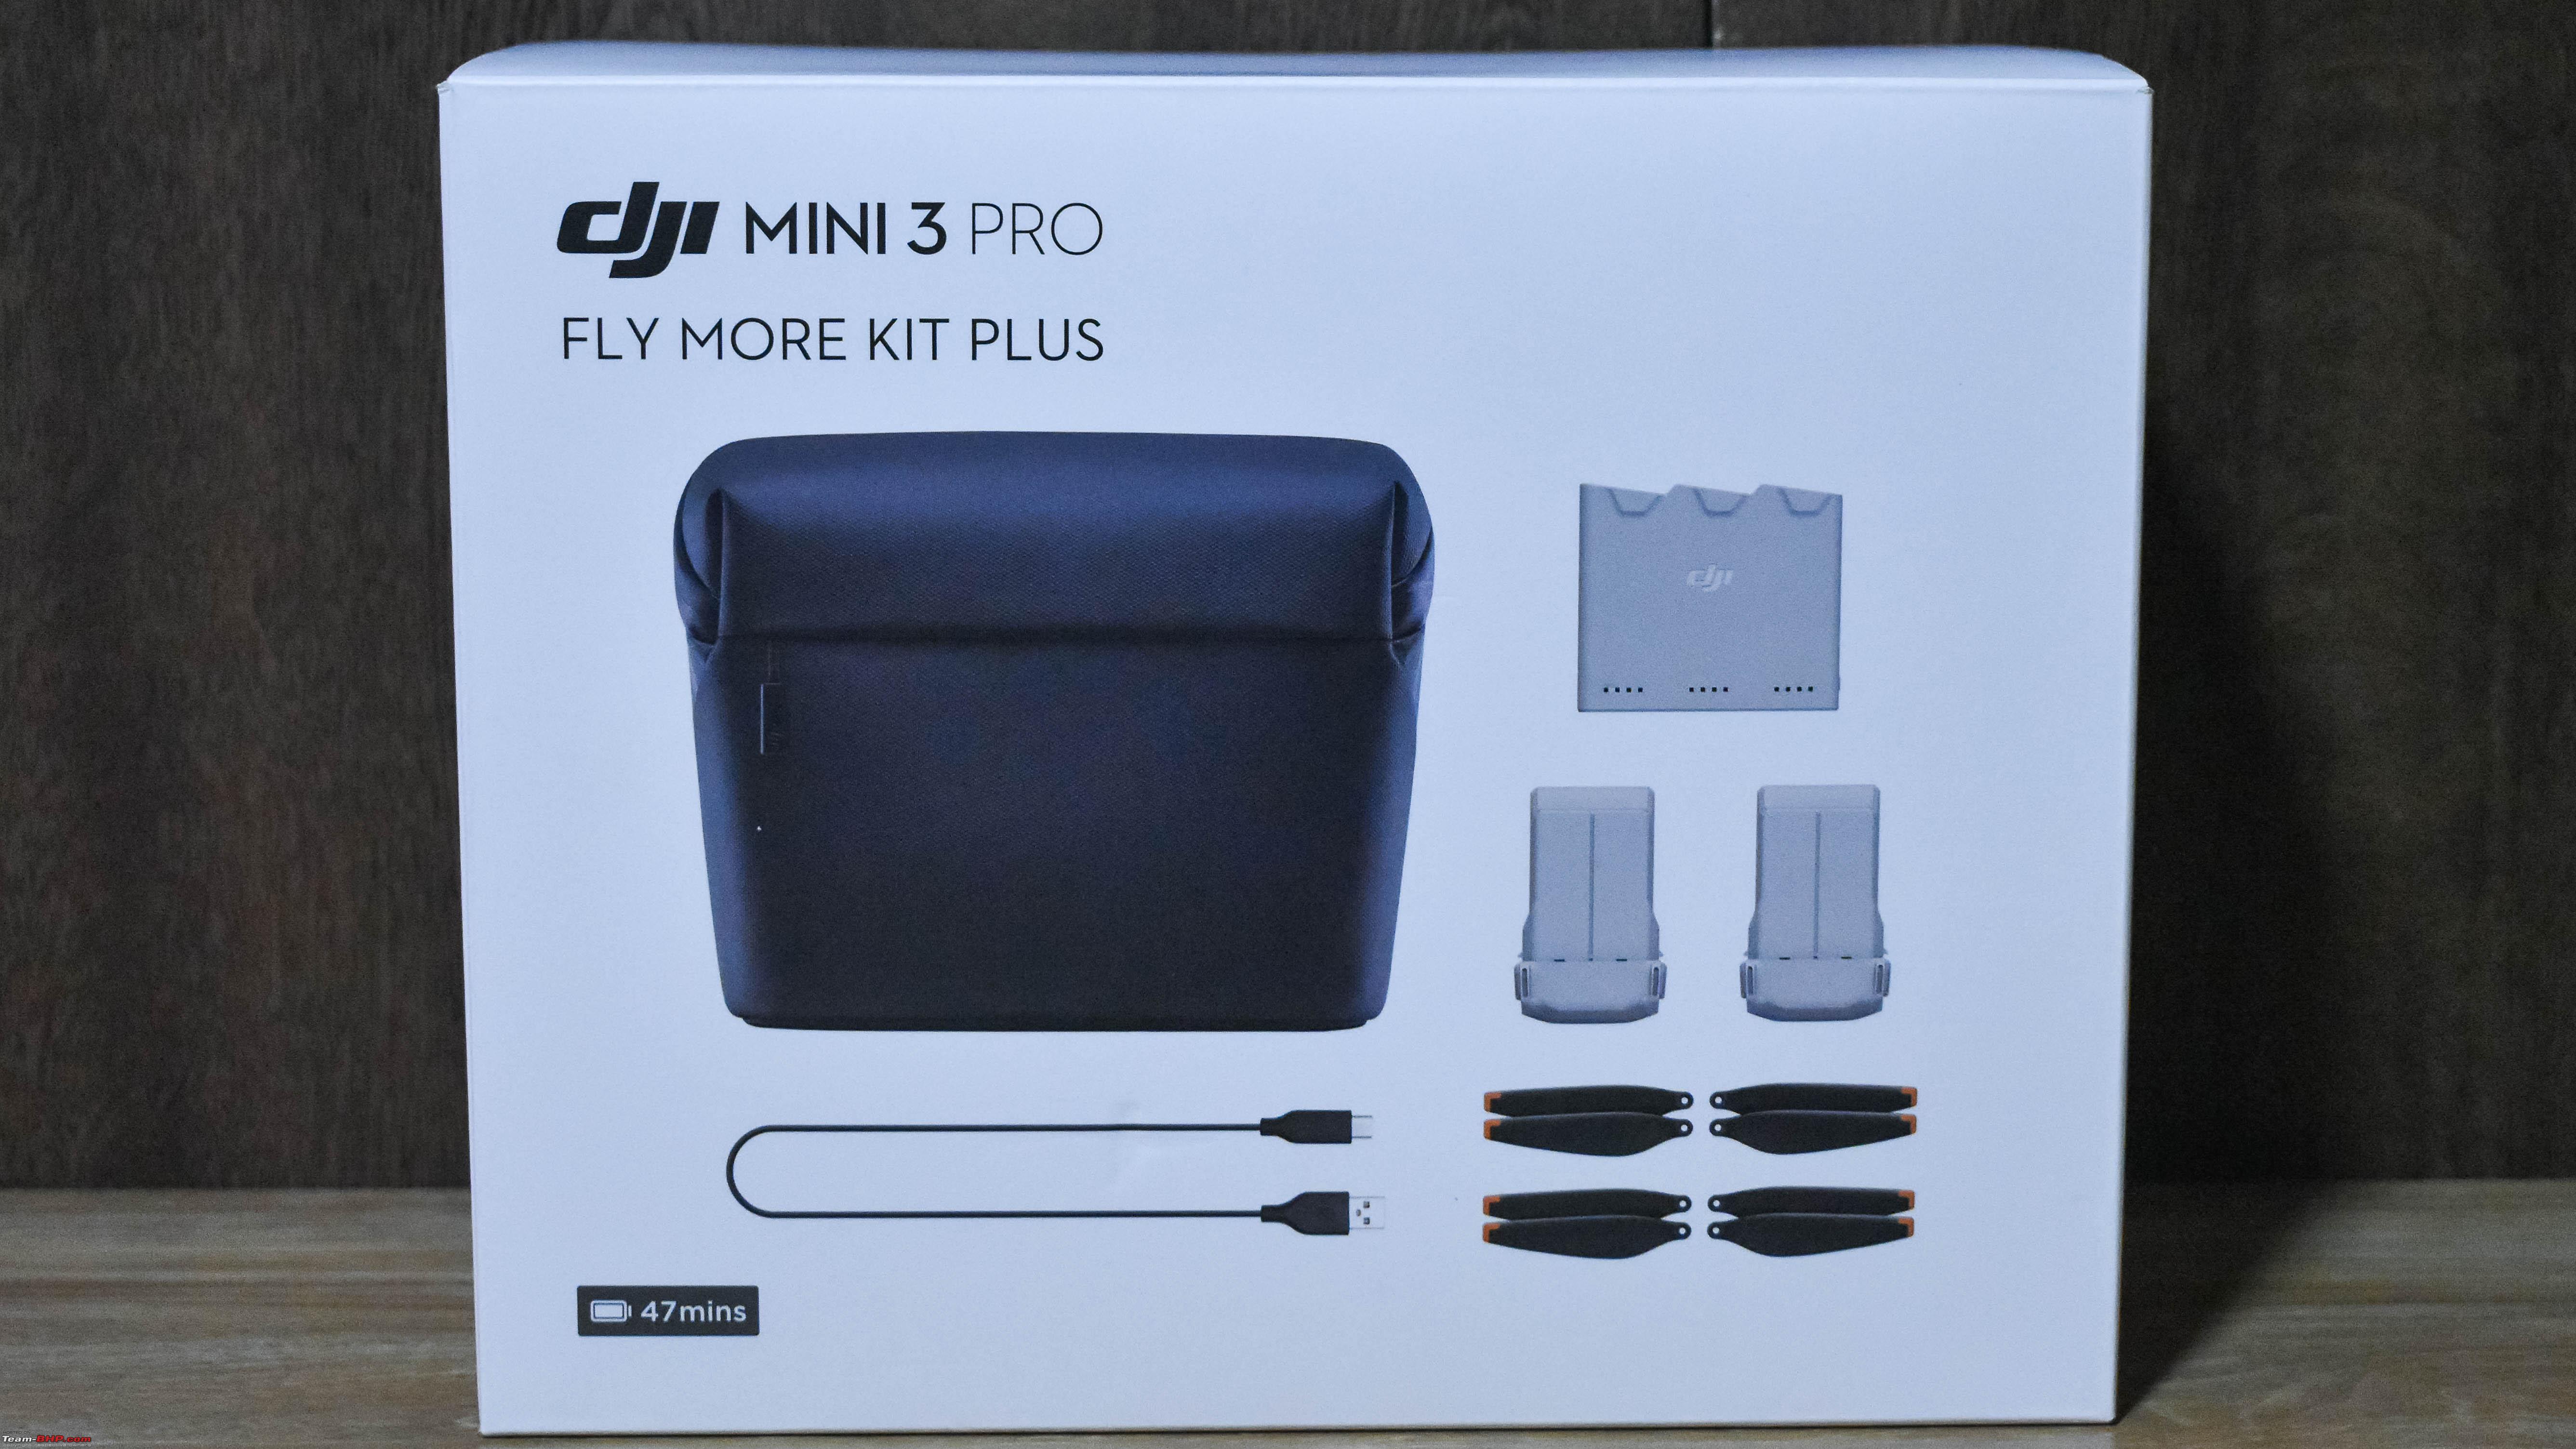 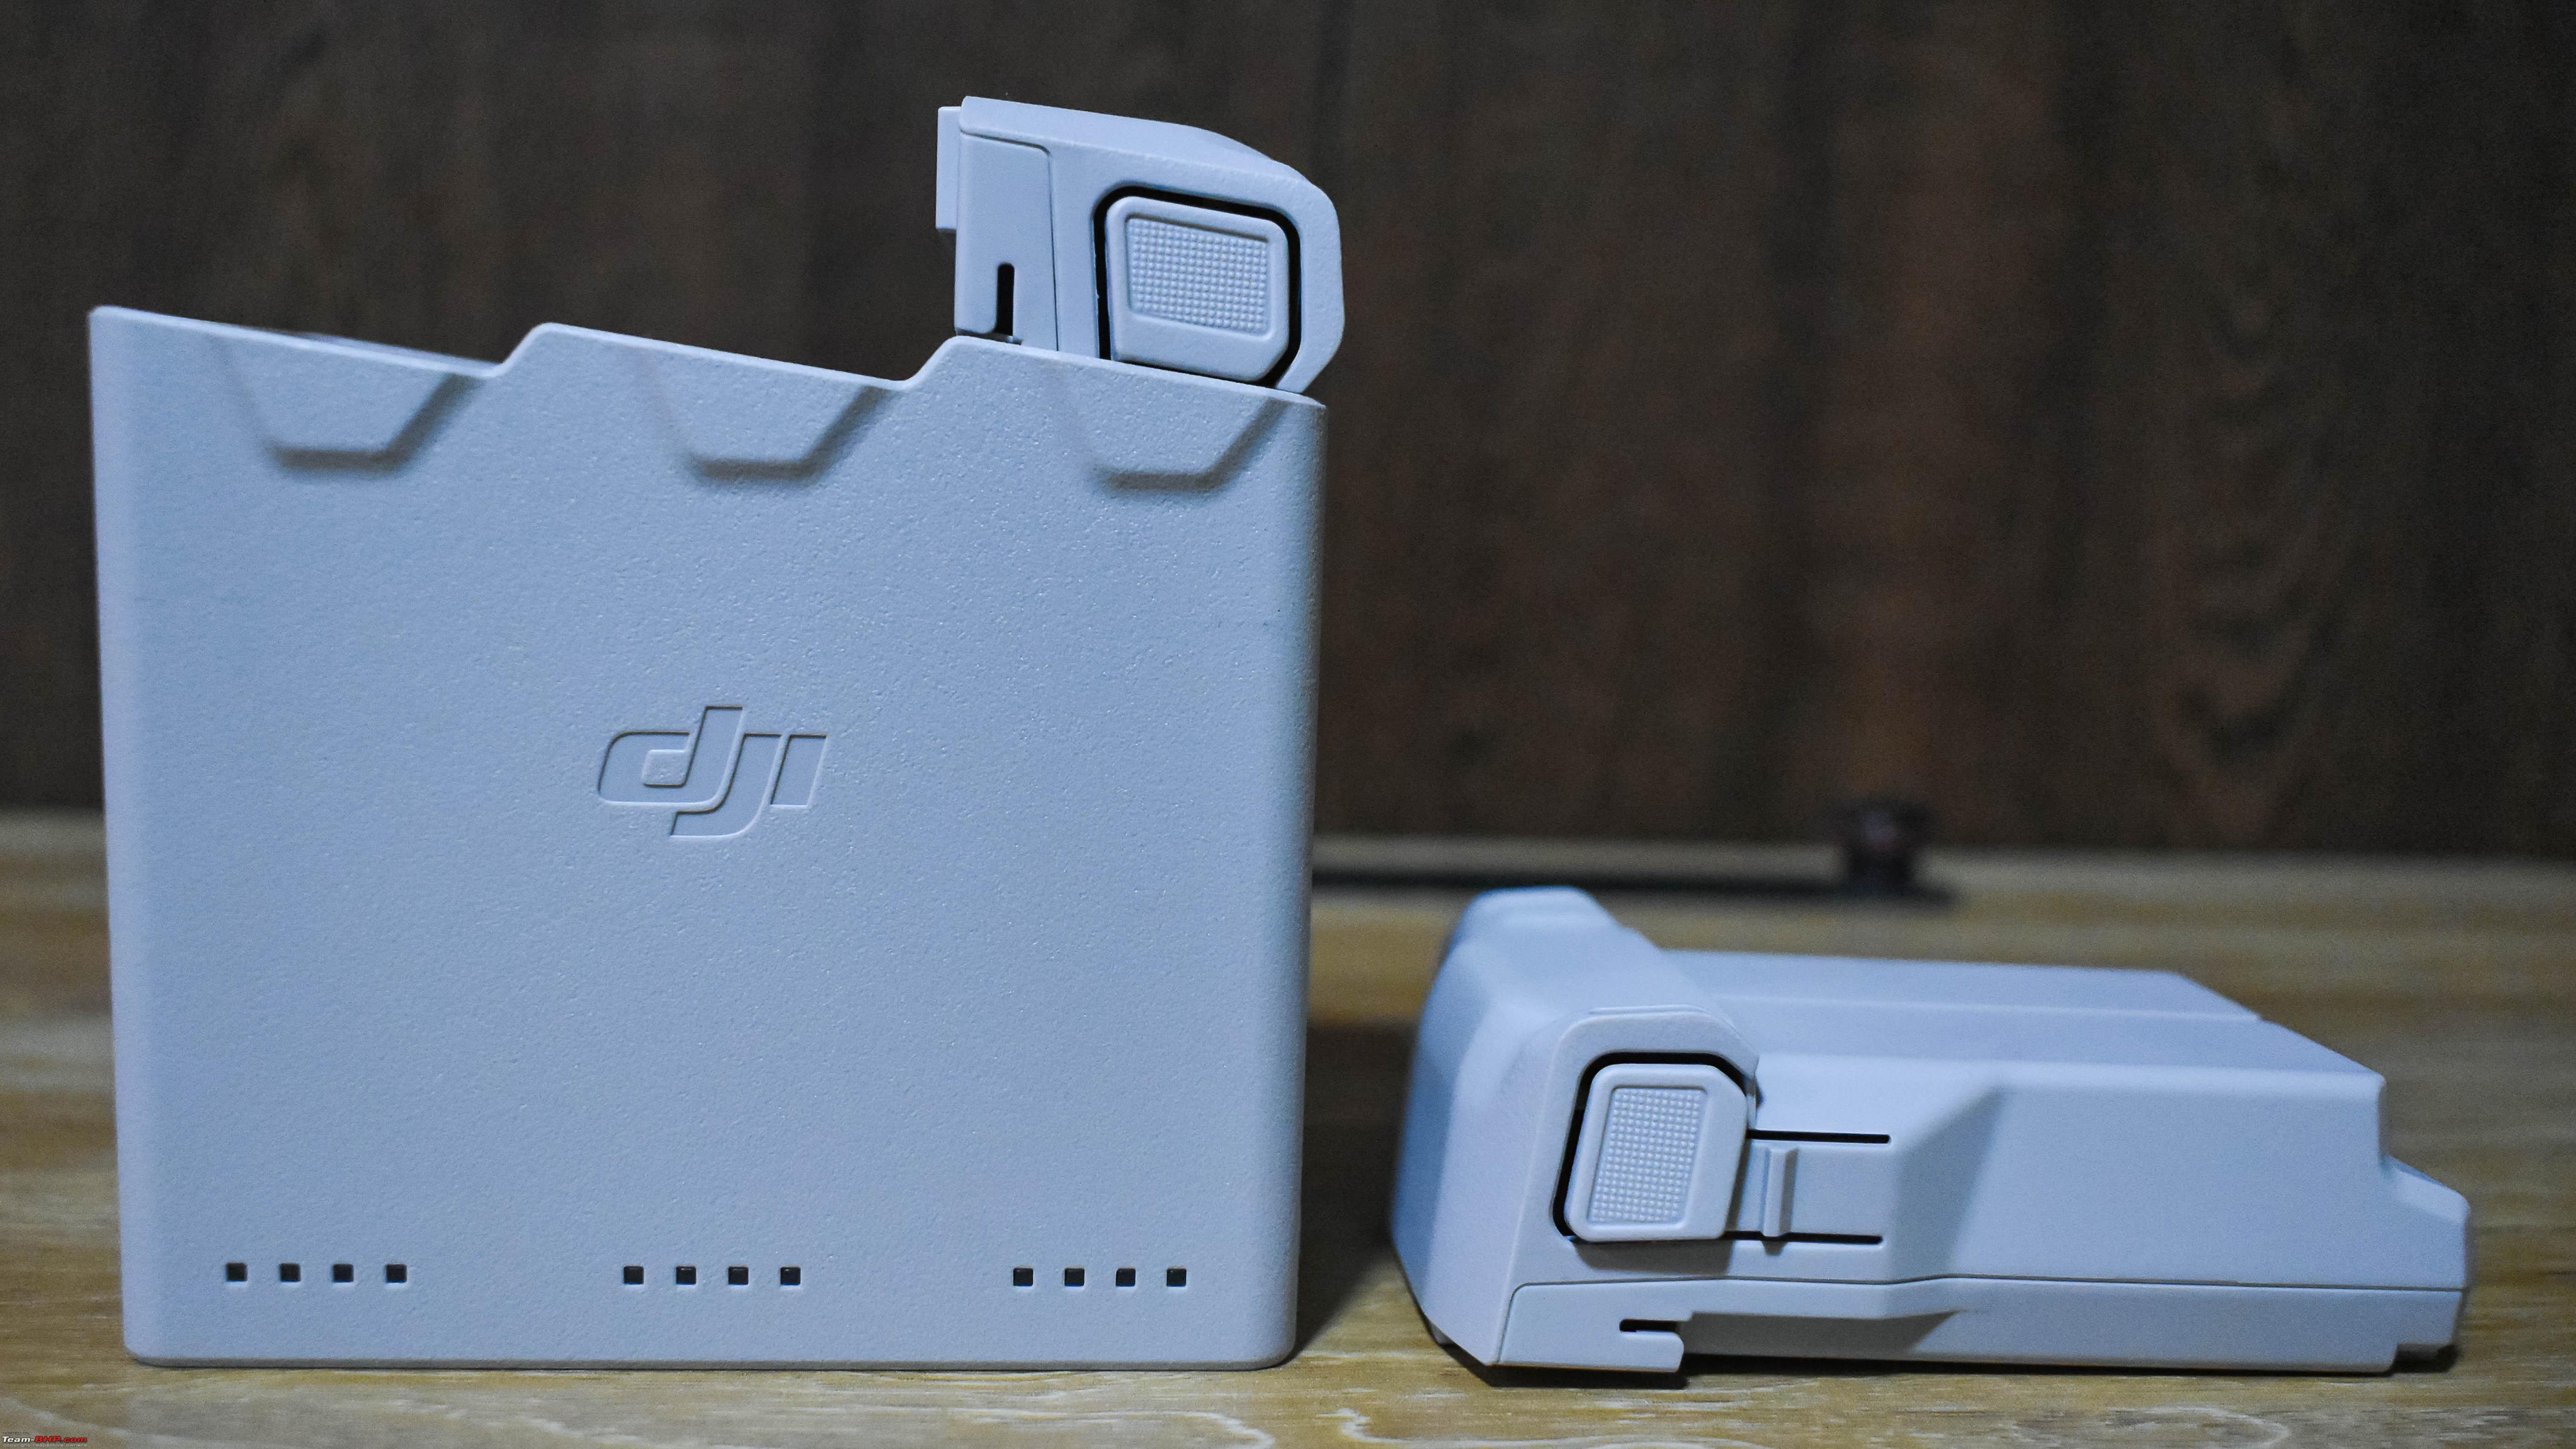 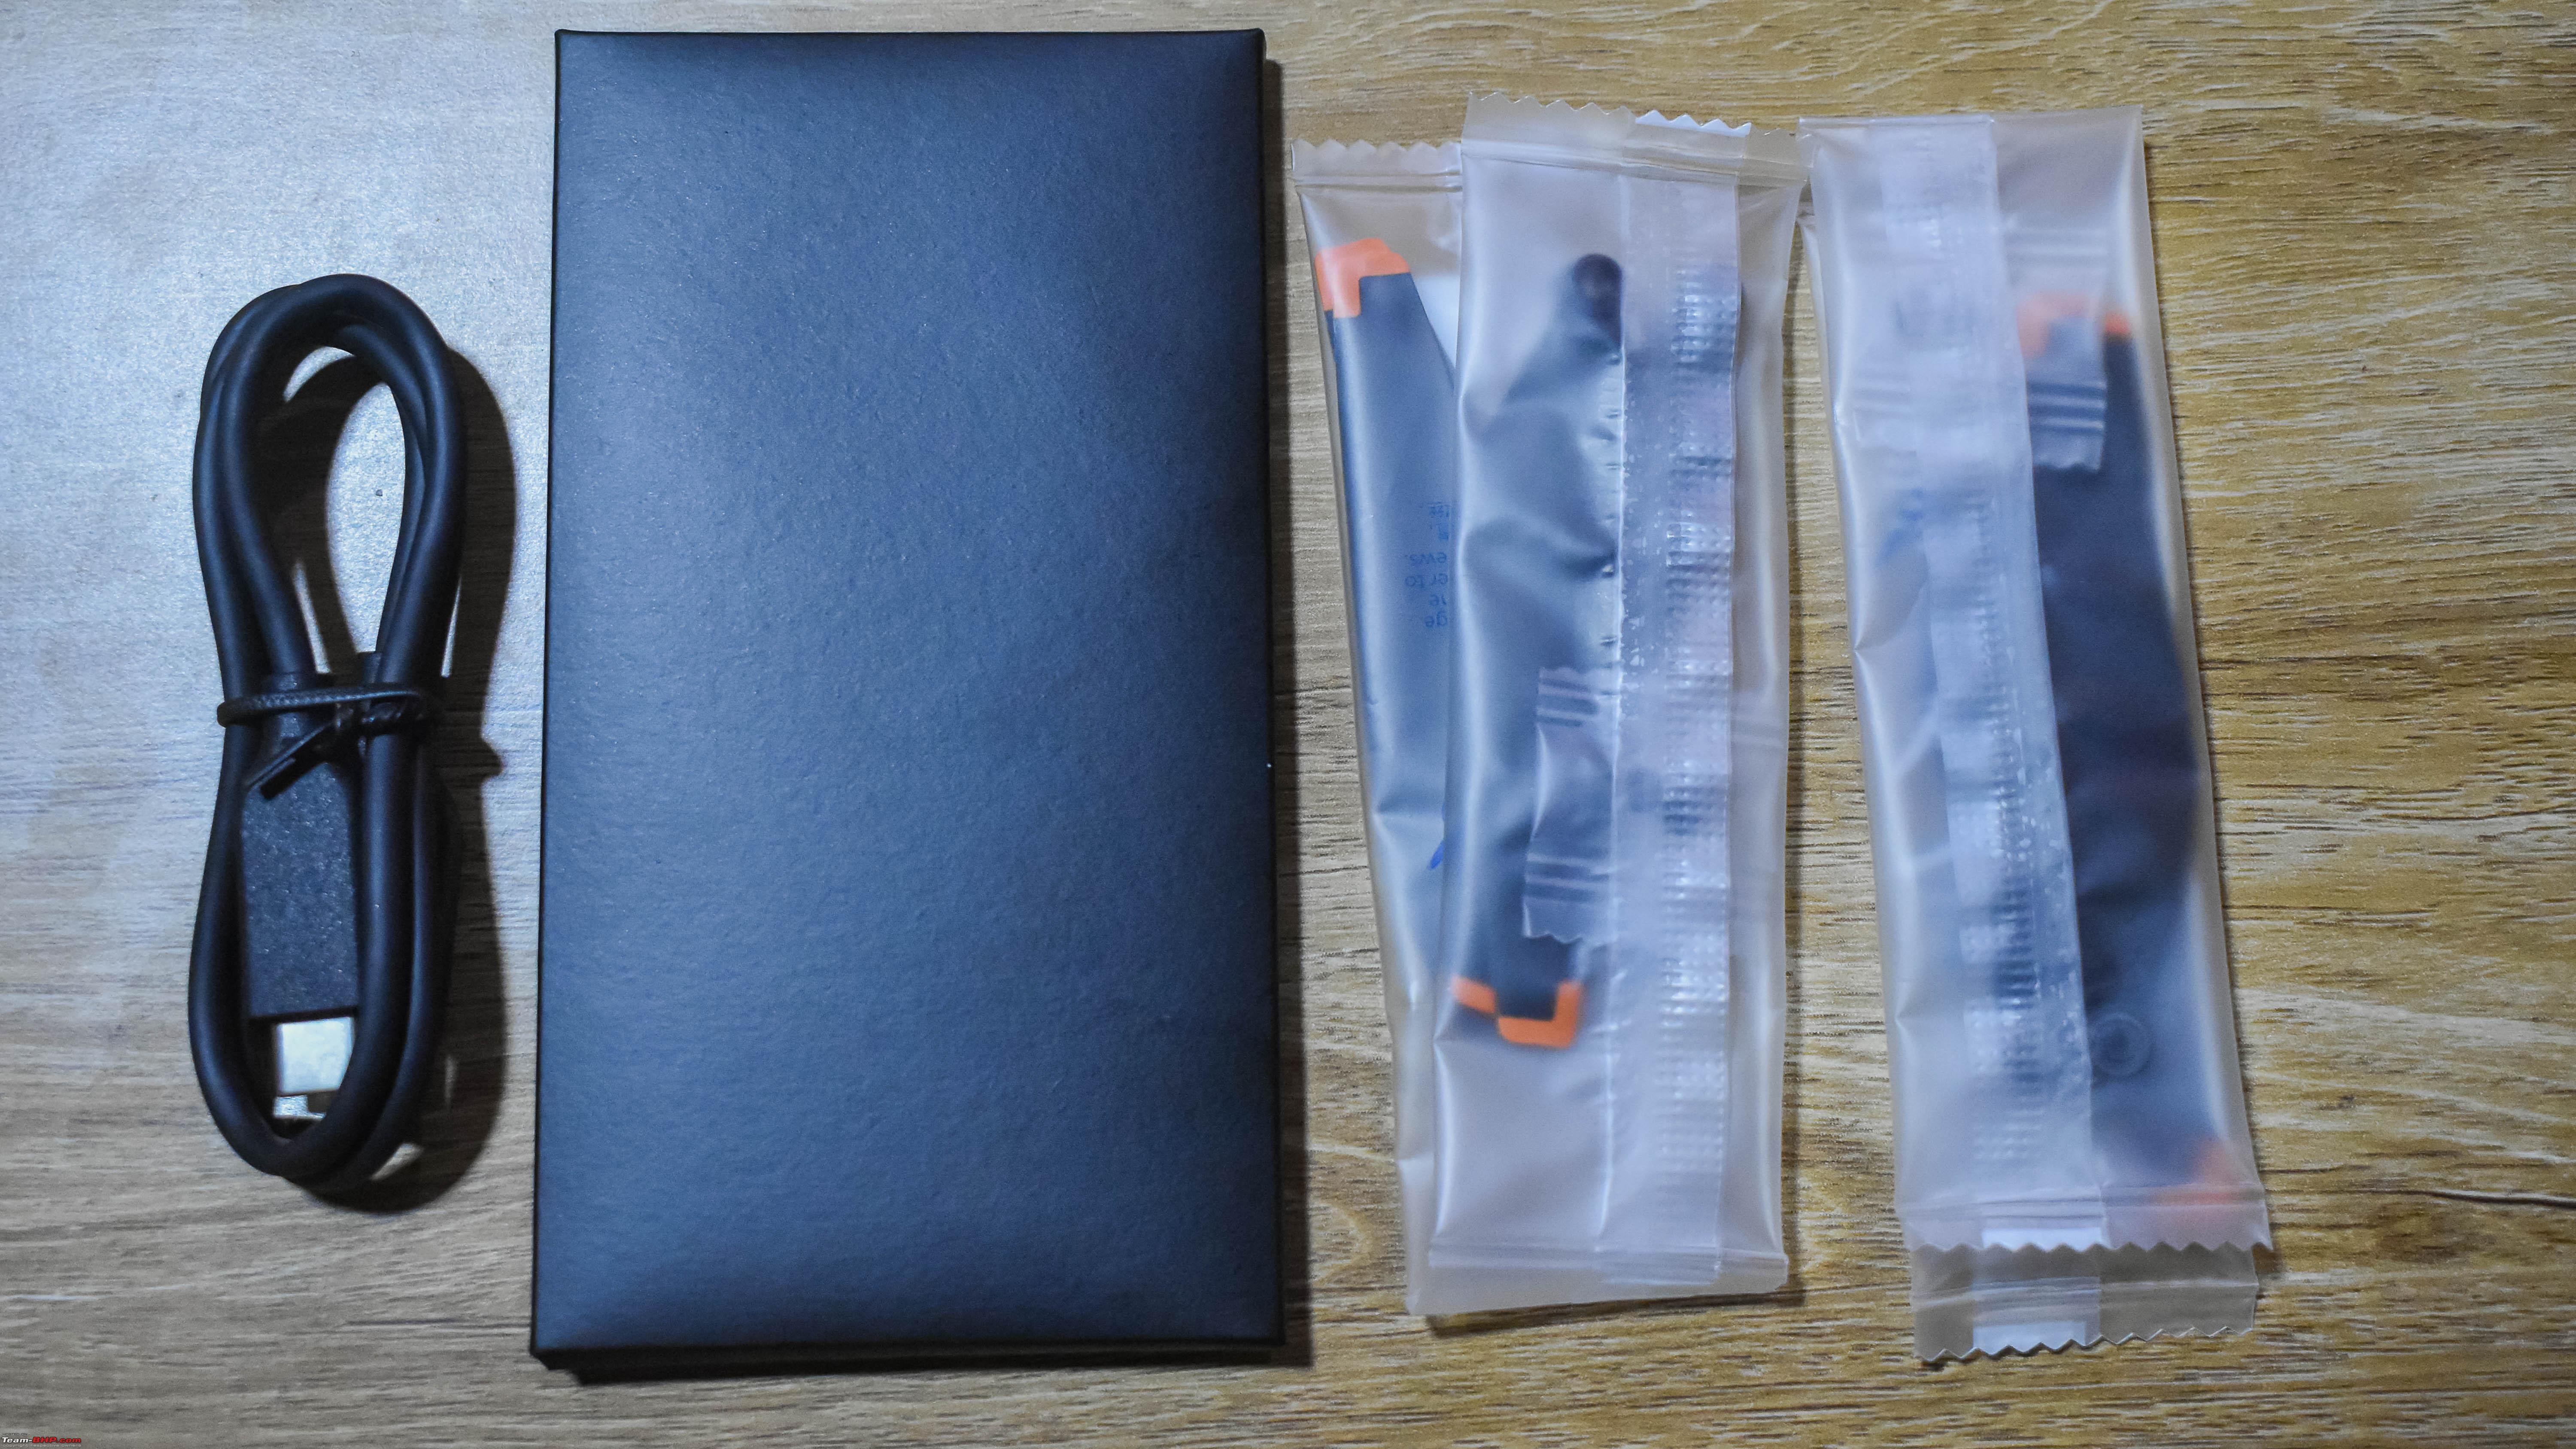  The two way charging hub can also be used as a power bank to charge other devices. It charges batteries one after another and not in parallel and also displays the percentage of charge left through battery level indicators with the push of a button. There are 3 compartments and each compartment has 4 LED lights, each LED representing about 25% of the total charge. All 4 LED's light up without blinking when the batteries are fully charged.  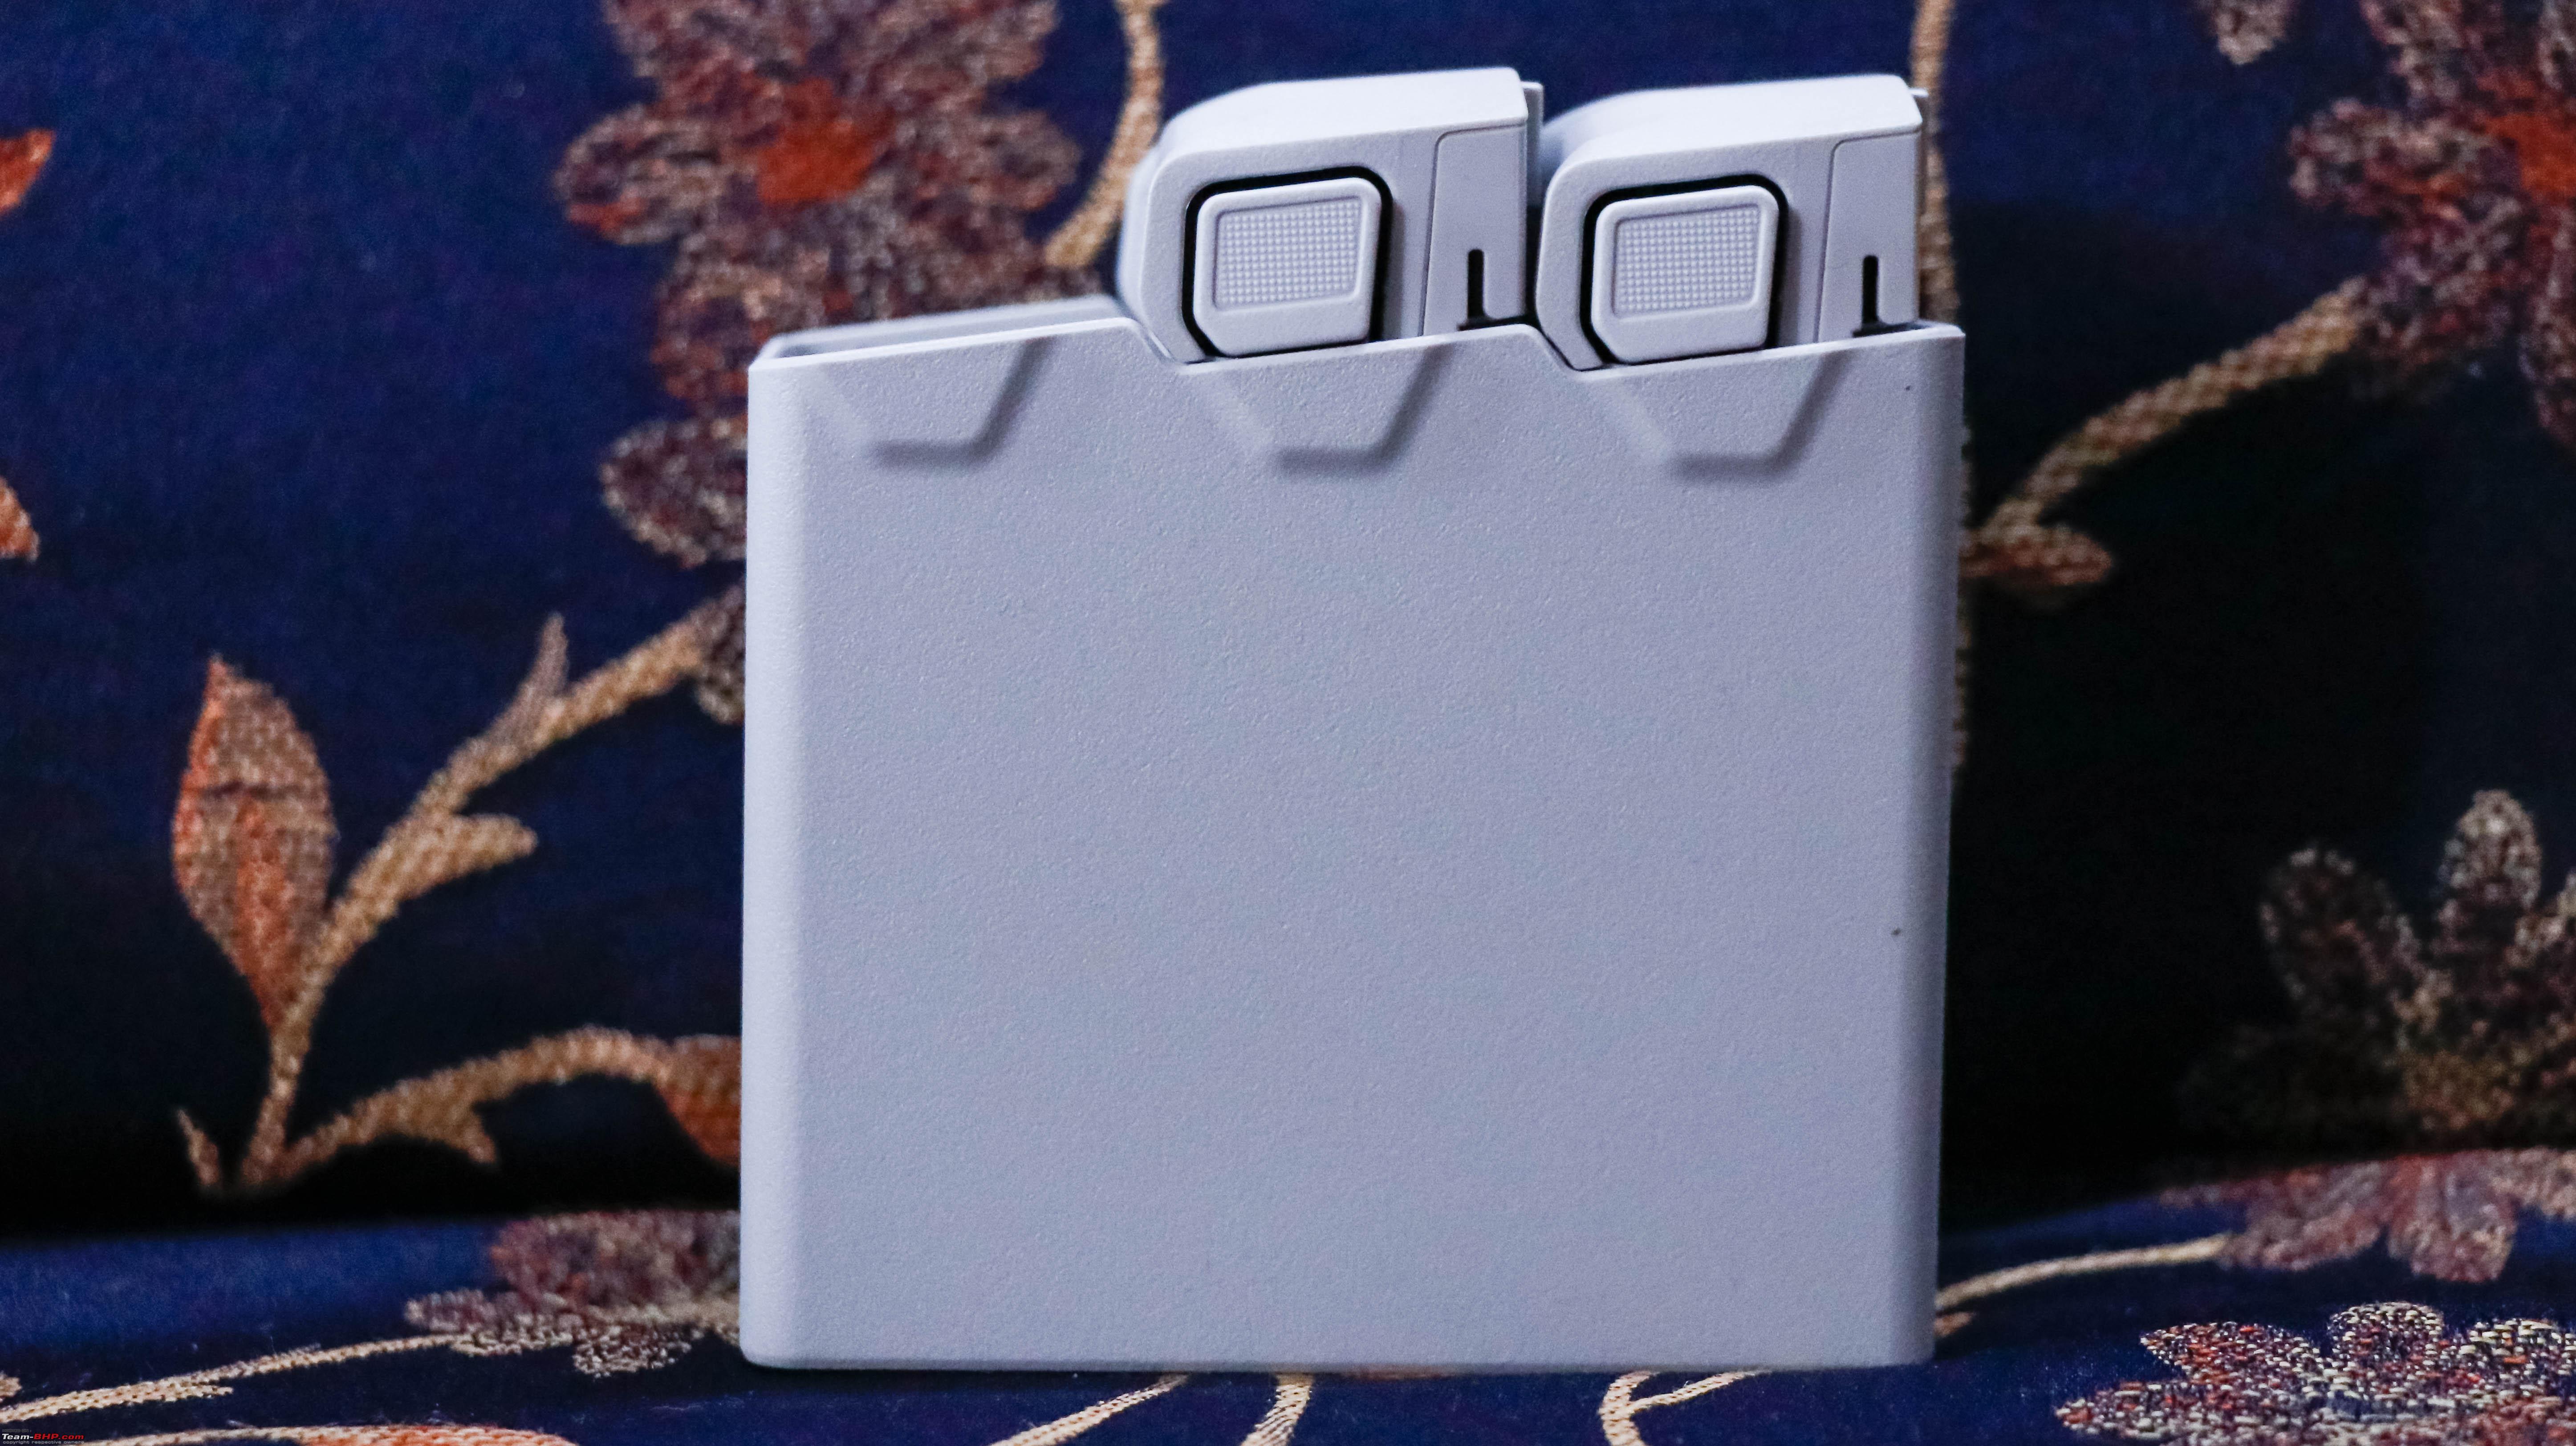 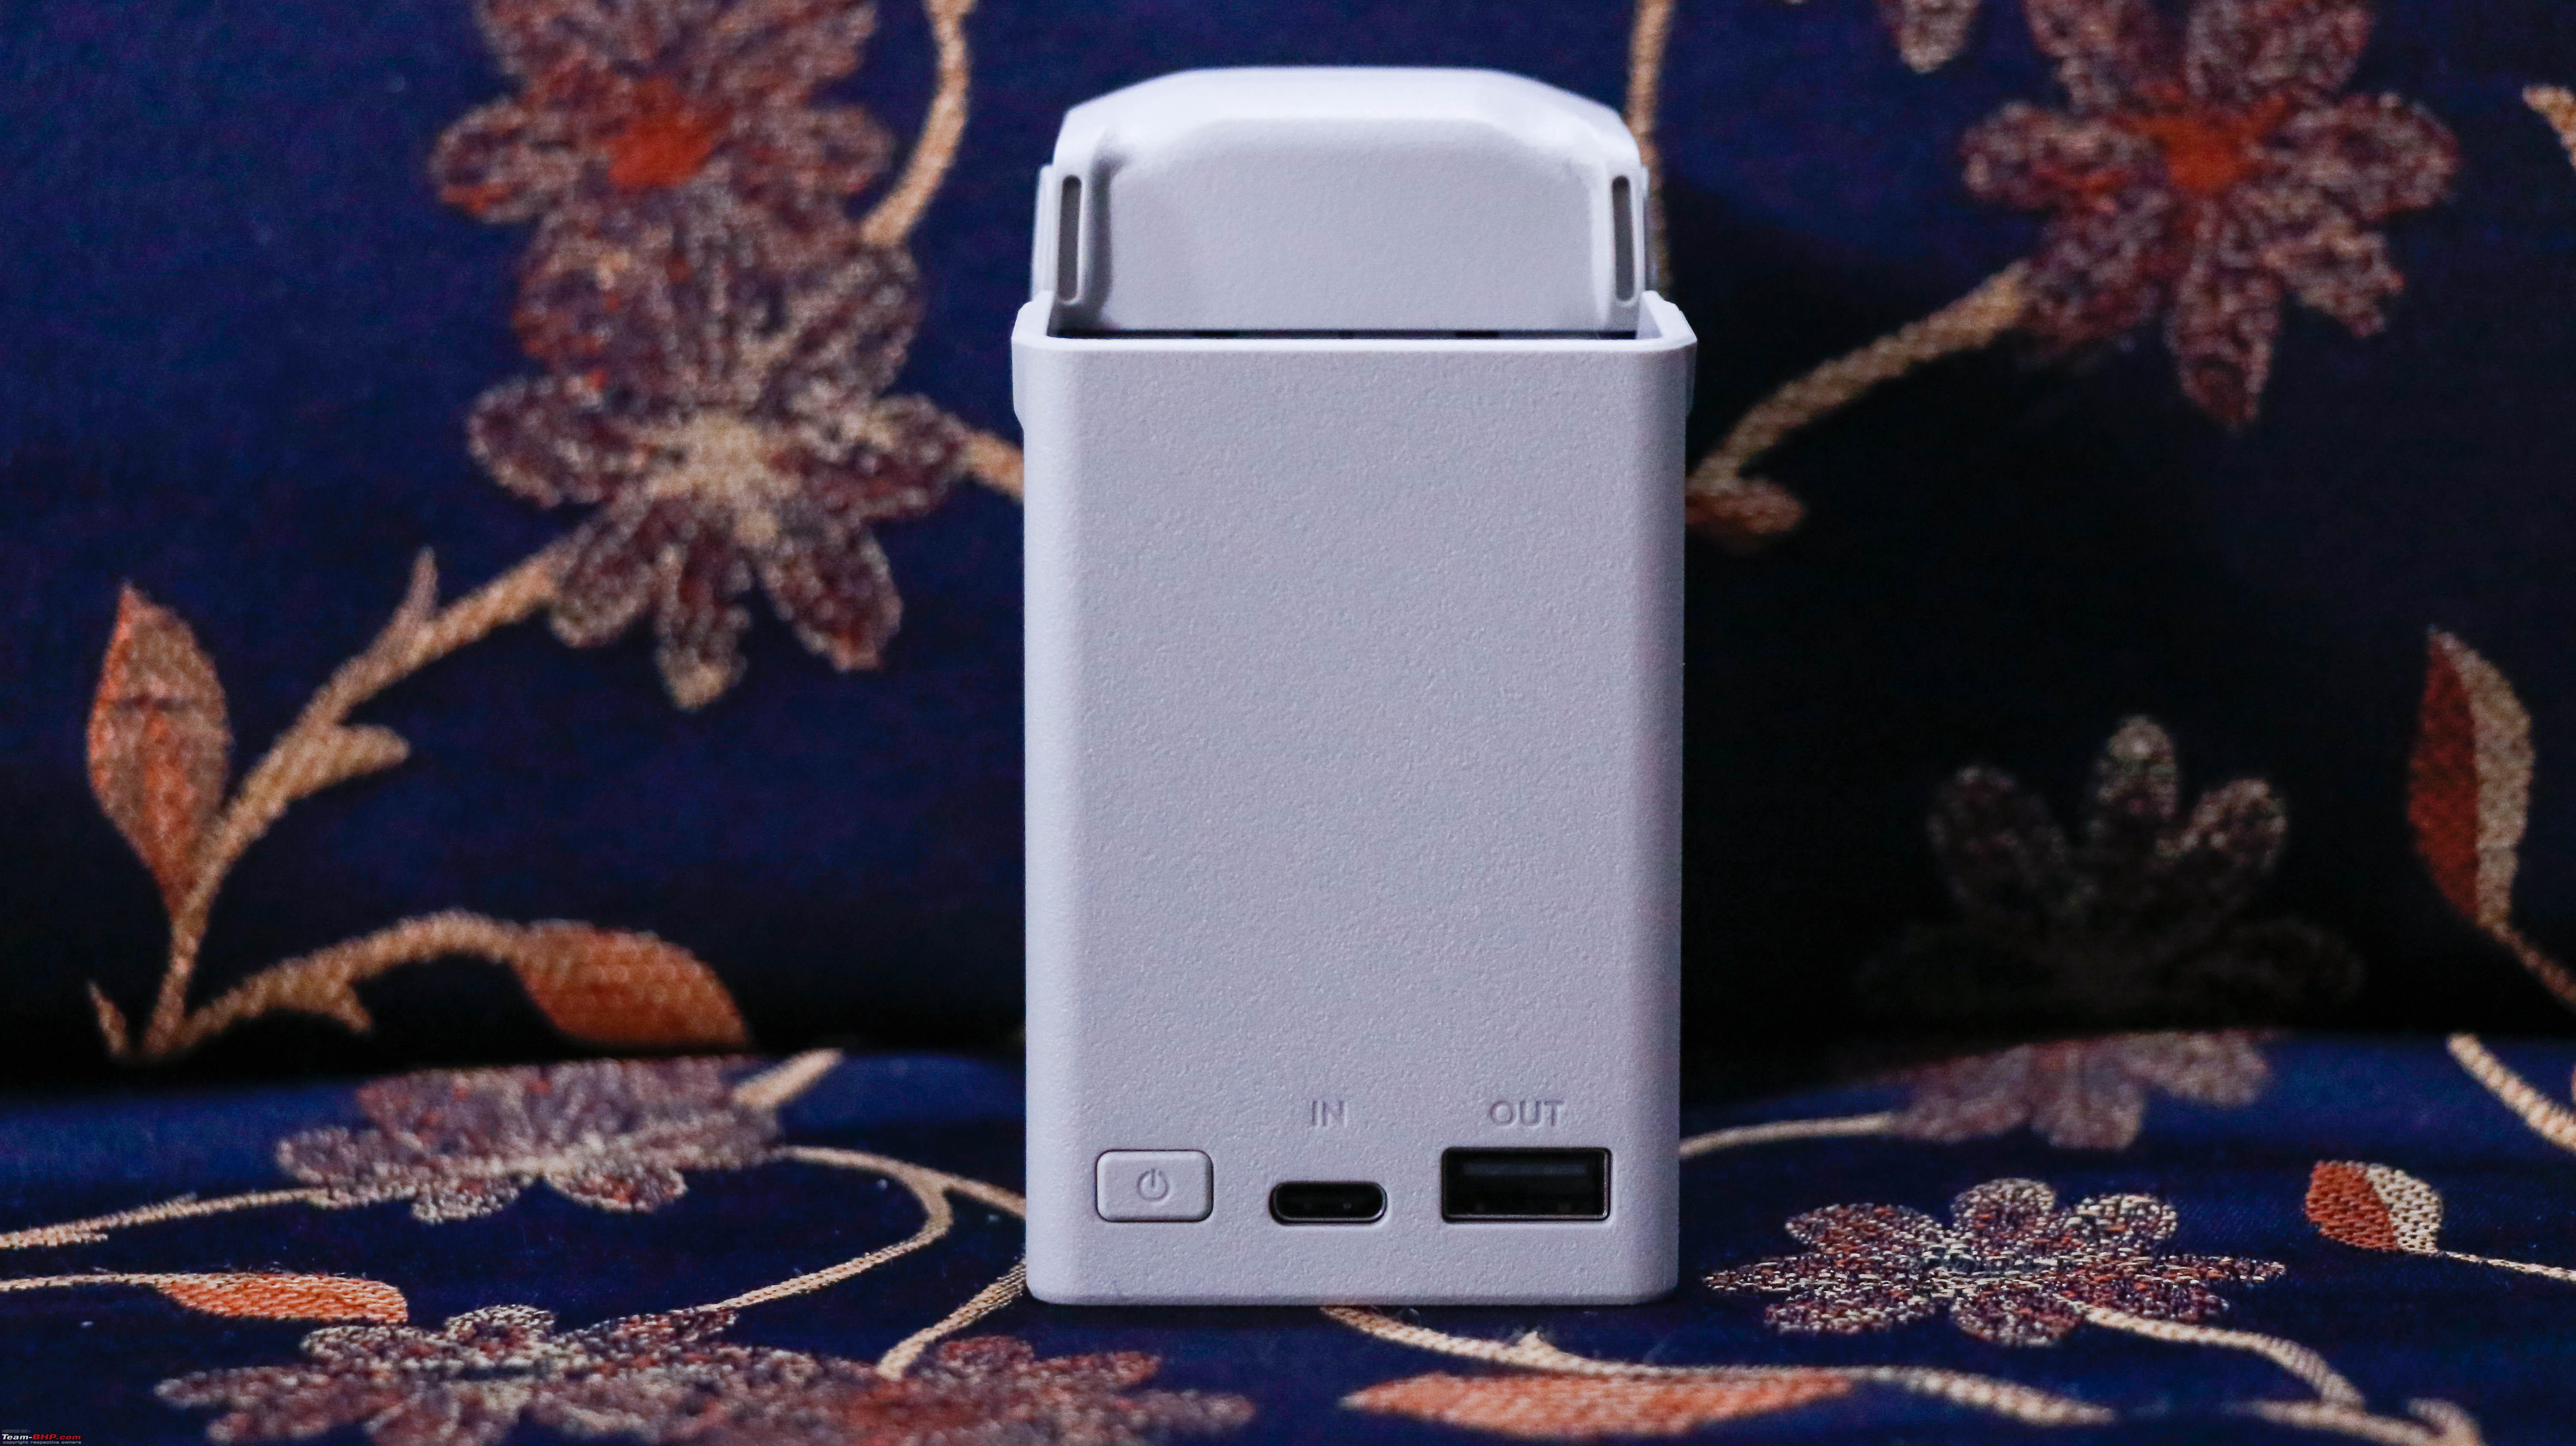 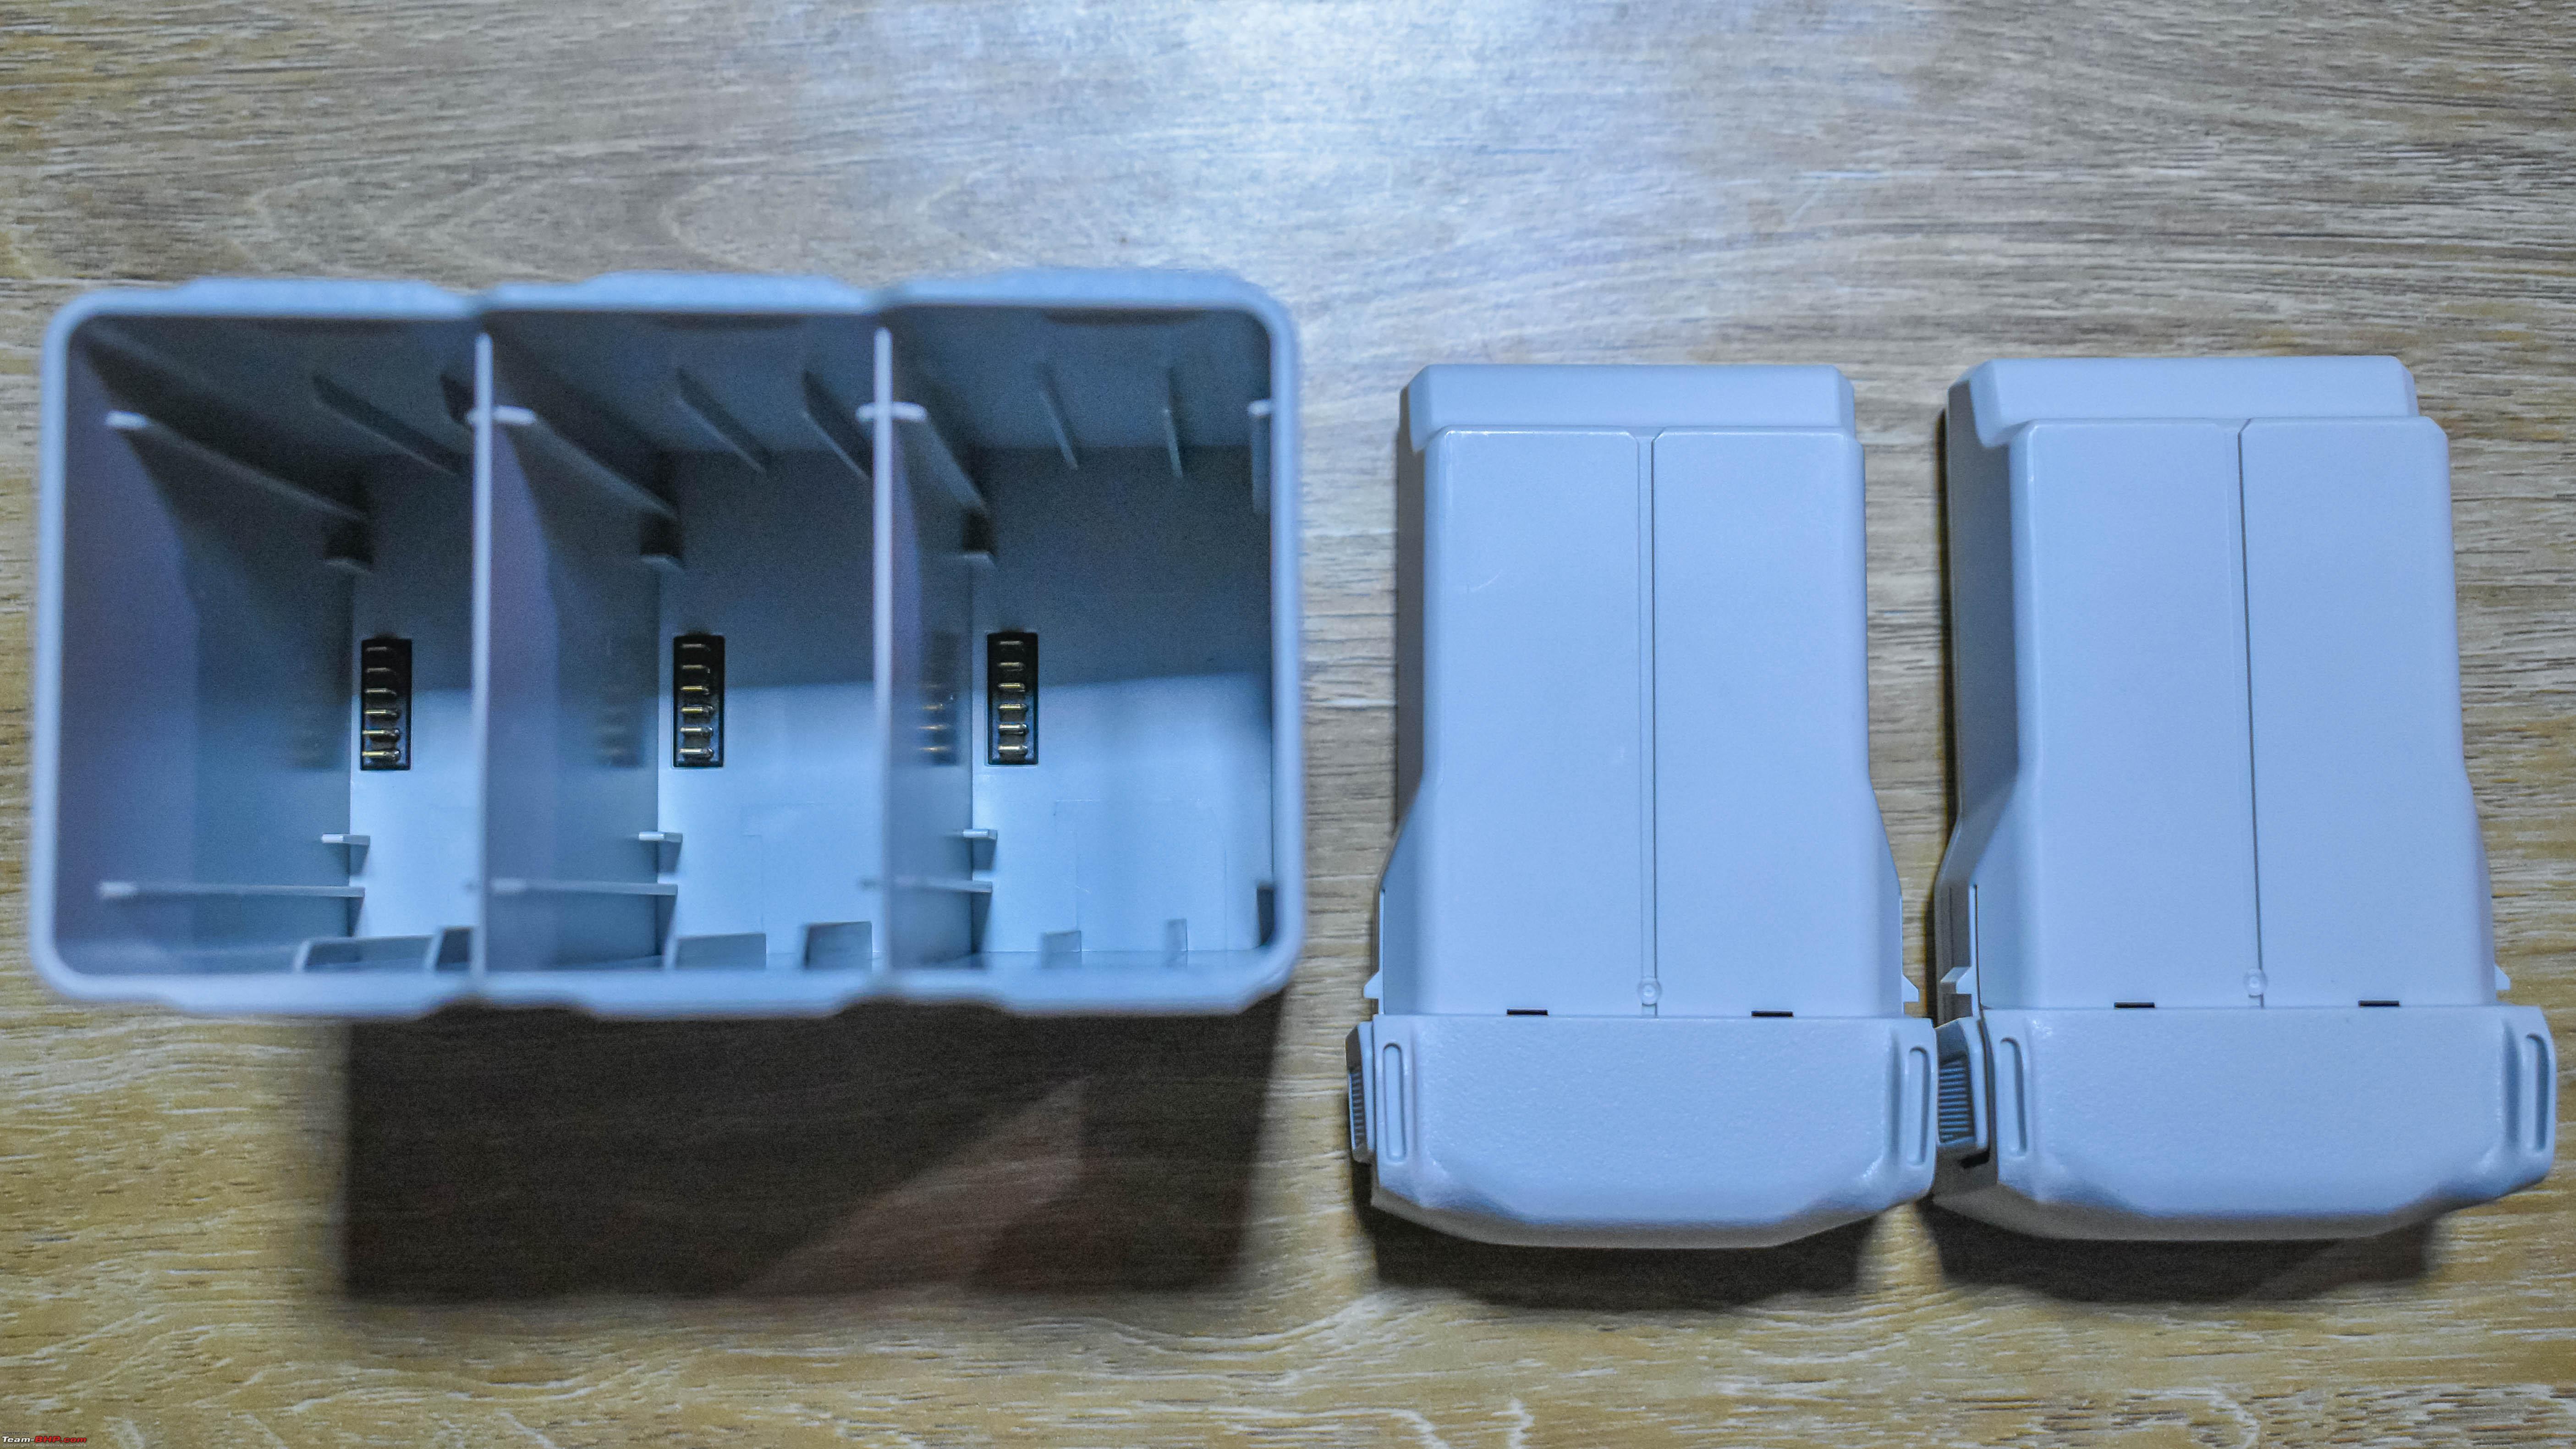 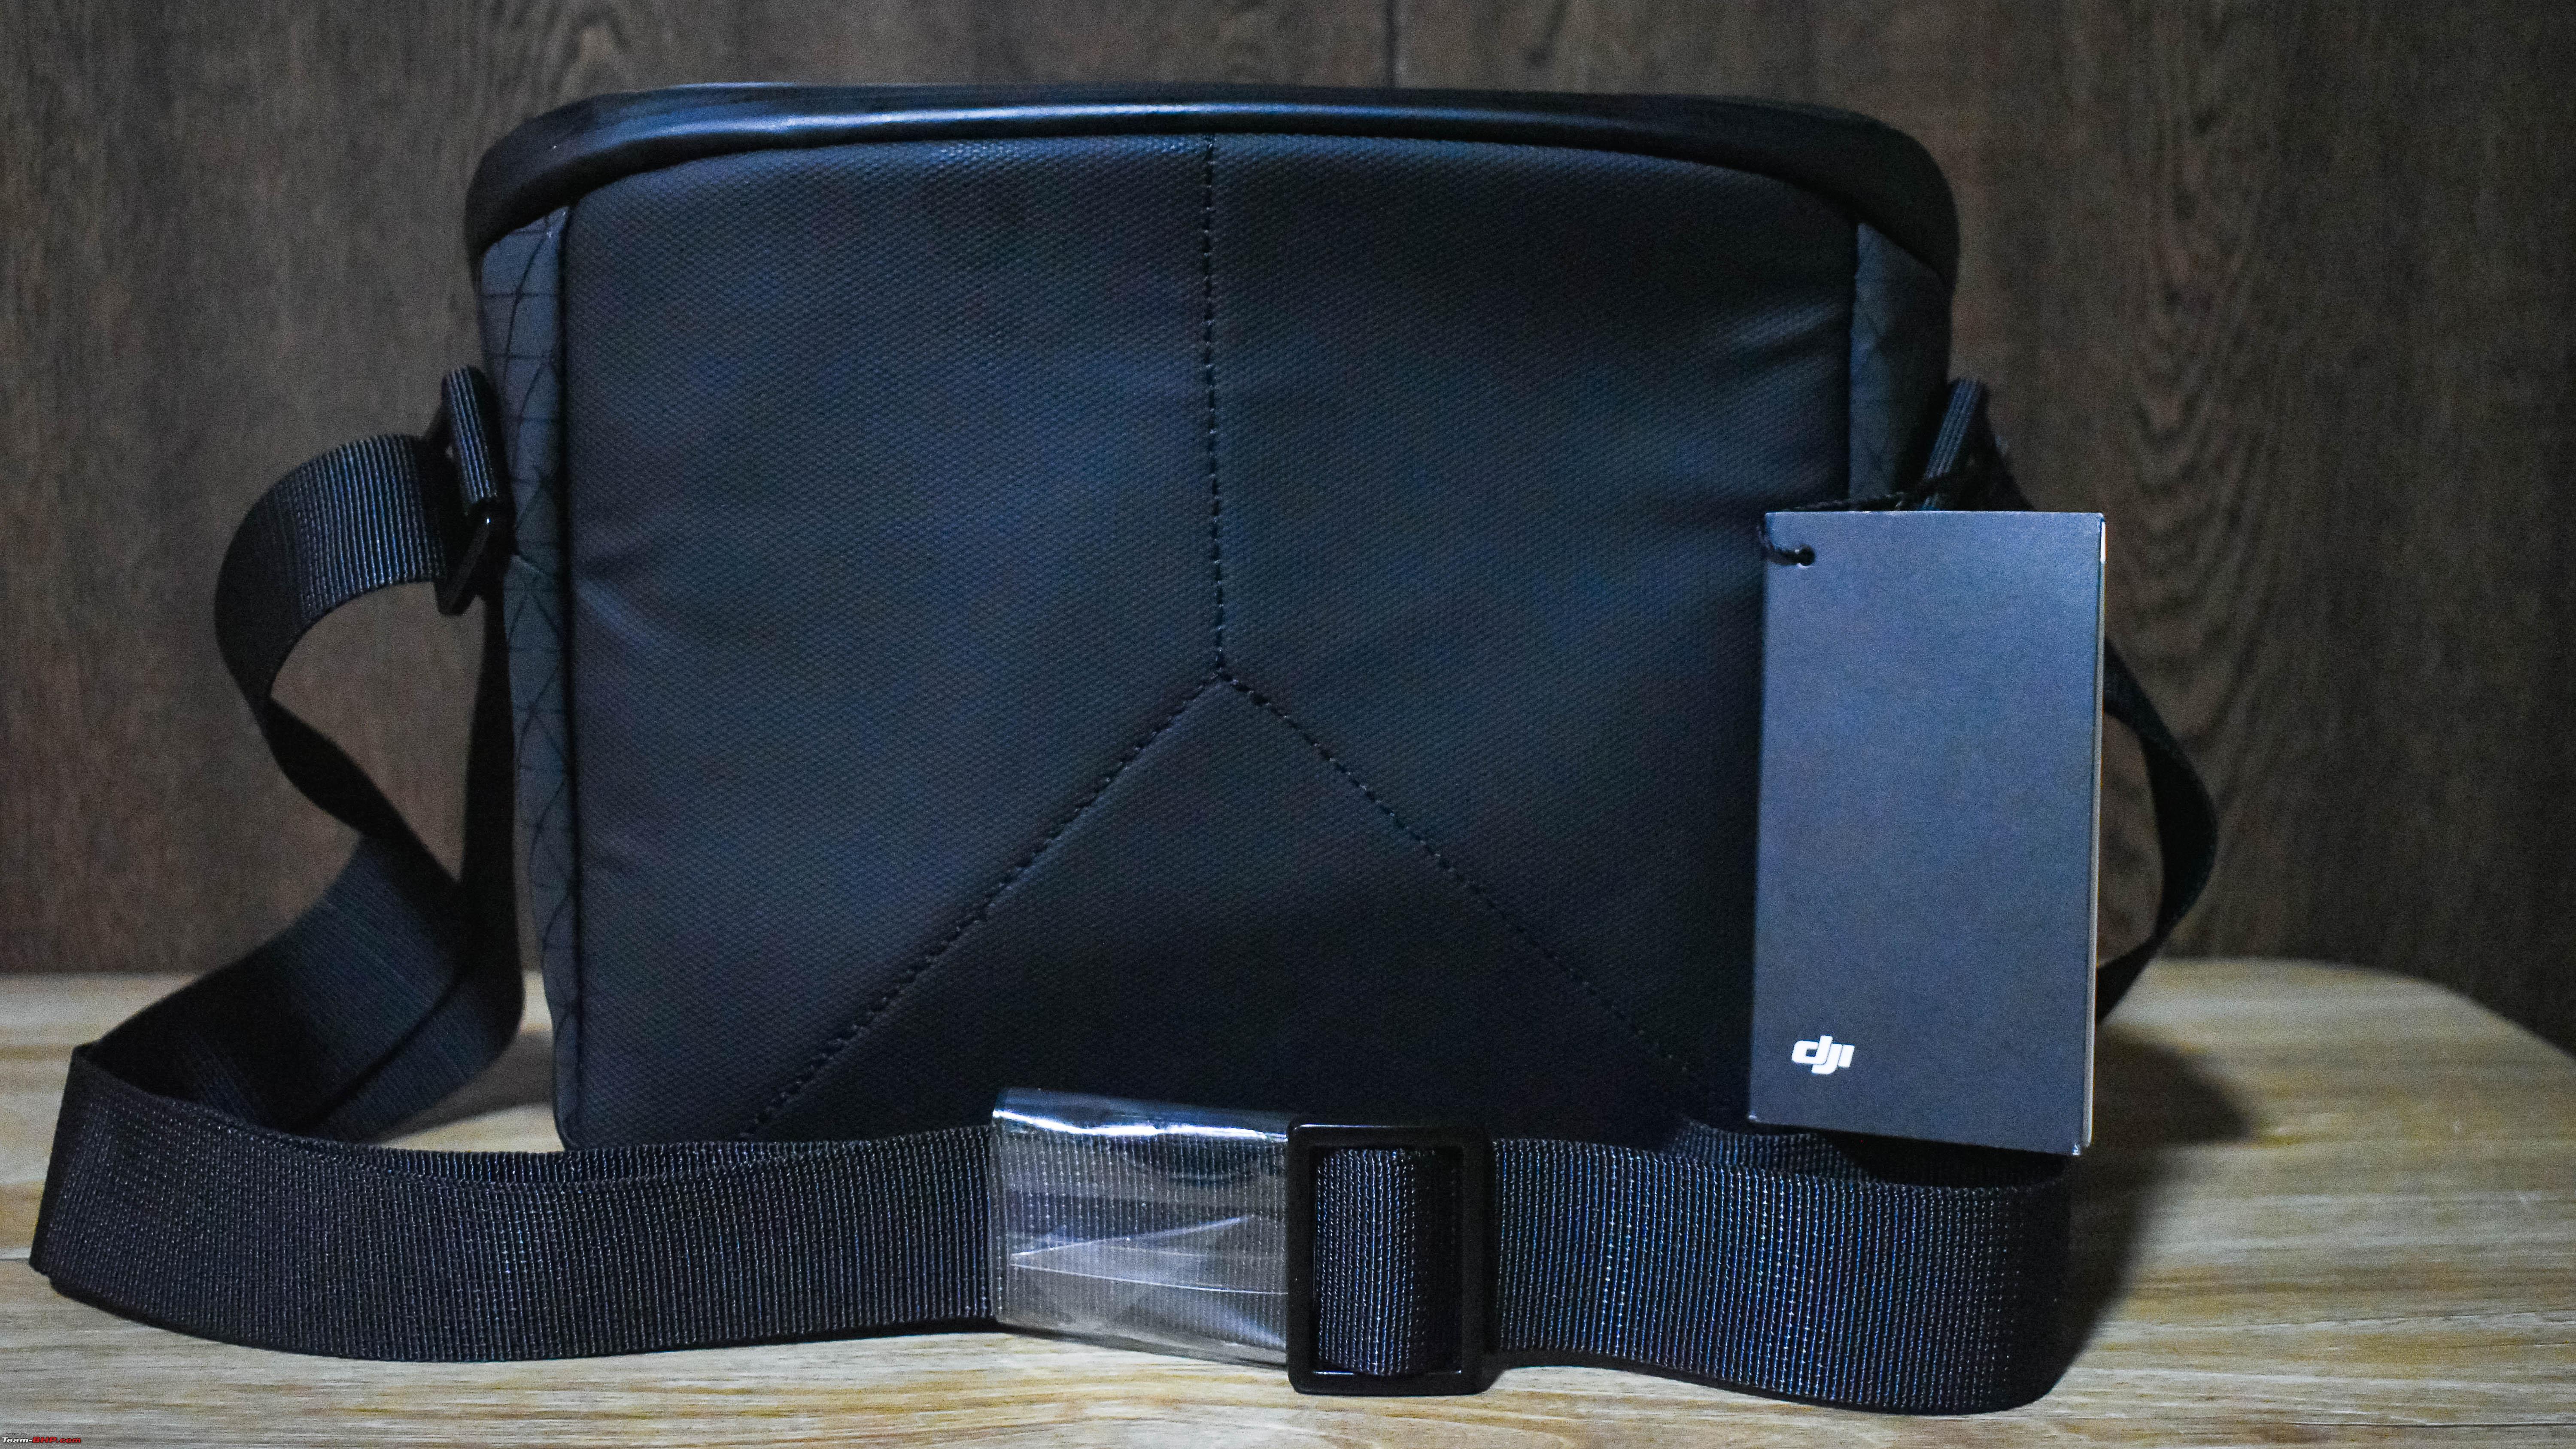 JTP 65 WATT PD CHARGER: DJI recommends a 30-watt fast charger for charging the batteries. Unfortunately, it is sold separately and not a part of the combo package. Since, it was out of stock at the store, I had to purchase a 65-watt PD fast charger along with a 3.0A cable in India. The JTP 65-watt charger is an intelligent and advanced Type-C to Type-C fast charger. There are USB-PD ports on it as well. It automatically detects and identifies the type of device connected to it and the amount of power needed to charge the device. Since it only supplies what is needed in a regulated way, there is no chance of batteries getting damaged with high current and it can be safely used to charge the batteries. 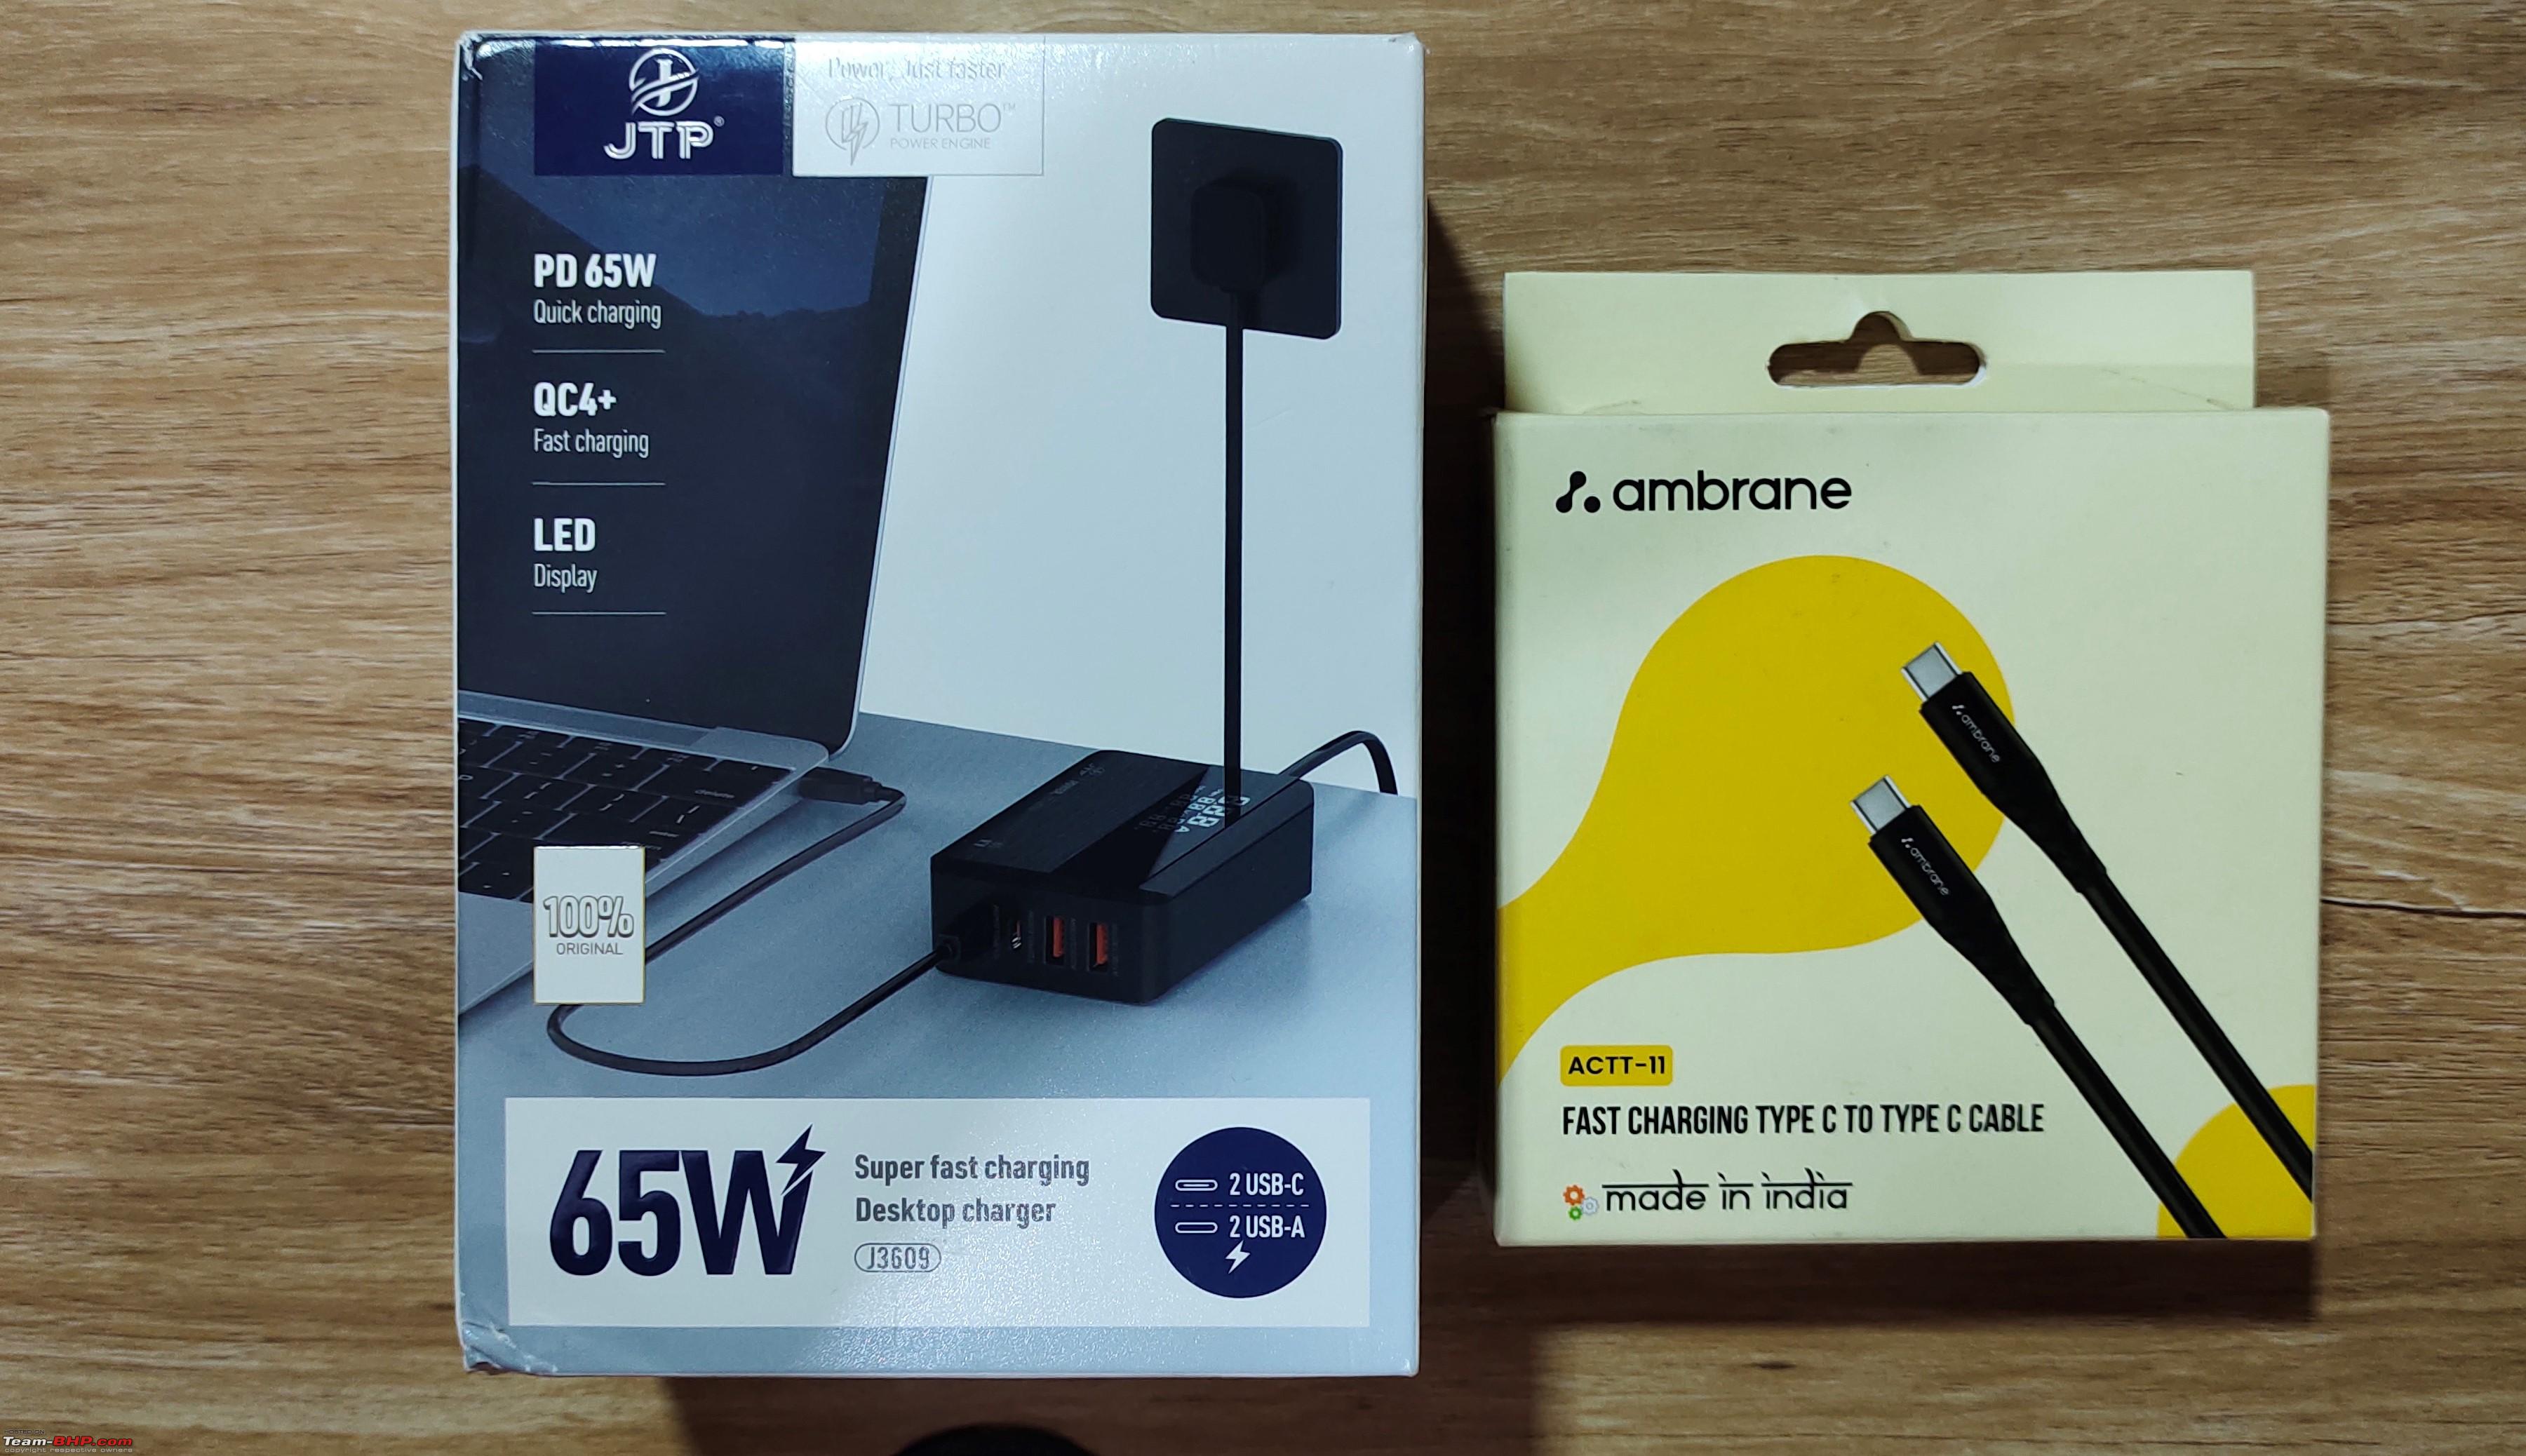 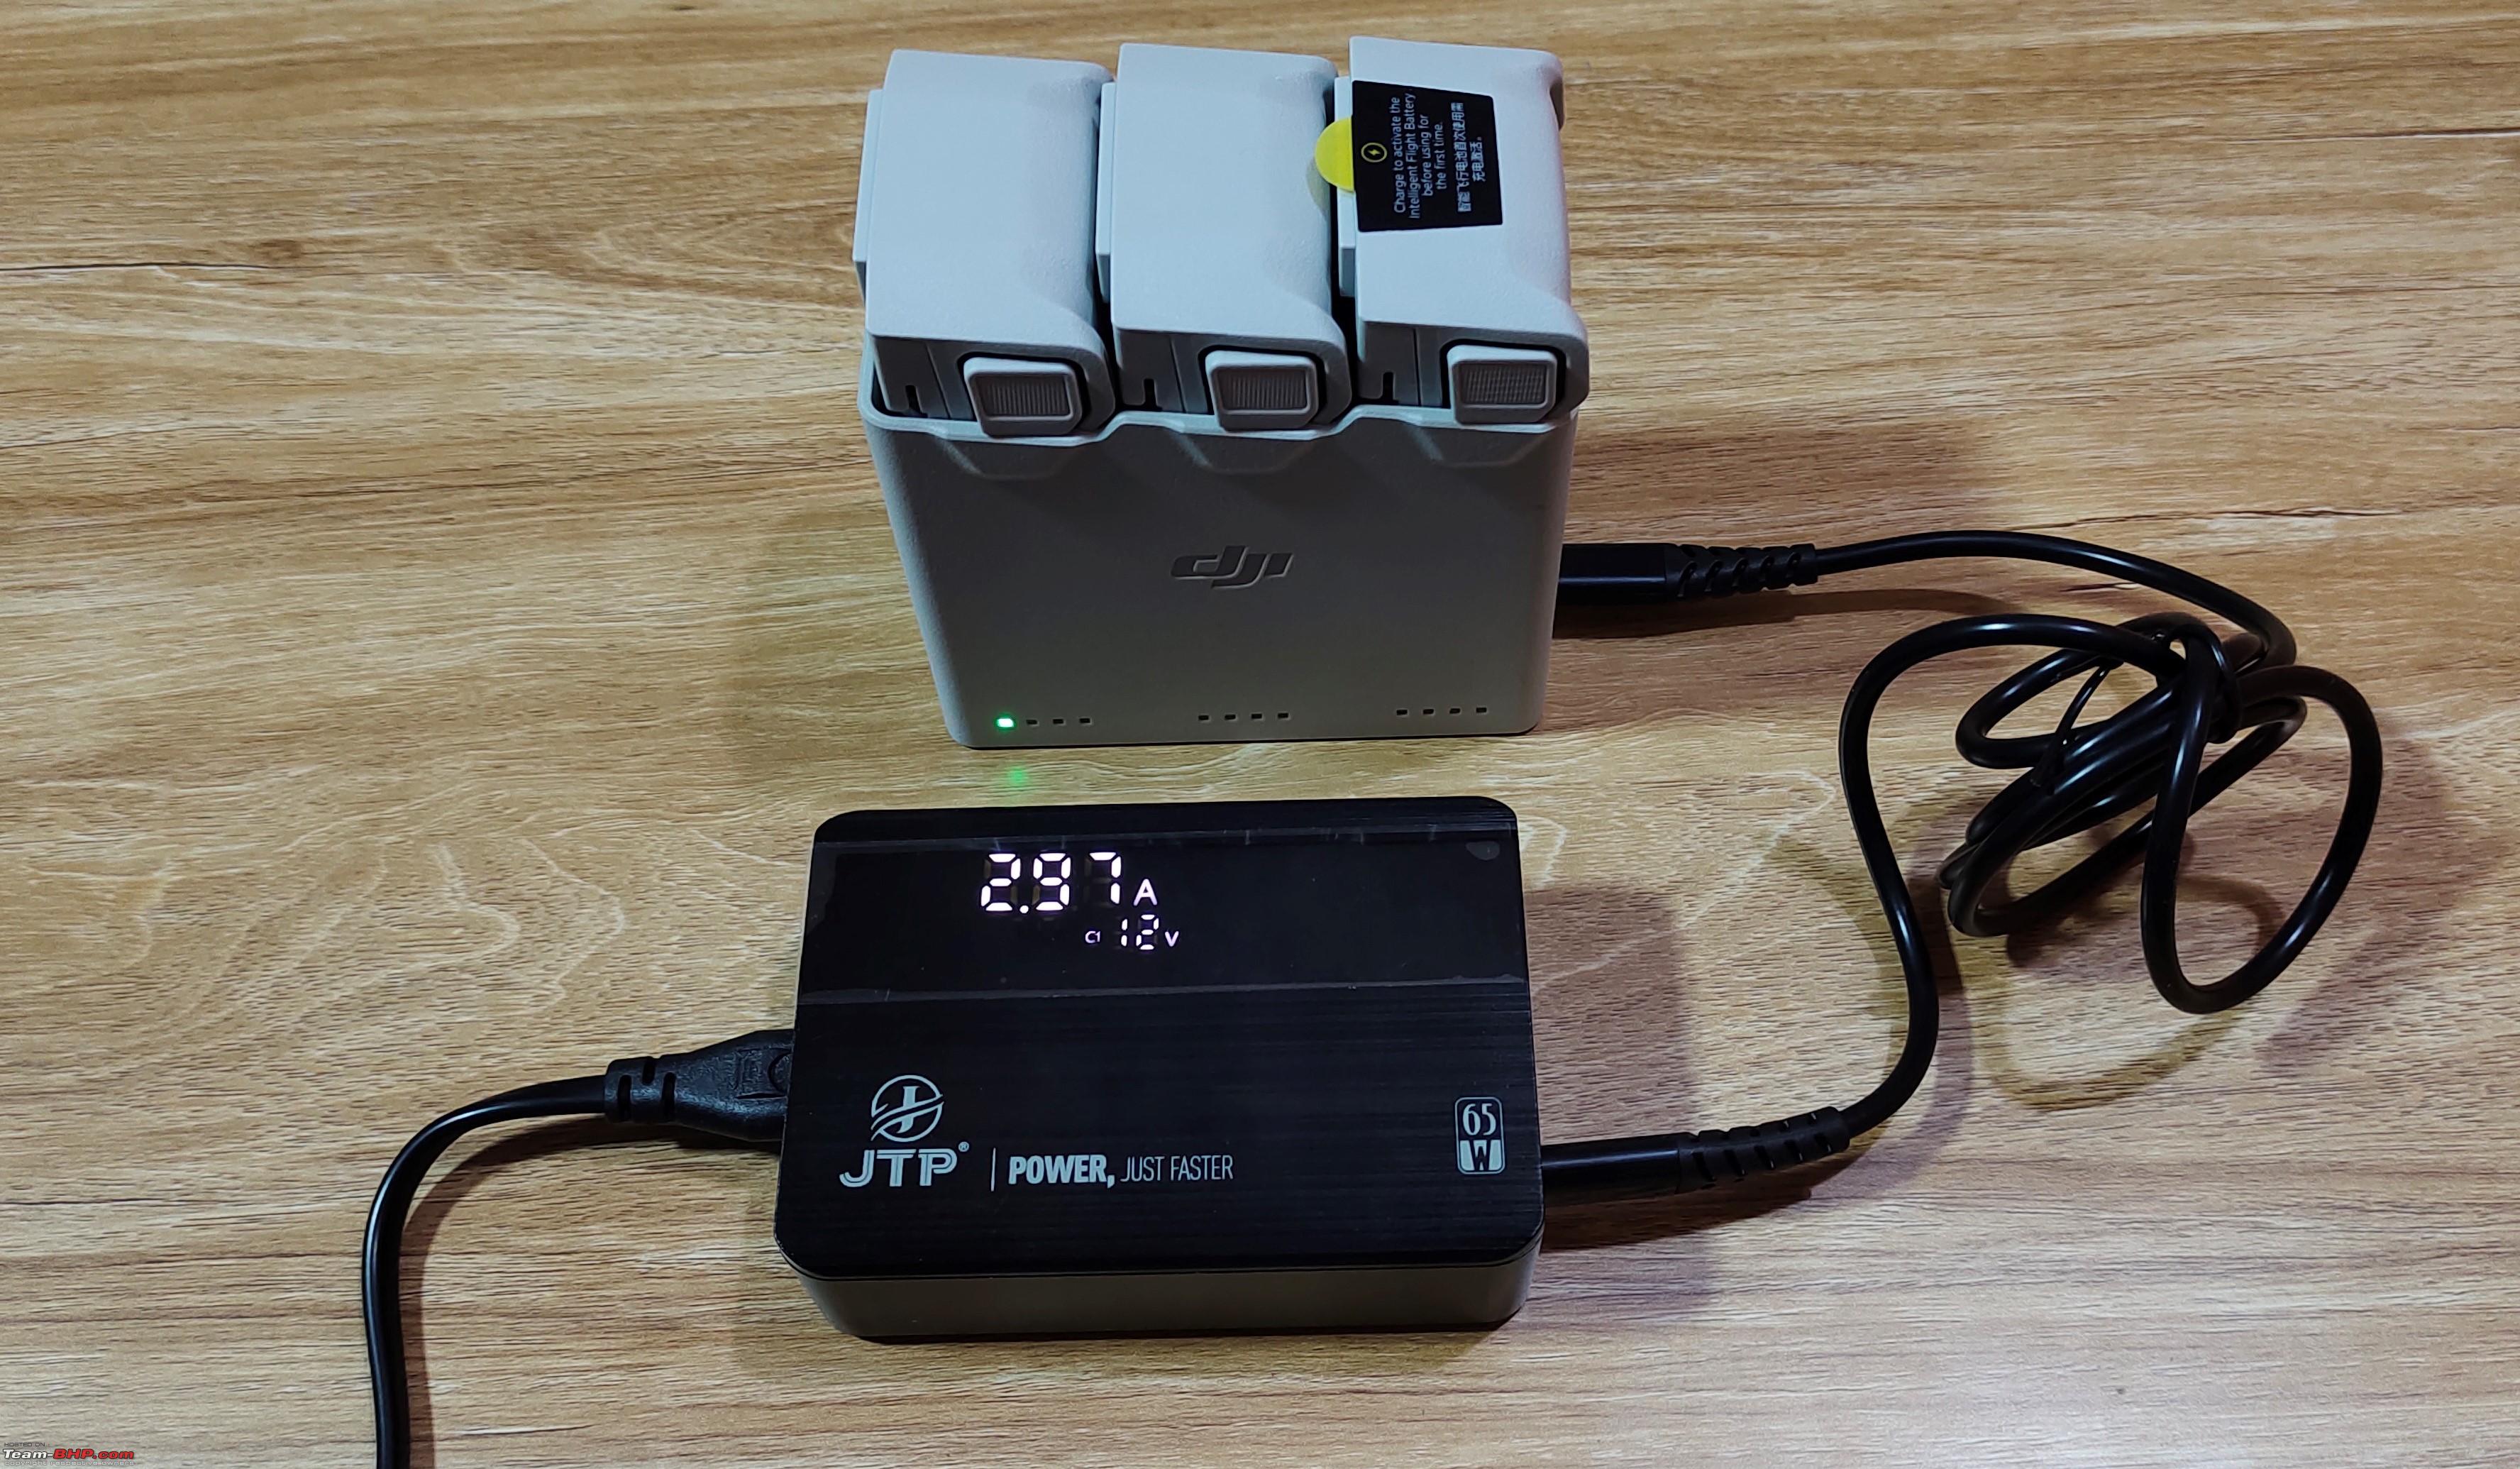 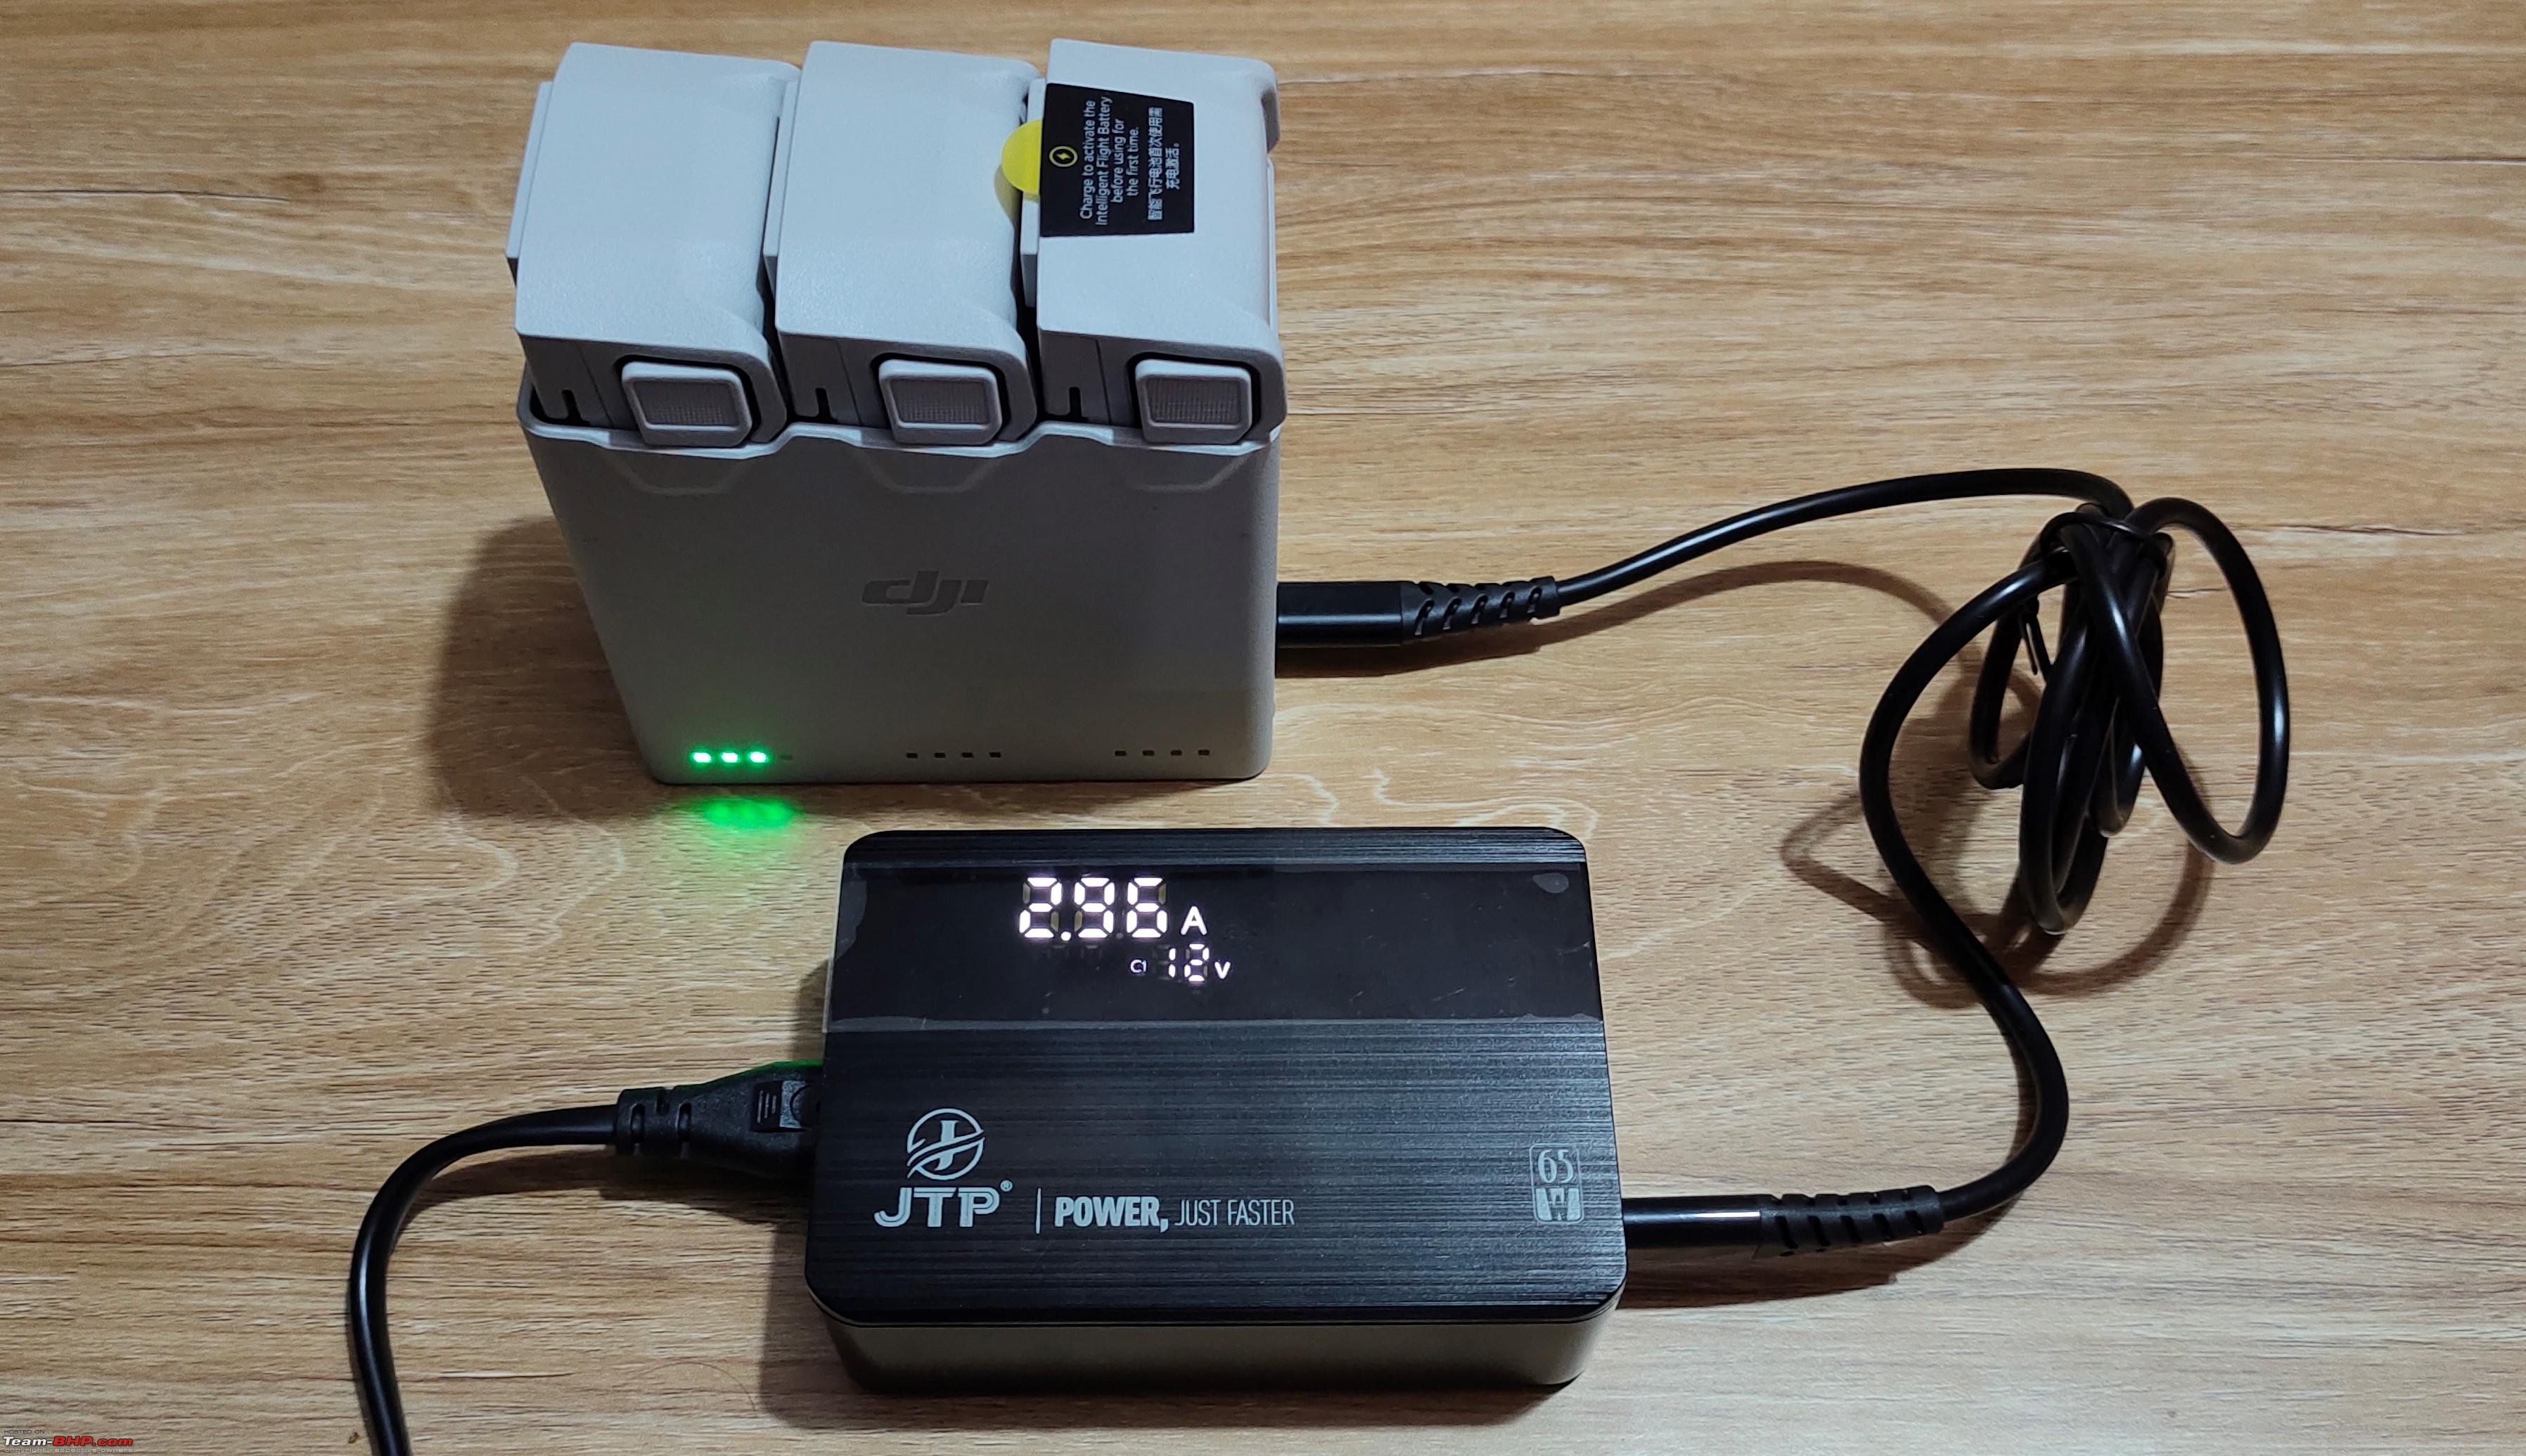 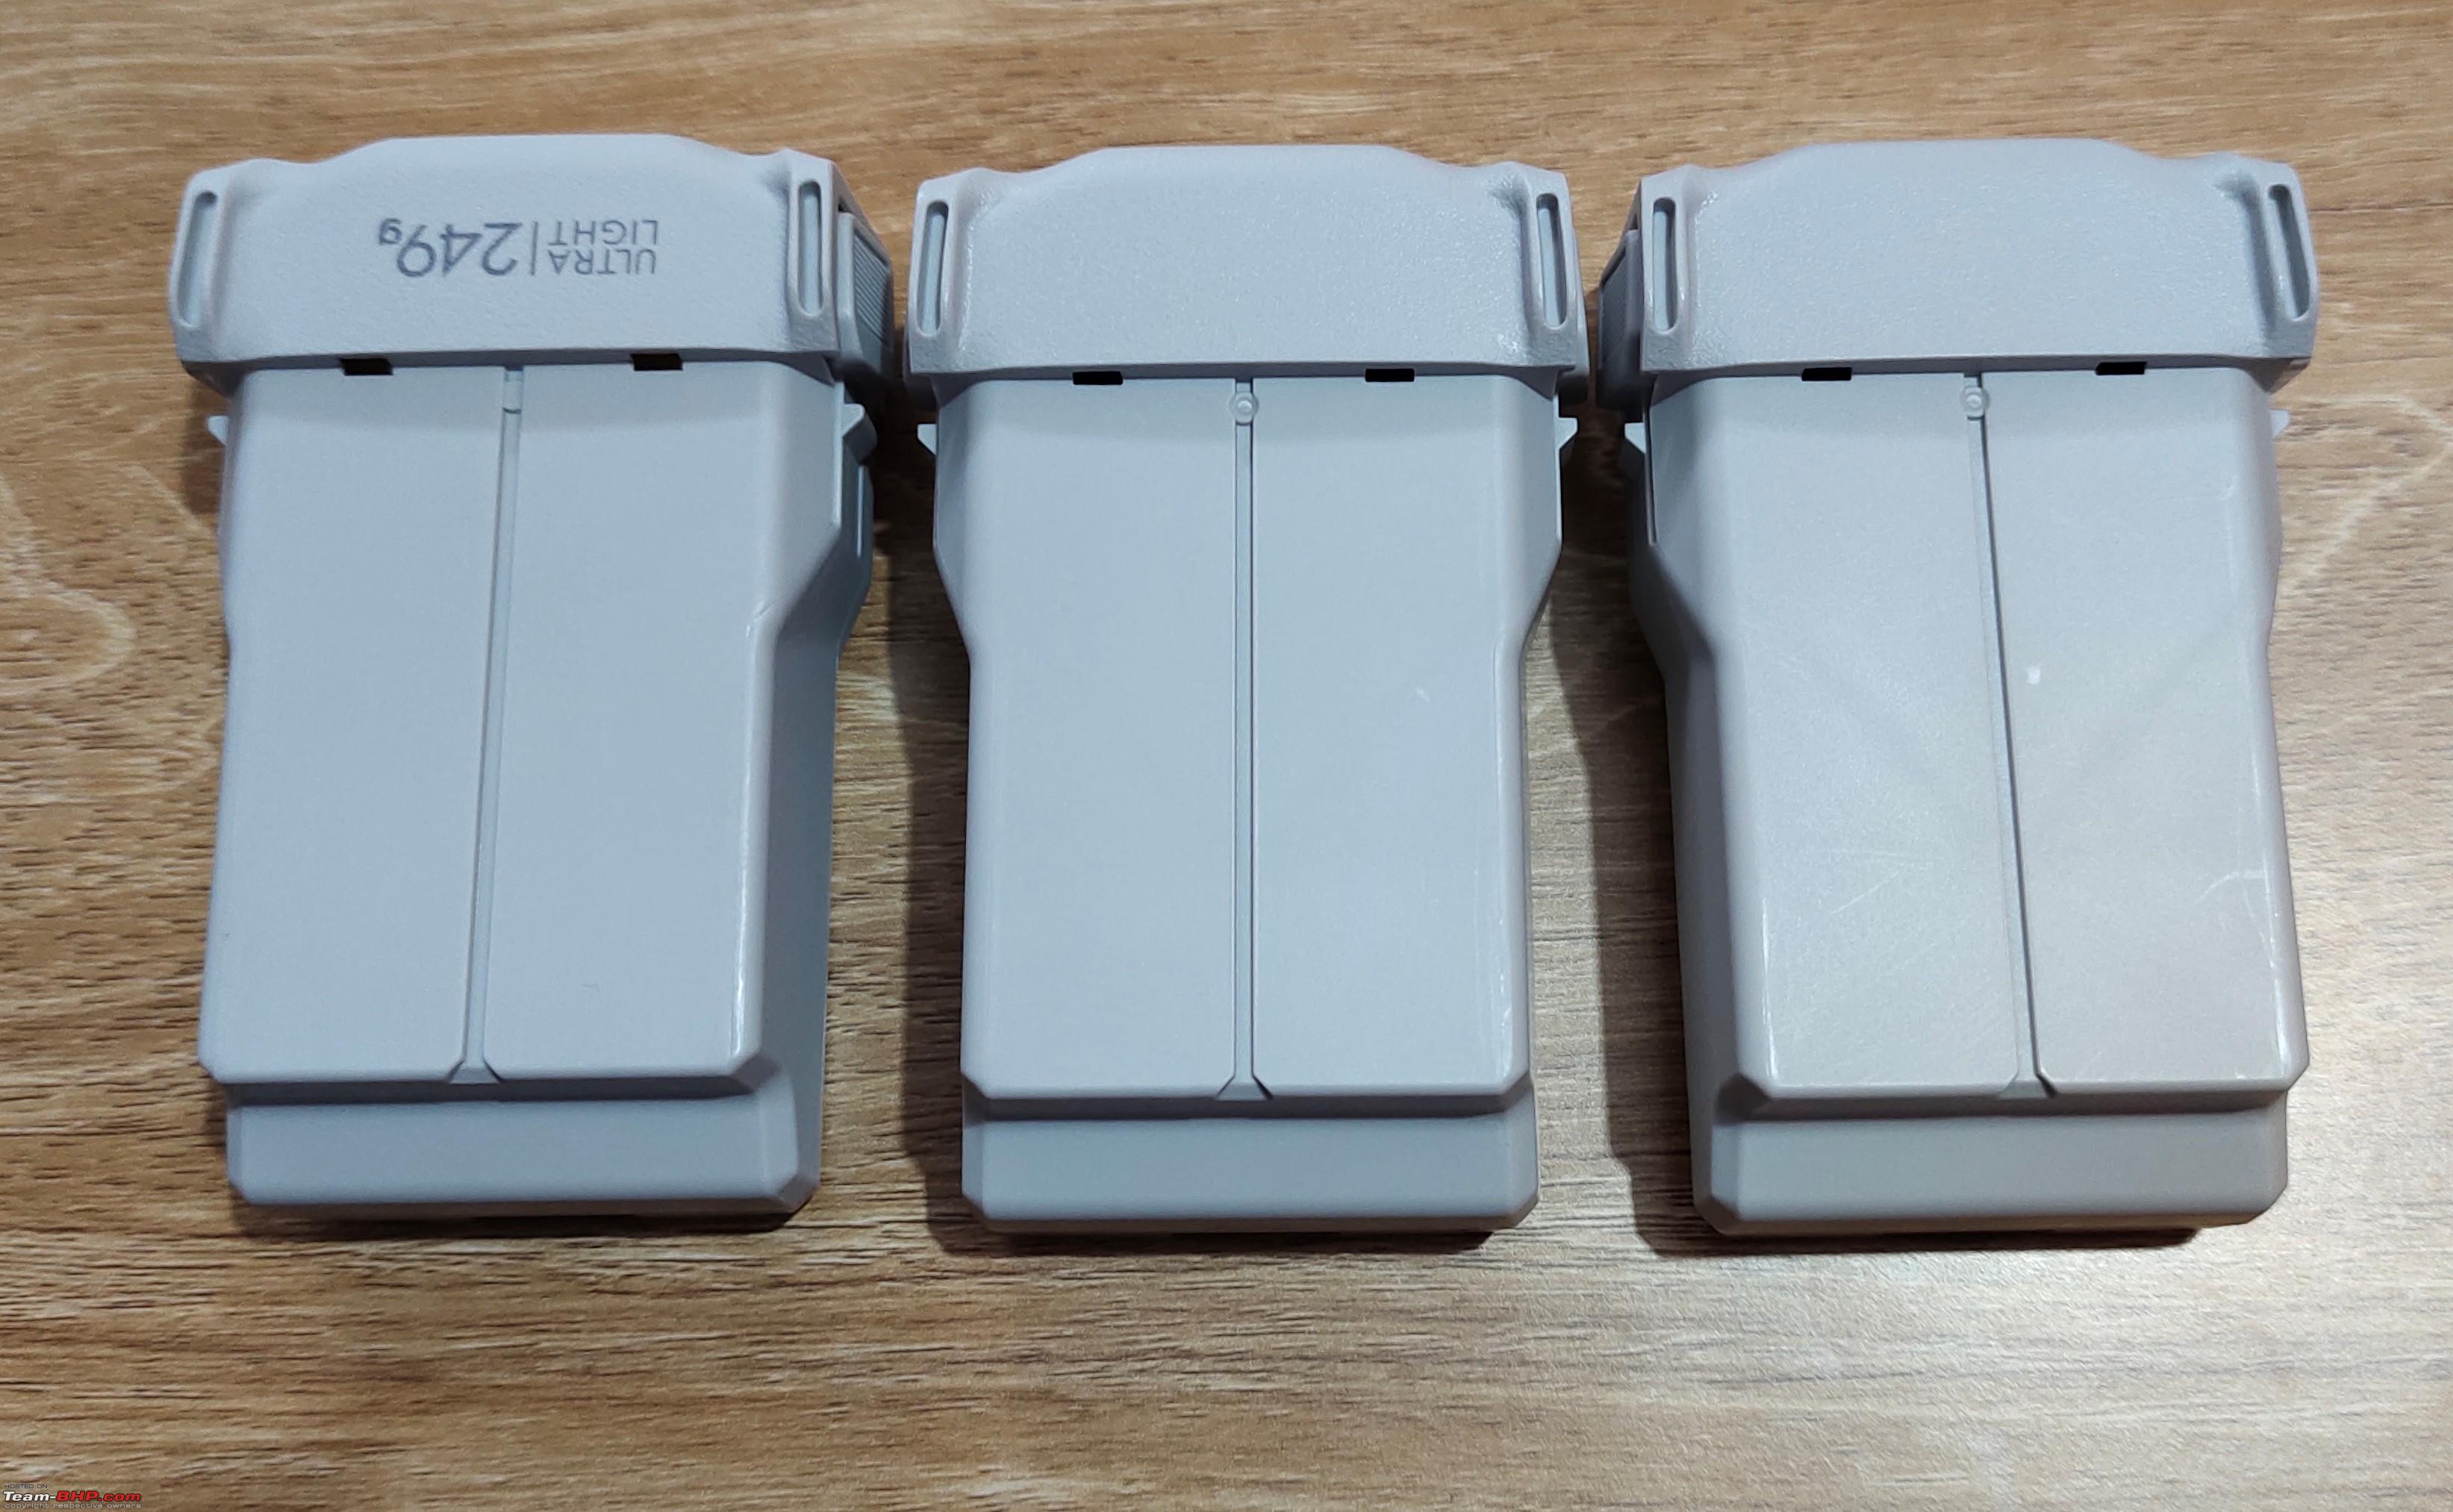  Mi 10K mAh, 22.5-watt pocket sized power bank to charge the batteries on the fly. 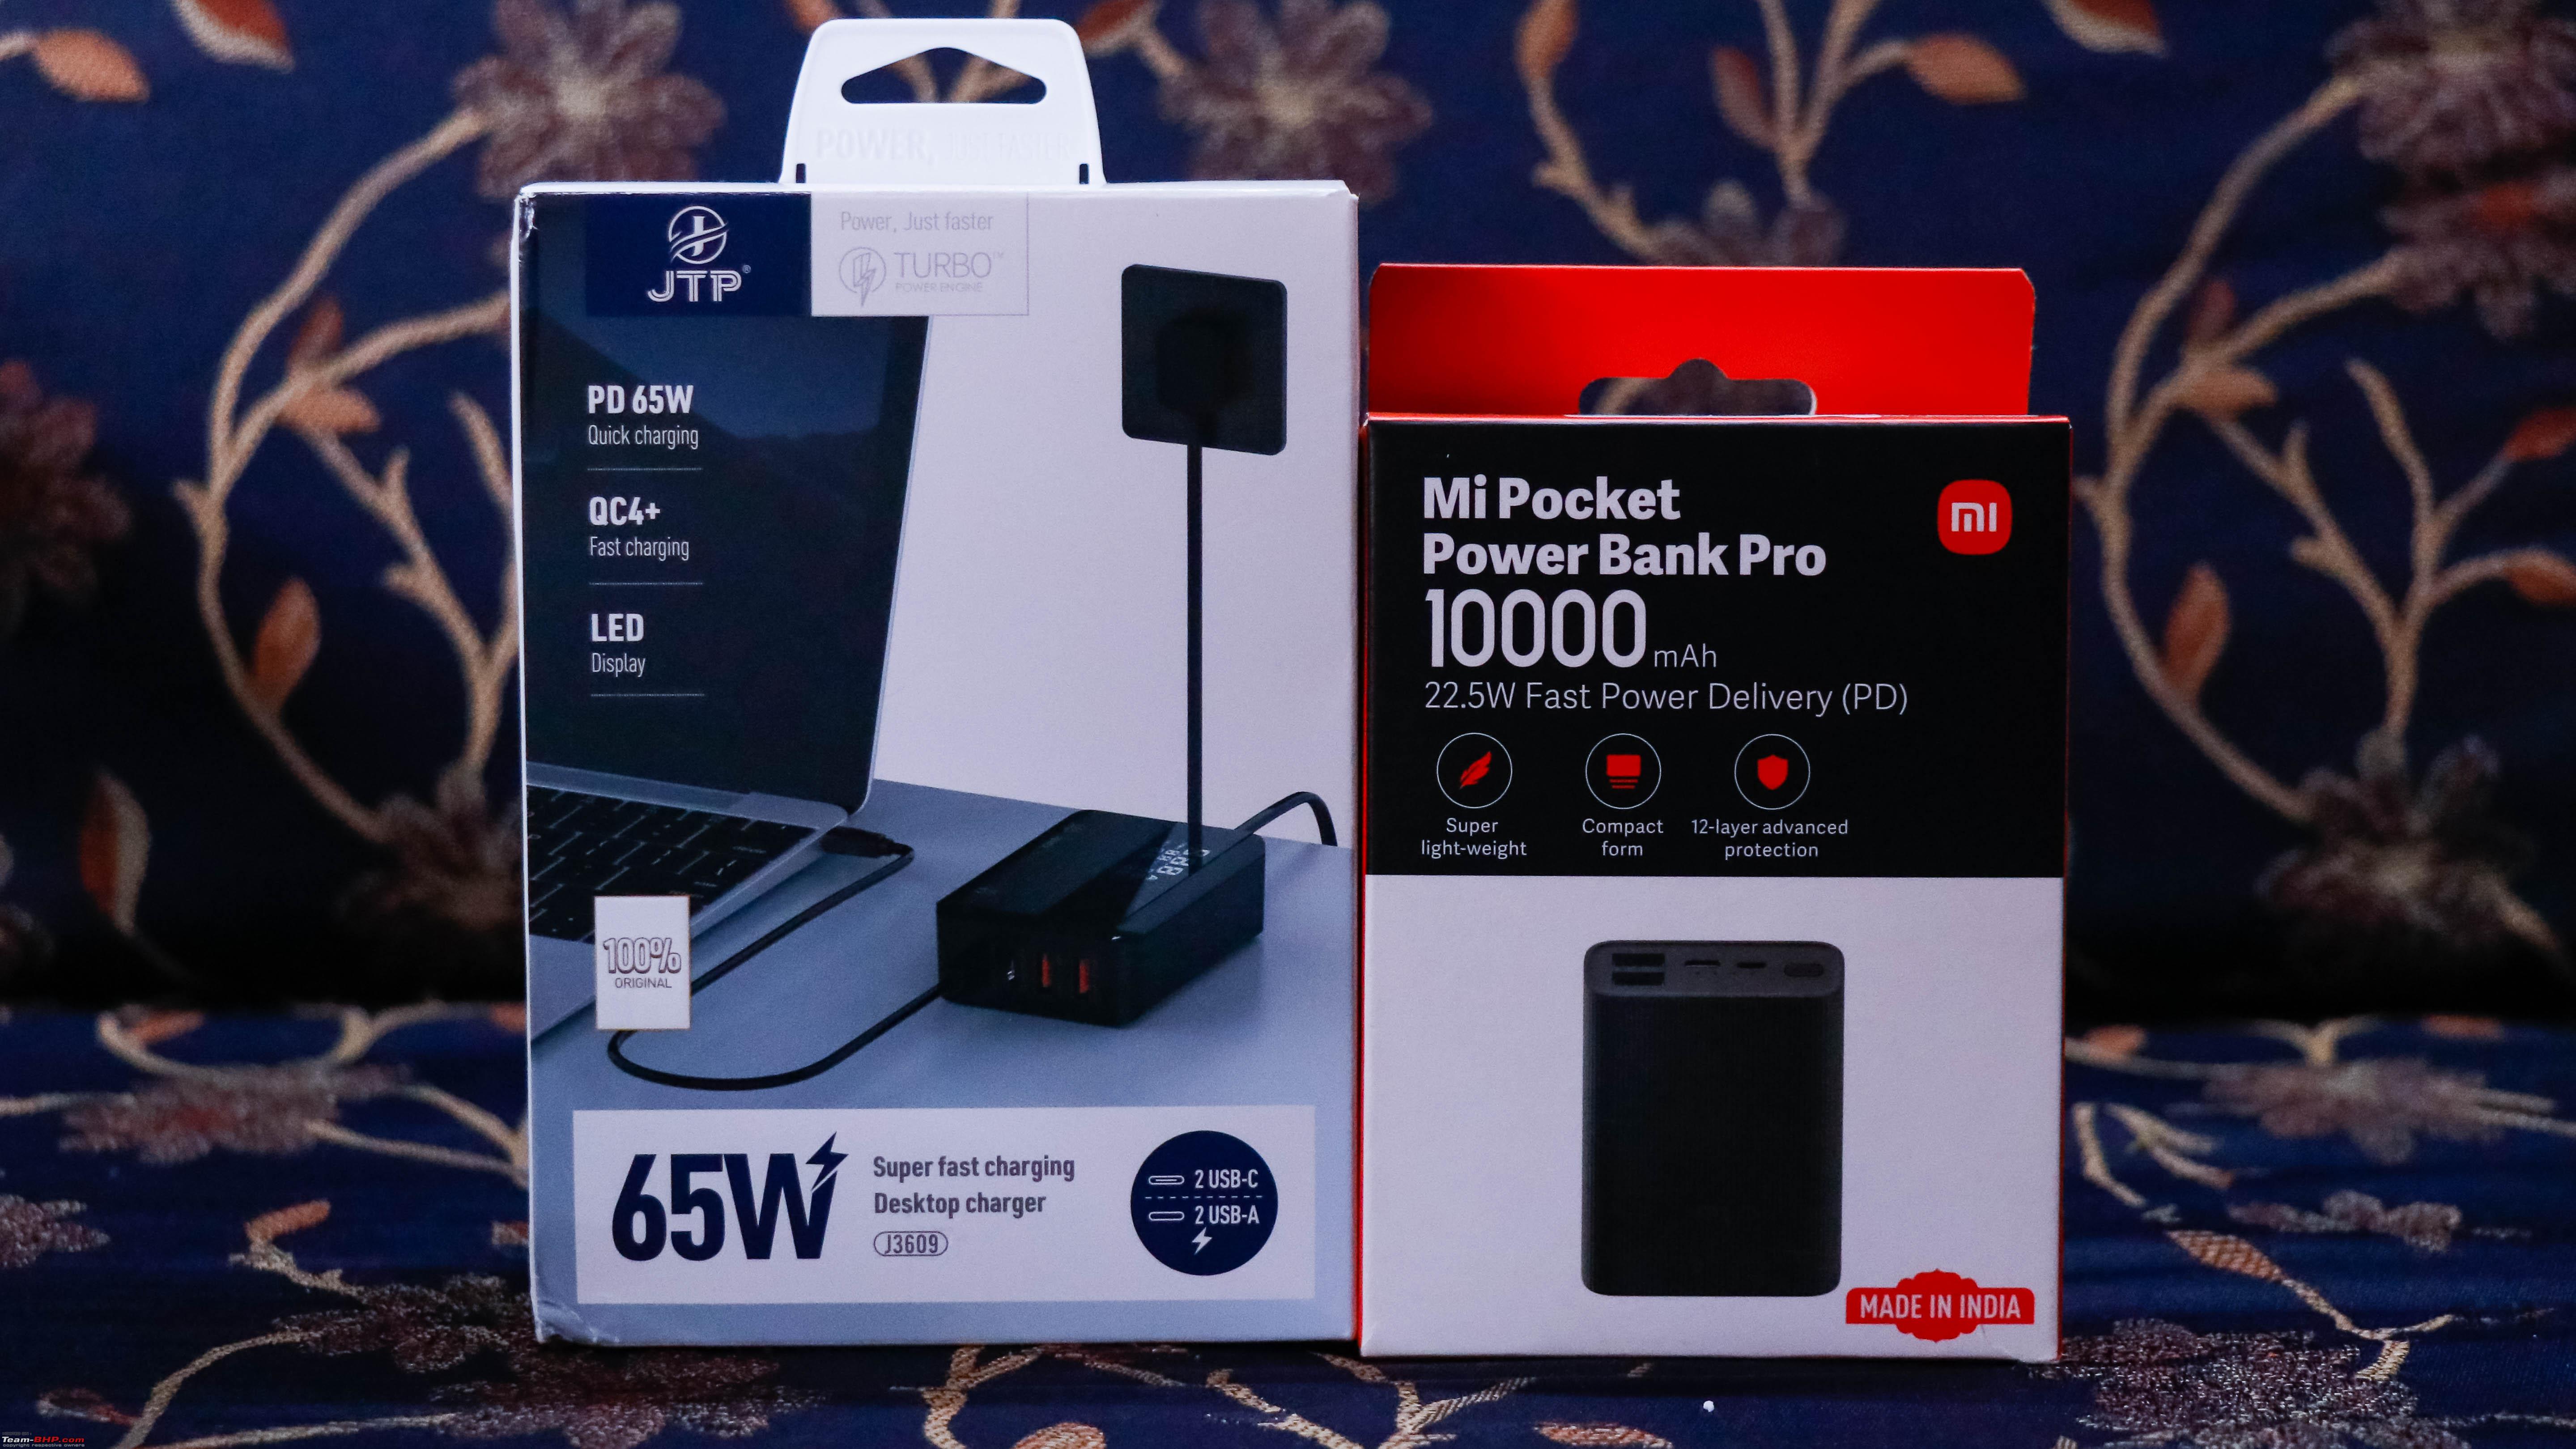 An additional power bank to charge the controller on the fly. I purchased the Samsung 25 watt charger exclusively for my Samsung Galaxy S20 FE and also use it to charge the controller as the controller does take an awful amount of time to charge fully with an ordinary charger.  PROPELLER STABLIZER: Propeller blades are very delicate and require extreme care. Although the propellers blades lock onto each other, they may come loose at certain times and break off. Prop stabilizer protects them and makes it easy to carry around without worrying. The soft band holds them tight and prevents the propellers from moving all around, gives a good under body protection and also enables the drone to sit straight and flat. 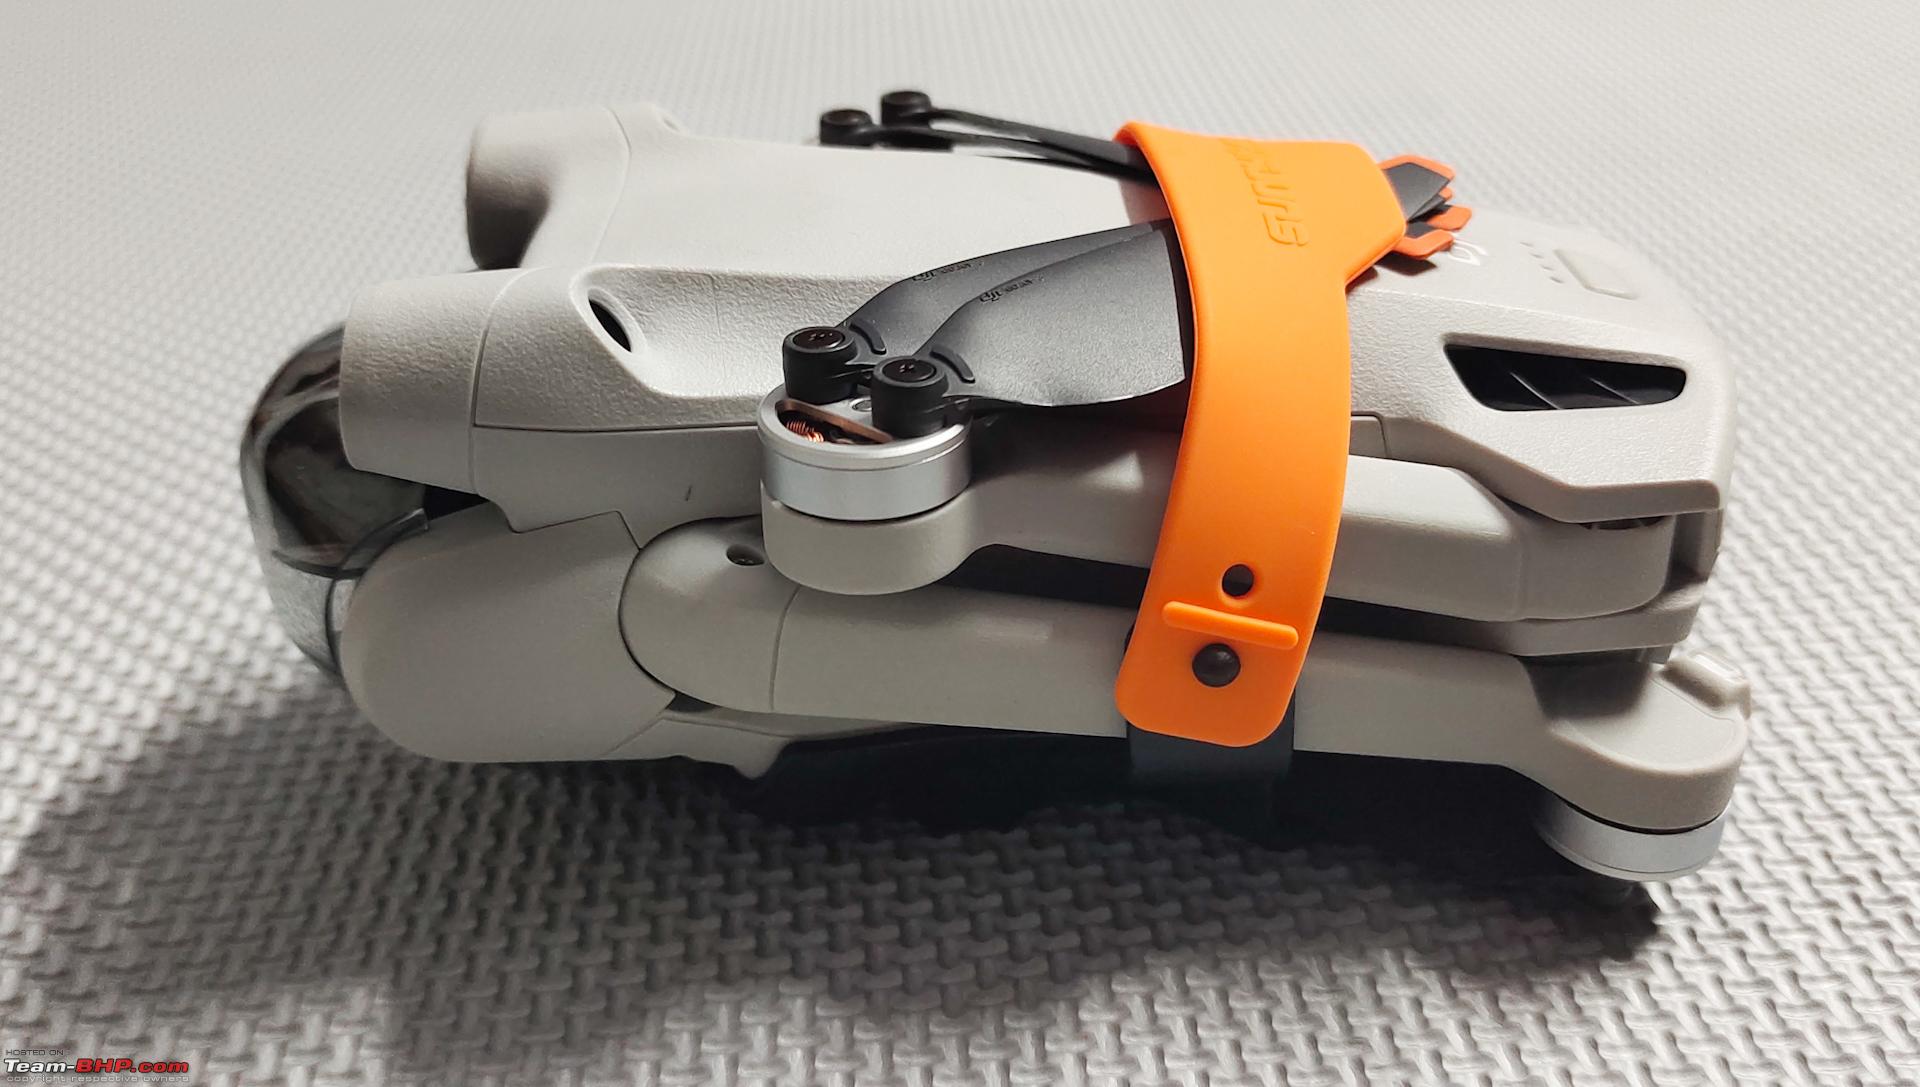 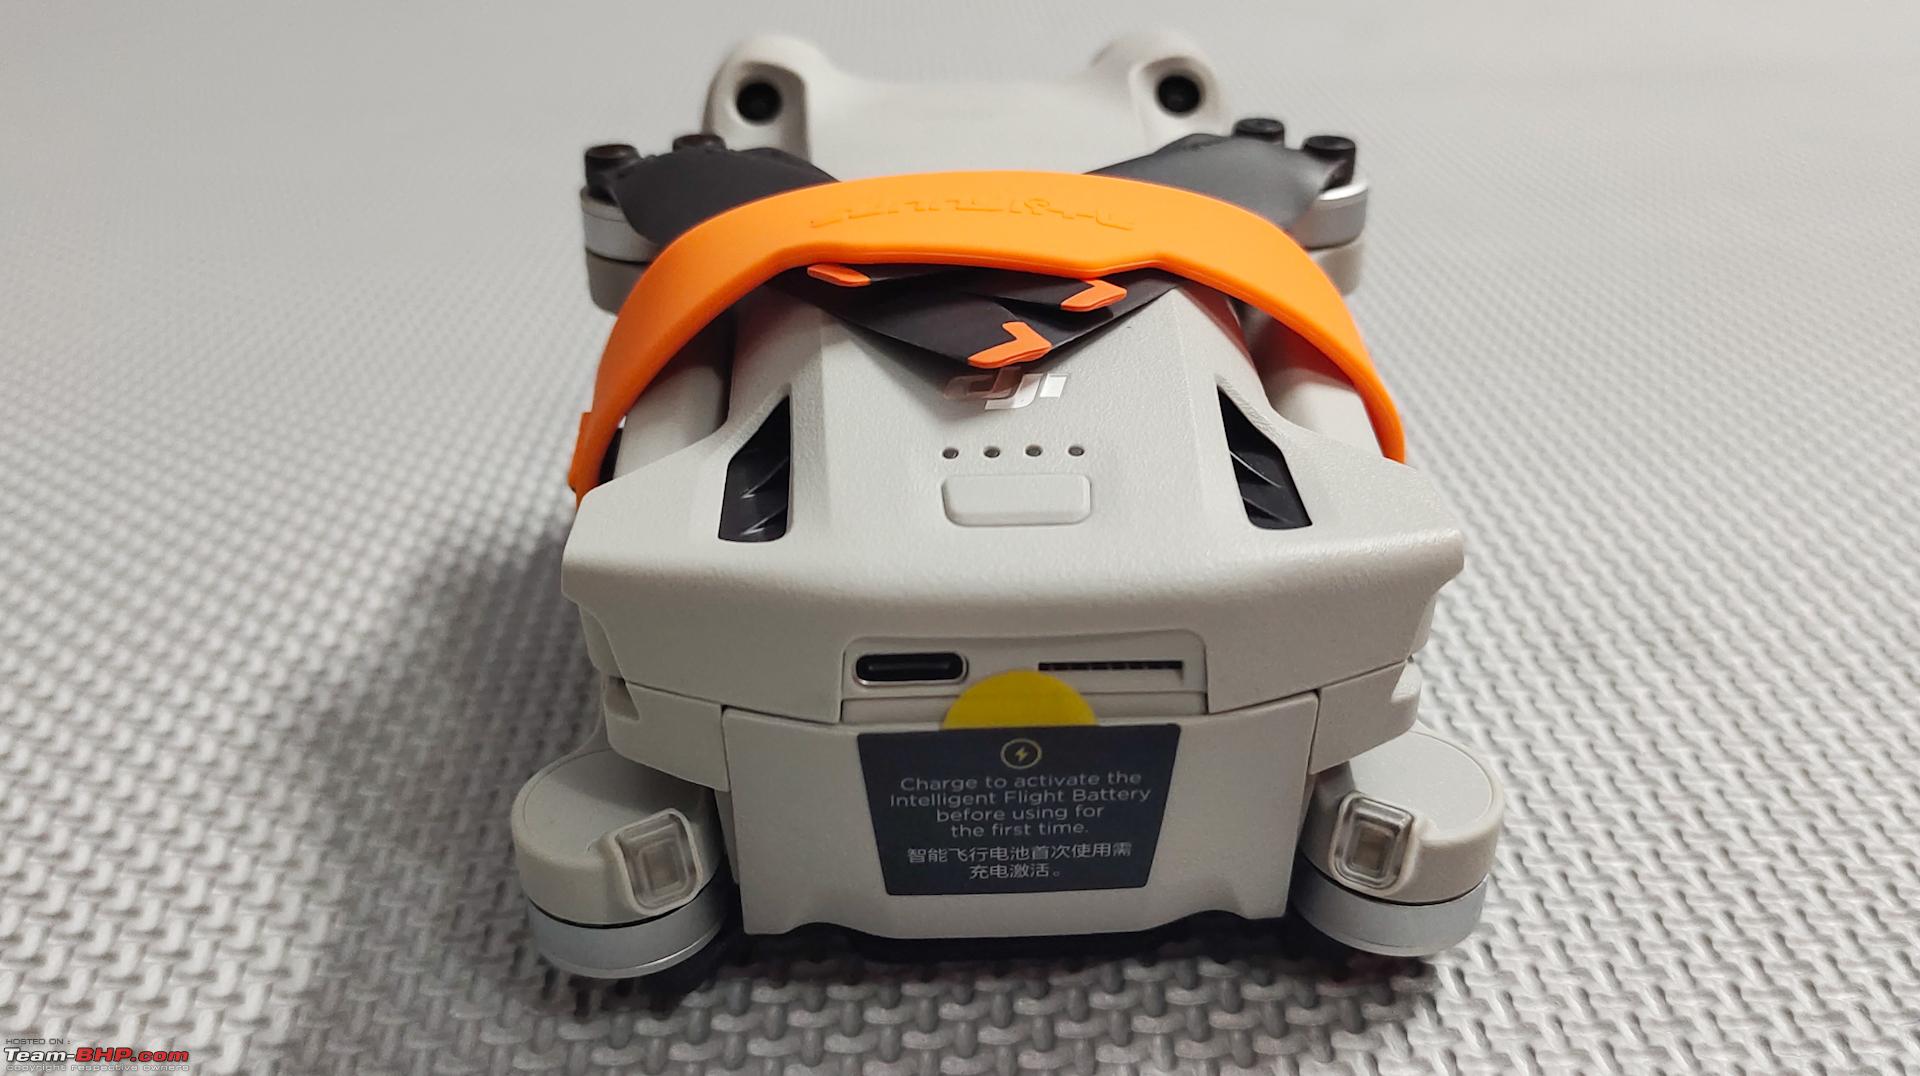   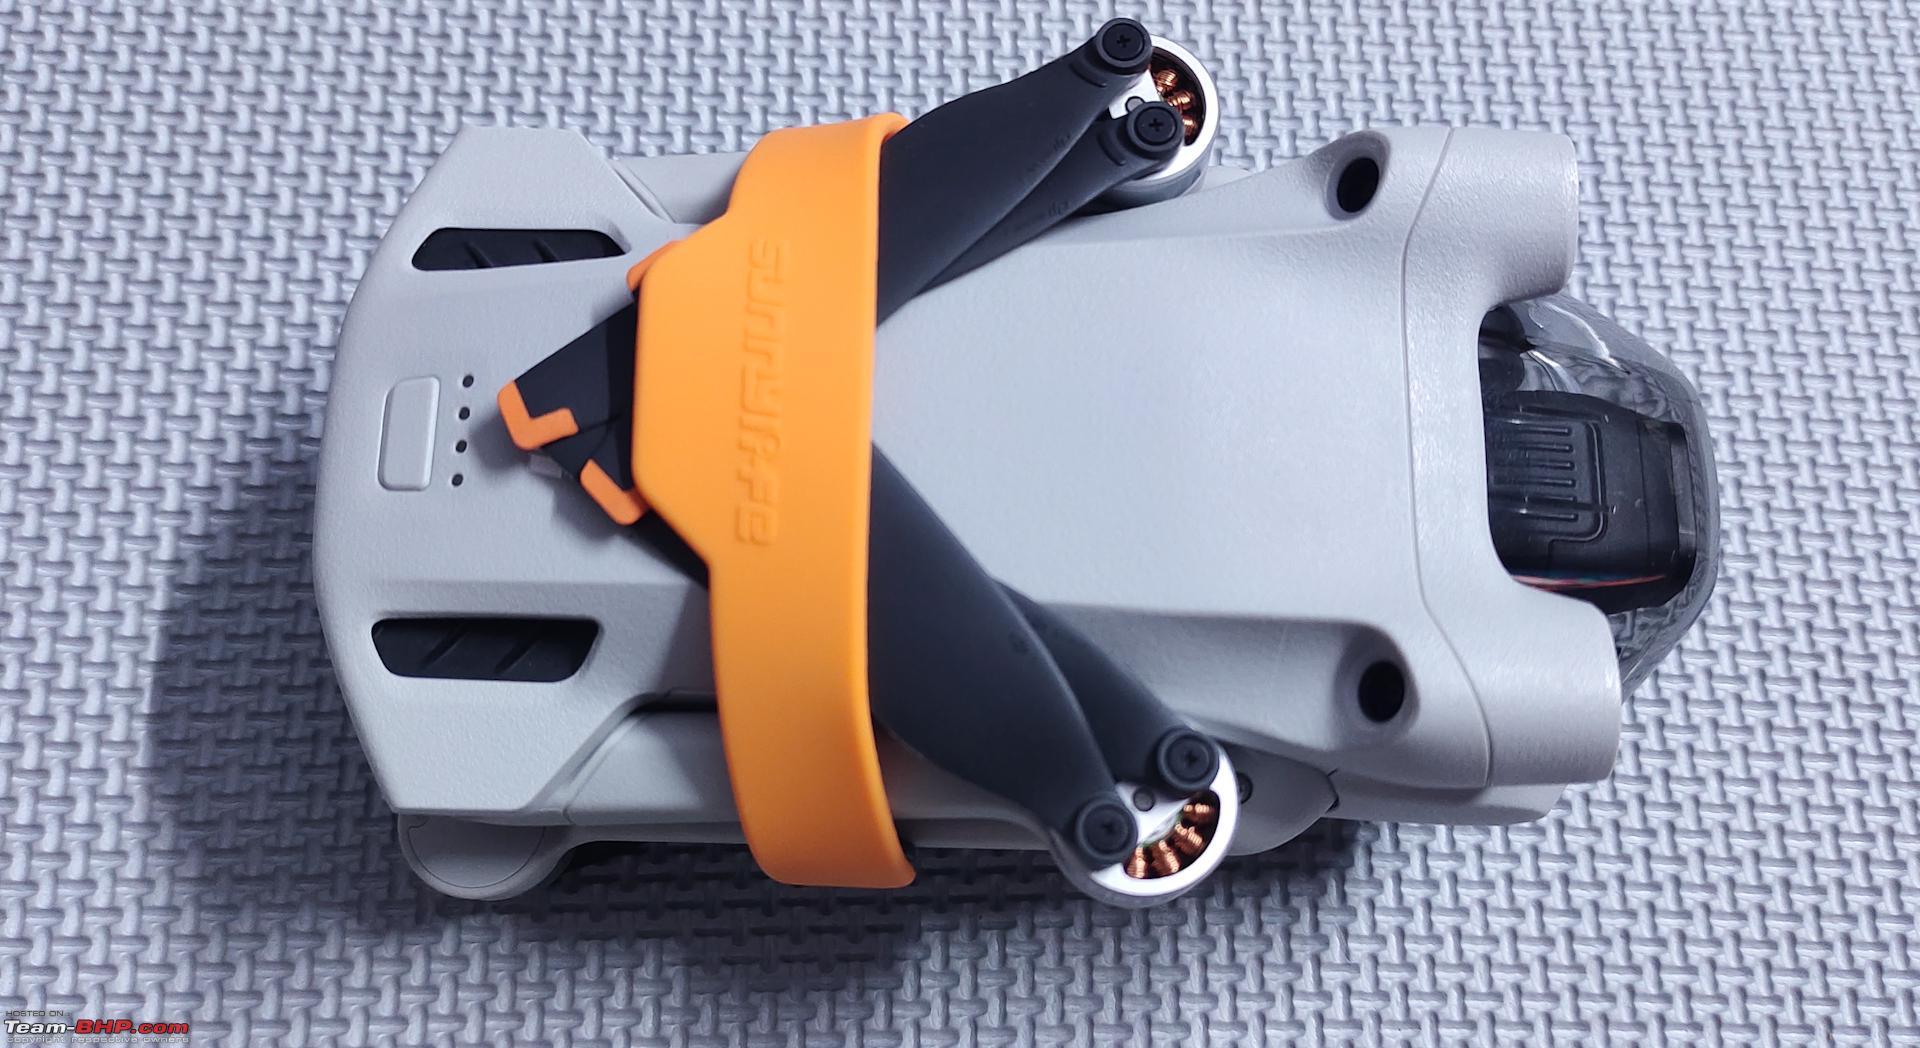 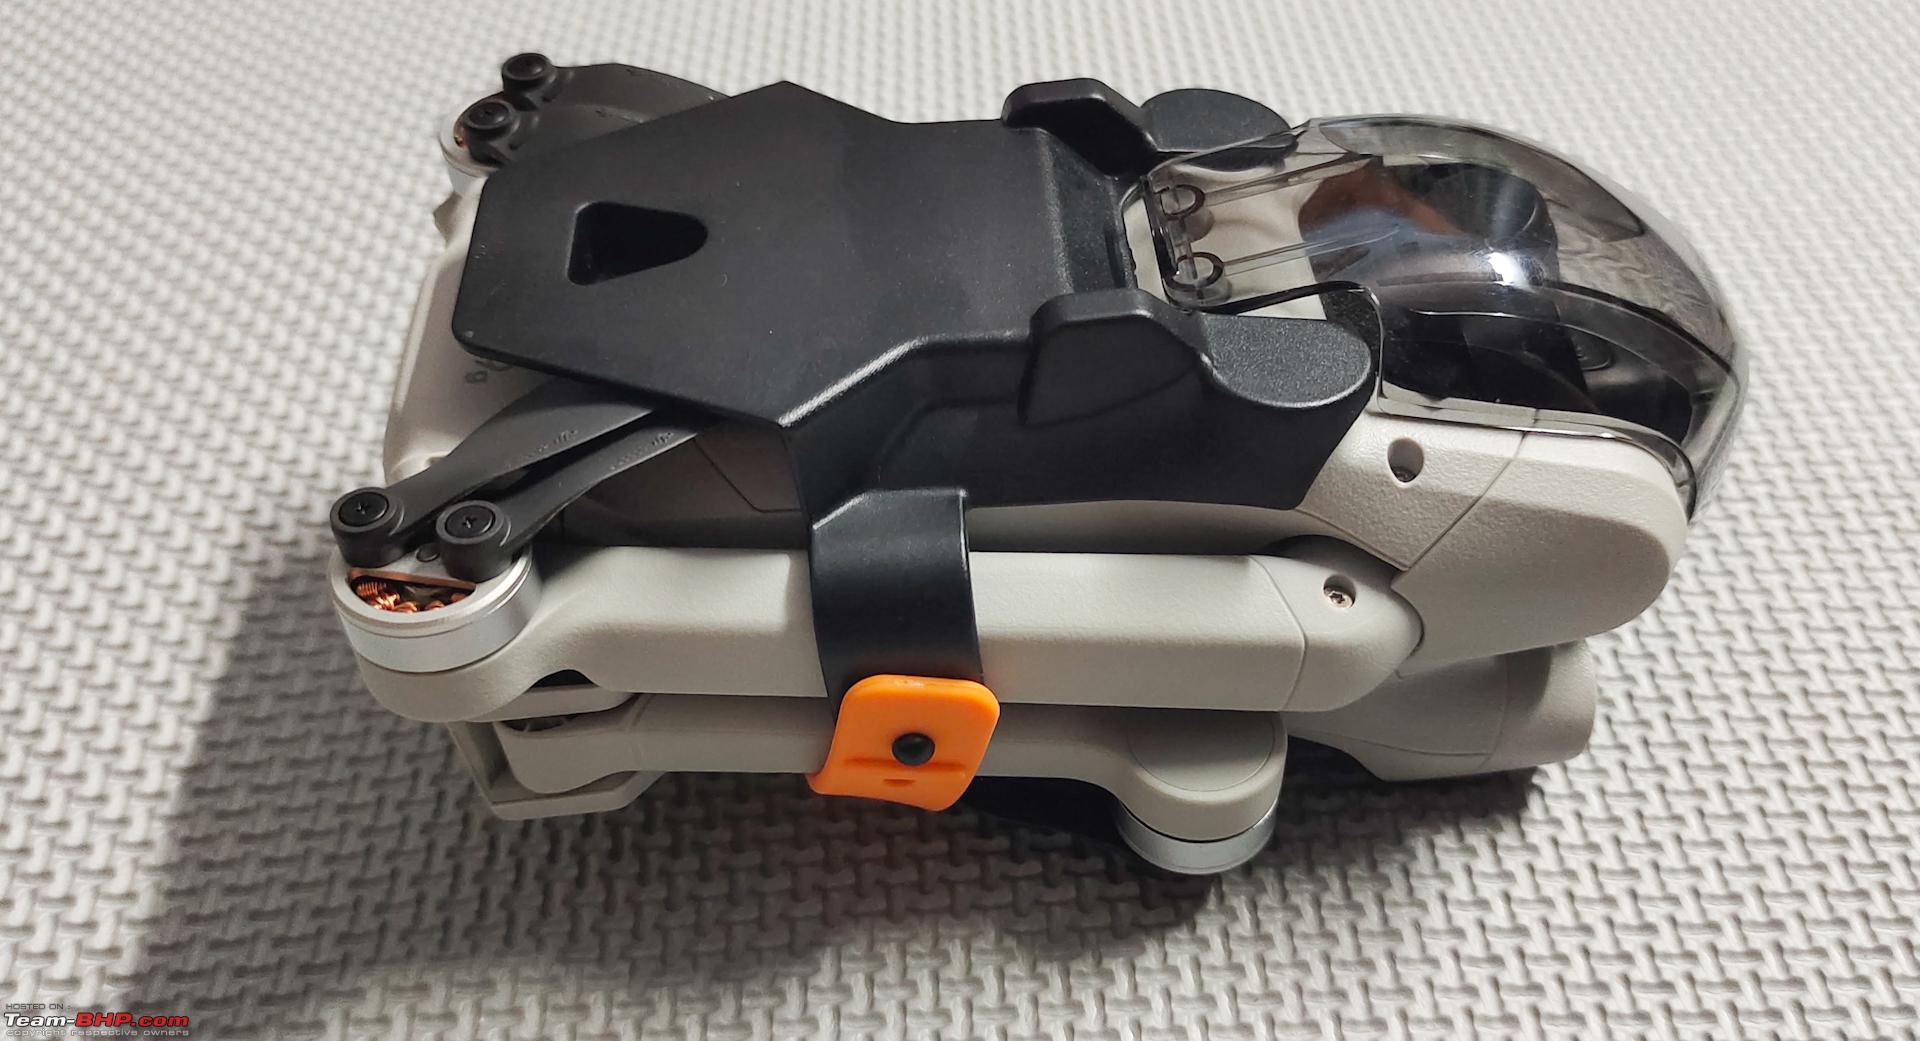   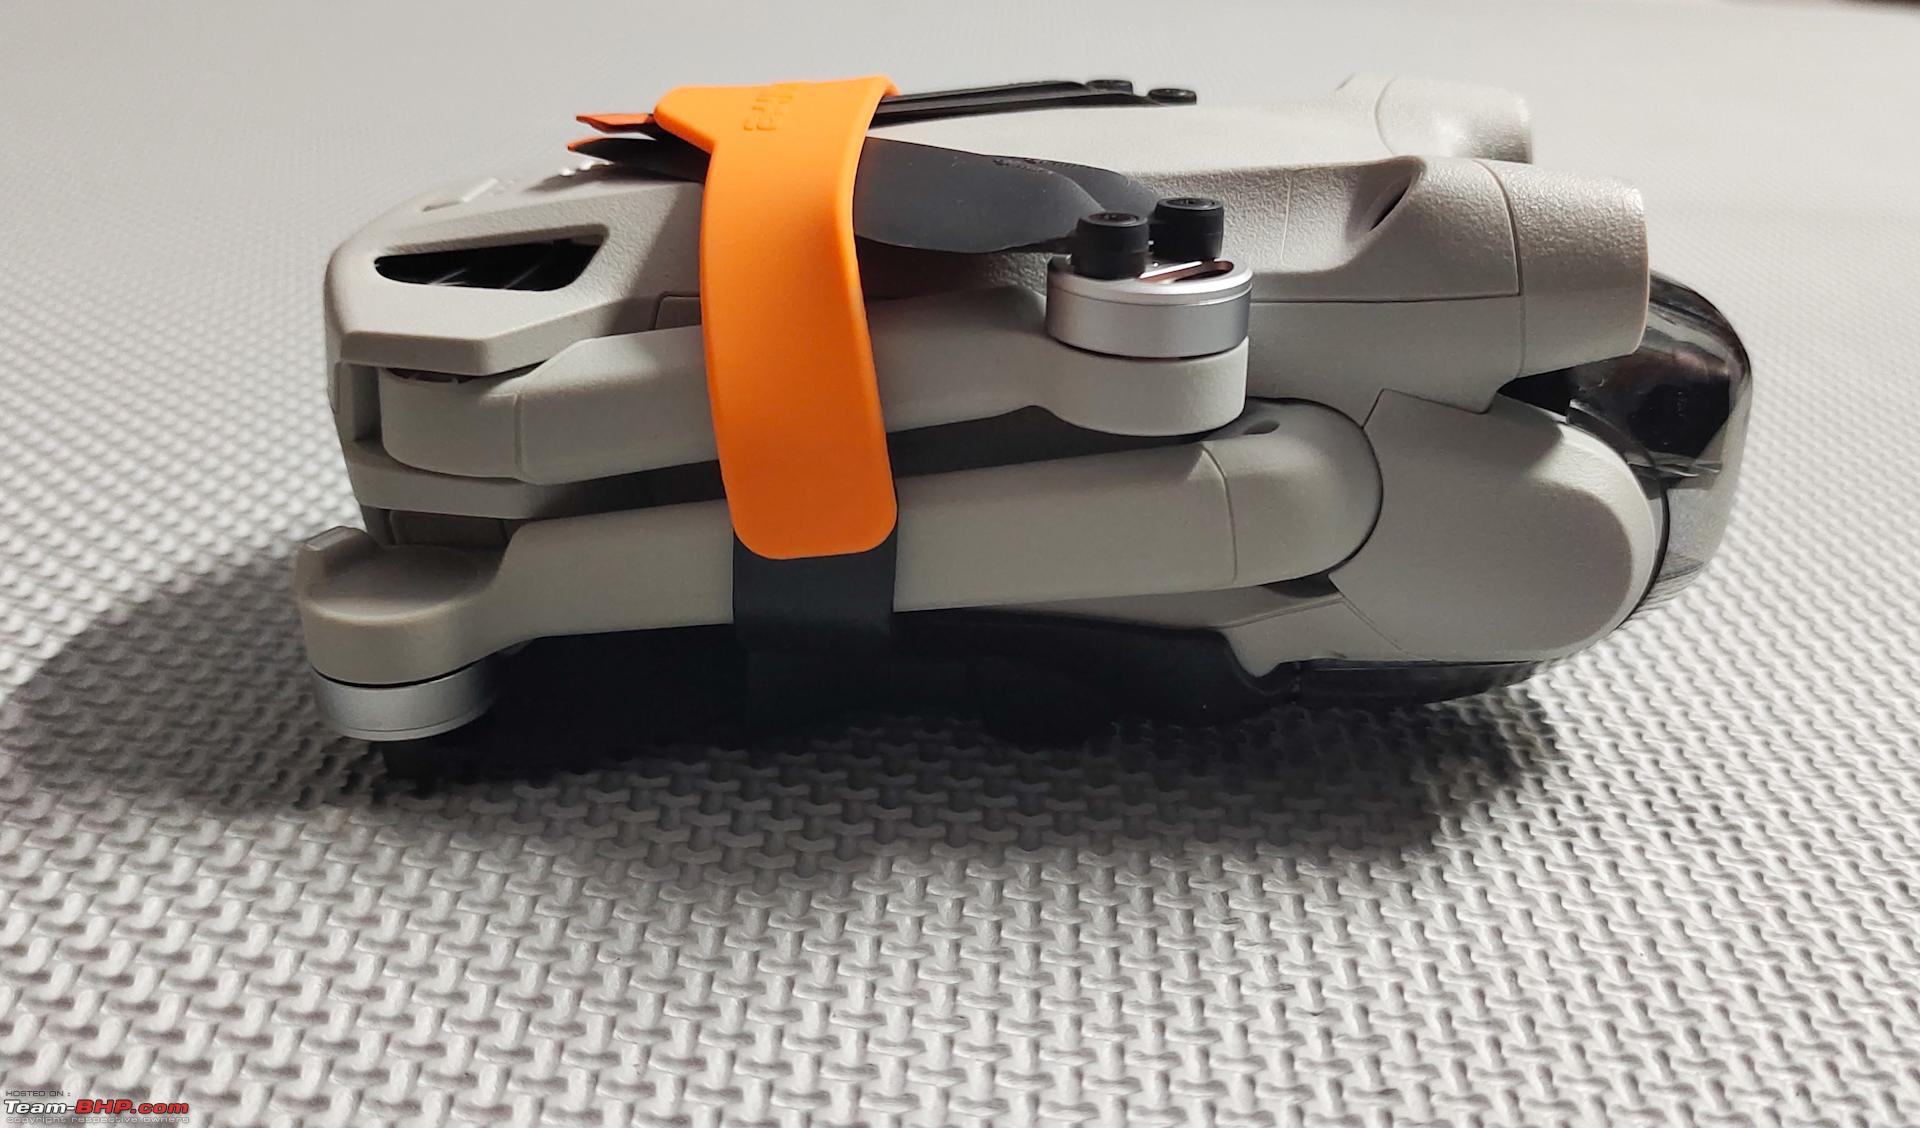 MEMORY CARDS: The drone does have a very limited 1.2 GB of internal storage and can only be used to store a few photos and record videos in low resolution. However, recoding 4K 60 fps footage in high bitrate and 10-bit color depth consumes a lot of memory space and also requires a fast memory card. Samsung was given free of cost as a part of promotional activity and the other two were purchased. Both the charging port and the memory card slot are left exposed and it looks like a bad design. 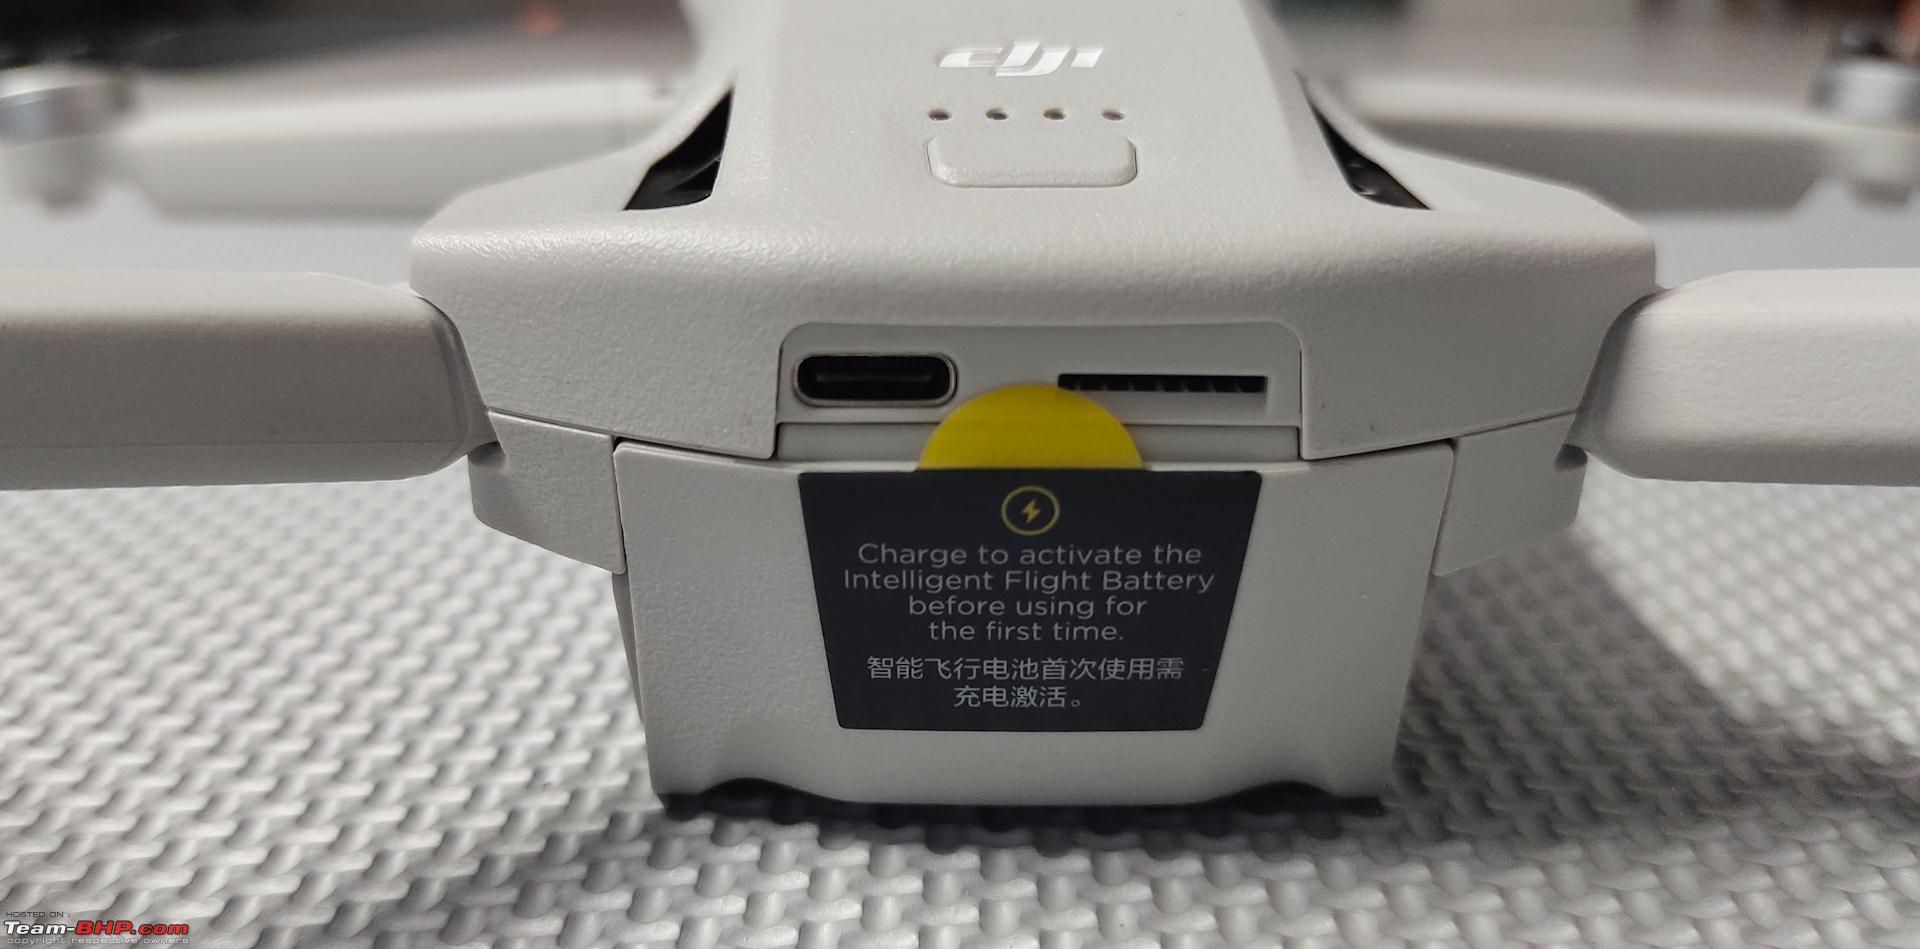 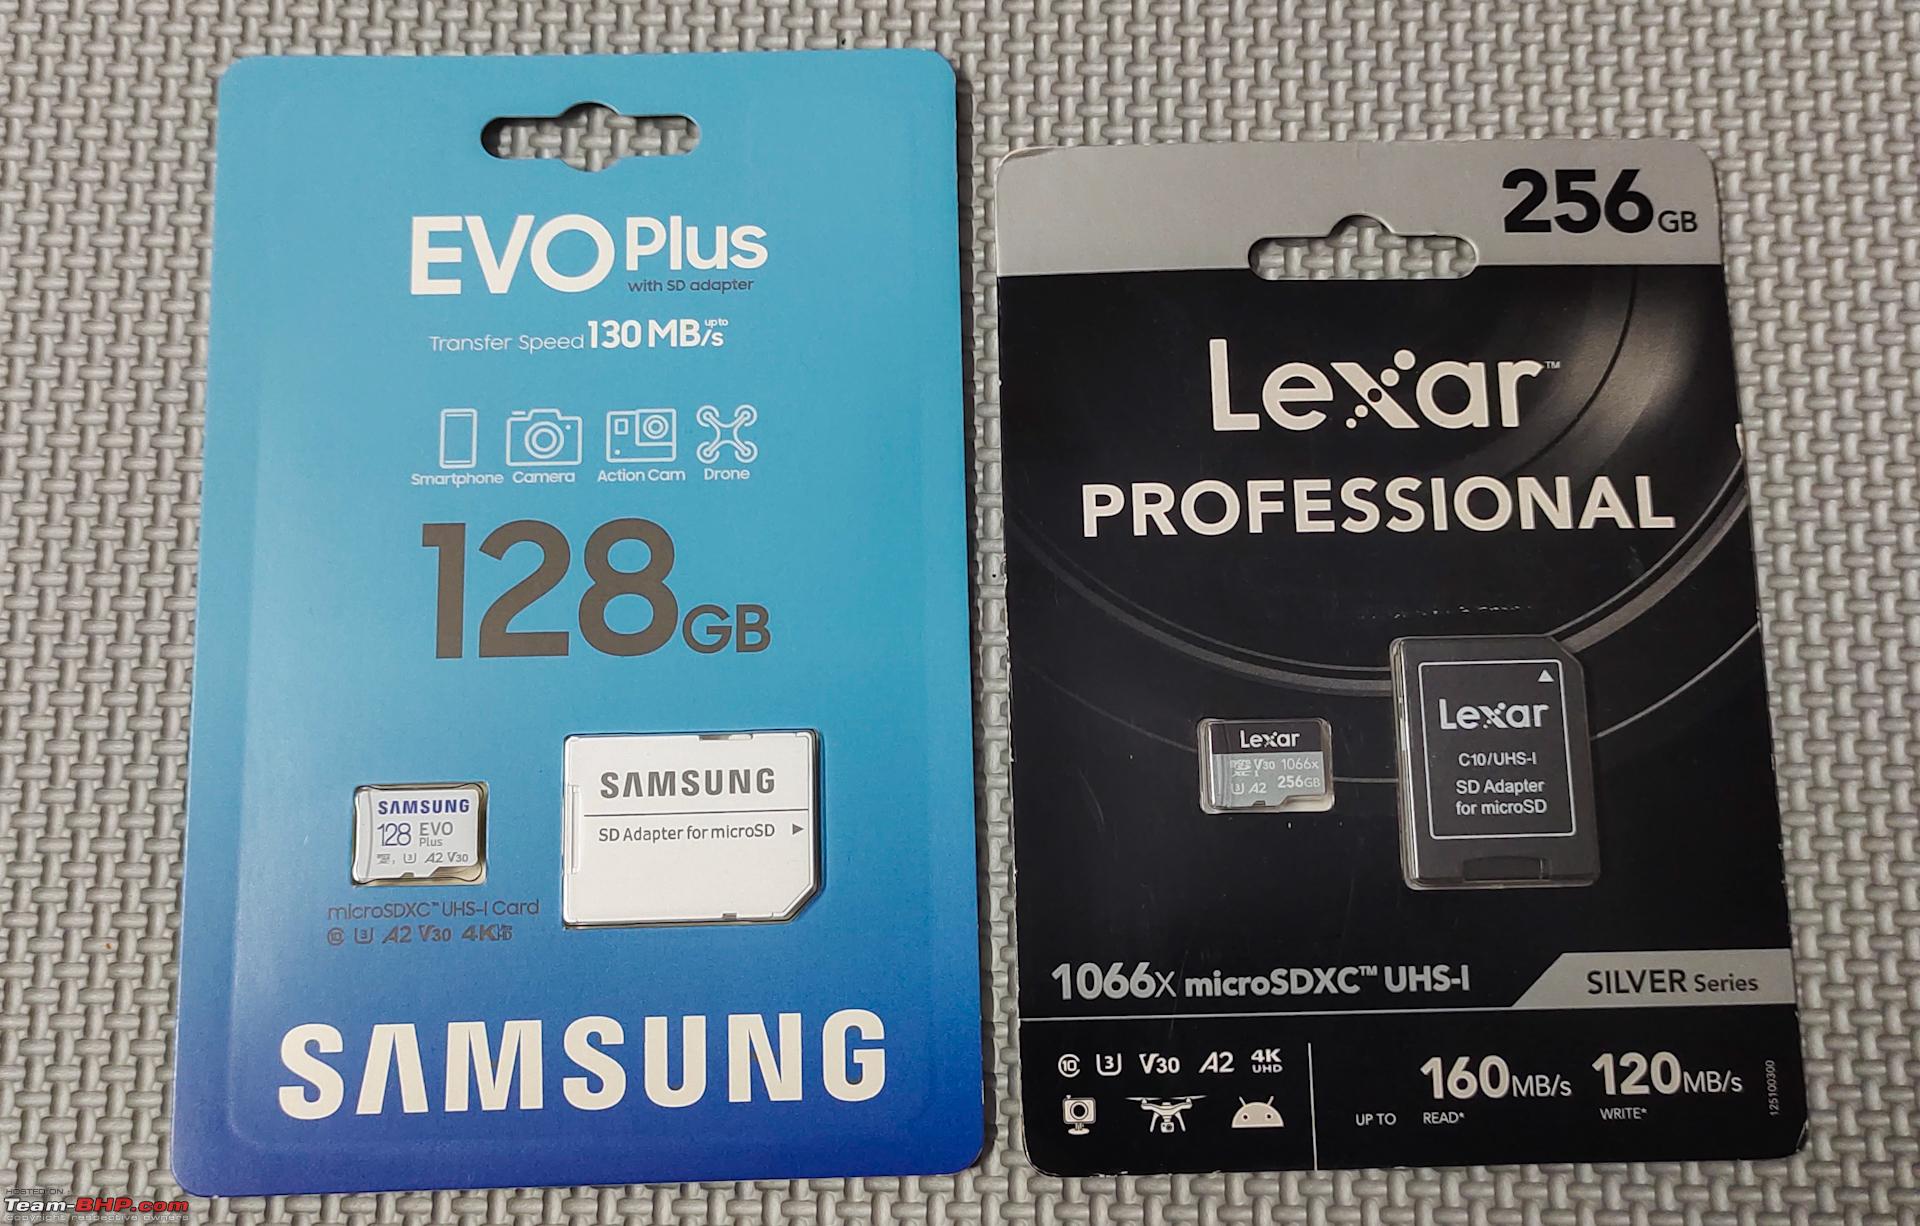 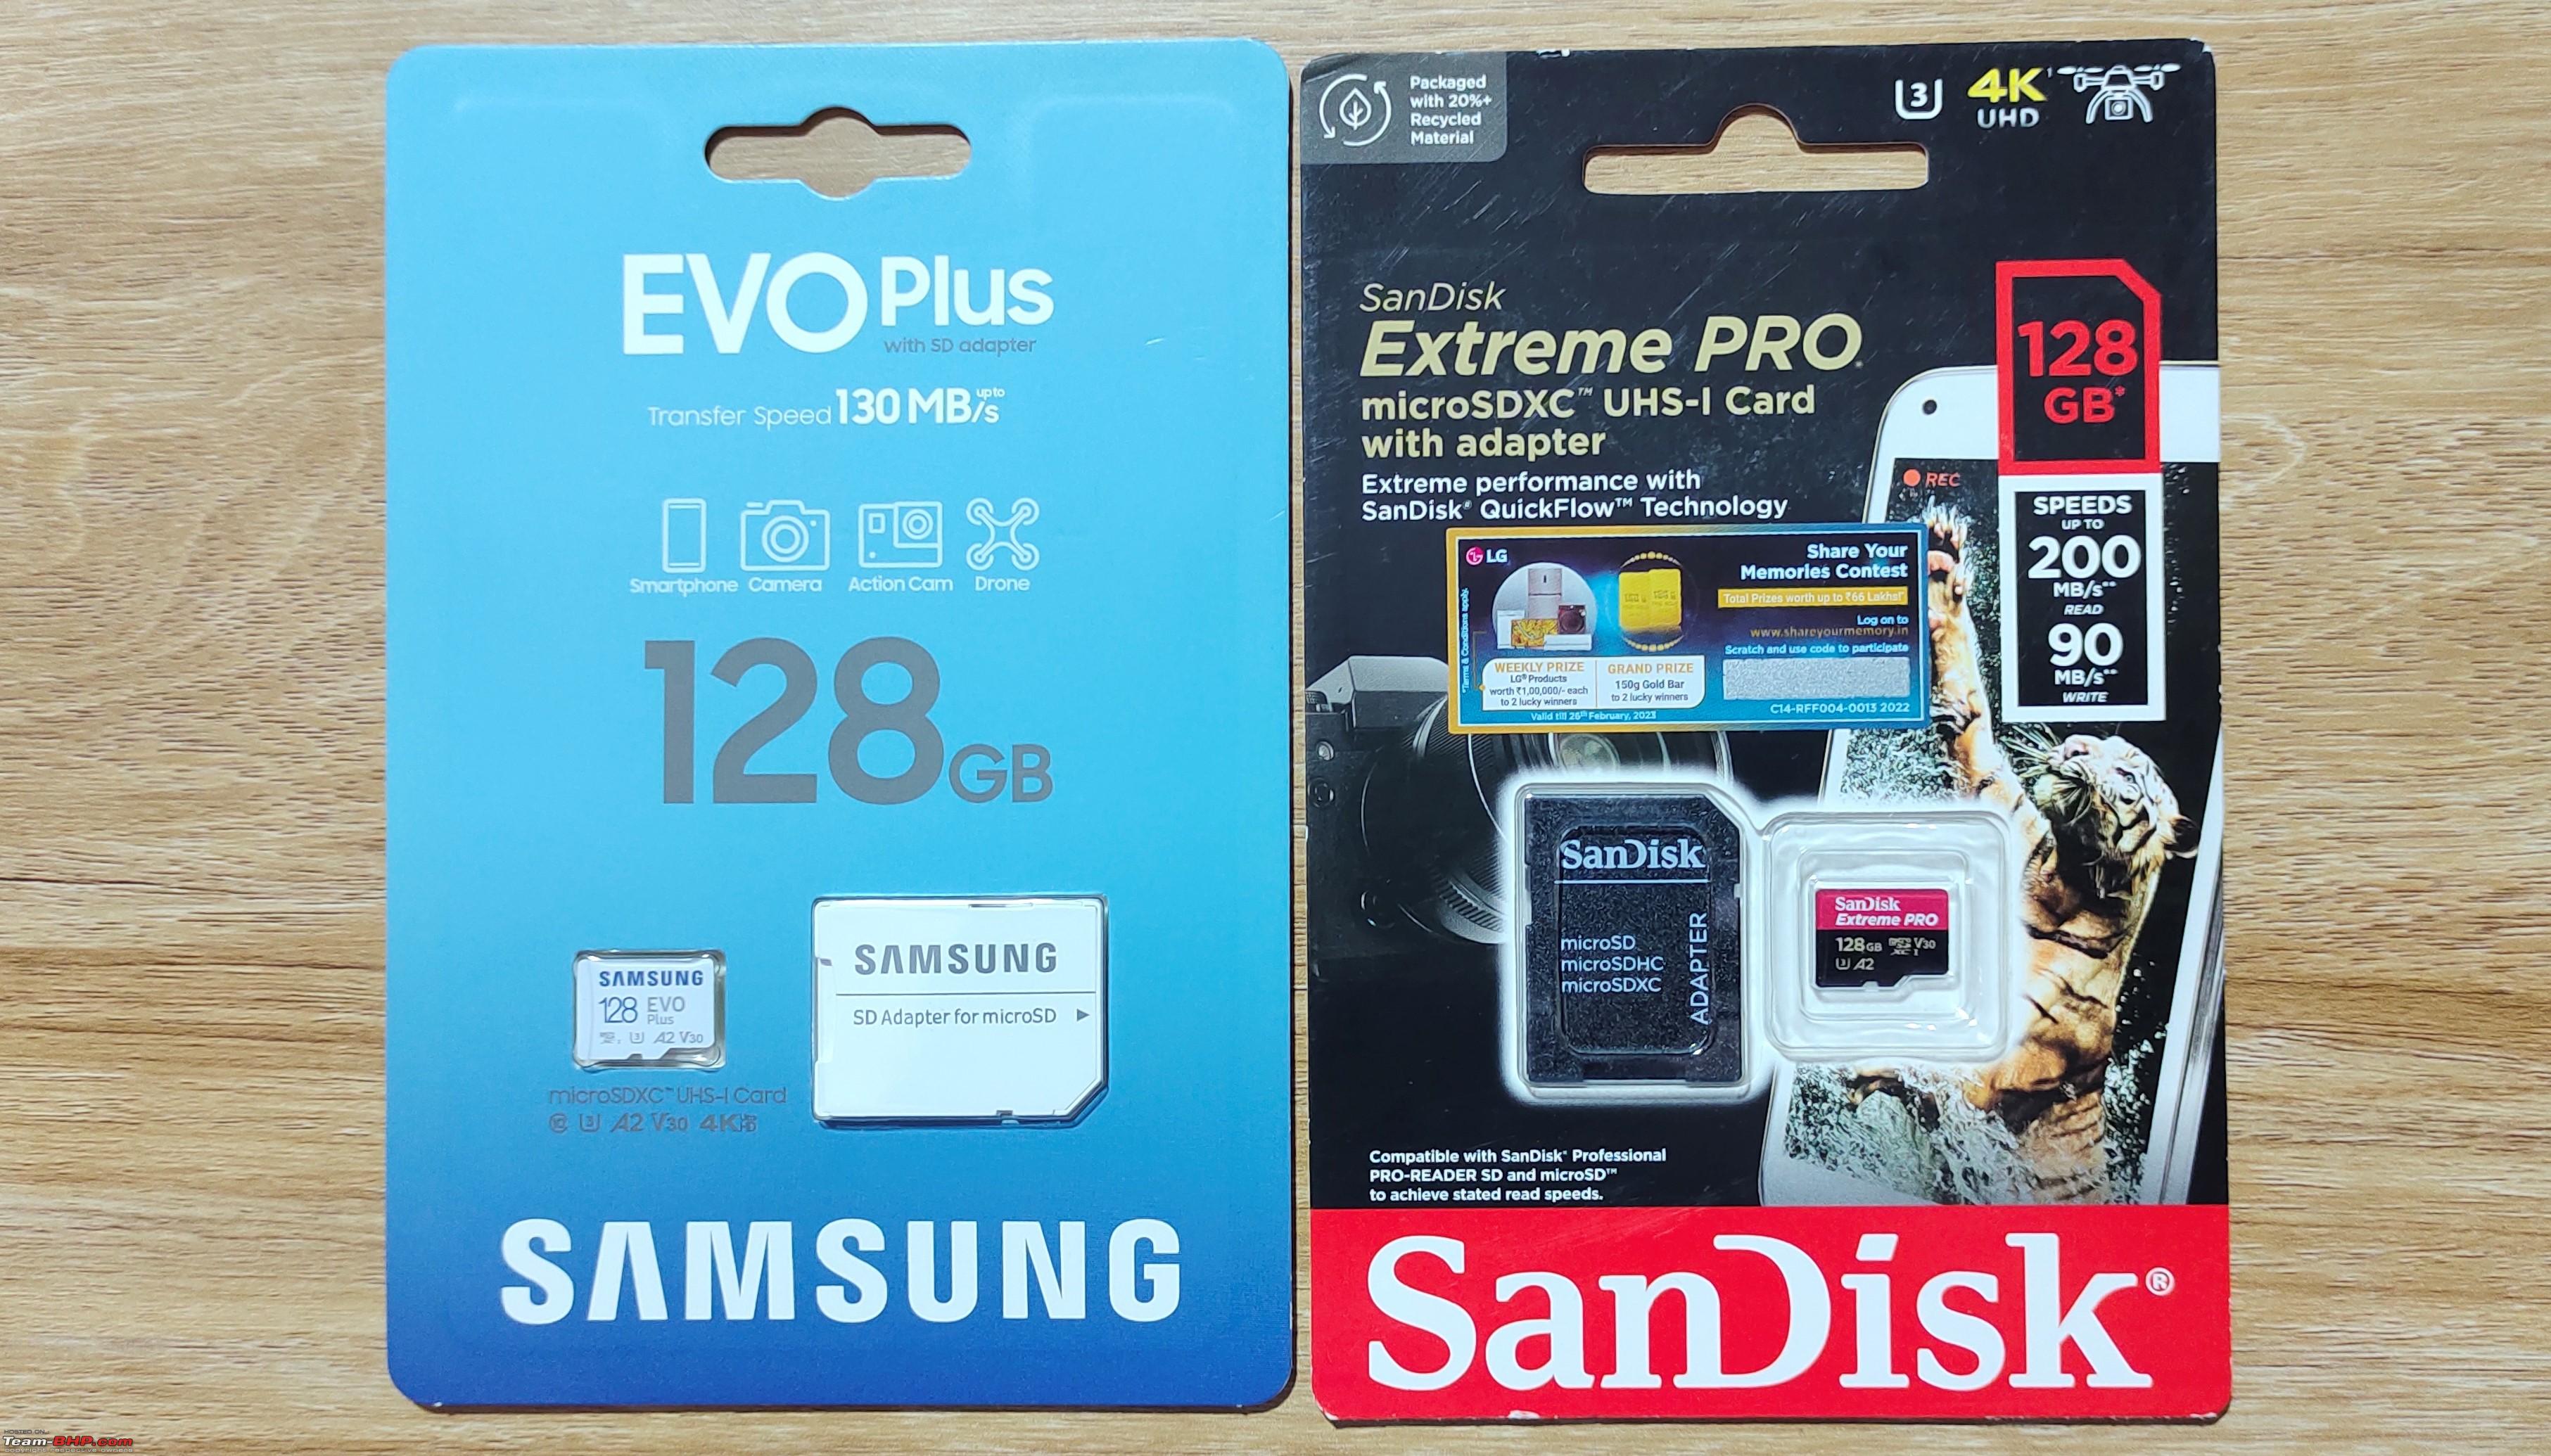 LITHIUM ION POLYMER BATTERY CASE: The Li-po bags are made out of a special fire resistant material and is the best and the safest way to carry the batteries while travelling. There are separate compartments to hold the batteries of Mini 3 Pro and it does protect and contain the fire in case of any accidents. Most airlines today require passengers to carry these high powered Lithium Ion batteries safely and having one of these helps to stay complaint with the airline regulations and policies as well. 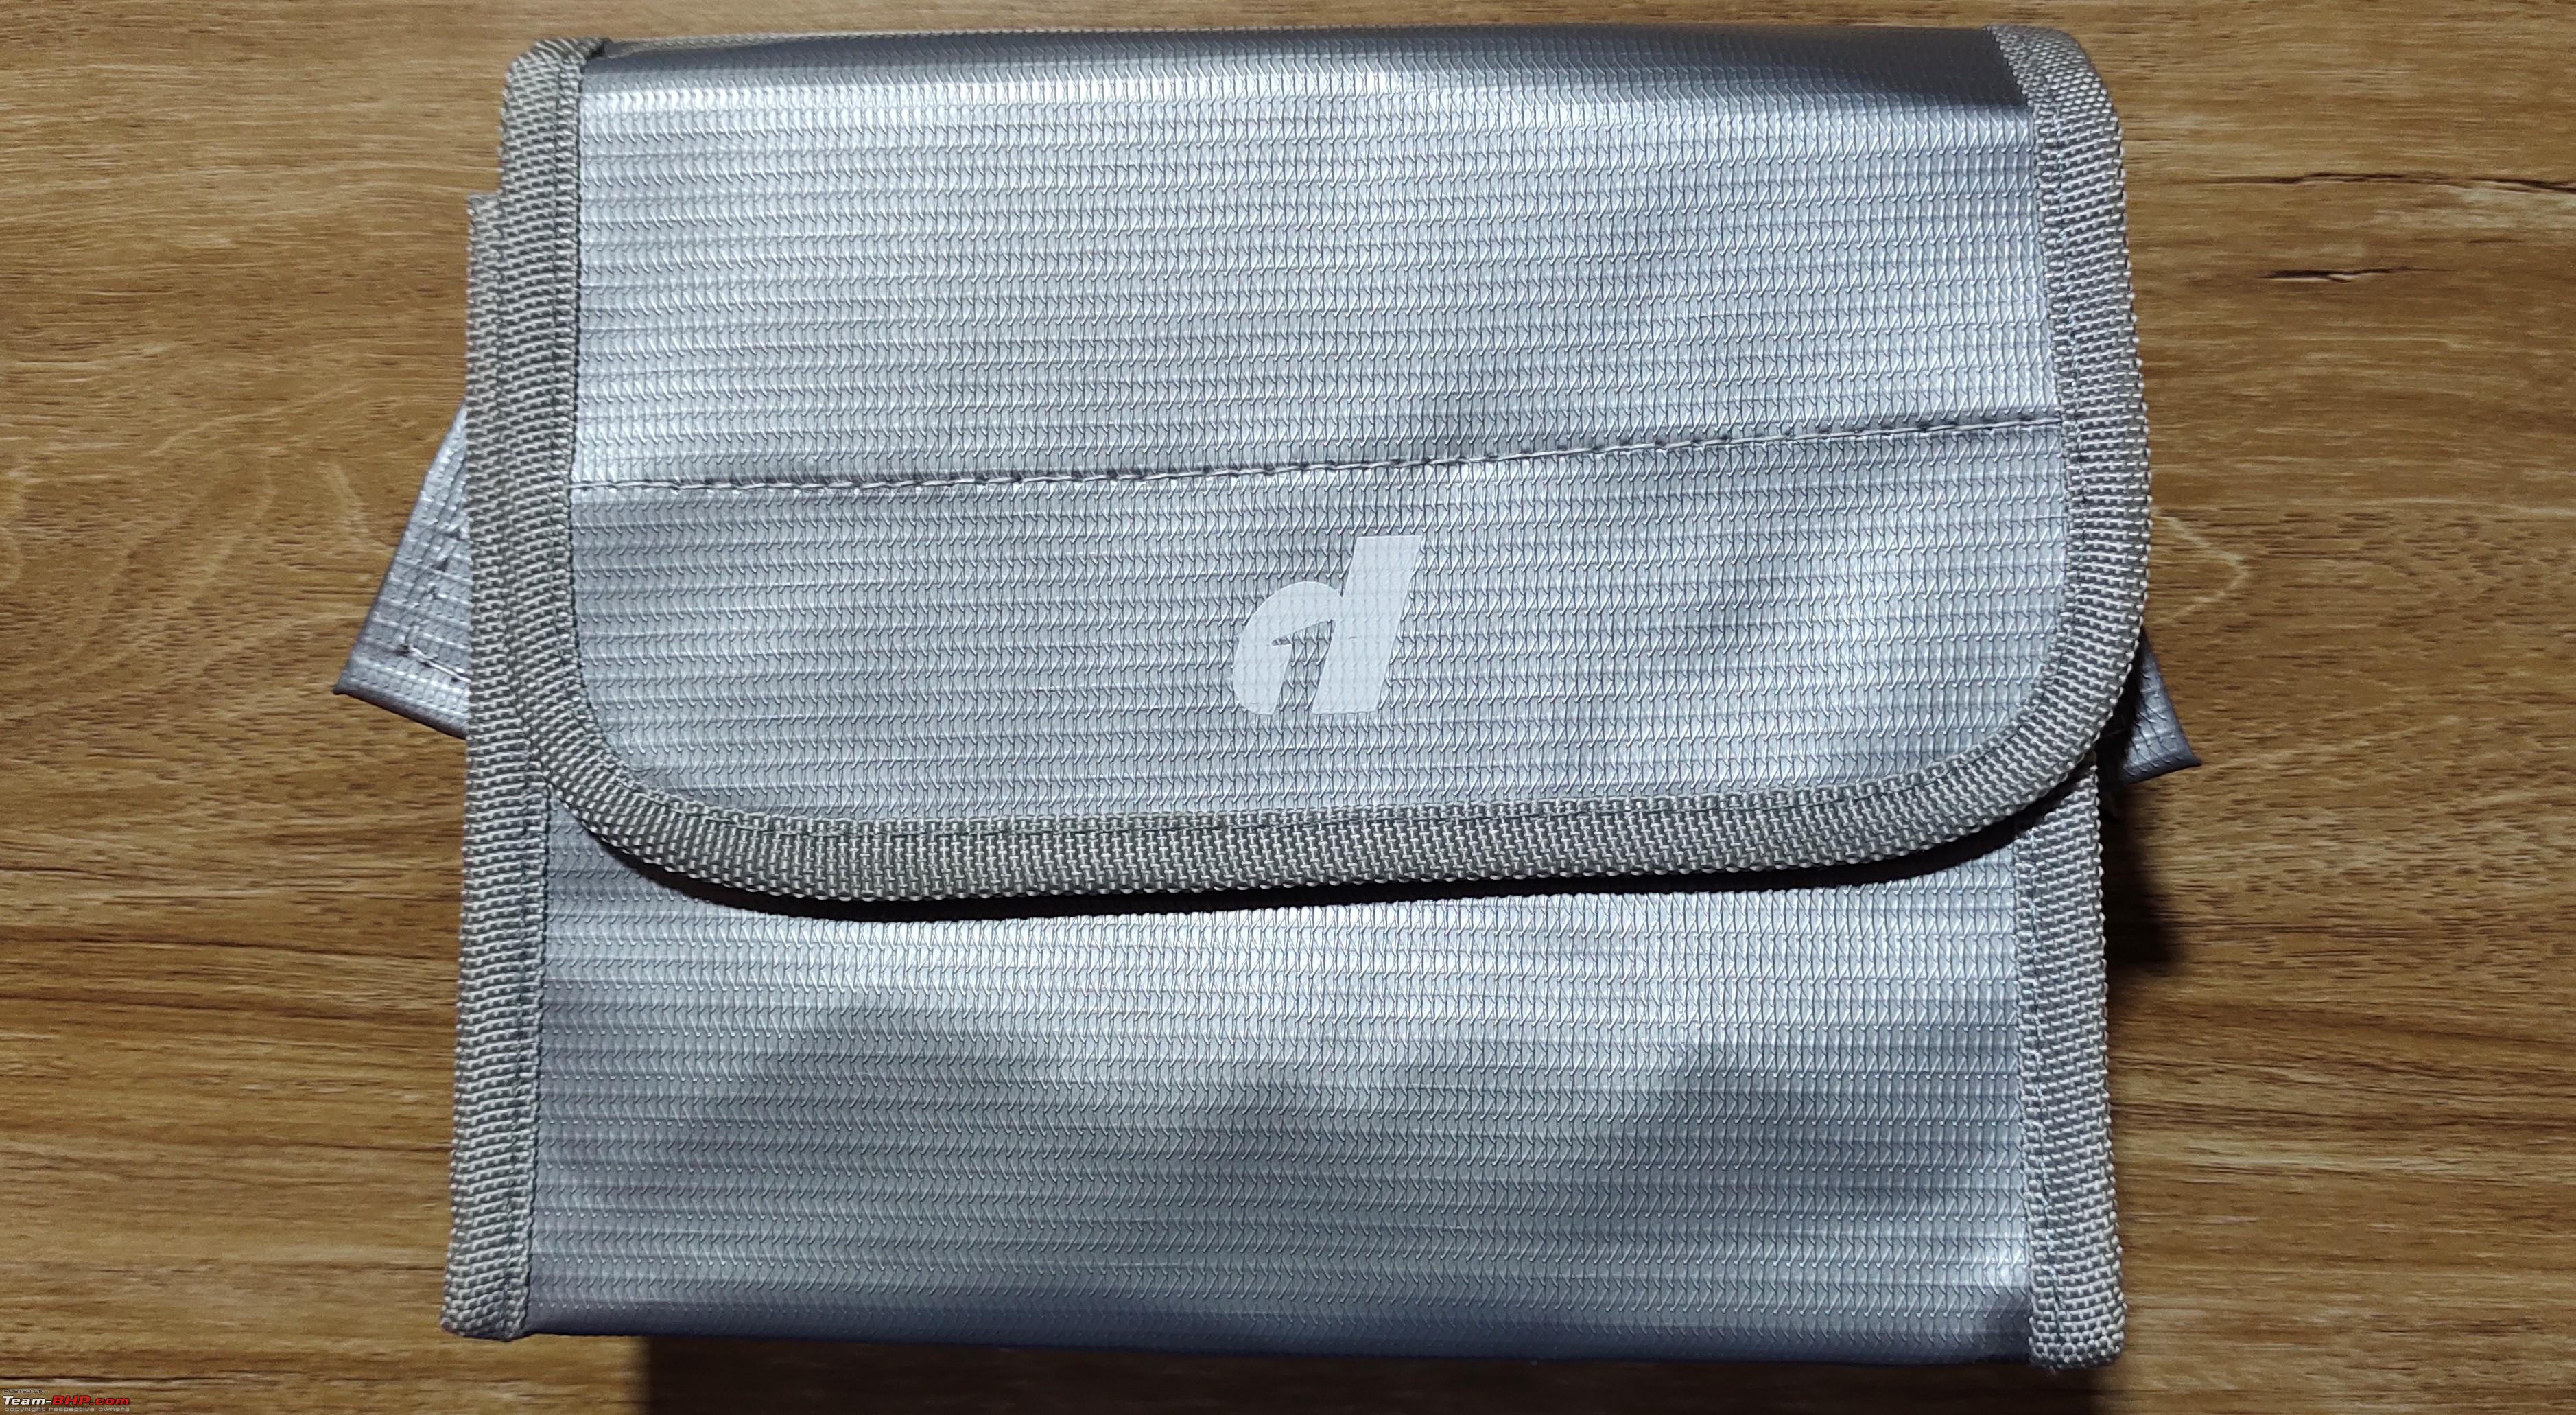  Last edited by Amyth Prabhakar : 10th December 2022 at 22:23. |
|
| (16)
Thanks
|
| The following 16 BHPians Thank Amyth Prabhakar for this useful post: | AdityaDeane, audioholic, brownkaiser, digitalnirvana, graaja, GTO, izzikio_rage, kung_foo_fanta, mail2sekh, NitSat, ph03n!x, Roy.S, Samfromindia, shyamg28, SRISRI_90, Yash390 |
|
8th December 2022, 06:53
| #5 |
| BHPian | re: Dji Mini 3 Pro Review | The Best Nano Drone LAUNCH PAD: The drone kicks up a lot of dust/sand when launched from the ground. It is always better to eihter use a dedicated launch pad to prevent the dust/sand from getting into the drone or do a hand launch.  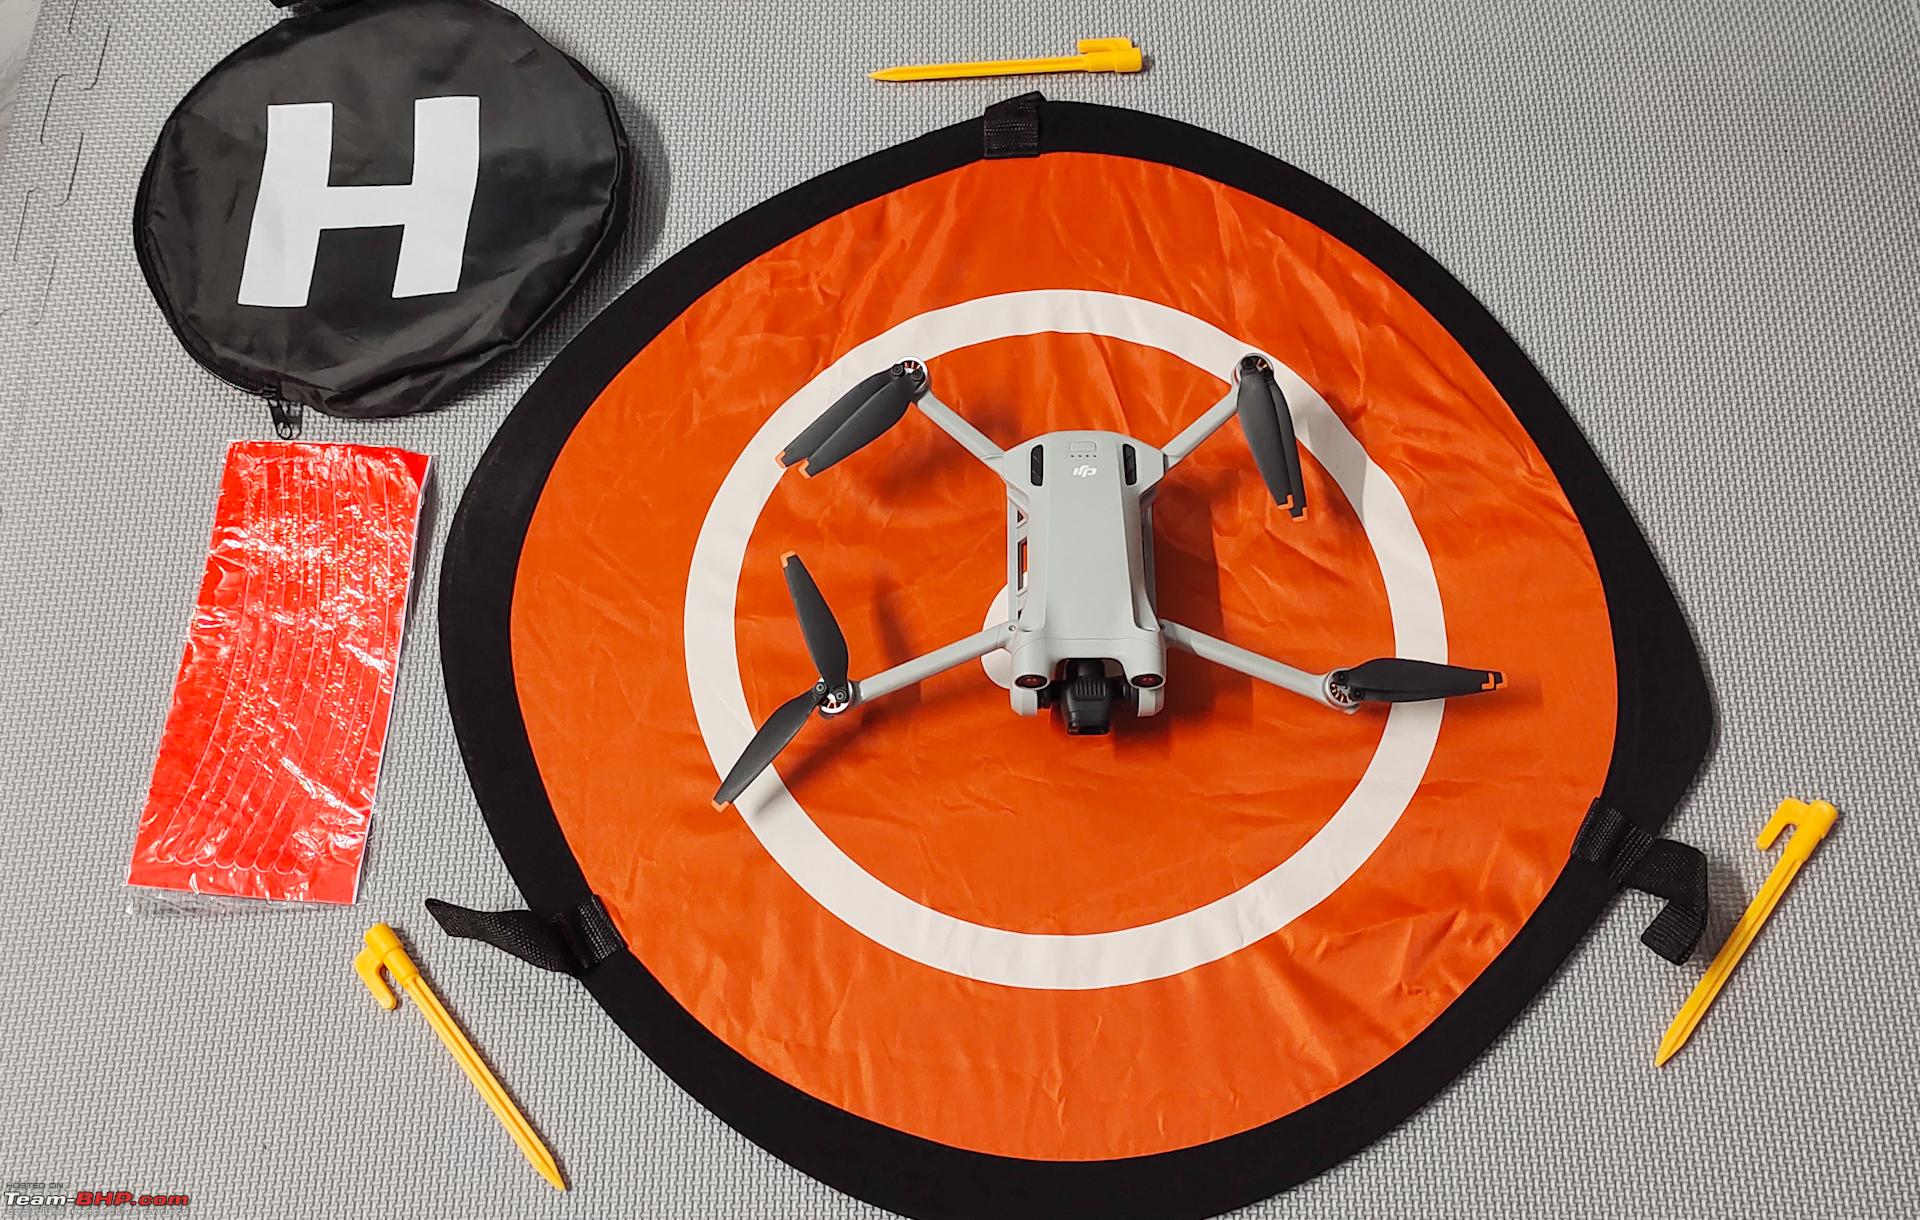 TEMPERED GLASS FOR THE RC:   LANYARD FOR RC: 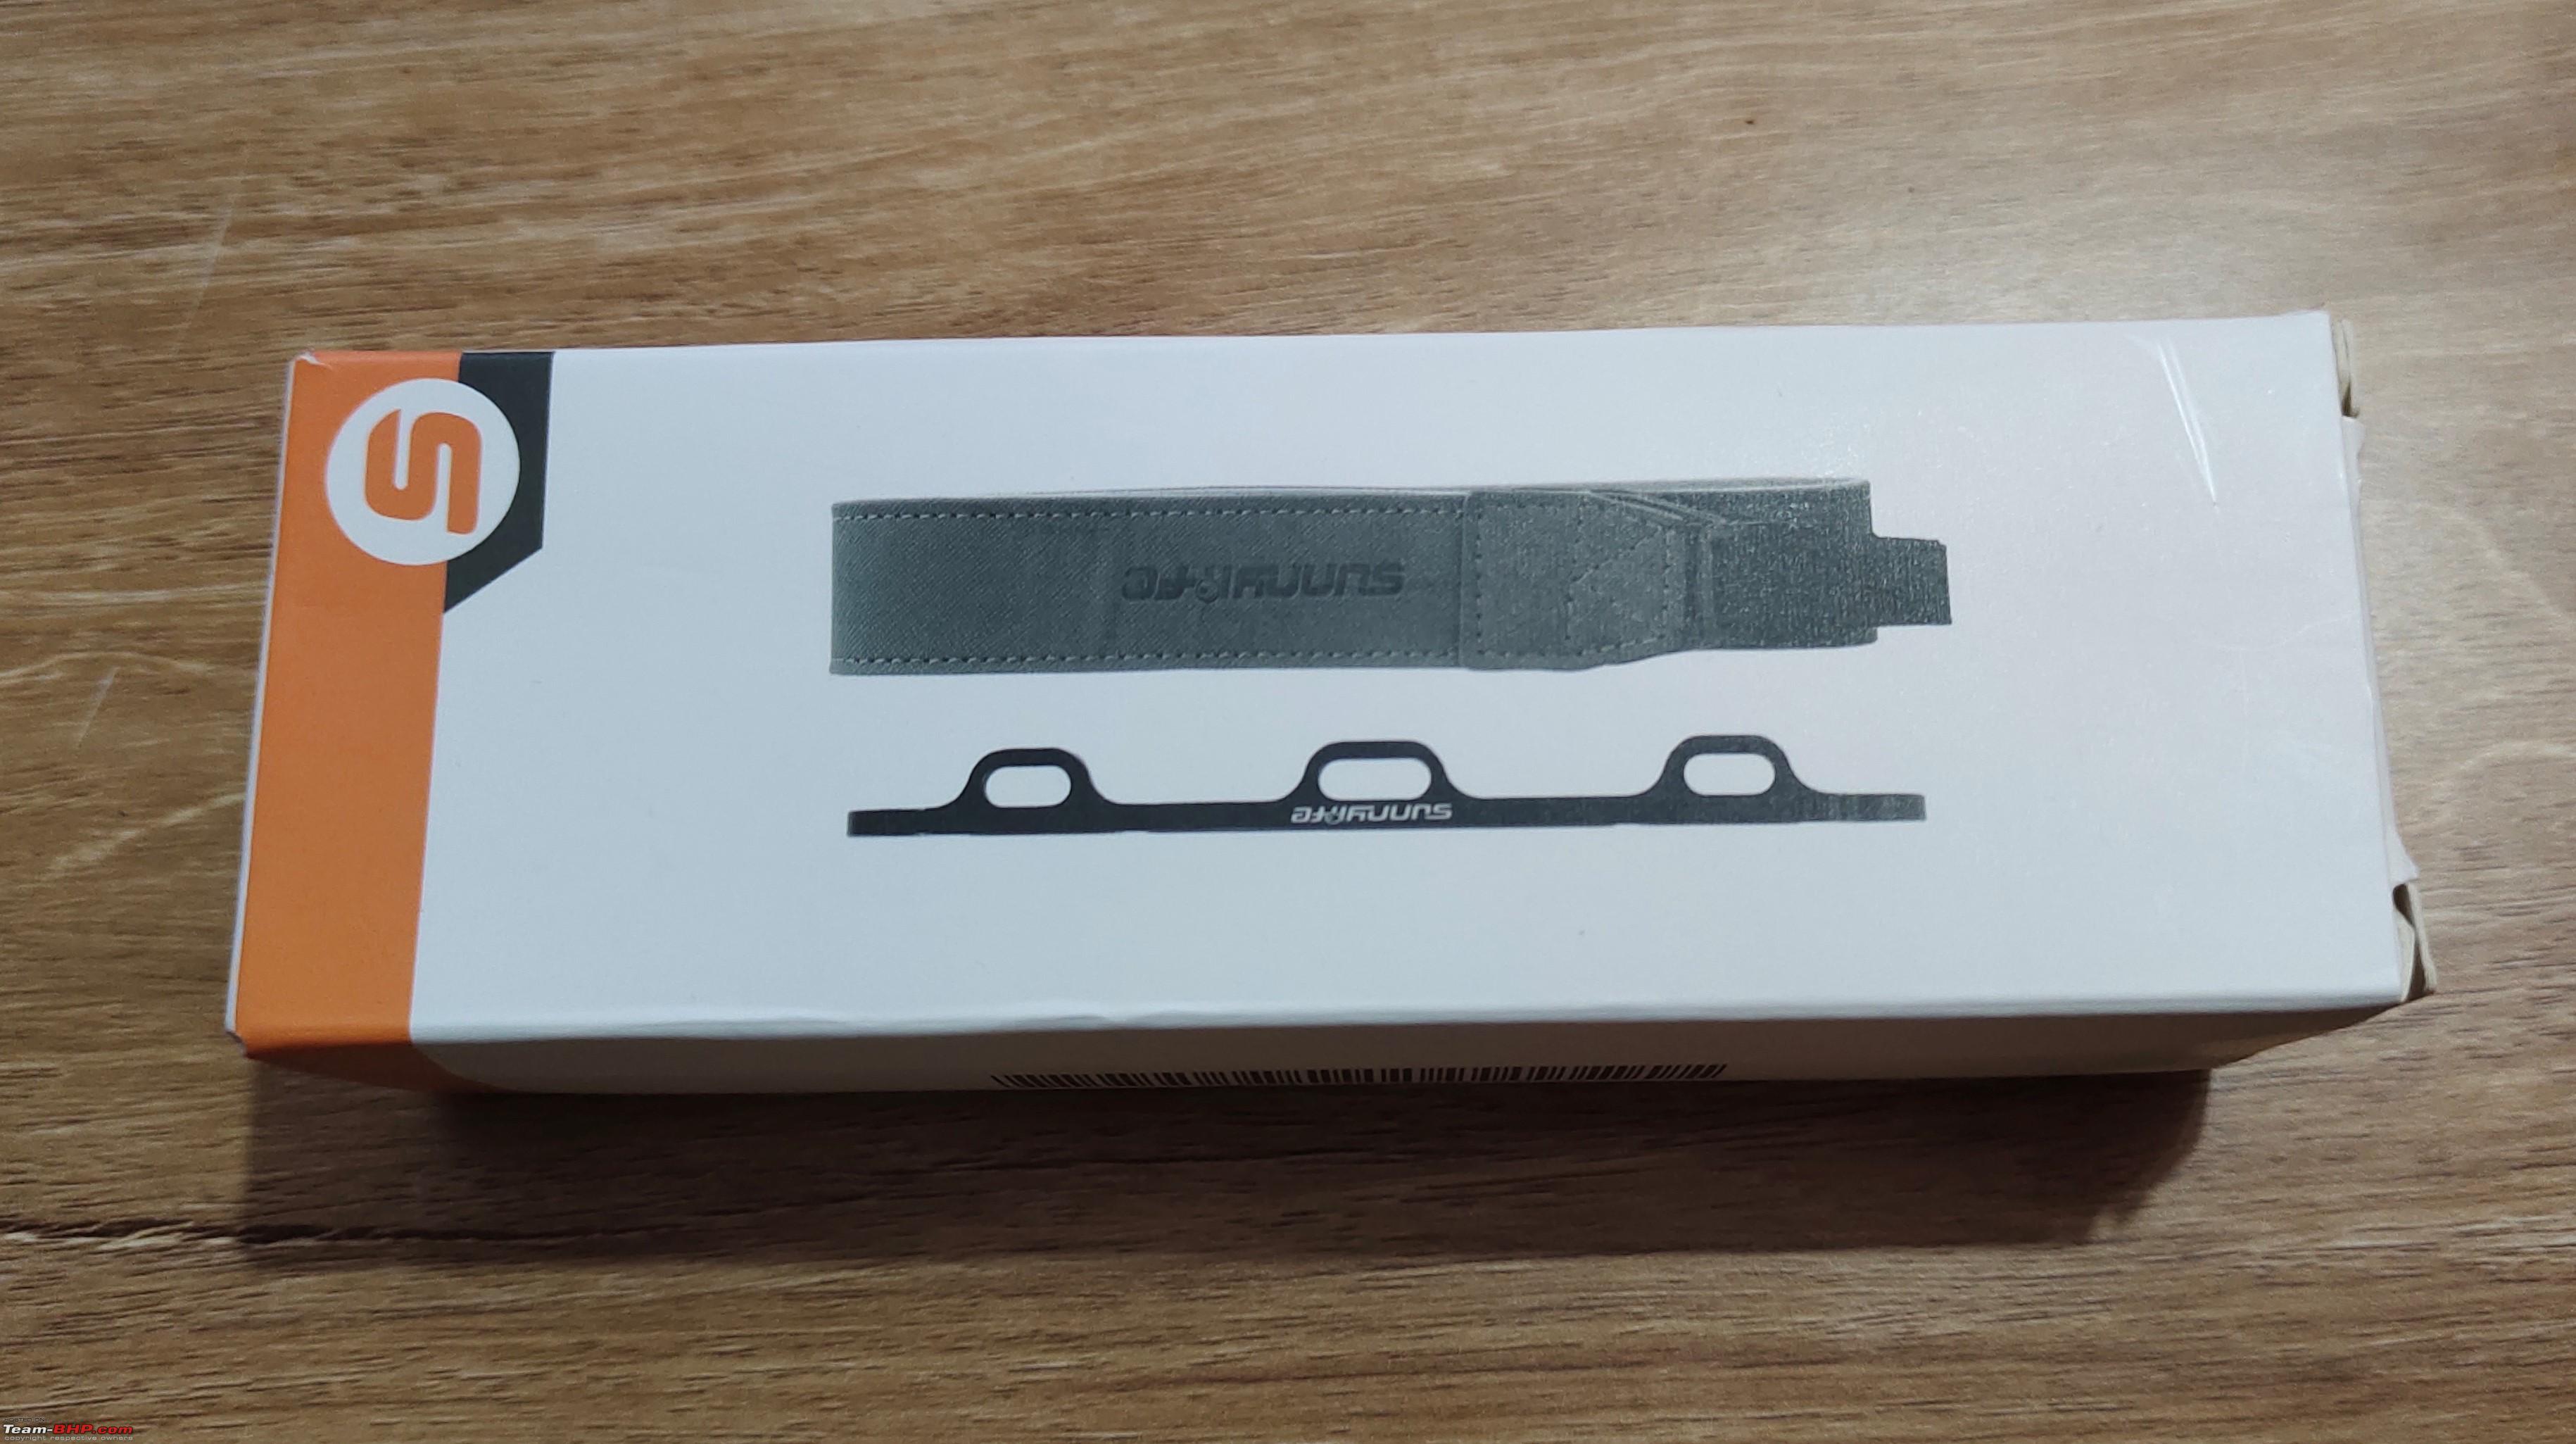 Lanyard bracket for DJI RC. 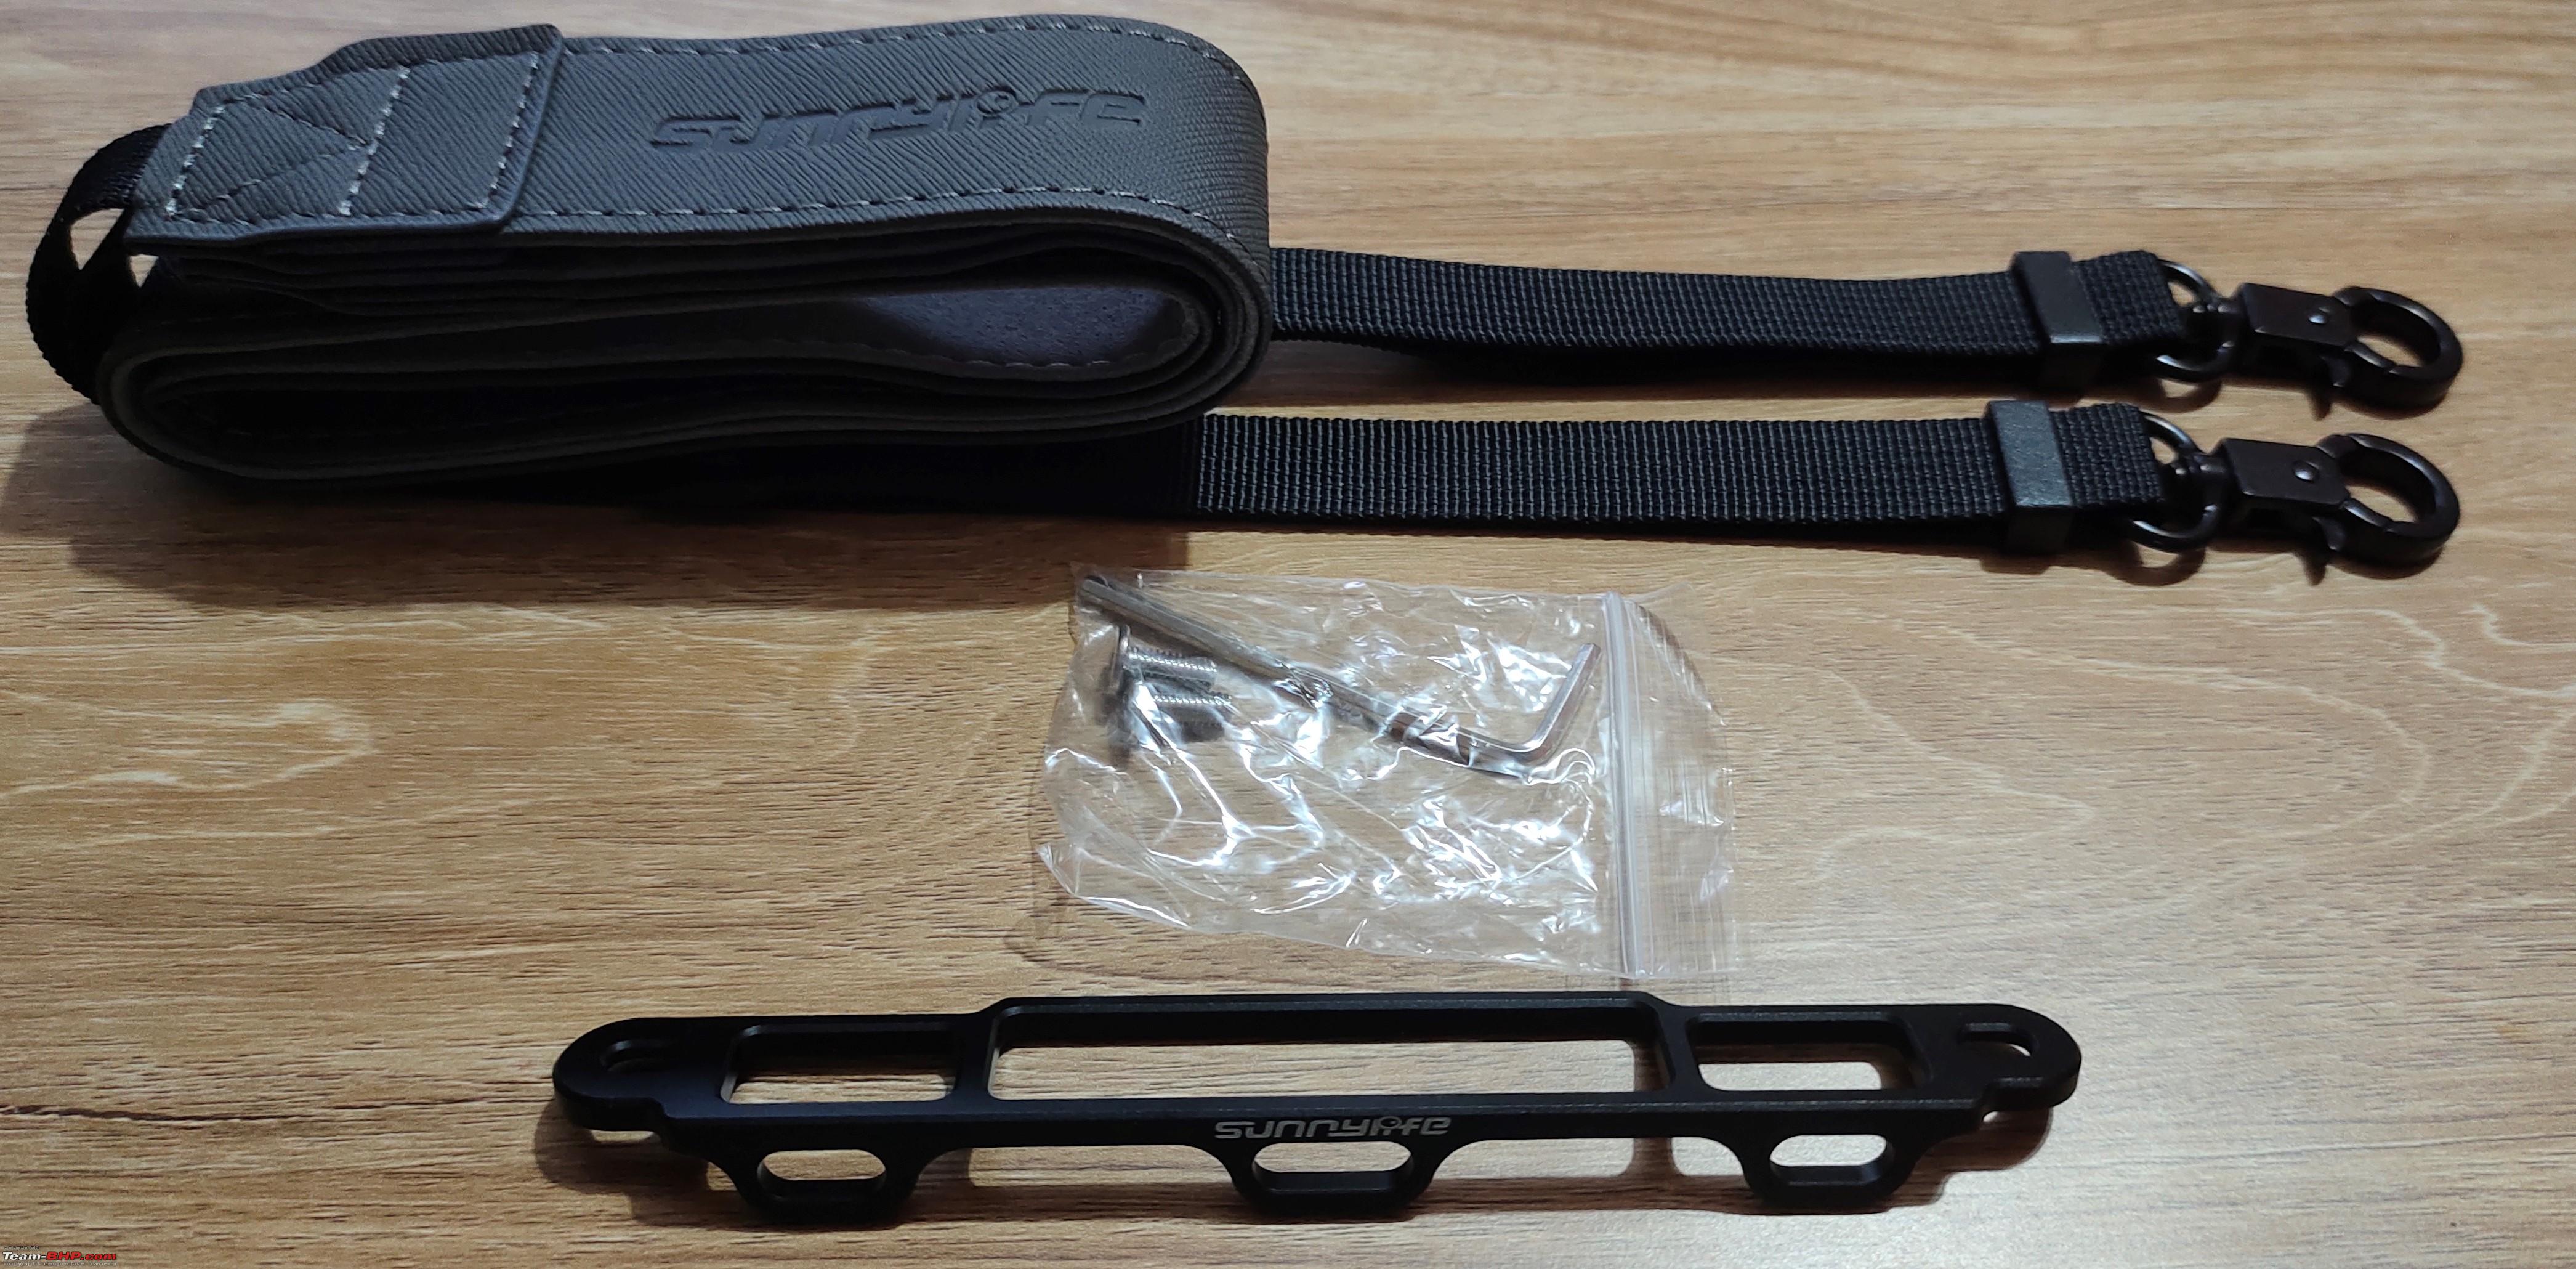 CAR CHARGER:  PROP STABALIZER AND LANDING GEAR: 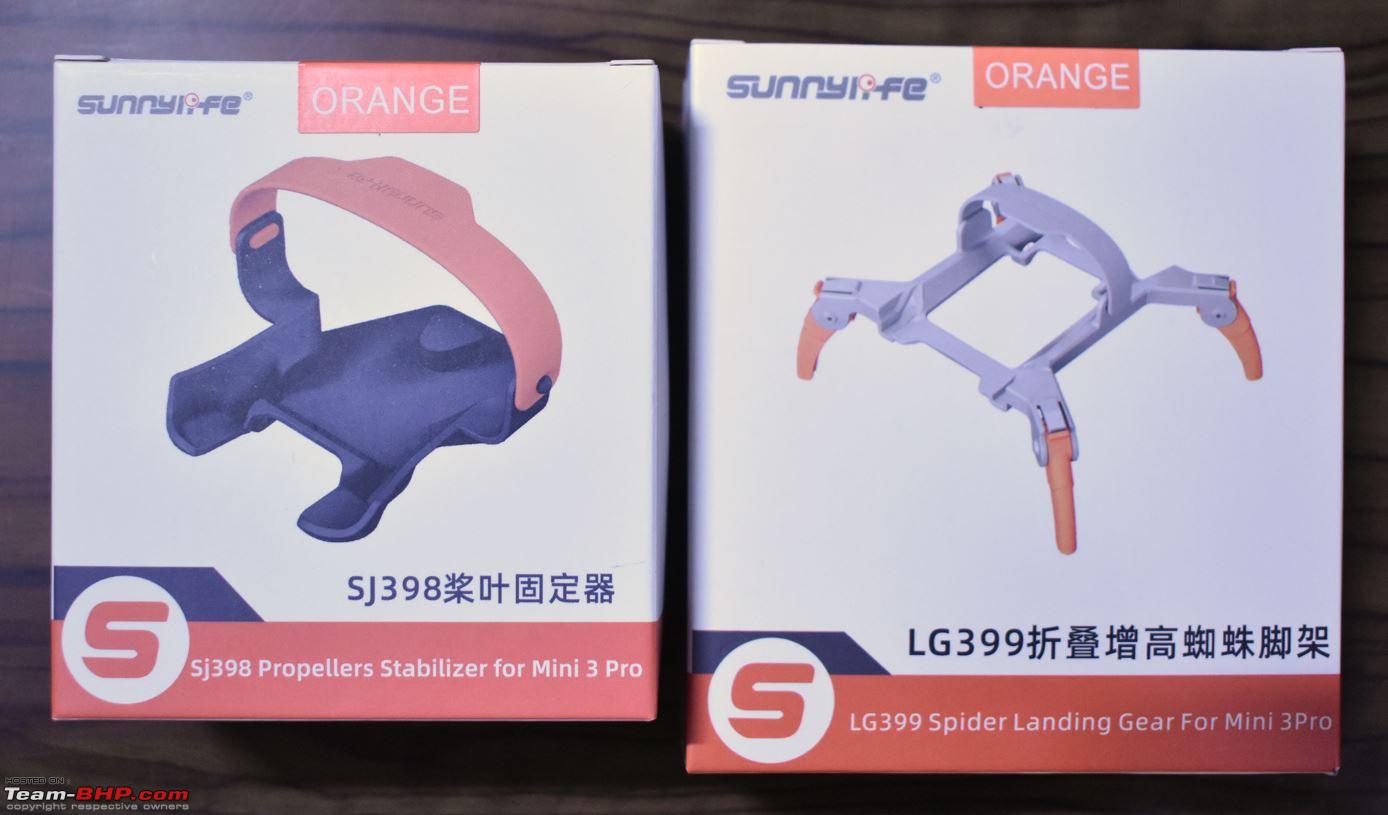 Some extra accessories for the controller: The bright red control sticks: 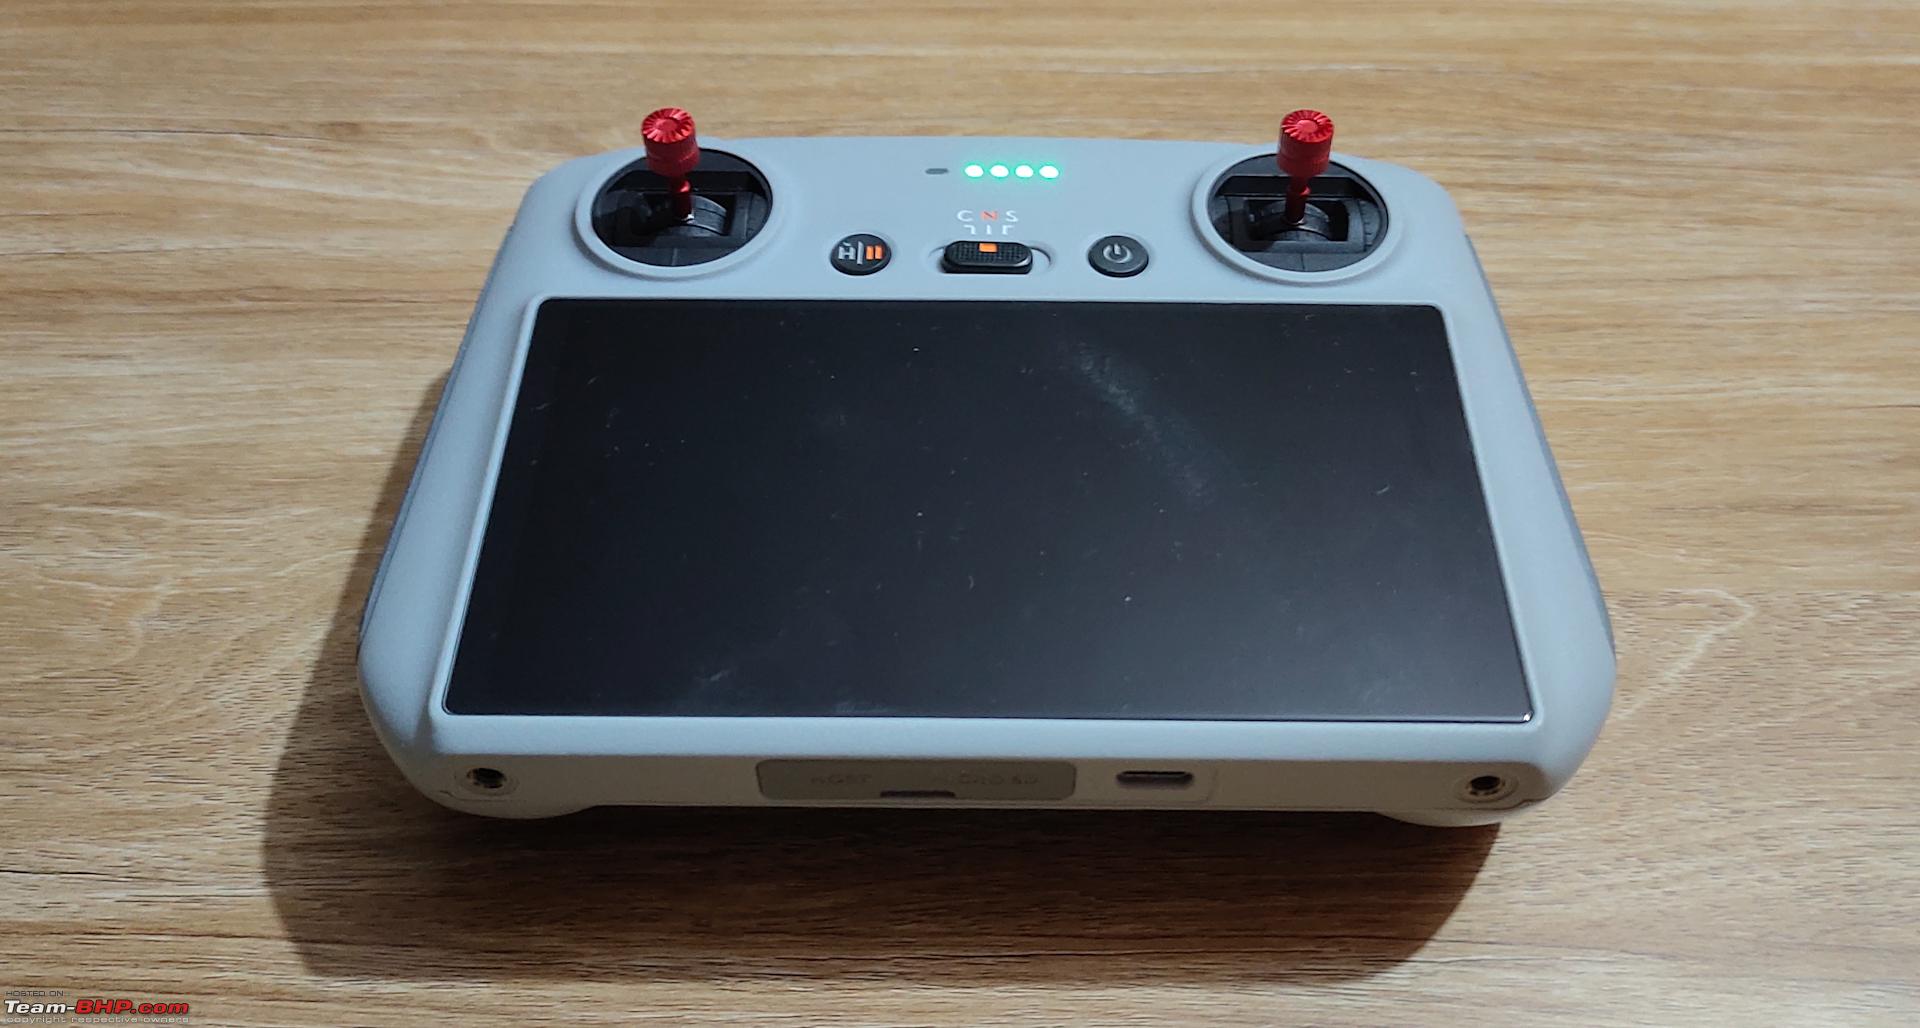 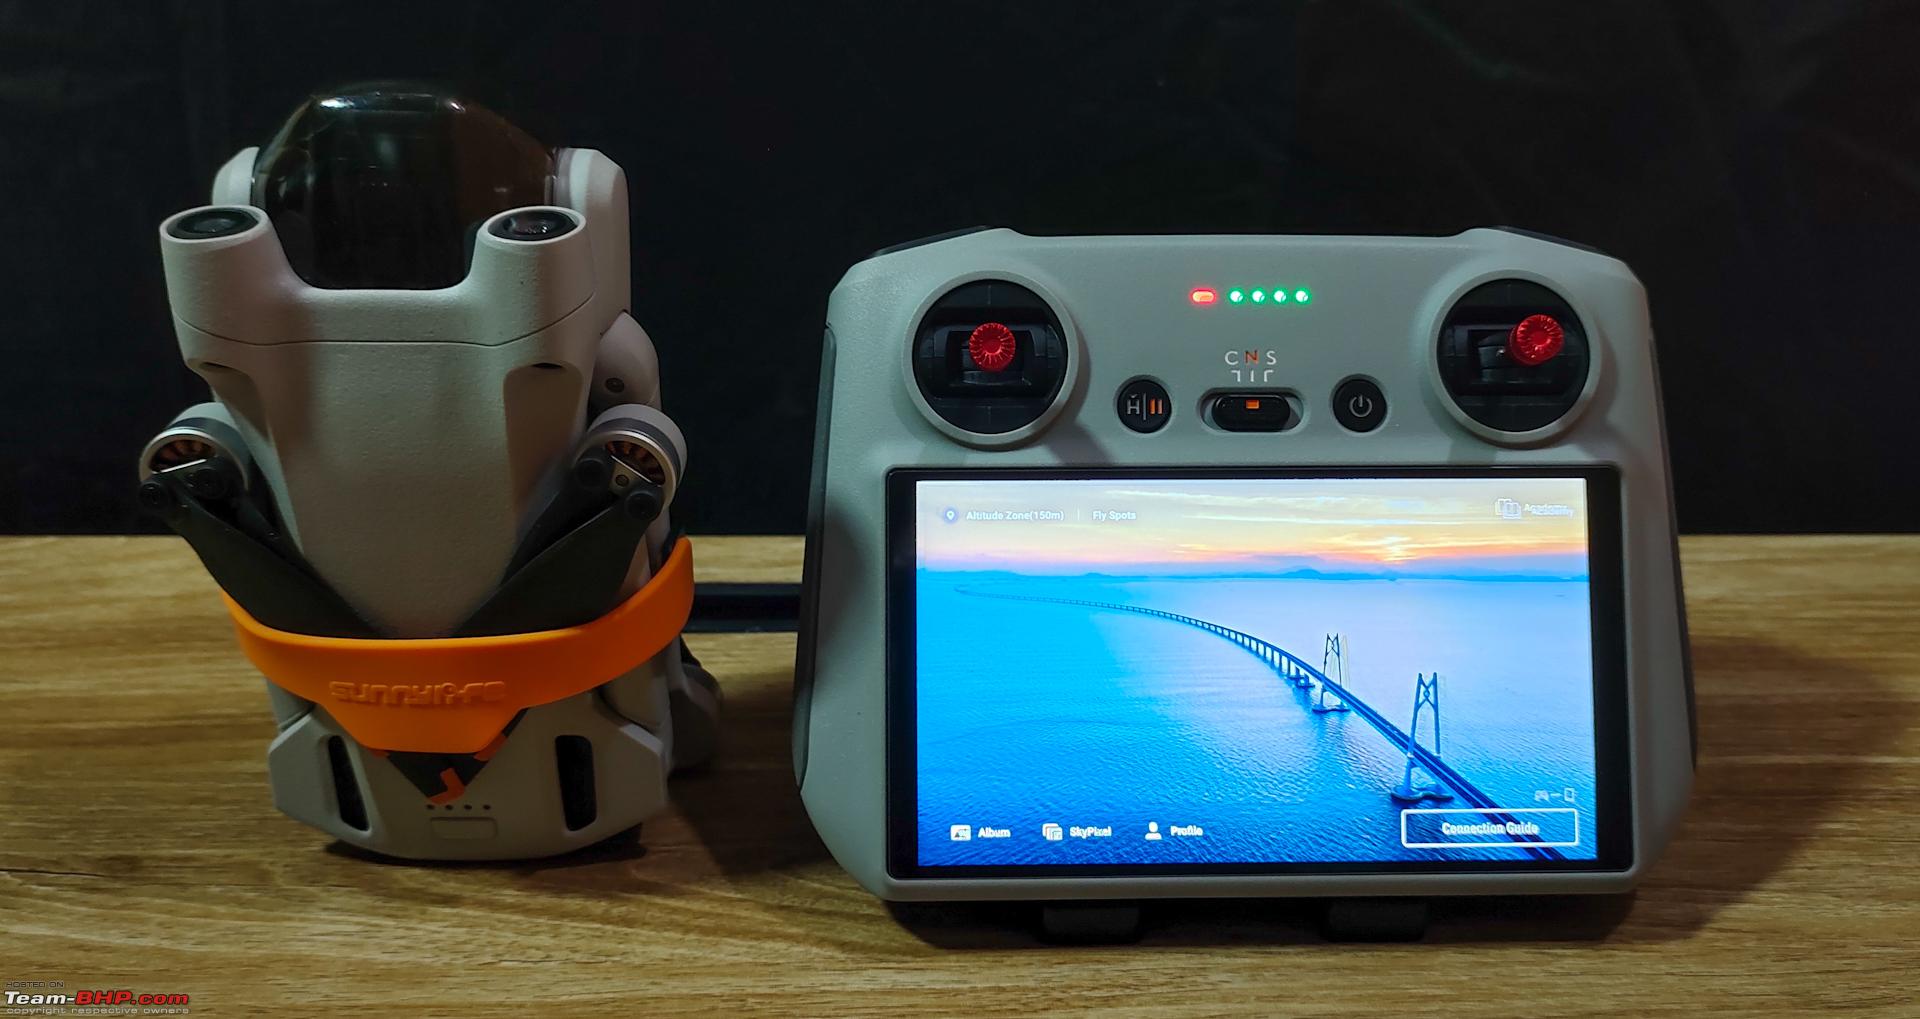 A silicone cover for the RC:  MI 22.5 watt PD power bank to charge the batteries. 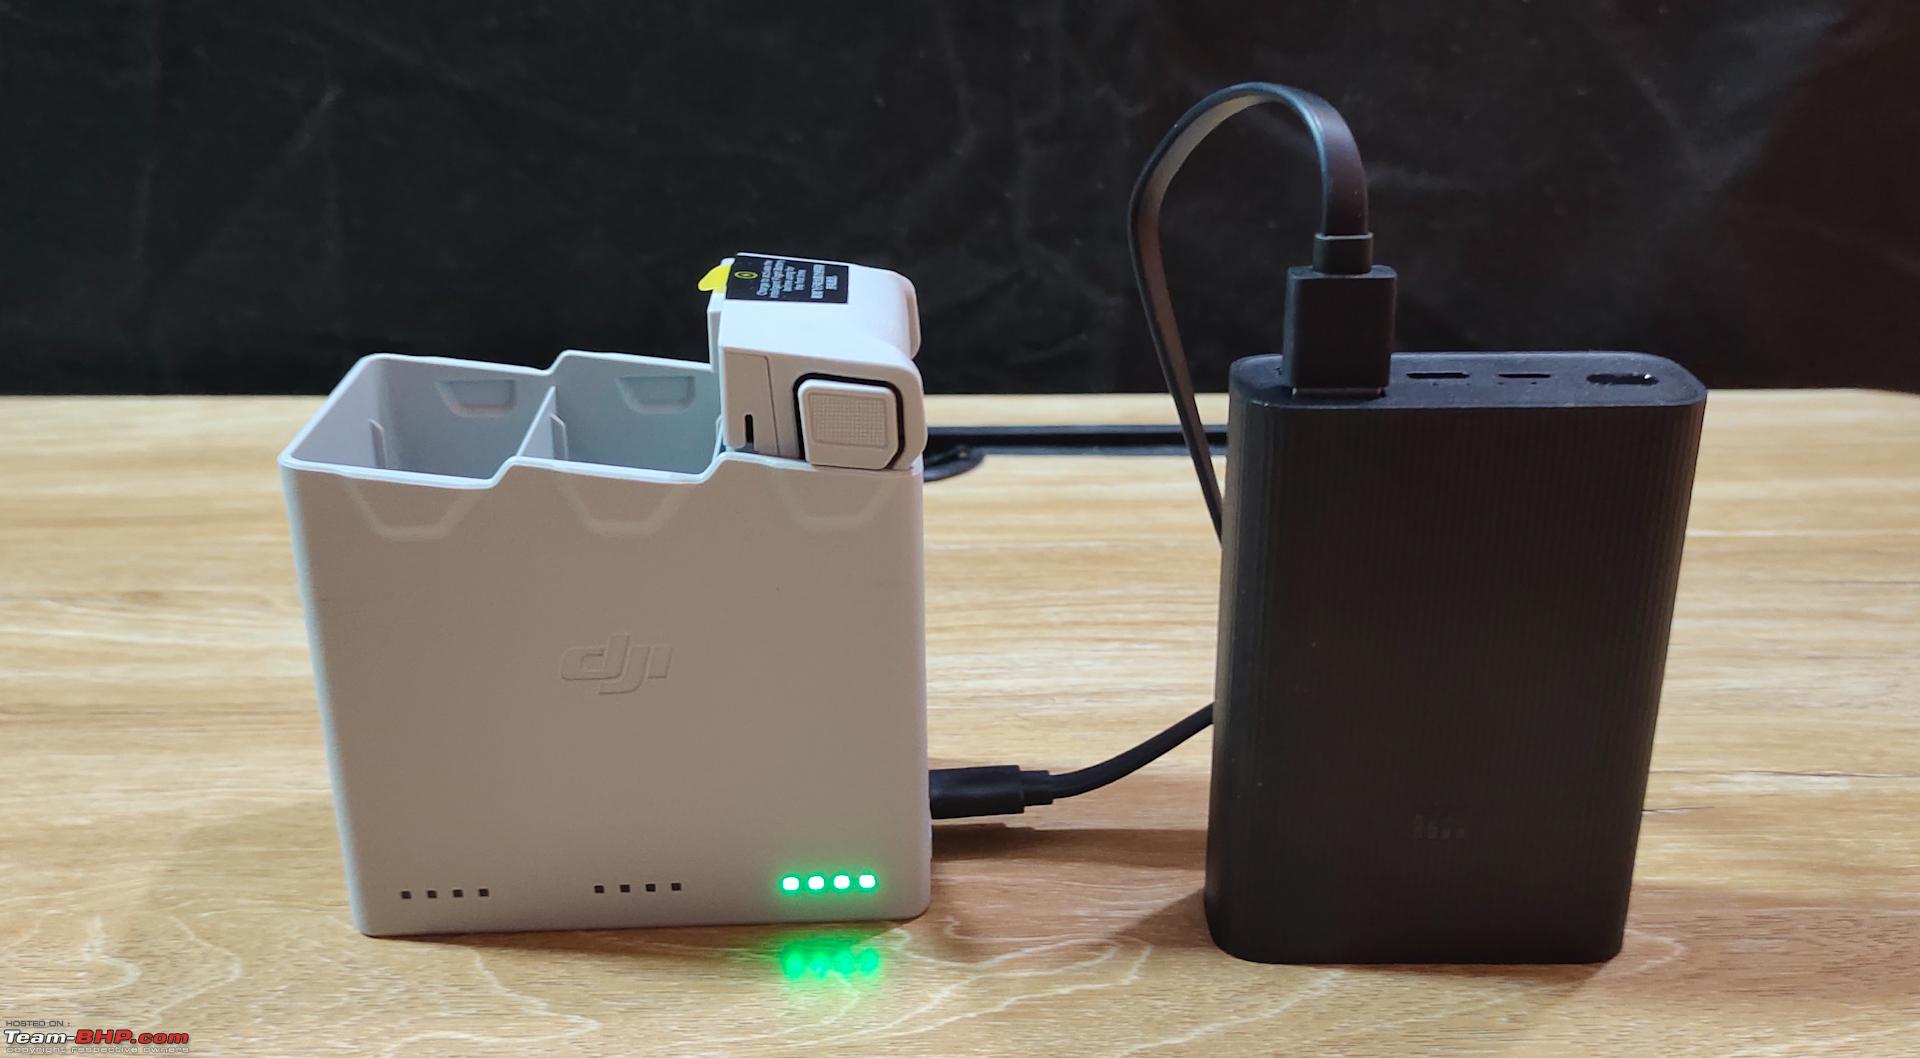 Protective Front cover for the drone: 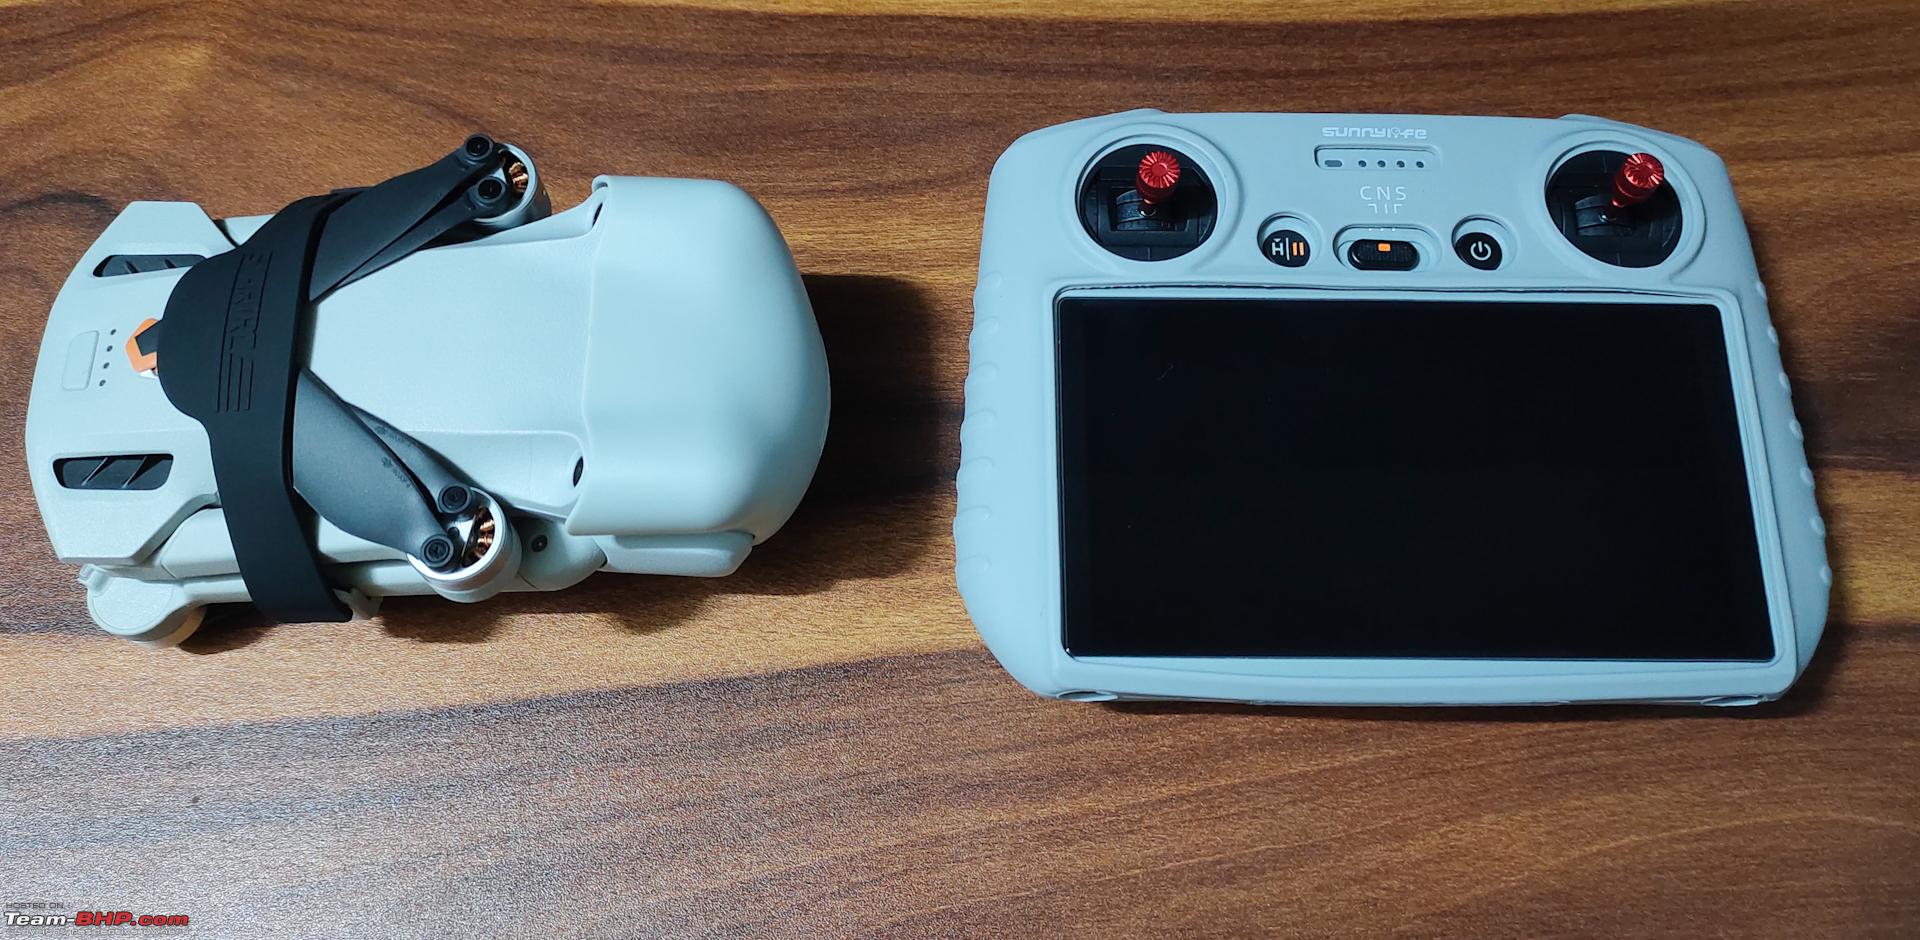 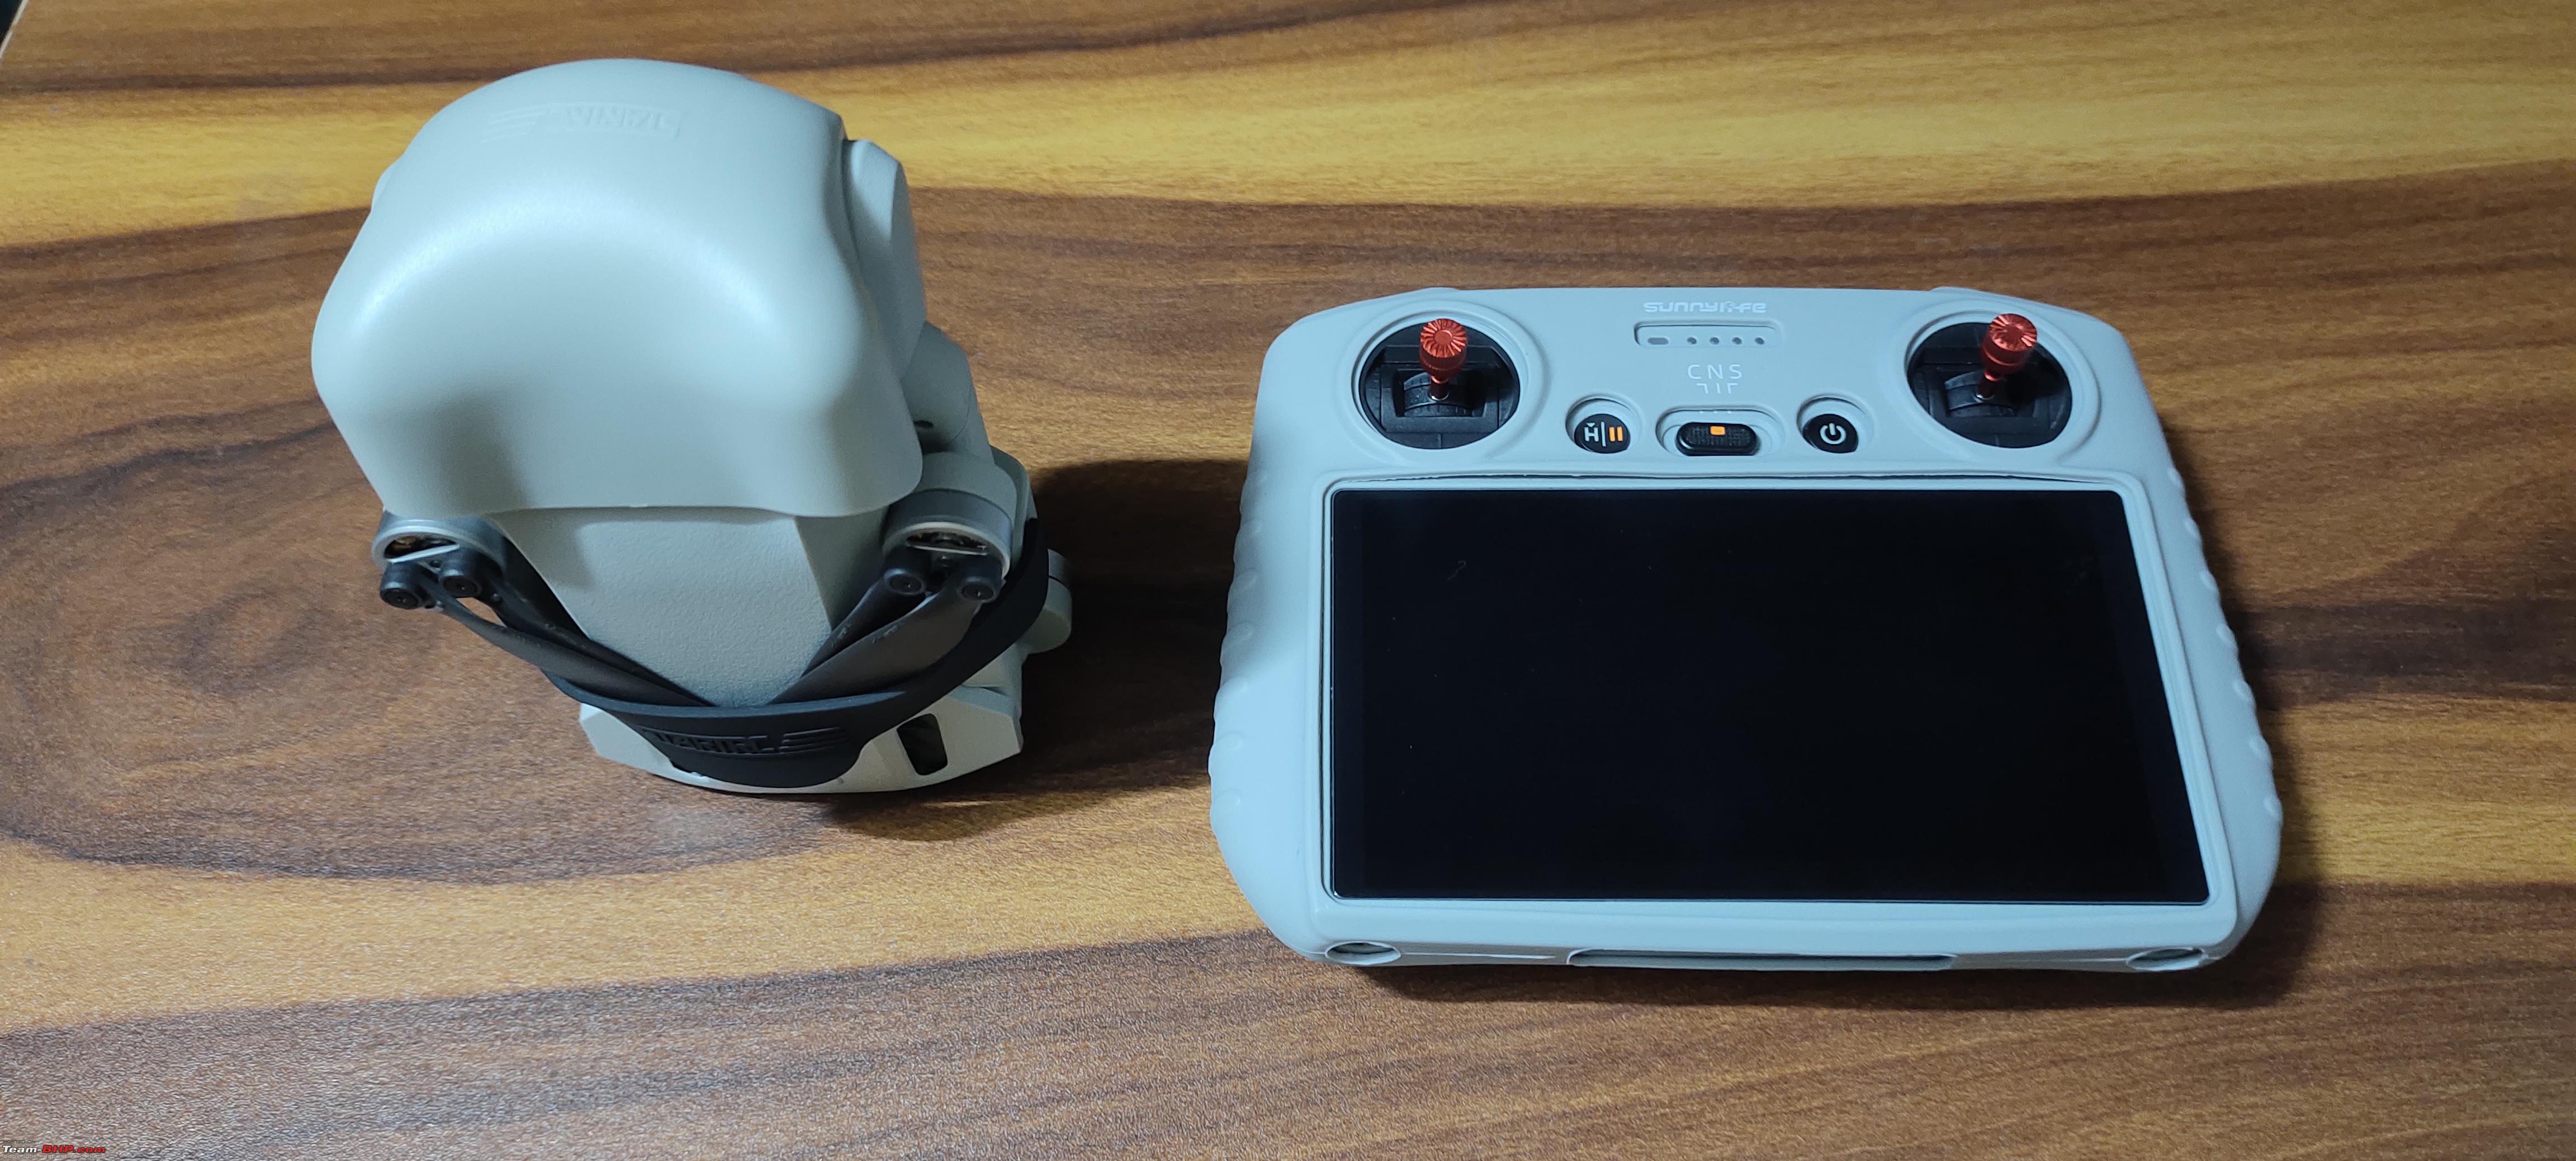   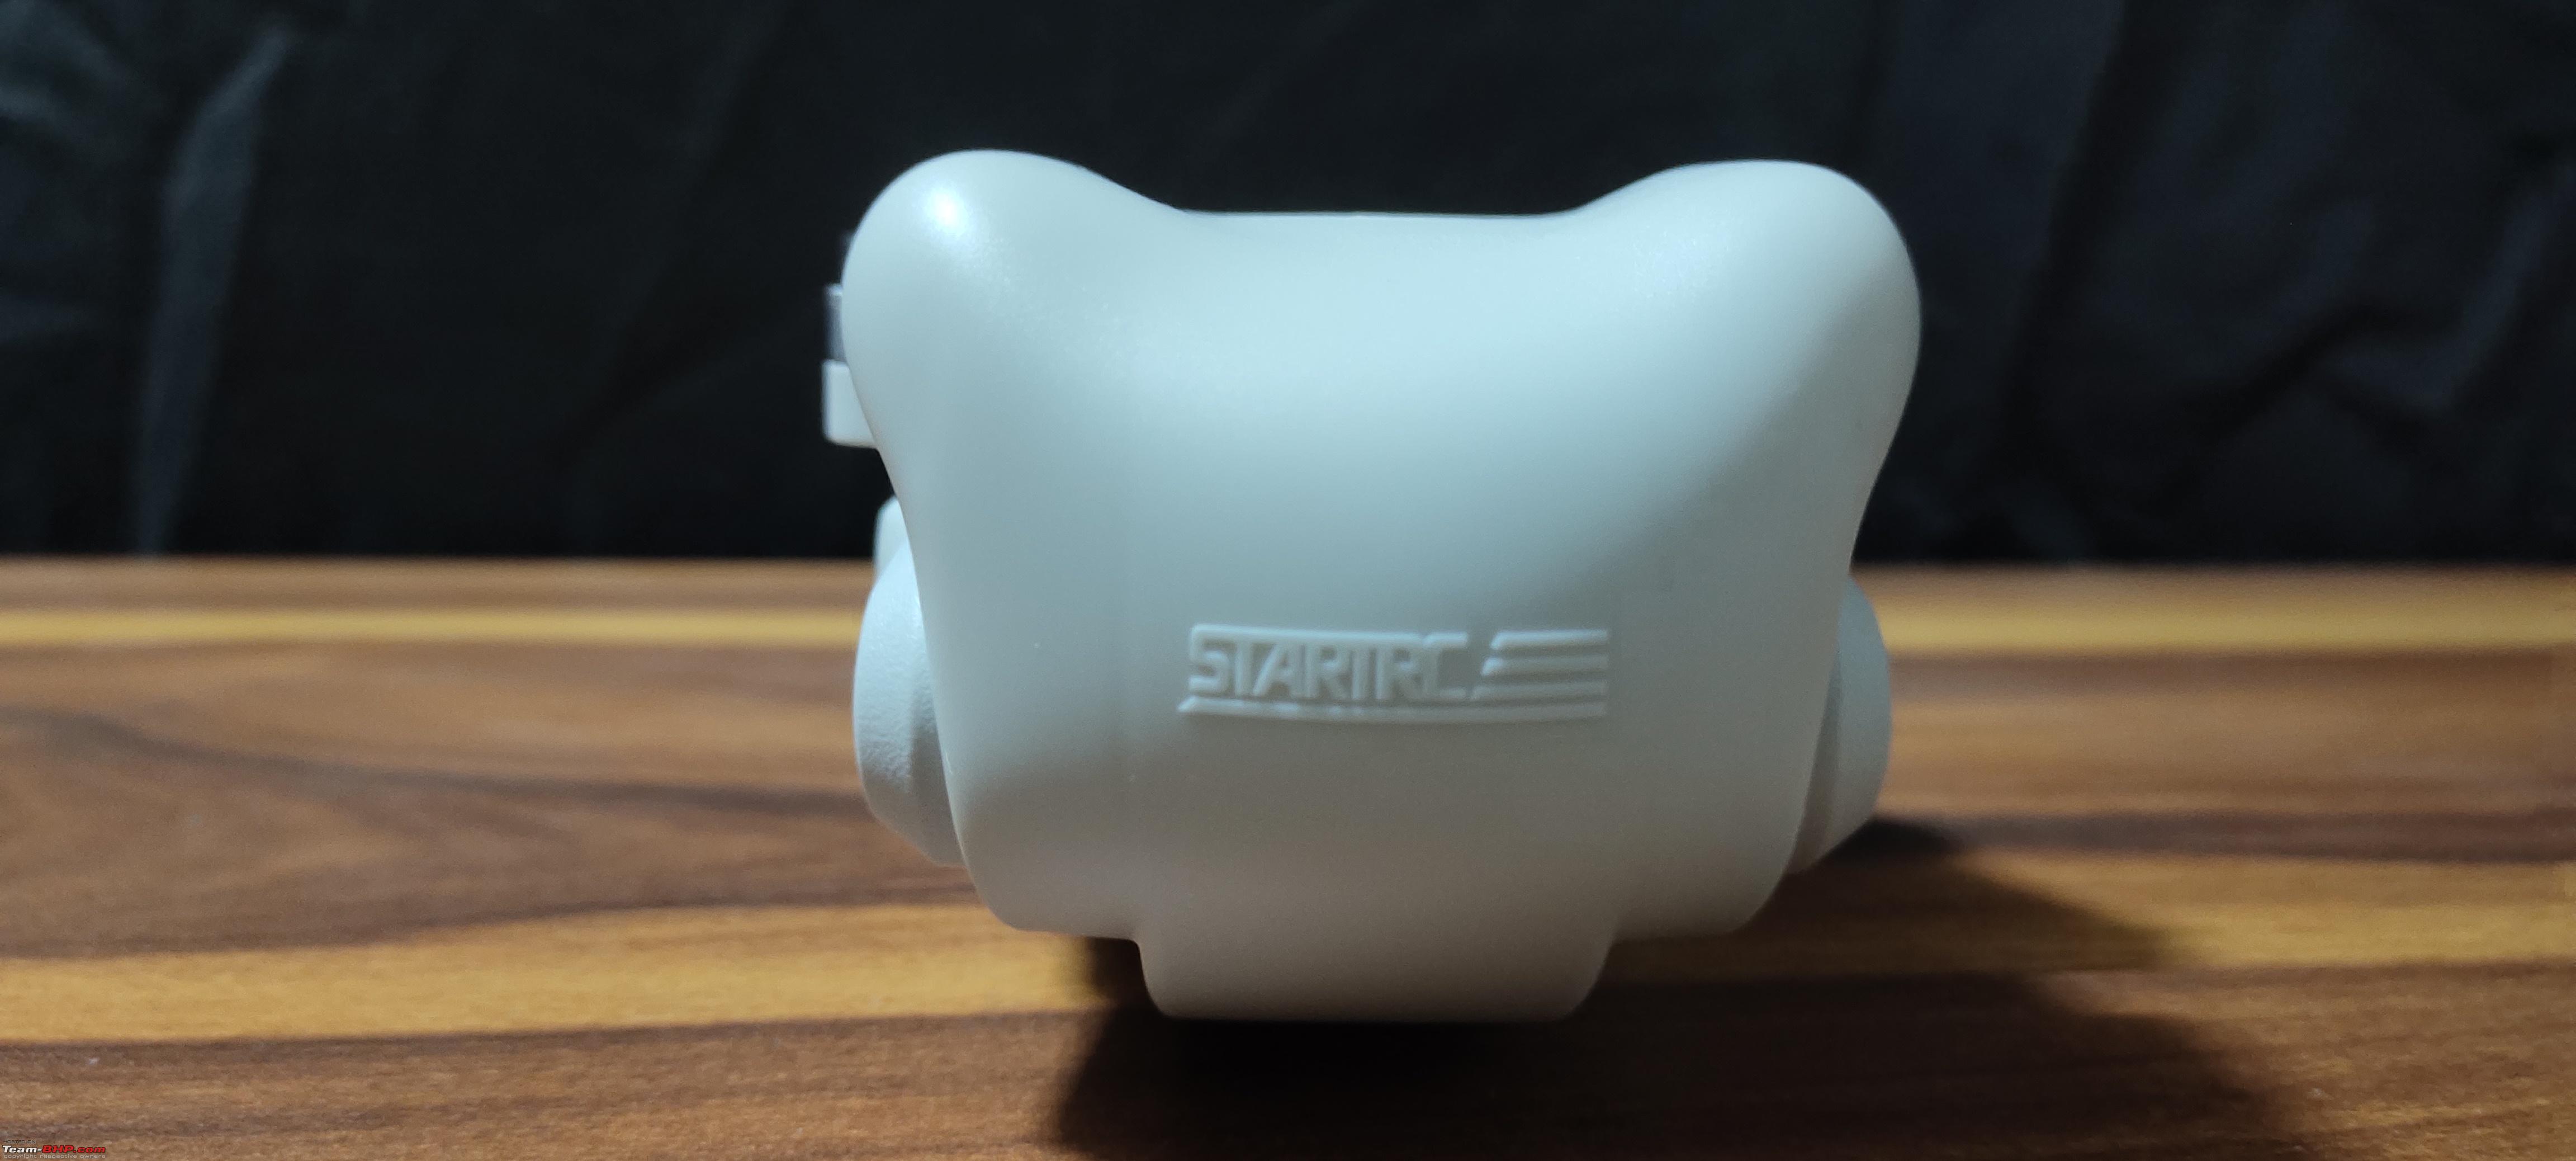 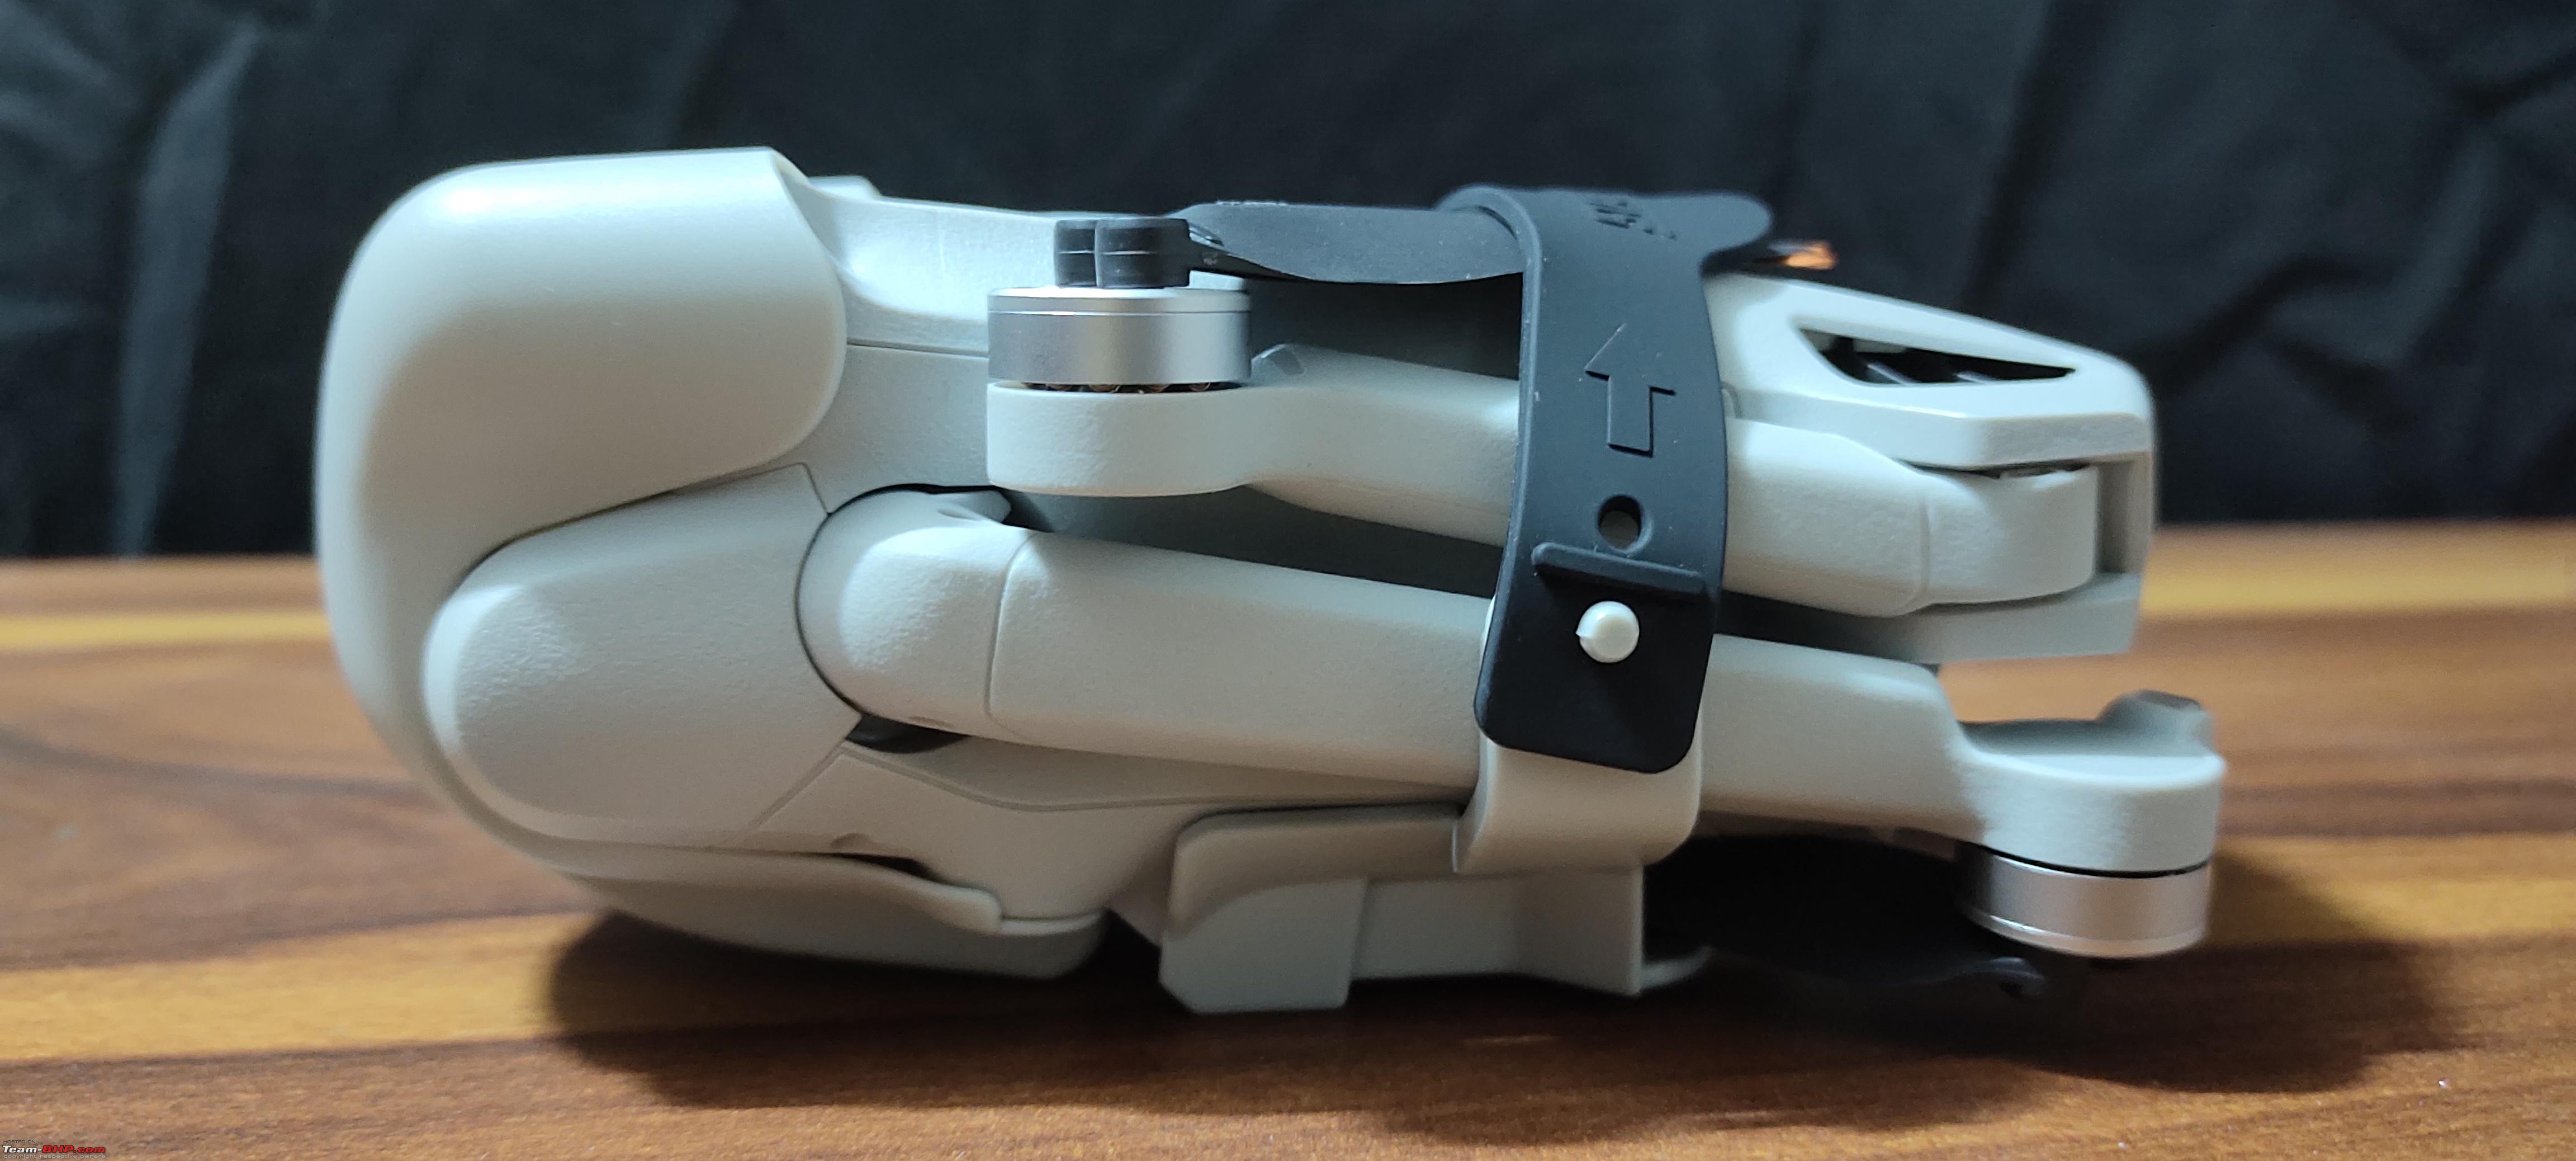  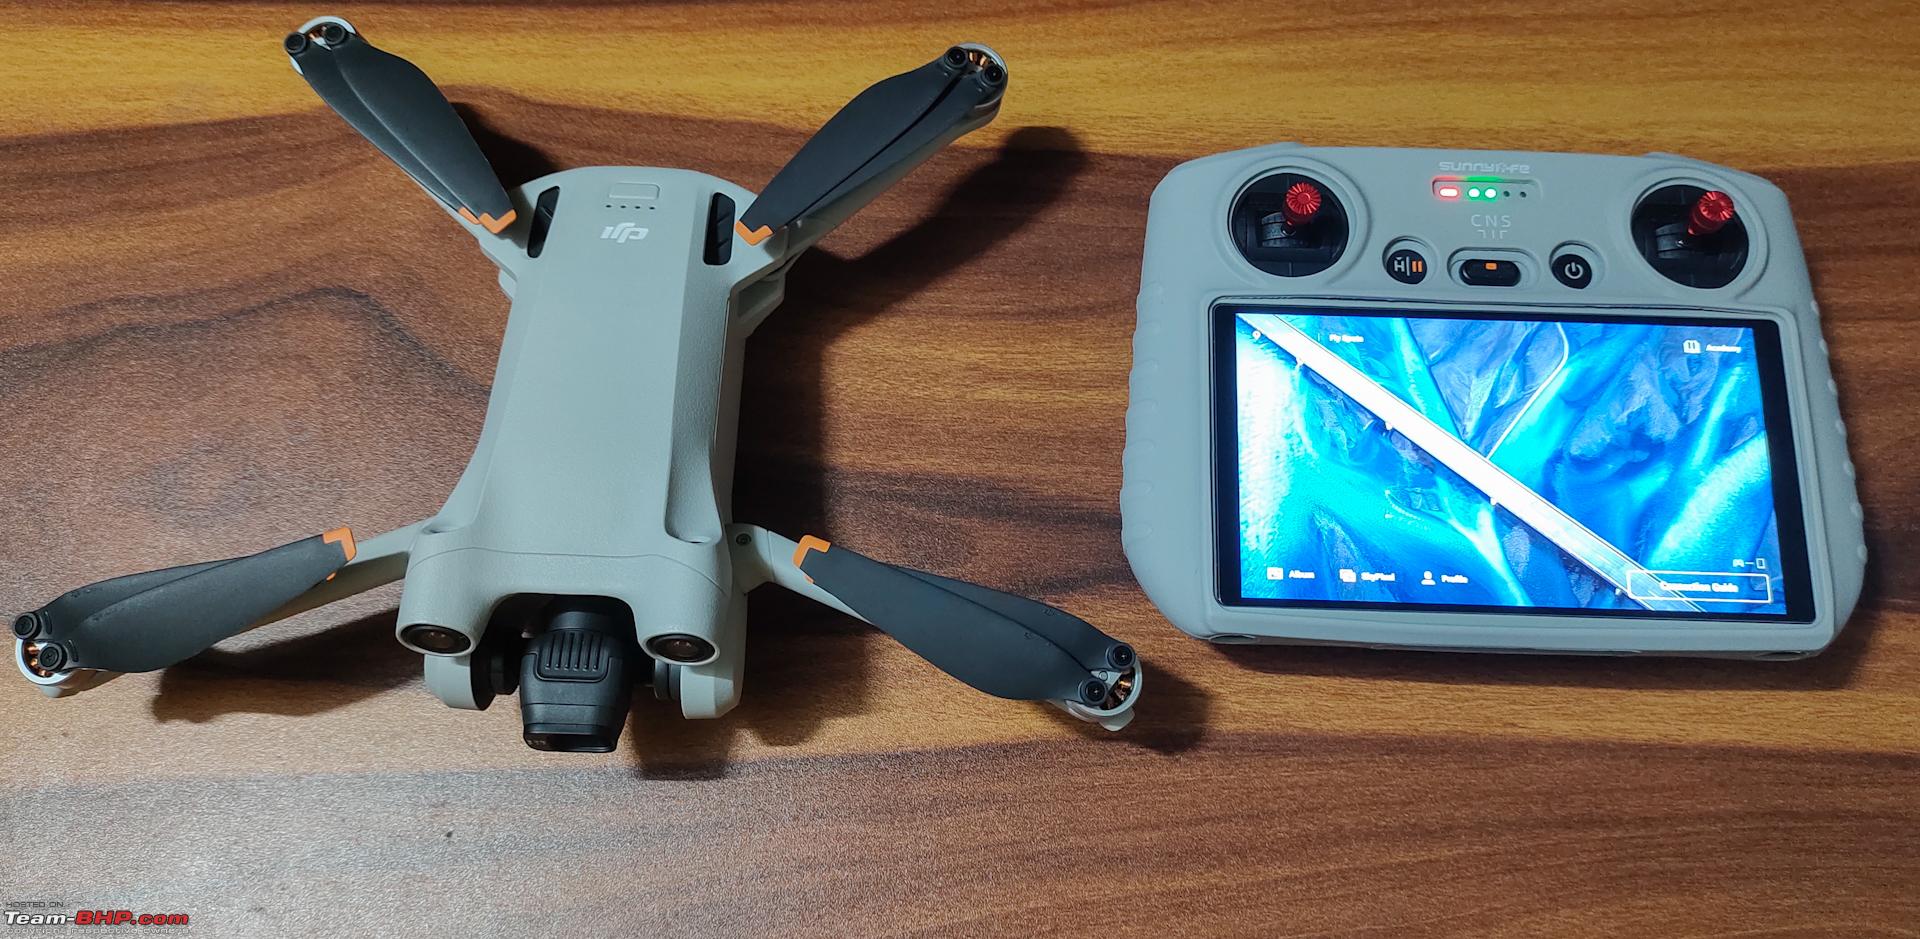 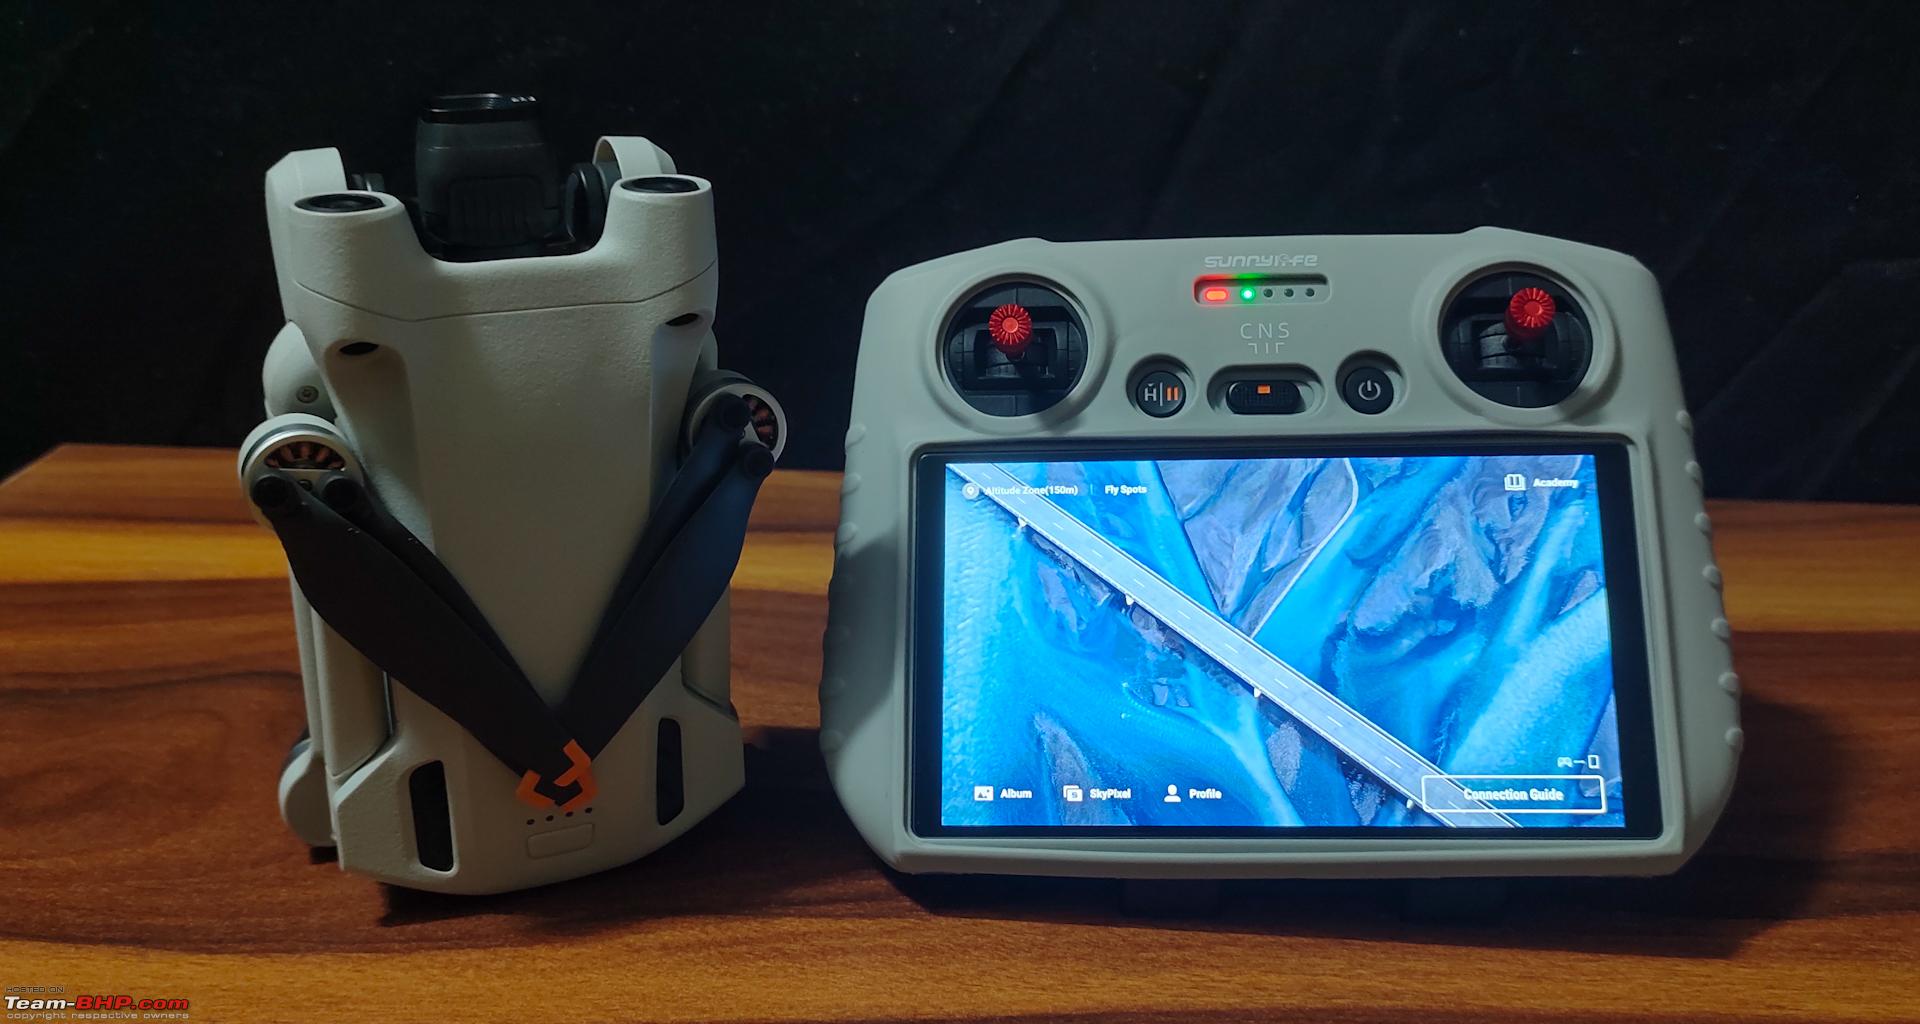 Last edited by Amyth Prabhakar : 9th December 2022 at 09:35. |
|
| (20)
Thanks
|
| The following 20 BHPians Thank Amyth Prabhakar for this useful post: | AdityaDeane, arvindmanju, audioholic, CEF_Beasts, digitalnirvana, graaja, GTO, KarthikK, kung_foo_fanta, mail2sekh, NewUser123, NitSat, ph03n!x, ritesh_44, Roy.S, saikarthik, Samfromindia, shyamg28, TSIboy, xsrahul |
|
9th December 2022, 09:35
| #6 |
| BHPian | re: Dji Mini 3 Pro Review | The Best Nano Drone The last post is exclusively for RC: Did not want to add too many pics at the start and clutter the content. Booting up the RC: The fly app is pre-installed and paired with the aircraft. It automatically connects and enters the camera view.  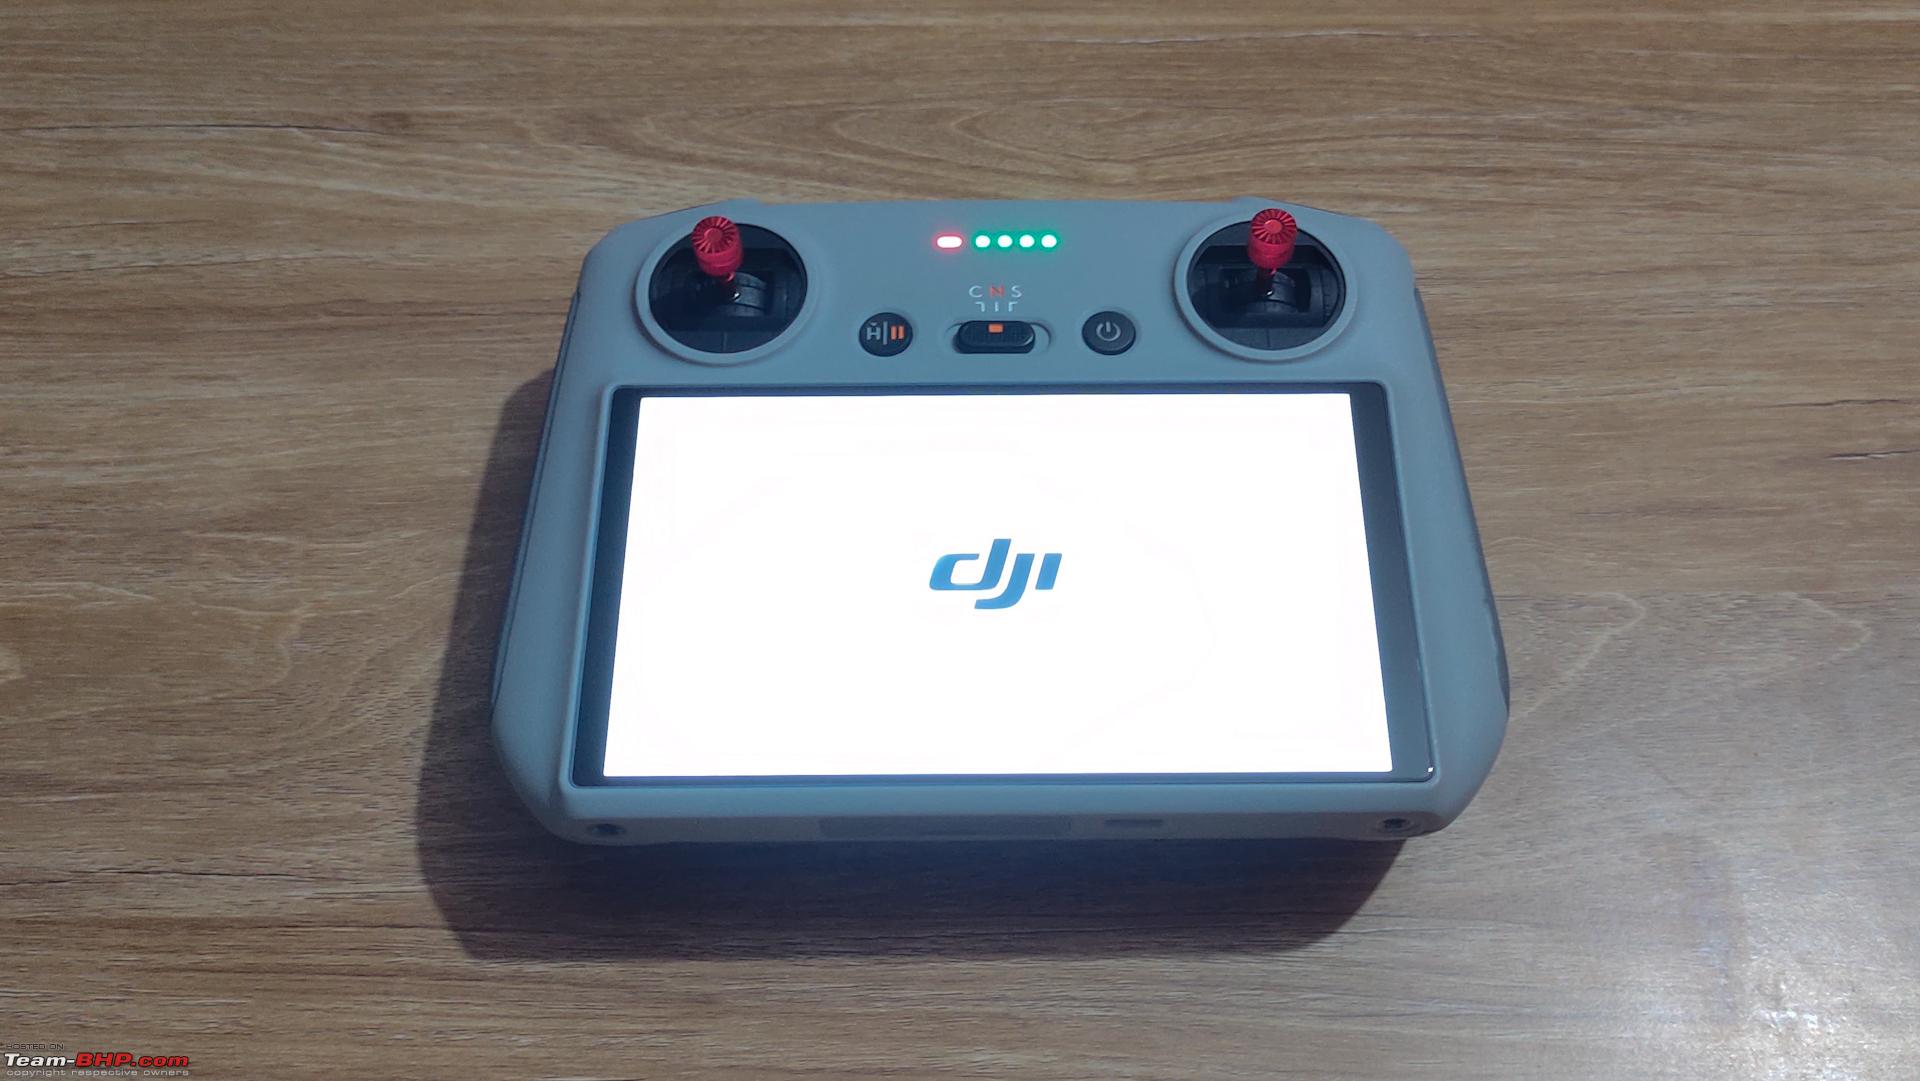 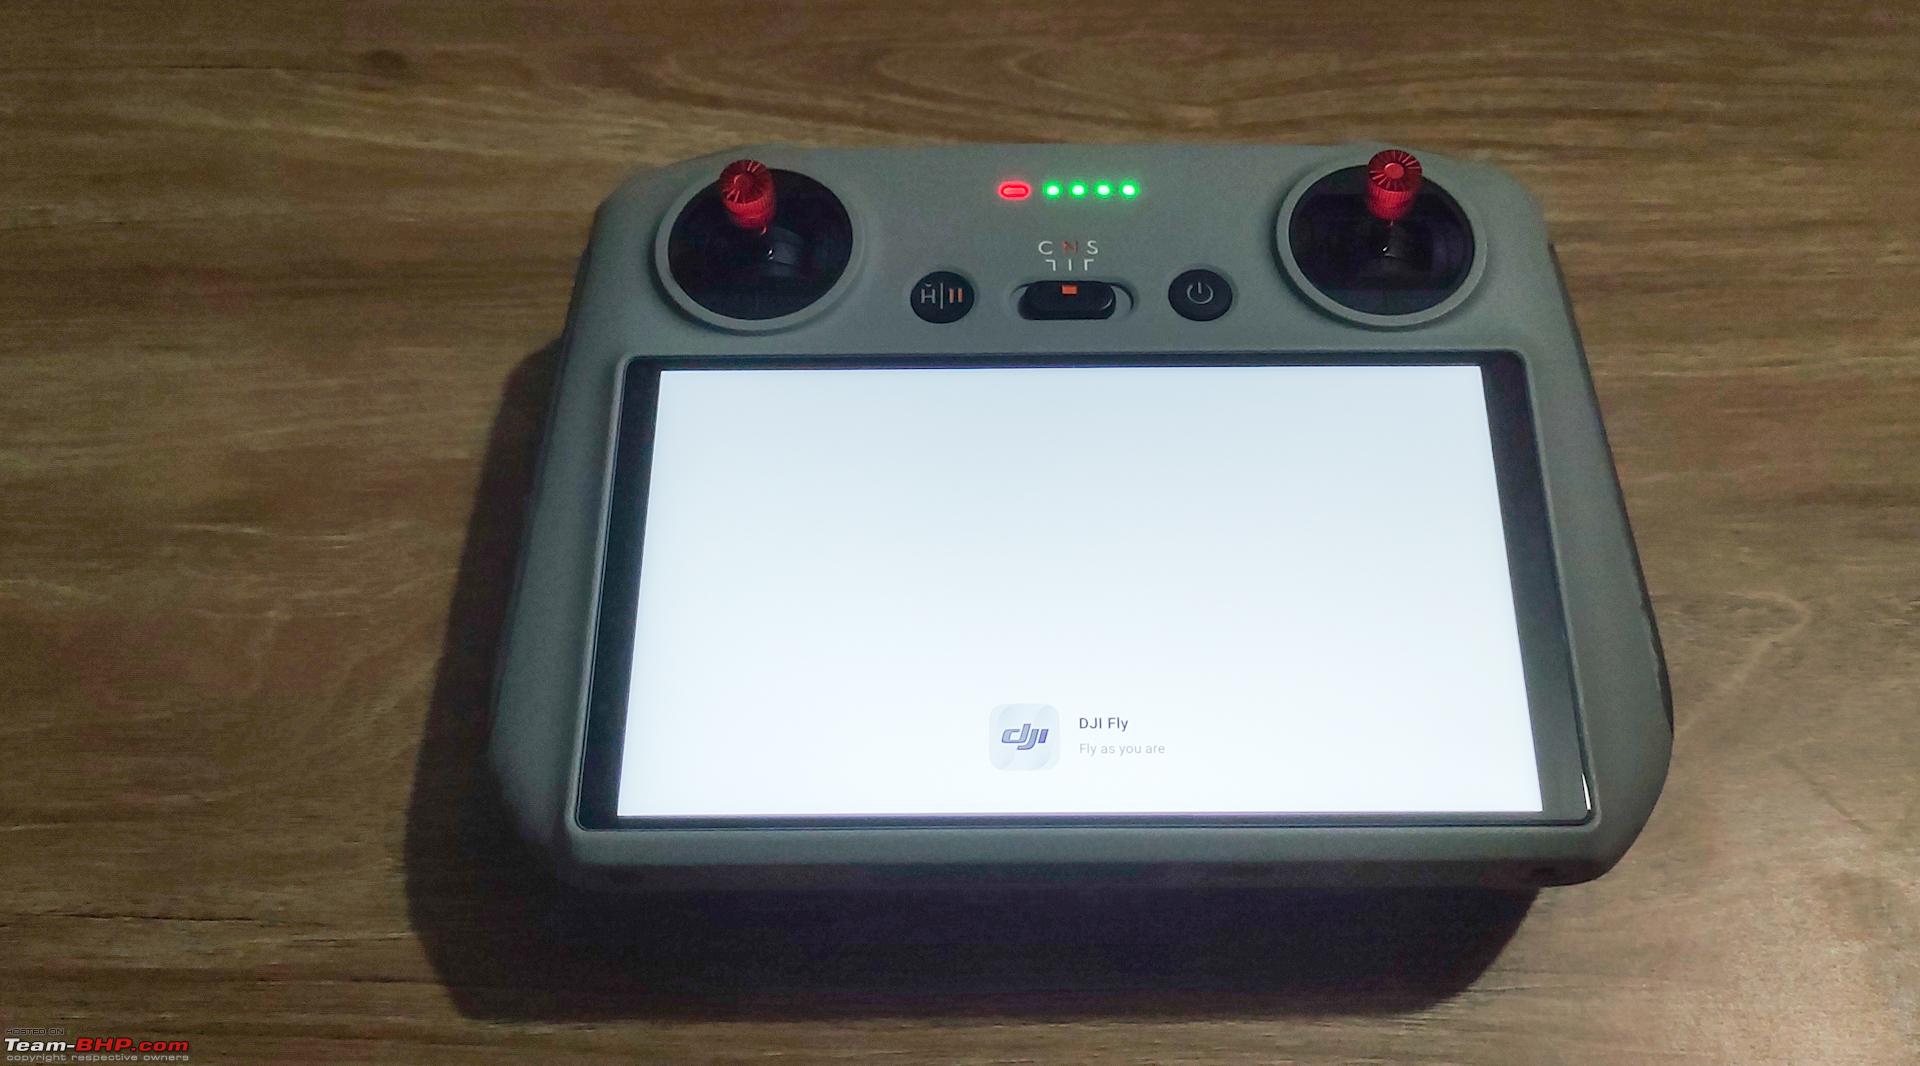    The fly safe database: It basically checks if it is a safe zone to fly the drone. If not the built-in Geo-fencing prevents take off. A request can also be sent to DJI along with pilot license and other approvals to unlock a particular zone. 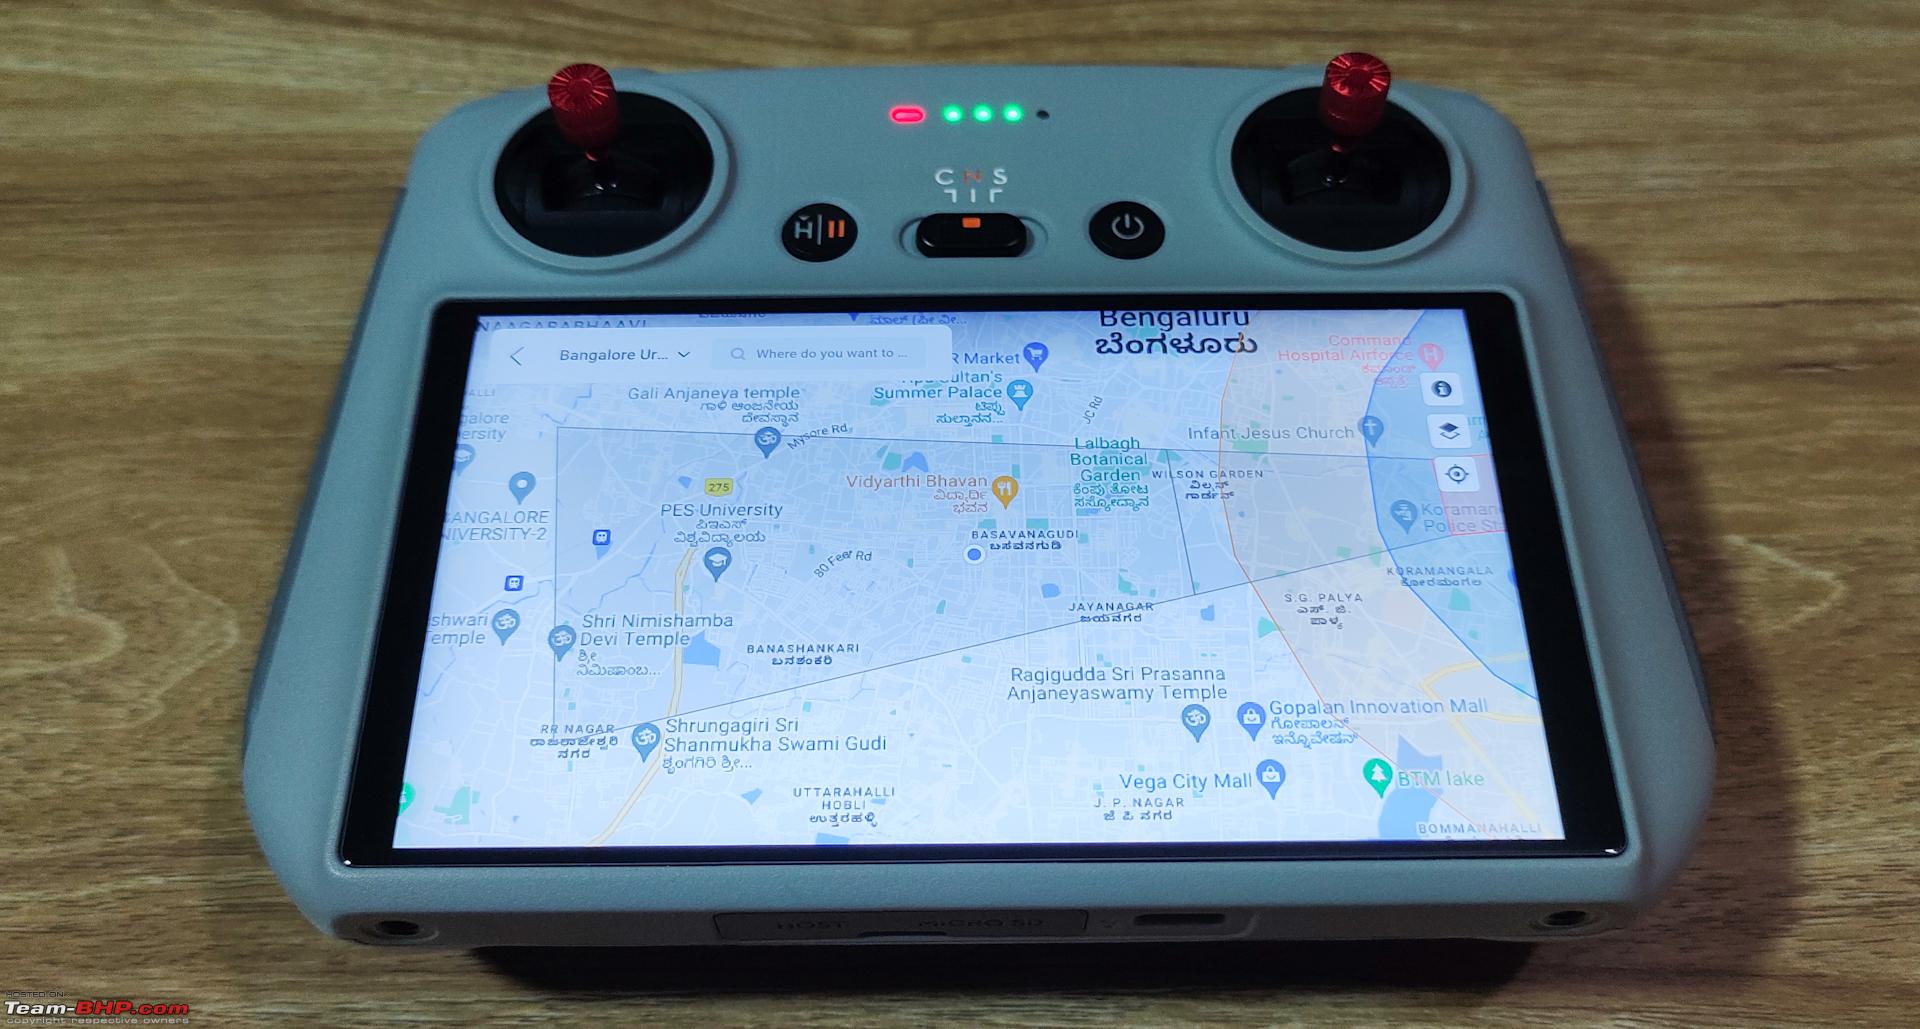 The flight logs. They can be retained or deleted. It can also be synced with the DJI account and very helpful during crash investigations. DJI can automatically retrieve them from your account. 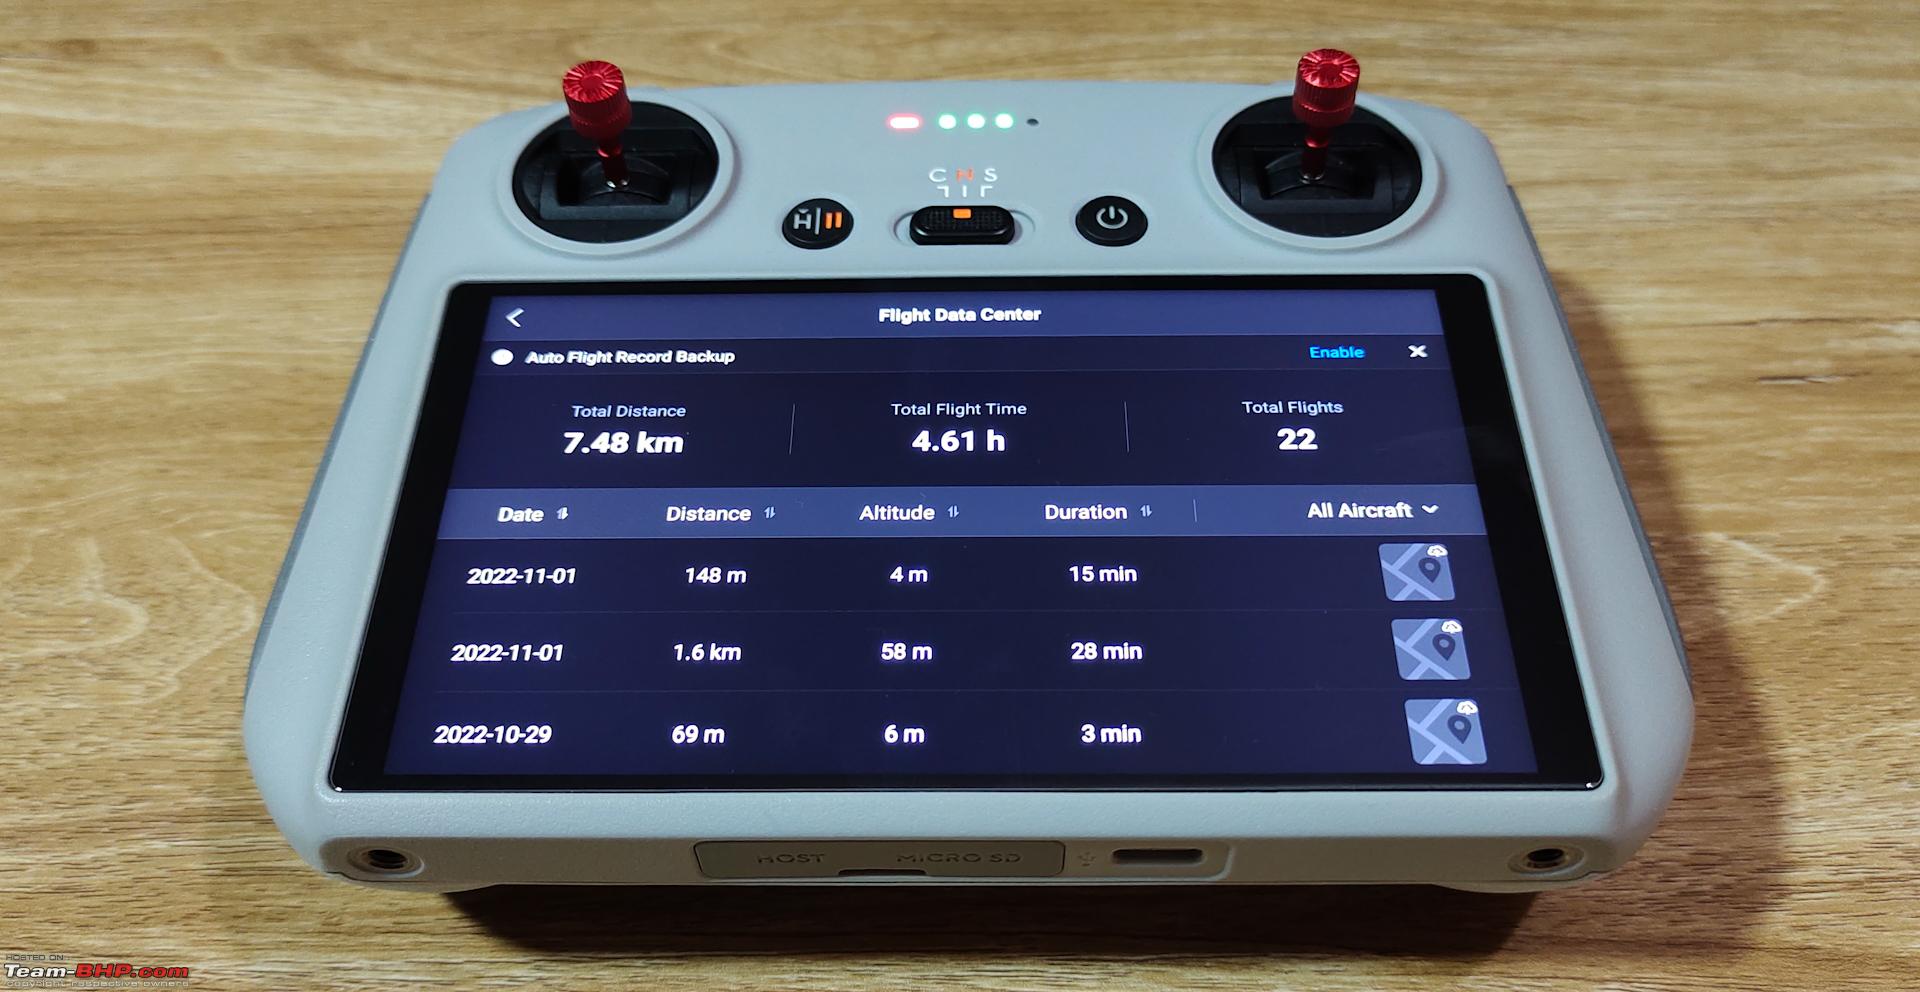 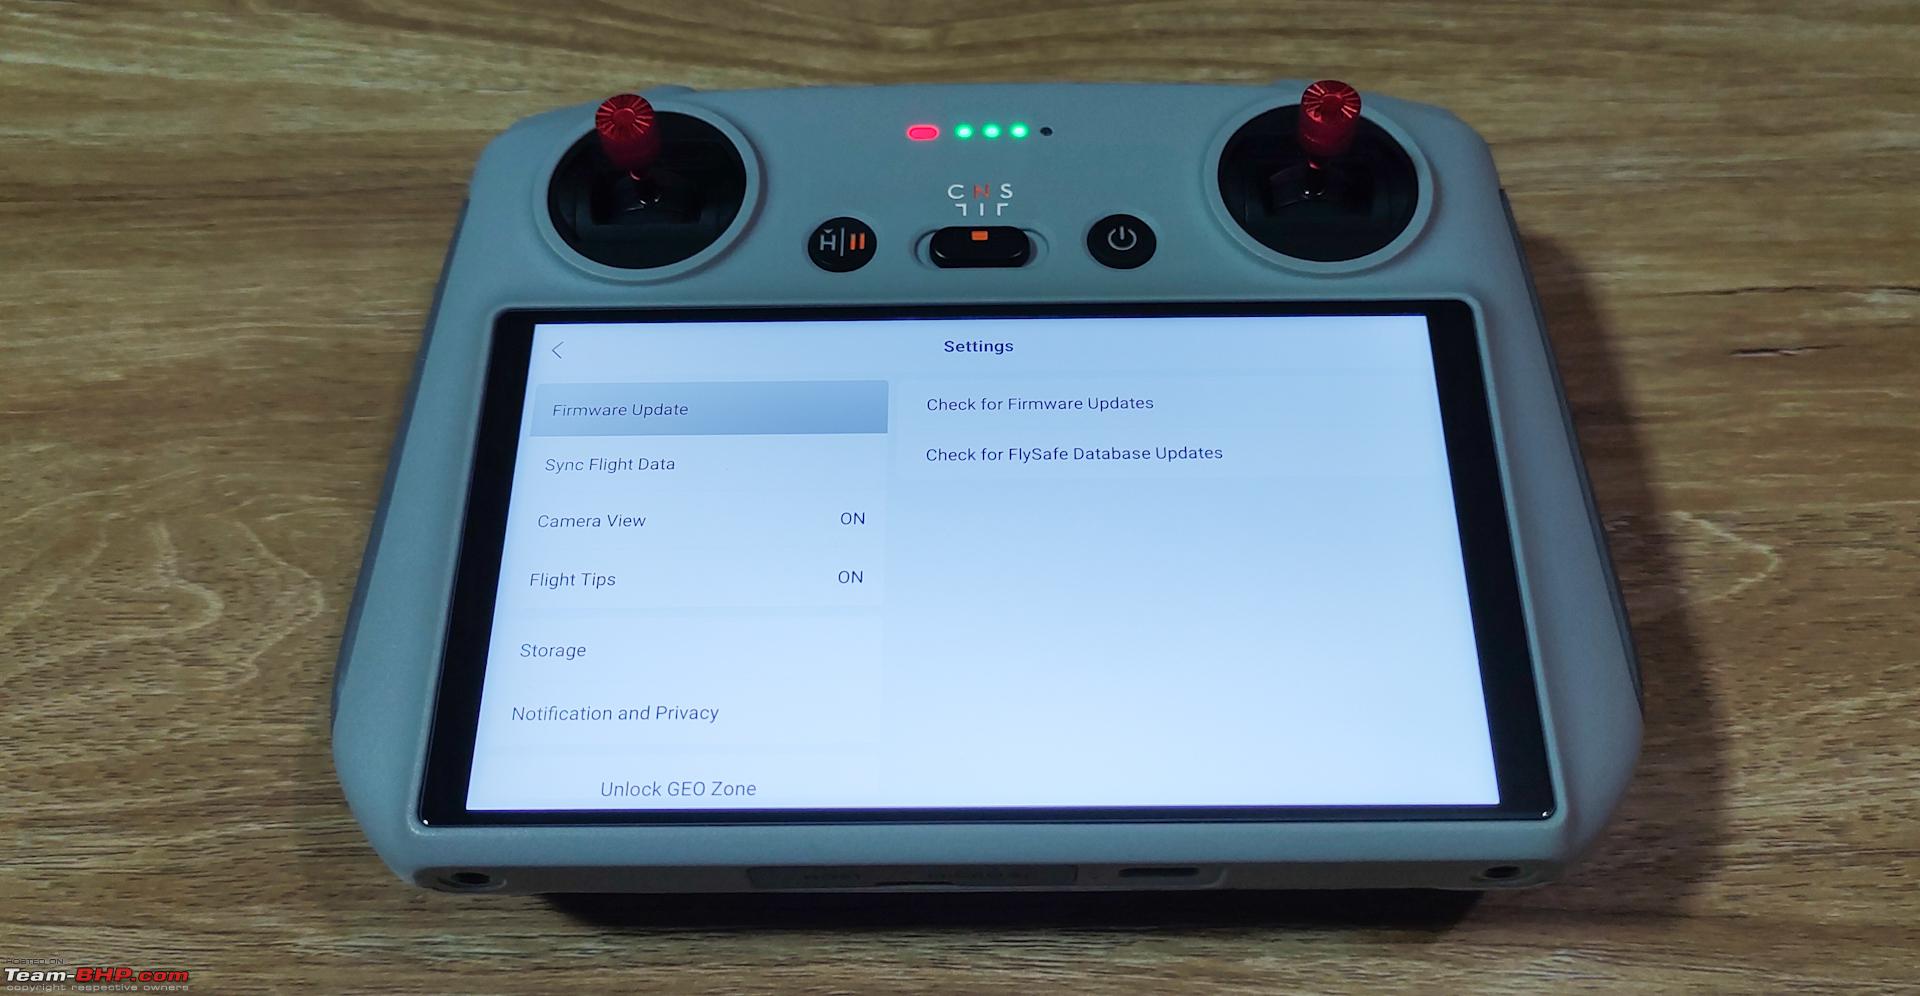 The RC has 4 GB of internal storage and can used for screen recording. It can also be connected to a computer as an external hard drive.    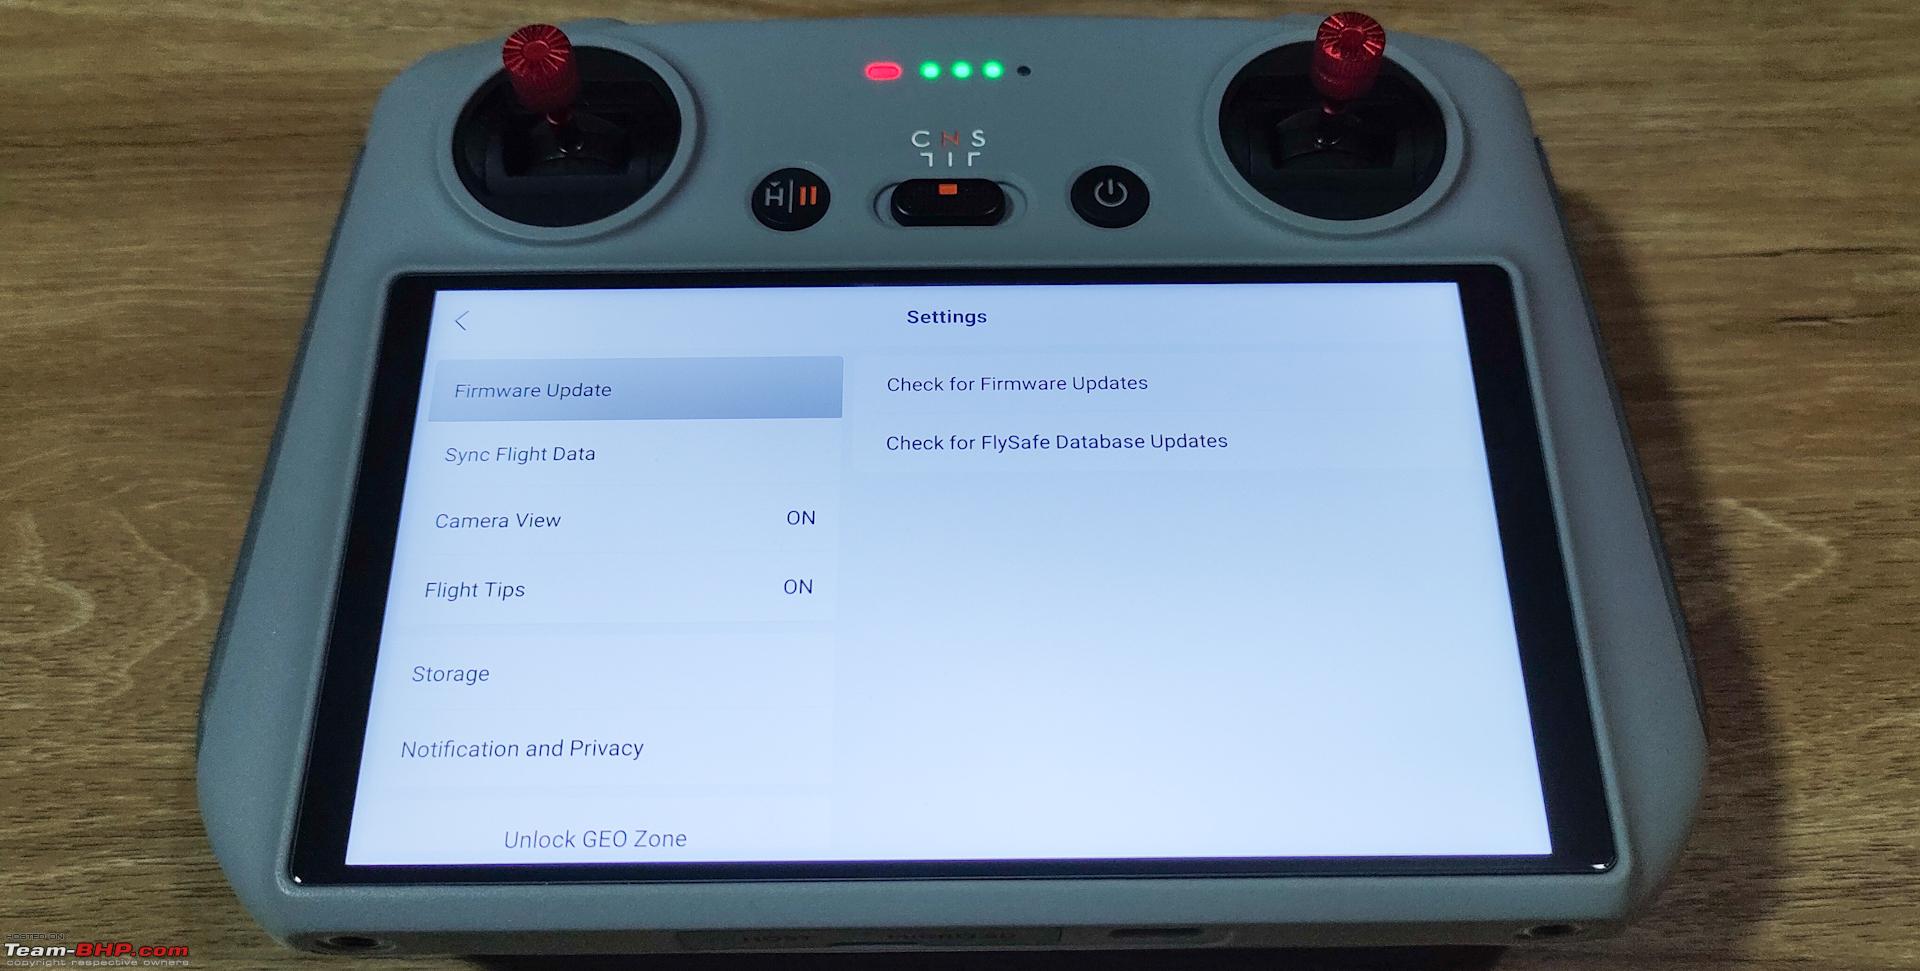 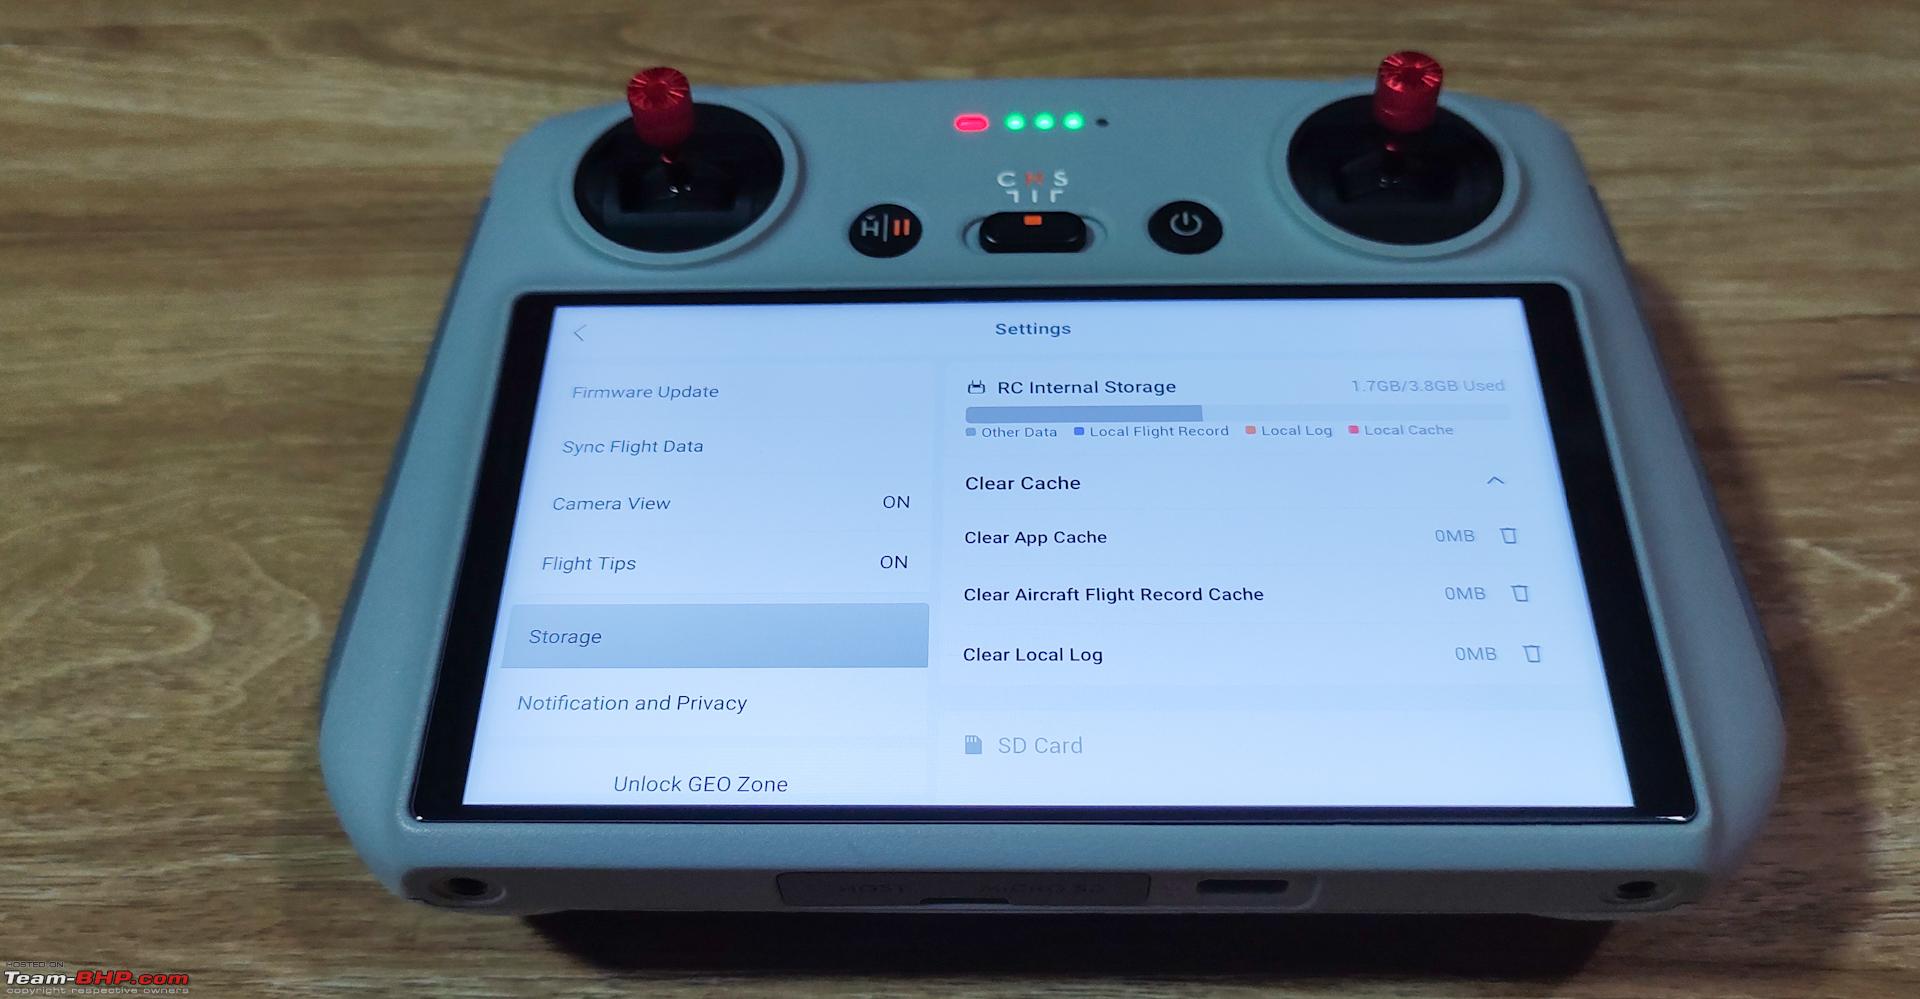 The RC works with the new models such as the Mavic 3 classic as well. 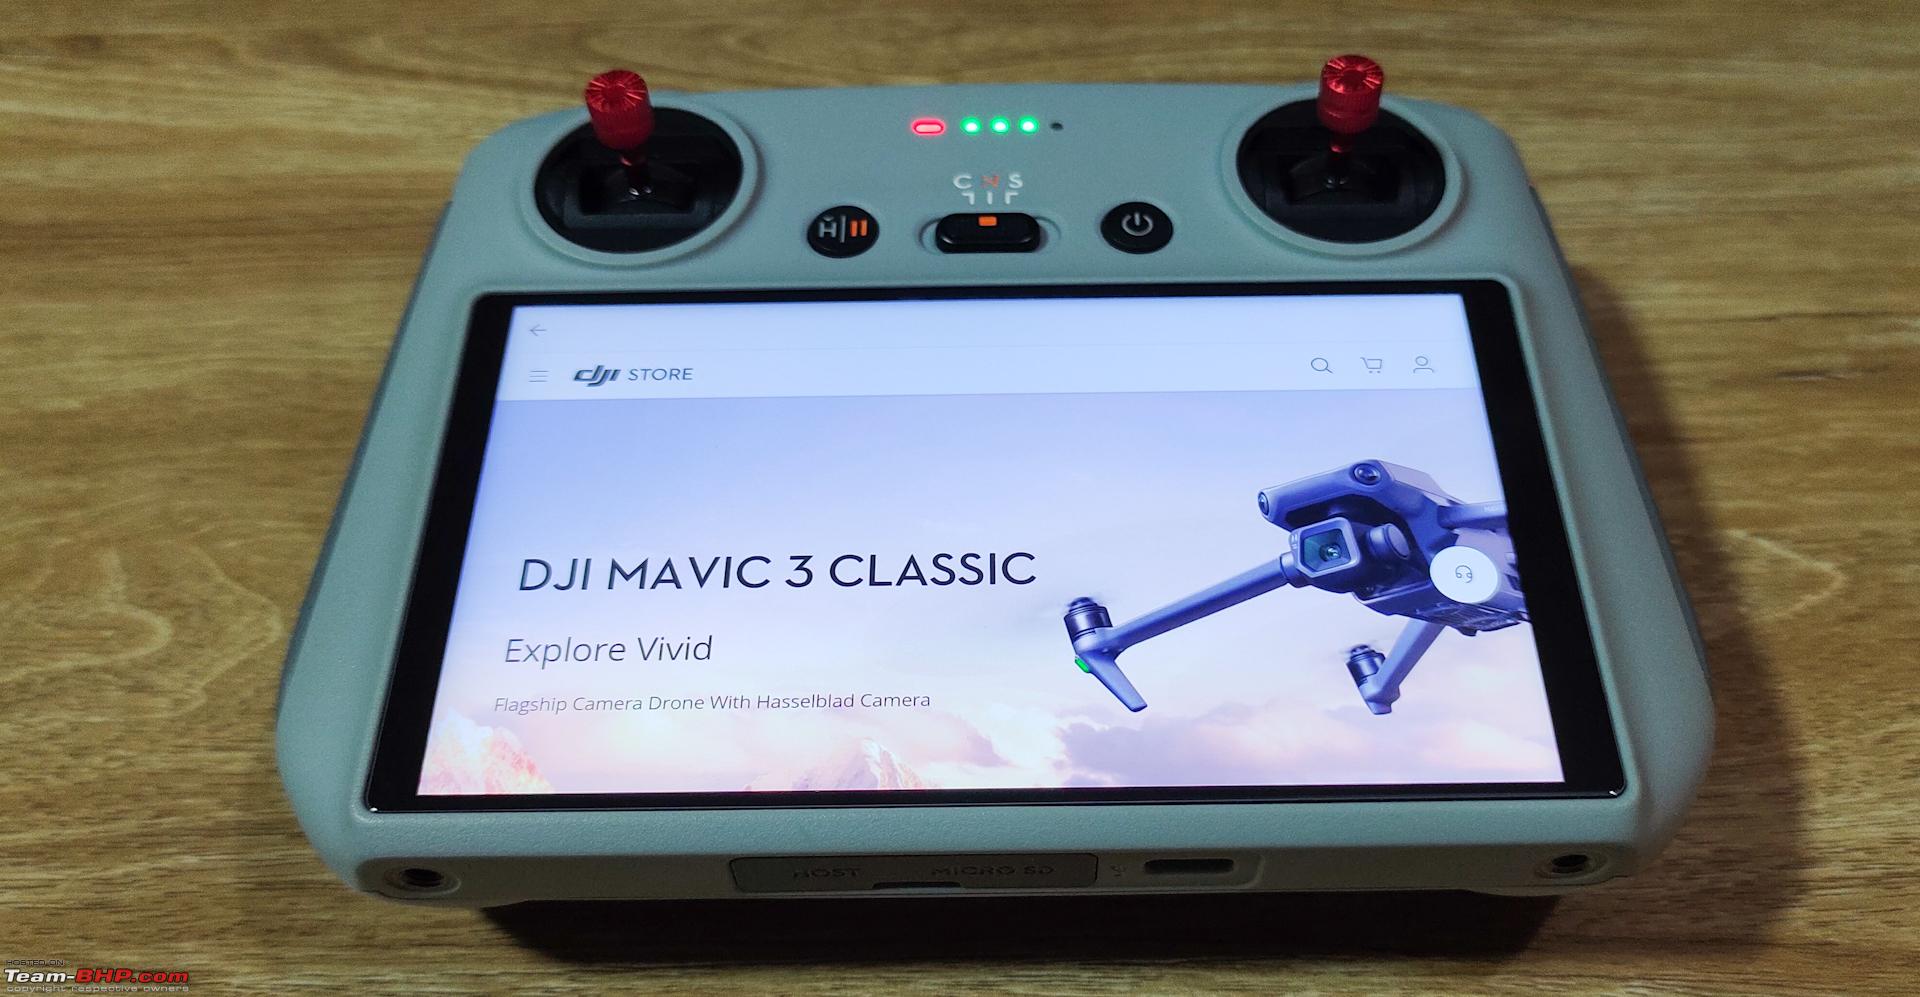  DJI store: 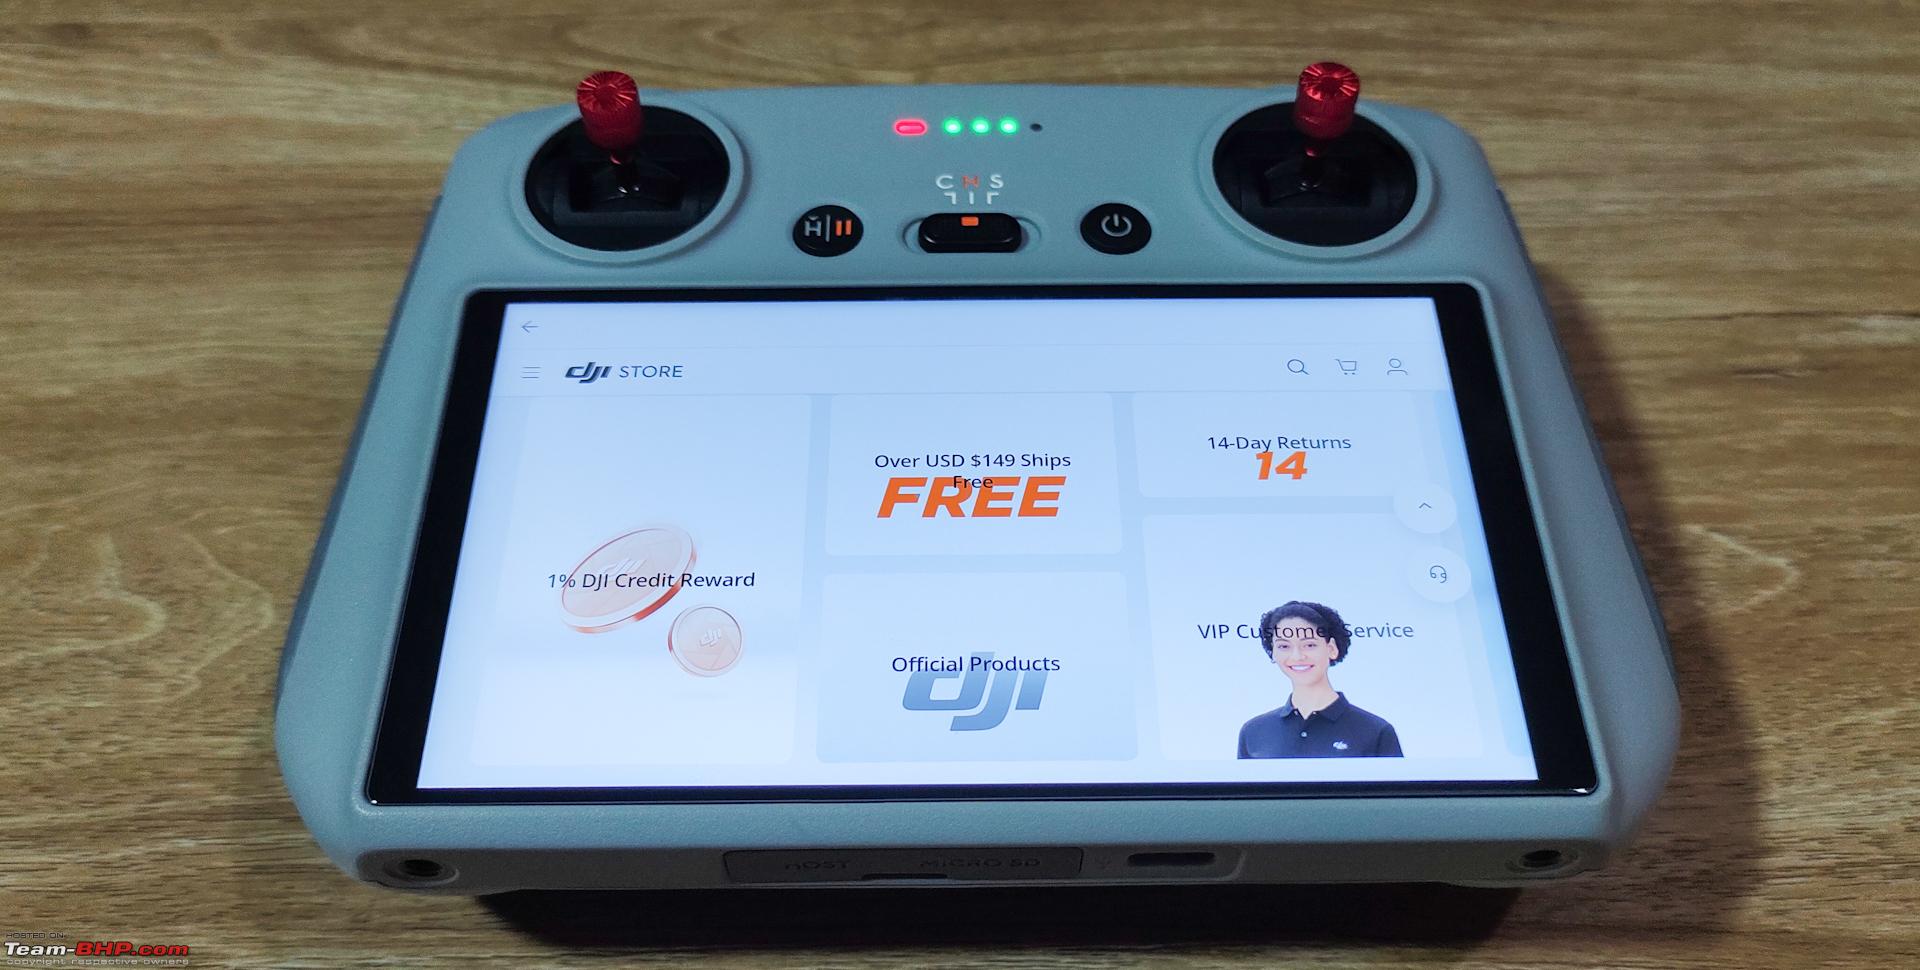  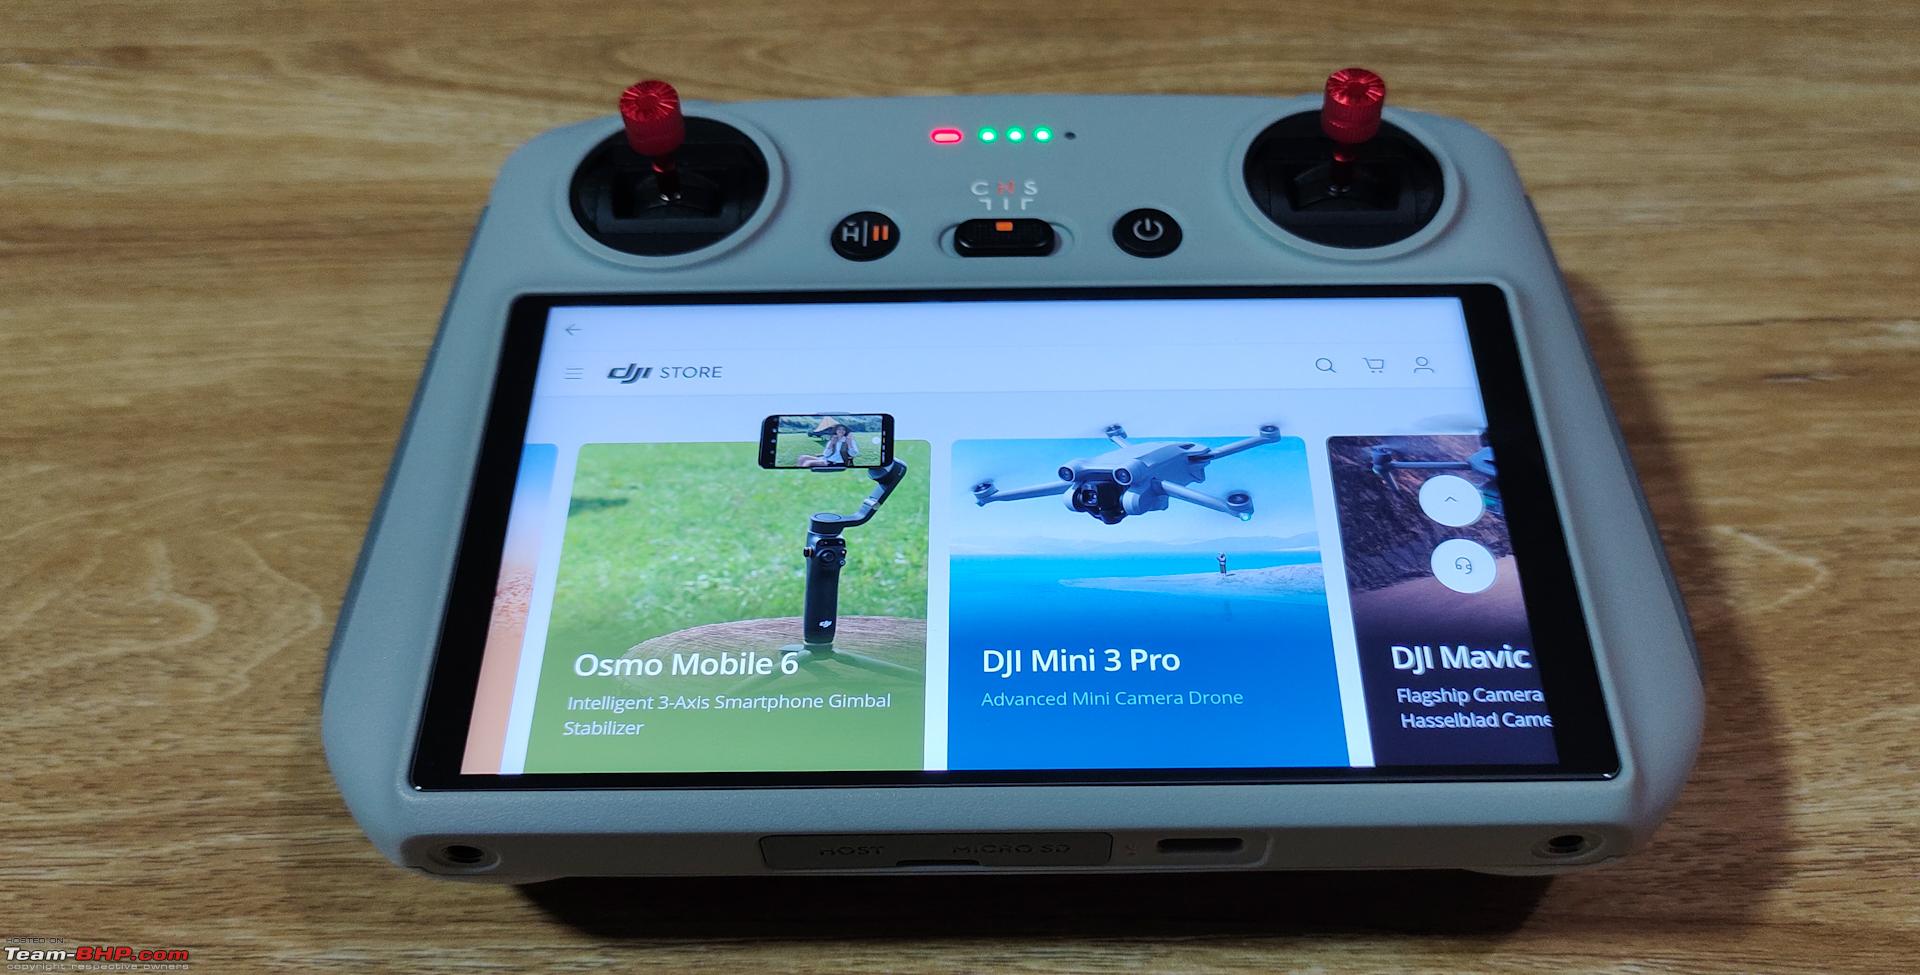  DJI Forum: Can be used to interact with fellow pilots. 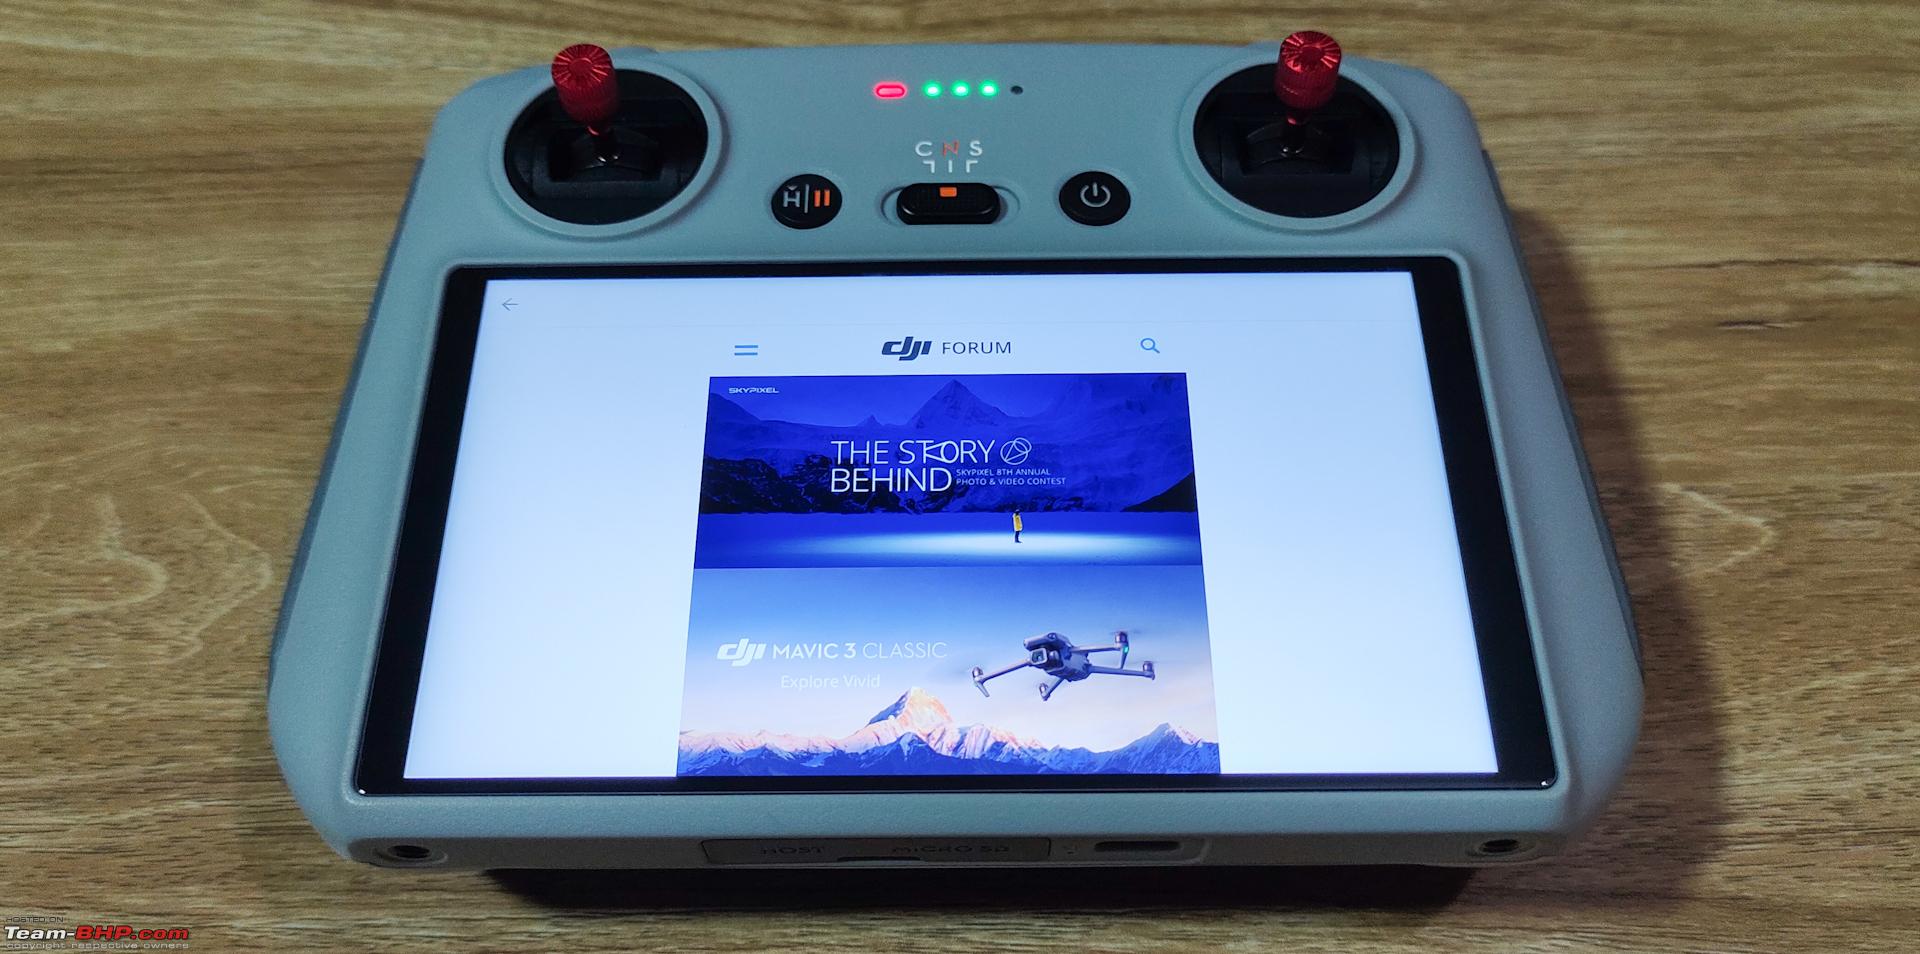  Find my Drone: It can used to recover the drone after a crash or if it flies off and lands somewhere else. The drone can be tracked or traced by using the last known GPS location. The drone can also be forced to beep continuously and flash lights to catch one's attention if it is not easily visible at the crash site. However, there are limitations and this may not be as easy as it sounds. It is not possible to get it back the drone in all situations and it is safe to always fly the drone within the visual line of sight.   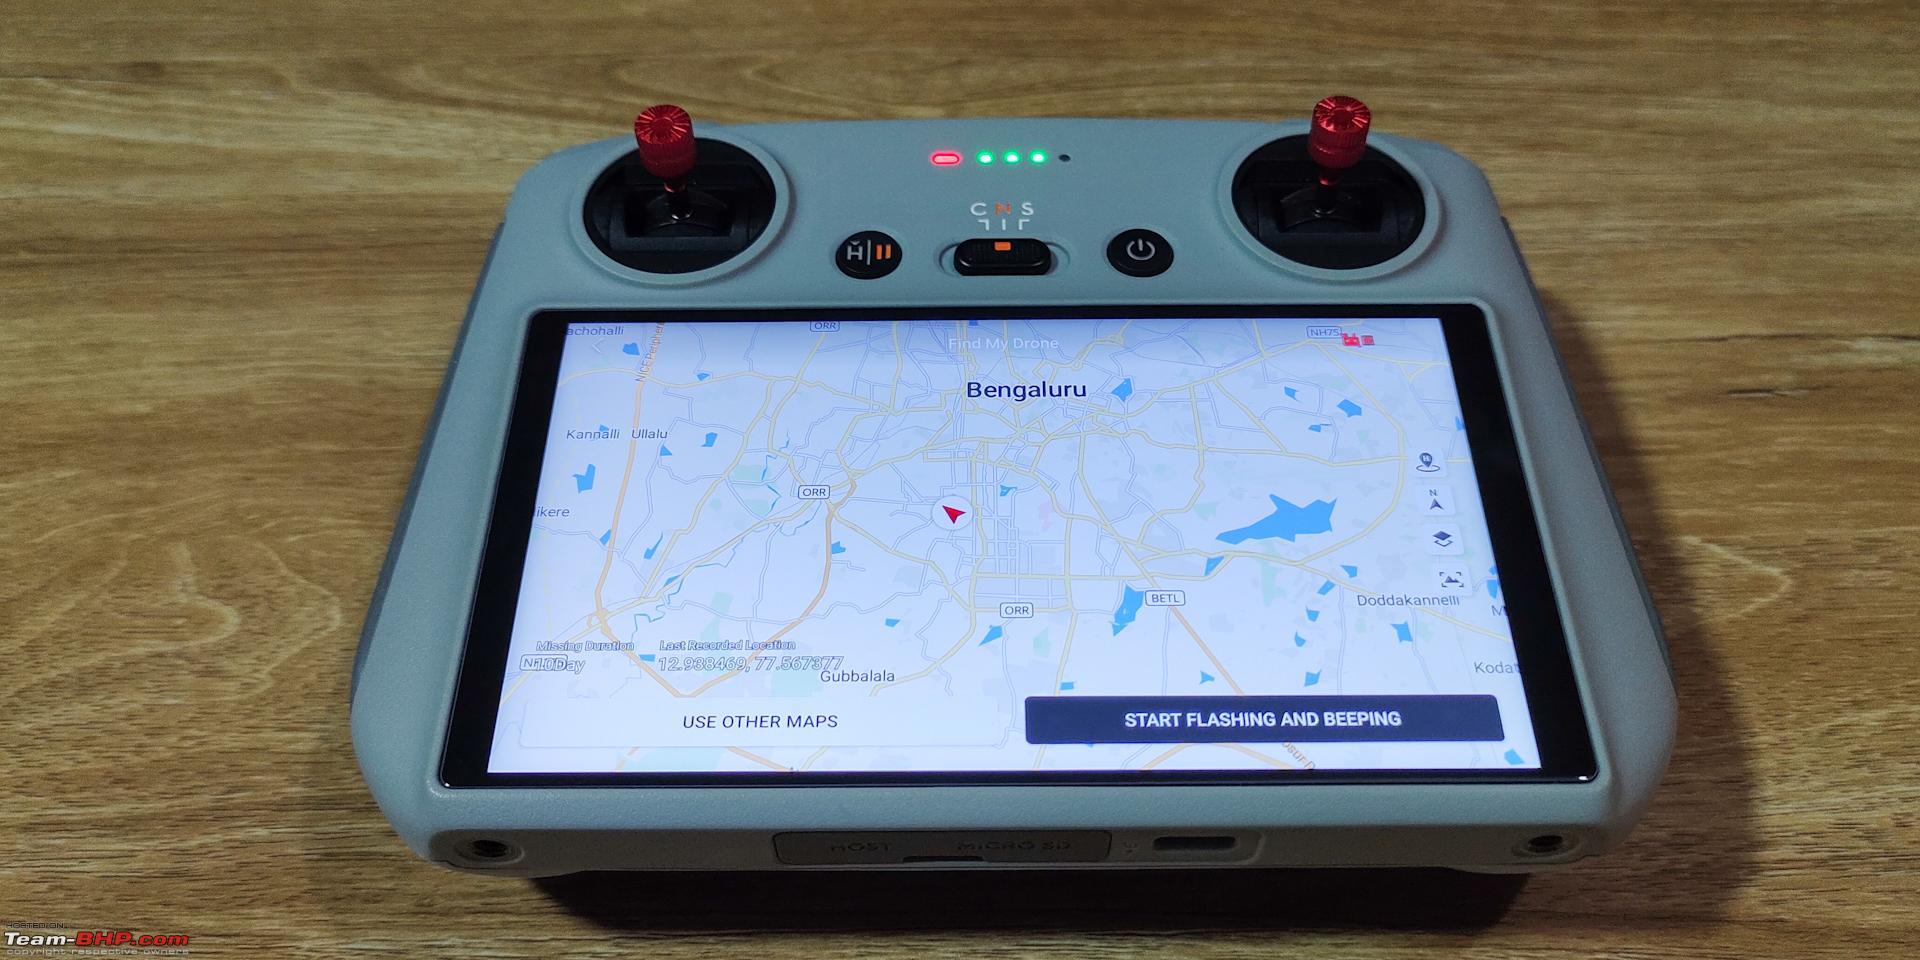 DJI Account: An account is required to activate the RC and to store and sync up the serial numbers, flight logs etc.  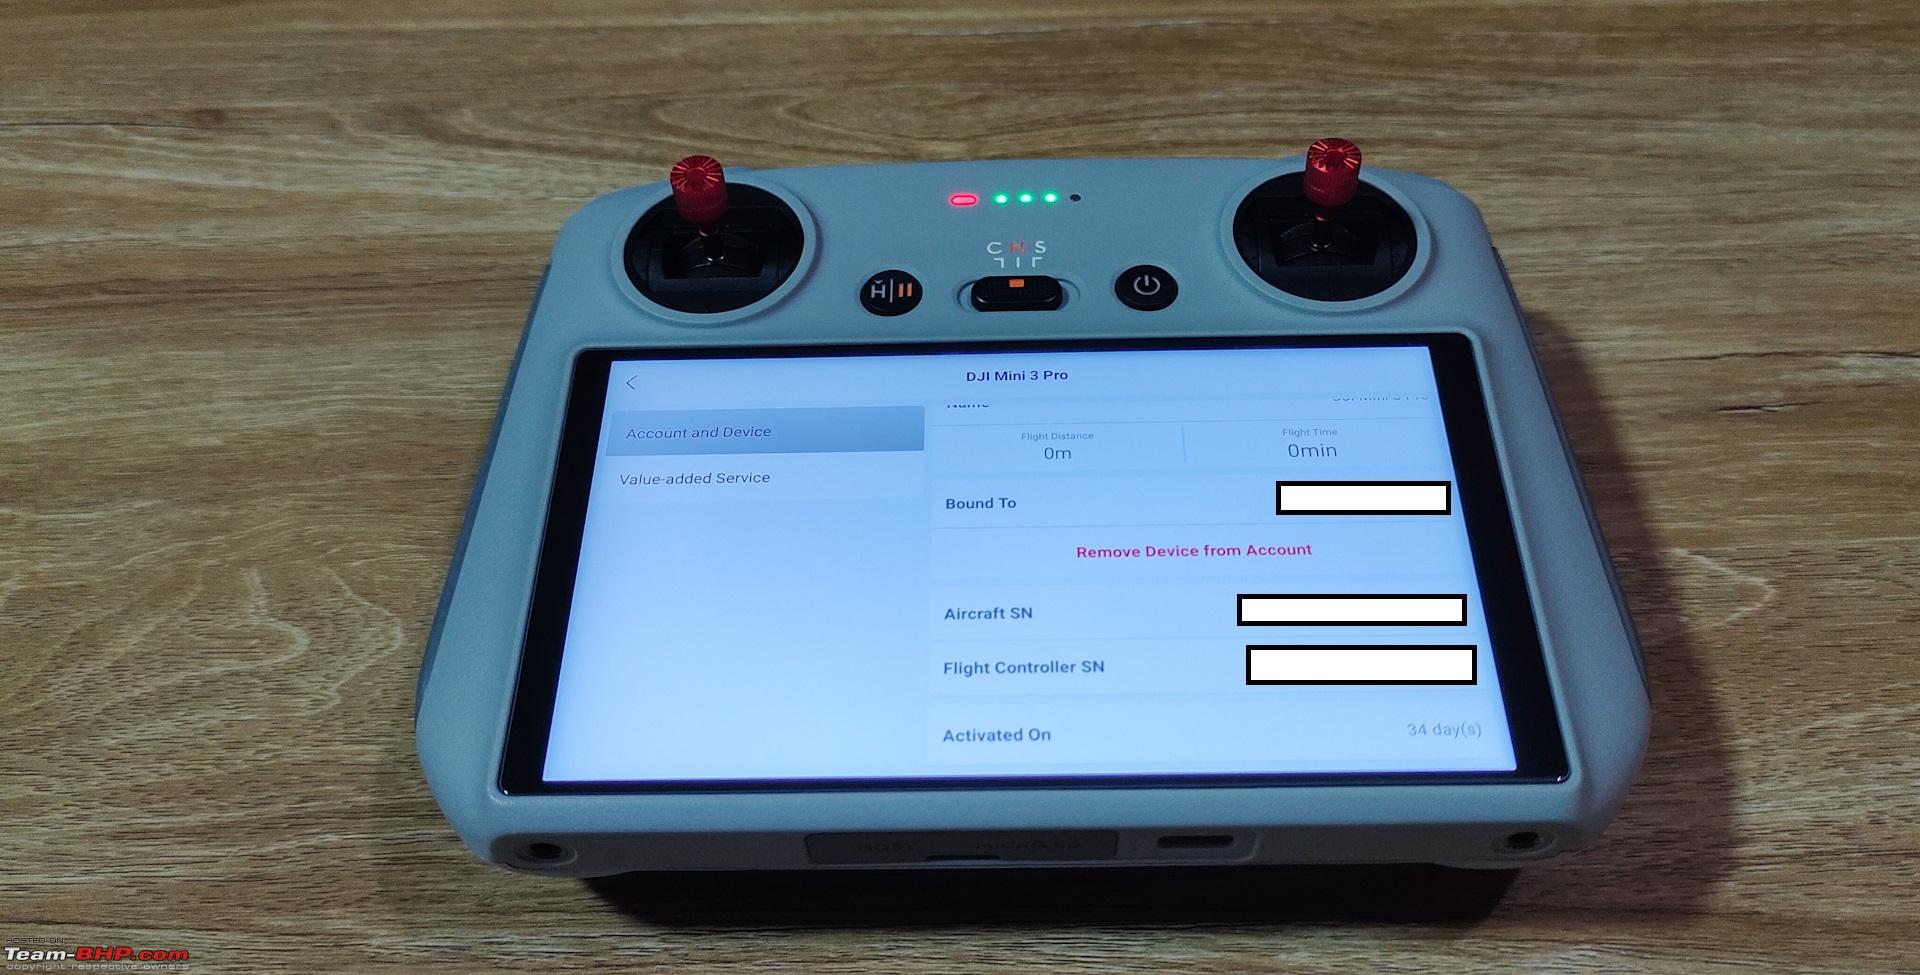  Firmware Updates: 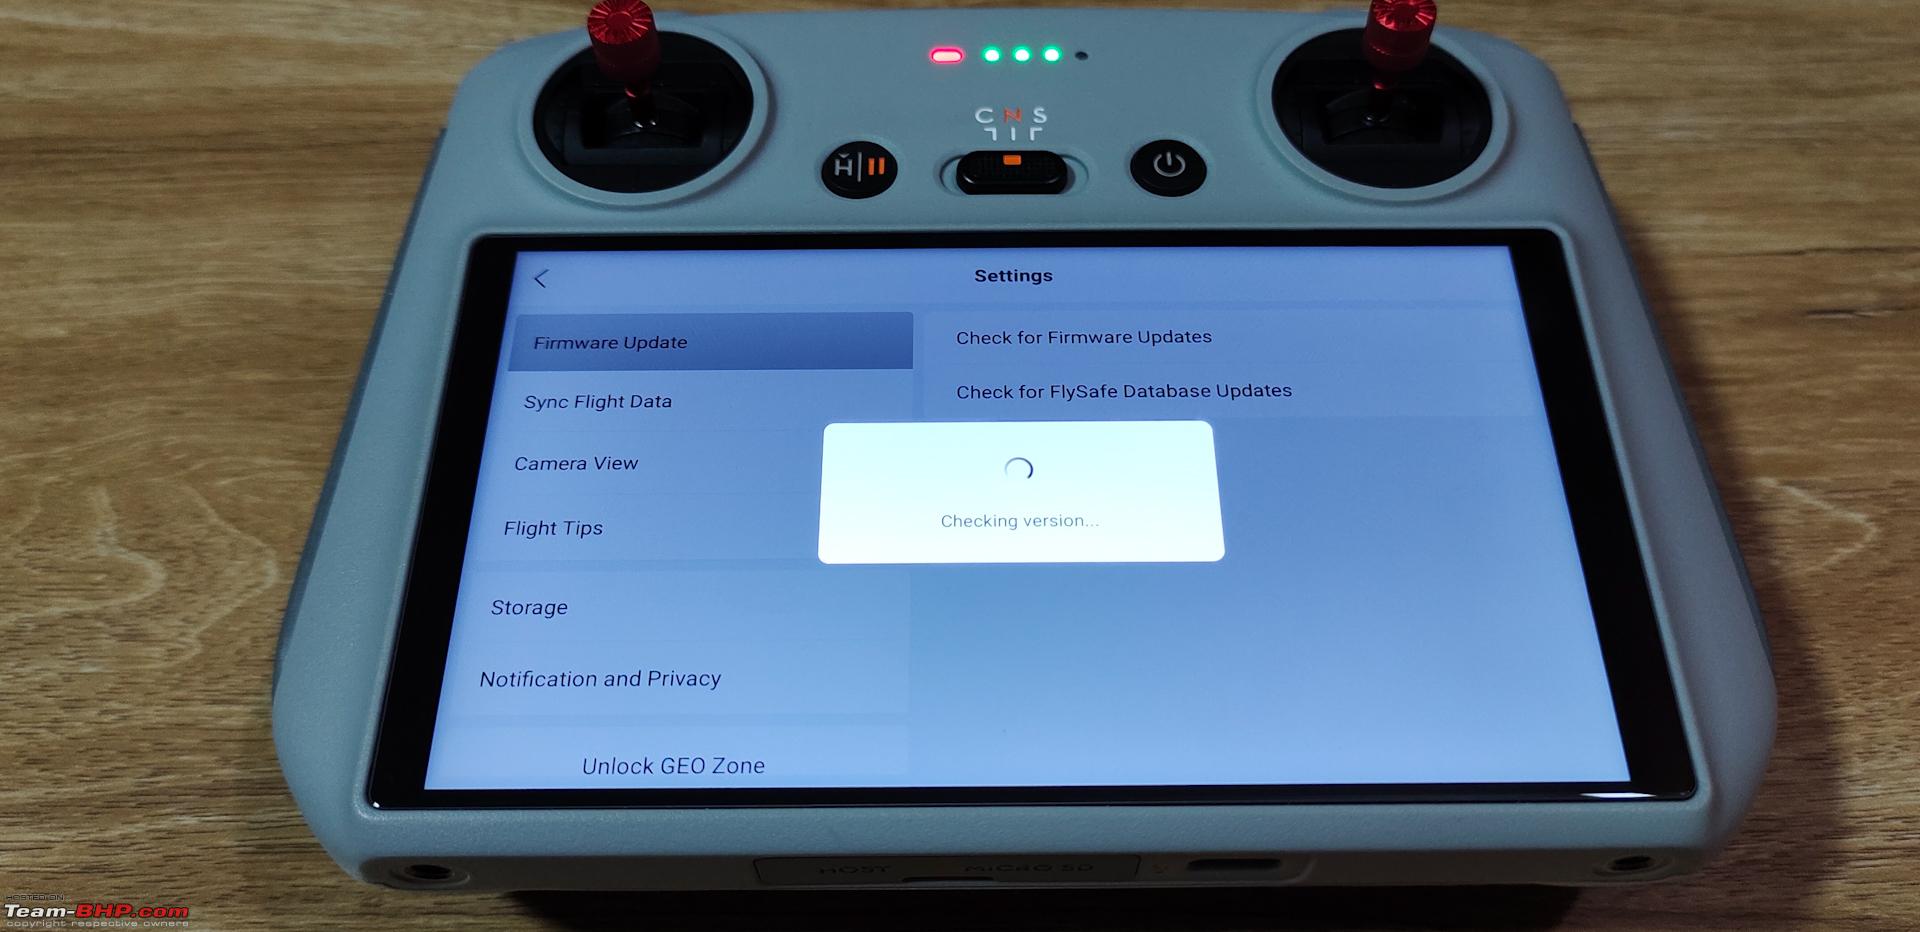 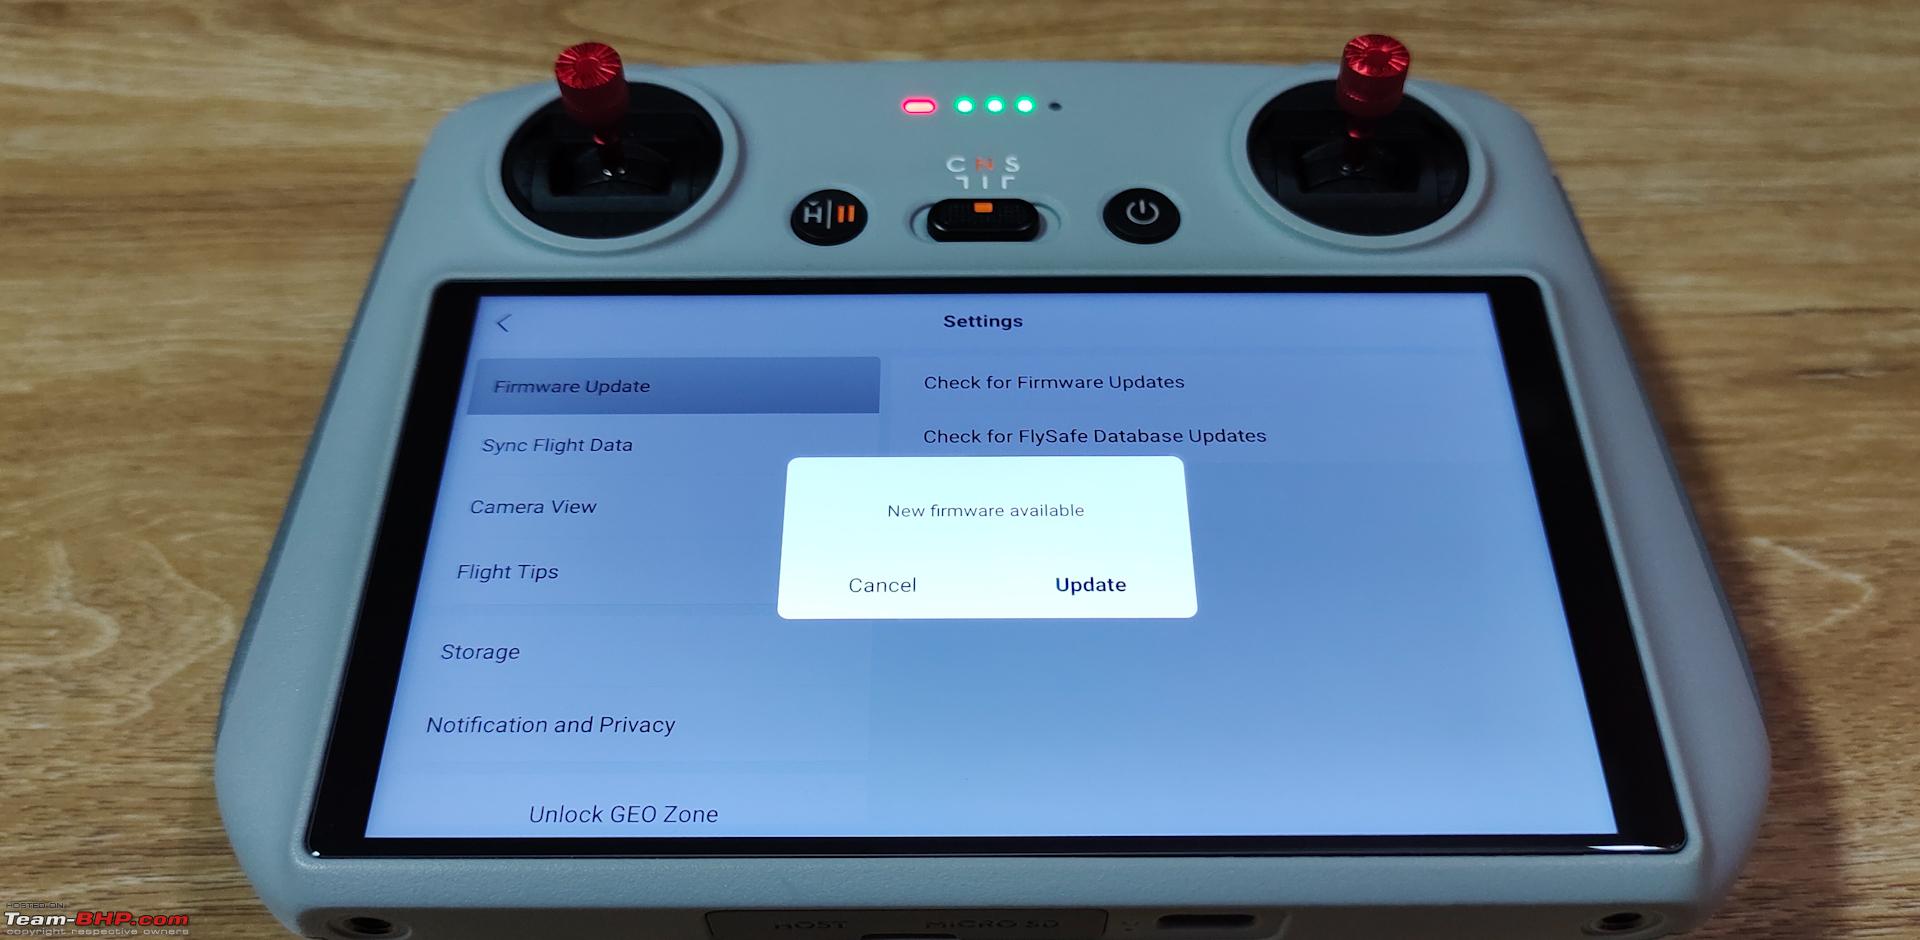 Last edited by Amyth Prabhakar : 10th December 2022 at 12:25. |
|
| (15)
Thanks
|
| The following 15 BHPians Thank Amyth Prabhakar for this useful post: | AdityaDeane, audioholic, brownkaiser, CEF_Beasts, digitalnirvana, graaja, GTO, KarthikK, mail2sekh, ph03n!x, Roy.S, saikarthik, Samfromindia, shyamg28, TSIboy |
|
9th December 2022, 10:07
| #7 |
| BHPian | re: Dji Mini 3 Pro Review | The Best Nano Drone The latest firmware update in progress: 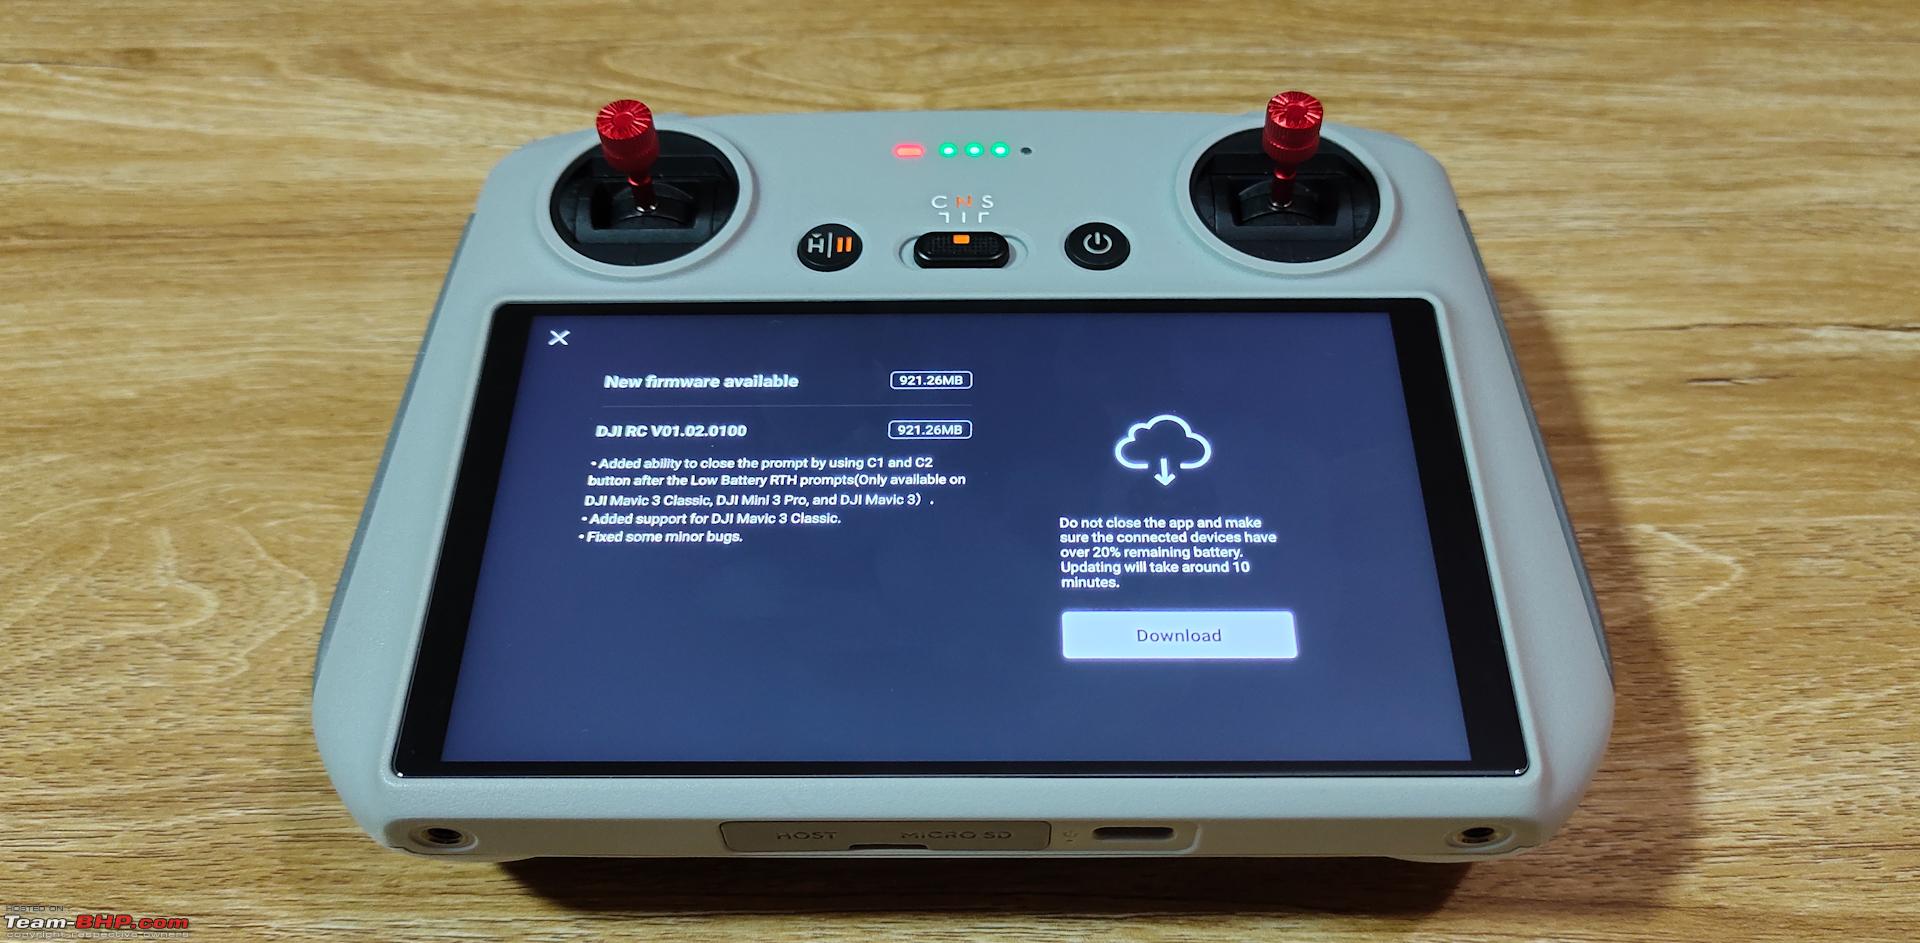 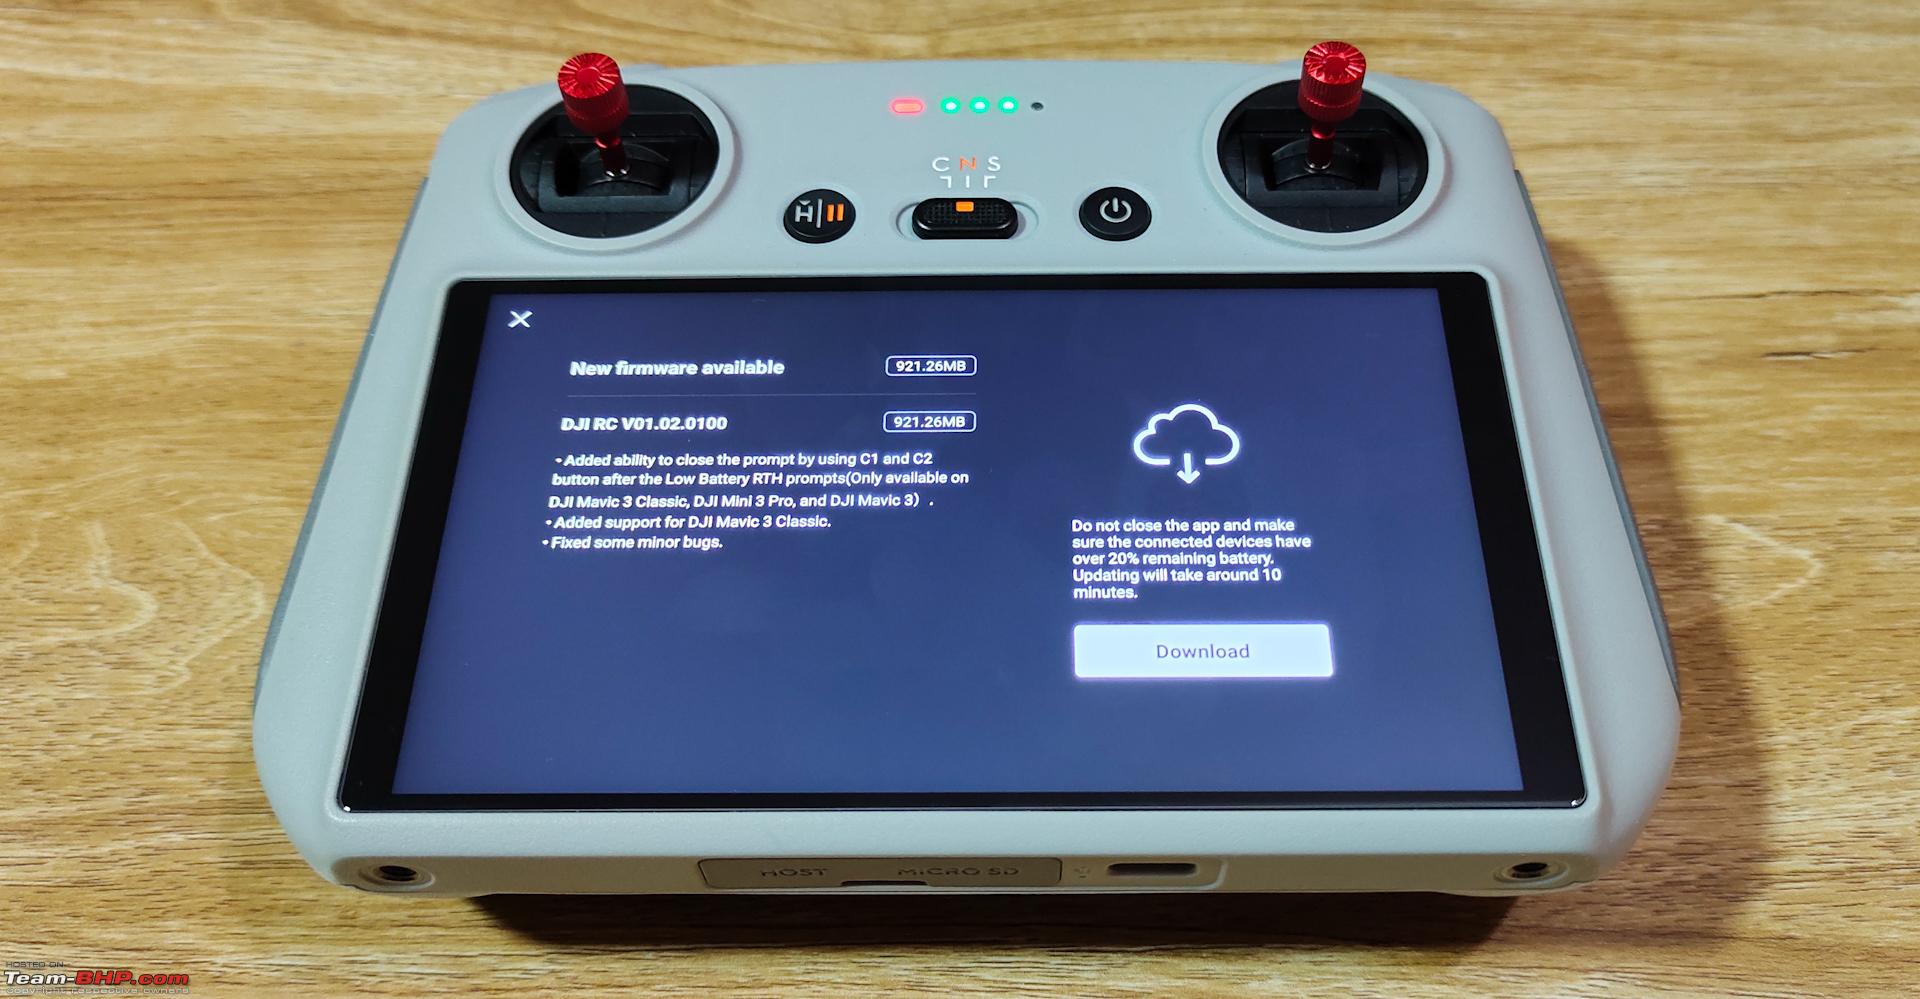 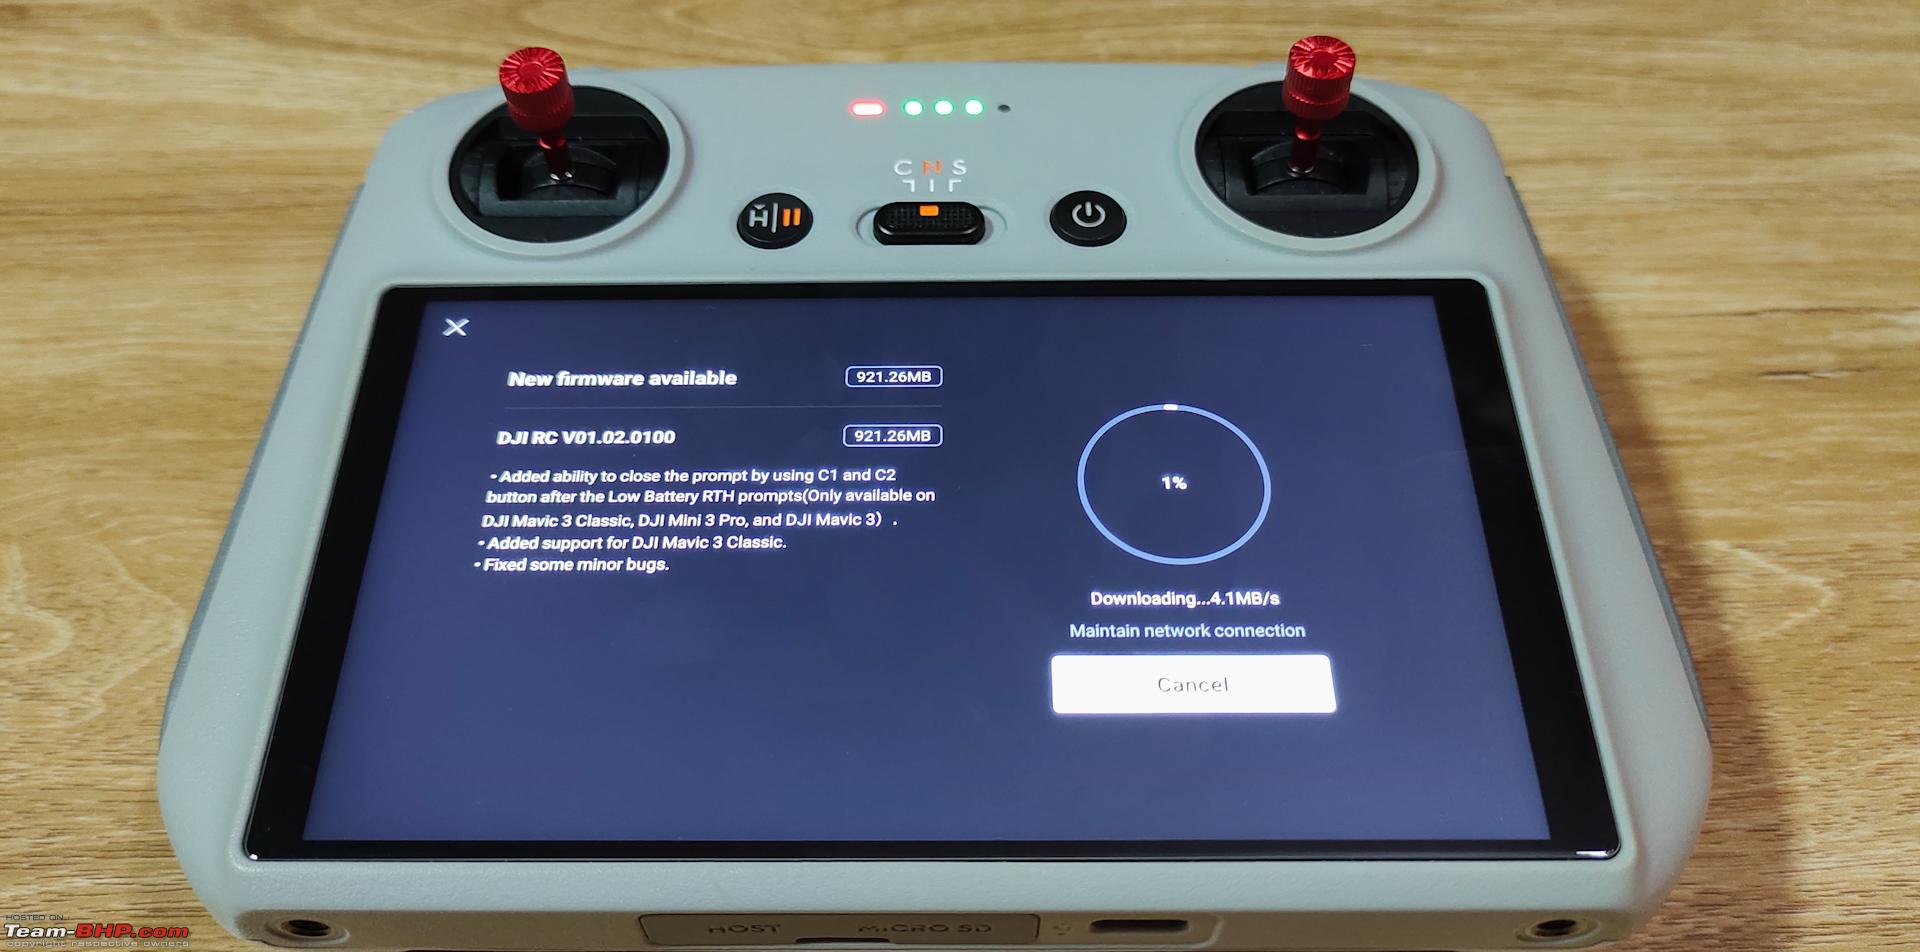 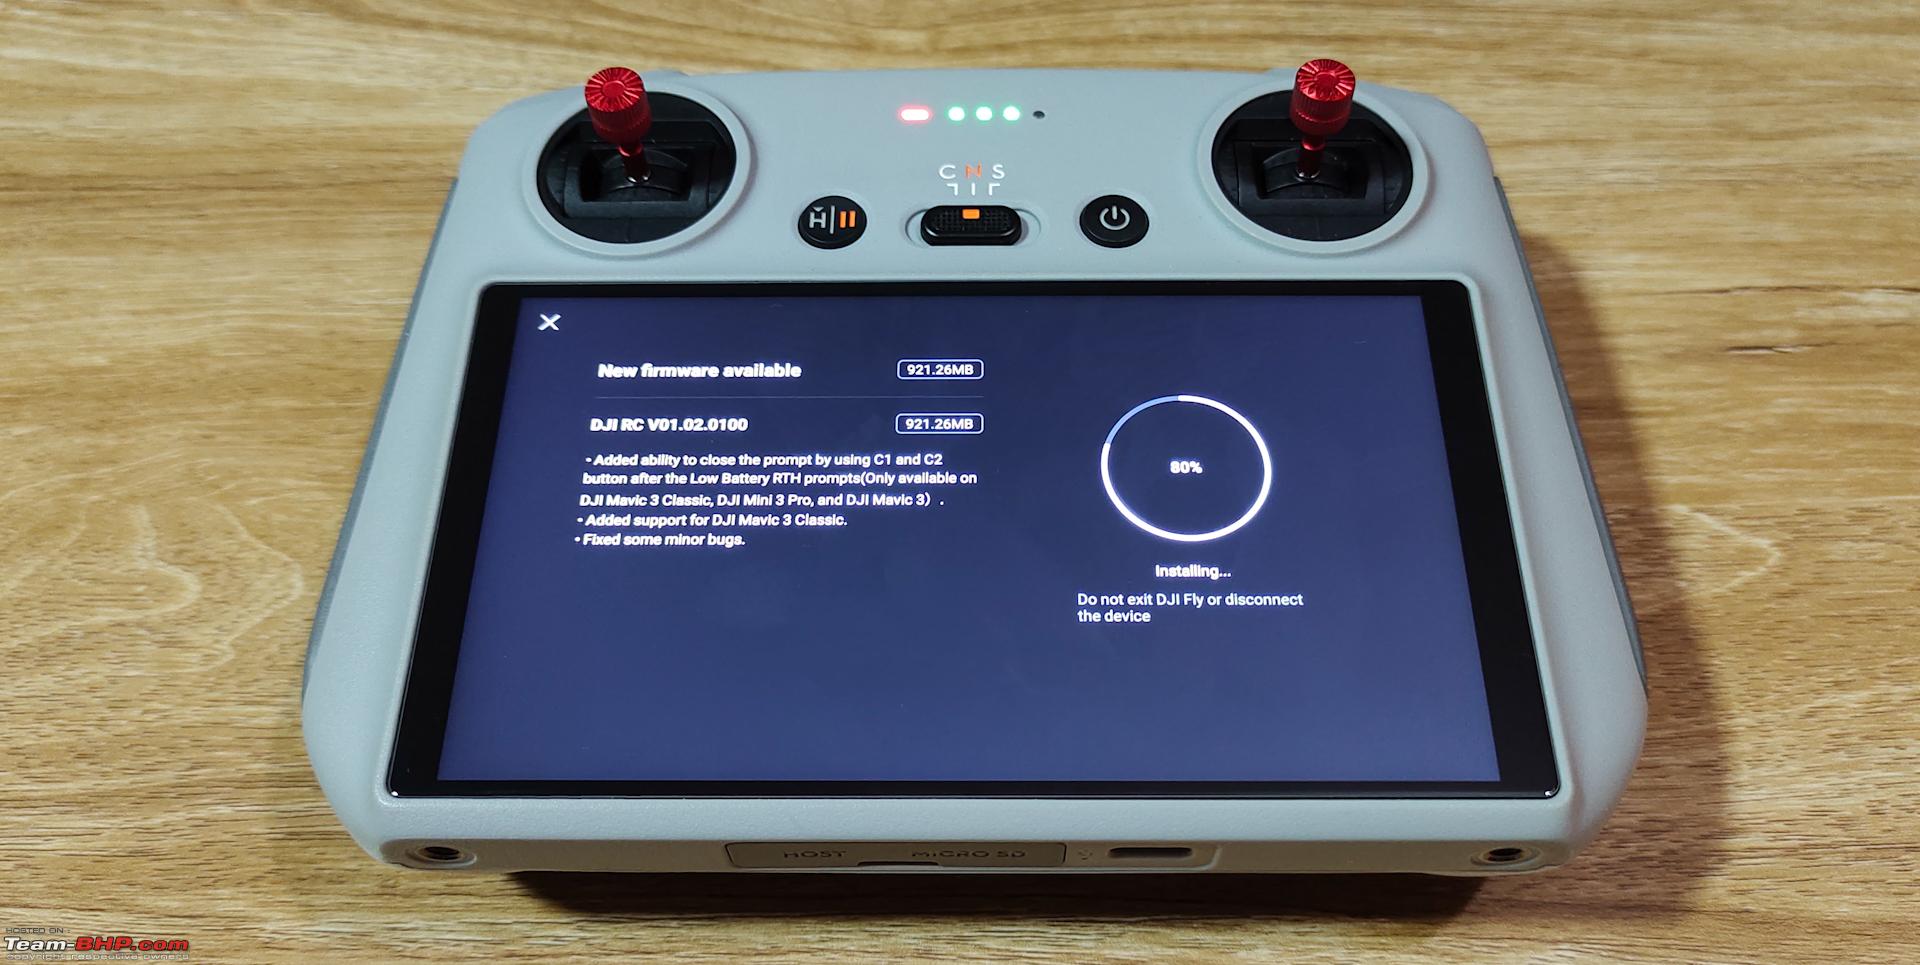  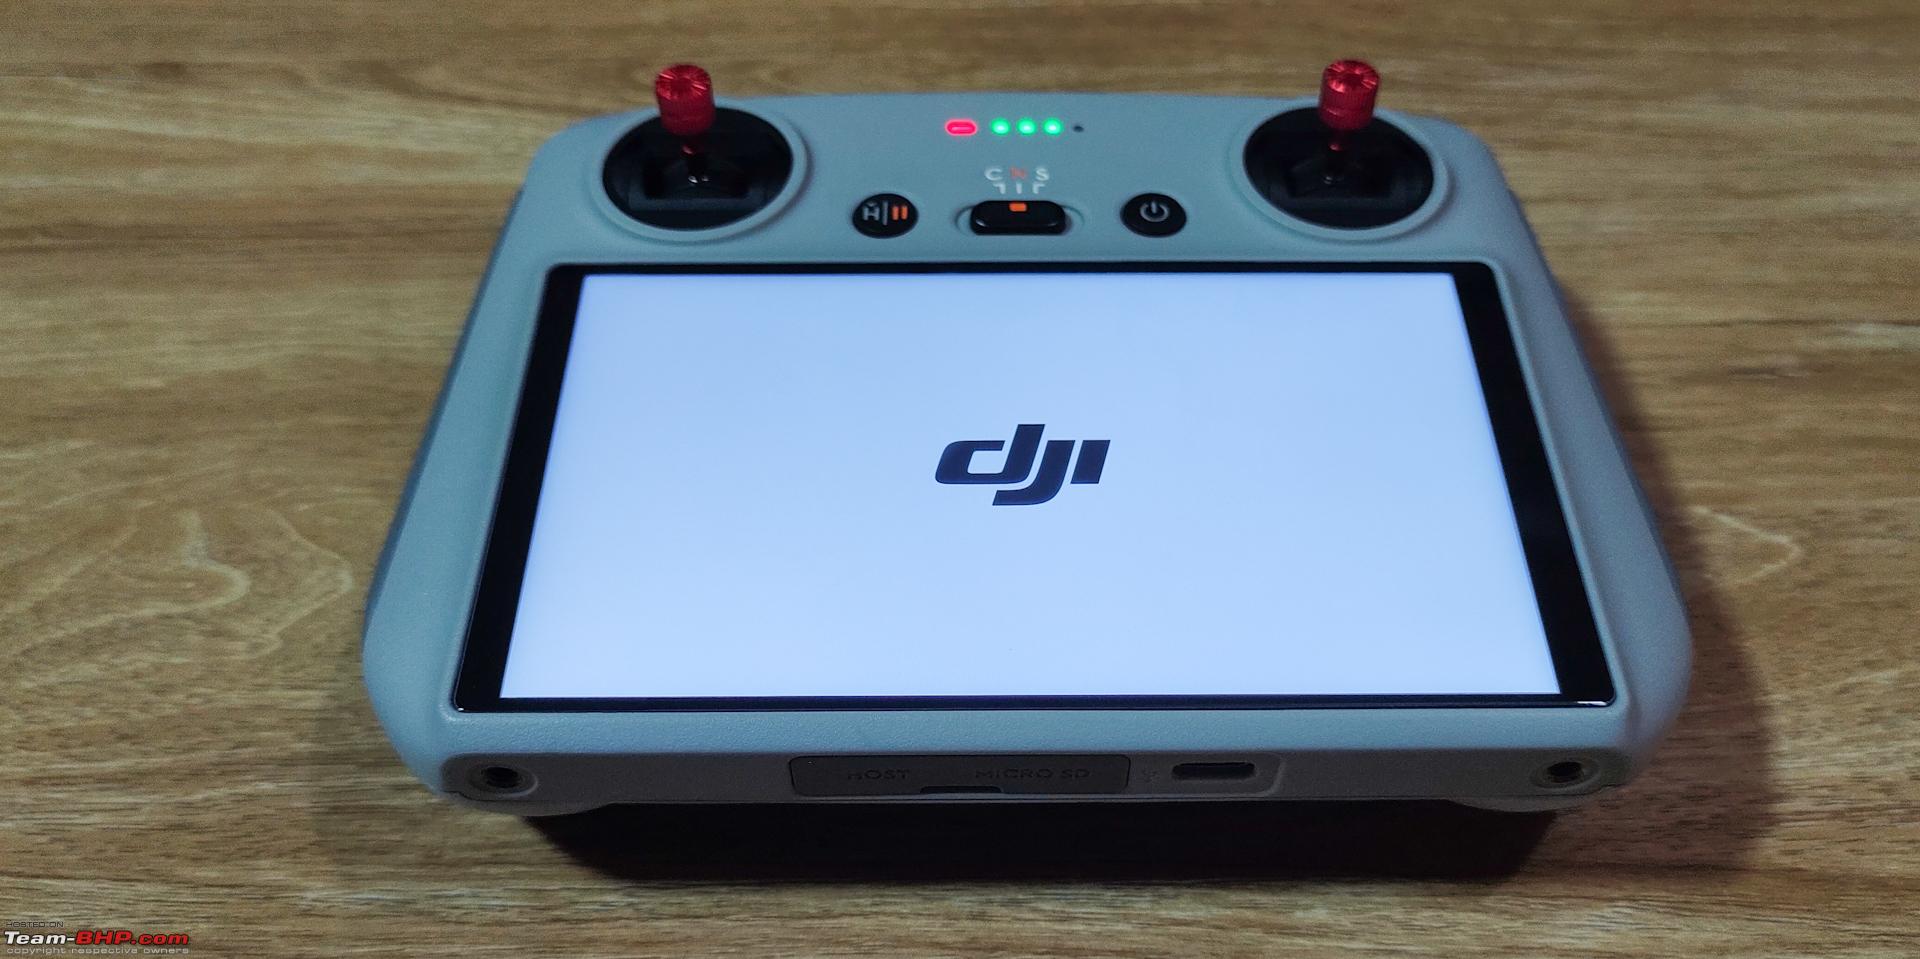  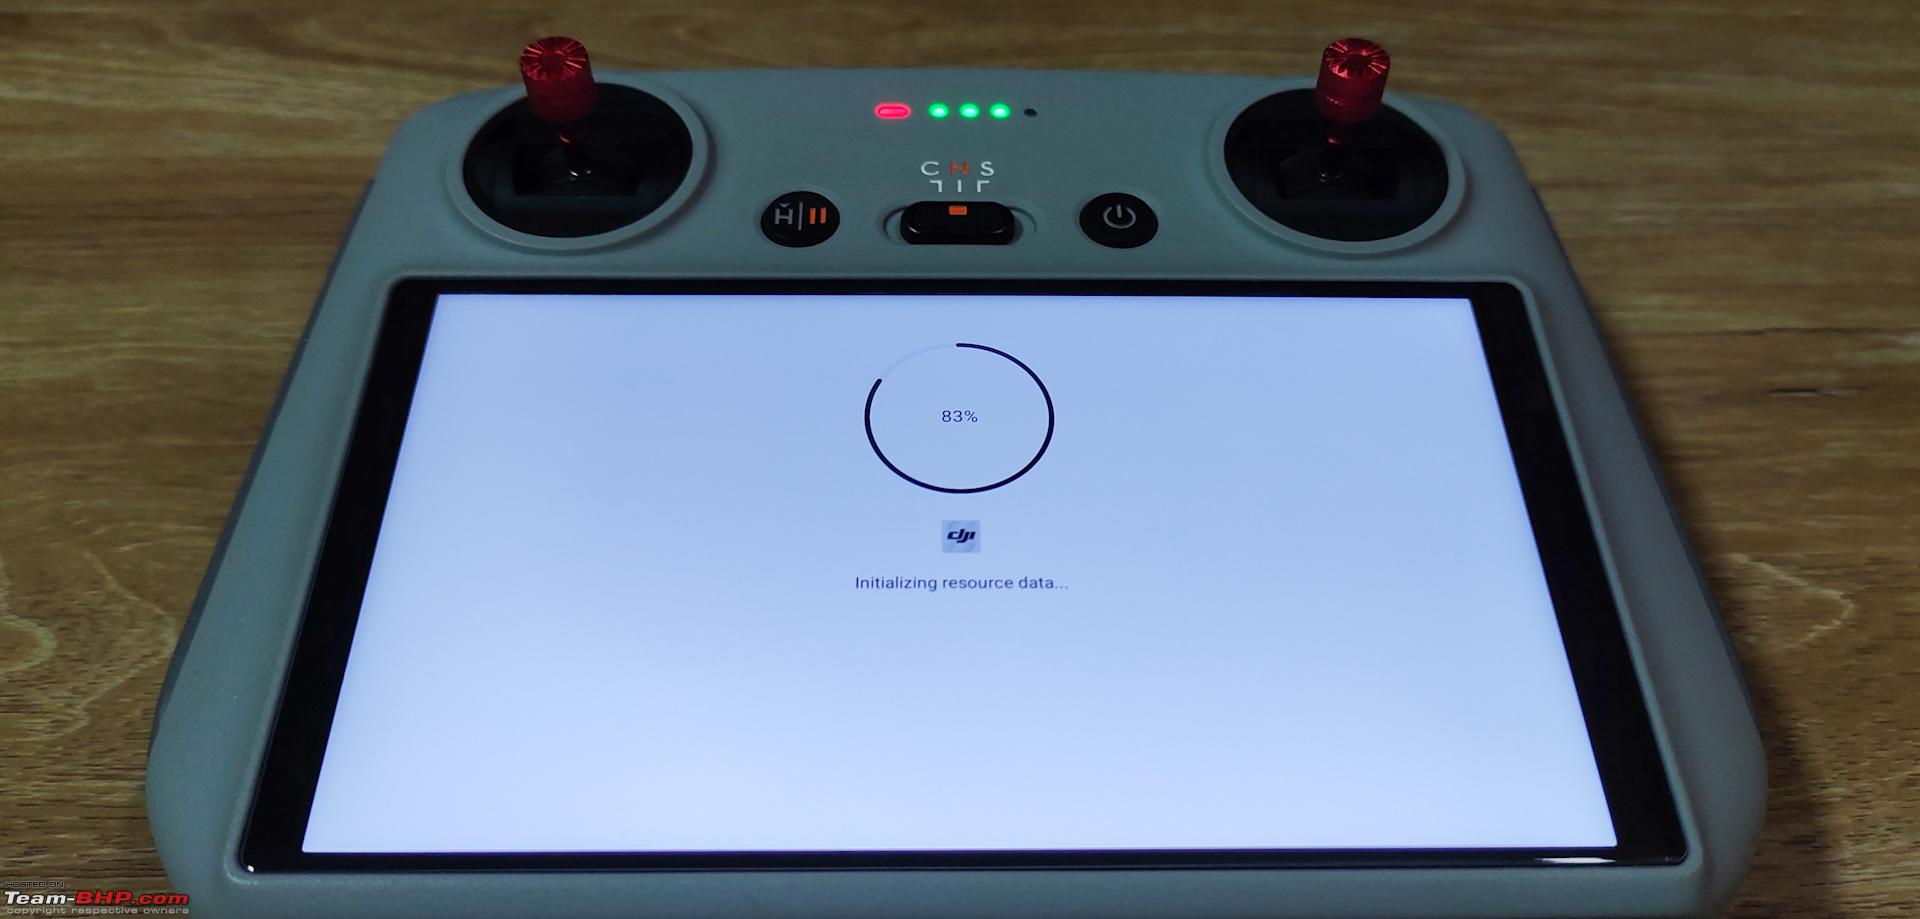 Firmware successfully installed on both RC and the Aircraft.  Beginners lessons: They are basically YouTube videos from the DJI official channel and shows up as tutorials in the RC. 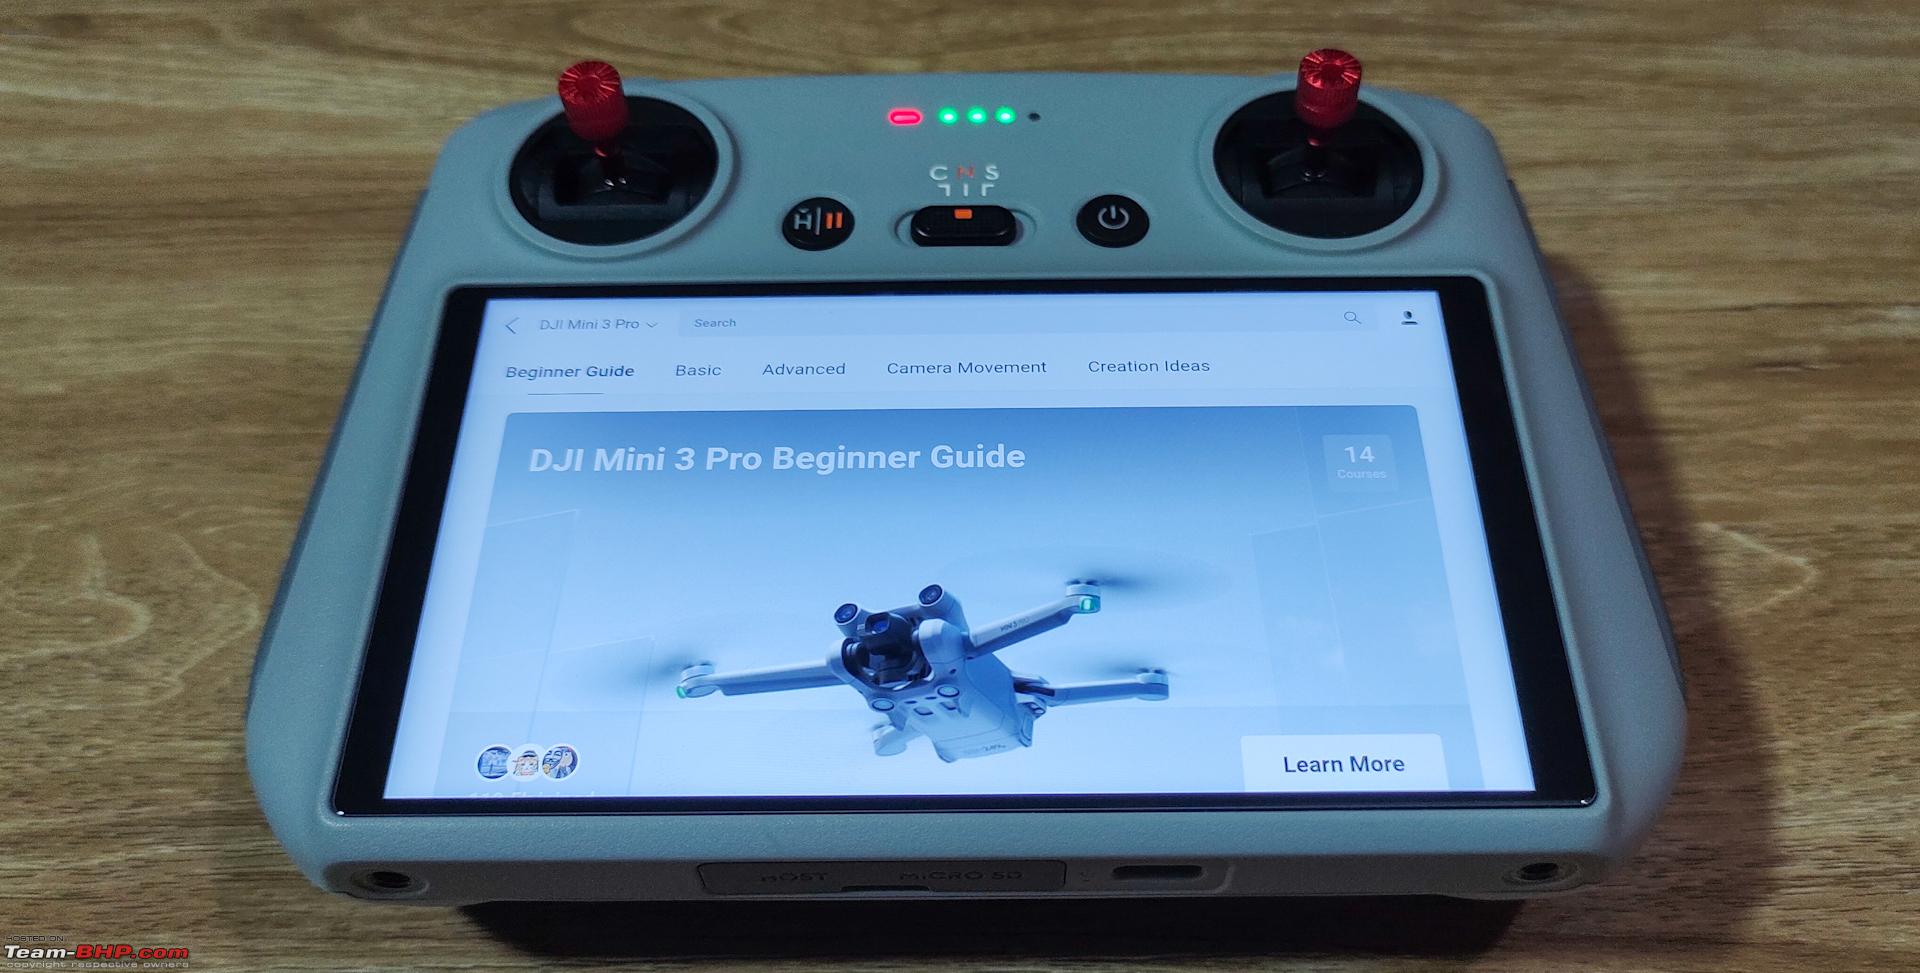 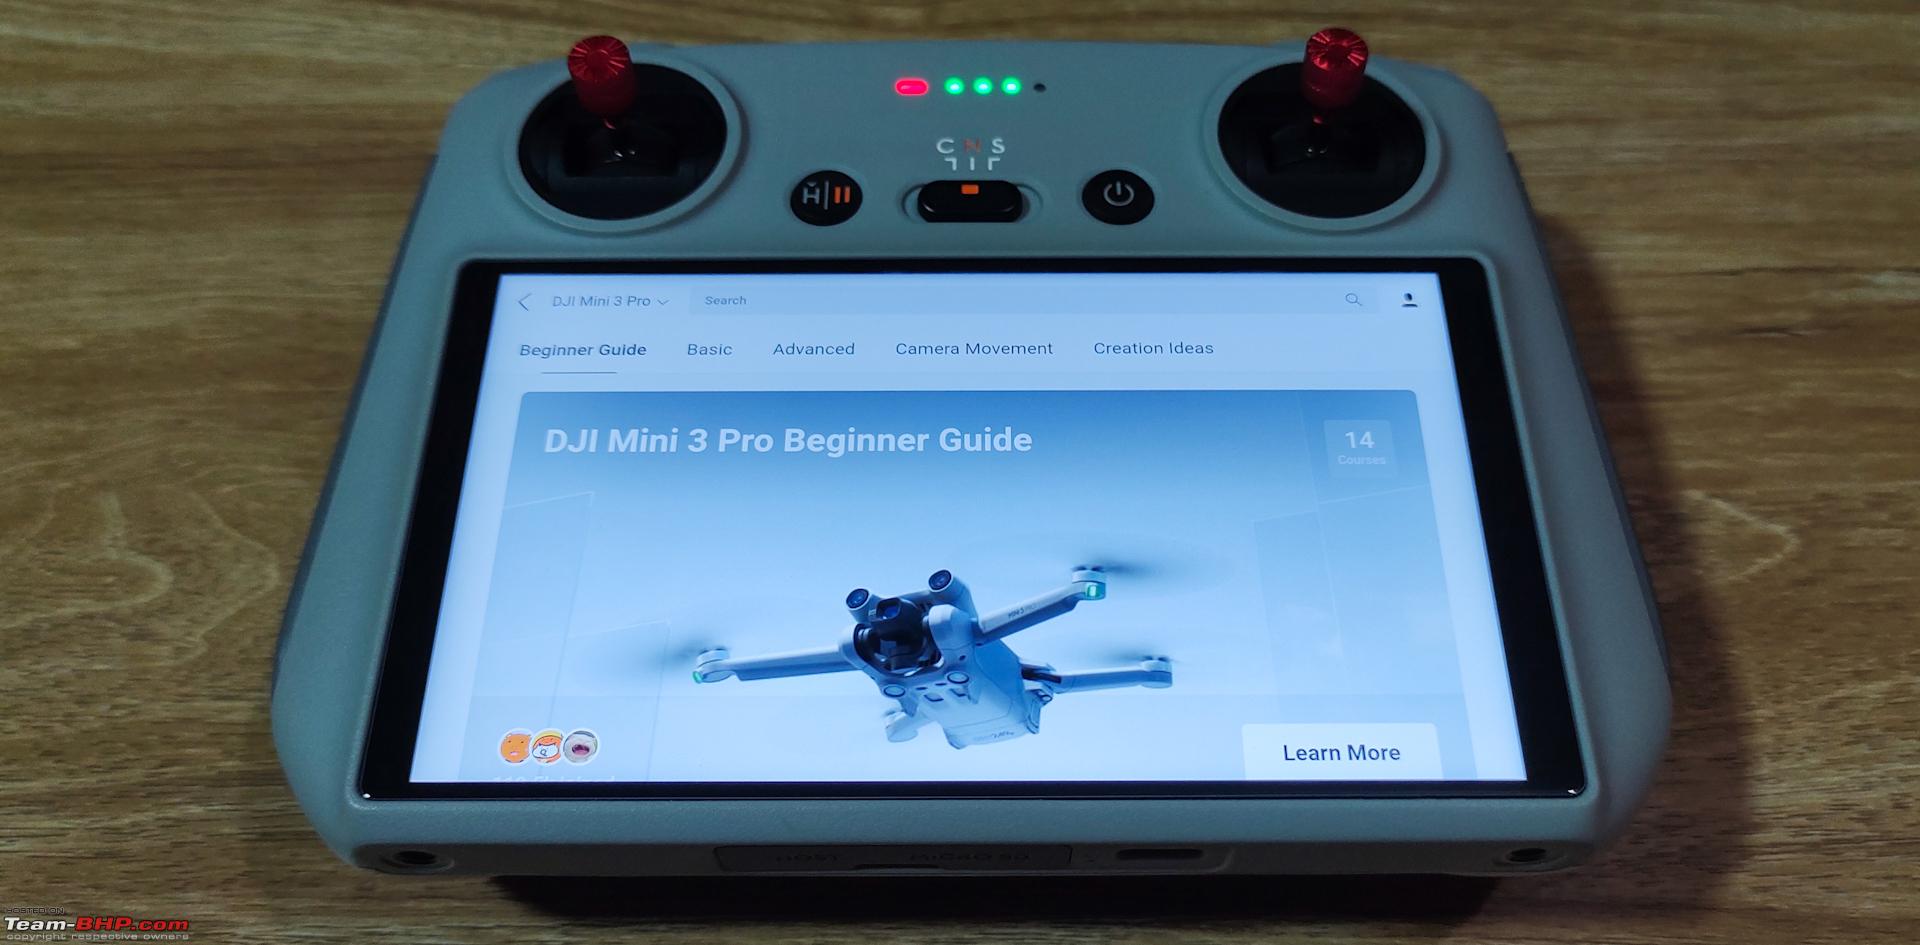  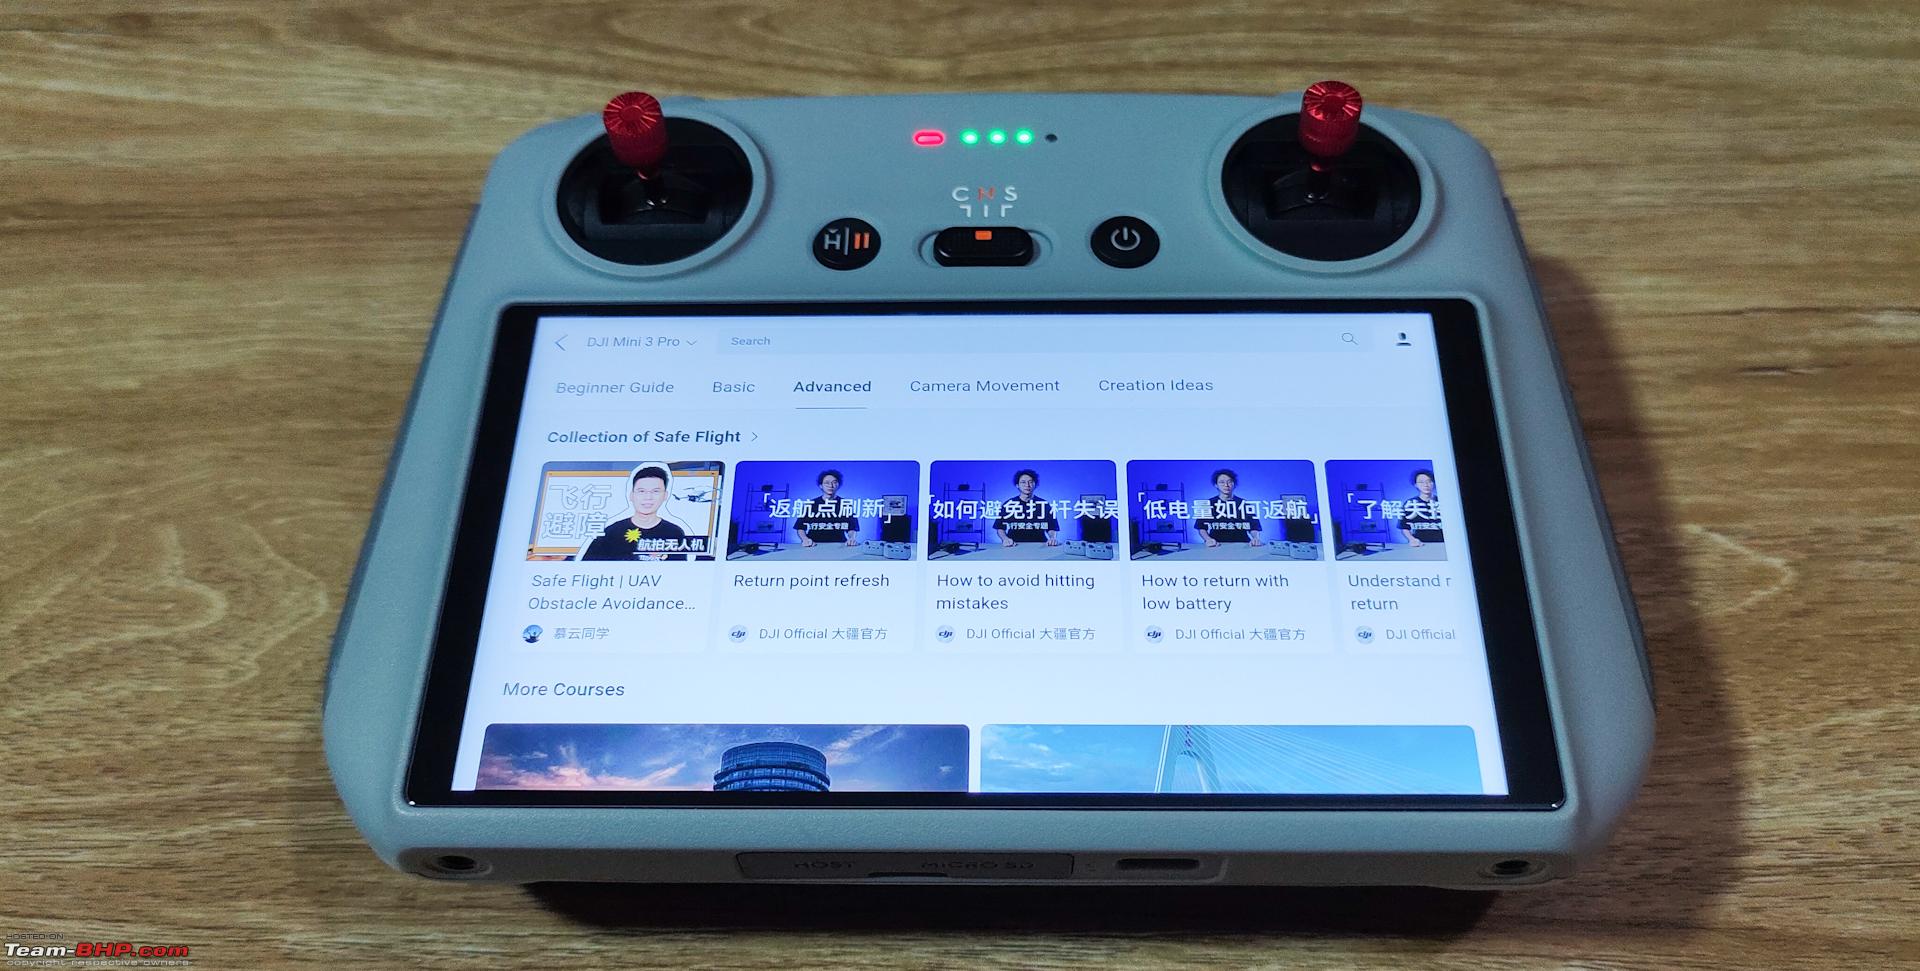  Sky Pixel is an online platform to collaborate and share content and also to participate is some Drone photography contests. 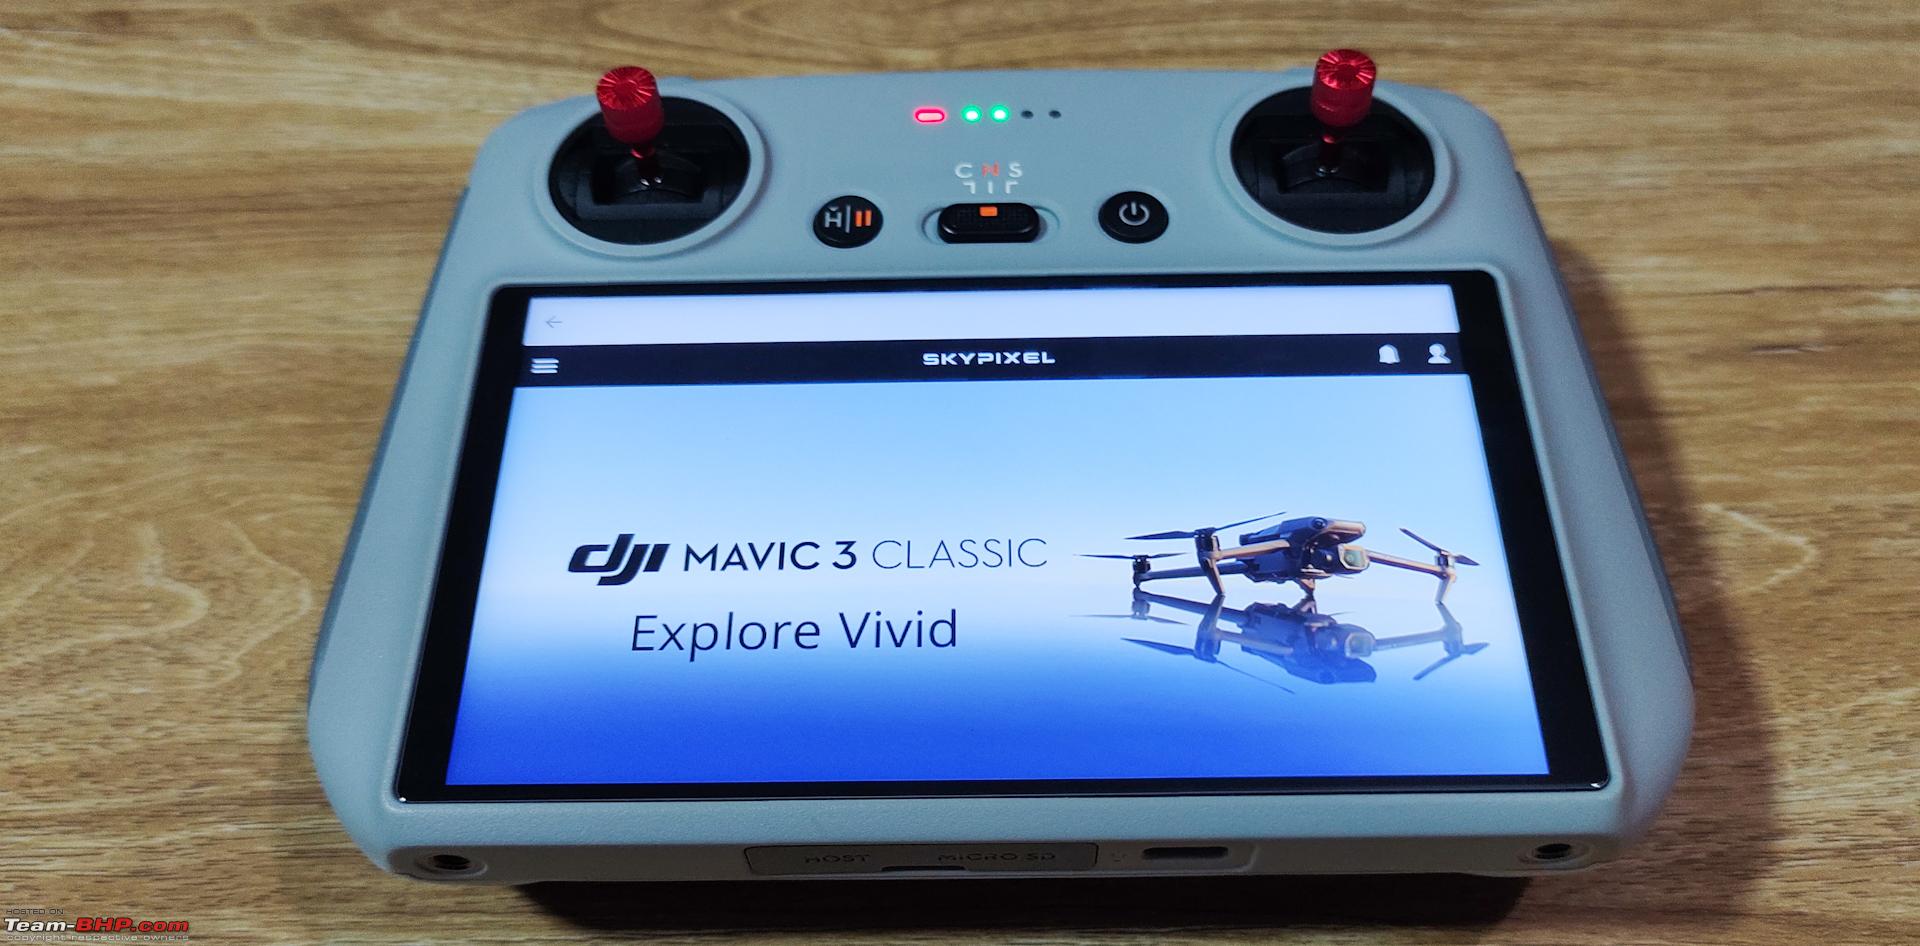    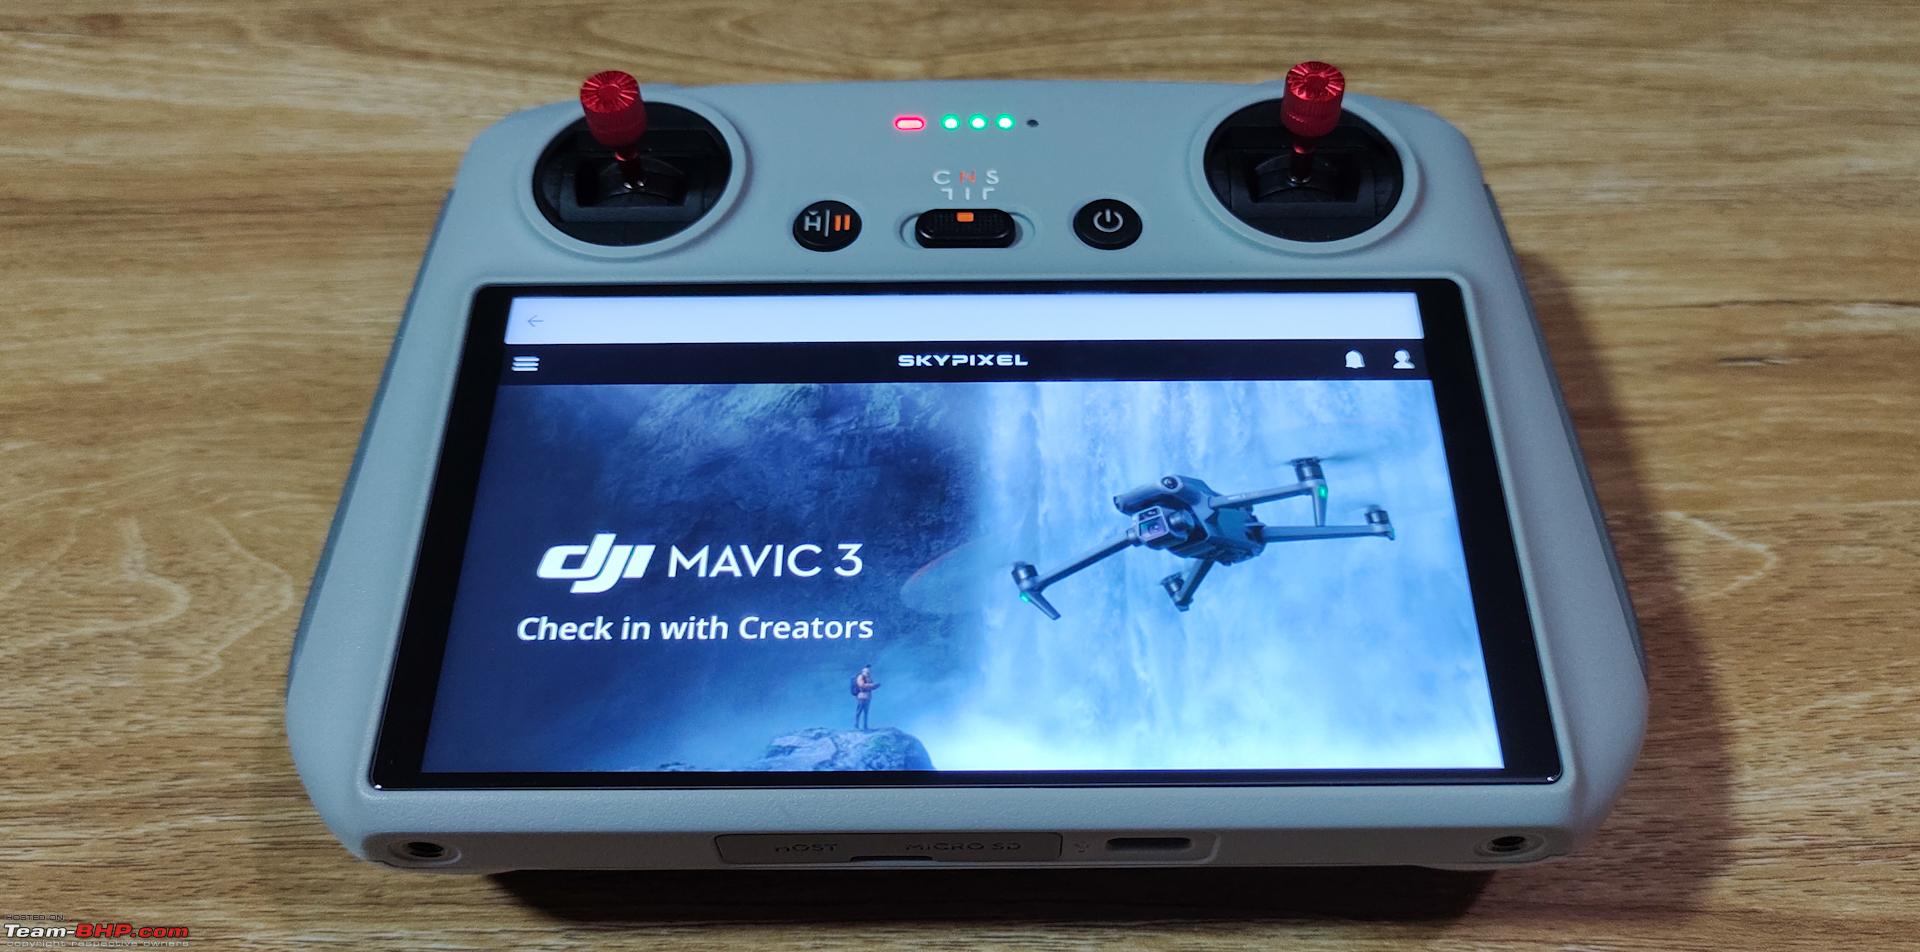   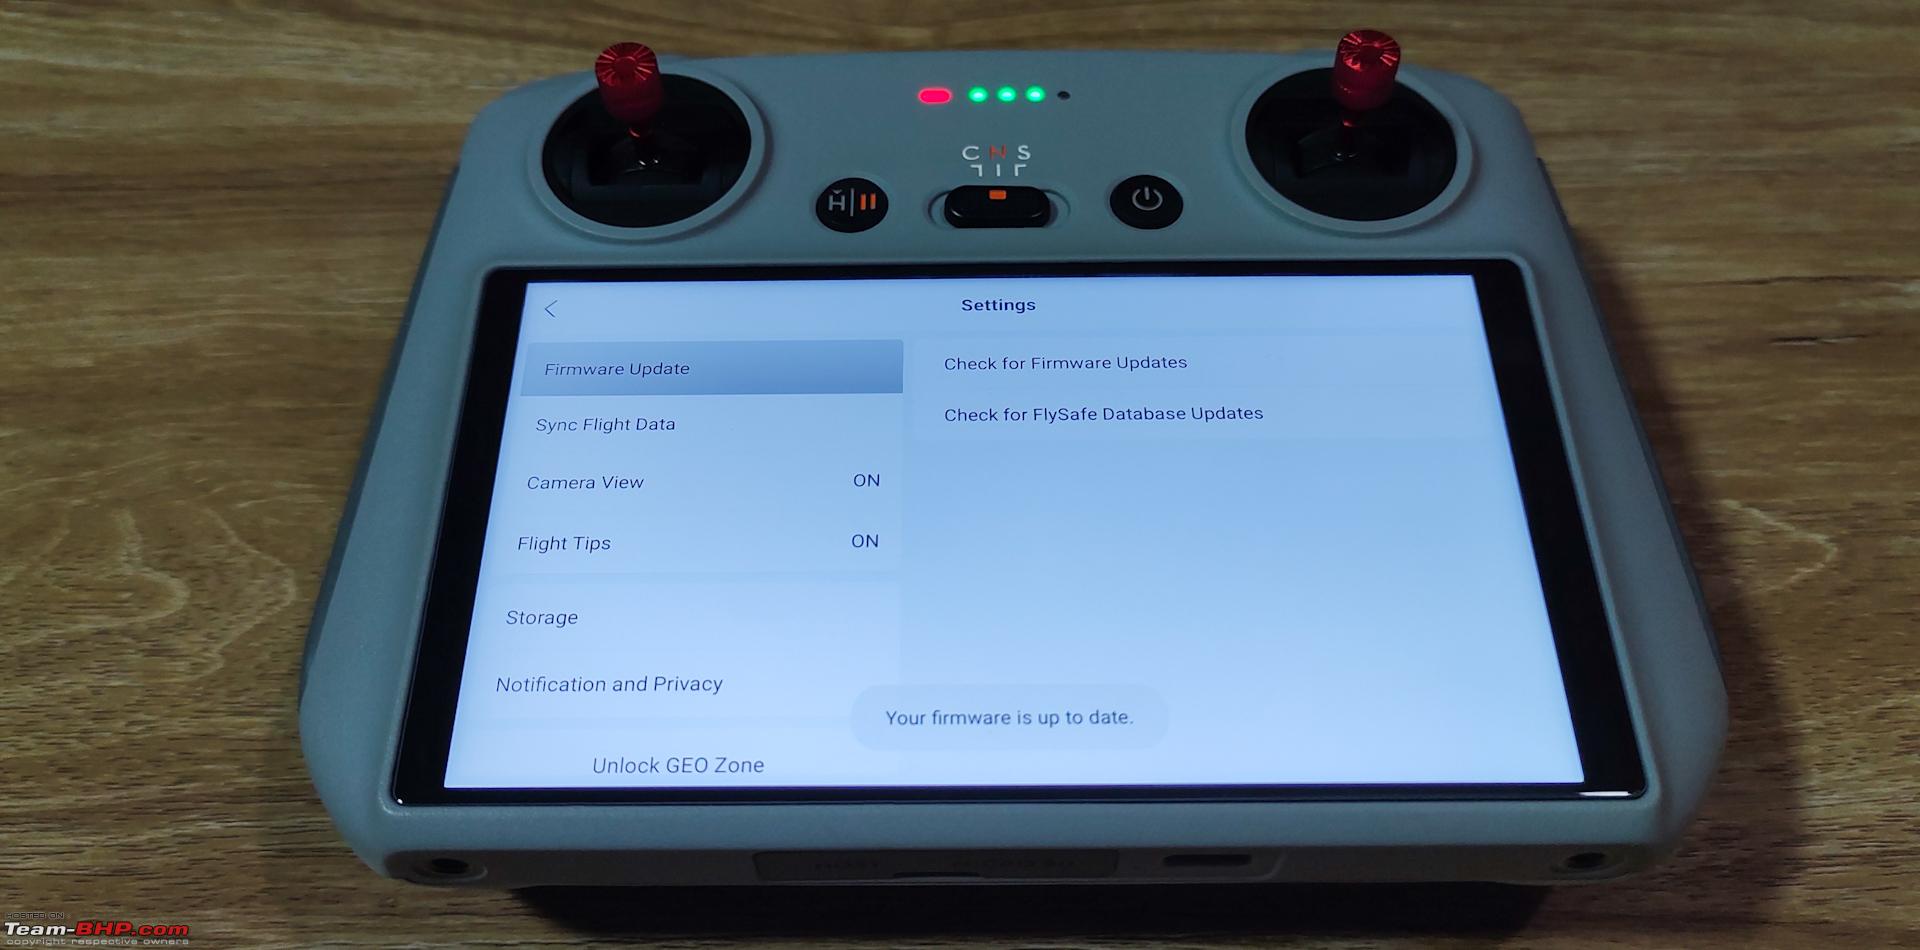 The latest firmware update makes it possible for the DJI RC to work seamlessly with all the below drones:  Mini 3 PRO: 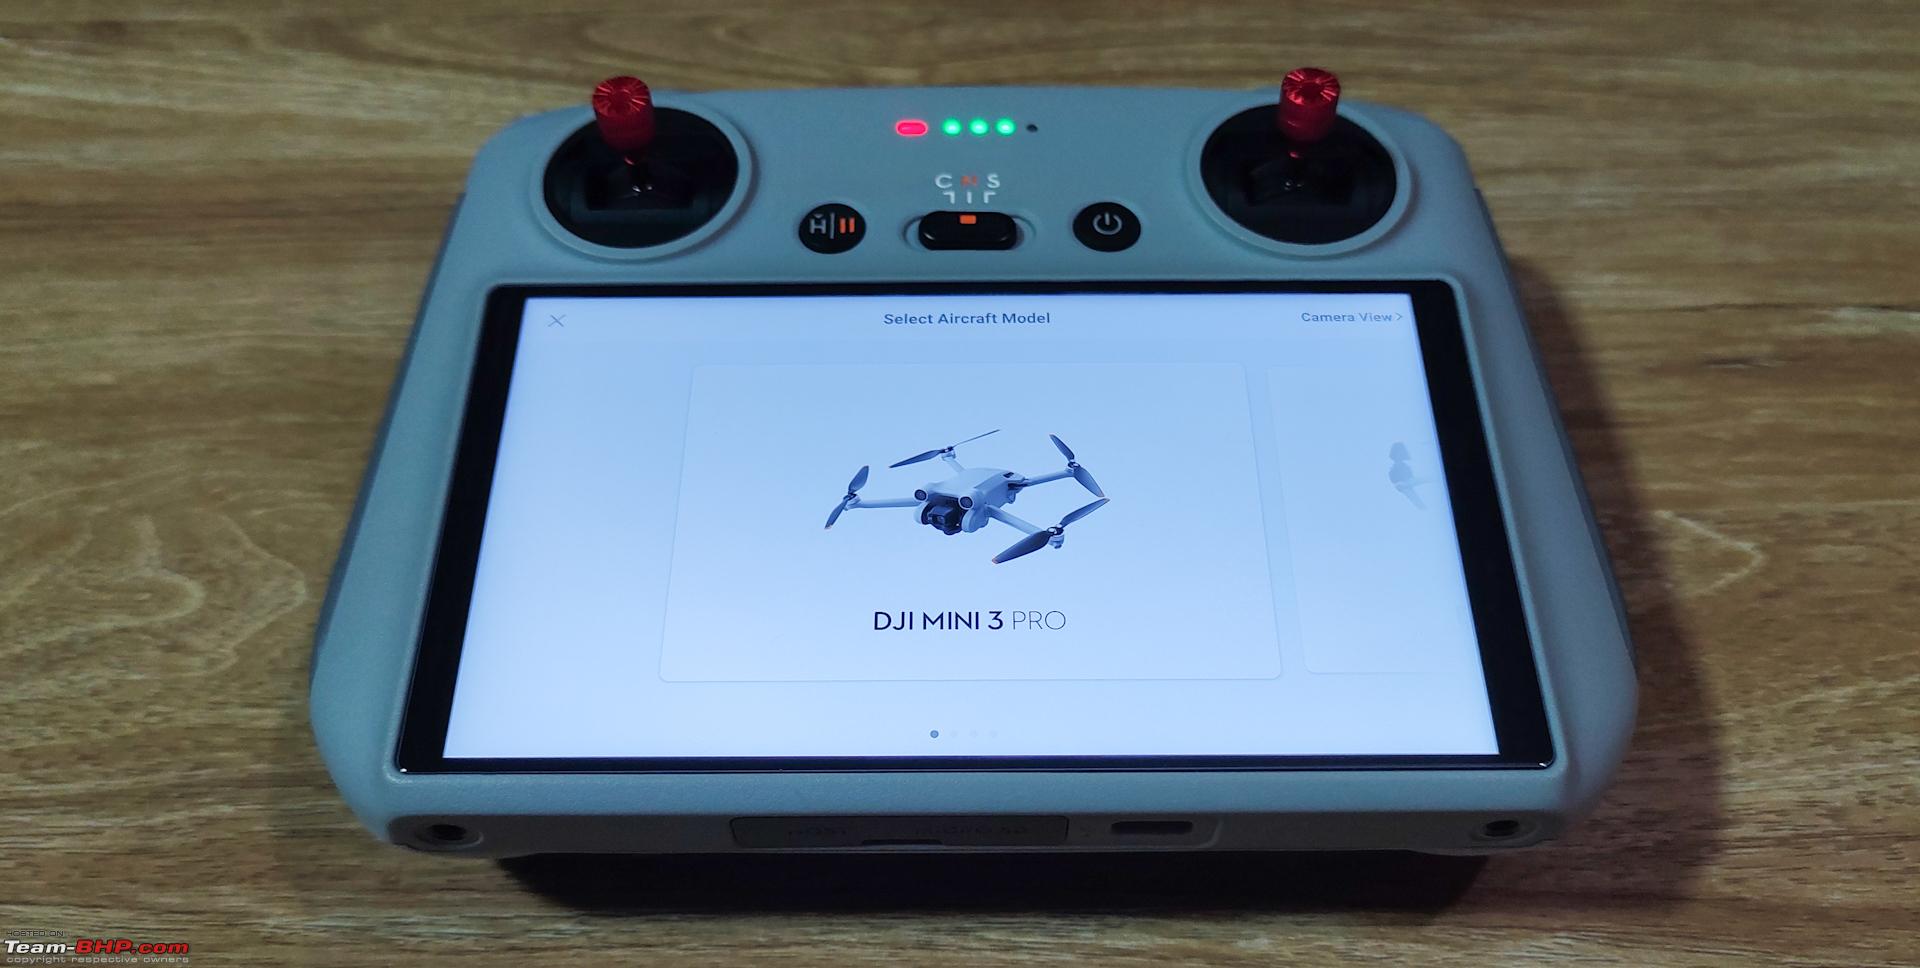 MAVIC 3 CLASSIC: 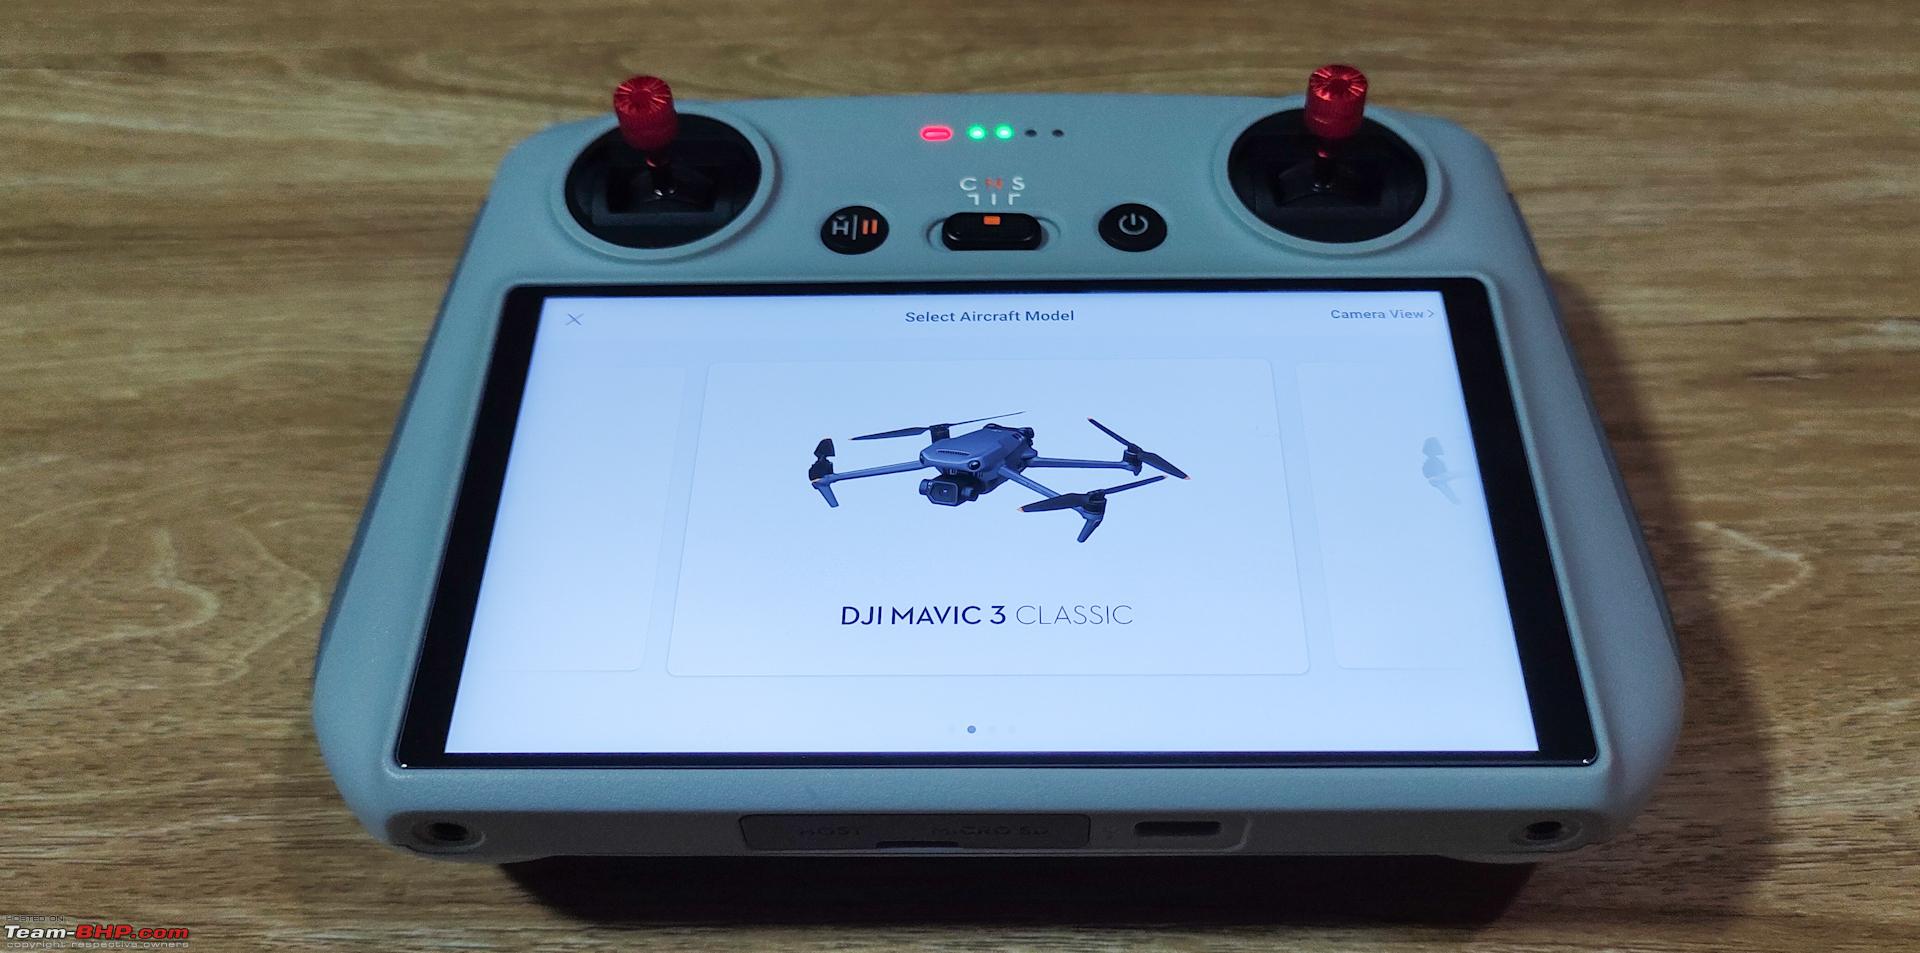 MAVIC 3 PRO: 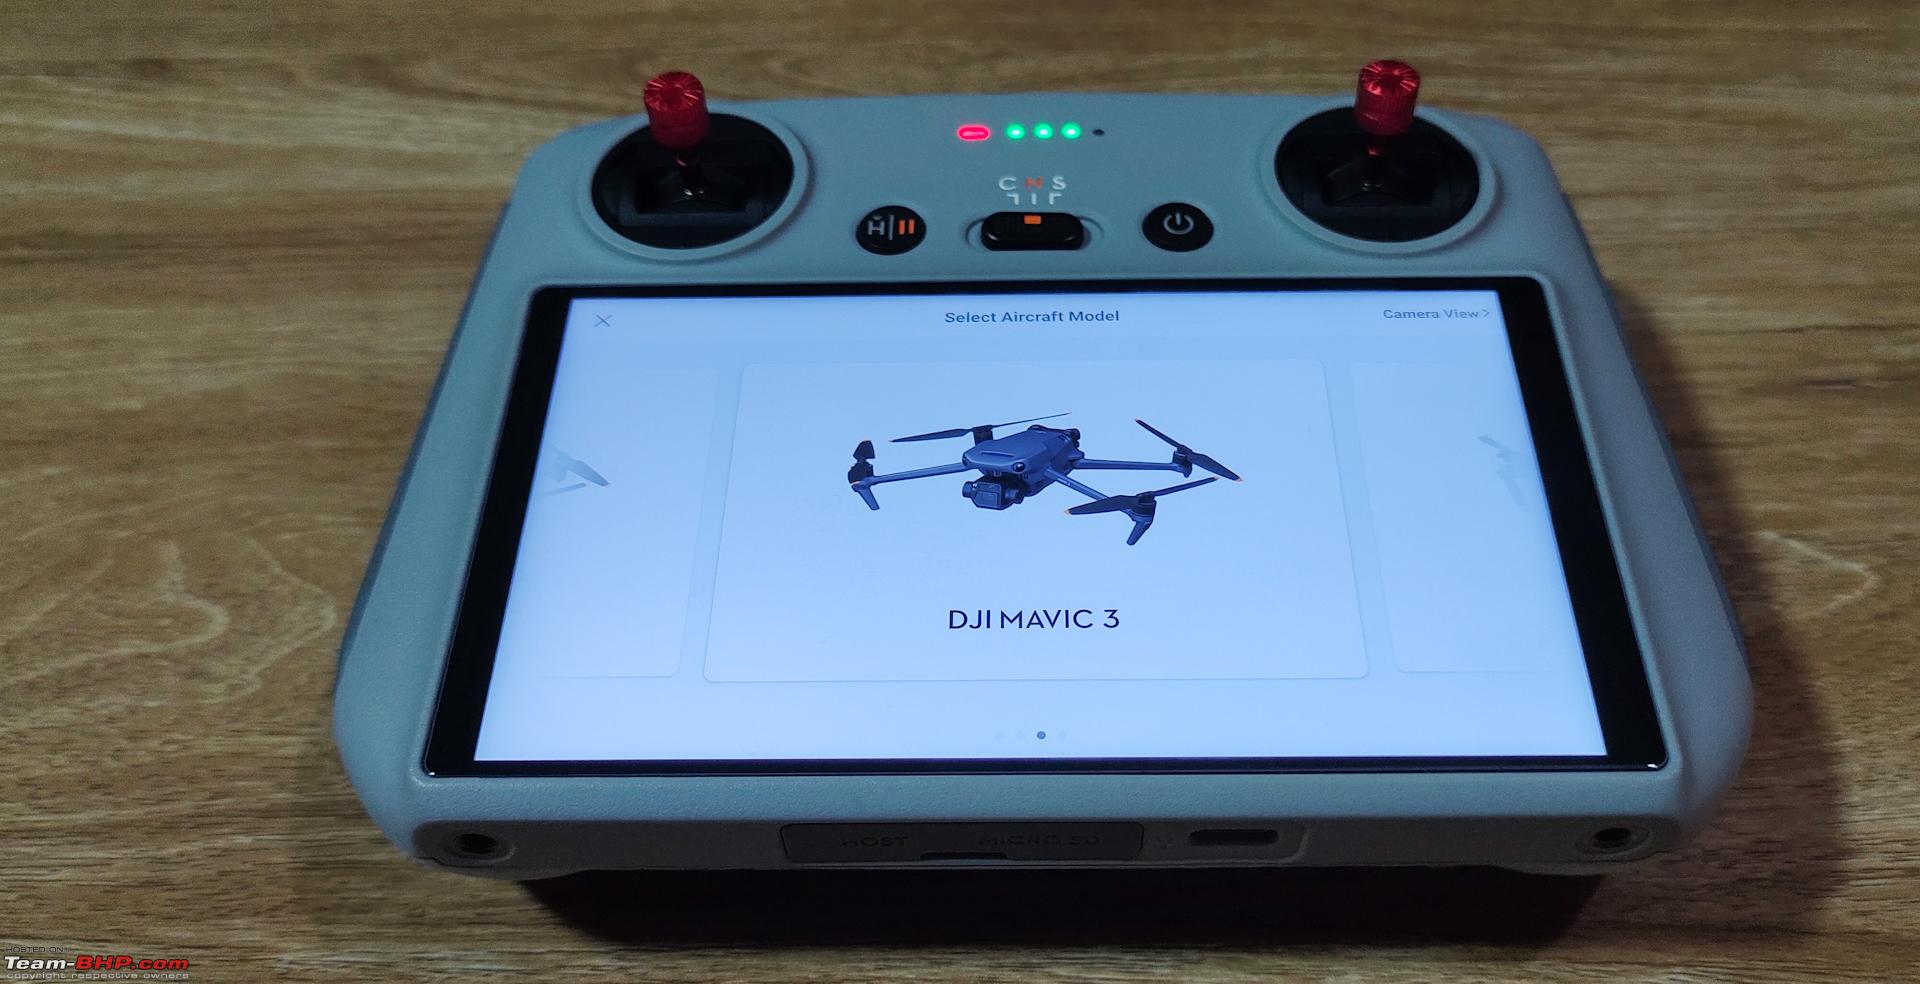 AIR 2S:  Update: Mini 3 as well. Last edited by Amyth Prabhakar : 11th December 2022 at 07:26. |
|
| (11)
Thanks
|
| The following 11 BHPians Thank Amyth Prabhakar for this useful post: | CEF_Beasts, digitalnirvana, graaja, GTO, KarthikK, ph03n!x, Roy.S, Samfromindia, shyamg28, SRISRI_90, TSIboy |
|
9th December 2022, 12:03
| #8 |
| BHPian | re: Dji Mini 3 Pro Review | The Best Nano Drone RC when connected to the camera view. It is pointed at a black screen in PRO mode and is the reason why it is showing up in black.  Device and Firmware details: 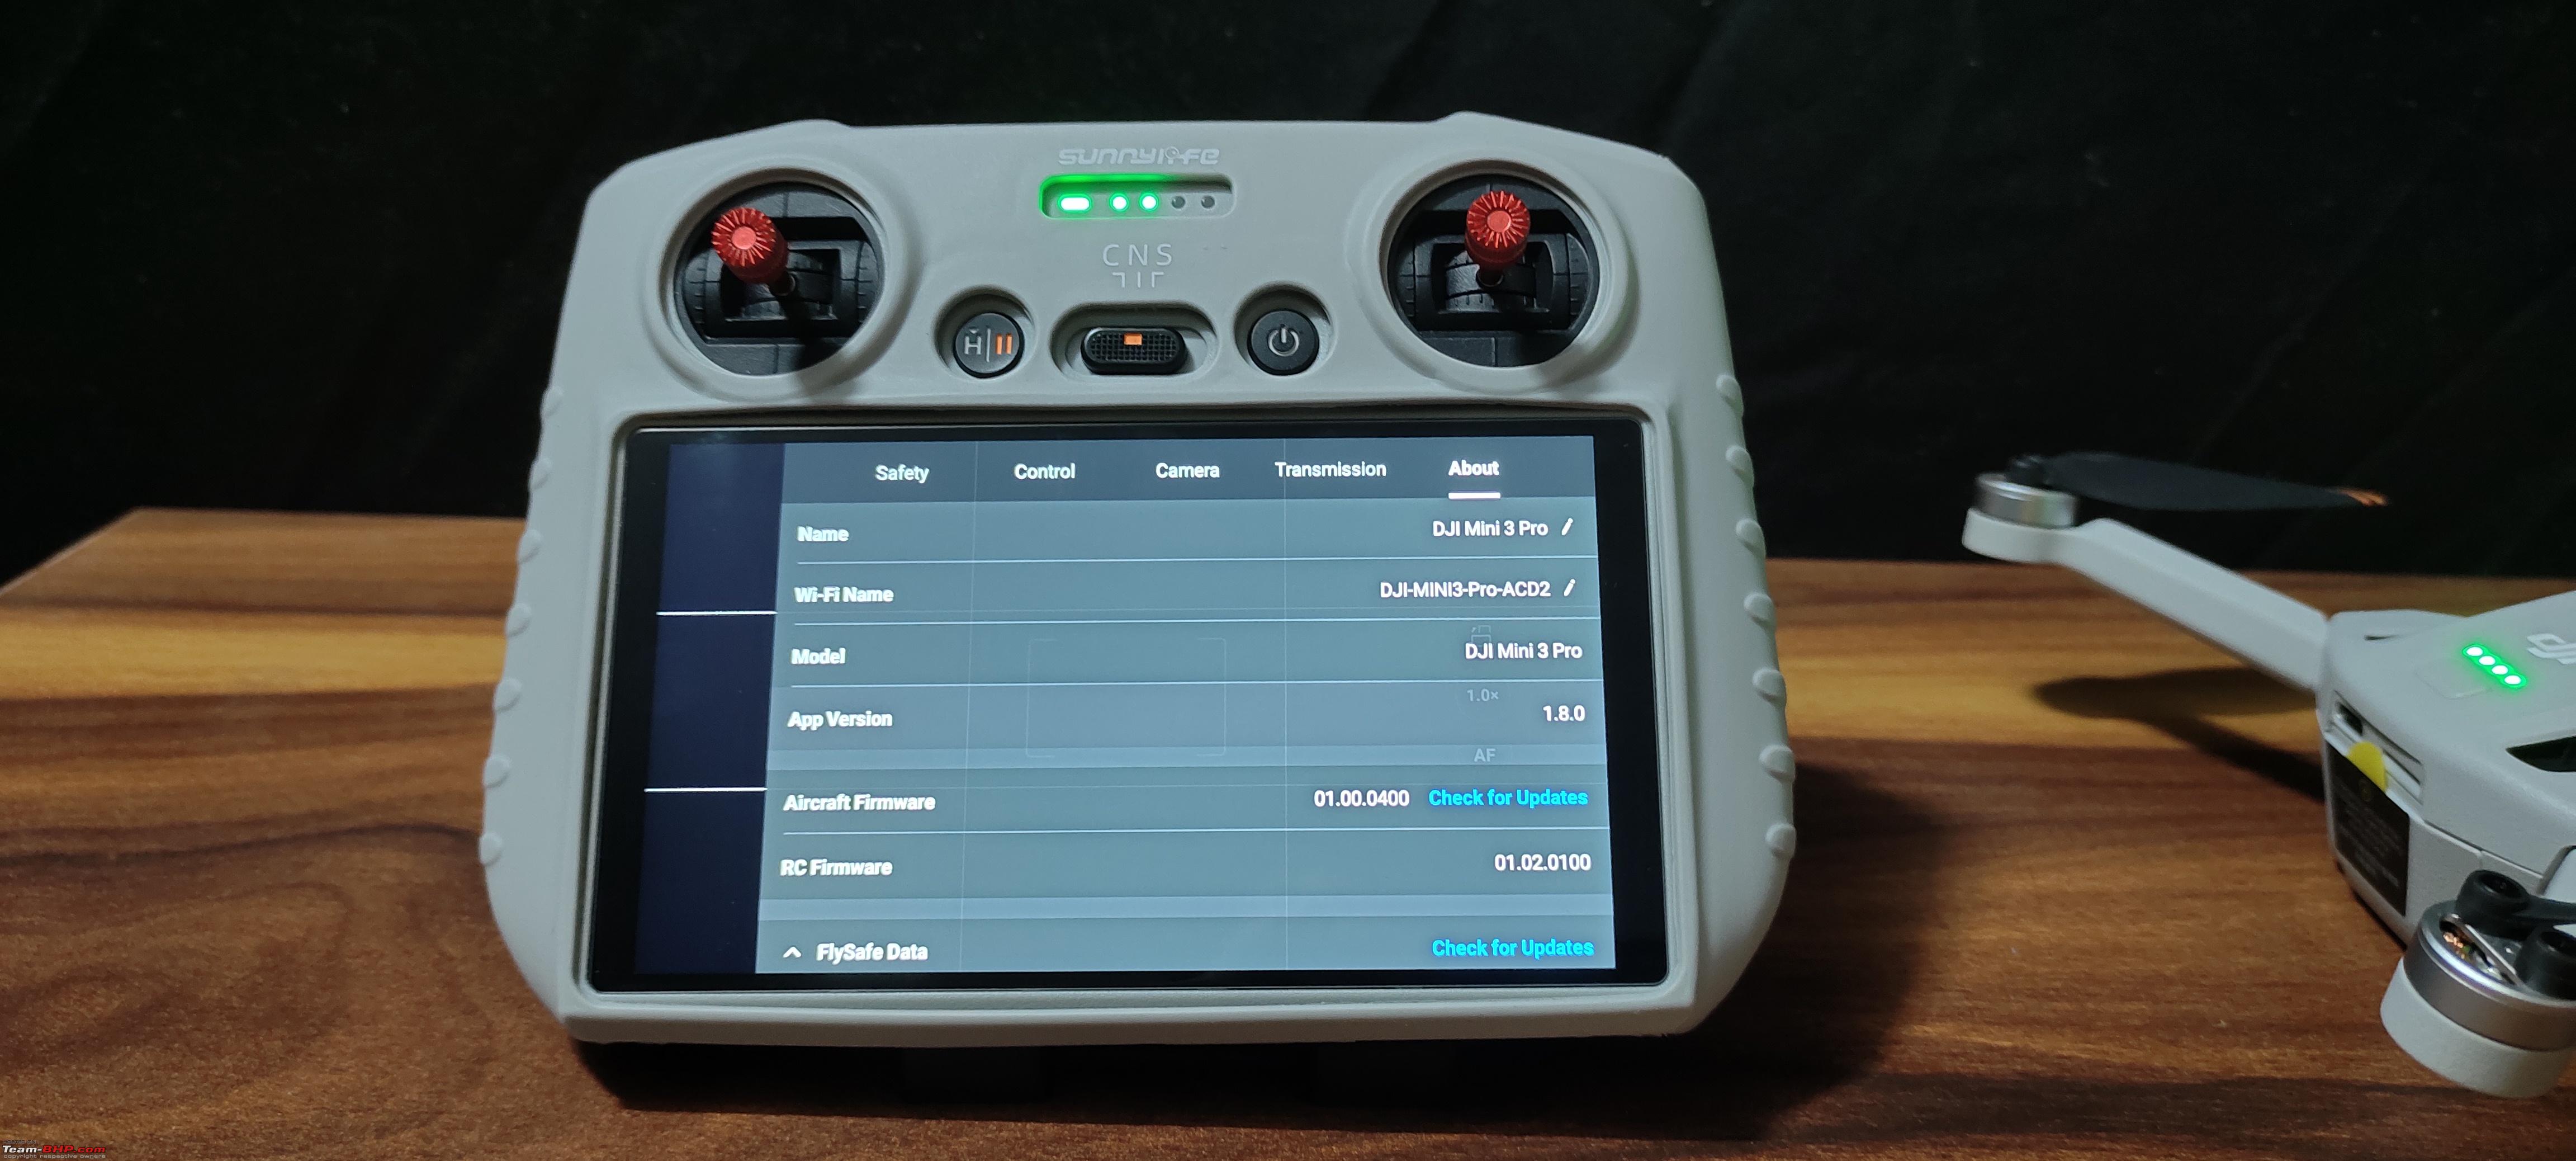 OcuSync Transmission system: It automatically switches between 2.4 and 5.8 Ghz depending on where the signal strength is the strongest. There is also an option to manually set it up. Better to not meddle with it and just leave it in auto to be on the safer side. Play with it only when u fully understand and know what to do.  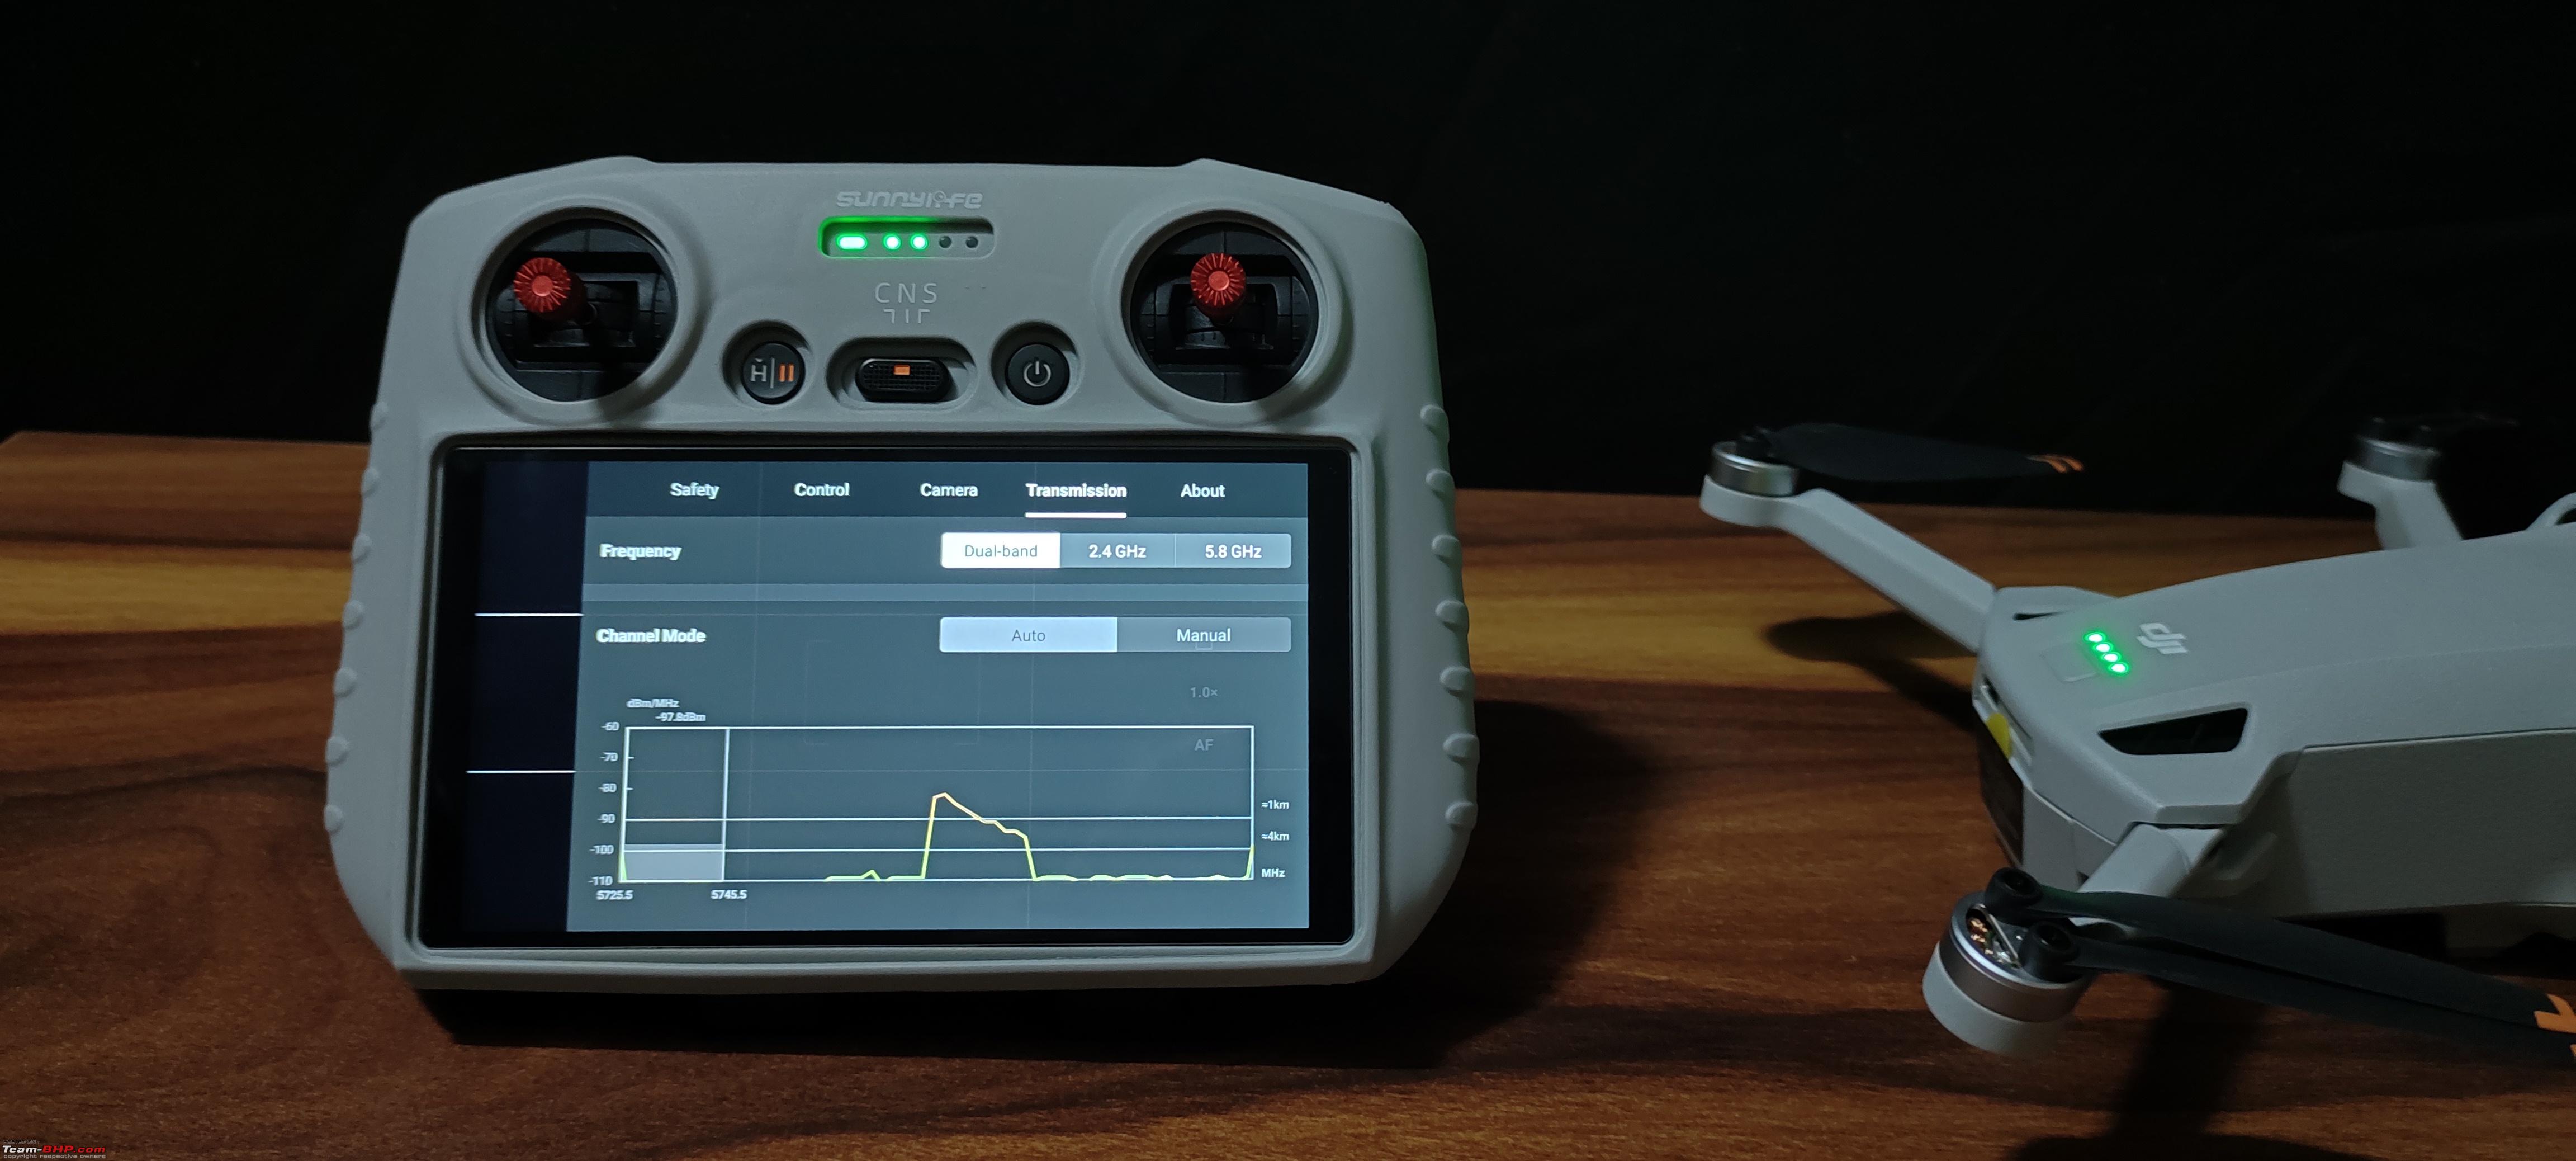 Useful settings for photography: Aspect ratio, grid lines, anti flicker frequency settings for shooting under certain lighting conditions. 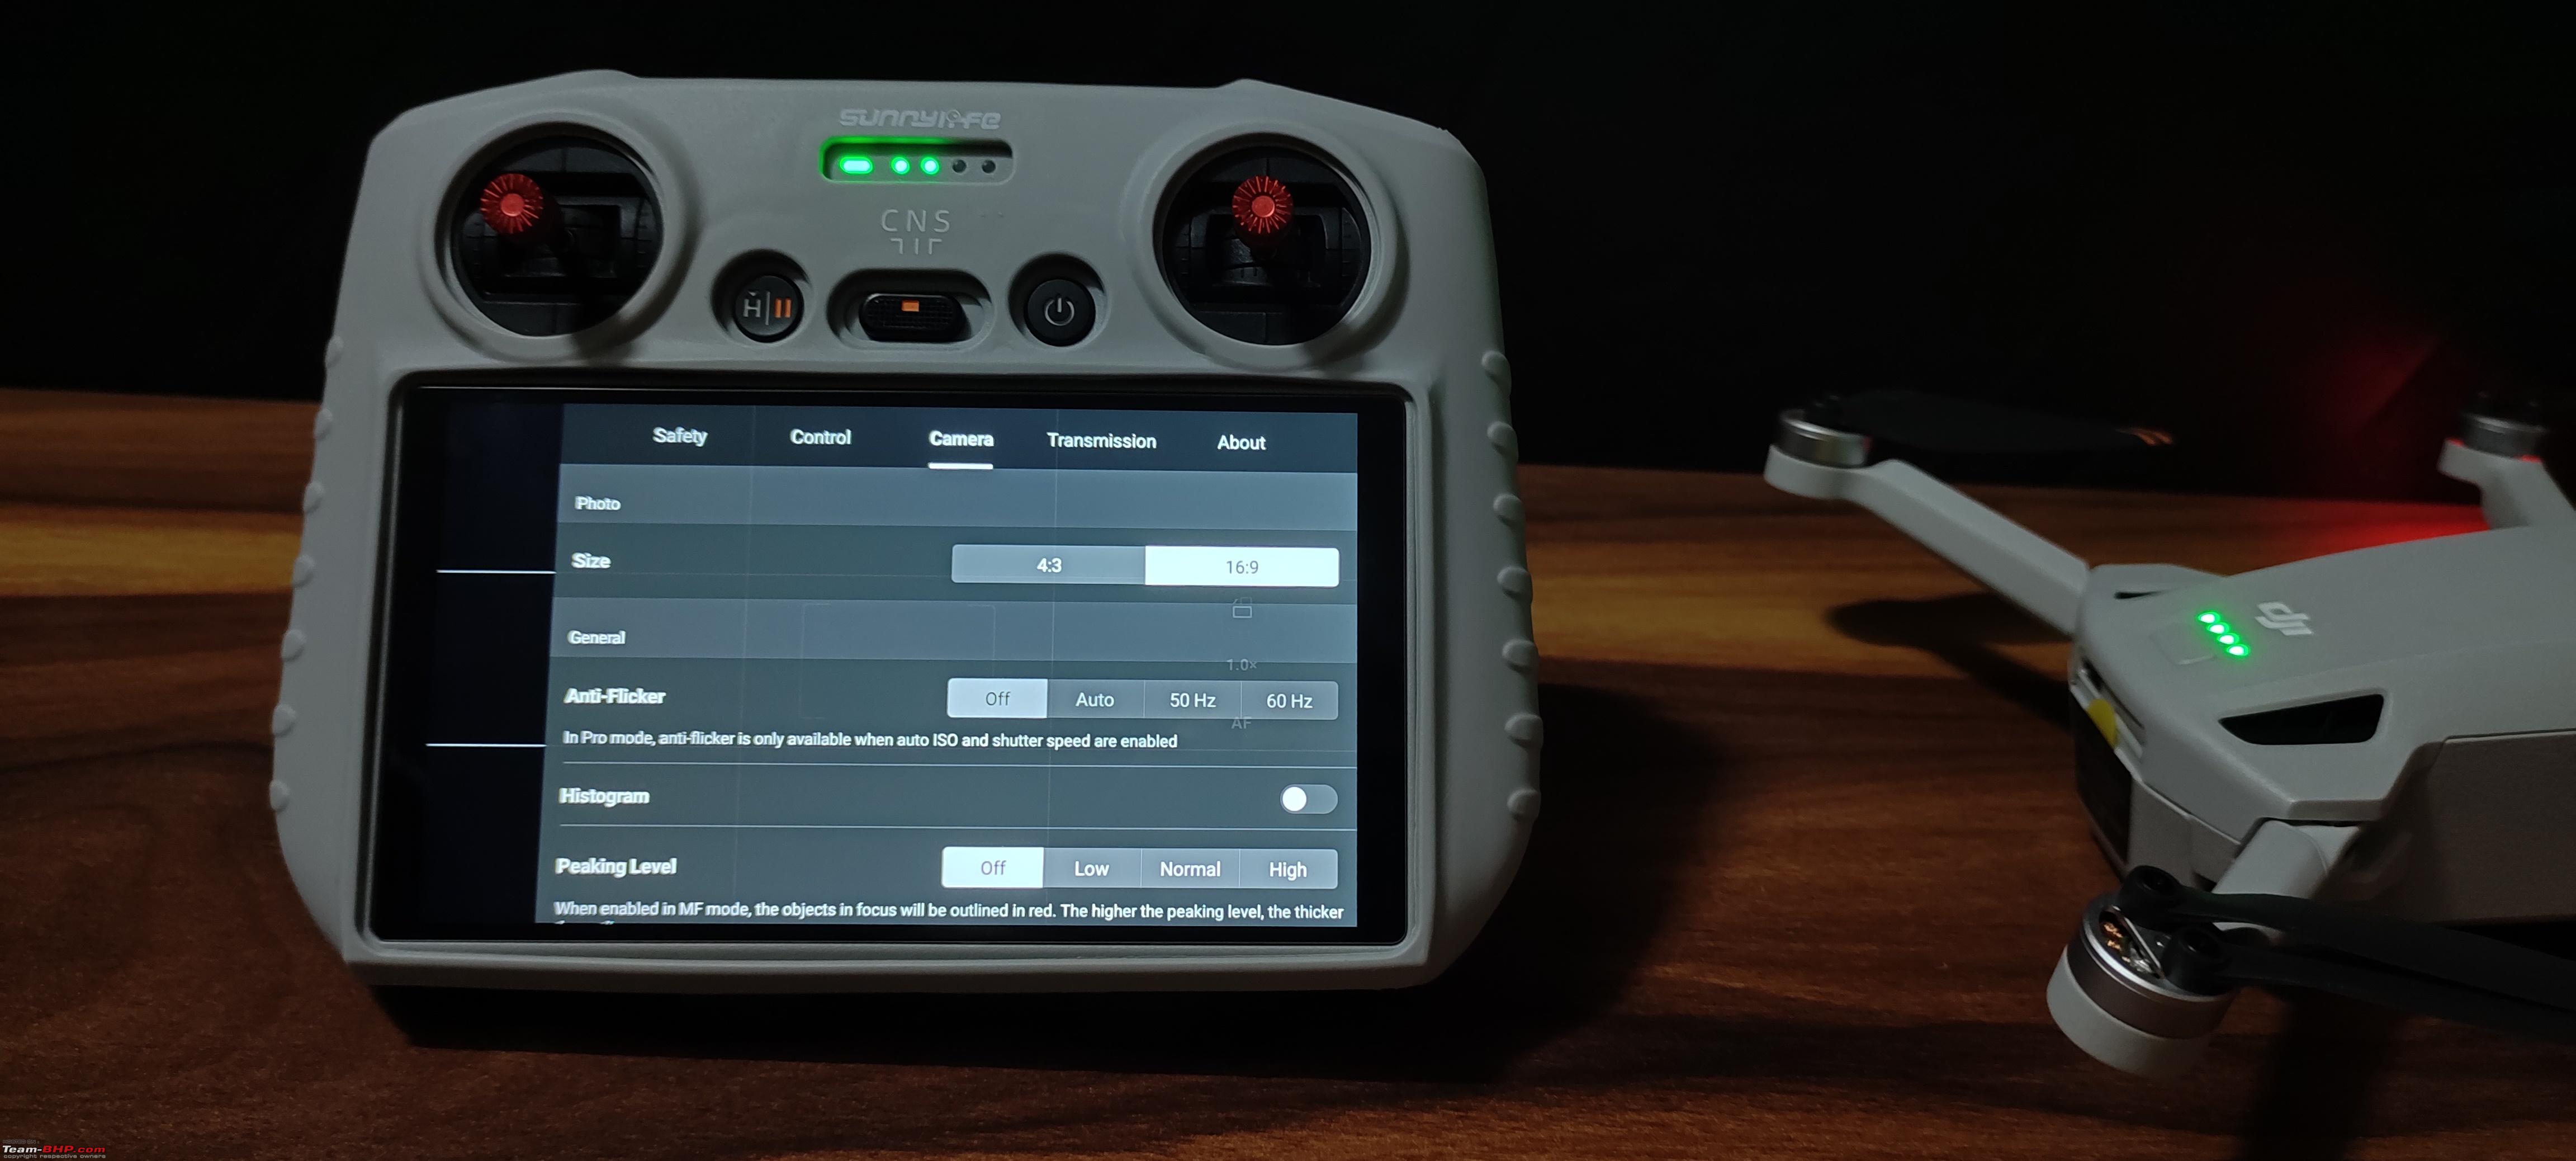 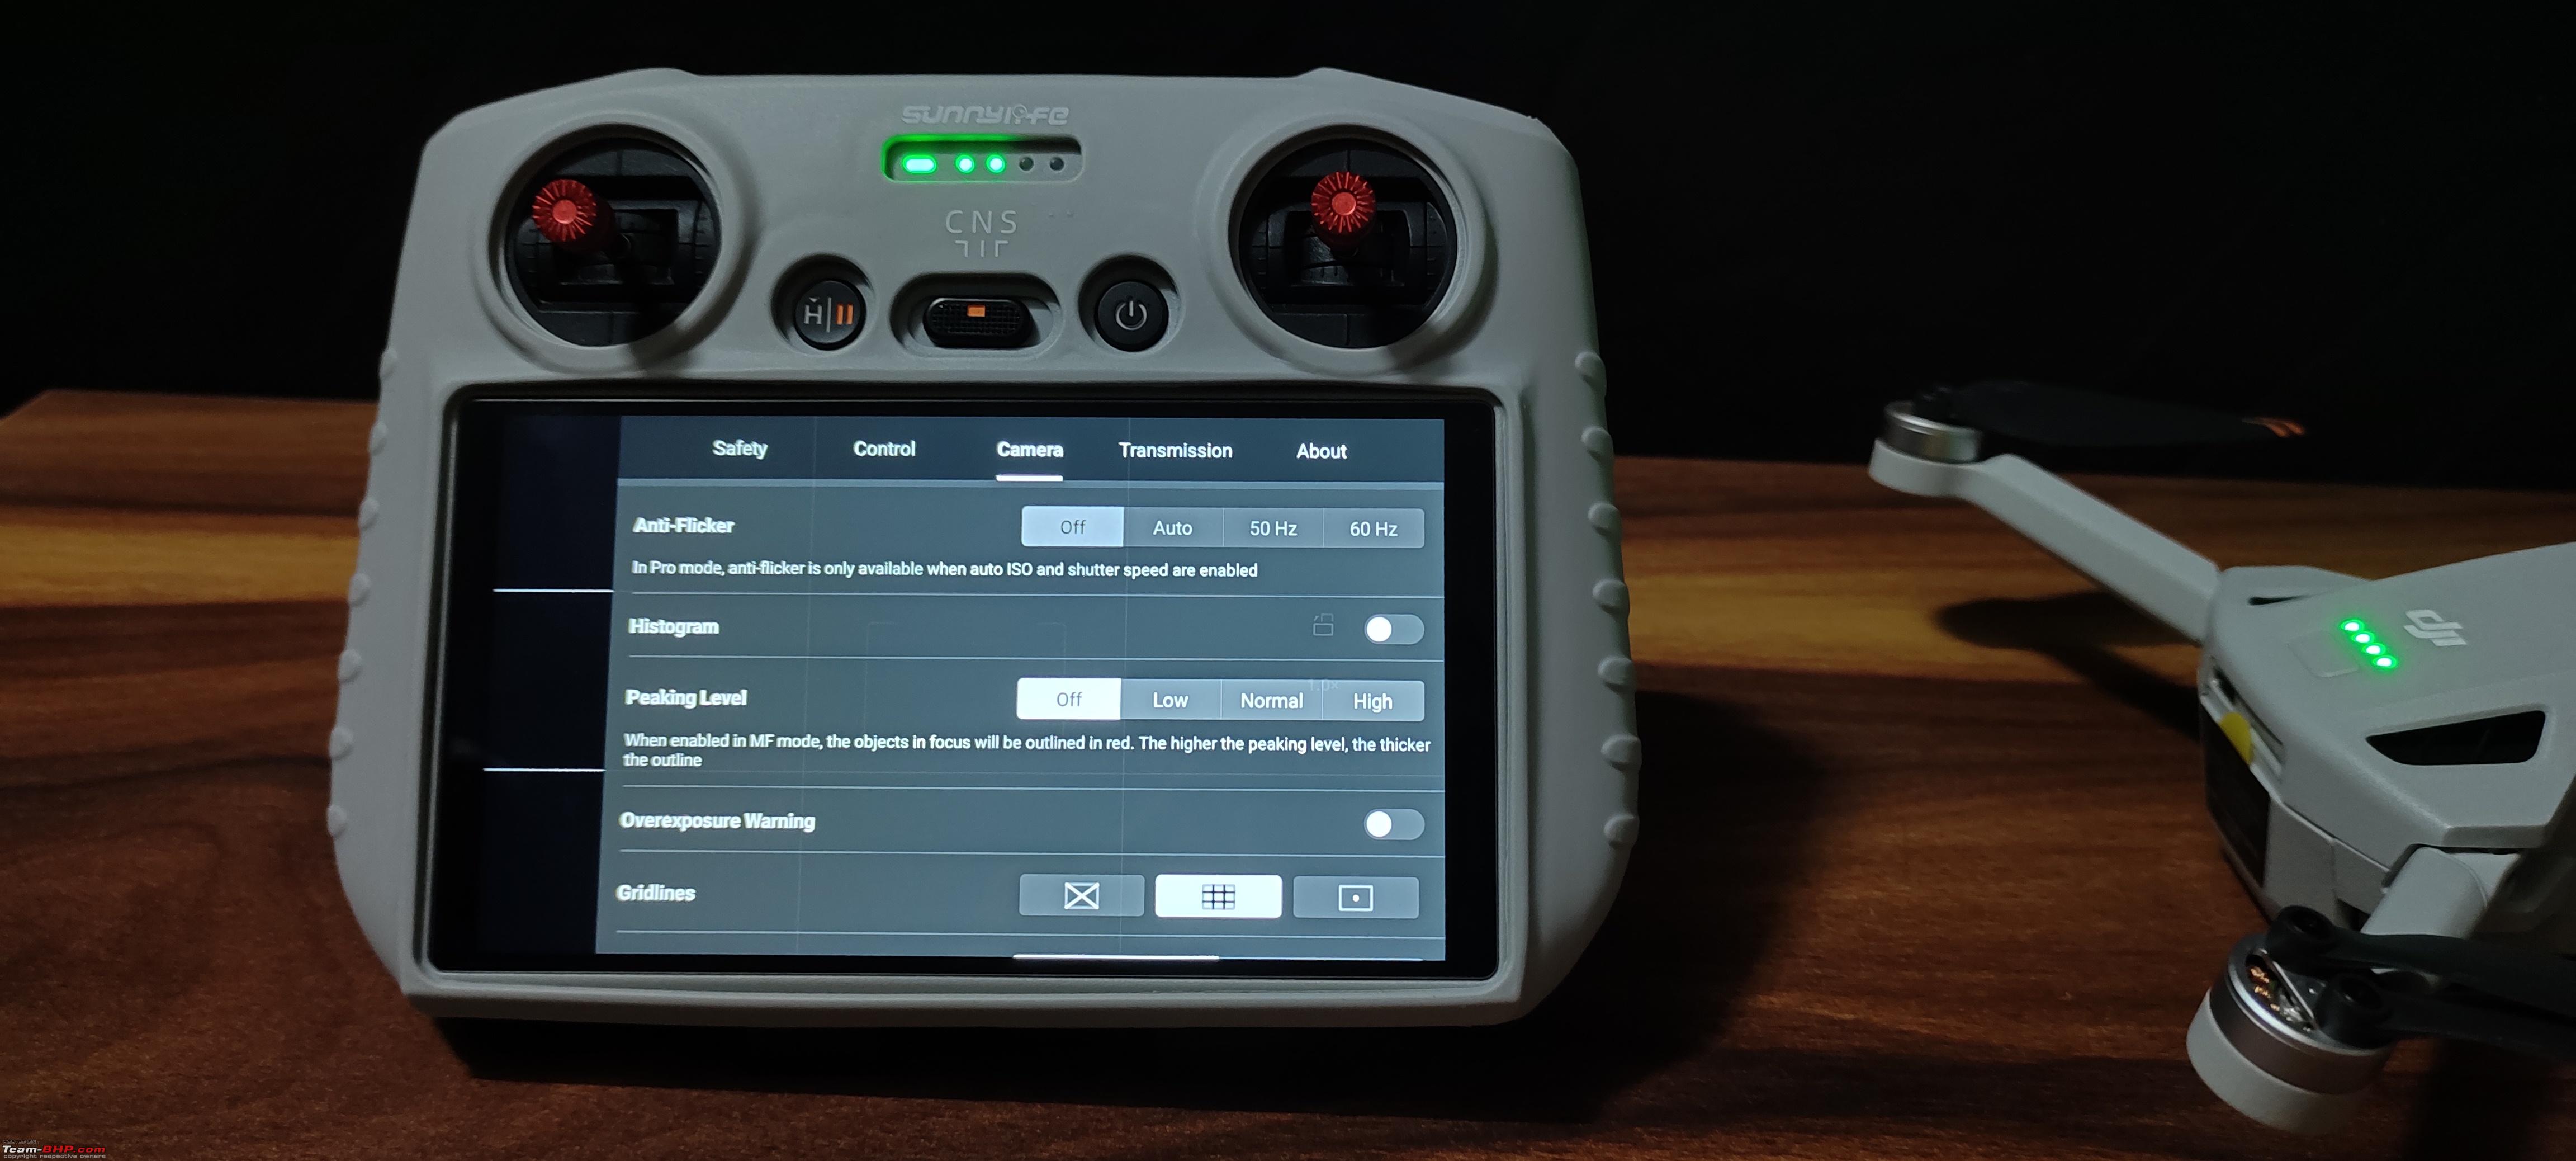  Either of the storage can be used. Internal or external. Internal storage comes handy at times when a memory card is forgotten. Though the drone has a very limited onboard storage capacity, it should still help to store a few photos and low resolution videos. When an external memory card is inserted it automatically detects it and switches over to the SD card. Both internal and external storages can be formatted through the RC. 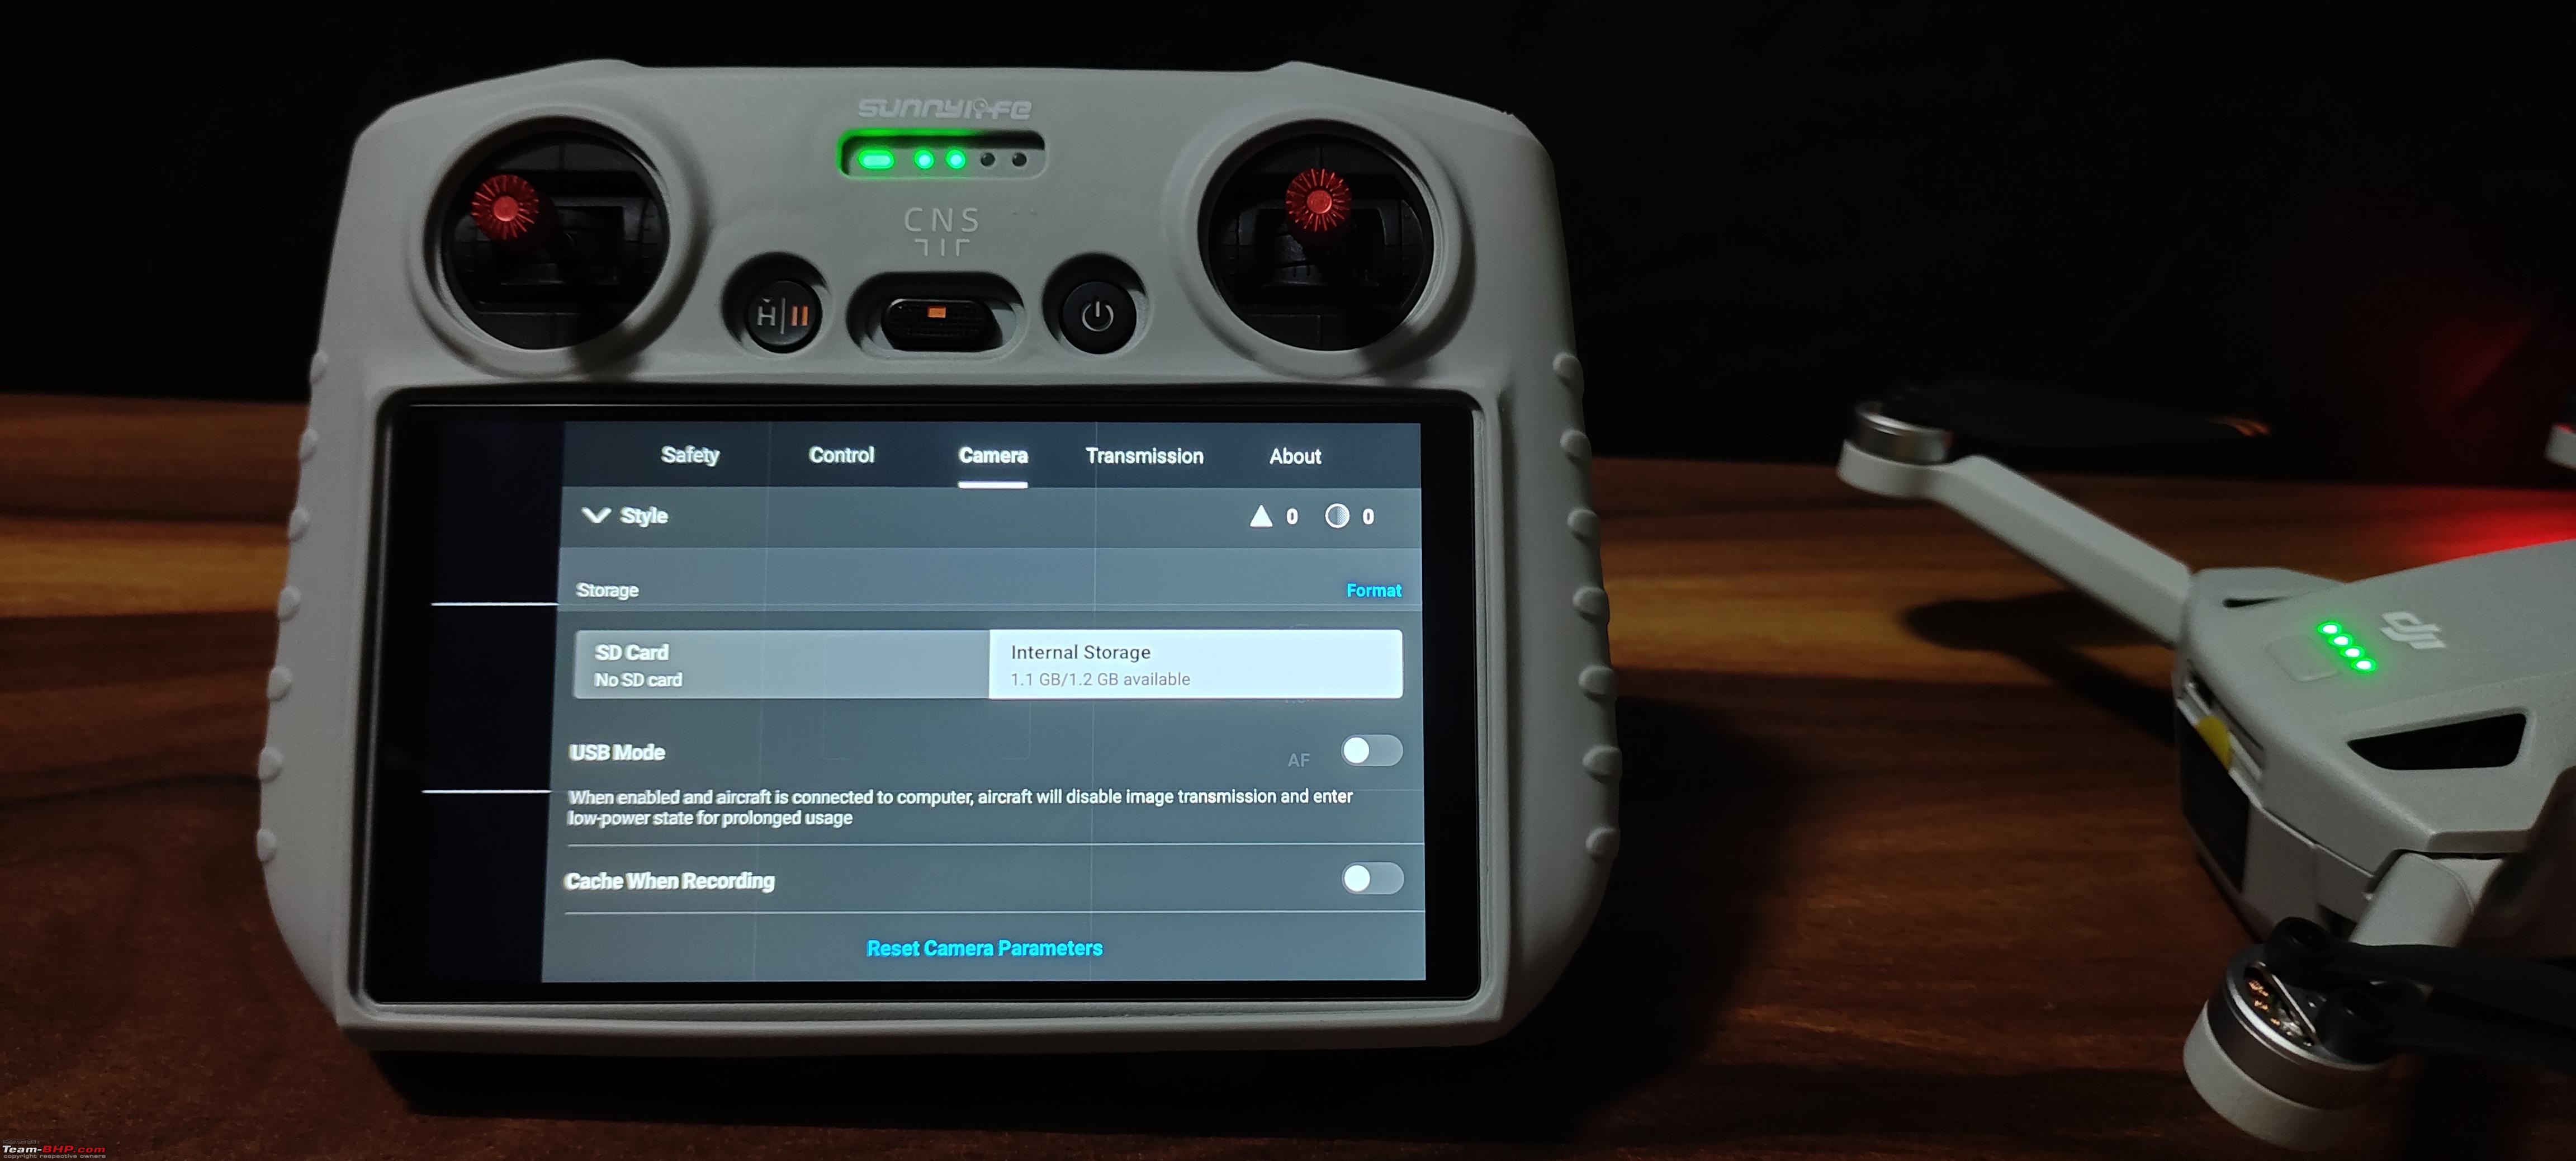 Metrics can be either in meters or kilometers depending on one's preference. Subject scanning when enabled automatically identifies and detects subjects with a plus mark on them. This is very useful for automated flight modes and for subject tracking.  The responsiveness of the control sticks related to yaw, roll, pitch and up/down movements can be adjusted to one's preference. It can be separately setup for each mode. ( Normal, Cine and Sport ) 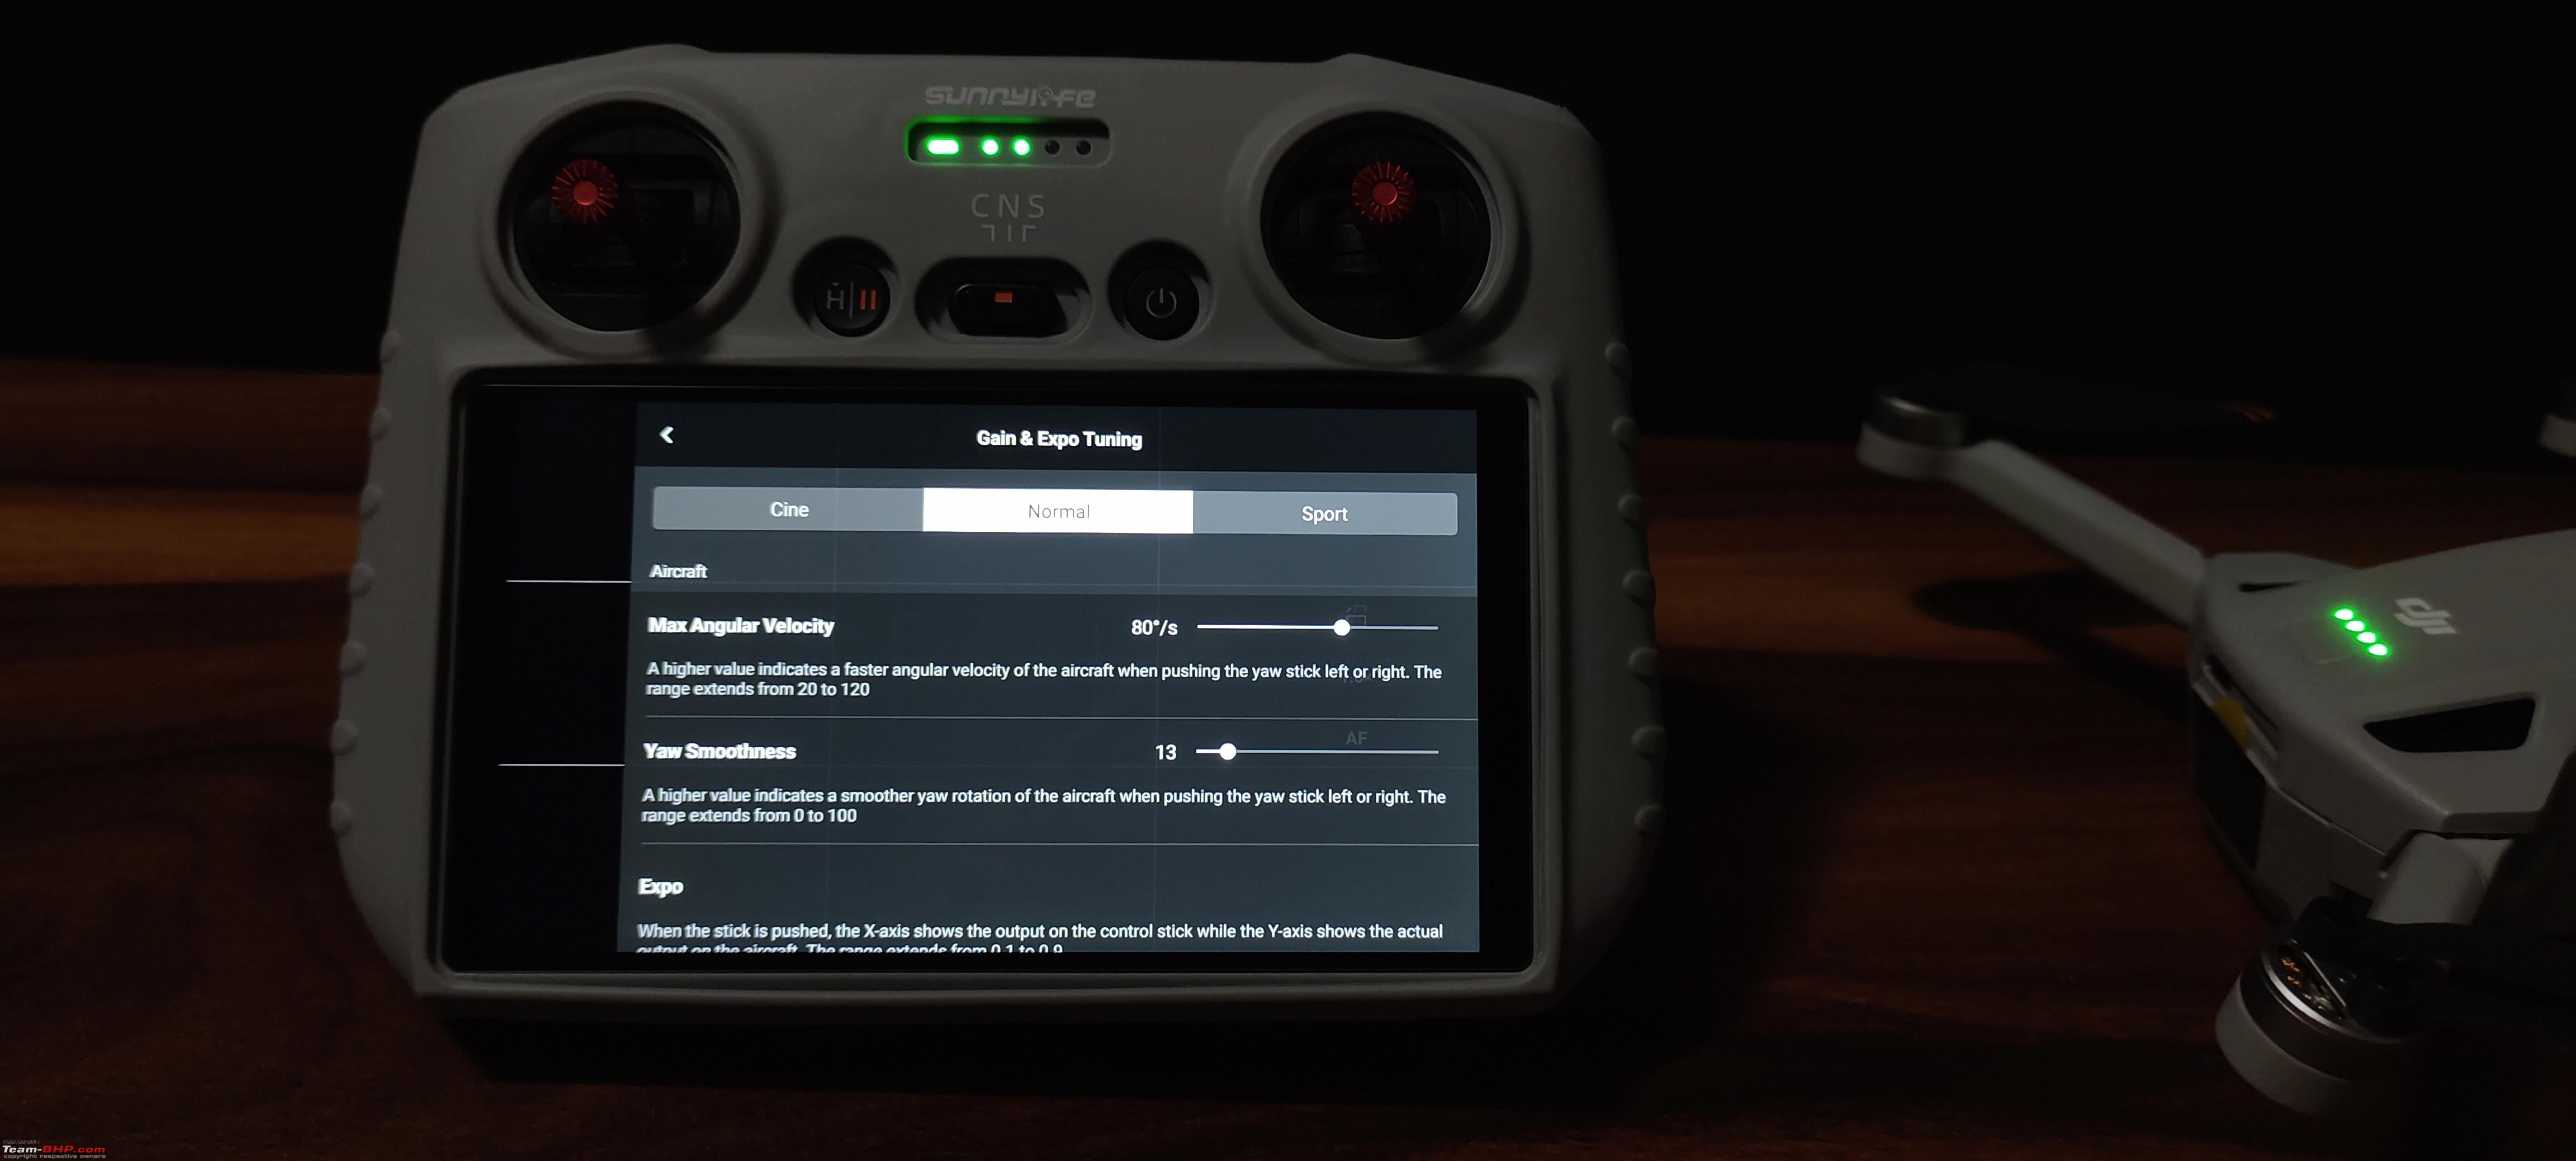 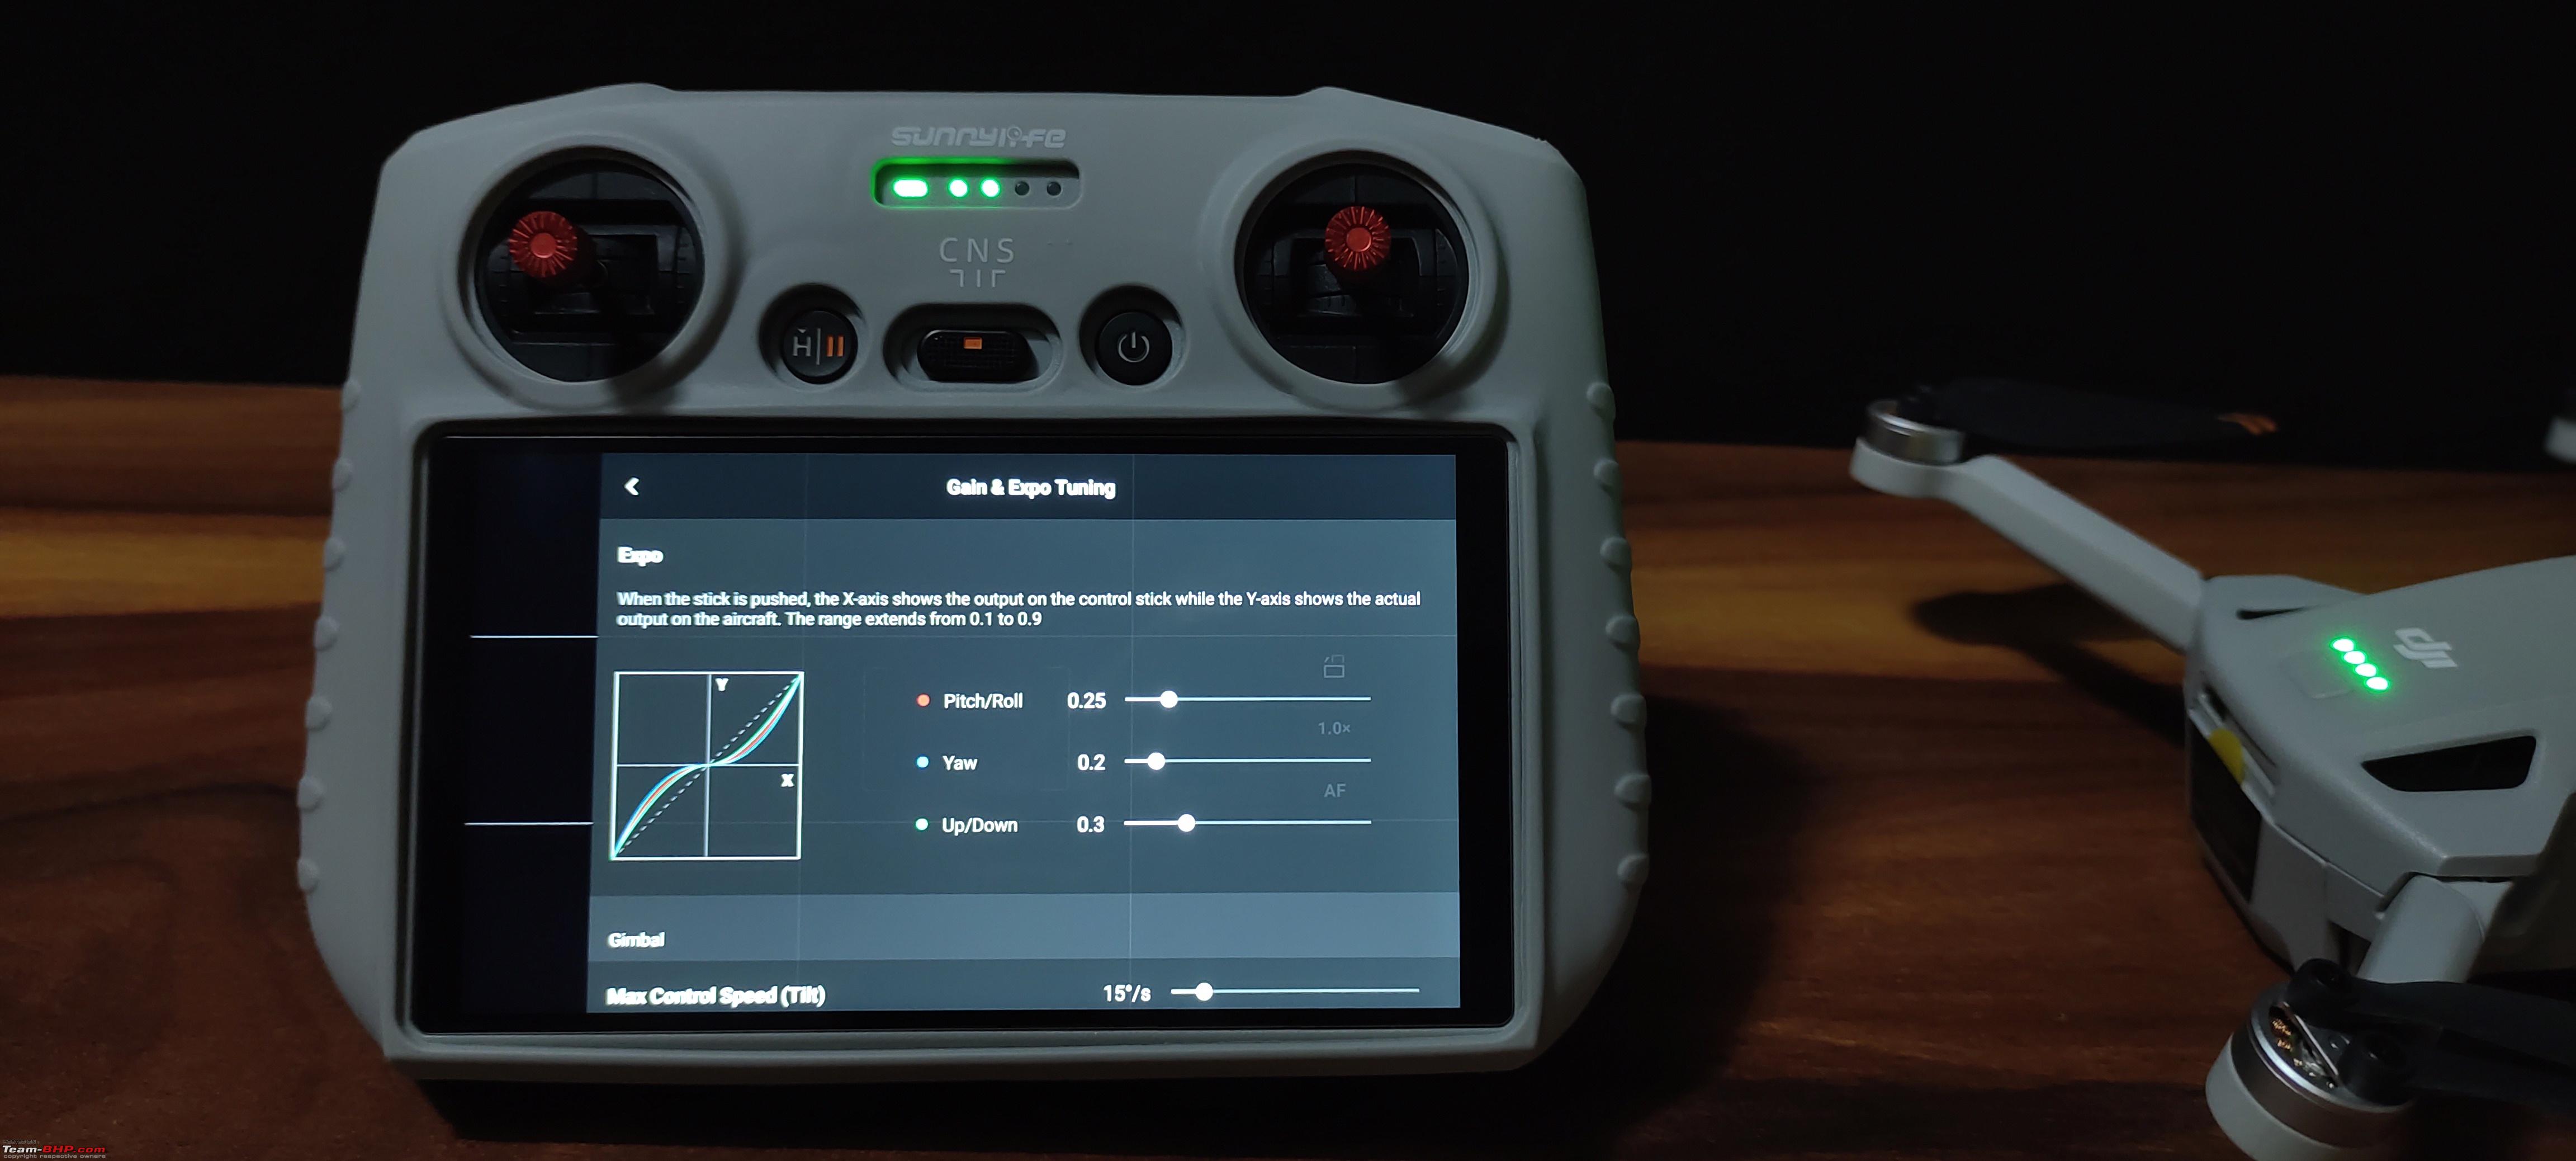  Safety: It can be set to either Bypass or Brake and can also be completely turned off to improve the battery performance and efficiency. The drone intelligently finds a new path around an obstacle when it is in bypass mode and the drone stops and hovers in front of an obstacle when it is in the brake mode. They do not work when shooting in higher resolutions and frame rates and also gets disabled when in sports mode. 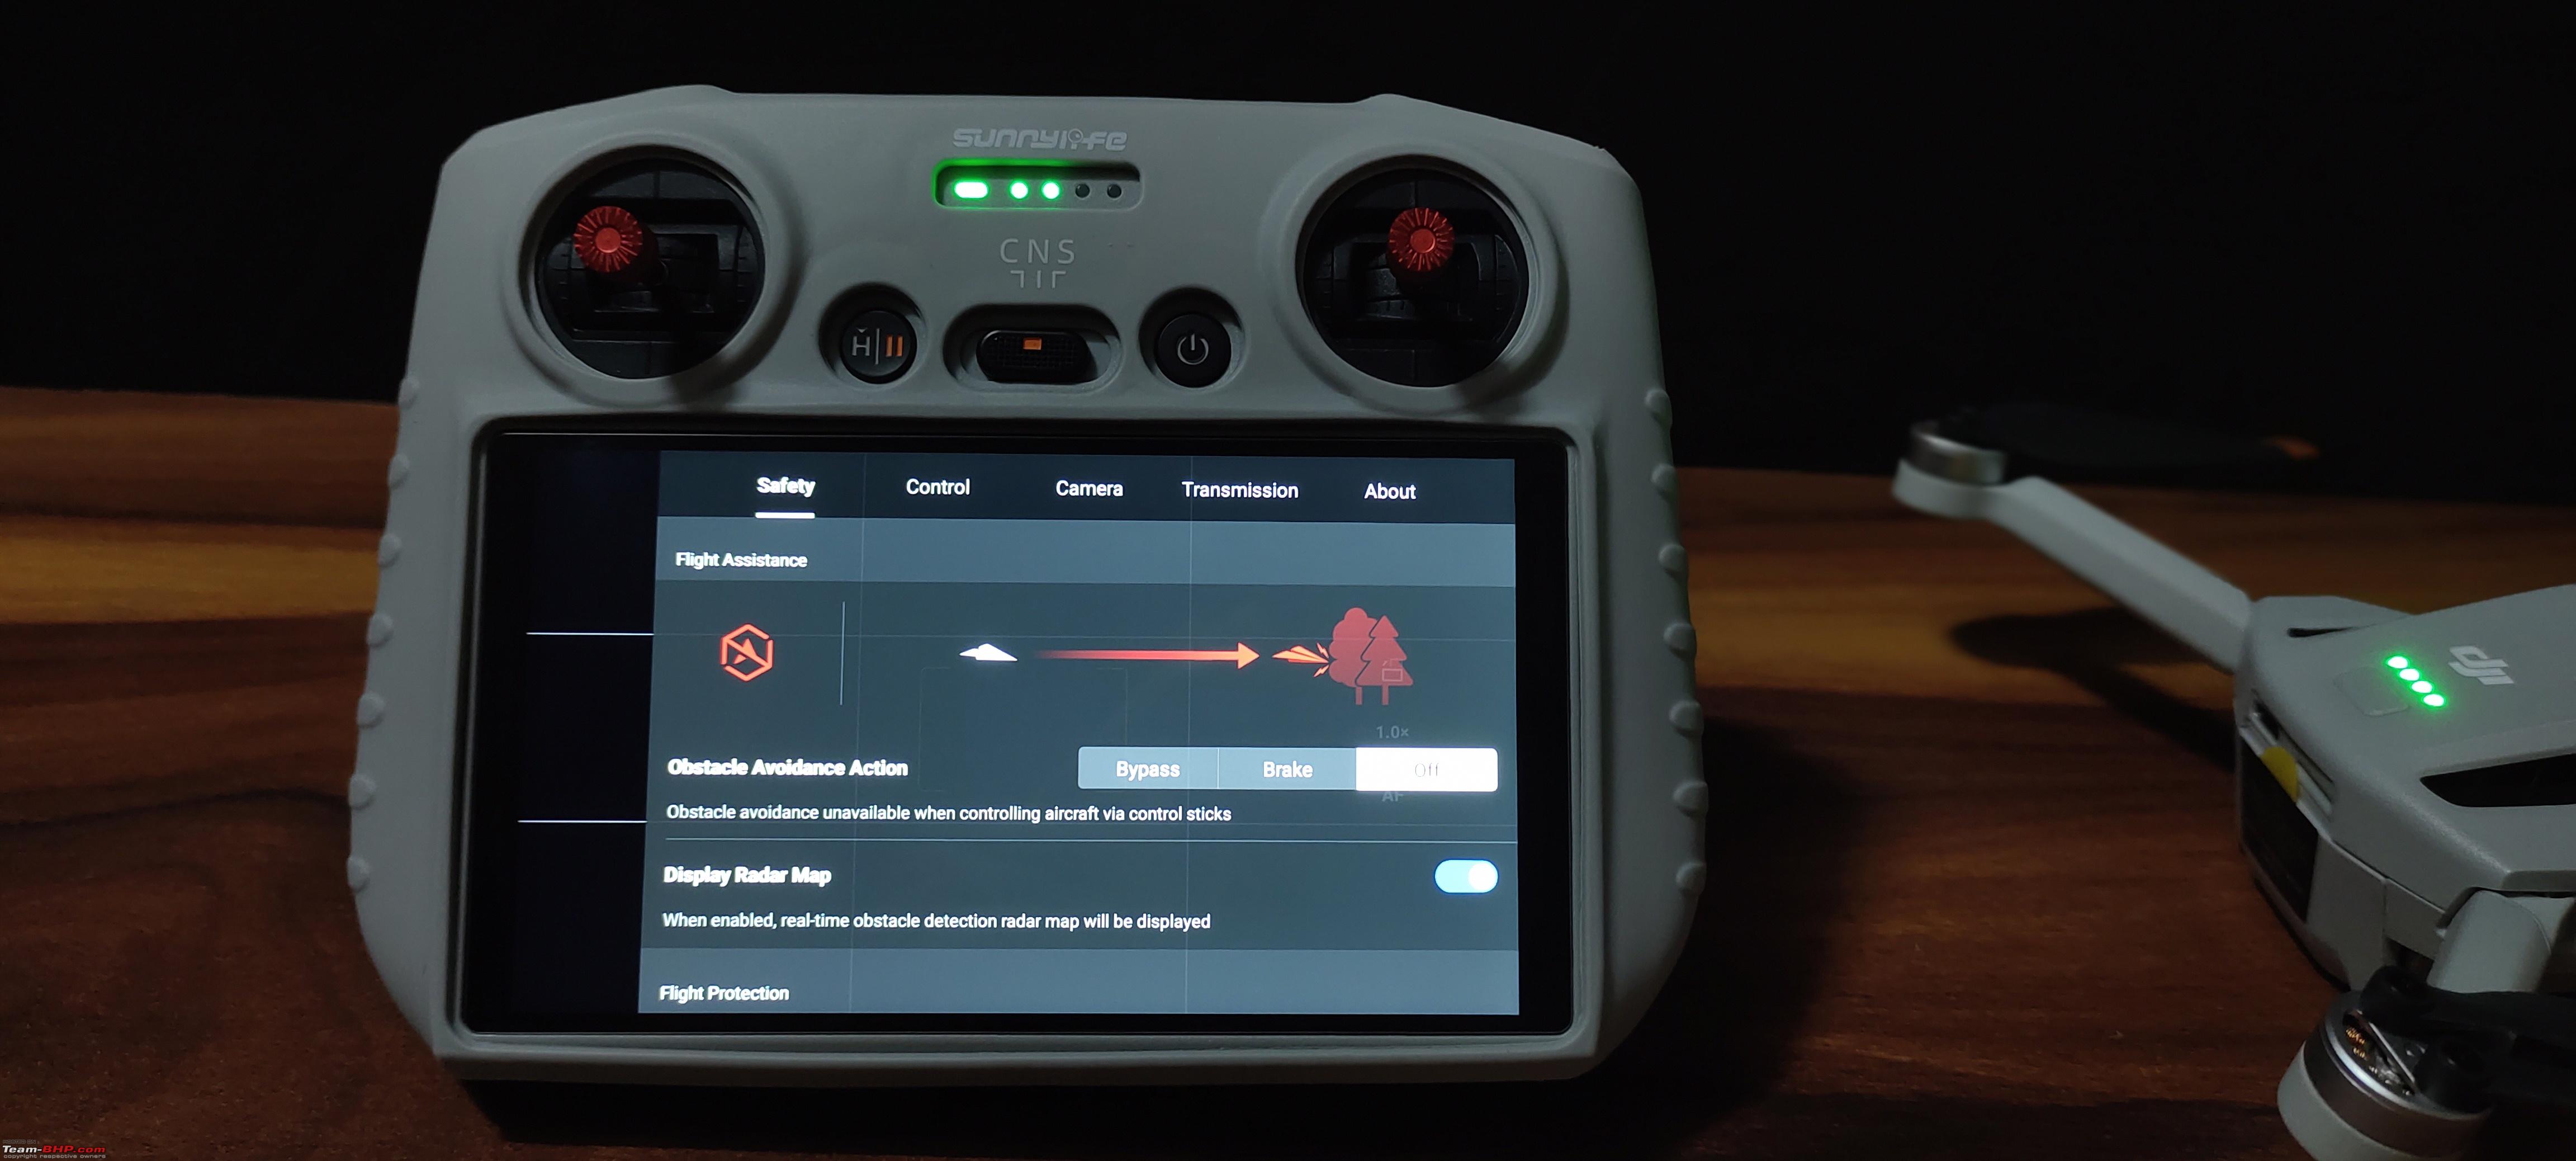 Radar map tells how close the drone is to the obstacles in real time and also gives a ton of other useful information for drone pilots. Max altitude is locked at 120m in India. Max distance is locked by me and I rarely take it beyond 500m. RTH altitude is defaulted to 20m and needs to be setup appropriately based on the location. 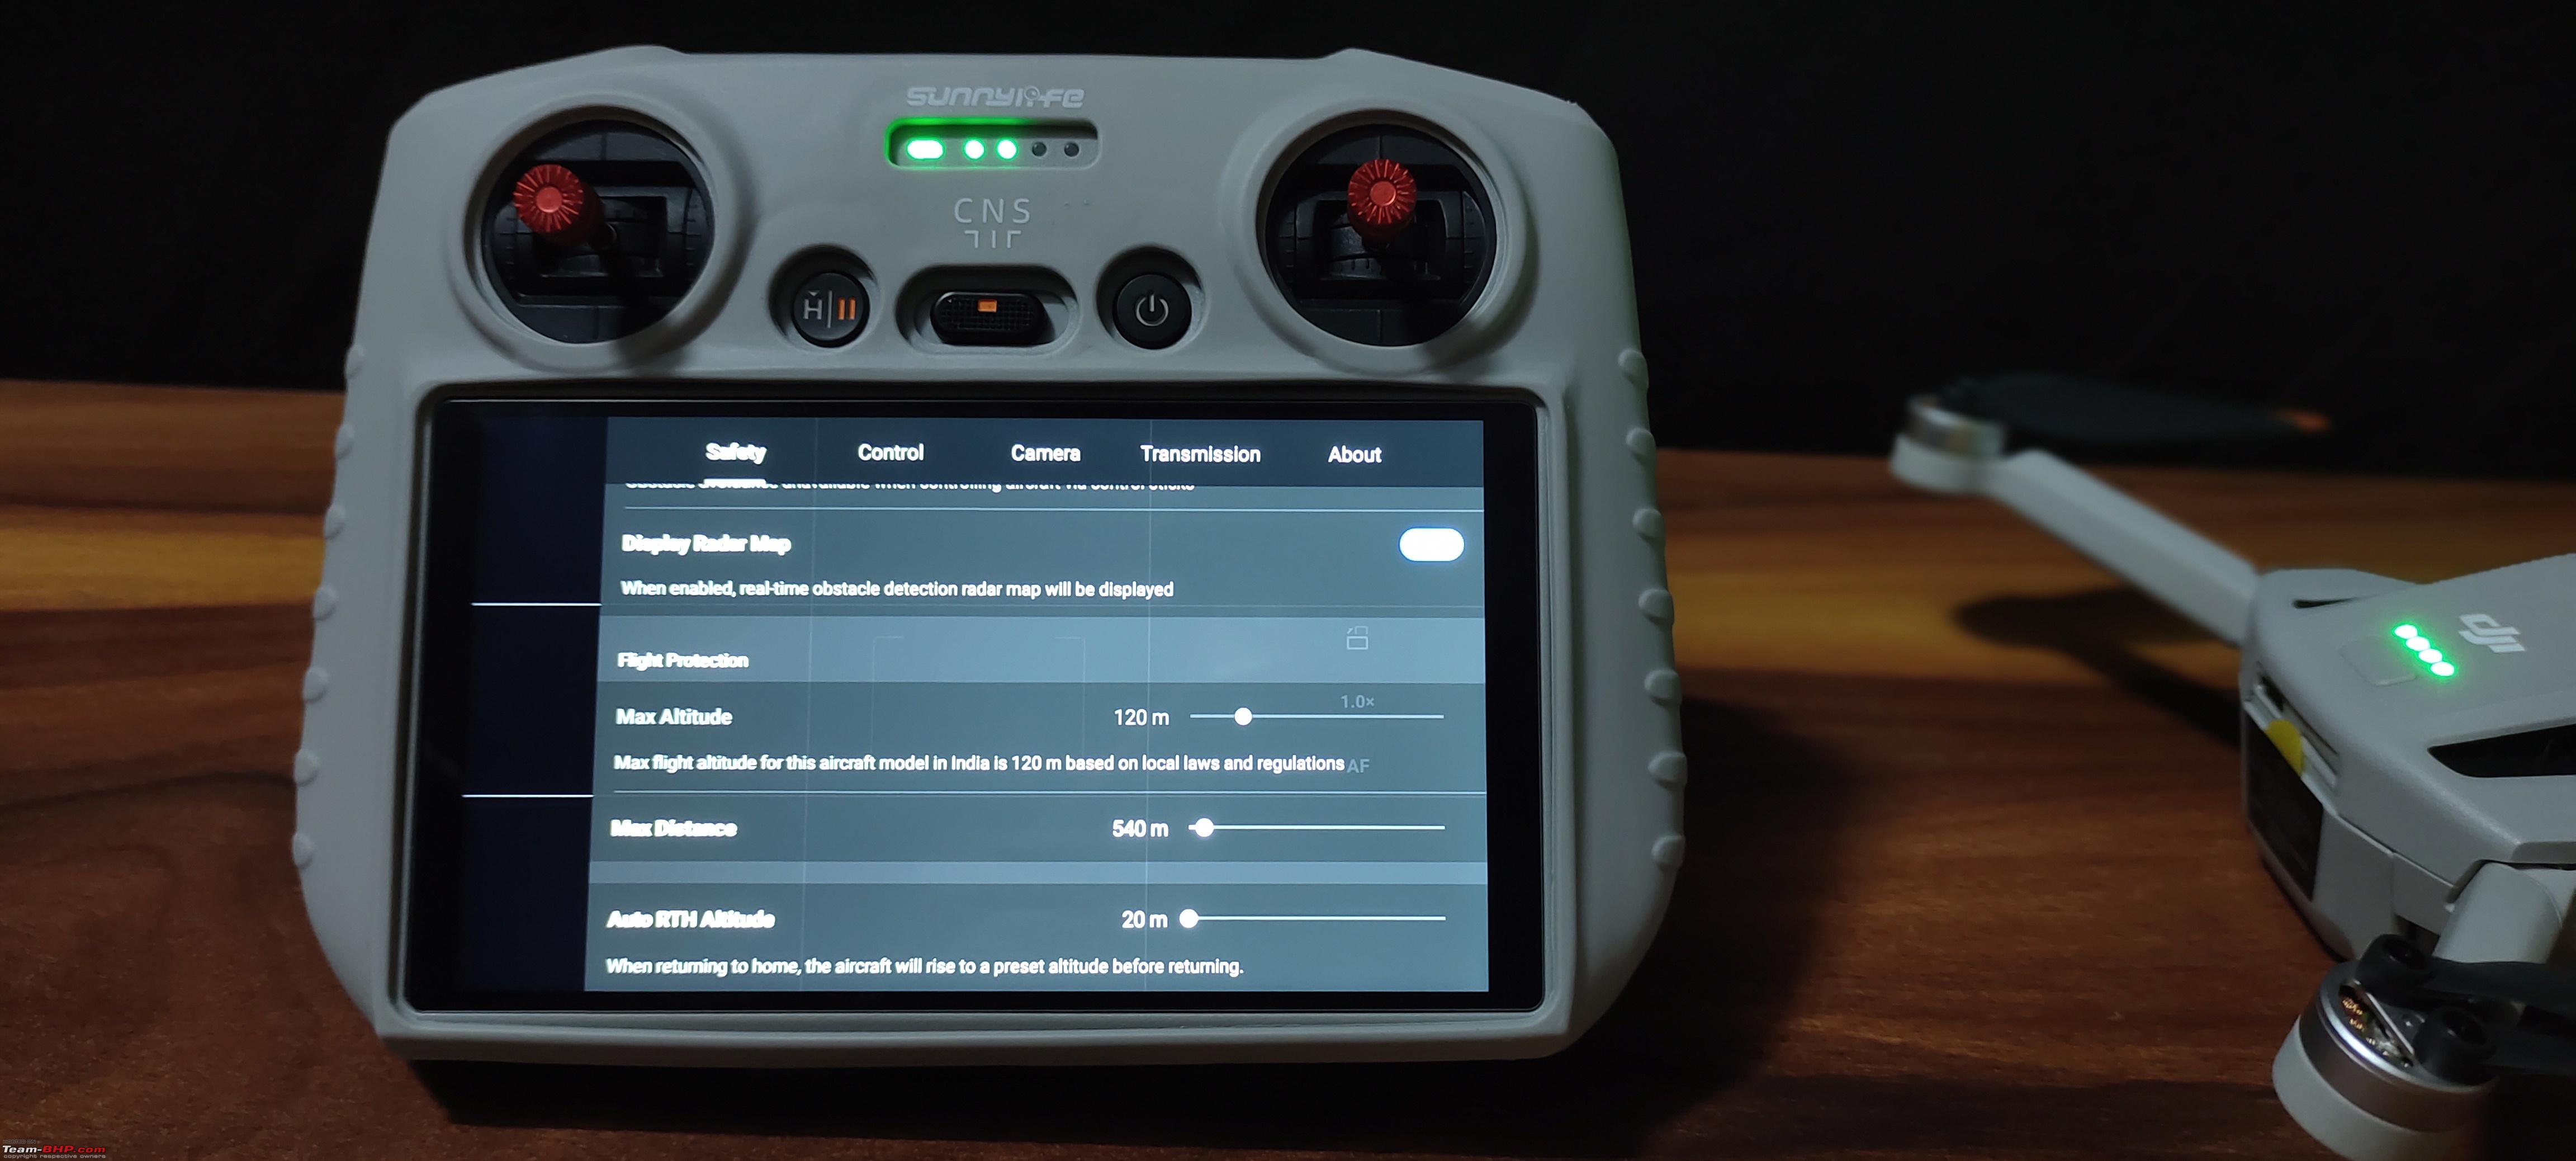 Home point can be updated on the fly. The compass and the IMU can be recalibrated if required. 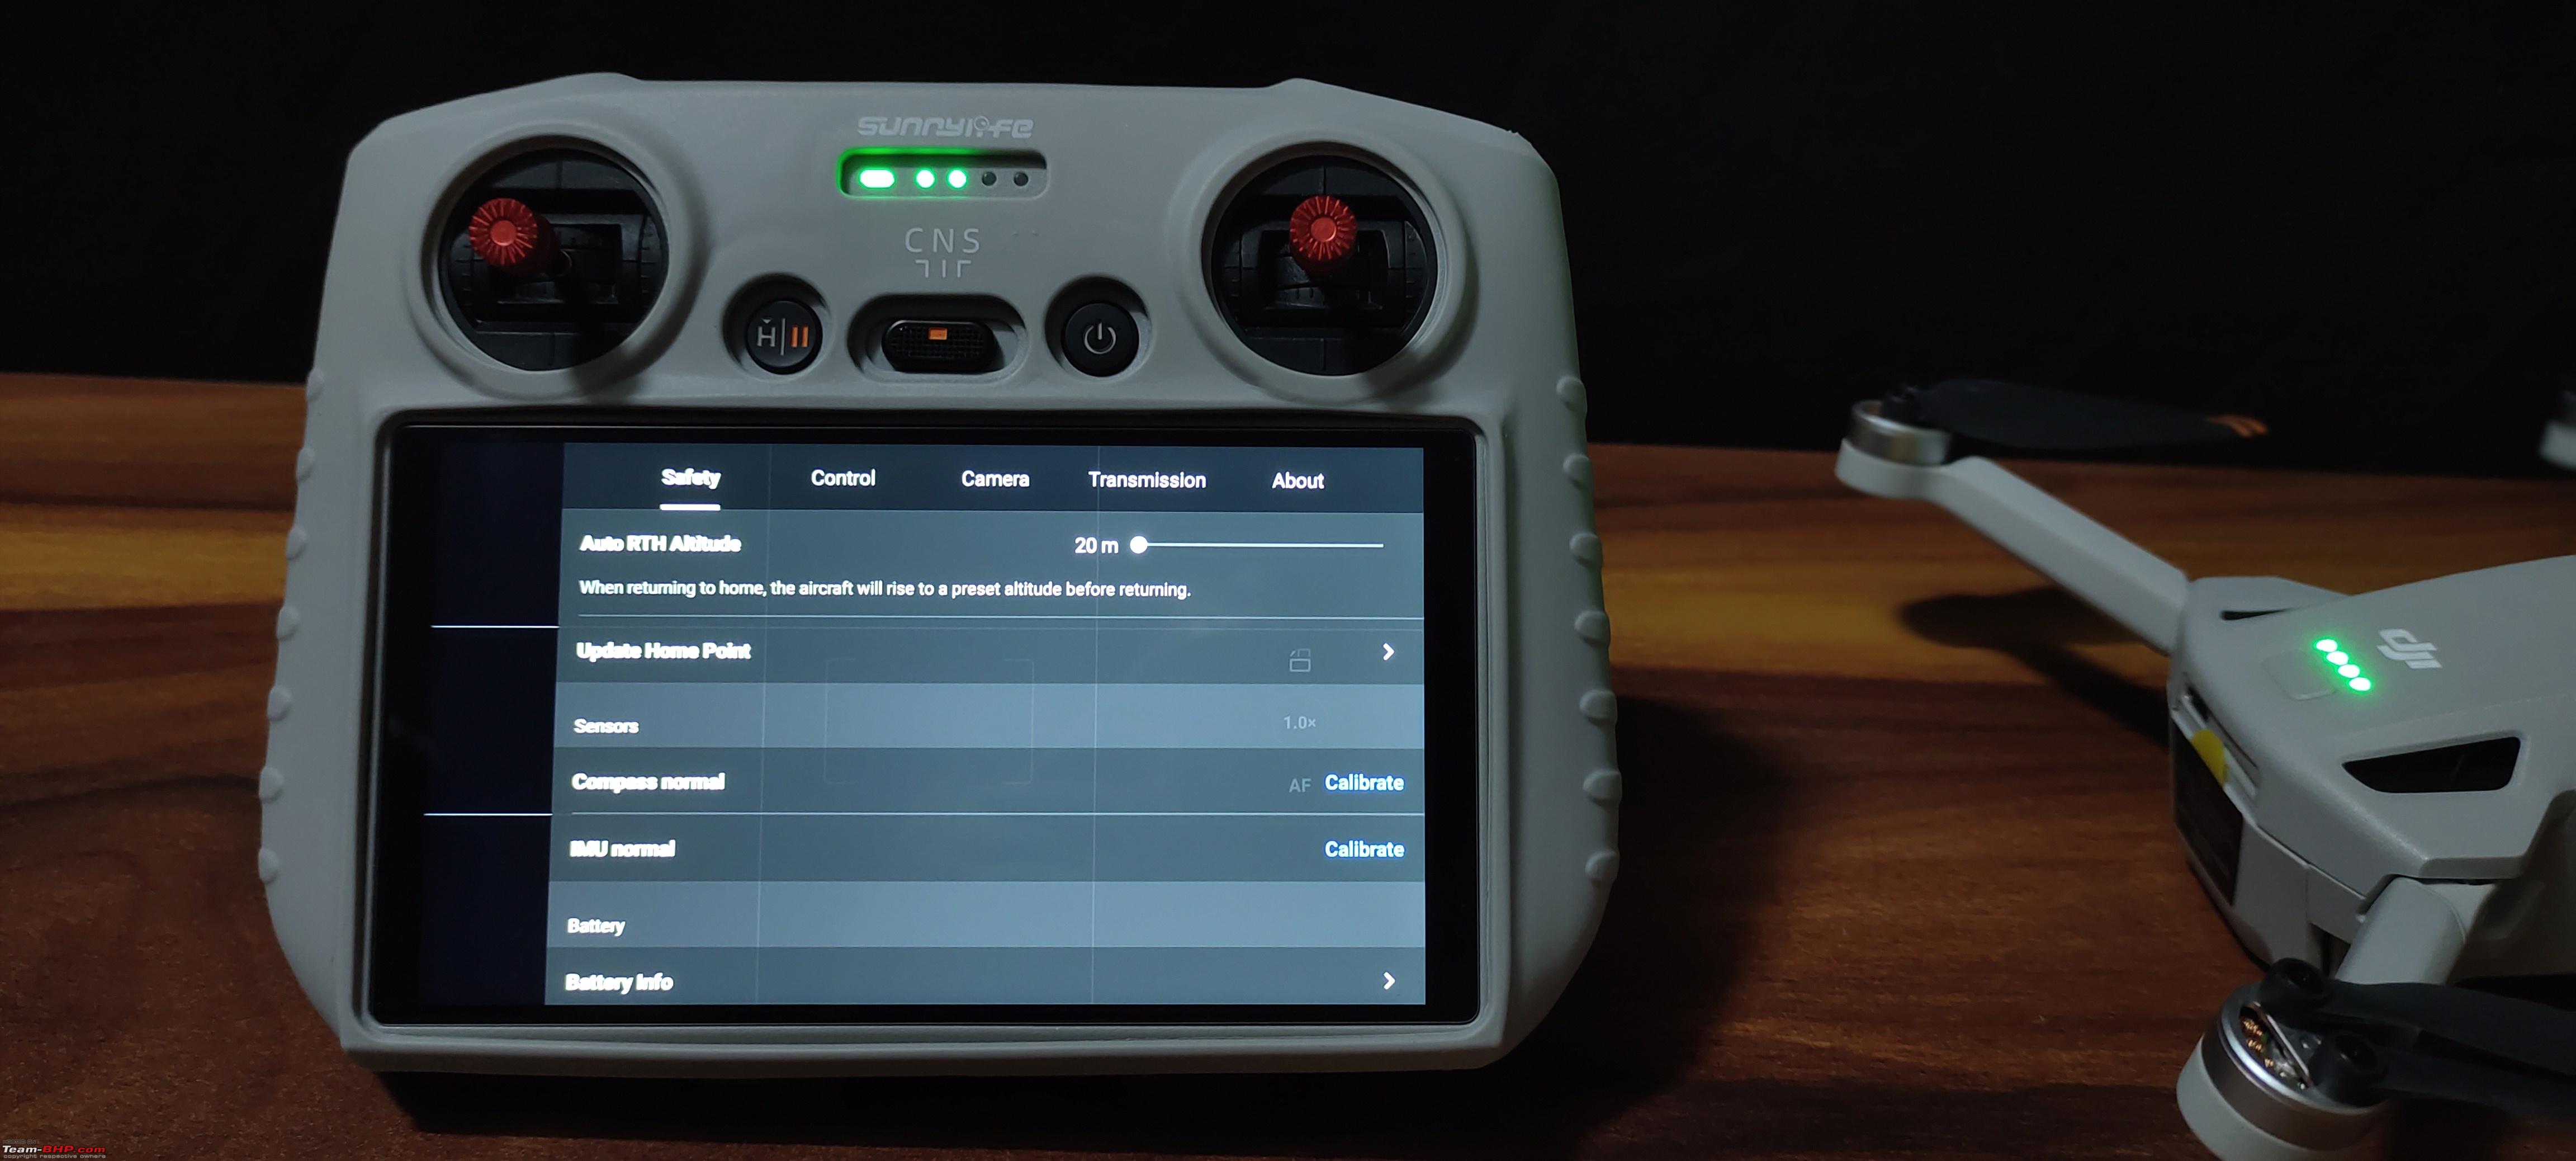 Battery voltage and the temperature: 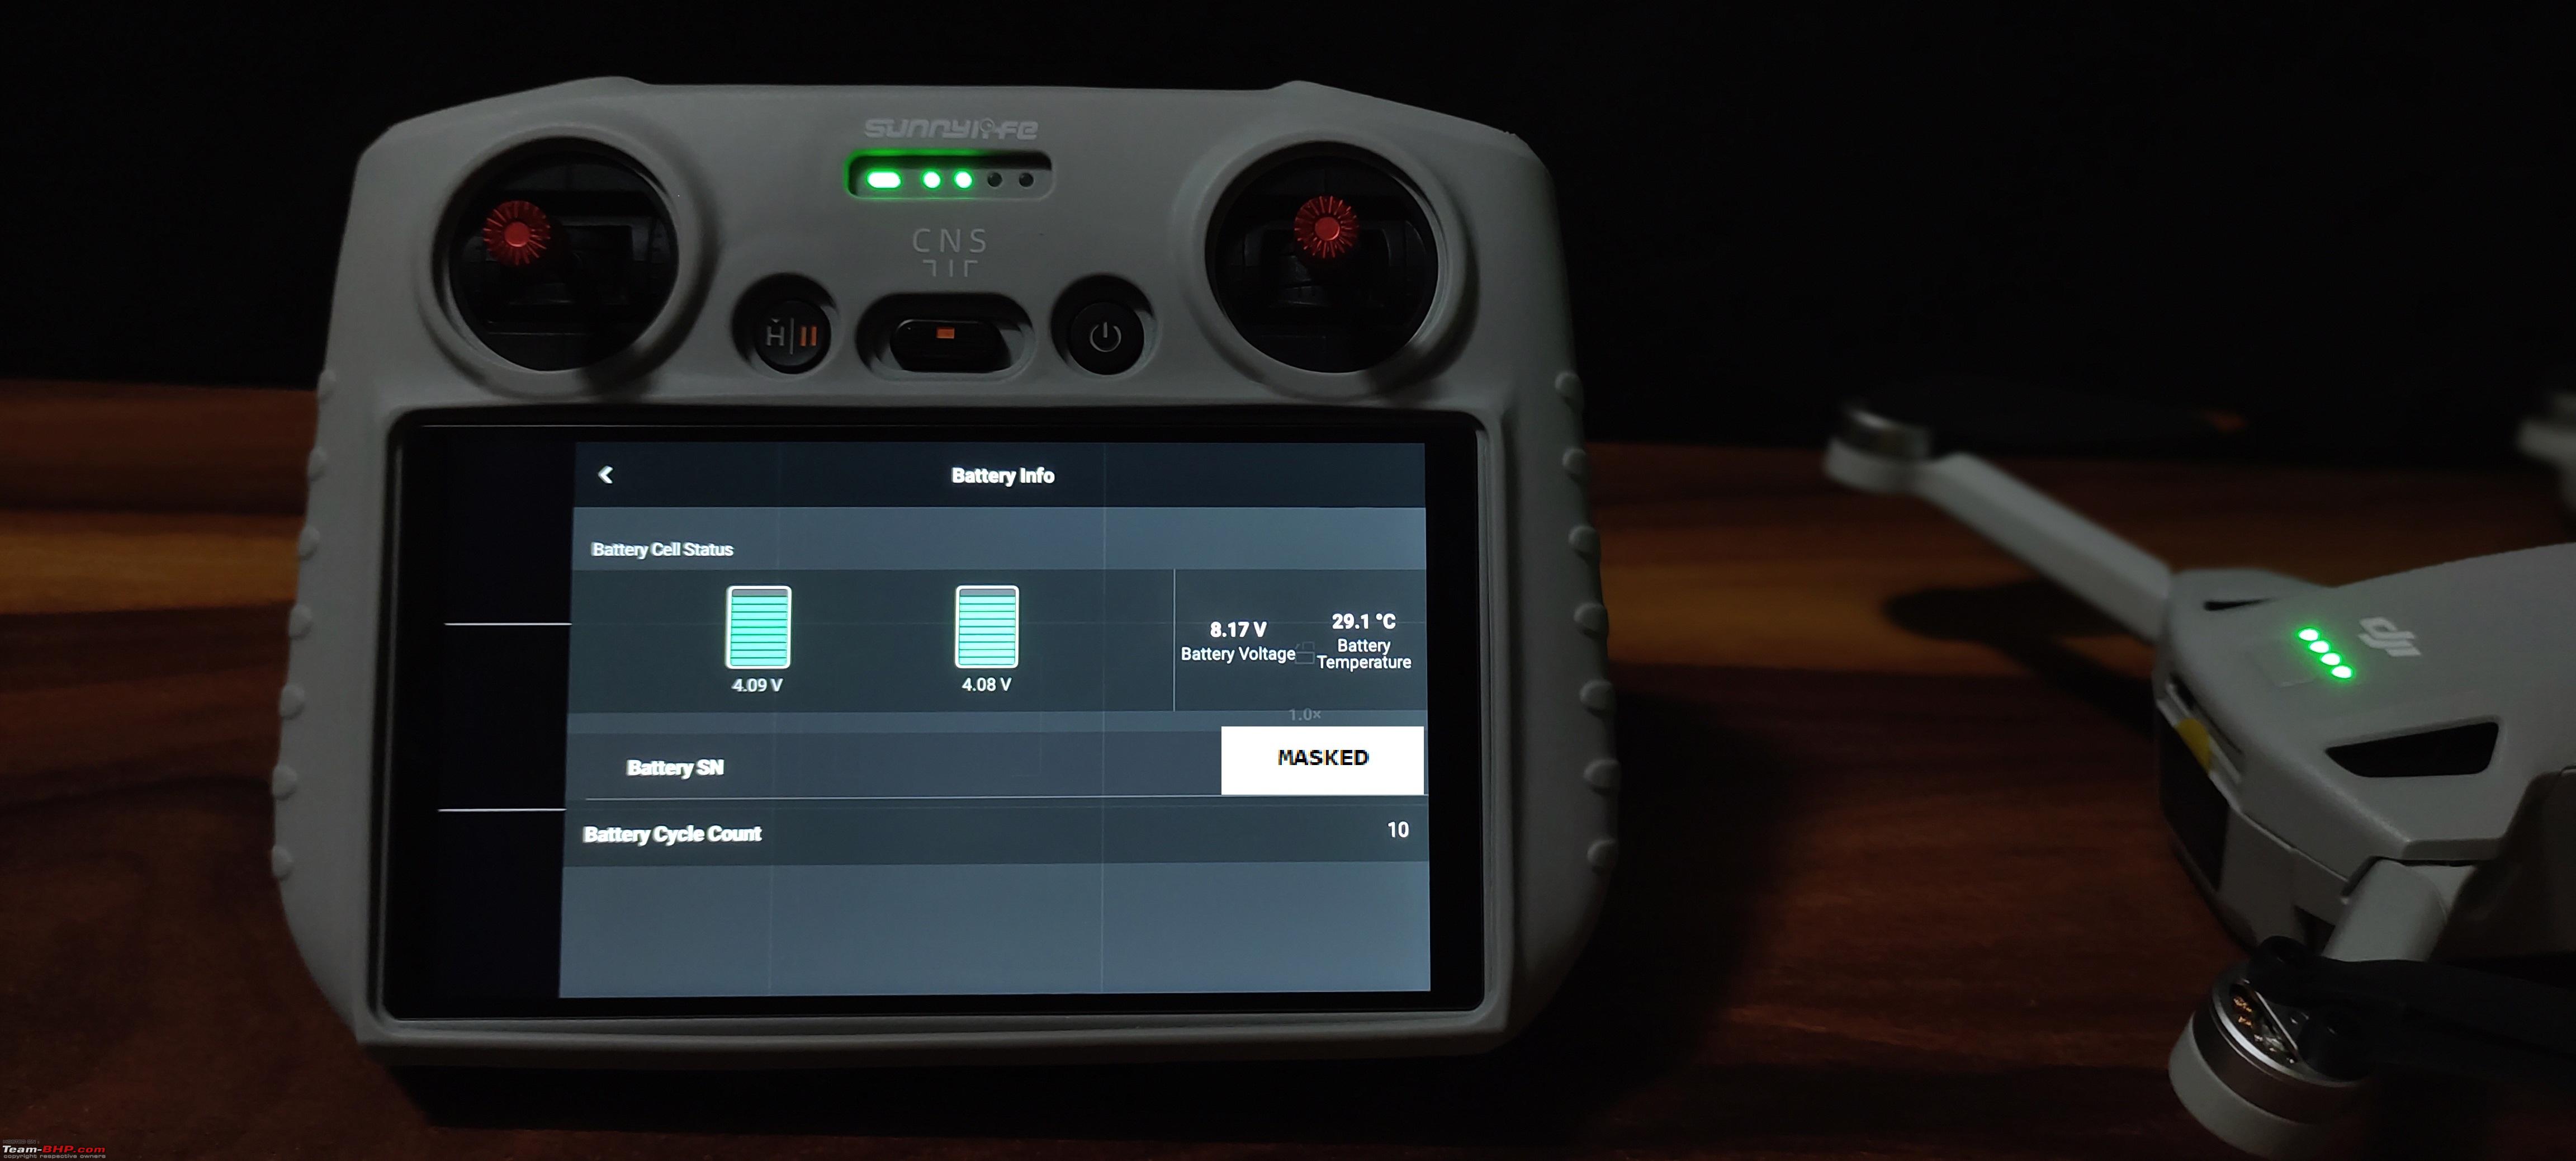 Advanced Safety settings: It springs into action when the connection from the controller to the drone is lost. There are three option to choose from. RTH, Hover or descend at the flying location. The RTH altitude can also be customized and set to a desired height and should normally be higher than the tallest building in the vicinity. With RTH set, it returns back safely to the home point at an altitude setup for RTH. With Hover set, it hovers at the same location without flying back. With Descend set, it will automatically land at the same location it is in. 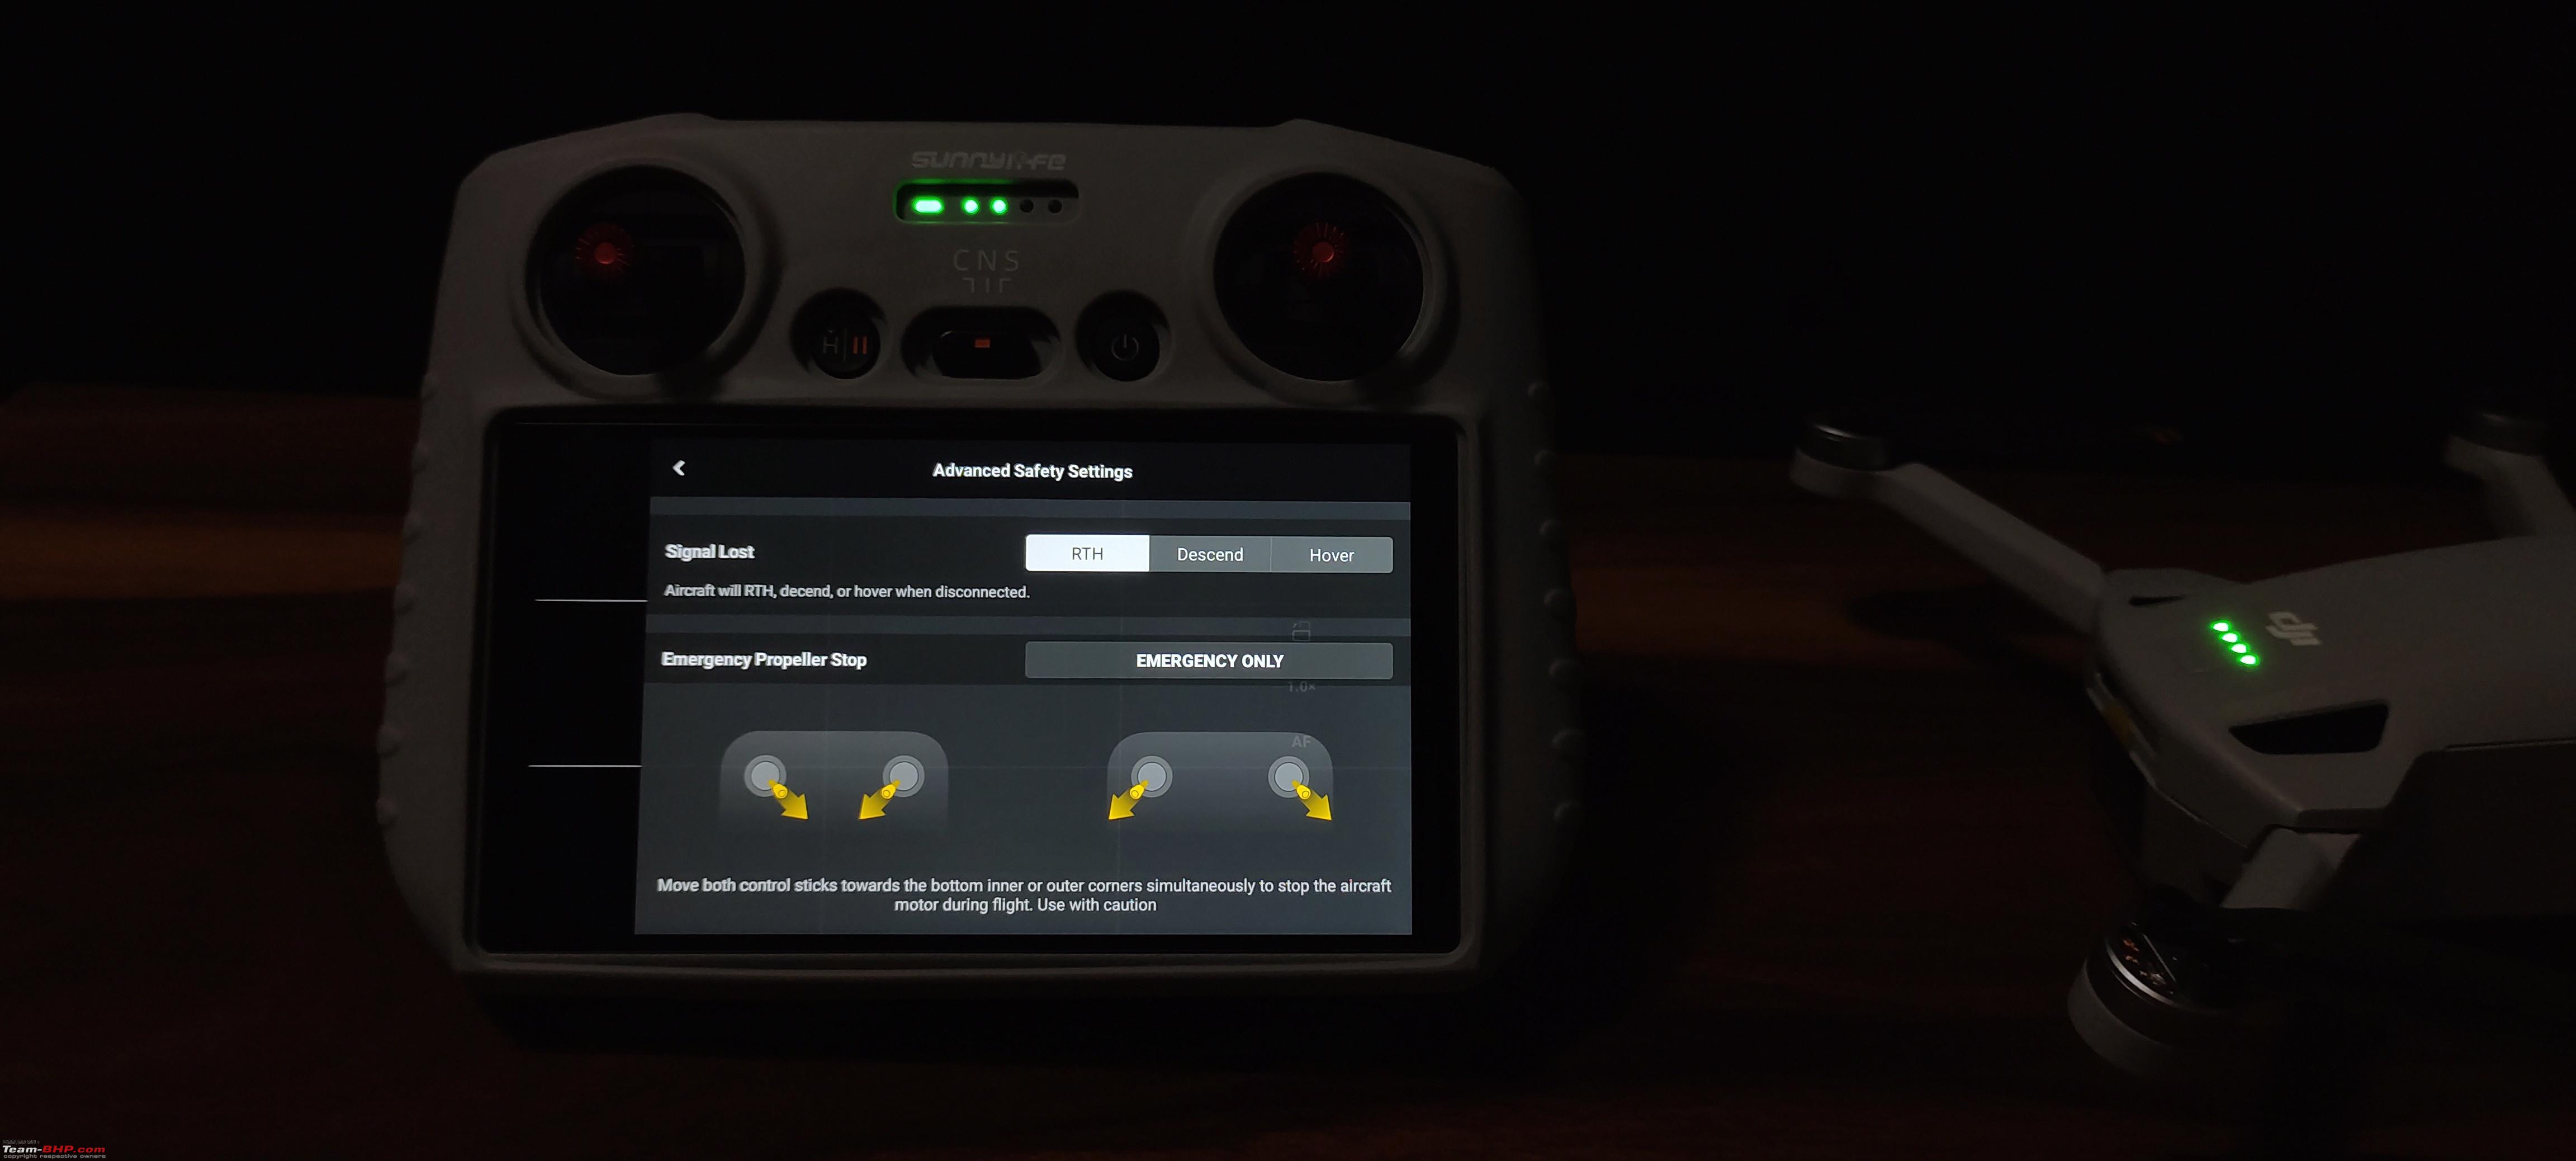 At the top of the screen, it shows the speed mode (Normal, cine or Sport) followed by a message from the fly app database indicating whether take off is permitted or not. It also shows the battery percentage levels and the total number of remaining minutes available for flight, the signal strength, obstacle senor status and the number of satellites it is connected to. Note that the obstacle sensor indicator is showing up in red indicating that the obstacle detection is completely turned off. It turns white when enabled. 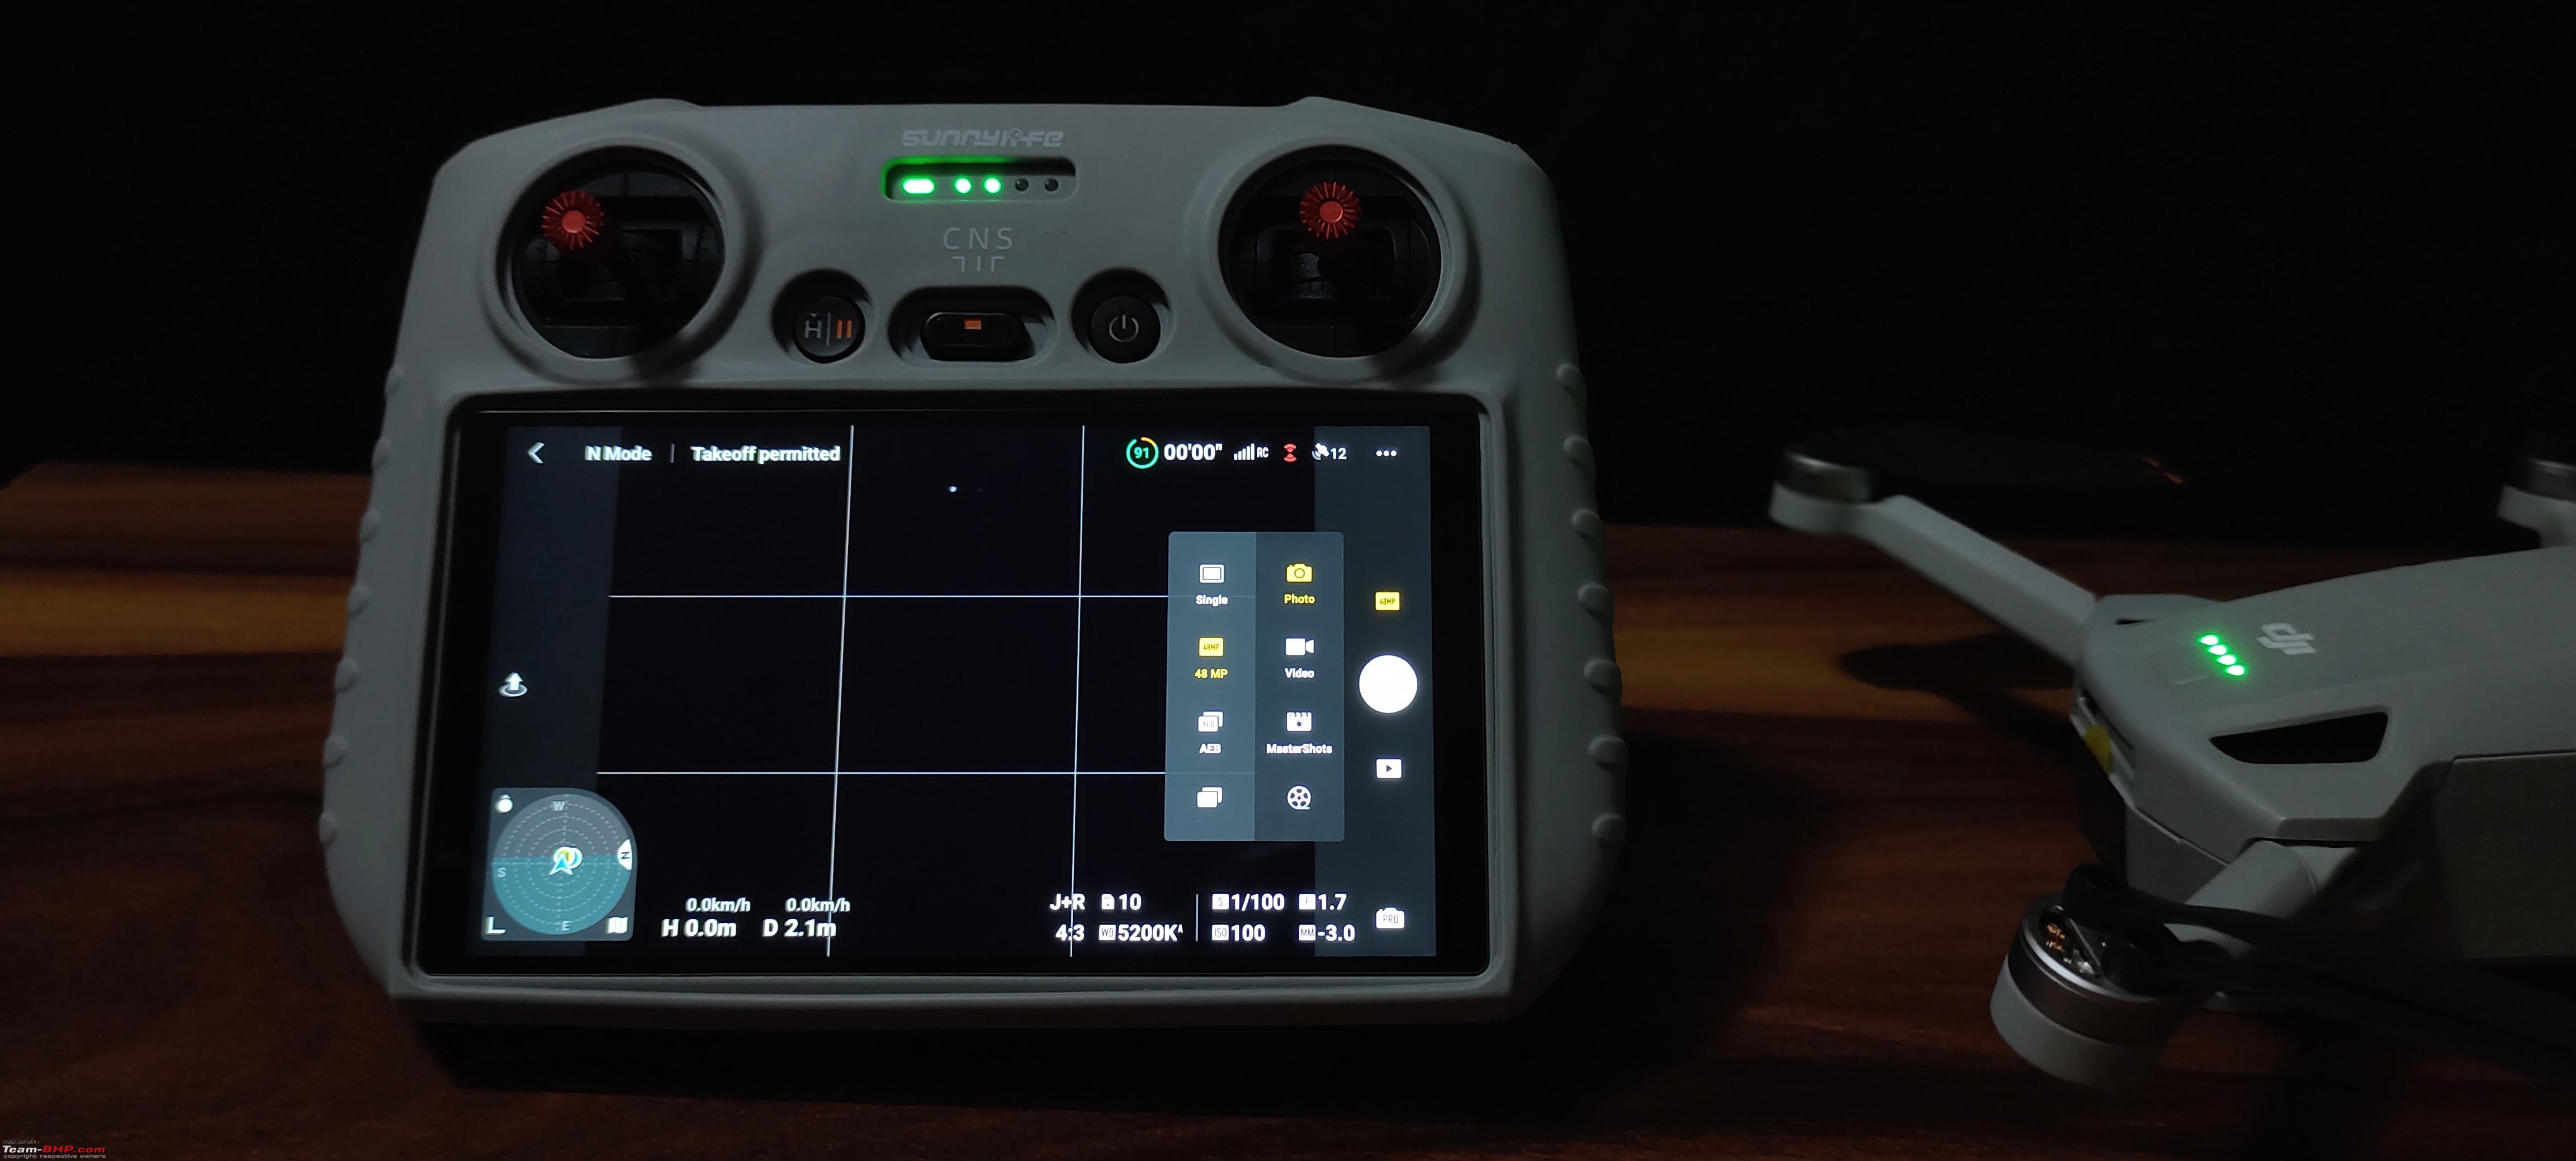 The Multi functional Radar map: It is an electronic level indicator and can be used to determine how stable and balanced the drone is during its flight. It also accurately shows the tilt angle of the drone in all four directions during its flight. (left, right, front and back) This gives an indication of how windy the situation is, which direction the wind is blowing from and how much the drone is struggling to fight the wind. Another excellent feature of this is, it highlights all the obstacles around the the drone in red and shows their relative distance to the drone and beeps with a warning if the drone gets too close to the them. Experienced pilots can turn off the obstacles sensors and fly and control the drone just by monitoring the radar maps. In addition to all these, it also shows the direction the RC controller is pointed at with a small blue triangle. On the radar map, the drone is represented by a big blue colored arrow, the RC controller by a small blue circle and direction of the RC by a small blue tringle which sits just above the blue circle. It clearly shows whether the controller is pointed at the drone or away from it and if so, the small triangle shows the exact direction it is pointed at. If by any chance, the signal strength drops, it can be restored by just pointing the RC to the drone to improve the signal strength. A click on the 3 bars located at the bottom of the map toggles between the Navigation map and radar. 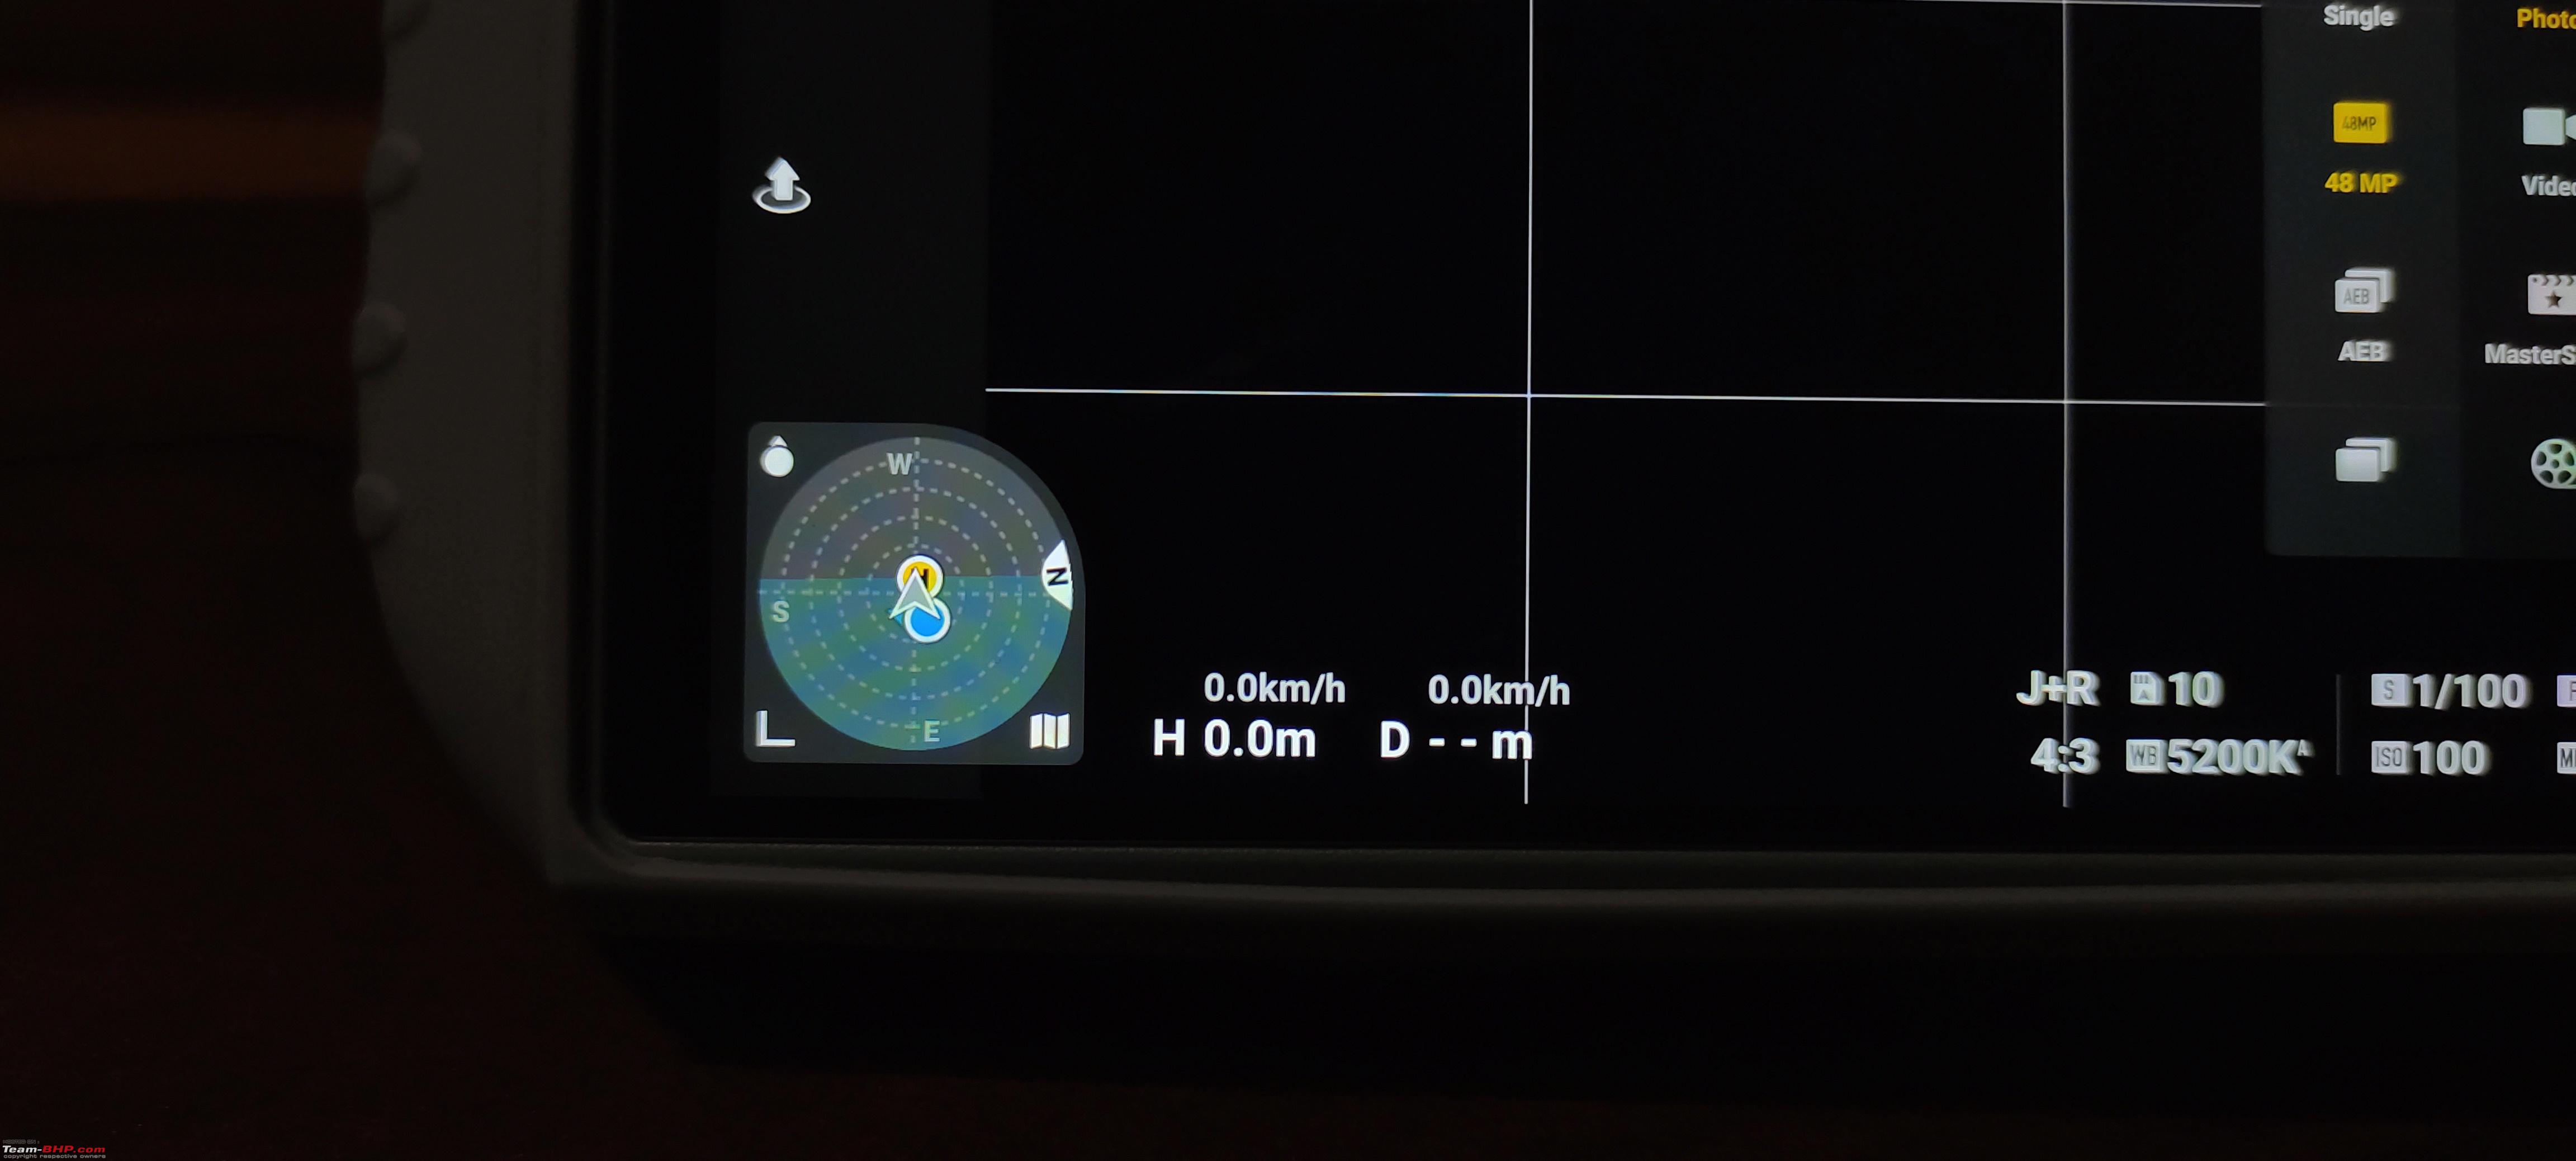 The Navigation map: Very useful for navigation and it requires a hotspot or a WiFi connection to work. The maps can also be downloaded and cached in advance when flying in areas where there is no internet or network connectivity. It shows the updated home point and also the location of the drone. 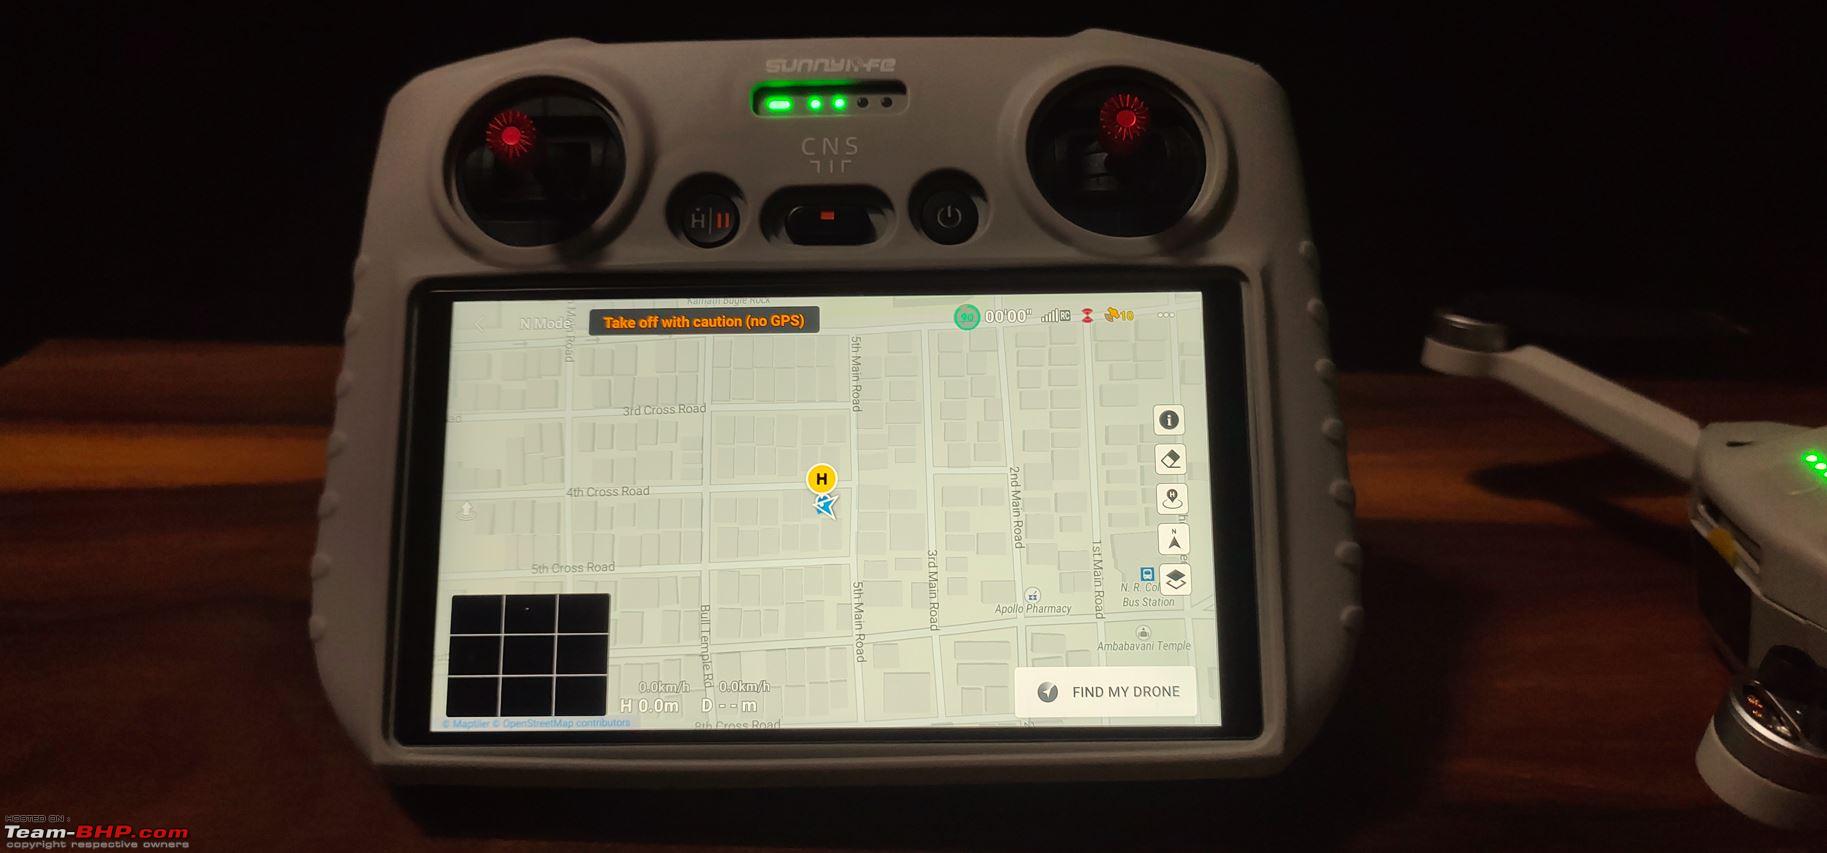 A lot of information is shown on the screen: Distance it has travelled from the take-off point, Altitude it has reached, Speed of ascent/descent, forward/backward speed etc. In addition to that there is information about the Resolution and frame rate, white balance level, ISO, Aperture, Shutter speed and exposure level. It also shows the magnification levels or zoom factor, the Focus mode ( Auto or Manual ) and the camera mode (PRO or Auto). Things related to the camera like the shutter speed, ISO etc. do disappear from the screen when switched over to Auto mode and shows only whatever is relevant.  Two new style parameters were added through a recent firmware update and it now allows to set the sharpness and noise reduction levels to one's liking. USB mode: The drone heats up a lot when it is idle. But when the USB mode is turned on, the drone enters into a low power state, stops relaying the live feed from the camera and behaves like an external disk and can used to transfer photos and videos onto a computer.  The Focus peaking level can be set to low, normal or high. This is a very helpful feature to check how much of the scene is in focus. Everything that is in focus is highlighted in RED. The intensity of the red color can be set to low normal or high. Over exposure warning when turned on, highlights all blown out areas. Grid lines can be turned on or off for composition and White balance can be set to auto or manually adjusted as per the pilots preference.  Video recording formats, color profiles and encoding formats. Video subtitles: When enabled, adds camera and telemetry data as subtitles to videos and the data is stored on a separate file and linked to the video.  Fly safe database version along with product serial numbers which I have masked. 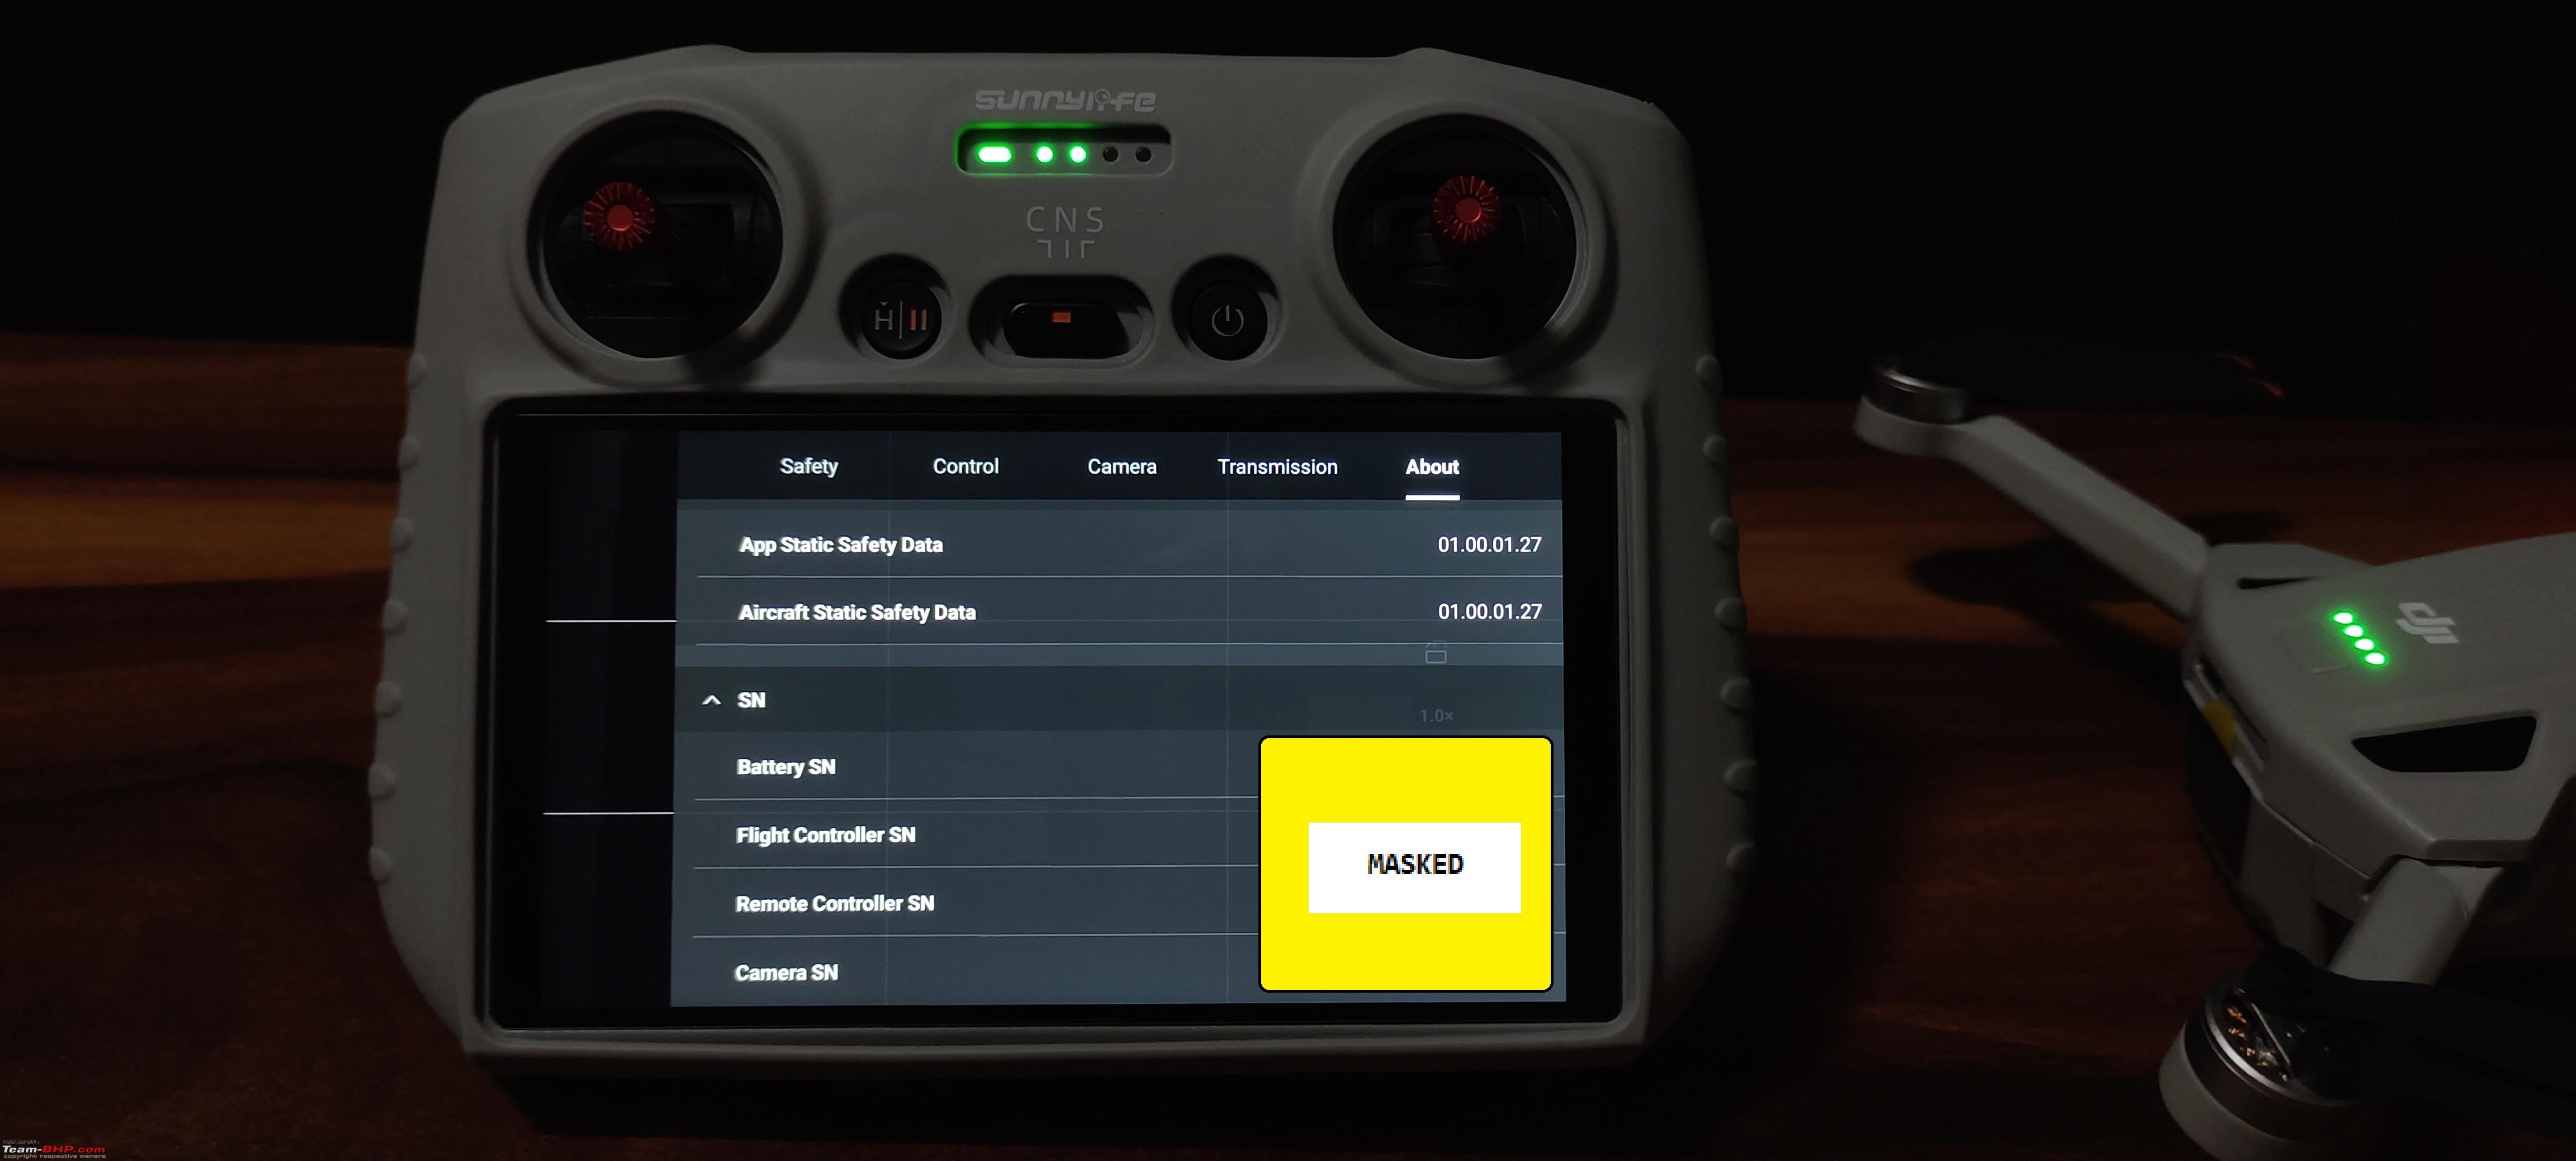 DJI Fly App version 1.8, Aircraft firmware: 01.00.0400, RC Firmware: 01.02.0100 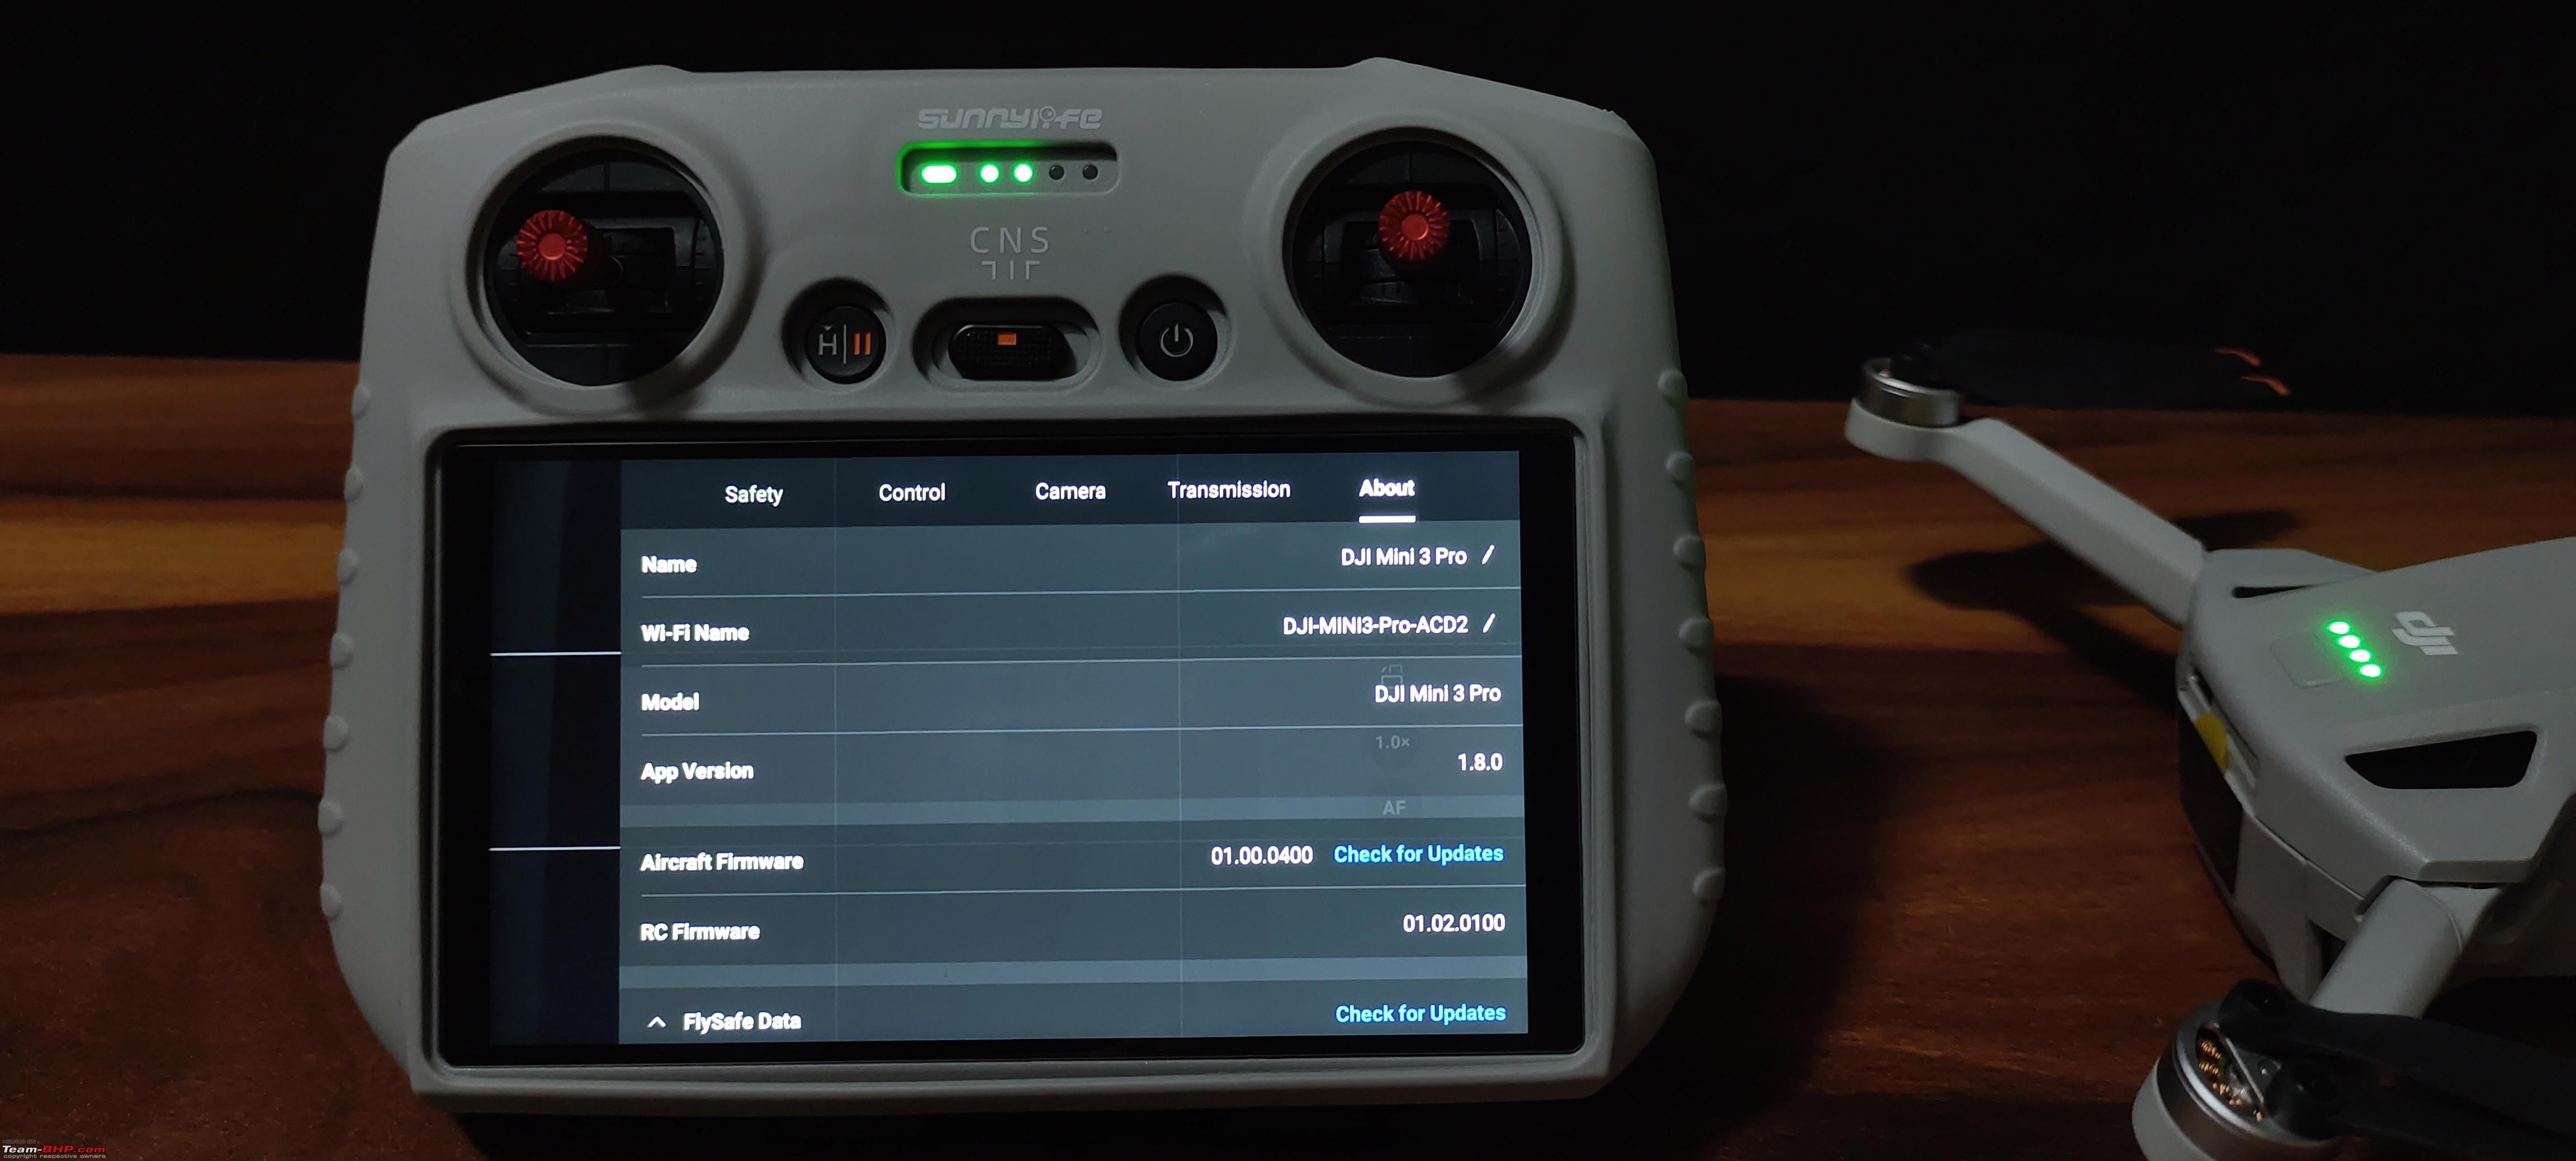 Camera view with no GPS connection. It is connected to 12 satellites but no GPS. GPS does not work when flying indoors.  1080p at 60 fps  Last edited by Amyth Prabhakar : 11th December 2022 at 07:08. |
|
| (14)
Thanks
|
| The following 14 BHPians Thank Amyth Prabhakar for this useful post: | audioholic, CEF_Beasts, digitalnirvana, graaja, GTO, KarthikK, kung_foo_fanta, mail2sekh, ph03n!x, Roy.S, Samfromindia, shyamg28, SRISRI_90, yashg |
|
9th December 2022, 12:12
| #9 |
| BHPian | re: Dji Mini 3 Pro Review | The Best Nano Drone 2K 60 fps and all its settings. 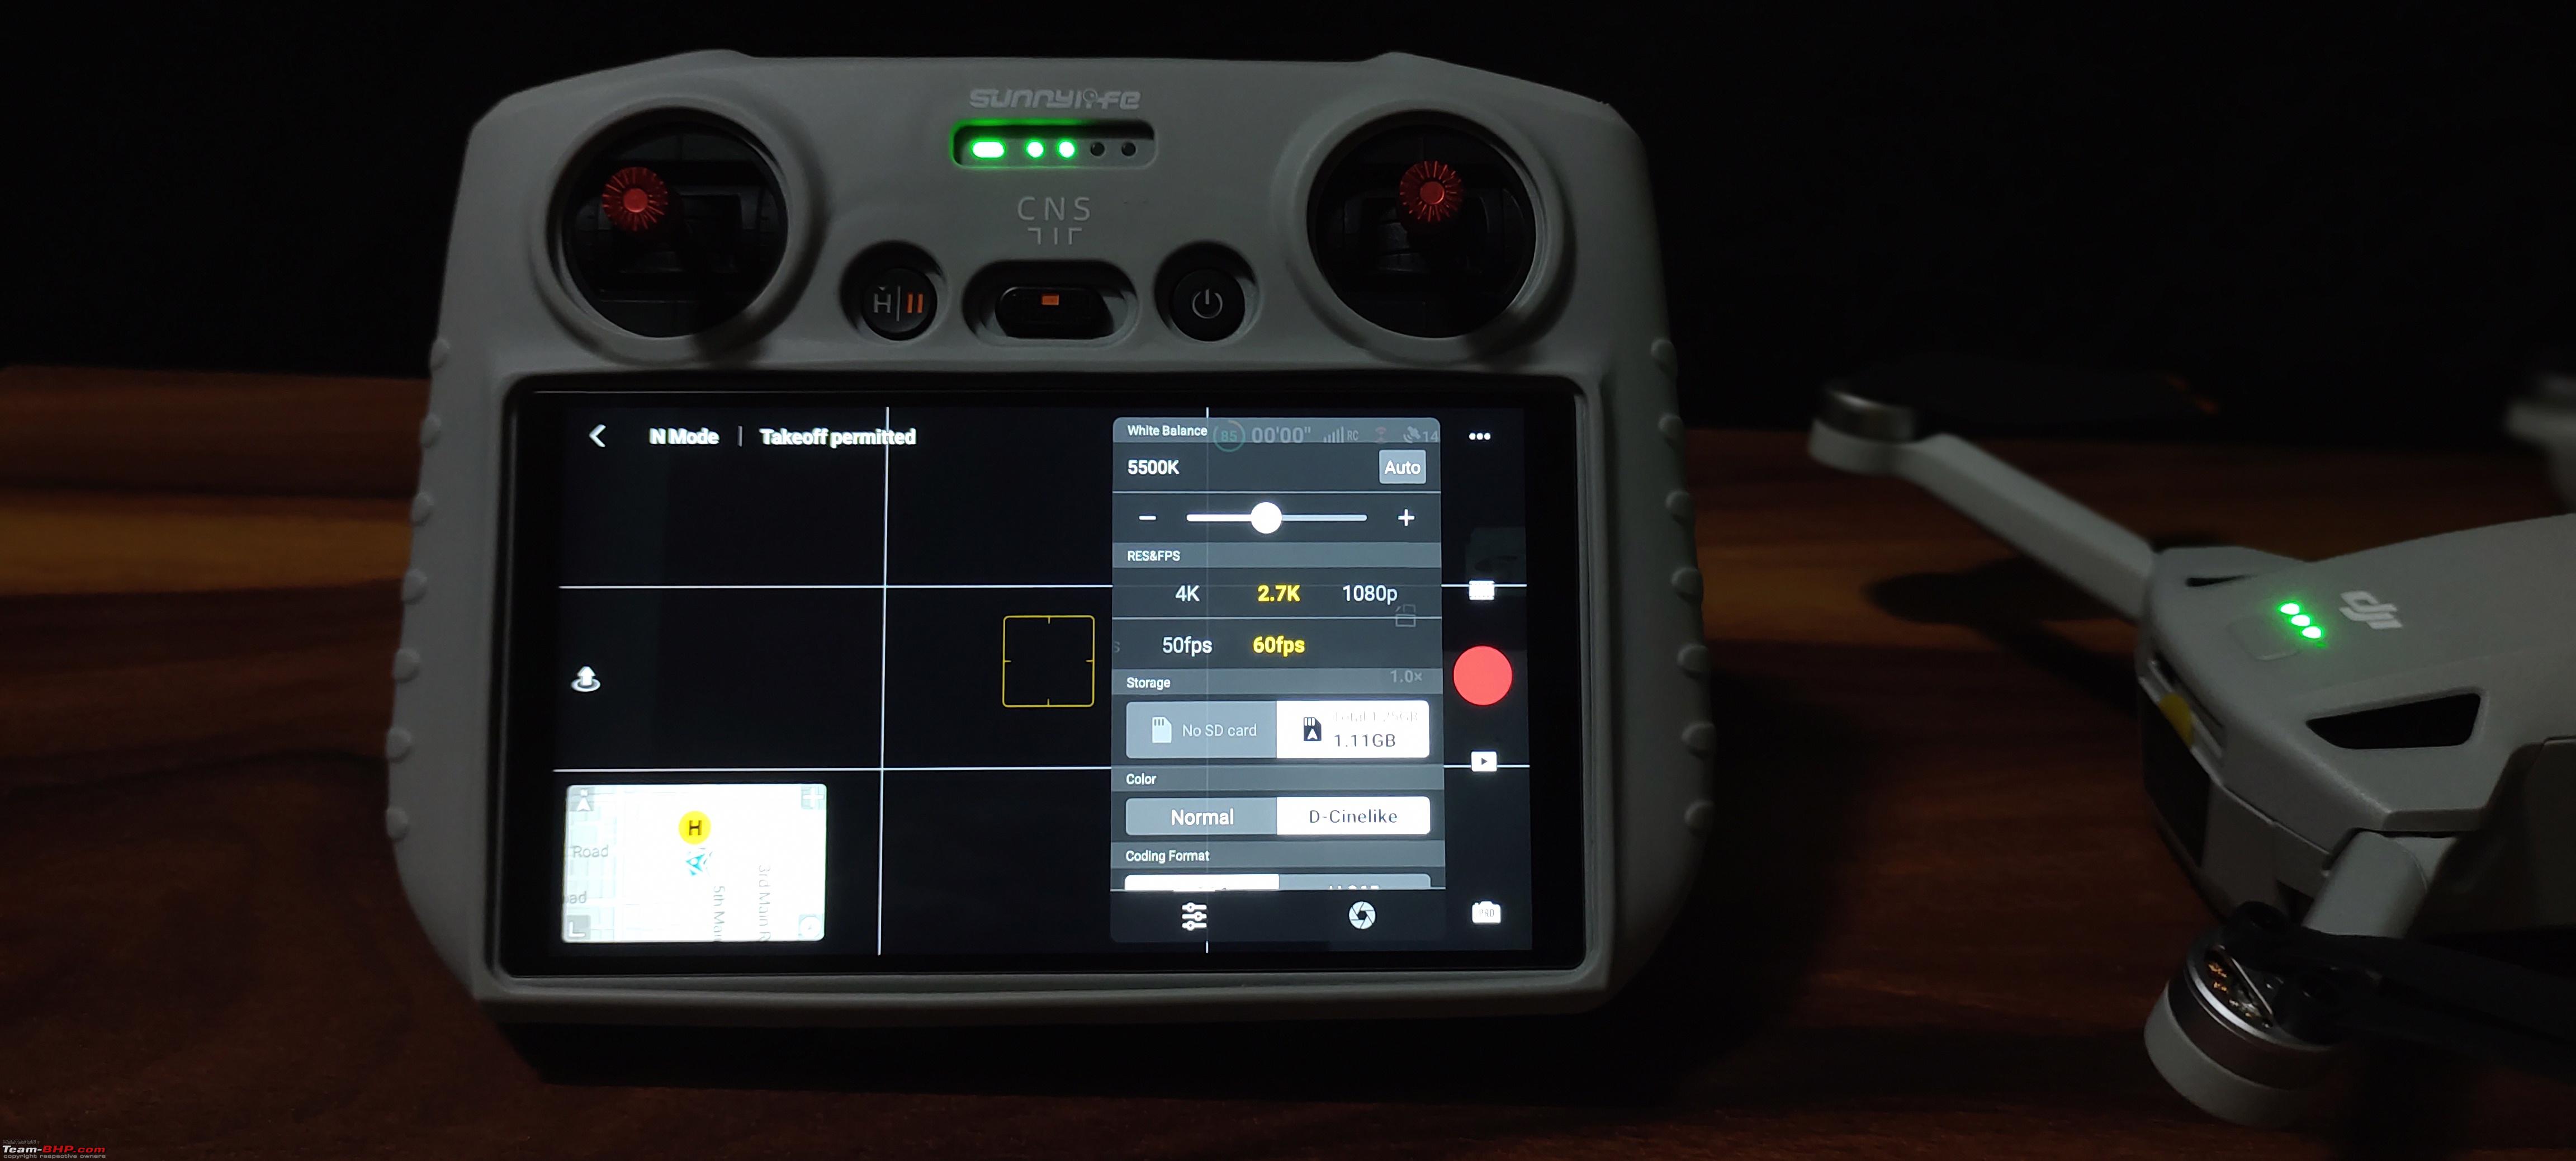 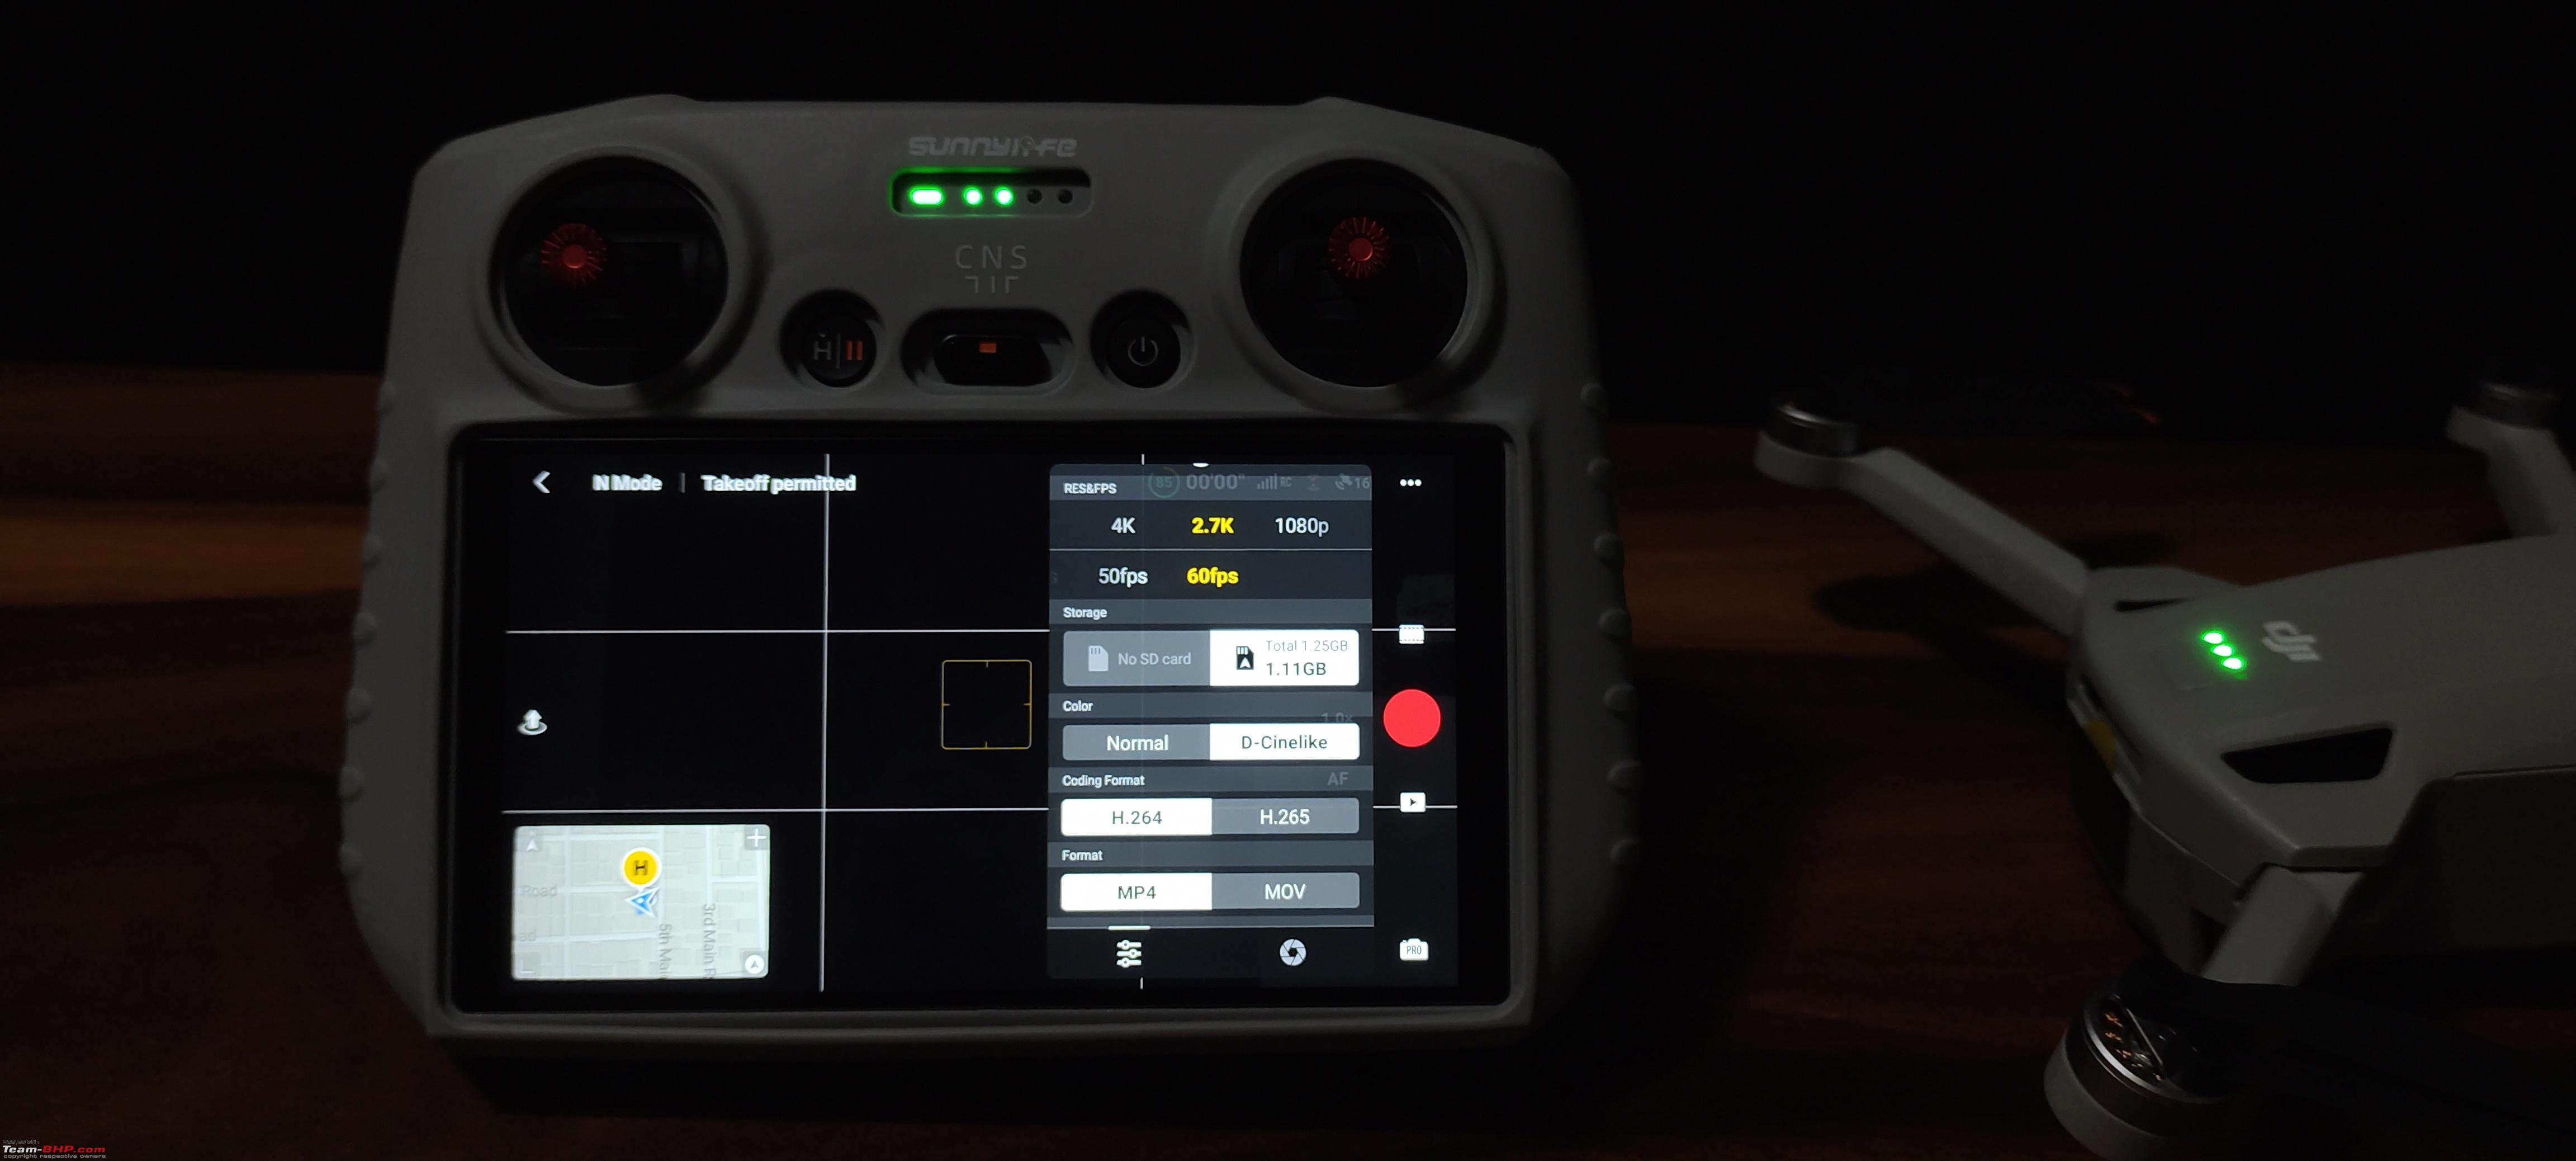 4K 60 fps and its settings. The encoding is defaulted to H.265 with no other options. 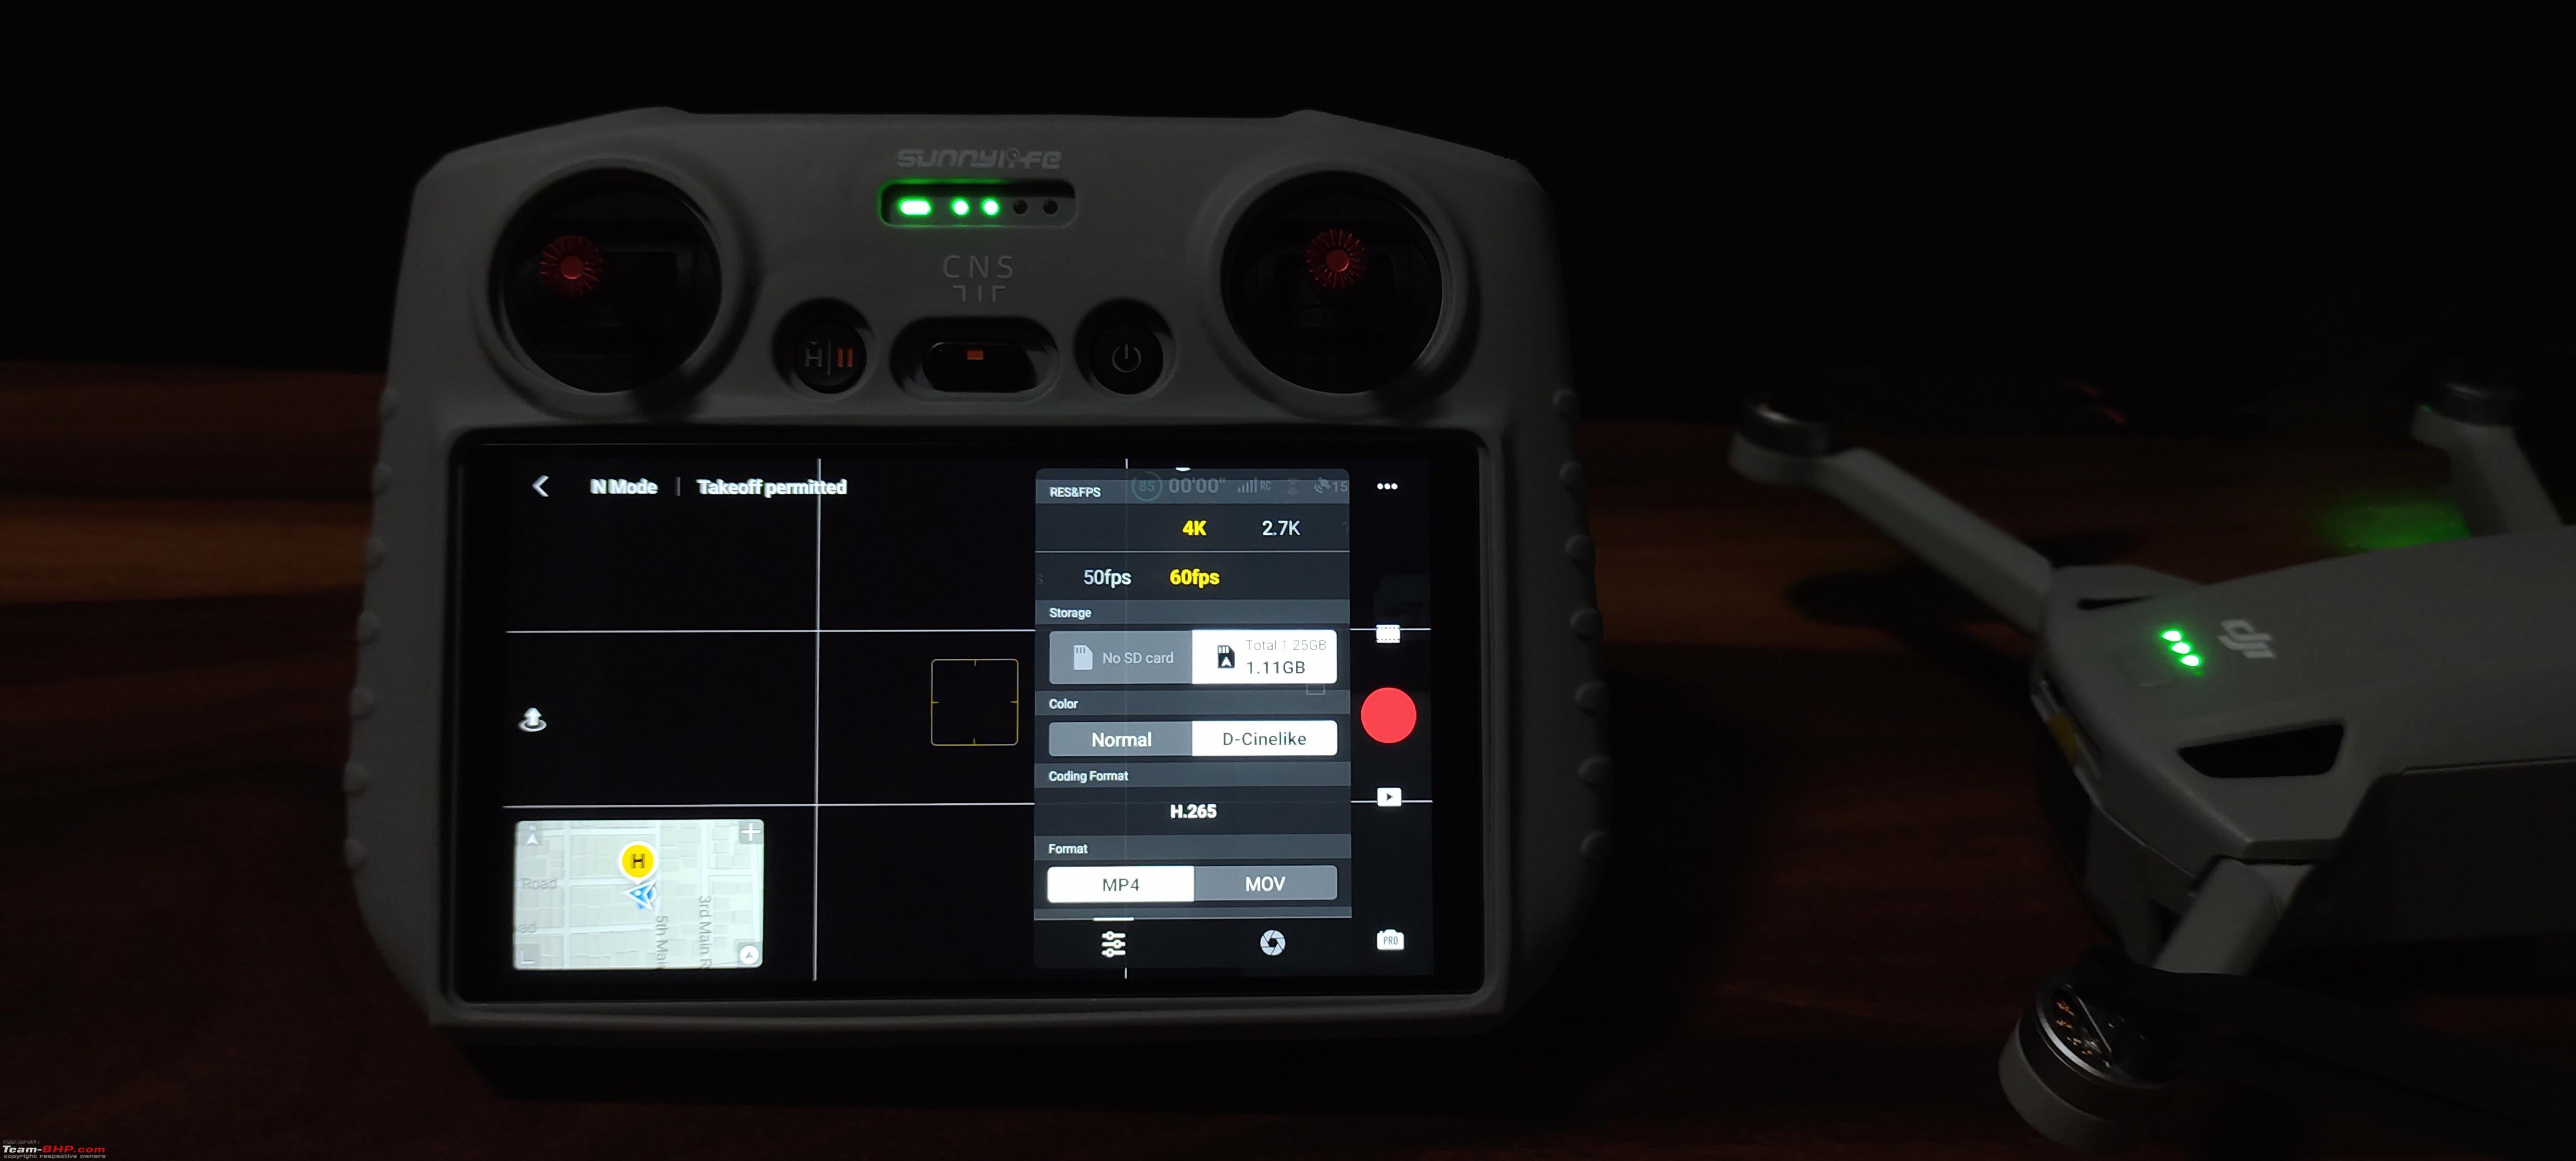 Photo modes: Single or 12MP, 48 MP, AEB (Auto Exposure Bracketing) and Burst shots. The AEB and the Burst shots are disabled in the menu when shooting 48 MP photos.  Aspect ratio, Histogram, Anti-Flicker settings and Focus Peaking.  RC controls setting, stick mode, Gimbal and RC calibration. 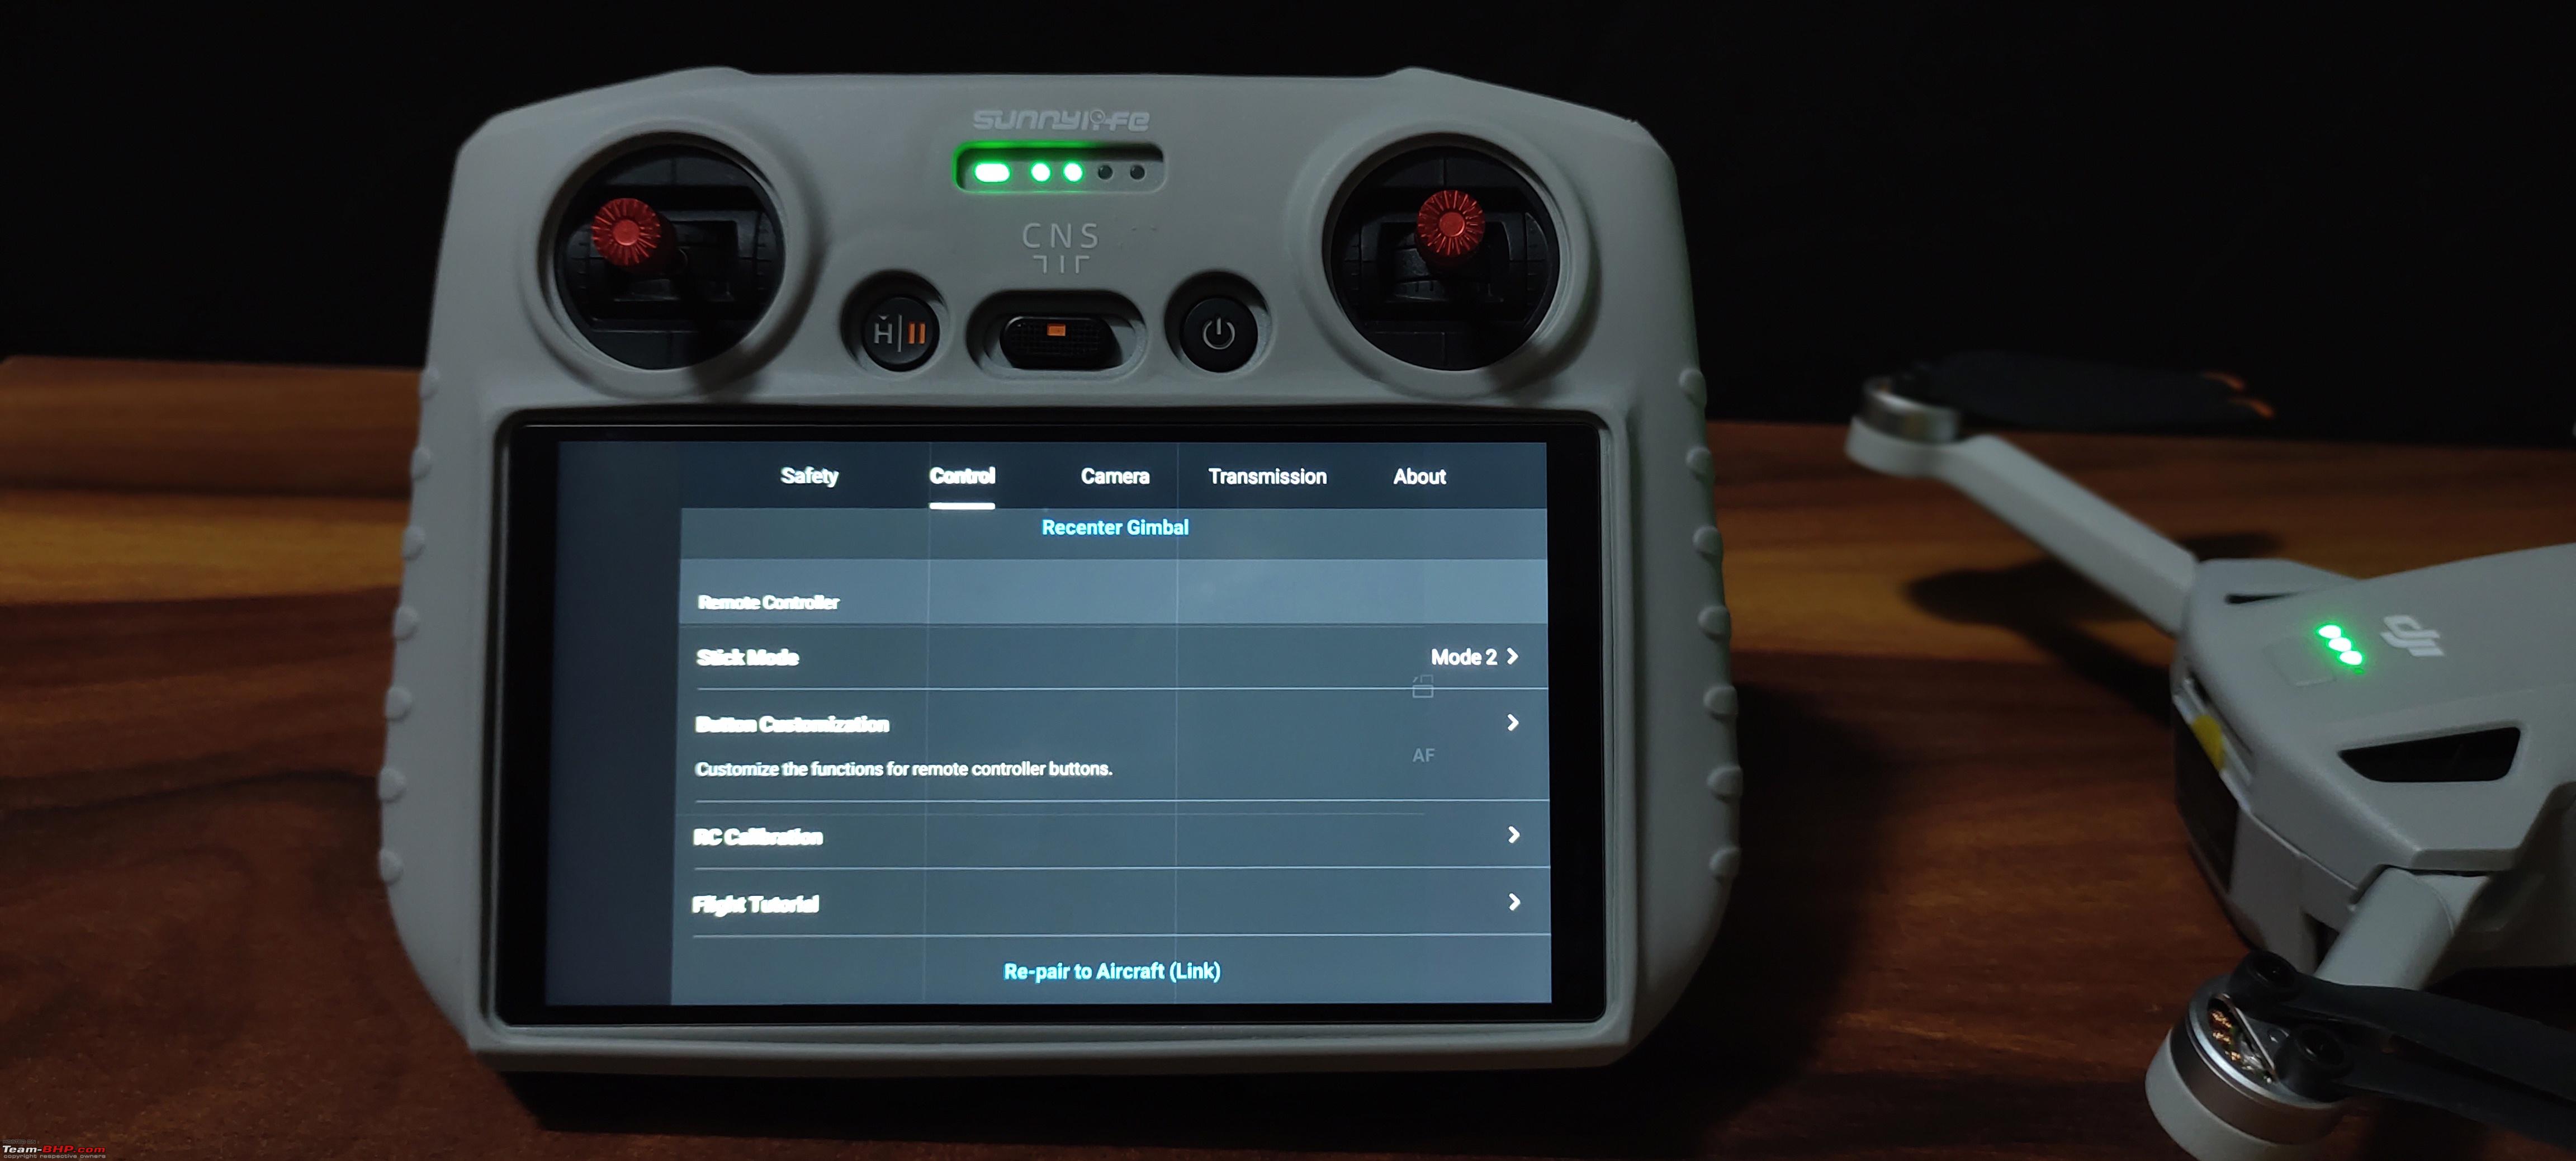 OcuSync 3.0 Signal Transmission graph. By default it is in FCC mode. 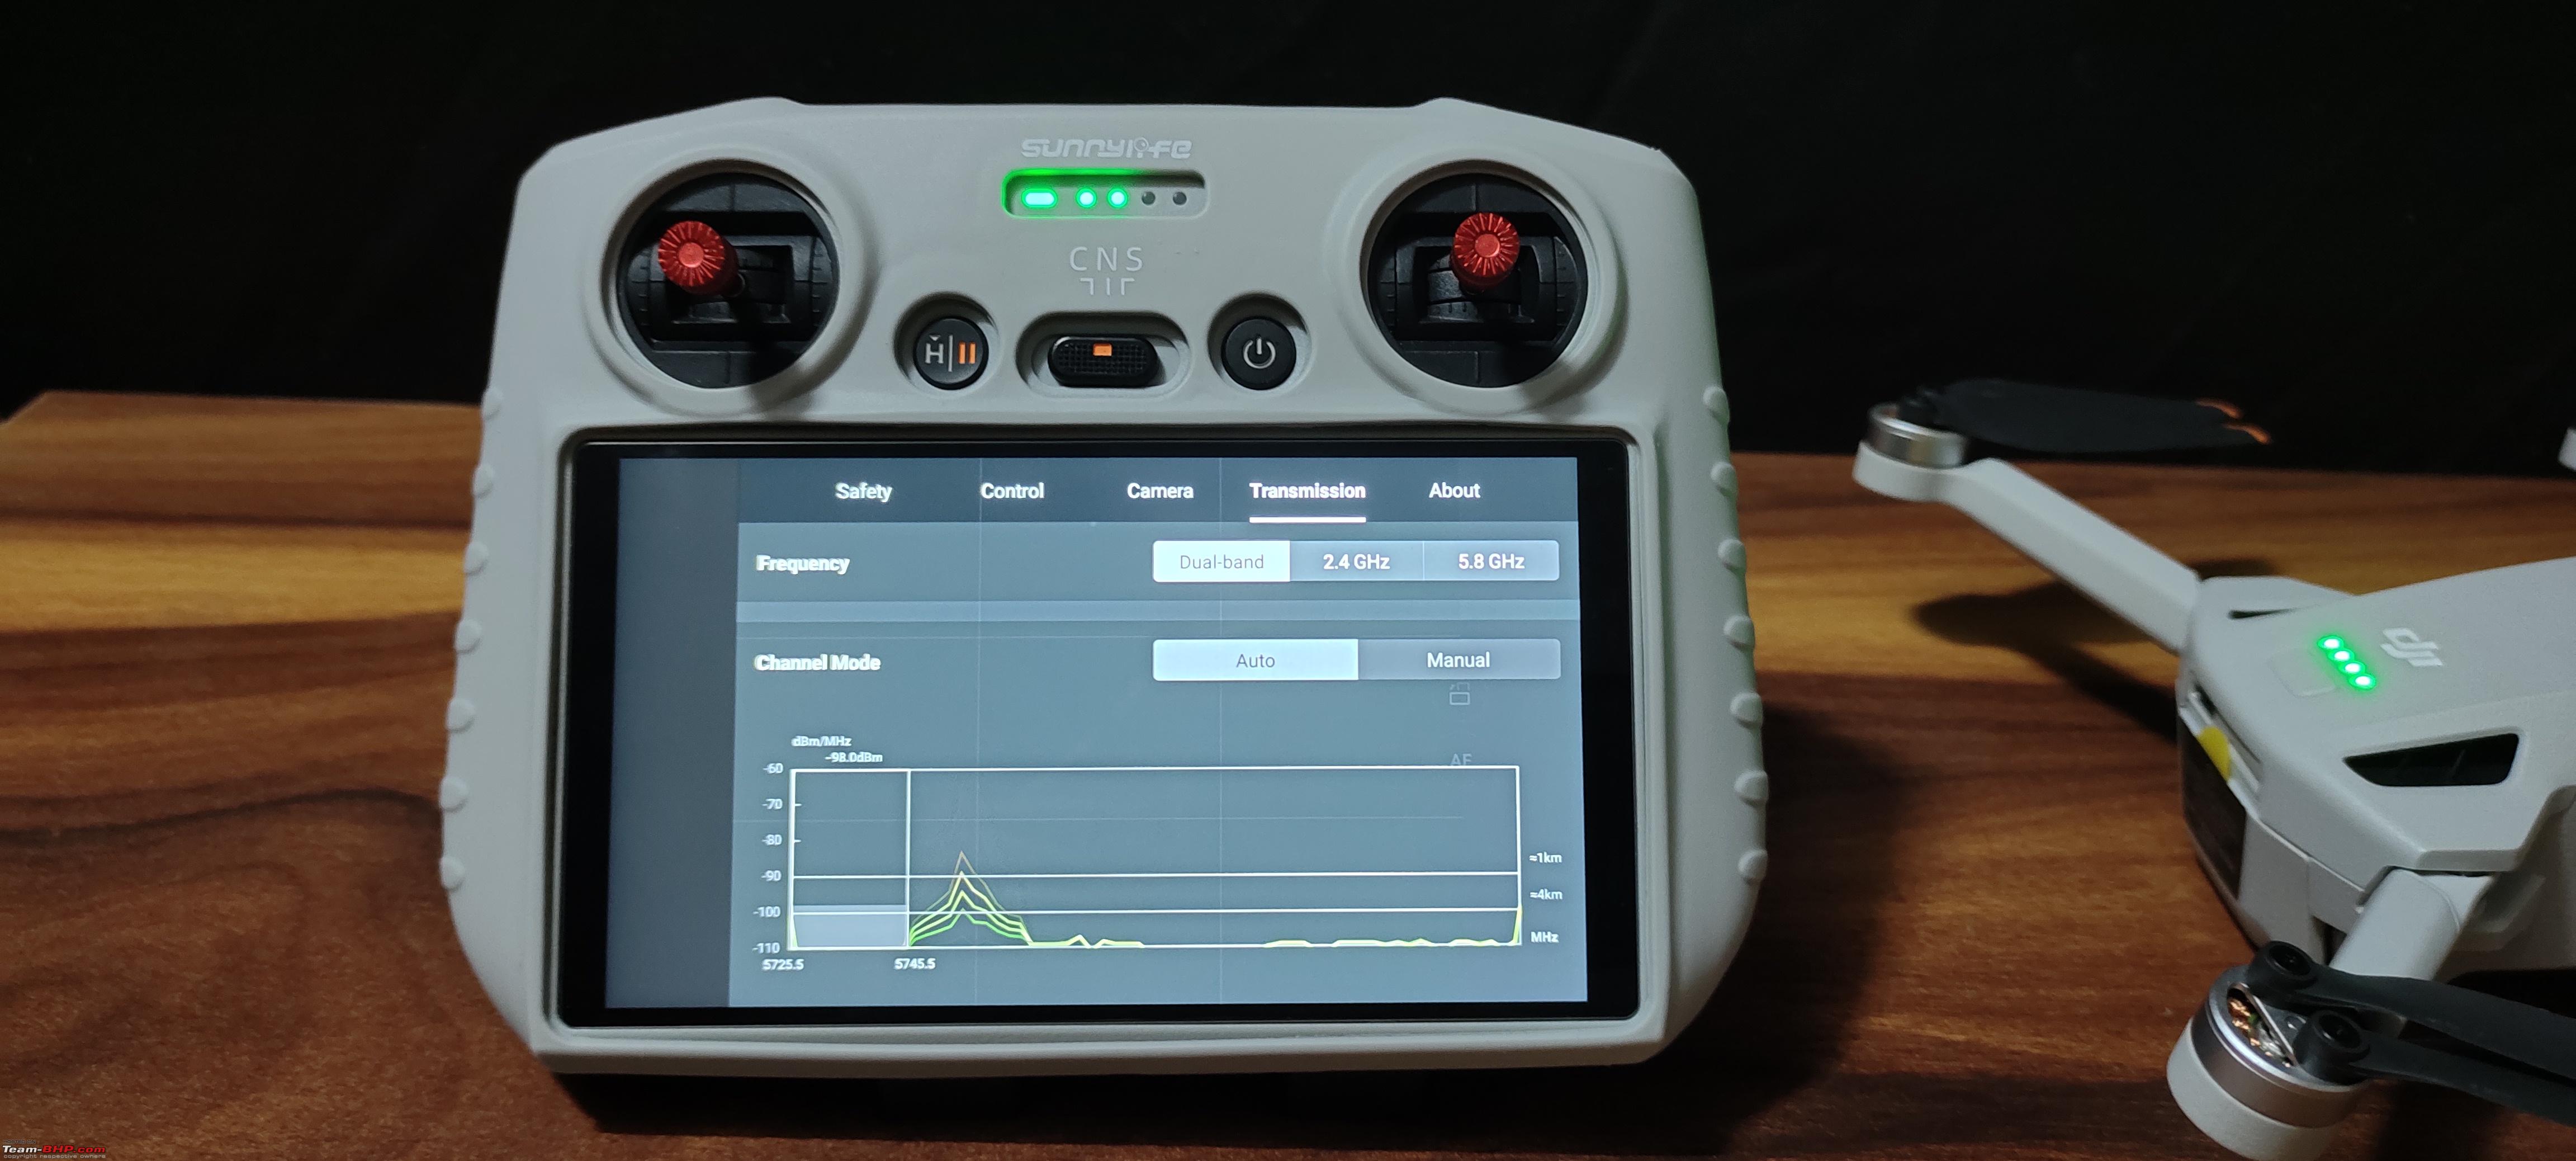 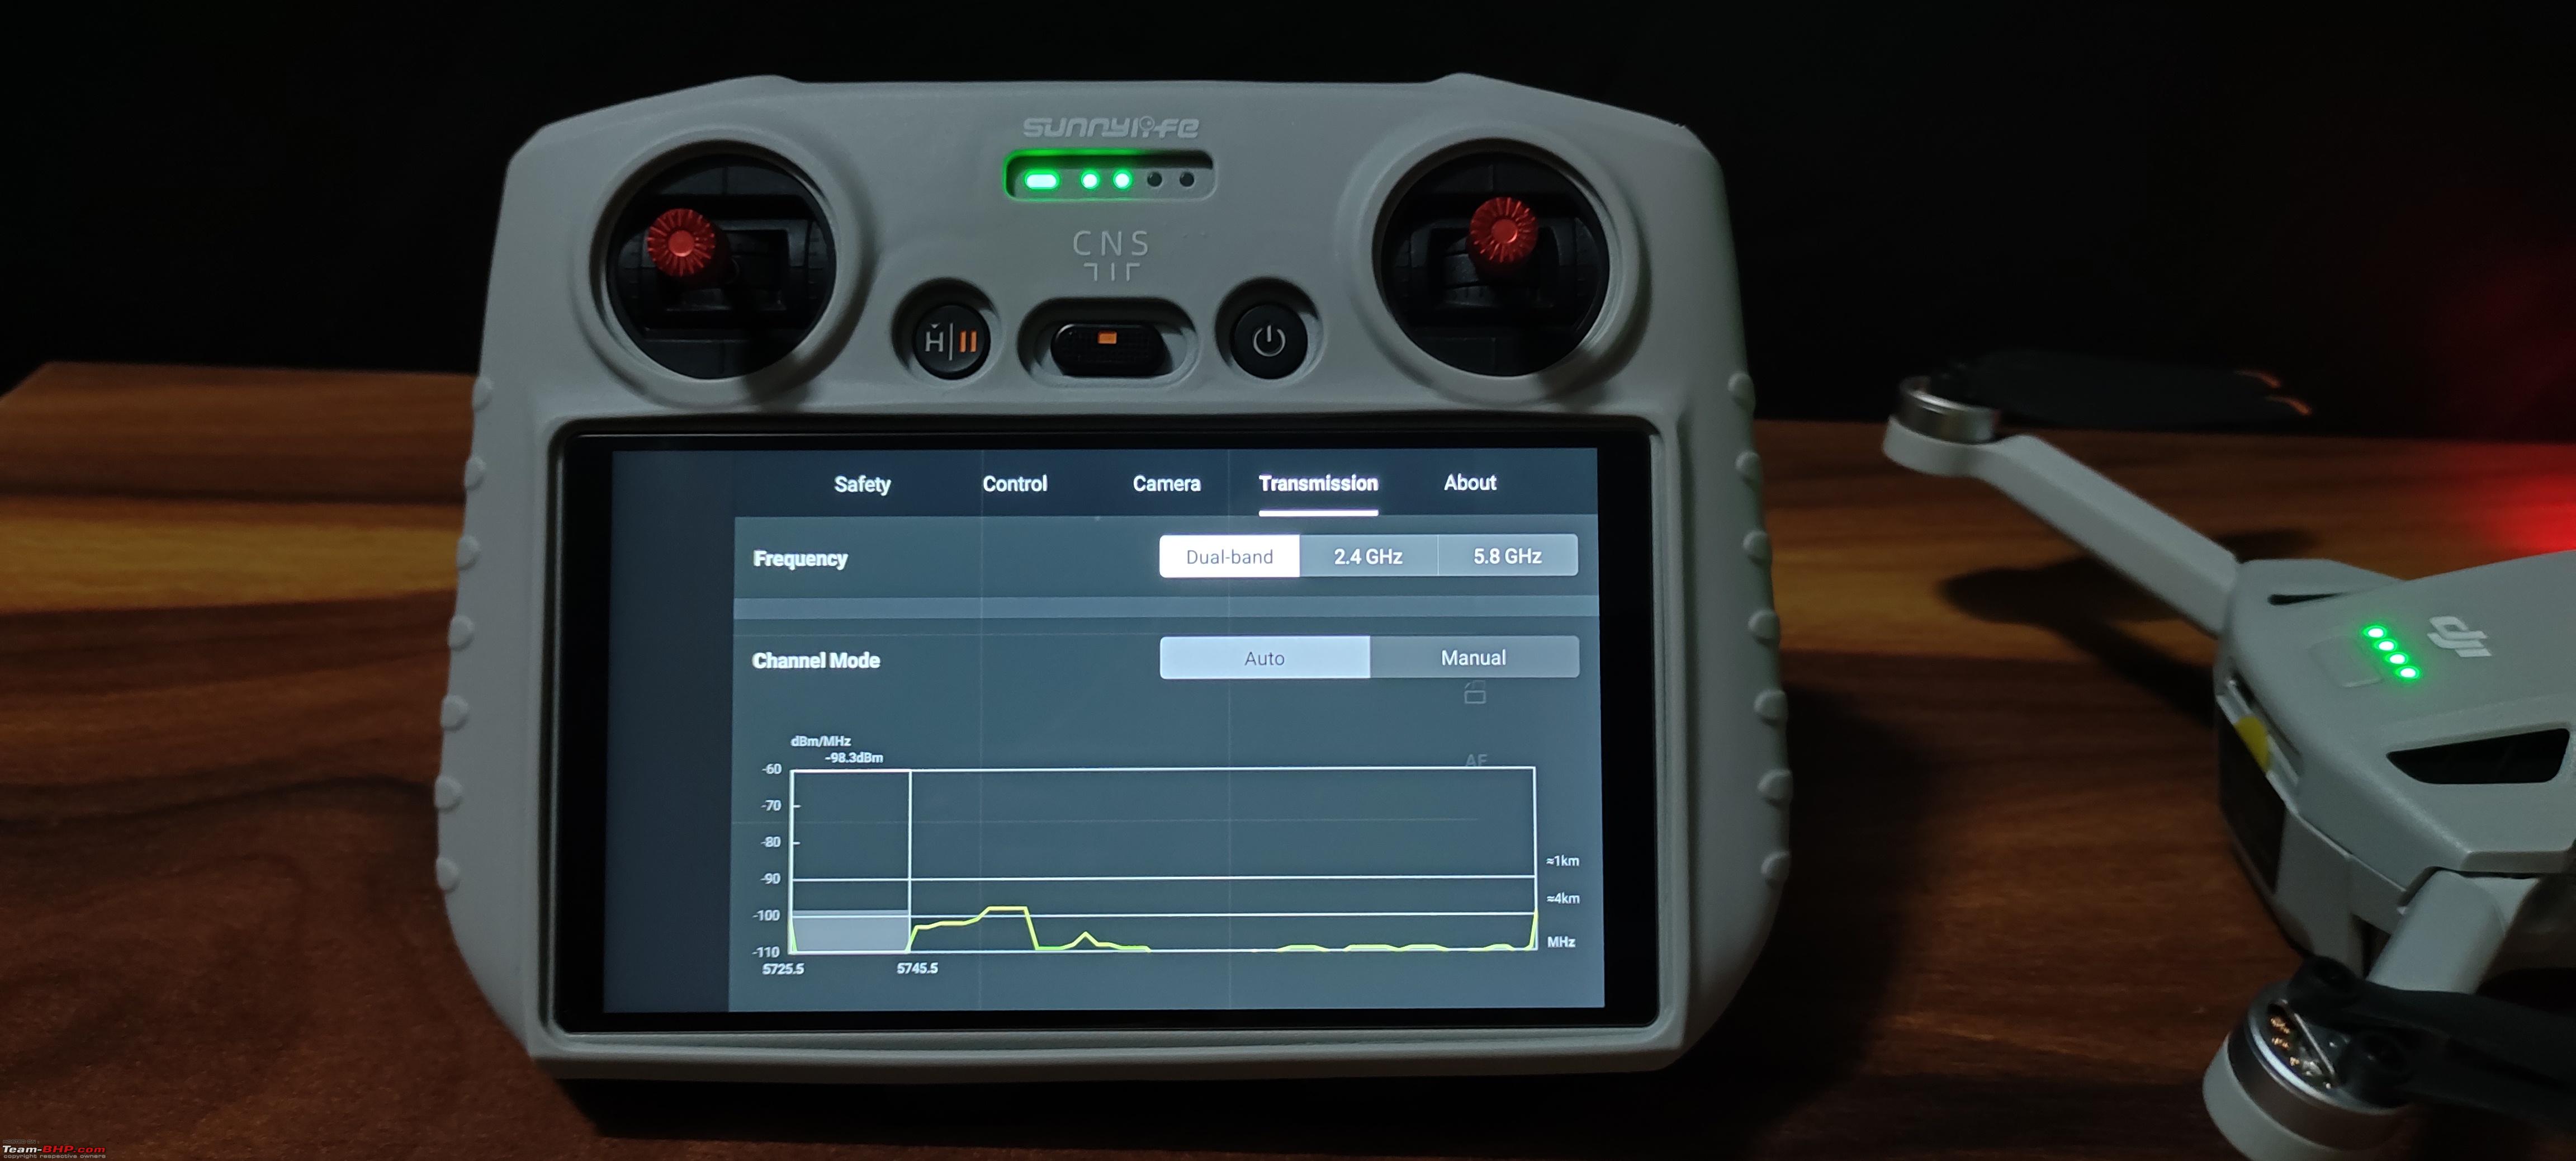  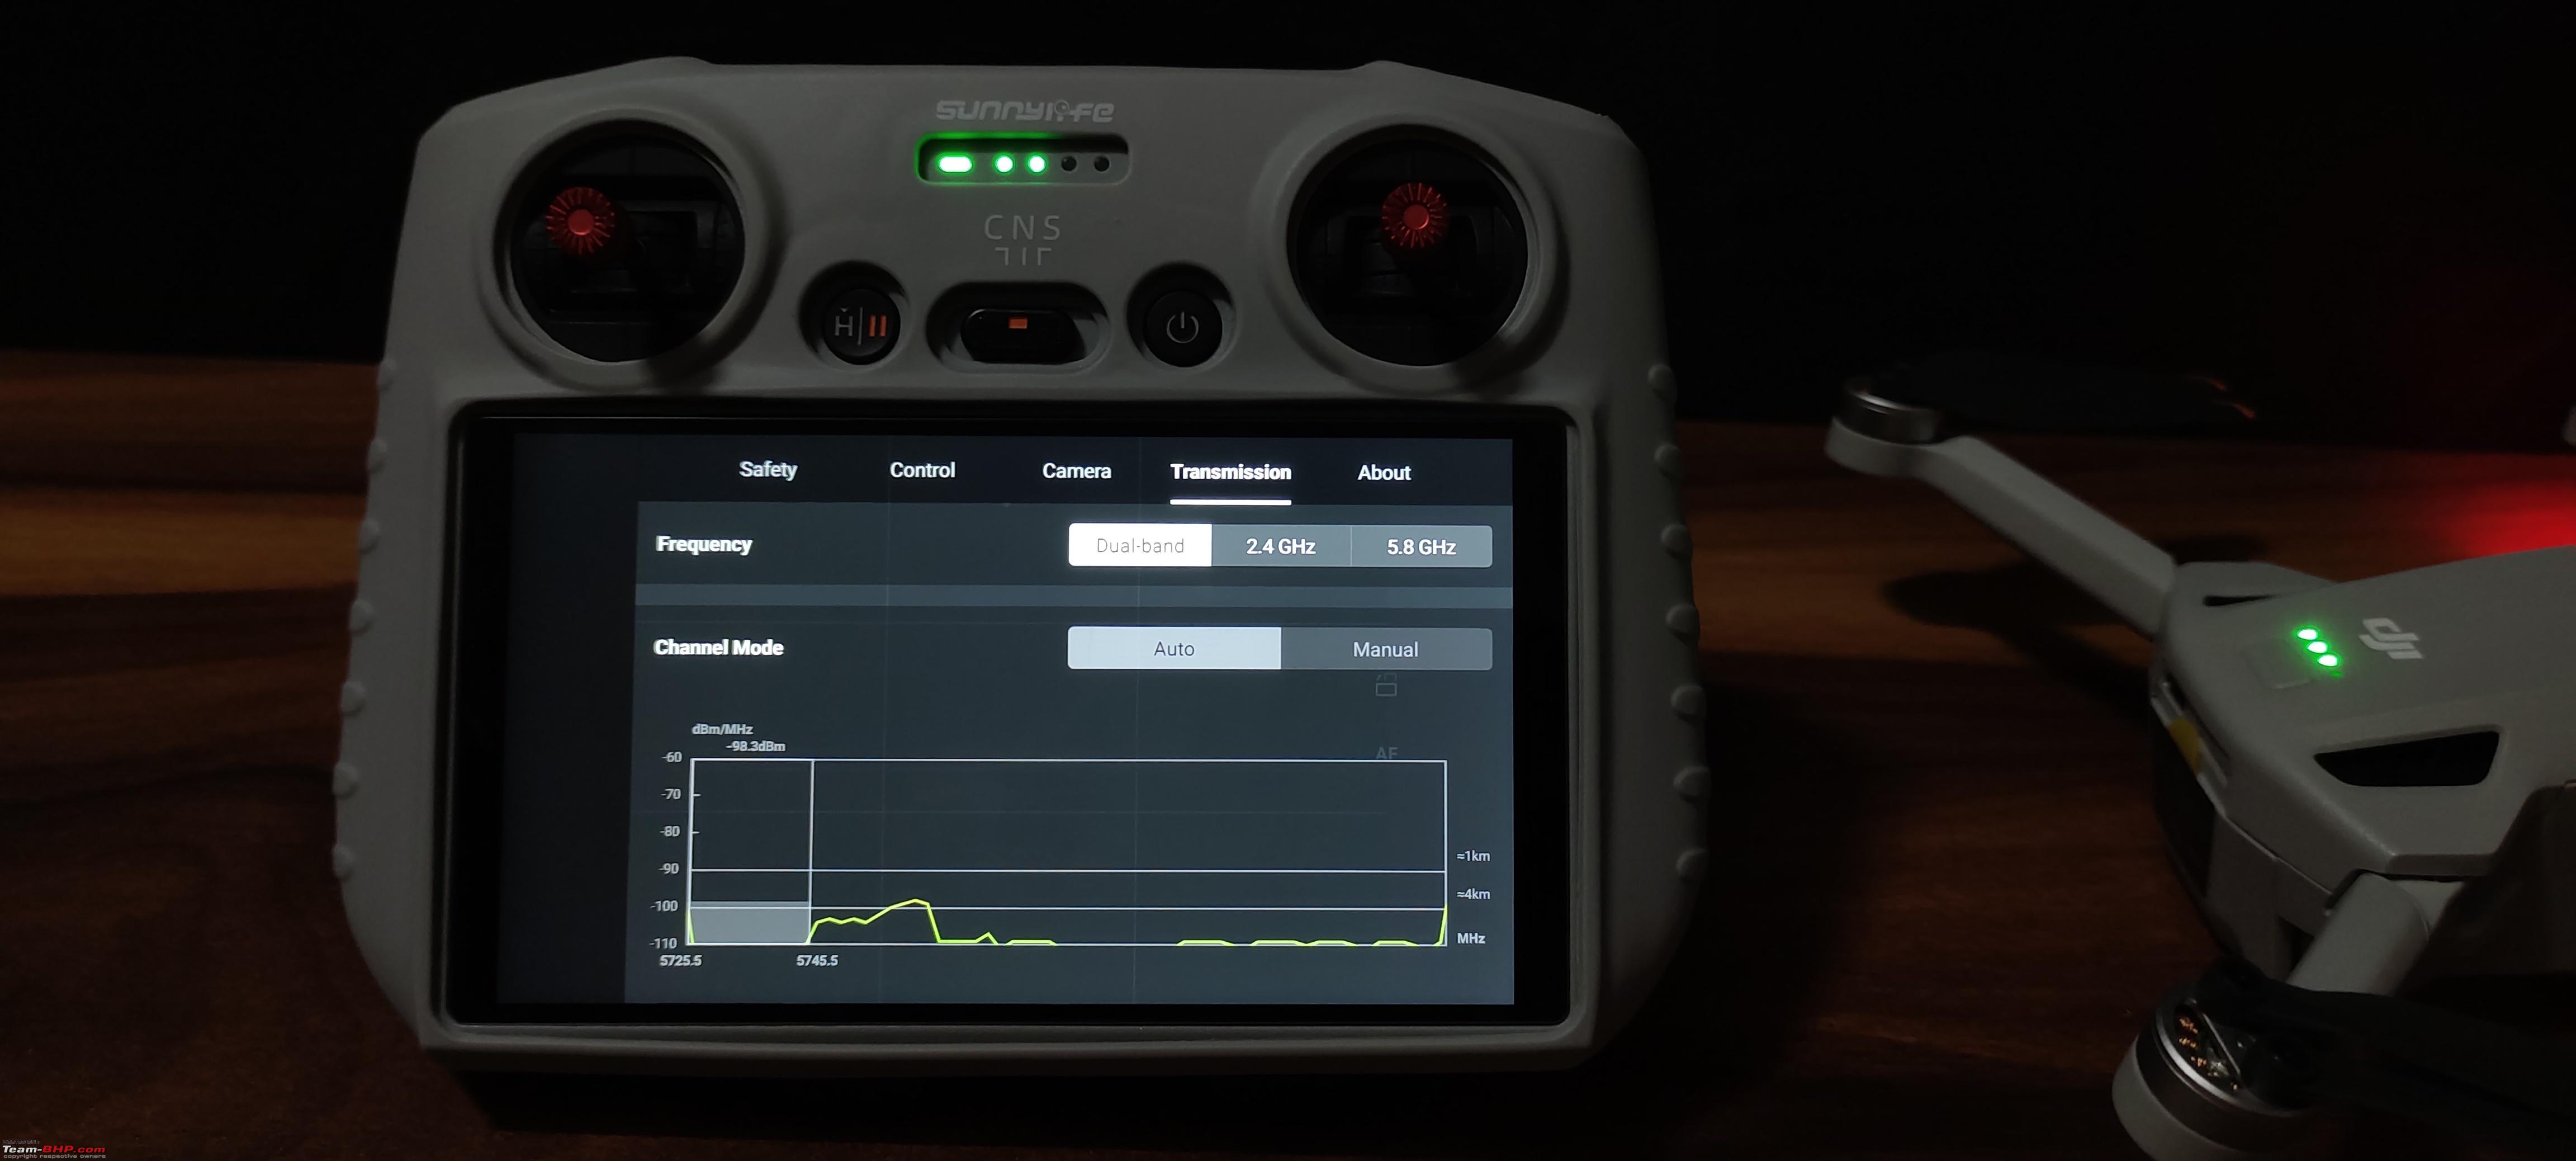 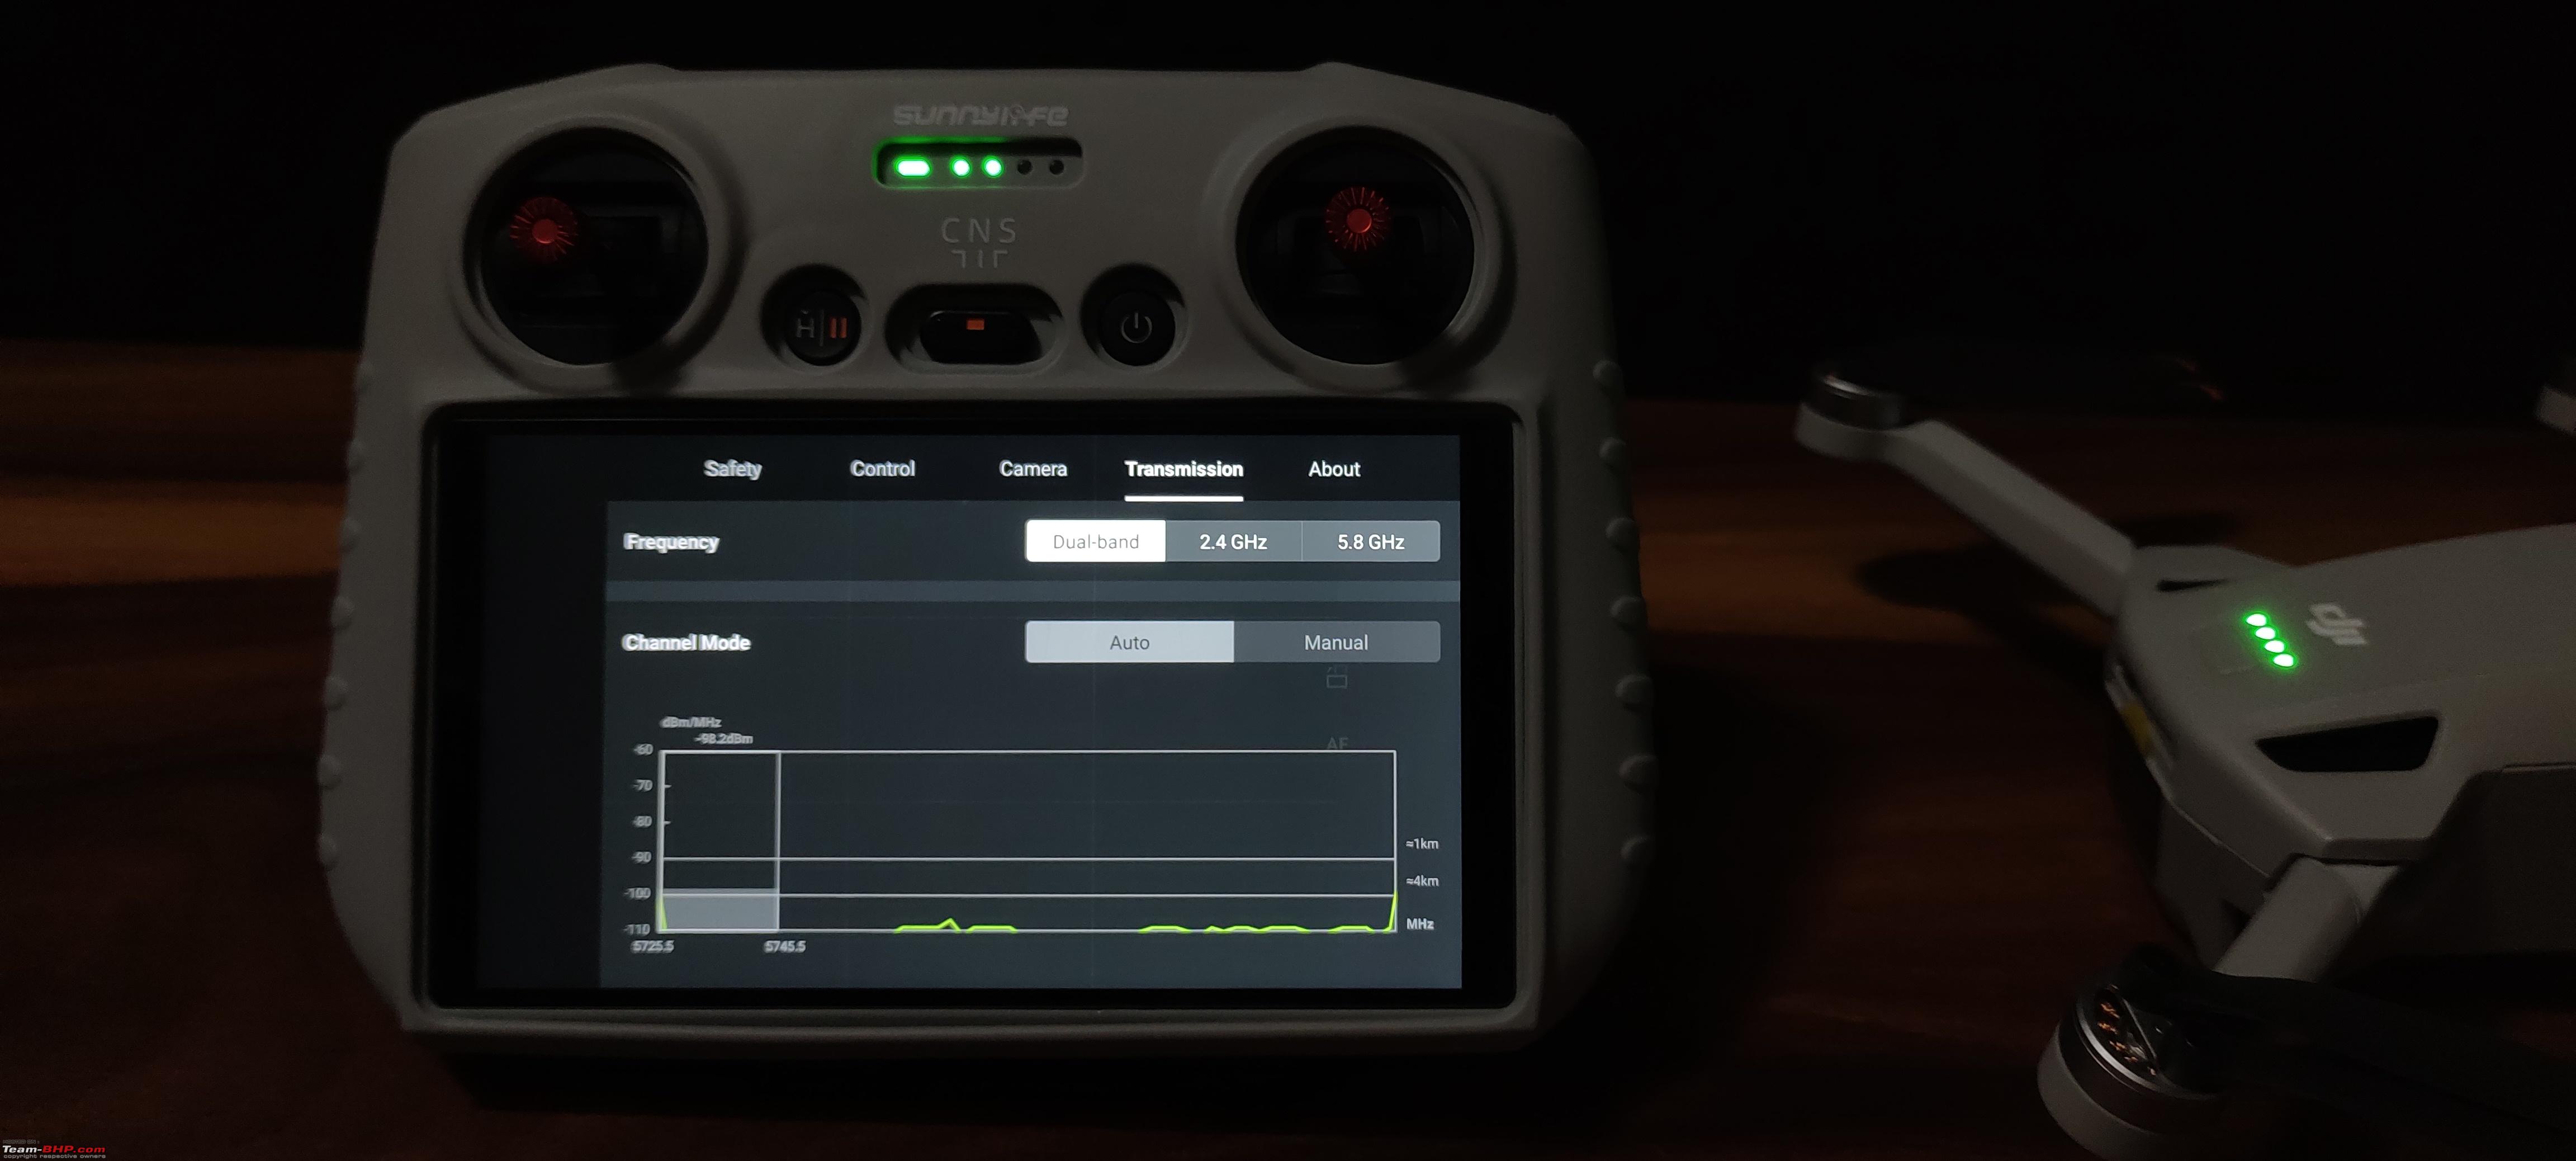 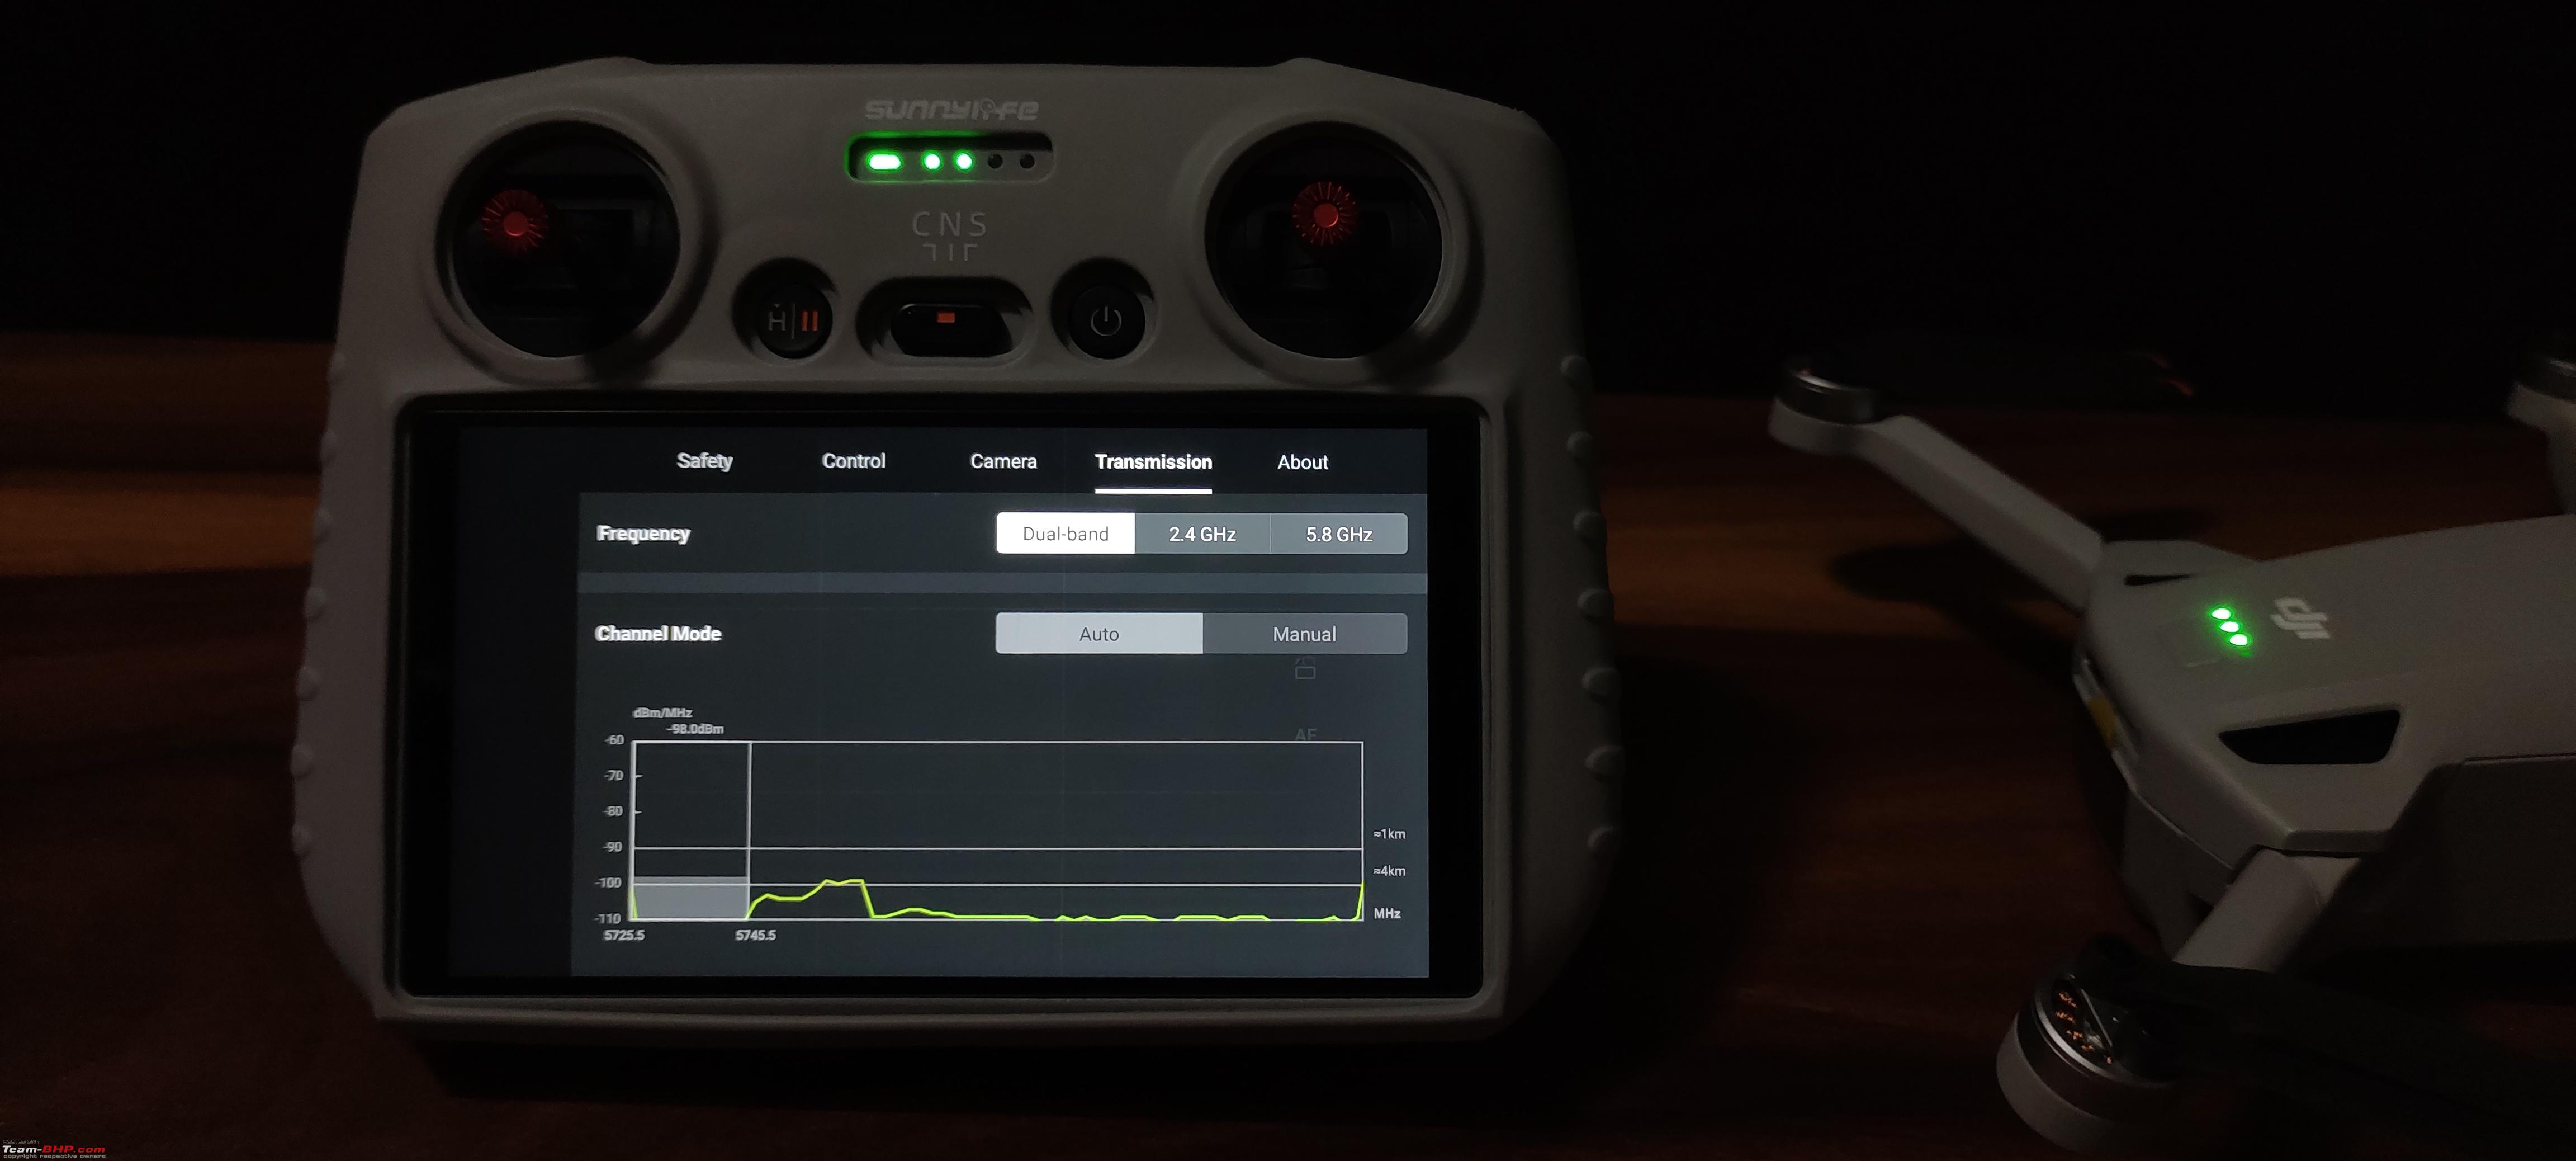 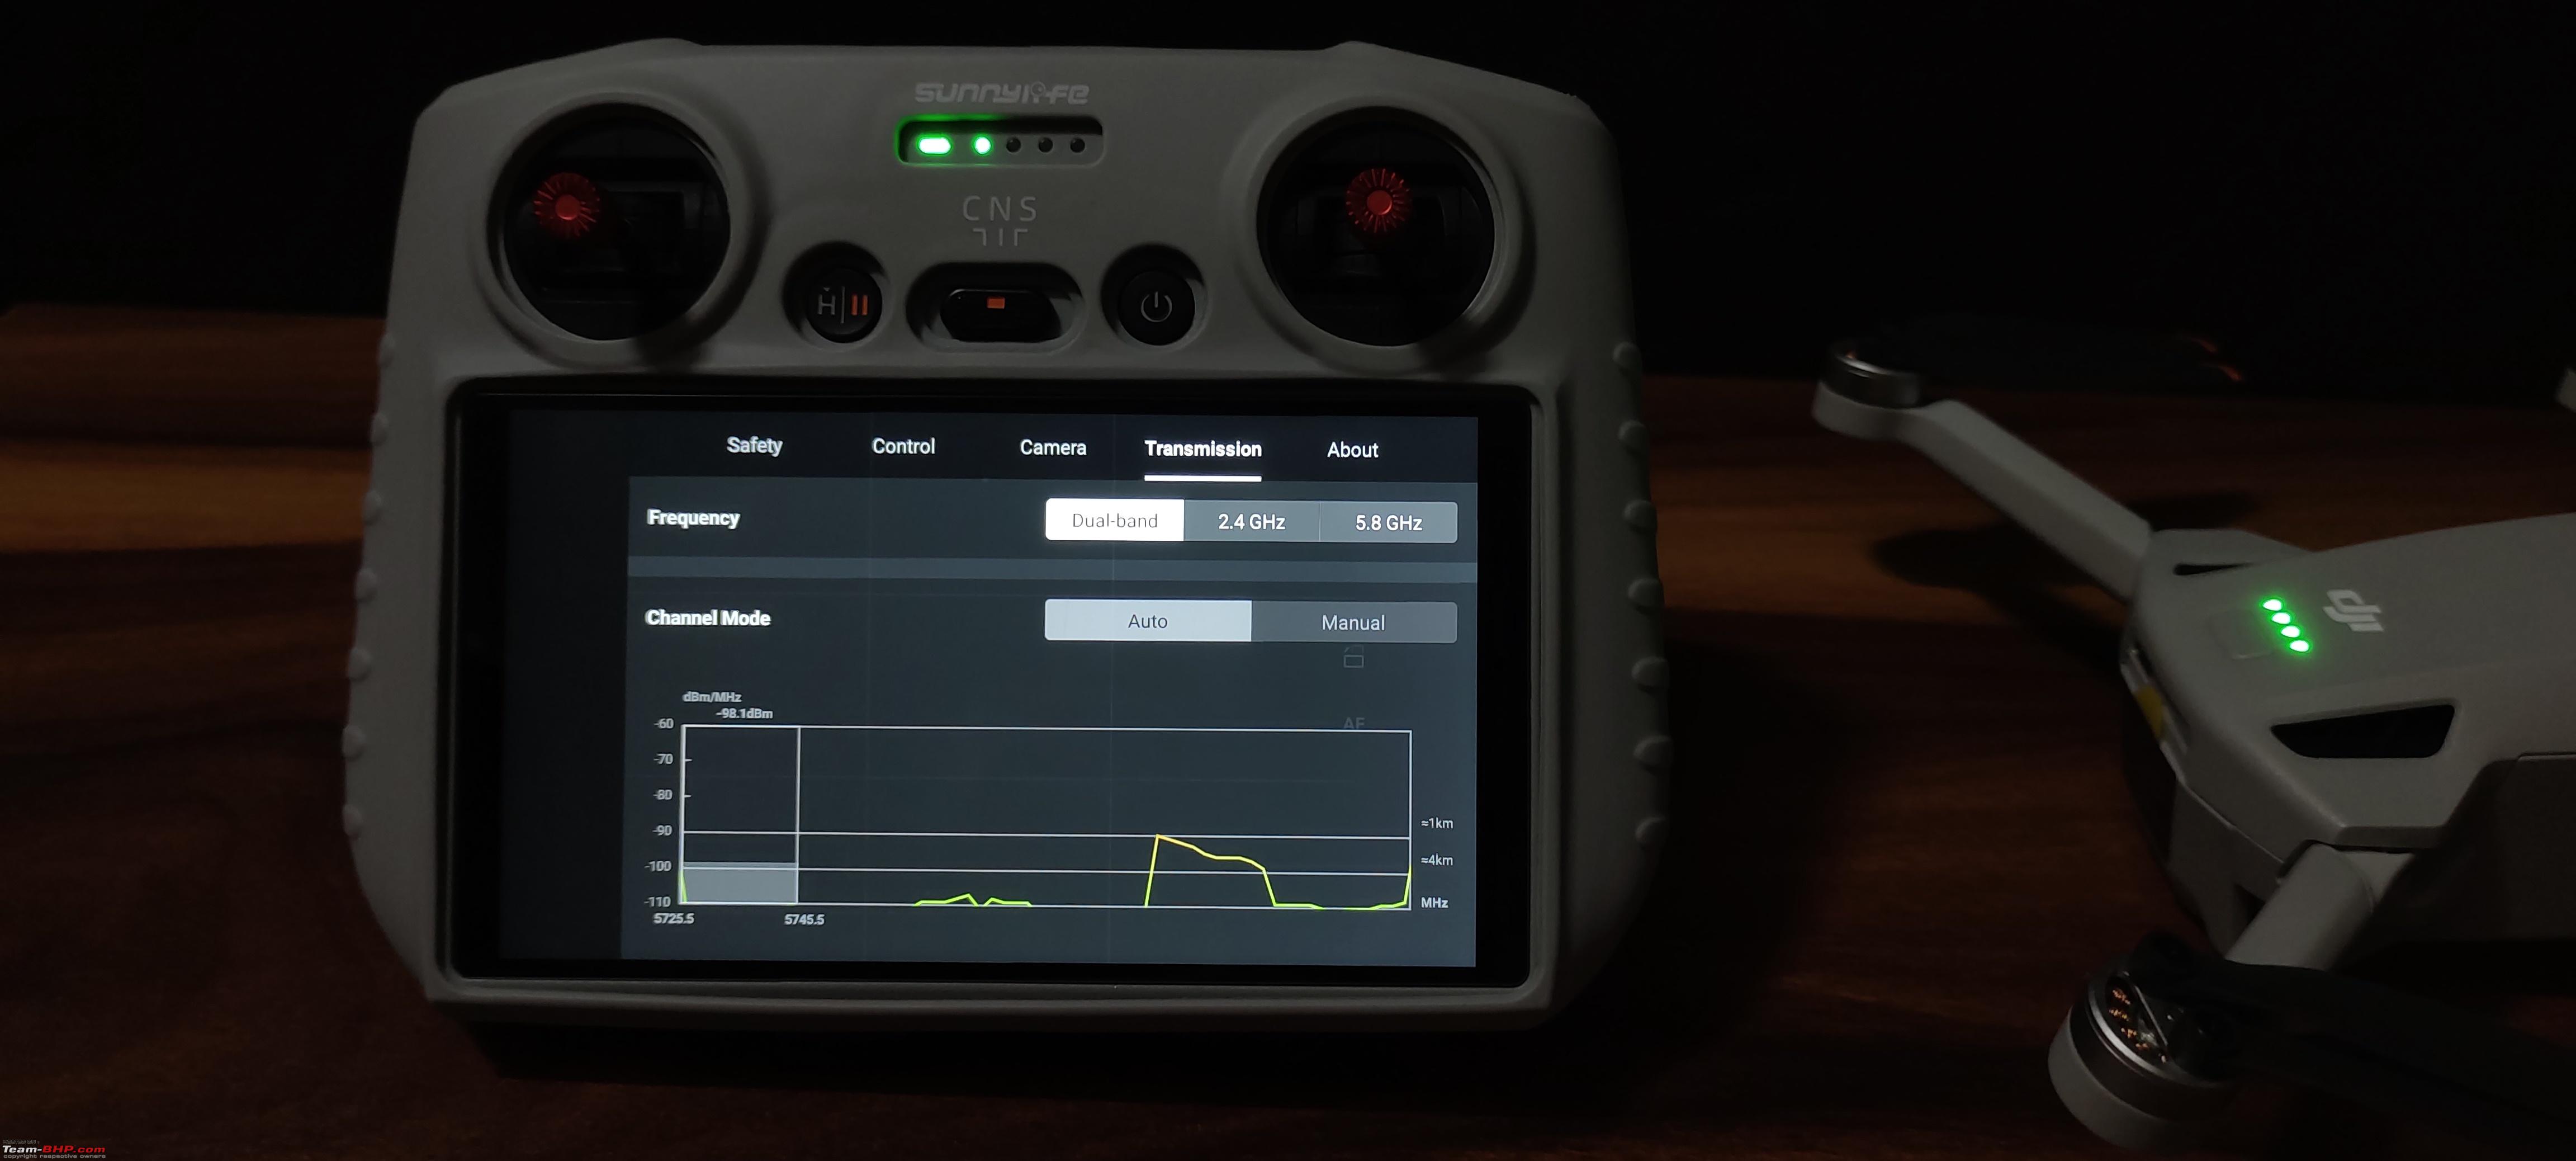 Intelligent flight modes: Quick shots, Master shots, Panorama and Hyperlapse. 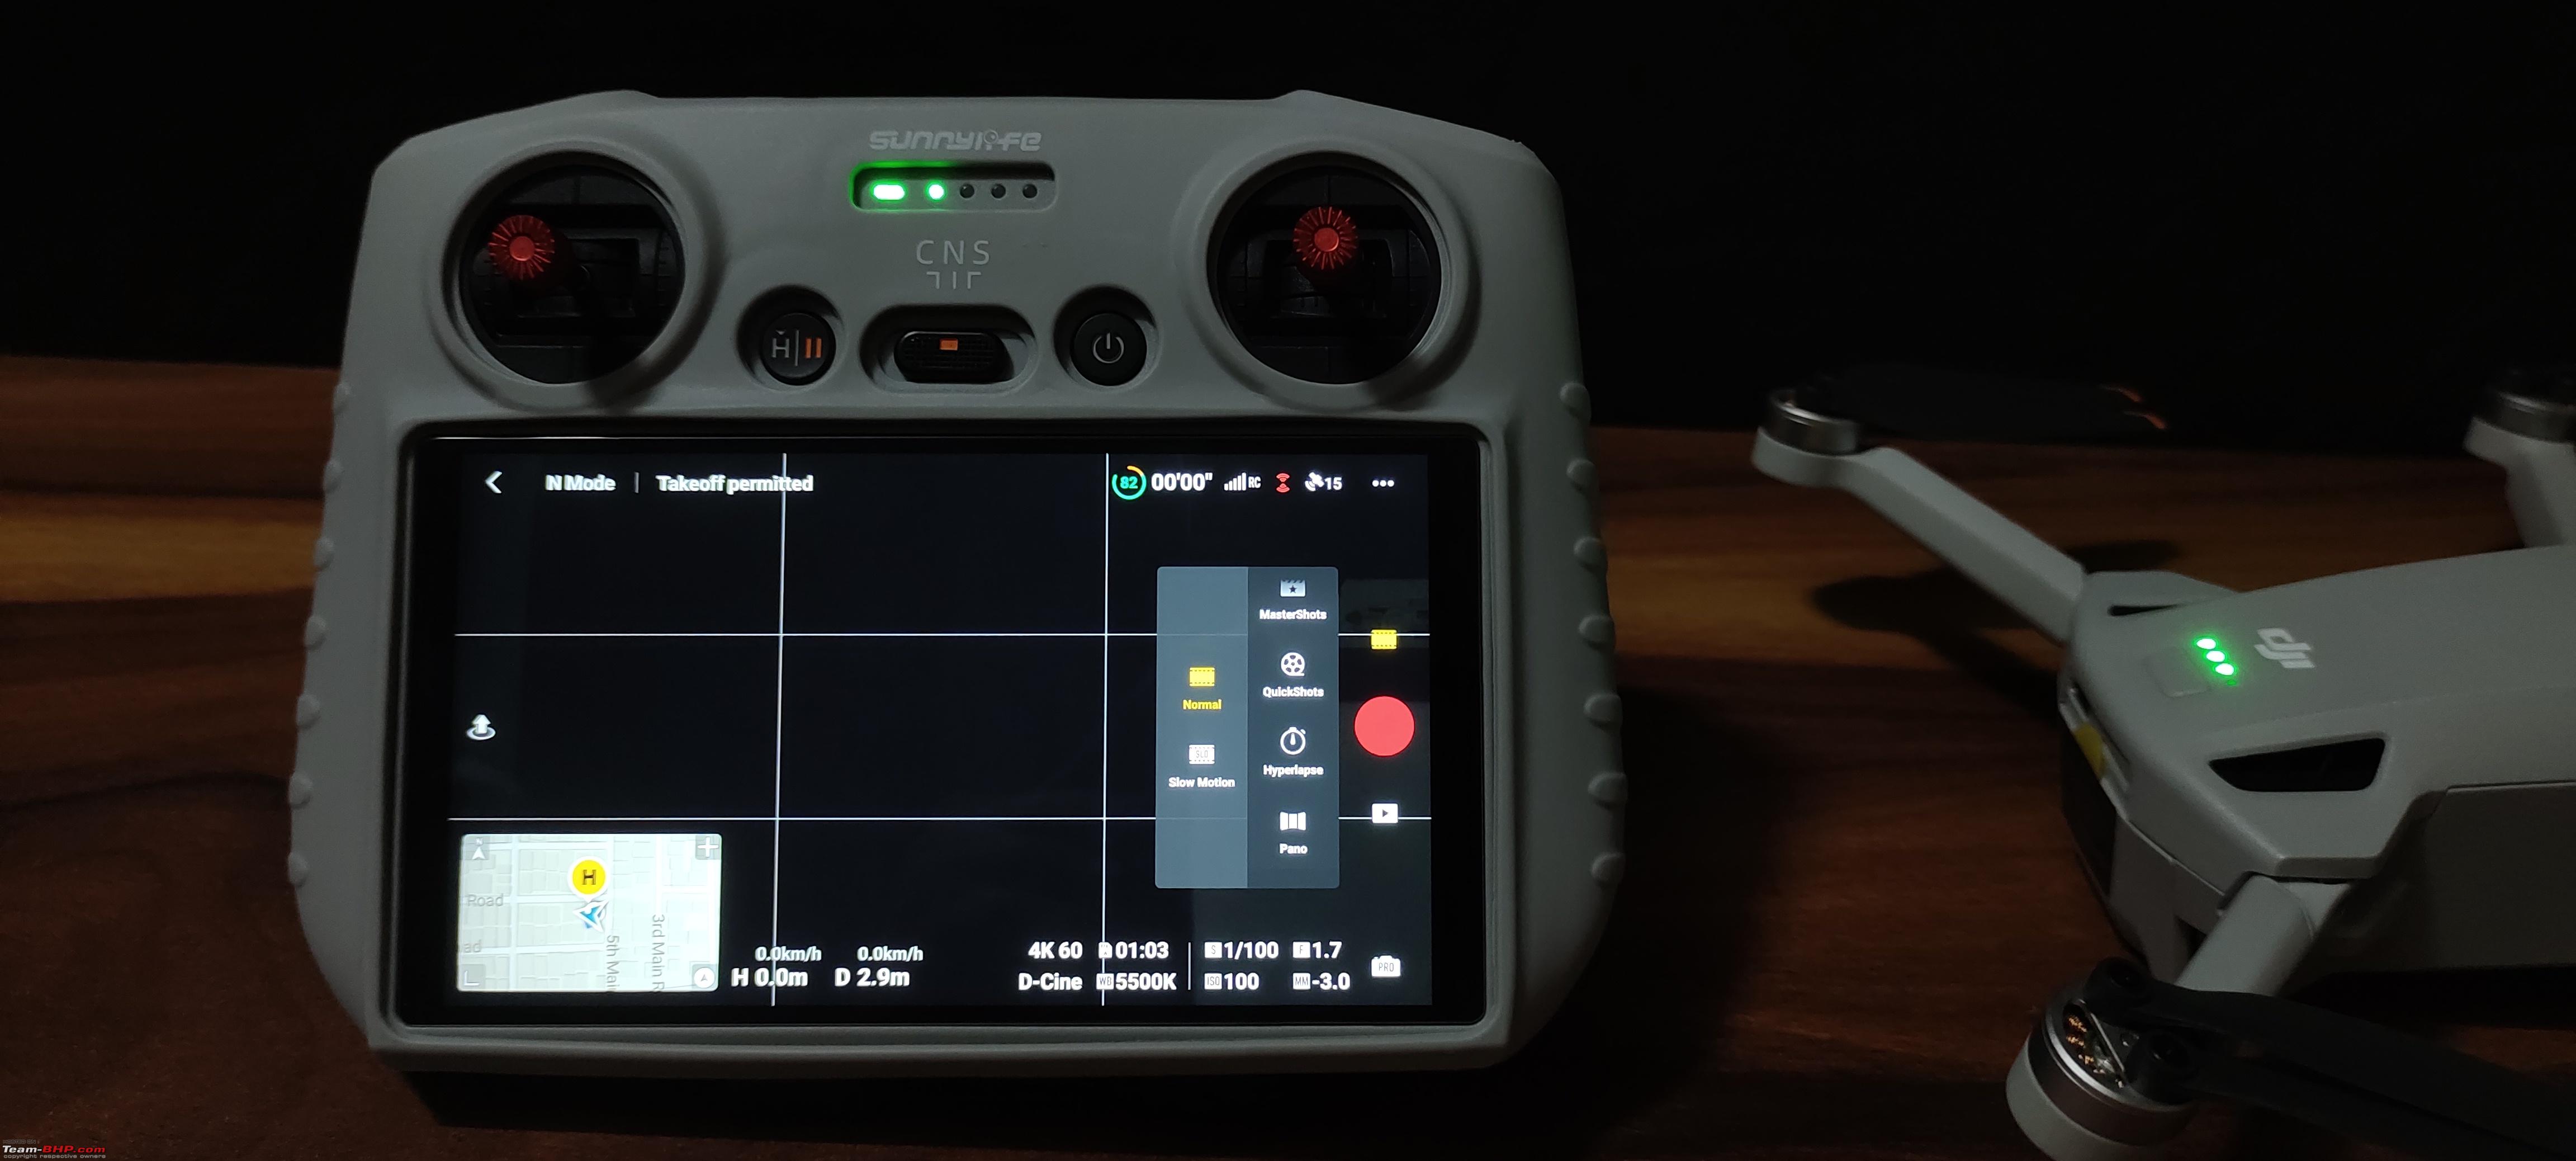 When not connected to an aircraft, everything in the camera view gets disabled. The first LED on the controller also turns red indicating that it is disconnected from the aircraft.  A big thanks to BHPian @vsrivatsa for bringing the wide angle lens and a spare battery from Singapore. Received it just a day ago and haven't yet tested the wide angle lens. Most probably will do it during weekends and will post an update. I was actually looking out for a Wide Angle Lens with ND filters from FREEWELL. Since it wasn't available in the DJI Store at Singapore, I asked him to purchase DJI wide angle lens. DJI Wide Angle Lens and an Intelligent plus, spare battery: 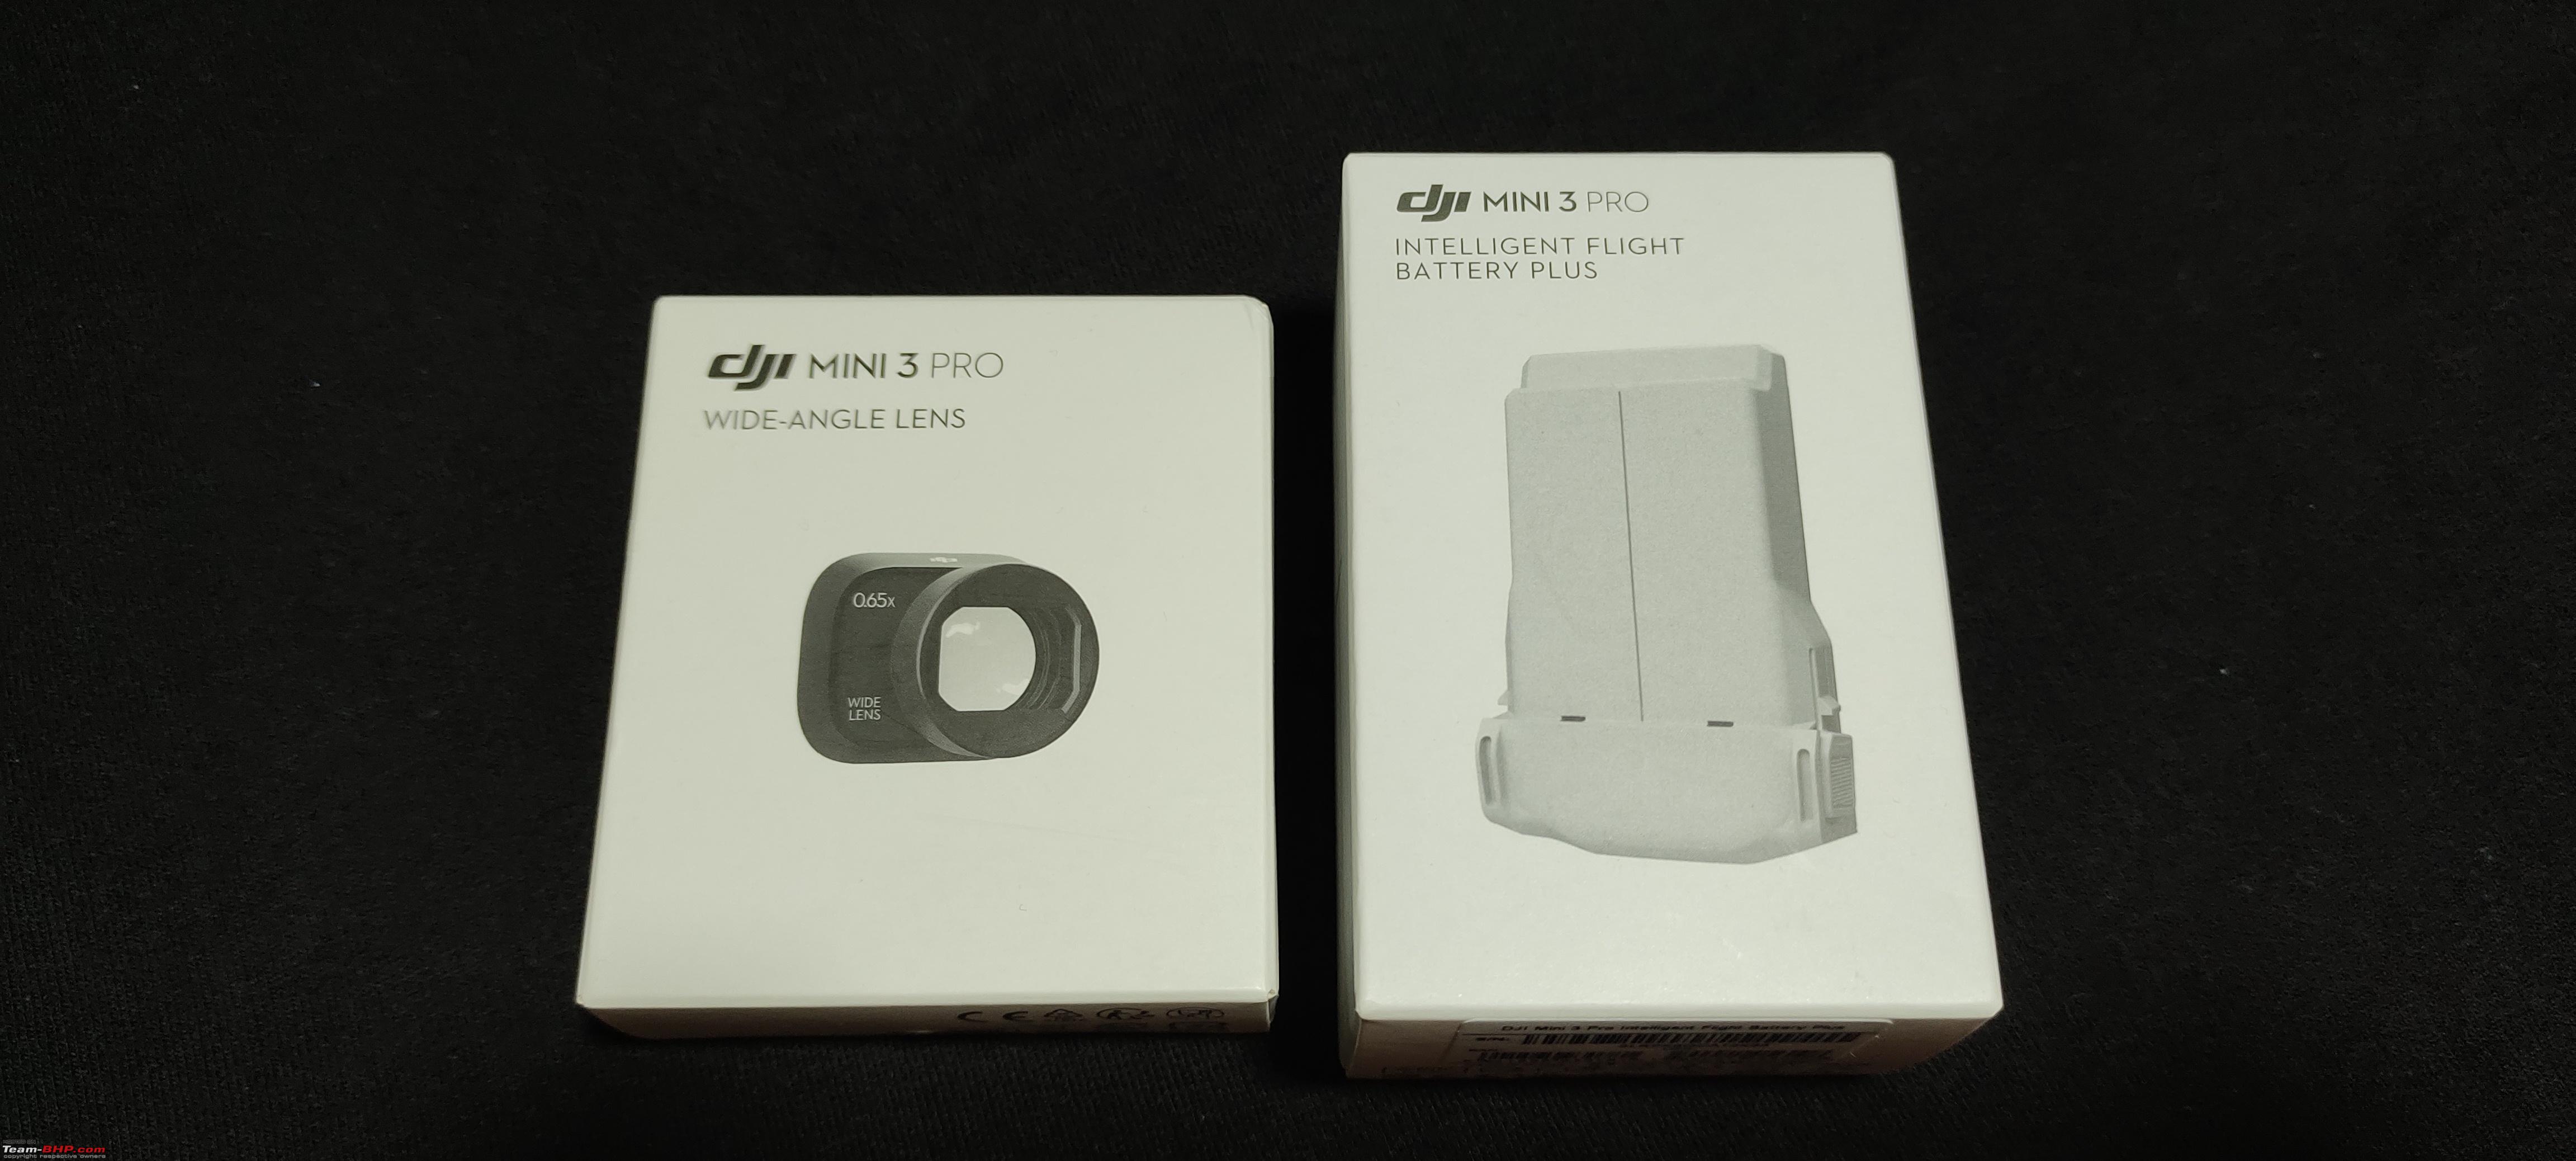 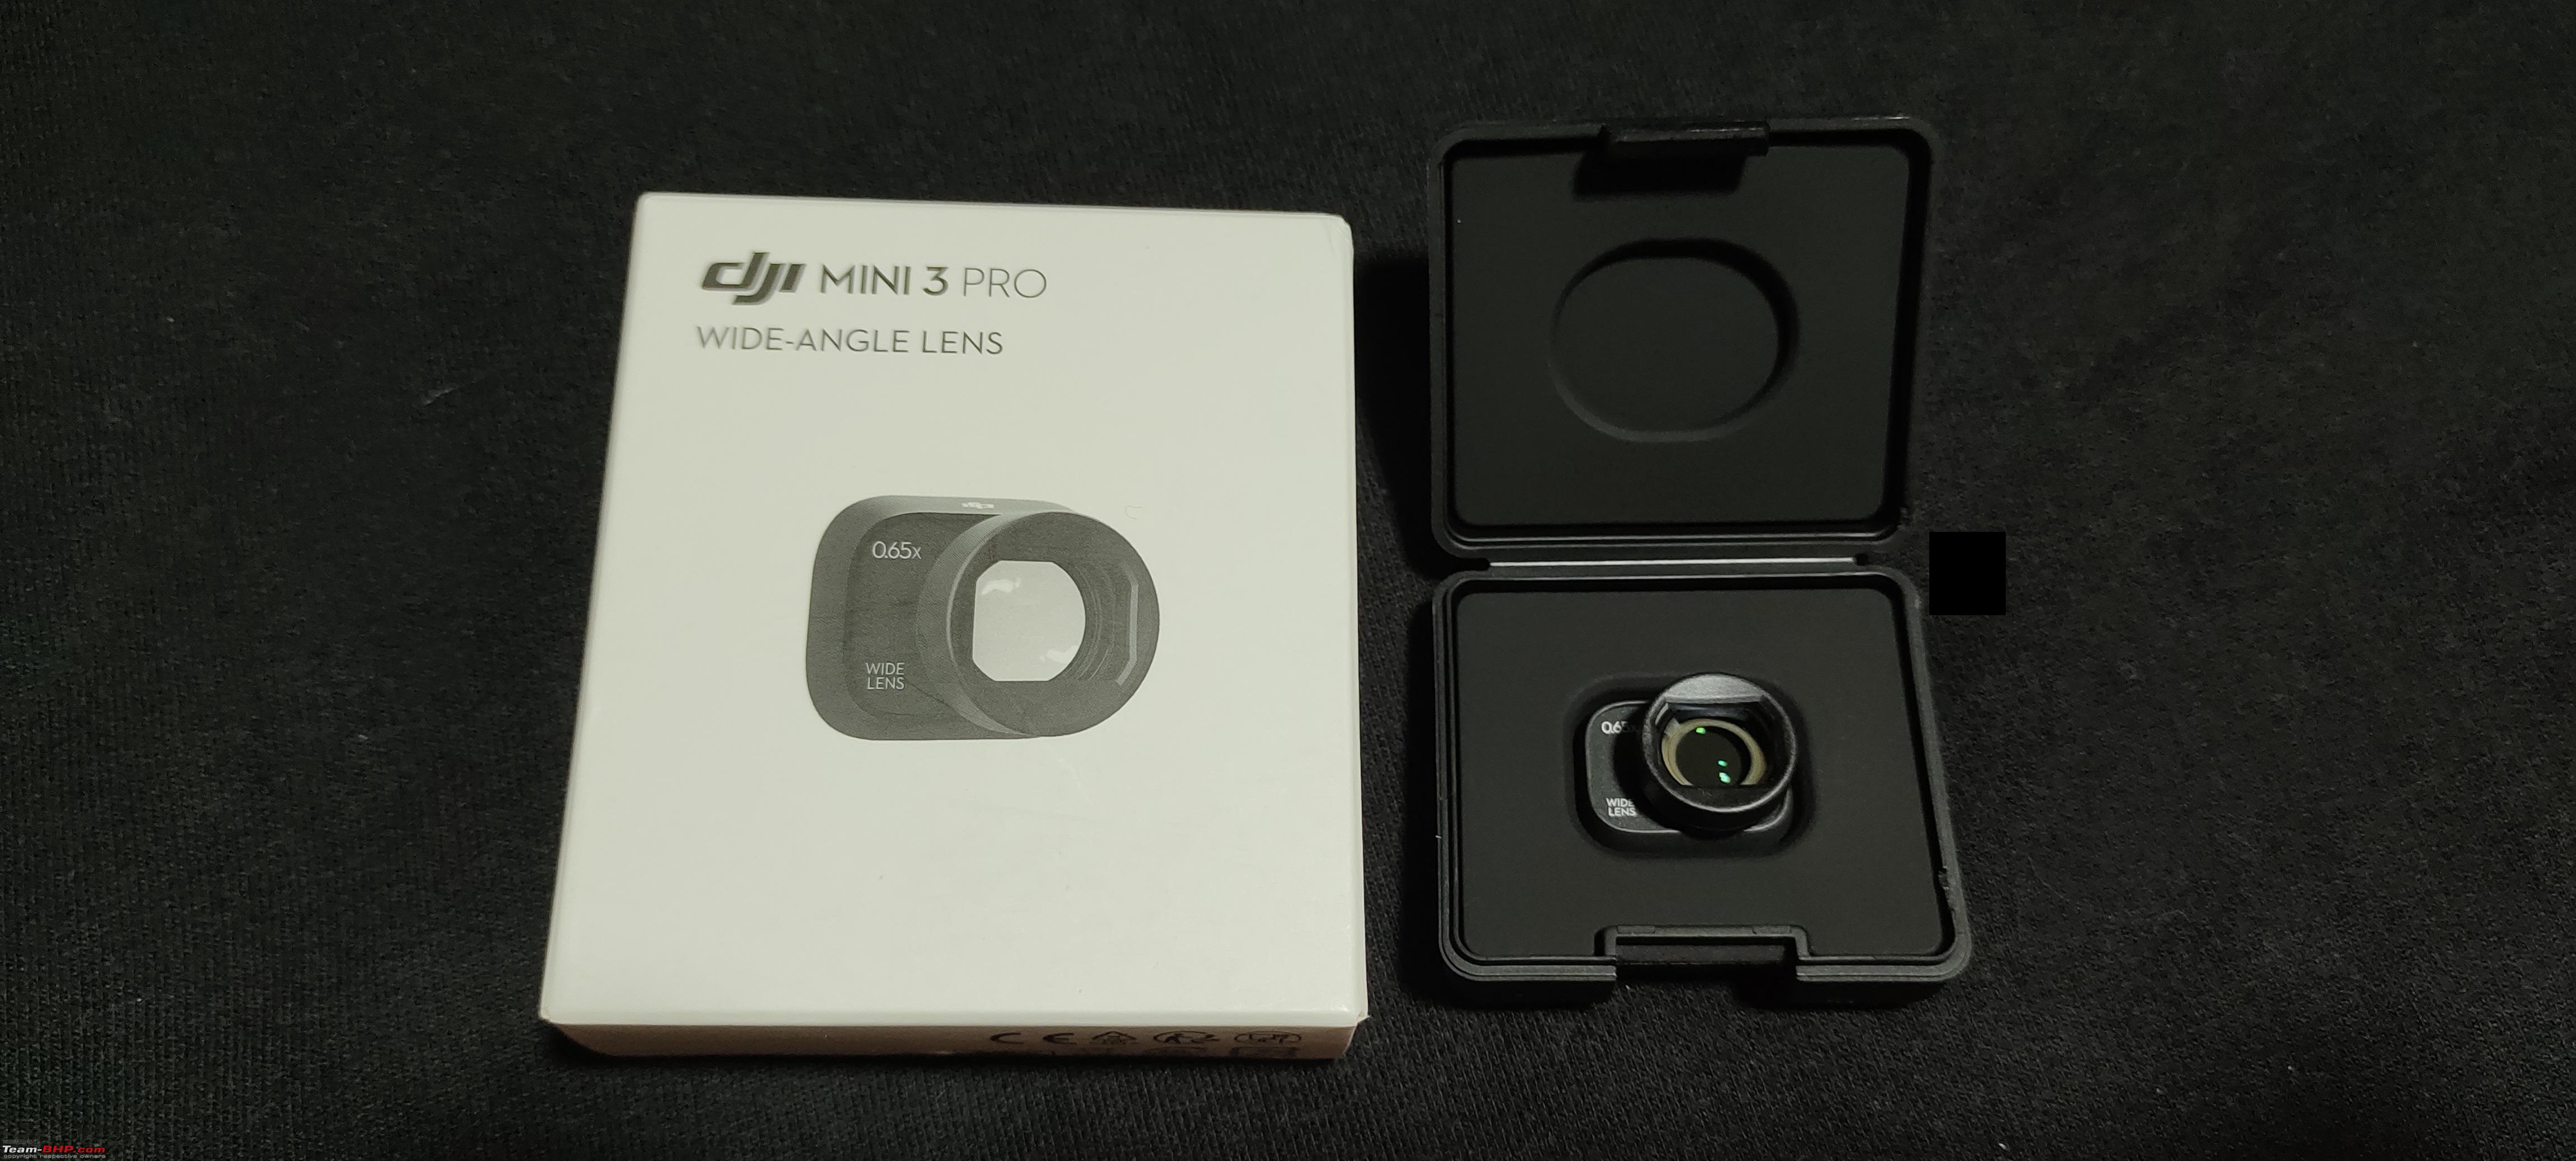  Last edited by Amyth Prabhakar : 11th December 2022 at 23:06. |
|
| (17)
Thanks
|
| The following 17 BHPians Thank Amyth Prabhakar for this useful post: | arpanjha, audioholic, brownkaiser, digitalnirvana, graaja, GTO, KarthikK, kung_foo_fanta, mail2sekh, ph03n!x, Roy.S, Samfromindia, shyamg28, TSIboy, vsrivatsa, xsrahul, yashg |
|
10th December 2022, 21:13
| #10 |
| BHPian | re: Dji Mini 3 Pro Review | The Best Nano Drone Just as I was wrapping up my writeup, I received an email from DJI last night. Here is what it says: "MINI 3 launched". Check it out here: https://www.dji.com/mini-3 DJI has launched a stripped down version of Mini 3 PRO:  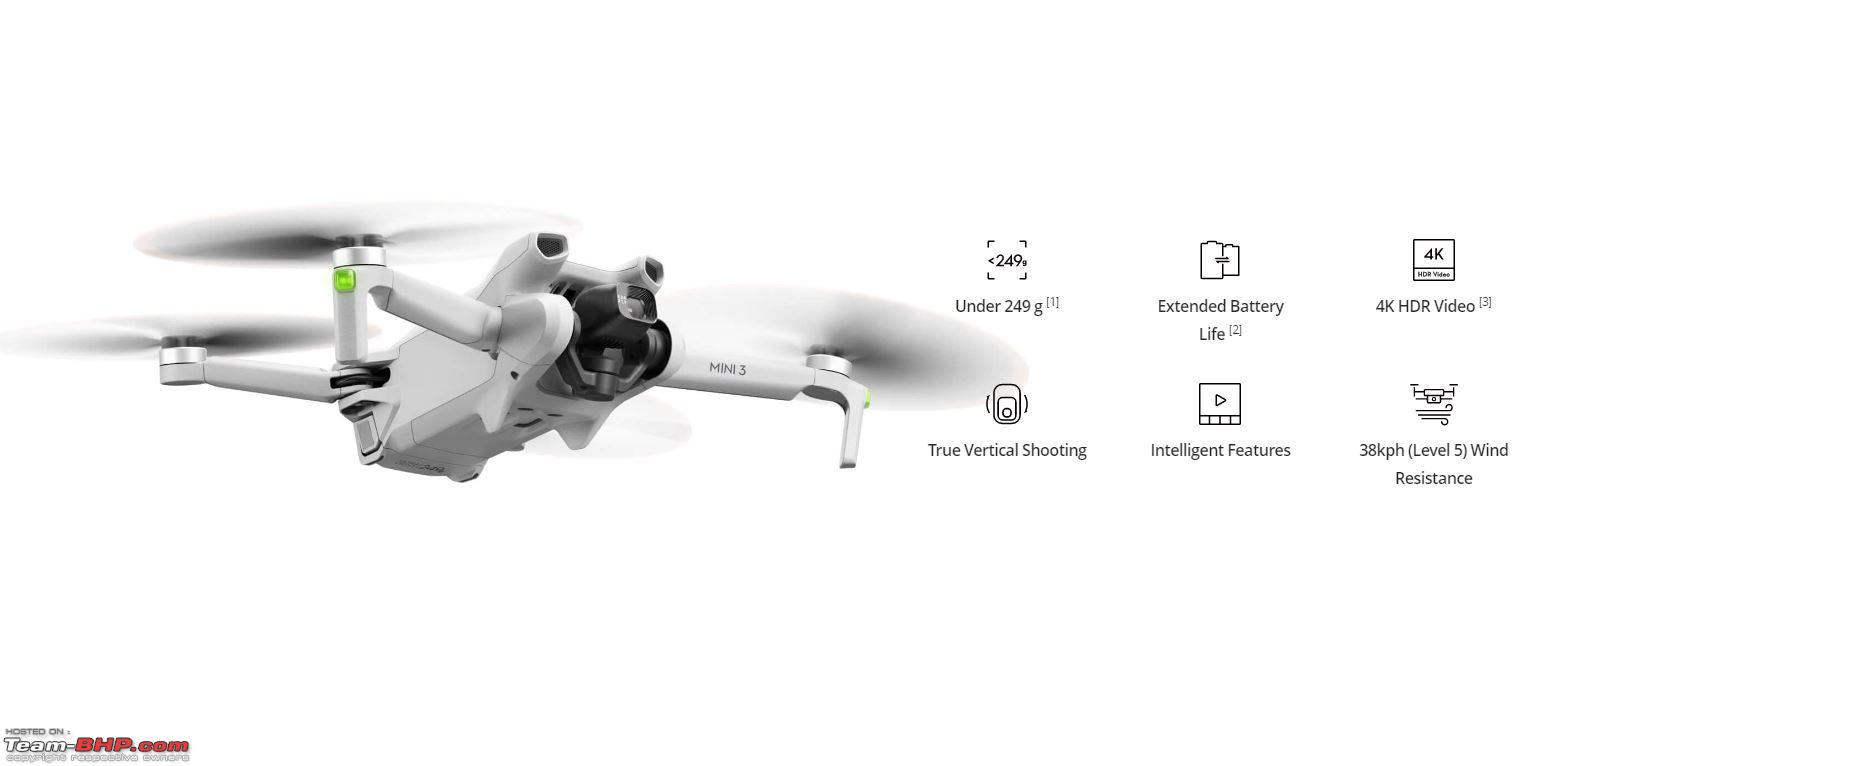 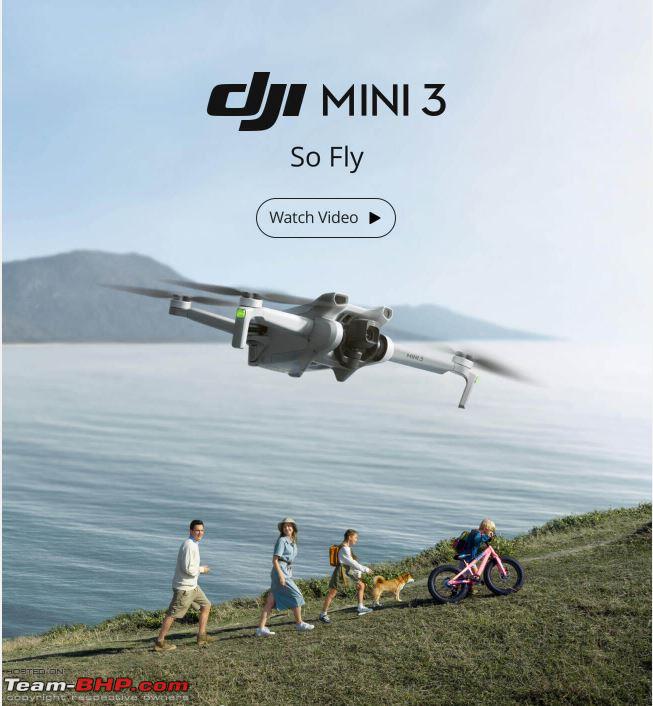 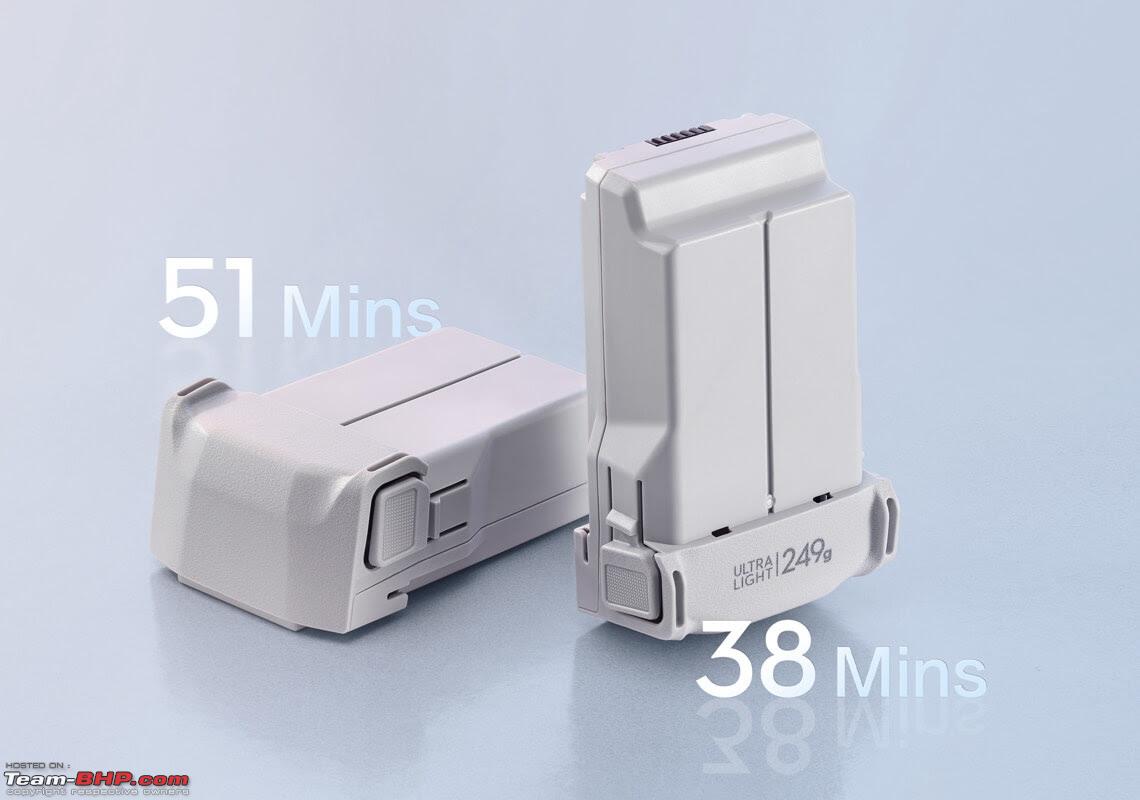   Complete specs: https://www.dji.com/mini-3/specs DJI has released the latest version of DJI FLY APP ( v 1.9.0) and also have rolled out the latest version of the RC firmware v01.02.0200  Time to update my RC: New feature updates include Way-points and Support for Offline Maps and some bug fixes. Offline Maps:  Much needed and can be used to download the maps of a particular location beforehand in the DJI RC controller and use it when flying without a network connection. It stores the map on the RC storage and with this there is no need to cache the maps. Note: It downloads and stores the selected maps on the SD card and not in the internal storage. Way-points are applicable only to MAVIC 3 series. RC now updated with the latest firmware. 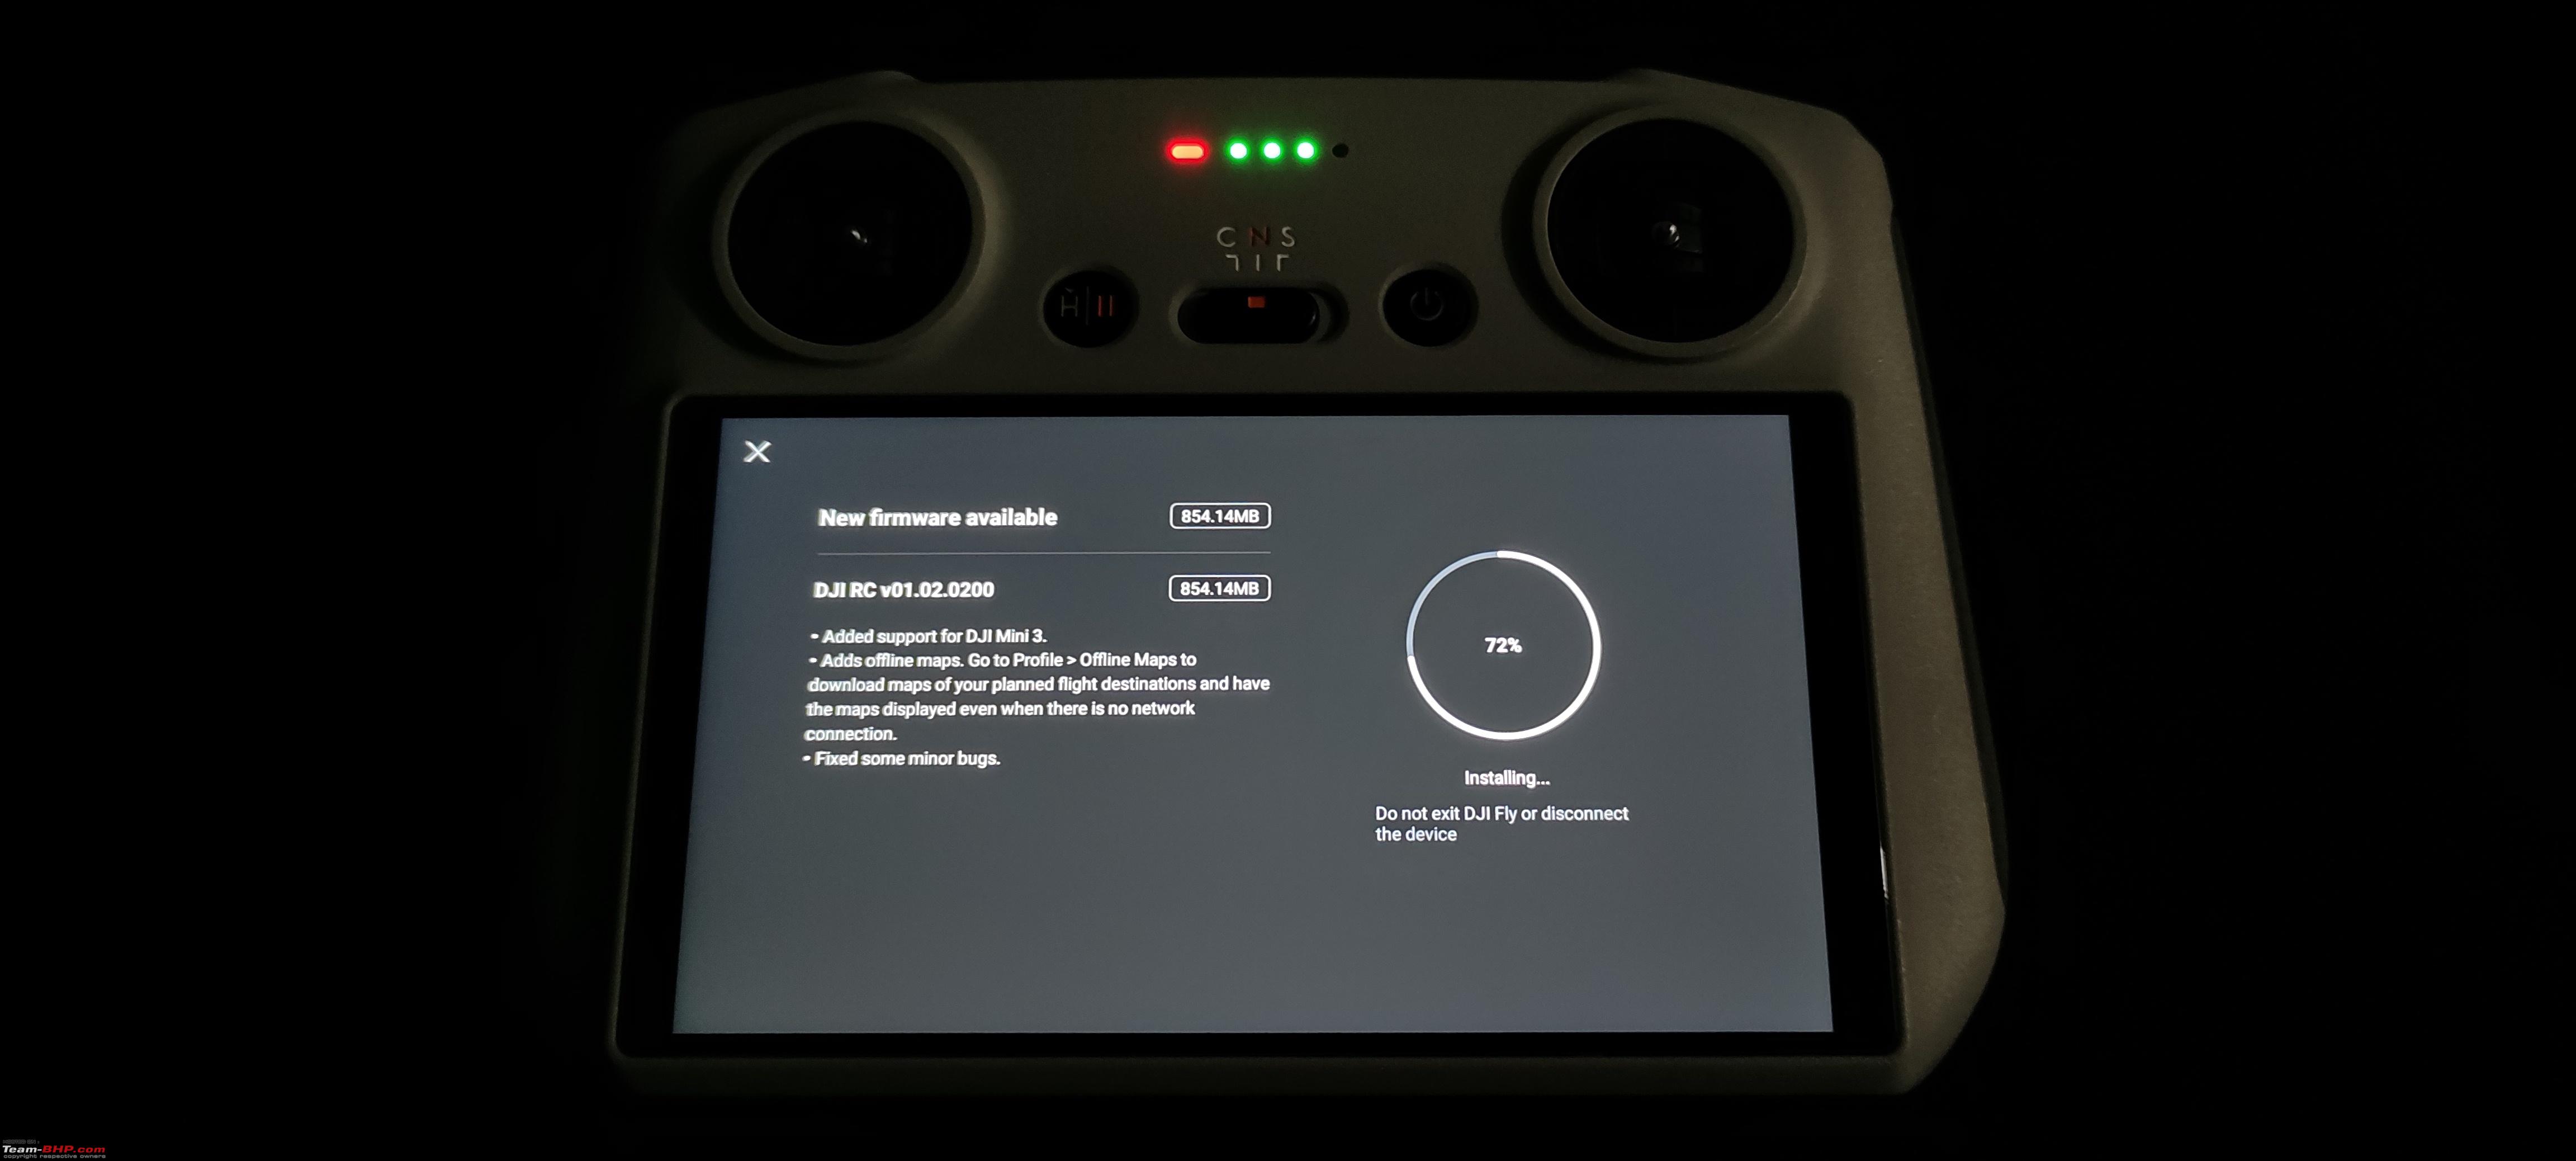 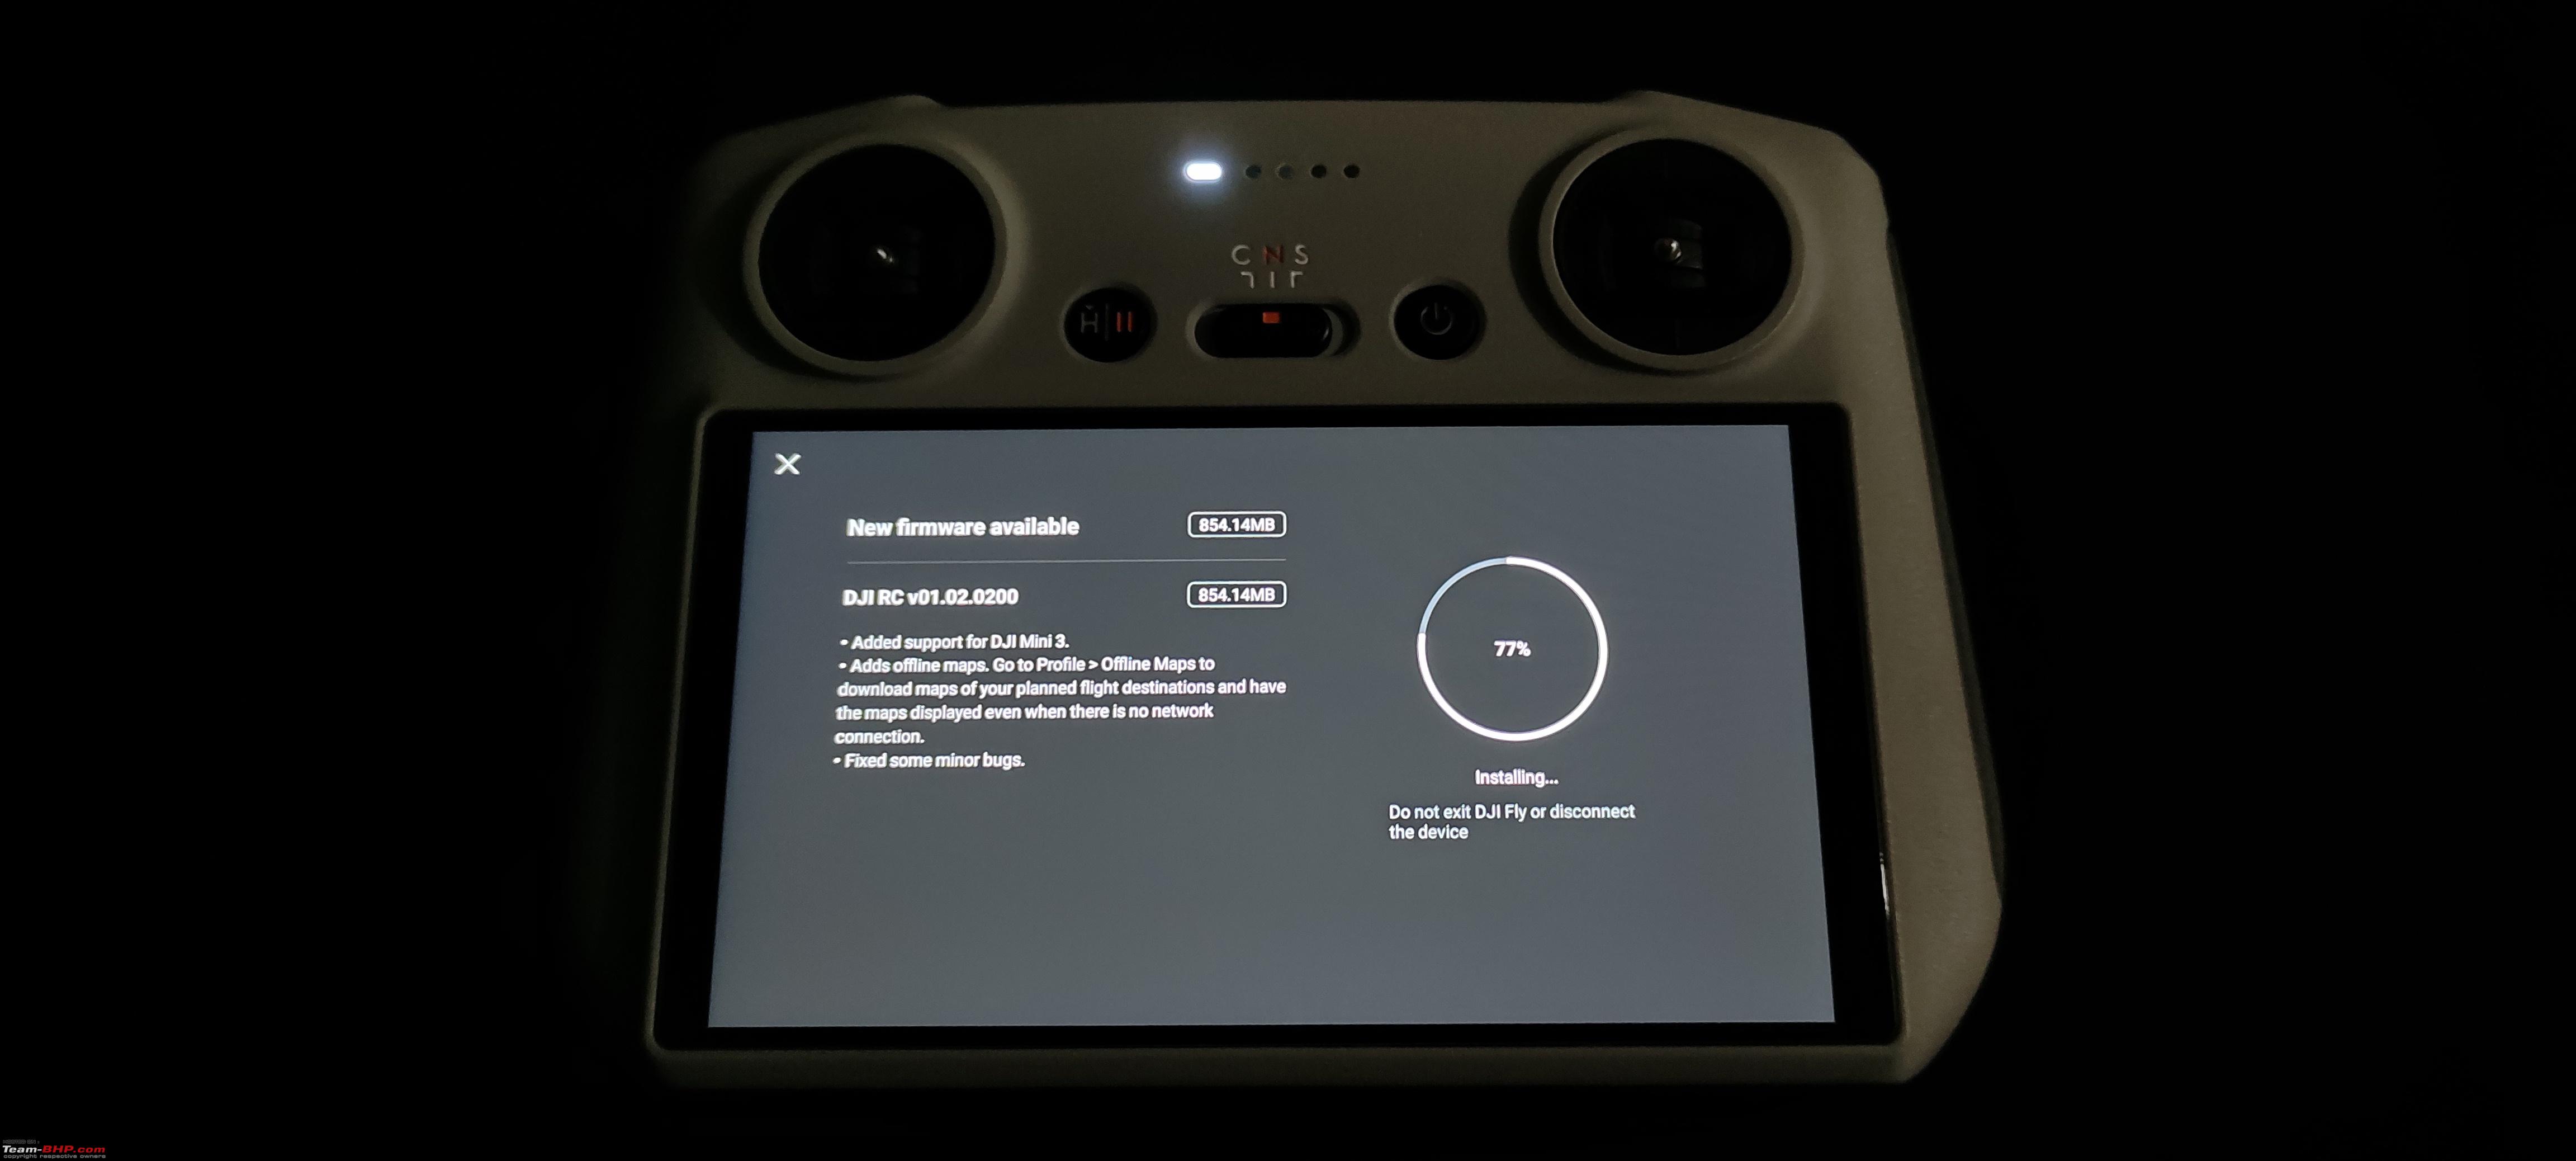 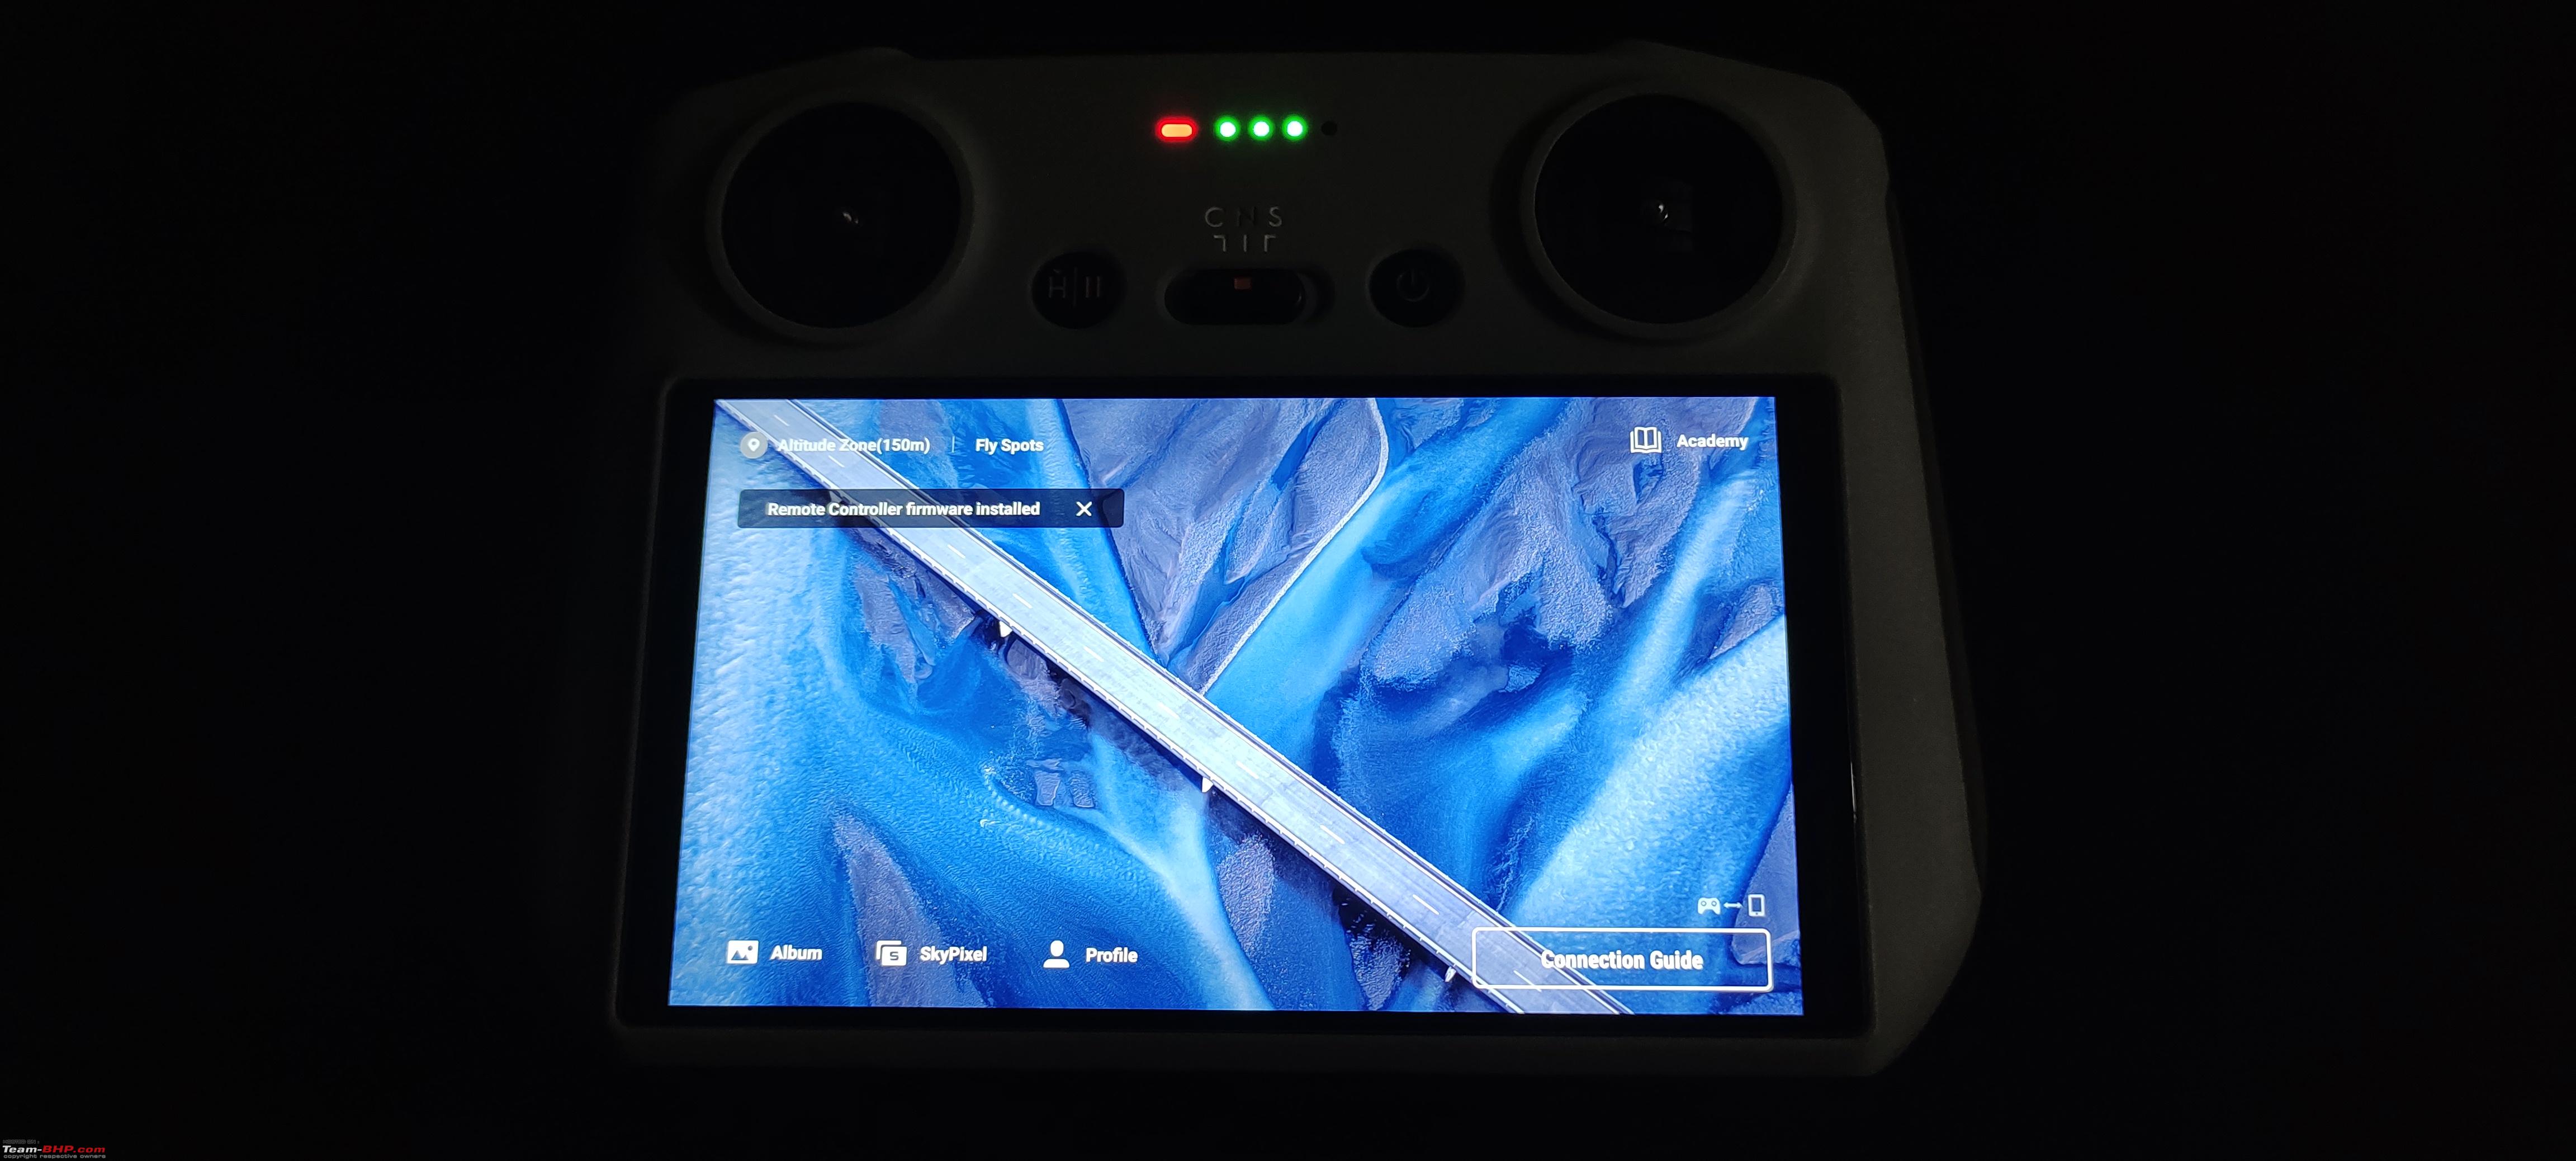 Offline maps feature is now available in the RC: 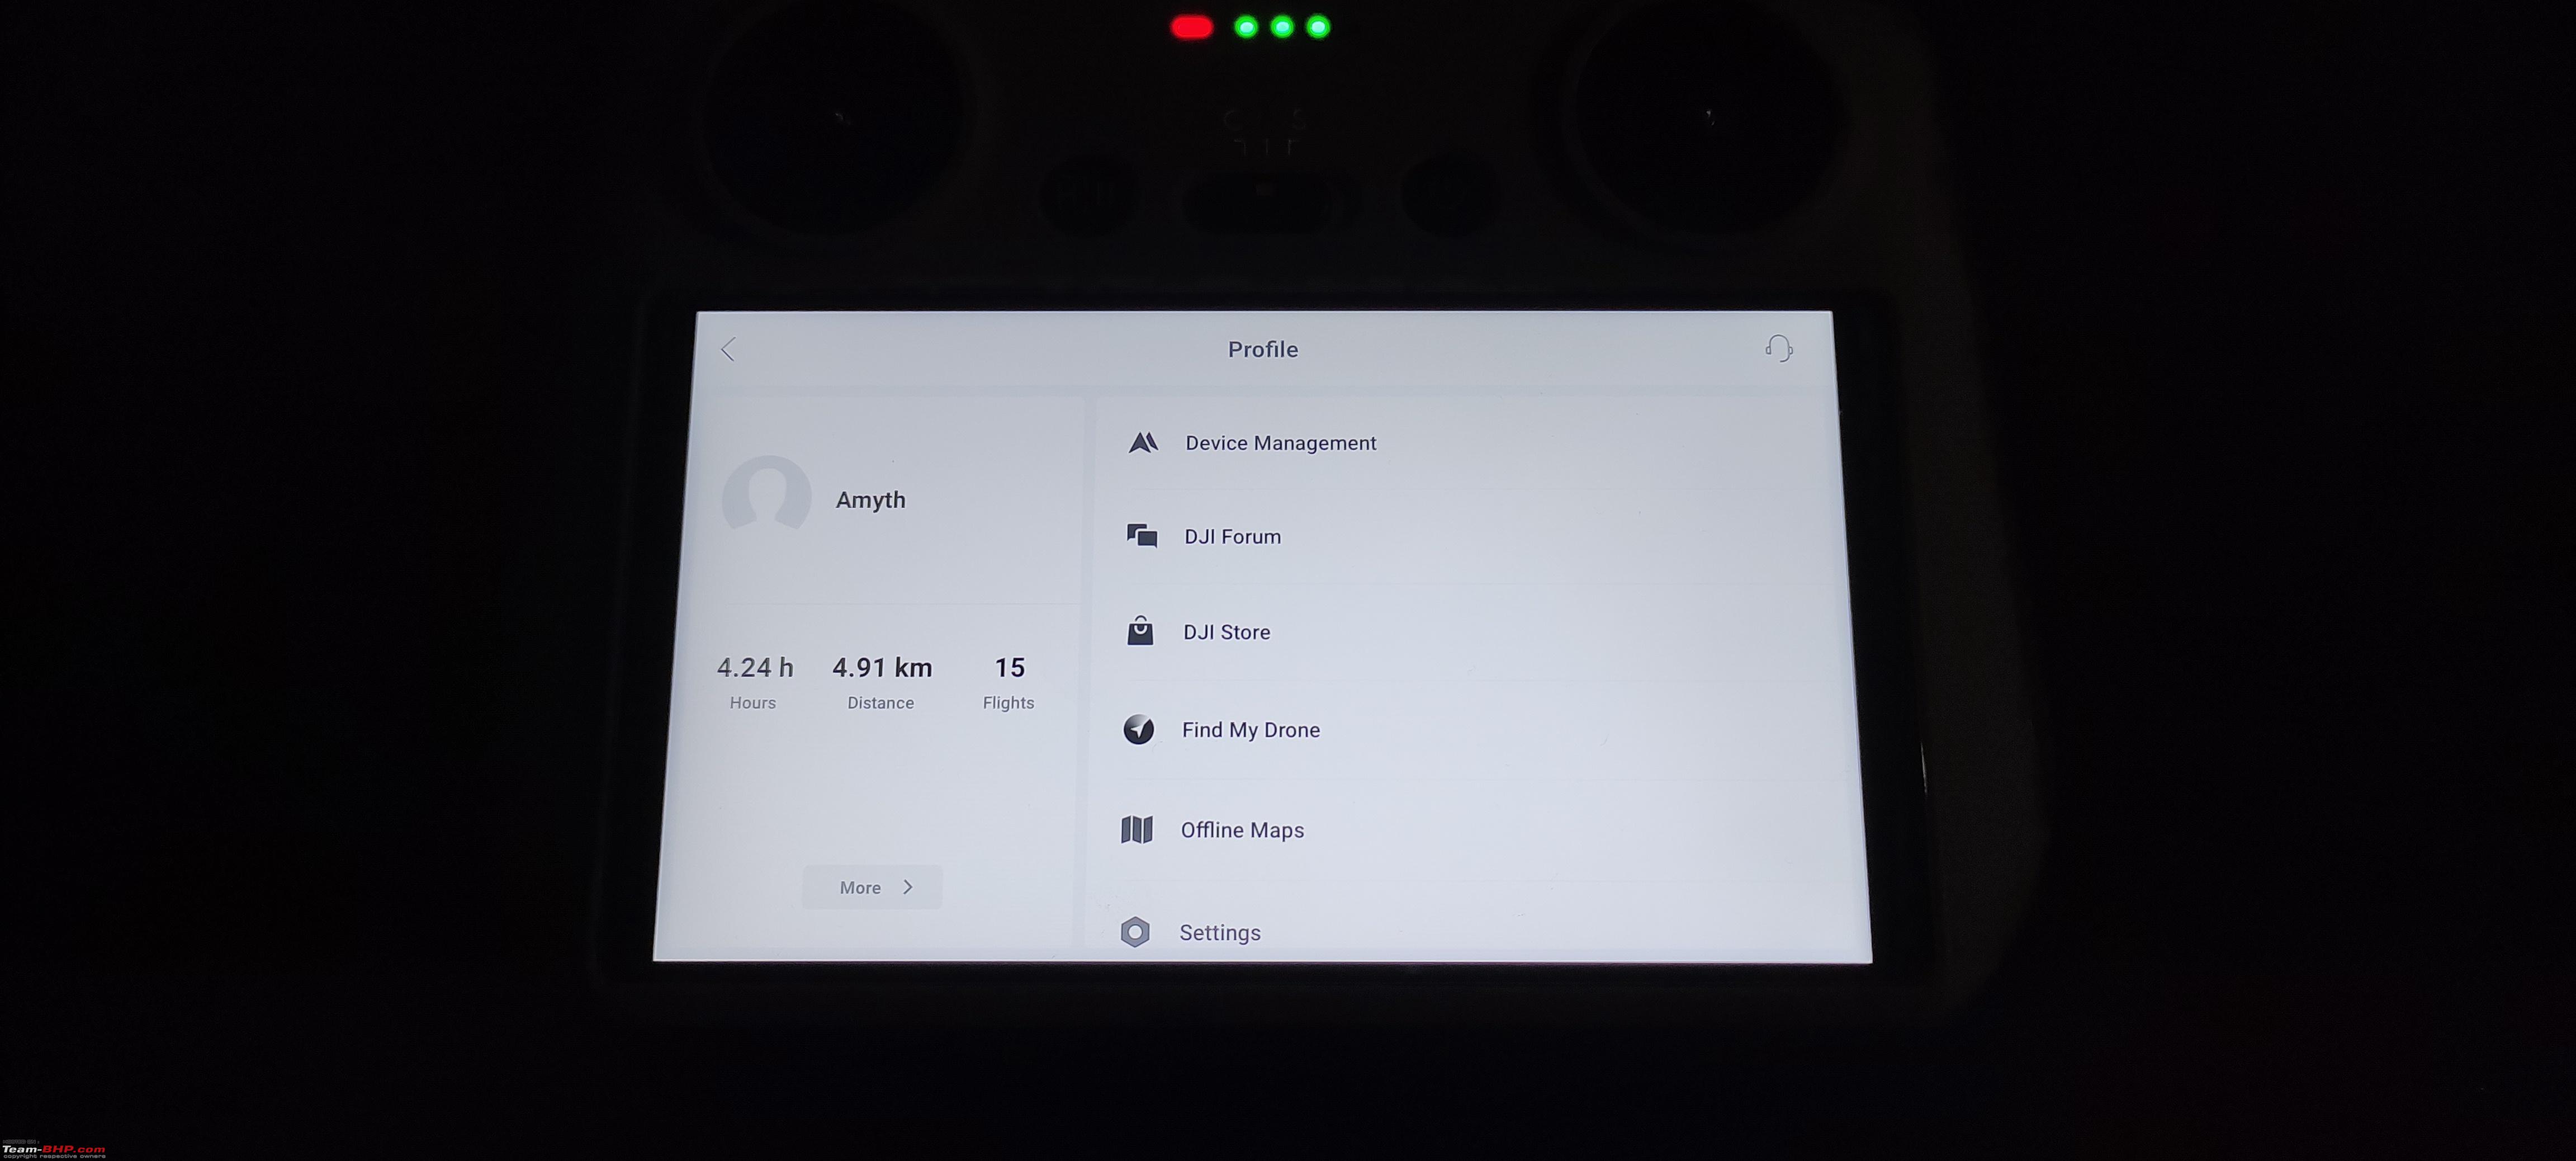 Well that's all I had for now !  Thanks for your time and attention !! Last edited by Amyth Prabhakar : 11th December 2022 at 23:17. |
|
| (43)
Thanks
|
| The following 43 BHPians Thank Amyth Prabhakar for this useful post: | aeroamit, audioholic, BoneCollector, brownkaiser, camitesh, CEF_Beasts, d3mon, digitalnirvana, fiat_tarun, graaja, GTO, Highh5, izzikio_rage, JoshMachine, KarthikK, kayvwar, Keynote, kiranknair, kung_foo_fanta, k_ajay, MotoBlip, NerdyMillennial, NewUser123, NitSat, ph03n!x, pramods, Roy.S, saikarthik, Samfromindia, shyamg28, Siva Prakash, SlowRider, somspaple, spindoc, SRISRI_90, SS4, StrikerK, swe.desi, TSIboy, Vasuki, vsrivatsa, xsrahul, yashg |
|
12th December 2022, 05:23
| #11 |
| Team-BHP Support  | Thread moved out from the Assembly Line. Thanks for sharing! Last edited by Aditya : 12th December 2022 at 05:25. |

| (2)
Thanks
|
| The following 2 BHPians Thank Aditya for this useful post: | digitalnirvana, GTO |
| |
|
12th December 2022, 11:28
| #12 |
| BHPian Join Date: Feb 2009 Location: Pune
Posts: 248
Thanked: 915 Times
| Re: Dji Mini 3 Pro Review | The Best Nano Drone What an incredibly detailed thread and account. For someone like me who has zero knowledge about the subject, this is an excellent reference. Have always wanted a drone but it gets pushed down in my list of things to buy! haha Sometime soon though! Thanks for sharing your full experience. |
|
| (2)
Thanks
|
| The following 2 BHPians Thank nitrogary for this useful post: | izzikio_rage, SRISRI_90 |
|
12th December 2022, 12:13
| #13 |
| Distinguished - BHPian  Join Date: Jun 2012 Location: BengaLuru
Posts: 5,657
Thanked: 19,395 Times
| Re: Dji Mini 3 Pro Review | The Best Nano Drone Incredible and exhaustive review. I am also having quite a lot of fun with my Mavic Mini and am considering an upgrade to the Mini3 sometime next year. One FAQ is the experience with customs upon arrival in India. Just the drone and the fly more combo usually doesnt attract attention but since you had the huge case, was this allowed without questioning? |
|
| (3)
Thanks
|
| The following 3 BHPians Thank audioholic for this useful post: | digitalnirvana, ruzbehxyz, vsrivatsa |
|
12th December 2022, 12:47
| #14 | ||
| Senior - BHPian Join Date: Jan 2014 Location: Bangalore
Posts: 1,621
Thanked: 4,001 Times
| Re: Dji Mini 3 Pro Review | The Best Nano Drone Superb Review! And thanks for providing a live demo of the Mini for my son at home! Quote:
Quote:
| ||
|
| (2)
Thanks
|

| The following 2 BHPians Thank vsrivatsa for this useful post: | digitalnirvana, gauravanekar |
|
12th December 2022, 12:59
| #15 |
| BHPian | Re: Dji Mini 3 Pro Review | The Best Nano Drone Great review. You got a killer price there at 90K with a ton of accessories. How did you carry it all on the flight? Did you bring the boxes or discarded them at the airport? Happy flying |
|
| ()
Thanks
|
|