| |||||||

| Search Forums |
| Advanced Search |
| Go to Page... |
 |
| Search this Thread |  1,802,450 views |
 24th November 2015, 11:54
| #691 | ||
| Team-BHP Support  Join Date: Apr 2013 Location: Madras
Posts: 7,174
Thanked: 20,220 Times
| re: VW Polo GT TDI ownership log. EDIT: Gujarat >> Chennai! Quote:
 Any reason you didn't opt for the extended warranty? Leave aside the electrics, I wanted the other bits (engine, gearbox, fuel, cooling system) to be covered at least till the vehicle clocks 1L km. Suspension will be a goner once we upgrade to a new set of aftermarket shocks anyway but not too worried about this system for the moment. Quote:
Last edited by Gannu_1 : 25th November 2015 at 08:02. Reason: Missed a word. | ||

|  (1)
Thanks (1)
Thanks
 |

| The following BHPian Thanks Gannu_1 for this useful post: | Chethan B G |
| |
|
28th November 2015, 21:32
| #692 | |
| Team-BHP Support Join Date: Apr 2013 Location: Madras
Posts: 7,174
Thanked: 20,220 Times
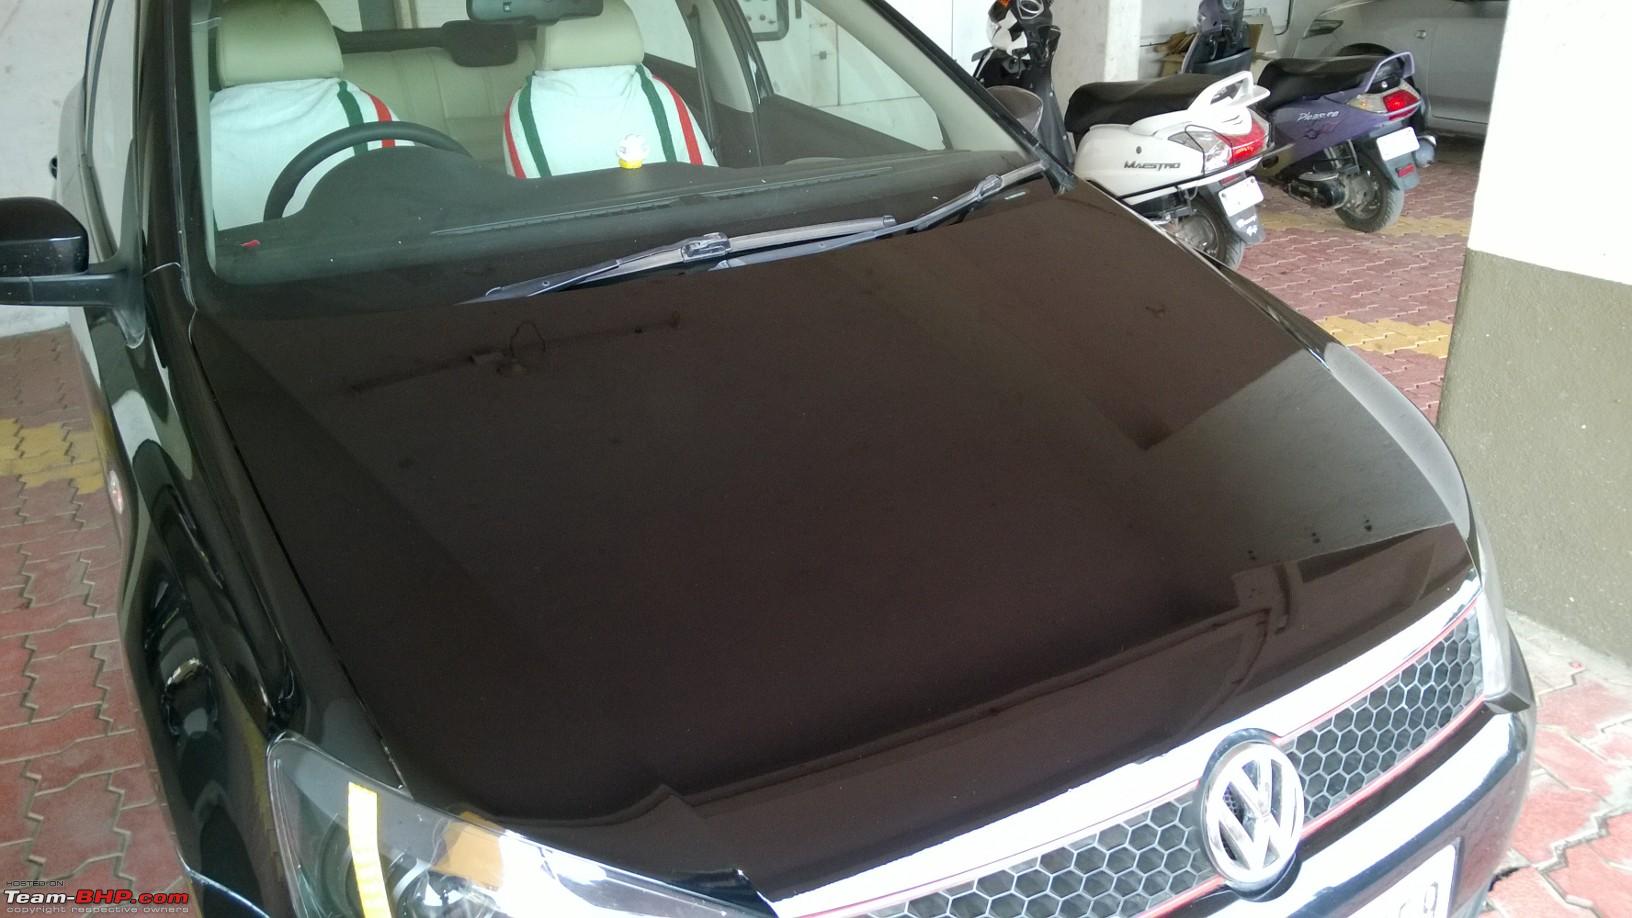
| re: VW Polo GT TDI ownership log. EDIT: Gujarat >> Chennai! Couple of instances to report.
Also figured out that while scrolling through the phonebook contacts on the MFD using the steering wheel buttons, long pressing the top/bottom buttons would cycle through the first alphabet of the contacts. So getting to a contact whose name starts with say M or N, this is easier instead of scrolling through one by one. I dont use voice dialing - its a pain sometimes! BTW, here are some modifications in the pipeline:
Got the price from the local service center for some parts today: 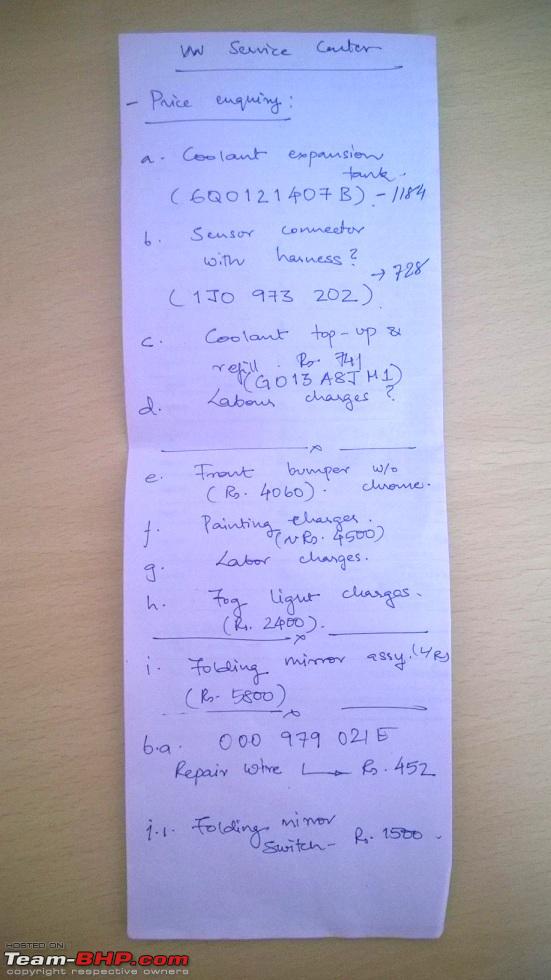 Quote:
 OK leaving all that aside, I have begun the research for the dream DIY I wish to do next year. And every day I end up learning something new towards this cause! If all goes well (finances, parts availability, research and data, support from service center), I am all set! And if it is successfully completed, it will be one hell of an achievement for me! No, it is not the OEM bi-xenon headlamps or rear disc brakes. I am happy with the current setup. Last edited by Gannu_1 : 30th November 2015 at 09:44. | |
|
| (7)
Thanks
|


| The following 7 BHPians Thank Gannu_1 for this useful post: | Chethan B G, execve, Jamsukh, JoseVijay, paragsachania, VeluM, Vik0728 |
|
29th November 2015, 17:13
| #693 | |
| Senior - BHPian | re: VW Polo GT TDI ownership log. EDIT: Gujarat >> Chennai! Quote:
 Some really low lying scum bags can even think of vandalising a well maintained car. I could care less if its a kid or a moron, I just can't imagine excusing such pathetic lives  I am really glad that you stead is back in all its glory and with the set of additions you have planned, I think this may well become the most exclusive Polo in INDIA soon. | |
|
| (2)
Thanks
|
| The following 2 BHPians Thank Vik0728 for this useful post: | Chethan B G, Gannu_1 |
|
29th November 2015, 17:40
| #694 |
| BHPian Join Date: Mar 2014 Location: Bombay
Posts: 67
Thanked: 188 Times
| re: VW Polo GT TDI ownership log. EDIT: Gujarat >> Chennai! Sorry to hear about your experience with the fool in the suv and the scratches on the bonnet. Great call on letting it go because children definitely don't deserve the unpleasantness.The VW service centre has done a real decent paint job though. Waiting eagerly for your DIY on the puddle lamps, thats something i've been wanting to do. Would you be getting the VW logo ones? |
|
| (1)
Thanks
|
| The following BHPian Thanks famousshoes for this useful post: | Gannu_1 |
|
30th November 2015, 12:24
| #695 |
| BHPian Join Date: Sep 2015 Location: Bangalore
Posts: 87
Thanked: 37 Times
| re: VW Polo GT TDI ownership log. EDIT: Gujarat >> Chennai! Gannu, really sorry to hear about the rear bumper and the scratches at the GT logo as I can understand the pain. There were two such incidents happened to my white GT once while coming on Bellandur Flyover when an auto rickshaw rammed into my car's rear bumper and I had to excuse the auto driver as he is old enough to drive an auto but luckily no damage to the bumper and the rubbing compound had taken away the complete scratches and then I applied a little candy white nailpolish to fix the deep starches which were very minute and the final outcome was not bad at all. Secondly, while I stopped at a Signal near Bommanahalli, a drunken motor cyclist hit from behind and ran away and it was his bike's tire which hit my car's rear bumper, rubbing compound was very effective to treat it but sadly, I had to pay the price for the left tail light which was completely damaged by the bike's handle. Note: Rubbing compound is very effective but after few washes it fades away and exposes the scratches underneath to some extent. Coming to the Trendz garage, I feel these guys have become too busy now a days or they have decided not to take up minor works like small touch-ups as I took my car for these two times and they were not ready to handle it and kept my work postponed for couple of times. Also they were quoting too much for minor touch-up works. So, I did the work by my own with just a rubbing compound. |
|
| (1)
Thanks
|
| The following BHPian Thanks keeru for this useful post: | Gannu_1 |
|
11th December 2015, 11:10
| #696 |
| BHPian Join Date: Jan 2006 Location: delhi
Posts: 380
Thanked: 295 Times
| re: VW Polo GT TDI ownership log. EDIT: Gujarat >> Chennai! Hi Gannu, Would you be able to help me identify location of clips to remove lower grill from the front bumper in Vento 2015 facelift. http://www.team-bhp.com/forum/indian...ml#post3860794 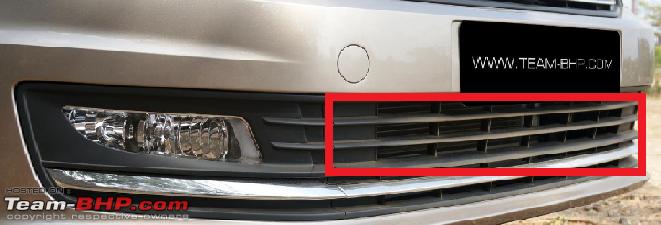 Regards. |
|
| ()
Thanks
|
|
26th December 2015, 08:36
| #697 | |
| Team-BHP Support Join Date: Apr 2013 Location: Madras
Posts: 7,174
Thanked: 20,220 Times
| re: VW Polo GT TDI ownership log. EDIT: Gujarat >> Chennai! 55,000 km up!  The car has been running just fine. *touchwood* Winters are here and I dont turn on the AC during the morning drives; I prefer to have the recirculation mode off with the windows rolled up. No misting on the windshield or windows thus. Cruise control has helped immensely! Check out the fuel efficiency during the last tankful: Distance traveled: 914.5 km  Fuel filled (tankful to tankful): 39.61 l  FE: 23.08 km/l Have some things lined up for the next month. Shall update this thread shortly. Quote:
| |
|
| (8)
Thanks
|
| The following 8 BHPians Thank Gannu_1 for this useful post: | Aakarsh, frankmehta, hemanth.anand, iliketurtles, paragsachania, planet_rocker, psispace, Vik0728 |
|
30th December 2015, 07:38
| #698 |
| BHPian Join Date: Feb 2014 Location: Mohali
Posts: 261
Thanked: 236 Times
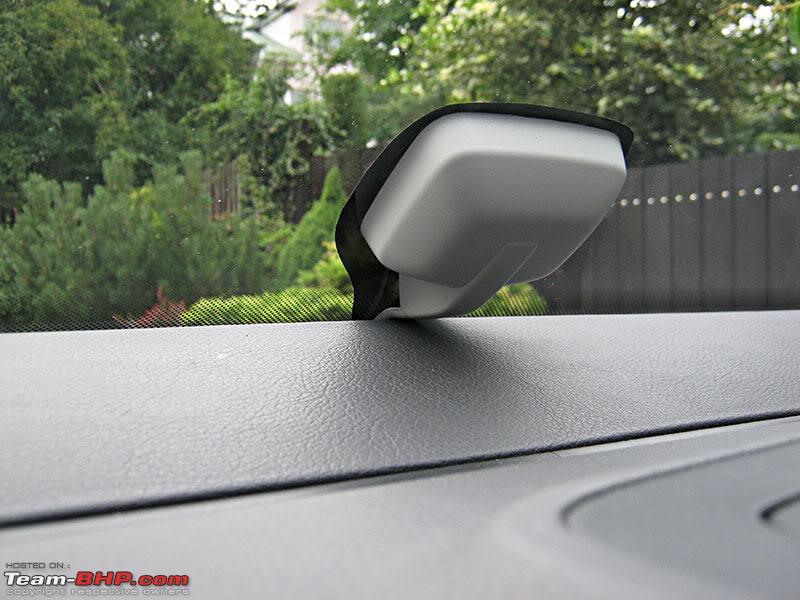
| re: VW Polo GT TDI ownership log. EDIT: Gujarat >> Chennai! Gannu Bhai need your help for installation of Auto Dimming Mirror. I want to know how to remove the existing mirror from the front glass? Also if you could guide me for what are the components we need for installation of auto folding mirror? |
|
| ()
Thanks
|
|
30th December 2015, 08:37
| #699 | ||
| Team-BHP Support Join Date: Apr 2013 Location: Madras
Posts: 7,174
Thanked: 20,220 Times
| re: VW Polo GT TDI ownership log. EDIT: Gujarat >> Chennai! High 5!   Quote:
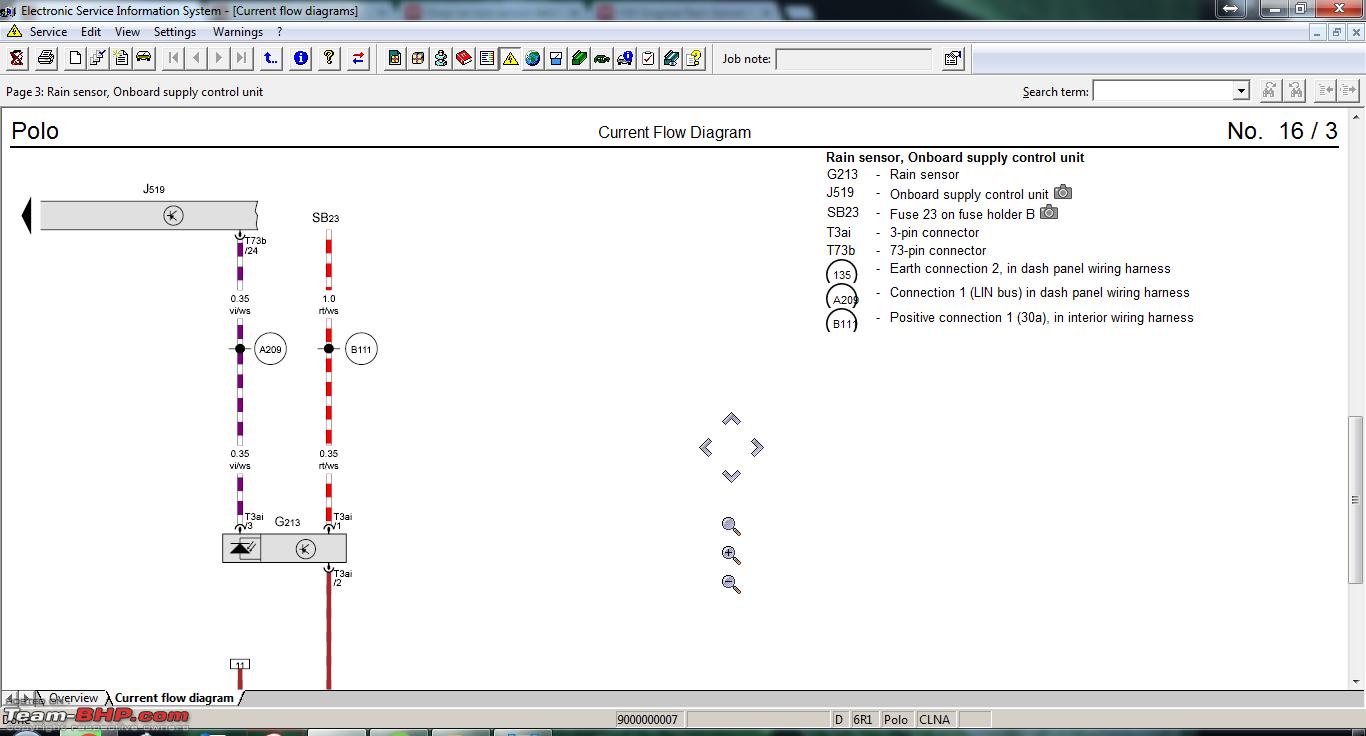
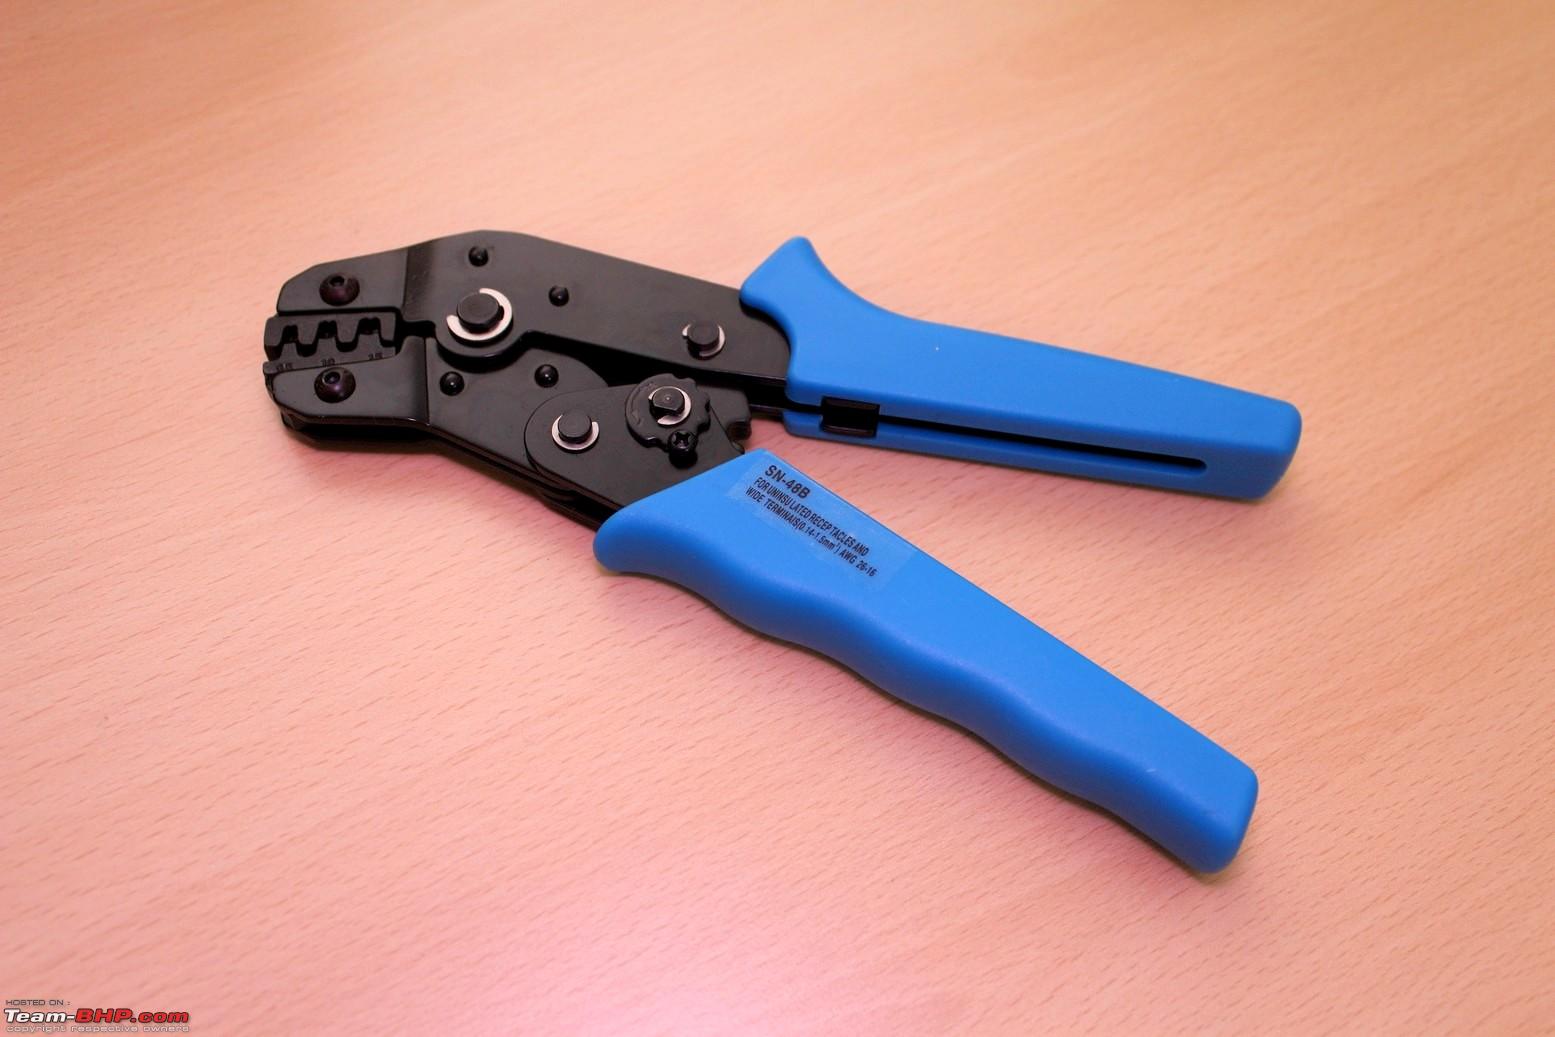
 As for the connections - connect the GND to a fastener anywhere on the body and tap the +12 V from the fuse boxs empty slot (eg. no. 24) using a fuse tap connector. Refer Anurags DIY thread for the details. Quote:
| ||
|
| (2)
Thanks
|
| The following 2 BHPians Thank Gannu_1 for this useful post: | iliketurtles, samaspire |
|
30th December 2015, 08:44
| #700 | |
| Senior - BHPian Join Date: Jun 2015 Location: Chicagoland
Posts: 2,986
Thanked: 6,859 Times
| re: VW Polo GT TDI ownership log. EDIT: Gujarat >> Chennai! Quote:
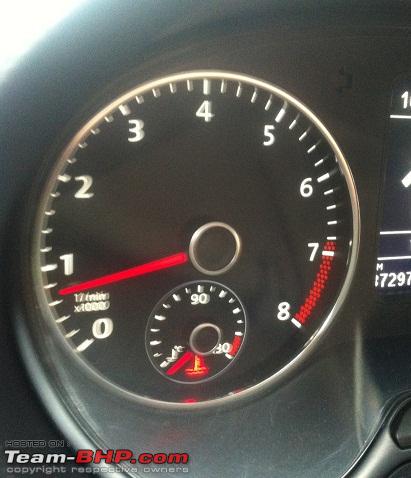
Why does the redline start at 6800 RPM?  Please change the title of the thread if not updated. | |
|
| (1)
Thanks
|
| The following BHPian Thanks landcruiser123 for this useful post: | samaspire |
|
30th December 2015, 09:32
| #701 | |
| BHPian Join Date: May 2014 Location: Gurgaon
Posts: 414
Thanked: 266 Times
| re: VW Polo GT TDI ownership log. EDIT: Gujarat >> Chennai! Quote:
If you follow his threads, he installed TSi cluster on his TDi. Hope this answers. | |
|
| (1)
Thanks
|
| The following BHPian Thanks Crazy_Bean for this useful post: | Gannu_1 |
| |
|
1st January 2016, 14:18
| #702 | |
| BHPian Join Date: Jan 2006 Location: delhi
Posts: 380
Thanked: 295 Times
| re: VW Polo GT TDI ownership log. EDIT: Gujarat >> Chennai! Quote:
Could you please help with following questions 1. I want to add parking sensors on the front bumper, would following part suffice and how this is different from the 8K unit you are planing to buy. I believe one difference in number of sensors (8 vs 4). Product name from AE: "OEM VW Rear OPS 4K Park Pilot 4 Parking Sensors Kit For Volkswagen New Polo 6R PQ25 6R0 919 475" Rear parking sensors are already there without ops. 2. Is it possible to integrate existing rear parking sensor with new front, so that we are able to reuse some components or we need 8K unit for integrated front and rear parking sensor? Regards. Last edited by antardaksh : 1st January 2016 at 14:19. | |
|
| ()
Thanks
|
|
1st January 2016, 14:44
| #703 | ||
| Team-BHP Support Join Date: Apr 2013 Location: Madras
Posts: 7,174
Thanked: 20,220 Times
| re: VW Polo GT TDI ownership log. EDIT: Gujarat >> Chennai! Quote:
Quote:
| ||
|
| (1)
Thanks
|
| The following BHPian Thanks Gannu_1 for this useful post: | frankmehta |
|
27th January 2016, 13:09
| #704 |
| BHPian Join Date: Jan 2016 Location: Bangalore
Posts: 61
Thanked: 58 Times
| re: VW Polo GT TDI ownership log. EDIT: Gujarat >> Chennai! Hi Gannu, Let me first congratulate on your brilliant ownership report. I have gone through your thread countless times. All the DIY's that you have carried out are brilliant and some requires in depth automotive knowledge. Hats off to you. Glued to this thread big time. Waiting for your next update |
|
| (1)
Thanks
|
| The following BHPian Thanks CarMaster for this useful post: | Gannu_1 |
|
22nd February 2016, 08:58
| #705 |
| Team-BHP Support Join Date: Apr 2013 Location: Madras
Posts: 7,174
Thanked: 20,220 Times
| re: VW Polo GT TDI ownership log. EDIT: Gujarat >> Chennai! It’s been a while since the last update. The car has clocked 60,000 km and was serviced last week. I’ve summarized everything below including some changes and DIY work recently carried out.
That would be all. The next major upgrade would be the suspension. On every other weekend, there's something or the other to fiddle around with the car.  Last edited by Gannu_1 : 22nd February 2016 at 16:35. Reason: Adding some details missed out. |
|
| (55)
Thanks
|


| The following 55 BHPians Thank Gannu_1 for this useful post: | ACMohan, aeroamit, anilntny, AppyS, Arun.K, arun_josie, auto_enthusiast, a_bharadwaj, bharatbs, BigBrad, bosporus, brainstormer, bsdbsd, Chethan B G, Crazy_cars_guy, deetjohn, Desmosedici, Dr.AD, el lobo 6061, execve, F2005, fiat_tarun, frankmehta, fusionbang, ganesc, gpa, graaja, Grand Drive, GTO, Horizon81, johannskaria, keeru, mp417, Mr_Bean, naveenroy, paragsachania, PearlJam, petrolhead_neel, planet_rocker, psispace, Rajeevraj, rakesh_r, S2!!!, shreyak_ss, shreyascashyap, SnS_12, Srikanthan, SunnyBoi, swiftnfurious, Thad E Ginathom, Thar4x4, tifoso, Turbohead, Vik0728, vinayrathore |
|