Team-BHP
(
https://www.team-bhp.com/forum/)
Quote:
Originally Posted by rana_kirti
(Post 3556904)
1. where can i buy that white plastic part ? order online or any local store ?
2. you cut GTI black plastic part and stuck the GT on it right ?
3. which version of Araldite did you use ? i went to their website and got confused ? also where can i buy it ? order online or local store ?
|
1. Local hardware store that deals with plumbing and sanitary items.
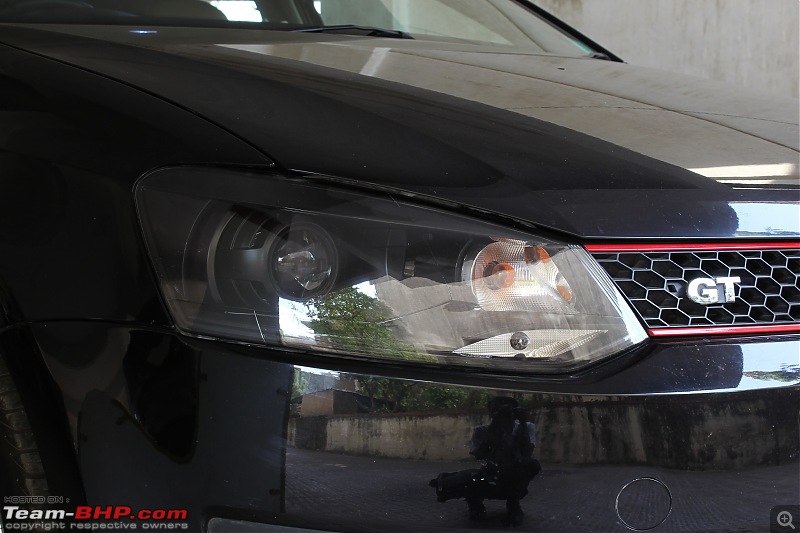
2. Correct. The G, T and I from the black plastic part comes off quite easily. Trim the backplate to fit the stock GT logo.
3. Not sure of the version. Ask the hardware store for Araldite and theyll give you a pack which has 2 tubes inside - resin and hardener in blue and white outer shades. Remember to clean the surface thoroughly (sand it if need be), squeeze equal amounts from both the tubes, mix them well and apply the mixture on the surface. Leave it to cure for a day. This is an epoxy adhesive and takes time to cure and set in. Unlike the instant cyanoacrylic adhesives like Fevi kwik.
Quote:
Originally Posted by deetjohn
(Post 3556915)
Can it be moved a bit to the right? I can see a hole besides the 'T'. Or will it expose a a similar hole on the left?
|
Thats right Deepak. It will expose a hole on the left. Unless noticed carefully up close, the hole on the right is not visible. :)
Quote:
Originally Posted by deetjohn
(Post 3556915)
The workman ship on the seat looks very good. A steal for that price. But I would have retained the stock covers. That Milan' Titanschwarz fabric upholstery is one of the best offered. A personal choice really. :)
|
The stock fabric upholstery was very comfortable - no doubts on that but this one looked much better. A notch less comfortable and the PU material makes some noise as you sit. Maintenance with beige shades are a big pain! I am realizing it now. I end up cleaning the seats every weekend! :Frustrati
thanks forgot to ask, you stuck the GT to the plastic also with araldite or 3m double sided tape ?
I hope it's easy to remove if need be or rather I hope it doesn't fall of easily.
would you know the adhesive used on the oem GT emblem ? it was grey in color.
cheers.
Quote:
Originally Posted by rana_kirti
(Post 3557185)
thanks forgot to ask, you stuck the GT to the plastic also with araldite or 3m double sided tape ?
|
No double sided tape used anywhere. Araldite was used for both - sticking GT to the backplate and backplate to the plastic screw. Don't use the double sided tape - peels off especially after the logo is exposed to a lot of heat.
Quote:
Originally Posted by rana_kirti
(Post 3557185)
would you know the adhesive used on the oem GT emblem ? it was grey in color.
|
I think it is some epoxy glue. It took a while to come off the stock grill.
Quote:
Originally Posted by Gannu_1
(Post 3557044)
The stock fabric upholstery was very comfortable - no doubts on that but this one looked much better. A notch less comfortable and the PU material makes some noise as you sit. Maintenance with beige shades are a big pain! I am realizing it now. I end up cleaning the seats every weekend! :Frustrati
|
I really like the way it looks as well. Also love that Interlagos trim VW use in GTI. :D
The downside of using artificial leather is less comfort and them getting soiled with ease. Pure leather is much more easier to live with. I have a can of
Gulf MultiAuto Cleansing Foam and it works really well on light colored trim.
Awaiting your Projector install, Gannu. I hope you are accounting for the lack of light throw of Aftermarket projector headlights
bro all equipment in place but got stuck again. how do i trim the black plastic part ? not able to do it with scissors.
any particular tool that'll help me trim it easily to the desired contour/shape...?
thanks.
Quote:
Originally Posted by frankmehta
(Post 3557862)
I hope you are accounting for the lack of light throw of Aftermarket projector headlights
|
Not sure about it Frank. I'd know after the installation. Will hopefully be done by the end of the month. We intend to take it up next weekend.
Quote:
Originally Posted by rana_kirti
(Post 3557918)
how do i trim the black plastic part ? not able to do it with scissors.
|
Excellent! You are set. Just that you would need a sharper tool and not just scissors. :)
I have this Stanley utility blade I had bought off eBay for my glovebox lamp mod
link. Cuts through plastic with ease.

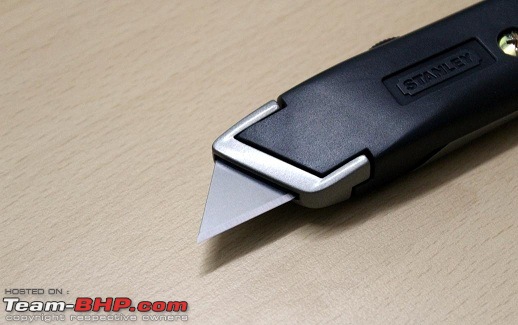
Place the letters G and T on that backplate and mark the rightmost tip of T using the blade. Now, use a steel rule, hold the backplate firmly and run this knife multiple times through a straight line (marked in yellow in the image below) where you just made the mark. The end would simply come off now.

Now use the Araldite as I had instructed but remember do not do excess of it. Or better still, use Fevi Kwik to fix the letters to the backplate and use Araldite to fix the screw to the backplate.
hi gannu,
just an extension to your idea. I filed away the plastic bits on the right honey comb with a slim taper file and now it looks like stock.
I intend to now stick the GT which i prepared overnight over the remaining left and center honeycomb where the black plate clips went in and it should look stock without any holes exposed.
should I use araldite for this. what say ?
cheers. :-)
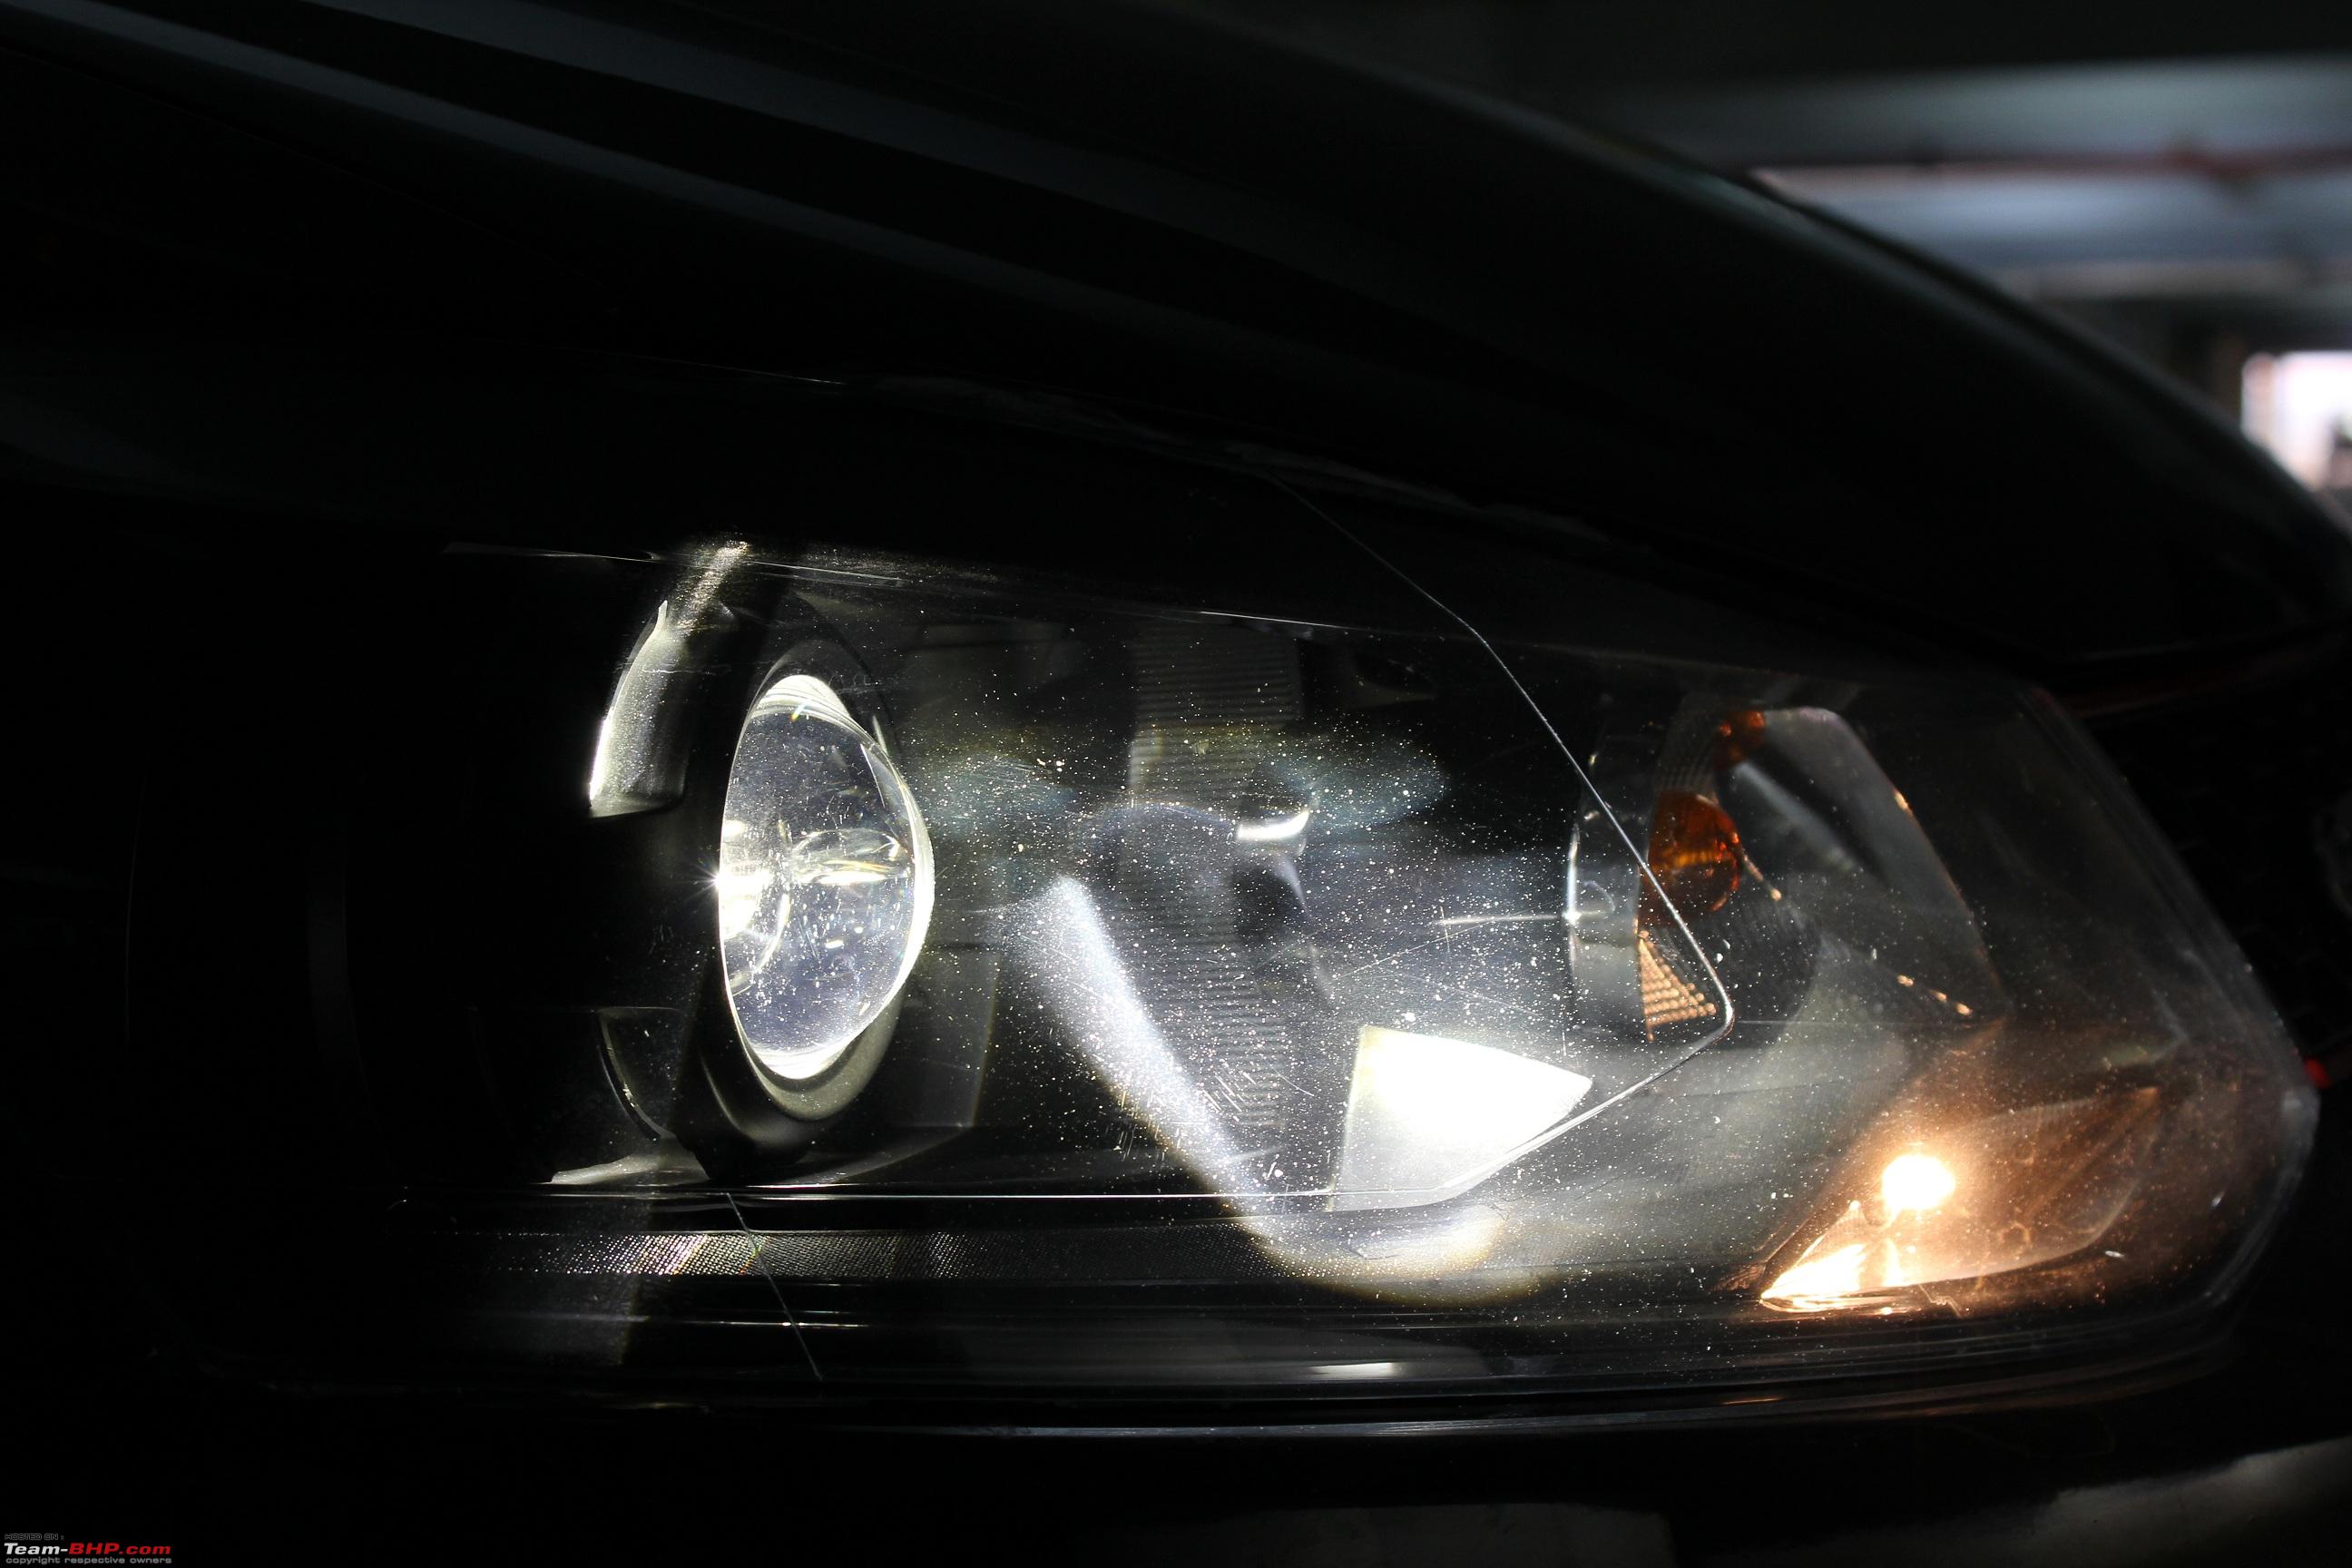
Finally, after 3 long painful weeks (perks of not being a bachelor anymore!) of waiting and hard work, the Morimoto Mini D2S Stage III bi-xenons have been retrofitted onto the stock headlights:


Unfortunately we couldn’t fine tune the cutoff for a perfectly horizontal/parallel line but we managed this after some trial and error:


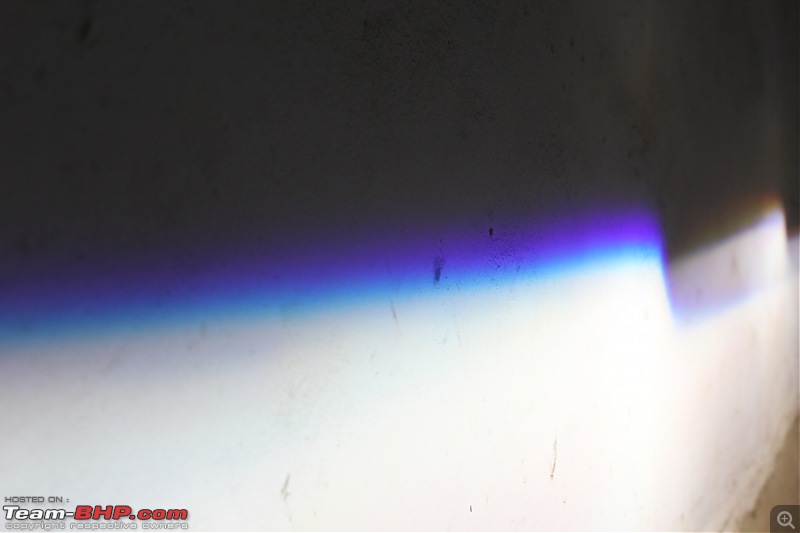
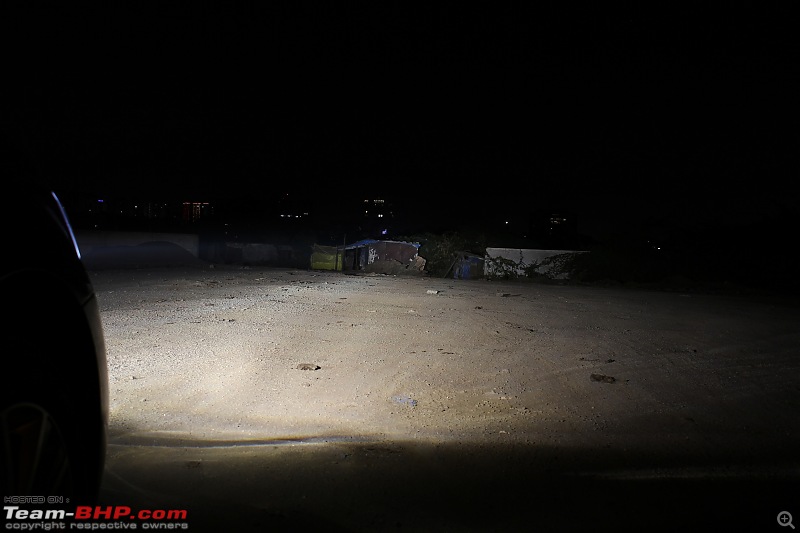
Night-time visibility has improved drastically - the throw is longer and the intensity of the beam is higher than the stock H4 halogen bulbs with a pleasant white light. Currently, the projectors are using Osram Xenarc 66240 D2S bulbs rated at 35 W, 4100 K and 3200 lm.
Before and after shots - same spot (open plot and no lights) and same camera settings (ISO 160, f/5, 0.6 s).
Before (Osram Nightbreaker Unlimited H4 60/55 W):
Low beam:

High beam:

.gif:
Imgur After (Morimoto Mini D2S 3.0 + Osram Xenarc 66240 4100K + 35W ballasts):
Low beam:

High beam:
.gif:
Imgur
Have clicked a short clip while driving the car through an unlit road but doesn’t highlight the intensity of the projector much (will try clicking another one):
http://www.youtube.com/watch?v=3YIEZiSm1vM
The entire DIY was done in-house with the assistance of my trusted ex-roomie, best friend and partner-in-crime - Moorthy, along with the support of my wife. Things would not have moved an inch further without the home ministry’s nod and approval. My heartfelt gratitude to Kedar Desai, a good friend from Bangalore whom I had interacted with on the HID Planet forums and over WhatsApp. You were of immense help during the course of this DIY. Thank you so much Kedar! I owe you one. And finally, Sreejith for lugging the Morimoto components from the US all the way to Palakkad.
As always, a detailed thread on the DIY - how to, all the tools and parts required, the roadblocks we met, the solutions and
jugaad we eventually came up with, the purchase experience from TRS and AVS Tuning, the entire DIY experience - will be up in a week’s time. Stay tuned. :)
Its now time you either re-badge your Polo or get a European registration number done and pay import duty for the whole car! Apart from Fuel & the driver, everything seems retrofitted & non India spec clap:.
Waiting for the DIY pics and explanation as usual.
Quote:
Originally Posted by Gannu_1
(Post 3576568)
Finally, after 3 long painful weeks (perks of not being a bachelor anymore!) of waiting and hard work, the Morimoto Mini D2S Stage III bi-xenons have been retrofitted onto the stock headlights
|
When I read "after 3 long painful weeks" related to retrofitting projector DIY, I felt nostalgic. It IS painful and the amount of patience required for the fine work involved in this DIY is something only a DIY specialist would understand in its true sense. Grinding the reflector unit to millimeter perfection and handling it without a scratch till project completion, finding ways to do a proper fitting of the projectors that will take the punishment of broken roads, achieving the precision alignment of the beam, managing the dust this work kicks up, all that noise and garbage generated from the work.. It DOES take lot of skill, time and patience. The dose of satisfaction this DIY gives you would last longer than your other projects. I know the hard work that goes into this job.
Quote:
Originally Posted by Gannu_1
(Post 3576568)
Unfortunately we couldn’t fine tune the cutoff for a perfectly horizontal/parallel line but we managed this after some trial and error
|
The cut off is great Gannu. I don't see a need to fine tune it further if at all you have run out of head light adjustment range (those manual adjusters). And since the very minute tilt (not big enough to be mentioned, but since you pointed it out..) is in advantage of RHD, it is very much safe and wont dazzle oncoming traffic at all. Don't worry about it. Looks good. Though I have 1 doubt. Why is the scattering of RH projector not as prominent as the LH ones? The scattering gives it the colorful sparkle which makes it look good. One car with that noticeable colorful sparkle (more than other cars few years back) on our roads was Laura. Now there are many.
Quote:
Originally Posted by Gannu_1
(Post 3576568)
Night-time visibility has improved drastically - the throw is longer and the intensity of the beam is higher than the stock H4 halogen bulbs with a pleasant white light. Currently, the projectors are using Osram Xenarc 66240 D2S bulbs rated at 35 W, 4100 K and 3200 lm
|
That's the best HID bulbs you got. Is it 4,100K or 4,300K? Was in my wish list too when I was sourcing parts for upgrade. But currently running Philips D1S HIDs and actually quite impressed with it. But Xenarc NBU is the leader, no doubt!
Quote:
Originally Posted by Gannu_1
(Post 3576568)
As always, a detailed thread on the DIY - how to, all the tools and parts required, the roadblocks we met, the solutions and jugaad we eventually came up with, the purchase experience from TRS and AVS Tuning, the entire DIY experience - will be up in a week’s time. Stay tuned. :)
|
That would be a great help for those who venture out into DIYs like us. The amount of data collection that goes into the preparation of each DIY is huge, you would know that. While most DIYs are from US or EU, problem for us Indians is finding cost/availability/sourcing details. So details from a DIY-er in India would be of great help to the guys here wanting to try these stuff. I couldn't be a member to share the info. when I did the DIY years back. Back then there were not even after market projector retrofitted head lamps (forget DIYs like you see on our forum today) available like today. Good you have the chance to share all the info. and you religiously do it too. Keep it up! :thumbs up
Great work Ganesh. So finally it's up after a long time. Had any trouble fixing the ballast?
Quote:
Originally Posted by paragsachania
(Post 3576600)
Waiting for the DIY pics and explanation as usual.
|
Thread in the works Parag bhai. This will be THE thread for anyone whos looking for the Mini D2S retrofit on the Polo or any other car. I can assure you that. :)
Quote:
Originally Posted by ajaypjayaraj
(Post 3577116)
The cut off is great Gannu. I don't see a need to fine tune it further if at all you have run out of head light adjustment range (those manual adjusters).
|
We did not observe the slight tilt of the driver side projector while fixing the epoxy glue. Not sure how it crept in. I am just glad it isn't too much!
Quote:
Originally Posted by ajaypjayaraj
(Post 3577116)
Why is the scattering of RH projector not as prominent as the LH ones?
|
I think the bulb has to be reseated after taking it out. My friend was also suggesting he had faced the same thing during his retrofit.
Quote:
Originally Posted by ajaypjayaraj
(Post 3577116)
That's the best HID bulbs you got. Is it 4,100K or 4,300K?
|
These Osrams are supposedly the OEM bulbs on many cars. It is 4100K as indicated in the spec sheet from Osram.
Quote:
Originally Posted by ajaypjayaraj
(Post 3577116)
Keep it up! :thumbs up
|
Thank you so much Ajay. Means a lot coming from established DIYers like you and Parag bhai. Appreciate it. :thumbs up
Quote:
Originally Posted by naveen.raju
(Post 3577384)
Great work Ganesh. So finally it's up after a long time. Had any trouble fixing the ballast?
|
No issues with fixing the ballasts Naveen. For the co-driver side, there is a small opening behind the headlight which had a hole. Mounted both, the ballast and the harness box on the same hole using the same hex. head bolt. For the driver side, there werent any open holes so we fixed the ballasts to the diesel filters column using a couple of zip-ties. It is a secure mount and wouldnt wobble. Everything will be on the DIY thread.
Great work. Was there any bulb failure error in polo after the install? If yes what was done to fix that?
Quote:
Originally Posted by abbey4u
(Post 3579232)
Great work. Was there any bulb failure error in polo after the install? If yes what was done to fix that?
|
The MID didn't throw any error or messages.
| All times are GMT +5.5. The time now is 07:57. | |