| |||||||

 |
| Search this Thread |  995,484 views |
 3rd July 2016, 10:57
| #106 | |
| Distinguished - BHPian  Join Date: Jul 2007 Location: MUMBAI
Posts: 3,060
Thanked: 5,353 Times
| re: The love of my life - A 2000 Maruti 800 DX 5-Speed. EDIT: Gets export model features on Pg 27 Quote:
Dear Shashi - take the battery out completely. My LHD fiat does not have a battery in it whenever it is n hibernation (it is in hibernation now due to monsoon). Also, cover the car completely with a big car's cover. I use the Honda City's cover for my fiats. Use flat shoe laces as ties, they don't loosen, even in windy conditions. Best regards, Behram Dhabhar | |

|  (11)
Thanks (11)
Thanks
 |

| The following 11 BHPians Thank DHABHAR.BEHRAM for this useful post: | AShubrah, baby_antu, blackwasp, karuvally, Leoshashi, MAKMADDY17, saket77, Scarlet_Rider, sidindica, sumitsinha0280, tacho9000 |
| |
|
3rd July 2016, 12:39
| #107 | ||
| Distinguished - BHPian | re: The love of my life - A 2000 Maruti 800 DX 5-Speed. EDIT: Gets export model features on Pg 27 Quote:
Quote:
My garage is like a large closed house, with no scope of wind, hence I haven't tied the cover (only a central plastic clamp is holding it from under the car).  I'm sure she'll survive this hibernation easily. However, its proving difficult for me to be away from my goose.  Regards, Shashi | ||
|
| (8)
Thanks
|
| The following 8 BHPians Thank Leoshashi for this useful post: | baby_antu, karuvally, MAKMADDY17, saket77, Scarlet_Rider, sidindica, sumitsinha0280, tacho9000 |
|
3rd July 2016, 21:27
| #108 | ||
| Distinguished - BHPian Join Date: Dec 2012 Location: Ranchi
Posts: 4,375
Thanked: 11,831 Times
| re: The love of my life - A 2000 Maruti 800 DX 5-Speed. EDIT: Gets export model features on Pg 27 Quote:
Quote:
The flat shoe lace is a great idea though. Regards, Saket. | ||
|
| (6)
Thanks
|
| The following 6 BHPians Thank saket77 for this useful post: | baby_antu, karuvally, Leoshashi, Scarlet_Rider, sumitsinha0280, tacho9000 |
|
4th July 2016, 15:22
| #109 | |
| Distinguished - BHPian Join Date: Jul 2007 Location: MUMBAI
Posts: 3,060
Thanked: 5,353 Times
| re: The love of my life - A 2000 Maruti 800 DX 5-Speed. EDIT: Gets export model features on Pg 27 Quote:
 . I pick up shoe laces from the general stores in the downmarket areas of town. A shoe lace which costs me 20 rupees in a dirty non-decrepit hole-in-the-wall shop, the same shoe lace will cost me 30 rupees with the railway station shoeshine man and the same shoe lace will cost me 150 rupees in the swanky shoe shop in a major mall! . . I pick up shoe laces from the general stores in the downmarket areas of town. A shoe lace which costs me 20 rupees in a dirty non-decrepit hole-in-the-wall shop, the same shoe lace will cost me 30 rupees with the railway station shoeshine man and the same shoe lace will cost me 150 rupees in the swanky shoe shop in a major mall! .Best regards, Behram Dhabhar | |
|
| (12)
Thanks
|
| The following 12 BHPians Thank DHABHAR.BEHRAM for this useful post: | baby_antu, GKMahajan, jeeva, karuvally, Leoshashi, MAKMADDY17, saket77, Scarlet_Rider, sidindica, sumitsinha0280, tacho9000, viXit |
|
28th November 2016, 17:29
| #110 |
| BHPian Join Date: Dec 2015 Location: Noida/Ranchi
Posts: 99
Thanked: 98 Times
| re: The love of my life - A 2000 Maruti 800 DX 5-Speed. EDIT: Gets export model features on Pg 27 Hey Shashi, It's been a while since you last updated this thread. How's your car doing? Any new upgradations? - Antu |
|
| (2)
Thanks
|
| The following 2 BHPians Thank baby_antu for this useful post: | Leoshashi, sumitsinha0280 |
|
1st December 2016, 22:23
| #111 | |
| Distinguished - BHPian | re: The love of my life - A 2000 Maruti 800 DX 5-Speed. EDIT: Gets export model features on Pg 27 Quote:
Stay tuned. Regards, Shashi | |
|
| (8)
Thanks
|
| The following 8 BHPians Thank Leoshashi for this useful post: | a4anurag, baby_antu, karuvally, MAKMADDY17, saket77, sidindica, sumitsinha0280, tacho9000 |
|
2nd December 2016, 07:18
| #112 |
| Senior - BHPian | re: The love of my life - A 2000 Maruti 800 DX 5-Speed. EDIT: Gets export model features on Pg 27 One of the best long term ownership reviews, and easily one of the best maintained cars! Brings back fond memories of my first car, a pre owned Maruti 800 5 speed. |
|
| (2)
Thanks
|
| The following 2 BHPians Thank honeybee for this useful post: | Leoshashi, sumitsinha0280 |
|
11th December 2016, 01:49
| #113 | |
| Distinguished - BHPian | Mega Update Firstly, RIP Behram Sir. This thread will never be the same without you. But given the hardcore petrolhead he was, I am sure he will find some time to shower his blessings on this thread, once he is done with lecturing the Gods on 4x4s and Fiats.  A lot of things have happened since the last update which last came out in June. I have tried a number of products, done some improvements, and most importantly, the car had a date with the bodyshop. New products tested- 1. Liqui Moly 5W40 Engine Oil- Since this thread is all about passion and my unconditional love for this car, I guess the spectators wont be surprised if I told them that I spent nearly 7k for an engine oil. Yes, my car finally got to run on Fully Synthetic engine oil. My last oil was Shell Helix HX7 10W40 semi synthetic, and I didnt use any flush to do the transition because firstly my car is a 16.5 year old example, with over 3lac kms, and still running on stock engine, and I didnt want to take any risk with the old oil seals. Secondly, the flush wont come out completely, and I didnt wish it to keep circulating in my engine forever. Liqui Moly 5W40  I also used Liqui Molys Ceratec additive, since I was impressed by the rave reviews it was getting. The engine oil cost me Rs. 3500 for 3.5L(We had purchased 7L, and the rest 3.5L was for BHPian Saket77s Zen) and the Ceratec came for Rs. 2,250.  Quoting Liqui Moly- Quote:
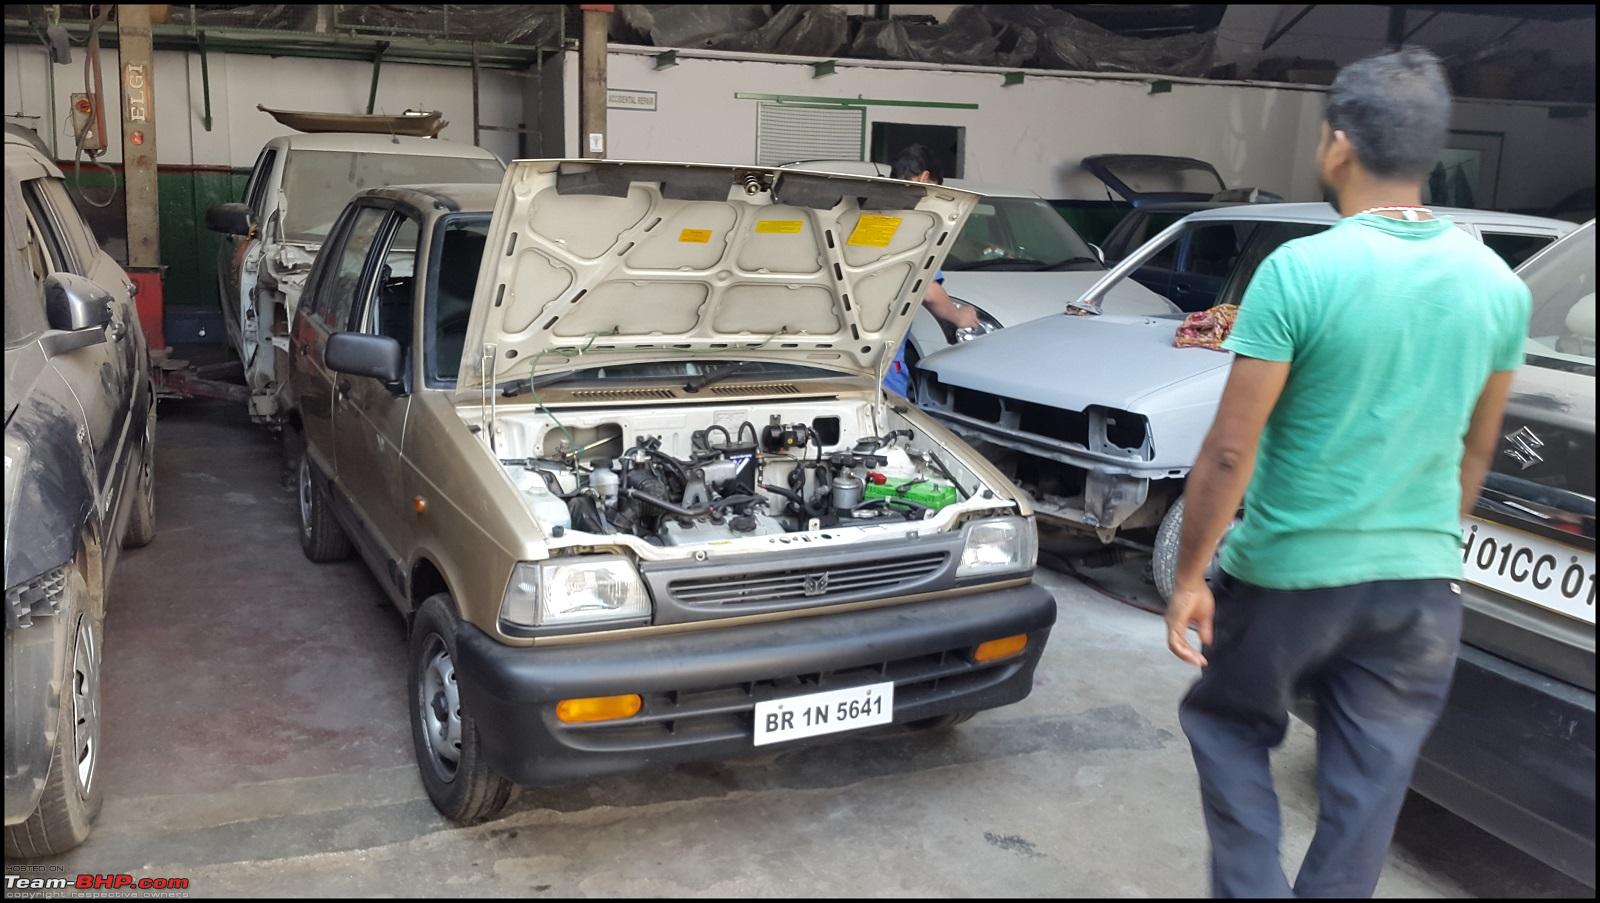
The way it was added- My MASS poured in 2L of Liqui Moly 5w40 engine oil. Then 300ml of Ceratec was poured in, and then the engine took close to 600ml of engine oil for the level to come upto max in the dipstick.- The car was then left idling for close to 10 minutes. With every passing second, the sound of engine started decreasing!! Effect- I have driven 2000kms after the oil change, and I simply can't explain how happy I am. The car has become extremely refined and revv happy. Post the oil change, there has been a noticeable improvement in fuel consumption too. I am easily getting close to 20-21kmpl within city without AC. Earlier that figure used to be around 17-18kmpl. Highway mileage is north of 25kmpl if driven sanely. I recently did a small trip of 330kms on some very good roads, with the average speed being 80kmph, and the mileage I got was 25.33kmpl without AC. 2. NGK Iridium Plugs- This is one mod which was on my radar since ages. The only reason why I was reluctant to carry it out was because almost everyone said that its useless for a car like M800. I read somewhere that Parag Sir had used them on his Wagon-R, so I pinged him for more details. He made it extremely simple for me, that the lower end will improve a bit. And it was exactly the same- The reluctance of the engine with AC, specially in bumper to bumper traffic was gone for good, and the car felt more eager to pick up speeds. Cost- Rs. 2,100 for 3 spark plugs. I got them from the NGK distributor in Safdarjung Enclave, New Delhi. Iridium Plugs 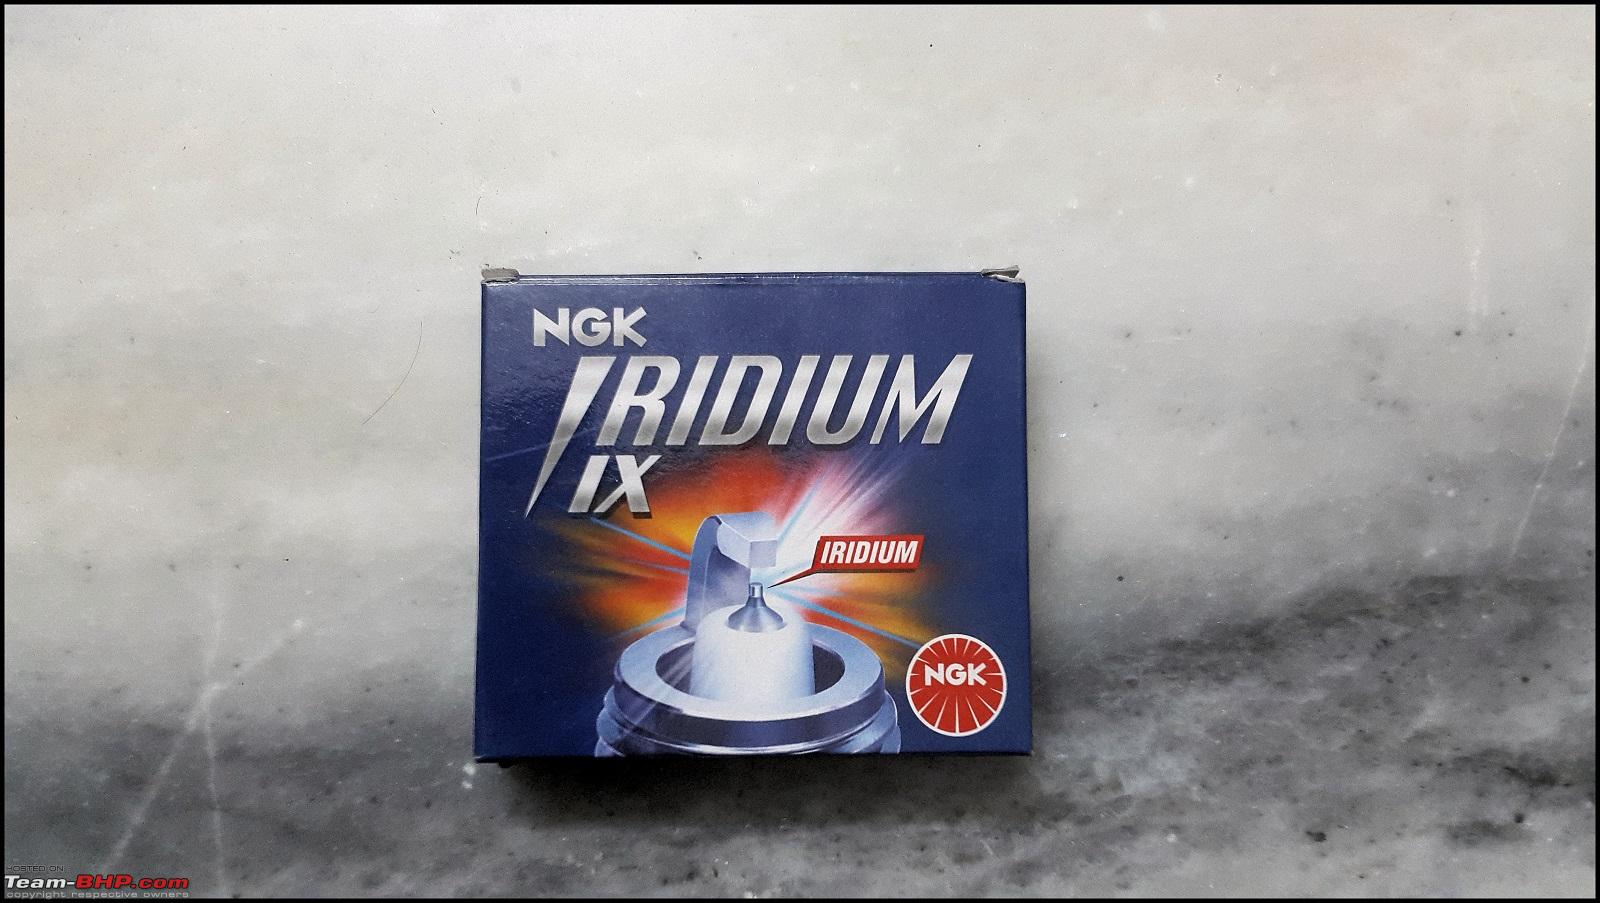 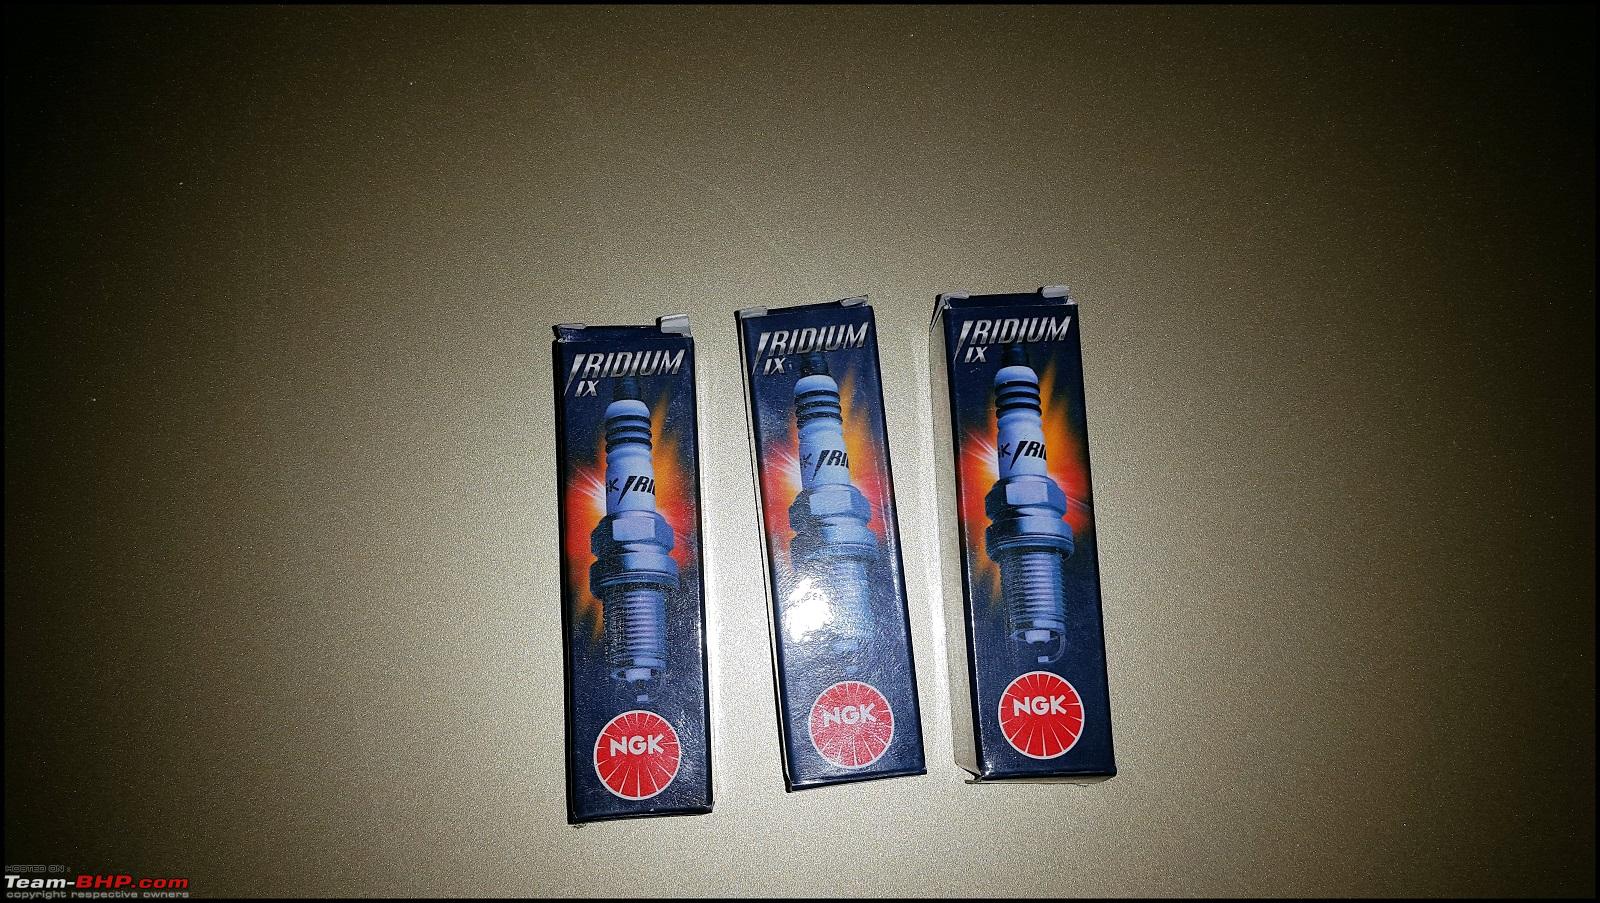  3. Liqui Moly Injector Cleaner- By this time, I was sold on Liqui Moly, and I didnt think twice before ordering this. My 800s tailpipe is devoid of any carbon or soot, but once I poured this, a lot of fine soot did come out. And the effectiveness of this product was established a few days later, when my car went for the Brake booster install. While opening the intake manifold, my SA said that the injector is unusually clean. Cost-Rs. 380 Link-Click to open 4. Liqui Moly Gear Oil additive- This one is a Molybdenum Disulphide based additive, and since the gearshifts on my car were really smooth earlier, the only difference this has made is that slotting into reverse feels the same as other gears. Earlier it used to make the normal reverse clunk sound. Cost-Rs. 480 Link-https://www.landroverlab.com/products/gear-oil-additive GB additive 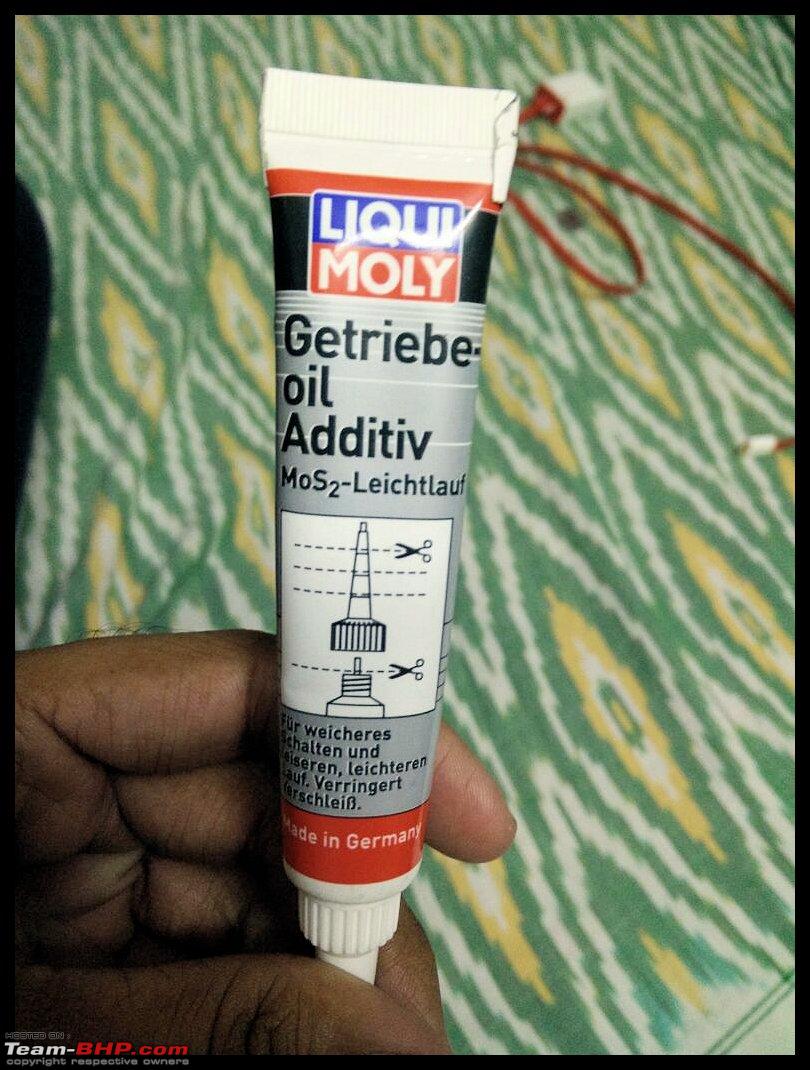 5. Liqui Moly Klima Fresh-  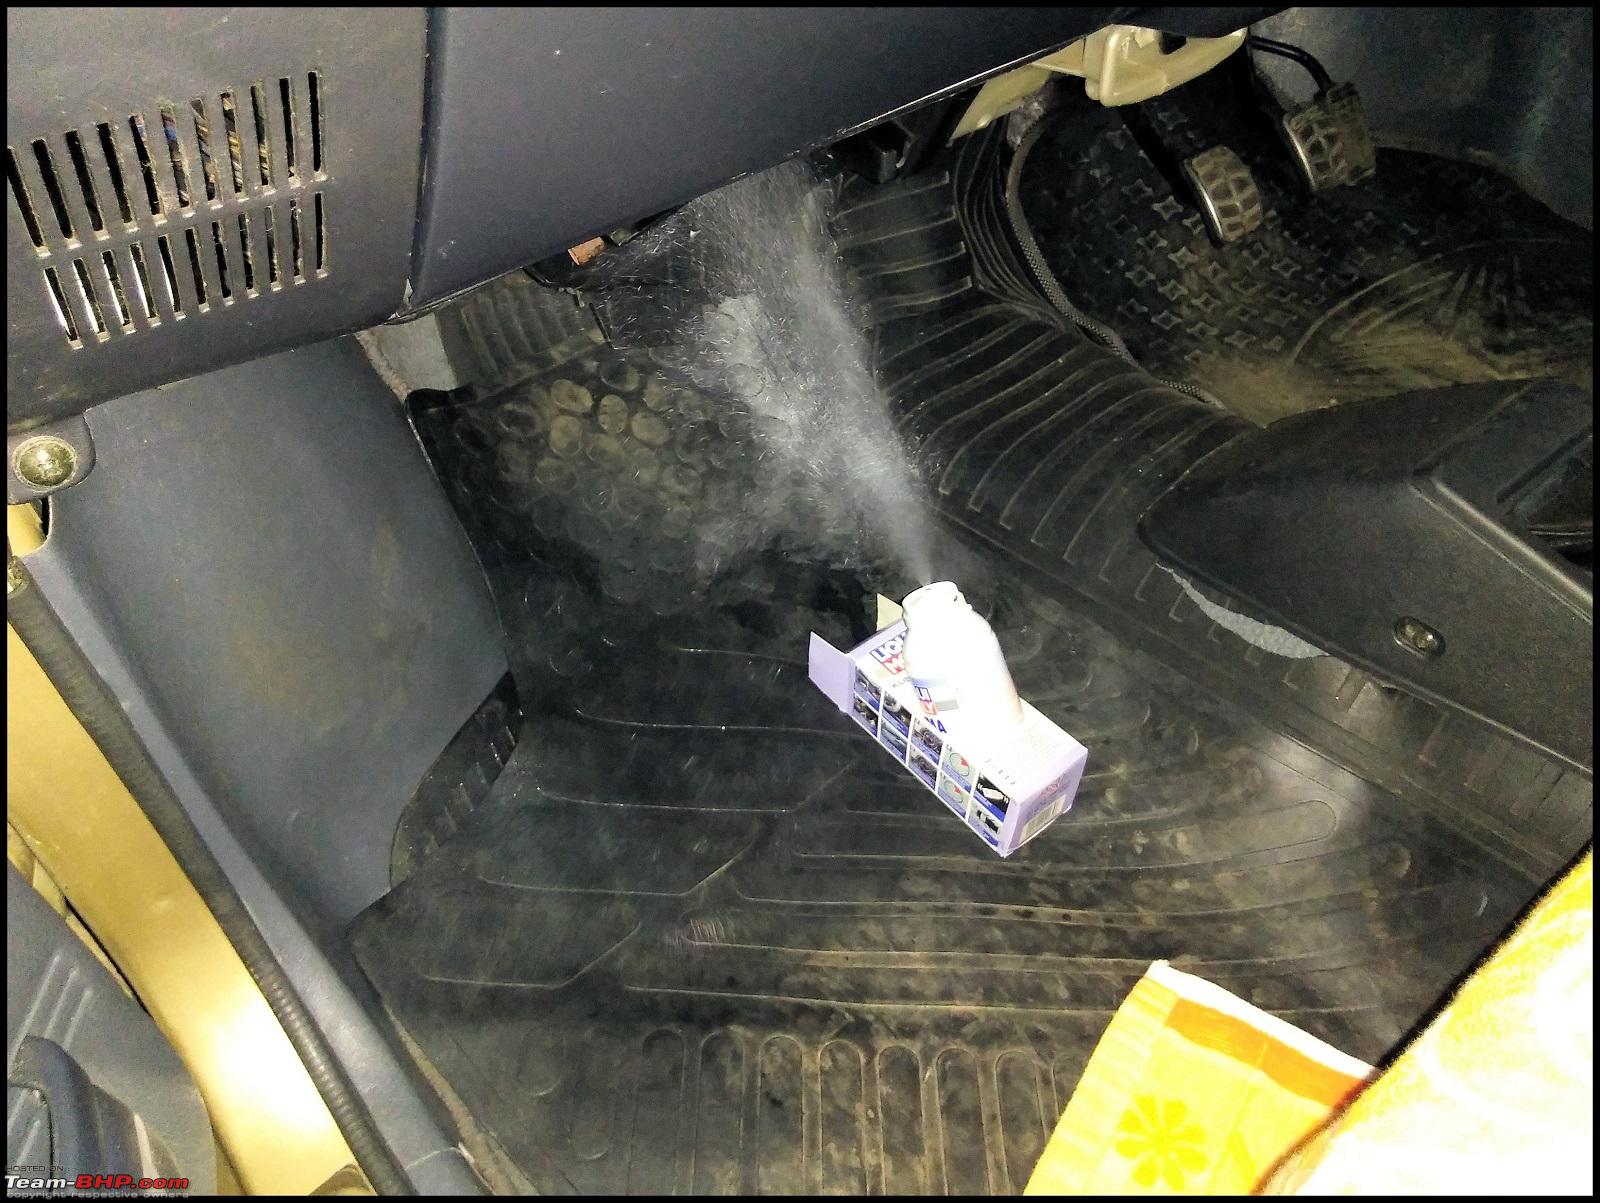 As is the case with any other AC equipped car, my car used to smell bad specially for the 1st few minutes of switching on the blower. LMs Klima fresh needs to be directed at the fresh air intake and the spray lasts for some 10-15 minutes. It did help to eradicate the foul smell, and it has been around 2 months when I used it, and I must say, it has worked. No foul smell now. Cost-Rs. 799 Link-Click to open 6. 3Ms vent cleaning foam- 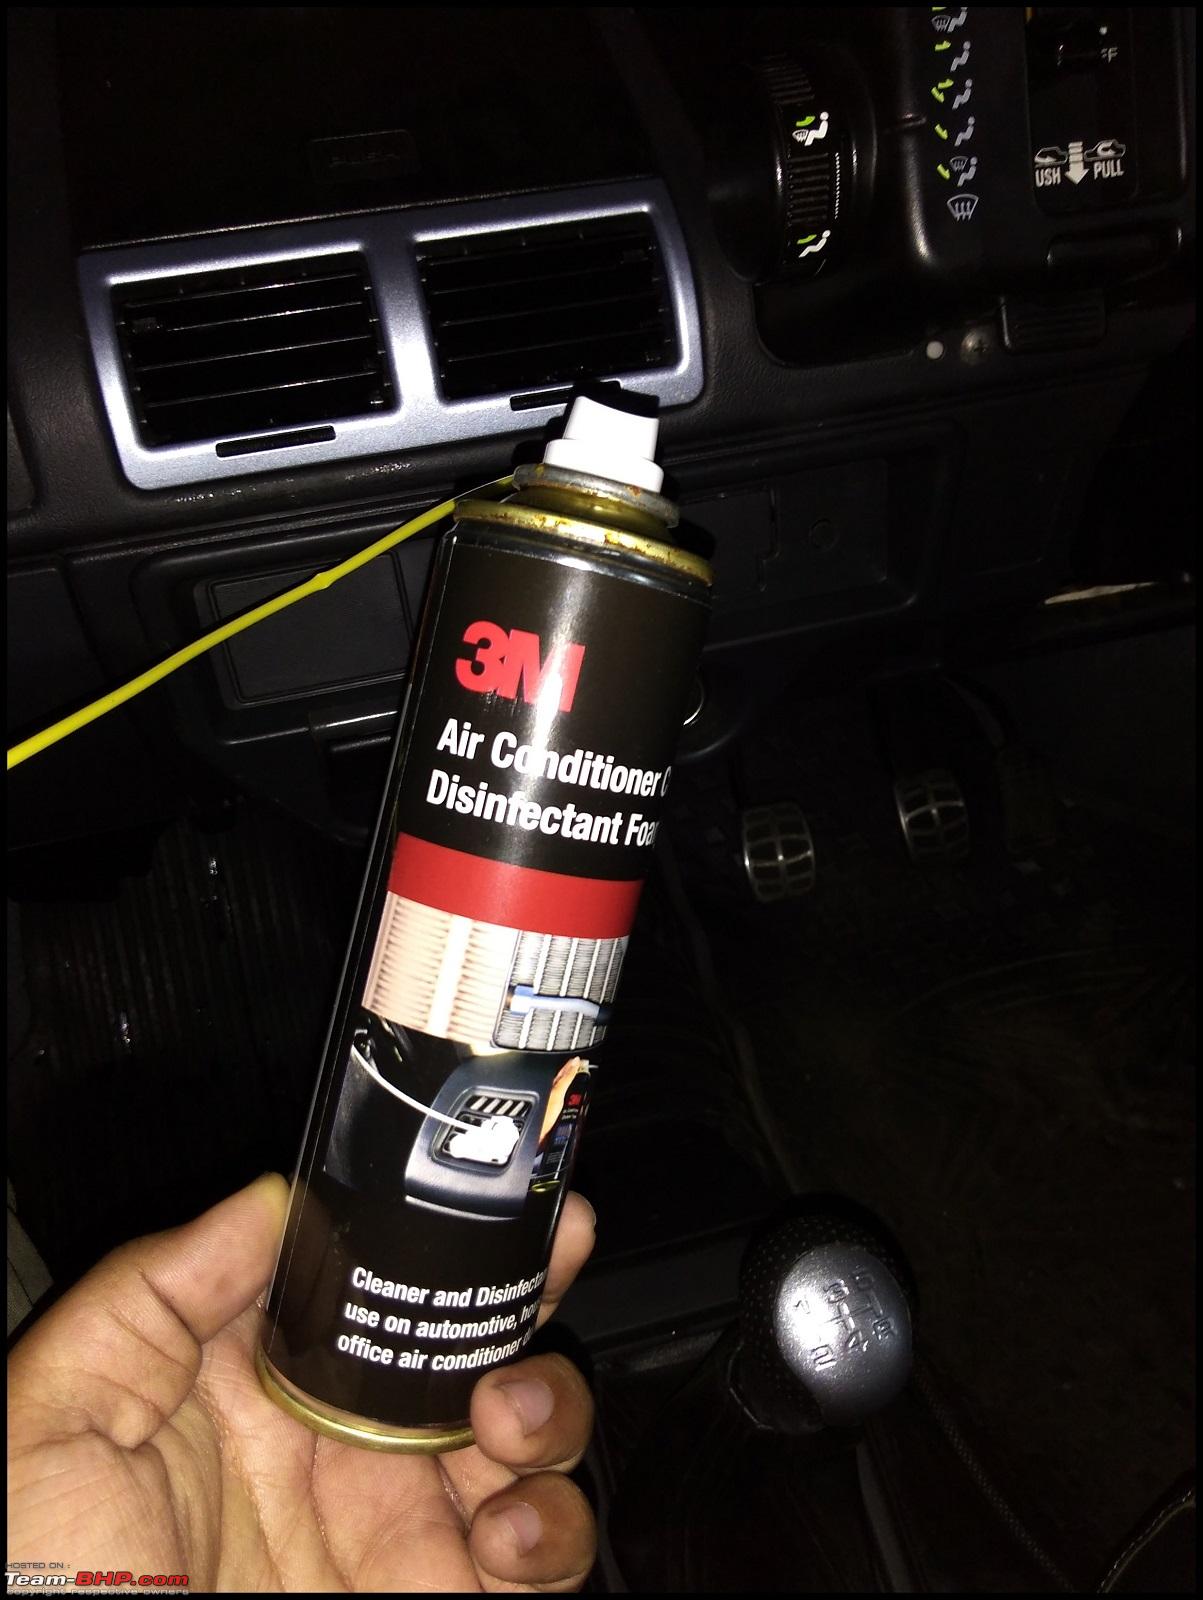 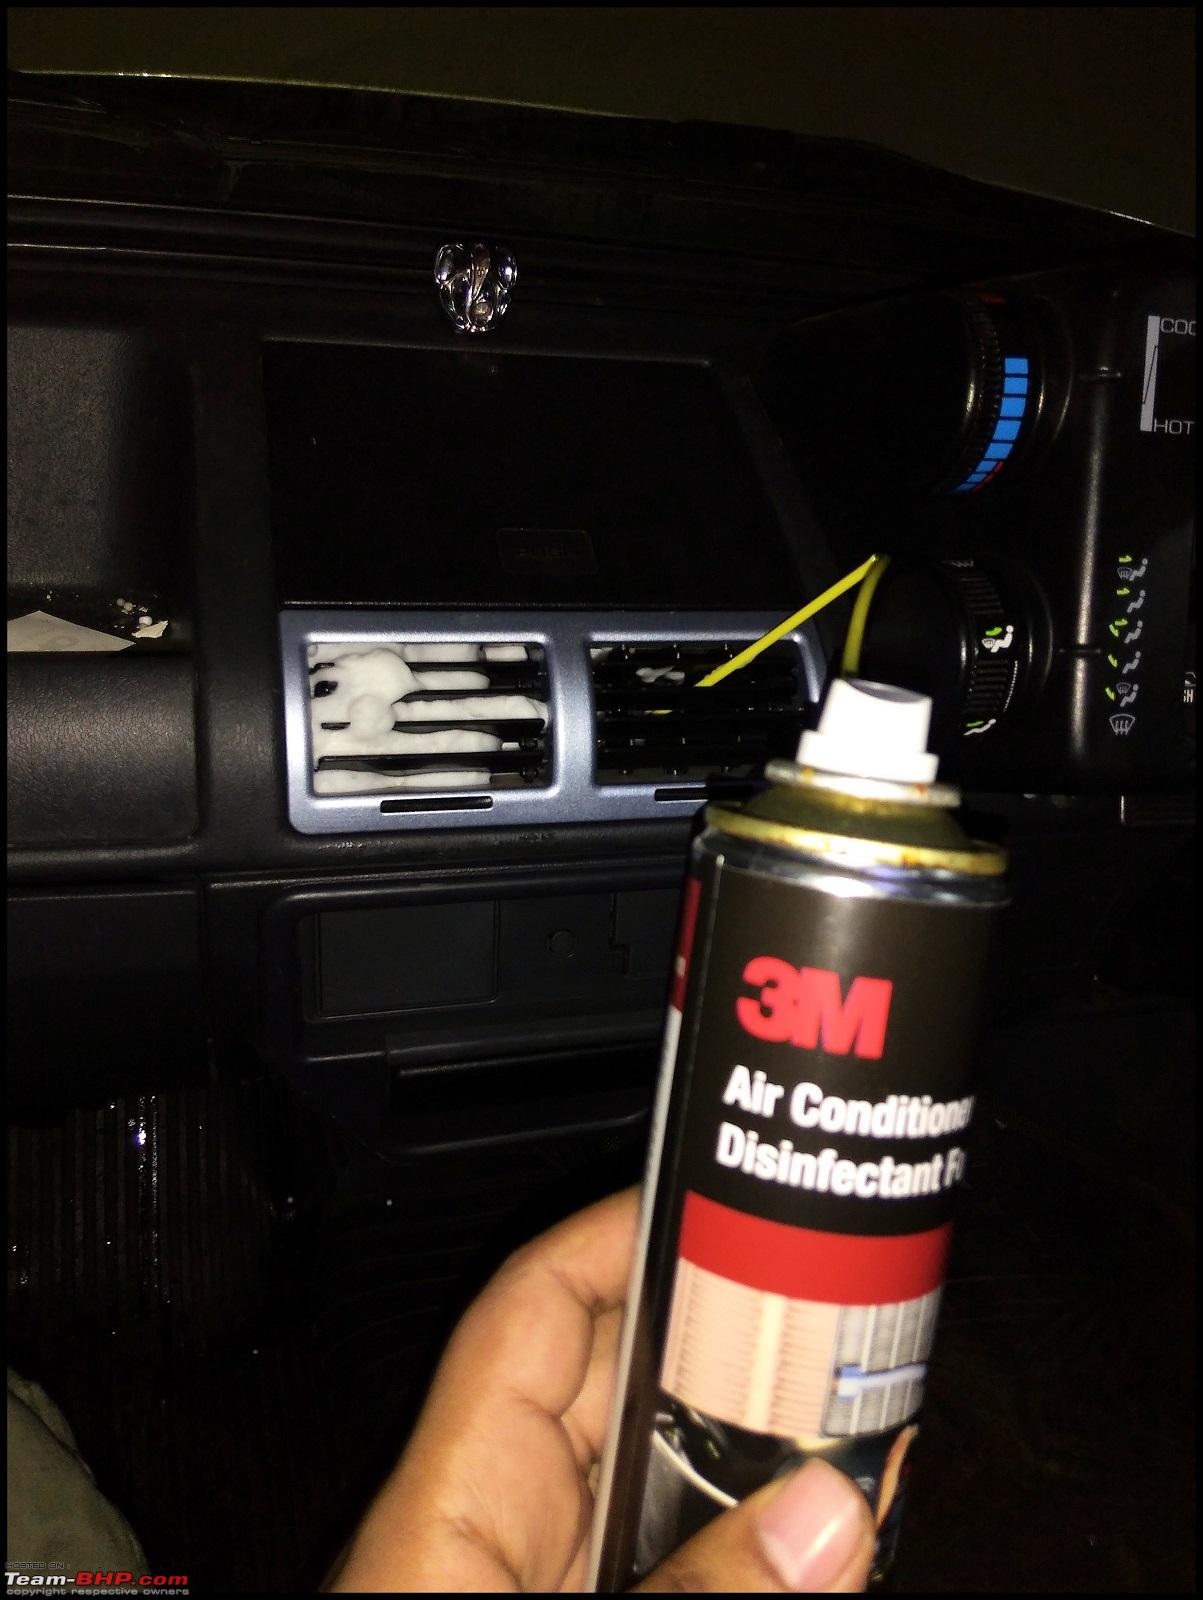  This didnt work as expected, and I wont recommend this to anyone. May be Ill try the AC duct cleaning foam from Liqui Moly and post the results later. This 3Ms foam caused a weird stink in my car which lasted for 2 days. I bought it from Kashmere Gate, New Delhi Cost-Rs. 250 Upgrades & Additions 1. Brake Booster- I needed a proper factory level installation, so I didnt cut any corners here, as a result of which the upgrade became a bit too expensive. But I have no qualms, since I believe in spending once, and then forgetting it for good. The things I bought for the upgrade- a. Intake Manifold with booster vacuum outlet: Part Number=13110-844S0 Price=Rs. 12,124.50 b. Gasket Intake manifold Part number=13119M84410 Price=Rs.6 c. Gasket, Throttle Body Part Number=13421M77G10 Price=Rs. 8.5 d. Brake Booster Assembly Part Number=51000M84351 Price=Rs.3,752   e. Hose, Vacuum Part number=51020-84350 Price=Rs.967.87 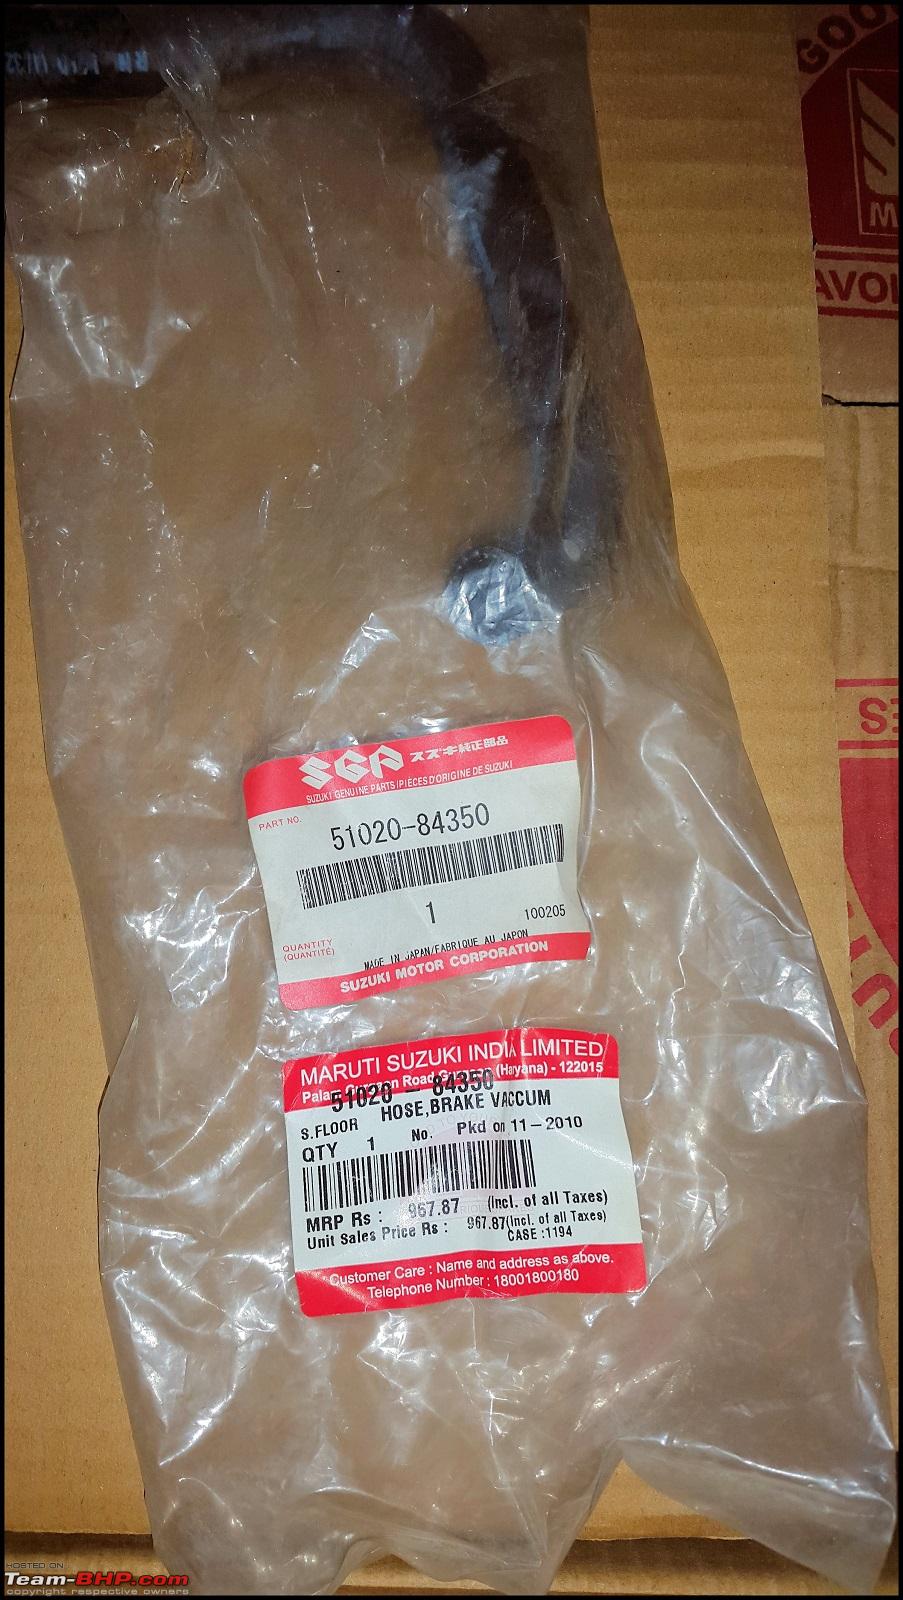 f. Injector Cushion Injector Part Number=09320M09022 Price-Rs. 20 g. Brake Pipe, Booster to RH wheel Part Number=51420M84350(Use this pipe specifically for booster models) Price=Rs. 33 h. Brake Pipe, Booster to LH Wheel(Optional) Part Number=51430M84350 Price=Rs. 66.5 i. Brake Pipe, Booster to Joint(2 Pieces) Part Number=51410M84350 Price=Rs.33 j. Gasket,Booster Assy(Used Zens Part) Part Number=51132M79G00 Price=Rs. 4 Note- I recommend you MGP spares. There is also one KBX kit(made by the same company BOSCH available for 4300, but they give you a simple vacuum pipe, without the vacuum hold check valve. And irrespective of what many people say, you do need that pipe with the vacuum check valve in an 800. I must thank my SA Mr. Dhiraj, and the mechanic Mr. Arjun who did an exemplary job on my car. Arjun made sure that the installation done is of the highest standards, and his attention to detail left me perplexed. All this without any guidance of mine. He also cleaned the hard to reach areas of my cars engine when the intake manifold was removed. Intake Manifold removed 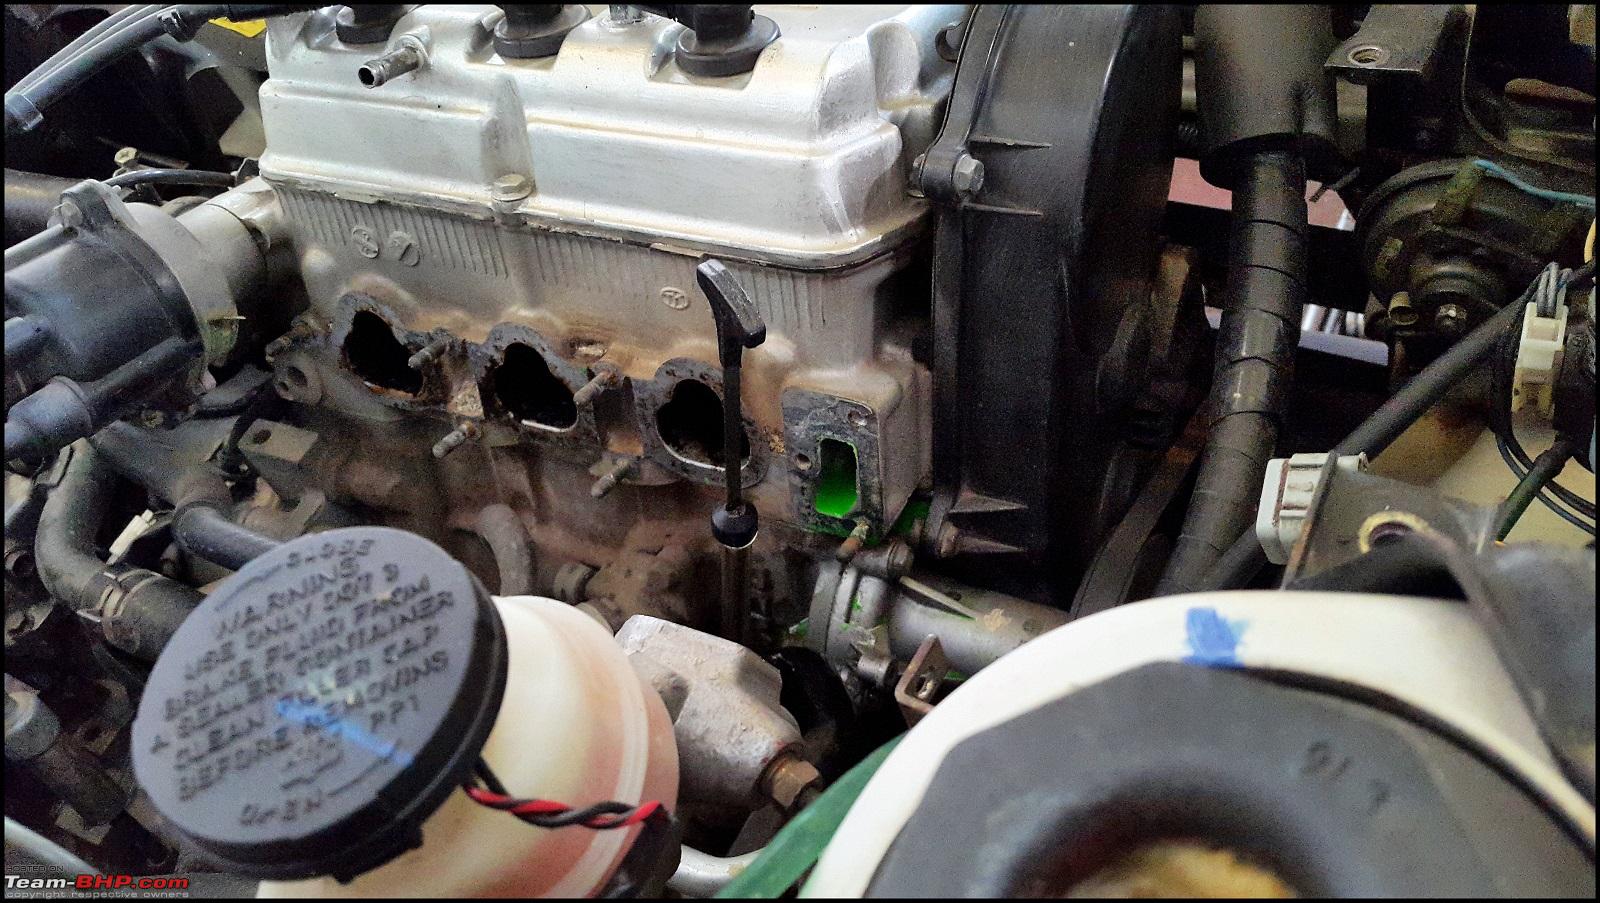 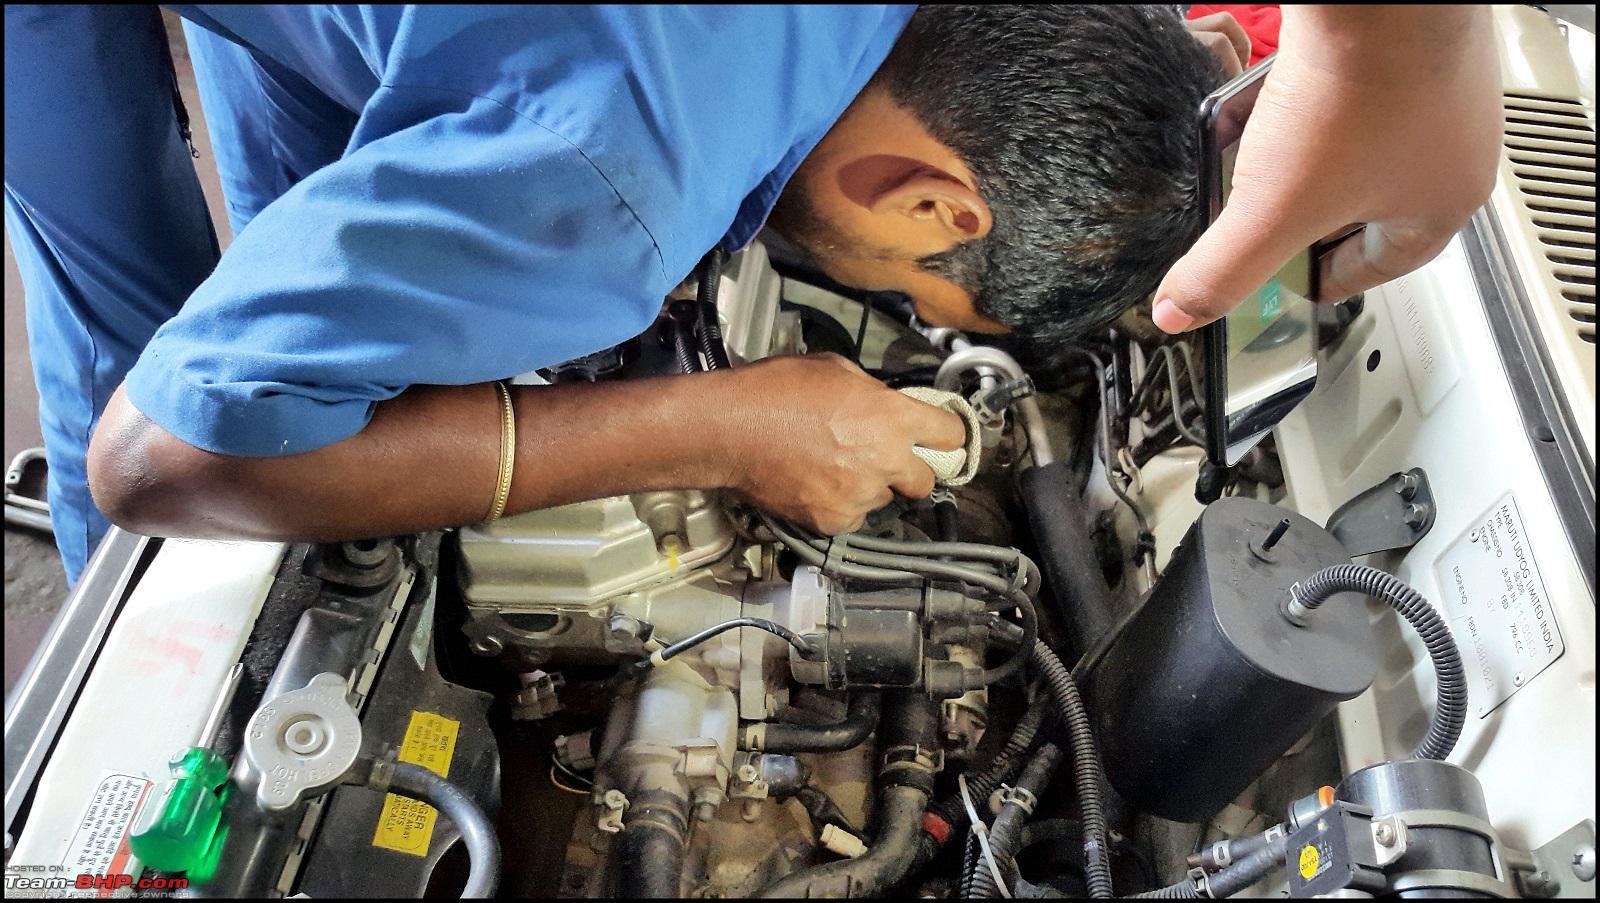 Brake Pipes Changed 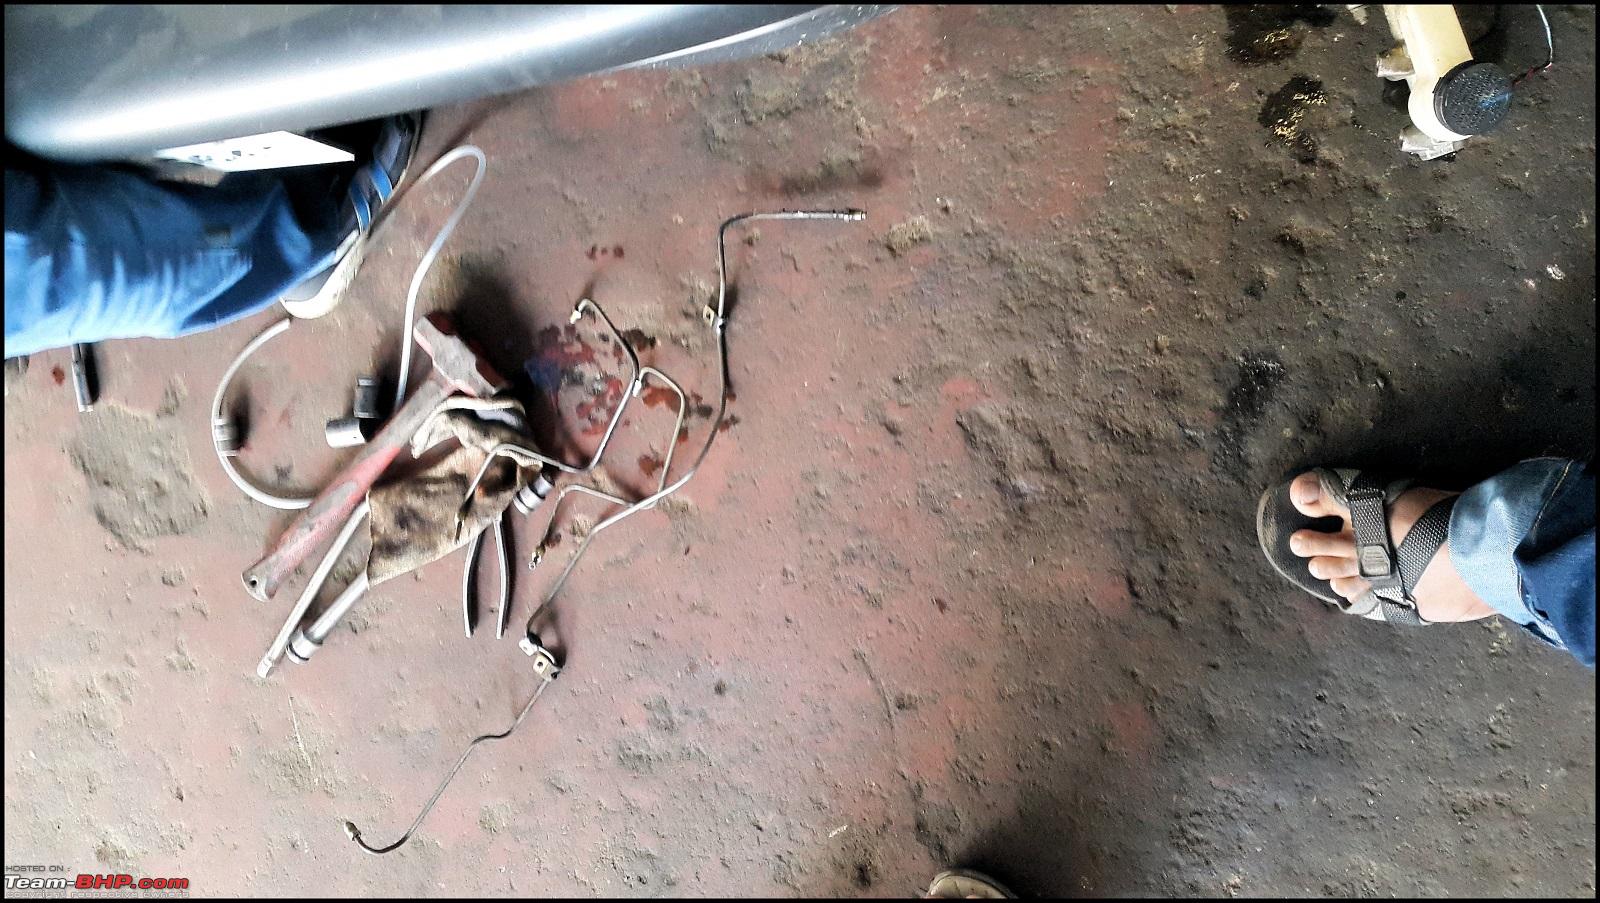 2. Nippon Densos Genuine SGP flasher relay- 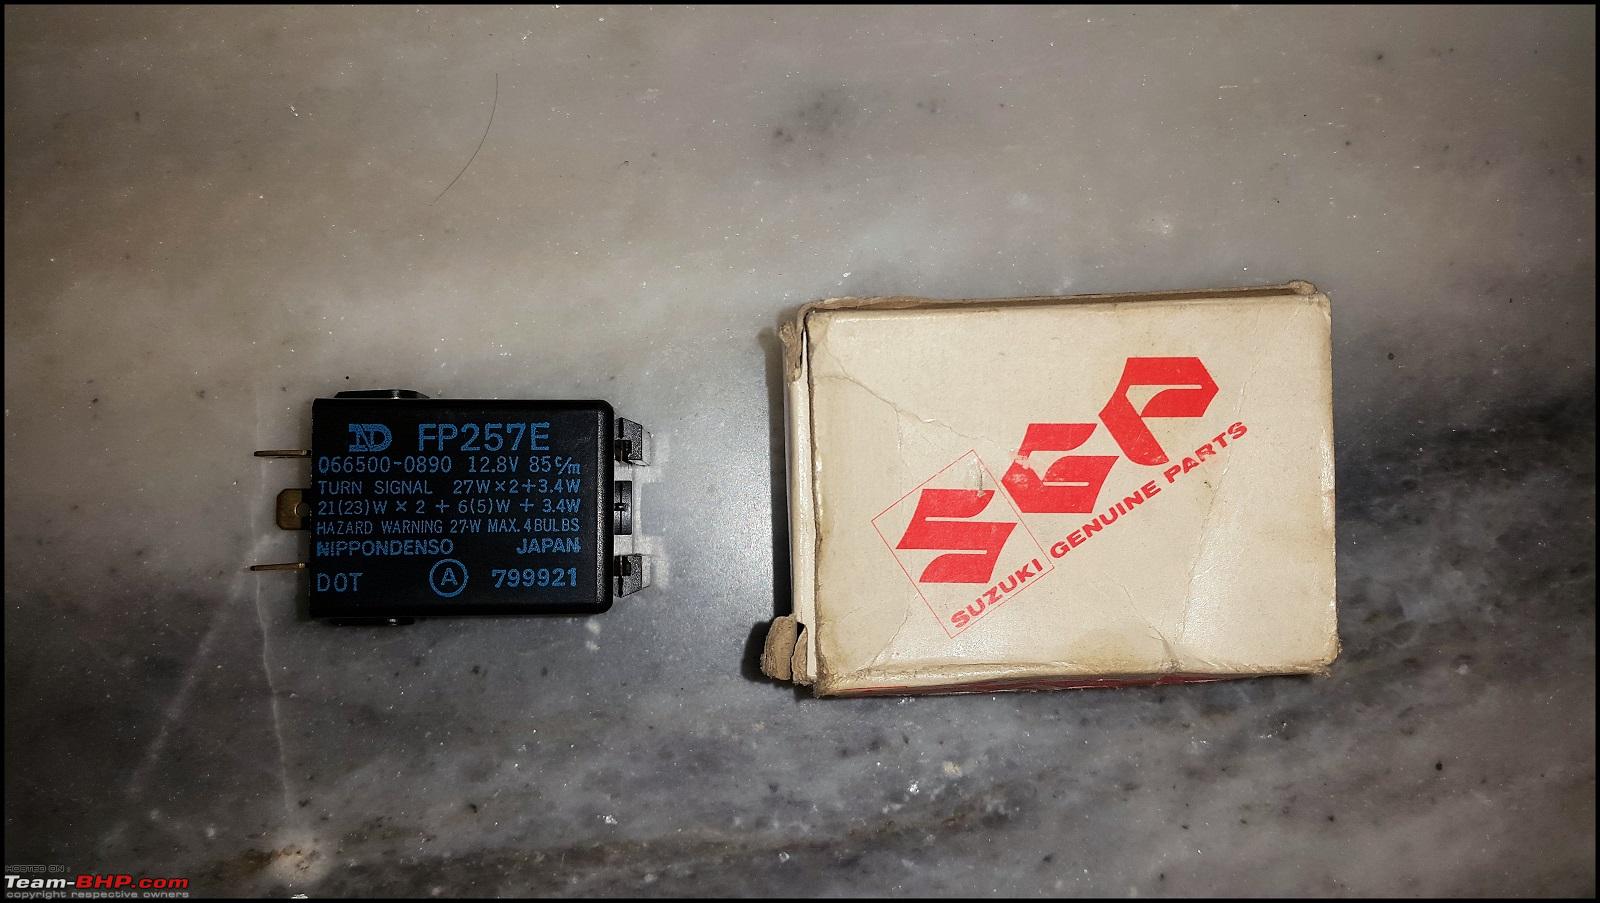 I am a fan of SGPs and I found these brand new relays in Delhi. These were meant for SS80 3. Philips Xtremevision Plus- Bought them from Amazon for Rs. 598 for a pair. And these are as good as any 100/90W bulbs. BHPian Saket77 recently had a night drive in my 800 and he was quick to appreciate the brightness of the bulbs. I had Philips XtremeVision earlier, and the new bulbs are definitely improved. A month of stress, planning and execution- On 26th October 2016, I discovered that the part around the fresh air intake had rusted a bit, and upon detail investigation, it turned out that rats had caused accumulation of waste around the area, which held moisture for too long, causing the part to rust and disintegrate. Luckily, the cowl was unscathed and it was only the fresh air wall which had perforation. It took me around 10 days to order products, and plan the execution. The wash which revealed the leak 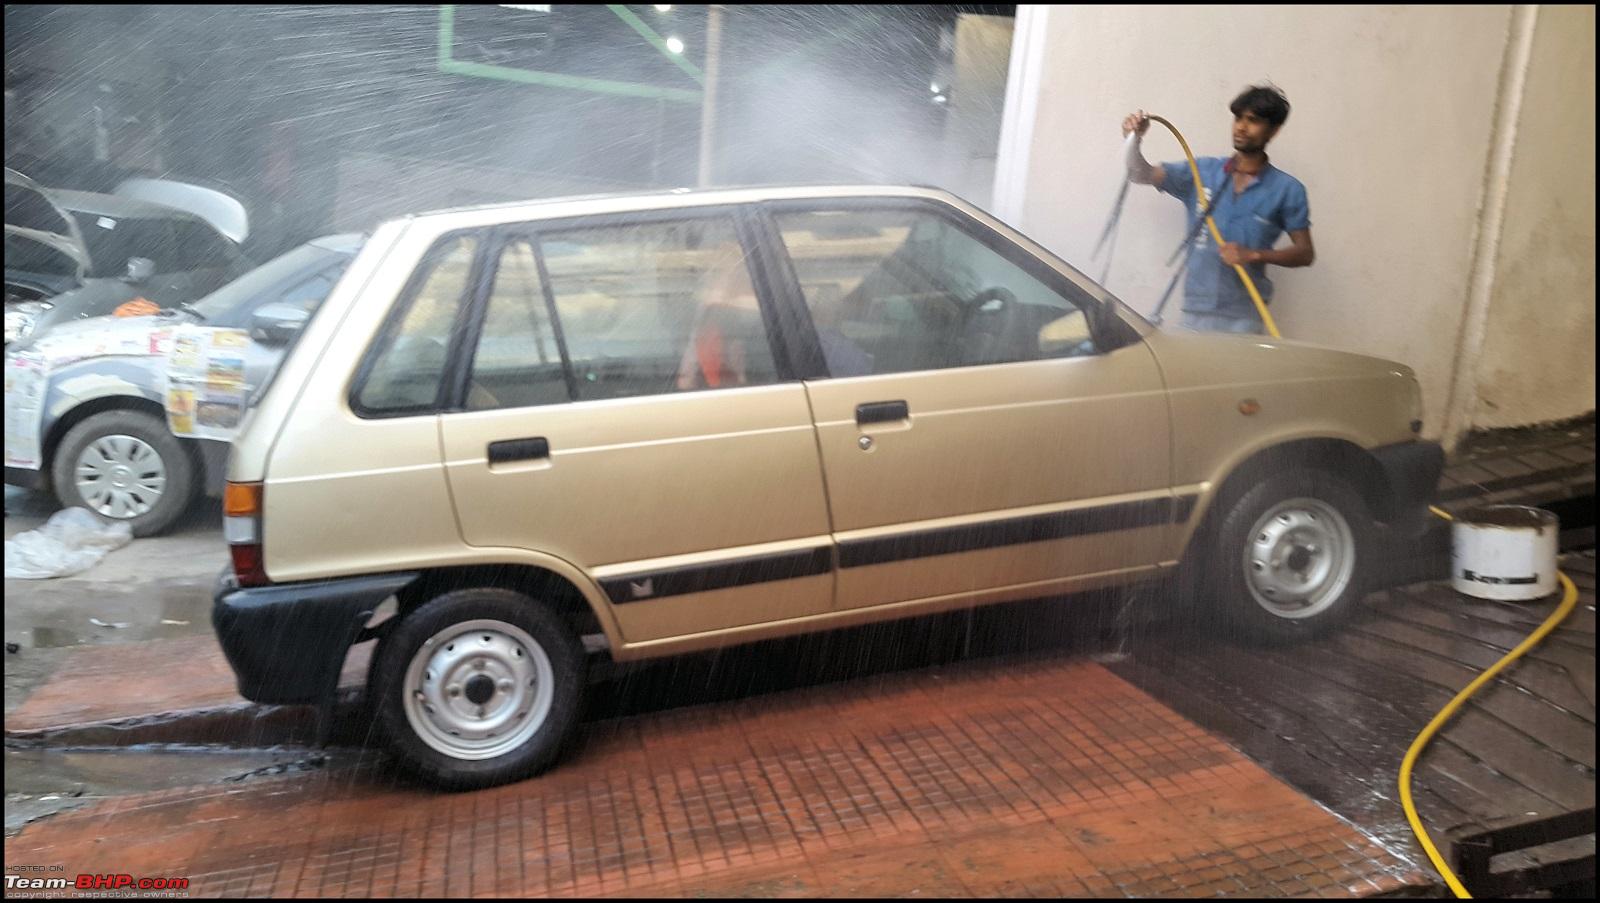 Rusted part 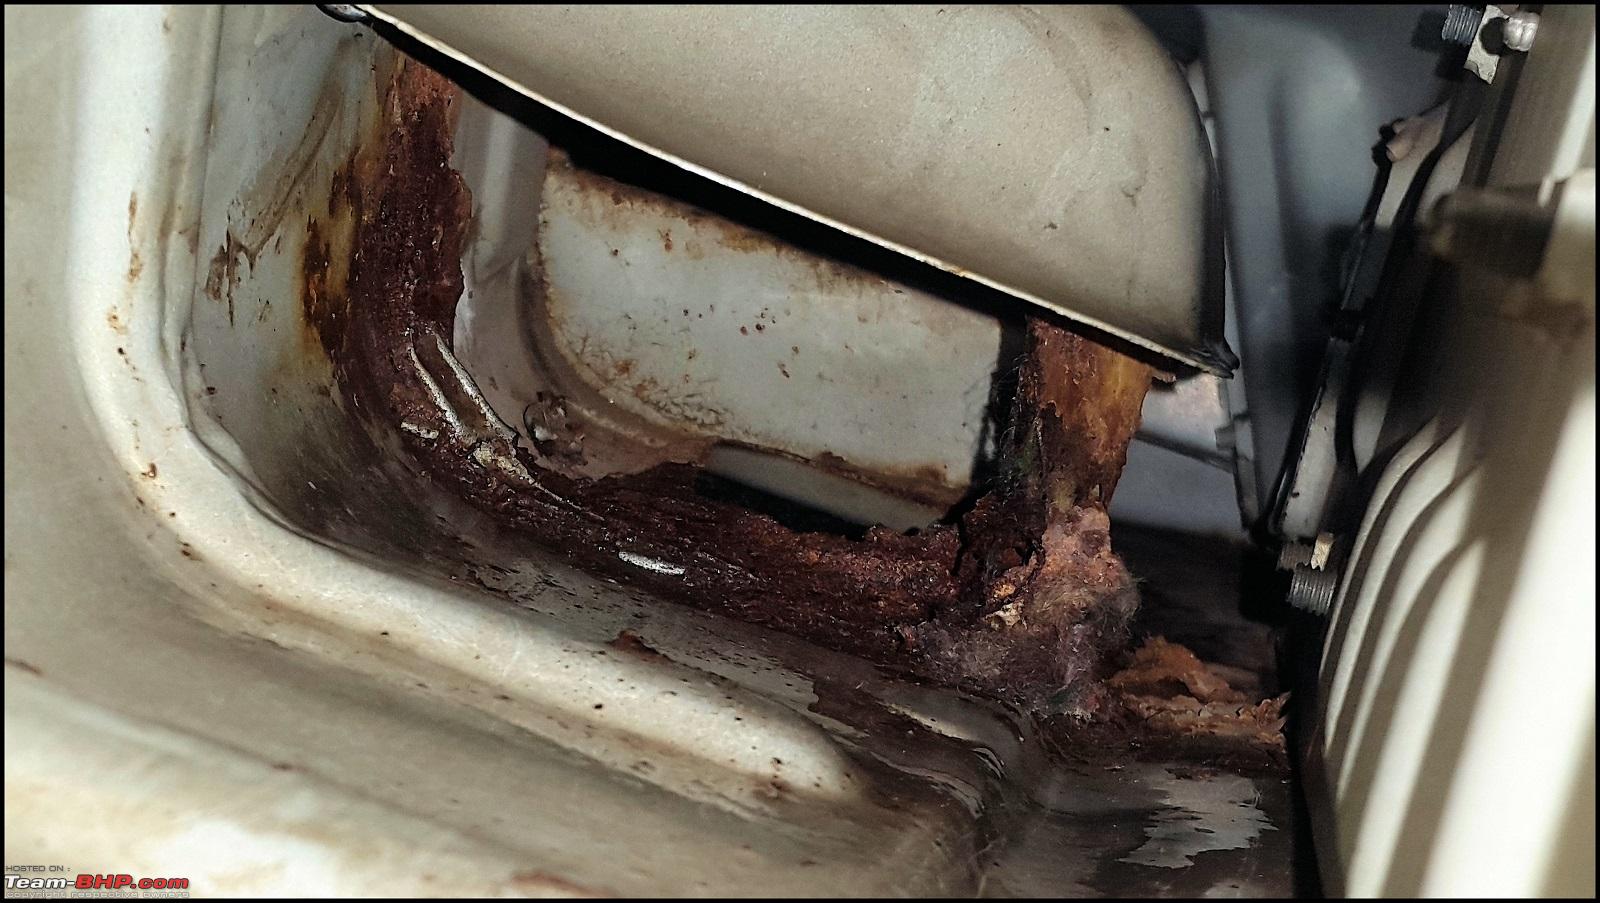 How it is in normal cars 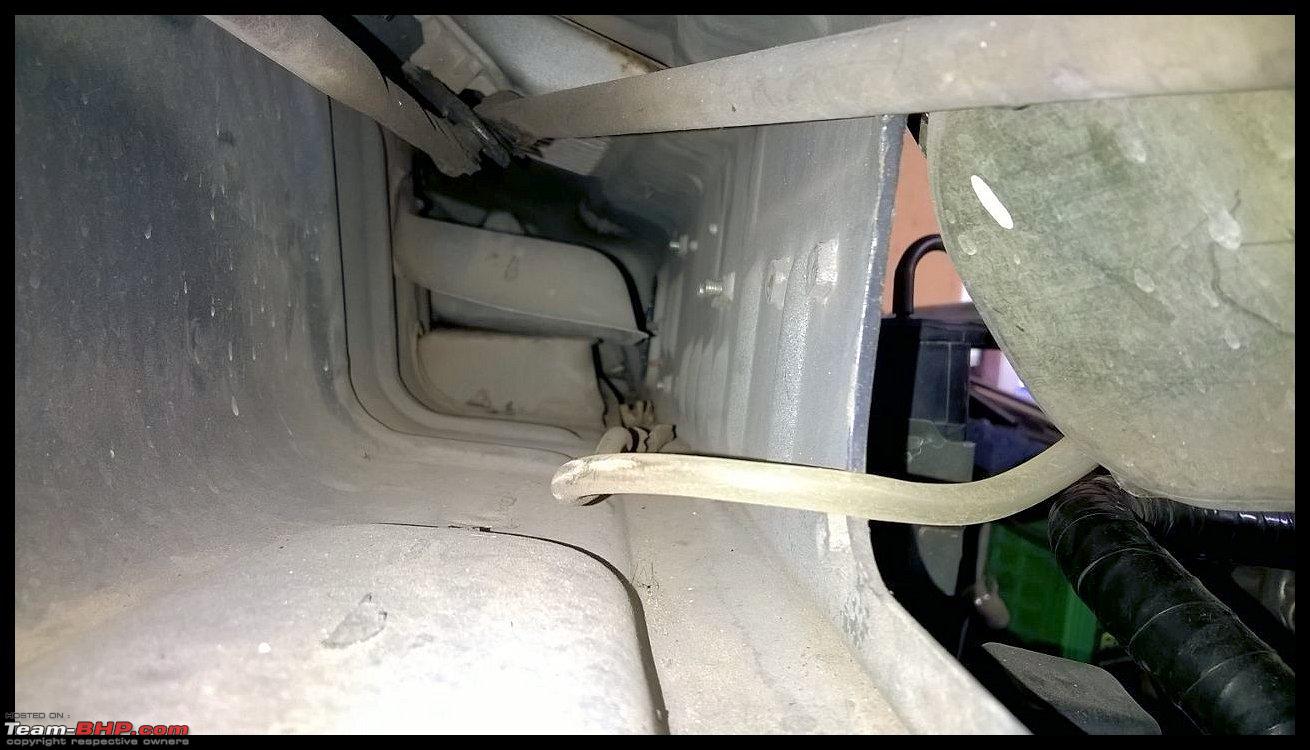 The products I ordered were a. Rustoleum Cold Galvanising Zinc spray. This product is also claimed to have properties of weld-through primer, and doesnt get too much damaged by the heat of welding. b. TufKote Rust converter-This product was mainly bought to treat rusted areas which are inaccessible. Quote-Rust Converter, a water-based primer, contains two active ingredients: Tannic acid and an organic polymer. The first ingredient, tannic acid, reacts with iron oxide (rust) and chemically converts it to iron tannate, a dark-colored stable material. c. Epoxy Primer d. Endoscope Camera-To get images of hard to reach areas like inside of running board, piston tops, etc. e. 3Ms Body schutz anti rust compound. I also took 2nd opinion from other MASS too, and soon realised that getting the work done at Maruti Automobiles was the best bet. Others were just interested in changing the cowl and making money. I didnt care about money, but fiddling with the cowl would have resulted in chassis getting disturbed, which wasnt needed as the rust was very minor. Meanwhile, I had to get ready too, both financially and mentally, and a proper plan was imperative. One day before the scheduled operation, I opened the door pads, stripped the interiors and made sure that I have removed all the useless bits from the car. I also cleaned the insides of the doors as they had dust accumulation. Interiors stripped  Doors cleaned 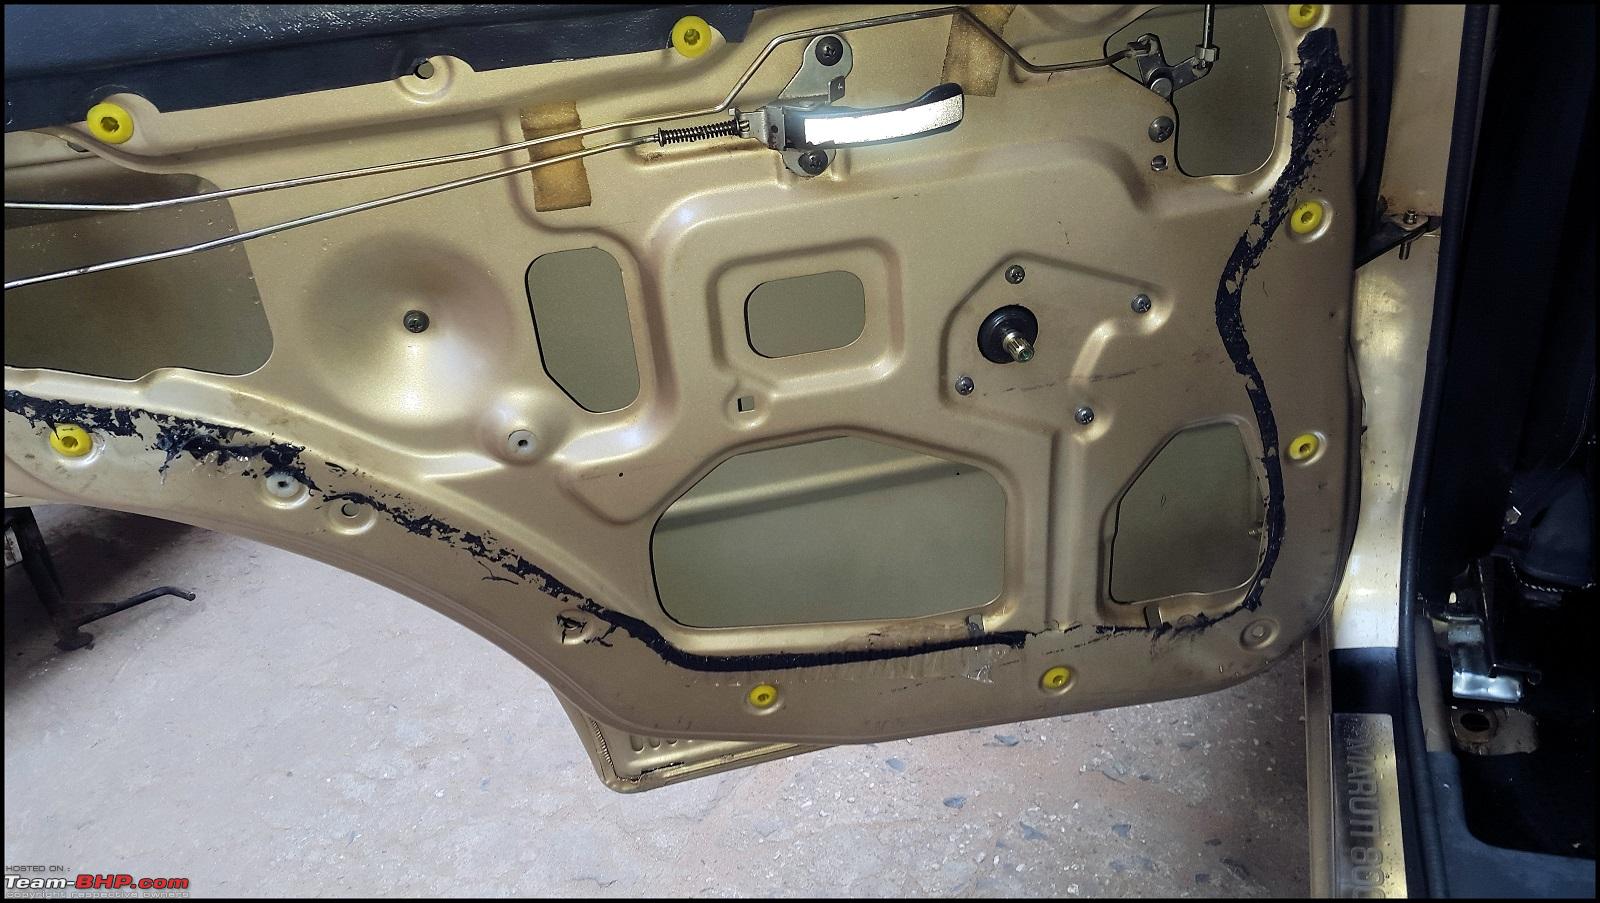 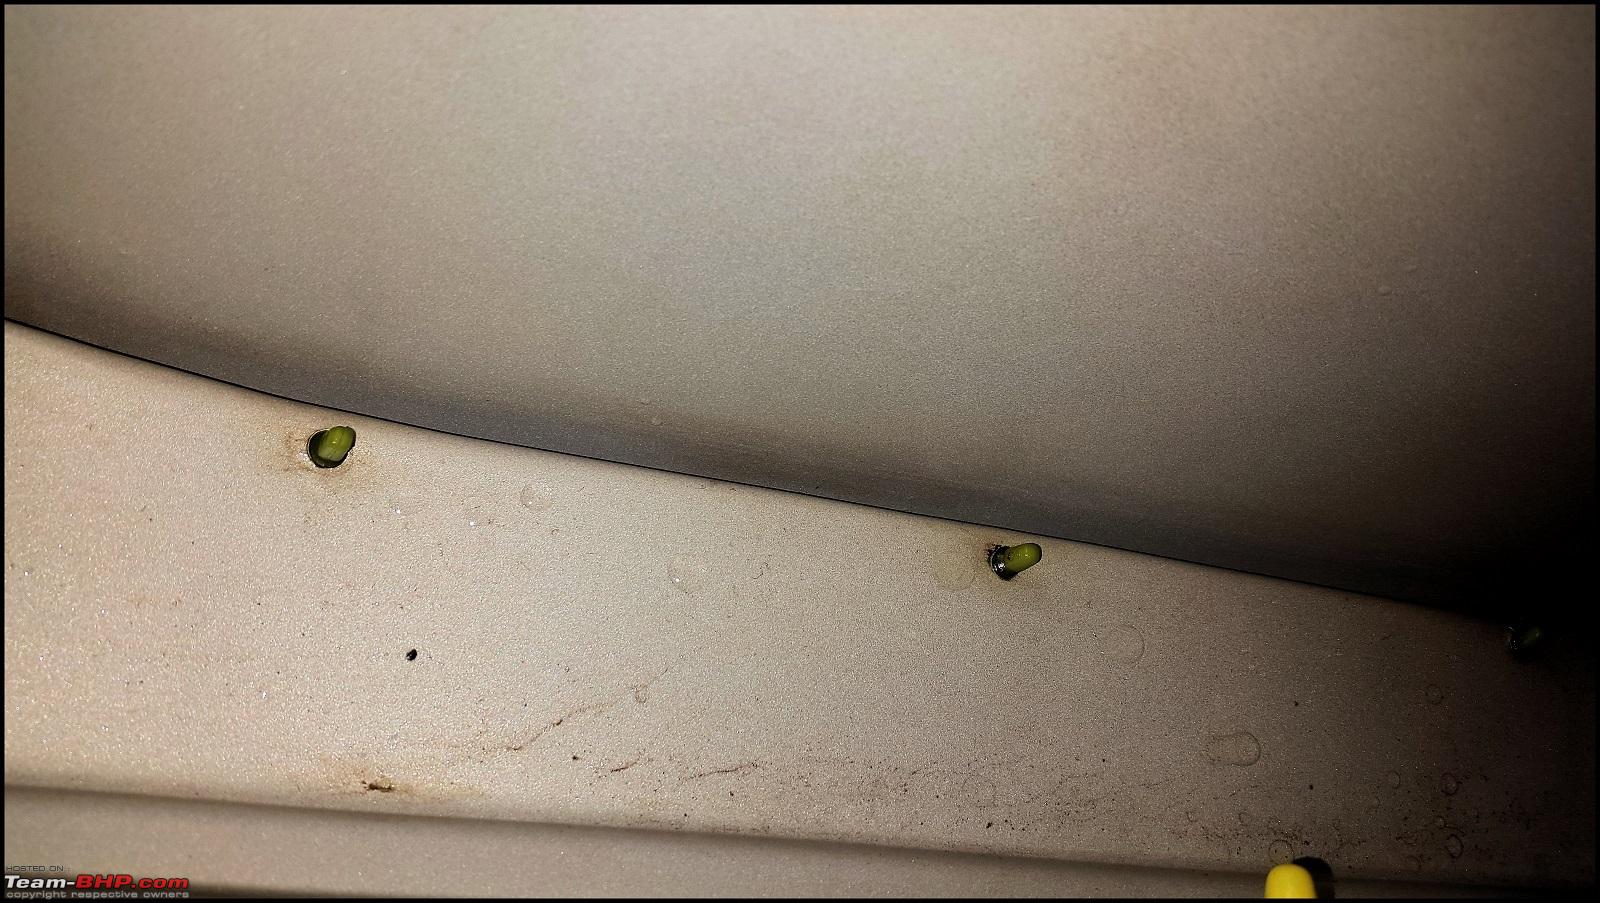 I was ready to get the car worked upon, and on 15th November, Mr. Dhiraj asked me to get the car for repair. He did everything to ensure that I am satisfied, and cared about the smallest details.
| |
|
| (15)
Thanks
|


| The following 15 BHPians Thank Leoshashi for this useful post: | a4anurag, baby_antu, karuvally, MAKMADDY17, paragsachania, R2D2, Rehaan, Researcher, saket77, Scarlet_Rider, sidindica, sumitsinha0280, Sushil Pingua, swiftnfurious, tacho9000 |
|
11th December 2016, 01:54
| #114 |
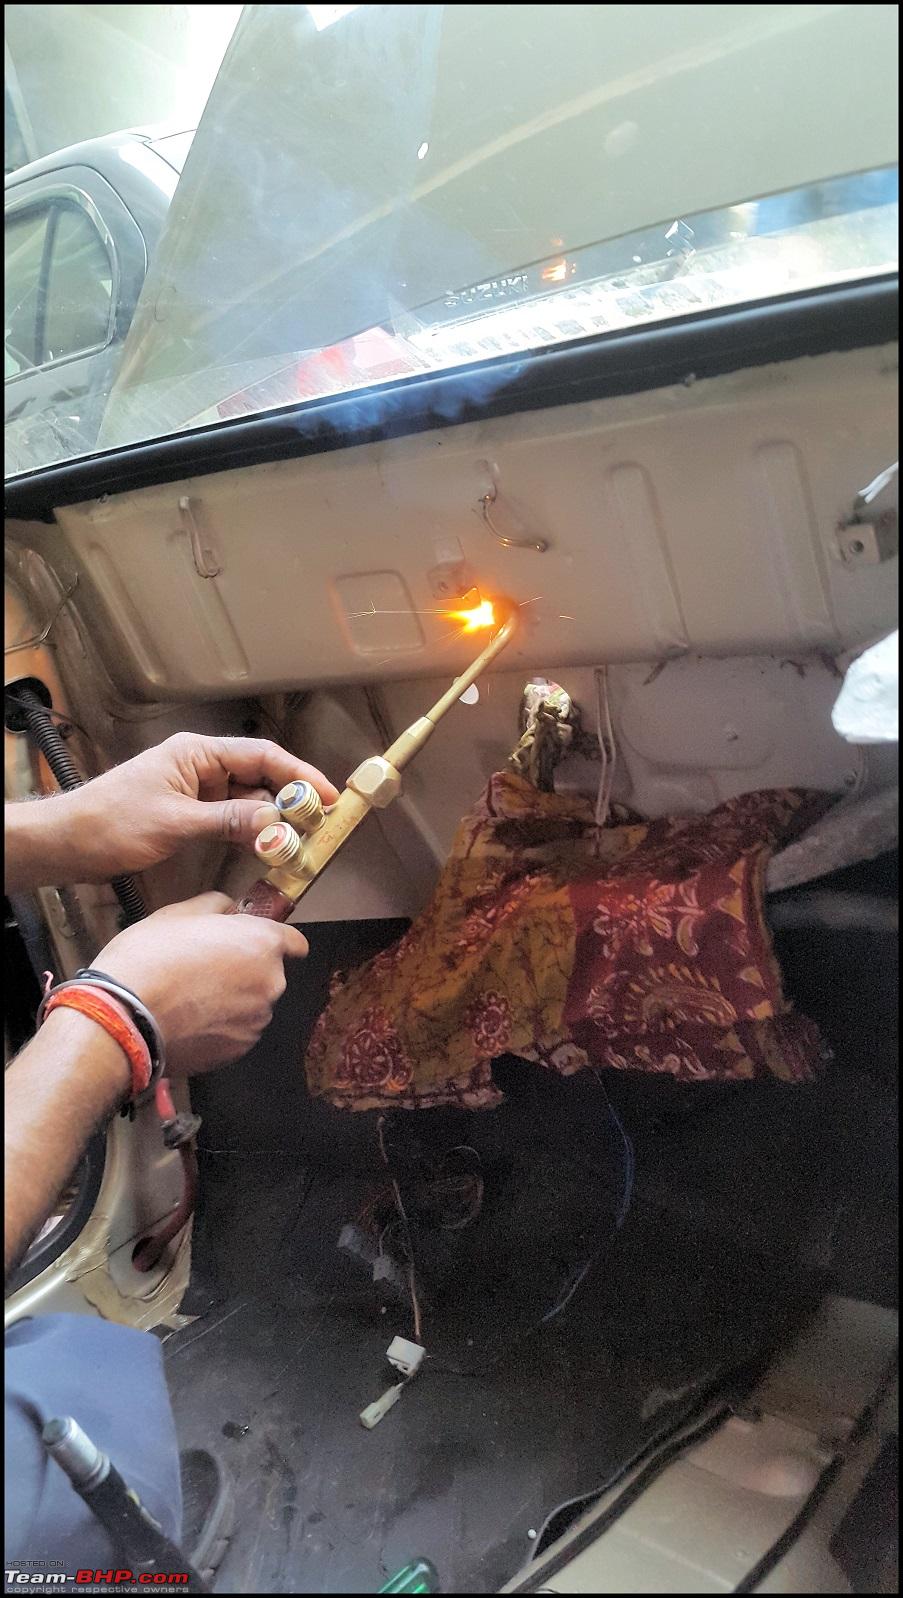
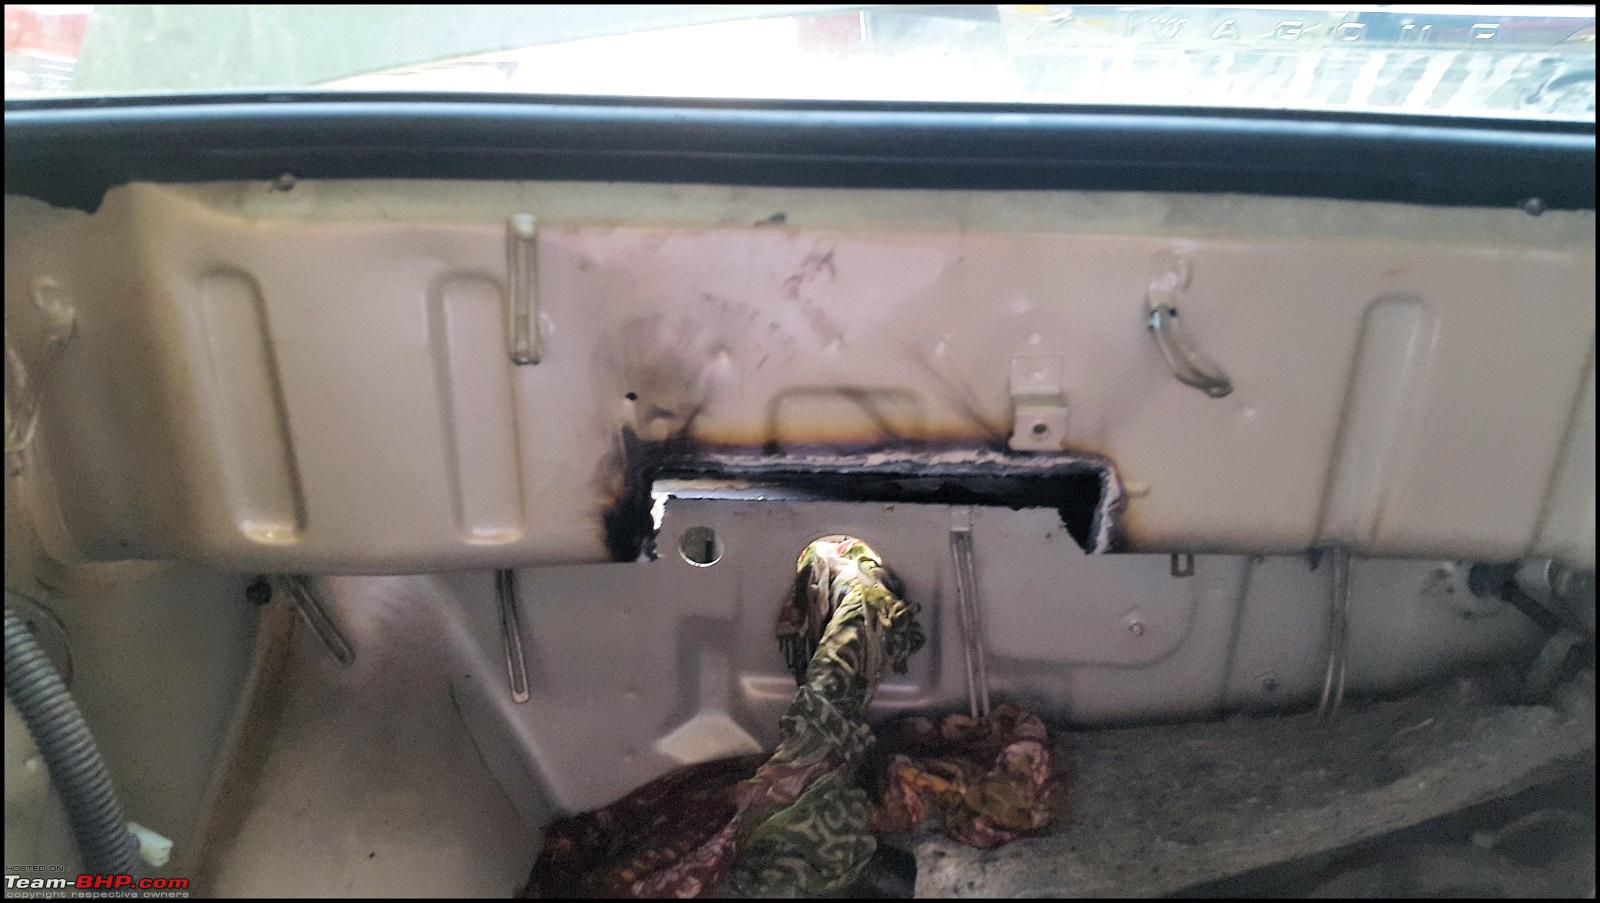
| Distinguished - BHPian | re: The love of my life - A 2000 Maruti 800 DX 5-Speed. EDIT: Gets export model features on Pg 27 Part 2 Once the affected part was out, the denter removed the old wall, fabricated a new one, and welded it back. Its easier said than done. Sincere thanks to Mr. Sunil(denter) who took every care to ensure that the cowl gets repaired to the factory standards. The fabrication done was so nice that even I couldnt tell the difference between the fabricated air vent wall, and the original one. Hats off man. 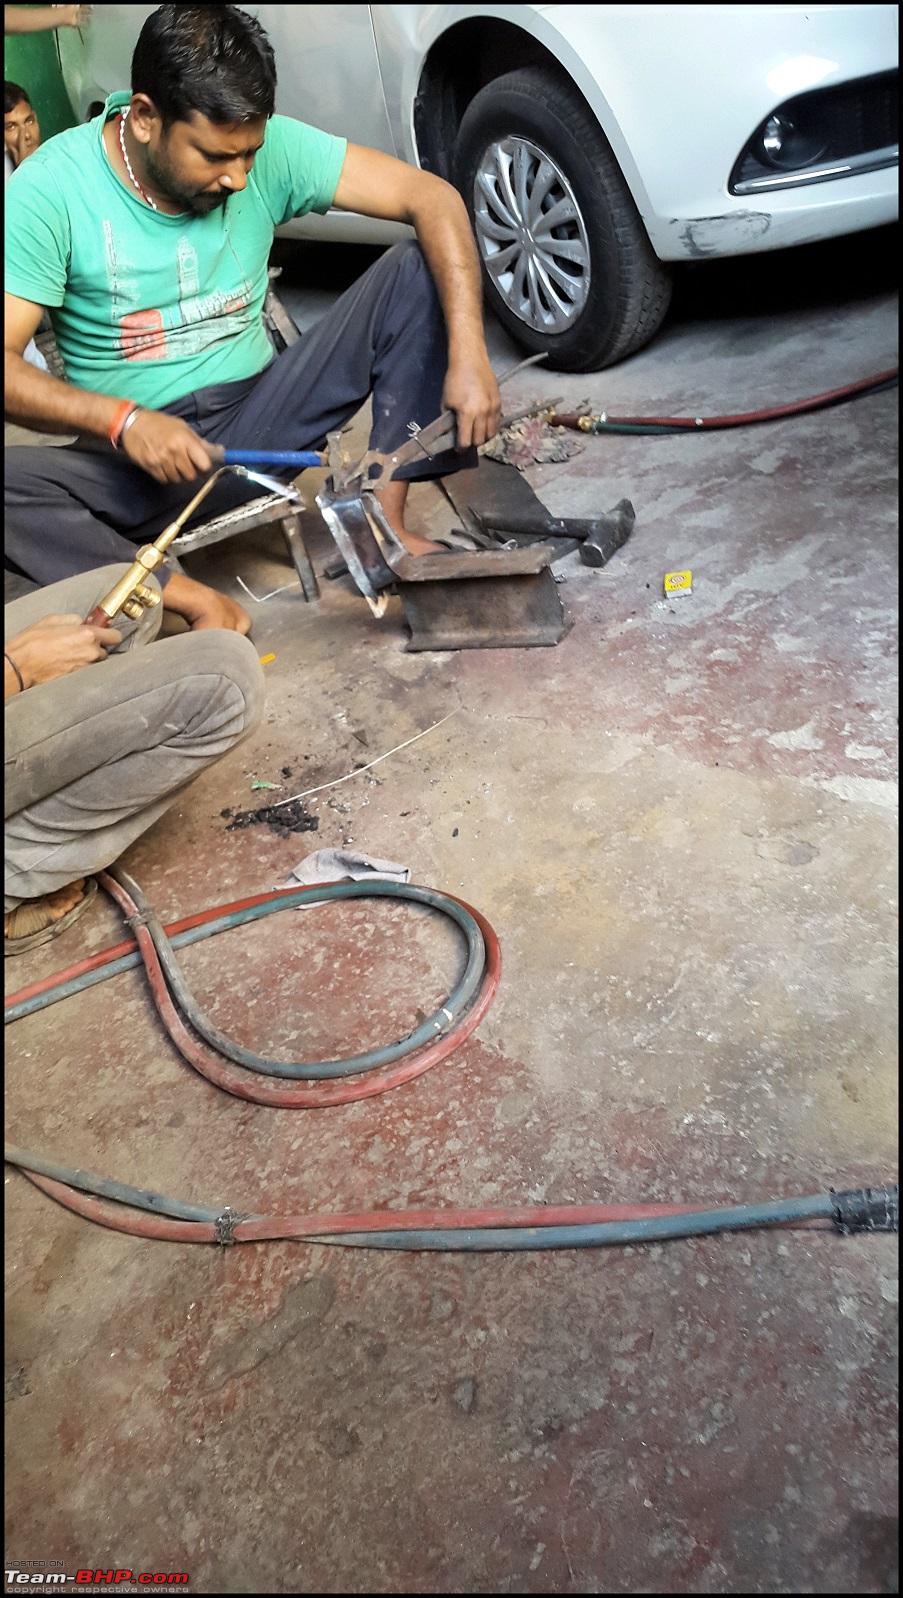 I took this opportunity to get the hood repaired too, which had a minor dent and a vandalism scar. So the hood becomes the first panel on my car to get painted.   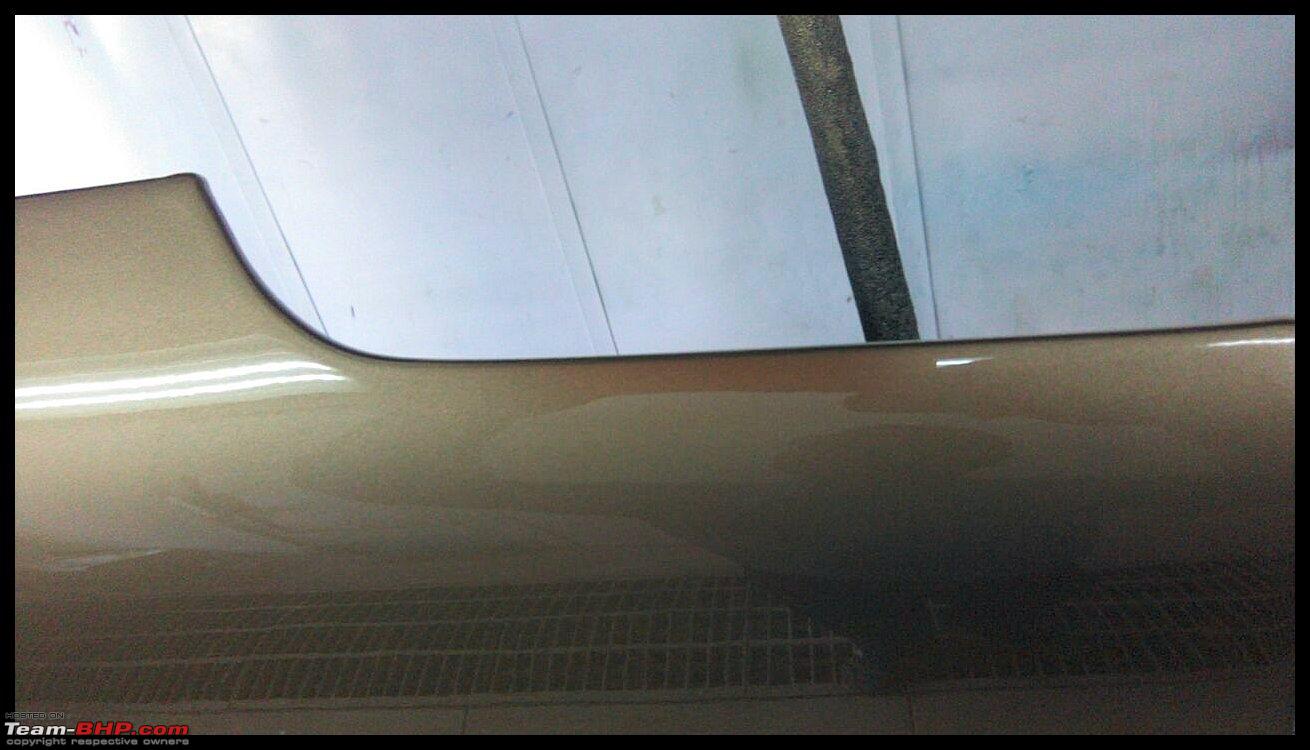 The hero of the booster install, Arjun, came and fixed all small imperfections he could find on my car. Seriously impressed by his attention to detail  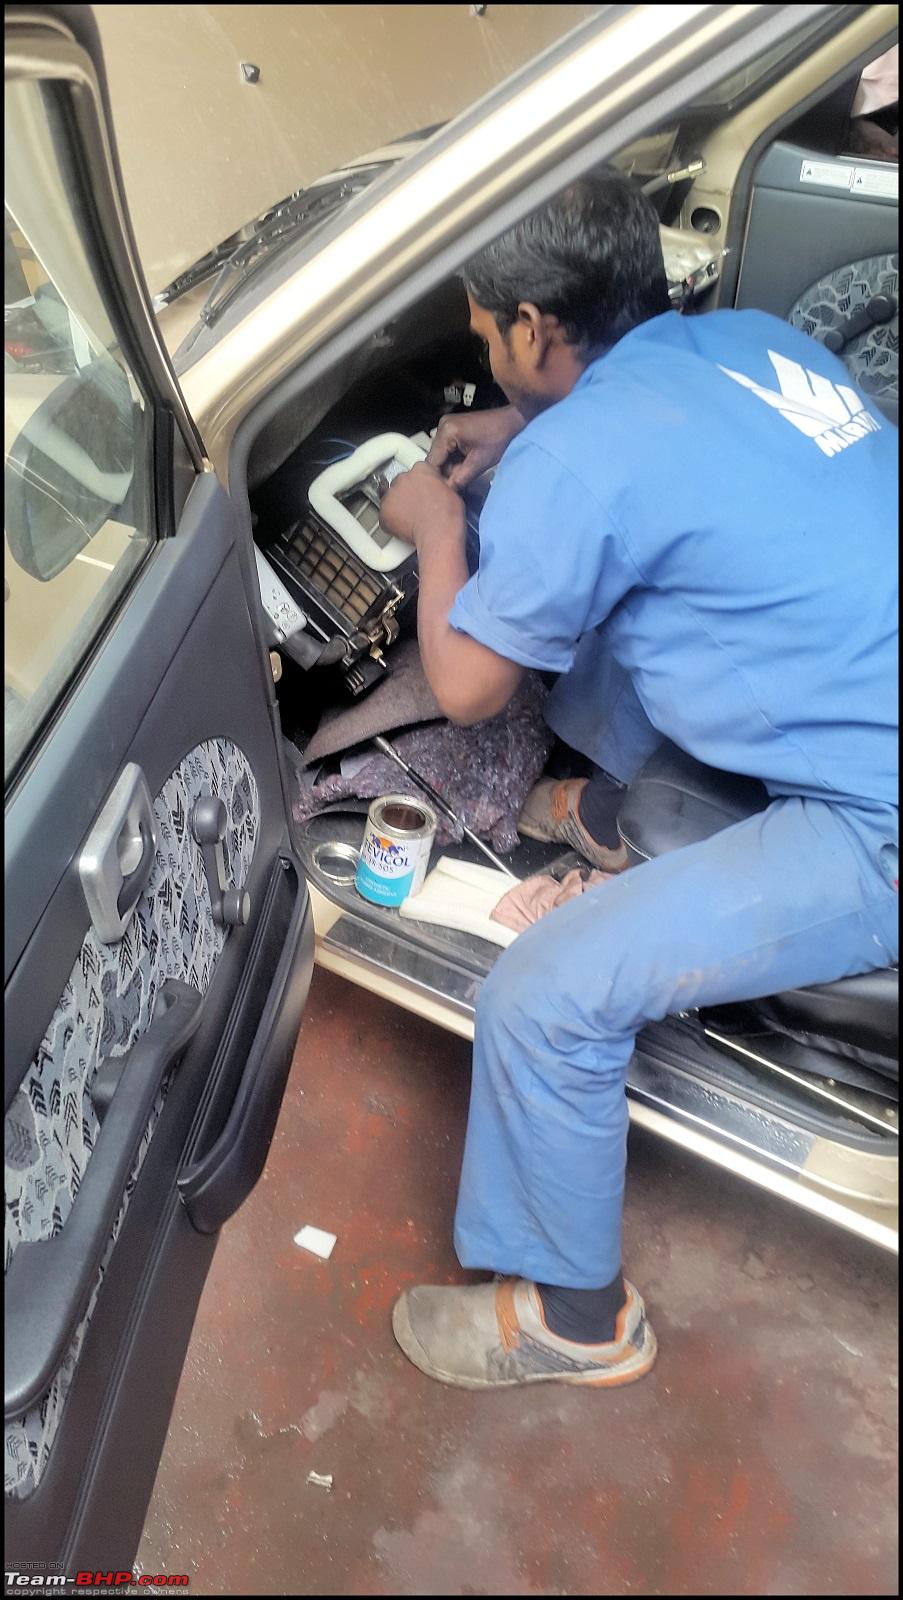 The newly fabricated panel is welded back. The protection starts-Zinc Cold galvanizing spray, followed by Epoxy Primer, followed by white paint, followed by Anti rust coating. 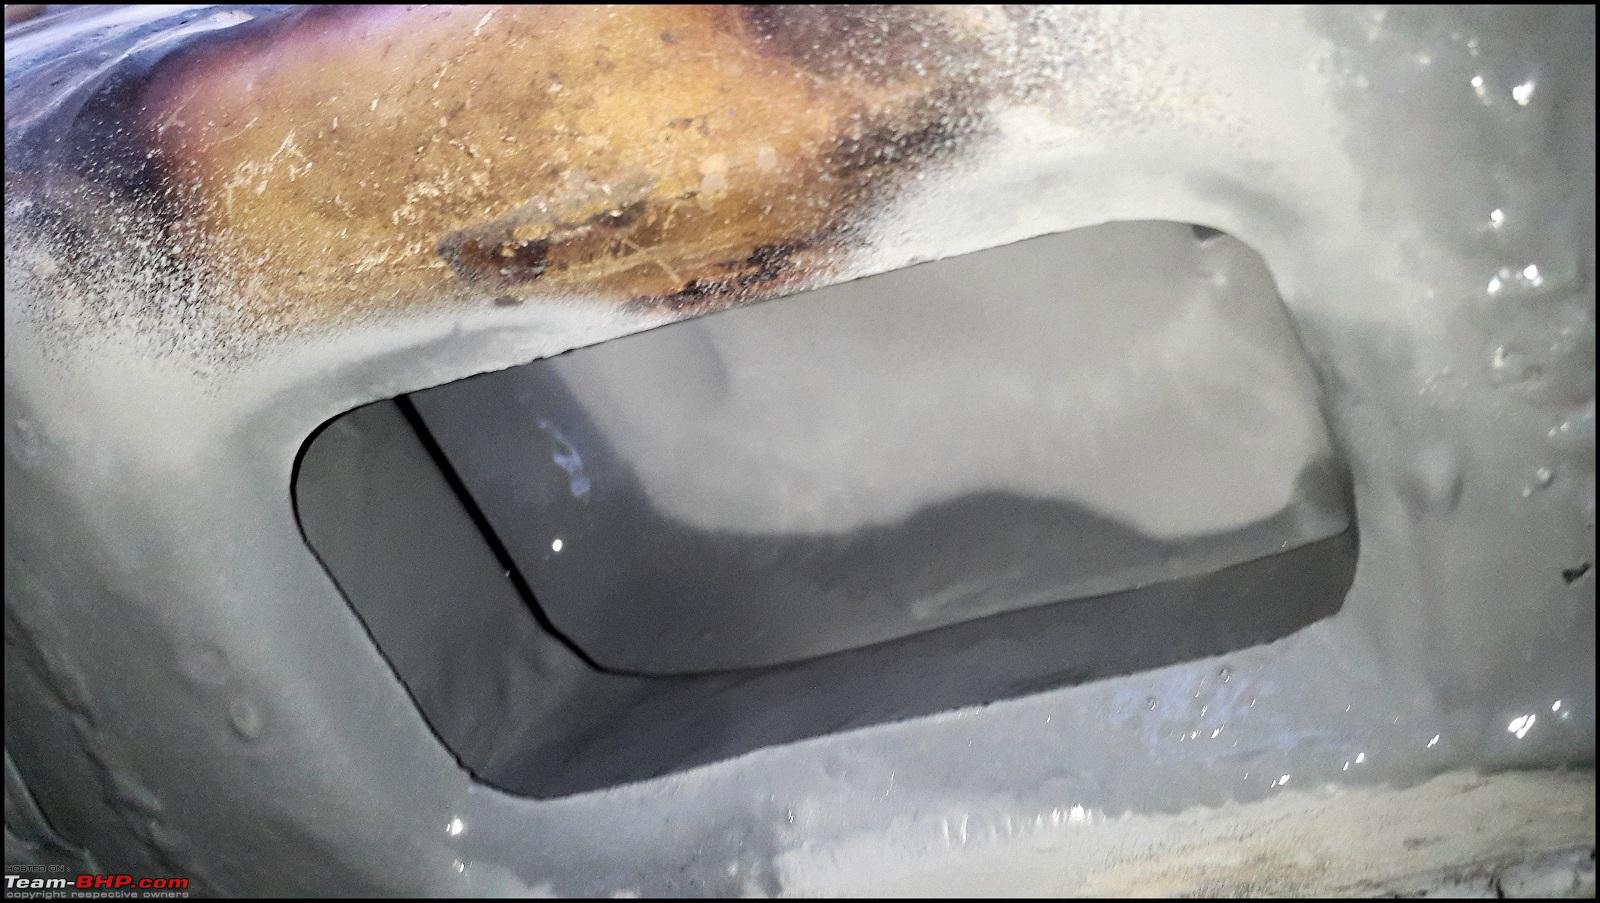 Mr. Dhiraj wasnt satisfied with the paint matching on the hood, and the finish(first attempt had lots of orange peel). So he gets the hood repainted thrice. I meanwhile drive around hoodless, attracting lots of eyeballs and smiles. While fixing the hood back, the denter Mr. Sunil opened the front fenders and aligned all the panels properly. Shame on you Maruti, the issue of misaligned front panel gaps finally gets resolved after 16.5 years. |
|
| (16)
Thanks
|
| The following 16 BHPians Thank Leoshashi for this useful post: | a4anurag, Ashtoncastelino, baby_antu, GTO, karuvally, MAKMADDY17, paragsachania, R2D2, Rehaan, saket77, Scarlet_Rider, sidindica, Simat, sumitsinha0280, swiftnfurious, tacho9000 |
|
11th December 2016, 02:11
| #115 |
| Distinguished - BHPian | re: The love of my life - A 2000 Maruti 800 DX 5-Speed. EDIT: Gets export model features on Pg 27 Small yet significant things- Cowl, box sections and insides of doors were treated with 3M's Body schutz Anti rust. Box sections and running board was first treated by Rust converter, and then painted over 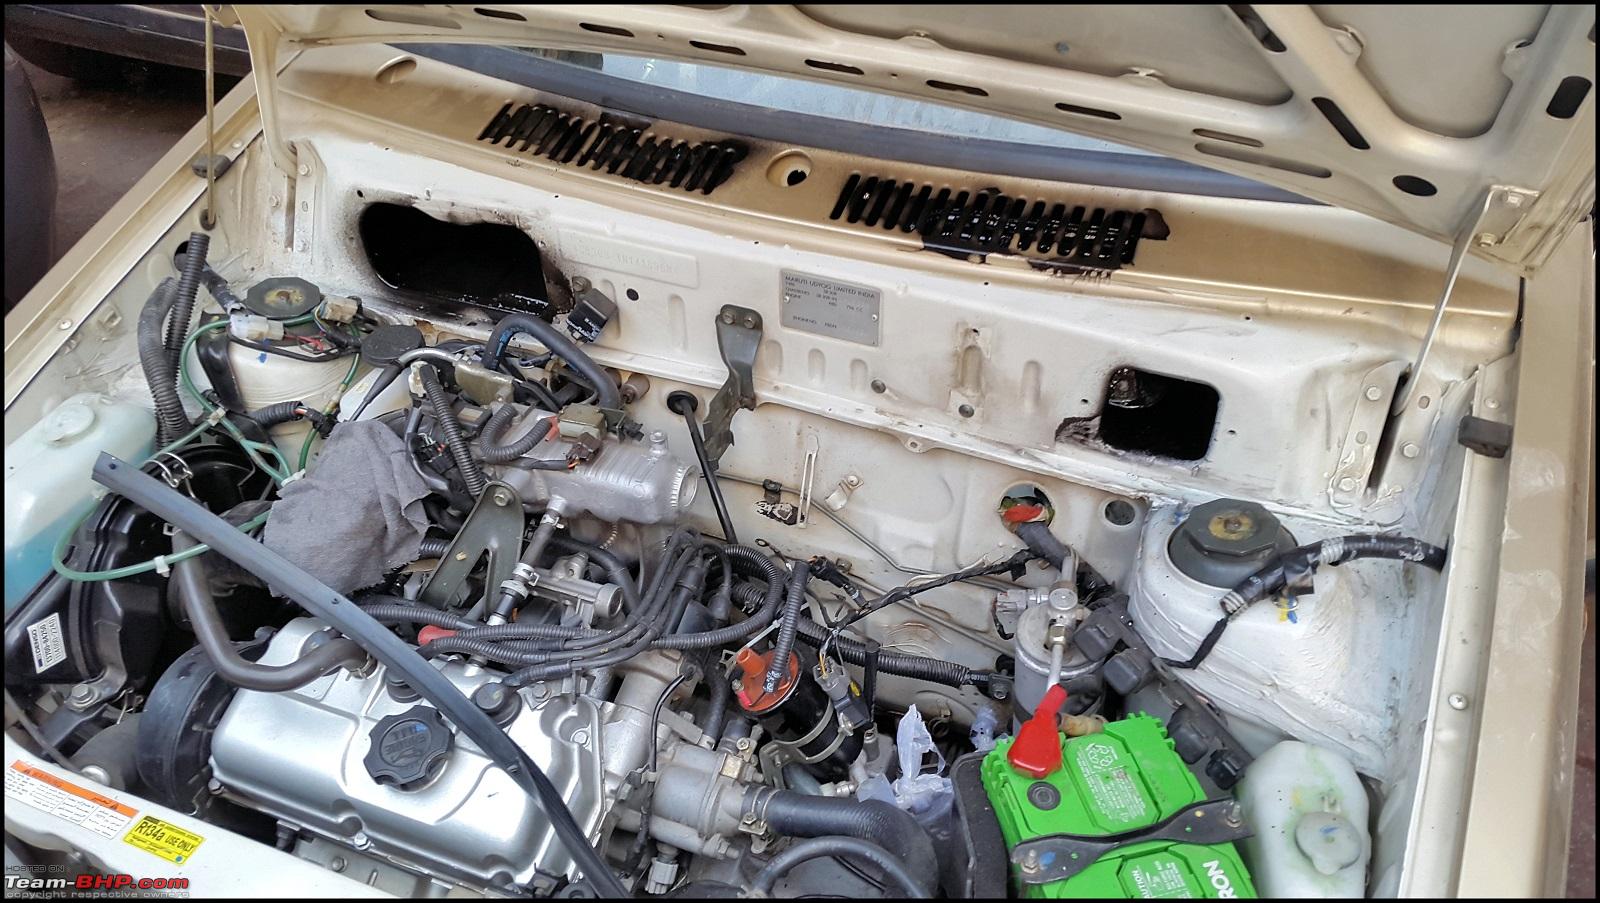 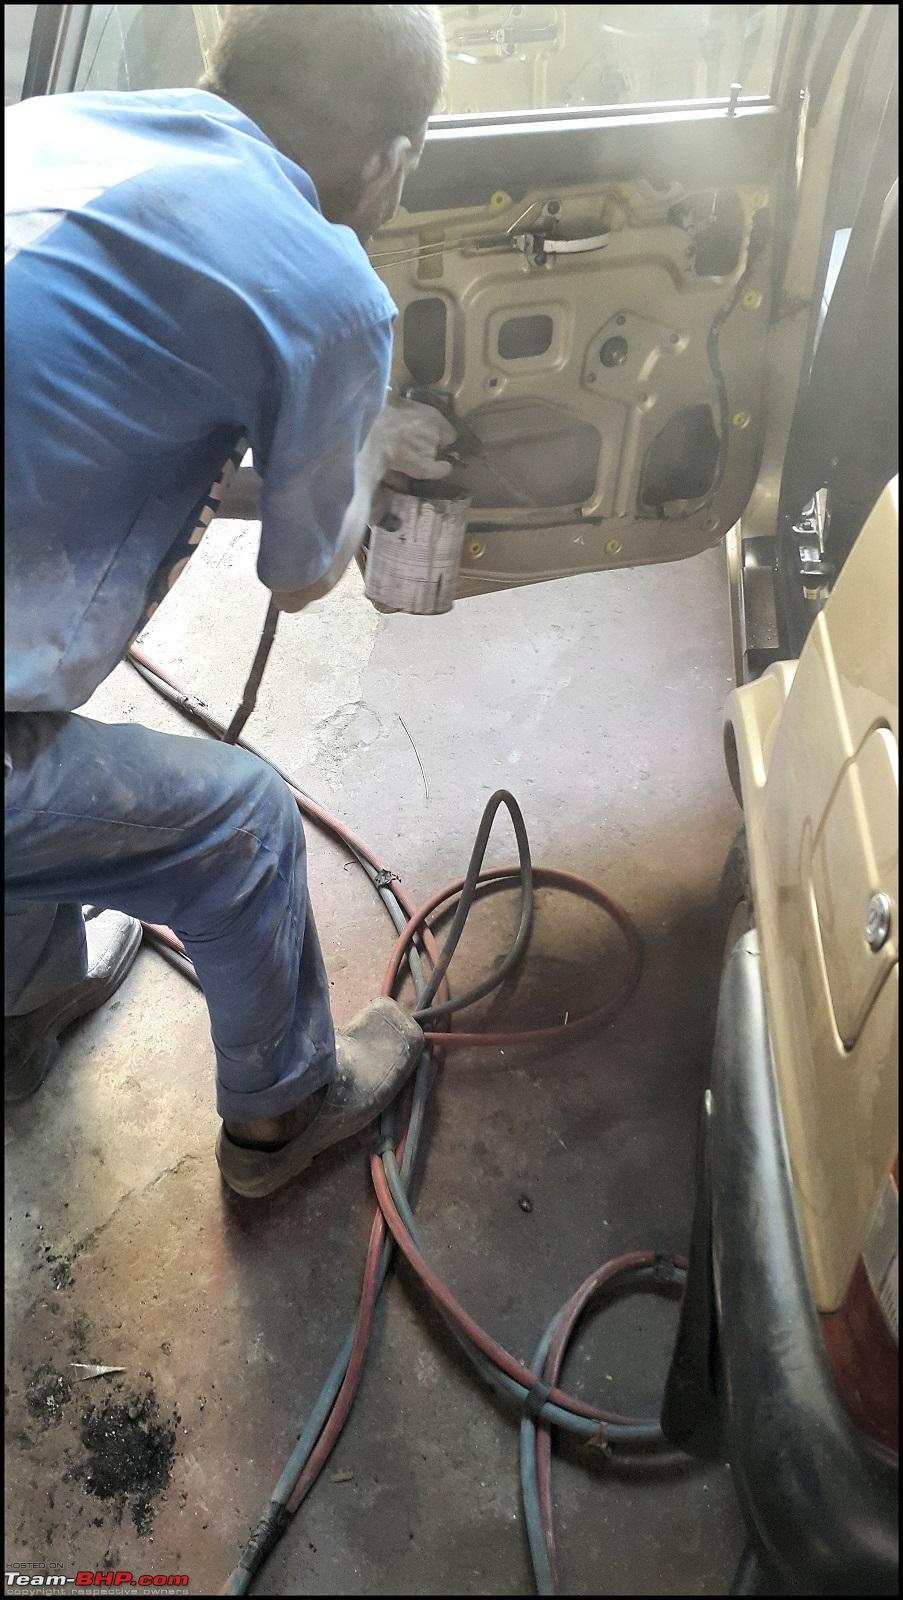  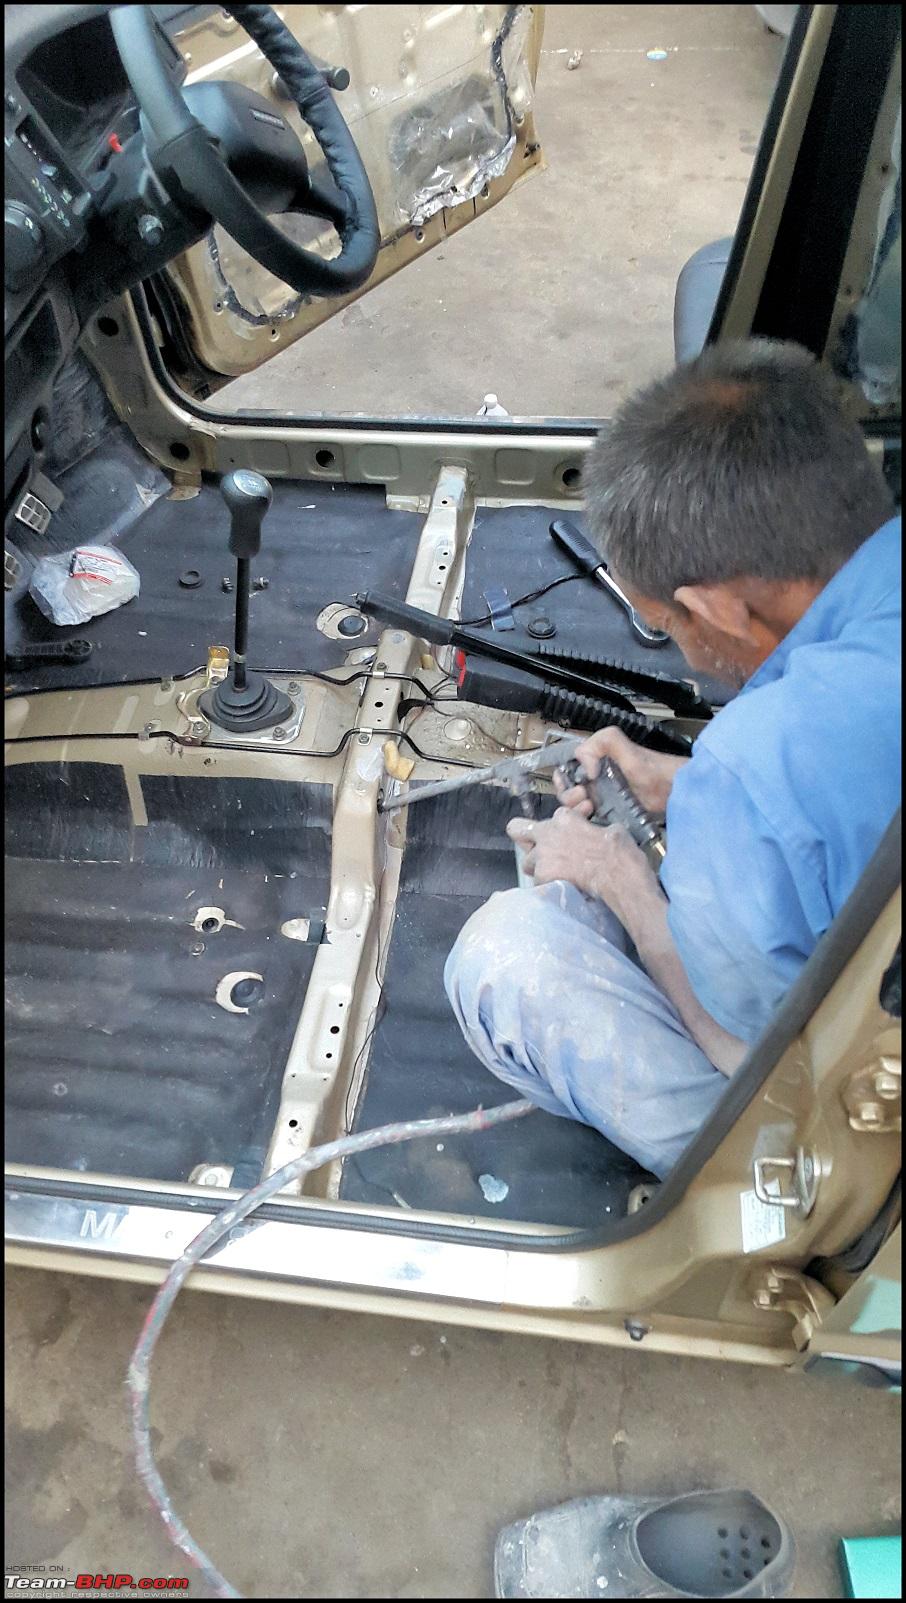 Evaporator cleaned  Crap which came out of the evporator   Hoodless for 2 days  Cars of the exact same vintage. 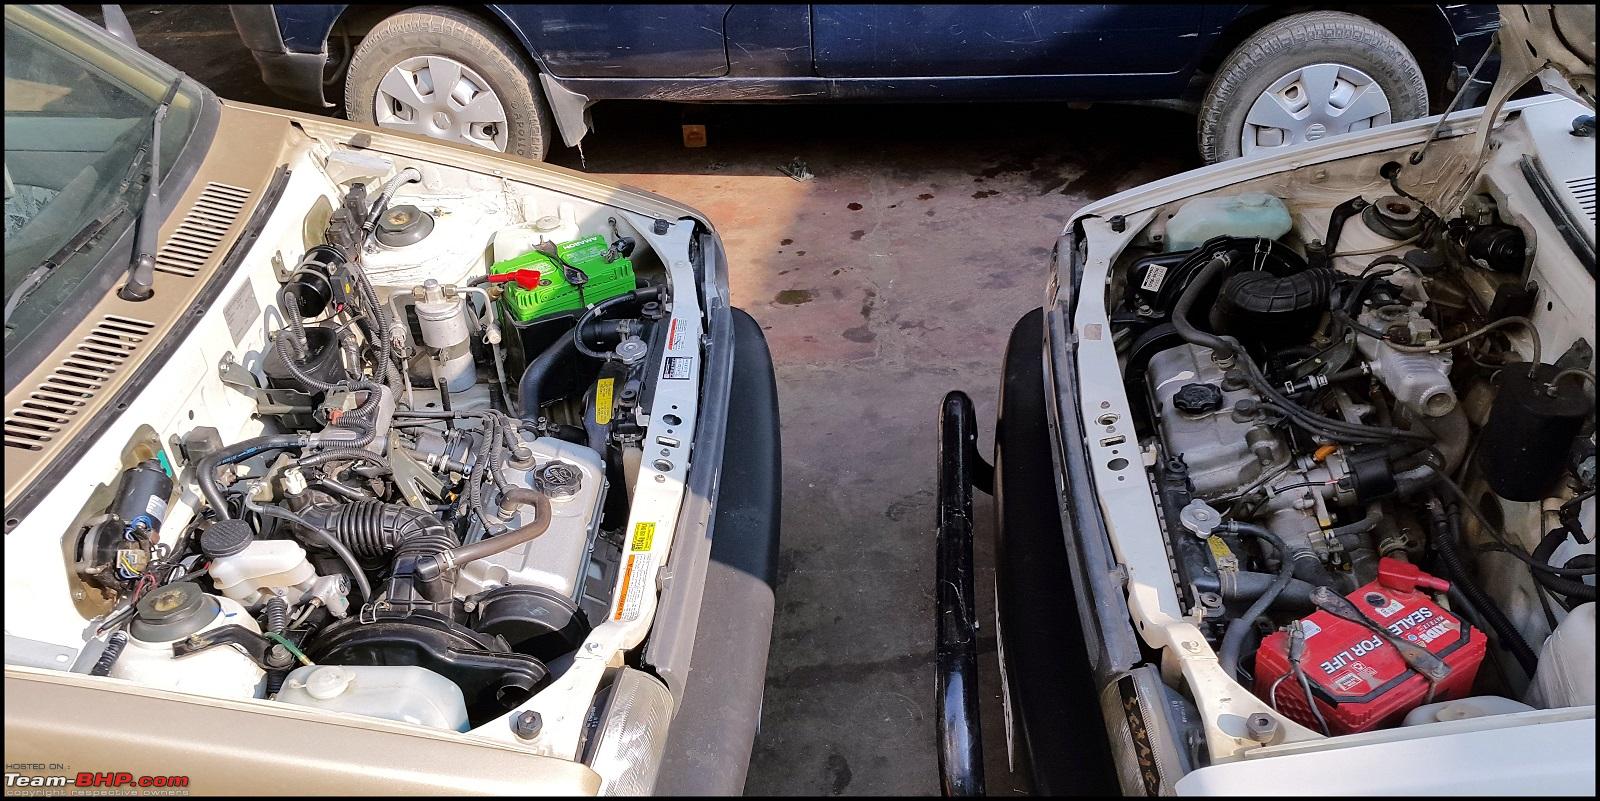 Panels adjusted the next day or even gaps and proper alignment 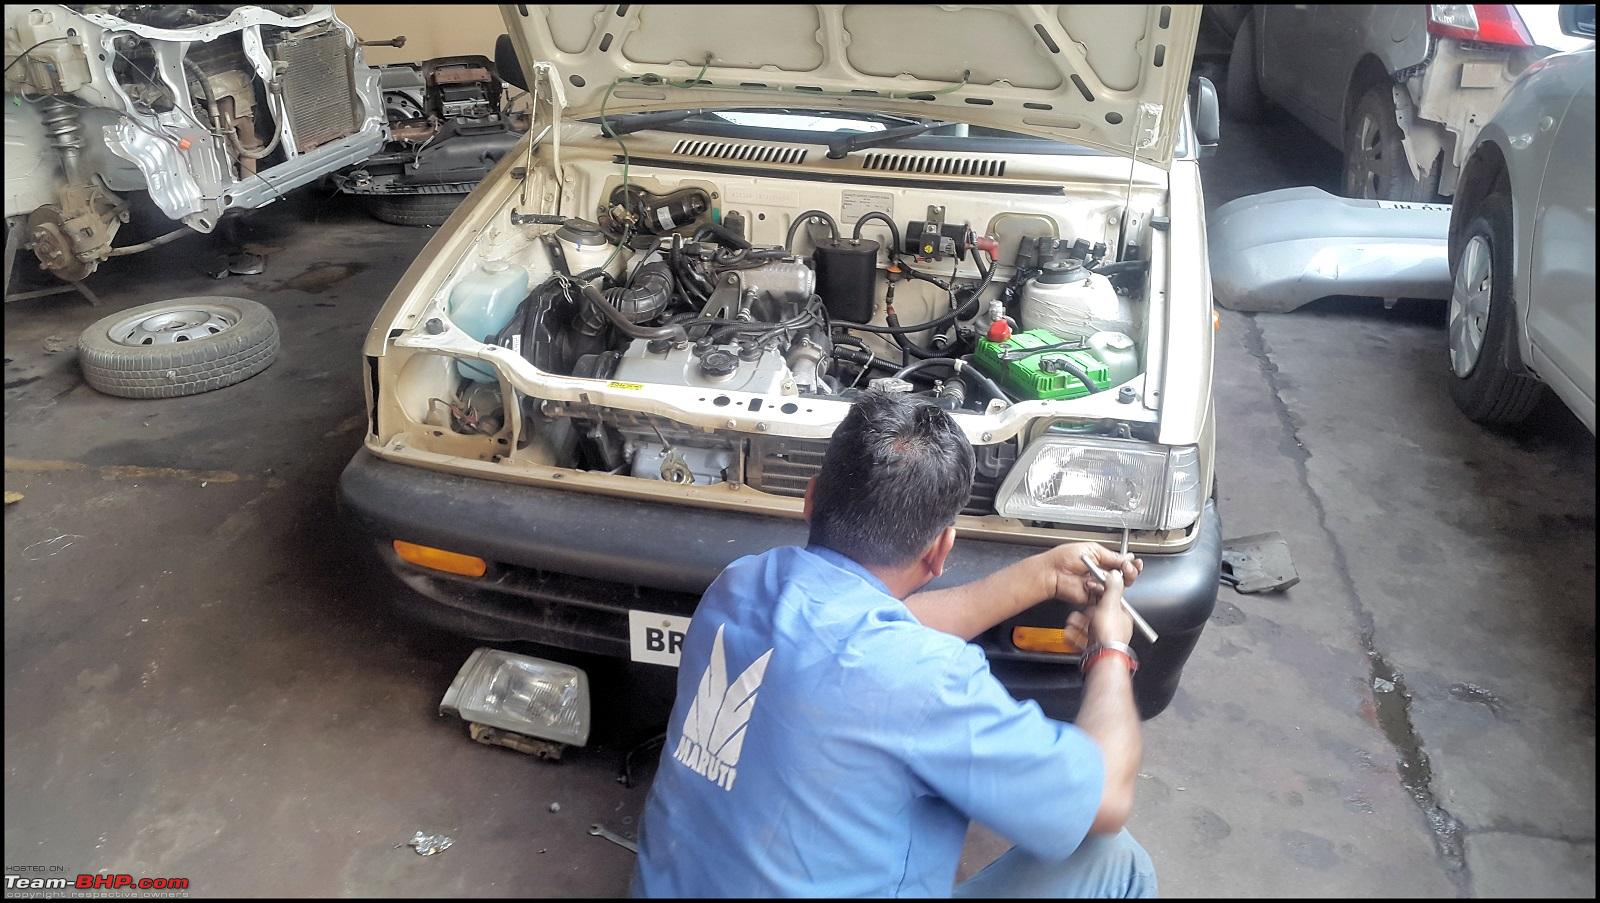 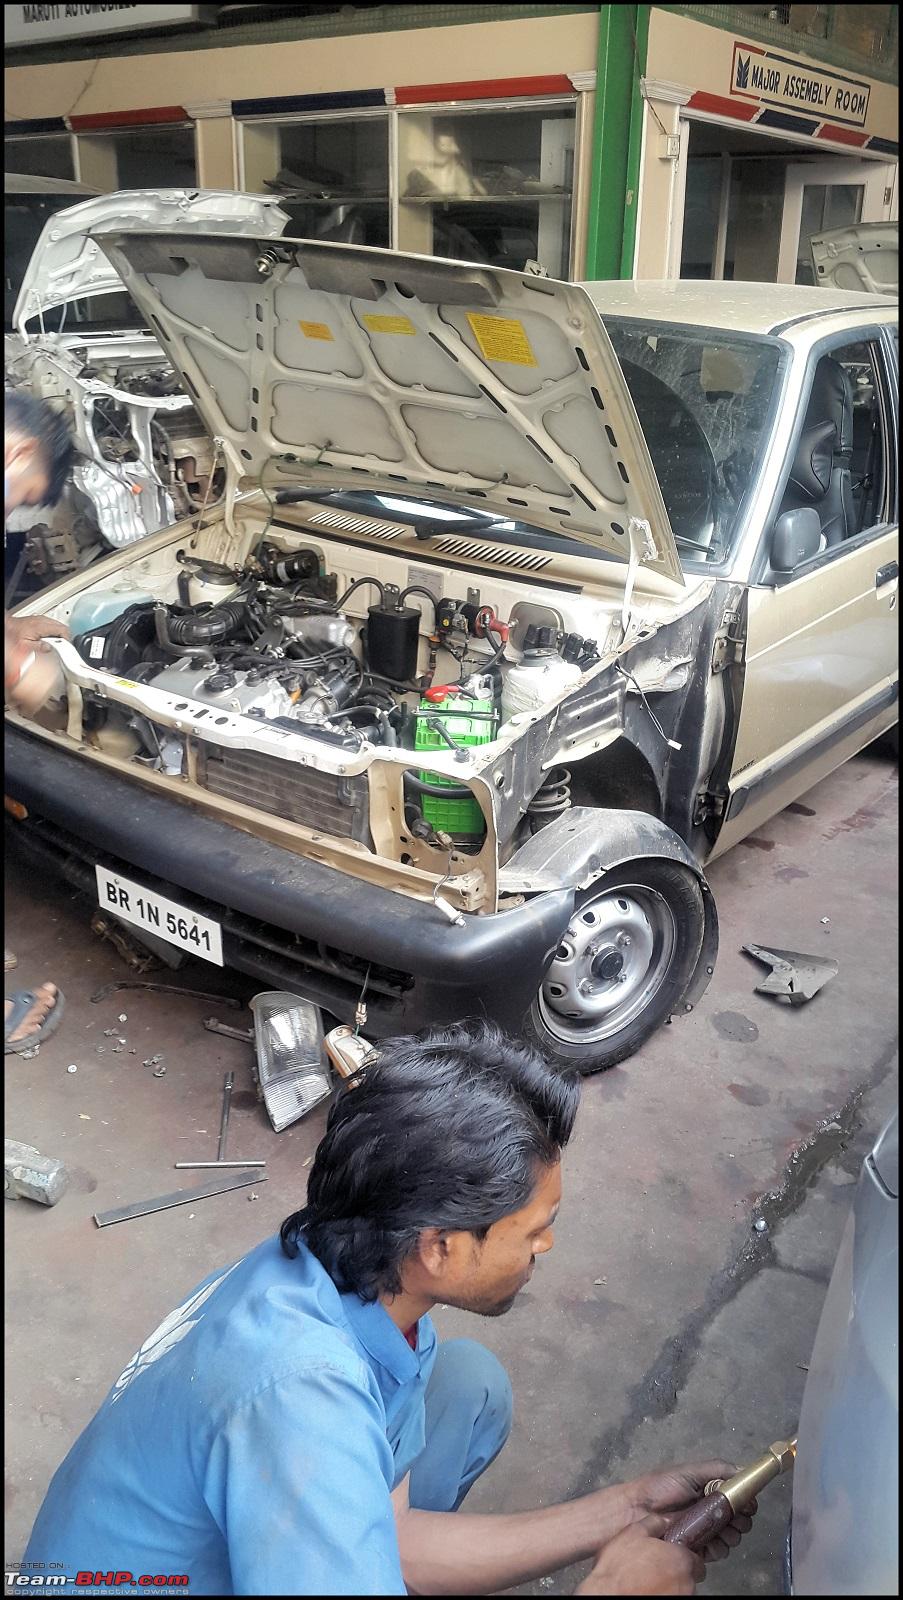 Reason why I love my SA-His hunger for perfection. He reapplied the body sealant around the hinges, exactly the way it came out from the factory. 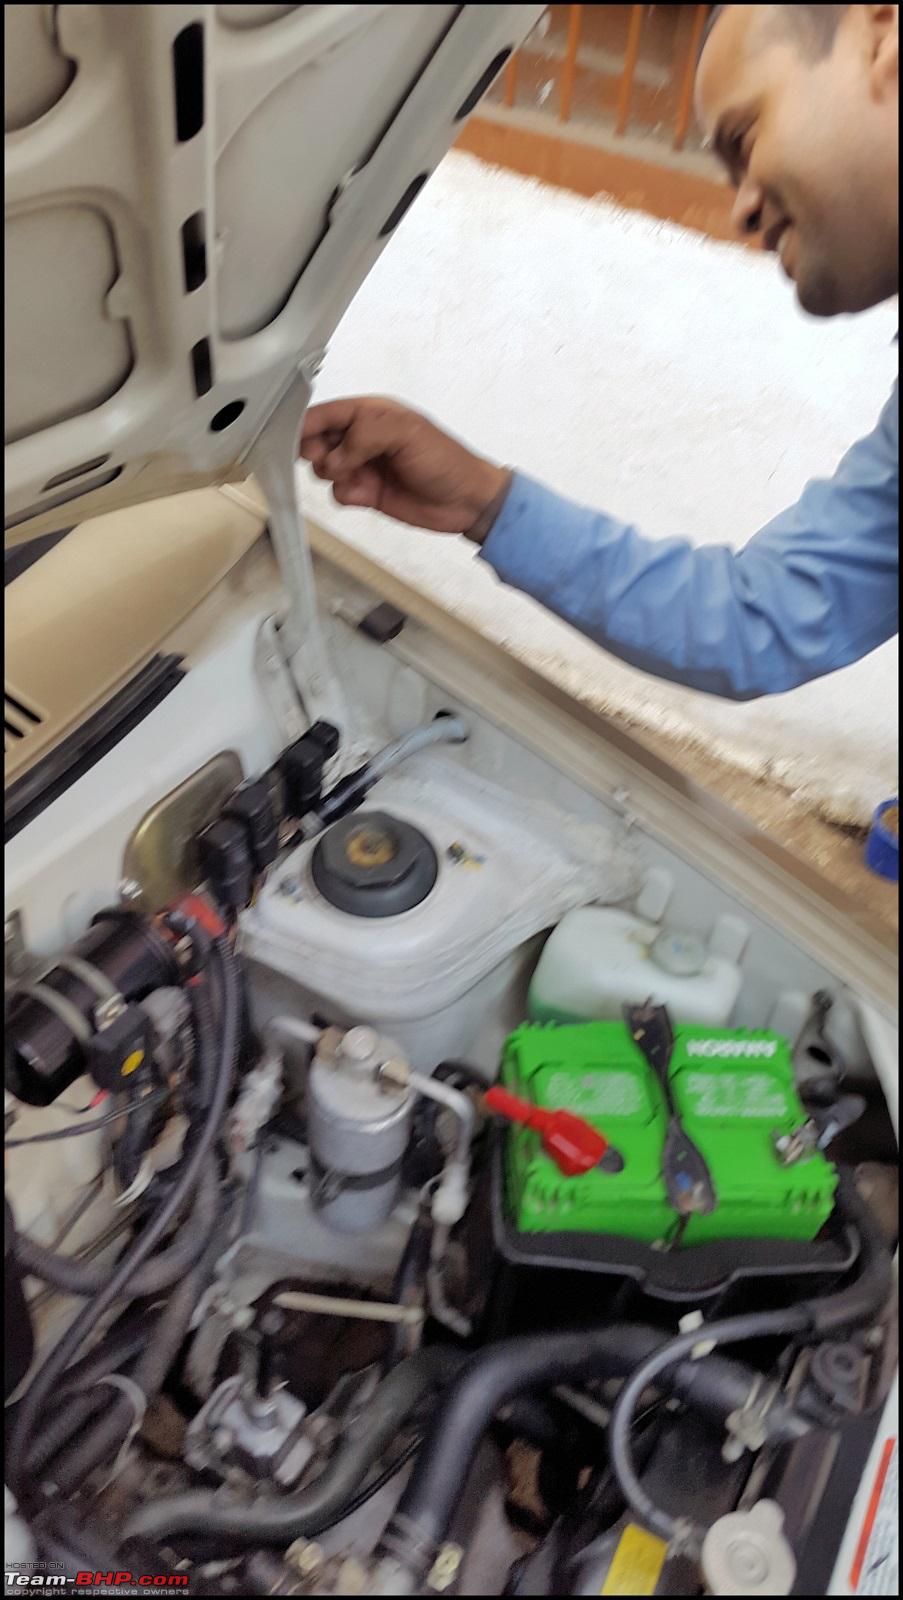 Ready to rock and roll 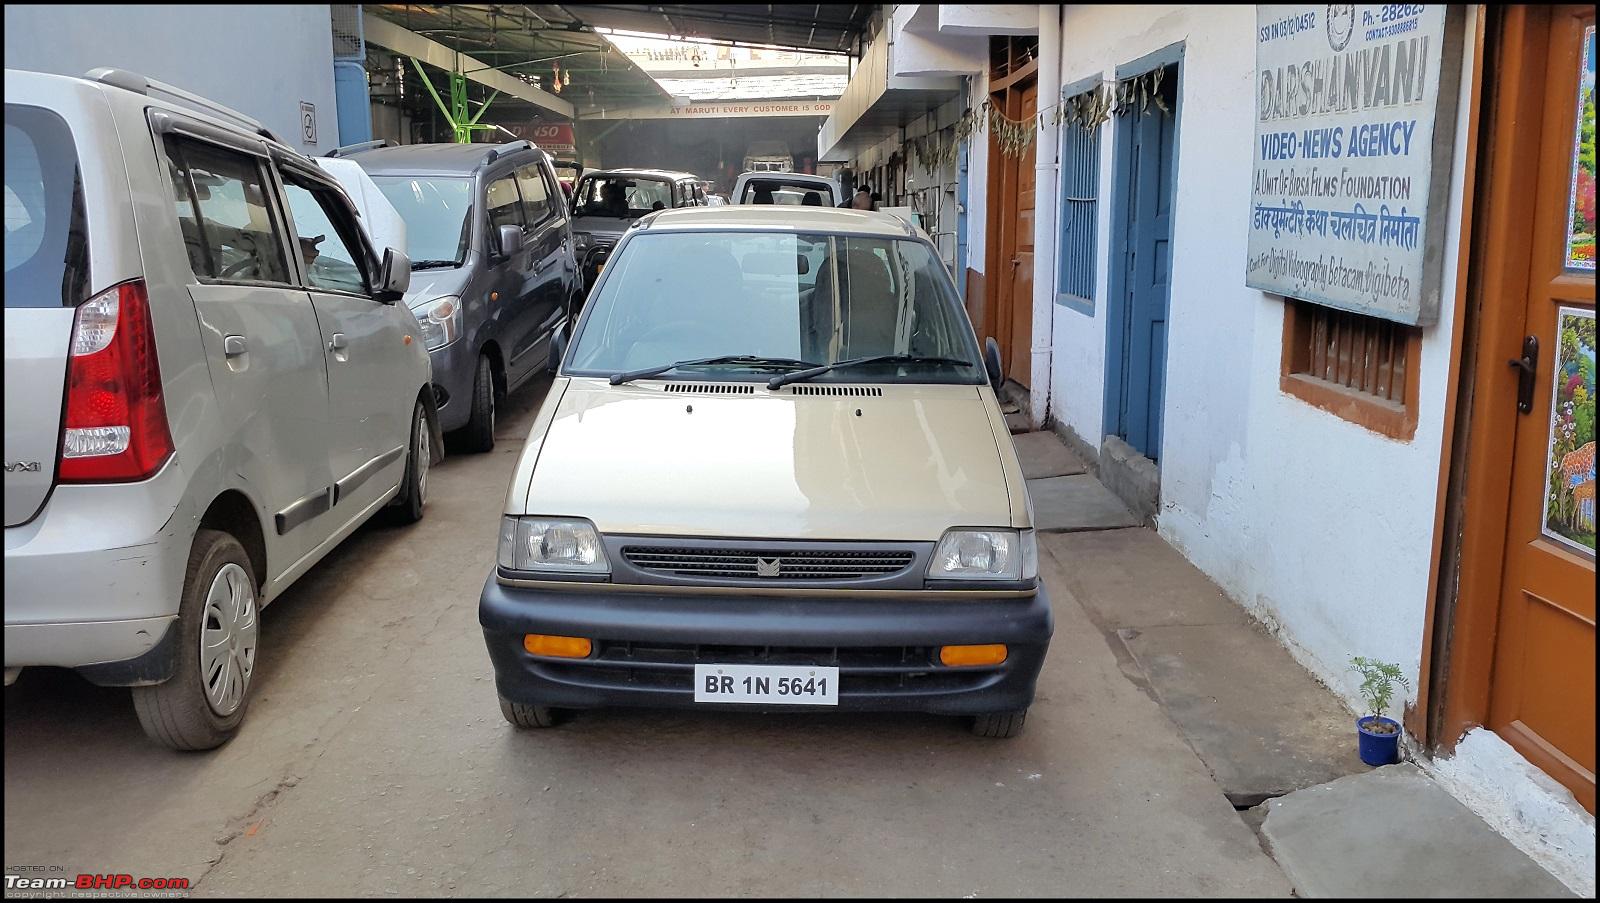 ECM-Made in Japan  Upholstery cleaned by MGA's Liqui Moly Foam after the car came from bodyshop   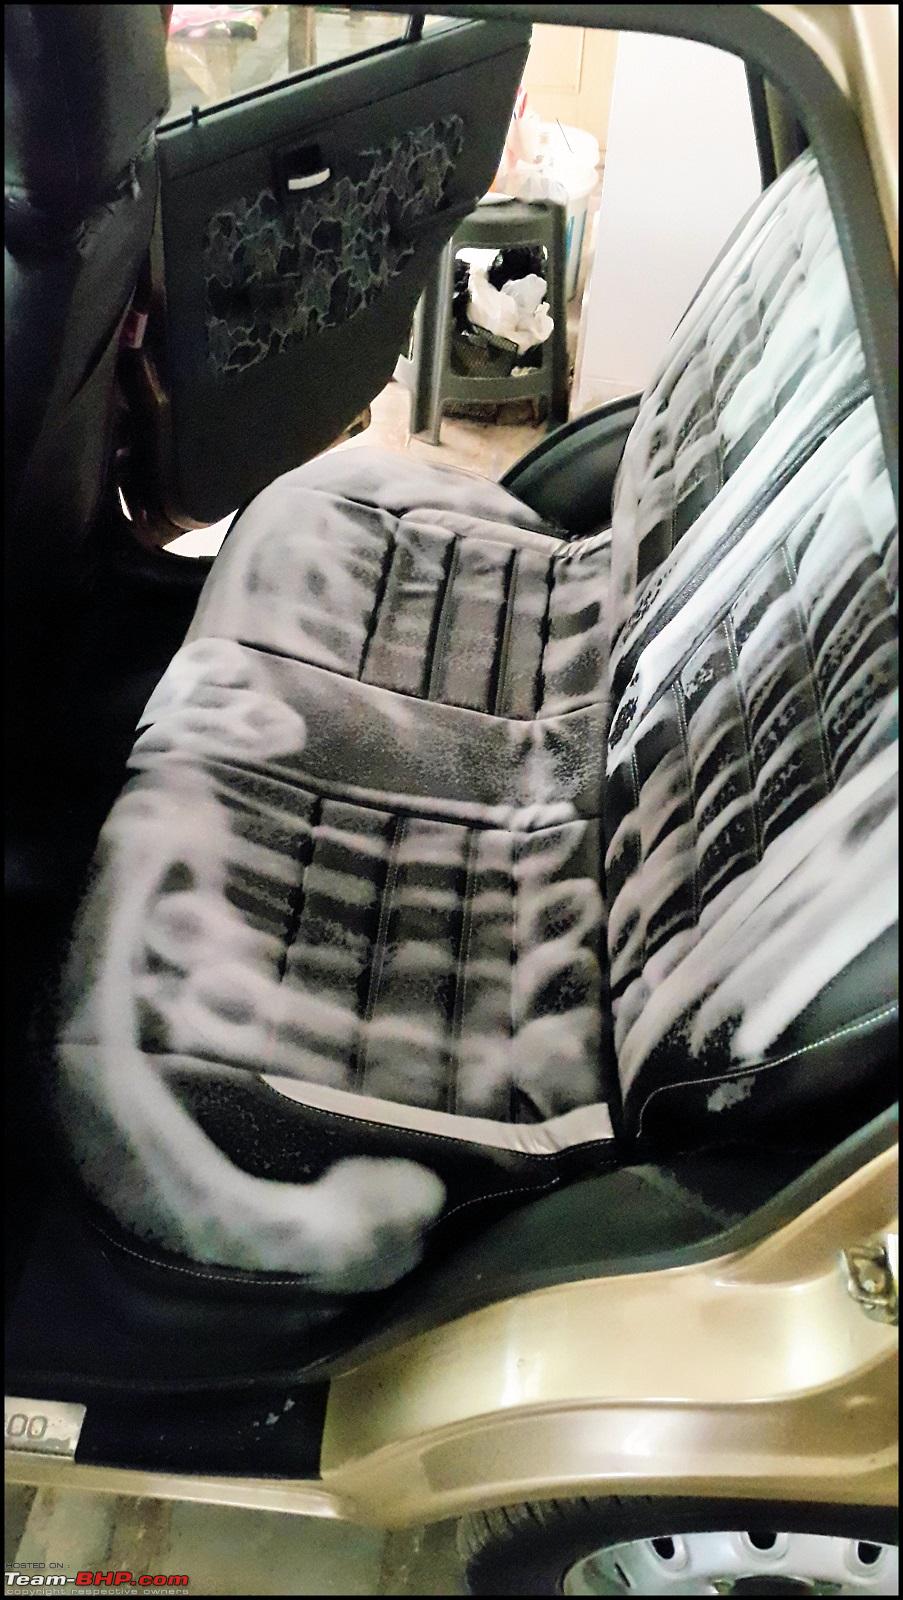 Swift's TriJet nozzles  Saviours of my car  I also painted the tappet cover myself 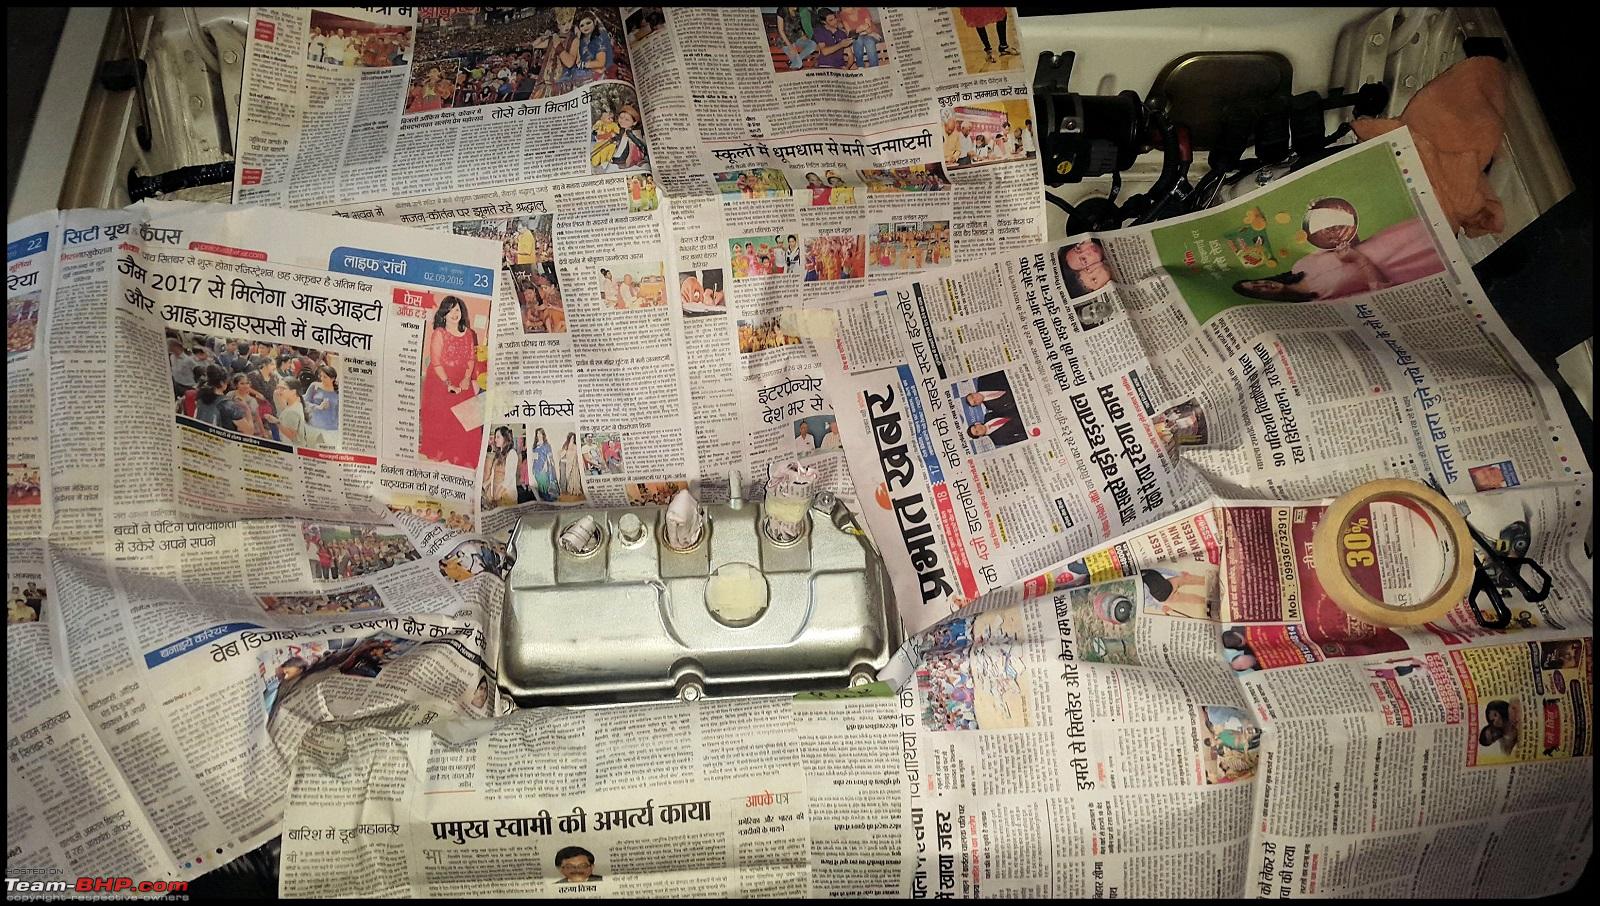 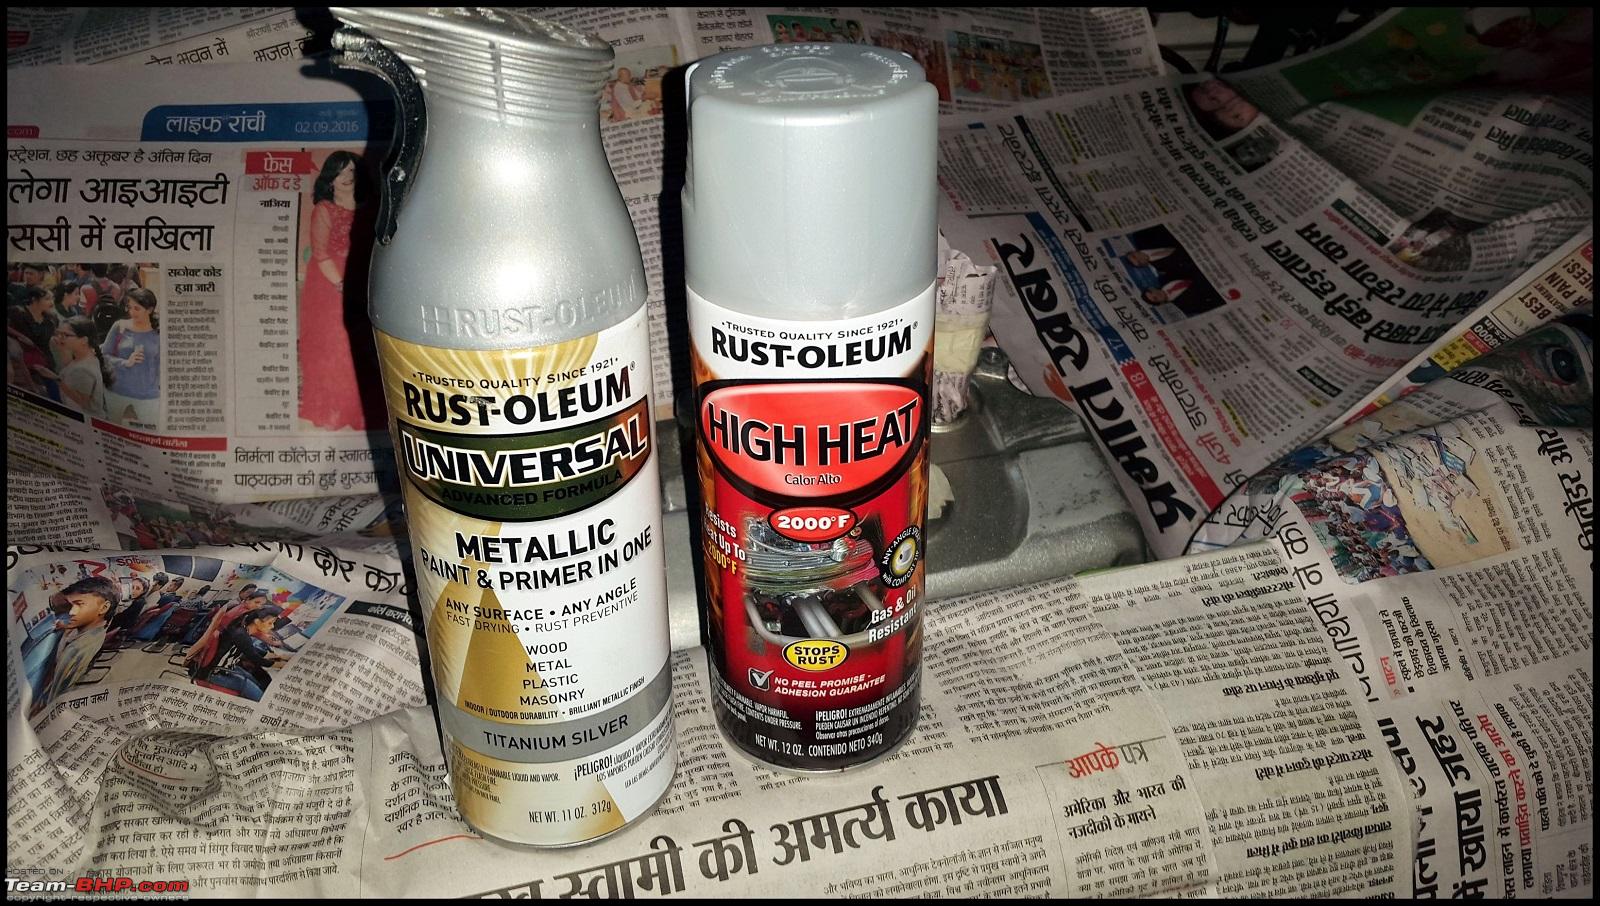 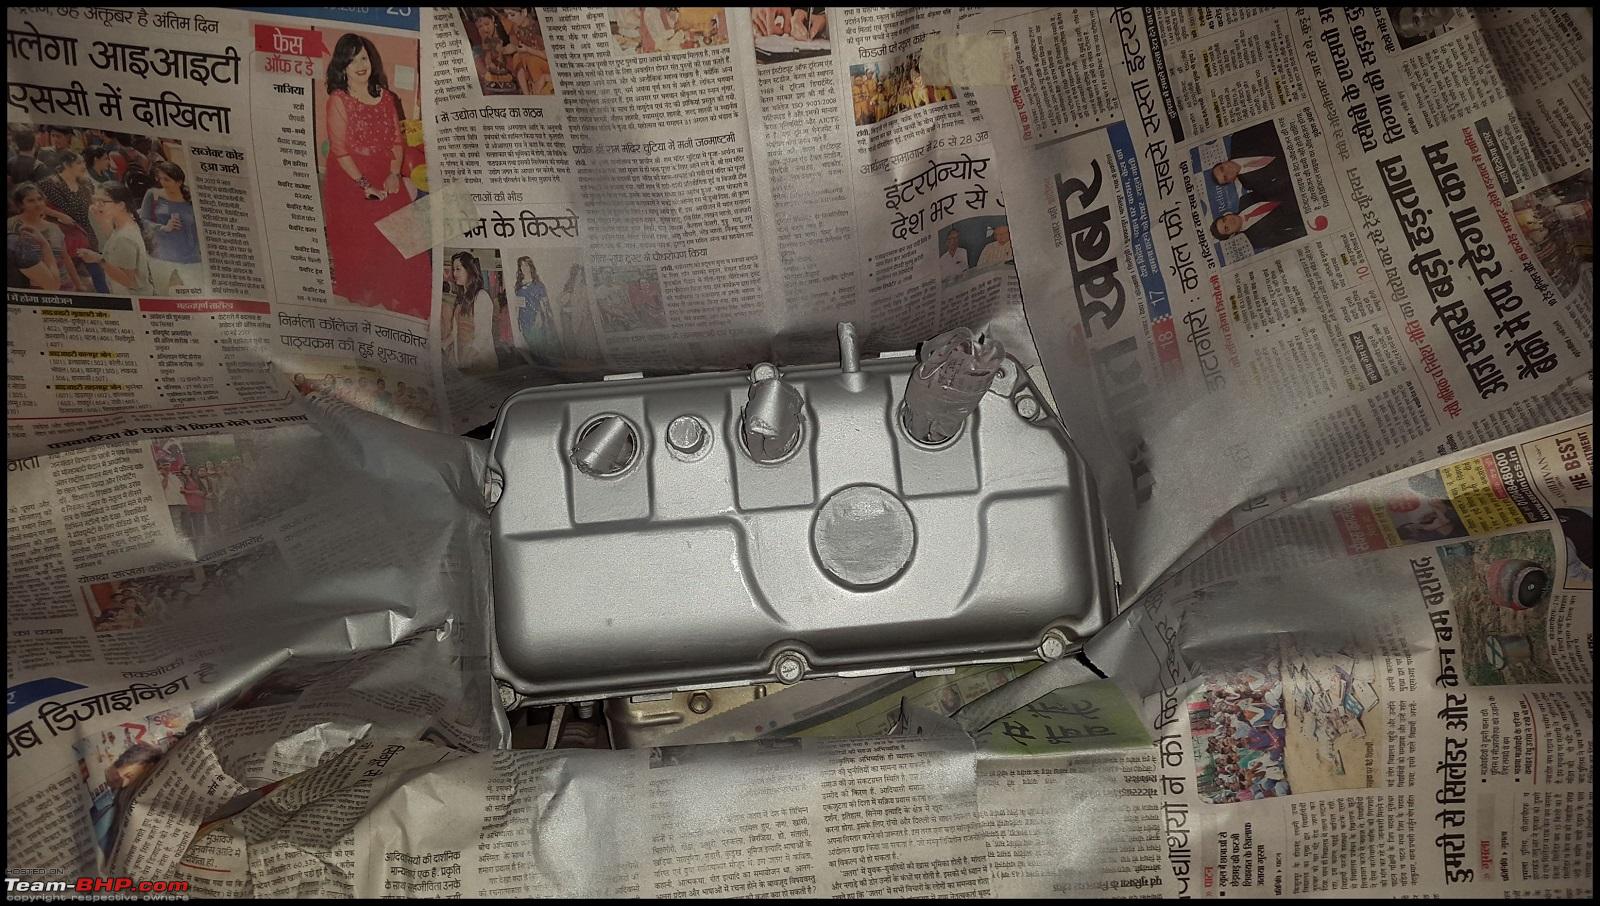 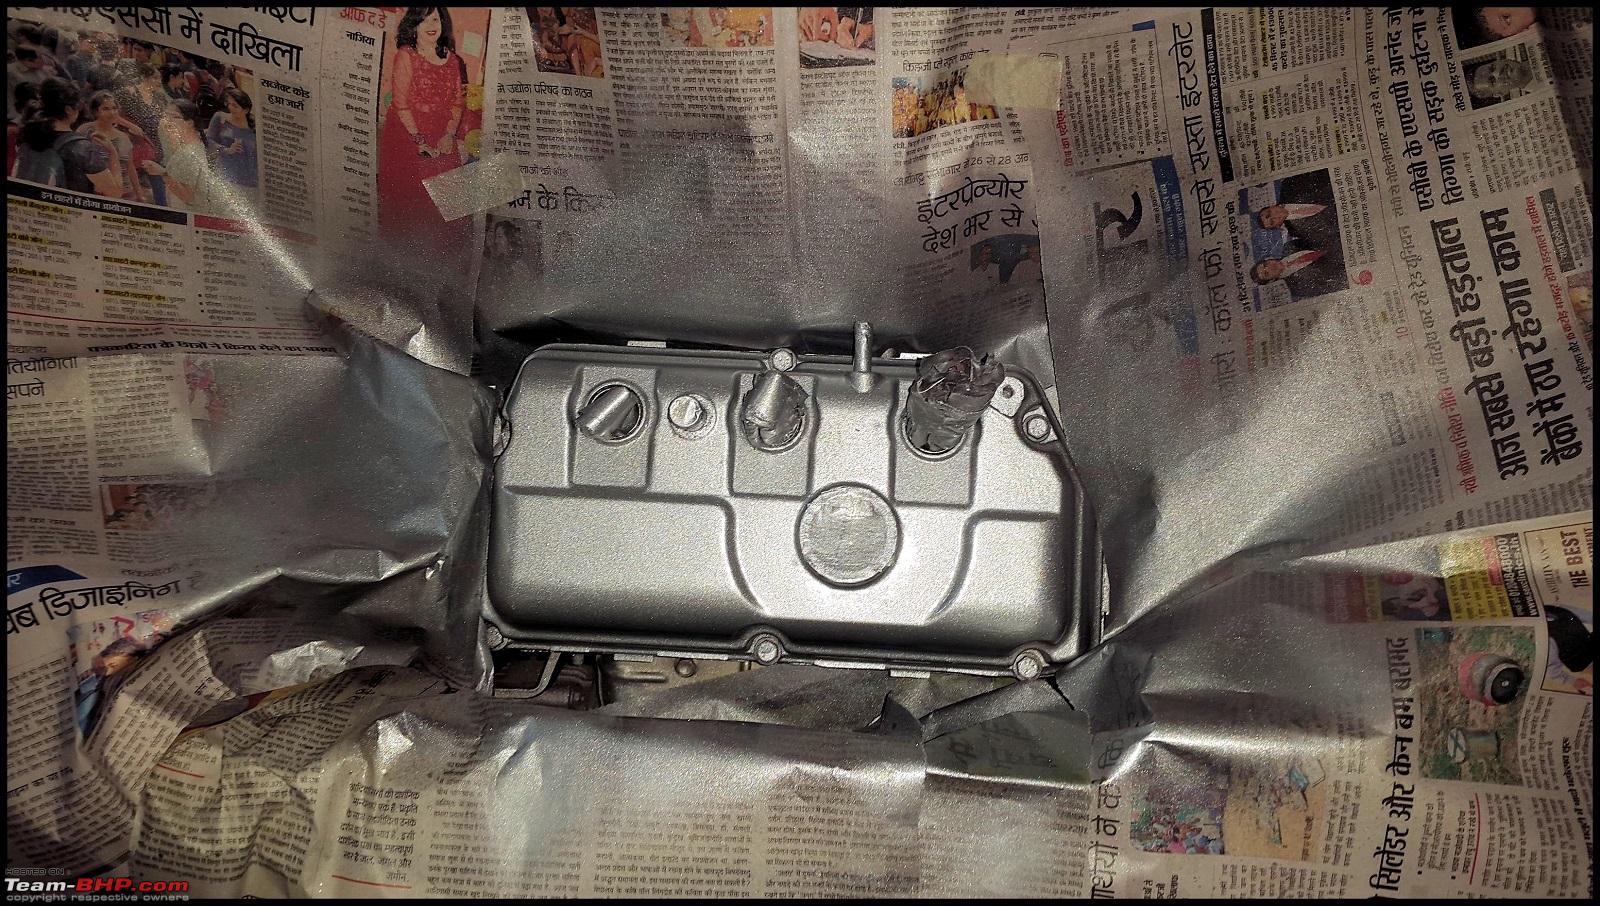 Improvised Heat booth  Regards, Shashi Last edited by Leoshashi : 11th December 2016 at 02:15. |
|
| (23)
Thanks
|
| The following 23 BHPians Thank Leoshashi for this useful post: | a4anurag, Aakarsh, AShubrah, baby_antu, DrANTO, GTO, karuvally, MAKMADDY17, paragsachania, R2D2, Rehaan, Researcher, saket77, samsag12, Scarlet_Rider, sidindica, Simat, sumitsinha0280, swiftnfurious, tacho9000, vaasu, vsaravind007, wbd8779 |
|
11th December 2016, 08:49
| #116 |
| Distinguished - BHPian Join Date: Dec 2012 Location: Ranchi
Posts: 4,375
Thanked: 11,831 Times
| re: The love of my life - A 2000 Maruti 800 DX 5-Speed. EDIT: Gets export model features on Pg 27 Shashi, your dedication and commitment towards cars is simply unparalleled. And for the perfectionist you are. Reaffirms the thought that you don't have to own an exotic car to love and take care of it. The car is so damn lucky to get an owner like you. This car is by far the cleanest example that one can see for the vintage it is. Having observed the job done in the car closely, I can only appreciate your sincerity towards it. Spending more than the car's IDV on these updates doesn't make financial sense; but for those who truly love their rides and the enthusiasm to keep it the way it rolled out of the showroom; it simply doesn't matter. Regards, Saket. |
|
| (12)
Thanks
|
| The following 12 BHPians Thank saket77 for this useful post: | --gKrish--, Aakarsh, AShubrah, baby_antu, karuvally, Leoshashi, MAKMADDY17, paragsachania, Scarlet_Rider, sumitsinha0280, swiftnfurious, tacho9000 |
| |
|
11th December 2016, 09:20
| #117 |
| Team-BHP Support  | re: The love of my life - A 2000 Maruti 800 DX 5-Speed. EDIT: Gets export model features on Pg 27 While I am all about keeping the car as mint as I can, I just can't resist to suggest you to think about adding alloy wheels for your M-800. The pains you have taken to get your ride prepped up deserves a mention and it is equally heartening to note the mechanics sharing the same spirit as well. Powder coat the alloys in black or dark graphite [if you decide to get them] And that should complete the look. |
|
| (8)
Thanks
|
| The following 8 BHPians Thank Sheel for this useful post: | AShubrah, baby_antu, Leoshashi, MAKMADDY17, paragsachania, Scarlet_Rider, sumitsinha0280, viXit |
|
11th December 2016, 09:31
| #118 |
| BHPian Join Date: Feb 2016 Location: warangal
Posts: 144
Thanked: 433 Times
| re: The love of my life - A 2000 Maruti 800 DX 5-Speed. EDIT: Gets export model features on Pg 27 Hey Shashi, Not trying to troll you but hasn't maruti 800 always given 25 kmpl on highway. I mean I own a carburetted maruti 800 and I usually get 24kmpl on state highways in Non-AC fully loaded conditions. The best I have got is 26 kmpl fully loaded on highway in the early hours with sparse traffic. I am pretty sure I can extract more if I go solo on highway. Your car has more valves which means you cann revv lower and still have the grunt and the precise fuelling of MPFI which should technically give you more mileage. I can see that you have mechanical spark distribution system and not ECU controlled like modern cars. Do you get the spark timings checked by the gun in the service center? It is a lost art these days. If you want a cheap dirty way of checking whether you have the right spark distribution, head over to my thread of Maruti 800 restoration. I have a video for every work I have done and more coming soon. Although I must say, I am a very good driver. My brother or father only manage to get 20-22kmpl on highway where I get 24. And btw, my car is running on 145/80 R12 tyres, oversized tyre sidewall height. It creates a stress on the engine when setting off but the average cruising speed becomes a bit higher. Maybe that too has something to do with mileage difference. Just imagine me having the ceratec coating and doing a solo highway run on a sparse highway at constant speed. I guess we can safely assume getting close to 30 kmpl in a car  . Where did you order these from? Amazon? I was deciding on getting something similar done but unfortunately, I did an engine oil change 500 kms ago. So, I have to wait for at least 5000 kms. If it is that good and cost savings are so drastic, I think it makes more sense to get it done now. . Where did you order these from? Amazon? I was deciding on getting something similar done but unfortunately, I did an engine oil change 500 kms ago. So, I have to wait for at least 5000 kms. If it is that good and cost savings are so drastic, I think it makes more sense to get it done now.Here is the thread of my restoration. I must admit, Marutis are rust boxes and it is frustrating to know that. Floor pans, all the corners where you cannot reach and other places are horrid sometimes. You have to get a second repaint of the whole car to get it to stick with you for longer. http://www.team-bhp.com/forum/diy-do...00-budget.html Good job of maintaining your car. I am so jealous of your car, you cannot even imagine. My car though is a well maintained example that I own, it does not even close to what you have. I want to have such a freakish attention to detail but I lack the vitamin M to go for such extensive neat restorations. Furthermore I am a mechanical engineer. So, it is always the jugaad life for me. Unless I go supercharging, everything is going to be done with my bare hands. By the way, do you not have any thermocol heat proofing for the floor? Does your AC even cool a fully loaded car at all in summer heat in city traffic? Marutis do struggle to keep up the temperature. So, I laid down an 8mm thermocol sheet on the floor below the floor mat and the results are simply astonishing. It is WAY cooler than before. I think you should try that out too and trust me, you will see the AC compressor cut off more often giving you more turbo time and better mileage.How easy is it to get the dashboard off? I haven't done that at all and was actually planning the same. I know where the screws are but I don't know if it snaps out or are there any vital components or anything. I need time to figure it out whether it comes out easily or not. And I cannot have downtime because I don't have a holiday at all and this is my only car now. Also, is there or was there any sort of sound in the 5th gear of the car? I am planning on retrofitting a 5 gear and my mechanic tells me not to because it gives a small noise in 5th gear under some circumstances maybe when holding the clutch and coasting or at low speeds in 5th gear. And he believes 4 speed is more reliable somehow. I want to have full information before I go in on the swap. All the best - Aveem Ashfaq Last edited by GTO : 12th December 2016 at 08:53. Reason: Typo |
|
| (1)
Thanks
|
| The following BHPian Thanks aveemashfaq for this useful post: | Simat |
|
11th December 2016, 21:10
| #119 | |||||||||
| Distinguished - BHPian | re: The love of my life - A 2000 Maruti 800 DX 5-Speed. EDIT: Gets export model features on Pg 27 Quote:
Quote:
Recently, one of my close friends, Varun, got his alloys powder coated, and I must say, they look smashing.   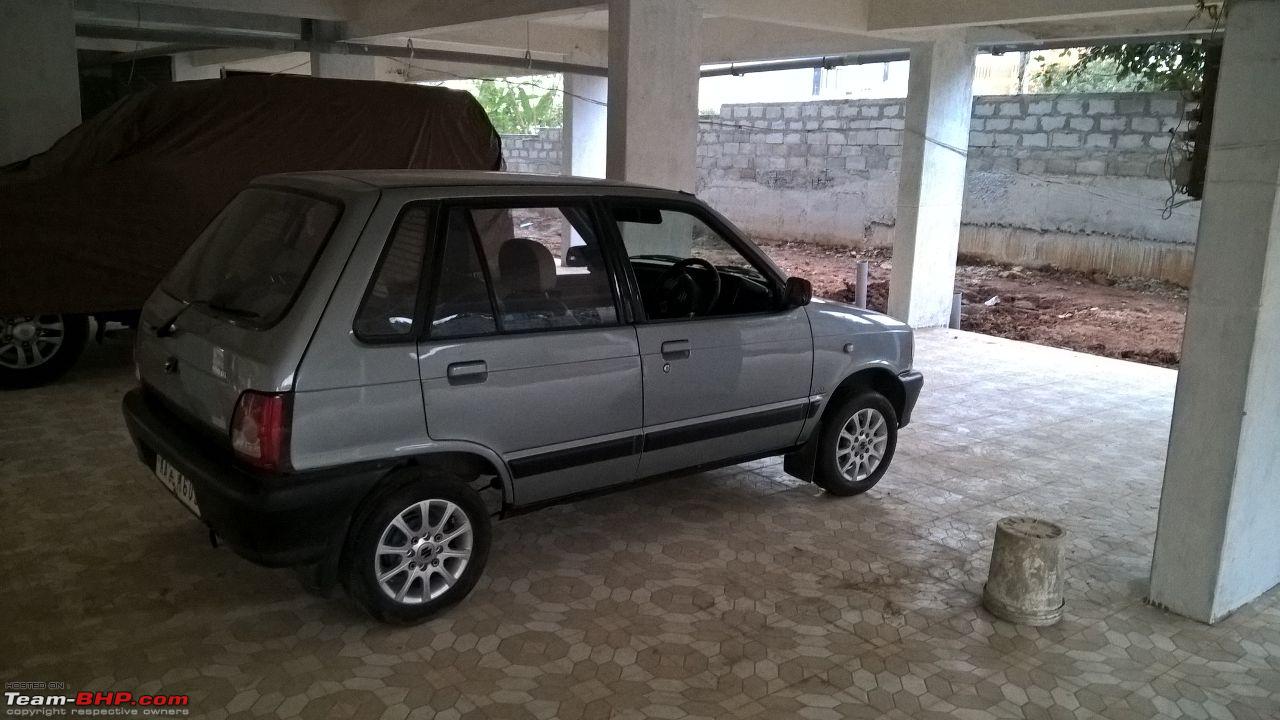 Quote:
Quote:
Quote:
Hence I am better off with the long, but correct way.Quote:
Quote:
Quote:
1. 5 Speed gearbox is hard to find in a decent shape. It is available in MGP for 48k though. 2. I have heard that the bell housing is larger for 5 speed and needs some mods. 3. Hubs, driveshaft etc are different. Someone known to me had done this mod once on his 2005 MPFI, he switched back to 4 speed after some time. 5 Speed GB is best suited to the F8D engine. So I won't recommend this to you. Regards, Shashi Last edited by Leoshashi : 11th December 2016 at 21:15. | |||||||||
|
| (15)
Thanks
|
| The following 15 BHPians Thank Leoshashi for this useful post: | --gKrish--, AShubrah, aveemashfaq, baby_antu, karuvally, MAKMADDY17, paragsachania, saket77, Scarlet_Rider, Sheel, sidindica, Simat, sumitsinha0280, swiftnfurious, tacho9000 |
|
11th December 2016, 21:28
| #120 |
| Distinguished - BHPian Join Date: Nov 2007 Location: Belur/Bangalore
Posts: 7,148
Thanked: 27,140 Times
| re: The love of my life - A 2000 Maruti 800 DX 5-Speed. EDIT: Gets export model features on Pg 27 Awesome Shashi! Your faithful M800 will continue to deliver for years and years for all the care that you have been taking. As Saket mentioned, you couldn't have been more perfect doing things that the car asked and doing it the right way - replacing as per specs and recommendations. I am particularly interested in the Engine oil (Fully Synthetic) now that you mention the transformation after using it. I cannot do anything but trust each word from you there since you know the car since 3 Lac Kms and only you can tell the difference. For my WagonR that is now 233,000 Kms, I am afraid to experiment using Synthetic Oil and have been using Shell 5W30 in place of 20W40 and I can easily notice the difference between the two. And with the engine still in mint condition that I notice on every crank and driving, I would be anxious to use fully synthetic oil (without flushing) and try it out. I also liked the NGK Iridium Plugs that you have installed. Something that I am using on the WagonR too. Stock spec was Champion or NGK (DCPR7E) and from the day I switched to NGK, I have loved its performance - Low revs or higher too. So I used all - NGK Conventional, G-Power and IX and finally settled with IX now since more than a lac kms. These little babying your car will always pay back. You never failed to get impressed each time you drive and trust me when I say that I feel more connected to my WagonR than the Ertiga even today when I drive - Very few cars of those days delivered that superb low end response. A different breed of "enthusiasts" that we are! Thank you for sharing with us such detailed posts on the recent developments! And as usual, I still have been thinking of updating my WagonR thread with recent developments - which undoubtedly have remained positive Last edited by paragsachania : 11th December 2016 at 21:37. |
|
| (8)
Thanks
|
| The following 8 BHPians Thank paragsachania for this useful post: | baby_antu, Leoshashi, MAKMADDY17, Scarlet_Rider, Sheel, sumitsinha0280, tacho9000, TheARUN |
|