Team-BHP > Team-BHP Reviews > Long-Term Ownership Reviews
Register New Topics New Posts Top Thanked Team-BHP FAQ


Reply
  Search this Thread
195,560 views
Old 1st October 2017, 11:52   #106
Senior - BHPian
 
SunnyBoi's Avatar
 
Join Date: Dec 2006
Location: Mysore / B'lore
Posts: 1,663
Thanked: 4,099 Times
Re: Life with a Red Mitsubishi Cedia

Quote:
Originally Posted by R2D2 View Post
Wow! Now that's a real surprise. Does Mitsu feel there's an advantage to using old fashioned HT cables over COPs?
Haha I have no clue why Mitsu stuck to coils and leads. COP Upgrade for Evos are quite common.

Quote:
Originally Posted by R2D2 View Post
What are/were your apprehensions about Ir plugs?

Actually I felt the same advantages that you outlined after I changed to these plugs i.e. smoother idling, very slightly better throttle response compared to standard plugs. The changes are slight but for someone sensitive to the engine they're noticeable. Best of all they're long lasting, over 2x the stock plugs.
My main apprehension is the cost. Its not worth the extra money for any/all benefit it gives. I personally did not have any iridium plugs on my cars/bikes but I did drive cars/bikes with the same and I couldn't feel any difference.

Its only on my Apache I got this year I discovered it had an Iridium plug in it, but the mods on that bike needed the Ir plug.

Quote:
Originally Posted by R2D2 View Post
So, now what's the next planned upgrade? A ECM remap? What about upgraded brakes? Believe me, I follow very few threads closely on this site and this is one of them.
I'm already running the maps from the USA OZ Rally Lancer since a year. They claim 120/123hp? Thats already a 6-9hp increase over stock. Moreover with the Evo ECU I run a higher rev limit which improves the acceleration as well.

As far as the brakes go, I'm running Mintex pads from UK for front and rear which are much better than the local Brembos. I also have a set of EBC Yellowstuff pads. I'm severely limited by my tyres though, they will be my next upgrade, or rather a replacement.That said, I have a huge cache of Mitsu OEM parts coming from the USA which includes some more Evo goodies

I had the option to buy a set of Wilwood 4 pot calipers and two piece rotors for cheap, similar to what Nikhil has on his Turbo Civic. I had to pass it on since bigger calipers/rotors means I have to shift to 16inch wheels which was an added expense for me.
SunnyBoi is offline   (3) Thanks
Old 6th October 2017, 16:02   #107
Senior - BHPian
 
SunnyBoi's Avatar
 
Join Date: Dec 2006
Location: Mysore / B'lore
Posts: 1,663
Thanked: 4,099 Times
Re: Life with a Red Mitsubishi Cedia

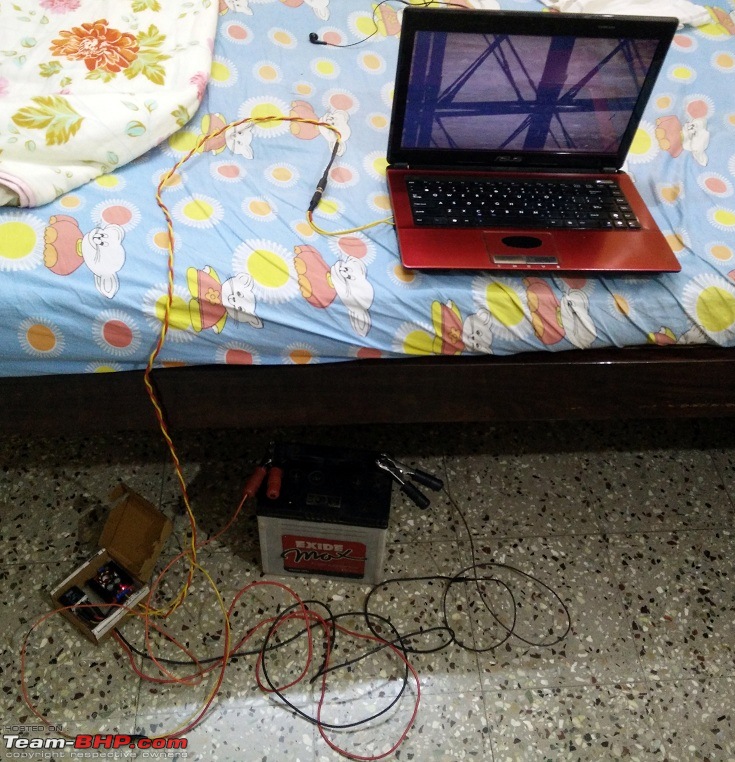
My laptop charger died suddenly and I was left with a laptop with barely any charge left for a week or so. I did not want to buy a new charger since I have a couple of spare ones in Bangalore. Being the cheapskate I am, I found something from my car and garage.

Quote:
Originally Posted by SunnyBoi View Post
Made a cheap laptop charger which will be placed permanently in the car. Instead of making a box for it, I just reused the box it was shipped it
So I took out the charger from my car and the old battery from the garage. Now it works to charge my laptop as I use it Its been 5 days of continuous usage and I'm happy to say its working really well!

Life with a Red Mitsubishi Cedia-00.jpg

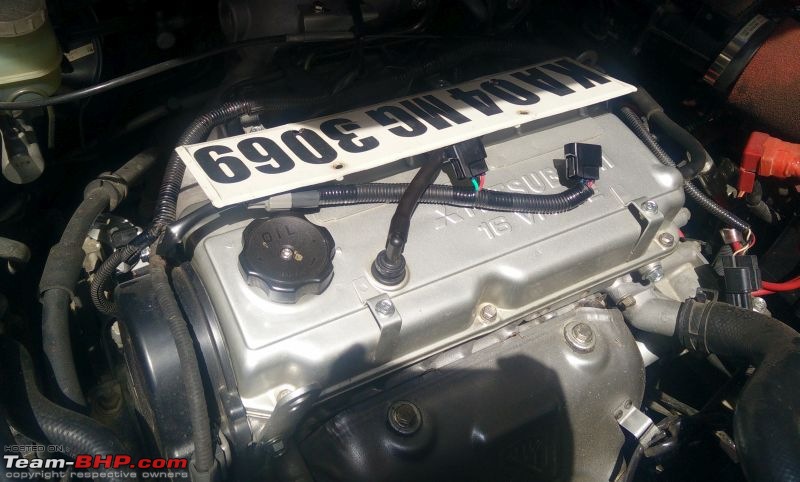
With the COP Upgrade working, It was important to secure the coils, make sure they made contact with the plugs at all times. Since these are not OE, I had to make a hold down plate so that they didn't move around.

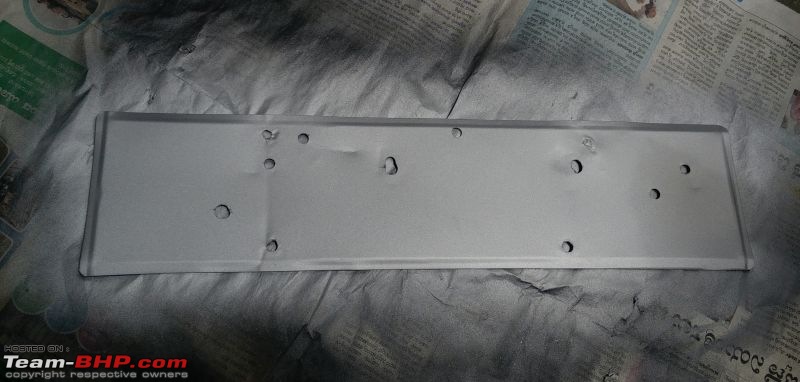
I was outside visiting my bike mech, I found this old unused metal number plate lying at the neighbor number plate vendor and he was happy to give it away.

Life with a Red Mitsubishi Cedia-01.jpg

I have a M6 bolt which will be held in place with a nyloc nut (picture has a normal nut, this was replaced with nyloc nuts) and then secured to the plate via an acorn nut

Life with a Red Mitsubishi Cedia-02.jpg

I placed the plate on top and immediately I realised it wouldn't look good. Oh well, I can improve on the design and aesthetics later. Functionality is more important as of now.

Life with a Red Mitsubishi Cedia-03.jpg

Holes measured, drilled and plate was painted.

Life with a Red Mitsubishi Cedia-04.jpg

Installed. Looks meh to be honest

Life with a Red Mitsubishi Cedia-05.jpg

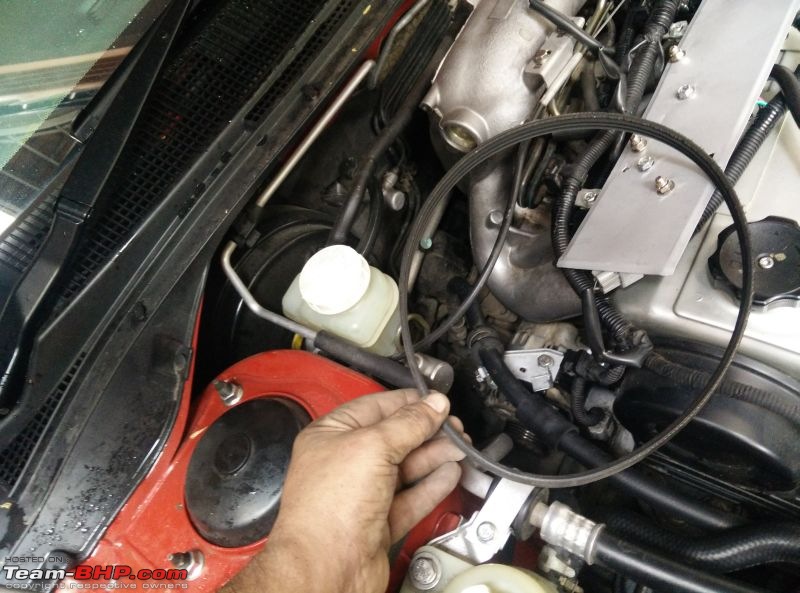
Not entirely happy with the progress, I decided to change the alternator belt as well. It was looking very tattered and I had a new belt ready with me, sourced surprisingly from boodmo. Details here

I have never changed a belt before - I had the AC PS belt failing because of an accident and that belt was changed by Rajesh. While wondering whether to attempt it or not, BHPian james told me to just do it!

And so I did! First step was to remove the AC PS belt. Loosen the idler pulley nut, ad loosen the tensioner, belt comes off

Life with a Red Mitsubishi Cedia-06.jpg

Next was the same process on the alternator. Loosen the lock bolt and loosen the tensioner. But the alternator did not move at all. I tried for few minutes and still couldn't figure out. I was at a point of giving up but went forward, the pain of putting back the AC PS belt without doing anything would be just too painful.

I went upstairs and referred the FSM again. Turns out I had to loosen the pinch bolt underneath the alternator. Grrr, how did I miss this? I went back downstairs and realised the pinch bolt was right underneath the intake manifold. Very tough place to put tools in. Quite easy if you have a lift and access from below is easy.

I tried different ratchets and bits, finally I could fit a ratchet and a long socket in. There was just enough room to loosen the nut by just one click! Breaking it loose and eventually loosening it was difficult. Access was so bad both my hands were properly bruised by now.

Once the pinch bolt was loose, the alternator could move and I could take out the old belt.

Life with a Red Mitsubishi Cedia-07.jpg

The OEM Mitsubishi belt is made by Mitsuboshi

Life with a Red Mitsubishi Cedia-08.jpg

One groove of the old belt was completely eaten up. Not sure how this happened, might have been the same reason why the AC PS belt got damaged last year.

Life with a Red Mitsubishi Cedia-09.jpg

New belt is in!

Life with a Red Mitsubishi Cedia-10.jpg

Embarassingly though, it took me 30 minutes to figure out how to operate the tensioner properly and tighten the belt. Derp moment for sure. I dont have professional tools to measure and set the right tension but I used the general thumb rule of having the belt just tight enough so it can be twisted 90*.

Another 30 minutes later, both belts were tightened and secured. The car was started and happy to report no noises or squeaks! Job well done I guess!
SunnyBoi is offline   (12) Thanks
Old 7th October 2017, 12:51   #108
BANNED
 
Join Date: May 2007
Location: kerala
Posts: 71
Thanked: 37 Times
Re: Life with a Red Mitsubishi Cedia

Your thread is a treat for diyrs. So now you have COP, what is next? CDI, ITB, FI, High Compression, DOHC upgrade.
Please surprise us and make our DSM guru proud.
dracul is offline   (1) Thanks
Old 8th October 2017, 00:00   #109
Senior - BHPian
 
SunnyBoi's Avatar
 
Join Date: Dec 2006
Location: Mysore / B'lore
Posts: 1,663
Thanked: 4,099 Times
Re: Life with a Red Mitsubishi Cedia

Quote:
Originally Posted by dracul View Post
Your thread is a treat for diyrs. So now you have COP, what is next? CDI, ITB, FI, High Compression, DOHC upgrade.
Please surprise us and make our DSM guru proud.
Thank you! I'm not sure what's next. I have a few evo parts coming in in 2 weeks, they should be interesting to put on the car!

I'm not sure of ITBs, the 4G94 isn't the kind of engine that will like an ITB setup. FI, honestly I wanted to get it but I'm having second thoughts since I don't want to compromise on the reliability aspect. High compression and DOHC are probably not for me, I don't want to open this engine ever.

That said, I definitely want to get a spare engine - break it down and build it back again just like how Jafro did it
SunnyBoi is offline   (2) Thanks
Old 10th October 2017, 00:34   #110
BHPian
 
motorpsycho's Avatar
 
Join Date: Jul 2009
Location: Hubli
Posts: 482
Thanked: 448 Times
Re: Life with a Red Mitsubishi Cedia

Quote:
Originally Posted by SunnyBoi View Post
I have been looking at a Coil On Plug ignition upgrade for my car for quite a while now. There are some vendors in USA who offer COP Upgrade kits for Evo 8/9 for around 450$ (!!!). I haven't seen anyone do a COP ignition for a lancer/cedia till now, I guess I'm sort of venturing into unknown territory!
Did the previous system have Ignition Coil and distributor? In a COP you bypass both of them? How do let the ECU know of the upgrade?
motorpsycho is offline  
Old 11th October 2017, 21:11   #111
Distinguished - BHPian
 
R2D2's Avatar
 
Join Date: Oct 2008
Location: Pune
Posts: 3,231
Thanked: 5,740 Times
Re: Life with a Red Mitsubishi Cedia

Quote:
Originally Posted by motorpsycho View Post
Did the previous system have Ignition Coil and distributor?
AFAIK petrol engines designed after the late '90s and early 2Ks have distributorless ignition. With the Cedia the HT coils are connected to the plugs via cables instead of COP.
R2D2 is offline   (1) Thanks
Old 12th October 2017, 22:25   #112
Senior - BHPian
 
SunnyBoi's Avatar
 
Join Date: Dec 2006
Location: Mysore / B'lore
Posts: 1,663
Thanked: 4,099 Times
Re: Life with a Red Mitsubishi Cedia

Quote:
Originally Posted by motorpsycho View Post
Did the previous system have Ignition Coil and distributor? In a COP you bypass both of them? How do let the ECU know of the upgrade?
Quote:
Originally Posted by R2D2 View Post
AFAIK petrol engines designed after the late '90s and early 2Ks have distributorless ignition. With the Cedia the HT coils are connected to the plugs via cables instead of COP.
R2D2 is right, The cedia has a distributorless wasted spark ignition. There are 2 coils for 4 cylinders in stock setup, now it has 4 for each cylinder.

The interiors of my car had been neglected for quite a while now. It had been 6 months since I last vacuumed the interiors plus there was a light funky smell inside. I never realised it, For a few days I was alternating between my car and a new vRS, this is when I started noticing that my car did have a weird smell.

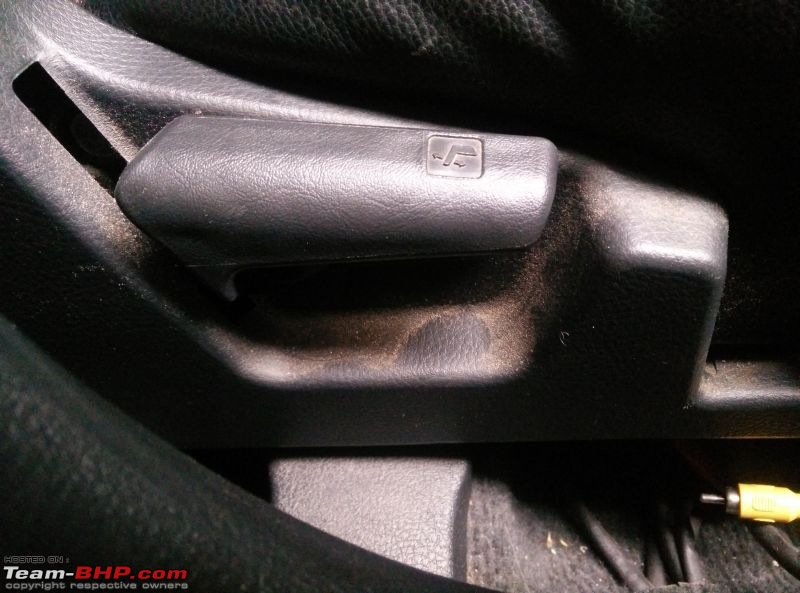
This is how bad my interiors were - I just did a finger swipe in the middle to show you how dirty it is

Life with a Red Mitsubishi Cedia-01.jpg

Life with a Red Mitsubishi Cedia-02.jpg

I had never done a proper interior detail on the car - Only vacuumed and maintained it. SO it was time for a proper detail including carpets. So decided to take off the seats and center console for easy access and complete cleaning.

Life with a Red Mitsubishi Cedia-03.jpg

Fiberglass strands - remnants from dashpod fabrication were also there

Life with a Red Mitsubishi Cedia-04.jpg

Vacuumed the carpets, already looking better!

Life with a Red Mitsubishi Cedia-05.jpg

The rear left always had a huge hump.. caused by running over a boulder or incorrect jacking point when on a 2 post lift. It was there ever since I bought the car, I wanted to check the root cause and see if I can fix it. The seats are out anyway and this is probably the best time to look into it.

Took off the Trim, hmm there is some dirt around. Lifted the carpet and a horror awaited me.

Life with a Red Mitsubishi Cedia-06.jpg

There was dampness all around and lots of dirt as well. It smelled very mouldy and rancid.

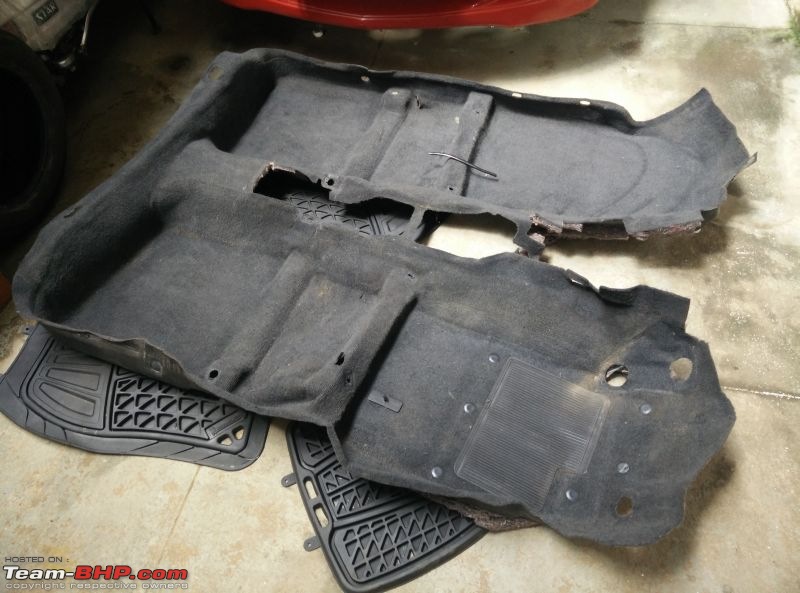
Even the carpets were in terrible shape. The smell was unbearable. Now I know the true source of funky smells!

Life with a Red Mitsubishi Cedia-07.jpg


This had to be fixed properly. The only proper solution was to take out the carpet, wash and disinfect it before putting it back.

Since the seats were already out, it barely took me another 20 minutes to pull the carpet out.

Life with a Red Mitsubishi Cedia-08.jpg

Life with a Red Mitsubishi Cedia-09.jpg

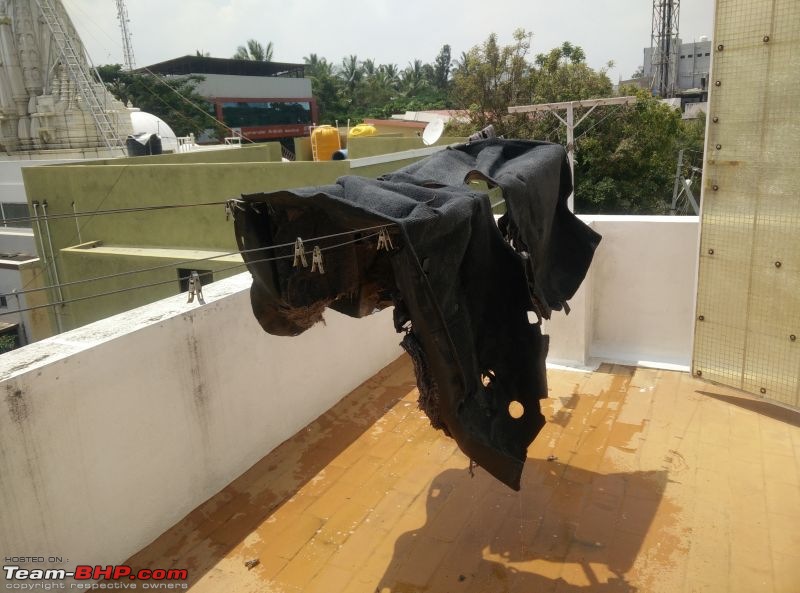
Took the carpet to the roof, doused it in a cleaner and let it do its thing

Life with a Red Mitsubishi Cedia-10.jpg

Finally hung it out to dry. Thankfully the sun was out in full force, 6 hours in the sun and the carpet was almost dry.

Life with a Red Mitsubishi Cedia-11.jpg

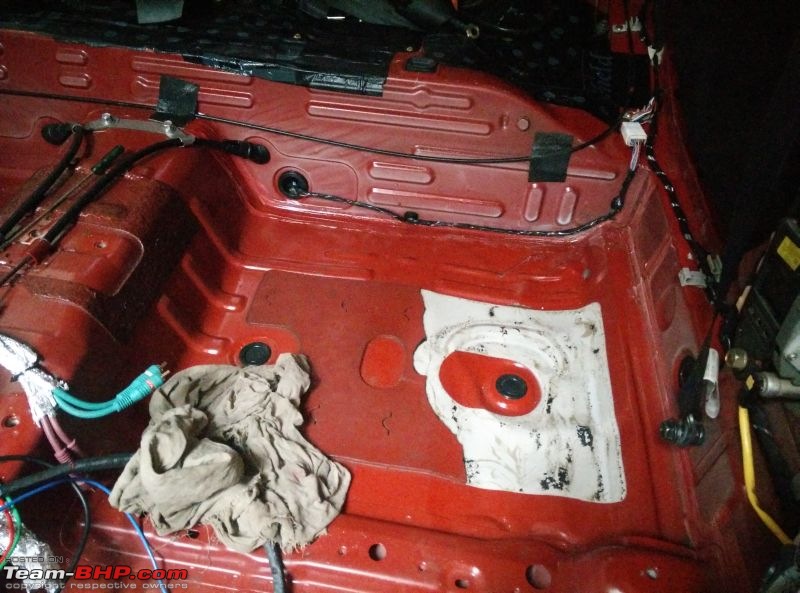
Meanwhile.. The dented floor portion was coaxed back into its original shape. The factory tar damping cracked and peeled off exposing the white primer area.

Life with a Red Mitsubishi Cedia-12.jpg

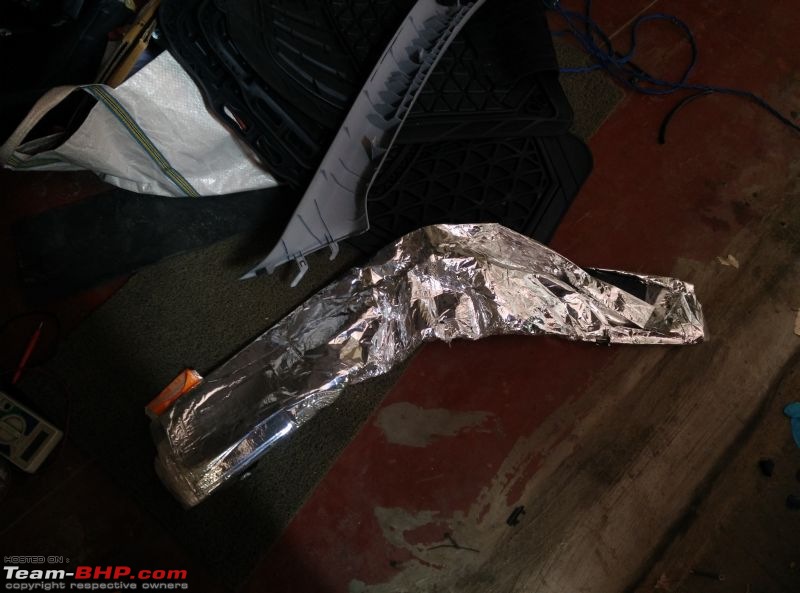
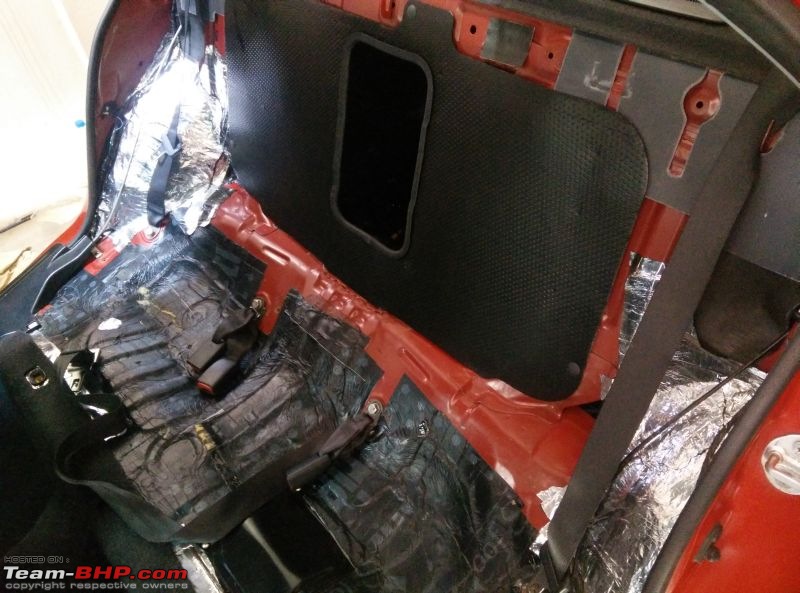
So this gave me an idea. Since the carpet is already out, why not damp the whole floor?

Rummaged around the garage and found a roll. CLearly this is not enough buta good start for now.

Life with a Red Mitsubishi Cedia-15.jpg

Last time I damped the car, I stopped at the rear seats. With the floor done, whole car with exception of rear doors will be damped!

Life with a Red Mitsubishi Cedia-14.jpg

A piece of masking tape left behind when the car was last painted

Life with a Red Mitsubishi Cedia-13.jpg

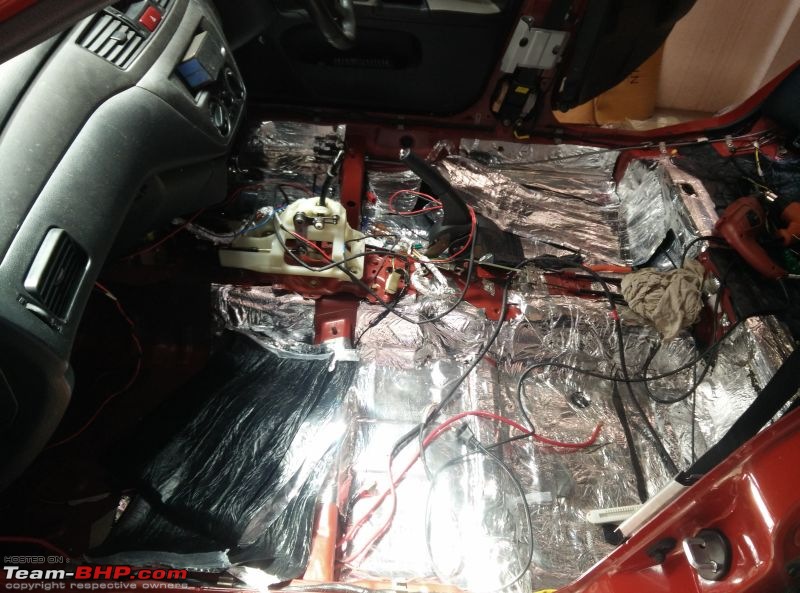
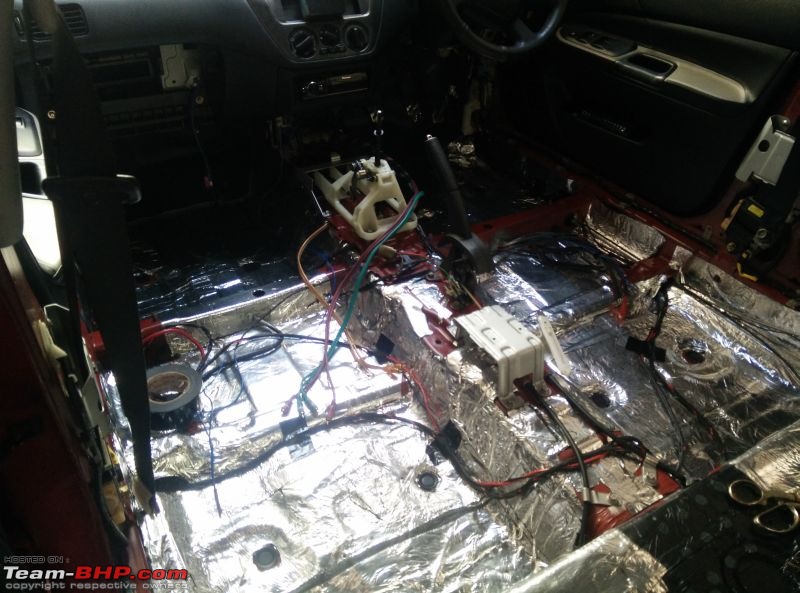
By the end of the day, Imanaged to damp half the floor. Used 3 layers on the floor.

Life with a Red Mitsubishi Cedia-16.jpg

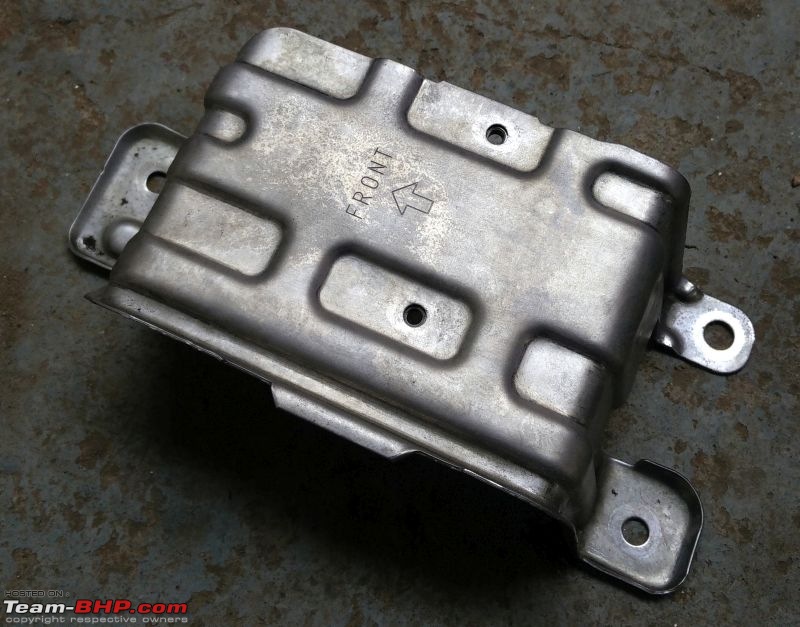
The bracket holding the center console had lots of surface rust on it and always looked icky. Time to spruce it up!

Life with a Red Mitsubishi Cedia-17.jpg

All rust removed

Life with a Red Mitsubishi Cedia-18.jpg

Fresh coat of Zinc

Life with a Red Mitsubishi Cedia-19.jpg

Whole floor save for few small portions done. The brackets holding the seat belts were also given the zinc treatment.

Life with a Red Mitsubishi Cedia-20.jpg

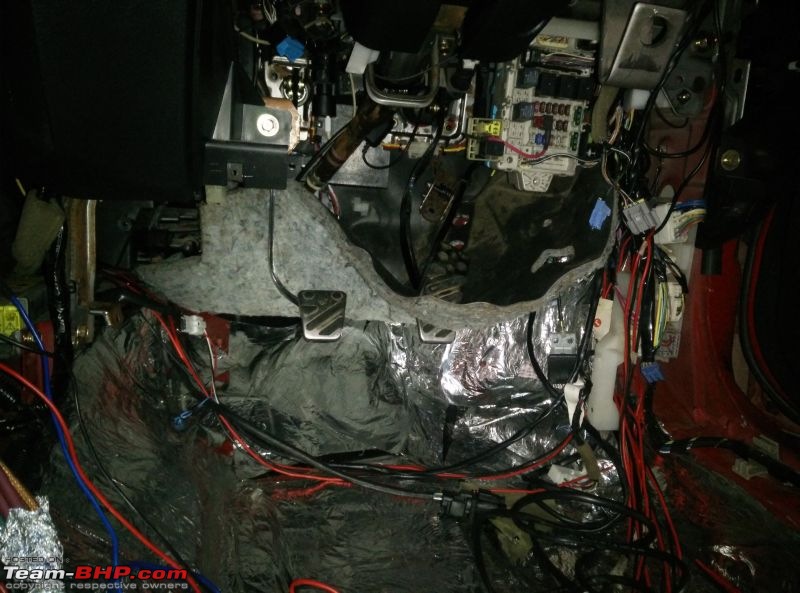
The wheel wells needed extra care, the accelerator pedal had to be removed and existing carpet removed. I put in 4 layers for wheel wells. maximum road/tyre noise comes through these areas. All the wiring mess you see here are from the ICE setup. I'll make sure I sort these out and route them beneath the carpet for full stealth setup.

Life with a Red Mitsubishi Cedia-21.jpg

scraped off paint, drilled a hole and fixed the ground for amps directly on the chassis. No more ugly terminals visible on seat rail!

Life with a Red Mitsubishi Cedia-22.jpg

Life with a Red Mitsubishi Cedia-23.jpg

This is still work in progress, I should wrap up everything in the next 2 days.
SunnyBoi is offline   (17) Thanks
Old 14th October 2017, 11:47   #113
Distinguished - BHPian
 
Leoshashi's Avatar
 
Join Date: Jul 2014
Location: India
Posts: 5,693
Thanked: 42,421 Times
Re: Life with a Red Mitsubishi Cedia

Quote:
Originally Posted by SunnyBoi View Post
All rust removed
What do you use for rust removal?? This surely doesn't look like sanded.

Regards,
Shashi
Leoshashi is offline   (2) Thanks
Old 15th October 2017, 14:41   #114
Senior - BHPian
 
SunnyBoi's Avatar
 
Join Date: Dec 2006
Location: Mysore / B'lore
Posts: 1,663
Thanked: 4,099 Times
Re: Life with a Red Mitsubishi Cedia

Quote:
Originally Posted by Leoshashi View Post
What do you use for rust removal?? This surely doesn't look like sanded.
I'm not a fan of sanding/abrasive method of removing rust. I do it the chemical way.

Here are couple of instances where I have done it on my thread itself:

http://www.team-bhp.com/forum/long-t...ml#post4051293

http://www.team-bhp.com/forum/long-t...ml#post4236050

Here are delight bumpers that BHPian schakravarthy picked up and I tried cleaning the rust off it. My method does not damage any paint/chrome.

Before

Life with a Red Mitsubishi Cedia-01.jpg

After

Life with a Red Mitsubishi Cedia-02.jpg

For you, I took a video this morning of removing rust from my bike's chain guard. Not bad for two minutes, bit more and I could have completely removed all rust.


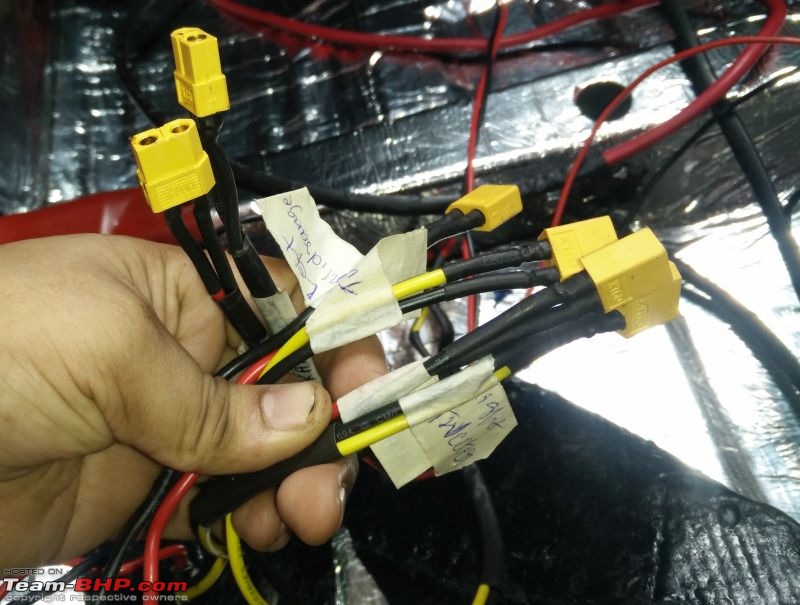
Back to the task at hand. Continuing with the wiring cleanup, I added XT60 connectors for the dash pods.

Life with a Red Mitsubishi Cedia-03.jpg

Few speaker wires were re routed. all power and speaker wires were wrapped in tesa tape

Life with a Red Mitsubishi Cedia-04.jpg

Life with a Red Mitsubishi Cedia-05.jpg

I had damaged one of the shifter bushes when modifying the shifter last time. Replaced with a new part

Life with a Red Mitsubishi Cedia-06.jpg

The shifter base also needed mods. While its out, dismantled the base plate and fully damped the tunnel.

Life with a Red Mitsubishi Cedia-07.jpg

Base plate, base assembled. The metal bracket above was also given the rust removal and zinc treatment.

Life with a Red Mitsubishi Cedia-08.jpg

All wiring mess cleaned up. Did not hide anything behind the carpet unlike last time

Life with a Red Mitsubishi Cedia-09.jpg

State of the car as of end of day

Life with a Red Mitsubishi Cedia-10.jpg

One of the power wires was short and I had routed it on the tunnel near the shifter. This would cross the RCAs and it was bothering me a lot. If I am going to fix and finalise all the wiring, I don't want this one part to possibly give me any issue going forward.

I did not want to put in a new section of power wire all the way because I'd have to buy the new wire. Being a cheapskate, I fished around and found couple of meters of left over power wire of the same guage. The best way I could figure out of joining two 16sqmm wires was to crimp and fix, since soldering these together would be impossible.

Added two terminals like before to the new section.

Life with a Red Mitsubishi Cedia-11.jpg

Heatshrunk insulated and jojned with an M6 nut and bolt.

Life with a Red Mitsubishi Cedia-12.jpg

Insulated with silicon tape.

Life with a Red Mitsubishi Cedia-13.jpg

While adding new terminals to the new power cable, I added ring terminals to all speaker wires too. Used matching red and black heatshrinks for positive and negative terminals respectively. I did not have red heatshrink in big size, so wrapped the power wire end with red silicon tape.

Life with a Red Mitsubishi Cedia-14.jpg

While I'm sorting out all the wiring mess in my car, the focus shifted to the mess behind the dash. I began with removing the head unit and the DAC.

Life with a Red Mitsubishi Cedia-15.jpg

The head unit is out..what better time to paint the AC panels. Sigh, the list of things that gets fixed gets bigger and bigger.

Life with a Red Mitsubishi Cedia-16.jpg

Still lot more work to do, hopefully the car should be rolling in another two days.
SunnyBoi is offline   (11) Thanks
Old 18th October 2017, 00:35   #115
Senior - BHPian
 
SunnyBoi's Avatar
 
Join Date: Dec 2006
Location: Mysore / B'lore
Posts: 1,663
Thanked: 4,099 Times
Re: Life with a Red Mitsubishi Cedia

Continuing on, I moved the head unit back to the original position. The gap left on the top always looked weird plus I was not using the tablet setup recently so decided to ditch it all together.

Quote:
Originally Posted by SunnyBoi View Post
the only loose wire is the microphone wire which will be properly routed when I take out the head unit.
Since the head unit came off, it meant I could fix the final dangling wire! Woohoo!

Once the head unit was in place, fixed the positions for RCA cables and called it a day.

Next day, it was time to tackle the carpet. It was nice and dry after spending 5 days indoors. The carpet still looked grey and had a lot of sand in it.

Life with a Red Mitsubishi Cedia-01.jpg

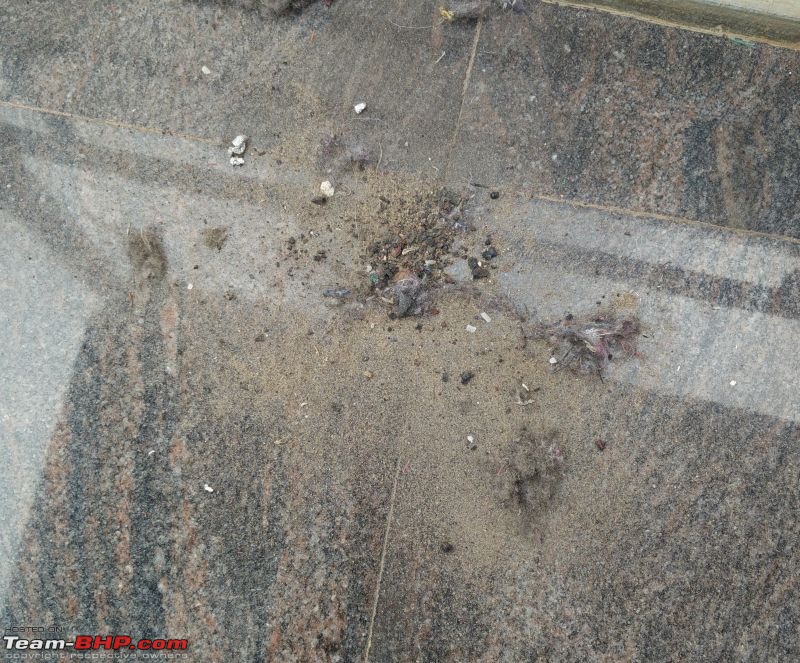
Brushing it and vacuuming wasn't cutting it. So used other techniques and got out the bulk of the sand. Ignore the black pieces, this is how much sand came out despite giving it a thorough wash.

Life with a Red Mitsubishi Cedia-02.jpg

After 4 hours of brushing and vacuuming, the colour changed to black and the carpet looked nice and fluffy! I was seriously considering dyeing the carpet black because it looked too grey before.

Life with a Red Mitsubishi Cedia-03.jpg

I applied a carpet protectant and left it for the day as it needed 24 hours to cure.

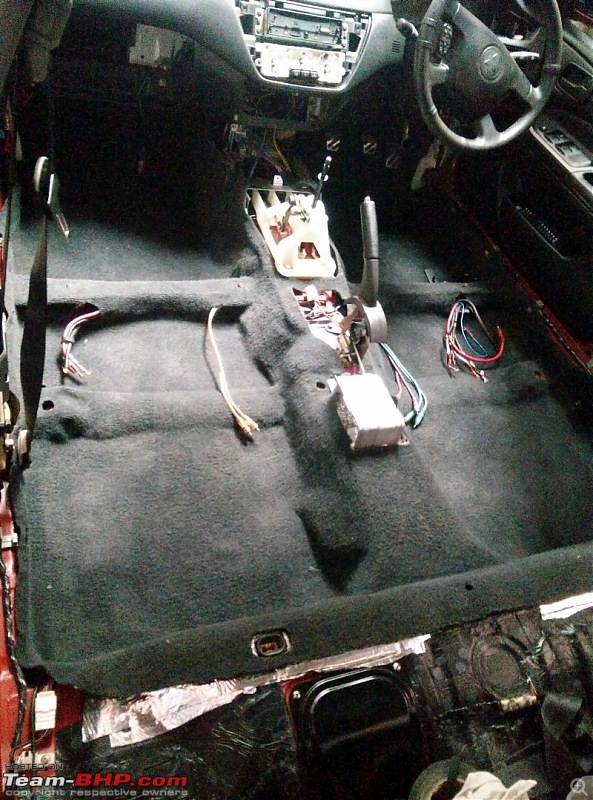
Next day, the carpet was in the car.

Life with a Red Mitsubishi Cedia-04.jpg

When I had to put back all the trim pieces, I realised I never cleaned any of them. Ugh it was time consuming to clean every bit first and then put it back in One can ignore and just bolt in everything, but its not possible to get it 100% clean unless you take it out and then clean it.

Even after the cleaning, the dead pedal looked grey with lots of usage scratches. Restored it and looked good

Before

Life with a Red Mitsubishi Cedia-05.jpg

After

Life with a Red Mitsubishi Cedia-06.jpg

Next was the turn of the amplifiers. Connected them both, attached the battery and first try all 6 speakers came to life!

Life with a Red Mitsubishi Cedia-07.jpg

It was a great decision to crimp terminals to all wires. This makes sure it looks clean plus wires will never come off.

Life with a Red Mitsubishi Cedia-08.jpg

Seats got a thorough cleaning as well. Some parts were just plain nasty - totally inaccessible when the seats are in the car.

Life with a Red Mitsubishi Cedia-09.jpg

Even the dirt on the nuts were cleaned. This was the before pic though. Next time I'll refresh the black zinc coat on these nuts.

Life with a Red Mitsubishi Cedia-11.jpg

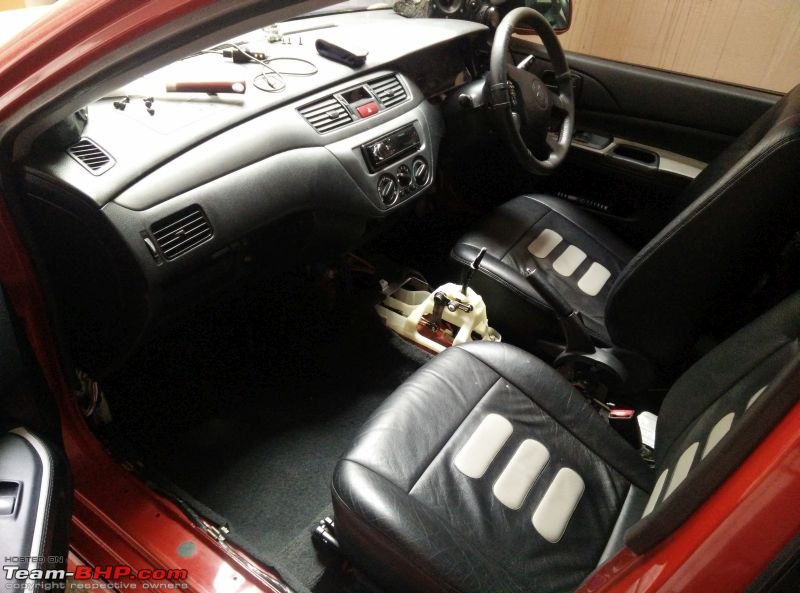
By afternoon, seats were in. AC panels were fixed back in

Life with a Red Mitsubishi Cedia-12.jpg

The battery had dipped a bit after being idle for over a week. Connected the charger and let it be, battery was full in 5 hours.

Life with a Red Mitsubishi Cedia-13.jpg

The bottom panels had a LOT of scratches with over 10 years of use and faded quite a bit. Did the restoration and looked LOT better

Before

Life with a Red Mitsubishi Cedia-14.jpg

After

Life with a Red Mitsubishi Cedia-15.jpg

Picture does not do justice..watch this video to get a good idea how it looks like now. Do remember I haven't used any sort of polish or dressing etc.


Another example with the front trim. Before

Life with a Red Mitsubishi Cedia-16.jpg

After

Life with a Red Mitsubishi Cedia-17.jpg

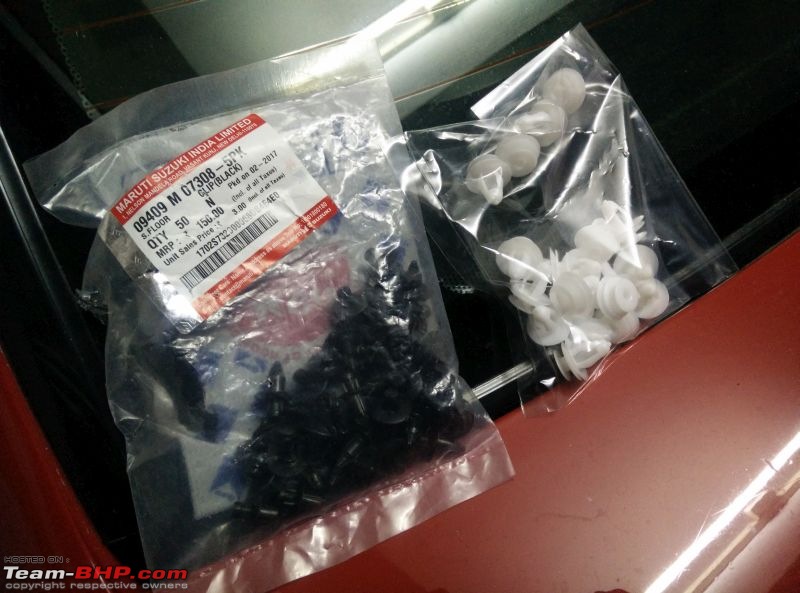
All this trim fixing took a lot of extra time, I realised I broke few clips and did not have spares! Dropped everything, went to Maroor and picked these up.

Life with a Red Mitsubishi Cedia-18.jpg

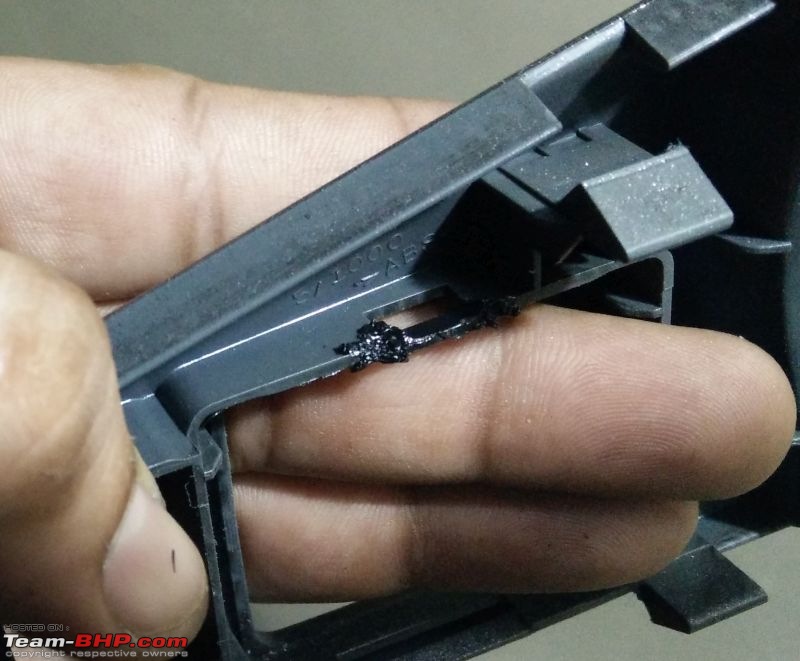
One of the locks holding the mirror adjustment switch had broken when I was dismantling it for painting. Fixed it by using a piece of cable tie

Life with a Red Mitsubishi Cedia-19.jpg

Does it work? Yes! Switch is in and doesnt jiggle or come out.

Life with a Red Mitsubishi Cedia-20.jpg

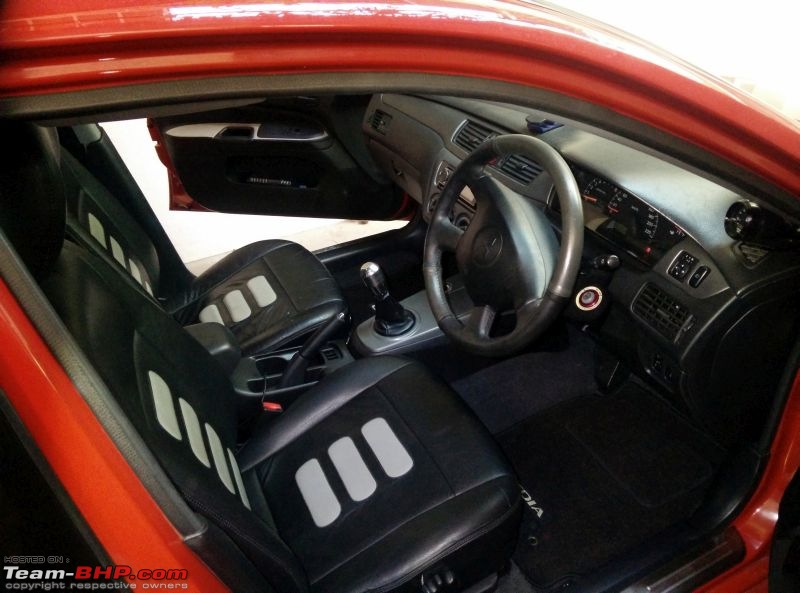
BY now it was pretty dark and decided to call it a day. This is how the car looks for now. The car smells SO GOOD right now!

Life with a Red Mitsubishi Cedia-21.jpg

Tomorrow's agenda :

Fix back the center console and rest of trim
Replace fuel pump with new unit
Bleed rear brakes
Adjust clutch
Wash and wax?
SunnyBoi is offline   (15) Thanks
Old 18th October 2017, 08:25   #116
BHPian
 
Join Date: Dec 2012
Location: .
Posts: 96
Thanked: 138 Times
Re: Life with a Red Mitsubishi Cedia

Thank God! That your attention to detail and OCD levels are not infectious!
We would all be ripping our cars apart and cleaning them now! (That I have no skills to do that is secondary! )

Awesome thread! Looking forward to the pictures after the current task is complete!
N.r.K is offline   (3) Thanks
Old 21st October 2017, 09:27   #117
Senior - BHPian
 
SunnyBoi's Avatar
 
Join Date: Dec 2006
Location: Mysore / B'lore
Posts: 1,663
Thanked: 4,099 Times
Re: Life with a Red Mitsubishi Cedia

Continuing on, the plastic trim below the steering had a metal brace, which had surface rust. Dismantled it, removed the rust and zinced it before assembling it back again

Life with a Red Mitsubishi Cedia-01.jpg

I wanted to deep clean the center console but it had those felt liners stuck to it, I did not have the luxury of letting those dry. SO dismantled the console and washed the center box and cupholders.

Corners and edges are dirty and a bit oily as well, not possible to fully clean them when together.

Life with a Red Mitsubishi Cedia-02.jpg

Cup holder was made in April 2002. Interesting.

Life with a Red Mitsubishi Cedia-03.jpg

When the center console was done, I went back in the car to check on the back portion of rear seat It was the only major portion of the interior I had not taken out. I was in shock.

Life with a Red Mitsubishi Cedia-04.jpg

The entire section was covered in mold, that too a serious amount! Just see how much mold was in the armrest which was closed.

Life with a Red Mitsubishi Cedia-05.jpg

The moment I saw this mould was when I quickly put on my mask and gloves, the first time since this week when I started. Took the seat out doused it in anti bacterial + cleaner solution, same as what I had used to treat the fungus on my carpets.

Life with a Red Mitsubishi Cedia-06.jpg

Three coats later, scrubbed it with a brush, rinse and wipedown with a dry cloth.

Not taking any chances, gave the bottom portion of the seat the same treatment. This is how it looked afterwards.

Life with a Red Mitsubishi Cedia-07.jpg

Turning attention back to the car, there were more sections that needed damping which was covered by rear seats. Unfortunately I only had enough tar sheets to give wheel wells about 4 layers each. I'll do the rest sometime later if I ever remove them again.

Life with a Red Mitsubishi Cedia-08.jpg

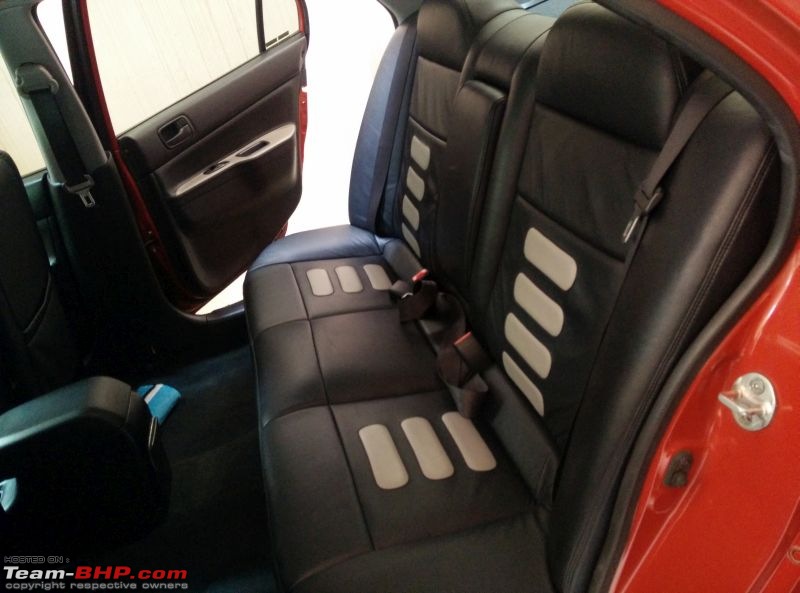
Finally by the afternoon, the seats went in. Made sure I wiped down the seat belts with the anti bacterial solution too.

Life with a Red Mitsubishi Cedia-09.jpg

Since I got black clips this time. swapped grey clips on the bumper to black ones. Looks much better IMO. A comparo

Life with a Red Mitsubishi Cedia-10.jpg

Adjusted the clutch, put in the lower trim and fixed back the center console. The mods to the shifter paid off, the gearshift panel is finally sitting flush! If anyone had noticed earlier, the panel had popped off and it wasn't fitting back properly. Thankfully I was able to put it all together without having to change the throws.

Life with a Red Mitsubishi Cedia-11.jpg

Life with a Red Mitsubishi Cedia-12.jpg

Life with a Red Mitsubishi Cedia-13.jpg

Connected the battery, took the car for a spin. There was definitely a difference in the car's behaviour..the car was so eager at low revs!The moment I came back home, I re-checked the clutch to make sure it wasn't engaging when driving..it wasn't!

Next day, drove from Mysore to Bangalore. 3 people in the car with a fully loaded boot with AC on. The car definitely felt a LOT better upto 3K RPM, way more responsive and clearly felt like it had lot more power down below. Cruising at 80KMPH in 5th, I didn't have to downshift to overtake anyone, plus when I slowed down to 55-60KMPH, it would easily accelerate back upto speed with poise. The fuel needle hasn't dipped much so I'm sure I'm getting better mileage too.

The damping, did it work? Well, yes..kind of. The noise level is lower in the car and I can barely hear any low frequency noises than before. All this silence means the tyre noise seems worse. Talking in the cabin has become much easier even at decent speeds. There was an irritating wind noise coming from the rear left, now that has gone as well. There will be more changes in regards to reducing noise in cabin very soon!

All in all, I can definitely say the Coil On Plug Ignition upgrade is worth every penny. Too bad it requires ECU mods and not a plug and play solution for Cedias.
SunnyBoi is offline   (11) Thanks
Old 22nd October 2017, 13:18   #118
Senior - BHPian
 
SunnyBoi's Avatar
 
Join Date: Dec 2006
Location: Mysore / B'lore
Posts: 1,663
Thanked: 4,099 Times
Re: Life with a Red Mitsubishi Cedia

I finally got new tyres on Saturday! Huge thanks to Nikhil for arranging them at a very short notice! The experience was documented here with pictures : http://www.team-bhp.com/forum/bangal...ml#post4291256

Drove to the airport and back this morning. Love the silence even at 120KMPH!

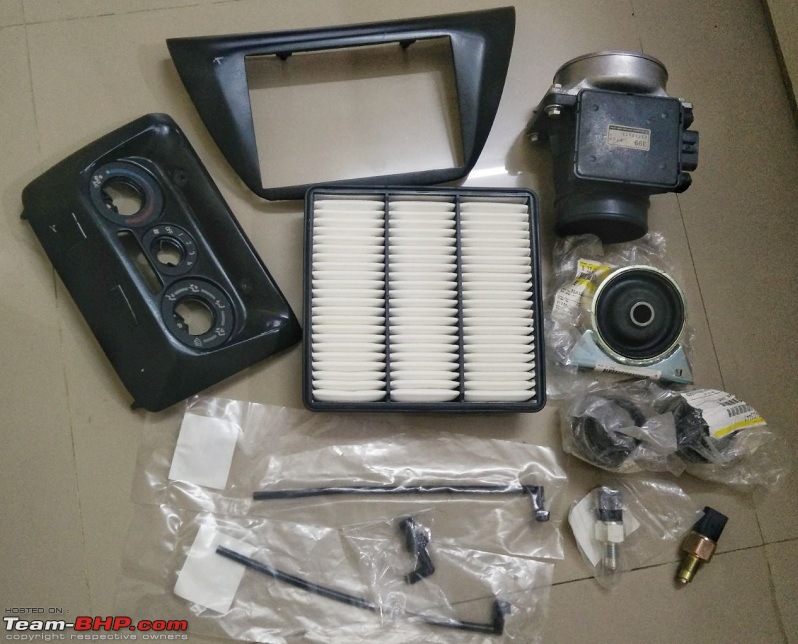
The reason I went to the airport more parts have landed!

Life with a Red Mitsubishi Cedia-evo-stuff.jpeg
SunnyBoi is offline   (8) Thanks
Old 31st October 2017, 00:41   #119
Senior - BHPian
 
SunnyBoi's Avatar
 
Join Date: Dec 2006
Location: Mysore / B'lore
Posts: 1,663
Thanked: 4,099 Times
Re: Life with a Red Mitsubishi Cedia

Quote:
Originally Posted by SunnyBoi View Post
The fuel needle hasn't dipped much so I'm sure I'm getting better mileage too.
Few days later I returned to Mysore. Did 422KMs in the whole journey, filled up and the car only took 30L! Which means I got 14KMPL I did drive a bit slowly but one cannot ignore 4 people and a full boot all the time. At this rate I'm sure I'll get back the COP investment!

Clicked this pic on the way back, 325KMs and it actually hadn't reached half yet! It did at ~333KMs but could not take a pic. My previous record was 350KMs to half, that was purely on highway and no AC, I was alone and driving even slower.

Life with a Red Mitsubishi Cedia-01.jpg

The damping had worked, next item on the agenda was a much quieter car! Got the OE airbox out. It needed some serious cleaning as it had cobwebs in it.

Life with a Red Mitsubishi Cedia-02.jpg

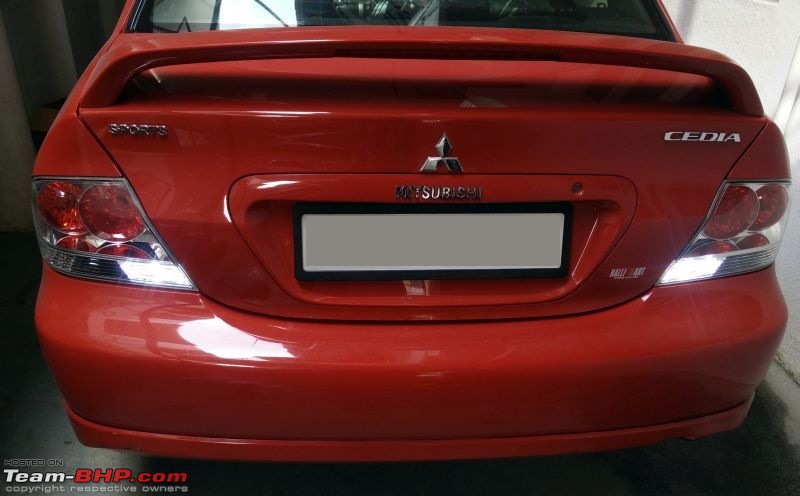
While the airbox dried, I swapped out the backup light switch. Old on the right, new on the left.

Life with a Red Mitsubishi Cedia-03.jpg

Did it work? Yup.

Life with a Red Mitsubishi Cedia-04.jpg

Coming back to the airbox. It's been a year since I've been running the UNI instead of the airbox. While I loved the intake roar, lately I've been wanting a silent car. The damping work done last time made the want stronger.

I was looking around and I found a particular model of Evo had a similar panel air filter as that of our Cedia. Needless to say I bought it! I was also inspired by Nikhil, his Turbo Civic is still running the original air filter. If it wors for him, it should work for me!

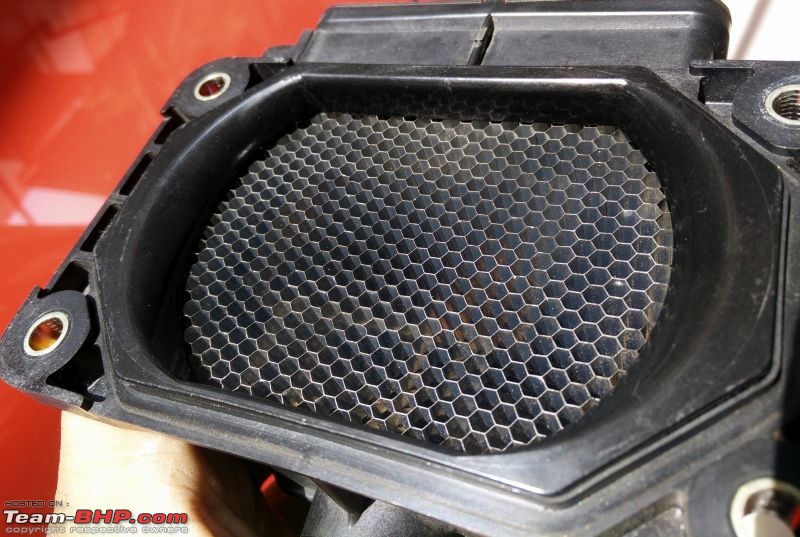
Apart from the Air Filter, I even got a MAF from an Evo. Since this was a pre owned part, it needed some serious cleaning first.

Life with a Red Mitsubishi Cedia-06.jpg

Life with a Red Mitsubishi Cedia-05.jpg

The intake hose got a thorough clean up, inside and outside!

Life with a Red Mitsubishi Cedia-07.jpg

Clamps get a fresh coat of Zinc

Life with a Red Mitsubishi Cedia-08.jpg

Assembling everything together - The Evo MAF fits straight into our airbox. The only visual difference is the Evo MAF says 399 while our stock MAF says 605.

Life with a Red Mitsubishi Cedia-09.jpg

Everything assembled. I tried some black plastic paint on the airbox and I'm not happy with the result. Its too glossy and looks cheap. Oh well, I'll fix it the next time it comes apart.

Life with a Red Mitsubishi Cedia-10.jpg
SunnyBoi is offline   (12) Thanks
Old 31st October 2017, 12:29   #120
BANNED
 
Join Date: May 2007
Location: kerala
Posts: 71
Thanked: 37 Times
Re: Life with a Red Mitsubishi Cedia

Please re-do the battery wiring with proper terminal cover and collect the trophy for best looking engine bay.
dracul is offline   (2) Thanks
Reply

Most Viewed

Copyright ©2000 - 2024, Team-BHP.com
Proudly powered by E2E Networks