Older Thread on the same vehicle : Link
Time flies .Van has grown from a boy to a man. Now it needs men’s stuff.
Stage I, carried work on restoration & modification to bring the van to present life & eco friendly.
Stage II, carries work on technical modification to achieve better performance. ( Keeping safety factor intact.)
Having drivability experience with a few thousand km completed, has given way to upgrade areas where better performance can be achieved.
With respect to upgrade, ordered parts have been delivered . Three major & most important modification to follow with respect to drivability & comfort.
First achievement :- Electrical Power Steering.
Solely done by me & my Tinker‘s assistance. (For Fabrication work.). The mod had only one single go. No spare no second chance.
Why Electrical Power Steering ?
A) Hydraulic Power Steering
Parts needed:-- power steering unit, steering rod, fluid pump, lengthy hoses, belt & fluid tank.
1 .It‘s very hard to import all these ‘OE’ parts.
2 .If belt snaps or fluid leaks, steering becomes very hard .
3. Part of engine bhp is determined by HPS.
4. To my knowledge, turning radius is more than manual or EPS.( Check Punto with Swift.)
5. More parts would mean using up more space & more weight.
6. Energy consumed by the PS pump is similar to ac compressor pump.
B) Electrical Power Steering
EPS needs only steering Column replacement & some proper wiring.
1.If motor or fuse burns out, steering will turn into non power assisted steering . (Normal driving, unlike HPS.)
2.Better turning radius & minimum power loss.
3. Maybe a part of battery life is determined by EPS.
4. Engine bay is free of EPS space.
5. Last but not the least, Fuel efficiency is better in EPS.
Latest technology uses both in a unit. ‘Hydroelectric power steering‘. Electrical run pump used instead of belt driven mechanical pump.
Photo shown is Universal Electrical pump.

Moving on to work’s progress, which we all love to do.( Spending two hrs a day took me six days from plan to commissioning. )
Note:- The Unit is not speed sensitive. A control knob is provided to vary the assistance.
Many rally cars have this kind of setting.

Make NSK Japan. (Famous for bearings.) Manufactured for GM.
The EPS unit was not a direct fit. Part of it is preadapted. Rest had to be modified using old steering Colum.
Colum.
Lets start with flash back continuity. Detailed explanations visual follows,
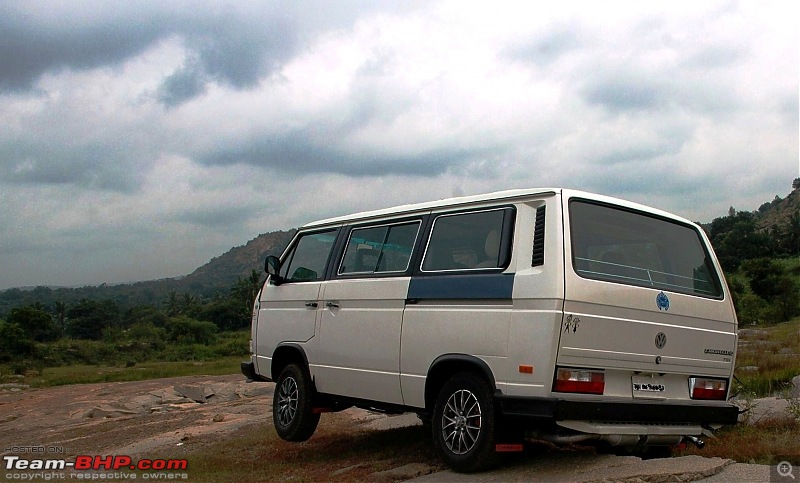
Yes, this is what I was talking about. Van in ‘Cloud 9‘. ( ‘Rear wiper & Roof railing’ added later.)
Contents when unboxed:- Steering Colum, Motor, Bottom shaft, Top shaft, Mounting bracket, Control box, Speed control knob & Fuses.

Assembly line ( At my home.) :- Motor & bracket fitted to the Colum.( Later bracket was customized to required setting.)

Top shaft provided is of no use.

Steering Colum removed from the van. OE bottom shaft yet to be removed. ( Sorry for blurriness.)

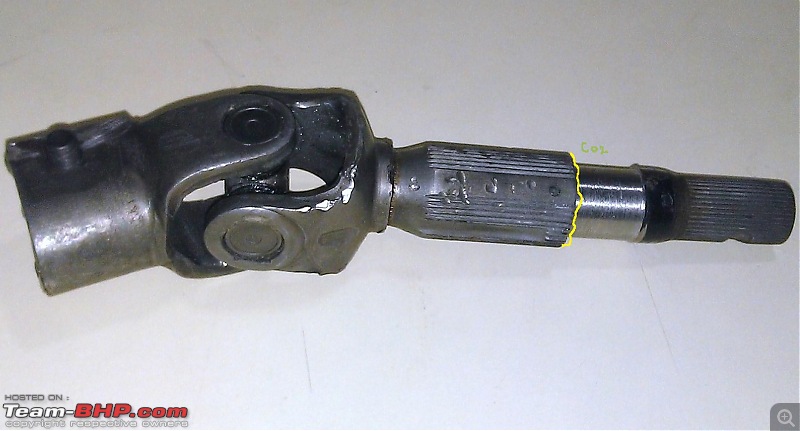
Parts dismantled from the OE Colum.( Note:- Arrow shows where Colum will be cut & the top part fused into EPS unit.)

Ready for dissection. Right detail is for EPS top &Left detail is for EPS bottom shaft. VW Purists close your eyes please.


Top of cut OE Colum fitted to check for the alignment.

The bracket provided for EPS unit’s bottom fitting had to be modified to achieve correct Colum alignment.
Spot weld to make sure proper fitment.( No stress on bracket or bolts.)

After seam weld, rough edges grind & a coat of paint Bottom bracket is ready. Note:--left side slot is open. . The EPS unit is heavy to hold in position & bolt it by a single person. Solution, first a bolt is screwed few threads on to the van’s steering cross member then the Bracketed EPS unit is slid into the bolt. Once one point holds, rest three bolts can be easily bolted. (This concept can be used in different situations.)

The bracket fitted back to the EPS unit.

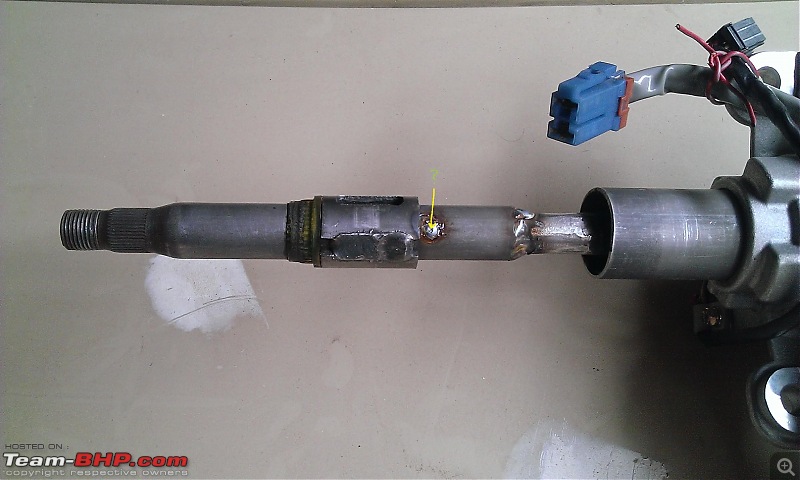
Top OE shaft is press fitted into EPS shaft. Once length is determined, shaft will be co2 welded.

Provided Bottom shaft is cut to required length. (App 40 mm)

Job work being done on provided bottom shaft.

OE bottom shaft is cut & outer dia is reduced by 1mm.

OE shaft is press fitted into provided shaft. Once length is determined it will be co2 welded. End to end app 185 mm.
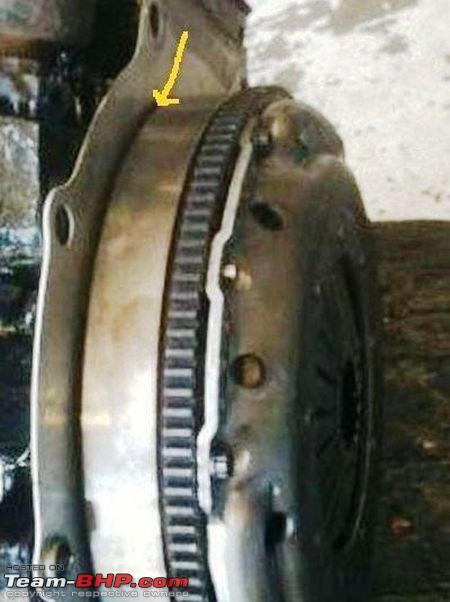
Both top & bottom shaft co2 welded. Safety at it’s best.( Note:-- Arrow mark shows 8mm hole drilled & co2 welded. Reason ?? )
Completed EPS unit finial fit. 1. Control knob yet to find a place. 2. Motor’s extra weight transfer bracket 3. Custom Clamp for Colum cover .( Some one ask VW purists to open their eyes now, please.)


Electrical Control’s & Connection.
The circuit wires had a very neat socket which were well marked to go into their designated places. Two colored wires for control knob. Connection to main battery & ignition on switch through fuse & two wires for grounding. This completes wiring.
Electrical control box 2. Mini ECU ( Please ignore the dirt on control box. Happened while fabricating a bracket fixture. )
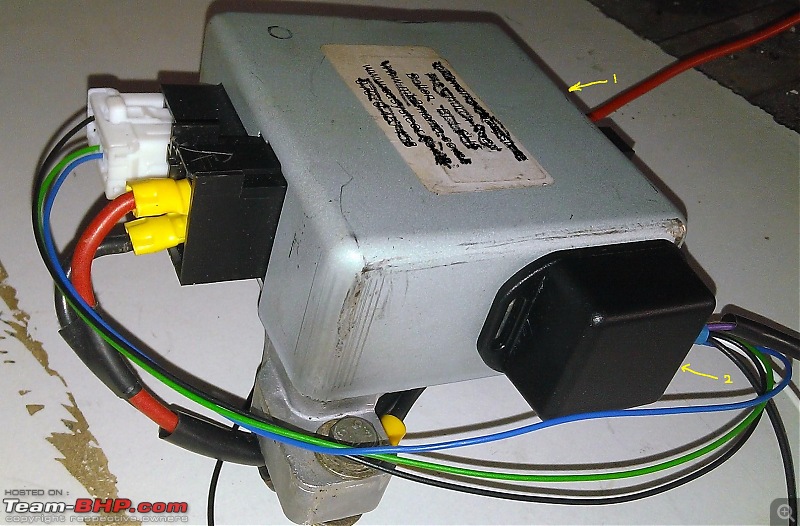
Control box fitted in it’s predetermined place.

30 amps fuse for motor, 5 amps for mini ECU(Not shown.) Completes electrical safety.

Completed work out look . Except motor projection, rest are all in OE position.(Control knob on bottom Colum cover.)

Important note- Modification done only to the steering Colum. Modified Colum is fitted to the OE van’s Colum mounting member. A spare OE steering Colum can be fixed back within minutes.( Expect money & time spent. )
Few km of trial run, steering made a huge difference. Reversing or driving in city traffic was a breeze. Van when stand still, a 10 yr old could steer. Once on highway the assistance had to be reduced to minimum, particularly cornering. It badly needs smaller dia steering wheel with respect to steering sensitiveness . Reason??
Bit of info:- Same can be modified to other cars. Rack & pinion more suited .
More driving experience.
Did a small 20 km acid test on Aldur Ghats near Chikmagalur, deliberately not avoiding bad patches with good speeds (Downhill & uphill.). Handled vary well. No slack, no feed back of pot holes, no unwanted sound in the steering Colum & cornering mm precise.
Photo taken from my video clip.(Sorry.) Patches were worst then it appears to be.

Just for the knowledge
EPS working Diagram.

Second achievement coming up.


 8th January 2014, 16:28

 (12)
Thanks
(12)
Thanks