Install and set-up
From the manual
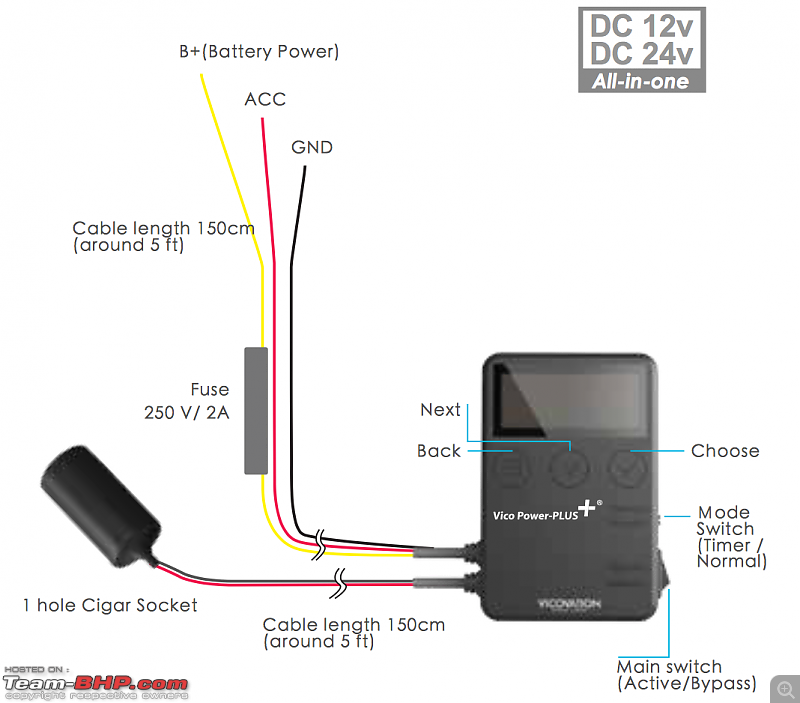
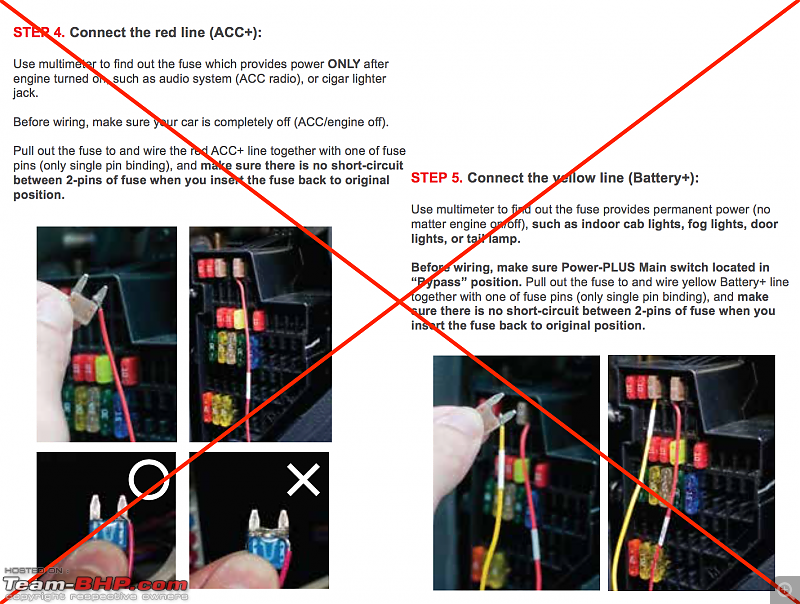
I do not agree with what VicoVation illustrates on page 12 & 14 of the manual. Please don't wrap wires around a fuse's leg. Crimp or solder the wire to a fuse-tap instead.
Special notices -
 Items required
 - Two appropriate fuse-taps
- Soldering or crimping tools
- Heat shrink tube (if soldering)
- Multimeter
Install
'ACC' and 'Battery' wire soldered to a fuse-tap each, then insulated with transparent heat shrink tubing. I've used two different sizes of heat shrink tubing to compensate for the thinner wire on the 'ACC' and 'Battery' ends

Wiring ready for installation. 3A fuses inserted into both the fuse-taps. The Vico-Power PLUS's 'Battery' wire comes with a 2A inline fuse. In the unlikely event of the dash cam pulling over 2 amps due to a malfunction or such, the inline fuse will blow first

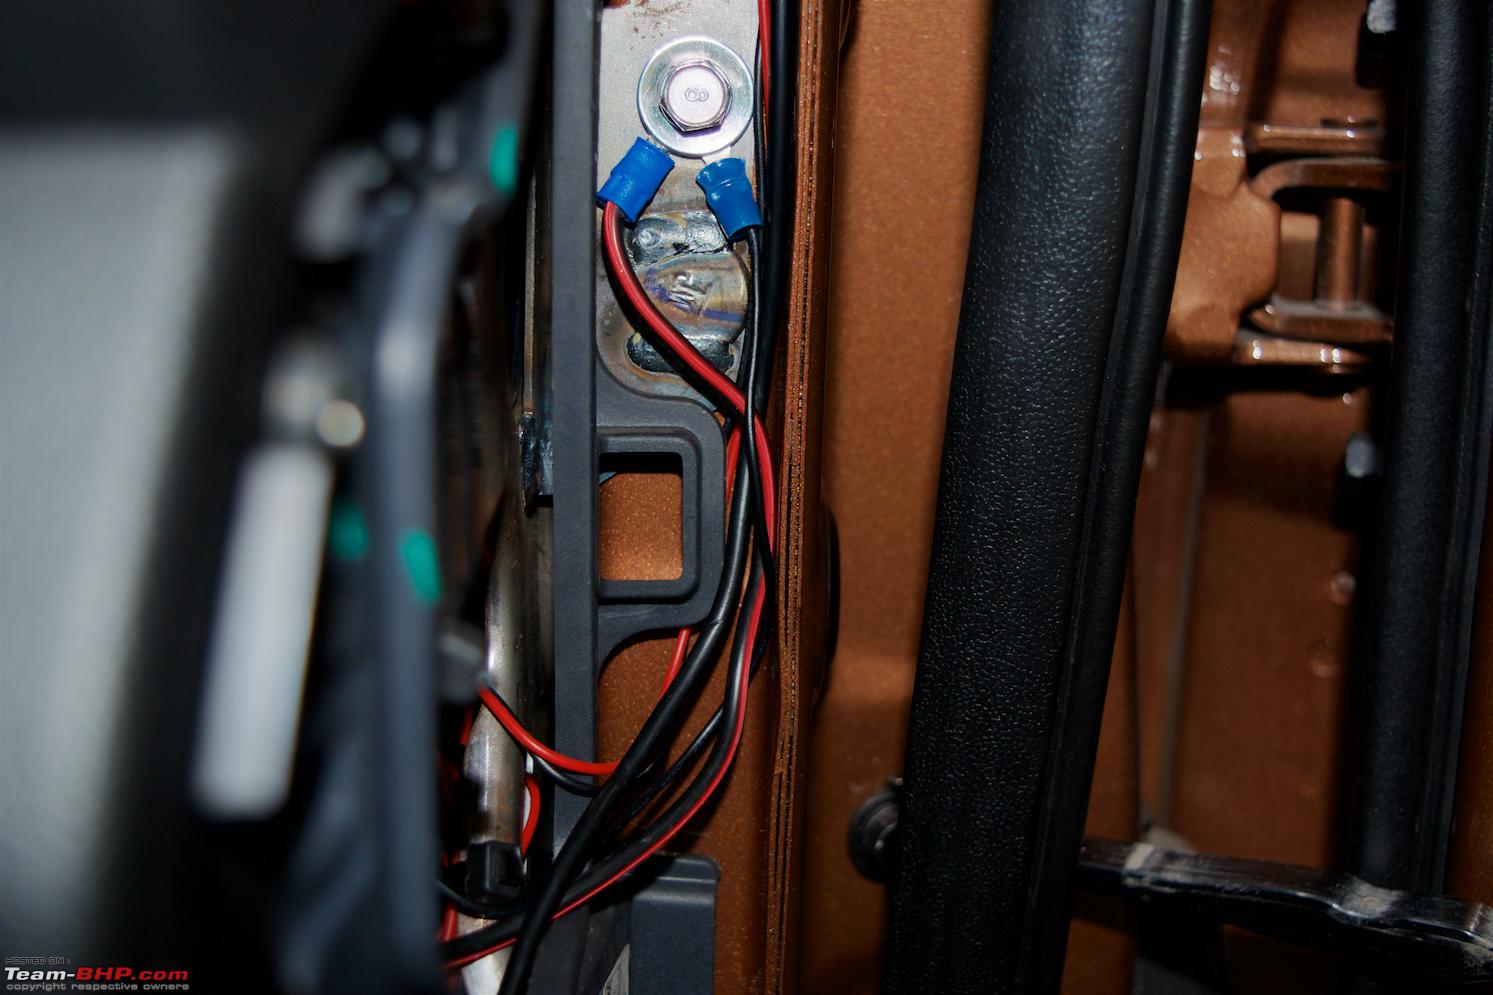
Ground (GND) wire location. The forked spade connector goes around the bolt

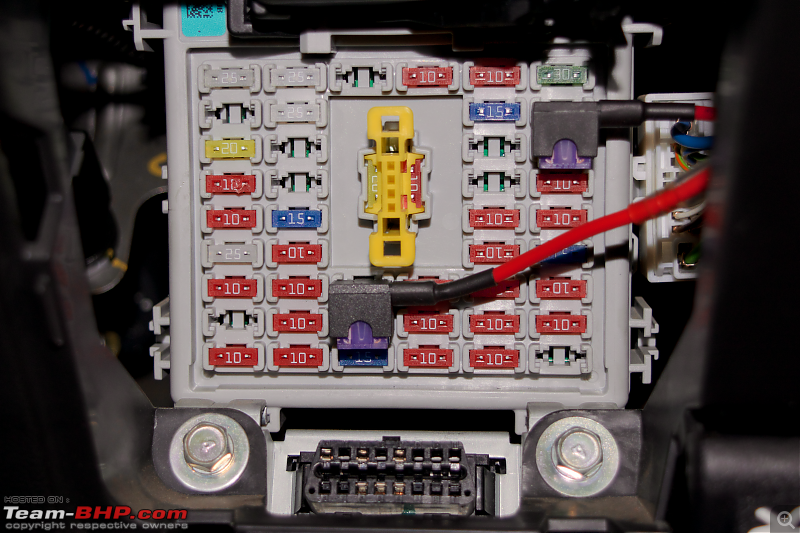
Original fuse pulled out and added to the fuse-tap. Both fuse locations tapped are rated for 10A.
VicoVation's manual recommends using fuse locations with a rating of 10A or less 
A 'Switched' and 'Constant' fuse location were located using a multimeter
Fuse-taps connected to the appropriate fuses. Yellow wire (Battery) connects to a fuse location that receives constant power from the battery. Red wire (ACC) connects to a fuse location that receives power only when ACC (accessory mode) is engaged or the engine is ON
Anker 5 port USB adapter connected to the Vico-Power PLUS's 12V female socket.
The Vico-Power PLUS's output current is rated at 1A (Max. 2A). Even though I have a 5 port adapter connected, don't plan on running more than two dash cams off this device
 Set-up Voltage offset
If there is a difference between the voltage measured through a multimeter and what shows on the Vico-Power PLUS's display, the offset needs to be corrected.
Voltage measurement from the fuse box with the engine OFF - 12.6V
Voltage showing on the Vico-Power PLUS - 12.5V
Offset - +0.1V
Low voltage cut-off
Once the battery reaches the low voltage cut-off threshold, the Vico-Power PLUS will turn OFF power to the cameras and switch OFF automatically.
Voltage measurement from the fuse box with the engine OFF - 12.6V
Voltage measured with the Vico-Power PLUS running and powering the dash cam in ACC mode with the engine OFF - 12.4V
The cut-off needs to be set at least 0.2V lower than the reading in ACC mode with the dash cam running. Cut-off voltage set to 12.2V
Plan on experimenting with 12.2V, if the recording time while parked turns out to be too short, will give 12.0V a go.
Temperature protection
Set to 65° C. If the ambient temperature of the device ever crosses 65° C, the device will cut power to the dash cam and turn OFF. If one doesn't want to utilise the temperature protection feature, it can be turned OFF in the settings.
Timer Protection
Set to 2 hours. After two hours of recording in parking mode, the device will cut power to the dash cam and turn OFF.
ACC restart reboot function
Set to OFF as none of my dash cams are made by VicoVation and I don't want them to reboot when I enter the car and start the engine.
Up and running
Start-up logo

ACC Mode (Switched power)

Battery Mode (Constant power)

Voltage reading with the engine turned OFF

Voltage reading with the engine turned ON

Parking mode ON (red dot blinks up & down in ACC mode and left & right in Battery mode)

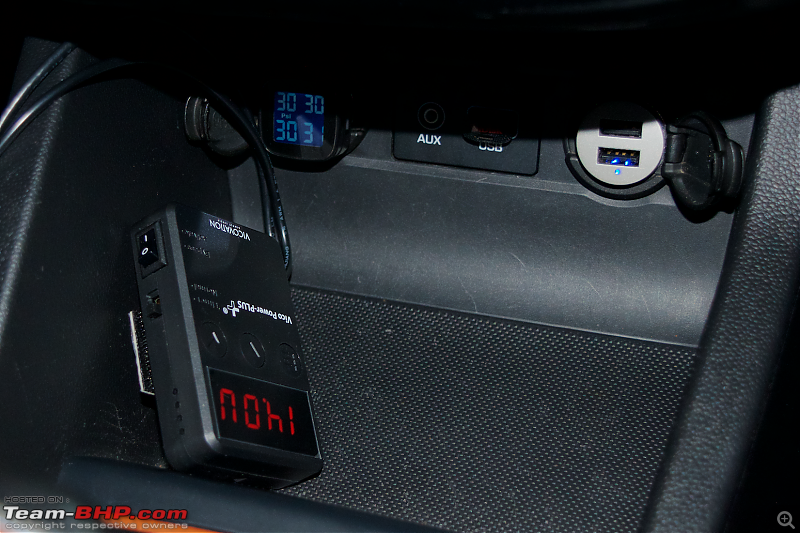
Ambient temperature reading

Dual Lock tape stuck to the unit's back. Still contemplating where to stick the main unit. Probably the panel it's resting on or somewhere inside the glovebox.
Overview and bench test (from Youtube)
Review, installation and set-up (from Youtube)
Since I've had the Vico-Power PLUS in action for just 3 days, don't feel like I'm in a position to comment on the pros and cons as of now.
While looking for a BDP hardwire kit a few months ago, I came across mostly positive experiences about this kit. I hope my experience is no different.
If there's anything I like or hate about the Vico-Power PLUS in the days to come, you'll definitely see it here.
Cheers!


 16th July 2017, 00:07

 (10)
Thanks
(10)
Thanks