| |||||||

| Search Forums |
| Advanced Search |
| Go to Page... |
 |
| Search this Thread |  22,656 views |
 2nd October 2018, 18:07
| #1 |
| BANNED Join Date: Nov 2016 Location: Kollam
Posts: 2,018
Thanked: 6,636 Times
| DIY: Chain & Sprocket change on the Bajaj CT100B, an investigative thriller of sorts! A couple of days ago I experienced a shimmy with the CT100B which was a first for me and I knew at that moment that I'd have some serious investigating to do and today being Gandhi Jayanti, I had the whole day to myself, so... Let the investigation begin! You'll need an 8 mm socket to get the front sprocket cover off. If my memory's right this is the first time since purchase I'm inspecting the front sprocket, ideally they should be inspected once every 5~10k km's depending on type of use. 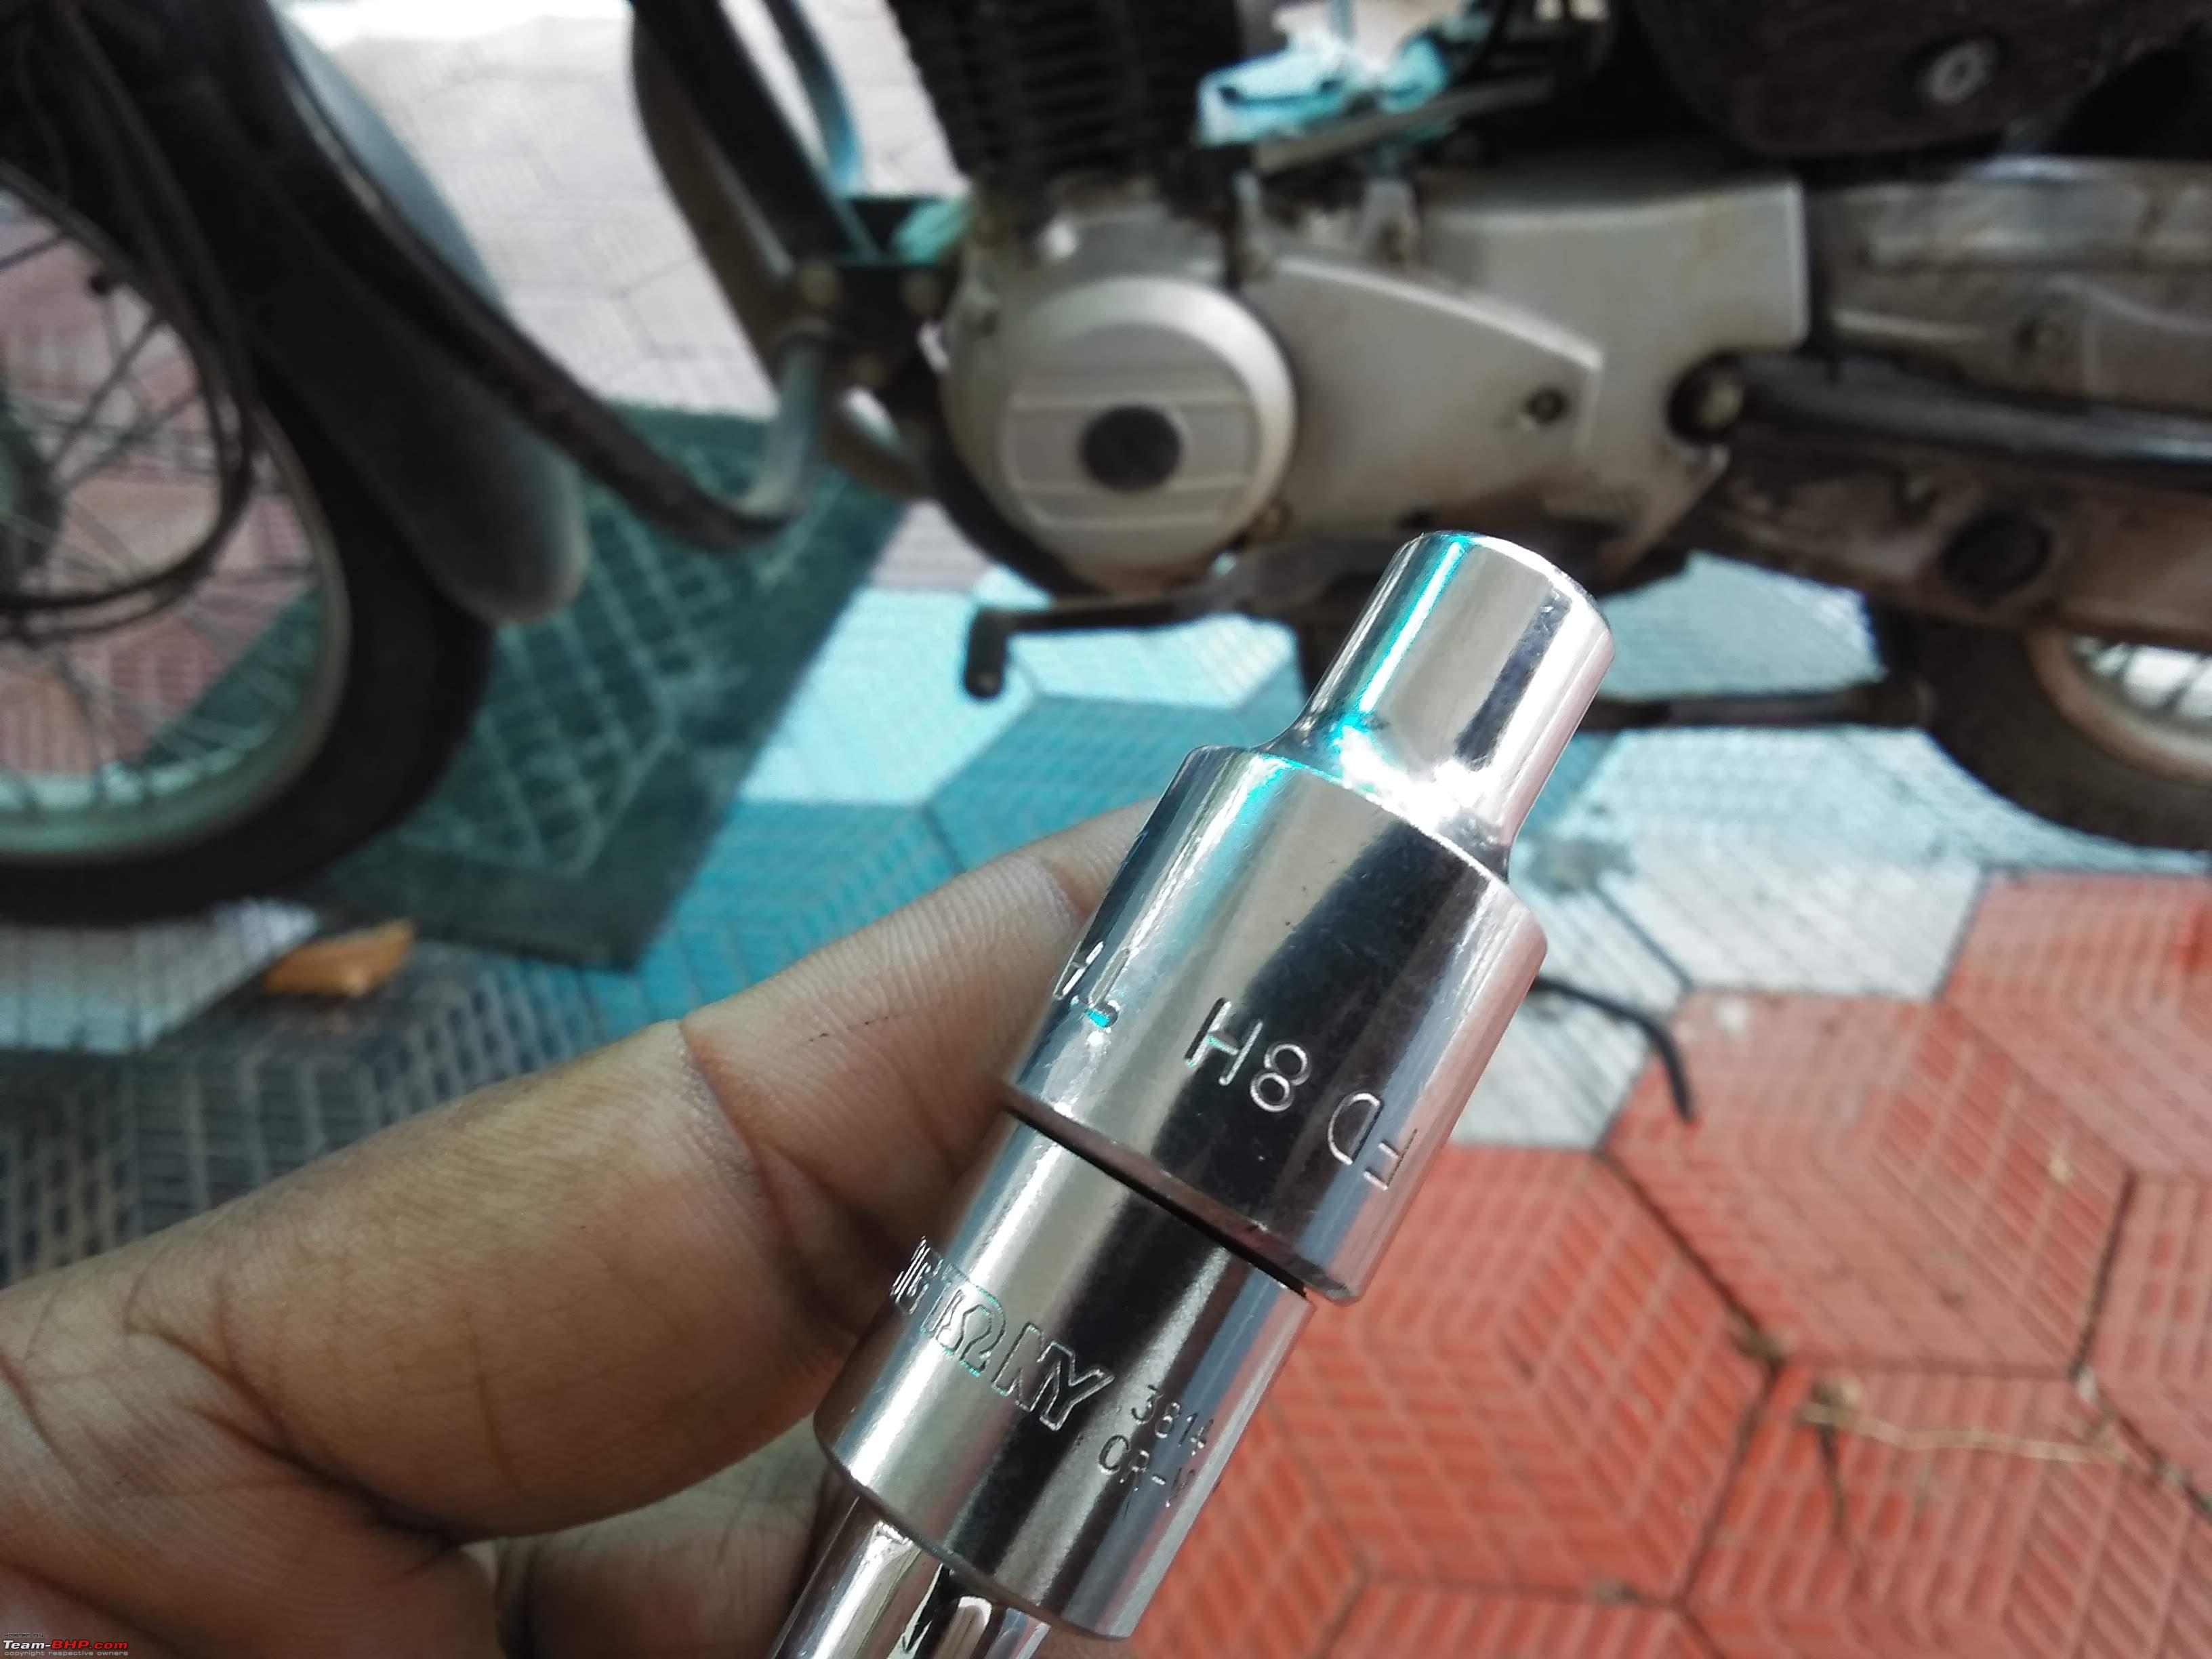 Once the cover was off, the allenkey bolt supposed to hold the front sprocket in place was missing, which was not much of a surprise considering the abuse the motorcycle has been through.  So in hopes of finding the missing allenkey bolt I removed the front sprocket using a 4 mm allenkey spanner and cleaned the area with diesel but couldn't find it.  The next possible culprit was the front sprocket cover and on closer inspection I found one of the rear sprocket nuts and something else stuck to it, which you'll notice if you look at the top right corner of the cover. 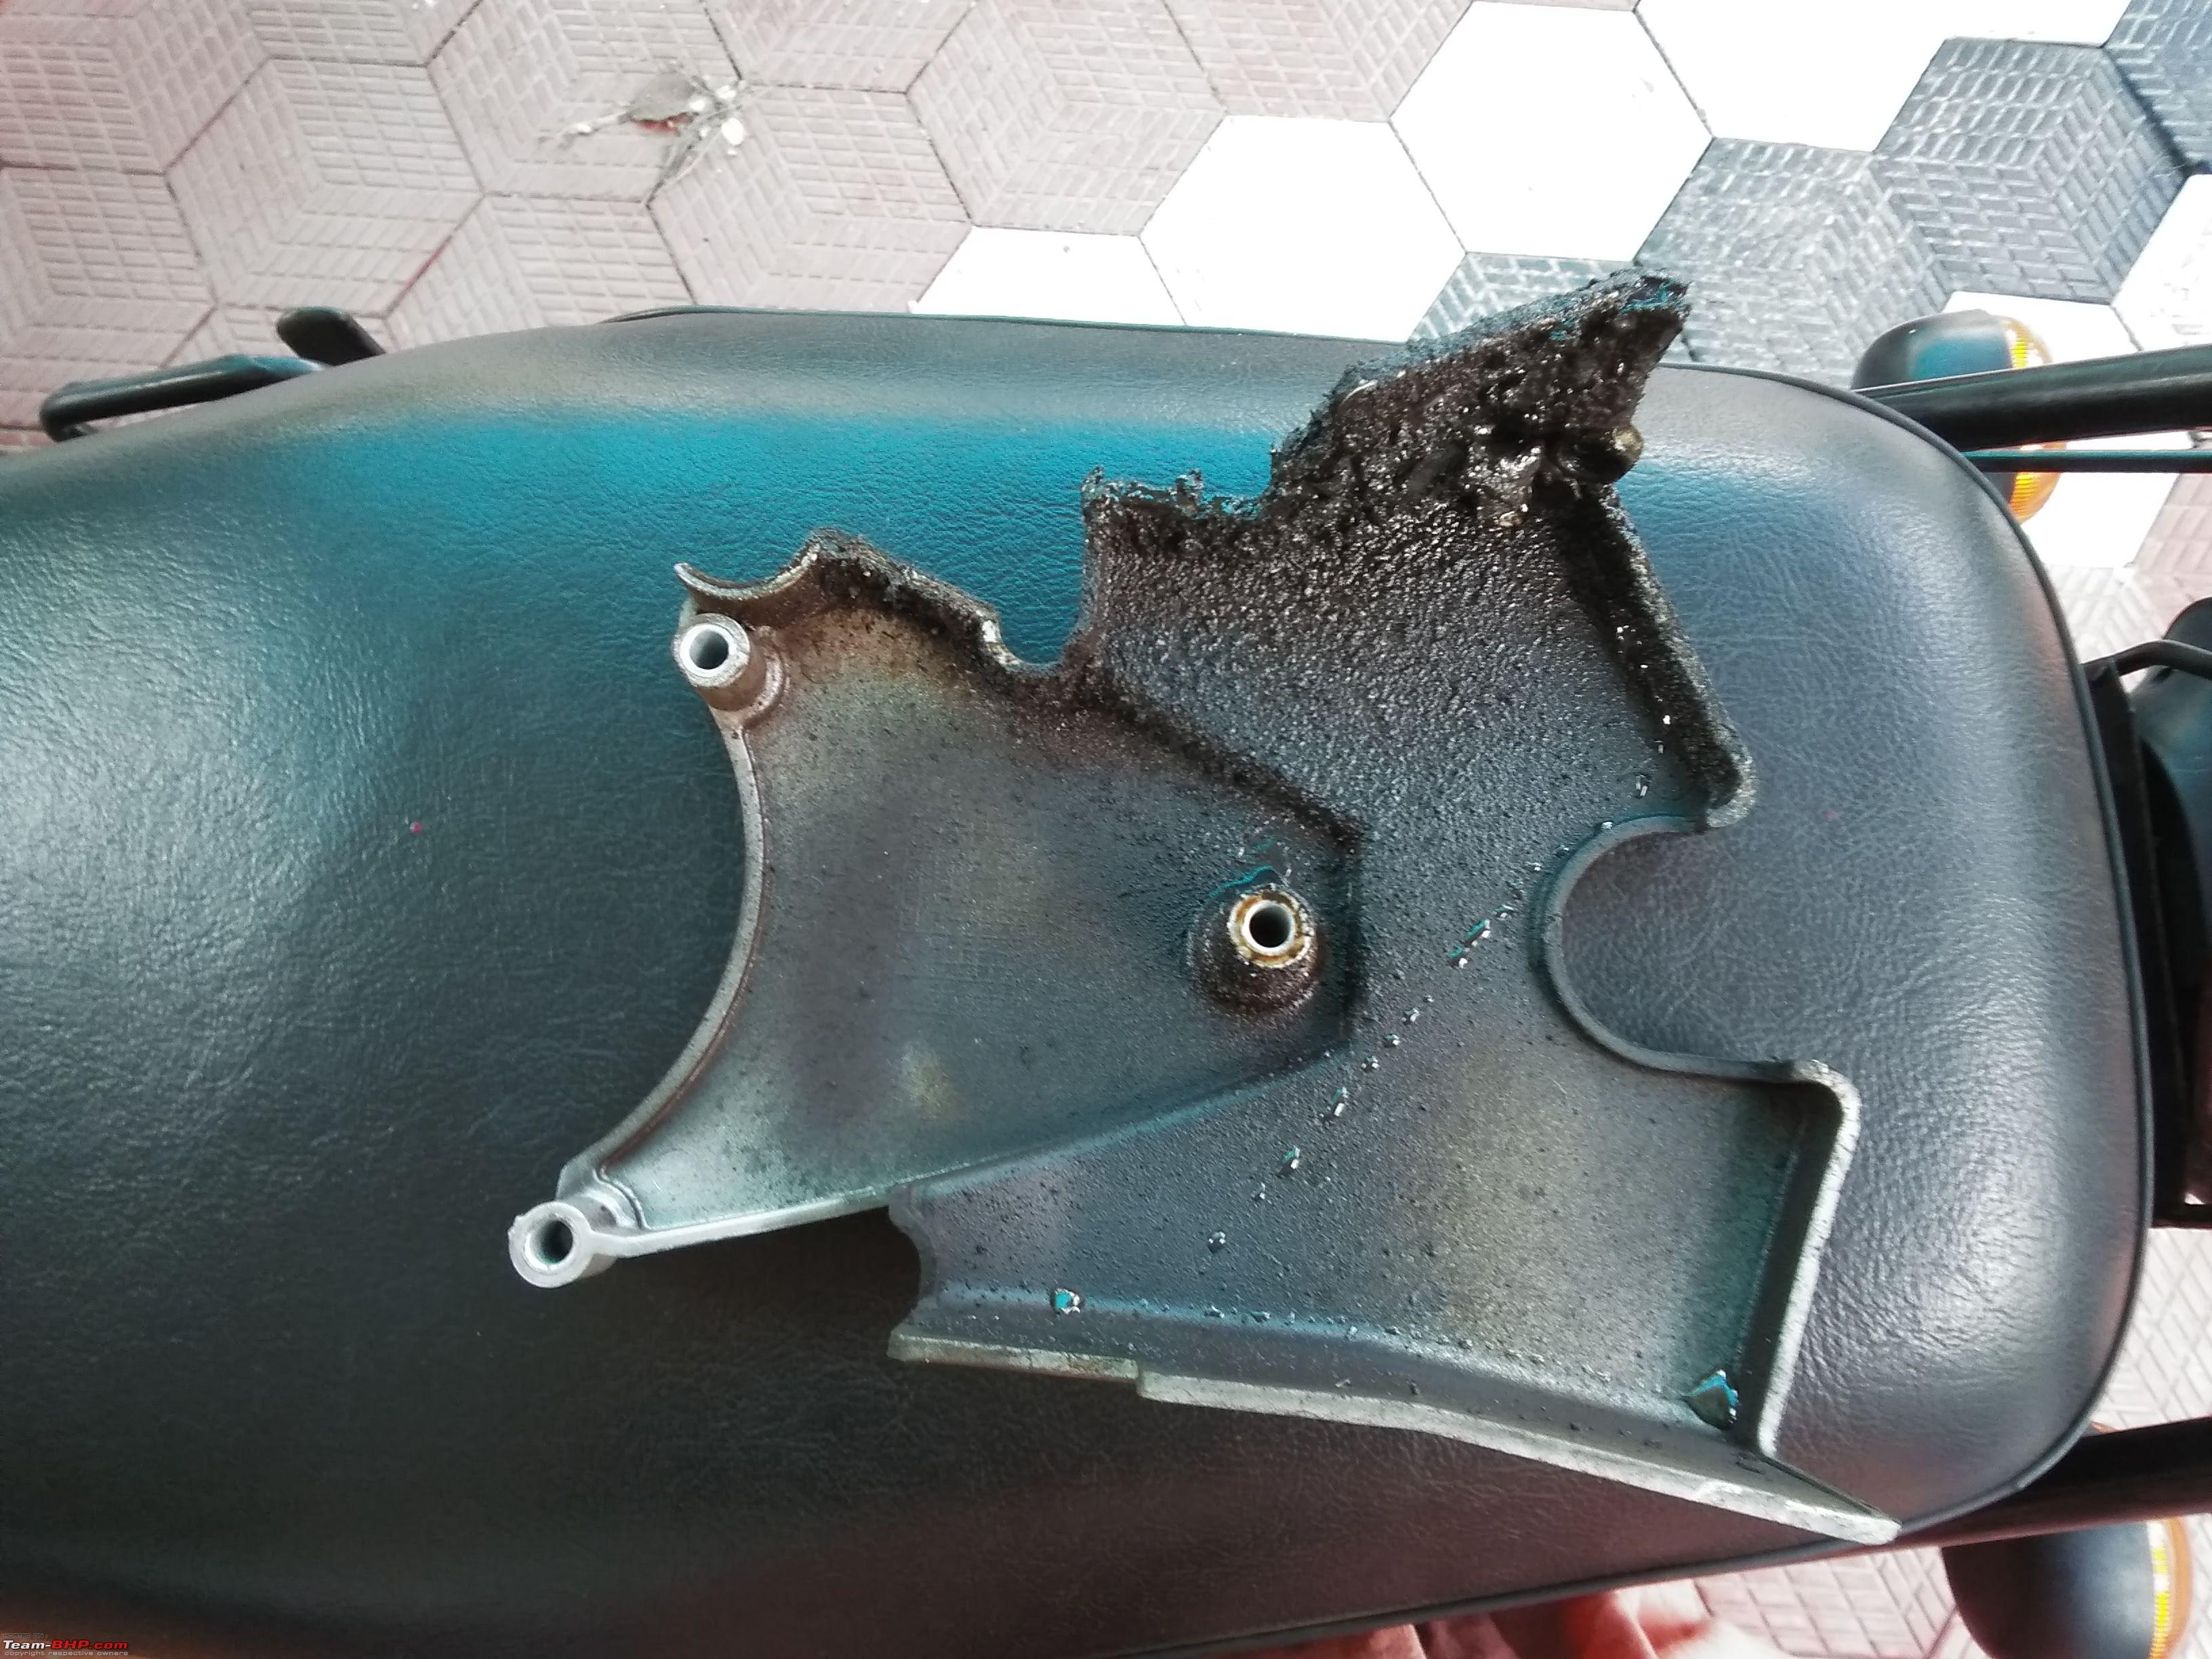 I sprayed some diesel and cleaned the front sprocket cover retrieving the rear sprocket nut but I could not find the missing front sprocket allenkey bolt, but I did find the reason for the shimmy, it was one of the rear sprocket locks, it had come loose. 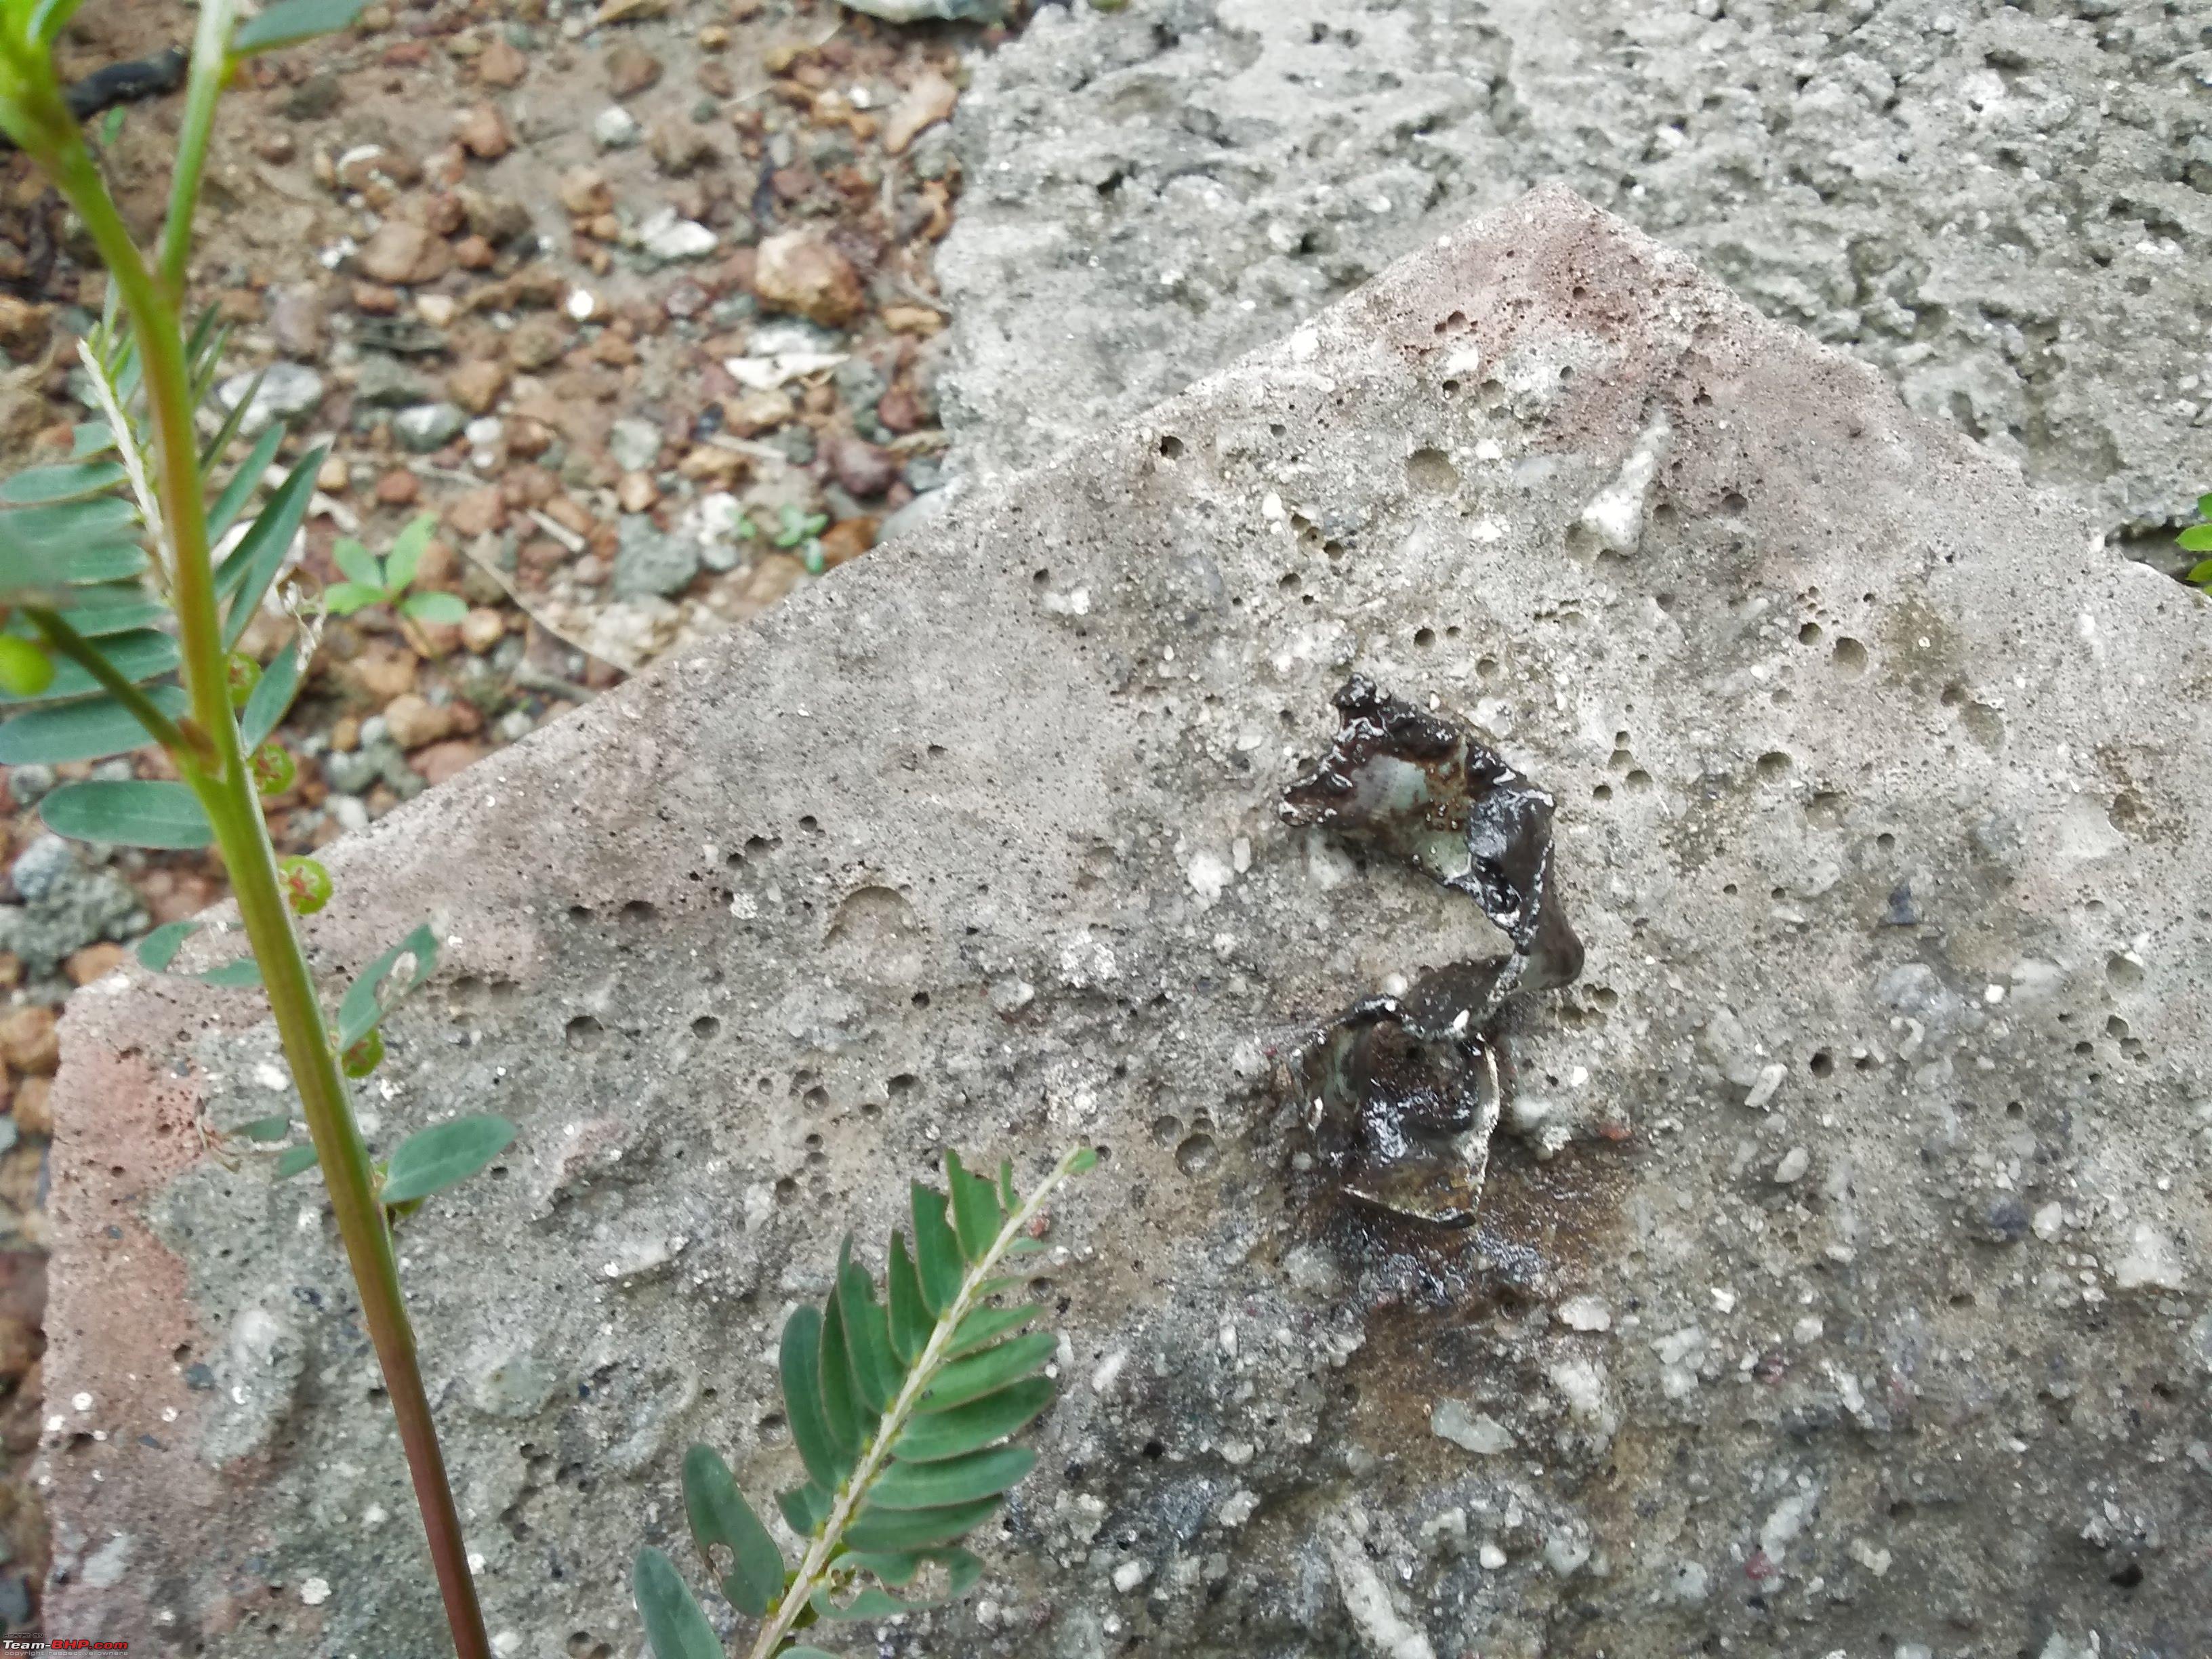 For comparison, here's a picture of a not so molested rear sprocket lock. And now it was obvious that we had at least two rear sprocket nuts that had come loose.  So next thing in order was to get the chain guard off, and for that you'd need a 10mm socket. 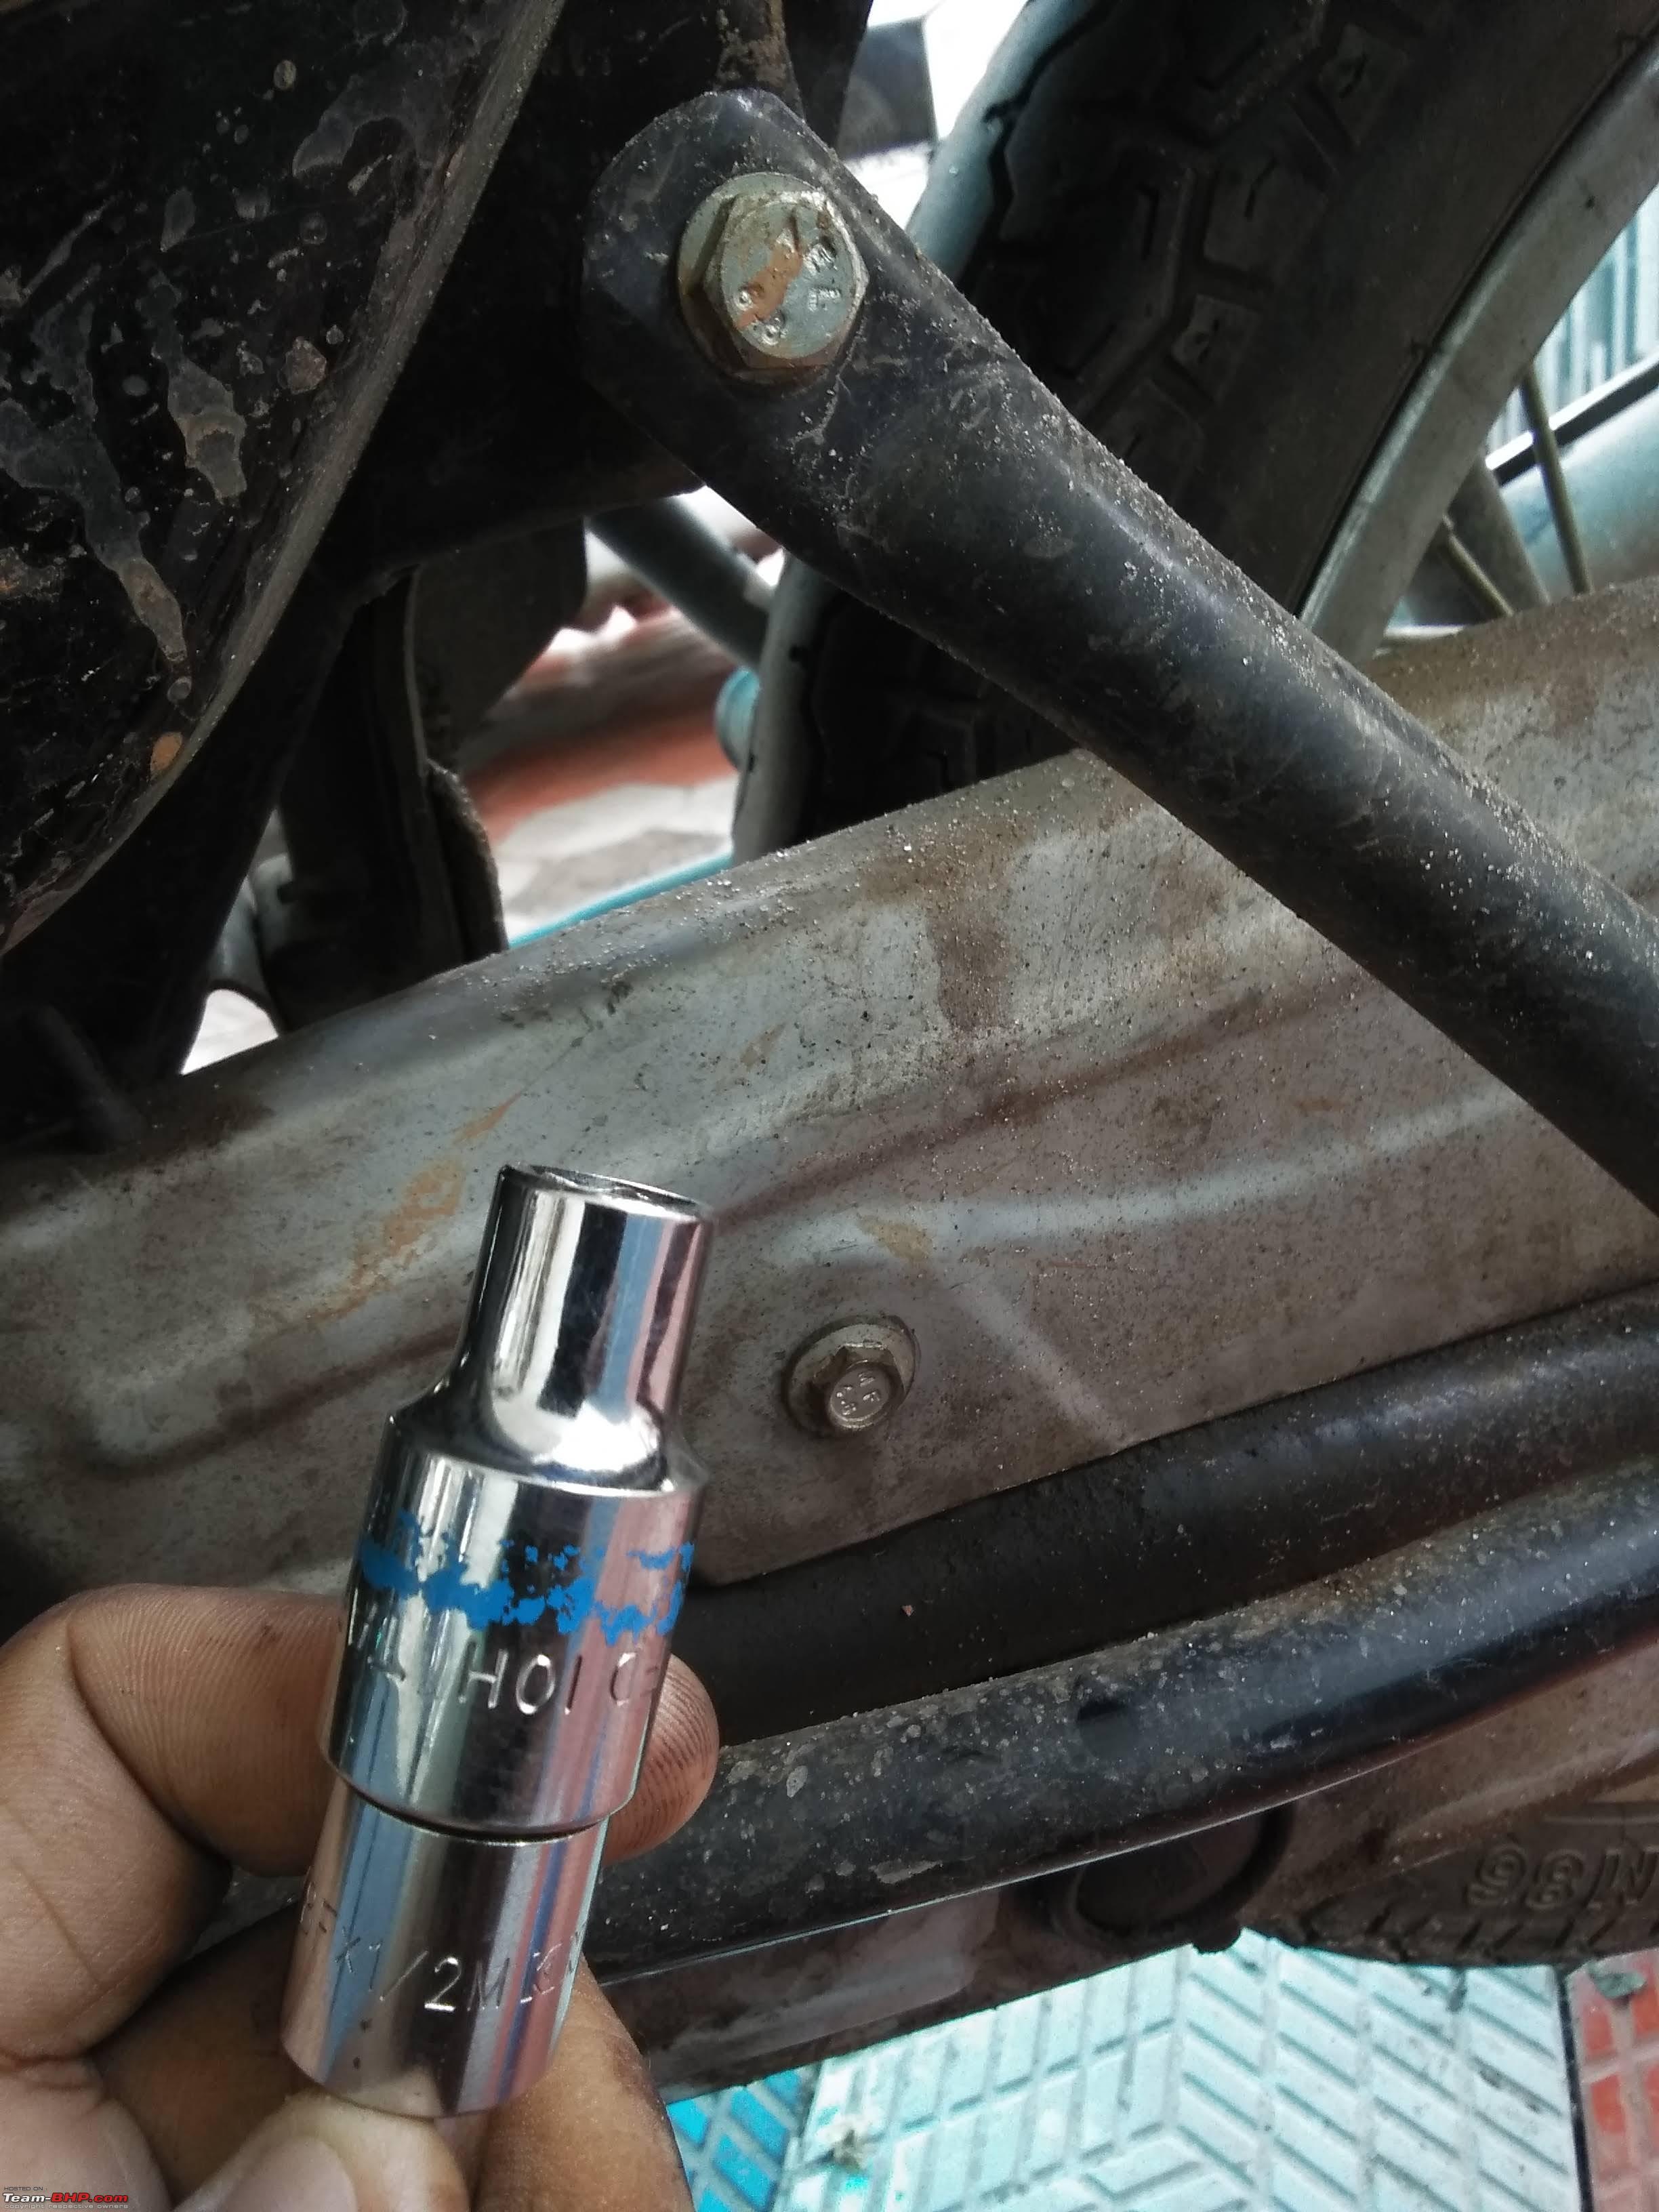 With the chain guard off, the obvious was staring me in the face. 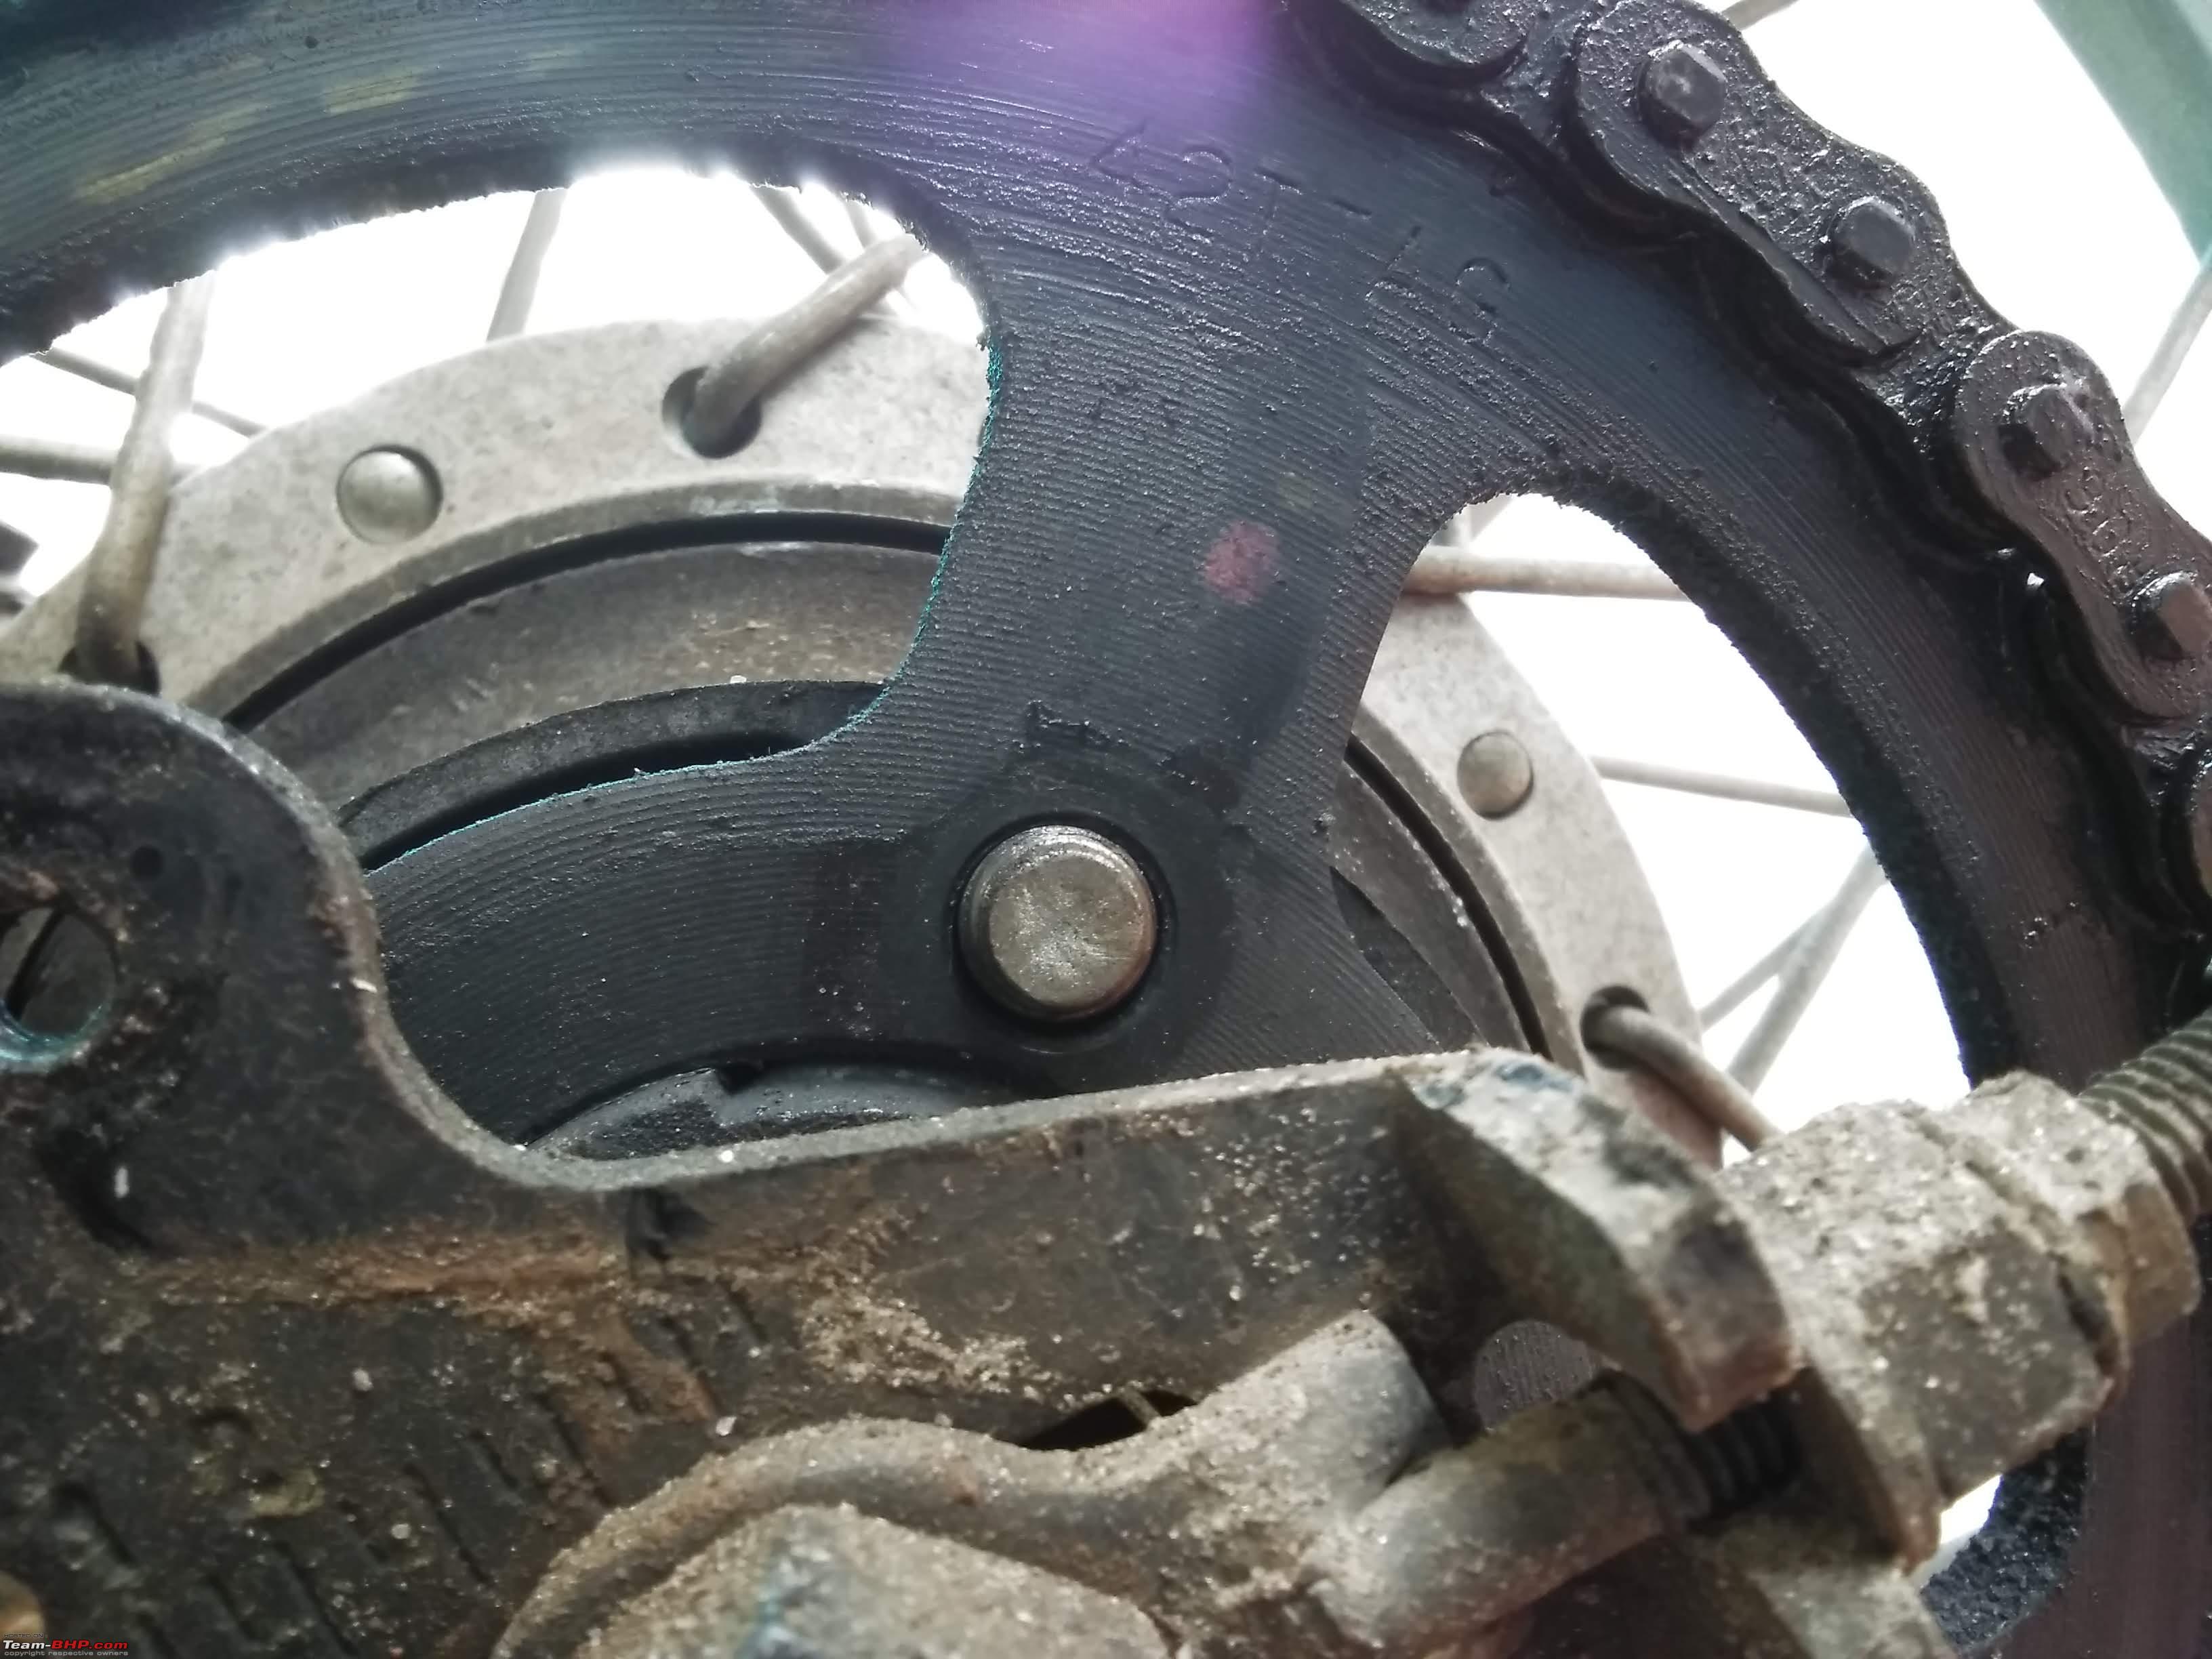 Assessing the situation: Fortunately since only one of the rear sprocket nut had gone missing as the other one was saved by the front sprocket cover the next thing in order was to check my inventory for a suitable nut, which I managed to find in a couple of minutes as similar sized nuts were used in my Bajaj Pulsar 220, but do note that these are not regular 14 mm nuts, the thread is a bit larger so unless you have a dedicated fixtures store in your area it would be best to source the same from Bajaj Spares. 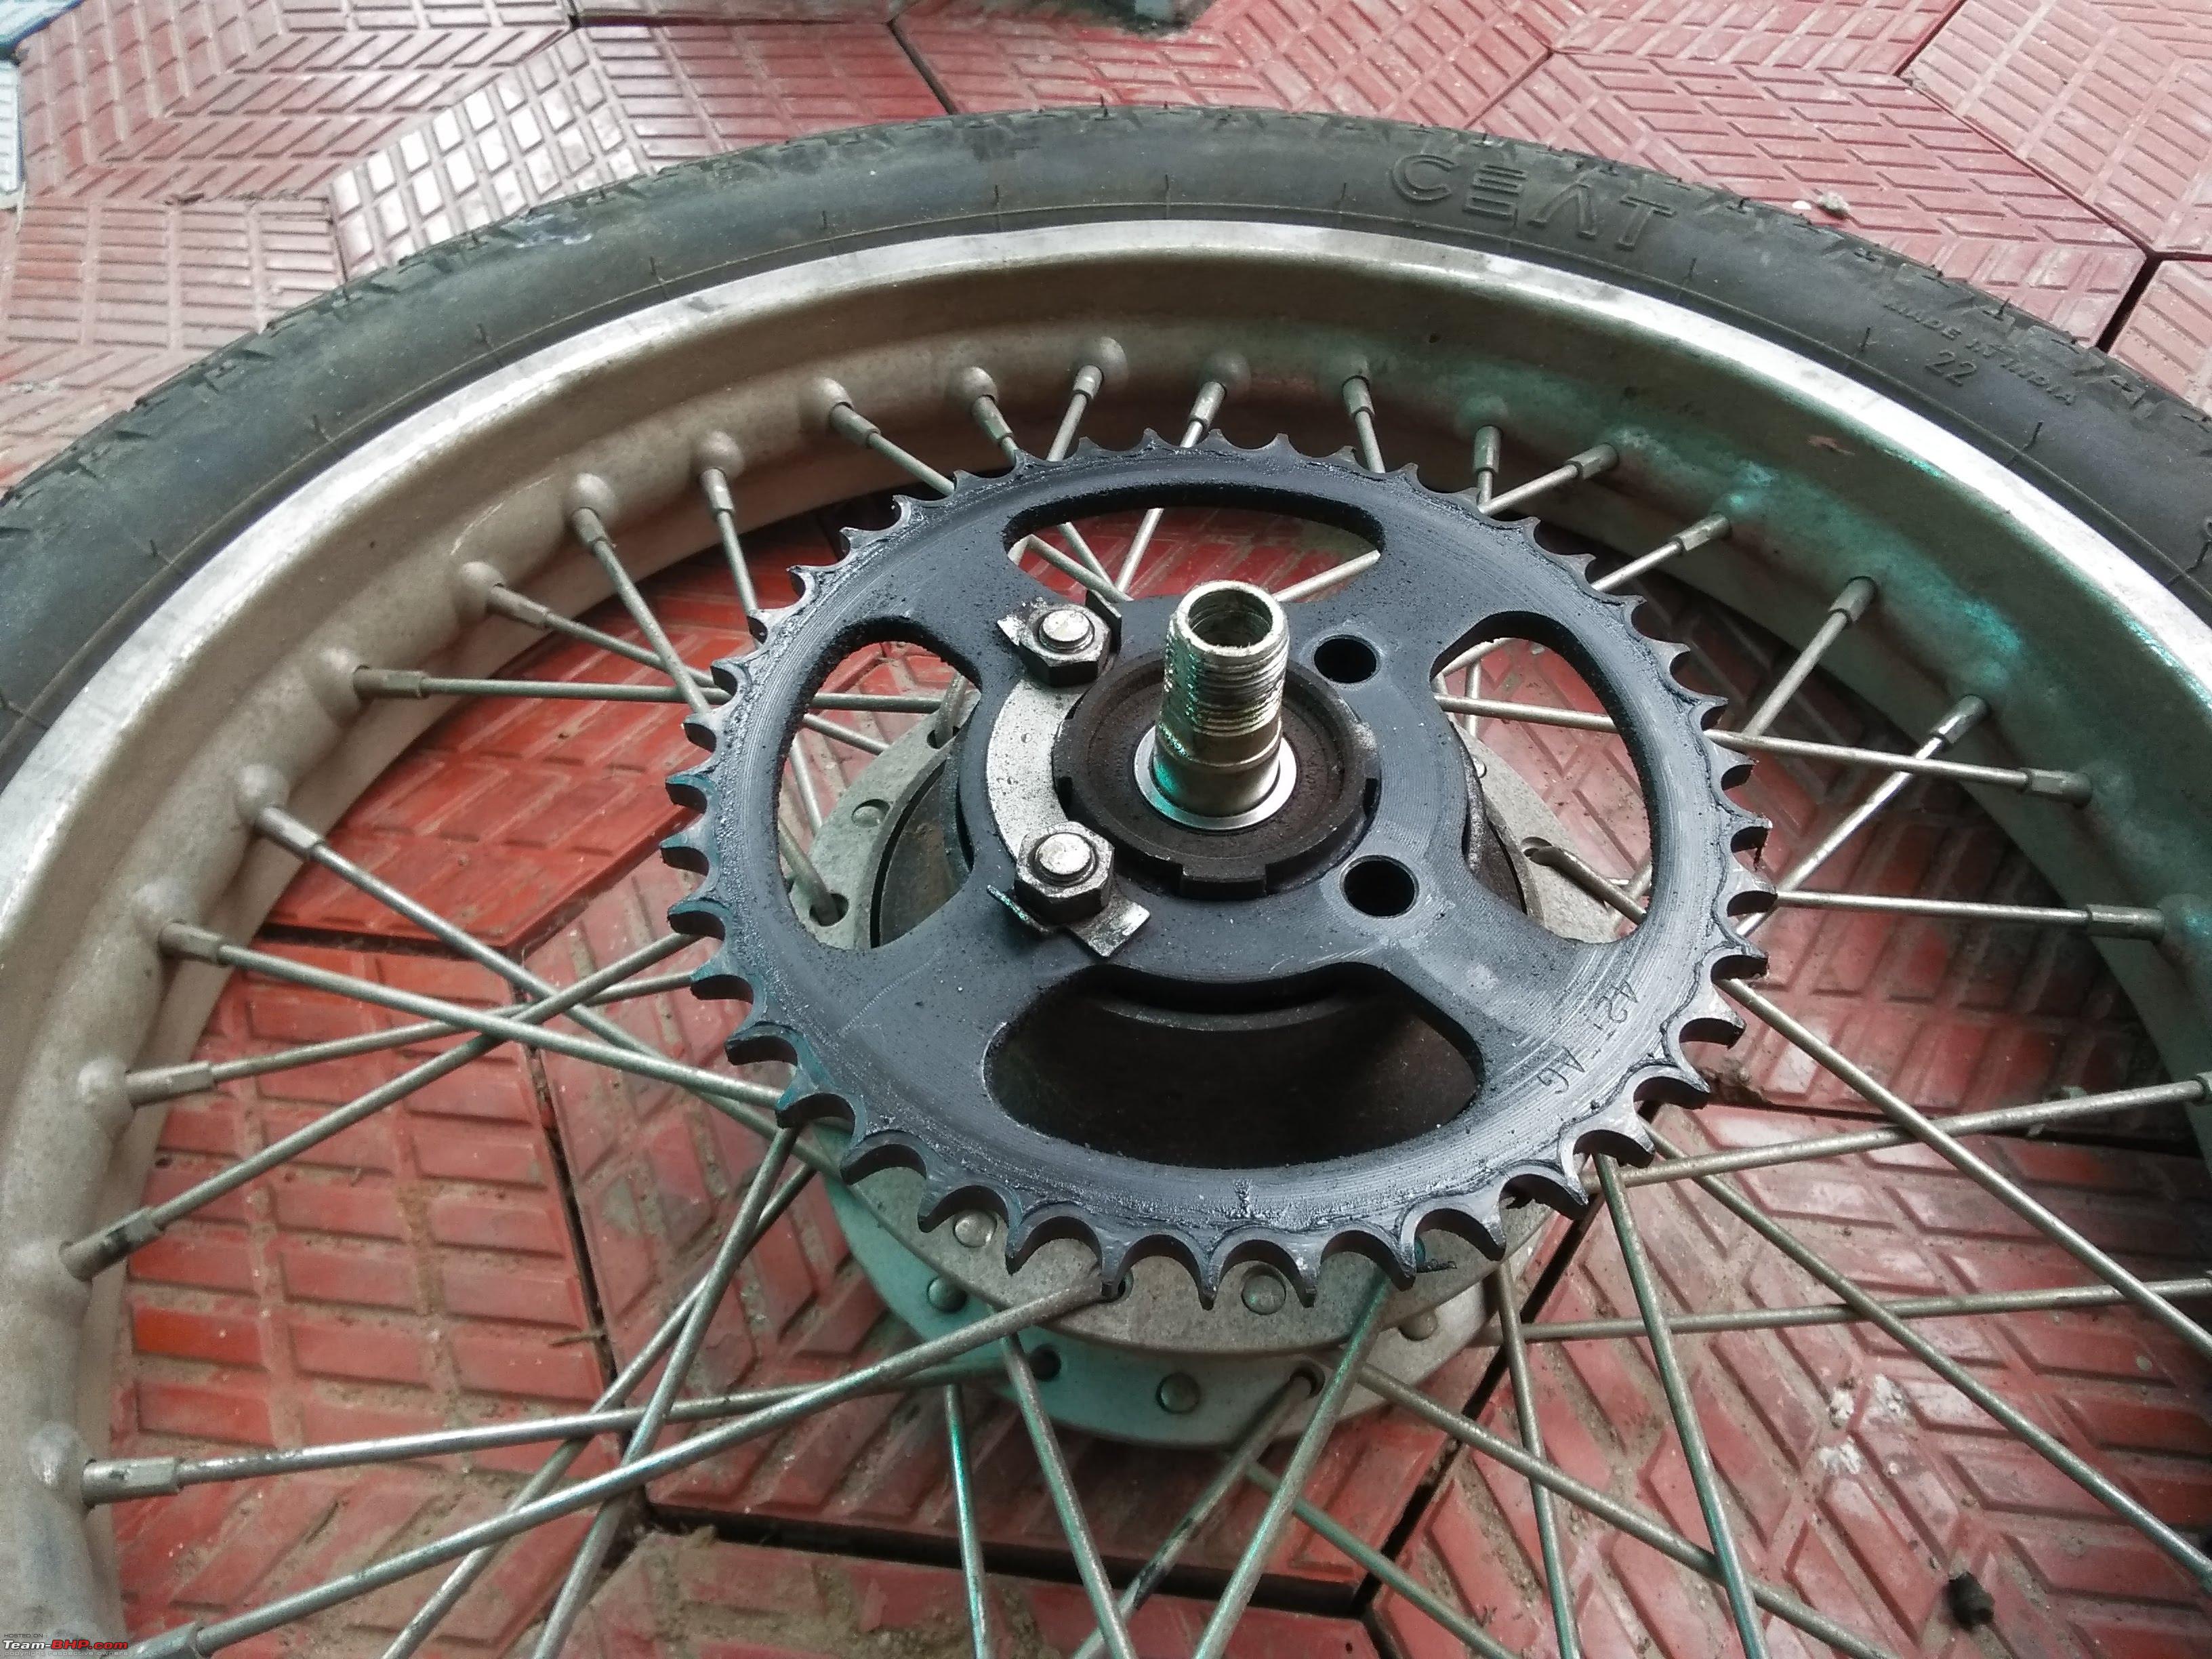 The next thing to source was the front sprocket allenkey bolt, since I'm currently at Trivandrum I had no clue where to source fixtures from, so headed for the nearest Bajaj A.S.S and was informed that the part was unavailable, so tried the next one and got the same response, tried a Hero A.S.S and got the same response, same was the case with TVS, Honda and Yamaha, this being a not so D.I.Y friendly town I decided to go a bit off-road and sourced the following; Left: Aftermarket 8 mm bolt and spacers sourced from a truck spares store nearby. Center: Stock bolt for comparison. Right: Aftermarket 8 mm bolt cut to size by a different store, which was surprising as I was impressed with the readiness by which they resolved my concern, they even asked me to return if the fitment was not up to my taste in which case they could place an order for a bolt matching my requirement. I simply went with 2 new bolts as the one seen in the left making up(almost!) for the difference in length by using two spacers. The reason I did not go for the bolt that was cut to size was due to fear of it snapping due to the aggressive heat cycles it had gone through while they had cut it with a dremel and my OCD didn't even let me consider only replacing the missing bolt with another one for the sake of uniformity.  Time to close the case! So with a 17 mm ring spanner you need to undo the axle nut which is immediately behind the exhaust pipe, you can insert a screw driver on the other end of the axle bolt where there'd be a hole, this is for locking the other end in place and preventing the axle bolt from freely rotating. Now you may use the screw driver for grip and pull out the axle nut which would free the wheel, to remove the wheel you would need to tilt the motorcycle a bit making sure not to slide off the main stand, it would be best to have the kickstand out at this point of time which is what I did as I'd slid off the main stand a couple of times as the CT100B is a very light motorcycle. Since I was alone I couldn't snap pictures of the wheel being removed as it required my undivided attention. To put the wheel back on you'd just have to reverse the above steps, its as simple as pie. Once the wheel is off, using a 14 mm socket you can remove the rear sprocket nuts, which in my case were missing or already loose enough to be fingered out. 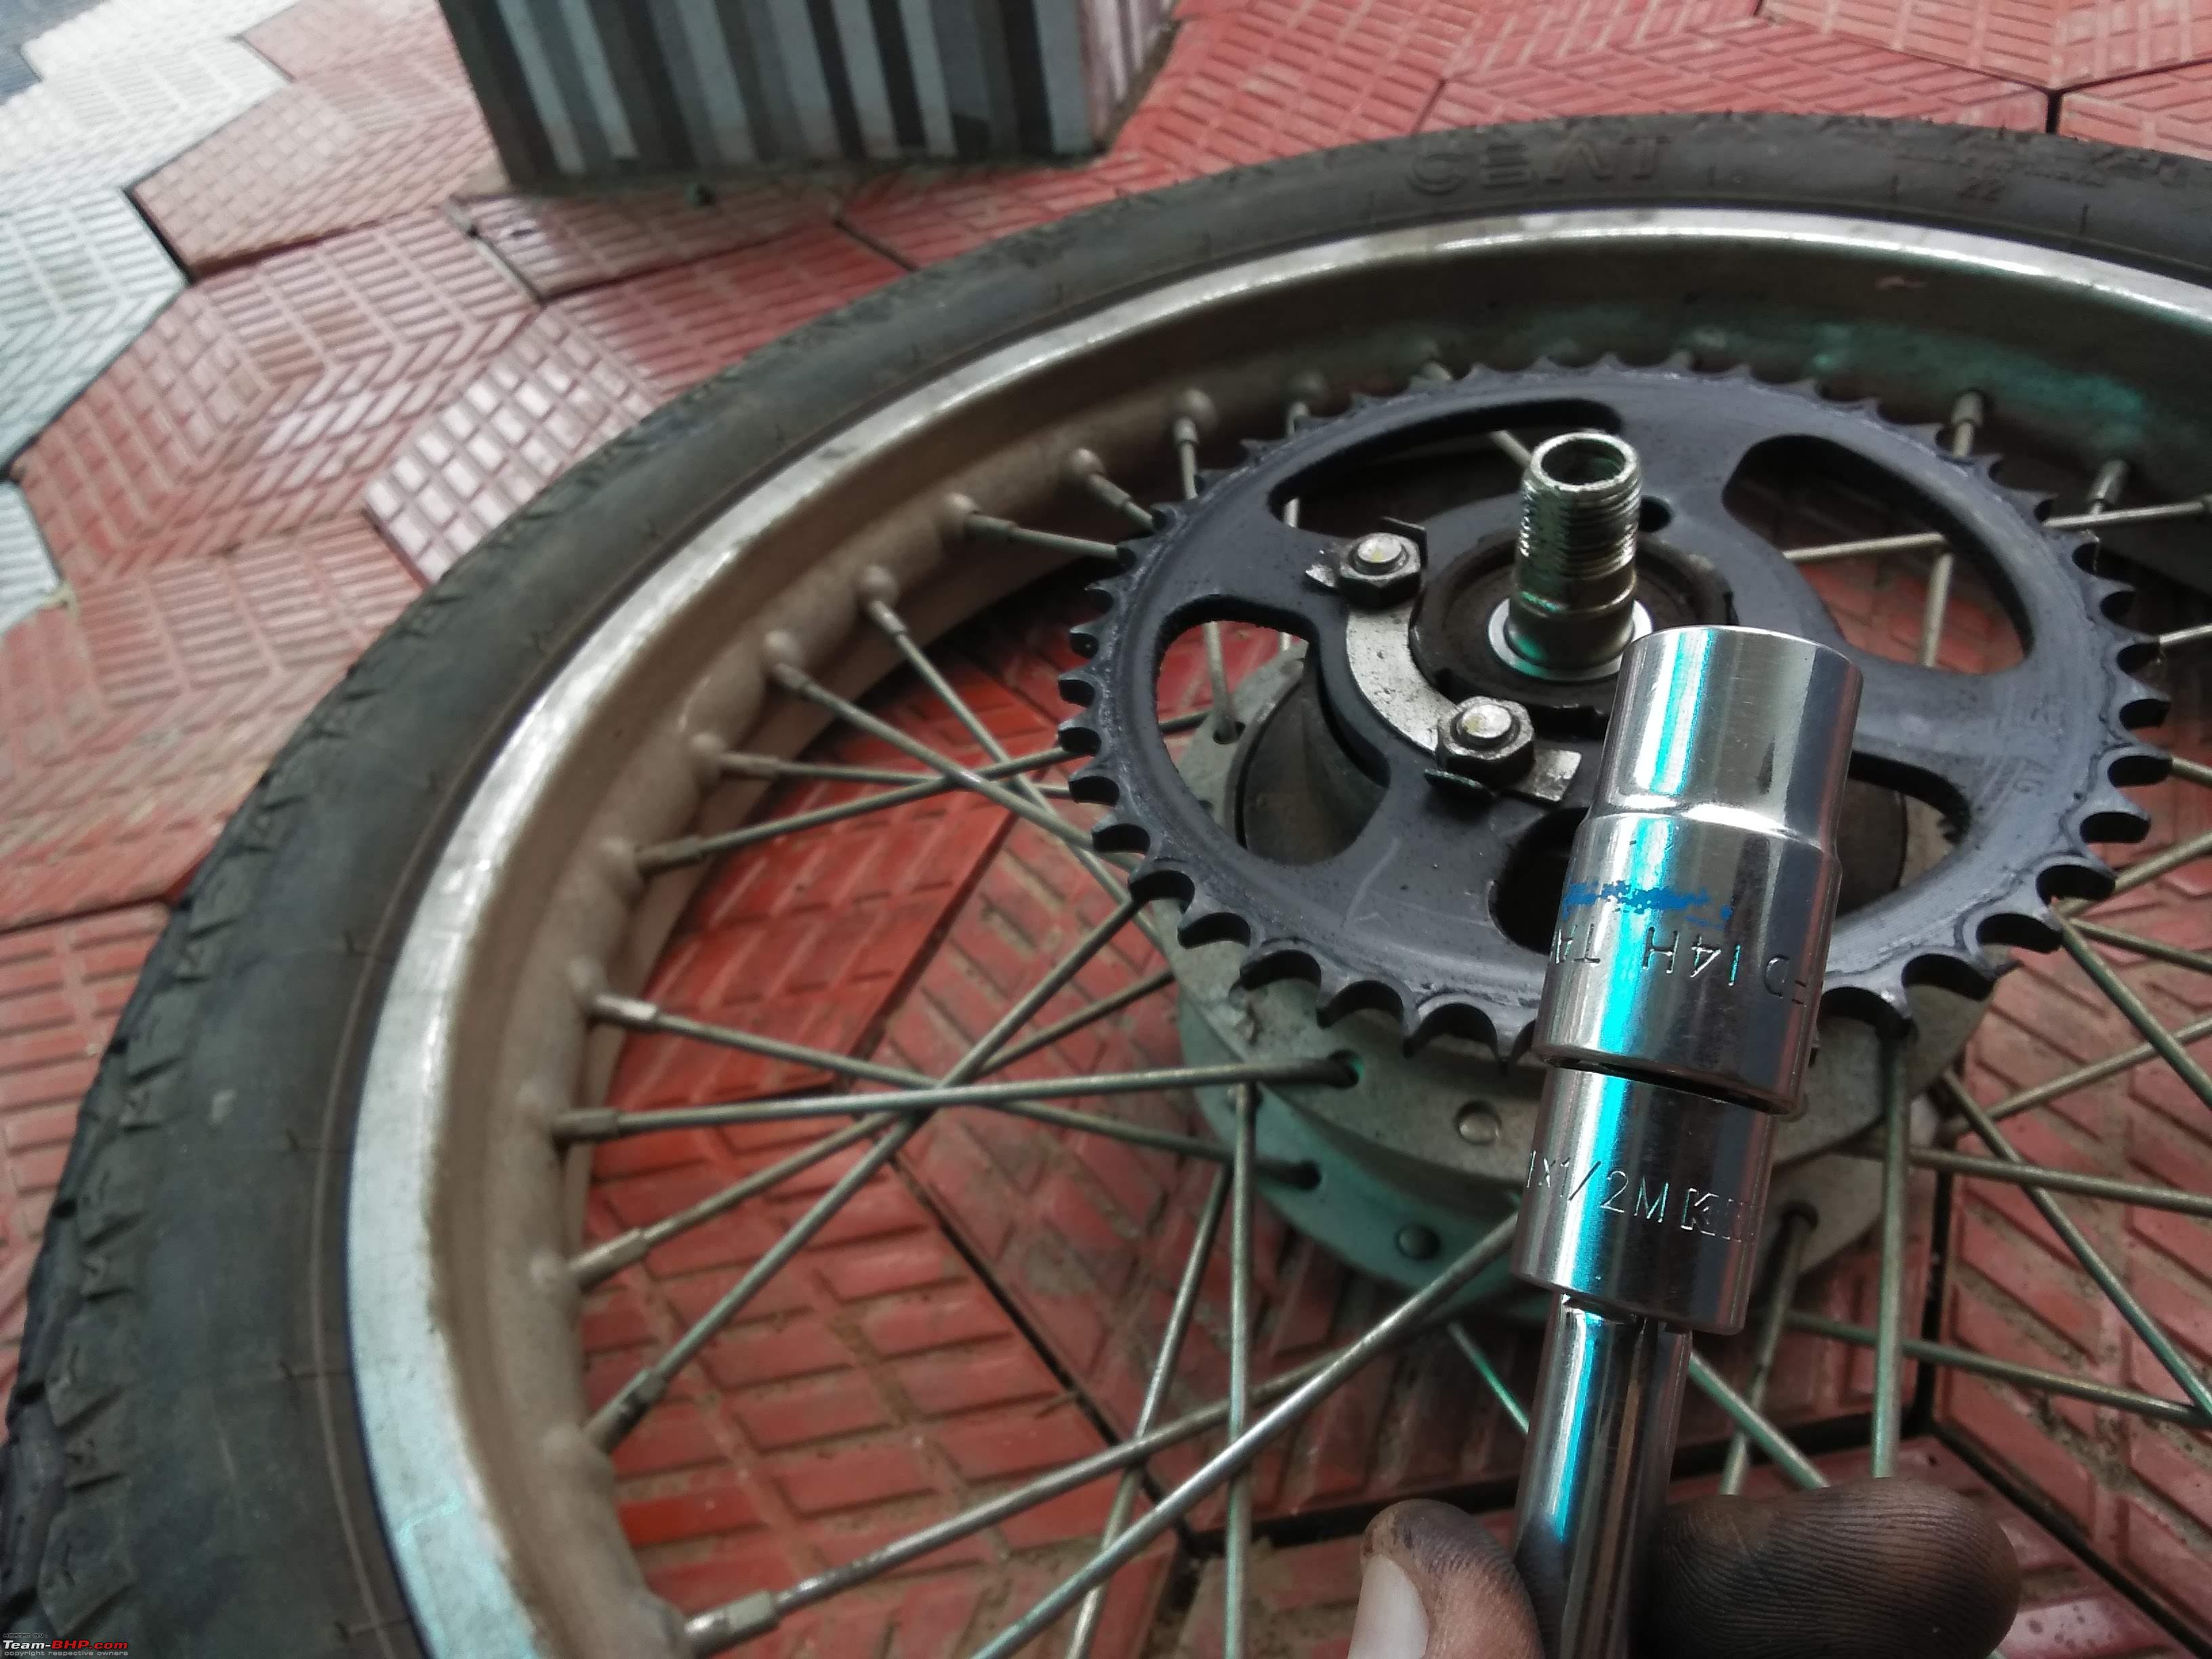 The sprocket lugs would fall inside once you remove the nut, which is not an issue, as once the old rear sprocket is off you would have to pull the sprocket drum cap off, it slides up easily, once off you'd have to replace the damper clutch/sprocket dampers as seen below, the old ones fell off so didn't bother taking a snap of them. 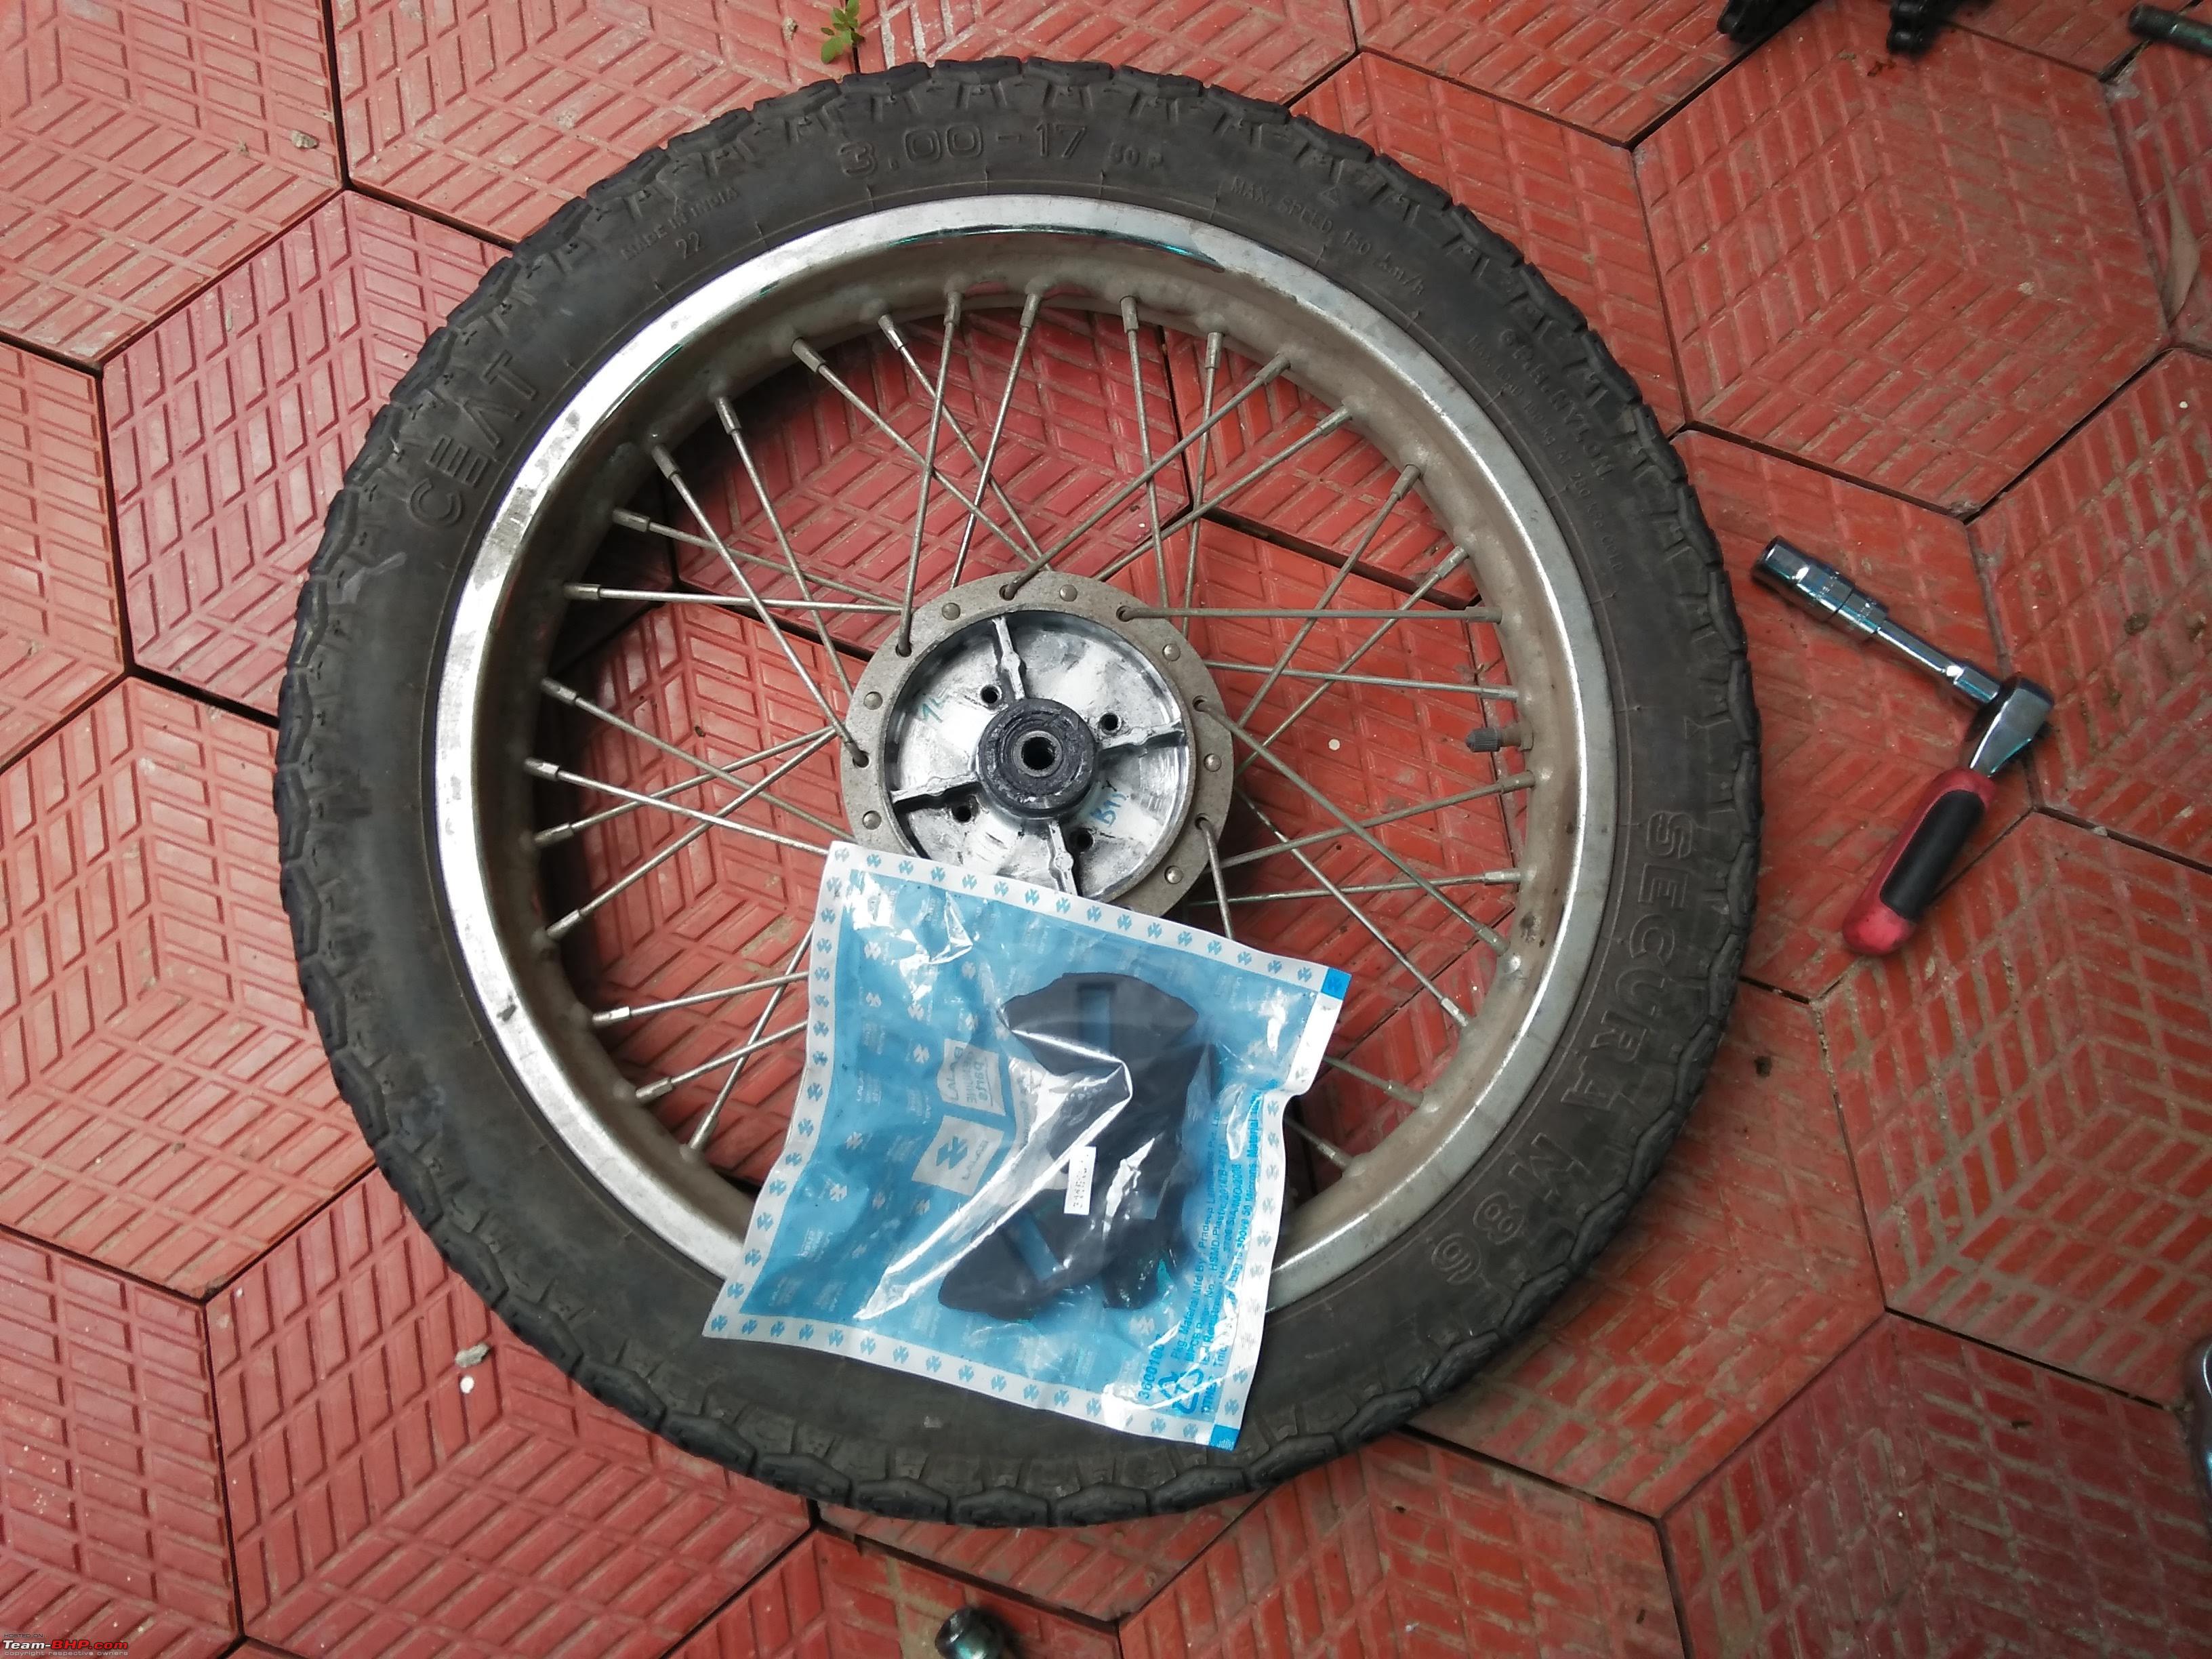 And now coming to the main course, here's the new chain and sprocket kit!  As my OCD didn't let me use the one rear sprocket lock I had, I chose to resort to going for the old-school way i.e thread locker, which I profusely used on both front and rear sprocket bolts/nuts.  Here's a snap of the front sprocket with the new bolts and spacers.  Now I'd already removed the old chain earlier as it was icky from all the muck, but here's a snap of the new chain and the master link, as you can see the Yellow part on top is the slide lock which can be removed and locked with the help of nose pliers. Also notice the direction of inserting the slide lock, the open end should be facing forward, if inserted and locked in the opposite orientation then while spinning the lock would come loose as the open end would encounter any debris head on and it would just be a matter of revolutions before the master link comes off, so be aware. 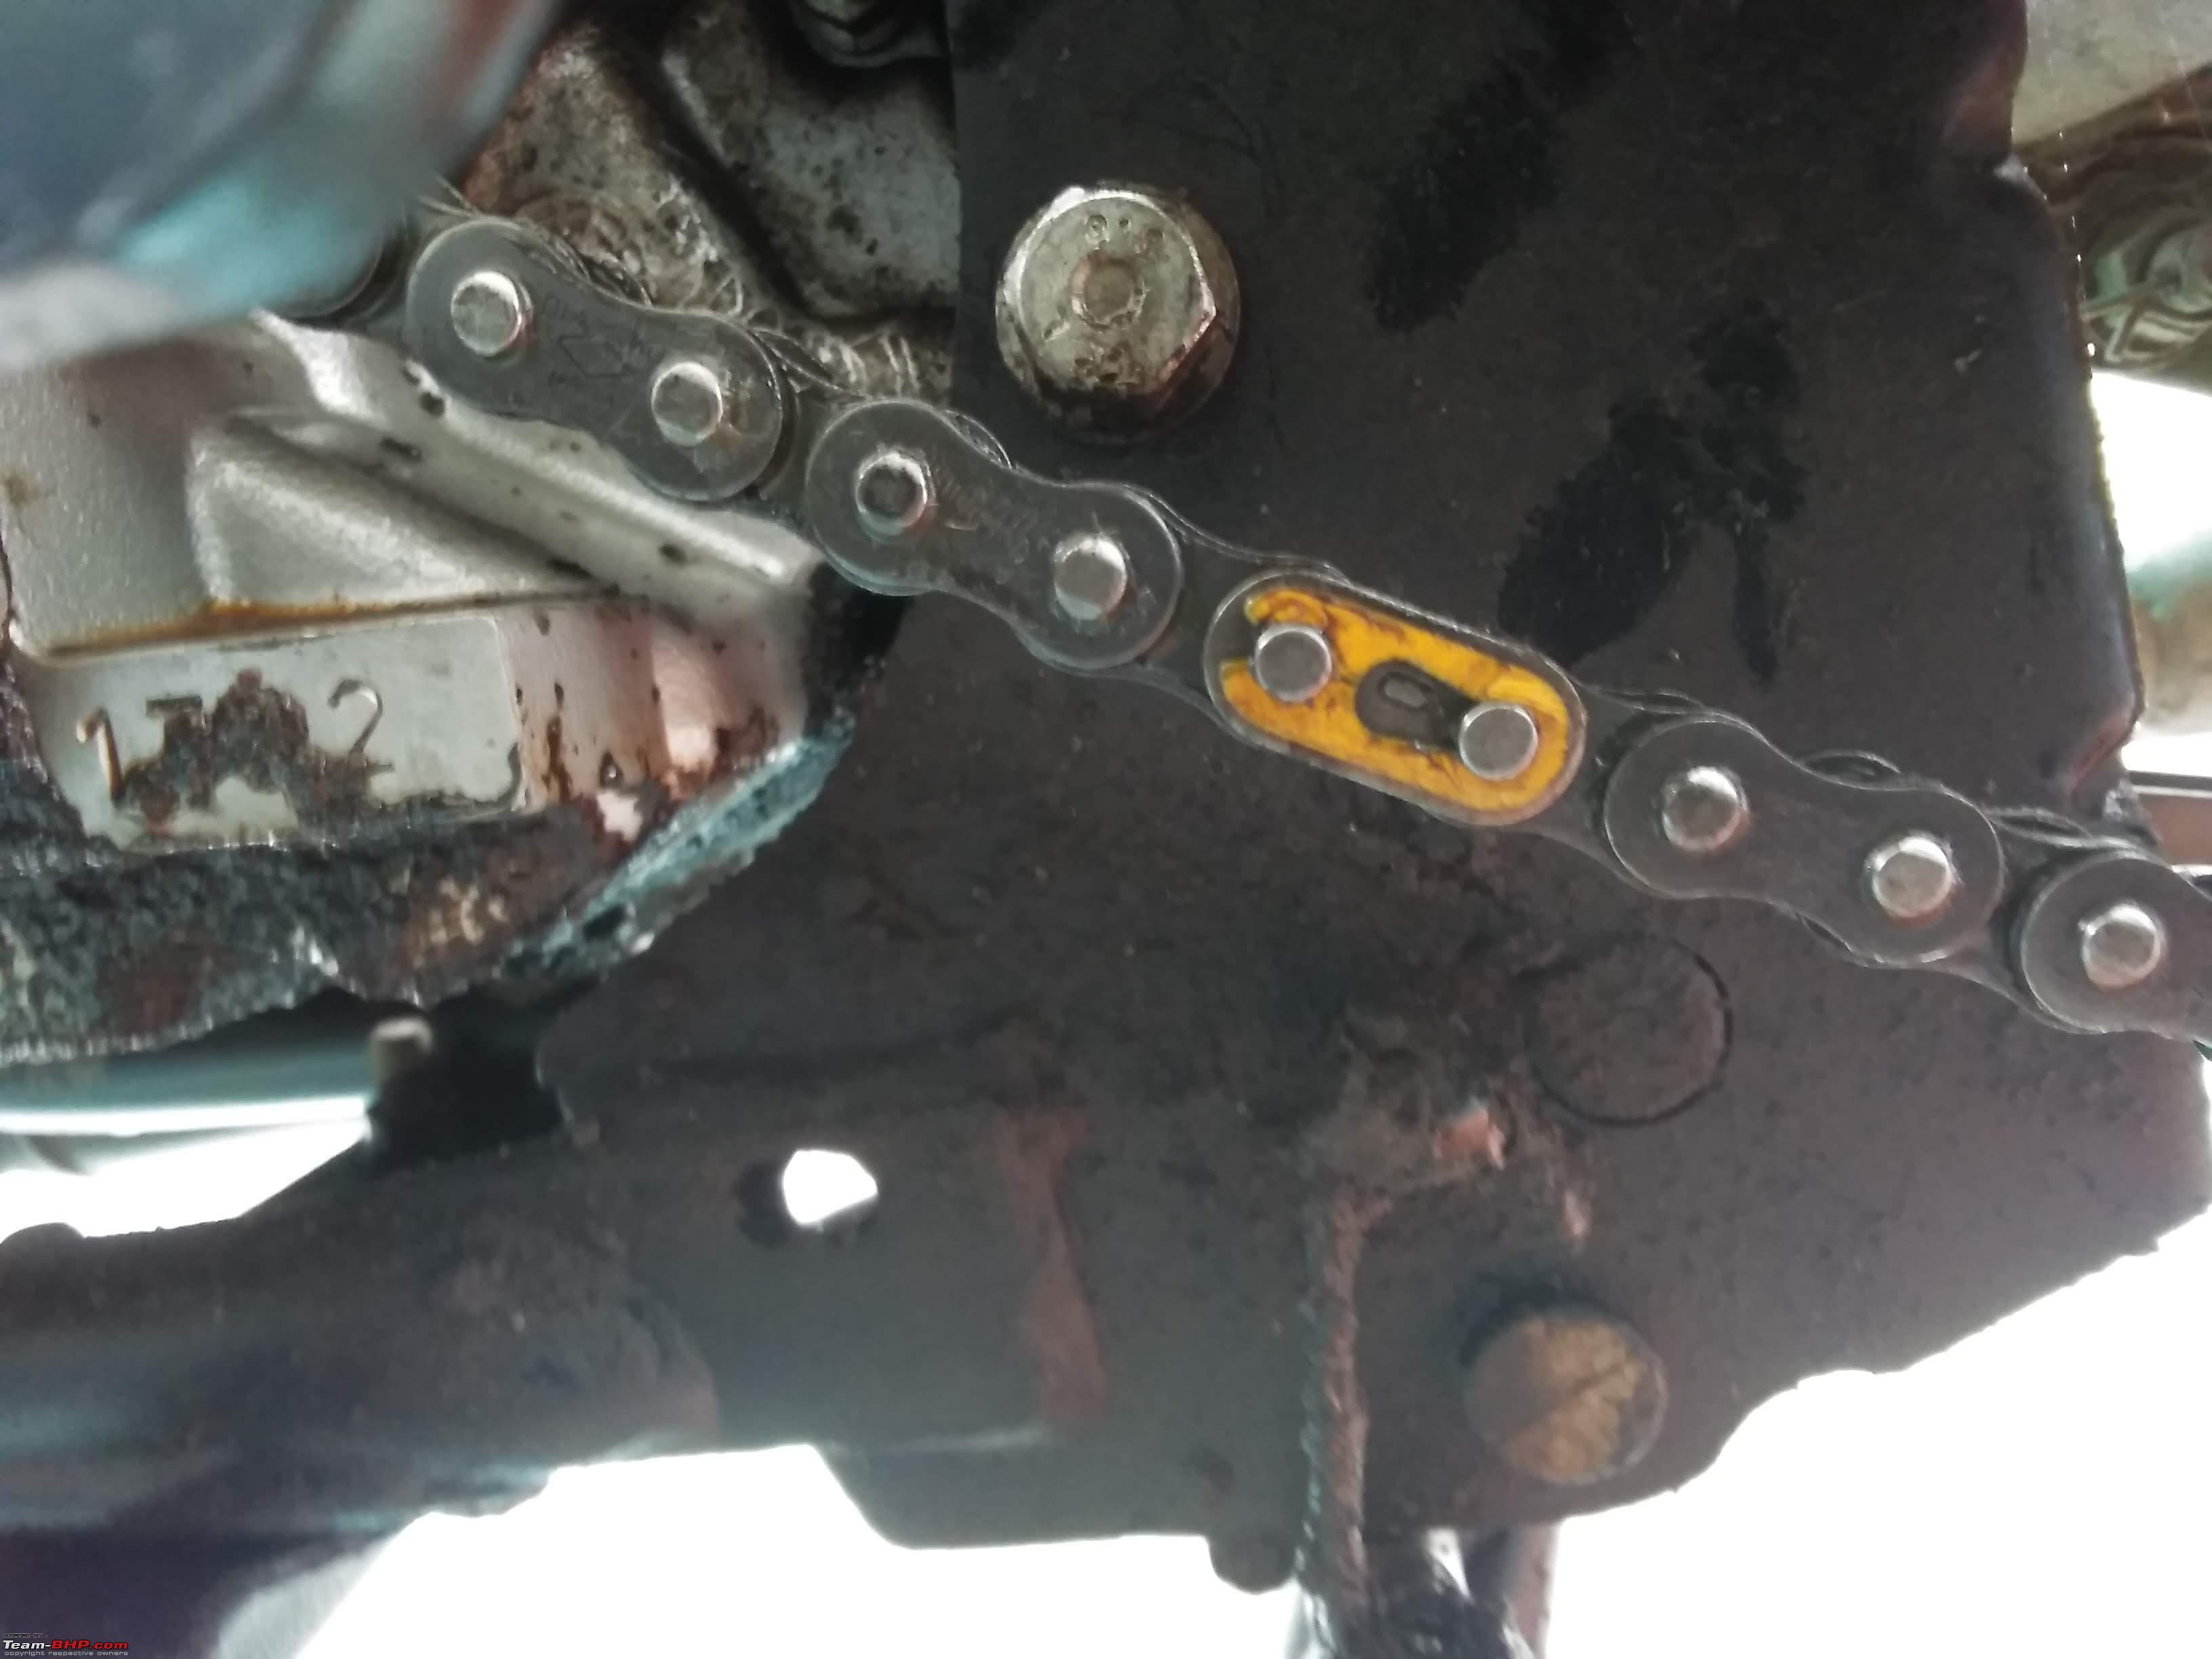 Once the chain and sprockets are in place you need to adjust the chain slack to about 1.5 ~ 2 inches or trust that your swing-arm markers are correct and set it to the lowest or second lowest marker, though it would be best to not depend on the swing-arm markers as I've found them to be inaccurate on a few motorcycles and setting them as per the markers would result in a slightly misaligned rear tire, which again is why I love motorcycles with cassette type adjusters, they're just a breeze to live with. So with the chain adjusted, all nuts and bolts torqued, brakes adjusted, you simply replace the chain cover followed by the front sprocket cover, which by the way is spotlessly clean due to me spraying 100/- worth of diesel on to it as I was a bit too lazy to get my hands dirty(at first!) 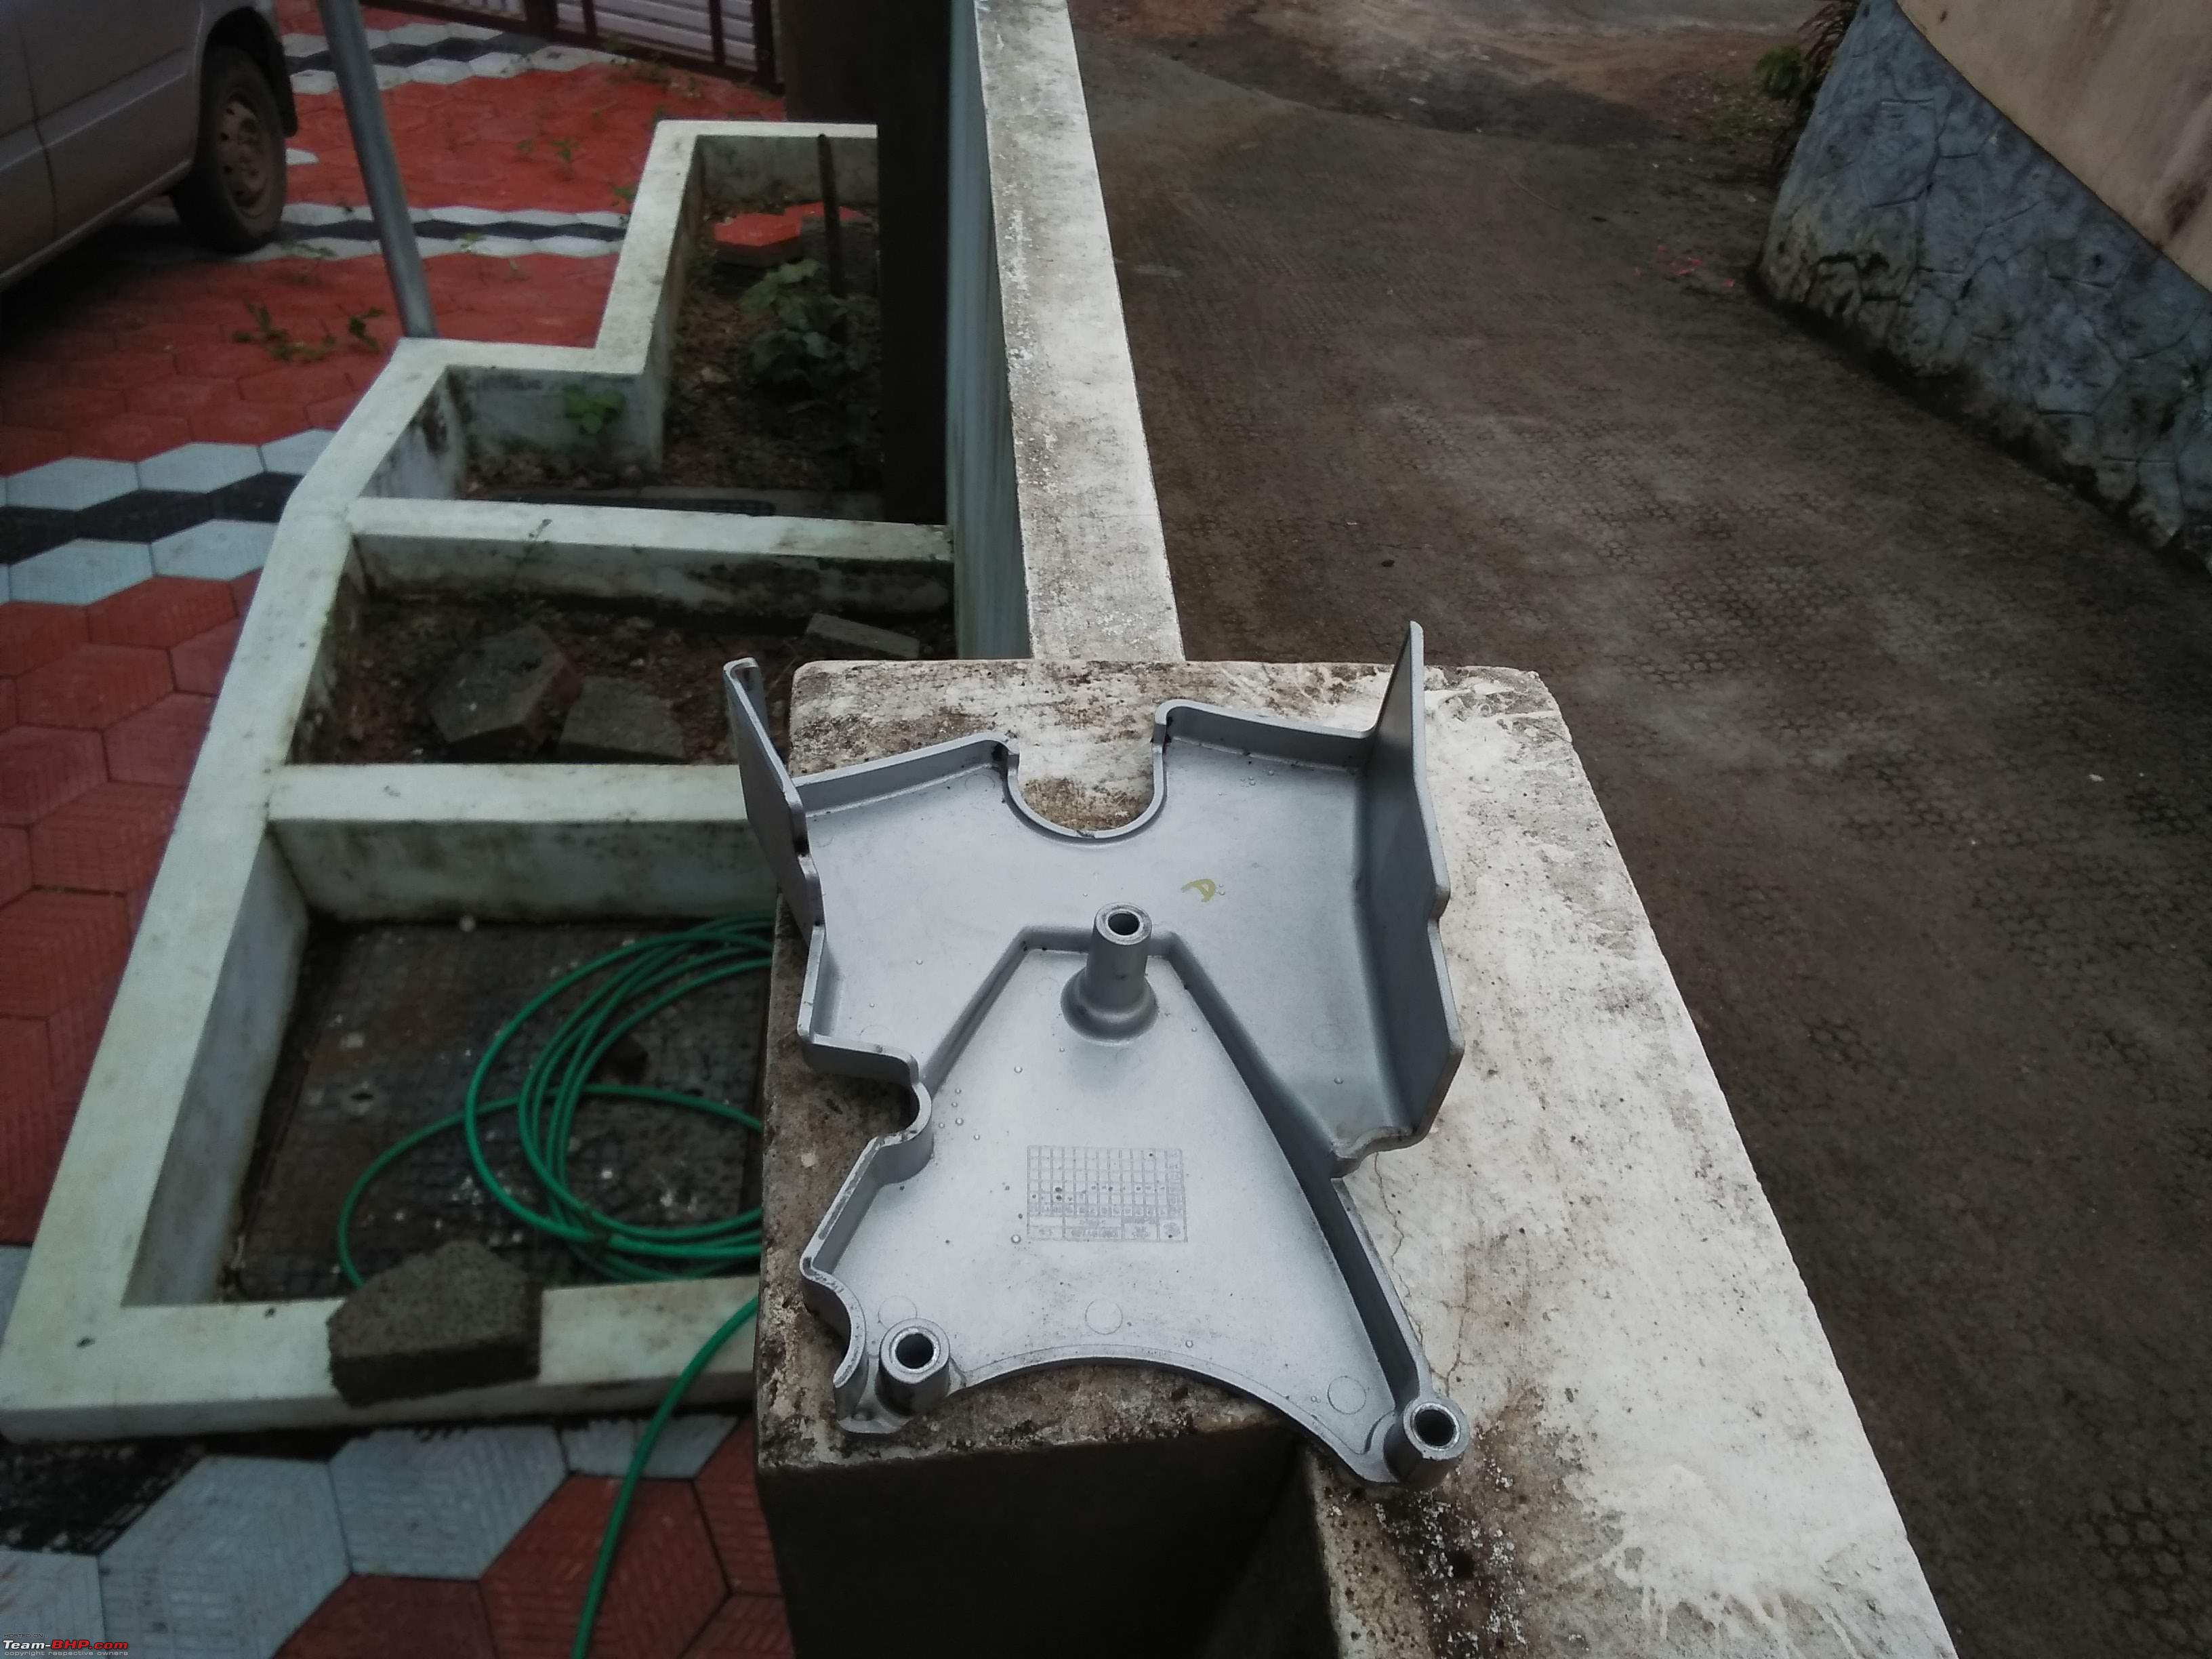 So that's all Dawson, Case Closed! Now all that is left for the jury to share their thoughts. Cheers, A.P. Last edited by ashwinprakas : 2nd October 2018 at 18:16. |

|  (20)
Thanks (20)
Thanks
 |
| The following 20 BHPians Thank ashwinprakas for this useful post: | 2himanshu, Bhatman510, comfortablynumb, DrANTO, Full_Minchingu, Geo_Ipe, govigov, GTO, ike, InControl, jomson13, ksameer1234, Leoshashi, MaheshY1, PraNeel, R2D2, Roy.S, sai_ace, vaasu, vishy76 |
| |
|
3rd October 2018, 08:16
| #2 |
| Team-BHP Support  | Re: DIY: Chain & Sprocket change on the Bajaj CT100B, an investigative thriller of sorts! Thanks for sharing! Thread moved to the Motorcycle section (redirect left behind in the DIY forum too). |
|
| (1)
Thanks
|
| The following BHPian Thanks GTO for this useful post: | ashwinprakas |
|
8th October 2018, 12:18
| #3 | |
| BHPian Join Date: Mar 2016 Location: Pune
Posts: 239
Thanked: 563 Times
| Re: DIY: Chain & Sprocket change on the Bajaj CT100B, an investigative thriller of sorts! Quote:
I am looking to buy a set of sockets for me to tinker around with my bikes. Would you suggest that I buy them online? I can see Taparia make cases available on Flipkart and Amazon. The one in the local hardware shop was missing two sizes, I found the steel rods too thick (they would've been approx. 10 mm in dia, 50 mm in length) and the price I was quoted was Rs. 1700. I now realize that I should've taken a picture of the set!  | |
|
| ()
Thanks
|

|
8th October 2018, 21:27
| #4 | |||
| BANNED Join Date: Nov 2016 Location: Kollam
Posts: 2,018
Thanked: 6,636 Times
| Re: DIY: Chain & Sprocket change on the Bajaj CT100B, an investigative thriller of sorts! Quote:
Quote:
But if it's a 6 Point, 1/2 Inch set then go for it by all means. Quote:
Extension bars are available in 3, 5, 8 and 10 inches IIRC, I've procured the 3 and 5, worst case scenario I couple them to get 8 inches. Here's a snap of my hardware;  The 3/4 to 1/2 convertor is from King Tony, I keep it to use the 1/2 inch sockets with the smaller ratchet as it helps me better modulate torque when tightening the finer nuts and bolts. I have a few long reach sockets as well for those darn bleeder nipples, guess I must've left them at my parents place. They're a lifesaver! | |||
|
| (1)
Thanks
|
| The following BHPian Thanks ashwinprakas for this useful post: | jomson13 |
|
9th October 2018, 10:02
| #5 | |
| BHPian Join Date: Mar 2016 Location: Pune
Posts: 239
Thanked: 563 Times
| Re: DIY: Chain & Sprocket change on the Bajaj CT100B, an investigative thriller of sorts! Quote:
 | |
|
| ()
Thanks
|
|
9th November 2018, 20:26
| #6 | |
| BHPian Join Date: Nov 2008 Location: Mumbai
Posts: 278
Thanked: 180 Times
| Re: DIY: Chain & Sprocket change on the Bajaj CT100B, an investigative thriller of sorts! Quote:
I maybe wrong, but I swear that all my life I was taught that the Chain link should be open end towards the back, that is closed end towards the direction of travel so that nothing gets caught in the open end and you loose your chain. You might want to check that | |
|
| (1)
Thanks
|
| The following BHPian Thanks DeepakMenon for this useful post: | ashwinprakas |
|
9th November 2018, 21:14
| #7 | |
| BANNED Join Date: Nov 2016 Location: Kollam
Posts: 2,018
Thanked: 6,636 Times
| Re: DIY: Chain & Sprocket change on the Bajaj CT100B, an investigative thriller of sorts! Quote:
Guess you say the same with the chain link on top of the chain whereas in my description I say it with the chain link at the bottom as seen in the picture.  | |
|
| ()
Thanks
|
|