Team-BHP > Motorbikes
Register New Topics New Posts Top Thanked Team-BHP FAQ


Reply
  Search this Thread
18,148 views
Old 25th May 2021, 19:57   #1
Senior - BHPian
 
funkykar's Avatar
 
Join Date: Oct 2008
Location: Bengaluru
Posts: 2,635
Thanked: 6,617 Times
Built - A 1968 Italian Vespa 150

Me and how I learned about Vespa 150


In the last few years, several Scooters, mostly Bajaj have made up an integral part of my life. A lot of my friends (especially Arun1100 & GreenDay) kept asking me why I don't have any Vespa. I mostly assumed they were referring to LML Scooters which are also generally referred to as Vespa. In these years, I learned the lineage of Bajaj scooters to be of Vespa, of course mostly on Team-bhp. Then I realized the old Vespa 150, the Bajaj 150, and the Priya were more or less the same shapes except for very subtle differences. As they were 3 geared, it did not interest me. But slowly, the curves on the Vespa 150 kept attracting me and slowly created enormous interest.

I then started to look for a Vespa 150. They were priced quite high. Very well restored ones cost anywhere between 60-100k with clean ownership and updated papers. I also started thinking why not get an unrestored one and restore it to originality. I couldn't find any reasonable ones. I then asked my Scooter mechanic Sunil, who is also a good friend now. He said he has one but in the dismantled state. He wasn't willing to sell it. He said he dismantled it so he will be able to keep it in his attic. He did this in the late 90s. His idea was to restore it some time and use it for himself. It was of his customer who gave it for a rebuild and never returned until few years later. The work also never started. He held the Scooter and waited for him to come back. After few years the owner comes back and says he had a bad accident and wouldn't want to ride any geared Scooter and was riding a Kinetic Honda. He apologized for the inconvenience and handed the papers and said the mechanic Sunil can keep/sell and recover for the trouble caused. The scooter was in an Ok condition. But it would likely fetch a pittance he thought and retained it. He was using an old Bajaj 150 at that time and for him, the 3 geared 150 cc was already nostalgia. Also, the Vespa and Bajaj 150 were the first of the Scooters he learned to repair. His elder brother was a mechanic at an Authorised service center and often would bring home engine assembly kind of work and teach his brothers. So these guys learned engine work first, then the rest of mechanicals at a later time. This nostalgia made him keep the Vespa in a dismantled state. Over the years, he once started to restore and postponed it due to monetary concerns. He never found time later to restore it nor have the heart to scrap it.

Some history of Vespa
Vespa as most know is the origin of Italy. It was a brand of scooter manufactured by Piaggio. The name meant a wasp in Italian. In the 1960s and '70s, it was the most sought-after Scooters in India. It was best known for its agility and excellent quality. Most people referred to them as 'Italian Vespa'. Once Bajaj started making Scooters, over the decades the brand name Vespa faded away. A compilation of some of their old TV Commercials:


2020 - The Pandemic
Then came 2020, the Covid-19 Pandemic. After the National lockdown, when cases started increasing crazily in Wave 1, my mechanic Sunil was very very worried. His family was in Kerala and the Lockdown had separated them (as interstate travel was not easy and trains weren't fully operating) for few months. He was quite depressed. So much that he was considering closing down his shop and go settle in Kerala. He hails from Kerala but lived entirely in Bangalore. That has been his idea anyway for a later time in life. He looked certain he has preponed. I was very distraught. How will my 10's of Scooters survive without him.

Sunil agreed, but I dictate the terms
One fine day around July 2020, I asked him again what he will do with the dismantled Scooter. He said he doesn't know. A couple of days later he called me and said I could have it. Deep within I was elated, but with great control over emotion, I said to him 'Ok, will think about it. Will speak to you tomorrow'. I visited him the next day. He did confirm he is willing to sell. He needs a couple of days to remove it. I said to him I will be ready to buy only if he is ready to restore it. Without restoring, he can't leave for Kerala. I will pay a sizeable chunk of money only in the end. He wasn't too sure as he was already a bit depressed and said he will think about it. After a lot of reluctance, he agreed. After 3 days, he had managed to get the chassis and panels from the attic.

Here is how it looked like:
The very first look
Built - A 1968 Italian Vespa 150-0-very-first-look.jpg

The chassis
Built - A 1968 Italian Vespa 150-0-fl.jpg

The chassis
Built - A 1968 Italian Vespa 150-0-fl1.jpg

The chassis
Built - A 1968 Italian Vespa 150-0-fl3.jpg

Panel and mud guard
Built - A 1968 Italian Vespa 150-0-panel-n-mudg.jpg

The panels
Built - A 1968 Italian Vespa 150-0-panels.jpg

The side panel
Built - A 1968 Italian Vespa 150-0-side-panel.jpg

Chassis where the tank sits, looked good
Built - A 1968 Italian Vespa 150-0-where-tank-sits-looks-reasonable.jpg

After seeing the chassis in the above condition, all the interest I had fizzled. I told Sunil that this wasn't good and I am not interested. He laughed at me and said it's not like how it appears. Why don't you check with the tinker once? After he persuaded me, I did visit the tinker and made him check. I told him beforehand I want an honest opinion on how the chassis is would want him to tinker it back if I chose to purchase.

The tinker checks to certify
The Tinker is inspecting
Built - A 1968 Italian Vespa 150-0-tinker-inspecting.jpg

The Tinker is inspecting


Good News from Tinker
Tinker after checking thoroughly said it's in very good condition. 2-3 days of tinkering at max needed. This re-ignited the interest and it was game-on! IT'S NOW TIME TO CONVERT THE PILE OF RUST INTO A SCOOTER! The tinker asked the chassis and all panels to be coated with red oxide which makes it easy to work on. I took it to the painter nearby and he said he has to scrape off the surface rust then apply red oxide. All set for the process:

Ready for scraping and red oxide
Built - A 1968 Italian Vespa 150-1-scr.jpg

All ready
Built - A 1968 Italian Vespa 150-1-sc.jpg

All ready
Built - A 1968 Italian Vespa 150-1-scr.jpg

All ready
Built - A 1968 Italian Vespa 150-1-scrp.jpg

After the Chassis was supposedly scraped:
Built - A 1968 Italian Vespa 150-s-0.jpg
Built - A 1968 Italian Vespa 150-s1.jpg
Built - A 1968 Italian Vespa 150-s3.jpg

The scraped Chassis

Last edited by funkykar : 1st June 2021 at 00:00.
funkykar is offline   (36) Thanks
Old 25th May 2021, 23:10   #2
Senior - BHPian
 
funkykar's Avatar
 
Join Date: Oct 2008
Location: Bengaluru
Posts: 2,635
Thanked: 6,617 Times
Re: Built - A 1968 Italian Vespa 150

The Tinkering

Owing to a busy schedule, I spent very little time at the Tinker. The name of the Tinker is Maghi and is extremely well known around. The very little I captured is below:

Belly being worked on
Built - A 1968 Italian Vespa 150-t-belly-being-worked.jpg

Belly upside down
Built - A 1968 Italian Vespa 150-t-belly-side-up.jpg

Likely one of the visible colors was from the factory
Built - A 1968 Italian Vespa 150-t-one-them-oe-color.jpg

The rear part being tinkered
Built - A 1968 Italian Vespa 150-t-rear-tinker-prog.jpg

The bottom floor being tinkered


The floor being tinkered


The floor being tinkered


The rear of Scooter being tinkered


Side panels being tinkered


Side panels being tapped


Ready and stoved before delivery
Built - A 1968 Italian Vespa 150-t-ready-toved.jpg

Left at the painter. This is how it looks after tinkering. The preparation to paint has just begun.
Built - A 1968 Italian Vespa 150-u-fin-tin-1.jpg

Built - A 1968 Italian Vespa 150-u-fin-tin-3.jpg

Built - A 1968 Italian Vespa 150-u-fin-tin-4.jpg

Built - A 1968 Italian Vespa 150-u-fin-tin.jpg

The panels
Built - A 1968 Italian Vespa 150-u-fin-tin-panels.jpg

Last edited by funkykar : 1st June 2021 at 00:03.
funkykar is offline   (24) Thanks
Old 28th May 2021, 18:47   #3
Senior - BHPian
 
funkykar's Avatar
 
Join Date: Oct 2008
Location: Bengaluru
Posts: 2,635
Thanked: 6,617 Times
Re: Built - A 1968 Italian Vespa 150

Let us Paint!

Some of the pics and colors I felt impressed with while browsing the internet are below.
Image courtesy: Internet
Built - A 1968 Italian Vespa 150-c0.jpeg
Image courtesy: Internet
Built - A 1968 Italian Vespa 150-c1.jpeg
Image courtesy: Internet
Built - A 1968 Italian Vespa 150-c2.jpeg

This catalog below represented some fine stock colors for which Vespa was available. I chose 3 of them and finally zeroed in on the 3rd one on top row.
Image courtesy: Internet
Built - A 1968 Italian Vespa 150-c-zcatalog.jpeg

I visited a well-known paint shop on Triveni road, near to Yeshwantpur circle. They were very patient in understanding my requirements. I showed old pics of Vespa Scooter for reference. They told me what it appears on pics and how it appears in real would slightly vary. Then they said we will mix and show you until you feel satisfied. Over the next 1 hour, we finalized on below color.

Built - A 1968 Italian Vespa 150-0-paint-sample.jpg

Primer applied
Built - A 1968 Italian Vespa 150-p0.jpg

Primer applied
Built - A 1968 Italian Vespa 150-p1.jpg

Putty work to even out the surface
Built - A 1968 Italian Vespa 150-p-putty-wip.jpg

Built - A 1968 Italian Vespa 150-p-putty-wip0.jpg

Built - A 1968 Italian Vespa 150-p-putty-wip1.jpg

Built - A 1968 Italian Vespa 150-p-putty-wip2.jpg

Putty work in progress


After putty work, ready for base coat
Built - A 1968 Italian Vespa 150-m-after-putty-apply-bubbed.jpg

Ready for base coat
Built - A 1968 Italian Vespa 150-m-panells.jpg

Ready for base coat
Built - A 1968 Italian Vespa 150-m-panels.jpg

After base coat
Built - A 1968 Italian Vespa 150-r-after-base-coa.jpg

Last edited by funkykar : 1st June 2021 at 00:03.
funkykar is offline   (24) Thanks
Old 28th May 2021, 22:45   #4
Senior - BHPian
 
funkykar's Avatar
 
Join Date: Oct 2008
Location: Bengaluru
Posts: 2,635
Thanked: 6,617 Times
Re: Built - A 1968 Italian Vespa 150

The engine


The restoration work on the chassis was already underway. The handle and engine were not yet removed from Sunil's attic 
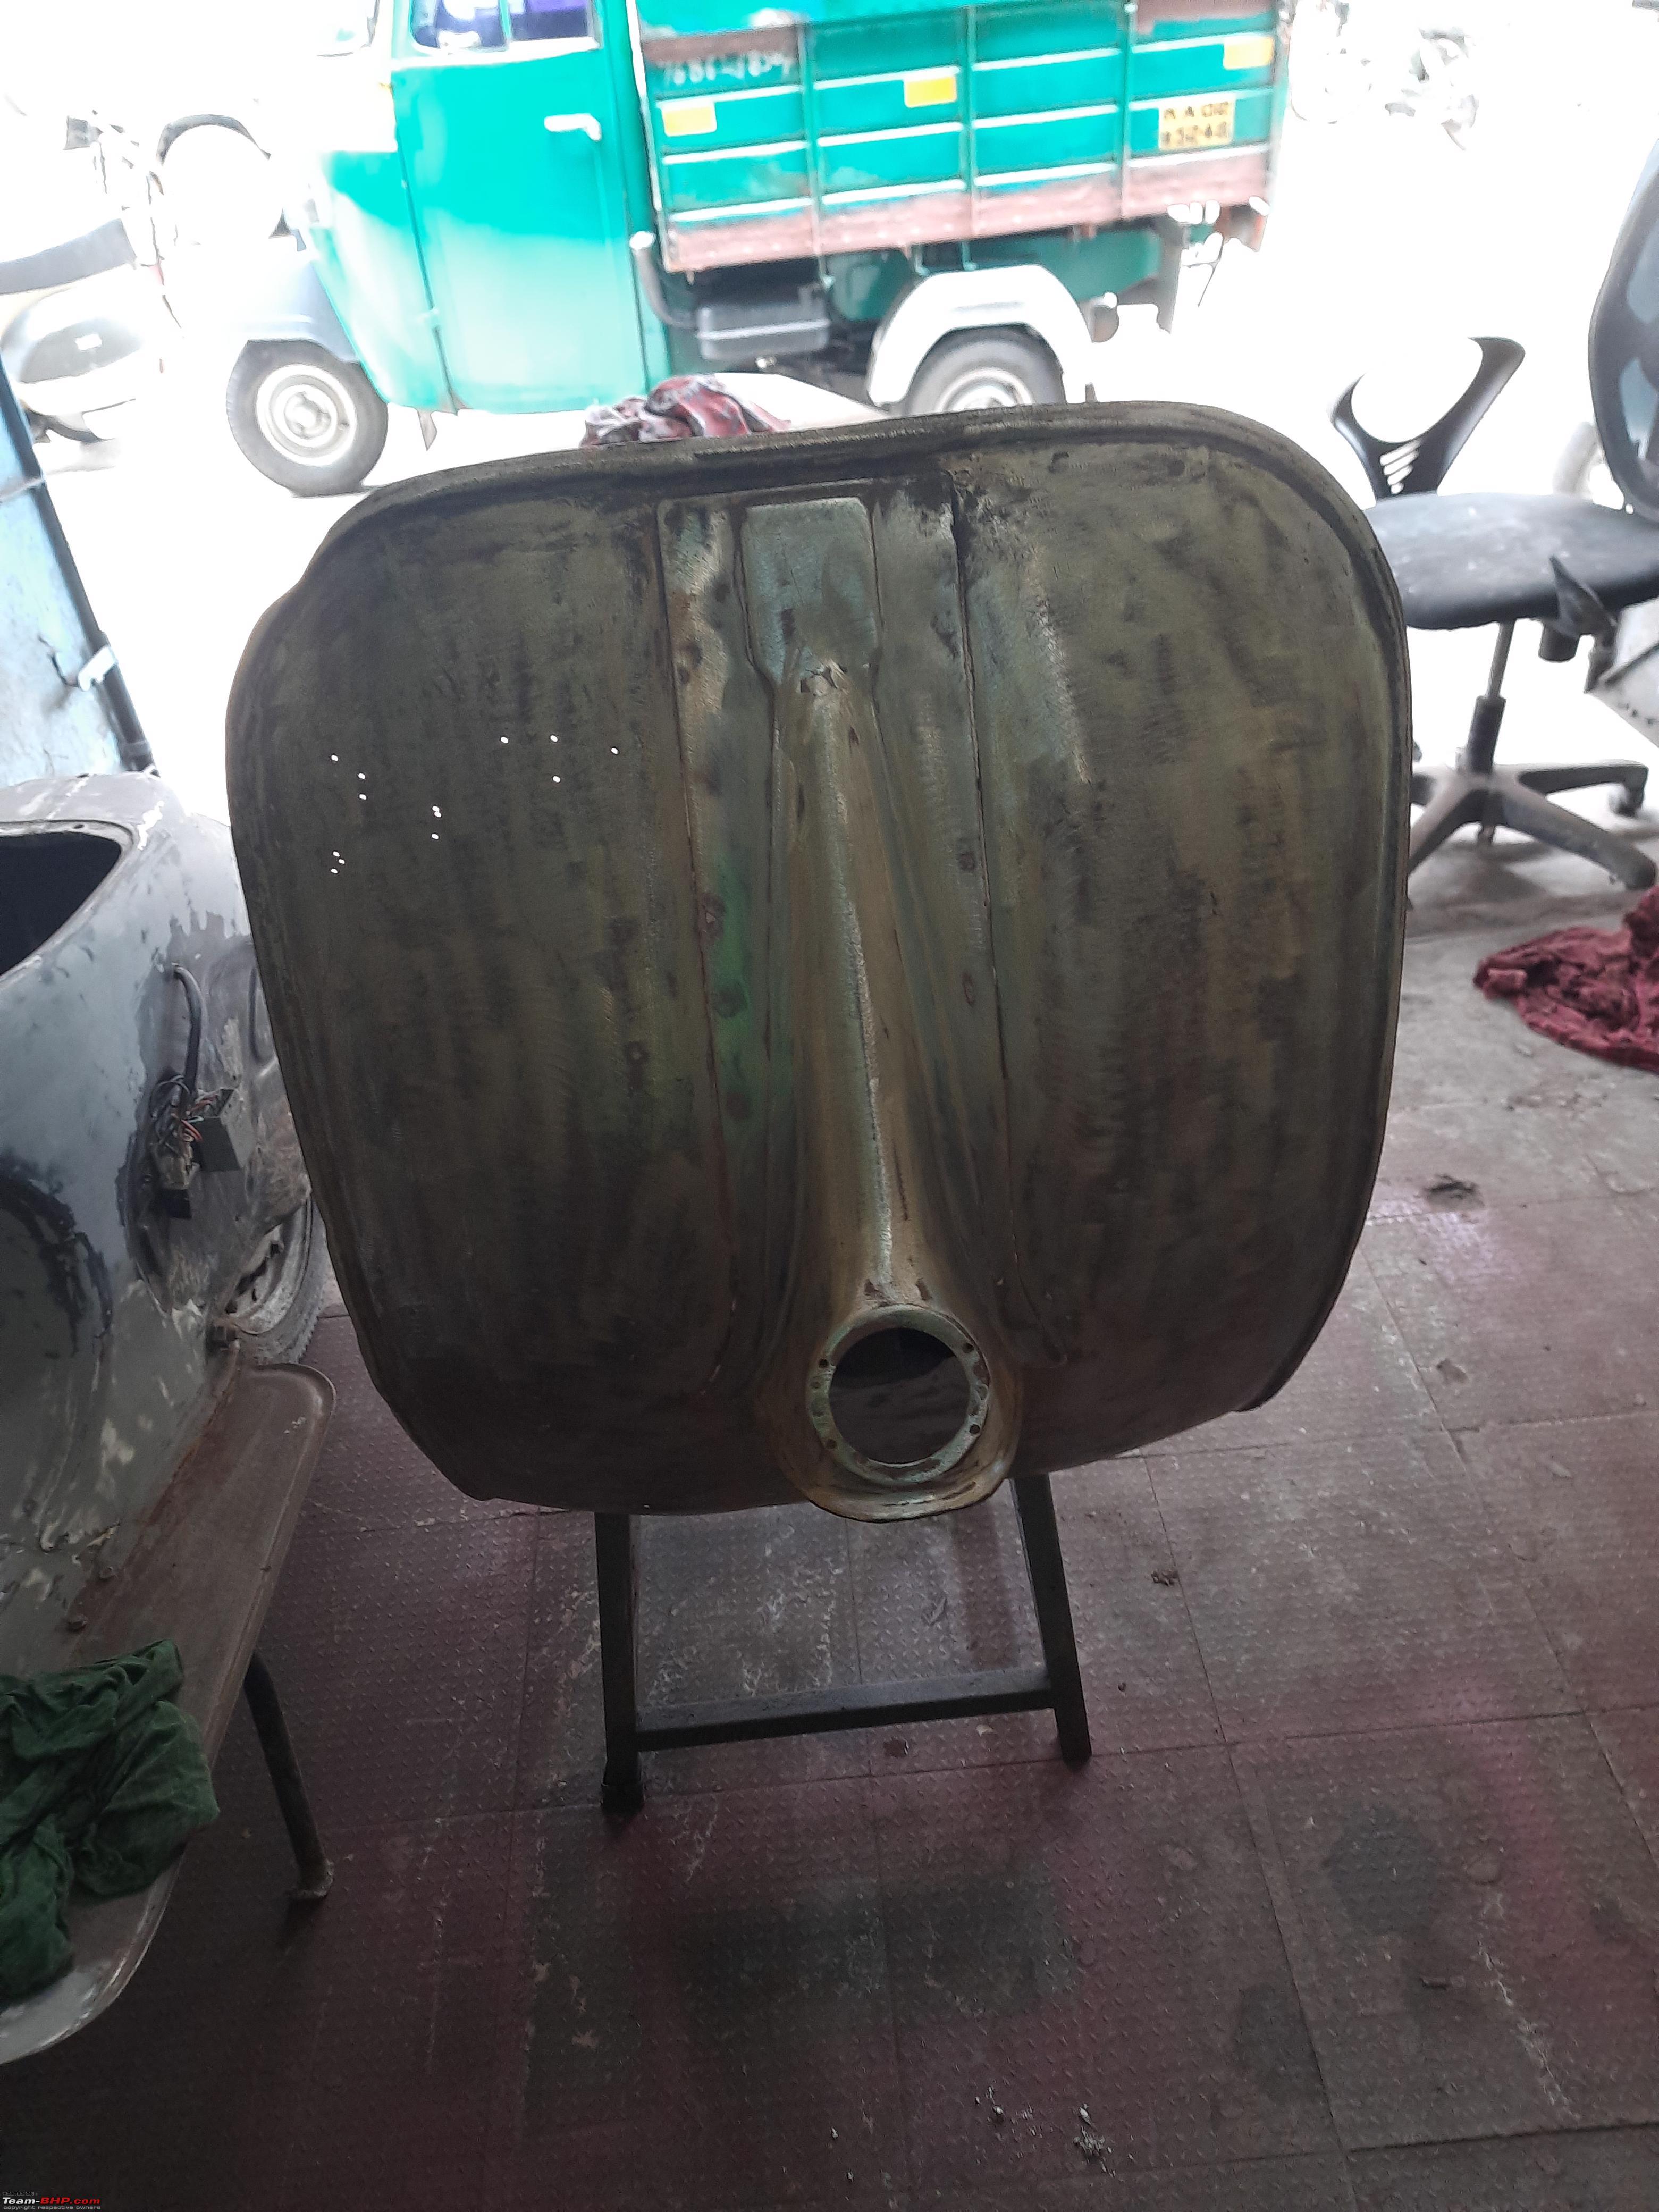
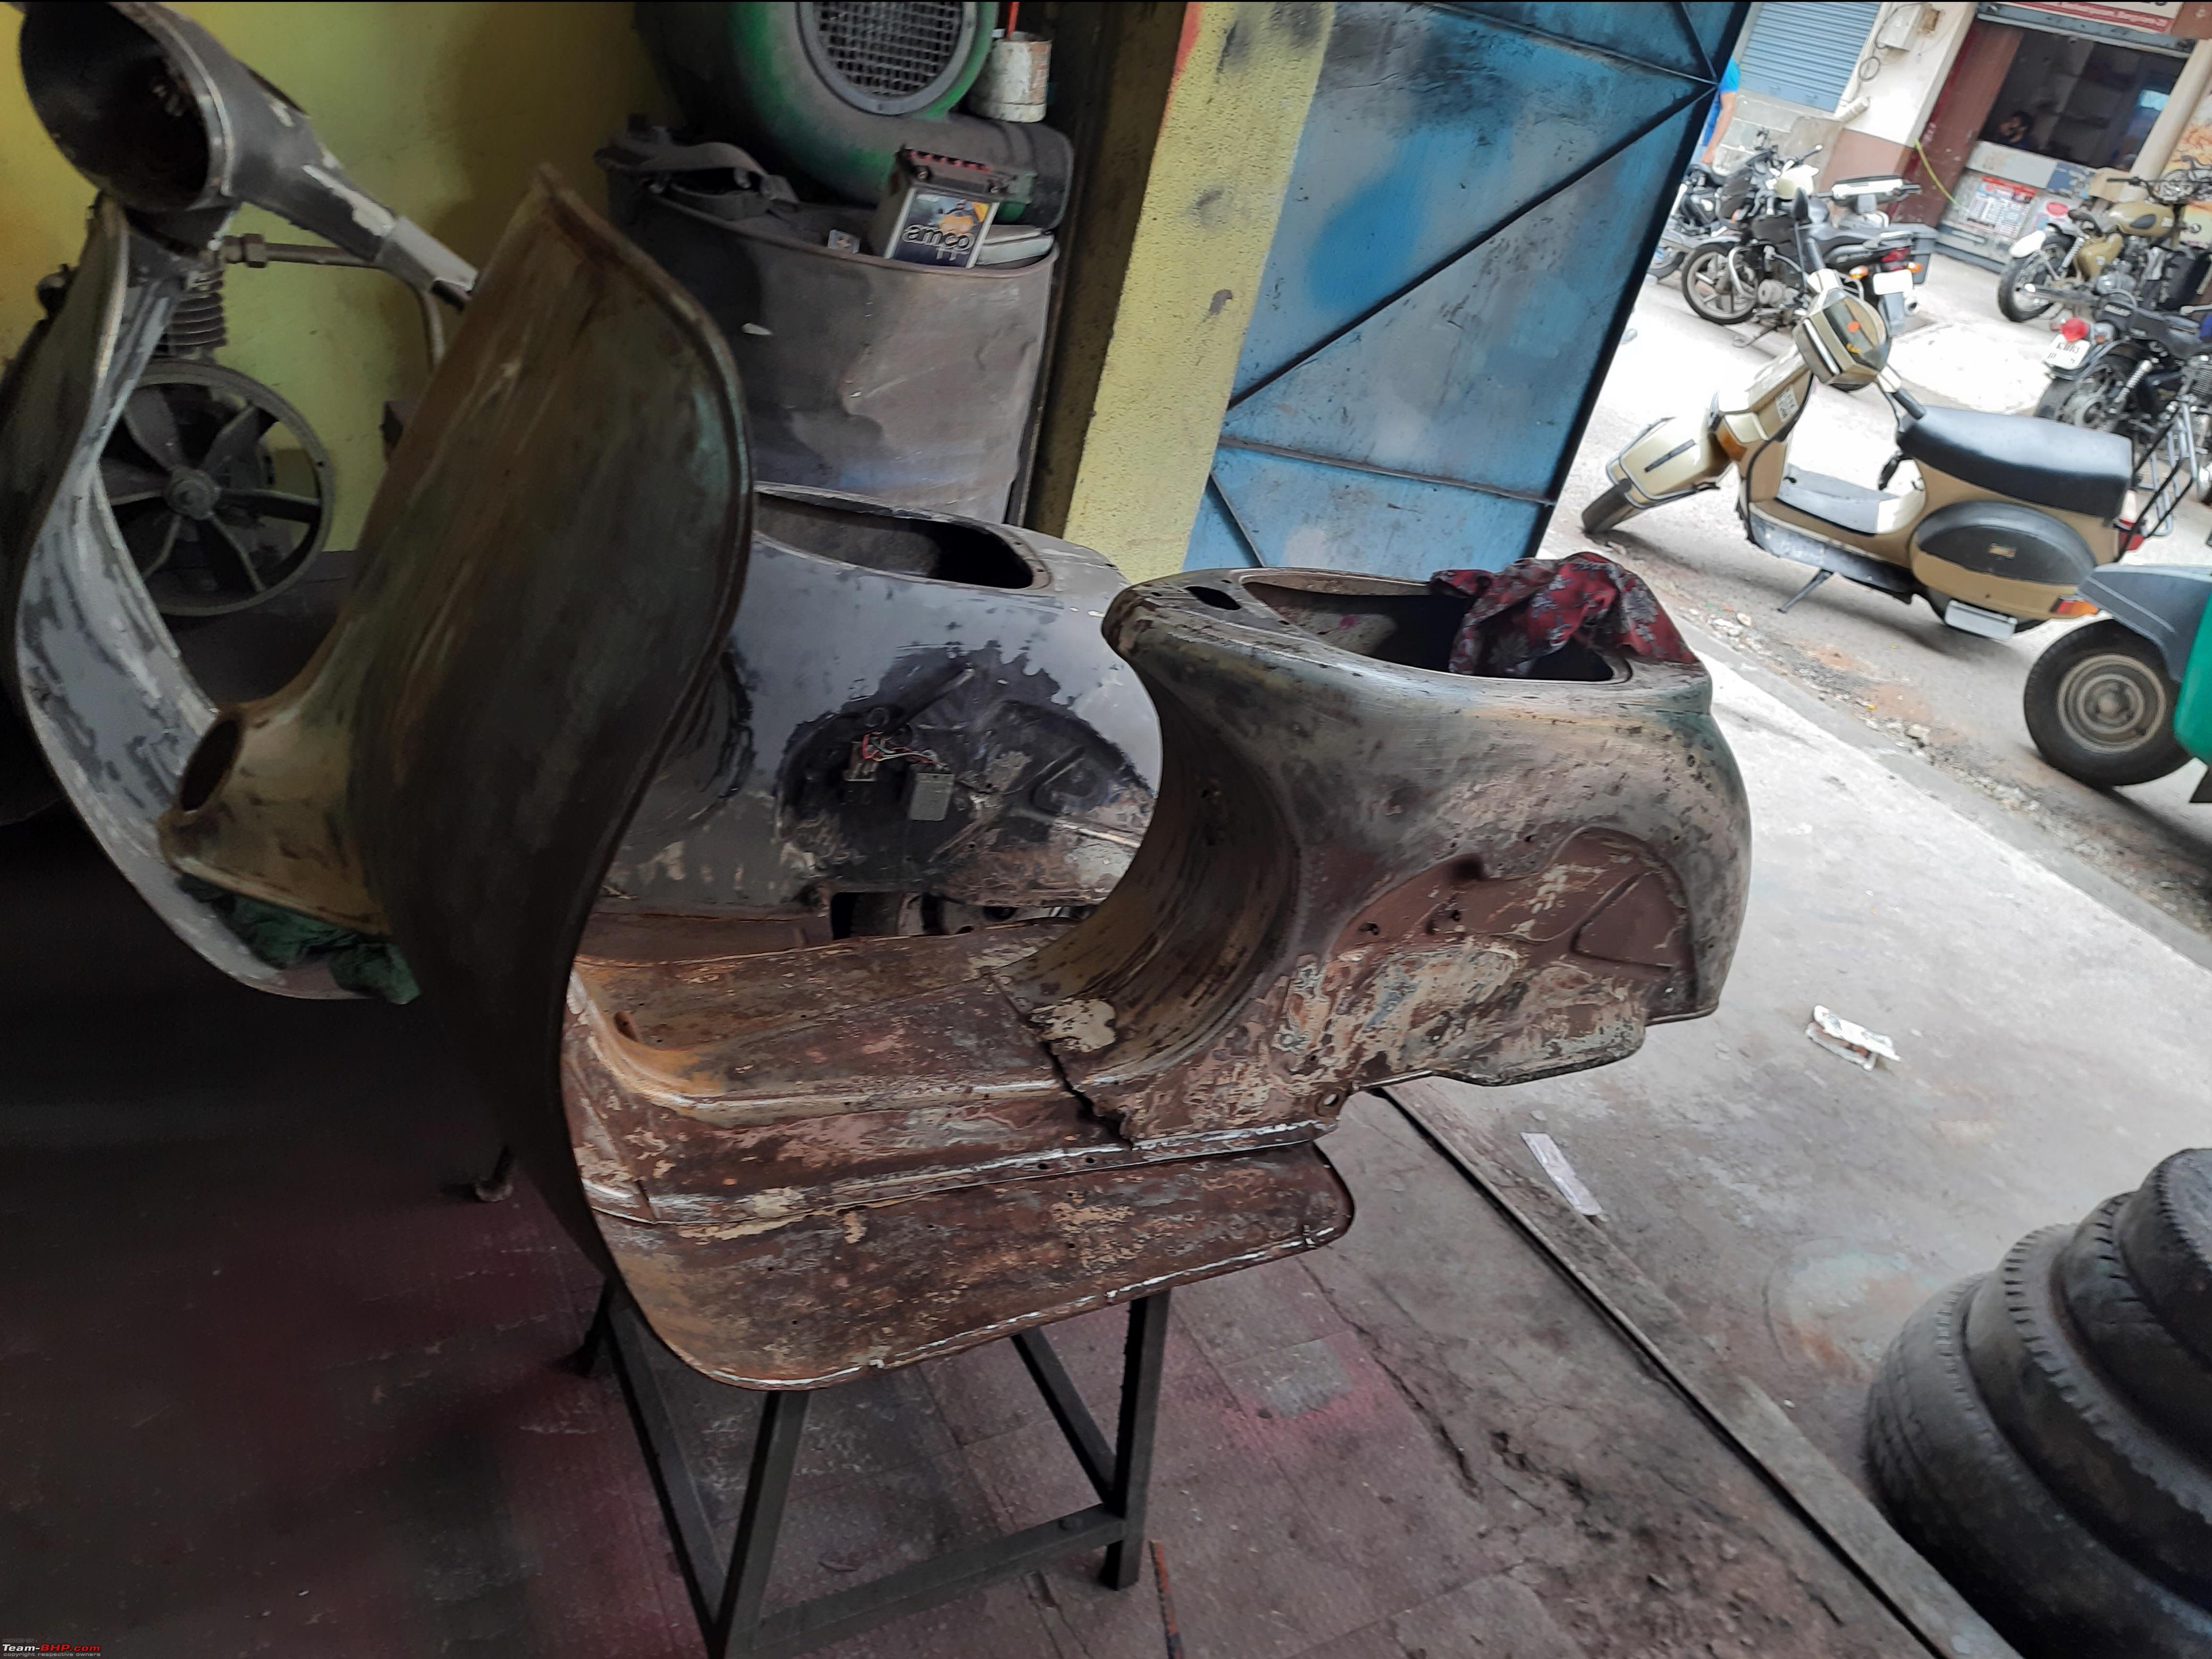
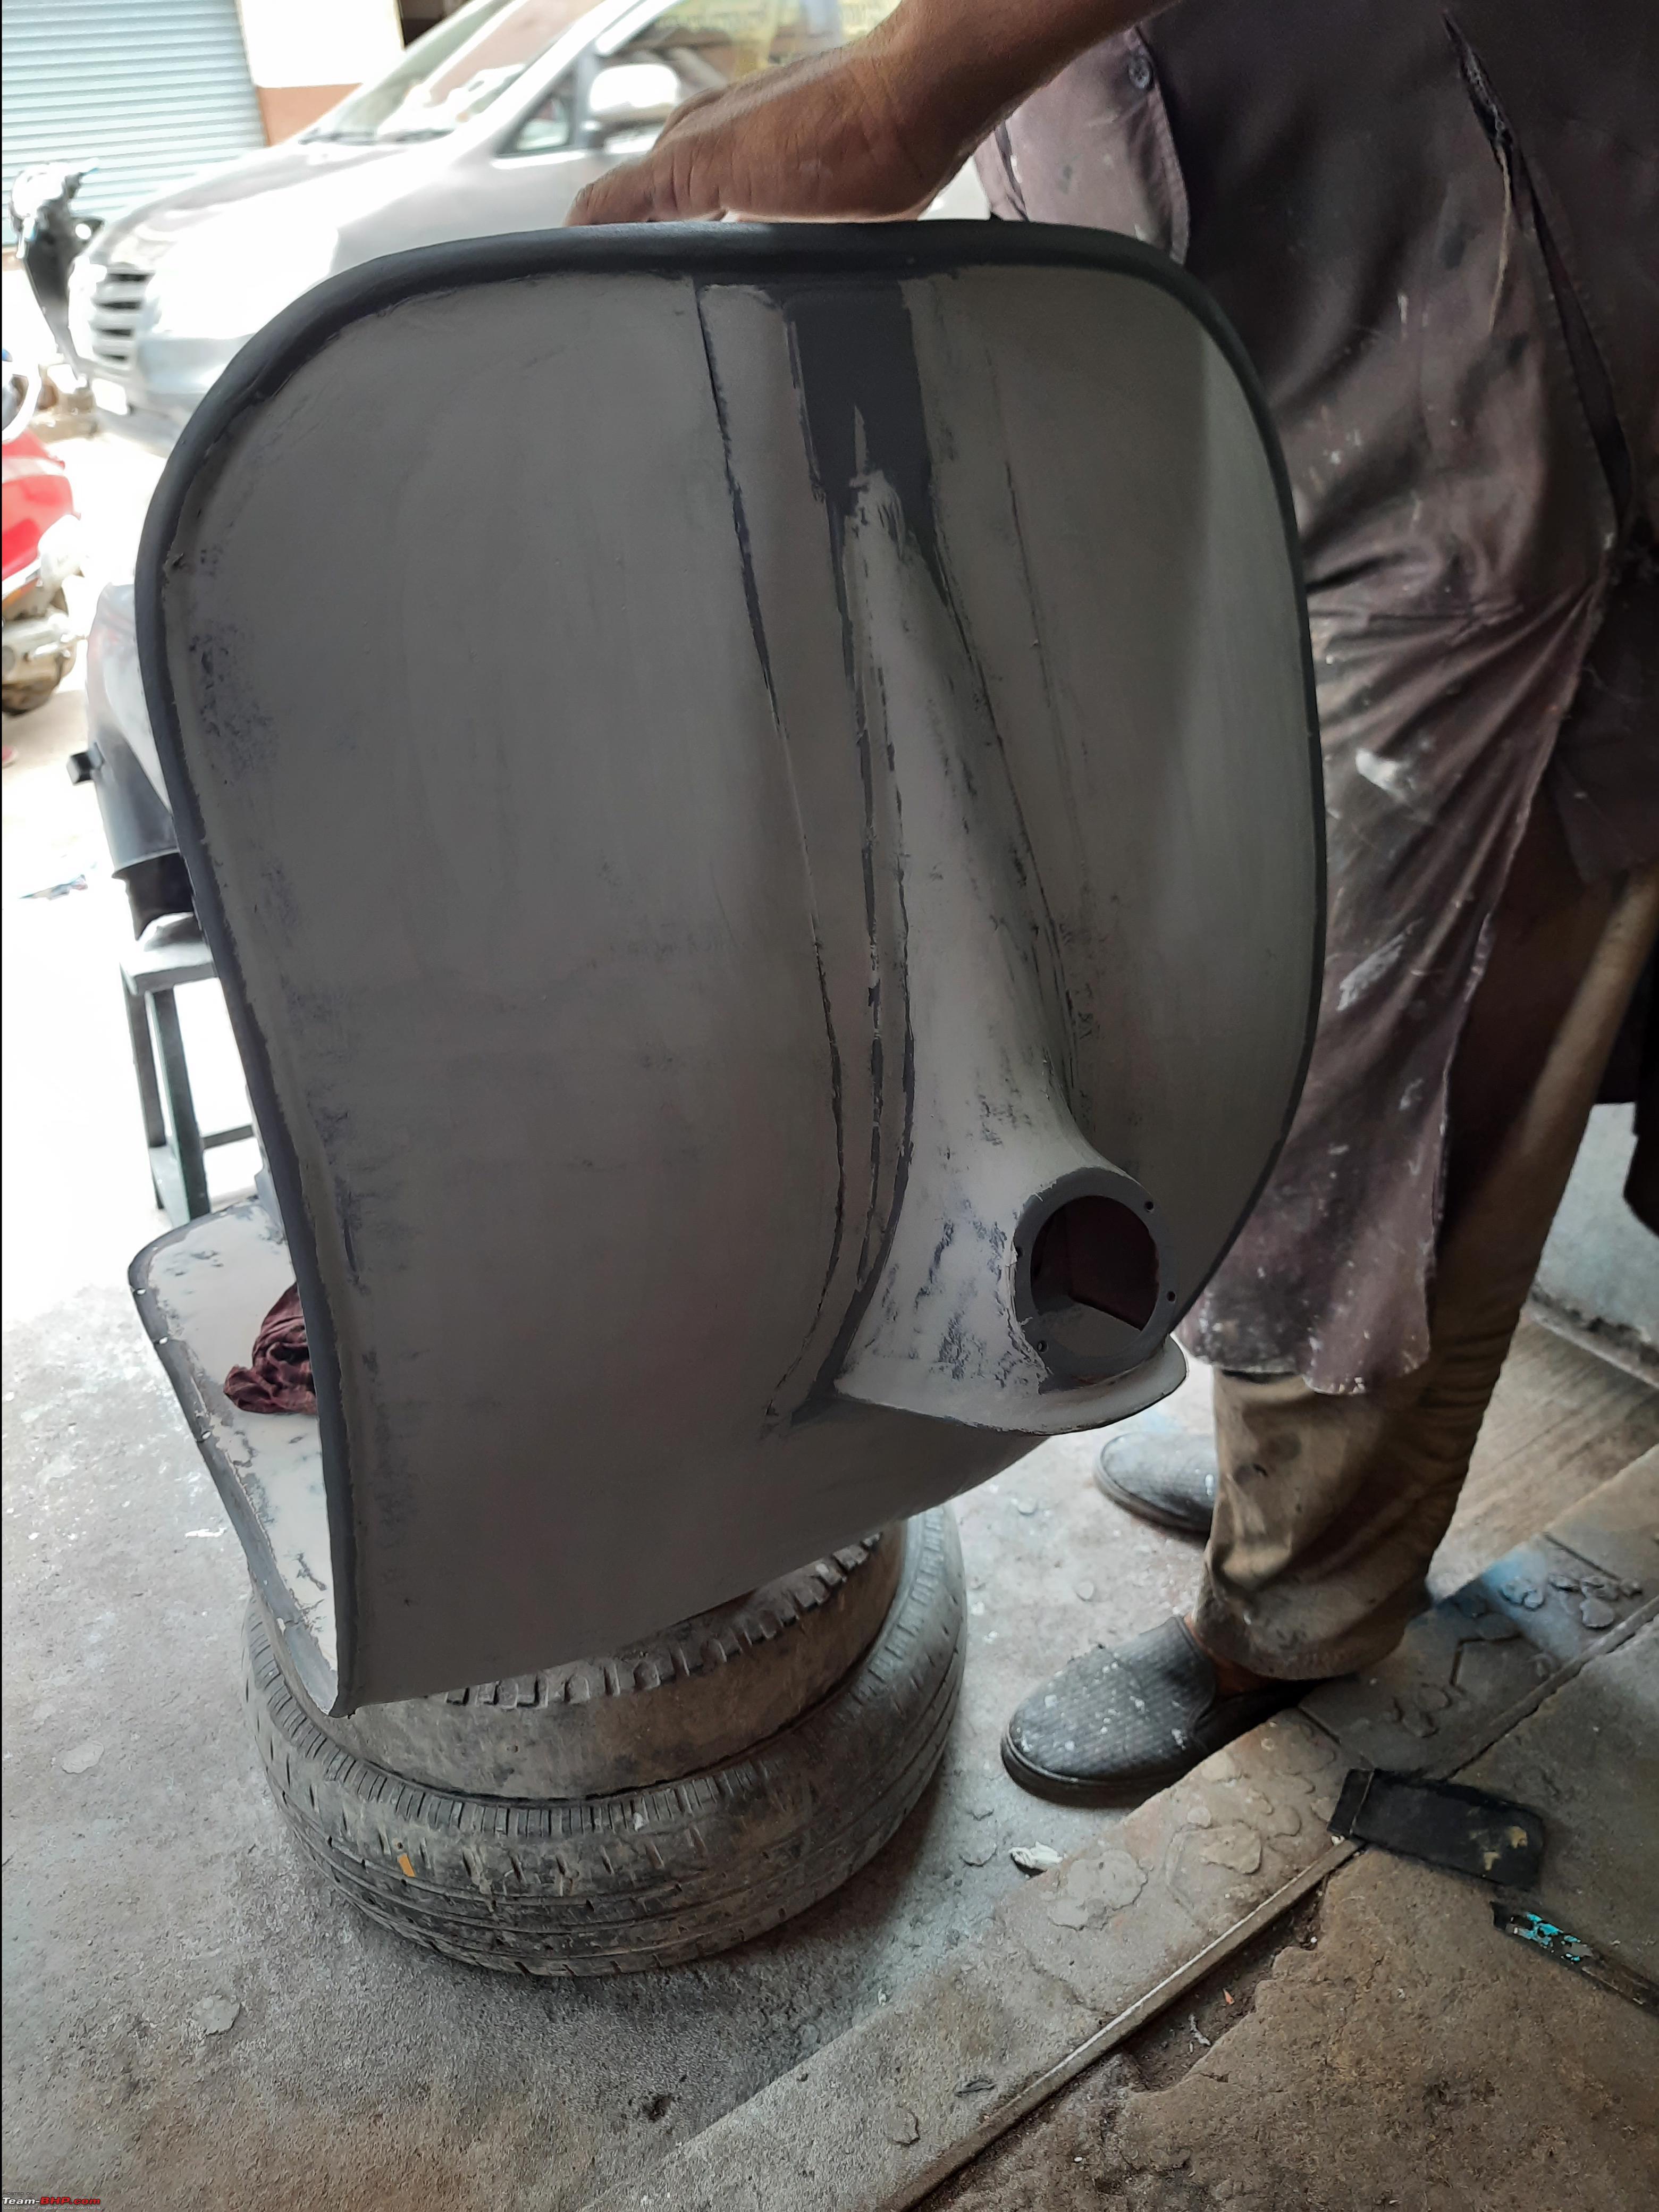
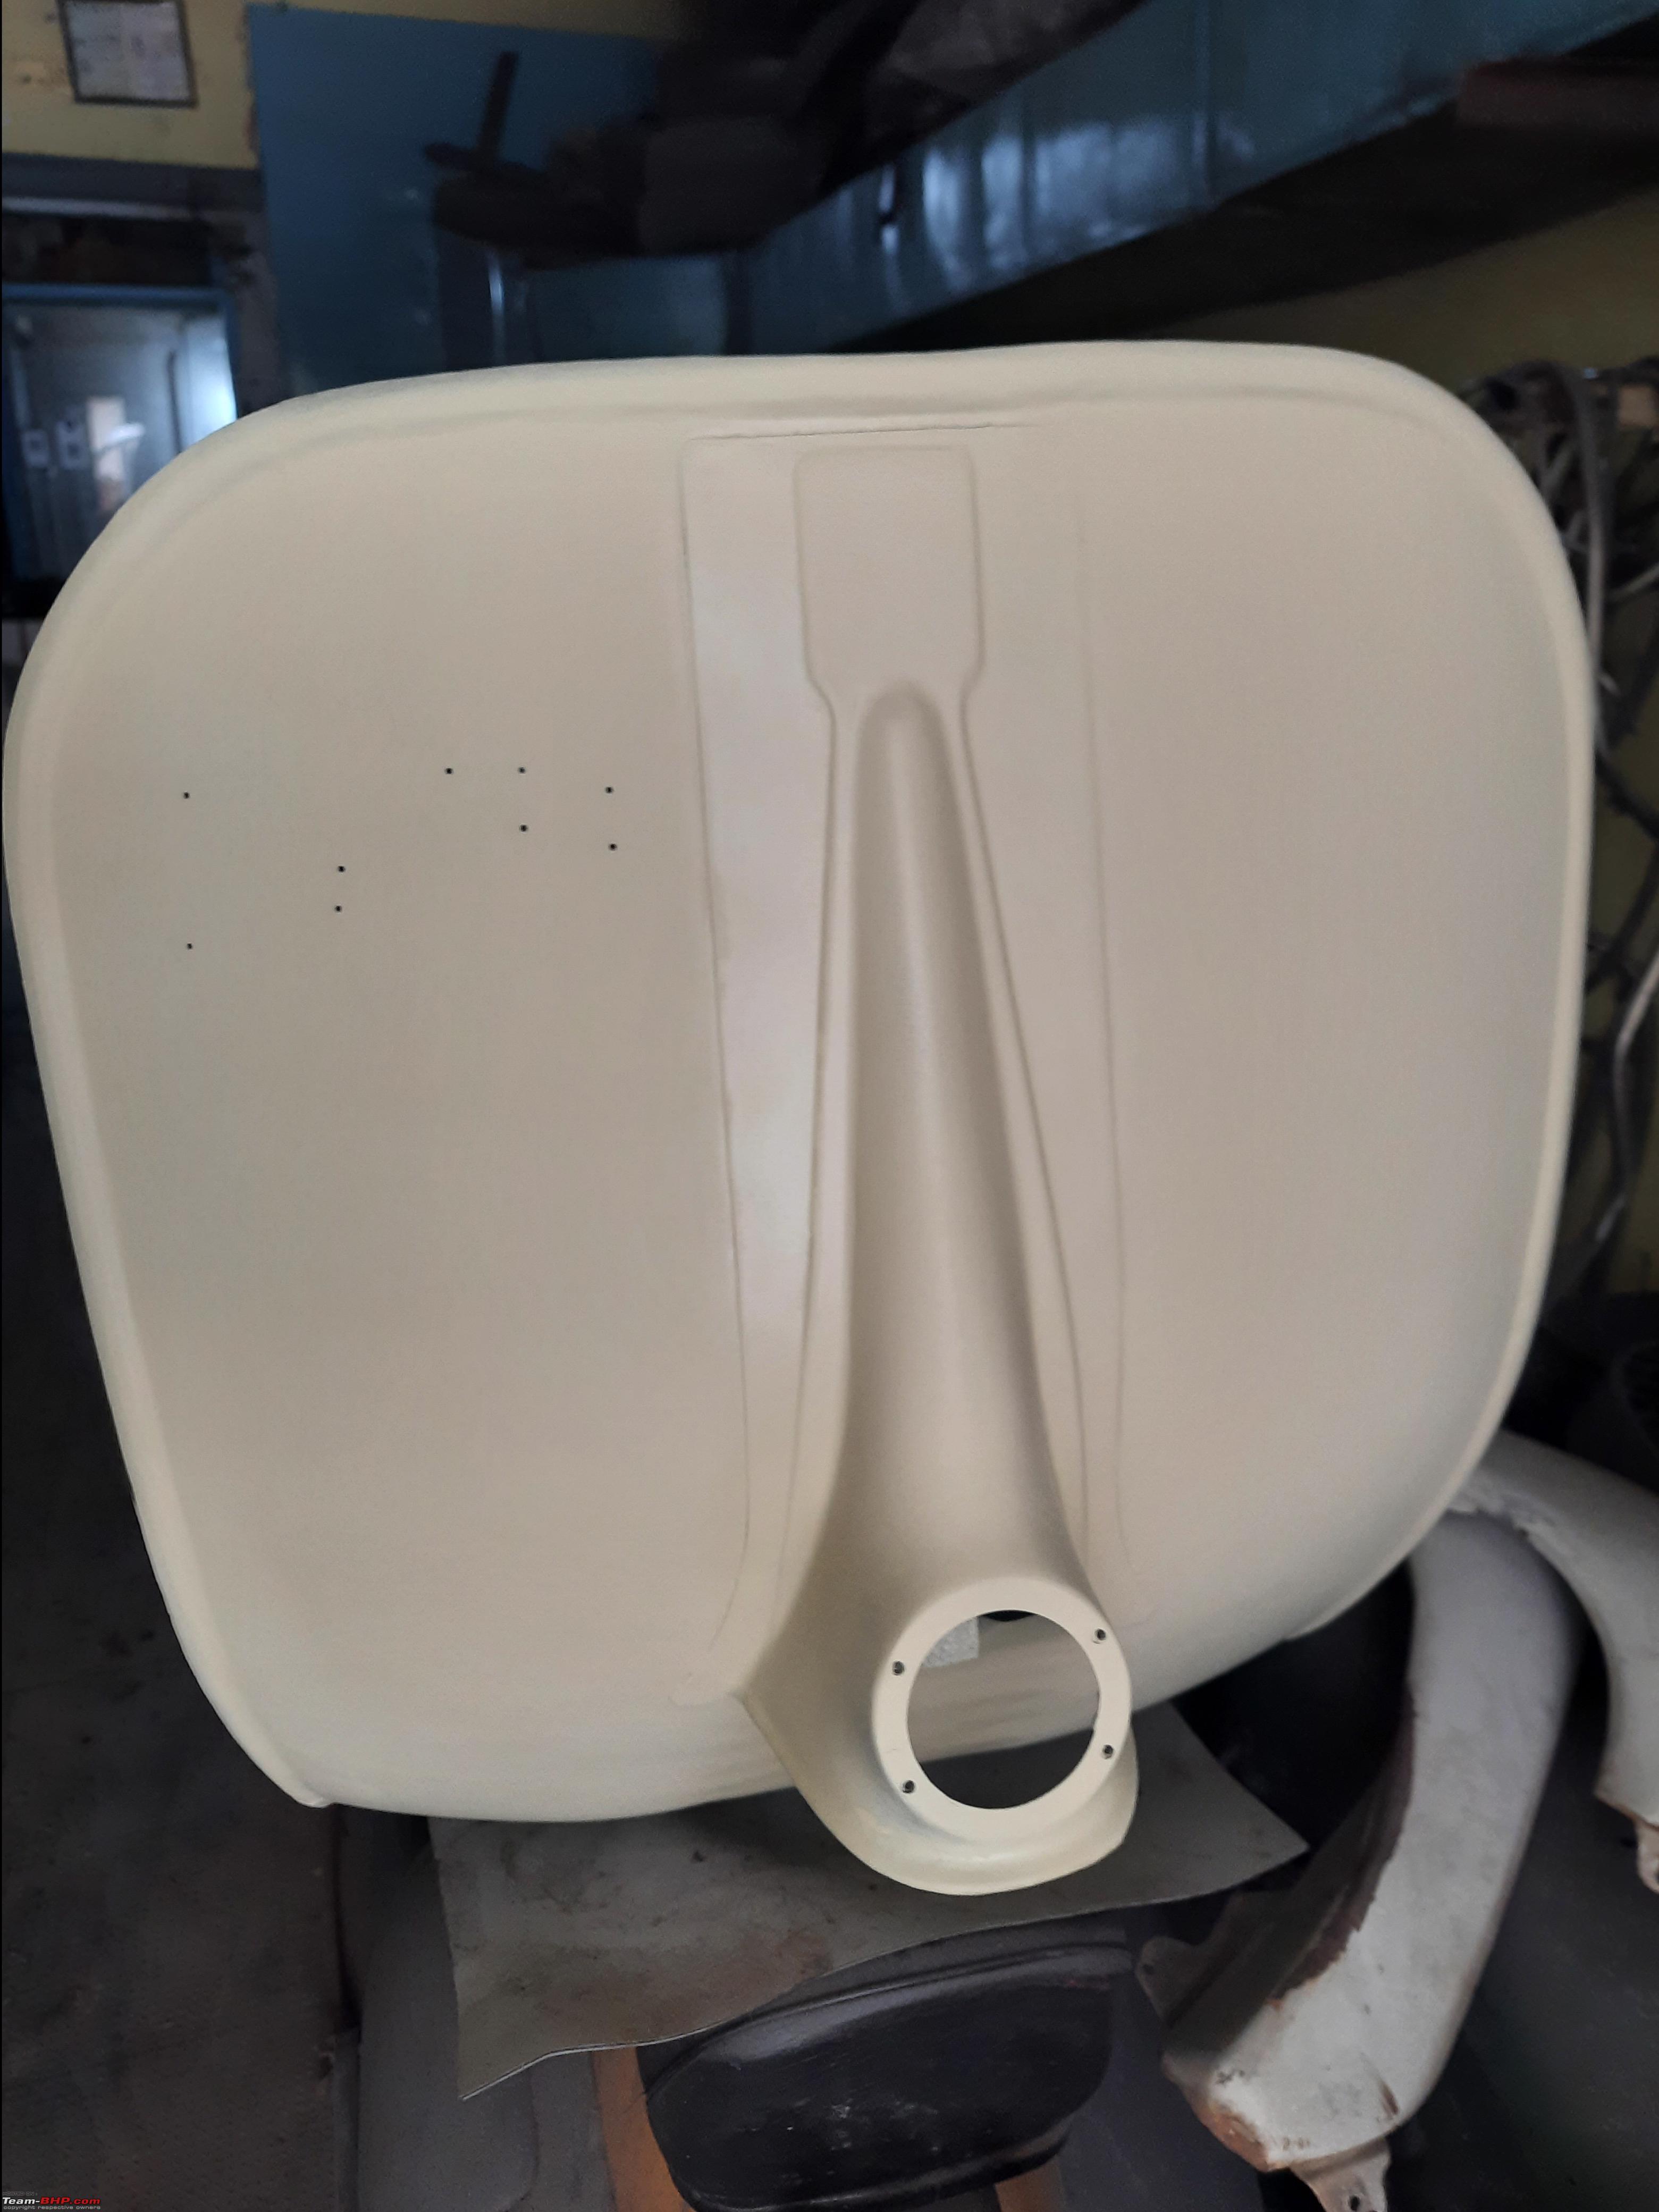
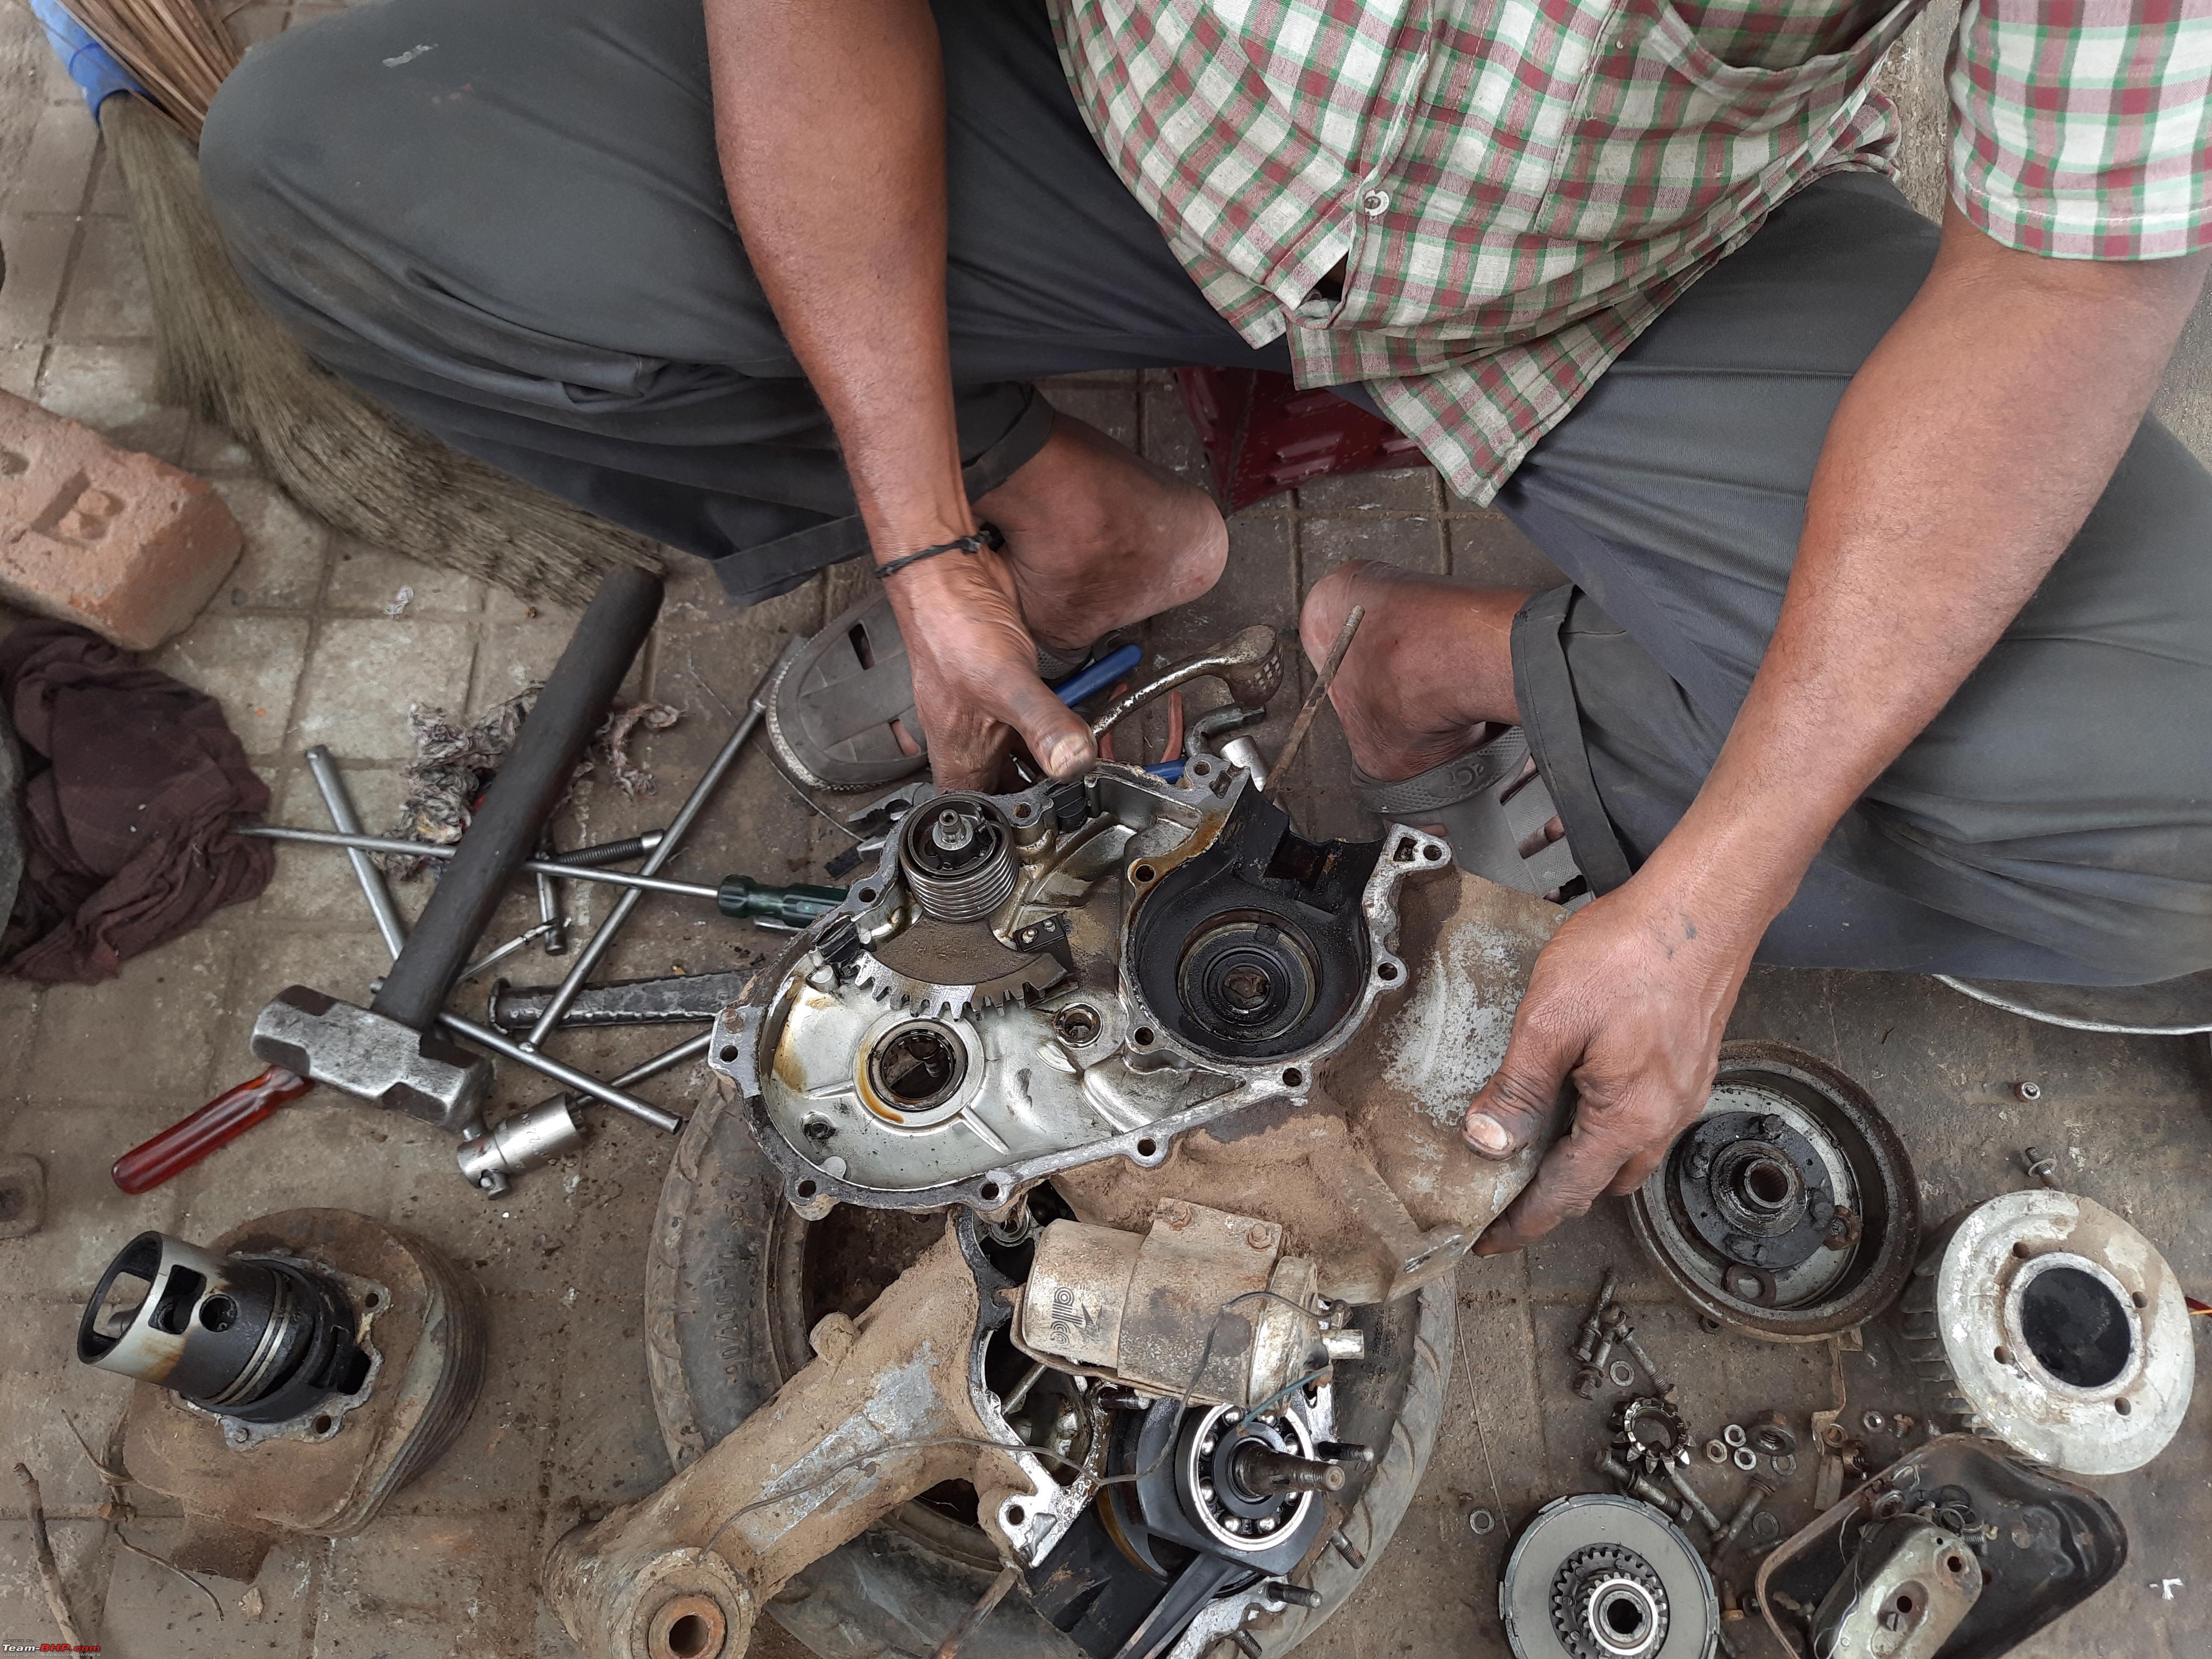
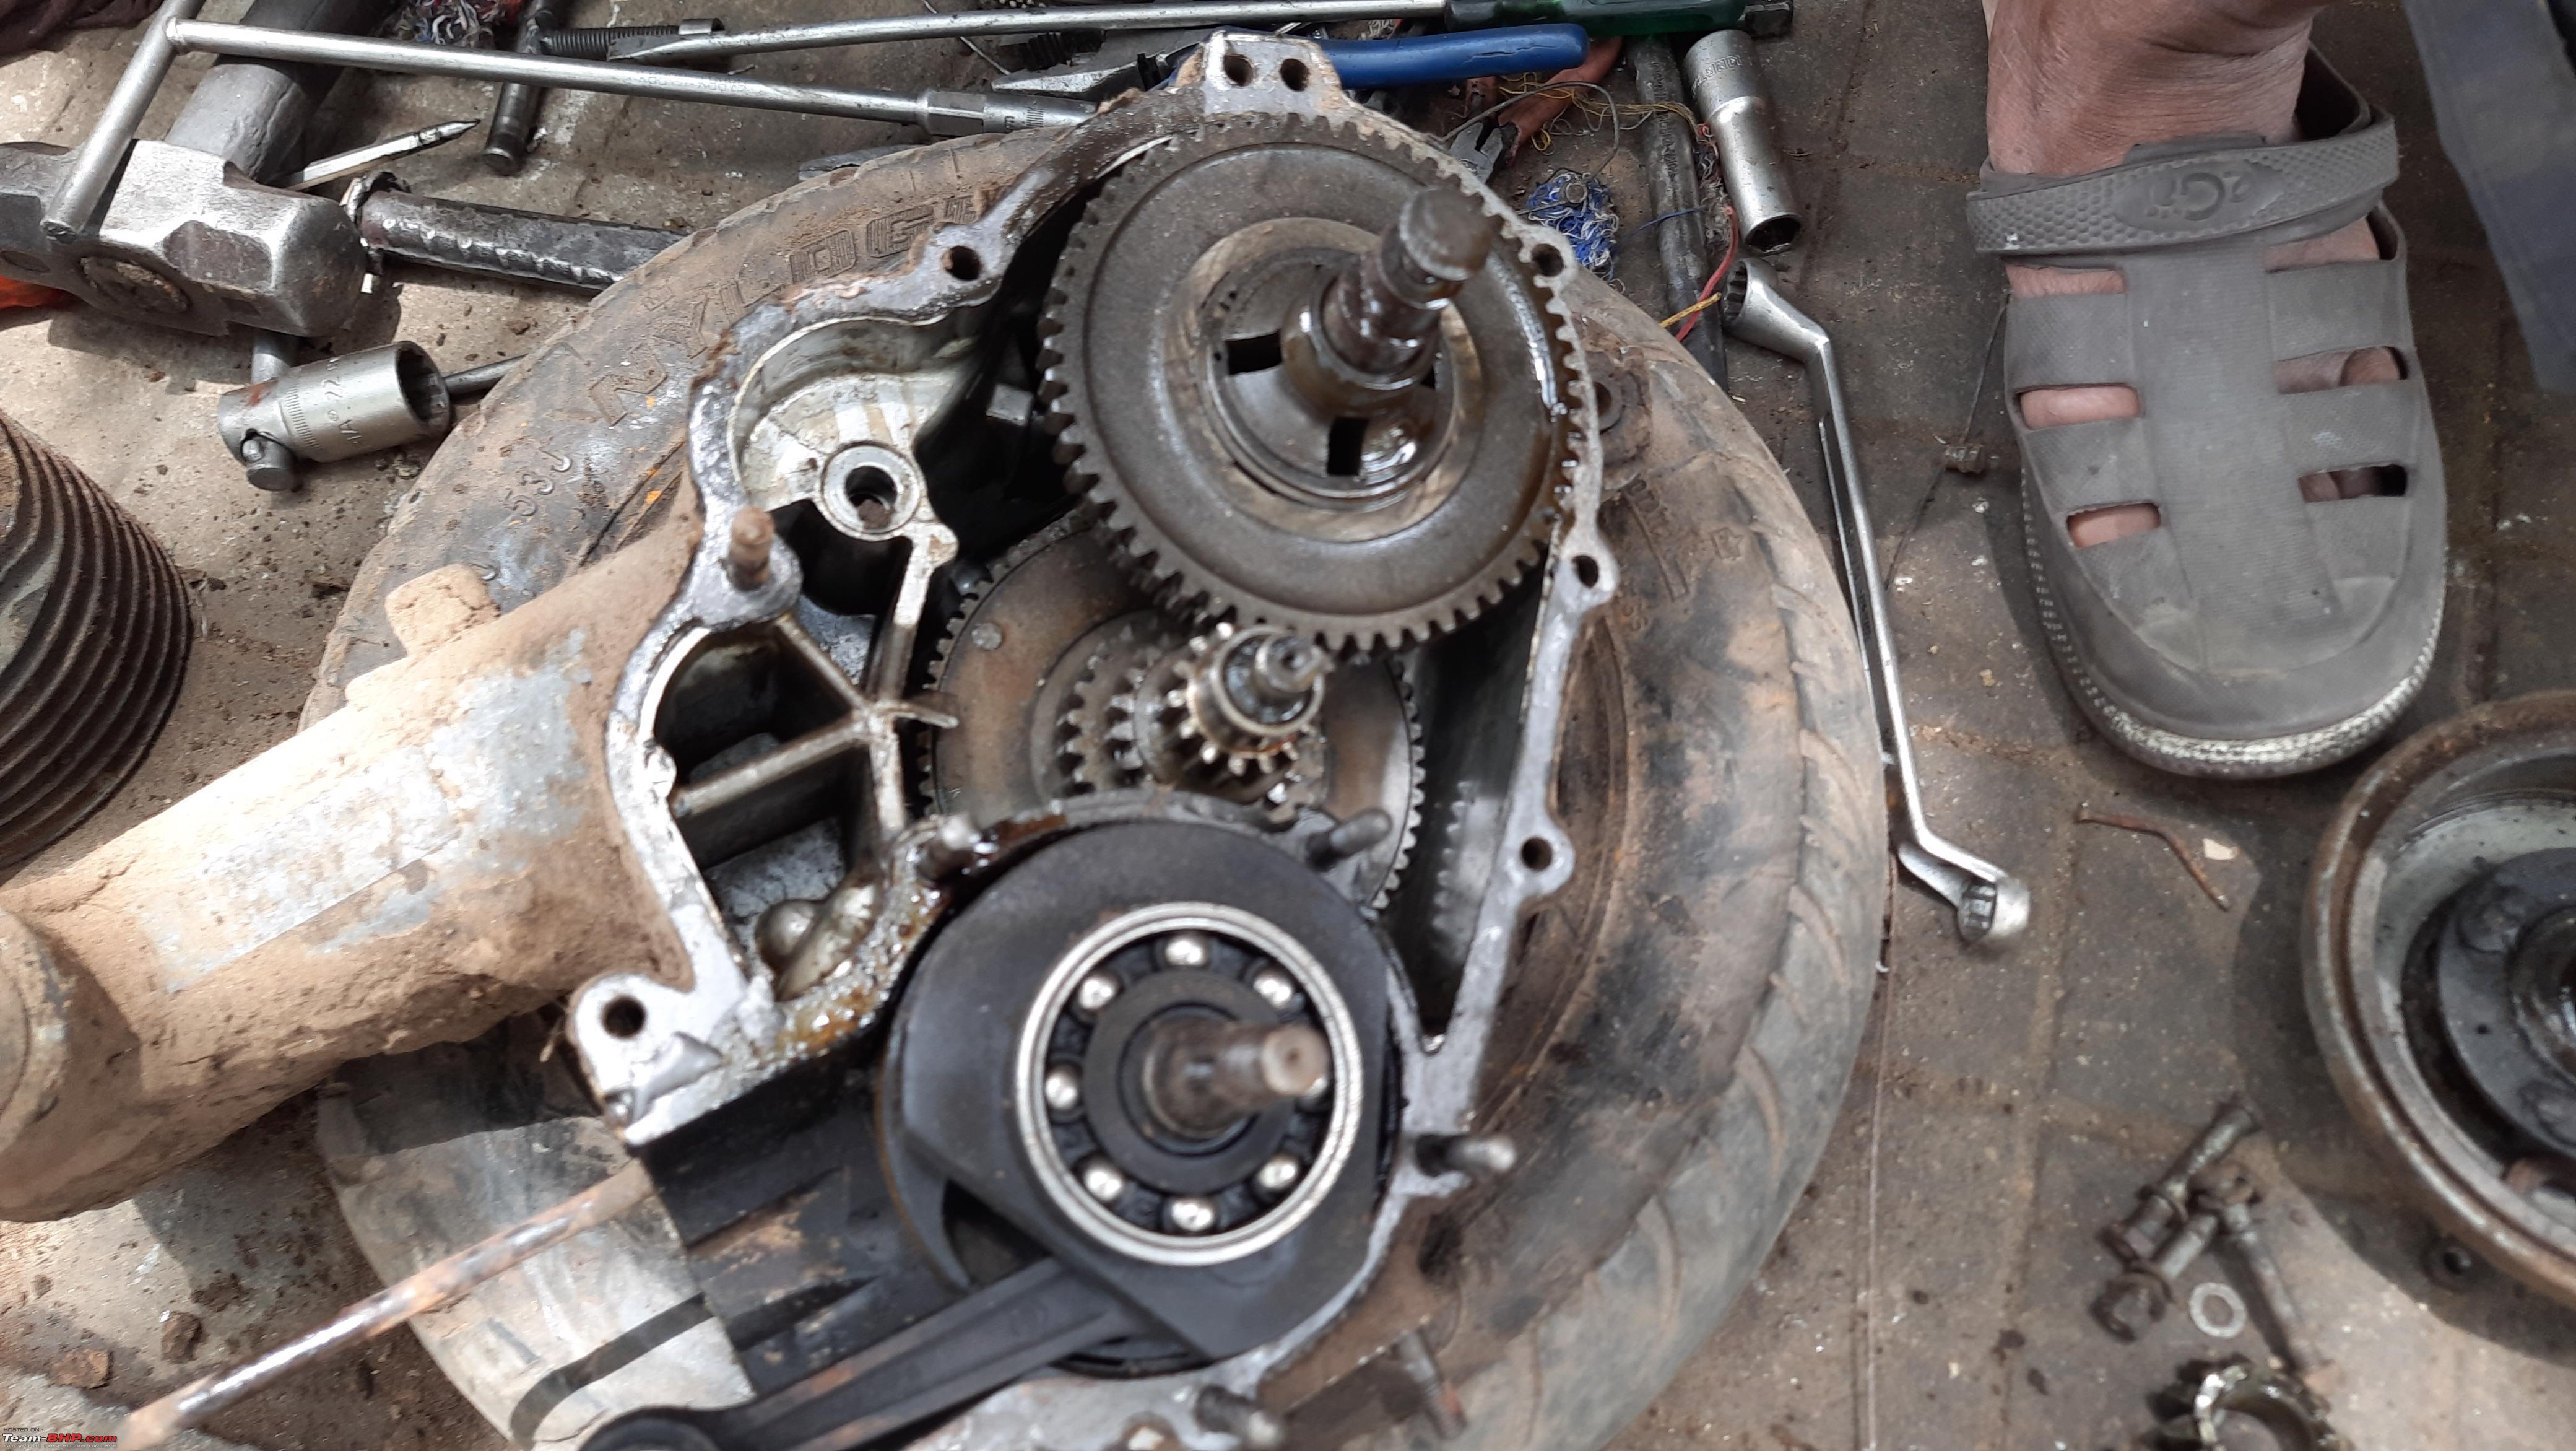
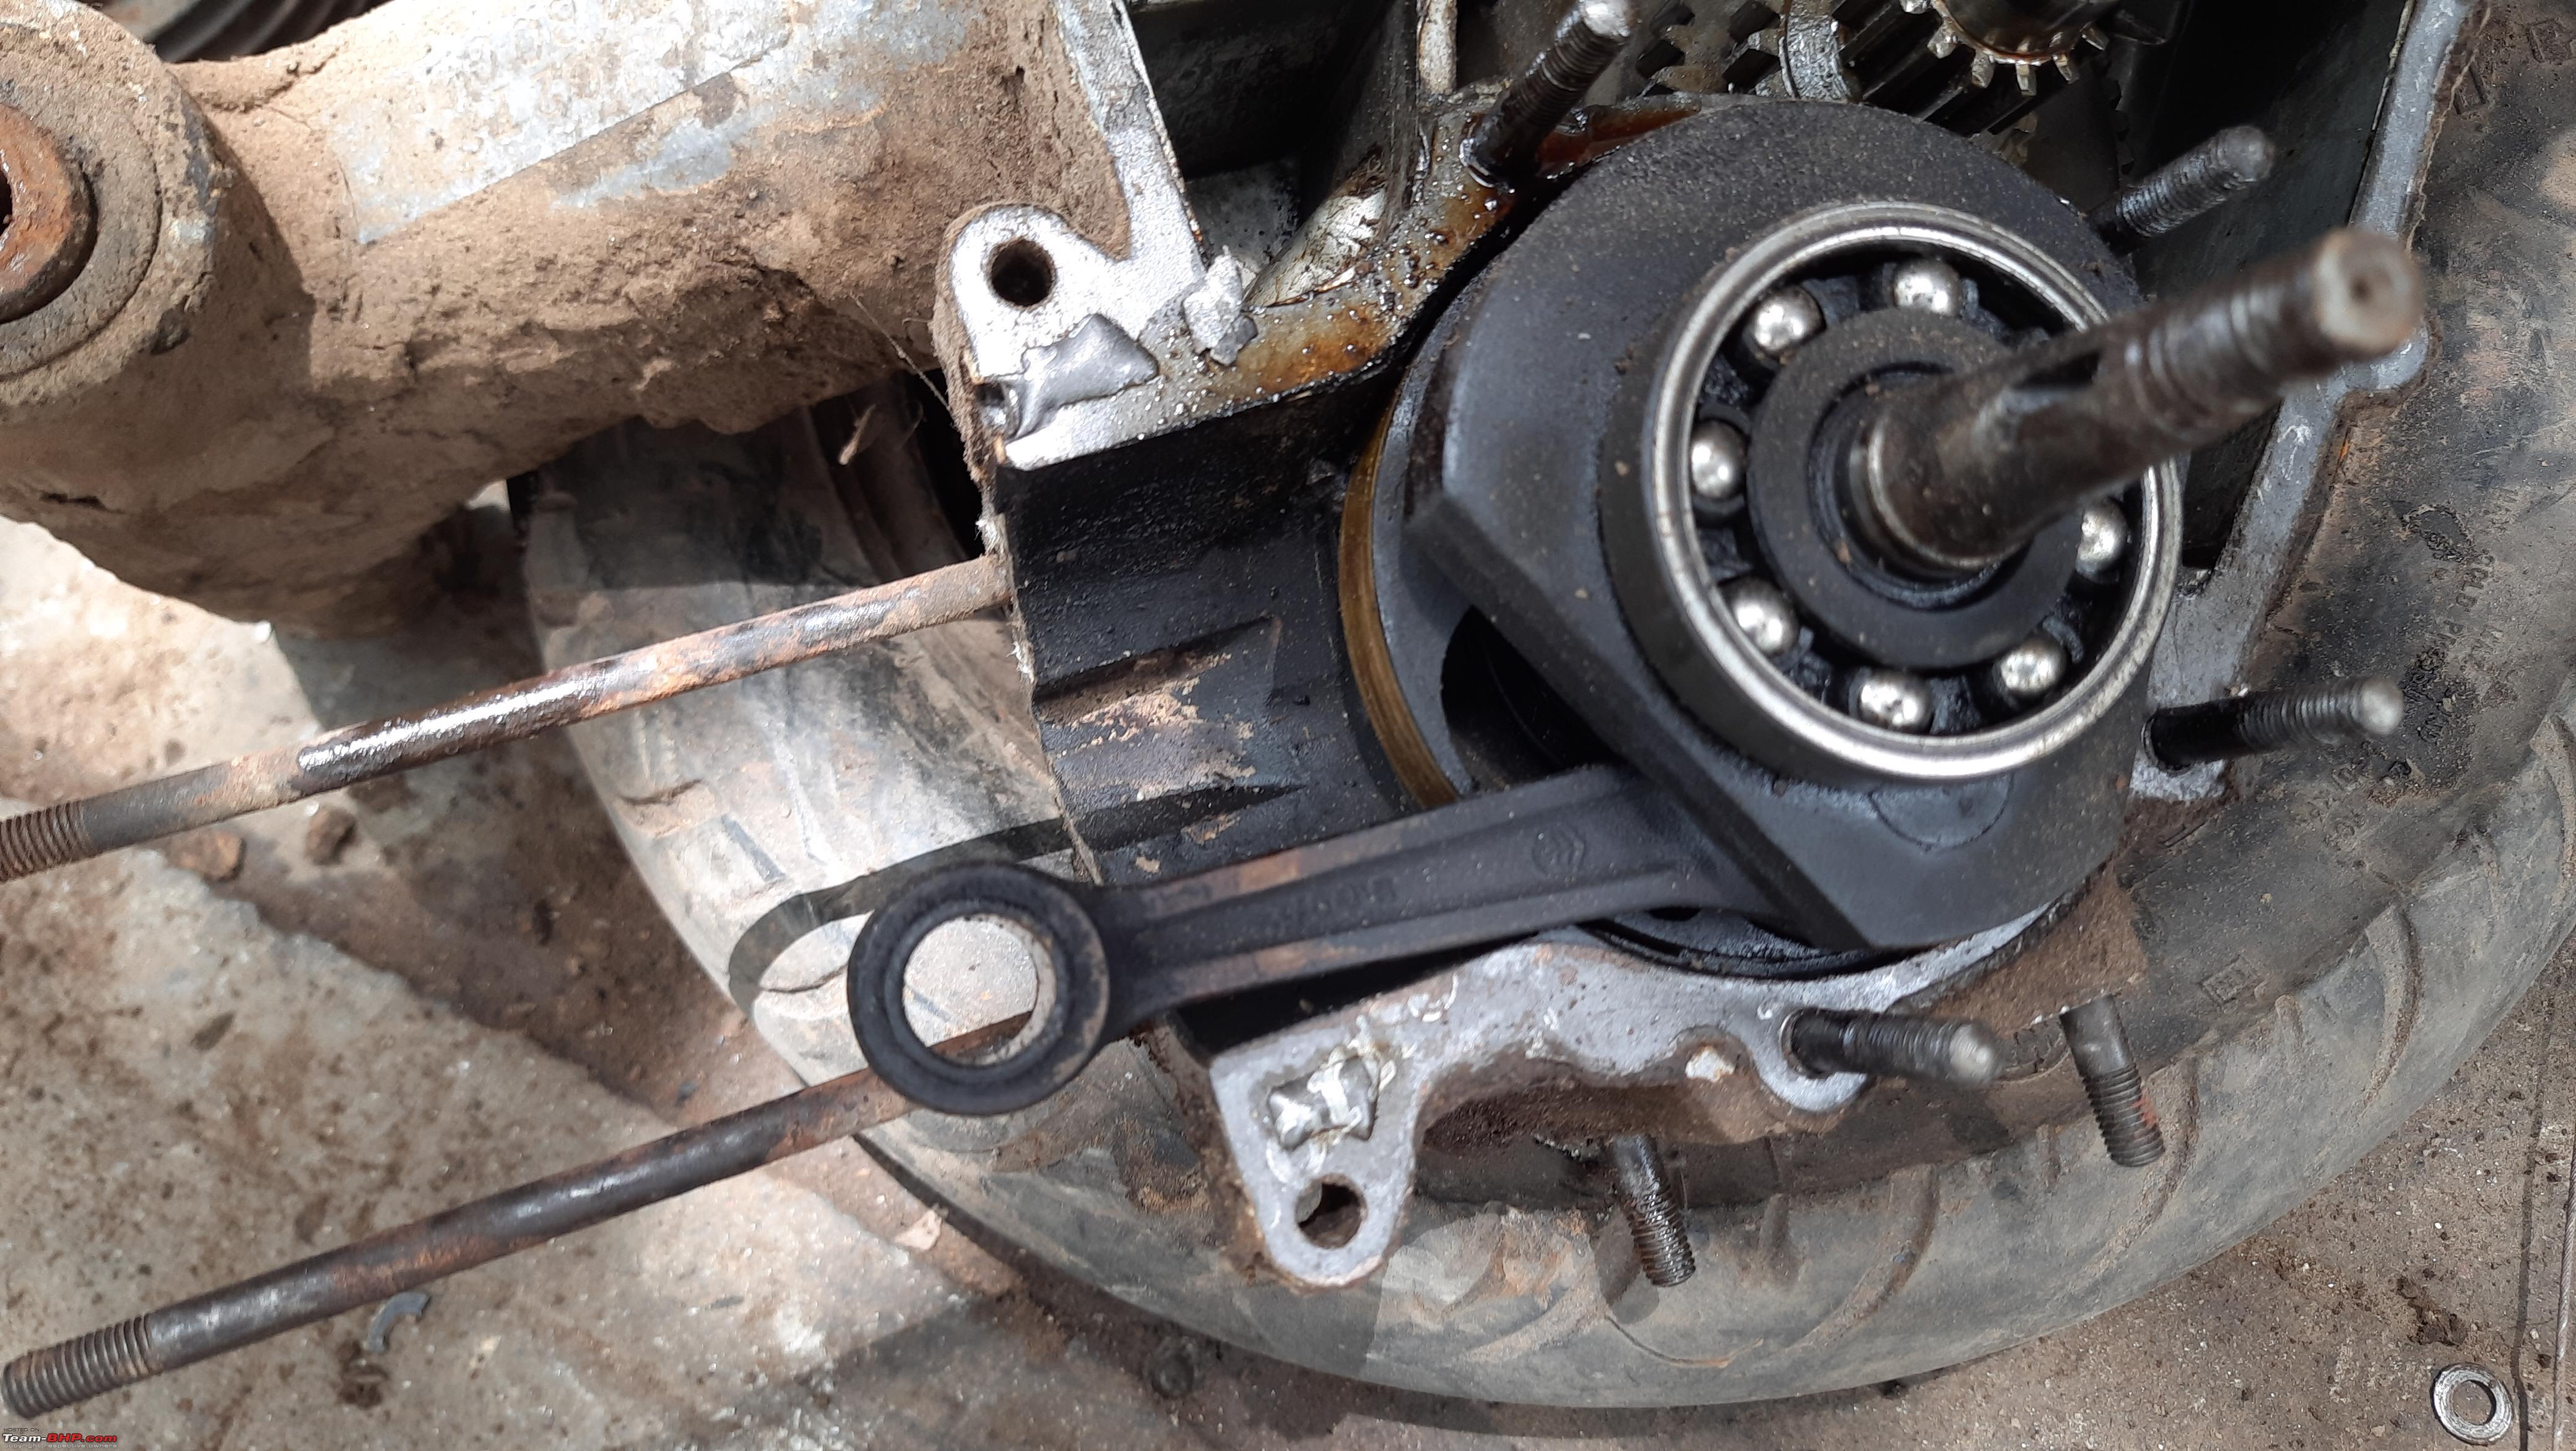
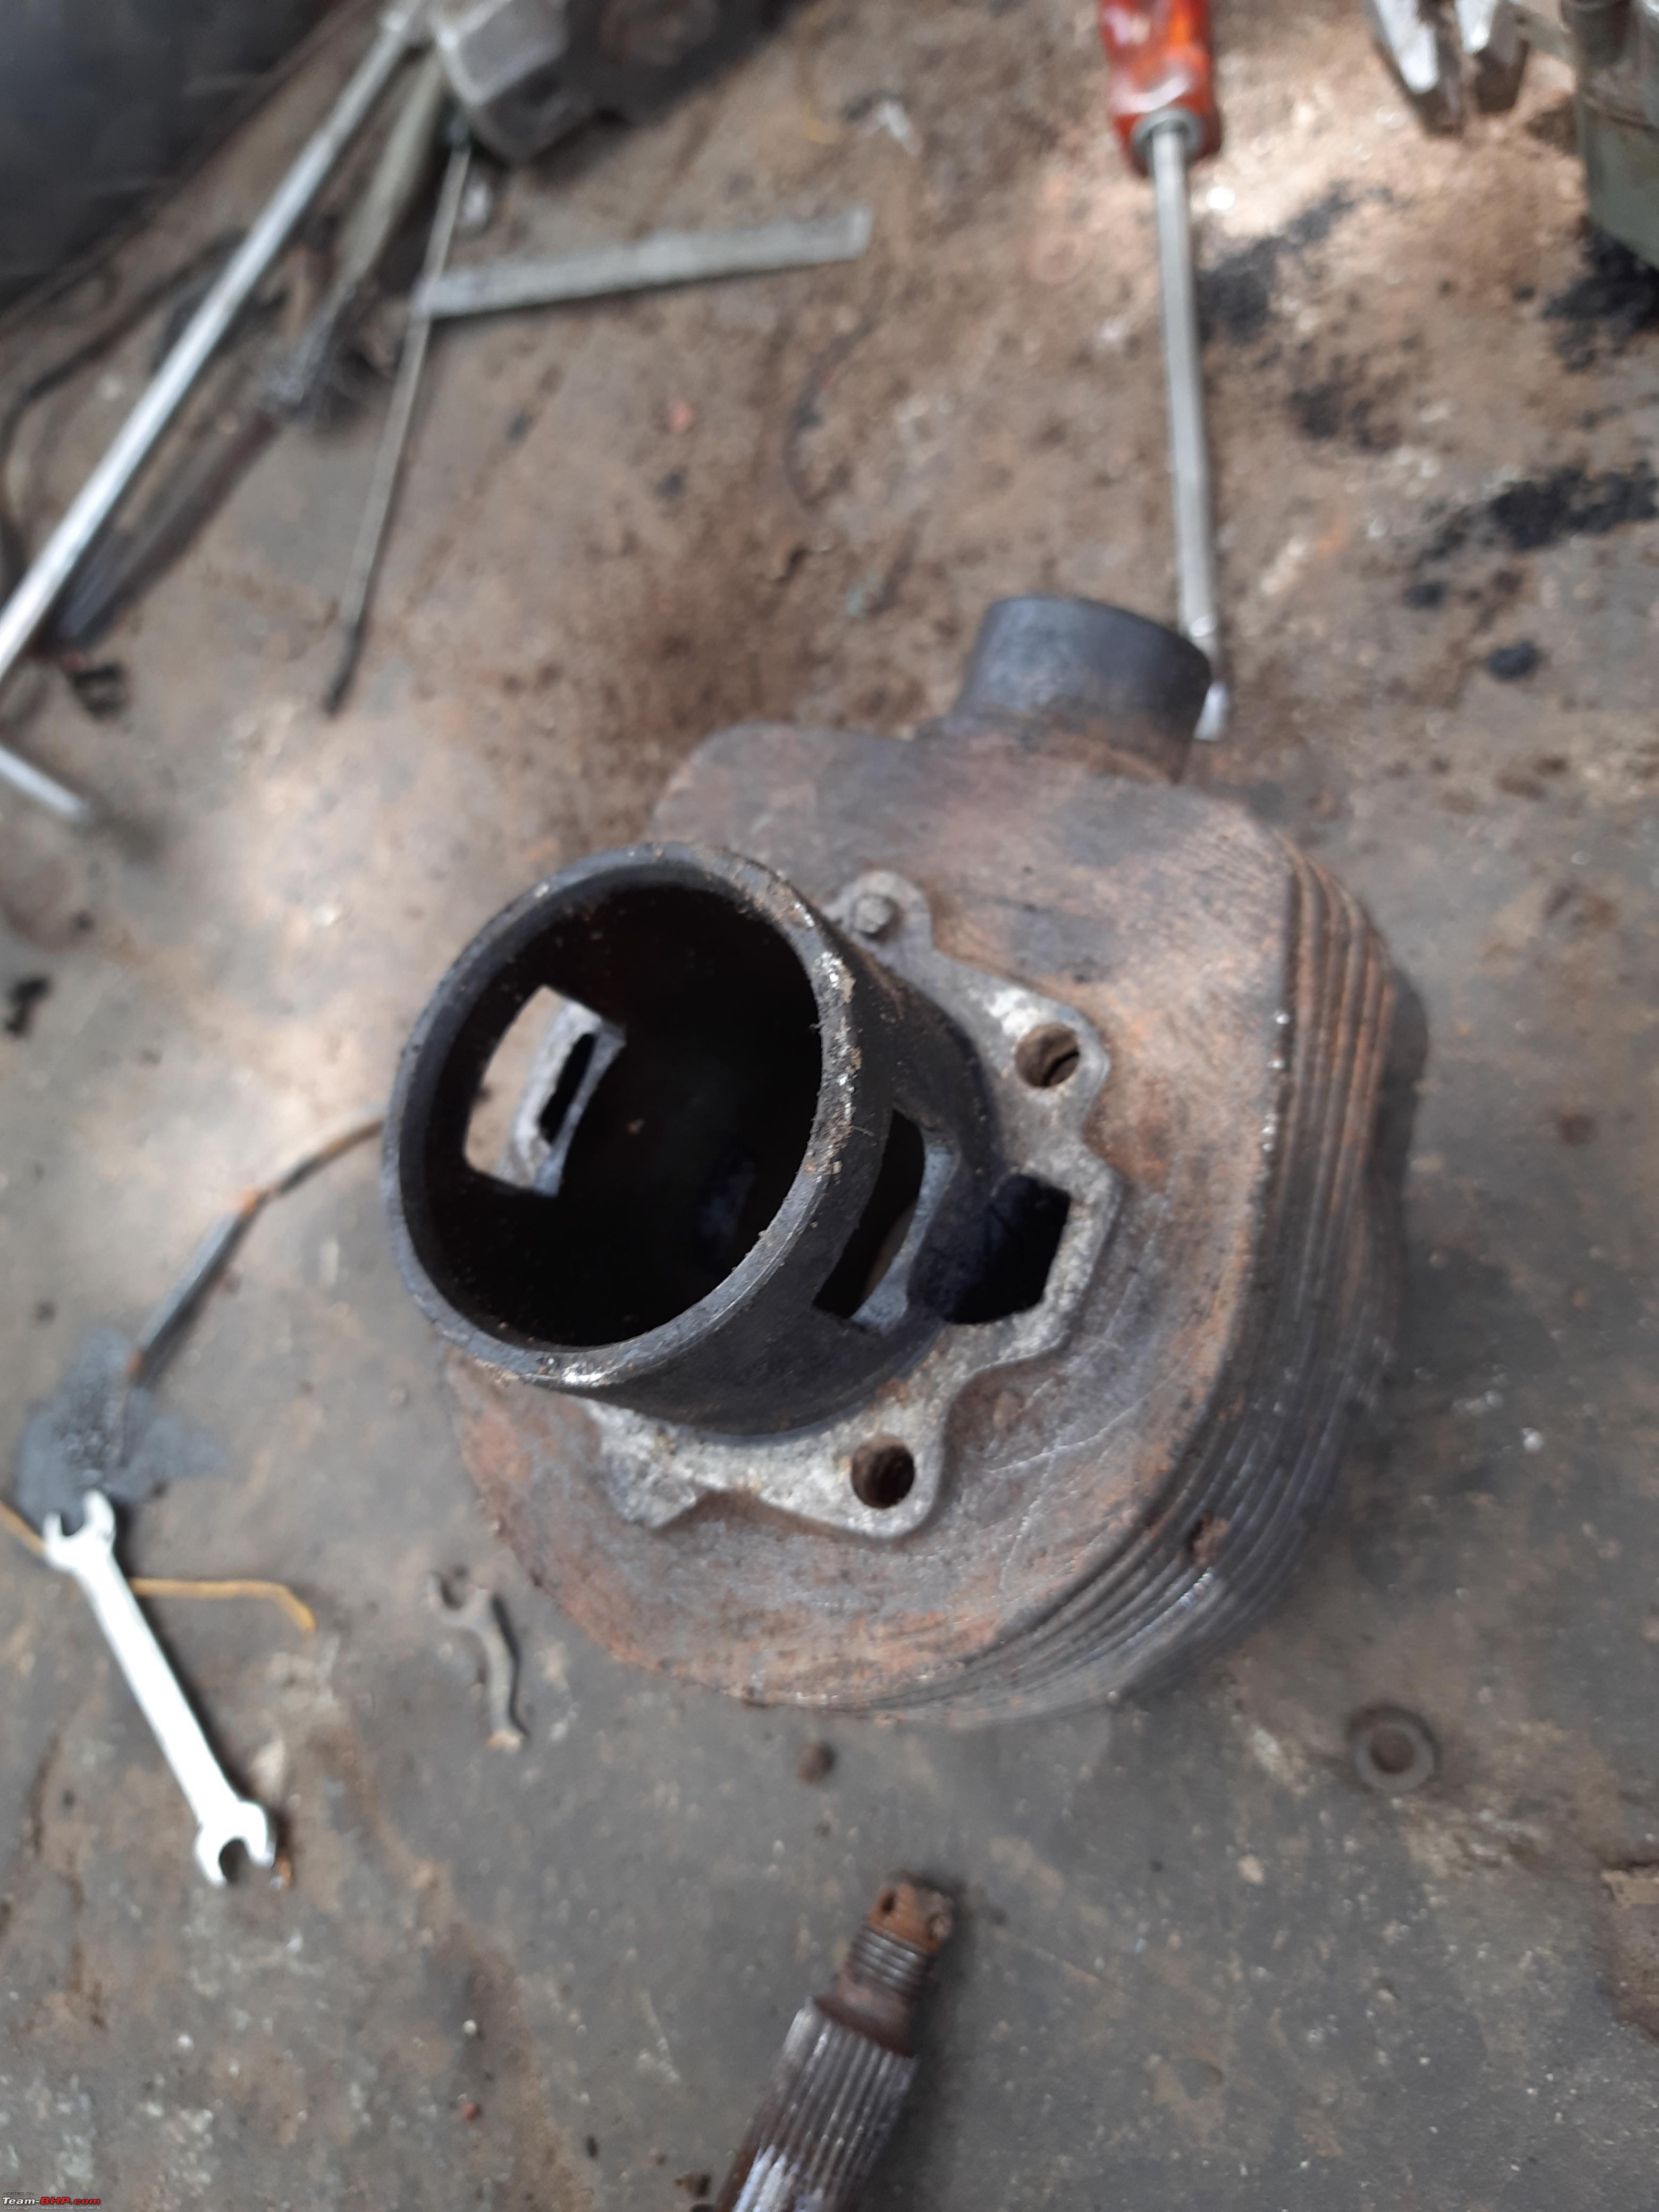
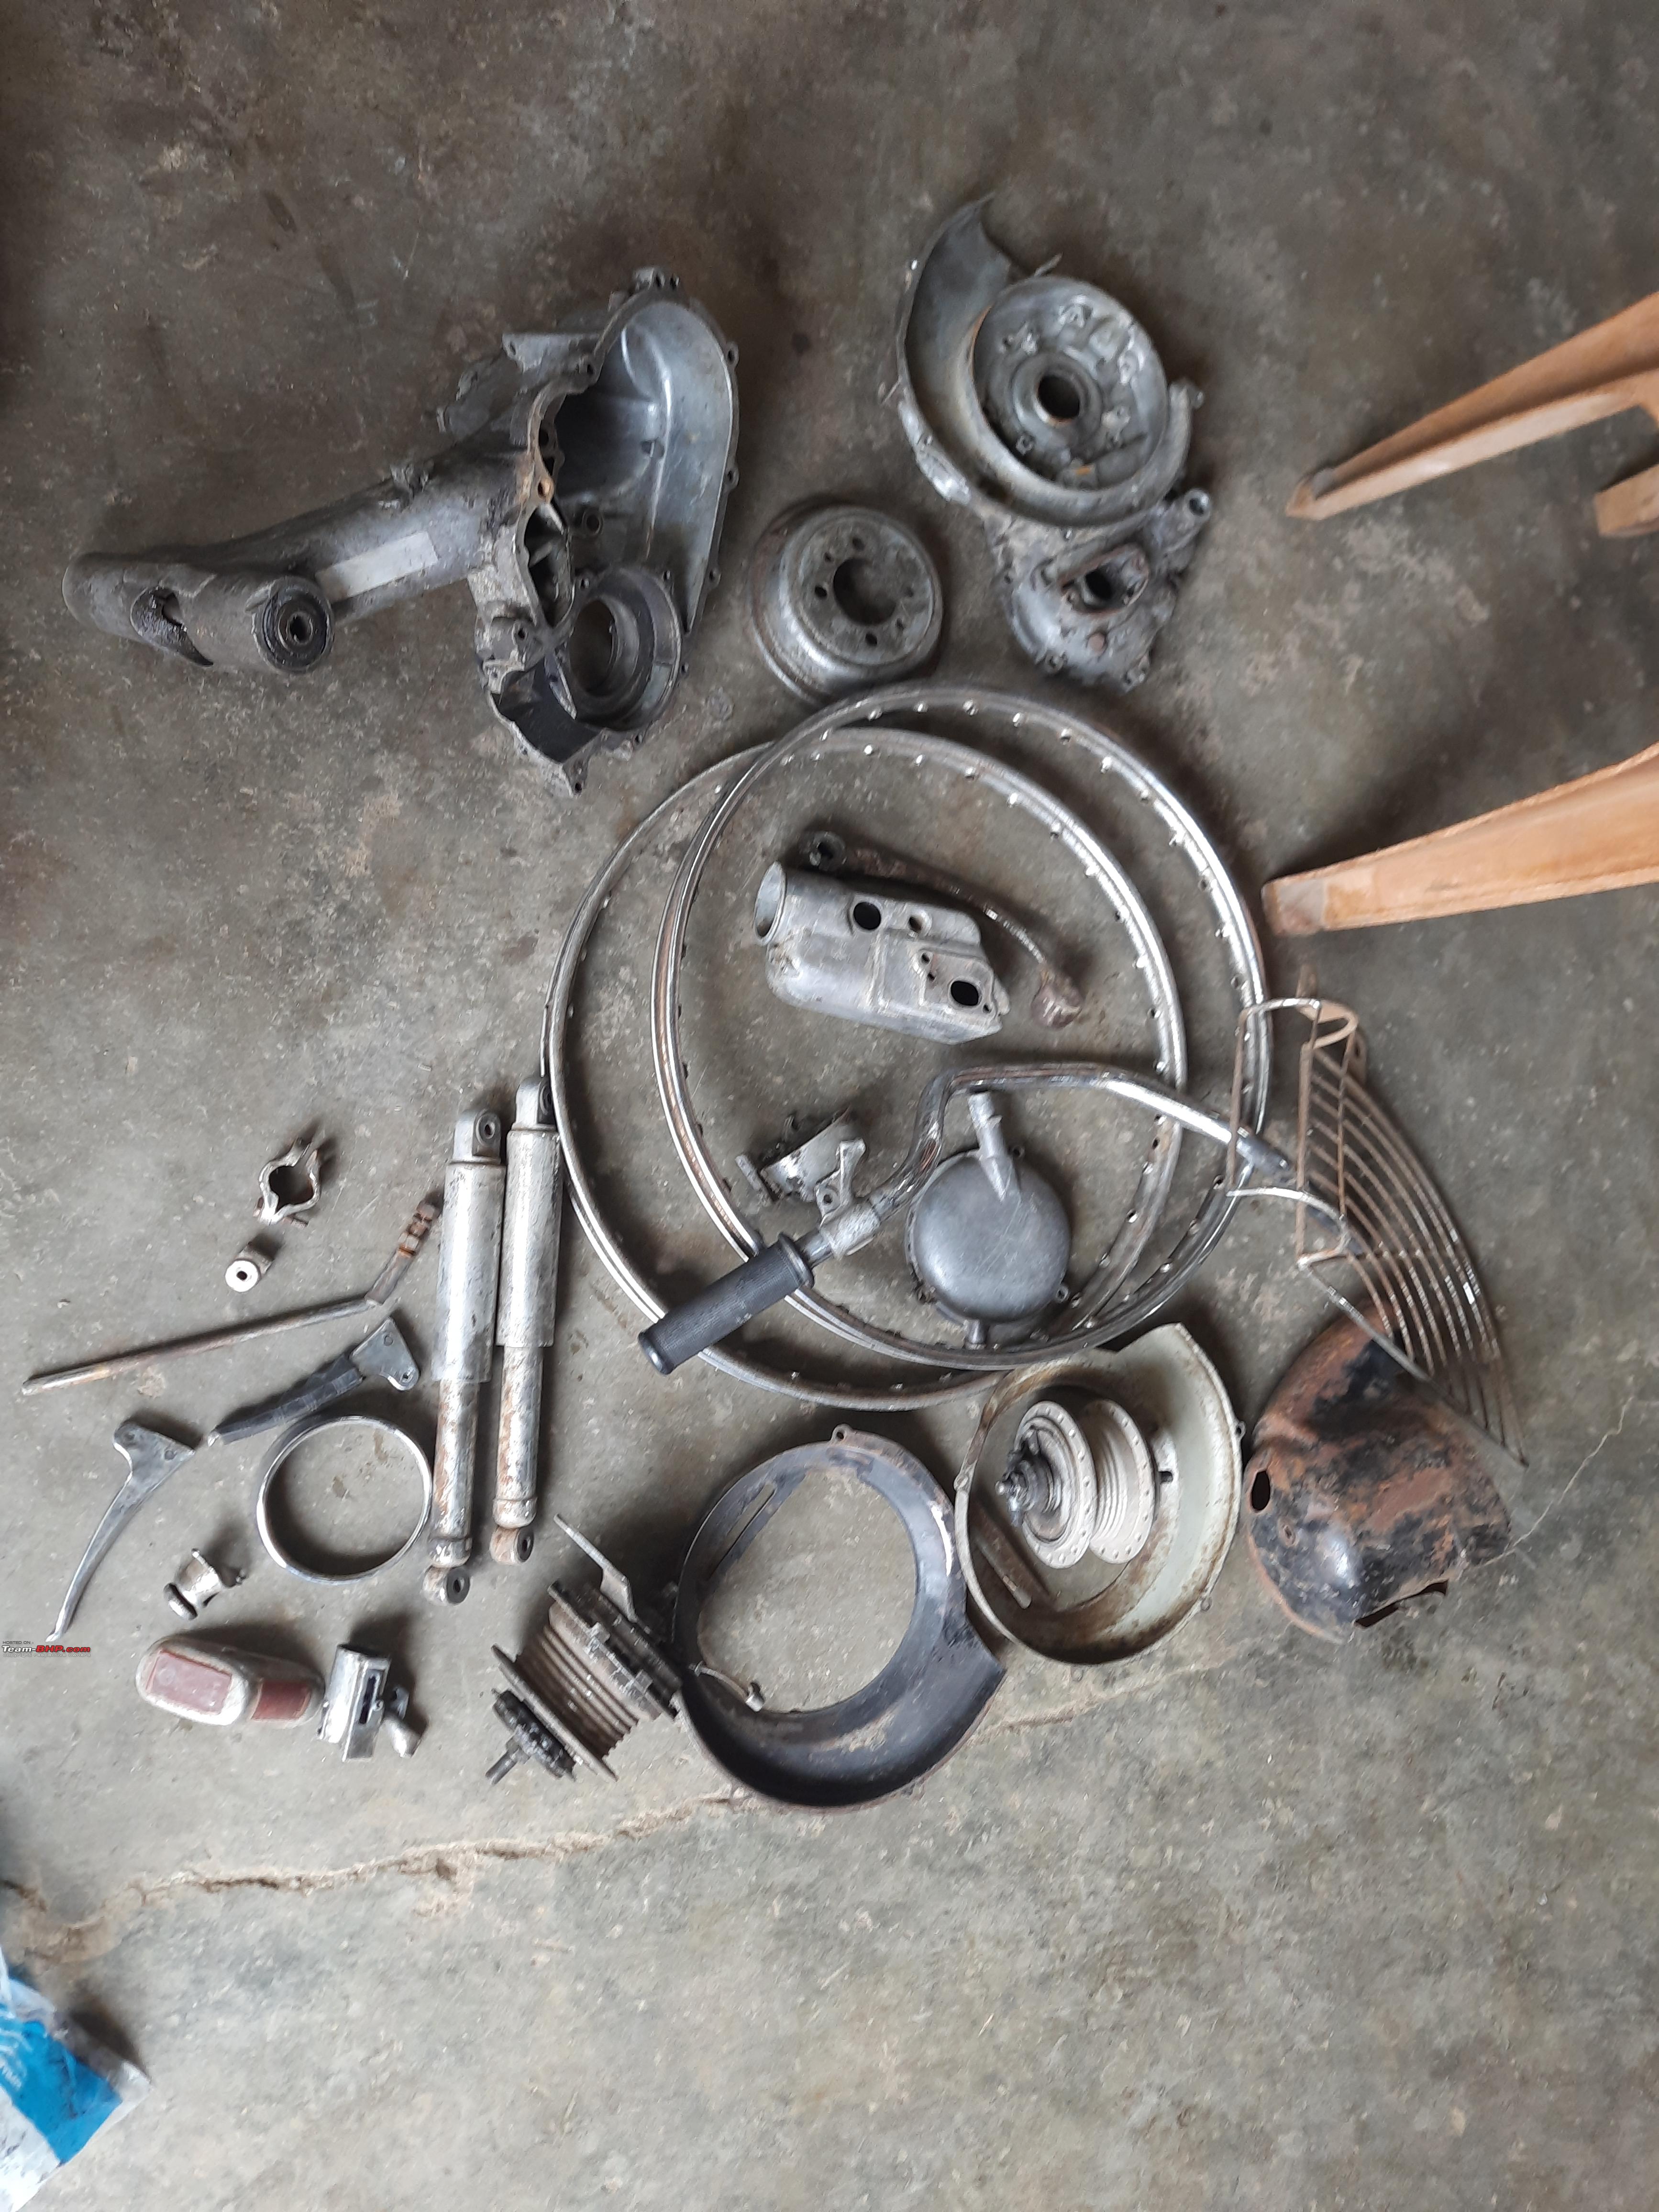
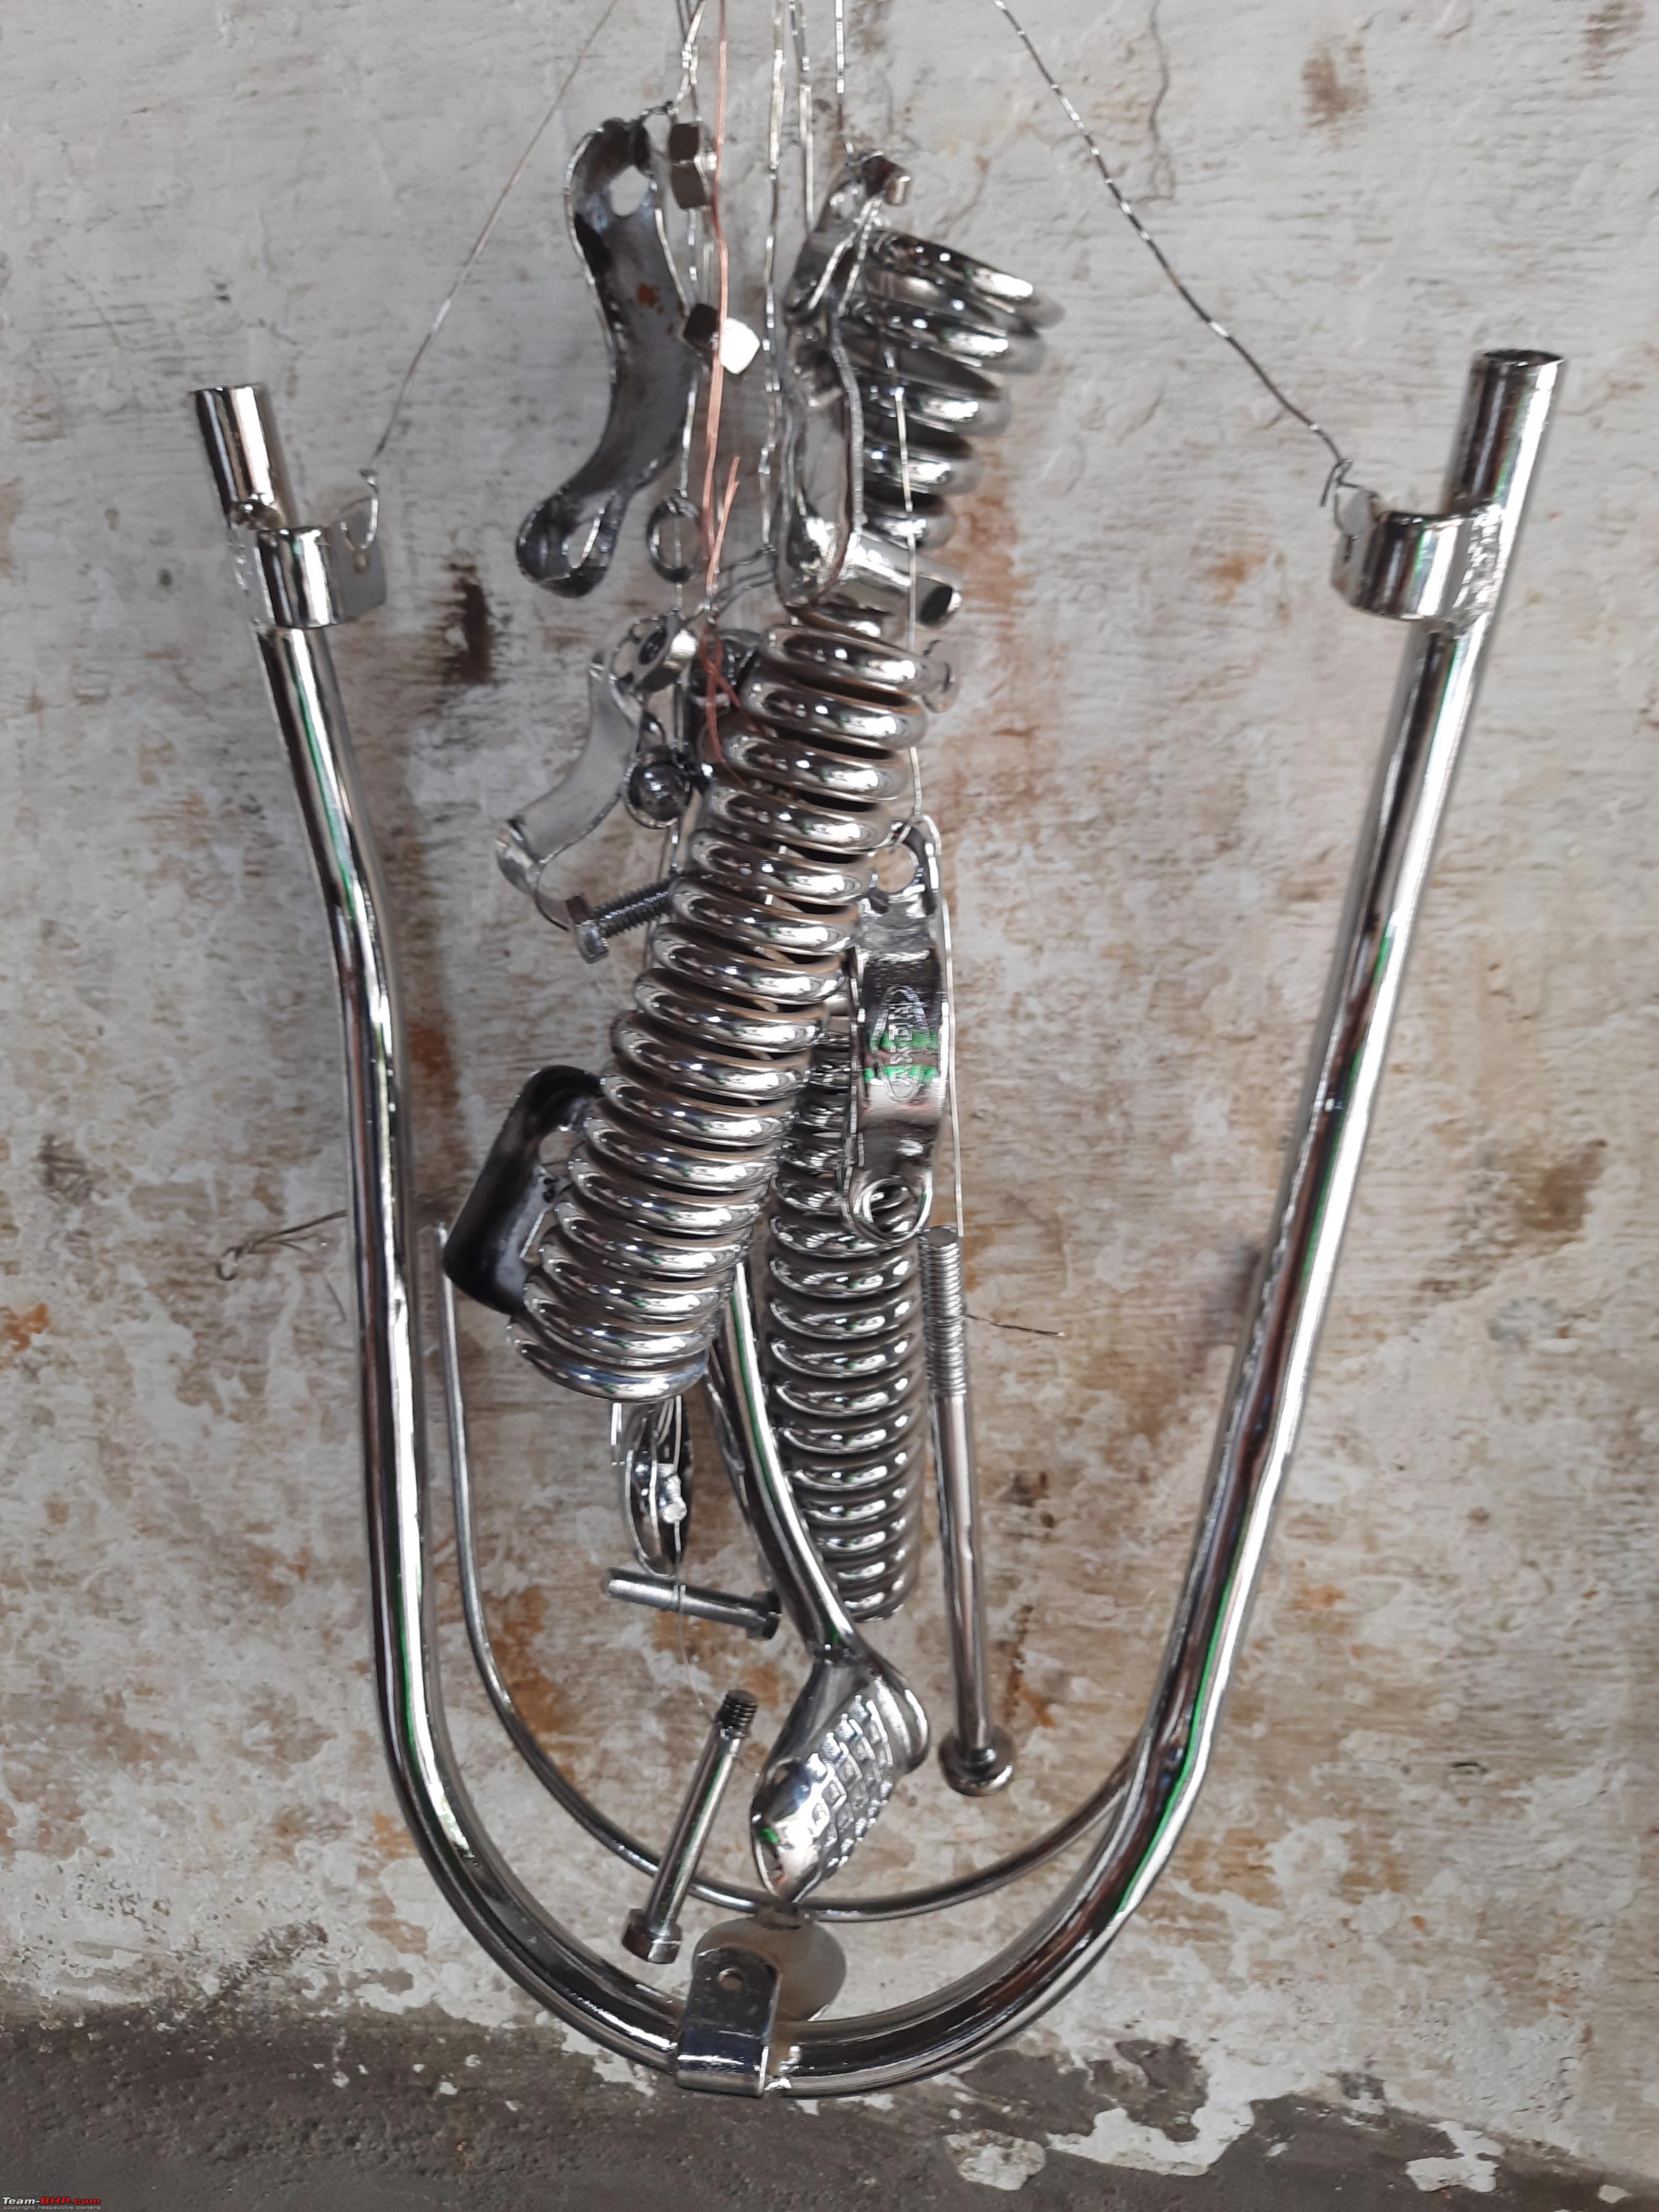
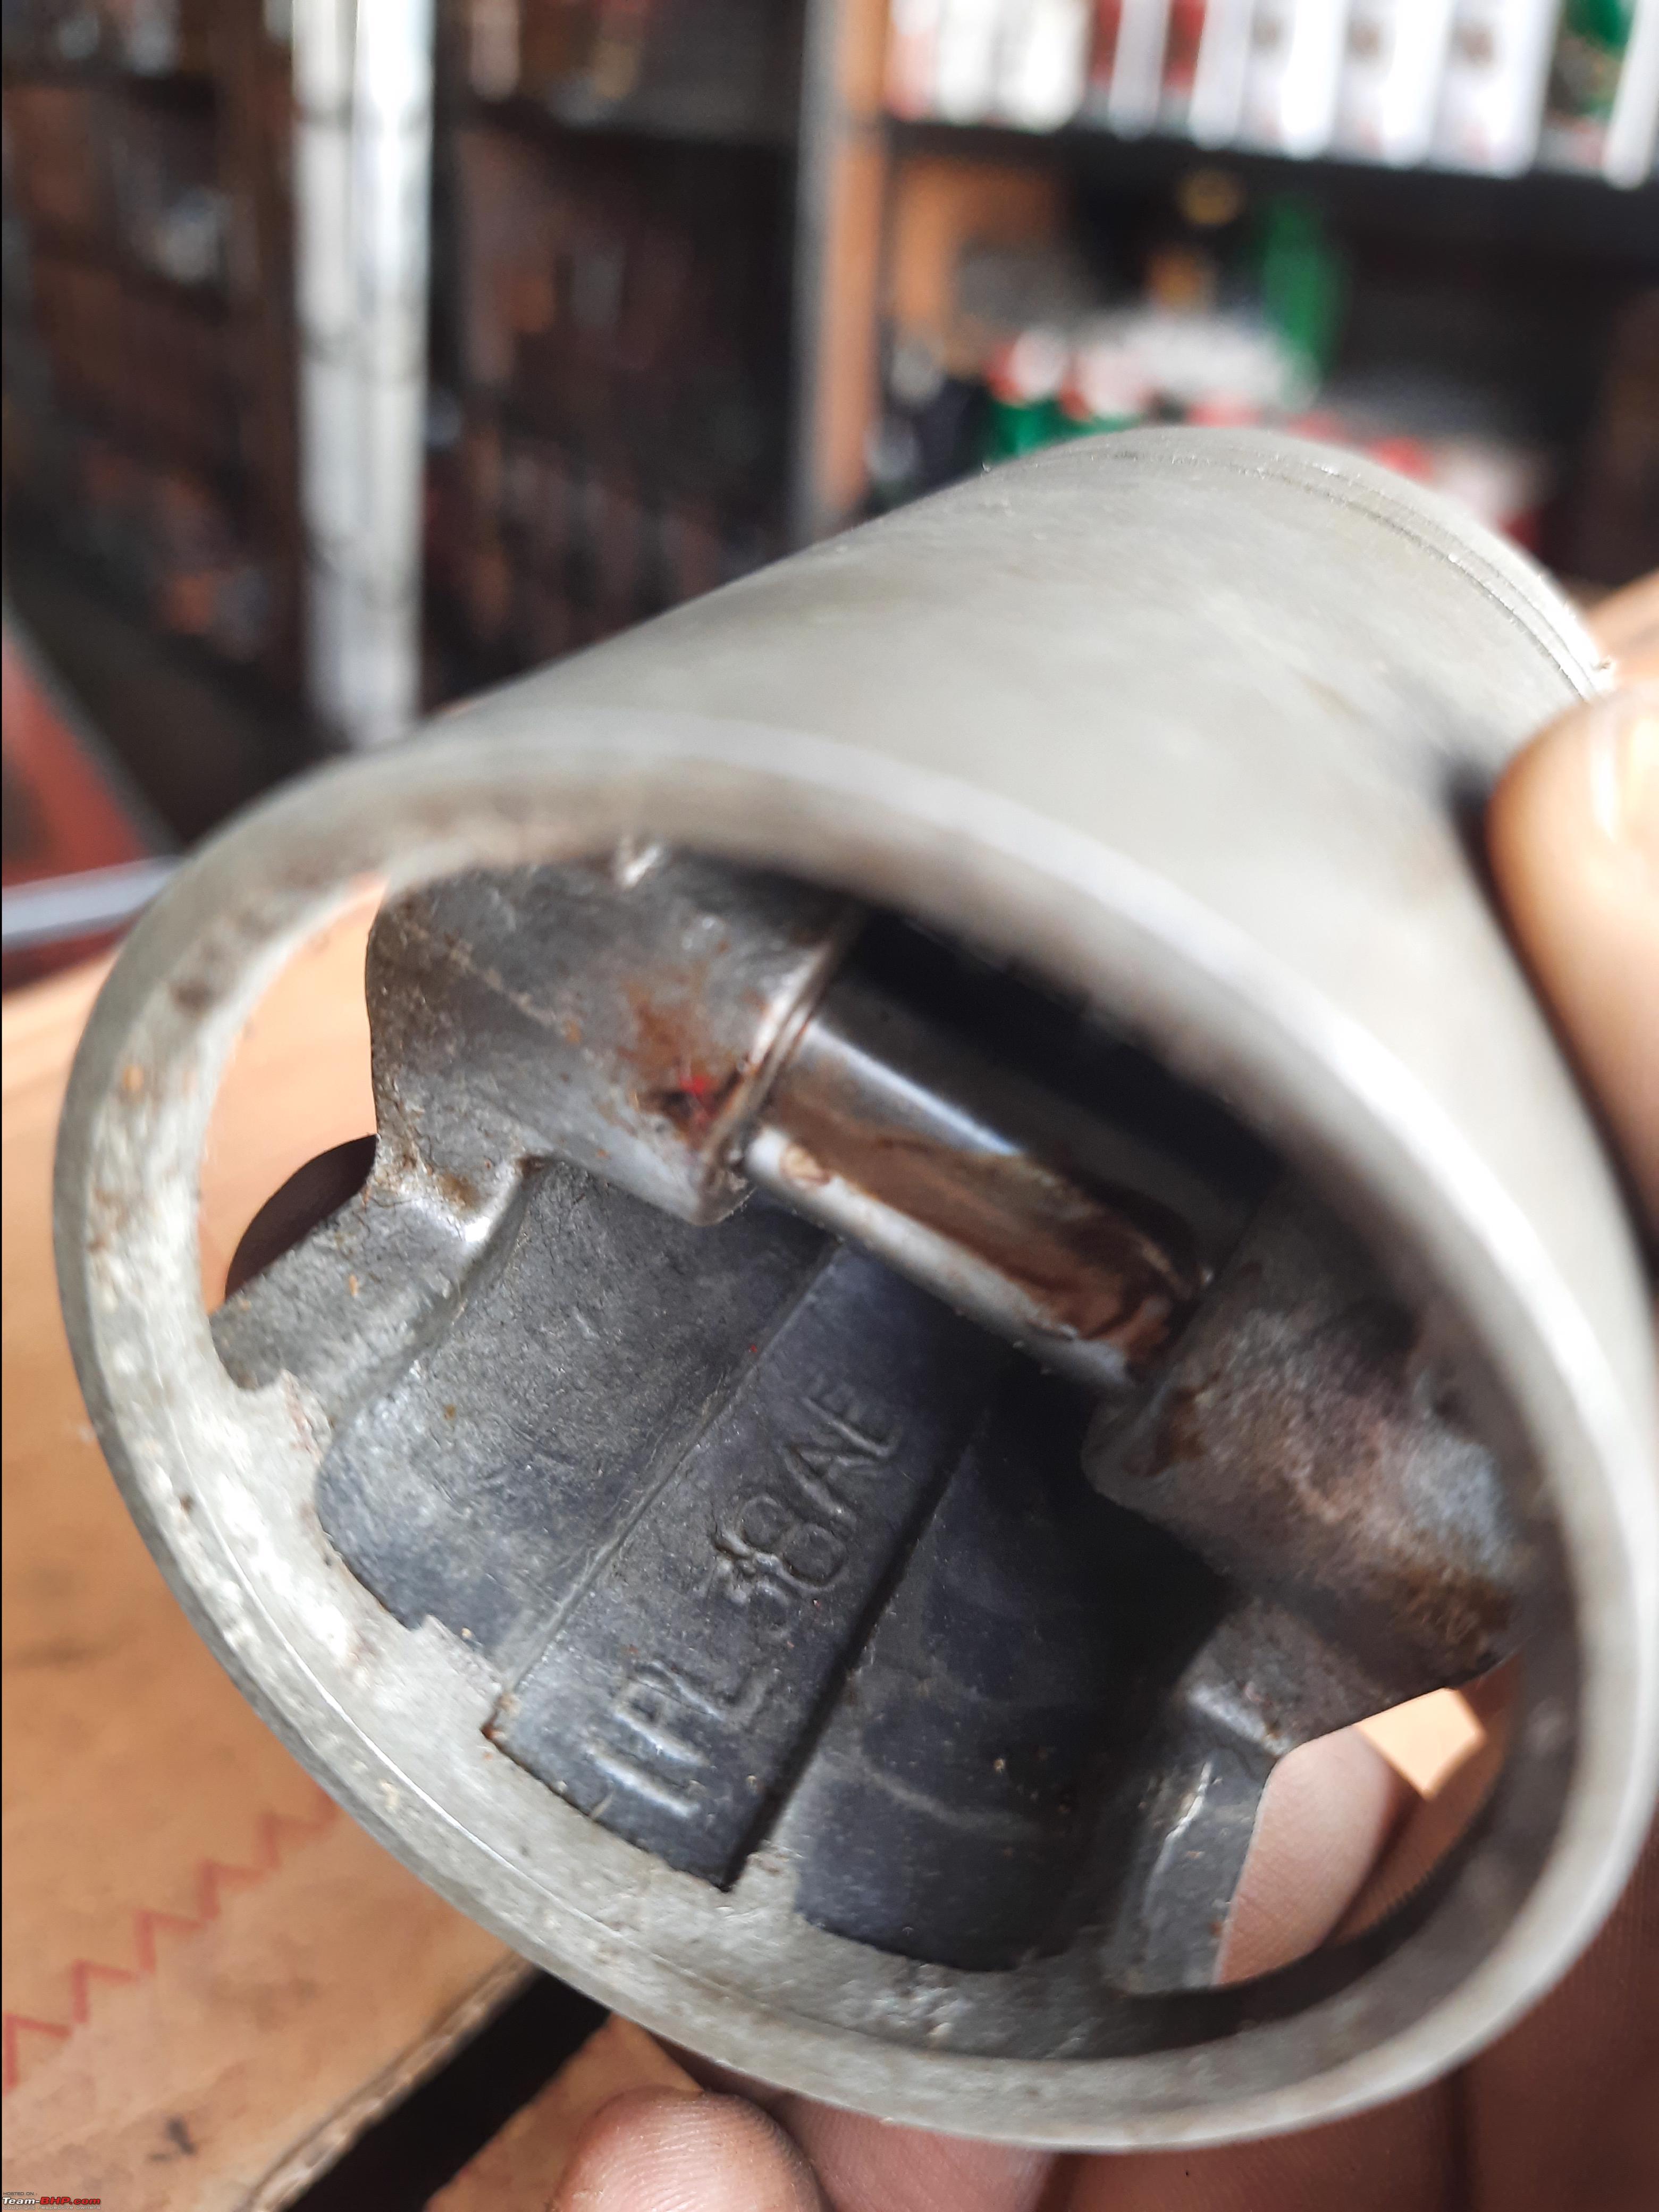
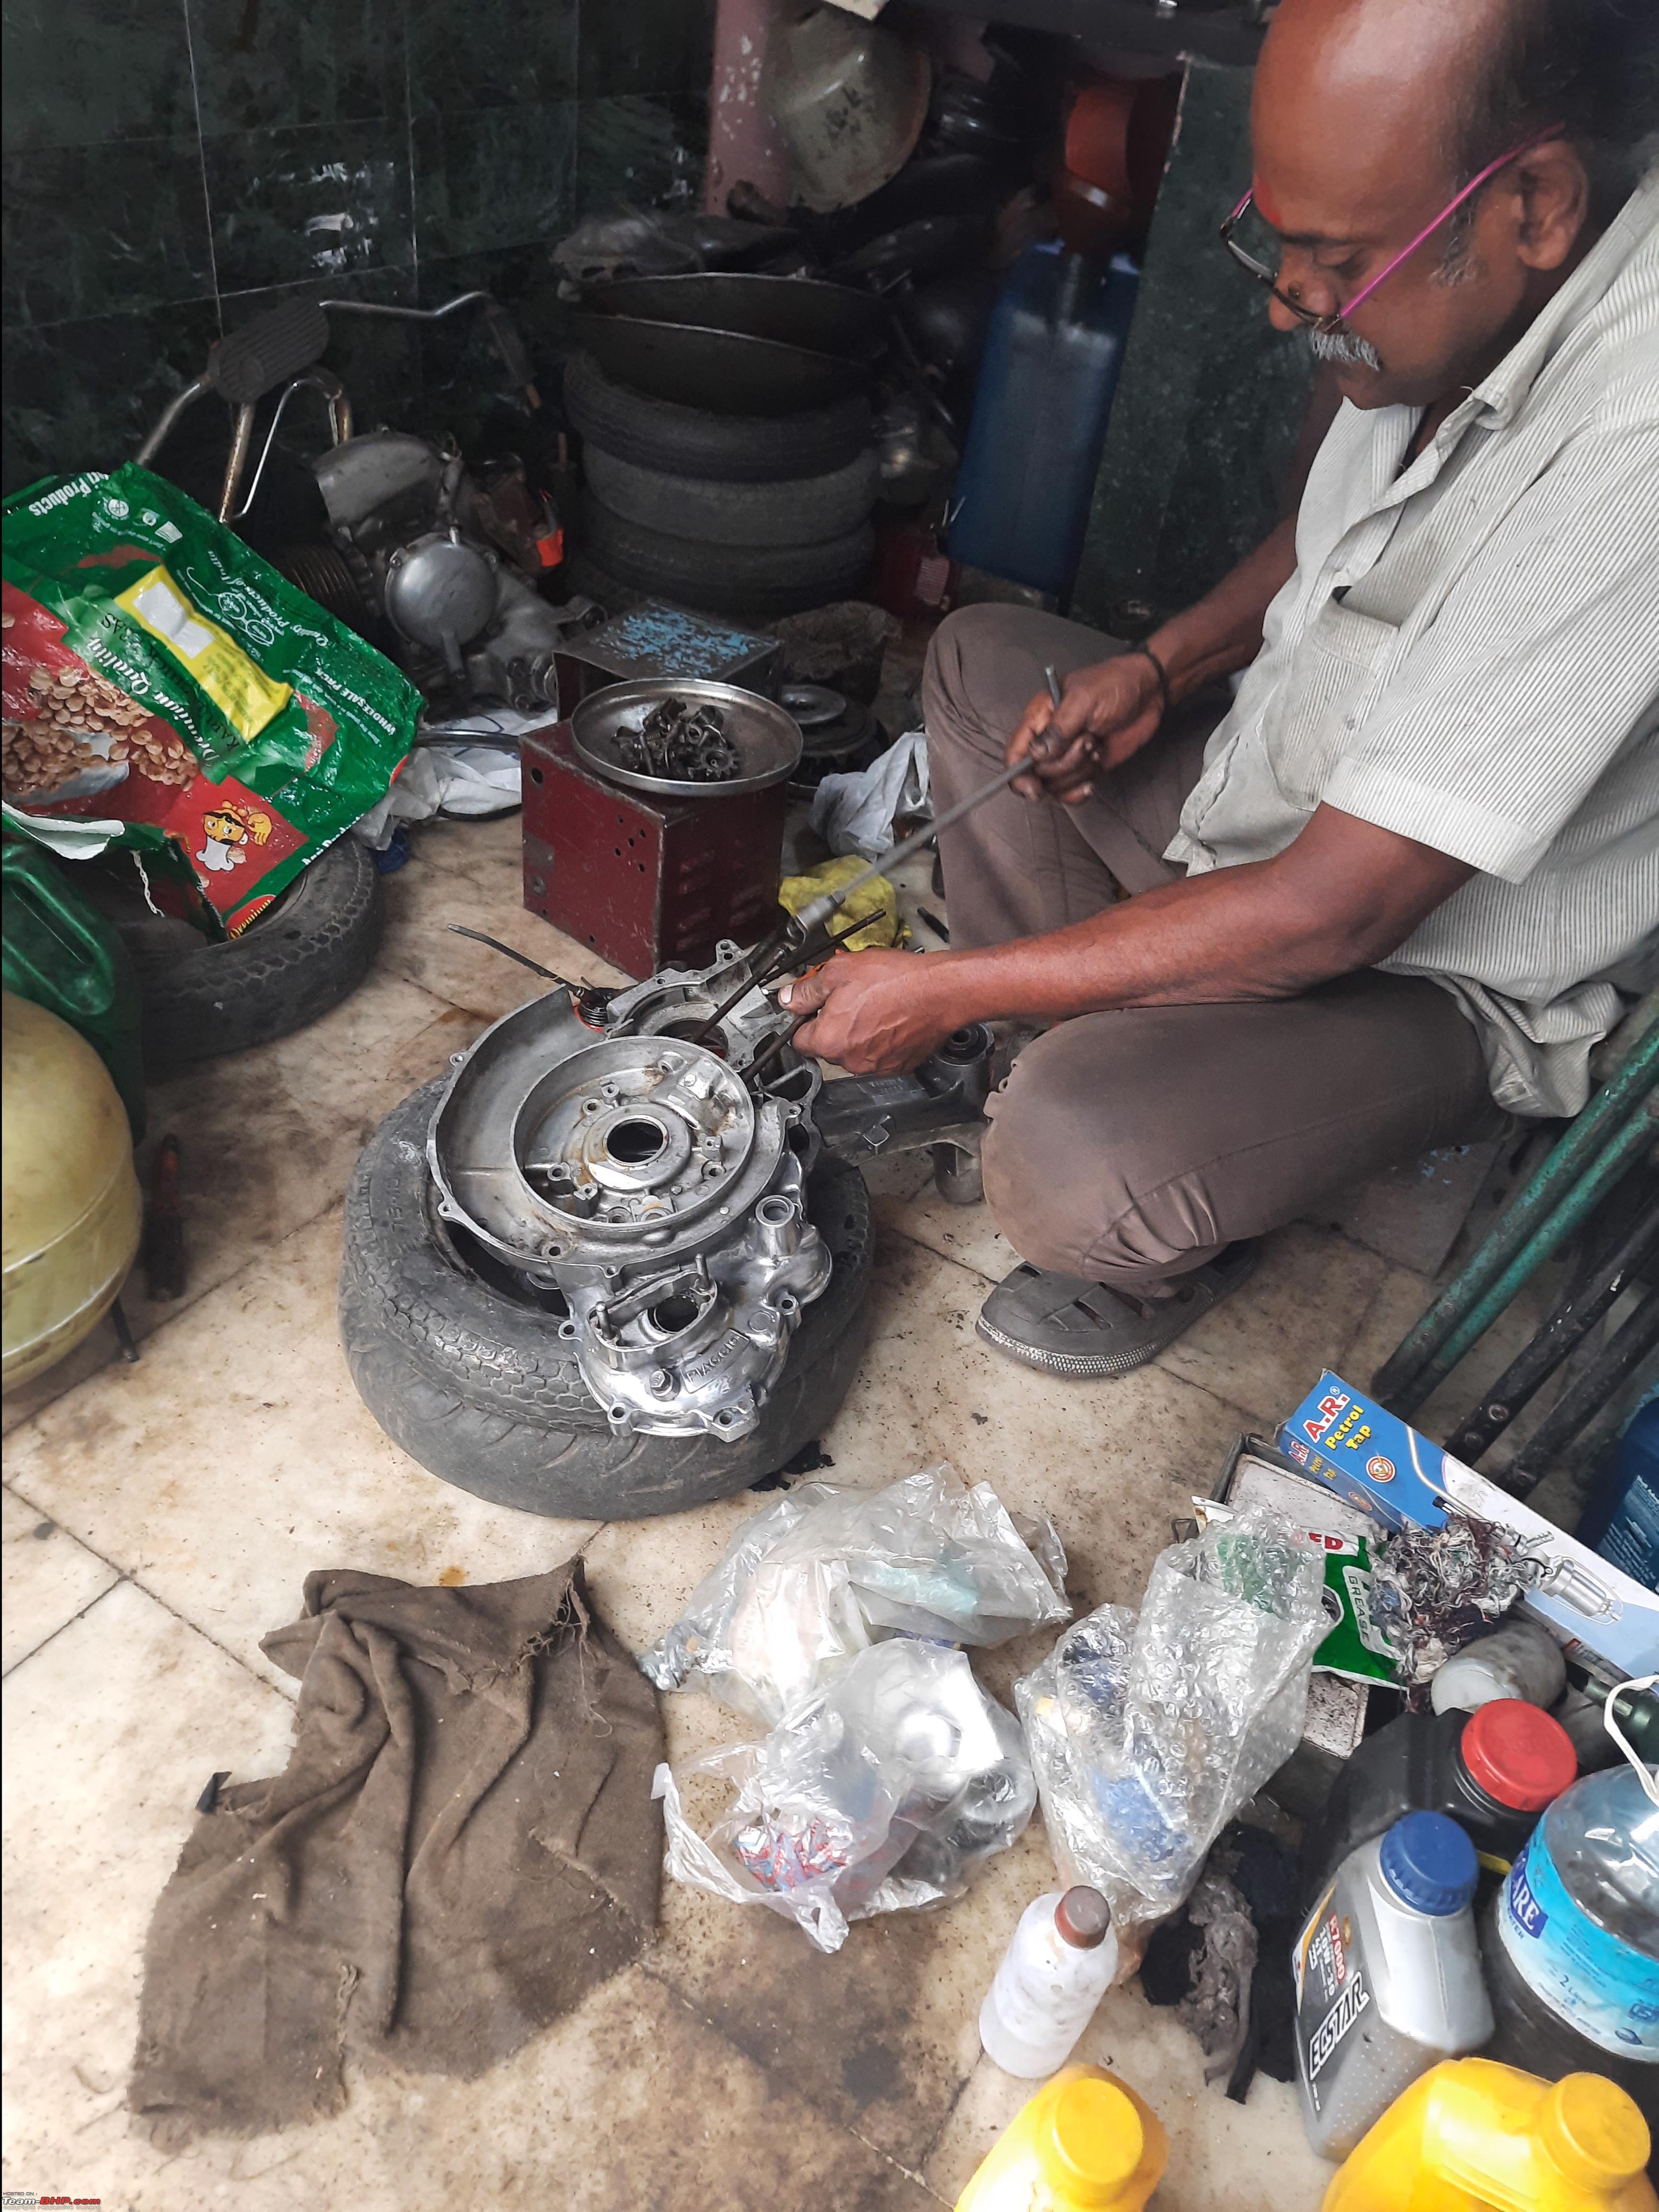
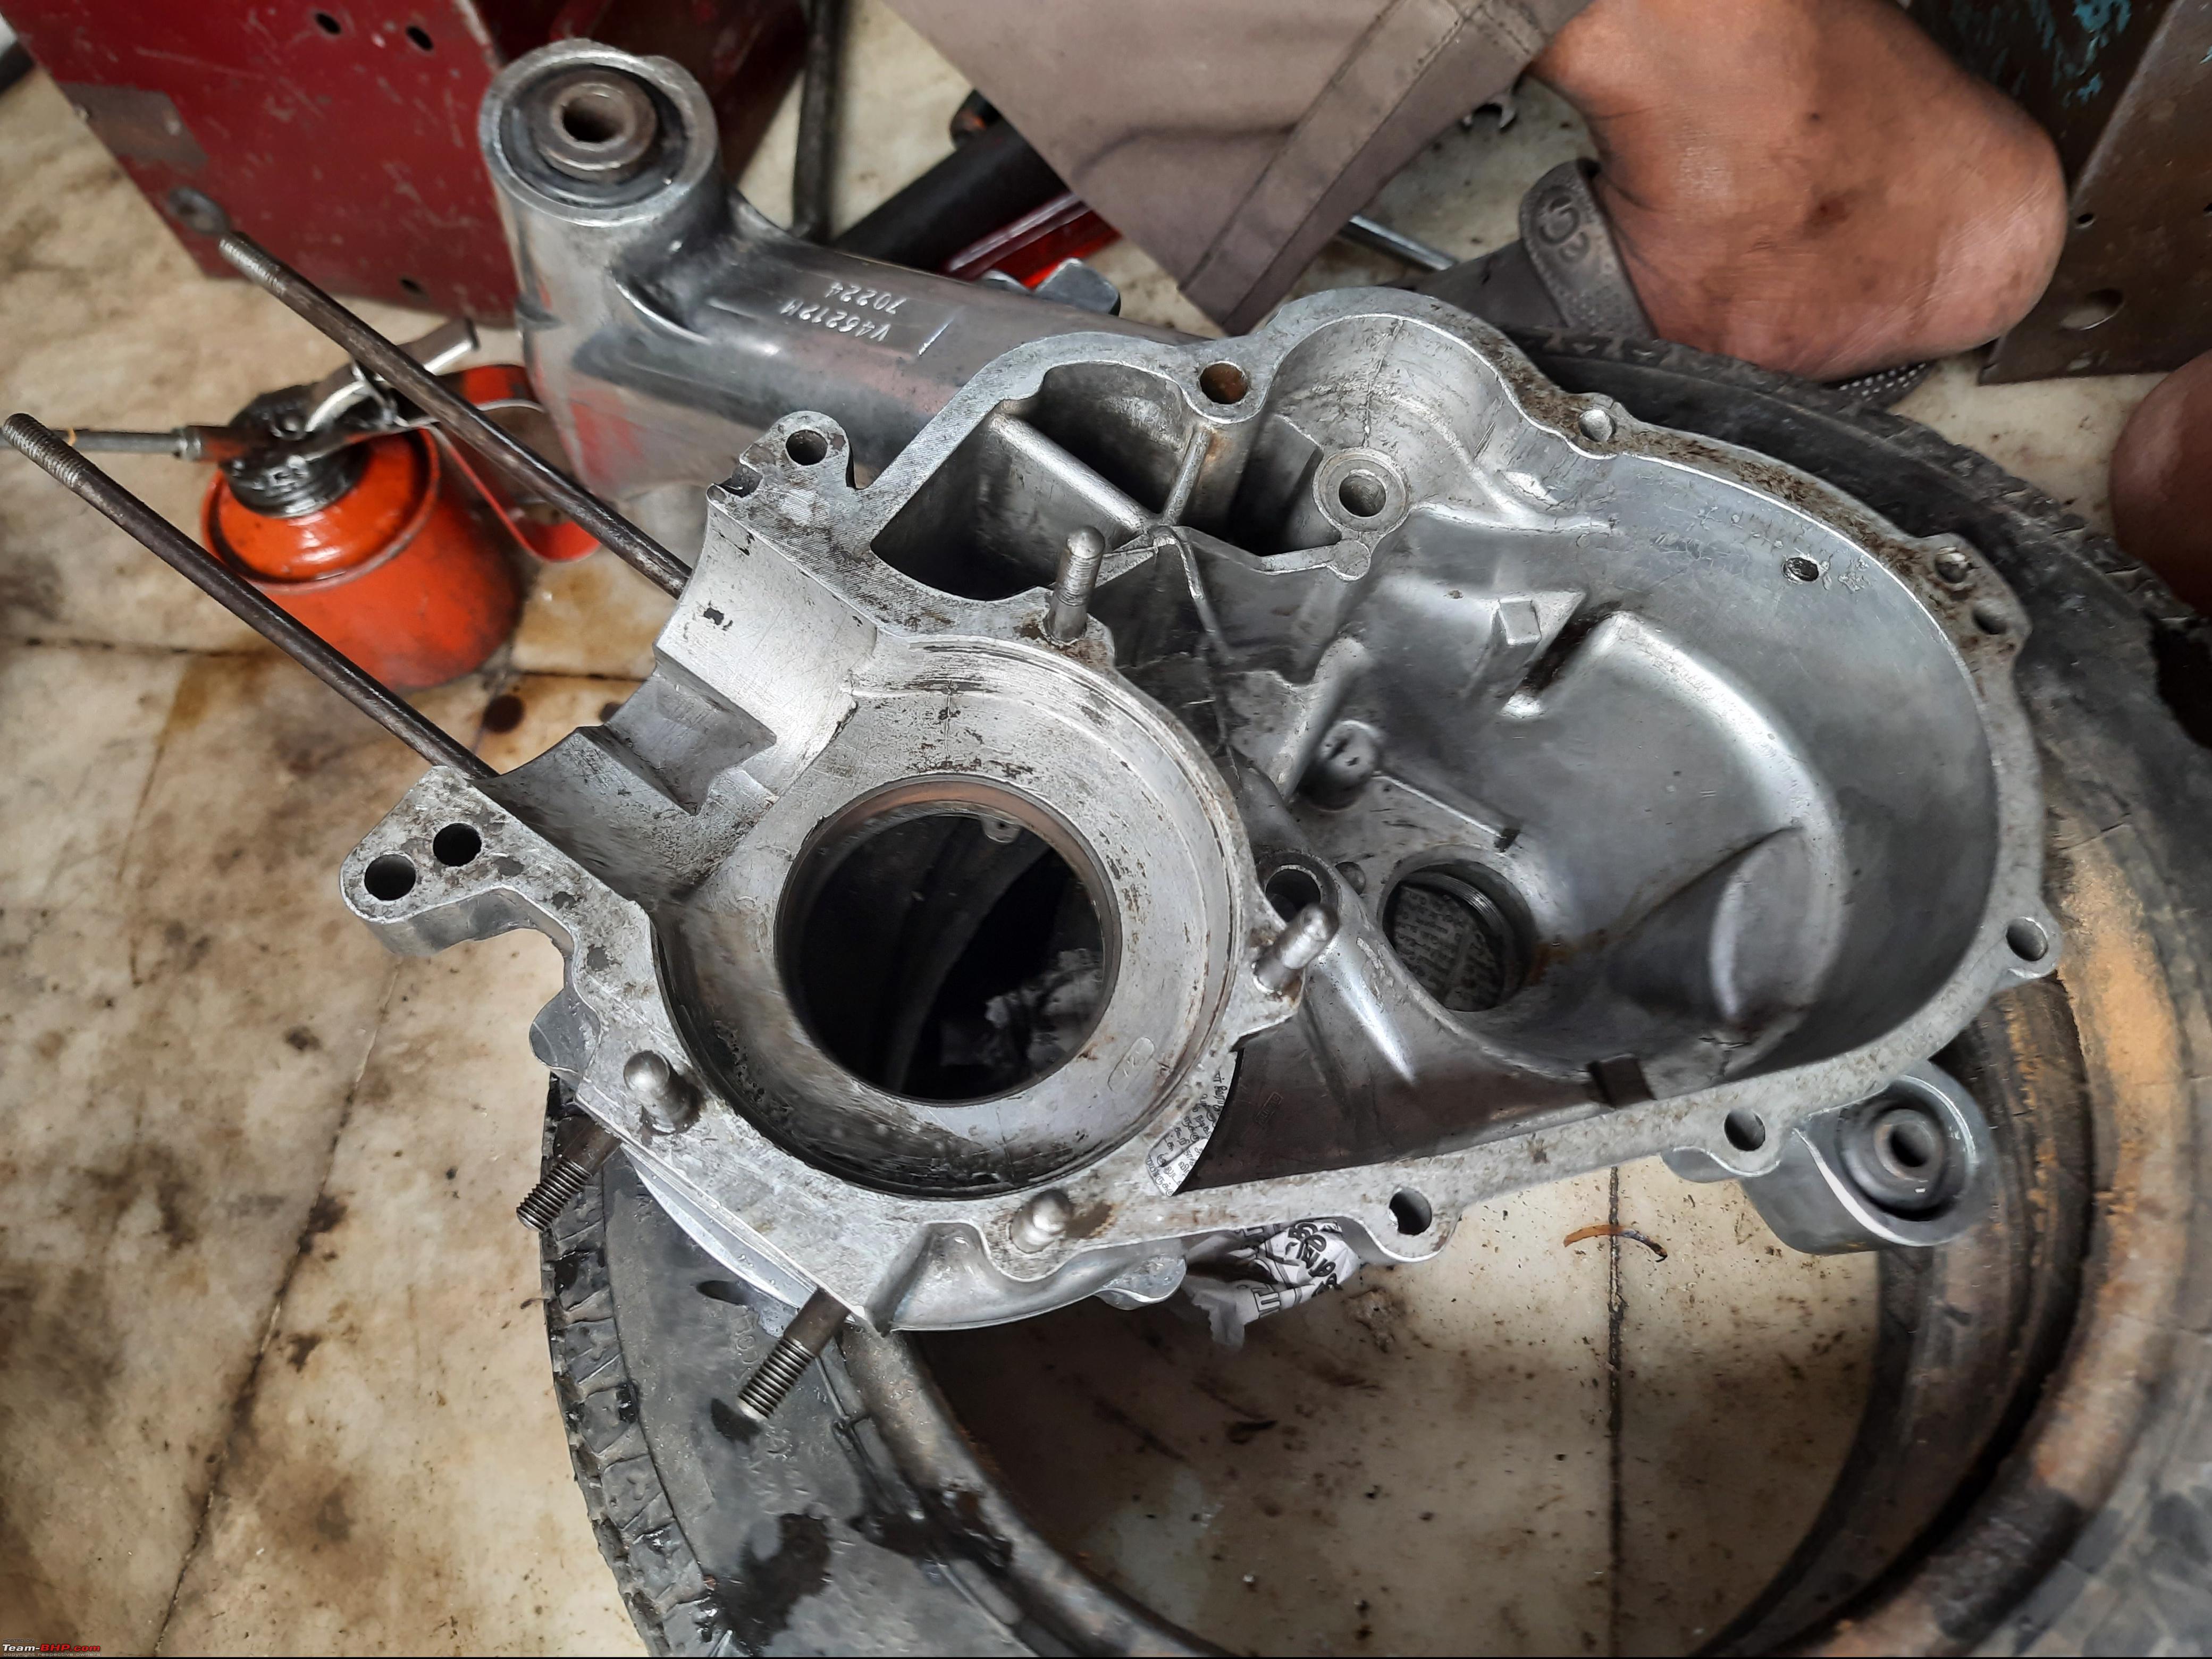
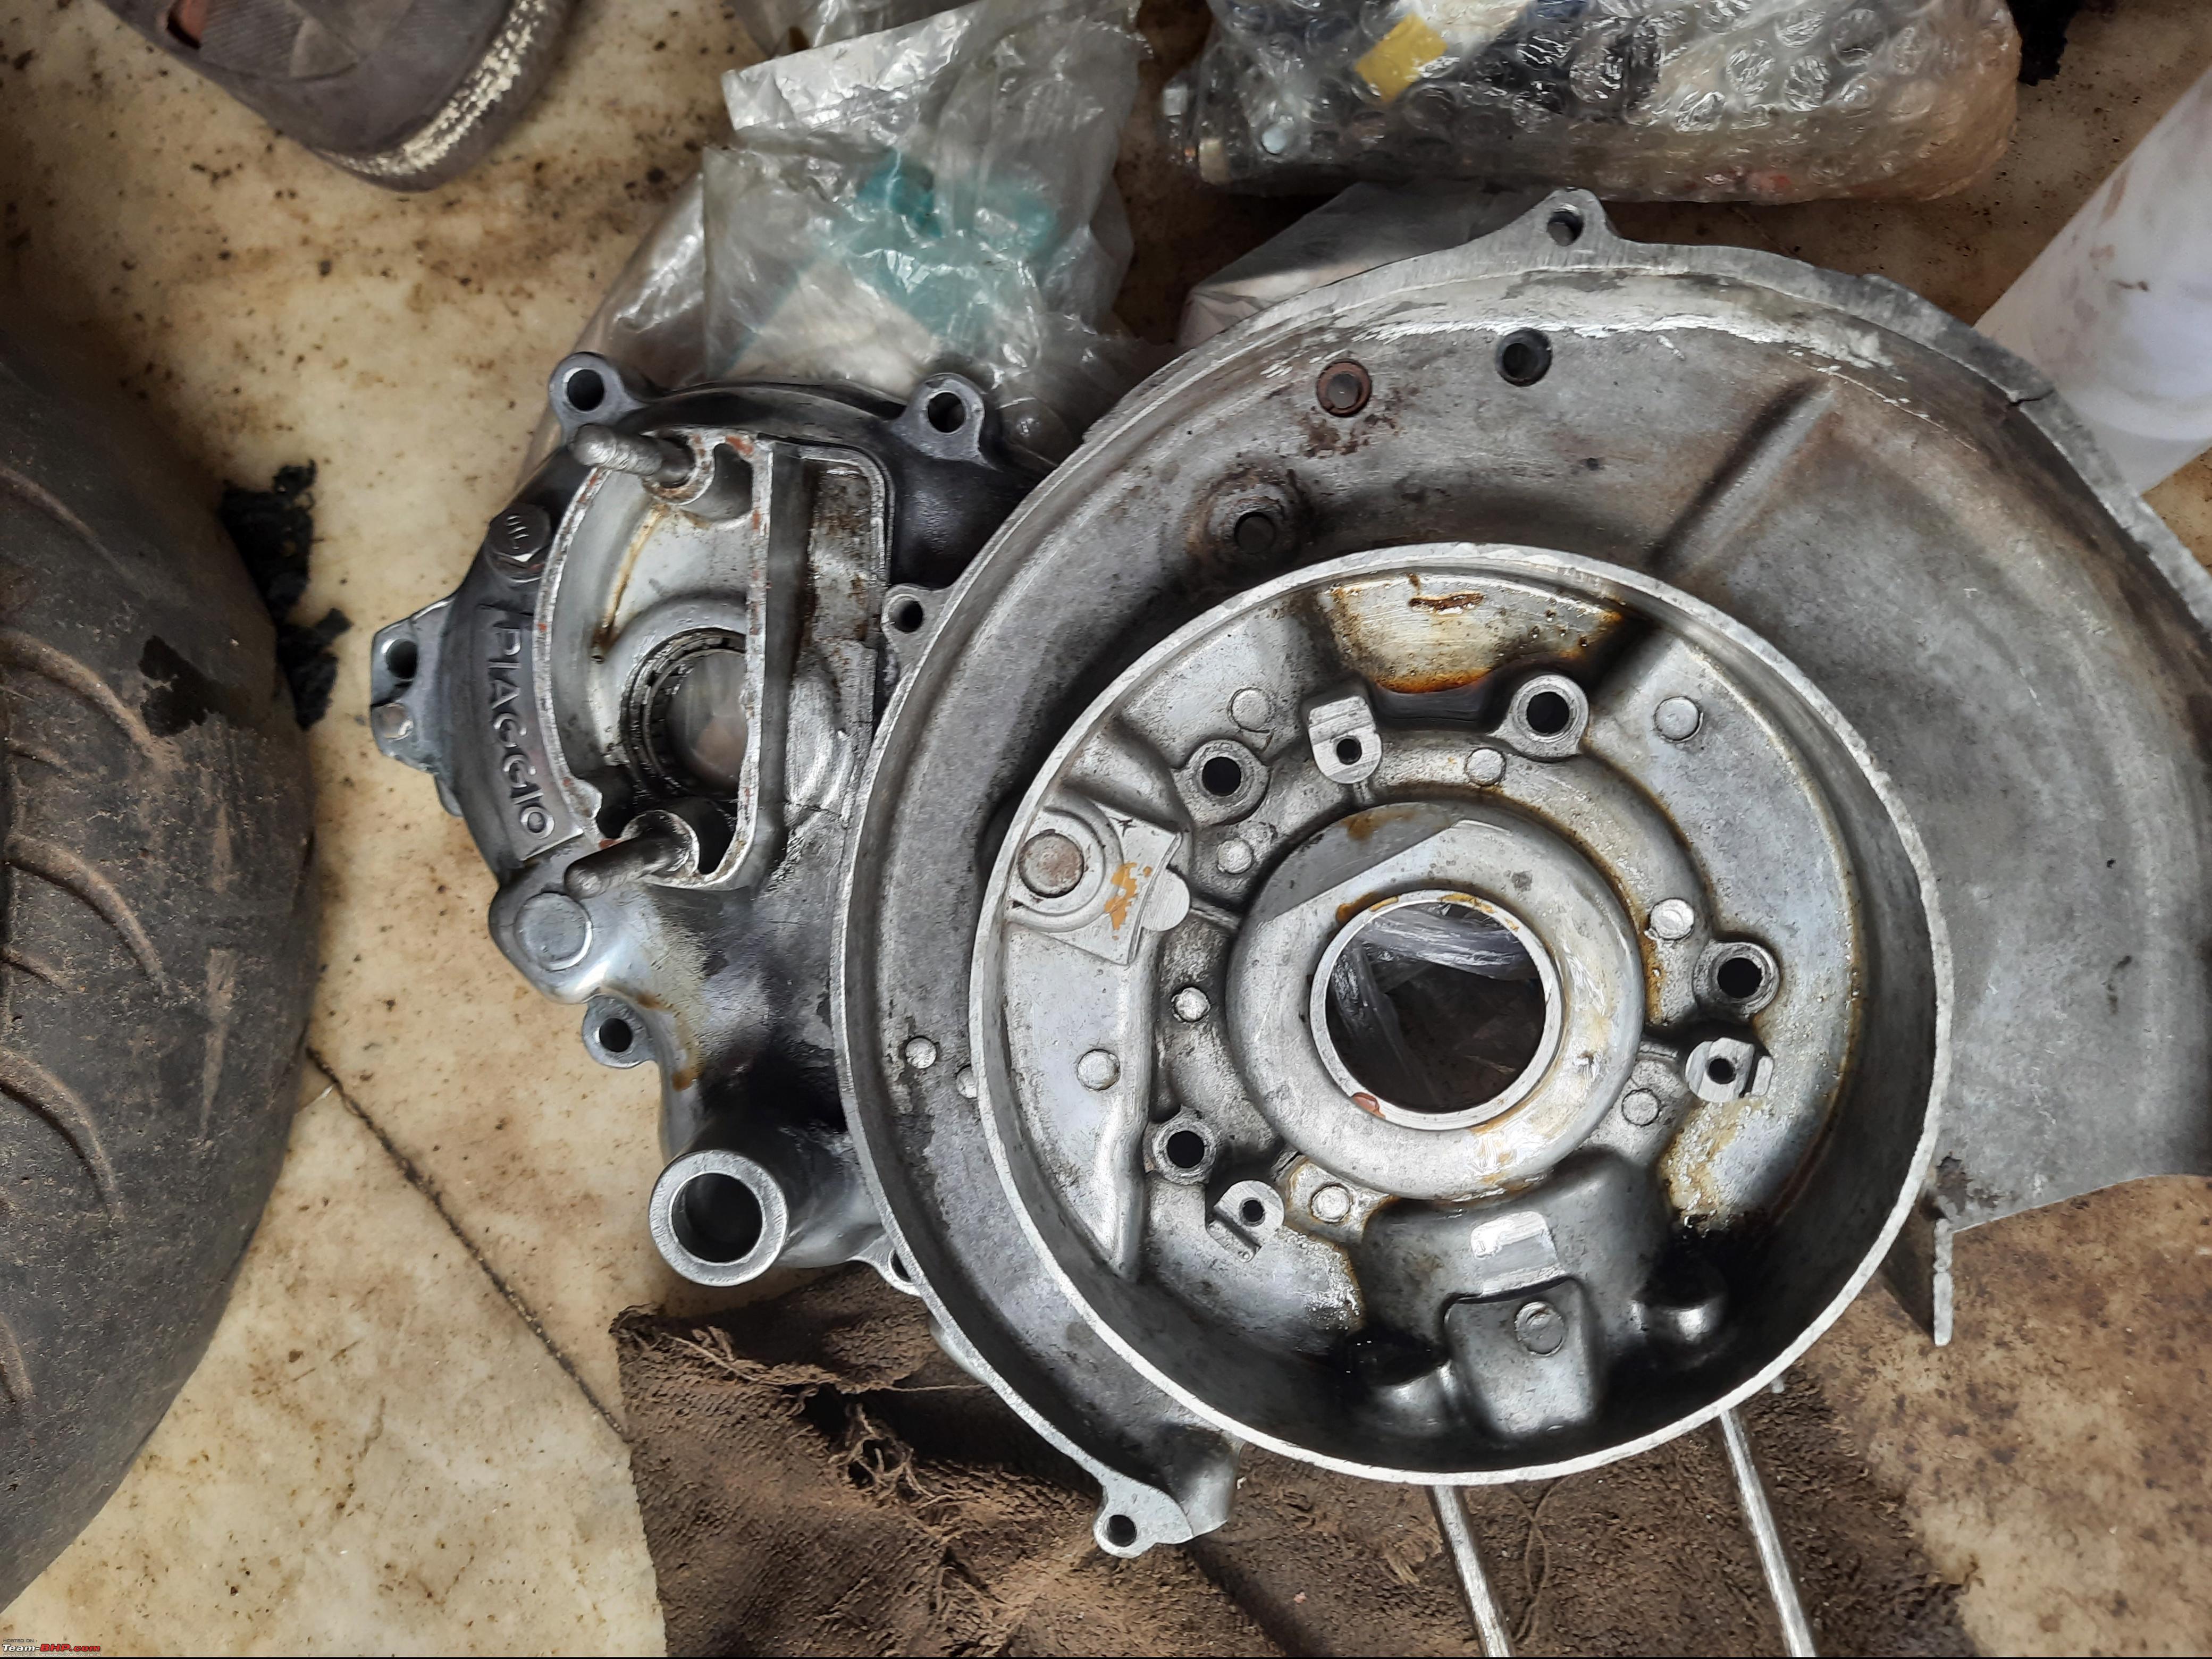
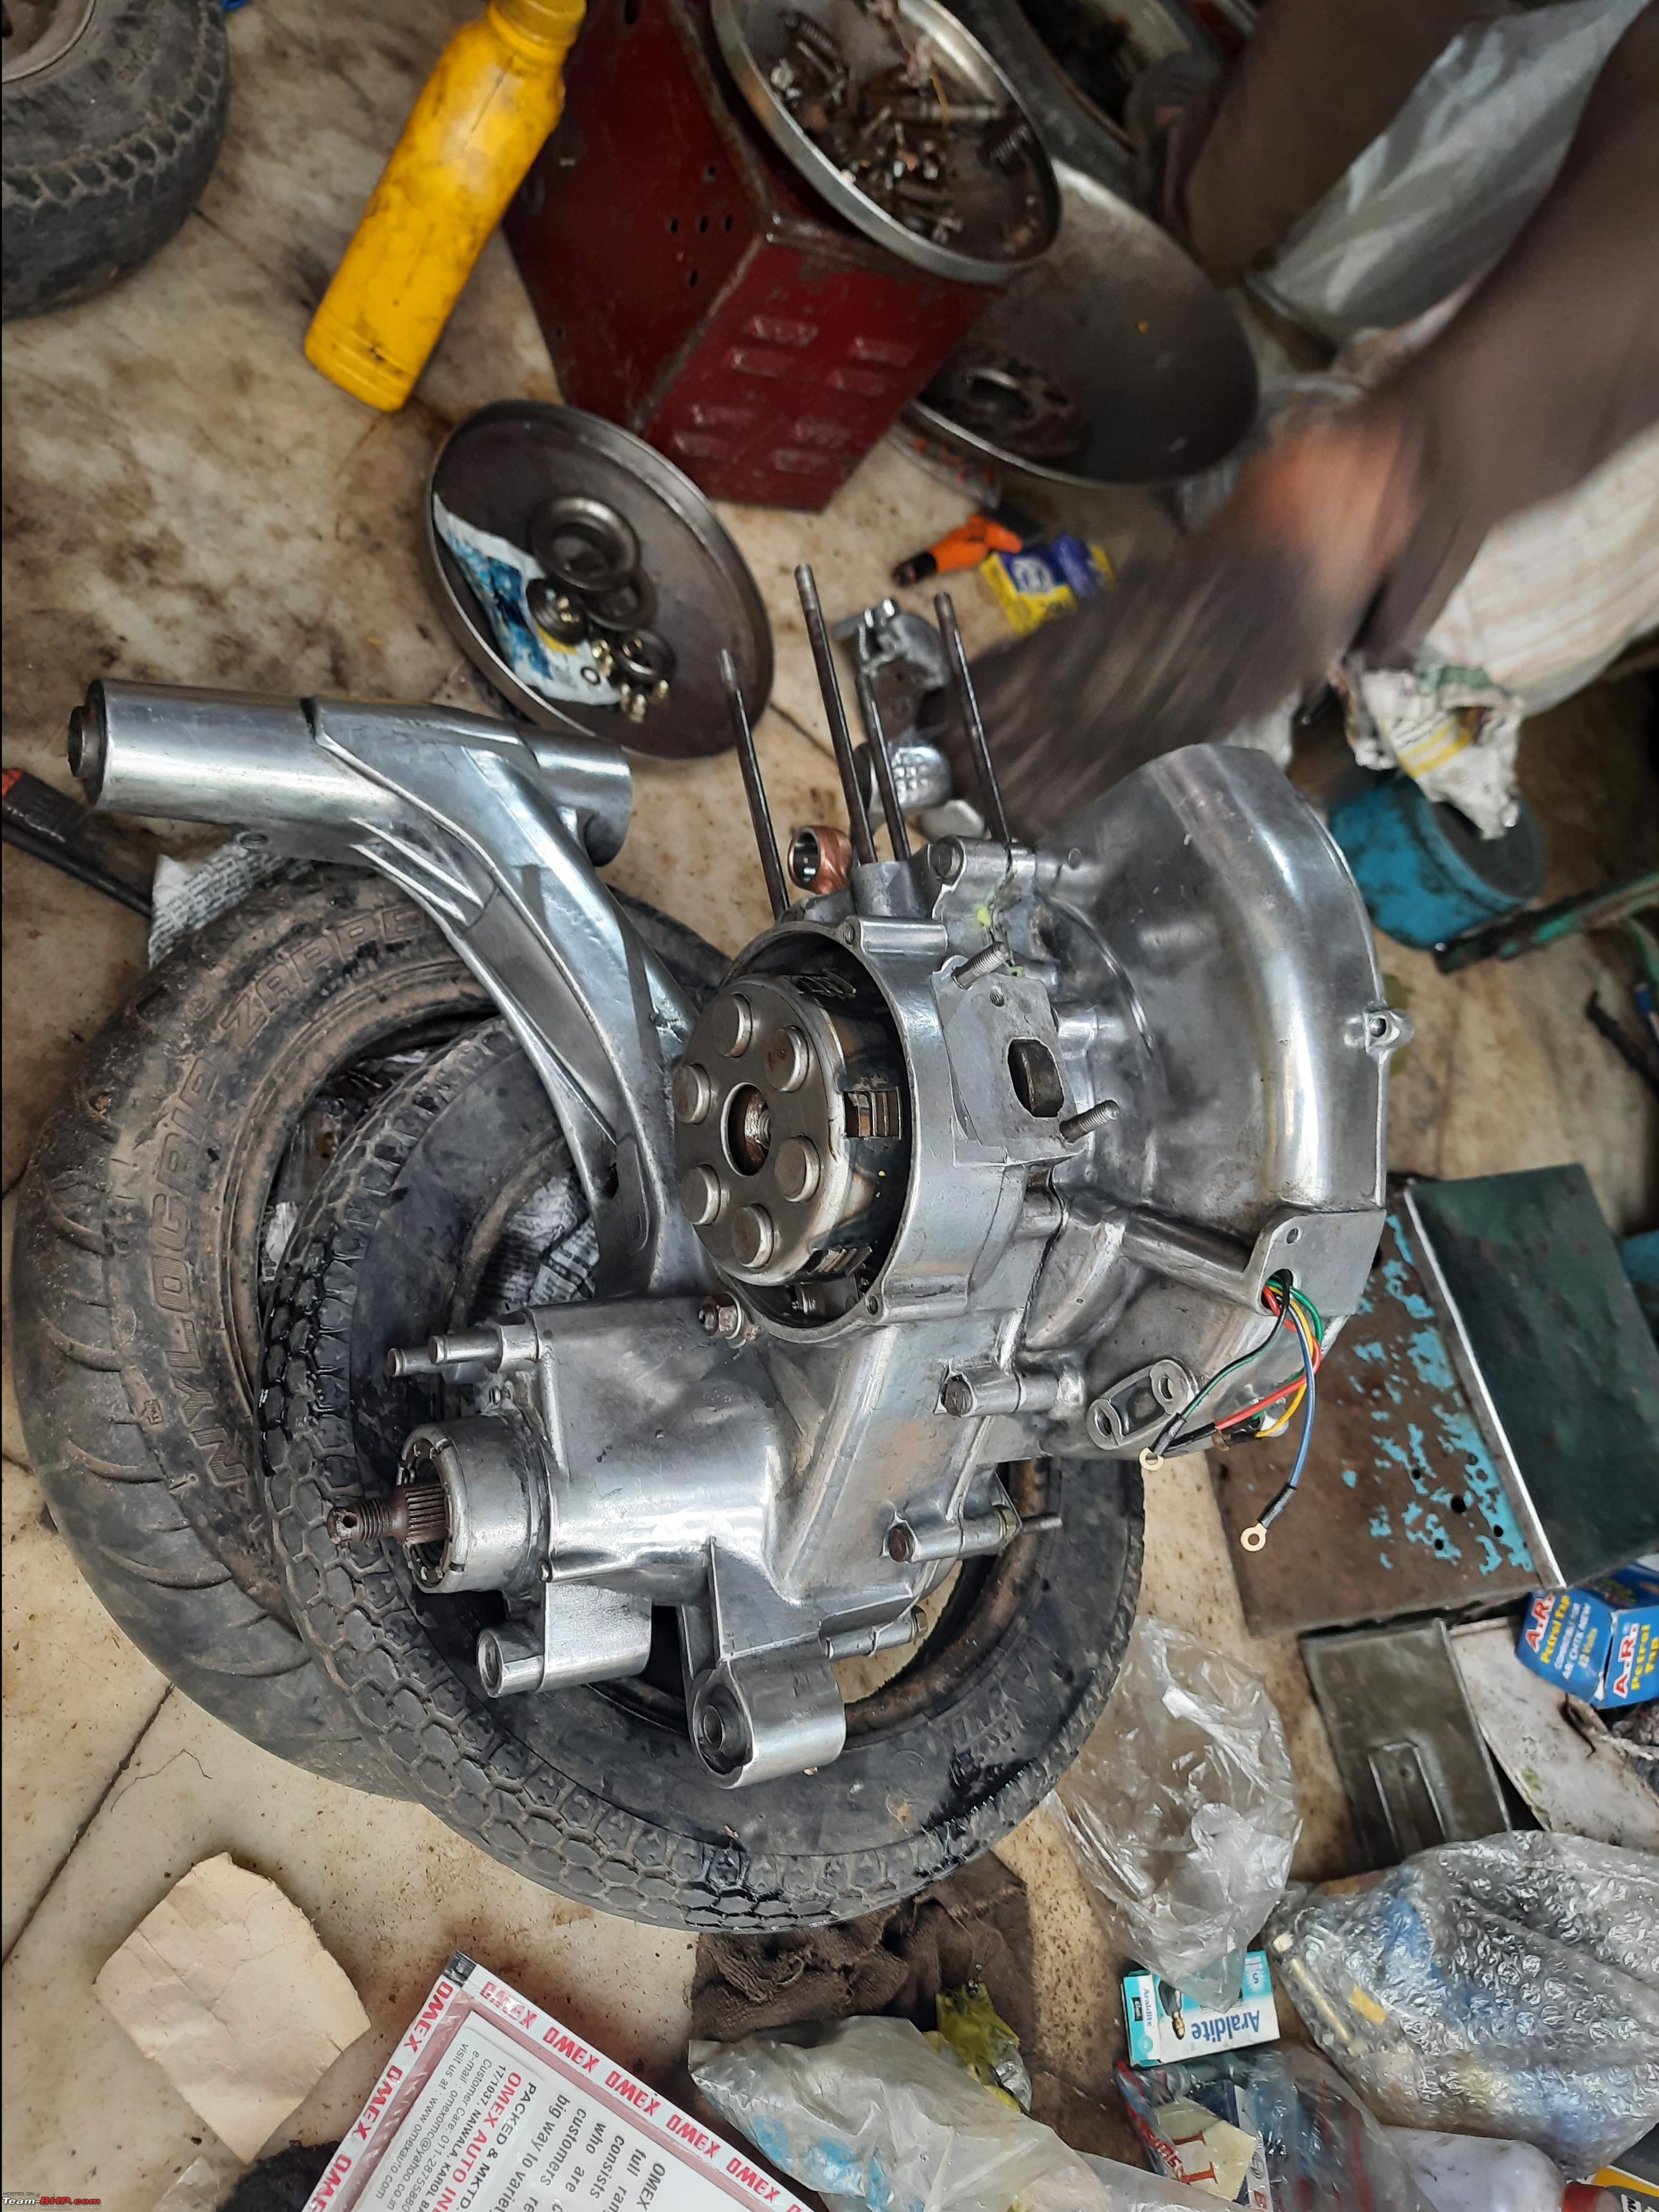
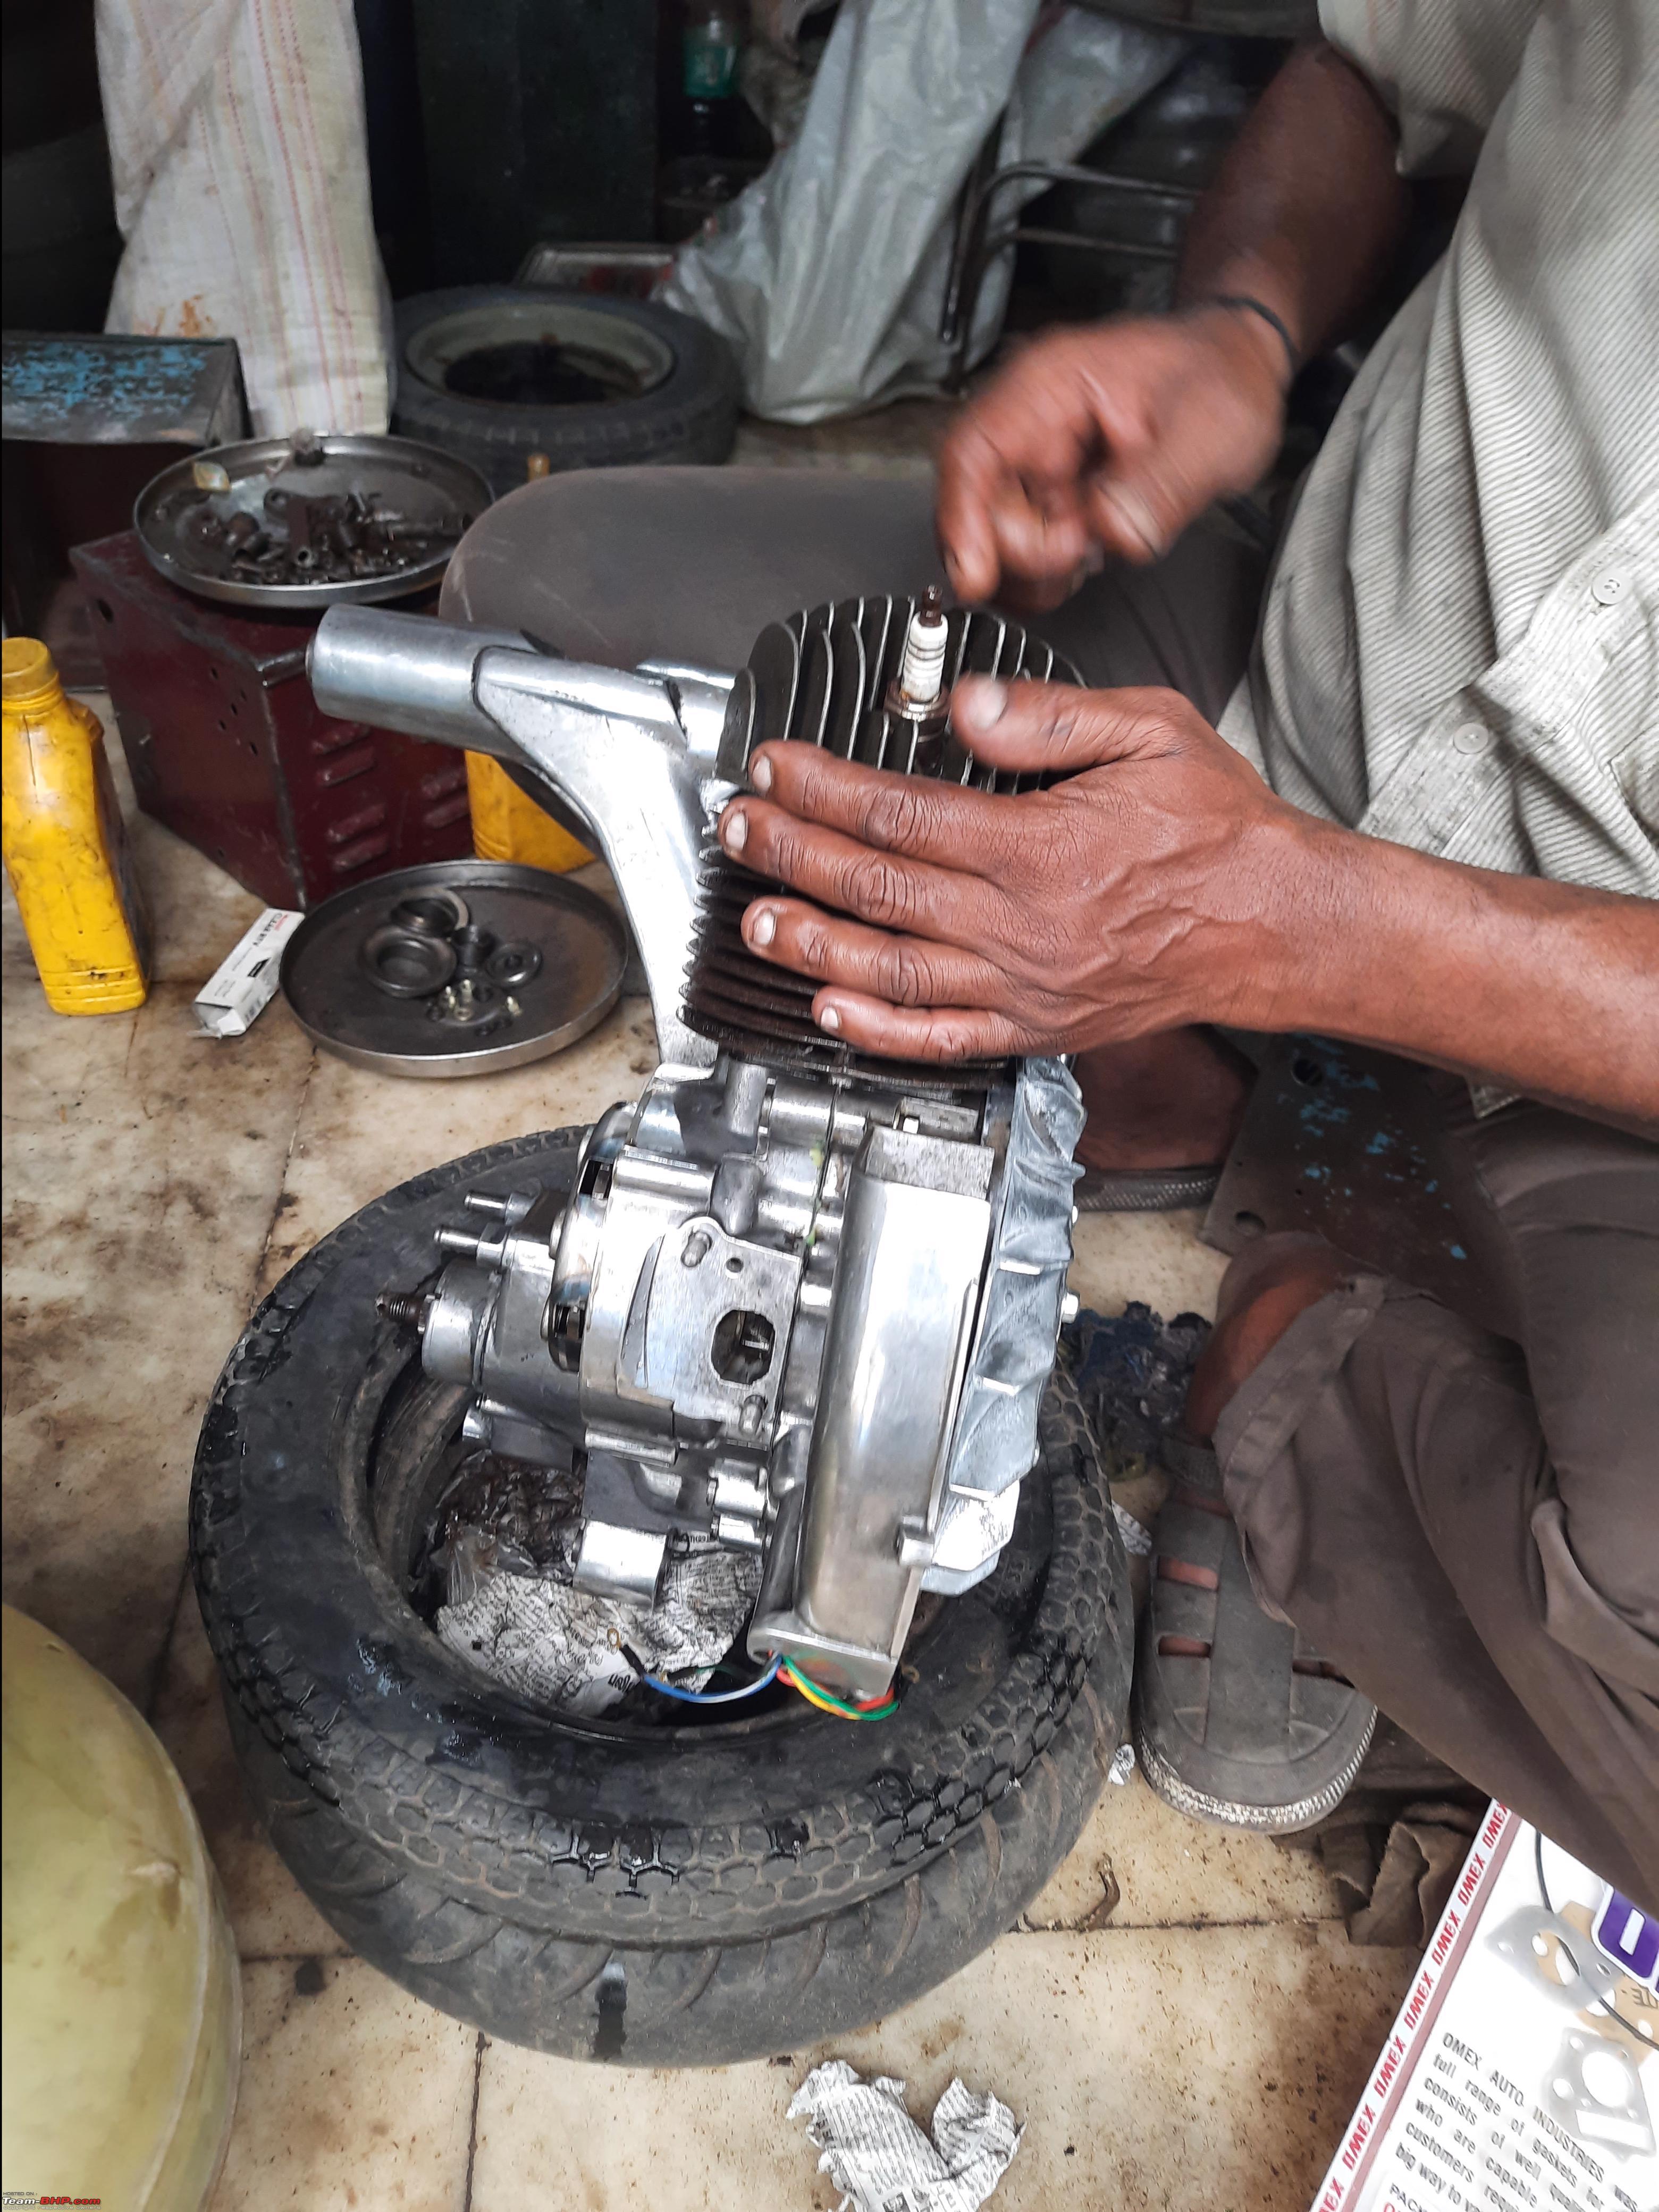
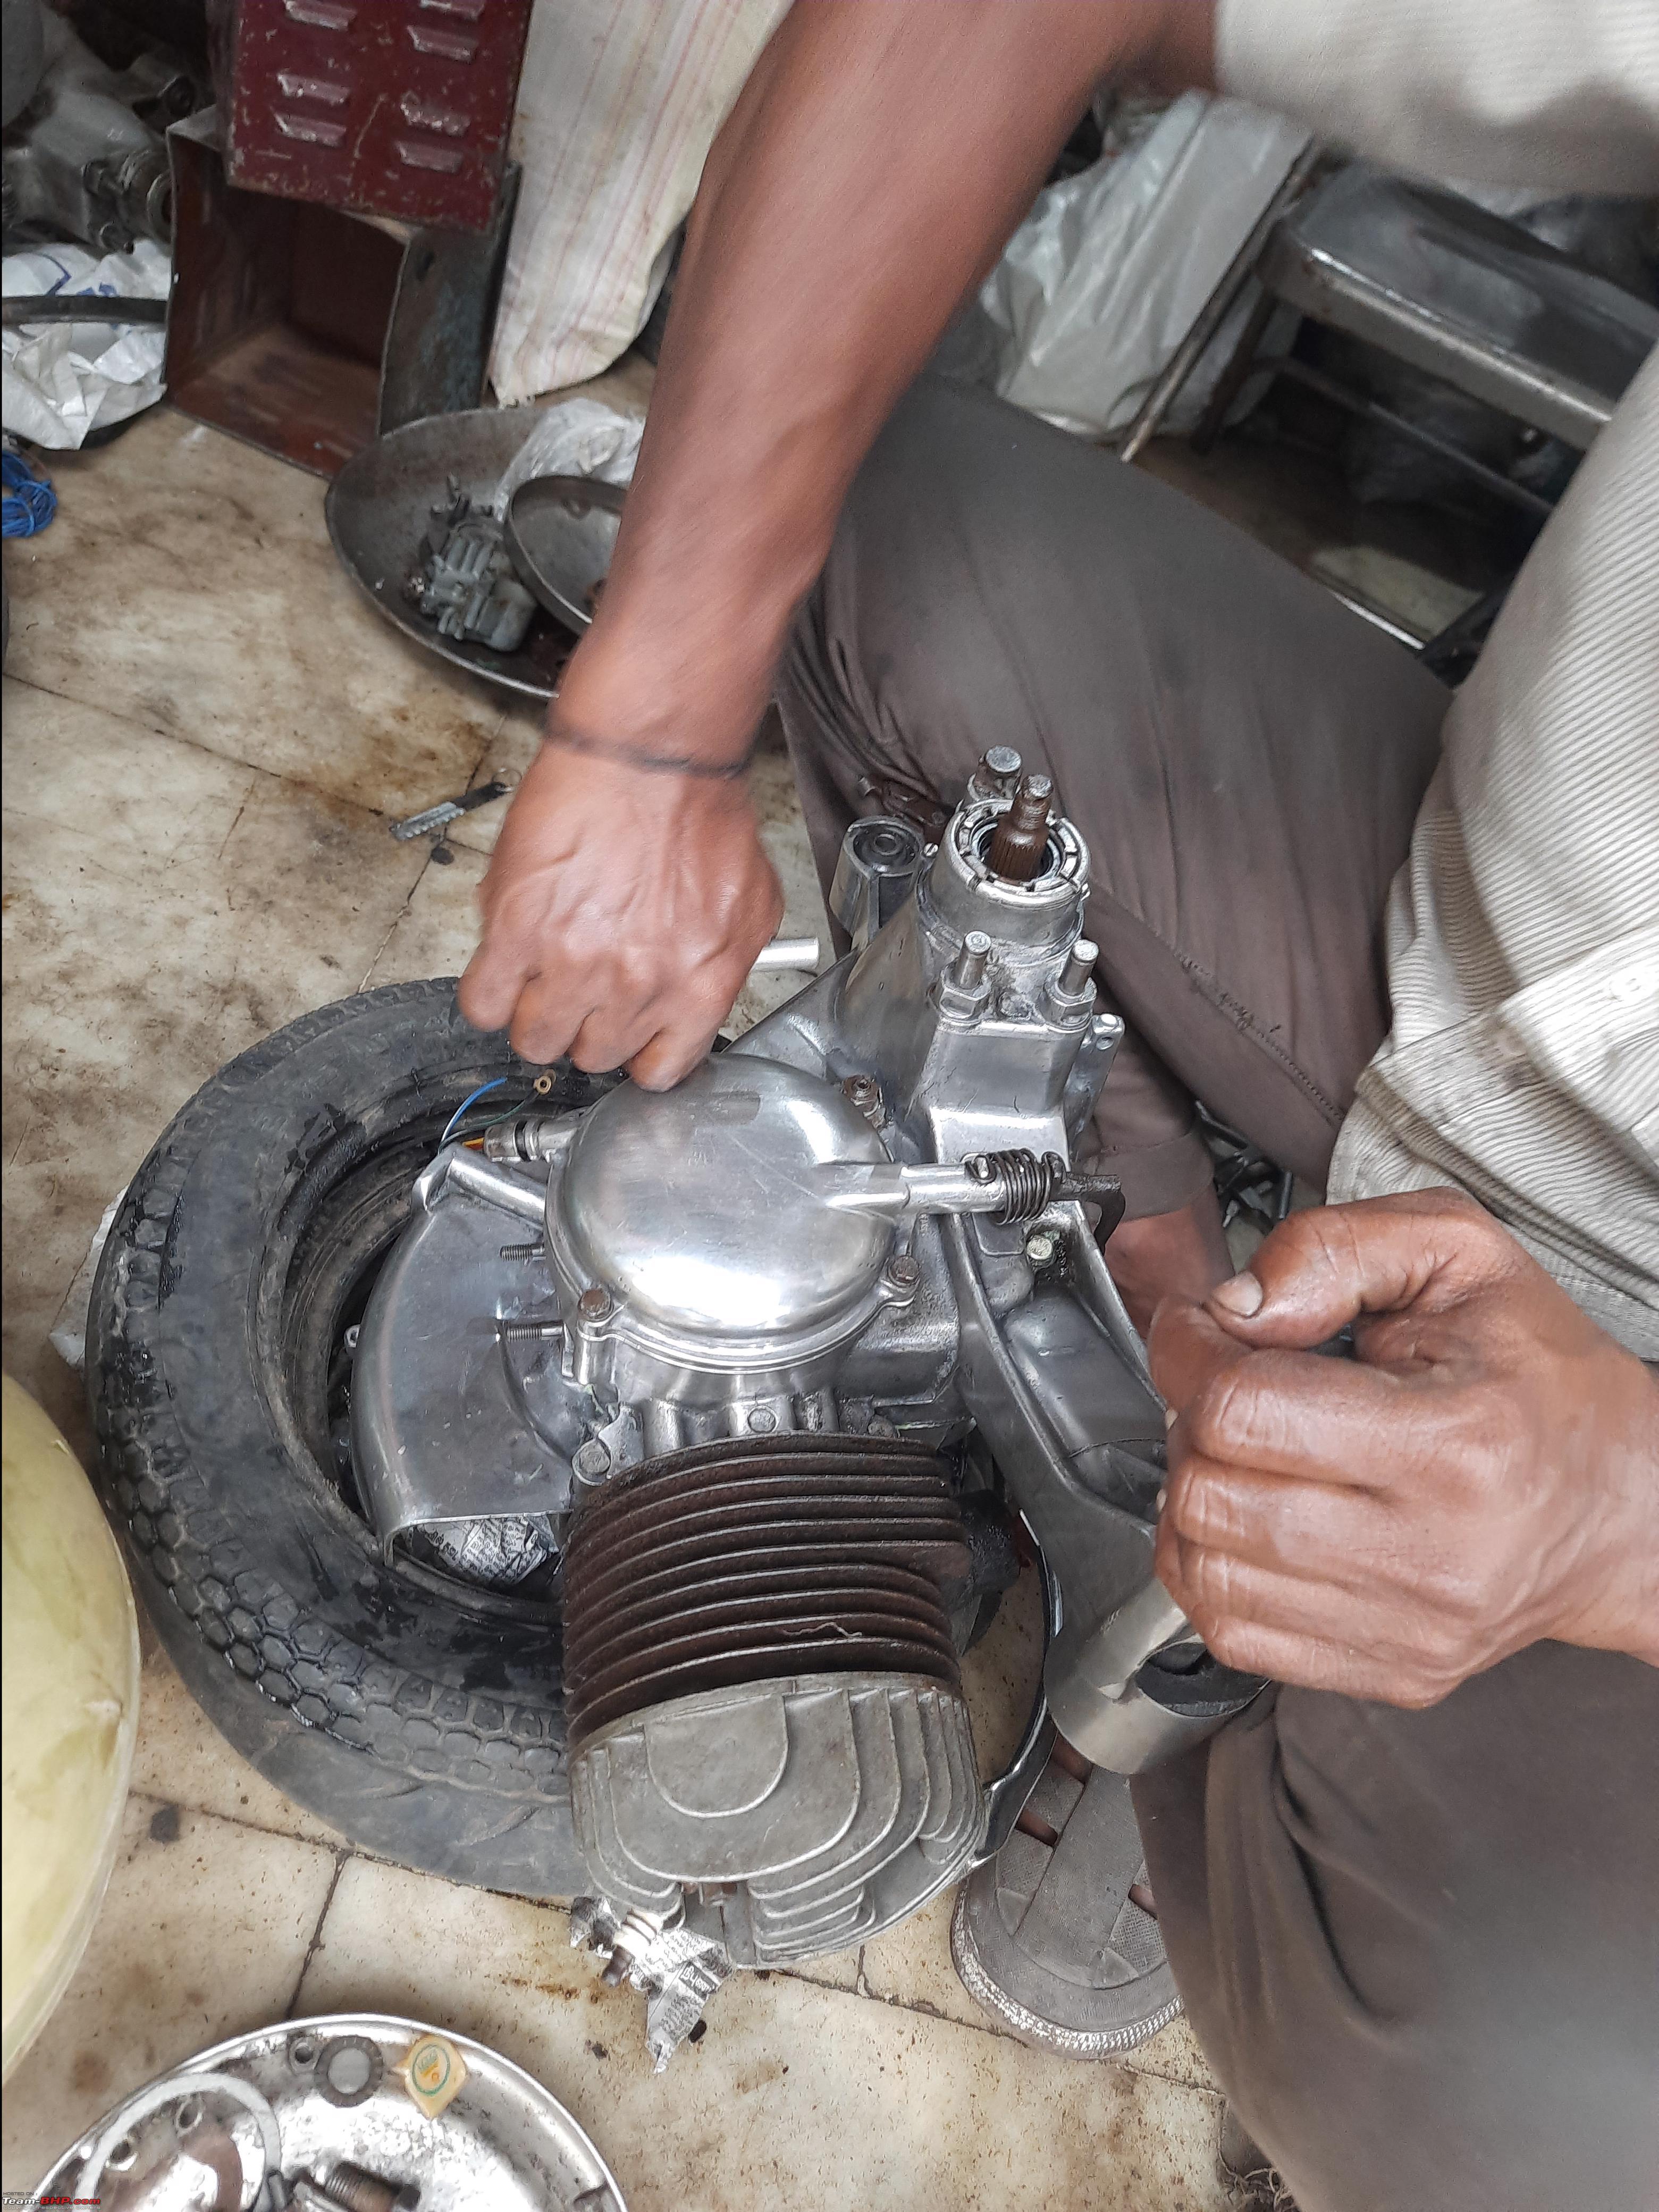
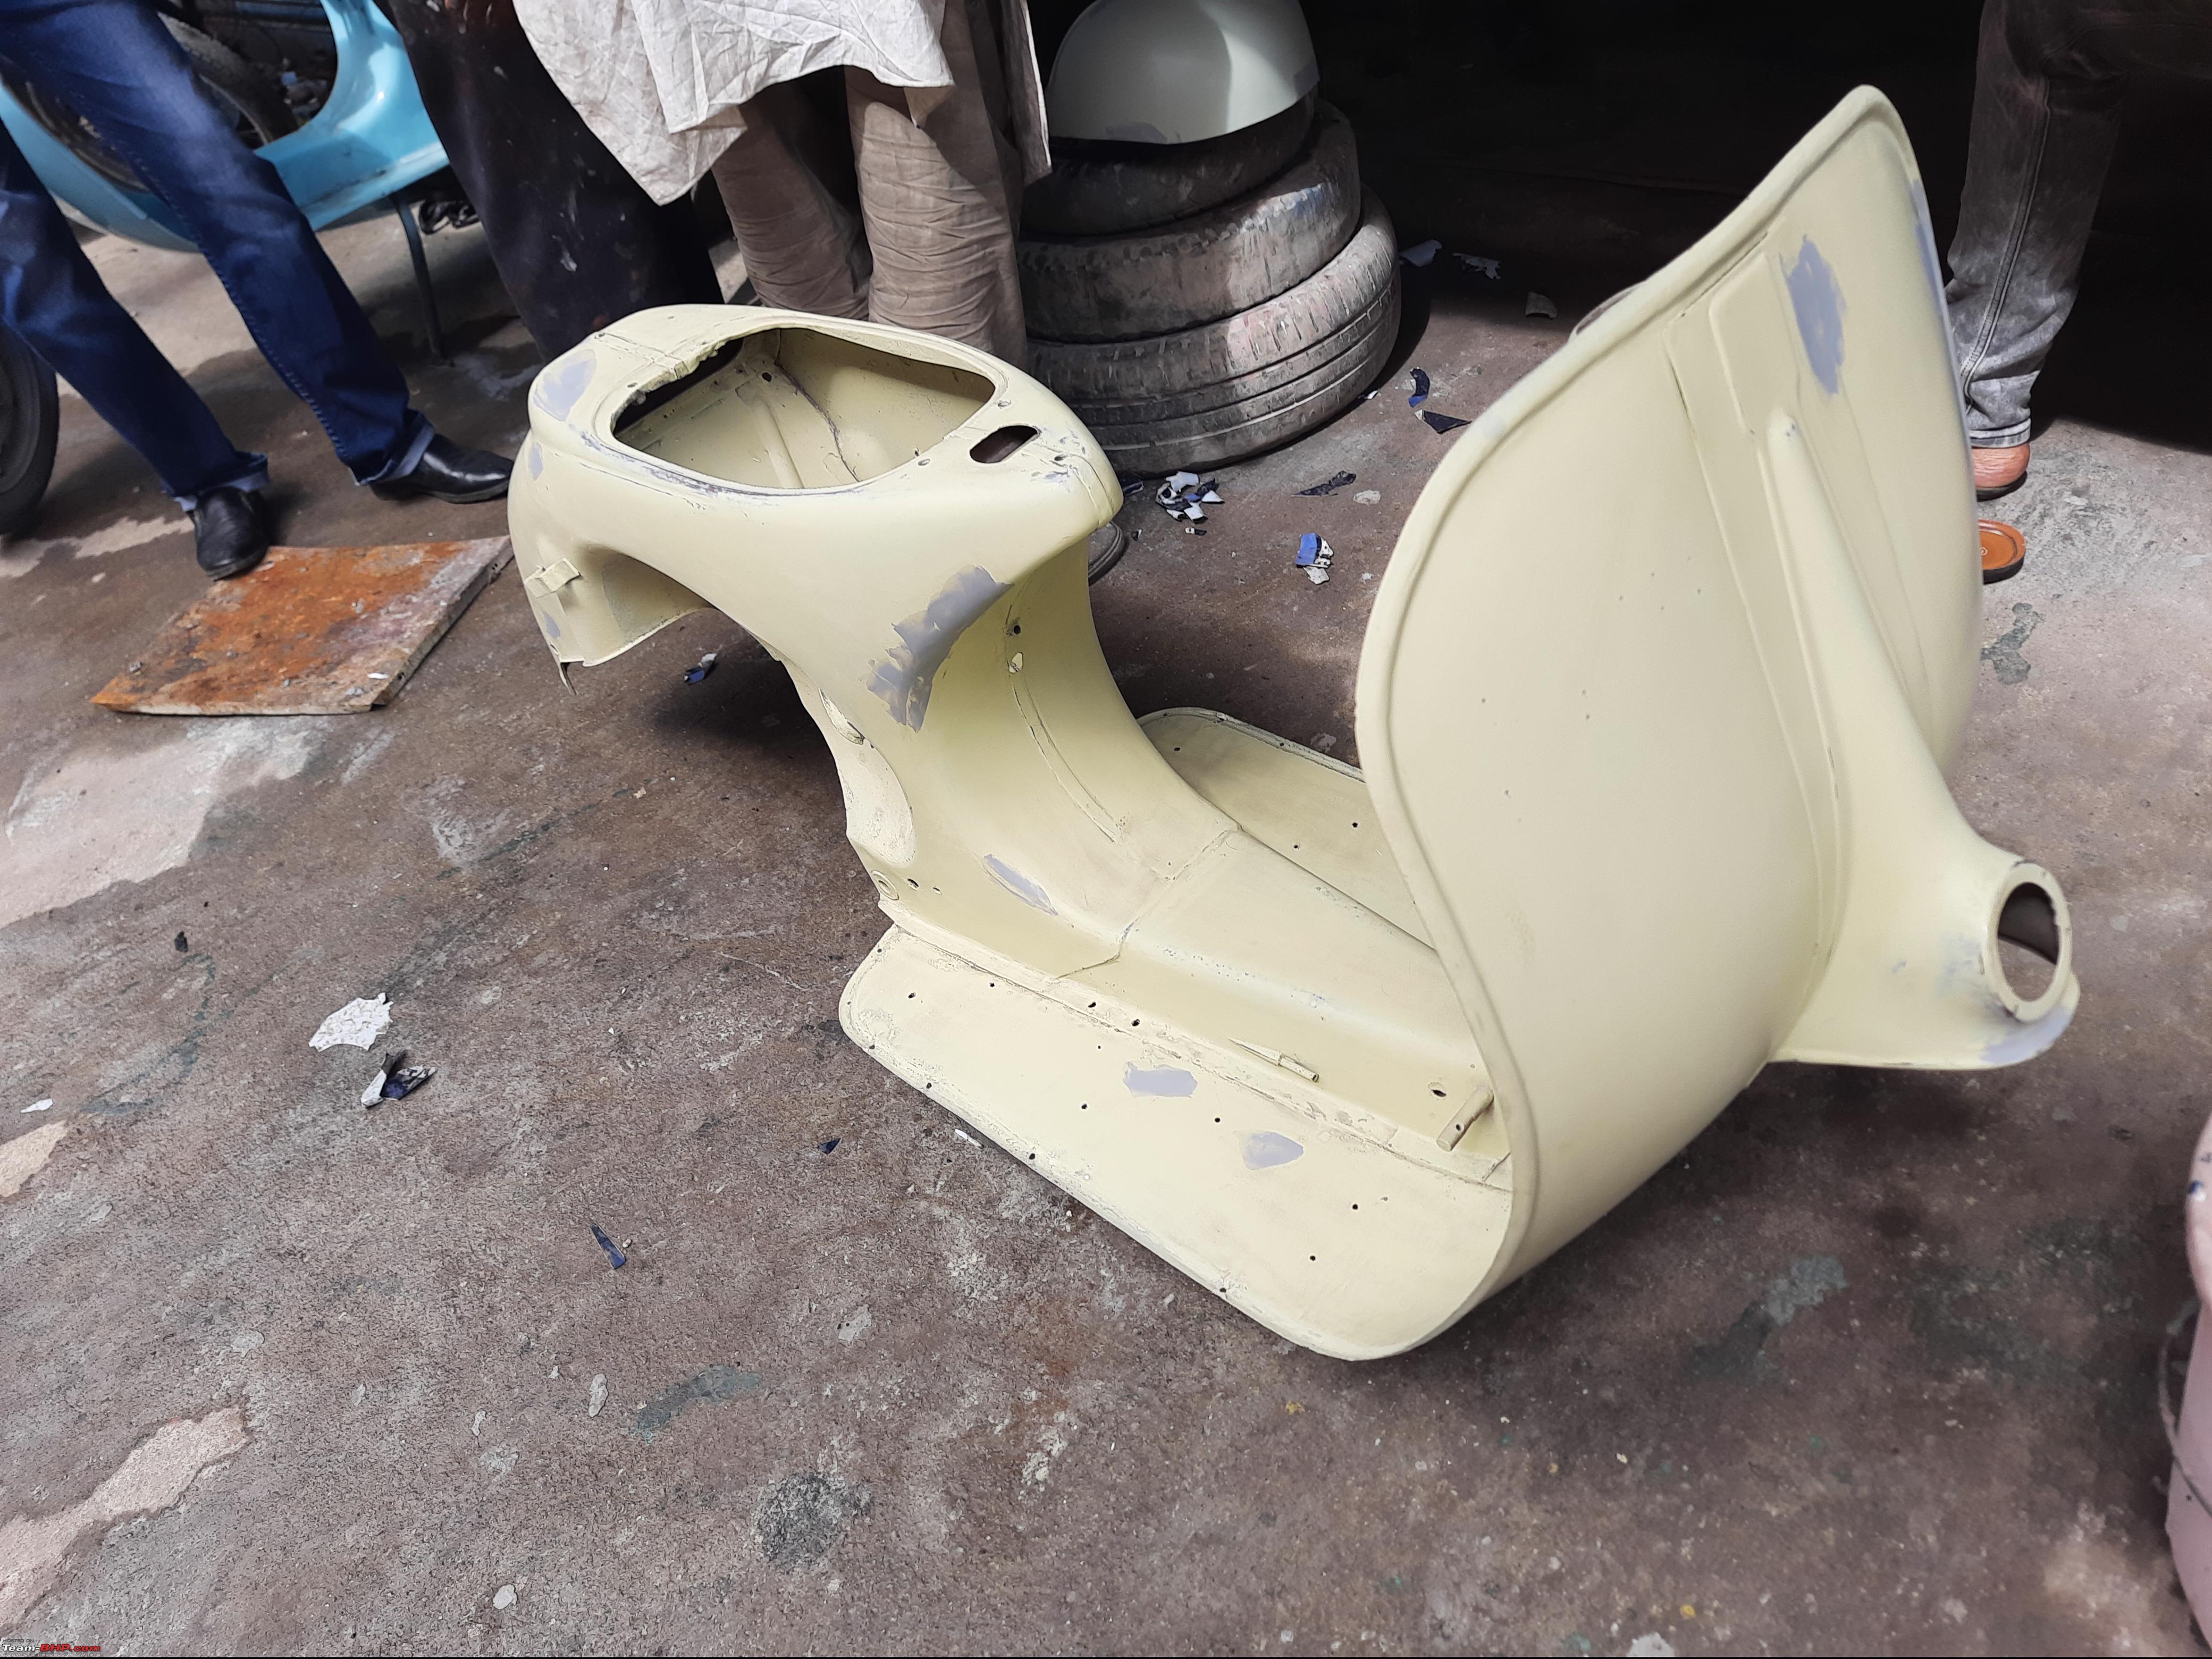
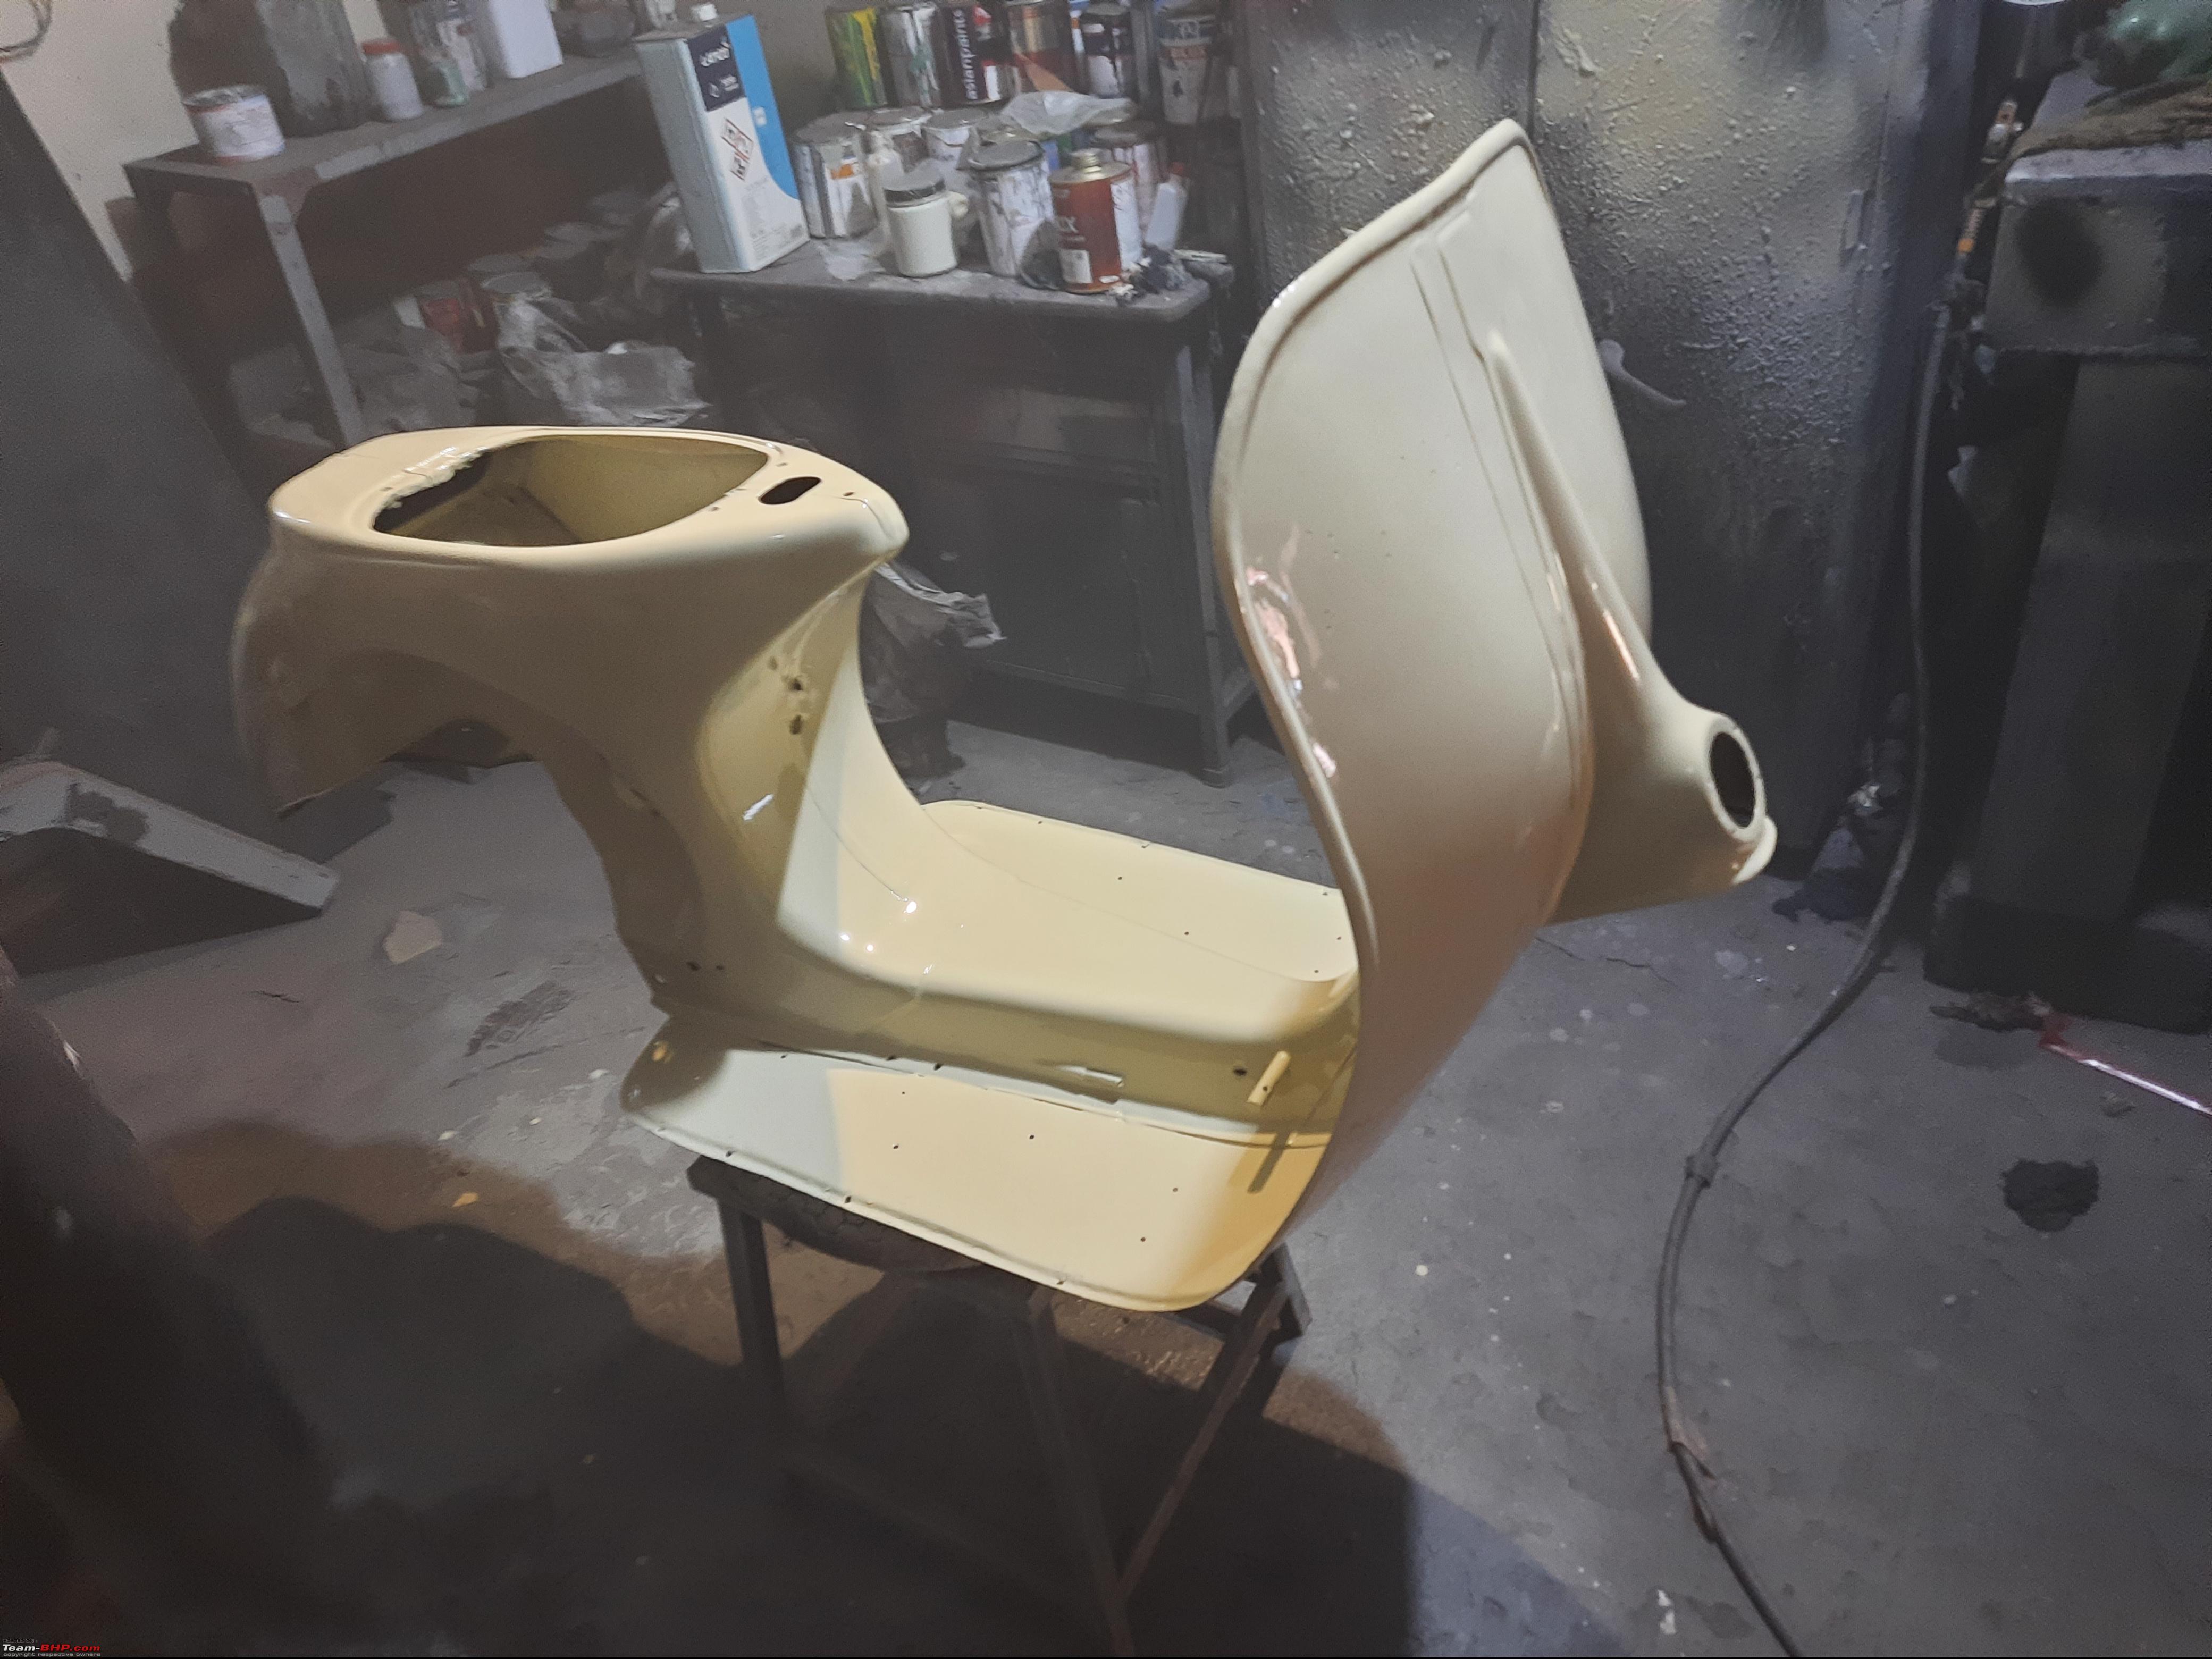
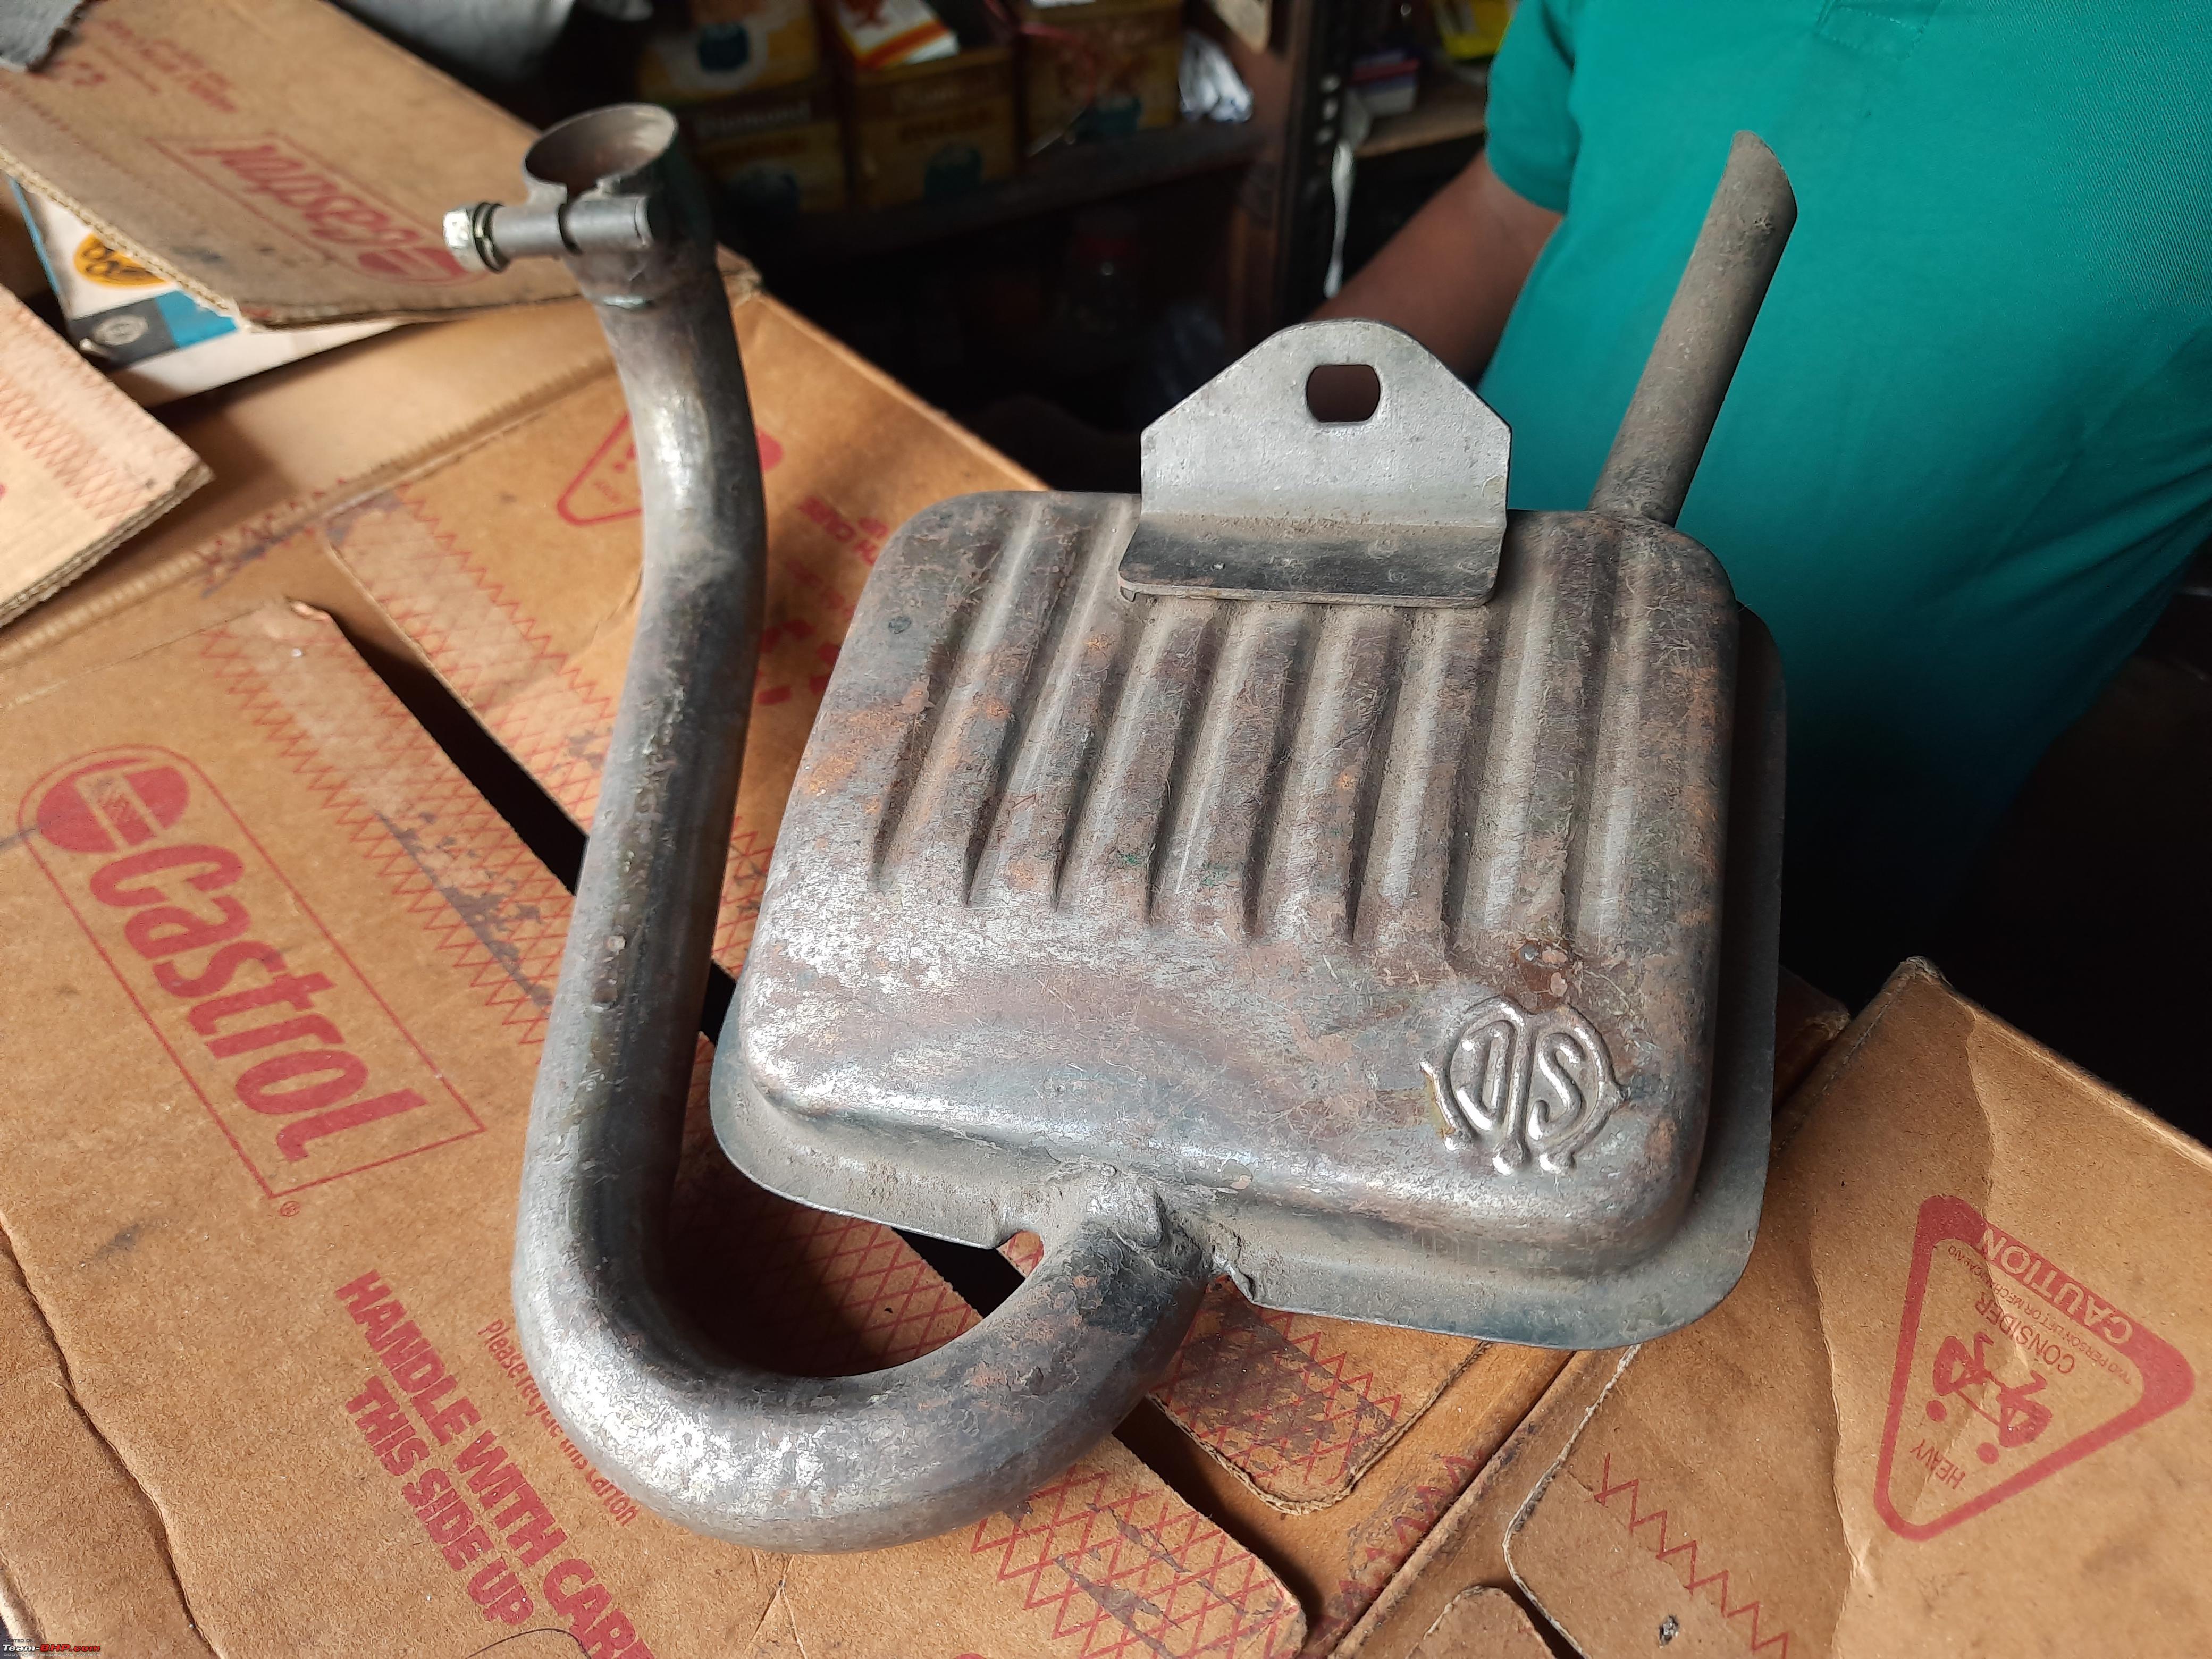
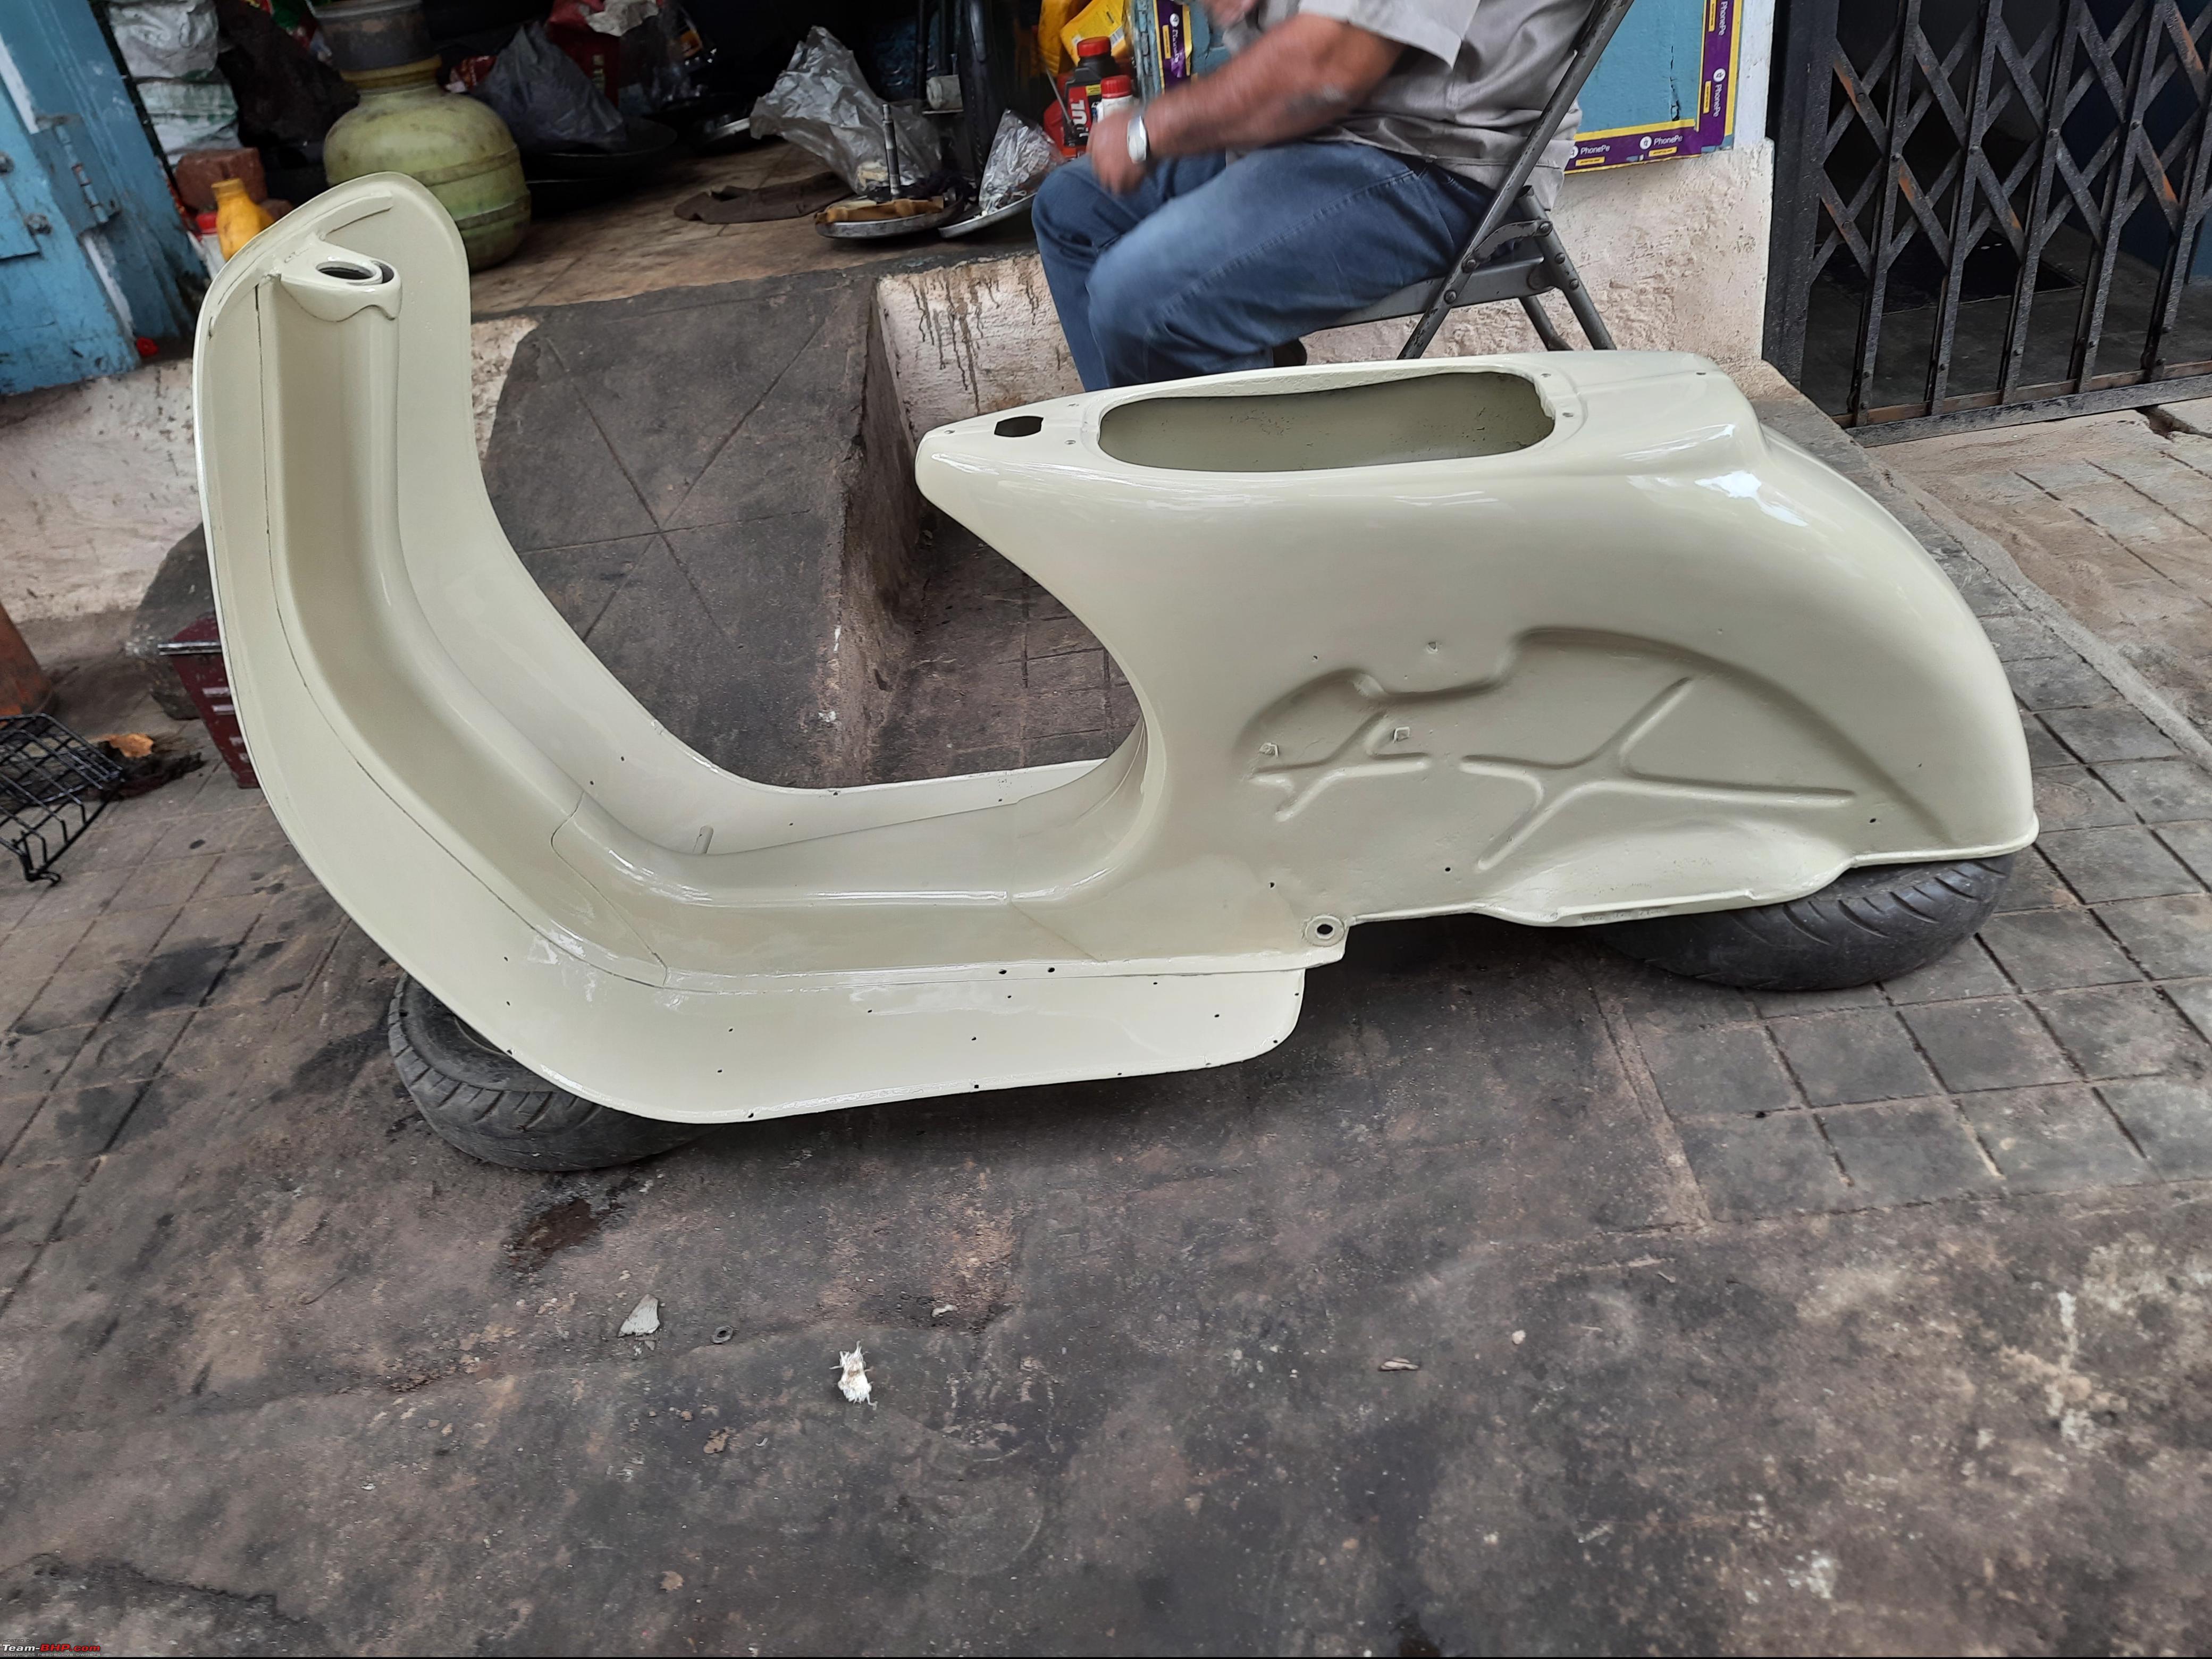
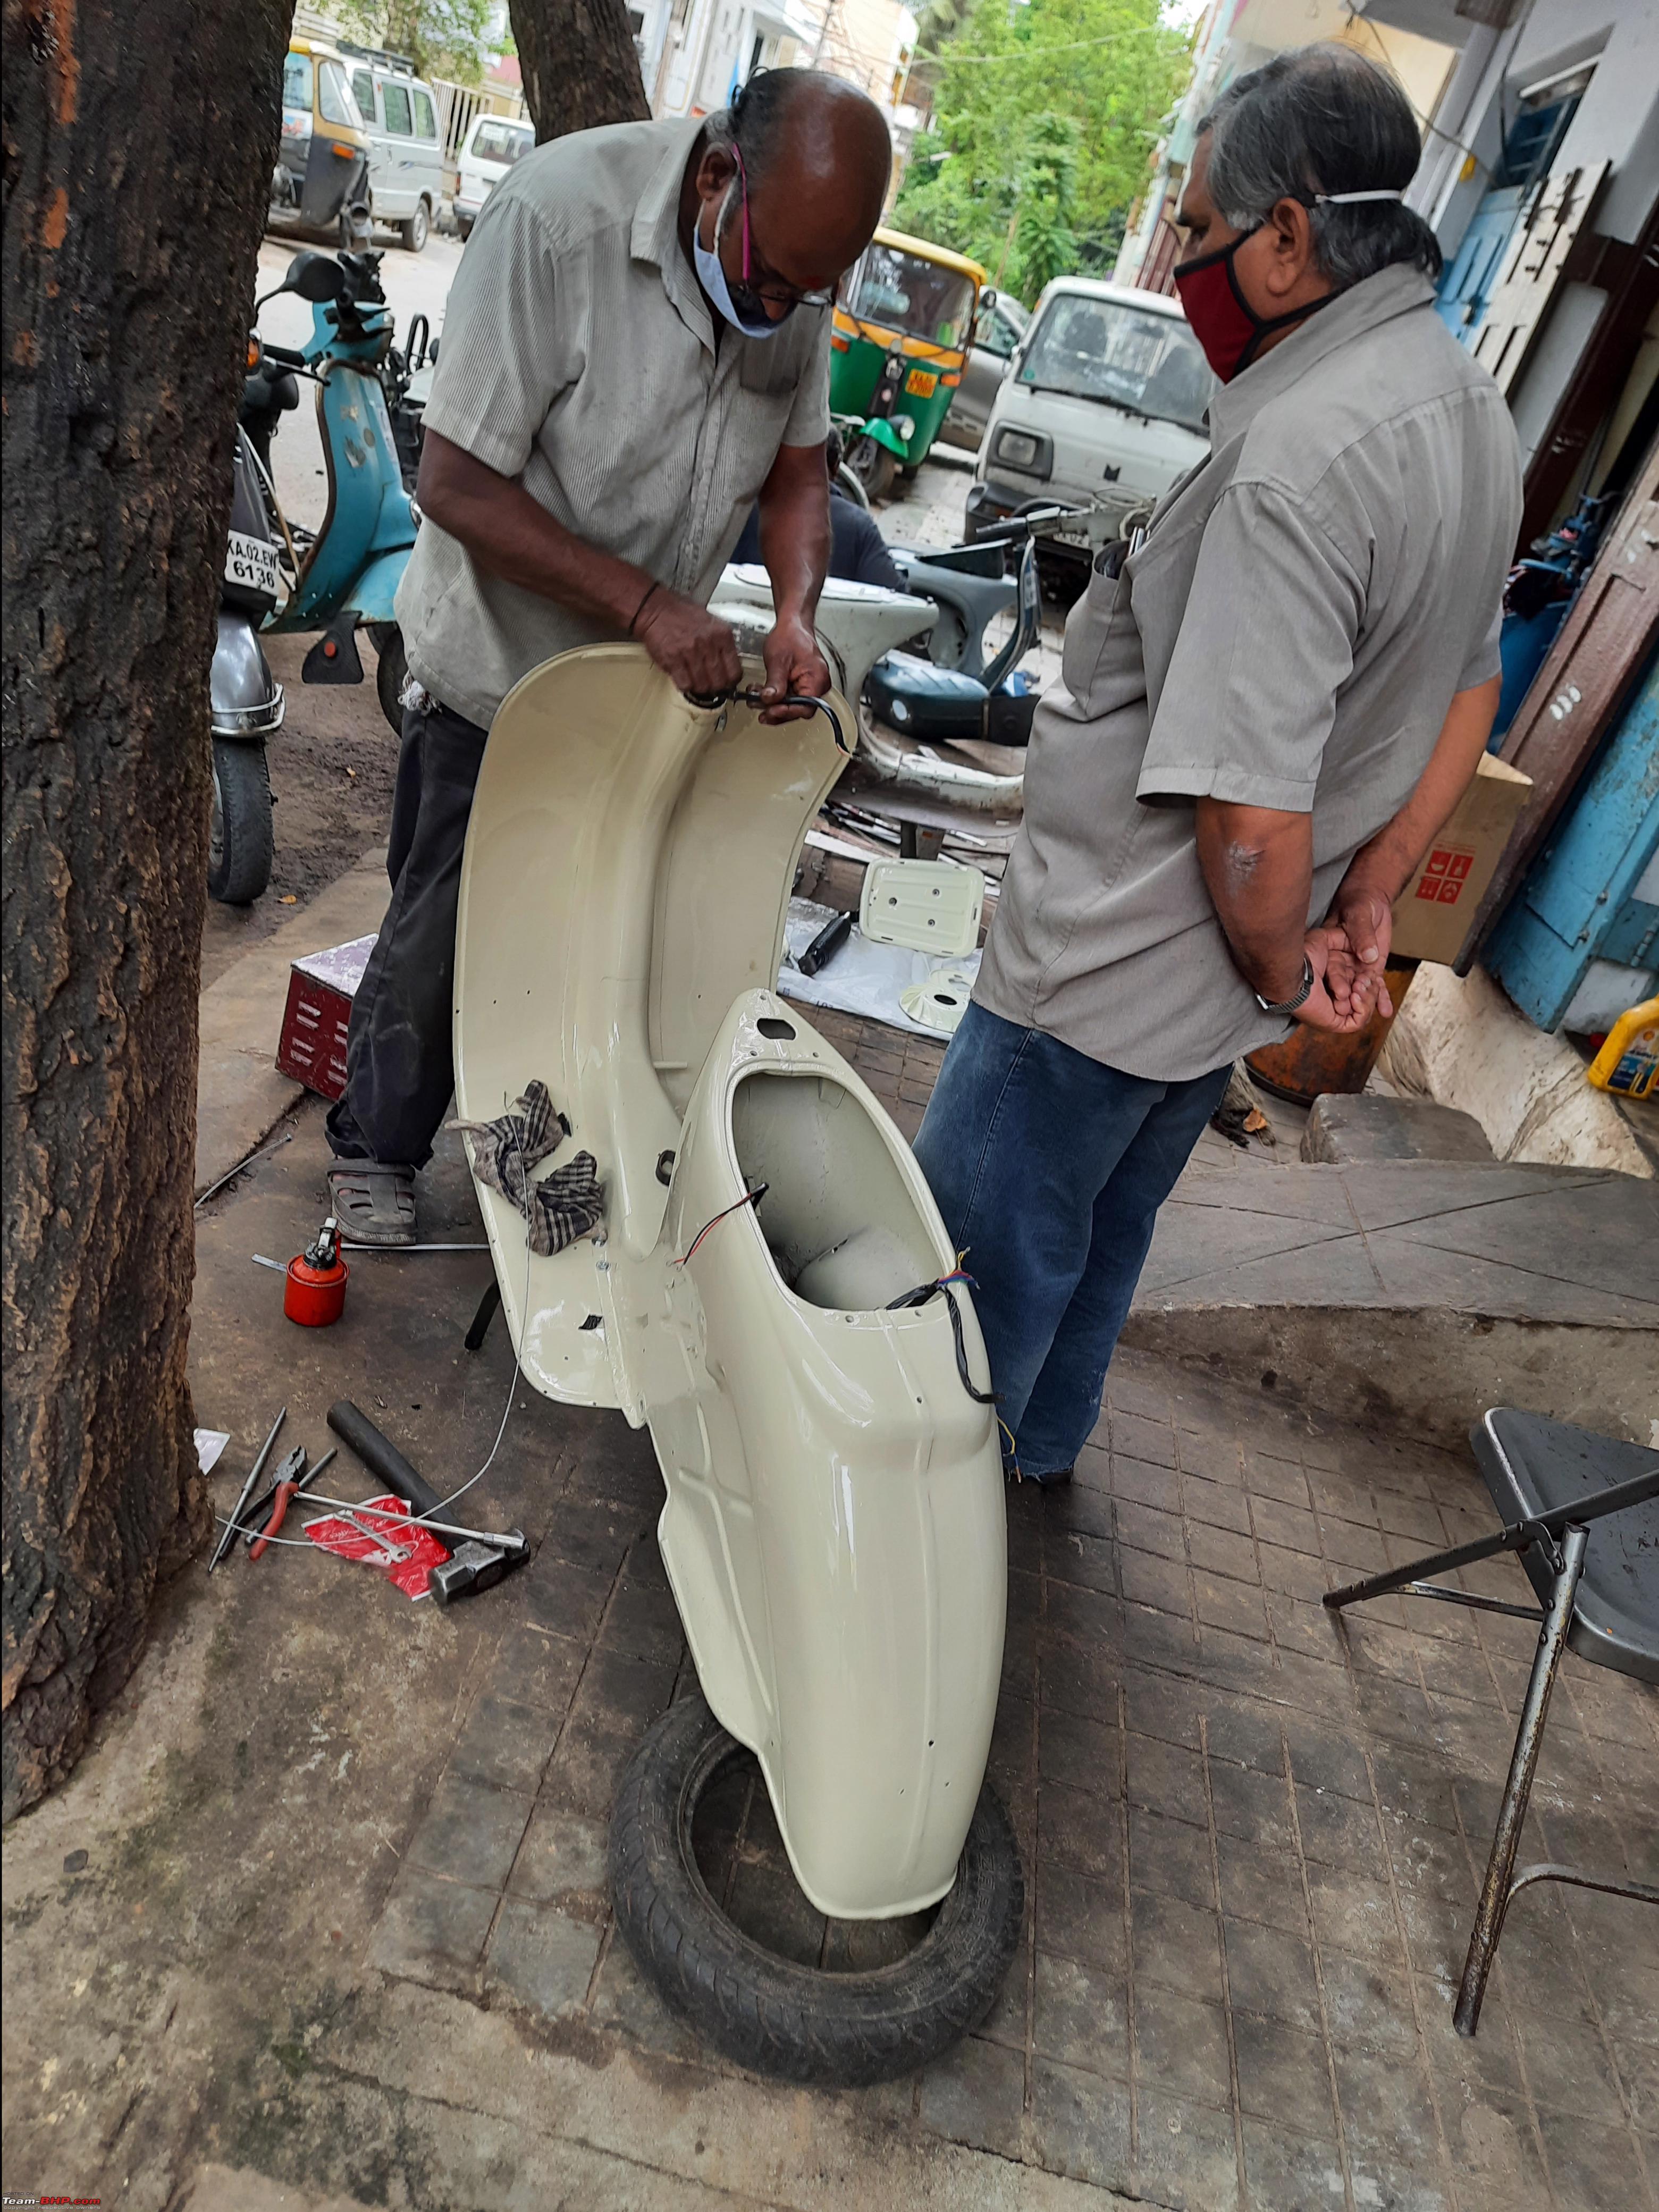
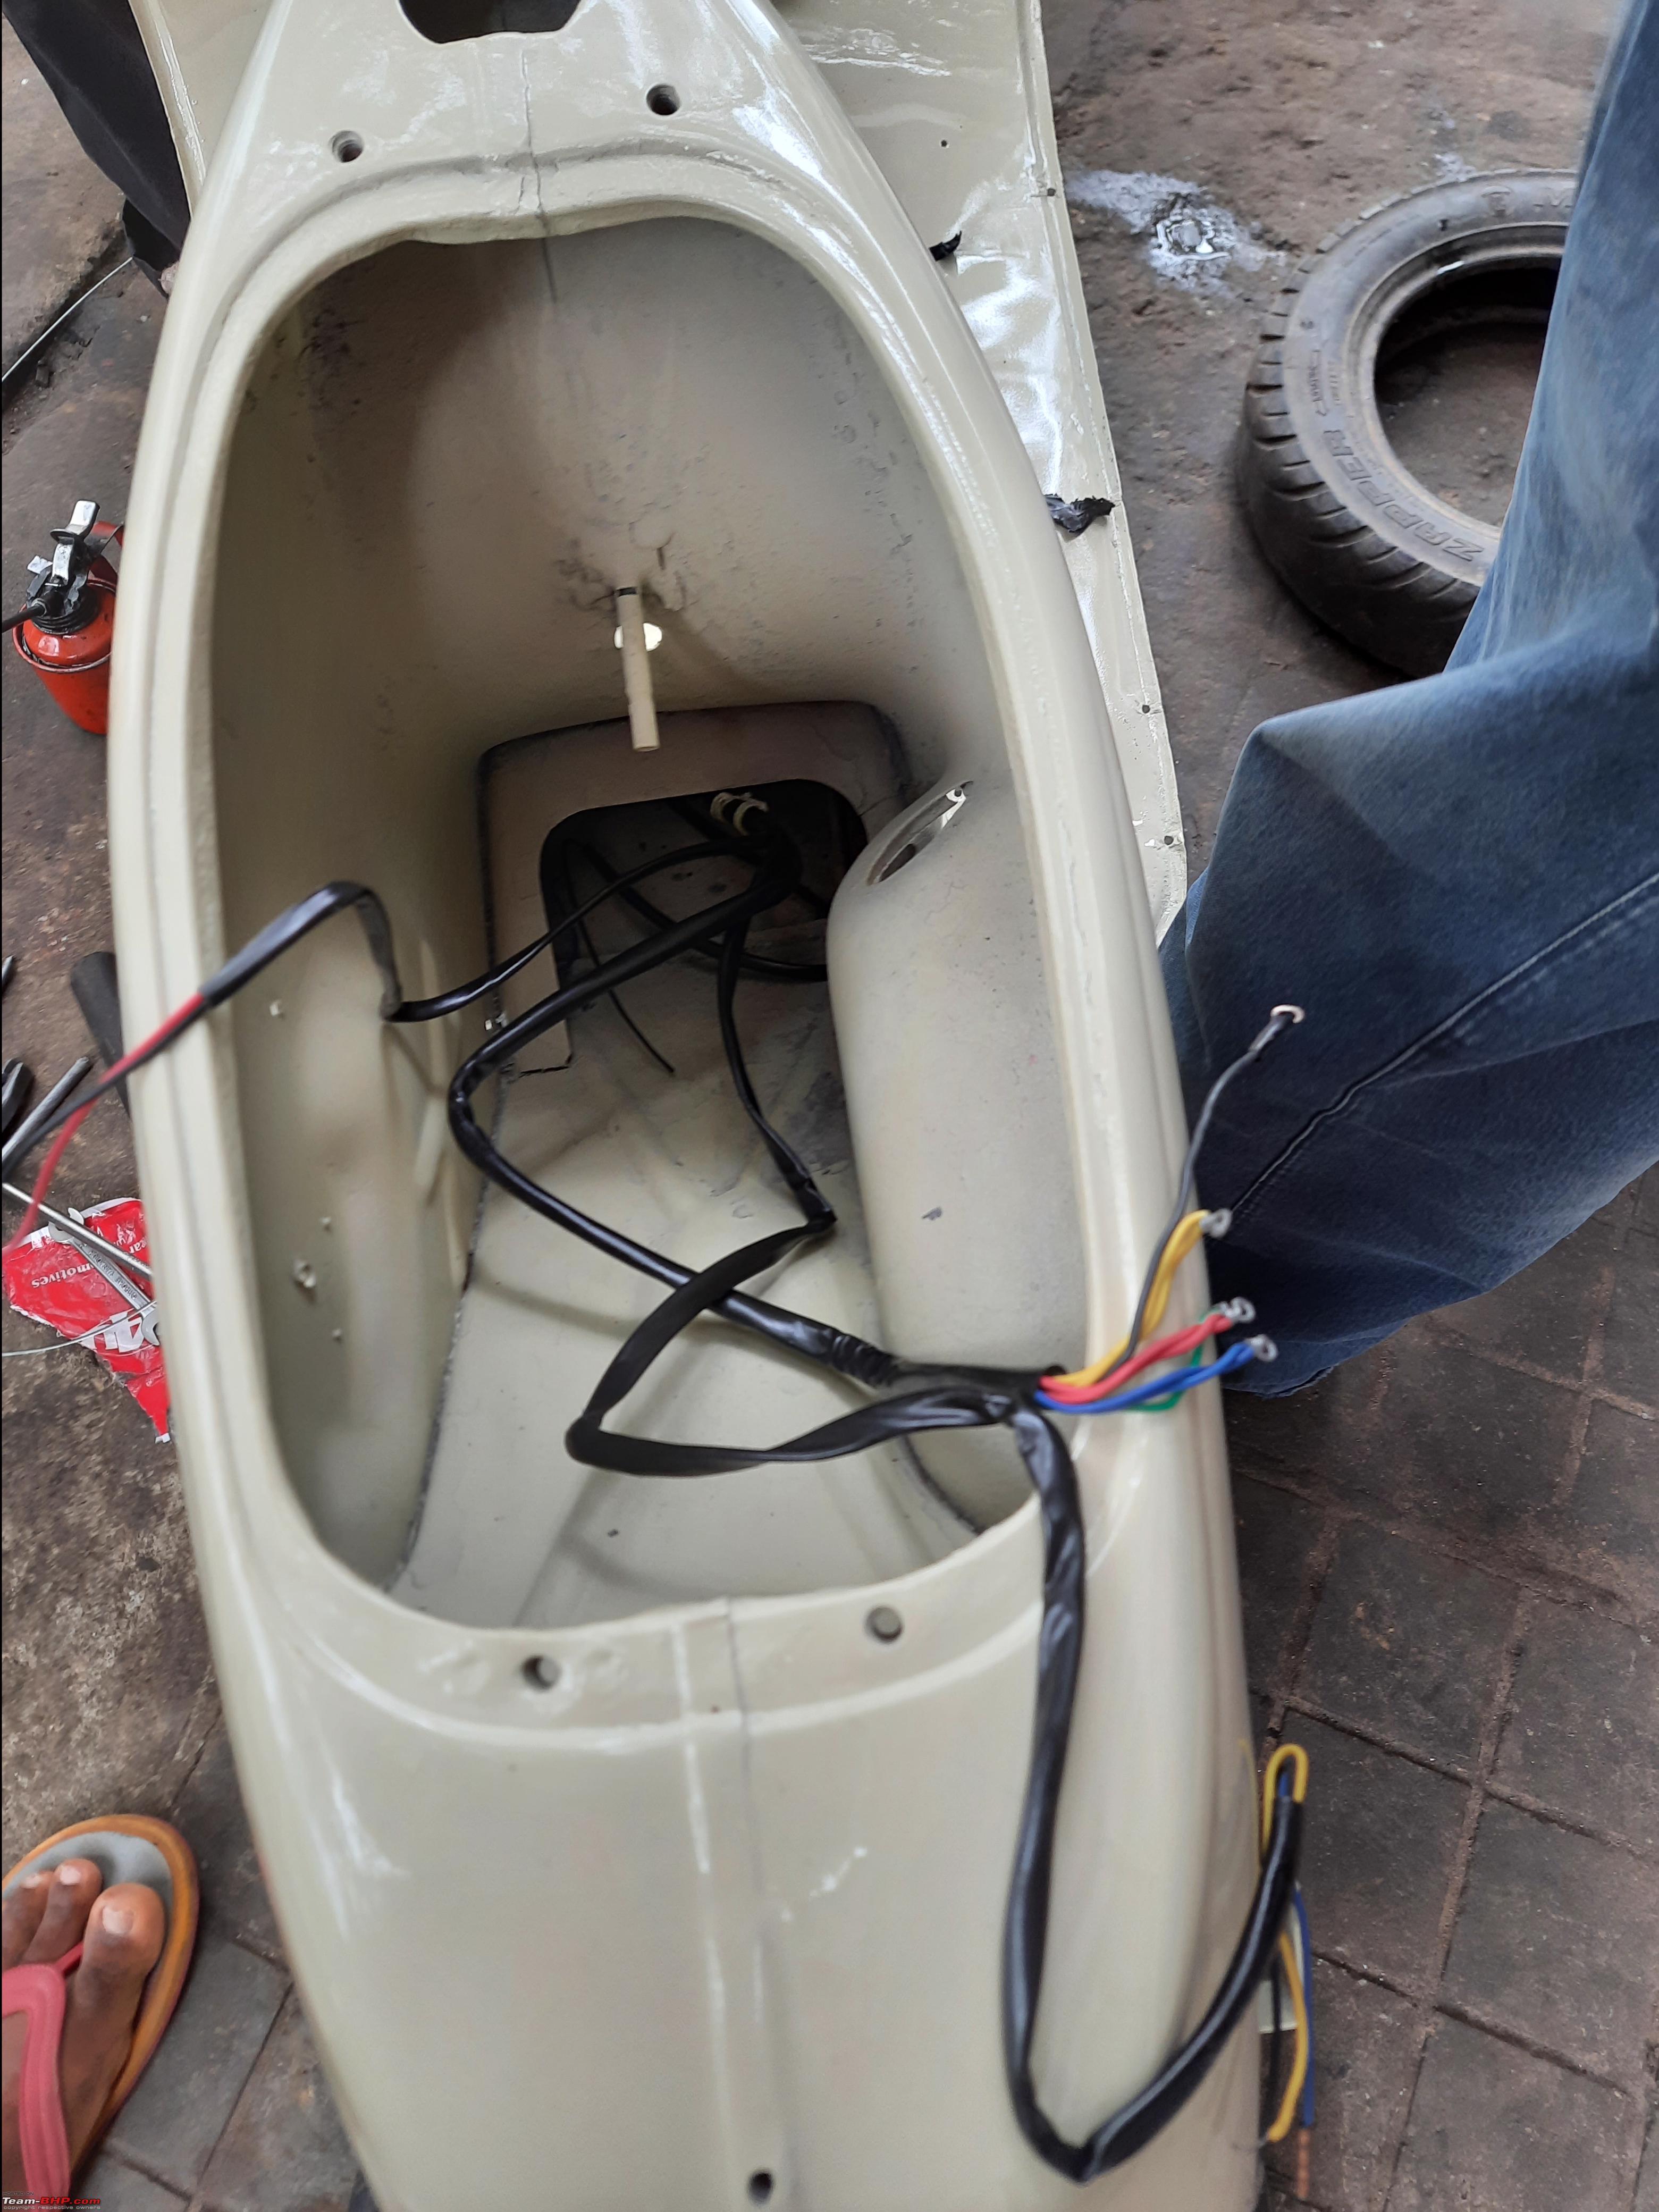
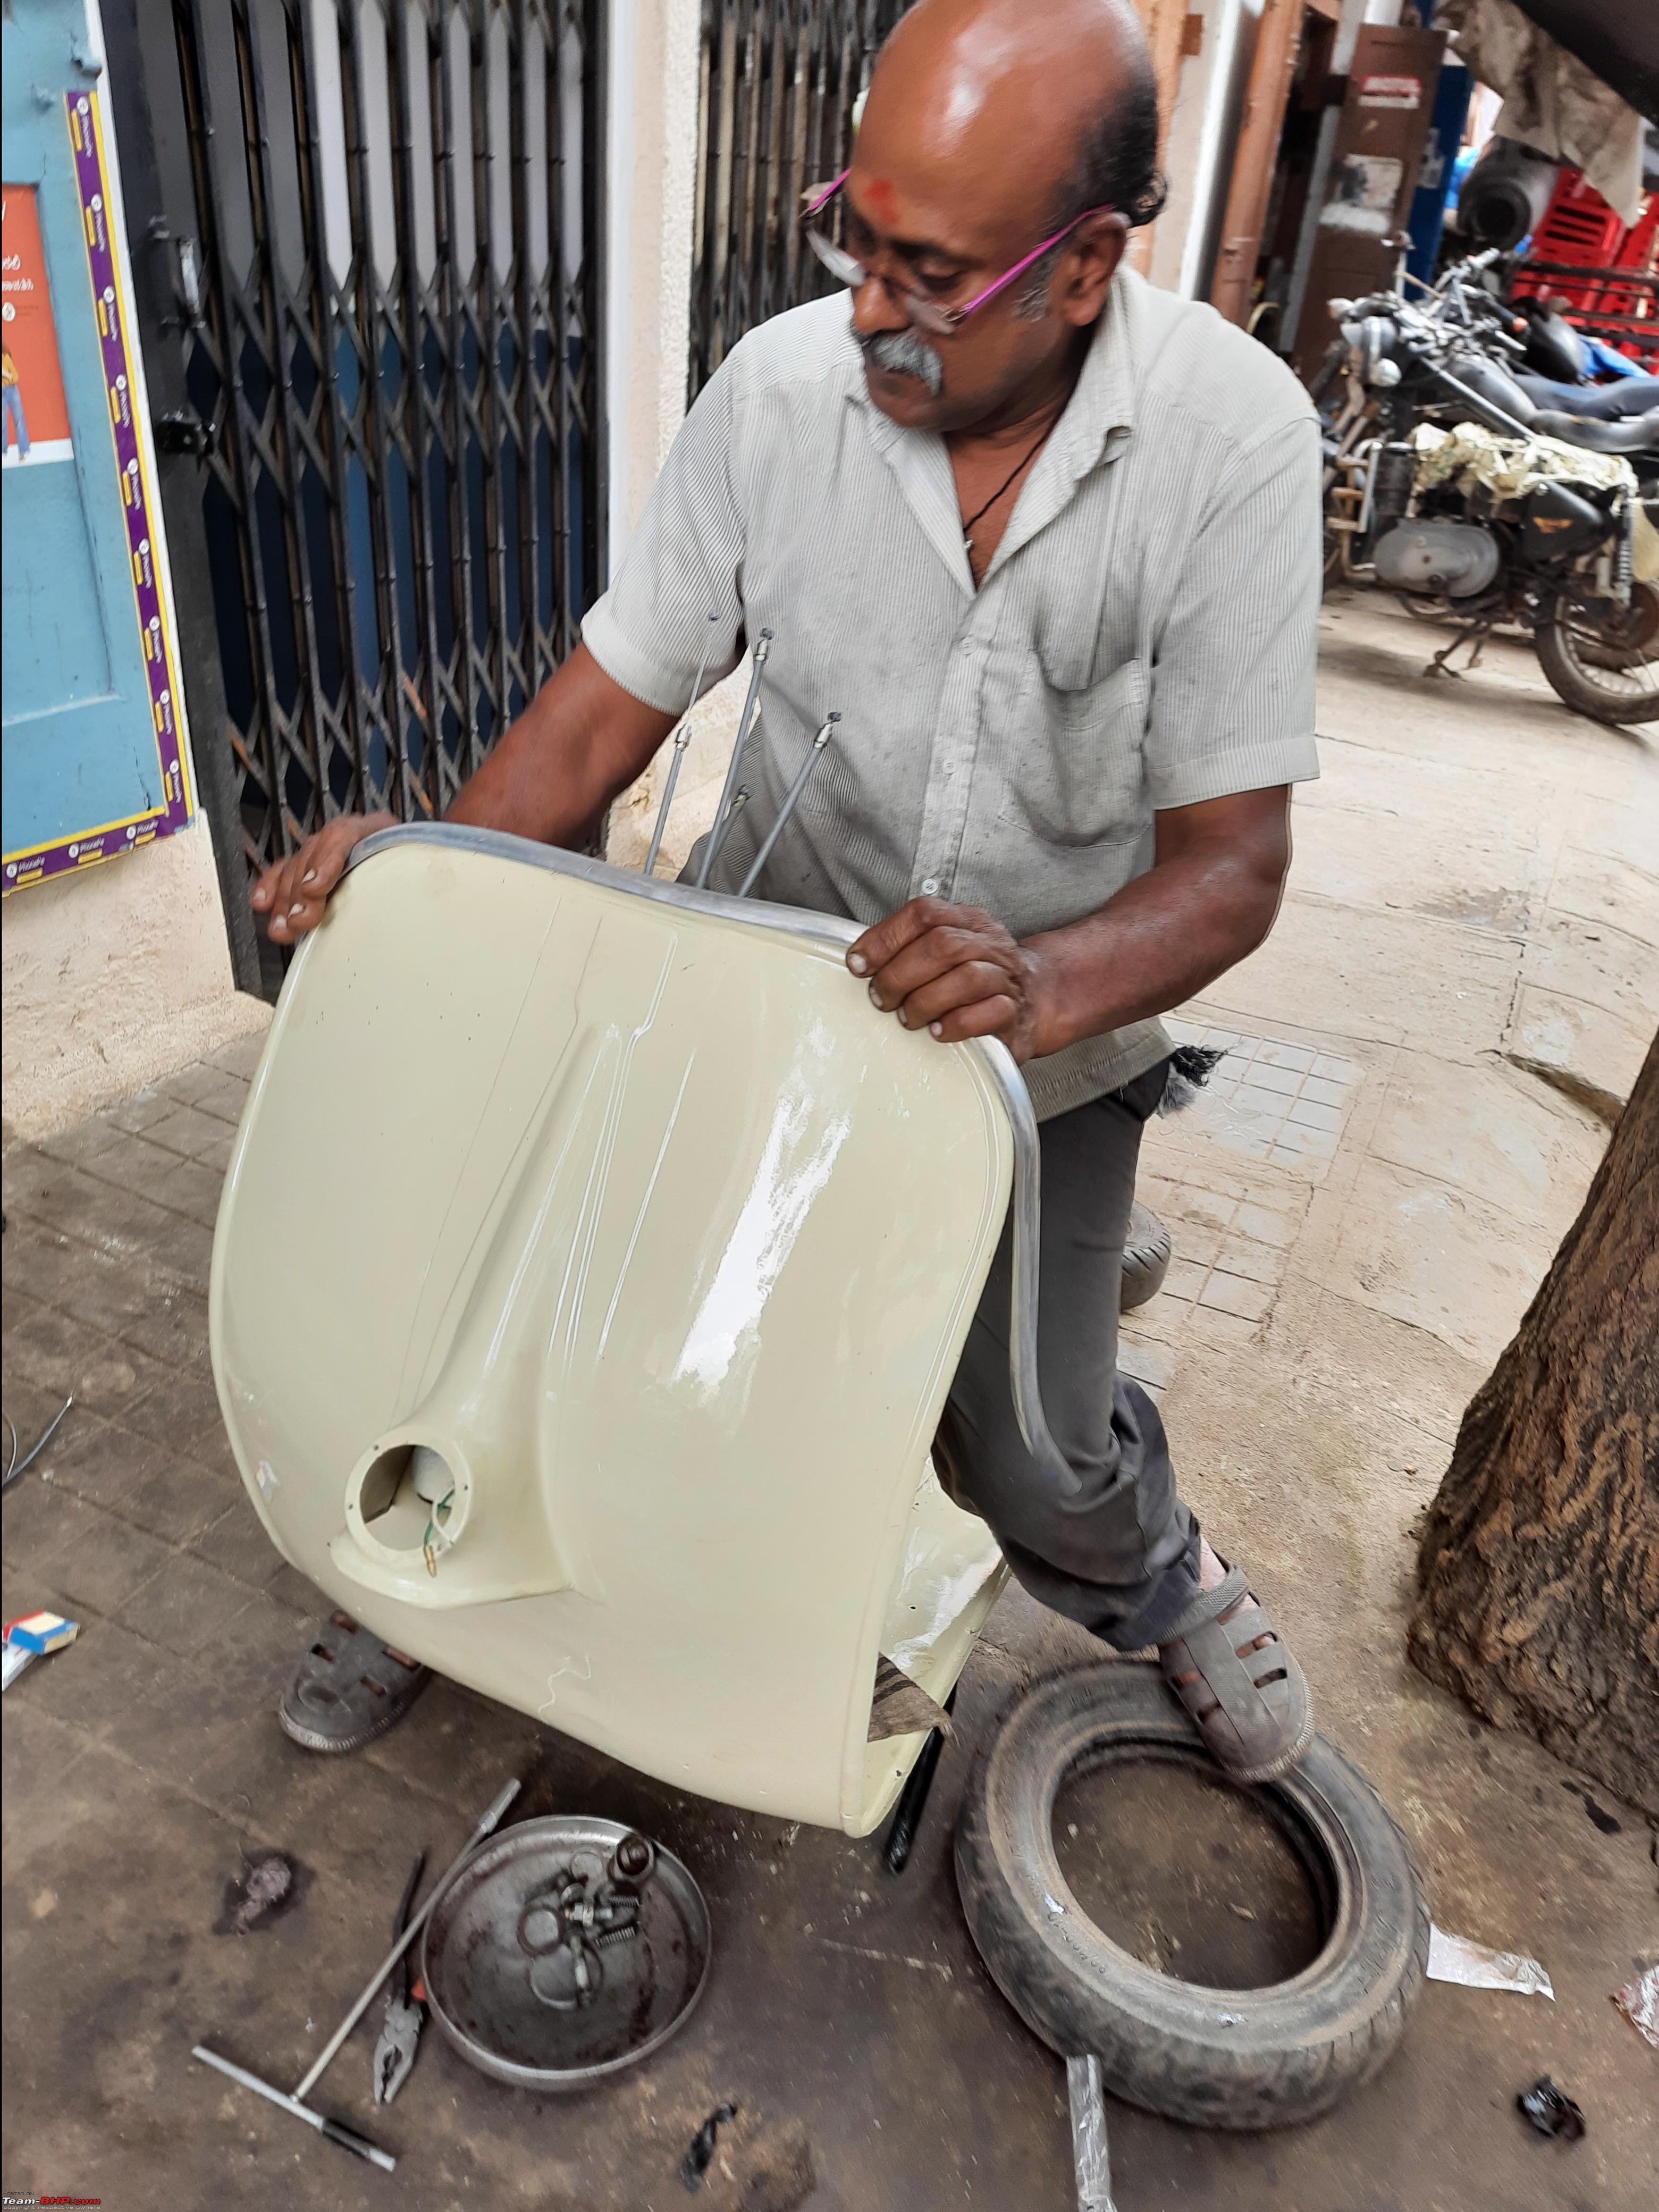
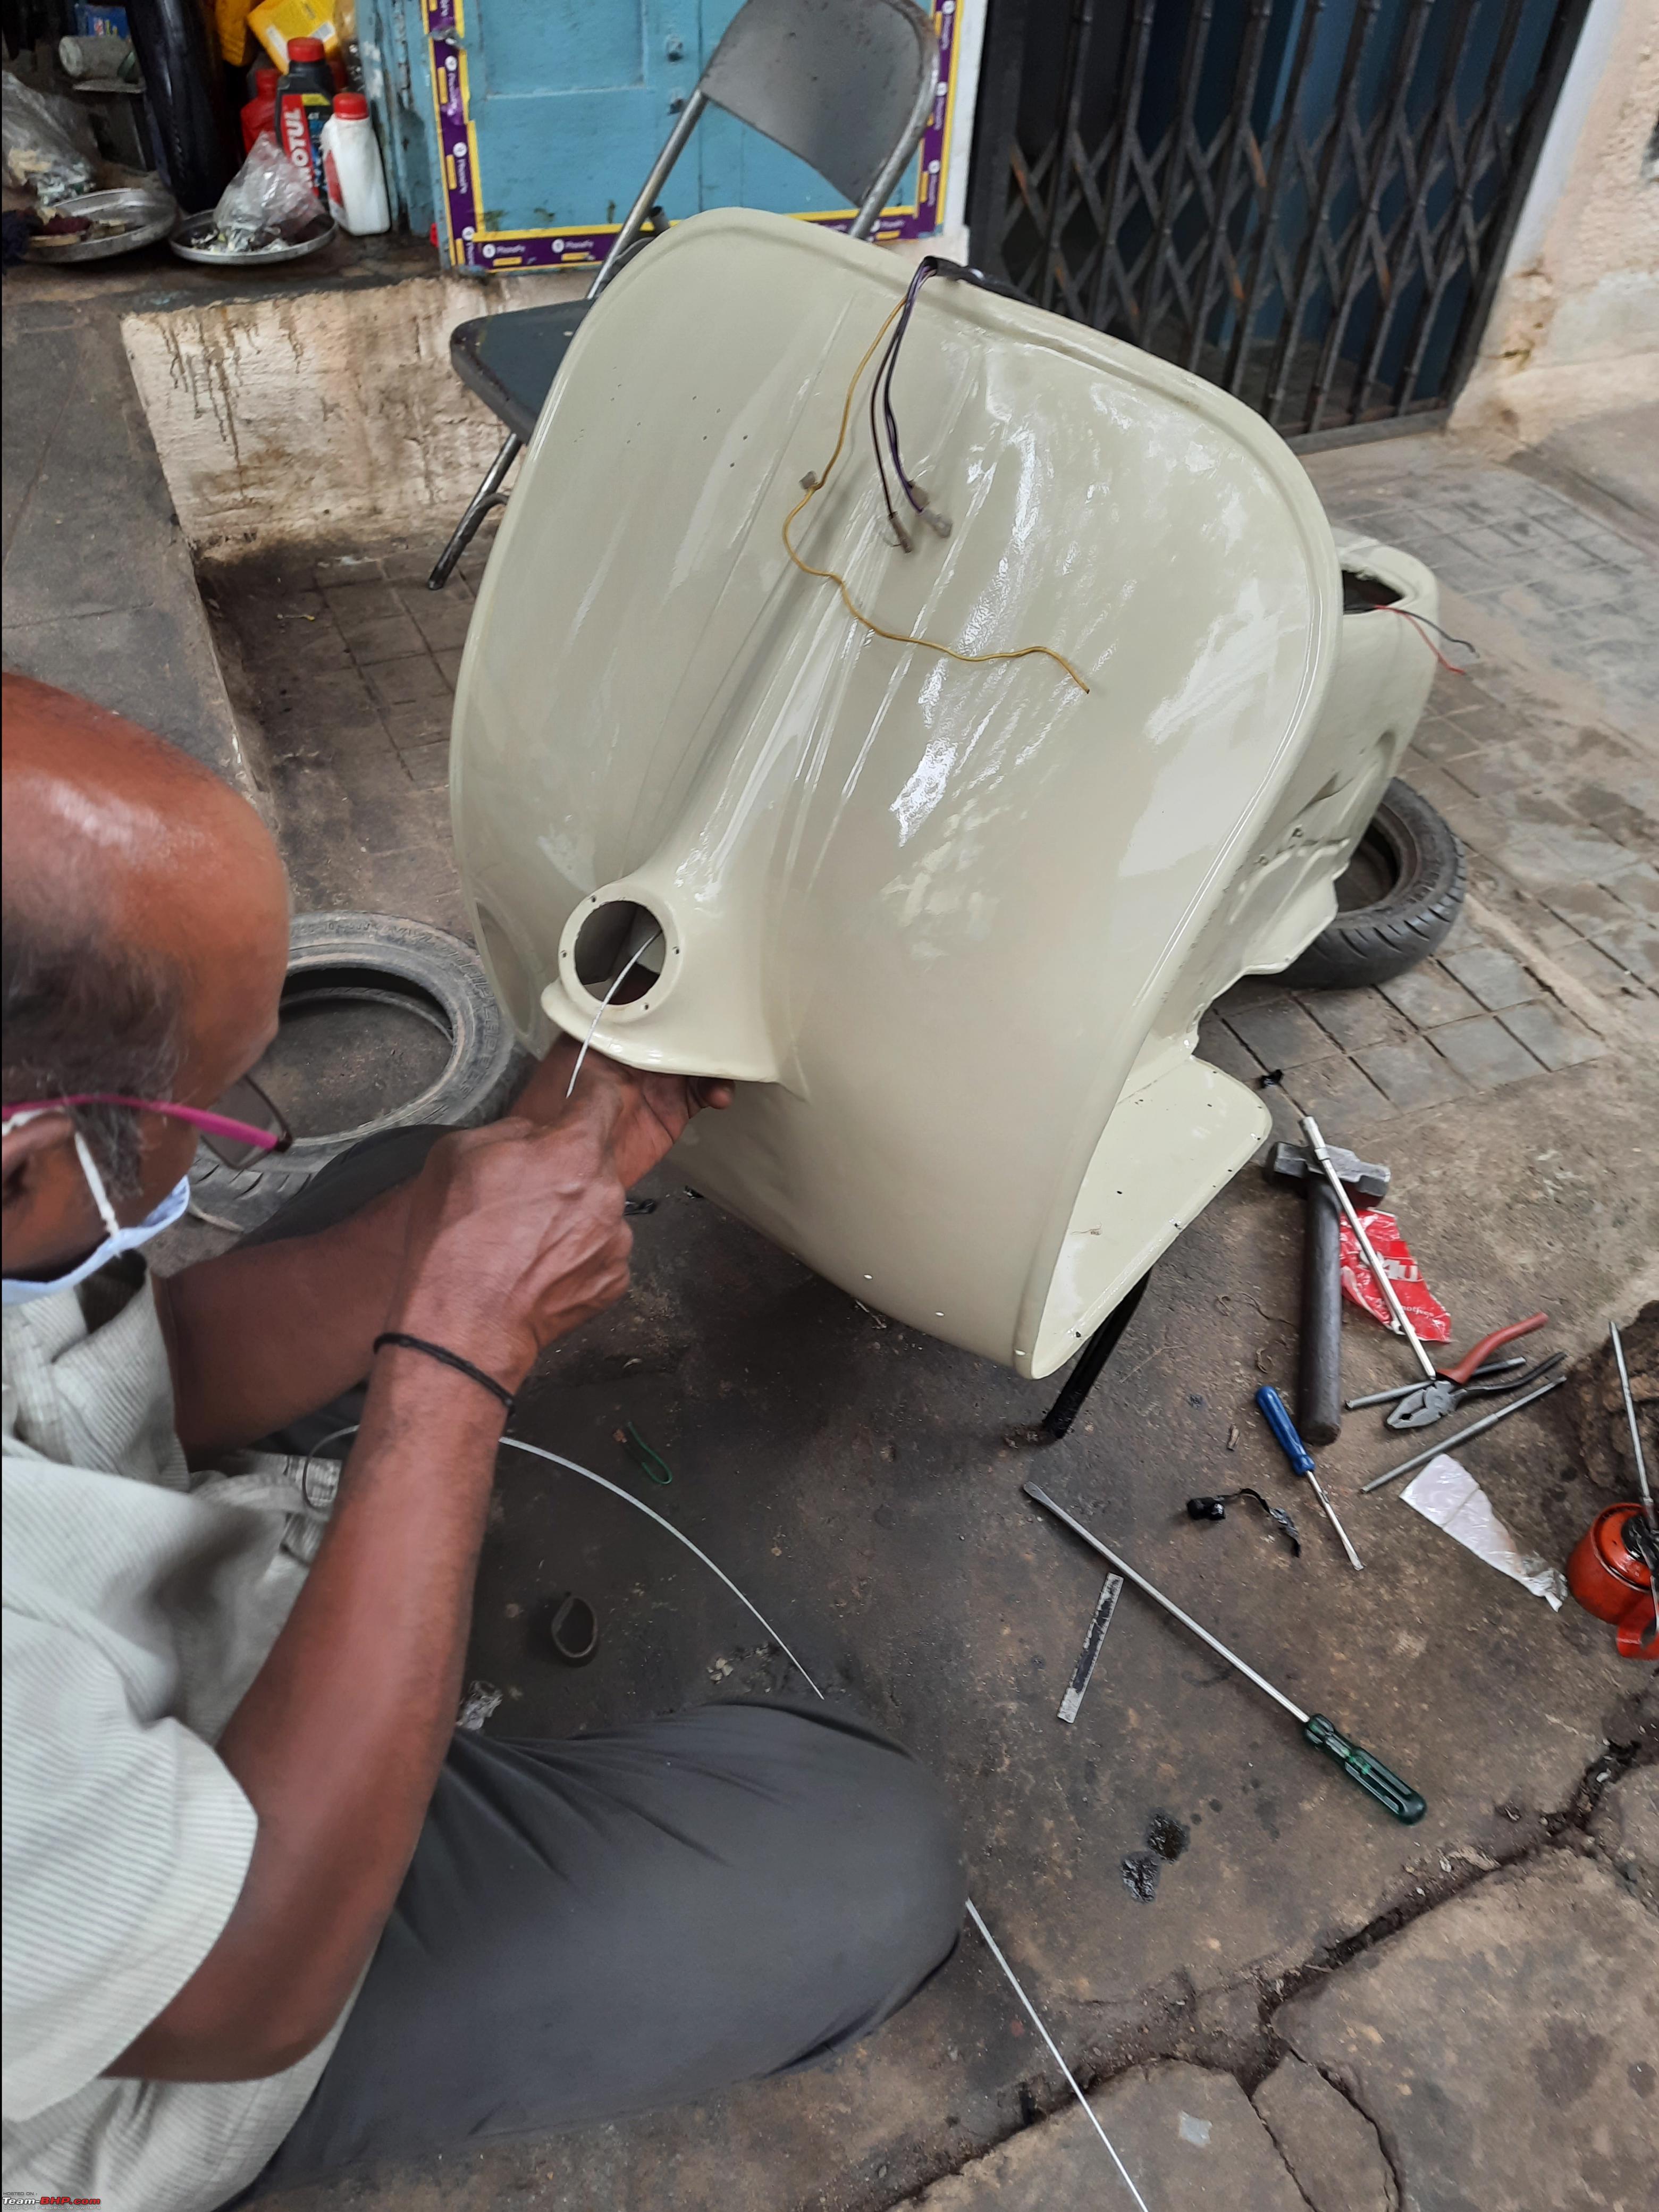
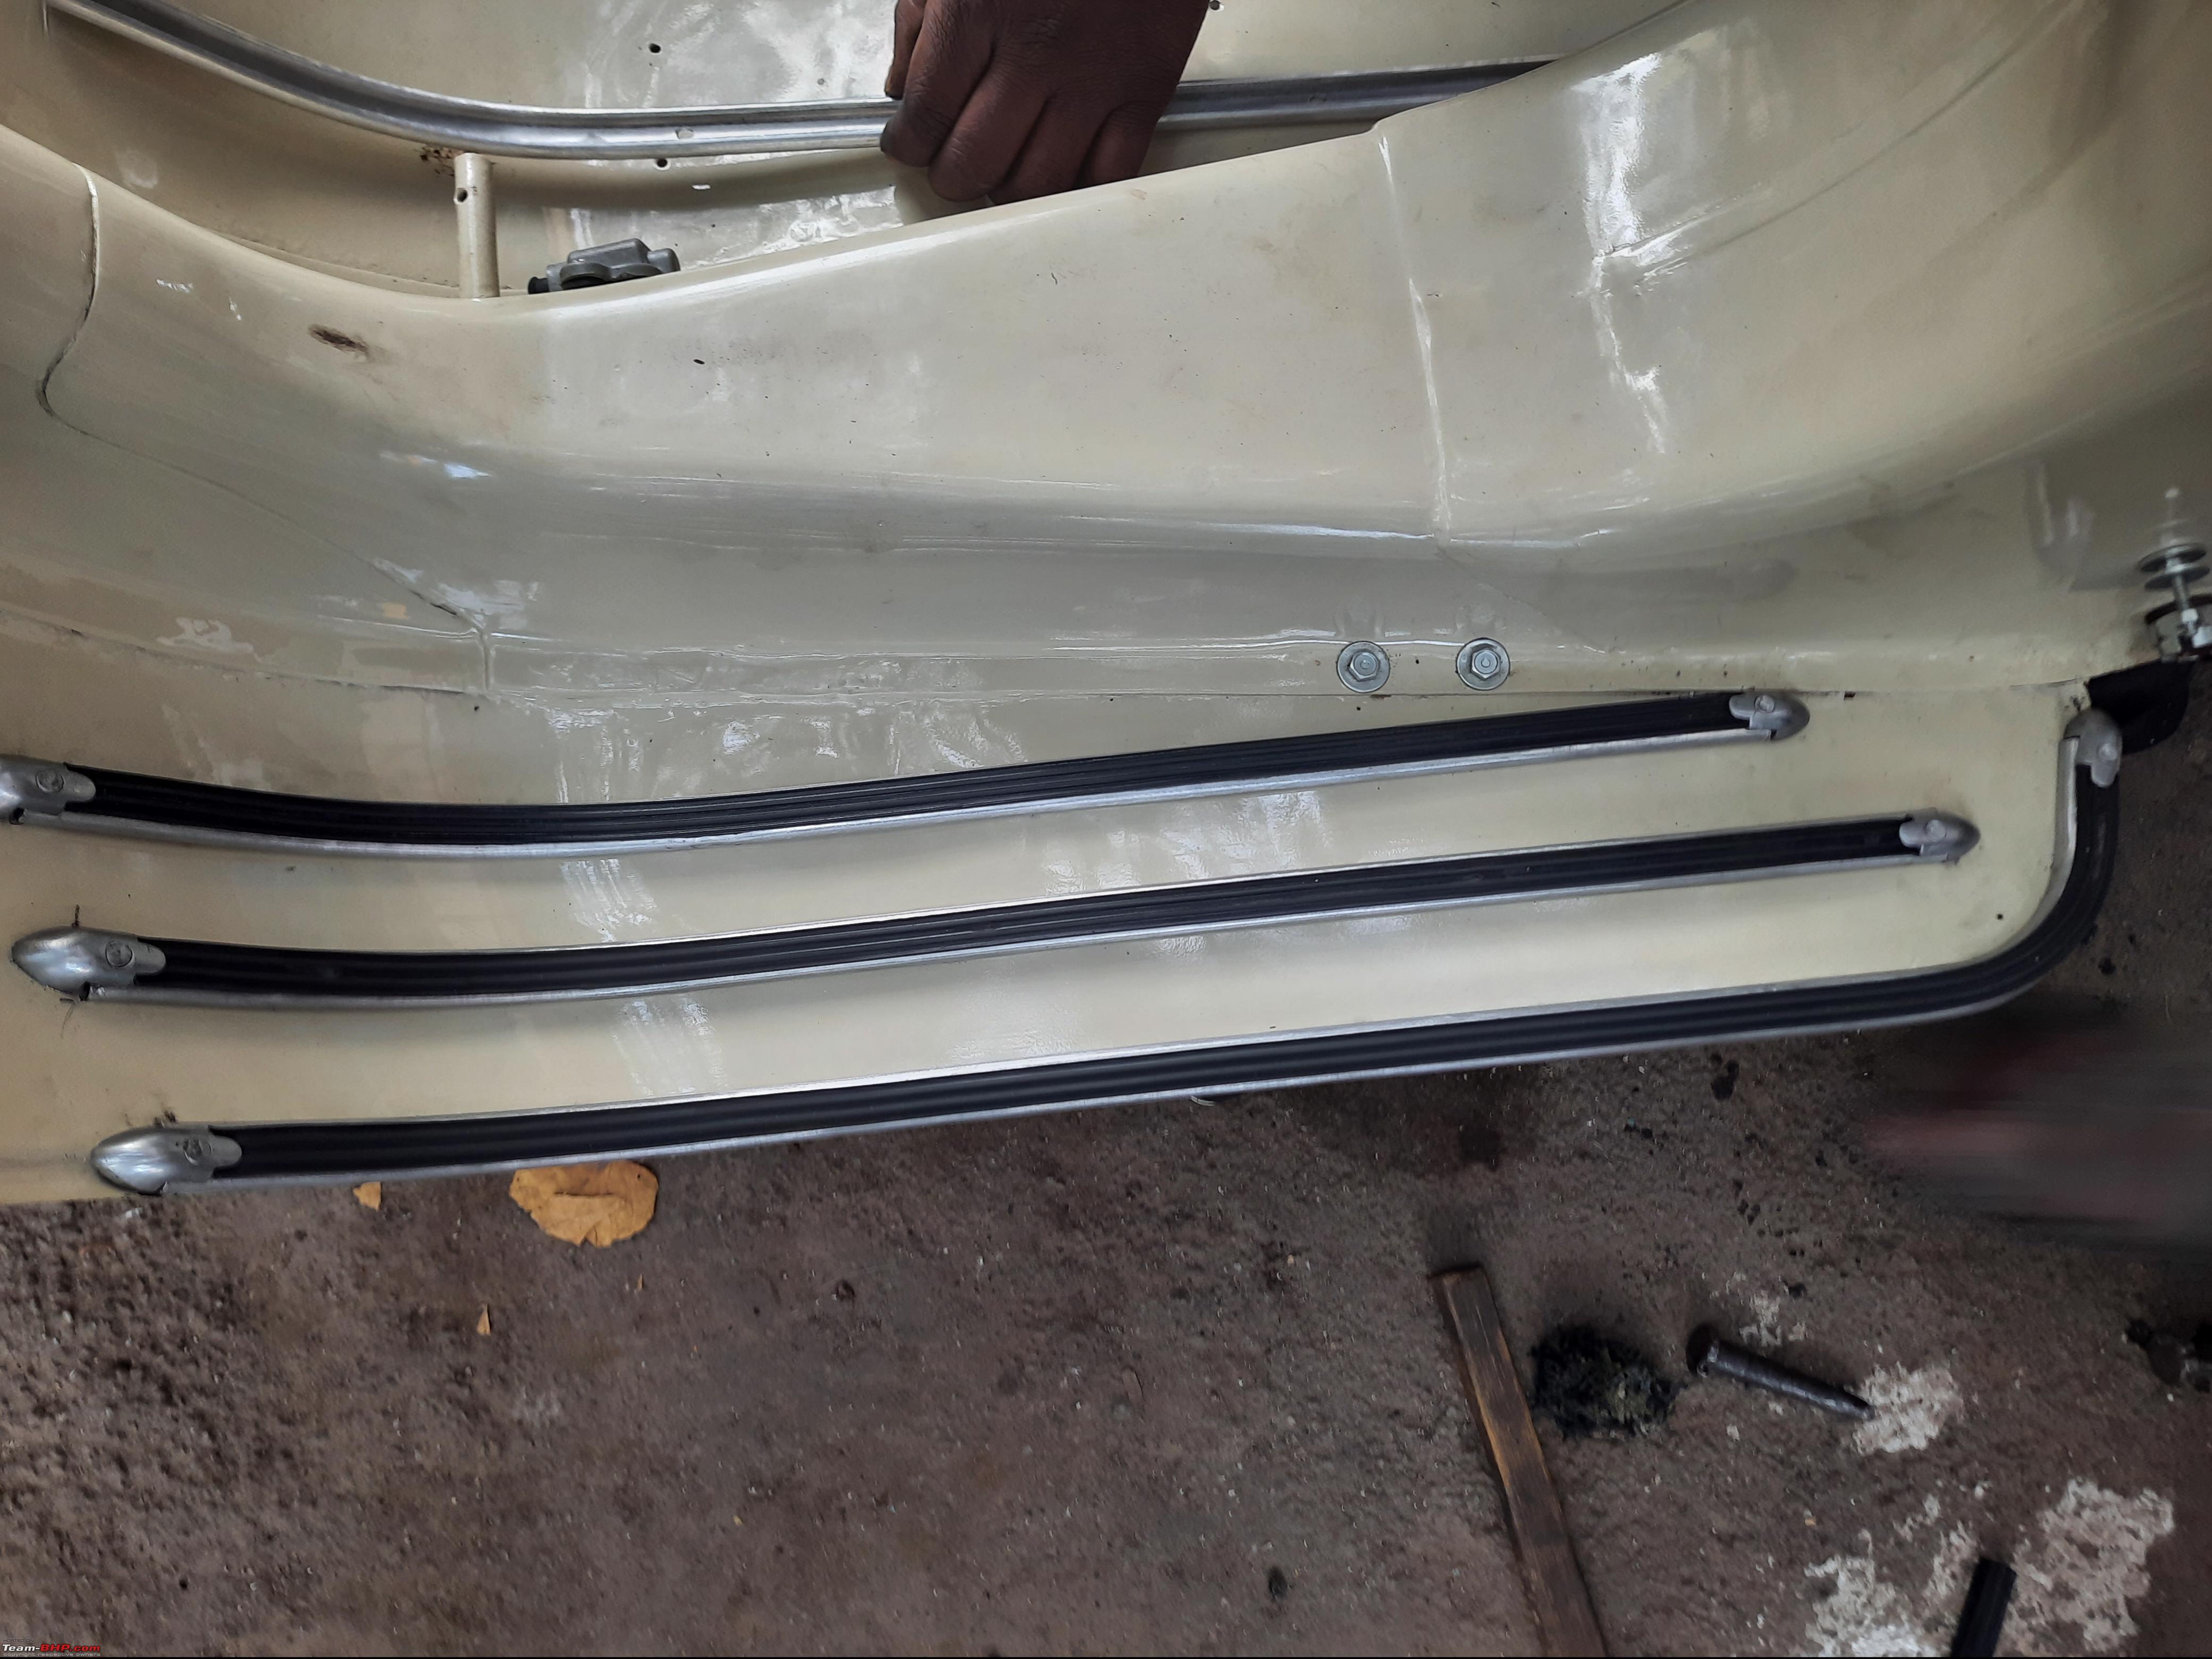
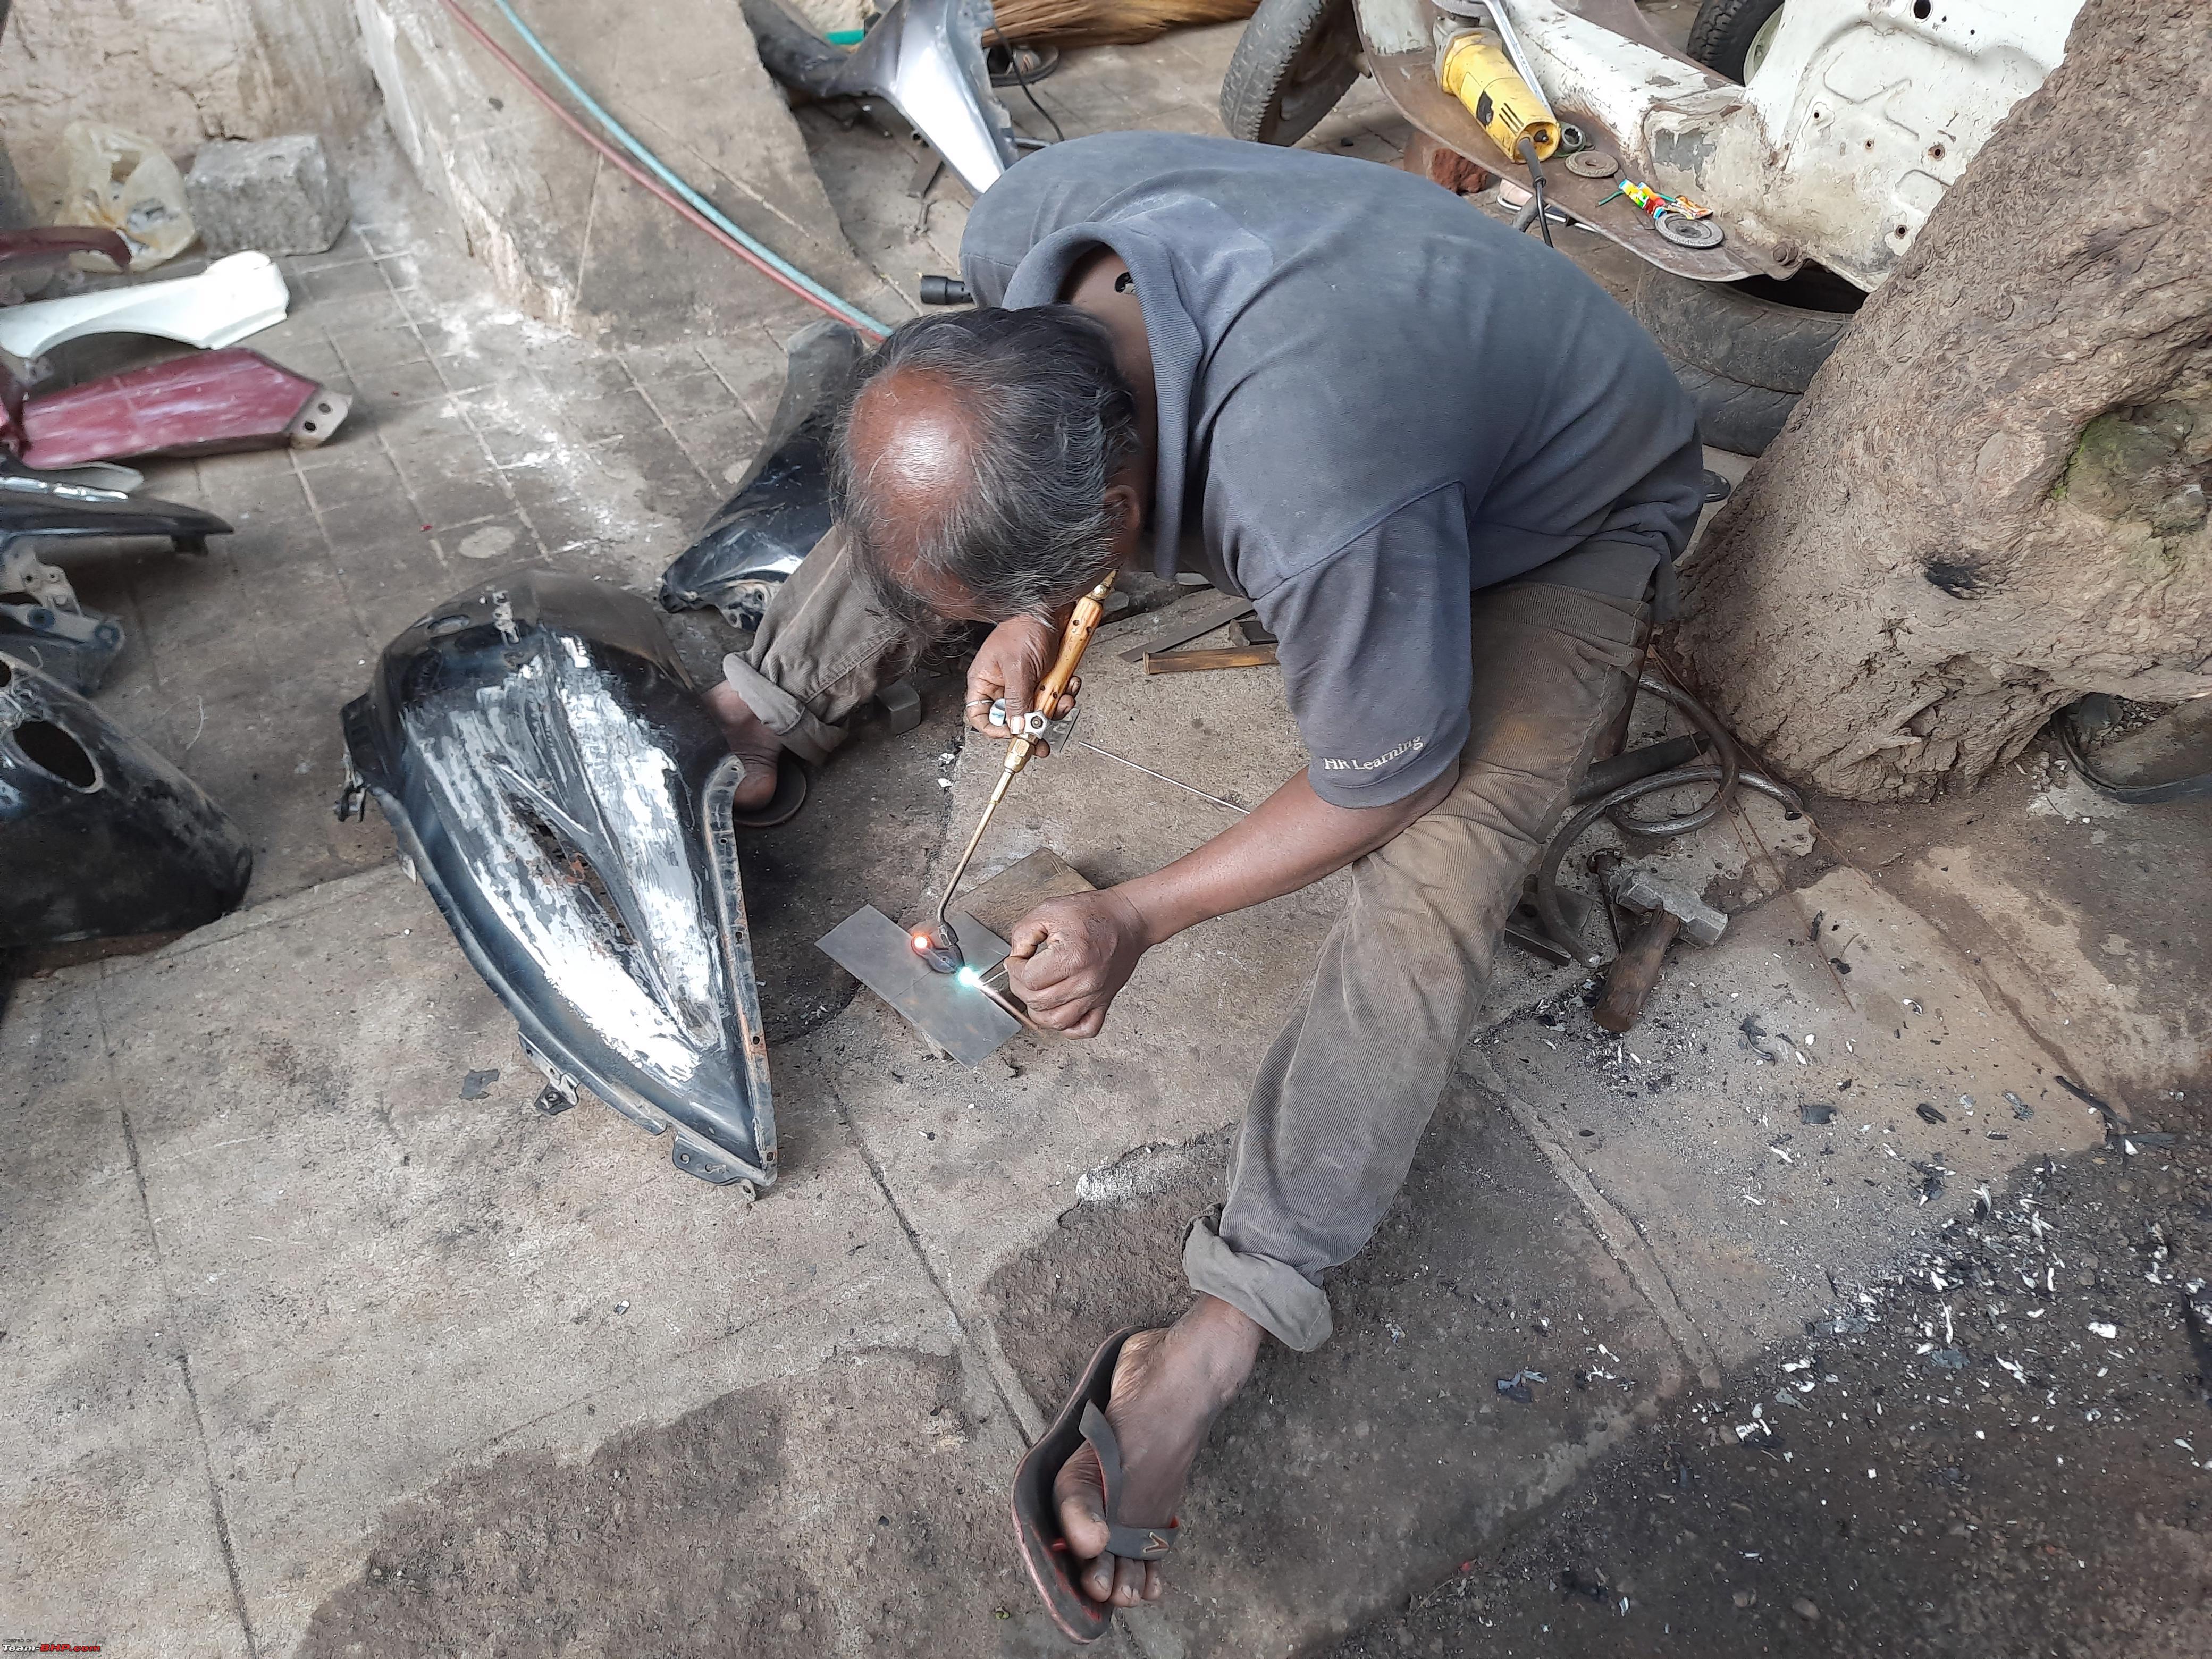
. Finally, a week after restoration started he called me and said he managed to get the engine down. It's packed, he will open in my presence.

Packed engine
Built - A 1968 Italian Vespa 150-e0.jpg

Was pretty unclean
Built - A 1968 Italian Vespa 150-e1.jpg

The carburetor
Built - A 1968 Italian Vespa 150-e2-carb.jpg

WIP - engine being ripped apart
Built - A 1968 Italian Vespa 150-re0.jpg

WIP
Built - A 1968 Italian Vespa 150-re1.jpg

WIP
Built - A 1968 Italian Vespa 150-re2.jpg

One of the bearings
Built - A 1968 Italian Vespa 150-re3-one-bearng.jpg

Standard size piston
Built - A 1968 Italian Vespa 150-re4-std-piston.jpg

Virgin bore
Built - A 1968 Italian Vespa 150-re5-virgin-bore.jpg

The head
Built - A 1968 Italian Vespa 150-re6-bore.jpg

One of the bearings
Built - A 1968 Italian Vespa 150-re7-bearing.jpg

One of the bearings
Built - A 1968 Italian Vespa 150-re8-one-bearin.jpg

A hyperlapse video capturing the moments of ripping apart of engine:


There was a hell of muck on the engine. Needless to say, several minutes went by cleaning it. Sunil said the engine probably is being opened only 2nd-time in 5+ decades. We were extremely surprised to see the bore be untouched and was still on STD size piston. This (very low run) also might be one of the reasons Sunil wanted to keep the vehicle for himself.

Meanwhile, there were lot of items that needed buffing and chroming. I worked on it in parallel. As these were unused and stored for many years, needed a good wash before turning them in.

Getting a good wash at local washing center
Built - A 1968 Italian Vespa 150-w00.jpg

Built - A 1968 Italian Vespa 150-w0.jpg

Built - A 1968 Italian Vespa 150-w1.jpg

Built - A 1968 Italian Vespa 150-w3.jpg

Was very satisfying to see them being cleaned:


Handing over for chrome/buffing
Built - A 1968 Italian Vespa 150-wz0.jpg

Built - A 1968 Italian Vespa 150-wz1.jpg

Built - A 1968 Italian Vespa 150-wz2.jpg

Some of the components were of my Suvega which I was restoring in parallel
Built - A 1968 Italian Vespa 150-wz3.jpg

Built - A 1968 Italian Vespa 150-wz4.jpg

See how all the components are after good buffing and chroming. Even the engine cases were buffed. No pics as they had packed well. It will be well evident when the engine is being assembled. Brought a lot of happiness:

Built - A 1968 Italian Vespa 150-ac0.jpg

Built - A 1968 Italian Vespa 150-ac2.jpg

Meanwhile, after trying many places, I did manage to find the old type piston. It was NOS as they say (New Old Stock) of 1986. It surely commands some premium, the shop being known to me gave at a reasonable price.

The original - New Old Stock
Built - A 1968 Italian Vespa 150-p2-original-piston-nos.jpg

The Piston
Built - A 1968 Italian Vespa 150-p0-piston.jpg

The original wrapper
Built - A 1968 Italian Vespa 150-p1-original-wrapper.jpg

Inside of Piston
Built - A 1968 Italian Vespa 150-p3-inside-piston.jpg

Last edited by funkykar : 1st June 2021 at 00:02.
funkykar is offline   (23) Thanks
Old 31st May 2021, 16:52   #5
Senior - BHPian
 
funkykar's Avatar
 
Join Date: Oct 2008
Location: Bengaluru
Posts: 2,635
Thanked: 6,617 Times
Re: Built - A 1968 Italian Vespa 150

Assemble the Engine
After the mechanic got all the necessary works in lathe and rebore, it was time to assemble the engine:

Built - A 1968 Italian Vespa 150-ass0-sunil-just-started.jpg

Built - A 1968 Italian Vespa 150-ass1-one-side-case.jpg

Built - A 1968 Italian Vespa 150-ass2-another-side-case.jpg

Built - A 1968 Italian Vespa 150-ass3-gleaming-after-buffing.jpg

Built - A 1968 Italian Vespa 150-ass4-piaggio-marking.jpg

Built - A 1968 Italian Vespa 150-ass5-wip.jpg

Built - A 1968 Italian Vespa 150-ass6-wip1.jpg

Built - A 1968 Italian Vespa 150-ass7-wip2.jpg

Built - A 1968 Italian Vespa 150-ass8-wip3.jpg

The engine being assembled. Video speed enhanced so that it doesn't get too boring.


The sight of the assembled engine was drool worthy
Built - A 1968 Italian Vespa 150-q1.jpg
Built - A 1968 Italian Vespa 150-q2.jpg

Last edited by funkykar : 1st June 2021 at 00:00.
funkykar is offline   (26) Thanks
Old 31st May 2021, 19:16   #6
Senior - BHPian
 
funkykar's Avatar
 
Join Date: Oct 2008
Location: Bengaluru
Posts: 2,635
Thanked: 6,617 Times
Re: Built - A 1968 Italian Vespa 150

The final coat

The painter kept the final coat pending until the mechanic gives a go-ahead. They follow the process of strictly hand over to customer after the final coat and don't want to keep with them even few extra hours as any damage or scratches they will be blamed. Now that the engine work, buffing/chrome work were done, the painter was given the green signal.

After base coat the chassis and components had to wait several days for engine work to complete
Built - A 1968 Italian Vespa 150-p0-dusty-there-pause-b4-final.jpg

Handle before final coat
Built - A 1968 Italian Vespa 150-p0-handle-before-paint.jpg

Being examined for putty work
Built - A 1968 Italian Vespa 150-p1-examineing-putty-work.jpg

Putty work in progress
Built - A 1968 Italian Vespa 150-p2-putty-work-prog.jpg

Putty work underbelly in progress
Built - A 1968 Italian Vespa 150-p3-putty-work-under-bell.jpg

Putty work on side panels
Built - A 1968 Italian Vespa 150-p4-putty-work-side-panel.jpg

Putty work
Built - A 1968 Italian Vespa 150-p5-putty-work.jpg

Almost ready for final coat
Built - A 1968 Italian Vespa 150-p6-almost-ready-final.jpg

Ready for final coat
Built - A 1968 Italian Vespa 150-p7-place-where-final-coat-applied.jpg

Panels kept for drying after final coat
Built - A 1968 Italian Vespa 150-p8-some-panels-after-pain.jpg

After final coat
Built - A 1968 Italian Vespa 150-p9-after-final-s.jpg

After final coat
Built - A 1968 Italian Vespa 150-p9-after-final.jpg

The miscellaneous components
Built - A 1968 Italian Vespa 150-p9z-misc-components.jpg

The miscellaneous components
Built - A 1968 Italian Vespa 150-p9z-misc-componentsb.jpg

The miscellaneous components including fork
Built - A 1968 Italian Vespa 150-p9z-misc-componentsfork.jpg

The drying process
Built - A 1968 Italian Vespa 150-p9zzzz-drying-process-after-fnal.jpg

Some of the videos I consolidated of the painting process:


New tires being installed
Built - A 1968 Italian Vespa 150-20200914_114449.jpg

Last edited by funkykar : 1st June 2021 at 00:02.
funkykar is offline   (24) Thanks
Old 31st May 2021, 20:59   #7
Senior - BHPian
 
funkykar's Avatar
 
Join Date: Oct 2008
Location: Bengaluru
Posts: 2,635
Thanked: 6,617 Times
Re: Built - A 1968 Italian Vespa 150

The business end - The Assembly


It was now time to put everything together and give life to what once was a pile of rust. I was nervously excited. Happy that I soon will have a Vespa. On other hand, I was a little sad that the enjoyable restoration process was coming to an end.

Found a new silencer at one of the shops. Says old stock, good quality
Built - A 1968 Italian Vespa 150-q0000-new-silensor.jpg

The chassis being got to the workshop
Built - A 1968 Italian Vespa 150-q0-chassis-being-bought-mech-place.jpg

Let us start!
Built - A 1968 Italian Vespa 150-q0-lets-begin.jpg

All set
Built - A 1968 Italian Vespa 150-q0-letsbegin0.jpg

Wiring first
Built - A 1968 Italian Vespa 150-q0-wiring-first.jpg

Wiring WIP
Built - A 1968 Italian Vespa 150-q0-wiring-wip.jpg

Cables - Chose the friction-free ones. Rare to find
Built - A 1968 Italian Vespa 150-q1-cables-1.jpg

Cables WIP
Built - A 1968 Italian Vespa 150-q1-cables.jpg

Front-wheel and respective components fitted
Built - A 1968 Italian Vespa 150-q3-front-wheel-compo-fitted.jpg

Handle and lever fitted. The look-alike Piaggio grip
Built - A 1968 Italian Vespa 150-q4-handle-lever-fitted.jpg

Wiring, cables, and rear Shock Absorber ready
Built - A 1968 Italian Vespa 150-q1-wiring-shock-cables-ready.jpg

Fitting the engine
Built - A 1968 Italian Vespa 150-q2-fitting-engine.jpg

Engine fitted
Built - A 1968 Italian Vespa 150-q2-engine-fitted.jpg

Engine - From the back
Built - A 1968 Italian Vespa 150-q2-engine-back.jpg

The very first time engine was started


Some videos consolidated the initial part of the assembly


The floor channel being fitted
Built - A 1968 Italian Vespa 150-q5-floor-channel-being-fitted.jpg

After floor channel fit
Built - A 1968 Italian Vespa 150-q5-after-floor-channel-fit.jpg

The logo is being fit
Built - A 1968 Italian Vespa 150-q5-logo-fitted.jpg

Som videos consolidated of Floor Channel fitment and Logo install


After seats were fitted
Built - A 1968 Italian Vespa 150-q6-seats-fitted.jpg

The engine just before closing the shield
Built - A 1968 Italian Vespa 150-q7-engn-just-before-closing-shield.jpg

Tinker preparing a custom number plate
Built - A 1968 Italian Vespa 150-q8-tinker-preparing-cutom-num-plate.jpg

Tinker preparing a custom number plate
Built - A 1968 Italian Vespa 150-q8q-tinker-cutom-num-plate.jpg

Custom number plate being fitted
Built - A 1968 Italian Vespa 150-q8z-custom-num-plate-being-fitted-after-painting.jpg

Number plate stickering


Sunil taking it for the Scooter's first spin
Built - A 1968 Italian Vespa 150-q9-mechanic-taking-spin-first-time.jpg

The very first ride by Sunil


The refurbished meter
Built - A 1968 Italian Vespa 150-q90-refurbished-meter.jpg

Just about ready
Built - A 1968 Italian Vespa 150-q99-just-about-ready.jpg

Sunil posing after work completed
Built - A 1968 Italian Vespa 150-qzz0-sunil-posing-b4-delivery.jpg

Reached home!
Built - A 1968 Italian Vespa 150-qzzzz-home.jpg

Last edited by funkykar : 1st June 2021 at 00:01.
funkykar is offline   (40) Thanks
Old 31st May 2021, 21:30   #8
Senior - BHPian
 
funkykar's Avatar
 
Join Date: Oct 2008
Location: Bengaluru
Posts: 2,635
Thanked: 6,617 Times
Re: Built - A 1968 Italian Vespa 150

Photoshoot after completion


It's a customary thing for me to ride/ drive all the cars and scoots at home to the iconic Vidhana Soudha!

Built - A 1968 Italian Vespa 150-v0.jpg

Built - A 1968 Italian Vespa 150-v1.jpg

Built - A 1968 Italian Vespa 150-v3.jpg

Built - A 1968 Italian Vespa 150-v4.jpg

Some pics taken around iconic Windsor Manor hotel
Built - A 1968 Italian Vespa 150-p0.jpg

Built - A 1968 Italian Vespa 150-p5.jpg

Along with my restored Suvega (Restoration logged on https://www.team-bhp.com/forum/motor...ck-chance.html (1980 Suvega - Luck by chance!))
Built - A 1968 Italian Vespa 150-p6.jpg

Built - A 1968 Italian Vespa 150-p1.jpg

Built - A 1968 Italian Vespa 150-p11.jpg

Built - A 1968 Italian Vespa 150-p12.jpg

Built - A 1968 Italian Vespa 150-p13.jpg

Built - A 1968 Italian Vespa 150-p14.jpg

Built - A 1968 Italian Vespa 150-p15.jpg

Daughter Risha happy to see another Scooter come home
Built - A 1968 Italian Vespa 150-h0-ri.jpg

She was delighted to see a basket where she could keep some of her things
Built - A 1968 Italian Vespa 150-h1-rish.jpg


Finally, a grueling restoration came to an end. Bucket of rust to a Scooter that was built. From the beginning to the end, I was glad to be part of the restoration. The process was so time-consuming and I had to run around for several things several times. The Honda Dio I was using as a beater bike clocked 1000kms during this restoration. I precisely remember as it just had a rebore done and I was running it in. This restoration shall remain close to my heart. Once the pandemic is over, hope to take it on a very long ride!

Credits
  • Bhpian Srinivas Chakravarthy (schakravarthy) - Greatly helped me with various information on the Vespa. I literally knew nothing. Over 50% of the necessary information provided by him. He also precisely directed me to specific online sellers/shops for specific parts. Life was so easy with this information. Not to forget his pictorial help too. He took time out of his busy schedule, clicked pics, and sent me to help me understand better.
  • Narendran, Vintage Spares Expert - Helped me with several parts including tires and tubes. An extremely honest and nice gentleman.
  • Prasad from Srinivasa Automobiles, link road, Bangalore - The majority of the spares supplied by him. All of them either OE or good quality aftermarket. He arranged for spares from different places as well.
  • Dr. Srikanth Narayana - A good friend who also owns a Vespa and helped me with various information. The front number plate copied from his Vespa. Hoping our Vespa's meet post-Bangalore Lockdown.
  • Choudhary Spares, Andhra Pradesh - Got some of the spares from here.
  • Vintage Spare Parts Online - Was greatly helped by good quality after-market cosmetic spares.
  • Bhpian Chethan (GreenDay) for helping me out with several logistics.
  • Bhpian Arun (Arun1100) for injecting me with the idea of Vespa/Priya.
  • Maghi the tinker. He did a fantastic job of tinkering, fabricating the front number plate, fixing the floor channel and logos, which required a lot of patience.
  • Sunil, the chief mechanic - He has immense expertise with scooters. All his experience was put to test. Not often do Vespa and Priya turn up here. He was glad to part with it initially and extremely happy to be the one who restored it. 100/100 to him.

There could be many others who helped me directly or indirectly. Apologies if I missed anyone.

Thanks,
Karthik Makam

Last edited by funkykar : 1st June 2021 at 00:01.
funkykar is offline   (61) Thanks
Old 1st June 2021, 06:58   #9
Team-BHP Support
 
Join Date: Feb 2004
Location: Mumbai
Posts: 17,835
Thanked: 77,057 Times
re: Built - A 1968 Italian Vespa 150

Thread moved out from the Assembly Line. Thanks for sharing!
Aditya is offline   (6) Thanks
Old 1st June 2021, 07:36   #10
Distinguished - BHPian
 
vigsom's Avatar
 
Join Date: Feb 2006
Location: NSEW
Posts: 3,767
Thanked: 25,480 Times
re: Built - A 1968 Italian Vespa 150

Now that's what one calls bringing back from the dead. True pedigree restoration, characteristic of @funkykar. Brilliant !!!

Except the crack in the belly, the chassis looked quite OK to me. It was nice to see all the primering, body filler, and final finisher putty the old school way, very common till the Fiats and Ambassadors were in majority. You will notice that the maximum finisher putty was used at the belly where the crack was.

I remember the day in 1976 in Delhi when my Dad had to choose his Bajaj 150 from at least a 100 examples at the dealer's premises. I very clearly remember that there were Bajaj 150s aplenty in this same shade and with the same type of tail light that you have showcased. He eventually chose a unique greenish blue Bajaj 150 with the newly launched larger tail lamp assembly similar to what one would see later in the Bajaj Cub. If I remember right, that scooter got the regn. number DEI 6421.

Last edited by vigsom : 1st June 2021 at 07:57. Reason: adding some text
vigsom is offline   (11) Thanks
Old 1st June 2021, 10:10   #11
Senior - BHPian
 
arun1100's Avatar
 
Join Date: Jun 2009
Location: Bangalore
Posts: 2,087
Thanked: 5,577 Times
Re: Built - A 1968 Italian Vespa 150

Excellent thread, Karthik. These detailed description and pics should help hundreds of scooter enthusiasts who wish to restore their scooters. During these tough times, you managed to stay safe and ensures the restoration is done meticulously. Hats off to the mechanic, painter and tinker for the wonderful job.

Even though I have restored my Padmini by personally involving from start to end, I couldn't get my Dad's '97 Chetak restored myself due to lack of information and reliable resources; thankfully, you got the Chetak restored along with the FC update. Just for viewer's reference, below is the thread. Such threads should give enough valuable information.
https://www.team-bhp.com/forum/motor...workhorse.html (Restored! Hamara Bajaj - Chetak, a fun workhorse)

Congratulations on the Vespa restoration. I am sure you had your learning from this restoration and took care of them in the Priya's restoration! Waiting for Priya's thread to go Live!

Do update this thread regularly on the ownership, maintenance and riding experience.

Last edited by arun1100 : 1st June 2021 at 10:22.
arun1100 is offline   (9) Thanks
Old 2nd June 2021, 10:15   #12
Distinguished - BHPian
 
neil.jericho's Avatar
 
Join Date: Aug 2009
Location: Cochin
Posts: 3,810
Thanked: 19,327 Times
Re: Built - A 1968 Italian Vespa 150

funkykar, Im not a scooter guy, but I greatly enjoy these scooter restoration threads on the forum. The colour that you selected is superb! I am sure that you must be turning heads when you take your lovely scooters out in Bangalore.

I look forward to more scooter related posts and threads from you and your partners in crime (Arun1100 & GreenDay).

Can you give us a ball park figure of the costs involved in such a great restoration?
neil.jericho is offline   (3) Thanks
Old 9th June 2021, 09:17   #13
Newbie
 
Join Date: Jul 2017
Location: SFXNYCOK
Posts: 17
Thanked: 38 Times
Re: Built - A 1968 Italian Vespa 150

Absolutely awesome restoration Karthik@funkykar, as exemplified by your words it gives such massive satisfaction to see the scooter back to its glory. .

Also as stated by Neil would love to know a cost breakdown. Cheers
atmosphere is offline   (2) Thanks
Old 9th June 2021, 09:49   #14
Distinguished - BHPian
 
ninjatalli's Avatar
 
Join Date: Jul 2011
Location: Bangalore
Posts: 3,802
Thanked: 15,583 Times
Re: Built - A 1968 Italian Vespa 150

@funkykar, each of your thread is a delight to read. But this brought a different levels of joy - I'd rate this one of the best restoration of yours.

If you don't mind, how many scooters (& other 2 wheelers) do you have in your garage? I'd love to see a picture of the lot.

P.s. Do you allow bhpians visits to see these beauties in their true glory in person?


Edit: My childhood memories of Vespa was the plasticky feel it had (compared to the Chetaks & Priyas) and the rectangularish headlight and boxed front. But the fact that this Vespa has a more Bajaj scooterish front look is a complete surprise - never knew it till now! Or this is such a different model than the ones I remember from childhood memories.

And sorry to hear about the situation of your mechanic Sunil. I hope his current state has improved and he's realigned to continue working from Bangalore going forward.

Last edited by ninjatalli : 9th June 2021 at 09:57.
ninjatalli is offline   (4) Thanks
Old 9th June 2021, 10:05   #15
BHPian
 
ash22's Avatar
 
Join Date: Jul 2019
Location: Chennai
Posts: 208
Thanked: 480 Times
Re: Built - A 1968 Italian Vespa 150

Excellent thread. It is always pleasure to see restorations like this.
One question - Can you send us a picture of your garage or parking space?
How do you accommodate all your vehicles in your home?
ash22 is offline   (3) Thanks
Reply

Most Viewed


Copyright ©2000 - 2024, Team-BHP.com
Proudly powered by E2E Networks