Animated Image:
source
It's a printing technique called hydrographics (aka water transfer printing / cubic printing).
Ever wondered how the plastic trim on car dashboards & door-pads have a faux wood or carbon-fibre look? This is how!
Any pattern or graphic can be printed onto a 3D object...
Animated Image:
source
The technology was invented 40 years ago, and has already been in India for 8 years (only for large-scale manufacturers).
BUT... this is the first time its being made accessible to individual Do-It-Yourselfers, right here in Mumbai!
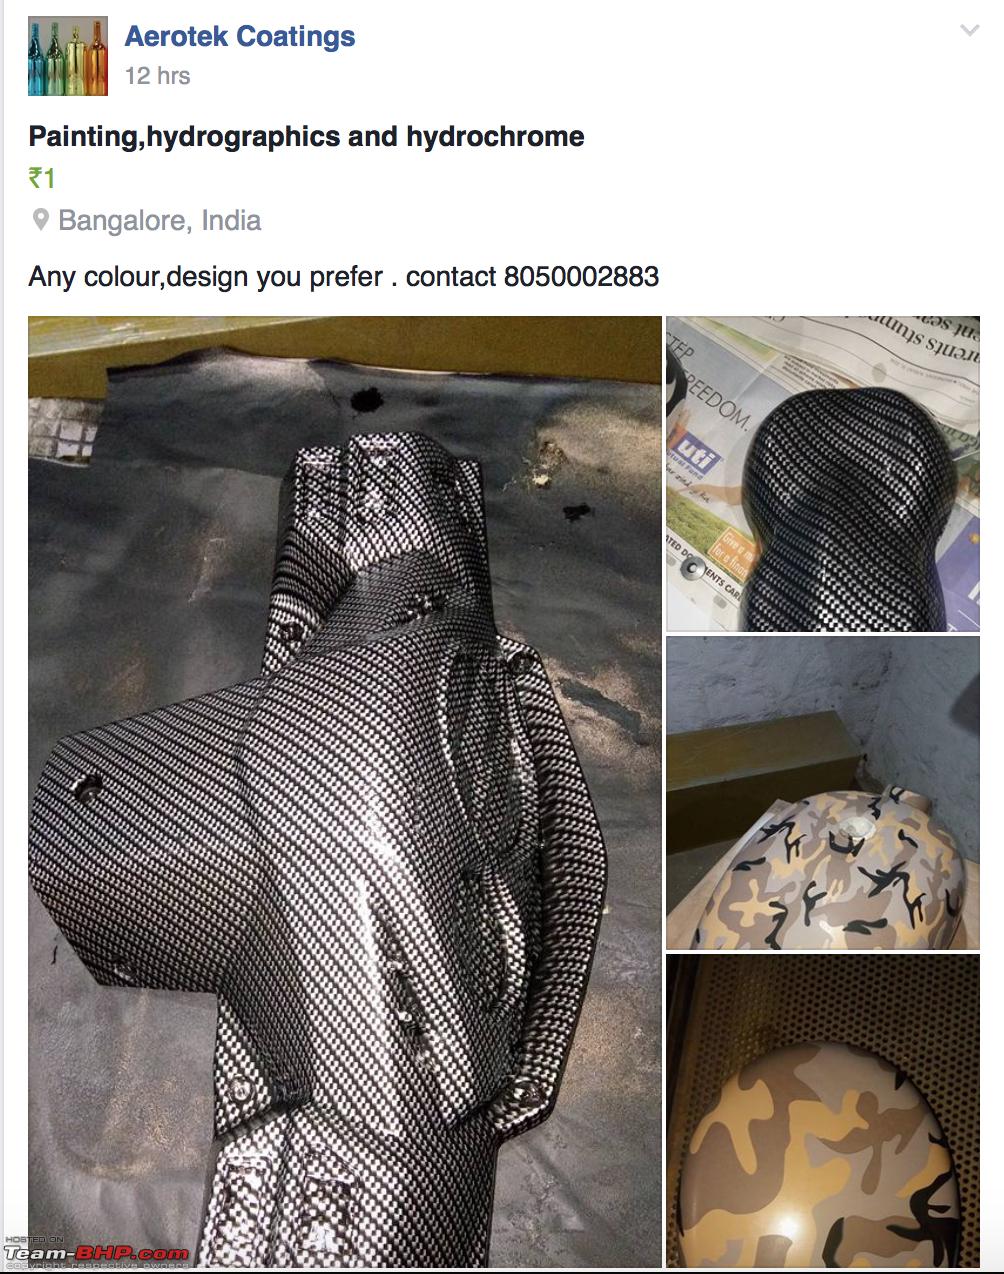
The people making it possible:
Post 2 - Samples of work
Post 3 - The printing process
Post 4 - Contact details & pricing
Post 5 - Additional videos
A Word of (#aesthetic) Caution:
There were a lot of pictures showcasing the wide range of patterns available, but I've removed most of the ones that I think BHPians wouldn't have had the palette for. I've left a few teasers in there though! ;)
A Quick Overview of the Steps:
1) Priming (The object is painted the desired base colour)
2) 'All Substrate Base' is applied (Essential to having the film adhere to the object)
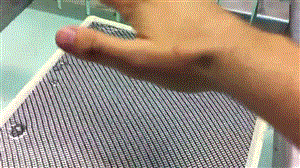
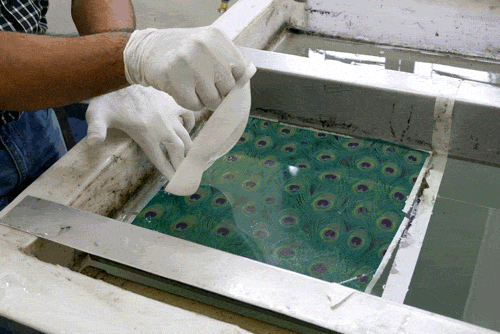
3) Film is placed on the water & a chemical activator is sprayed on it
4) The object is dipped into the printed film (shown above)
5) Slimey coating is washed off
6) The object is left to dry
7) Clear-coat is sprayed on, giving the object the final glossy or matte finish
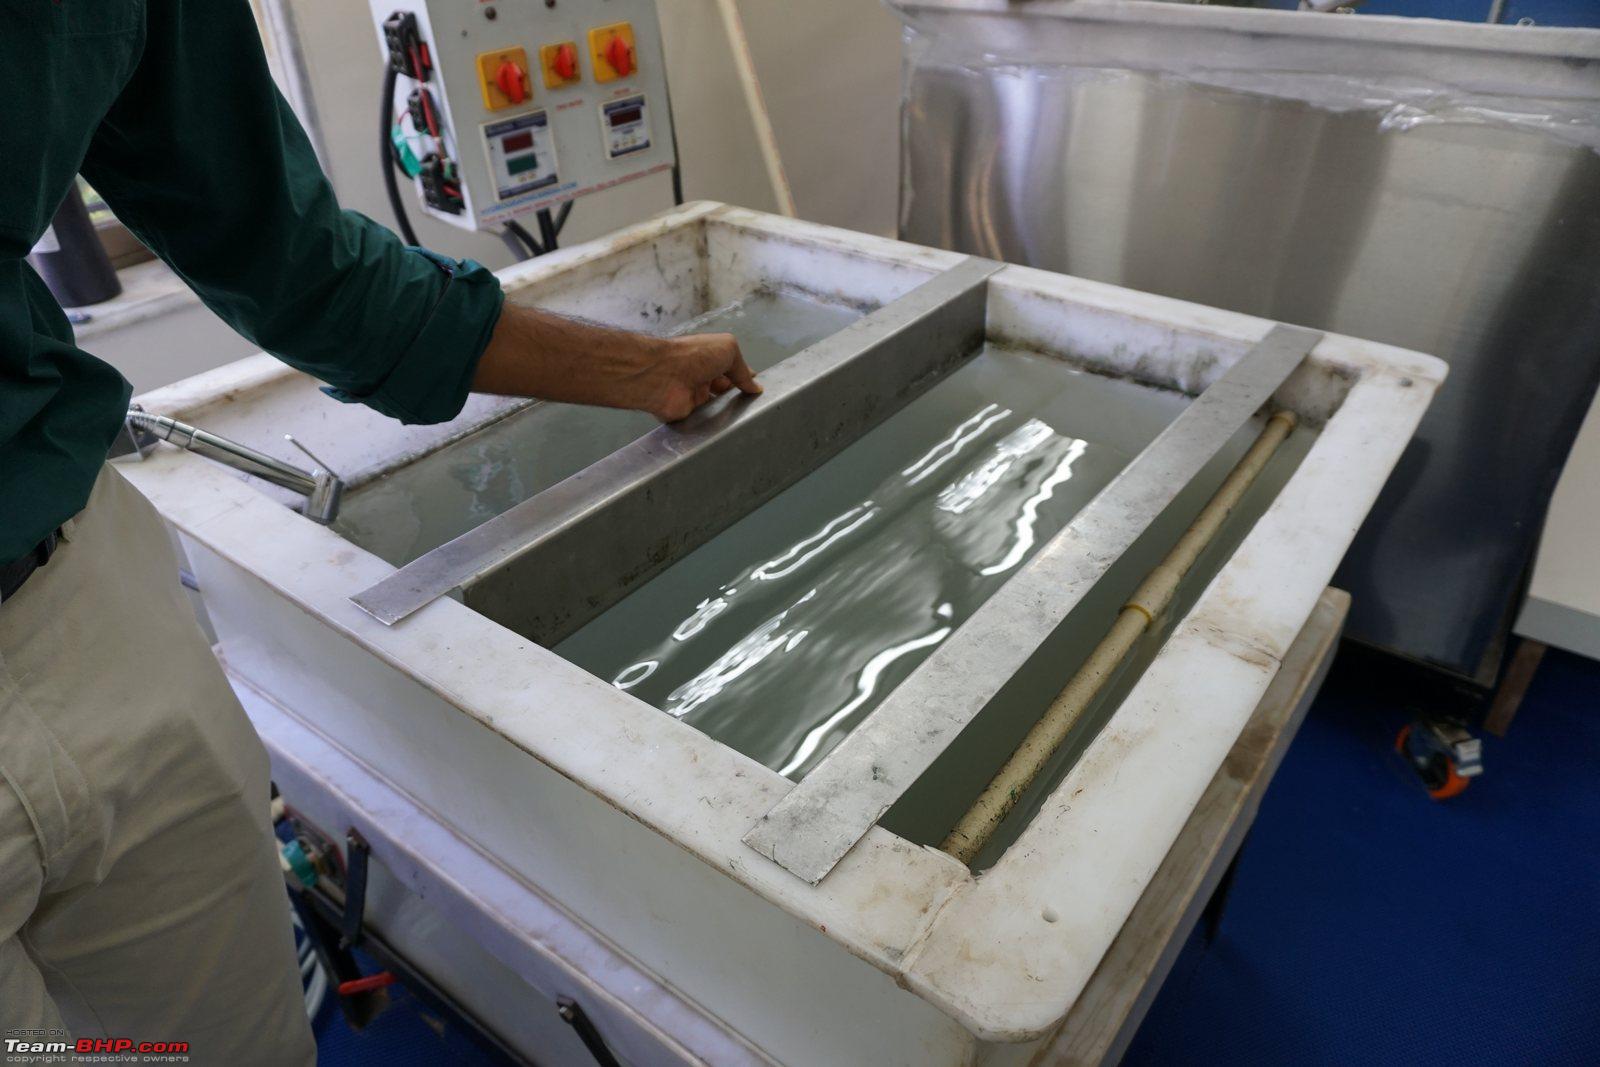
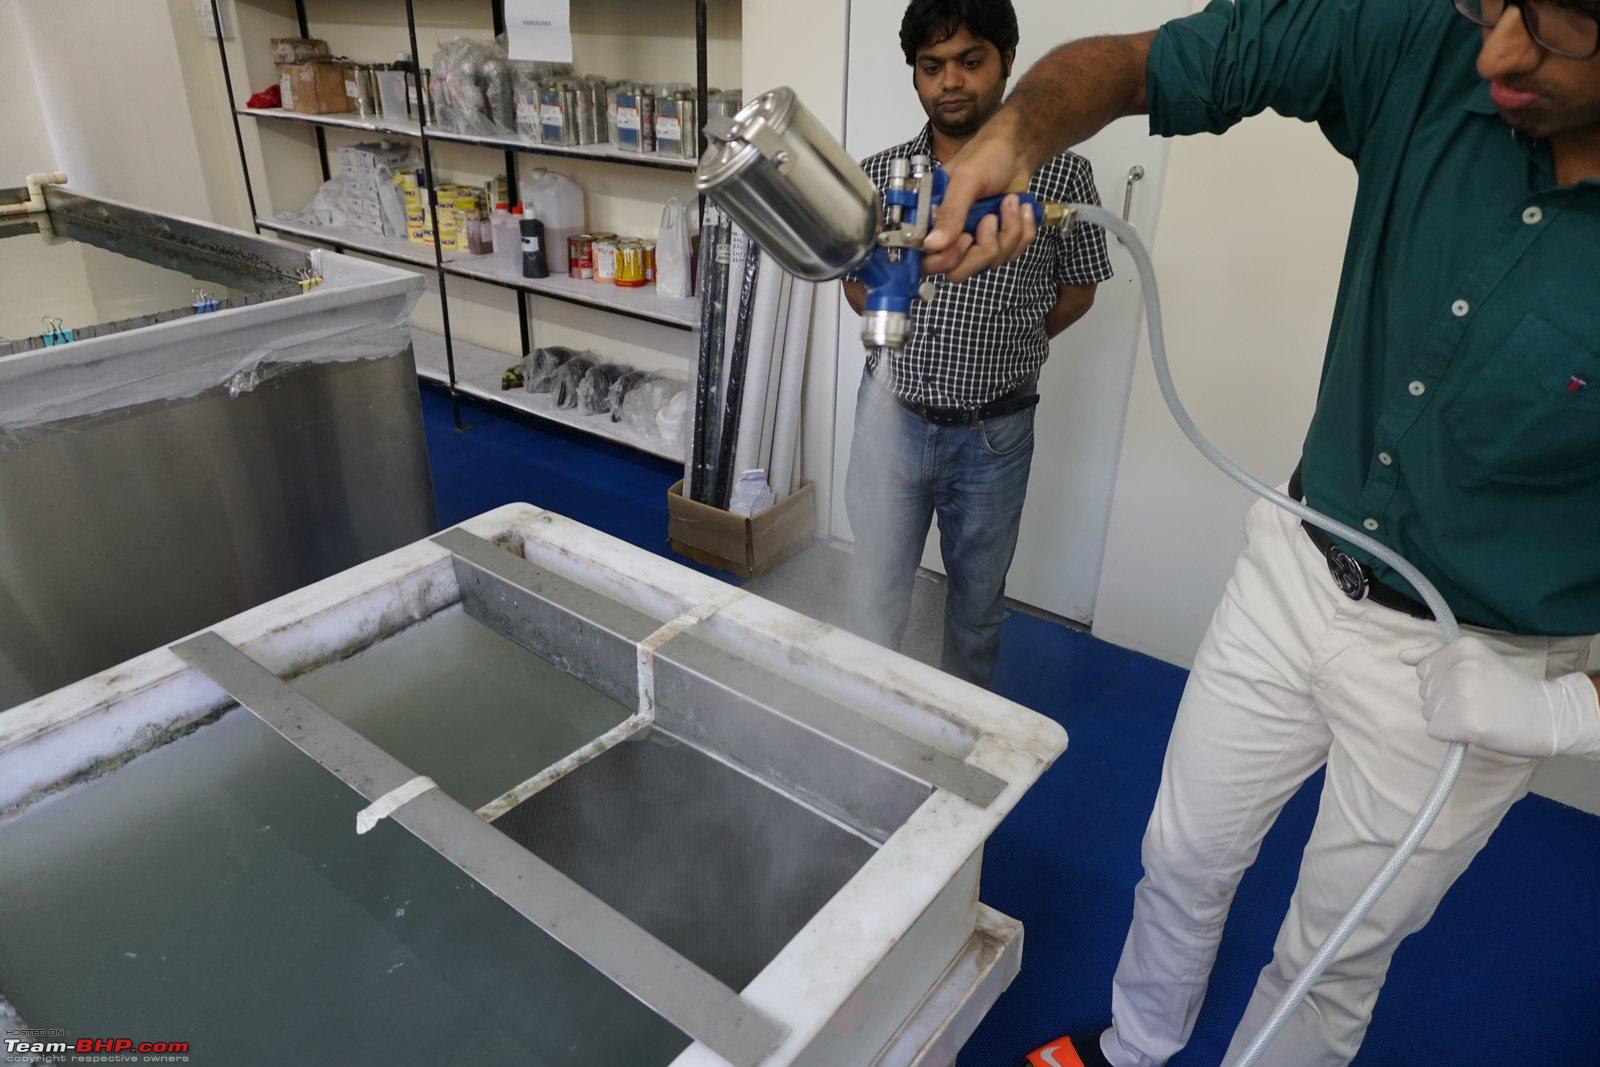
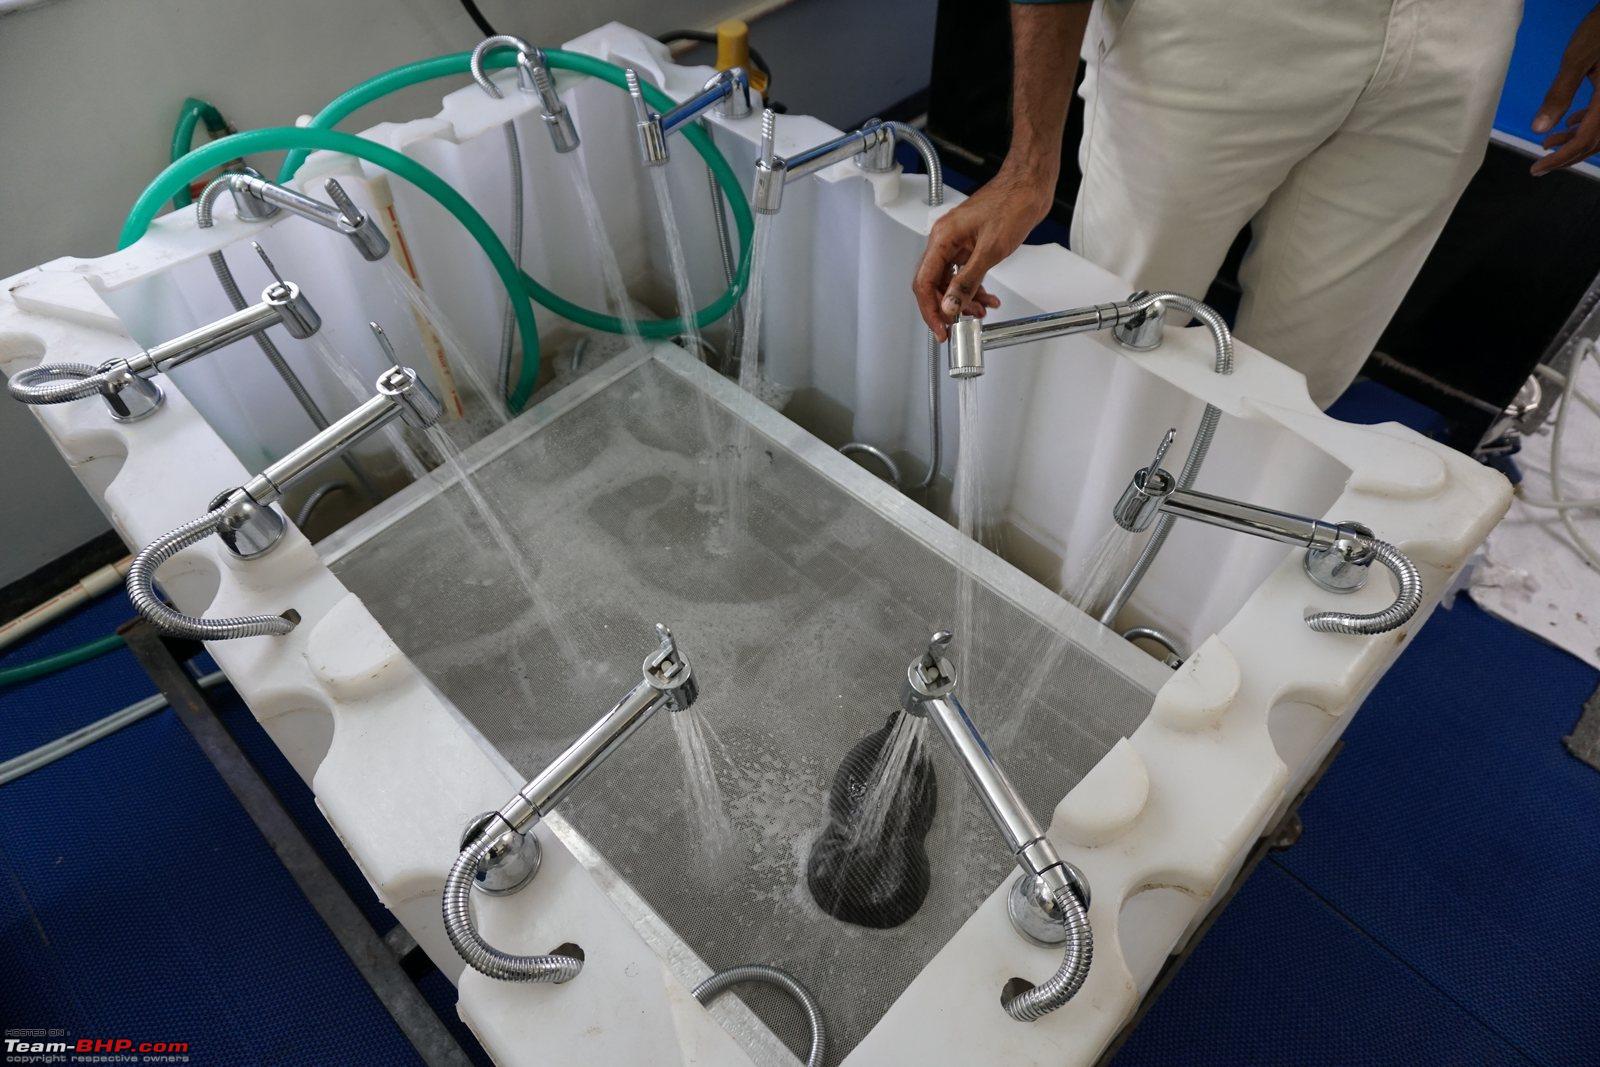
The printing space consists of two dipping tanks, a washing tank & a spray booth. On the right you can see the rolls of films and a chemical rack:
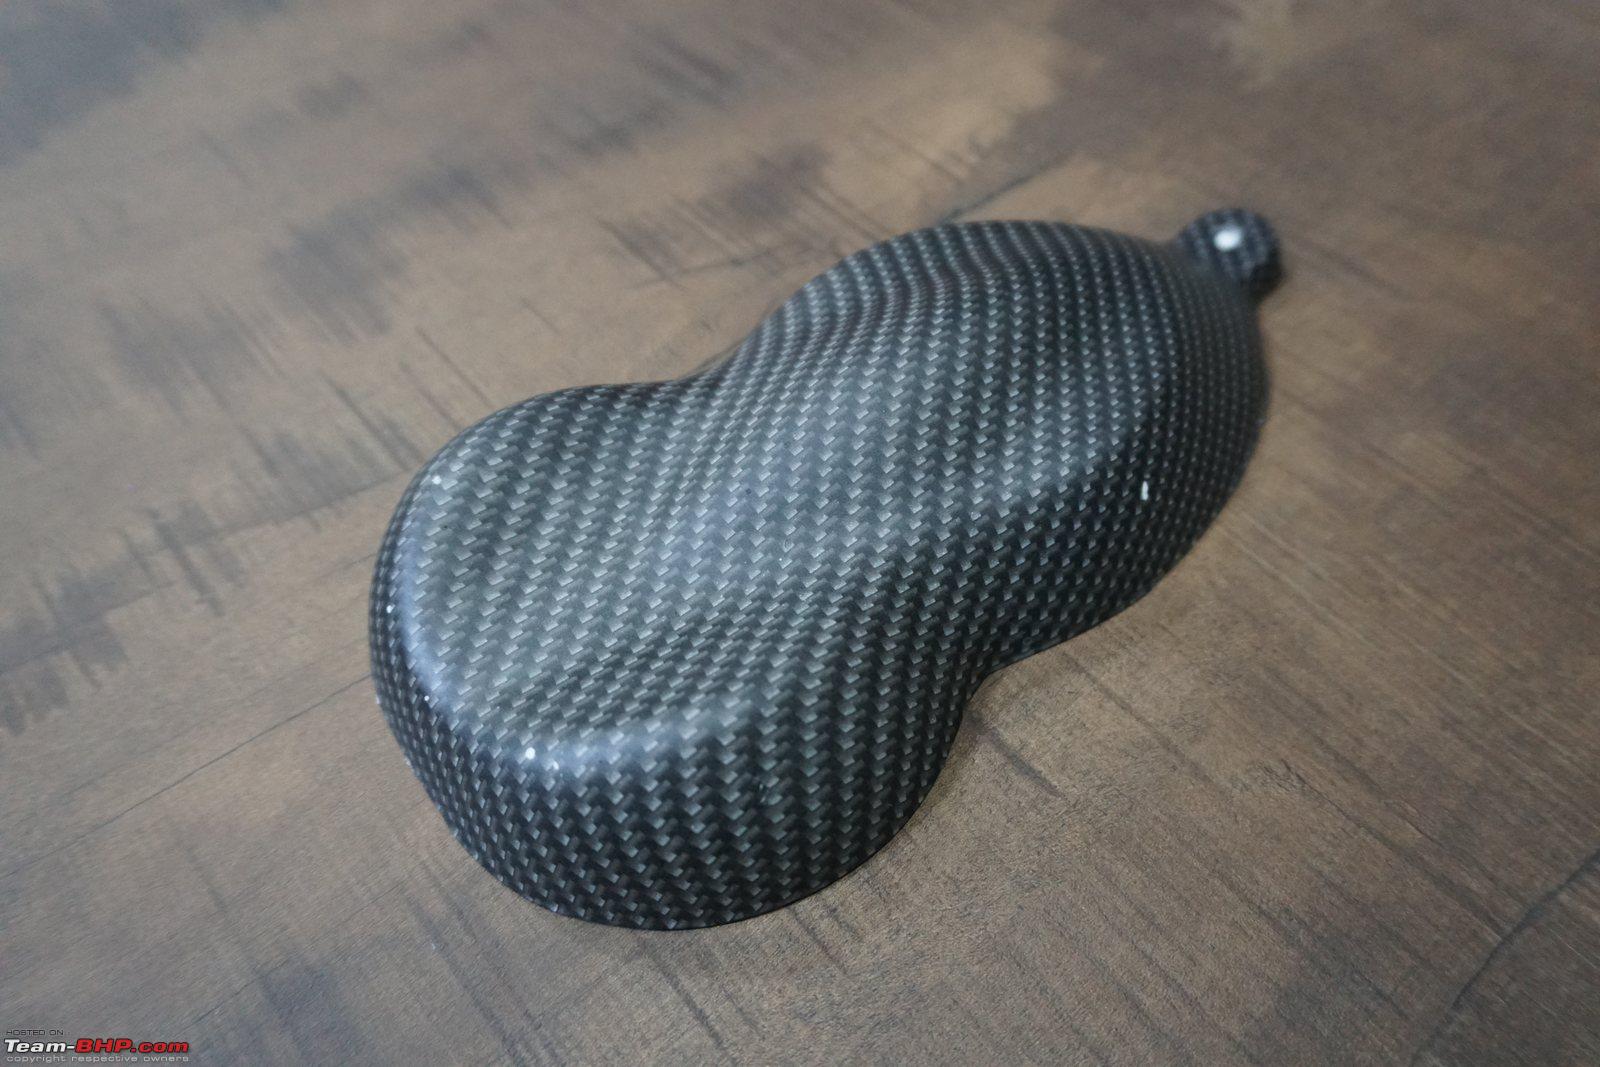
We'll be printing this carbon fibre pattern today:
The film is rather thin, and has a plasticy feel to it. Parts of it can be transparent, which shows the base colour below the print:
When put in the water, the edges tend to crinkle up - as illustrated. Masking tape is applied to the edges to prevent this:
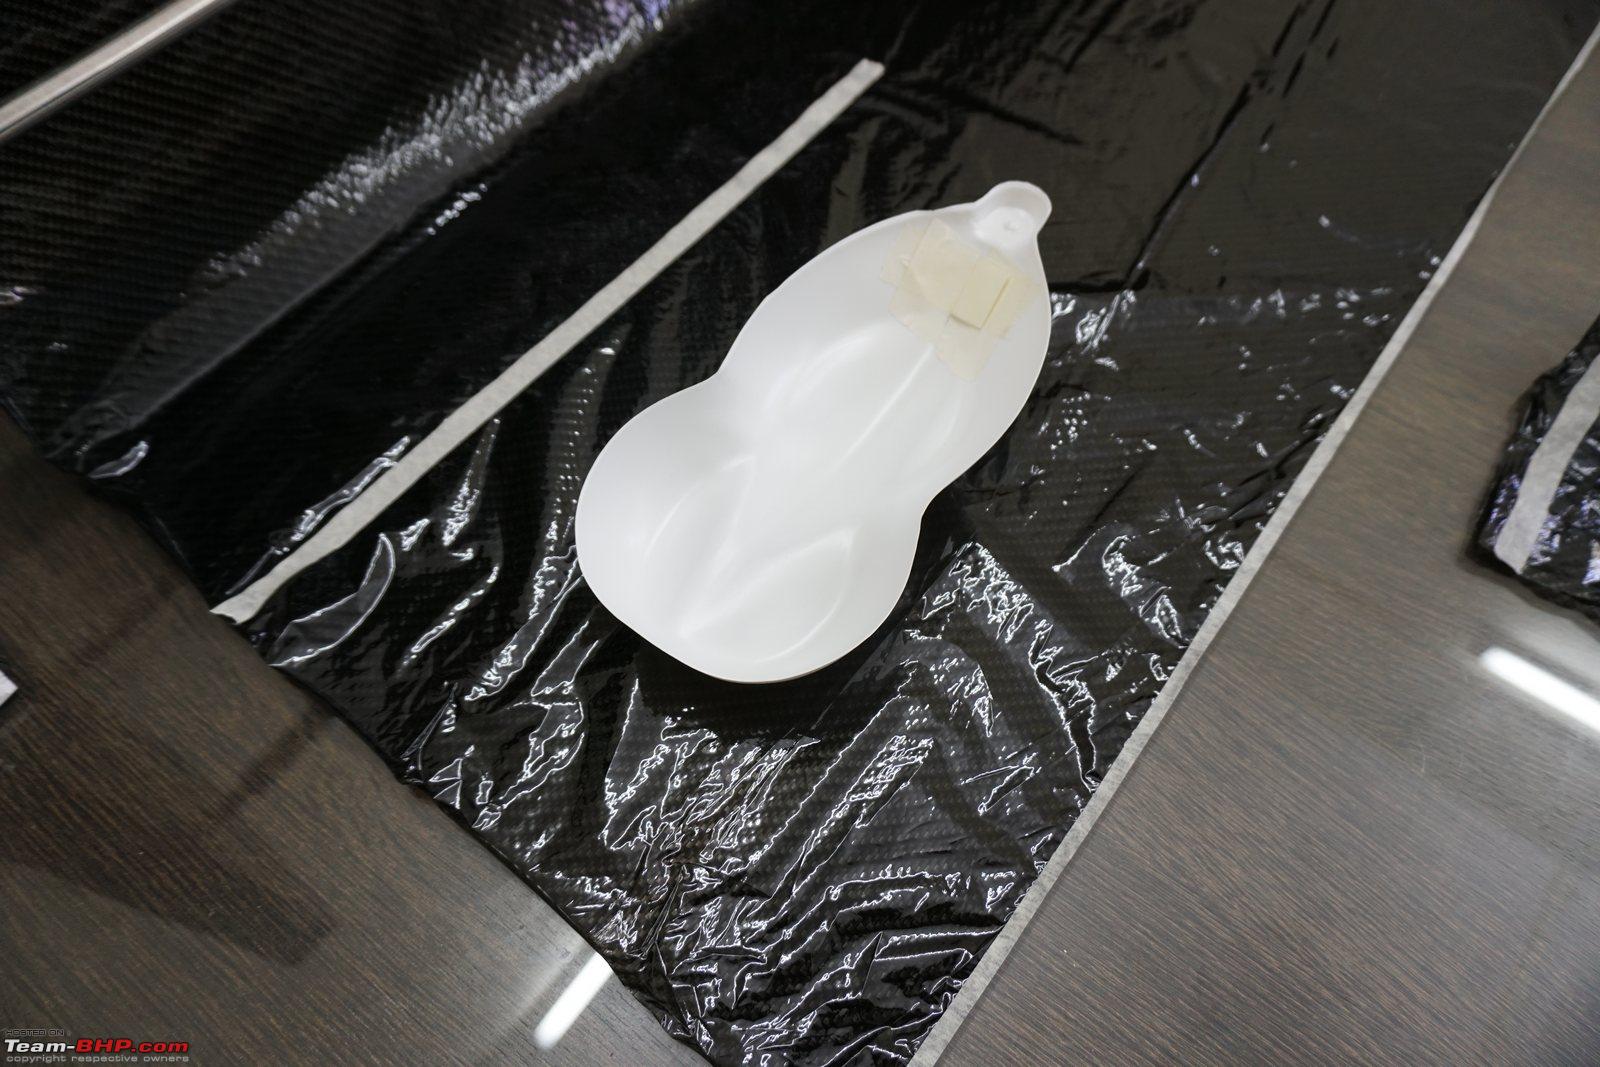
The 'speedshape' we're using has already been painted in a white colour, and the "all substrate base" has been sprayed on. The film is cut to an appropriate size:
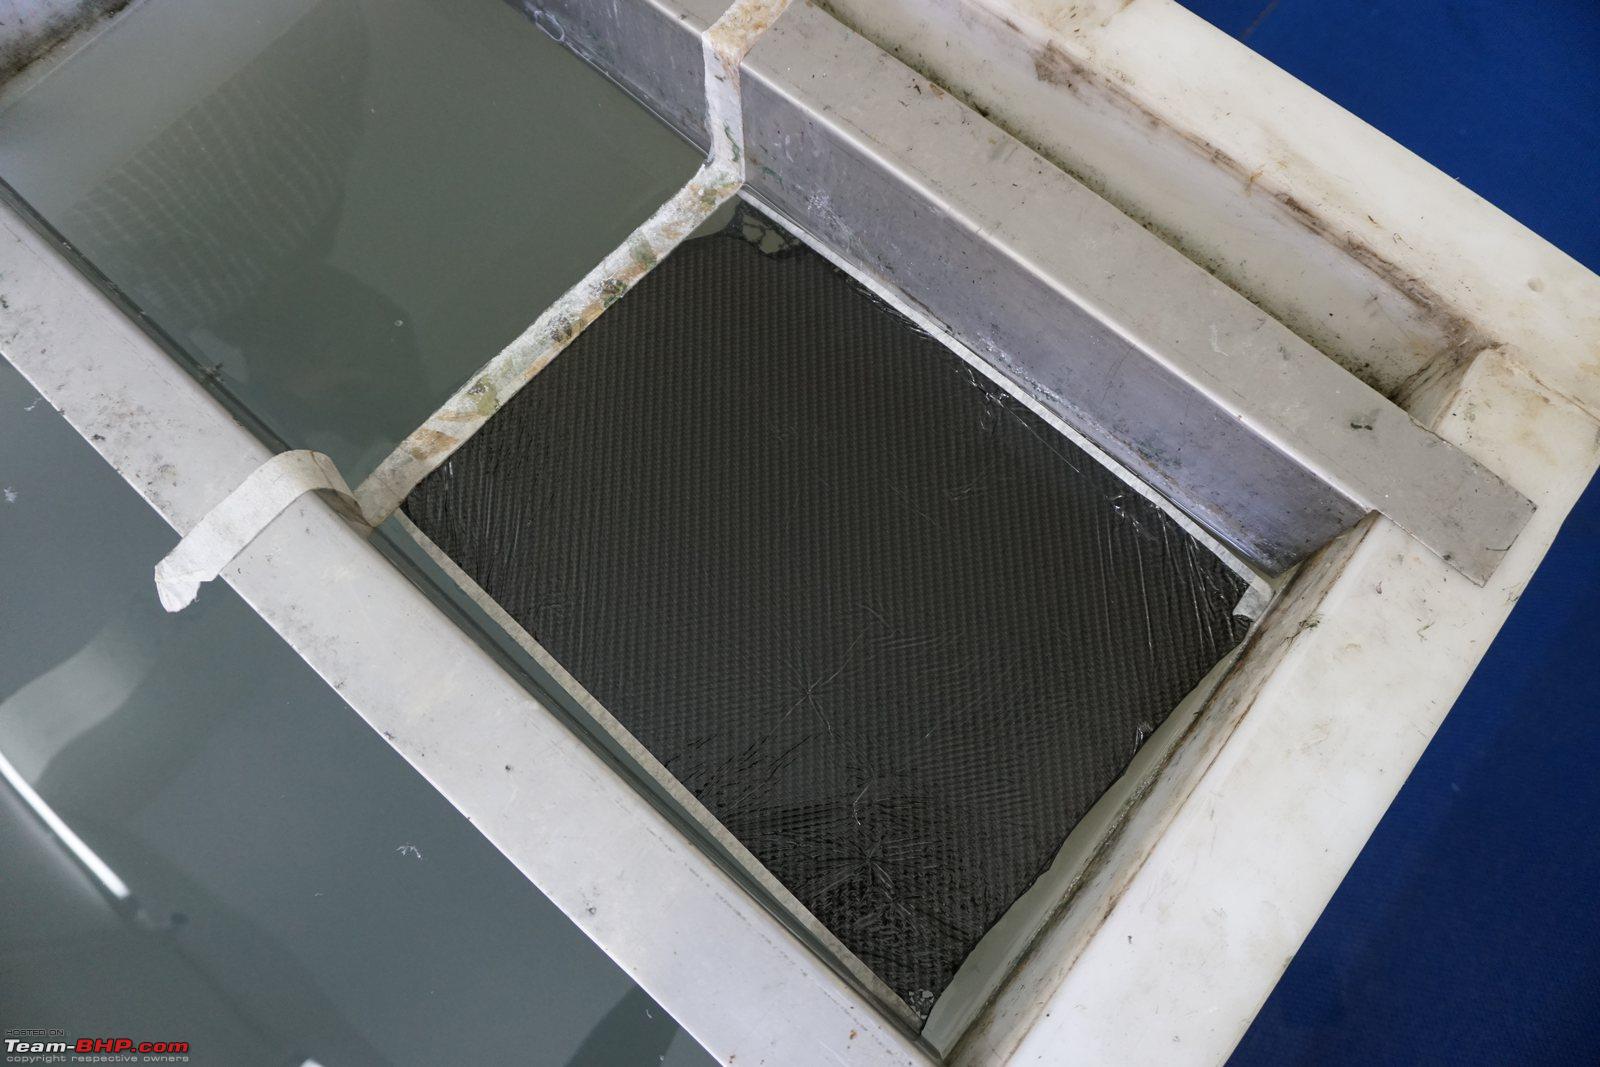
The movable dams are set up so that the smaller piece of film doesn't float around the whole tank:
The film is gently placed on the water's surface:
Air bubbles between the film and the water can be blown out:
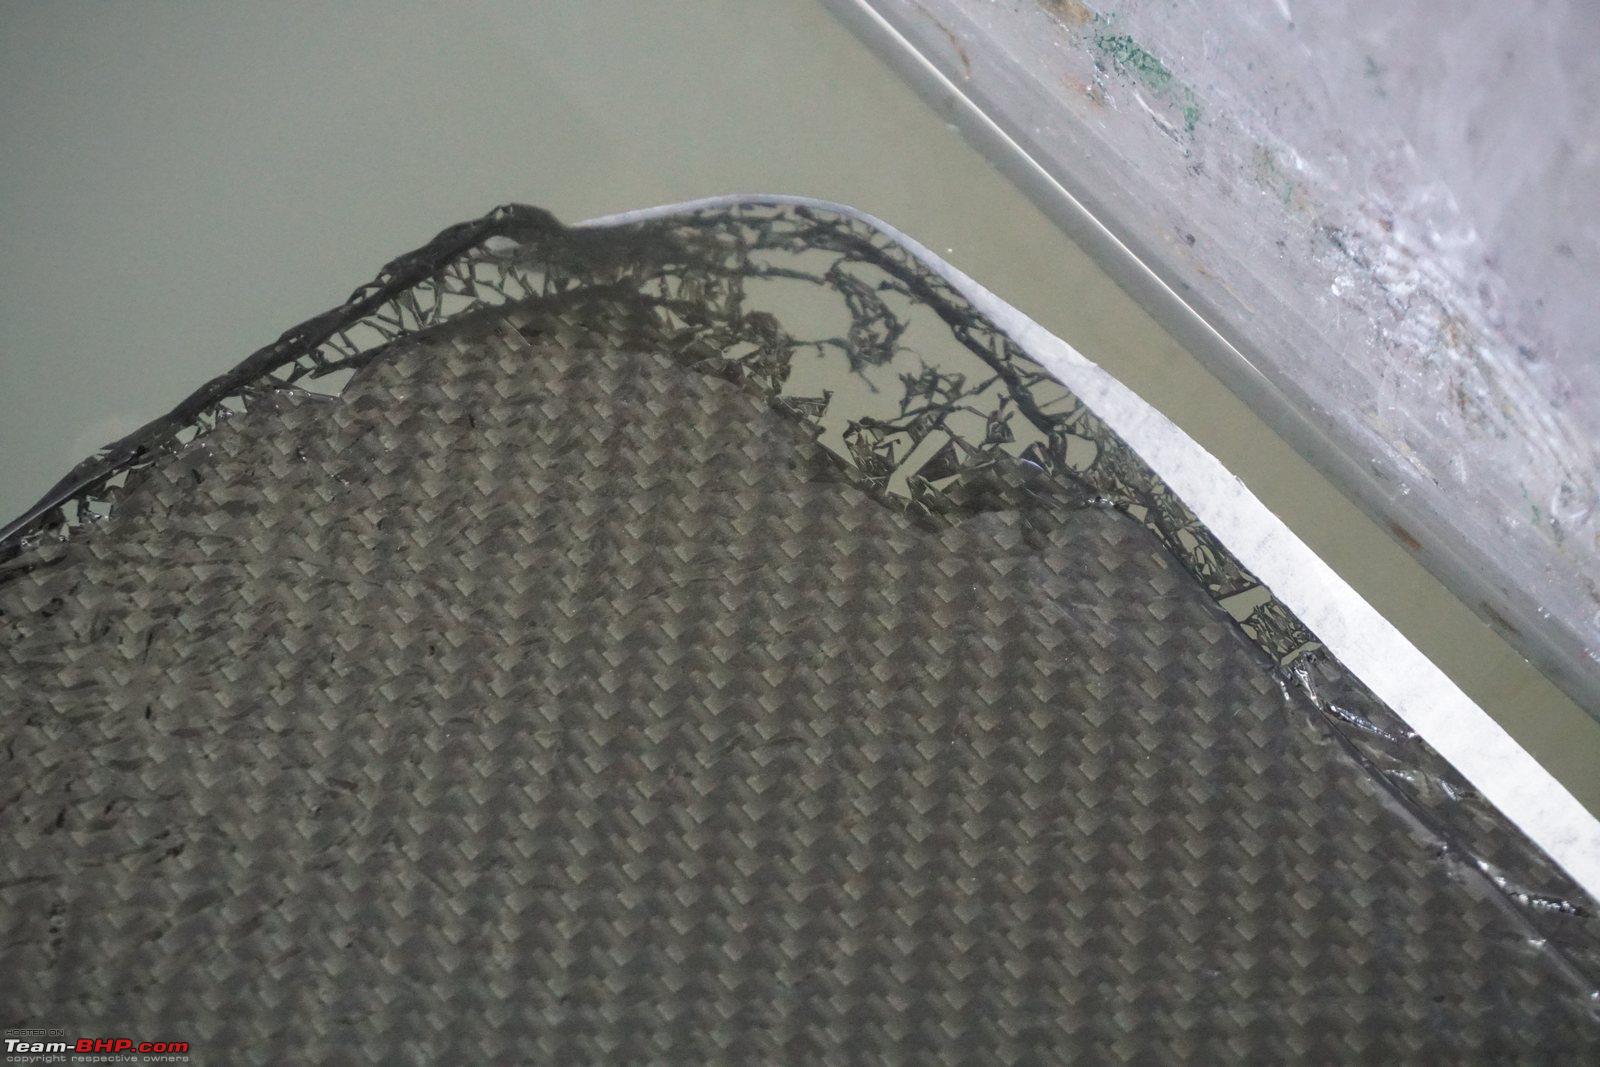
If water gets on top of the film, it starts to disintegrate like this:
A strip of masking tape is applied across both dams to prevent the film from moving around. Notice how wrinkly the film still is:
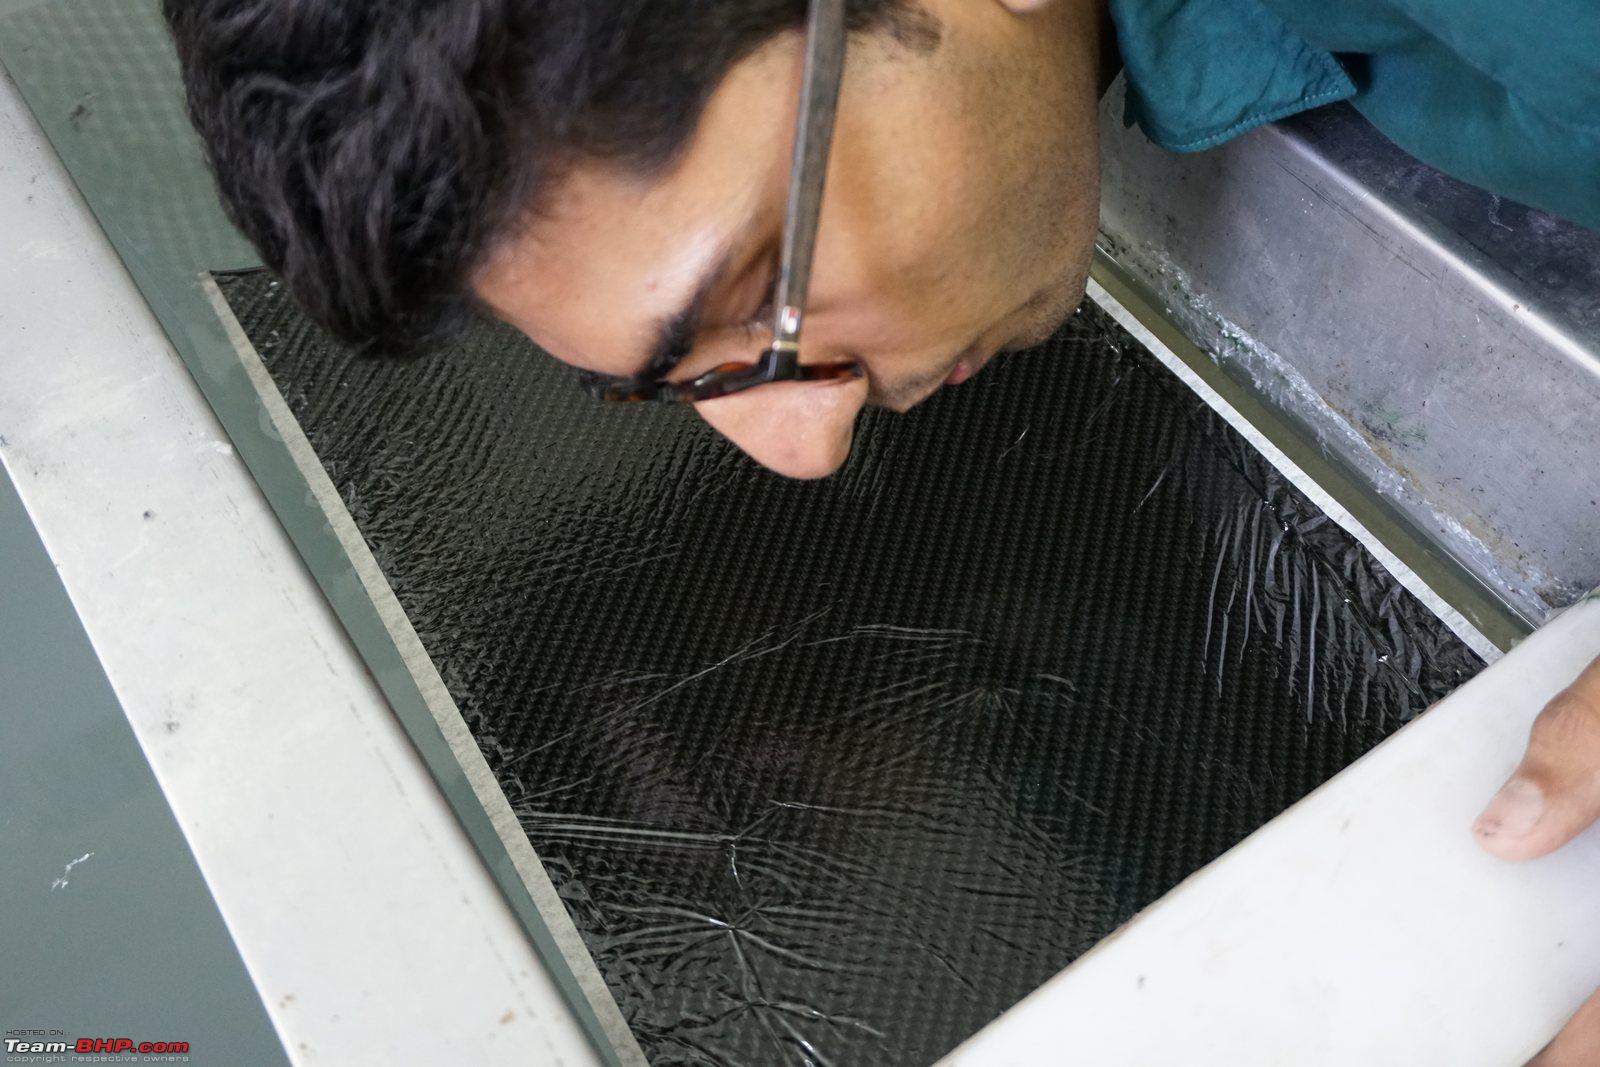
An activator is sprayed onto the film to start a chemical process:
Look now! The wrinkly film has become as smooth as glass:
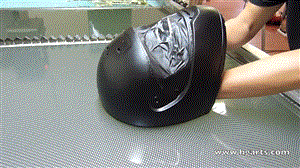
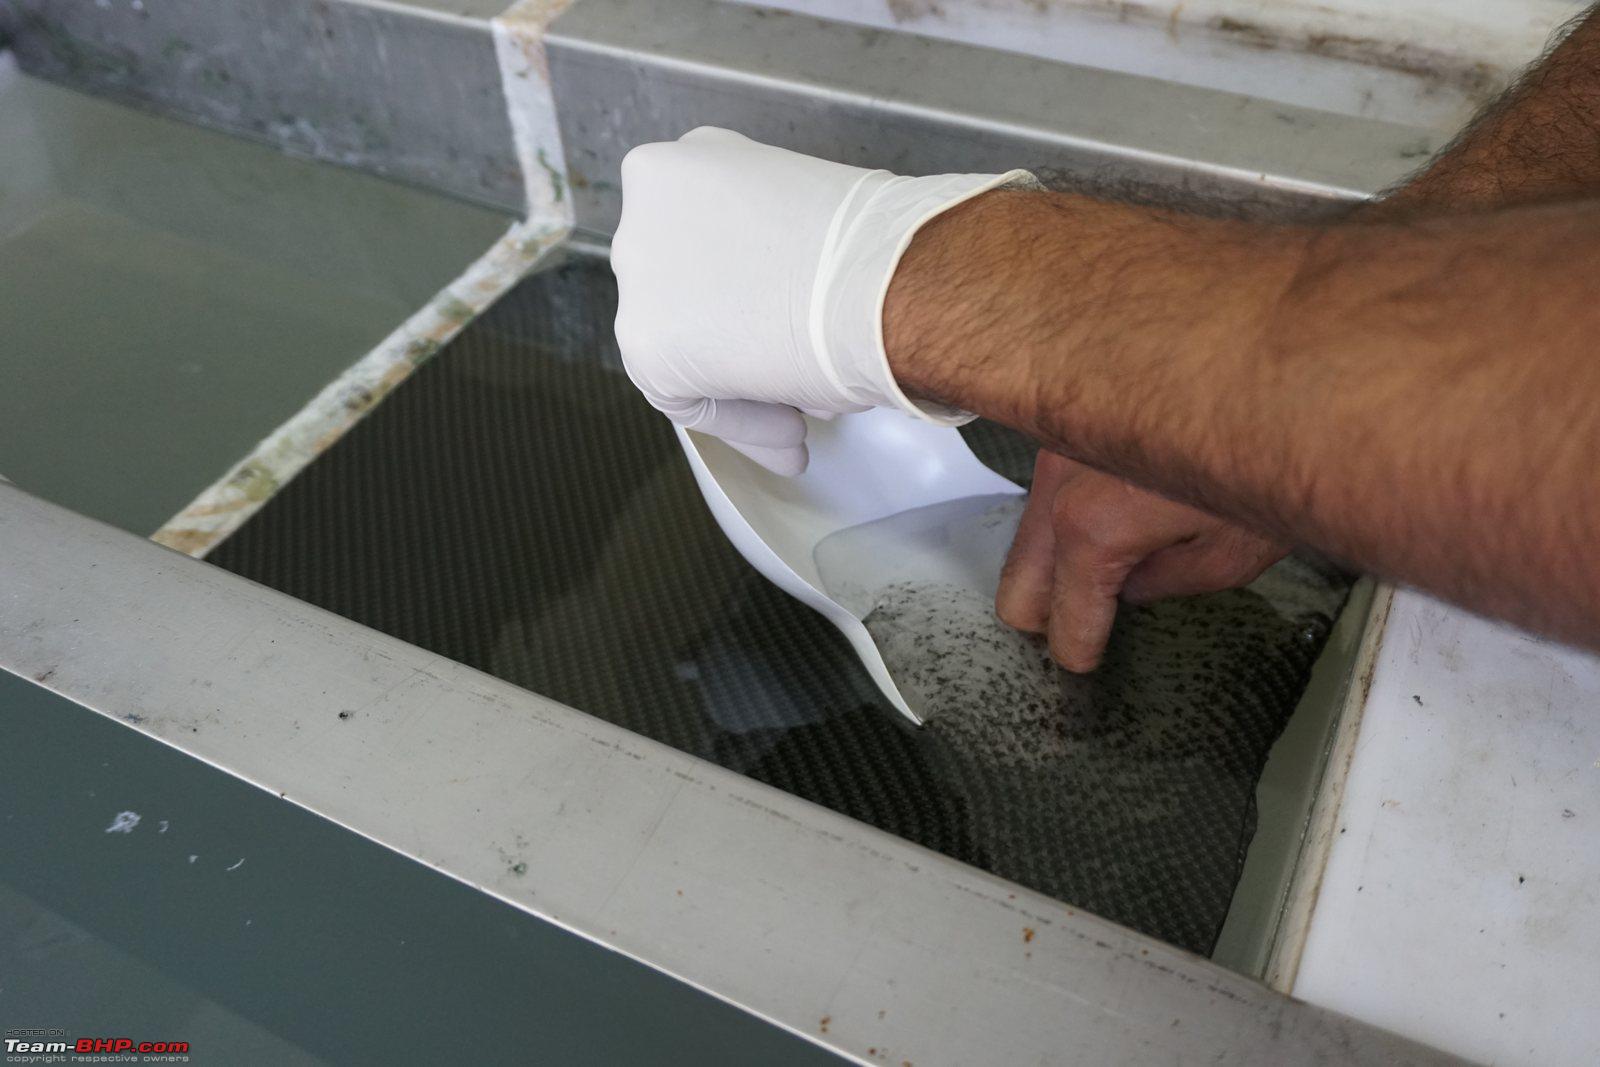
Slowly dip your object, first moving straight down for a bit, and then forwards and down:
Pull it out, and viola!
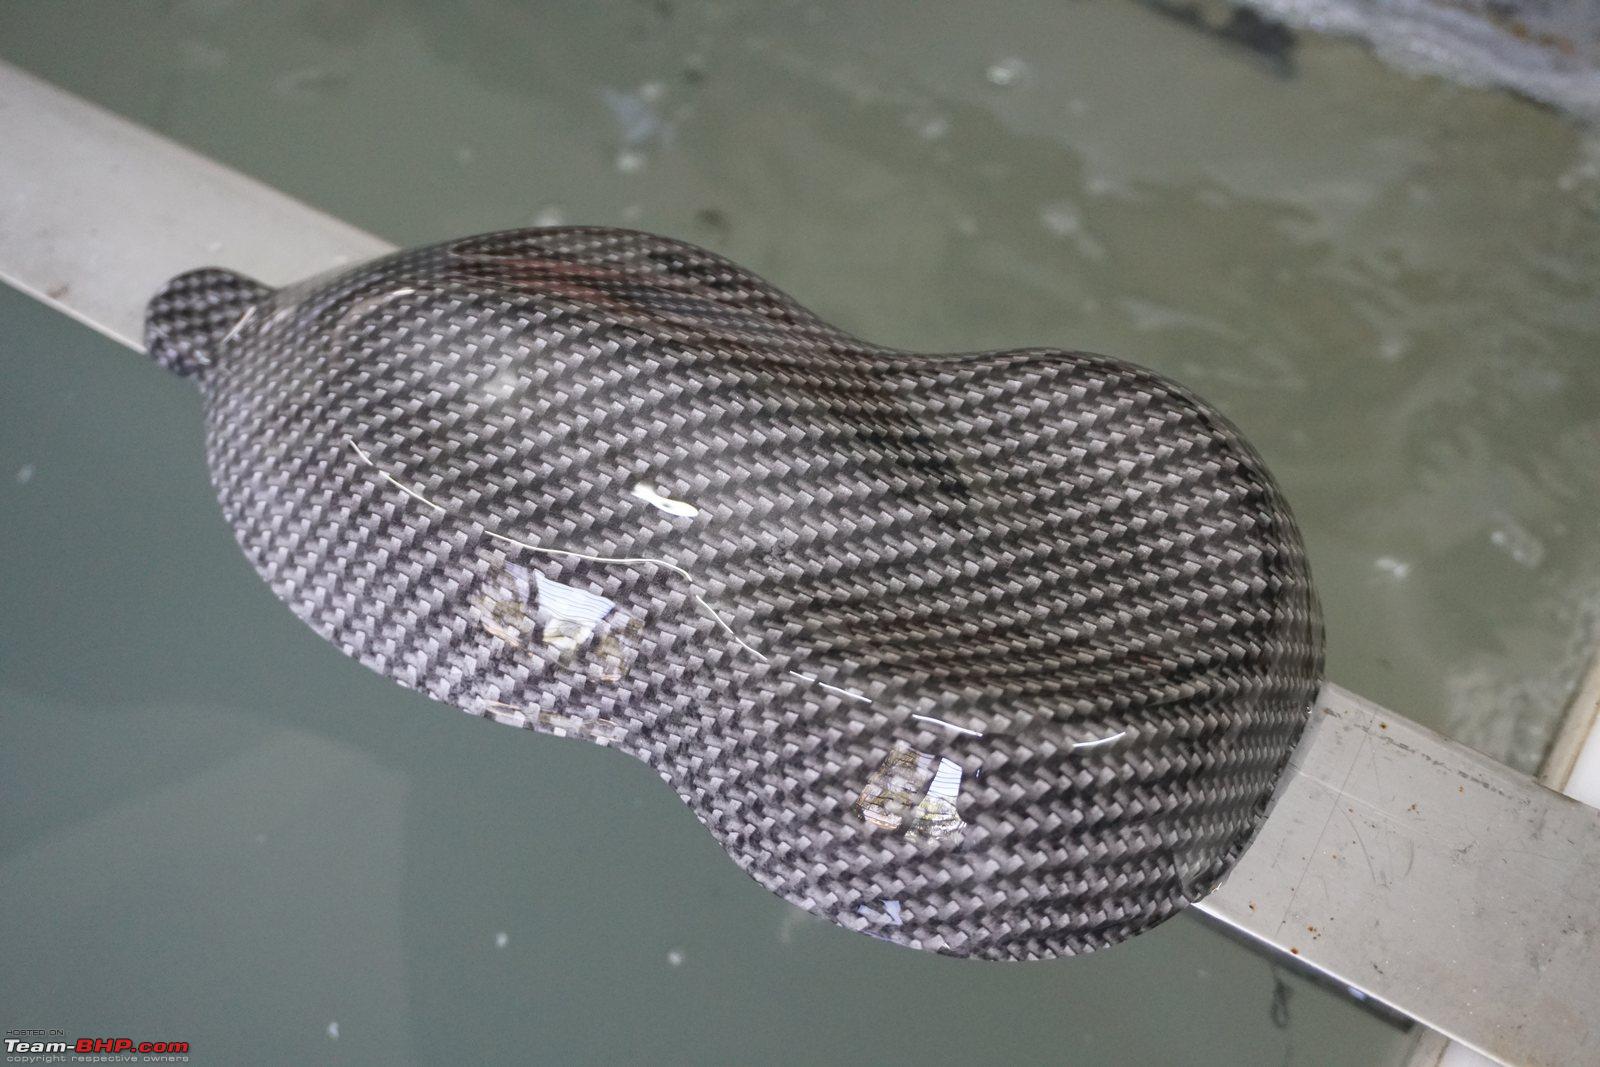
At this stage, it is very sticky to the touch:
A quick wash with clean water removes the stickyness. Note that h2ographix recycles all their water, with fresh water being put in only every few weeks:
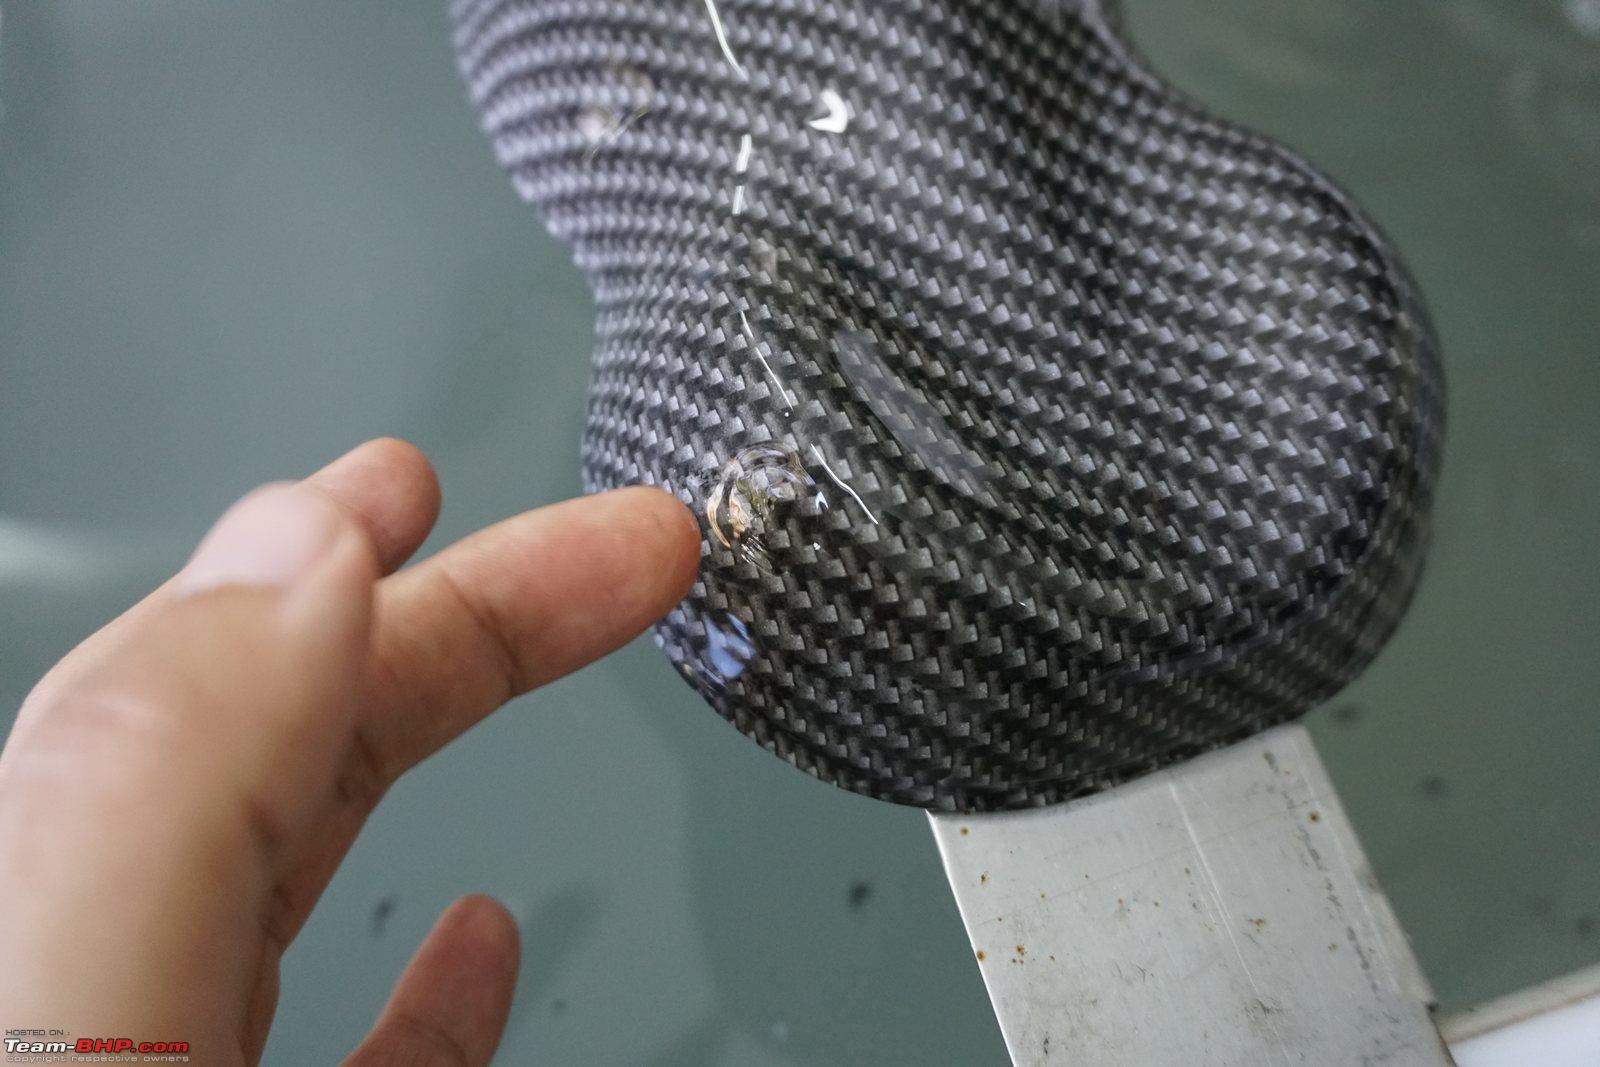
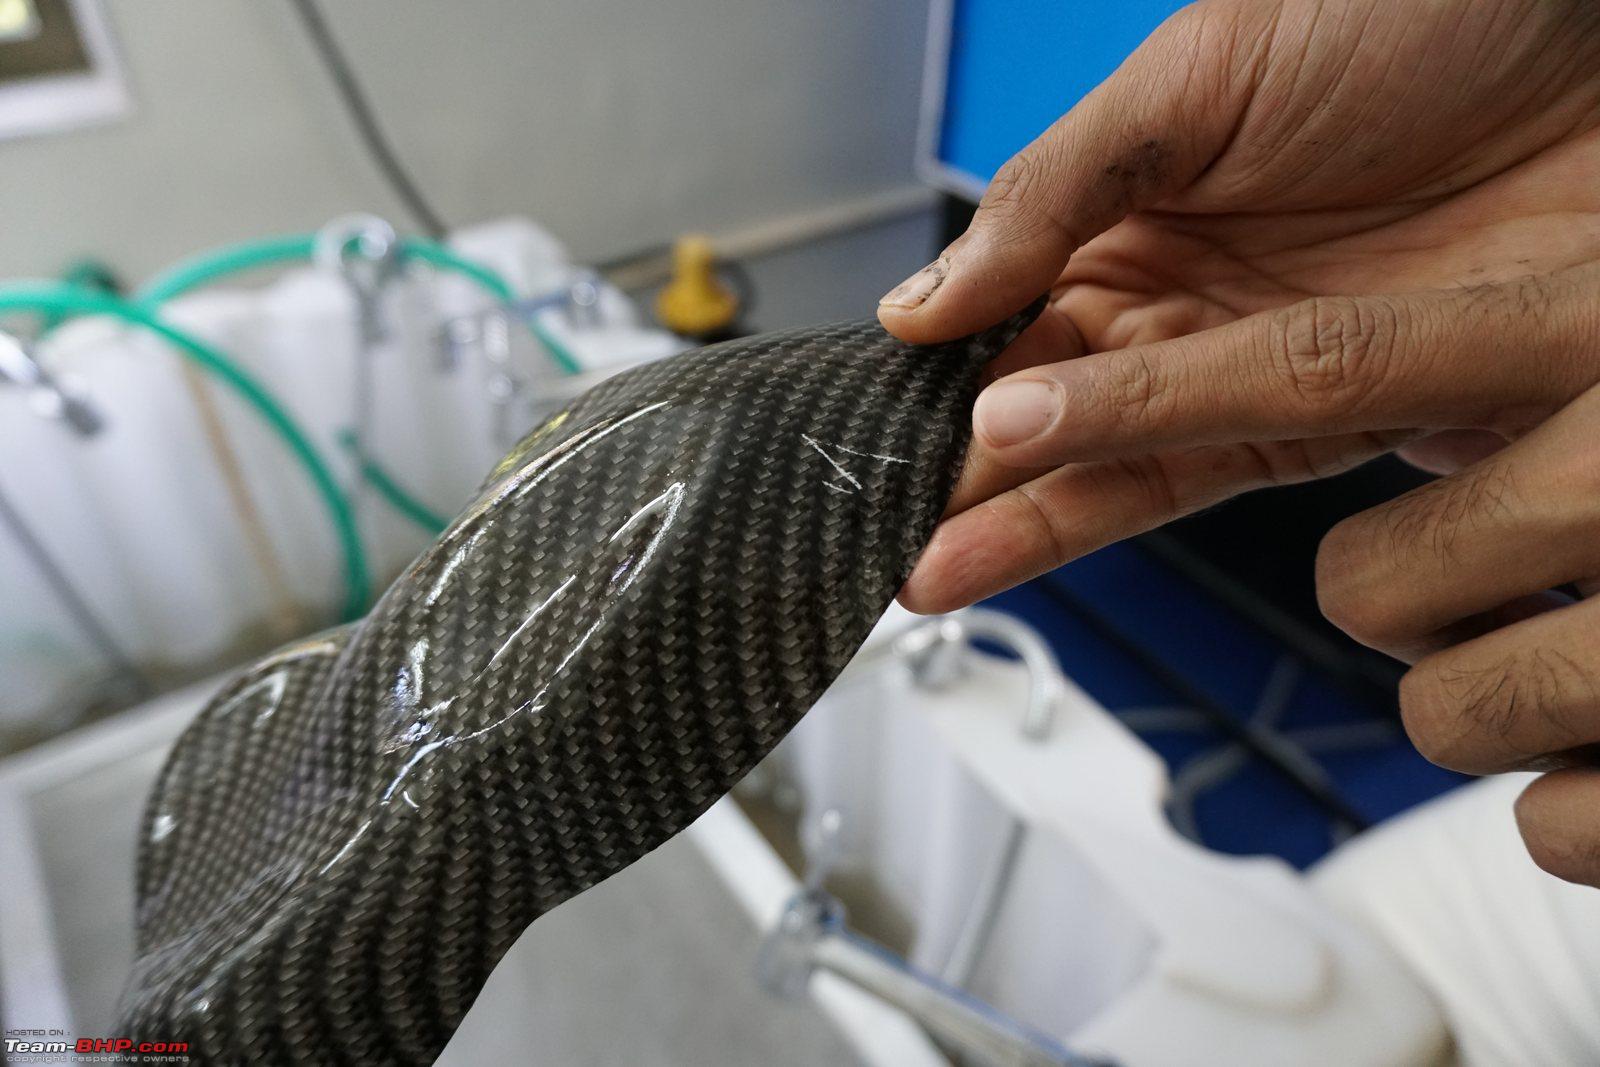
Oops, a little carelessness resulted in this scratch. The printed object is touchable, but still not protected by the layers of clearcoat that are yet to come:
Did I mention that I got a chance to do it myself too? :)
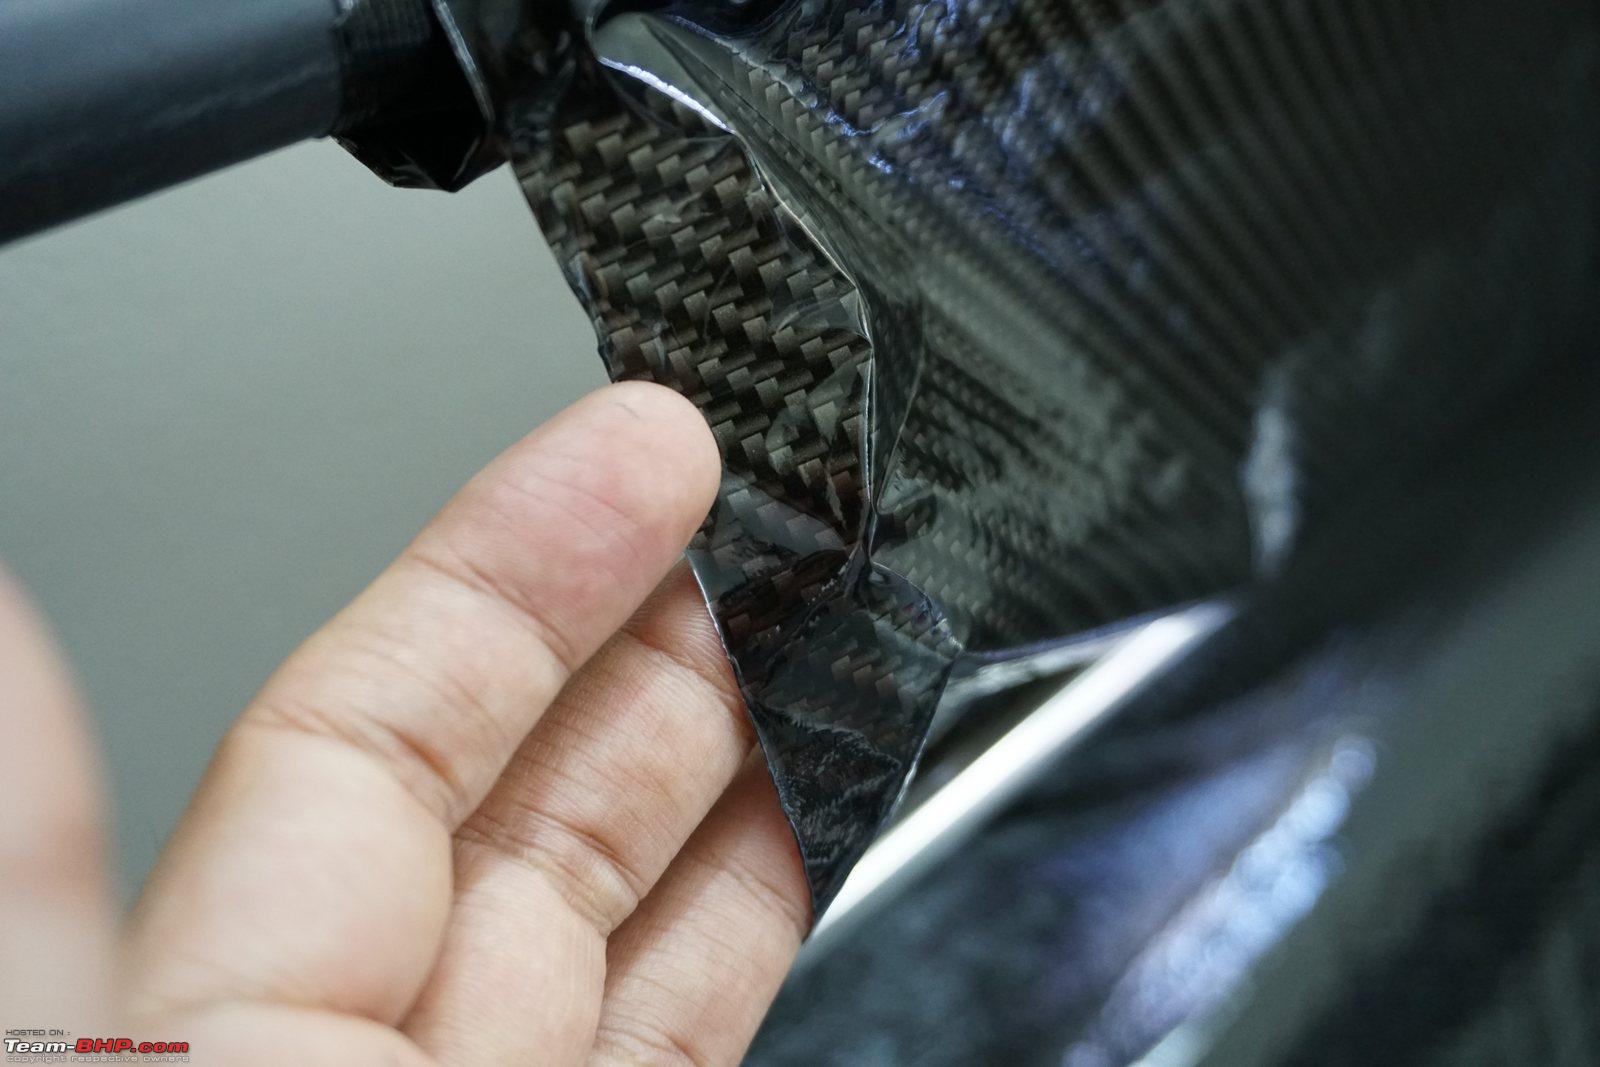
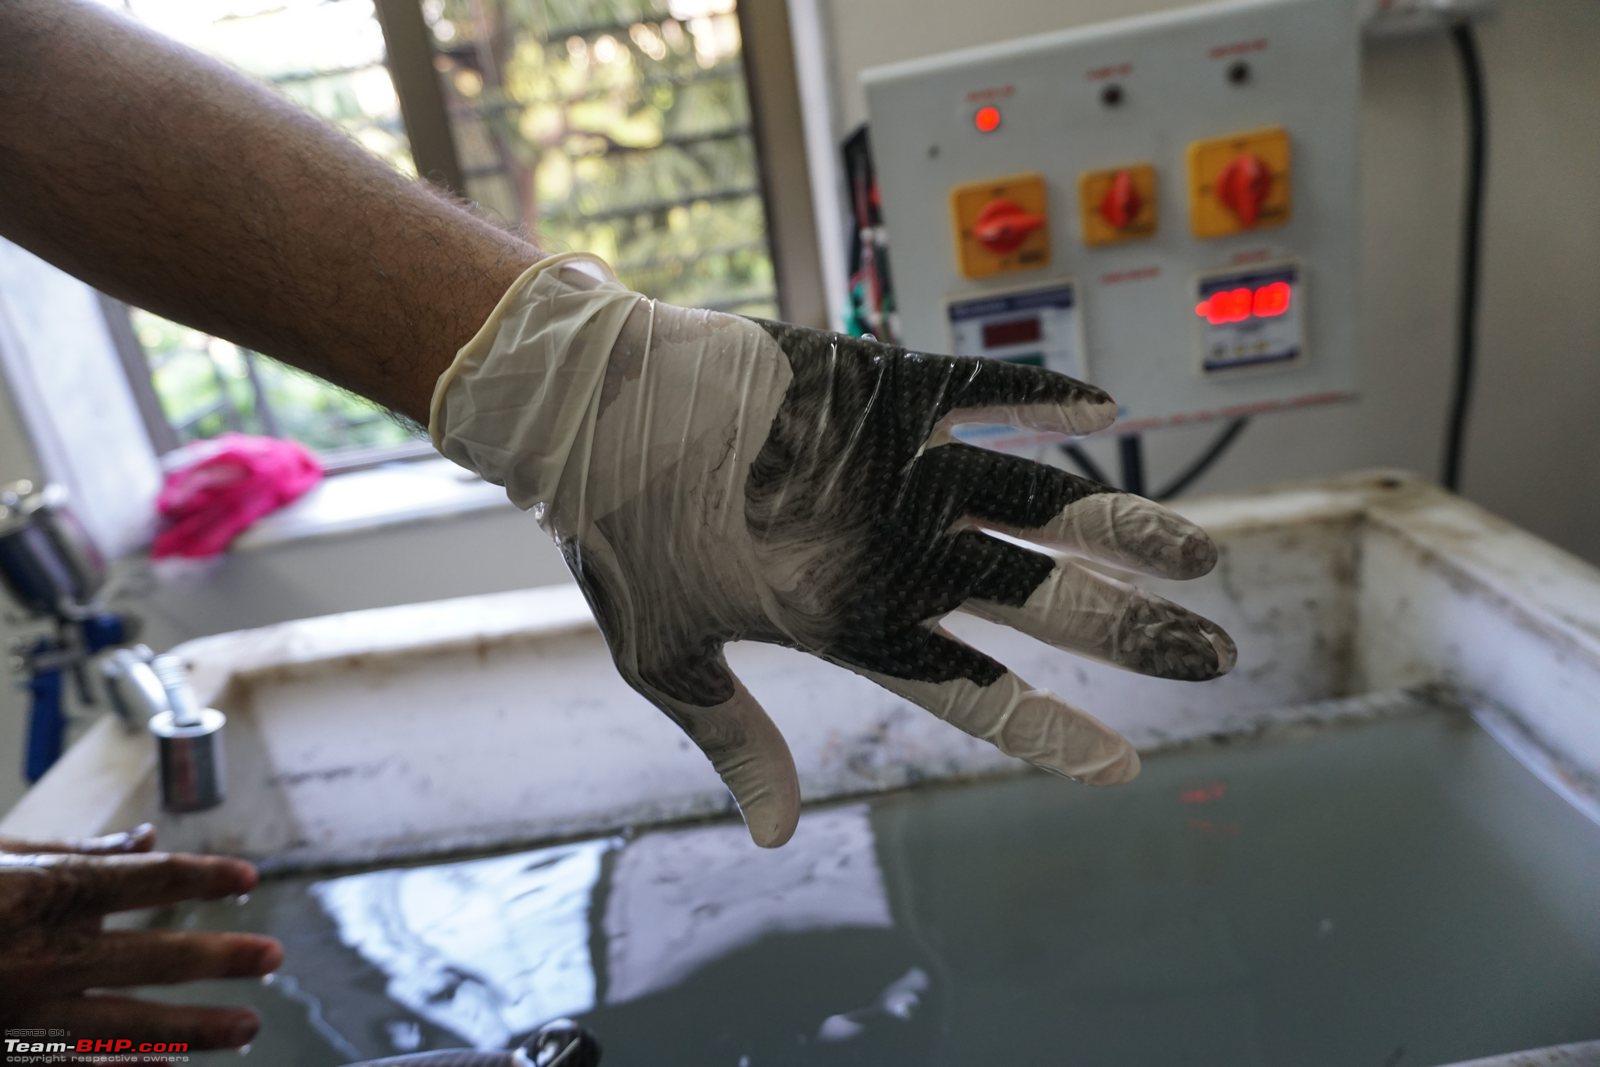
Carbon-fibre gloves are a pretty cool by-product of the process:
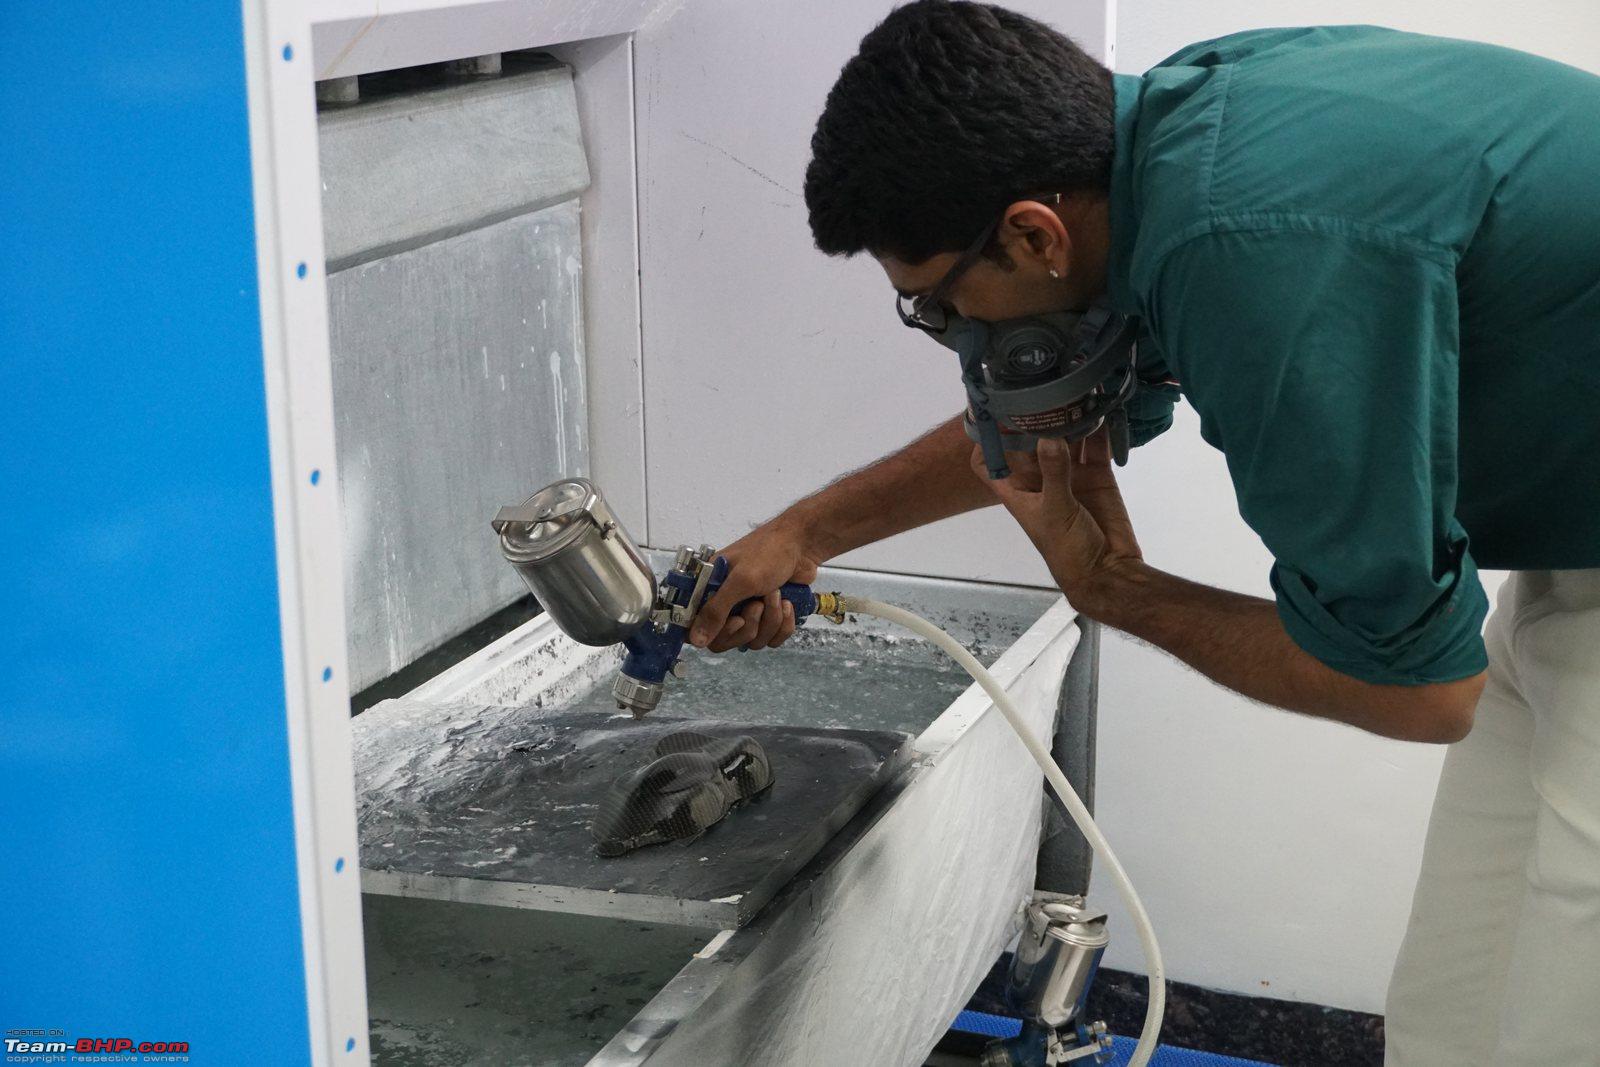
After the piece is washed and given some time to dry, 3-5 layers of clear-coat are sprayed on:
Clear-coat can either be matte or glossy. This is matte, though it looks glossy because it's still wet:
And here we go, after the clear-coat has dried, you're left with a sexy matte carbon-fibre finish:
• One-off and small-batch hydrographic printing jobs
• You can design your own artwork and have them print it on your choice of item
• Training sessions for improving your water printing skills (Rs. 11,000)
• Consulting, in case you want to set up your own hydrographics business
• Deep experience and understanding of the process, with years of experience in the field.
• They love R&D, and welcome challenging one-off printing projects.
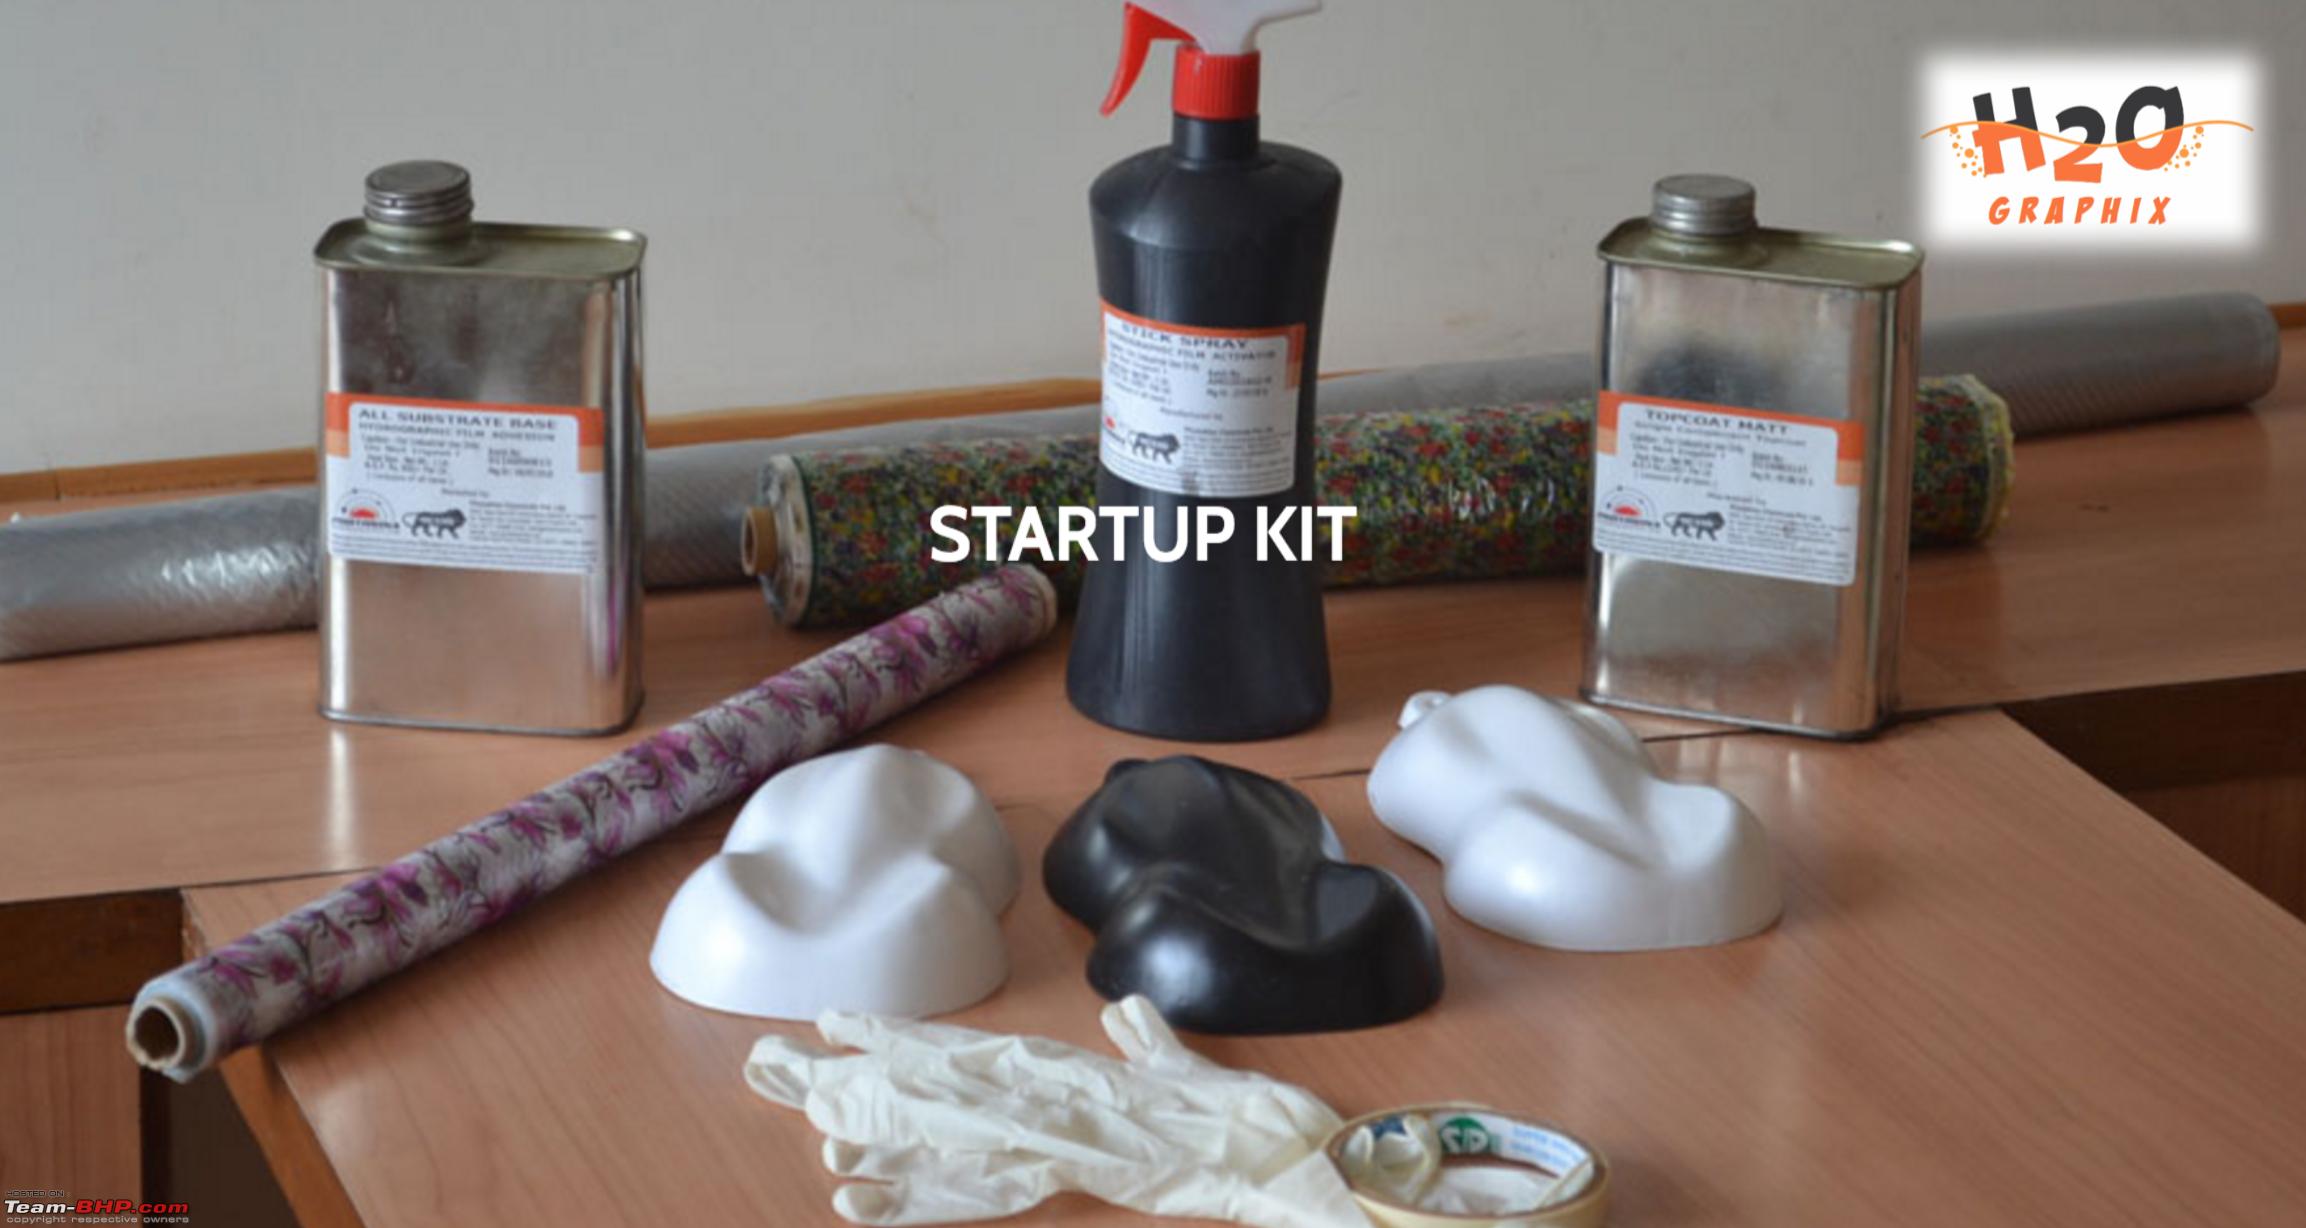
In addition to the services, and sales of the chemicals required, they also sell a "DIY Kit" for those who want to try this at home.
The kit includes 3 primed & coated speedshapes, gloves, hydrographic film, and all the chemicals required, including your choice of matte or glossy clear-coat.
The only down-side is that if you plan to dip your own item, you'll need a pressurized spray gun for applying the all-substrate base, which is a required step.
The kit costs Rs. 4,000.
So far, a tour of their brand new Mumbai facility, as well as having small parts printed for demo purposes.
7 x 2.5 x 3.5 feet
The dimensions of the tank limits the size of the object you can get one continuous print on, though there are work-arounds.
Alloys:
13-16" - Rs. 2,500 / alloy
17-21" - Rs. 3,000 / alloy
Wheel caps - Rs. 800-1000 each (cheaper since there's less printable area, being more 2D)
Pricing includes sanding, priming, printing & clear coat.
Customized artwork / patterns can be printed as well. You need to provide the high-res artwork.
The cost for custom artwork is Rs. 10 per square inch. Calculated as length x breadth of item to be printed.
Aakash Sheth
+91 96199 62146
Avinash Jhaveri
+91 98207 46047
http://h2ographix.in
H2O Graphix
2nd floor, Kanta Kunj,
Above fitness gym / opposite the Yamaha bike showroom
Teli Gali, Andheri East,
Mumbai
Google Maps Link
All Available Patterns - H2O Graphix Catalogue.pdf
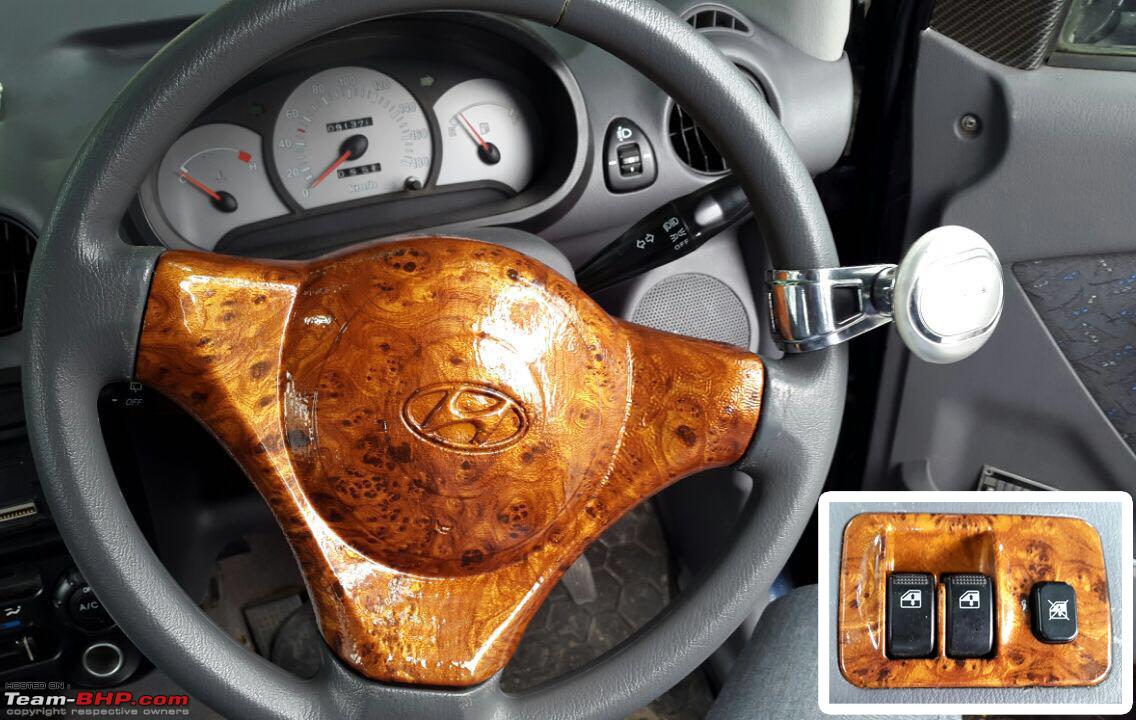
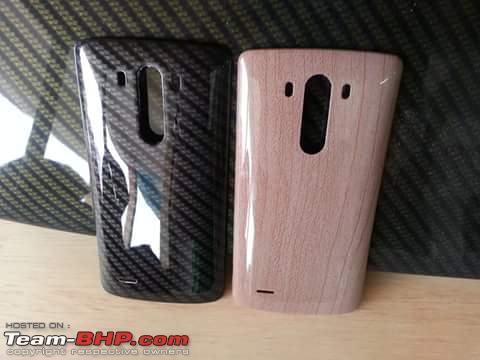
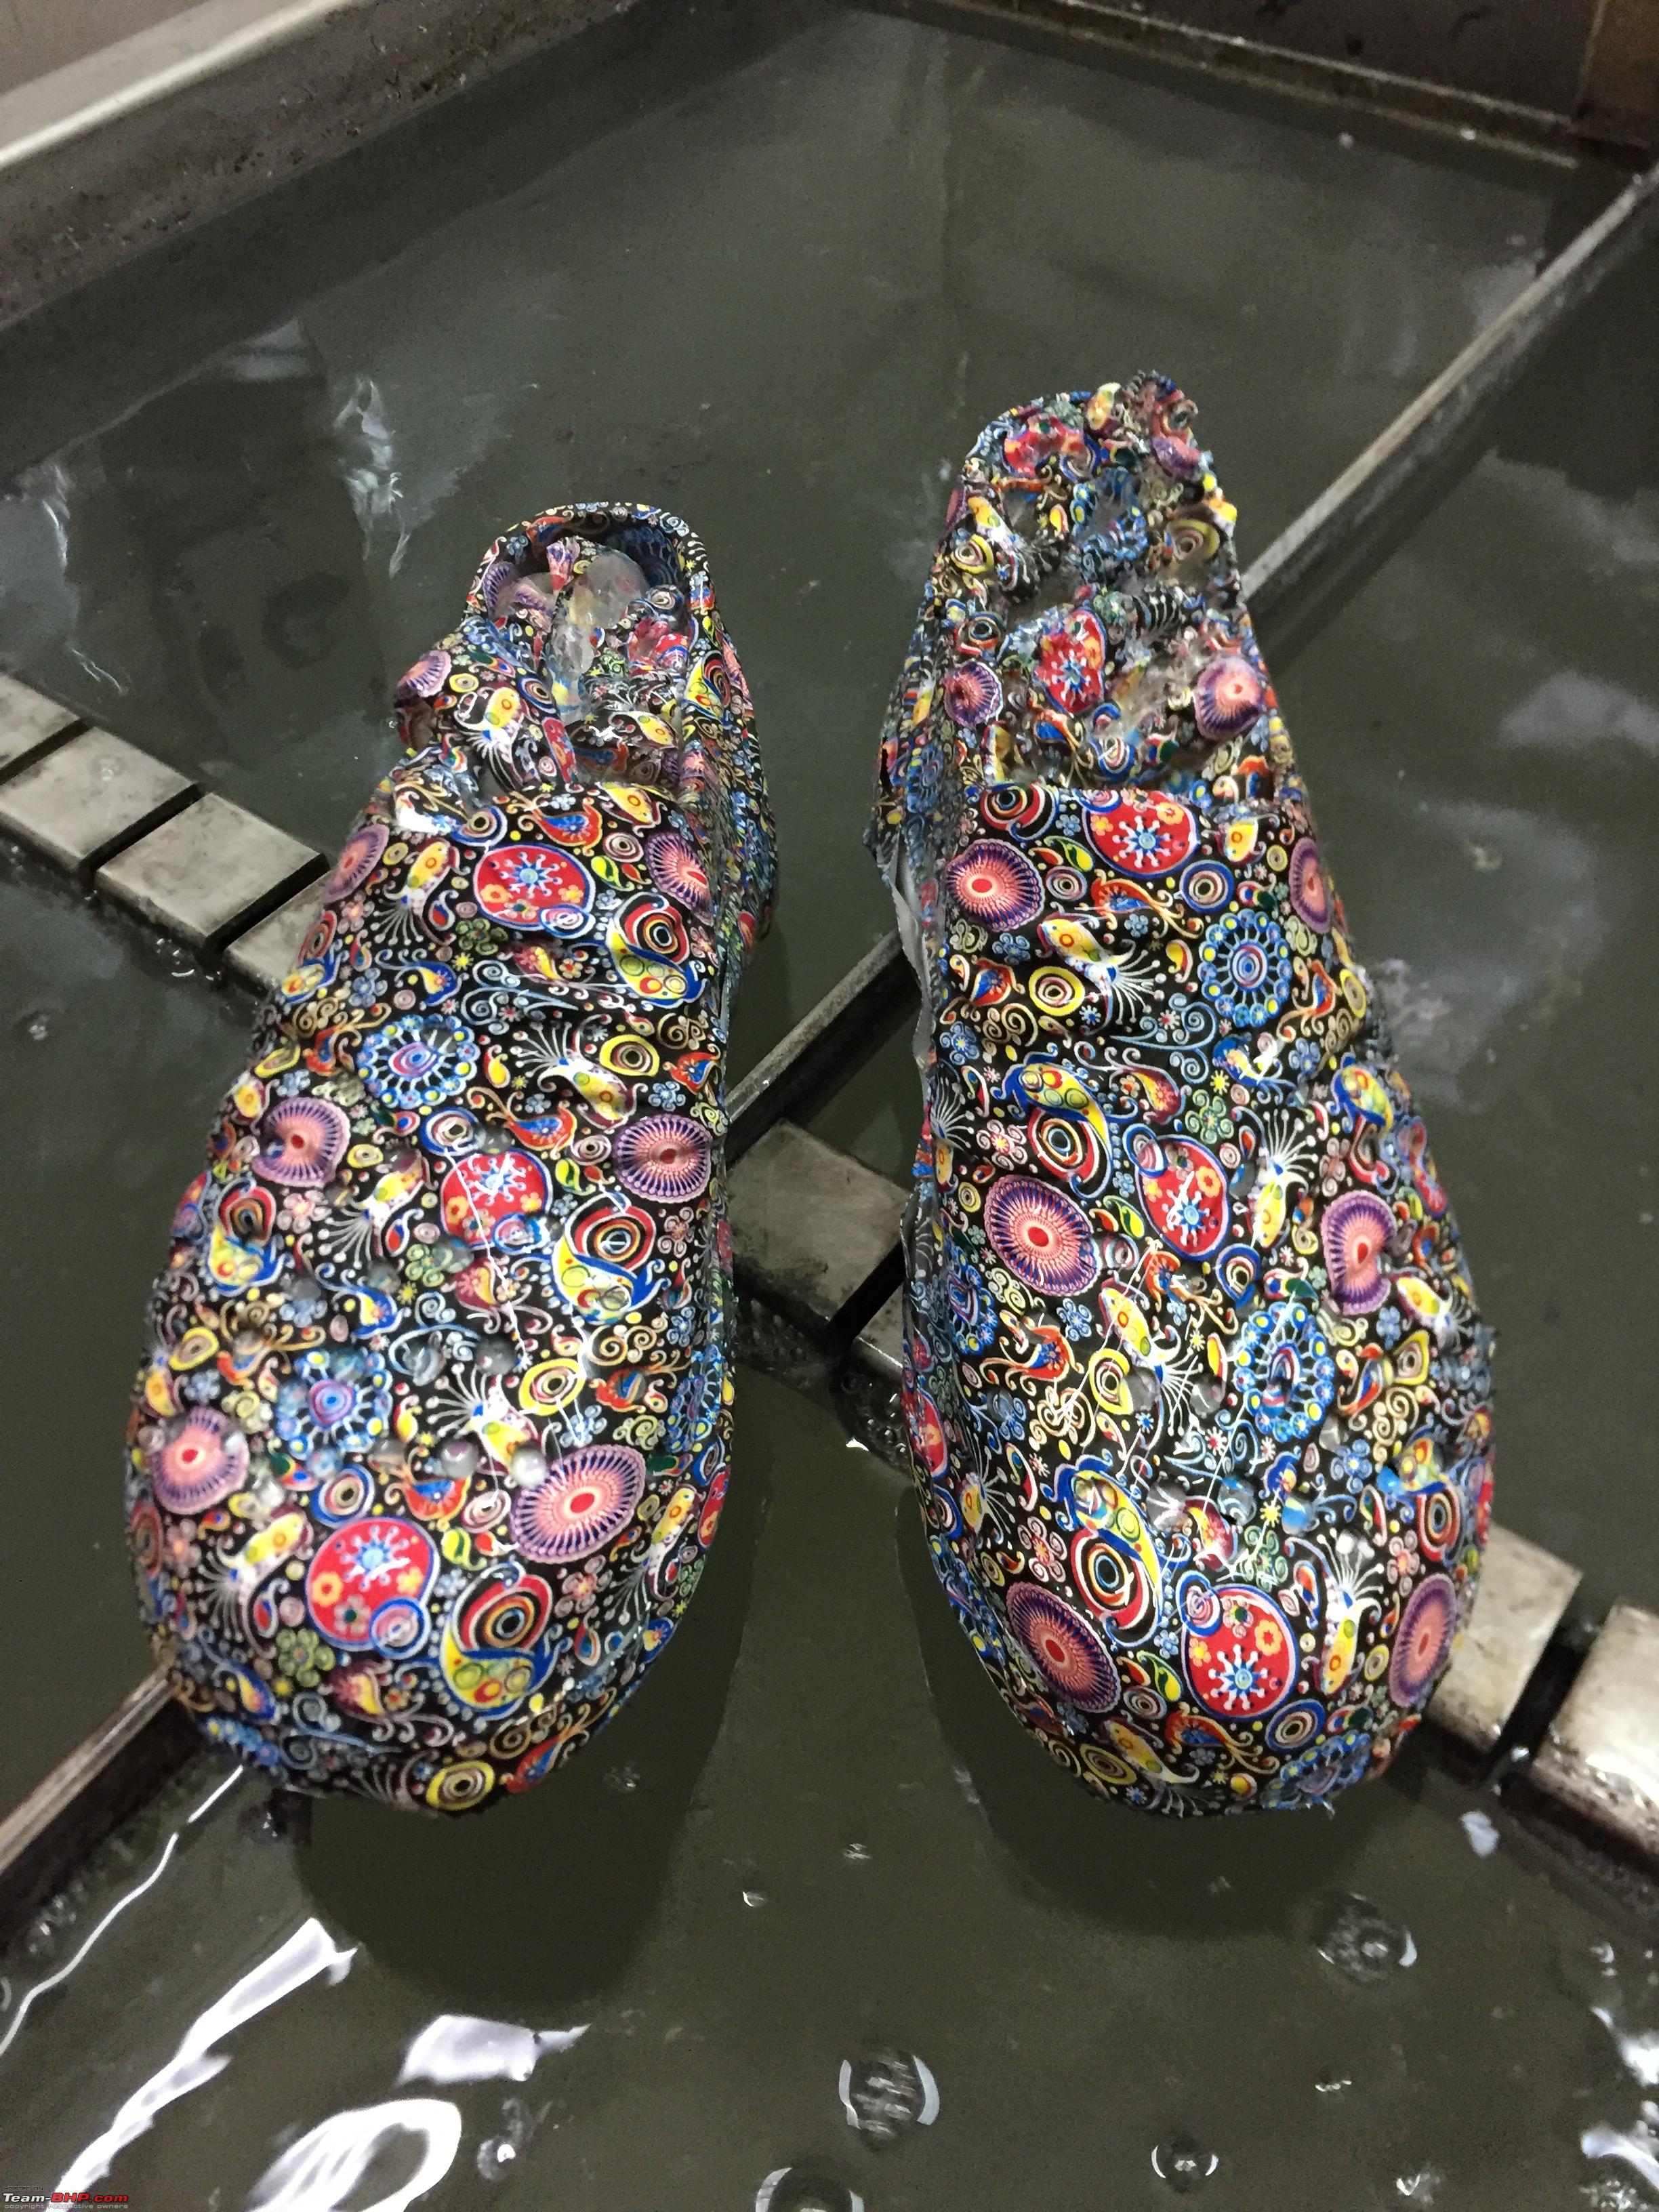
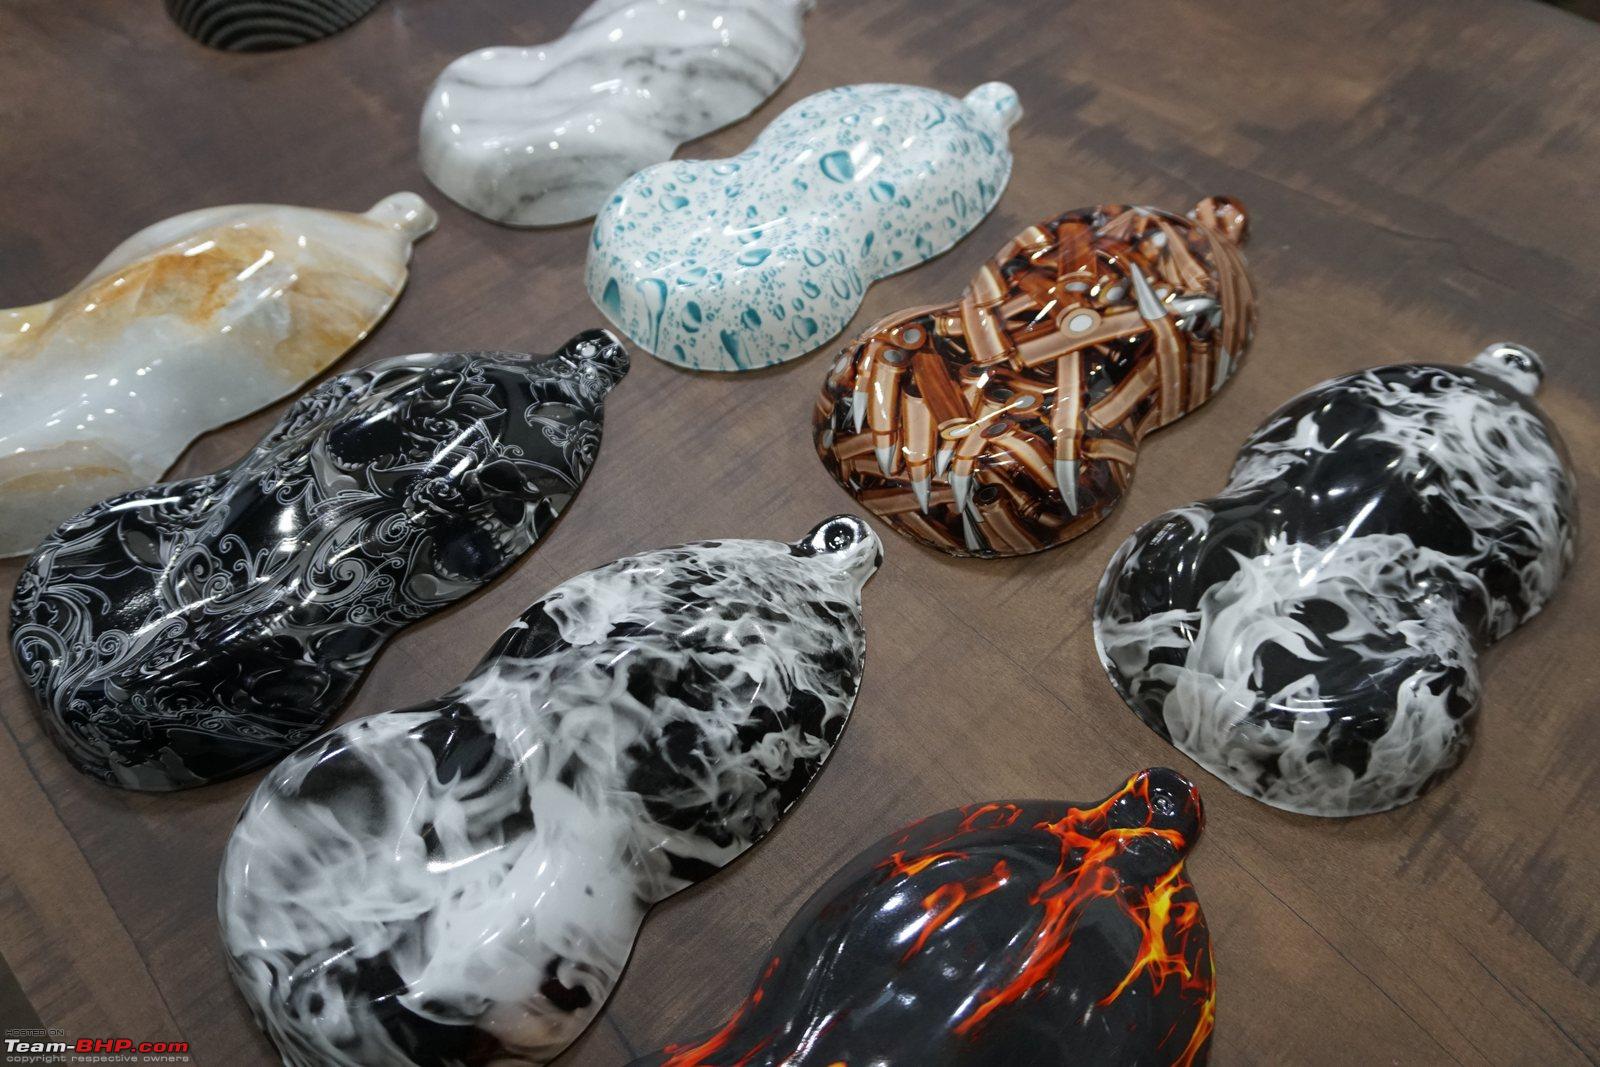
The wood patterns look incredibly real:
Here you can see the difference between a matte finish and a gloss finish:
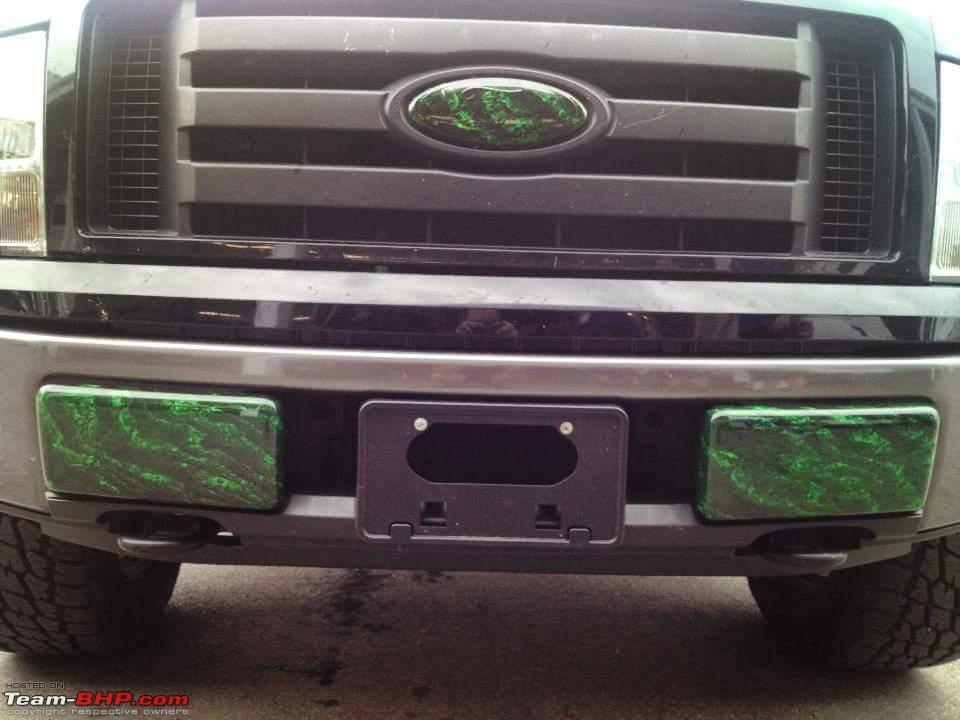
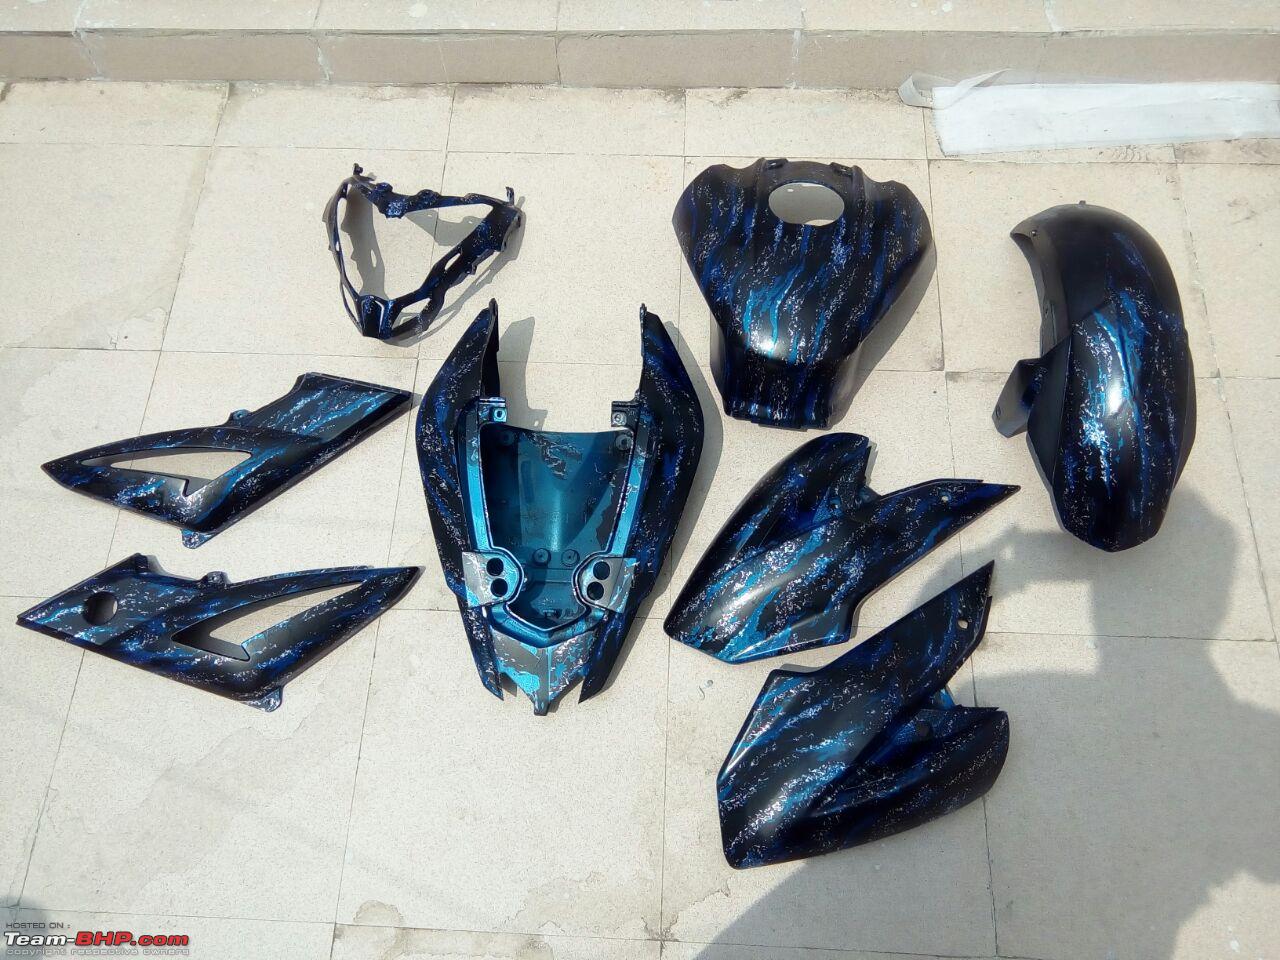
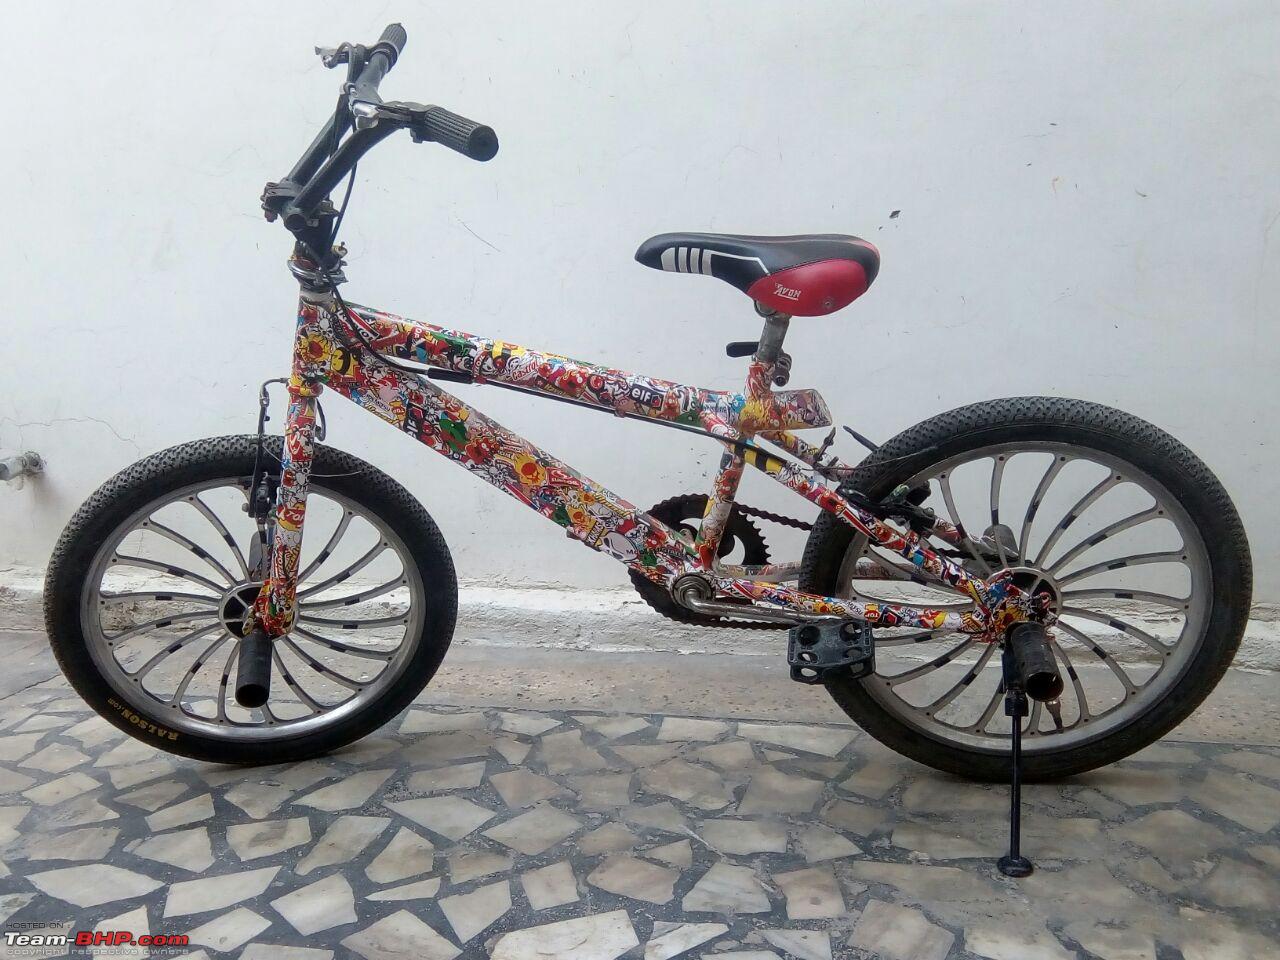
Graphical patterns are available too:
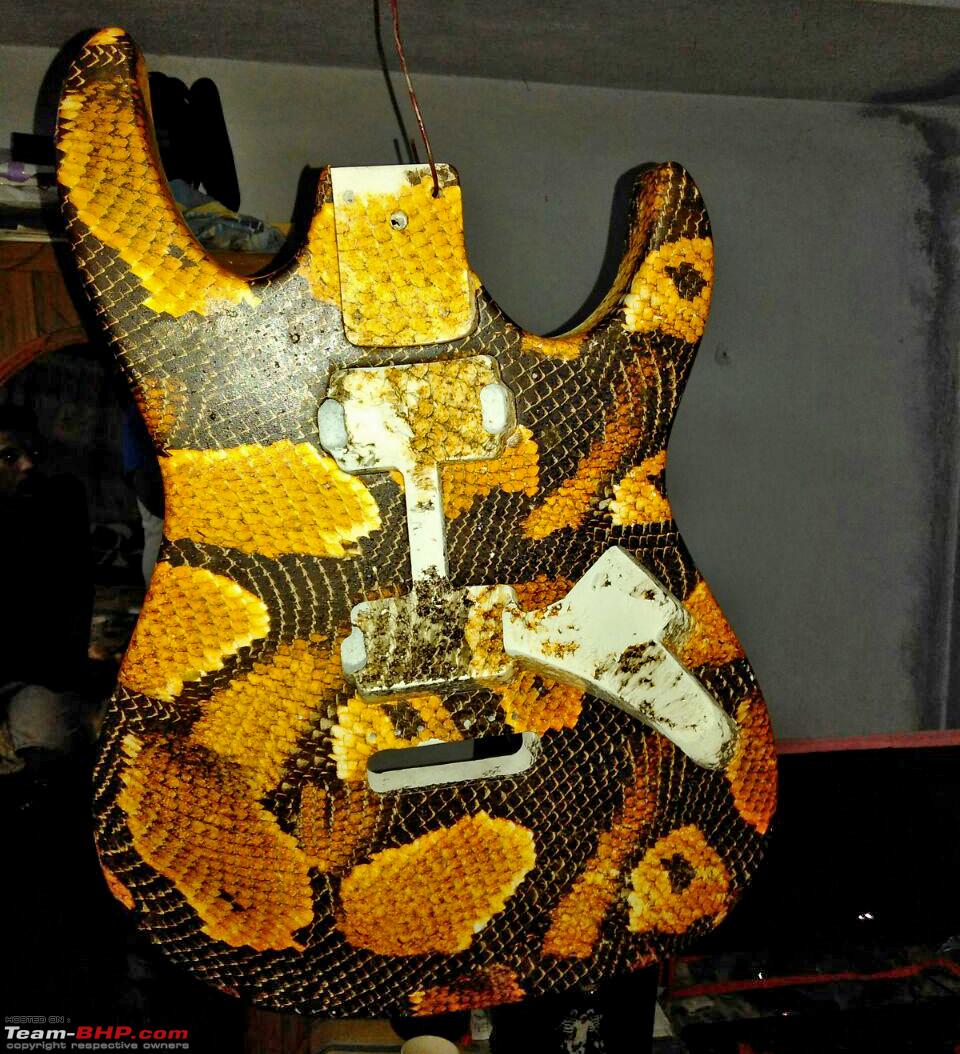
Photo-realistic images can be printed as well, though obviously they'll warp a bit when put on the shape:
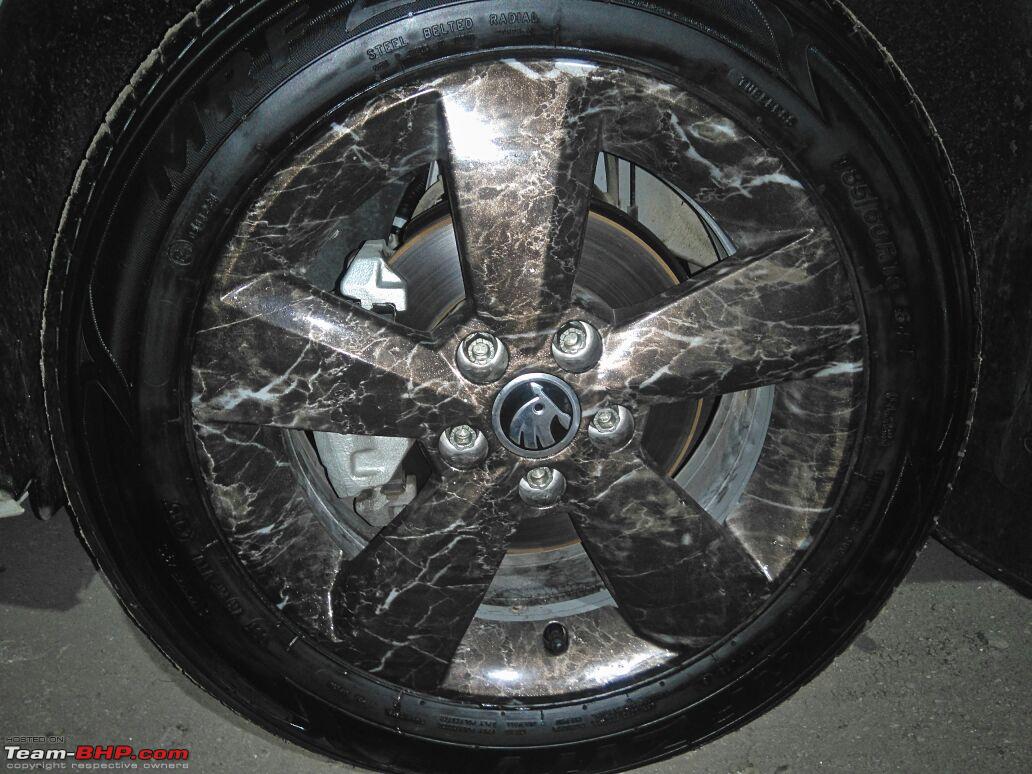
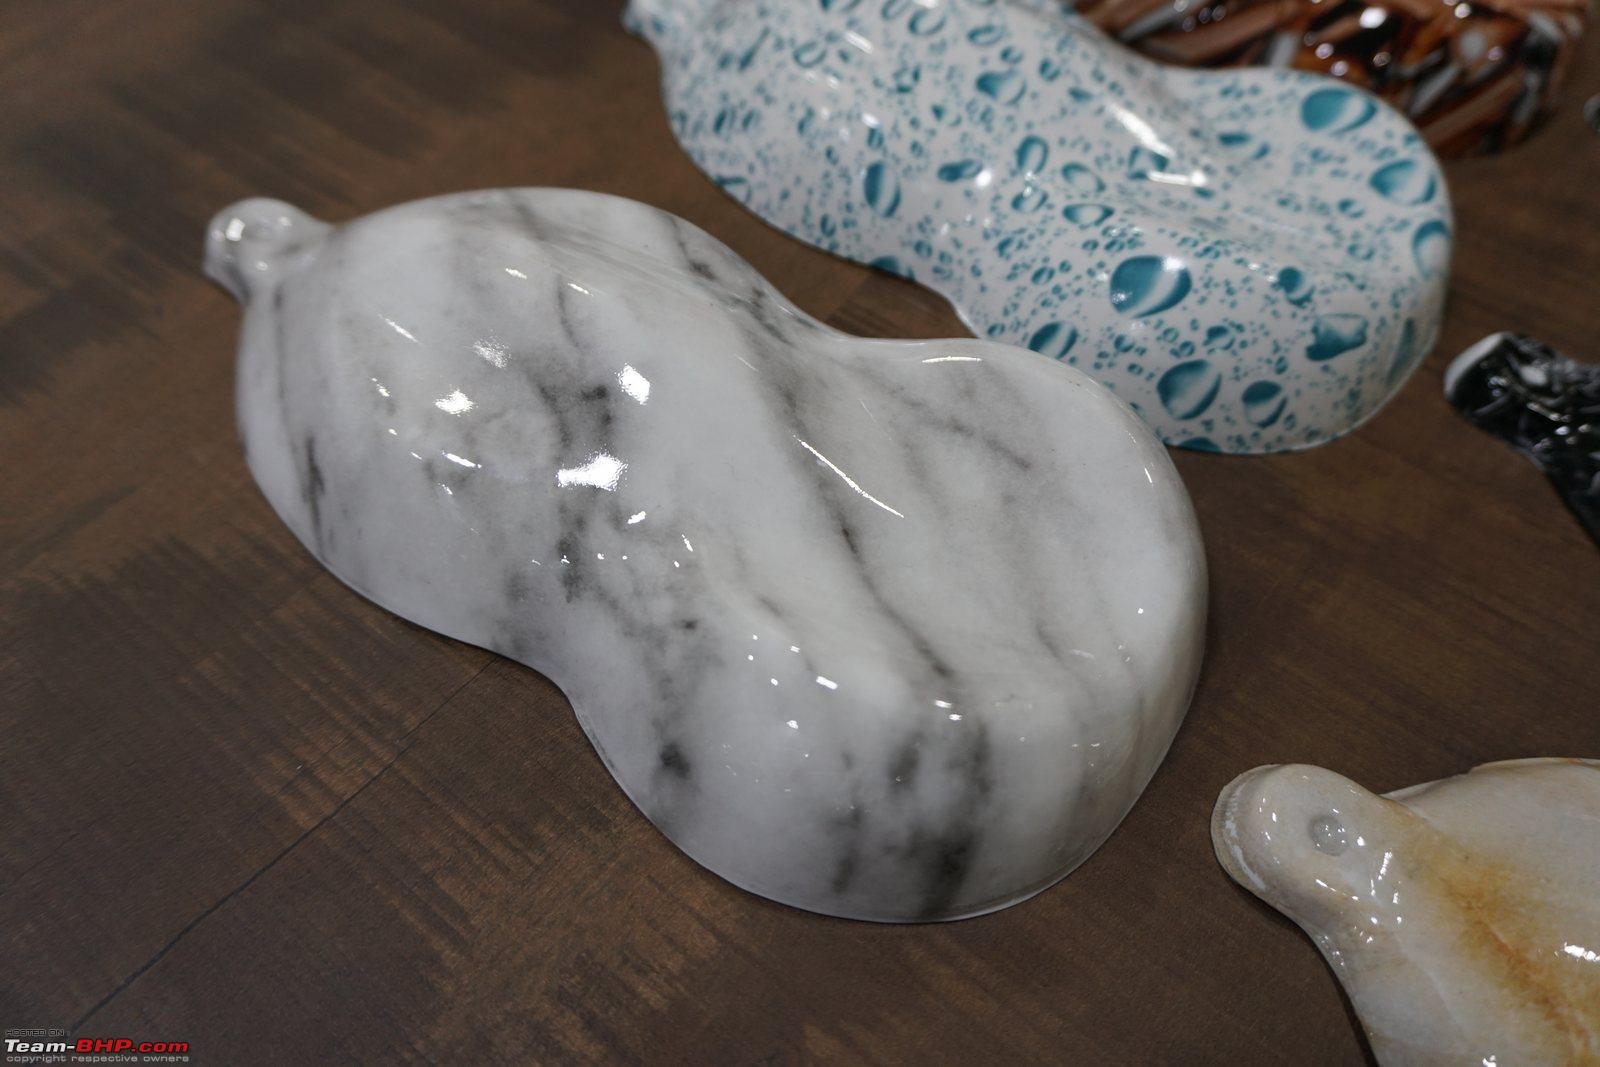
The specularity of the glossy clear-coat and the shape of this piece made it look just like a piece of marble:
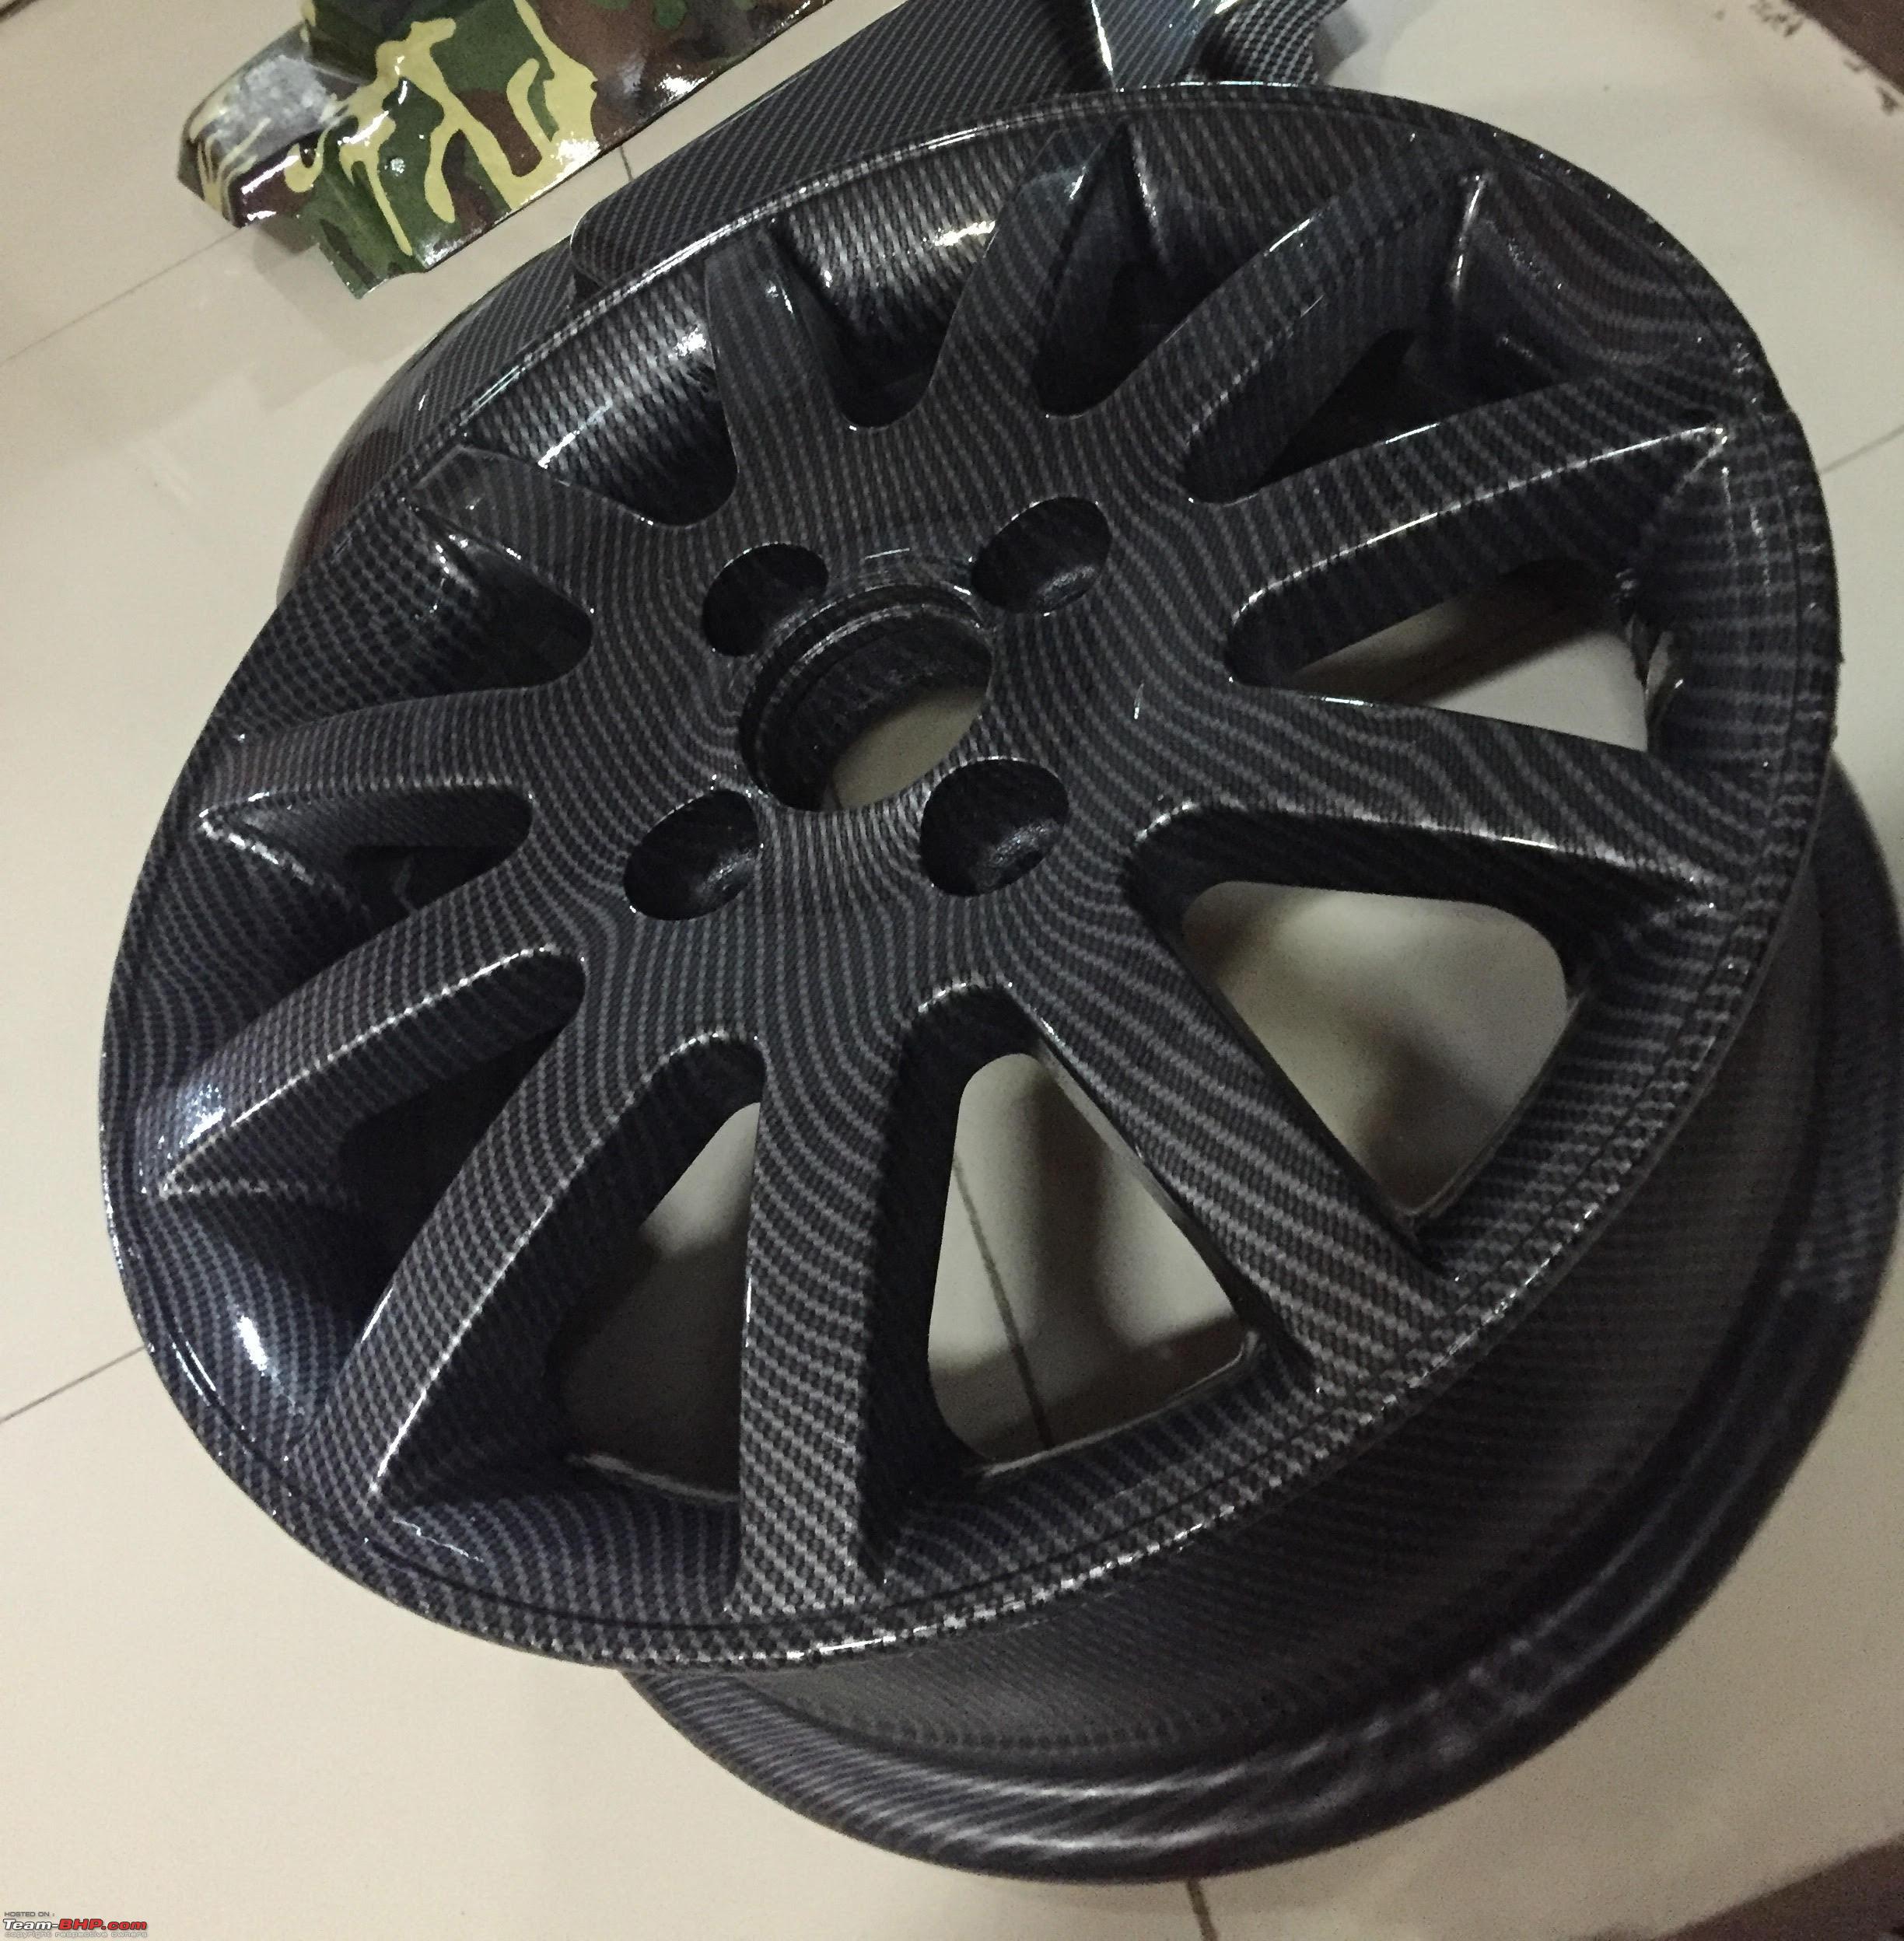
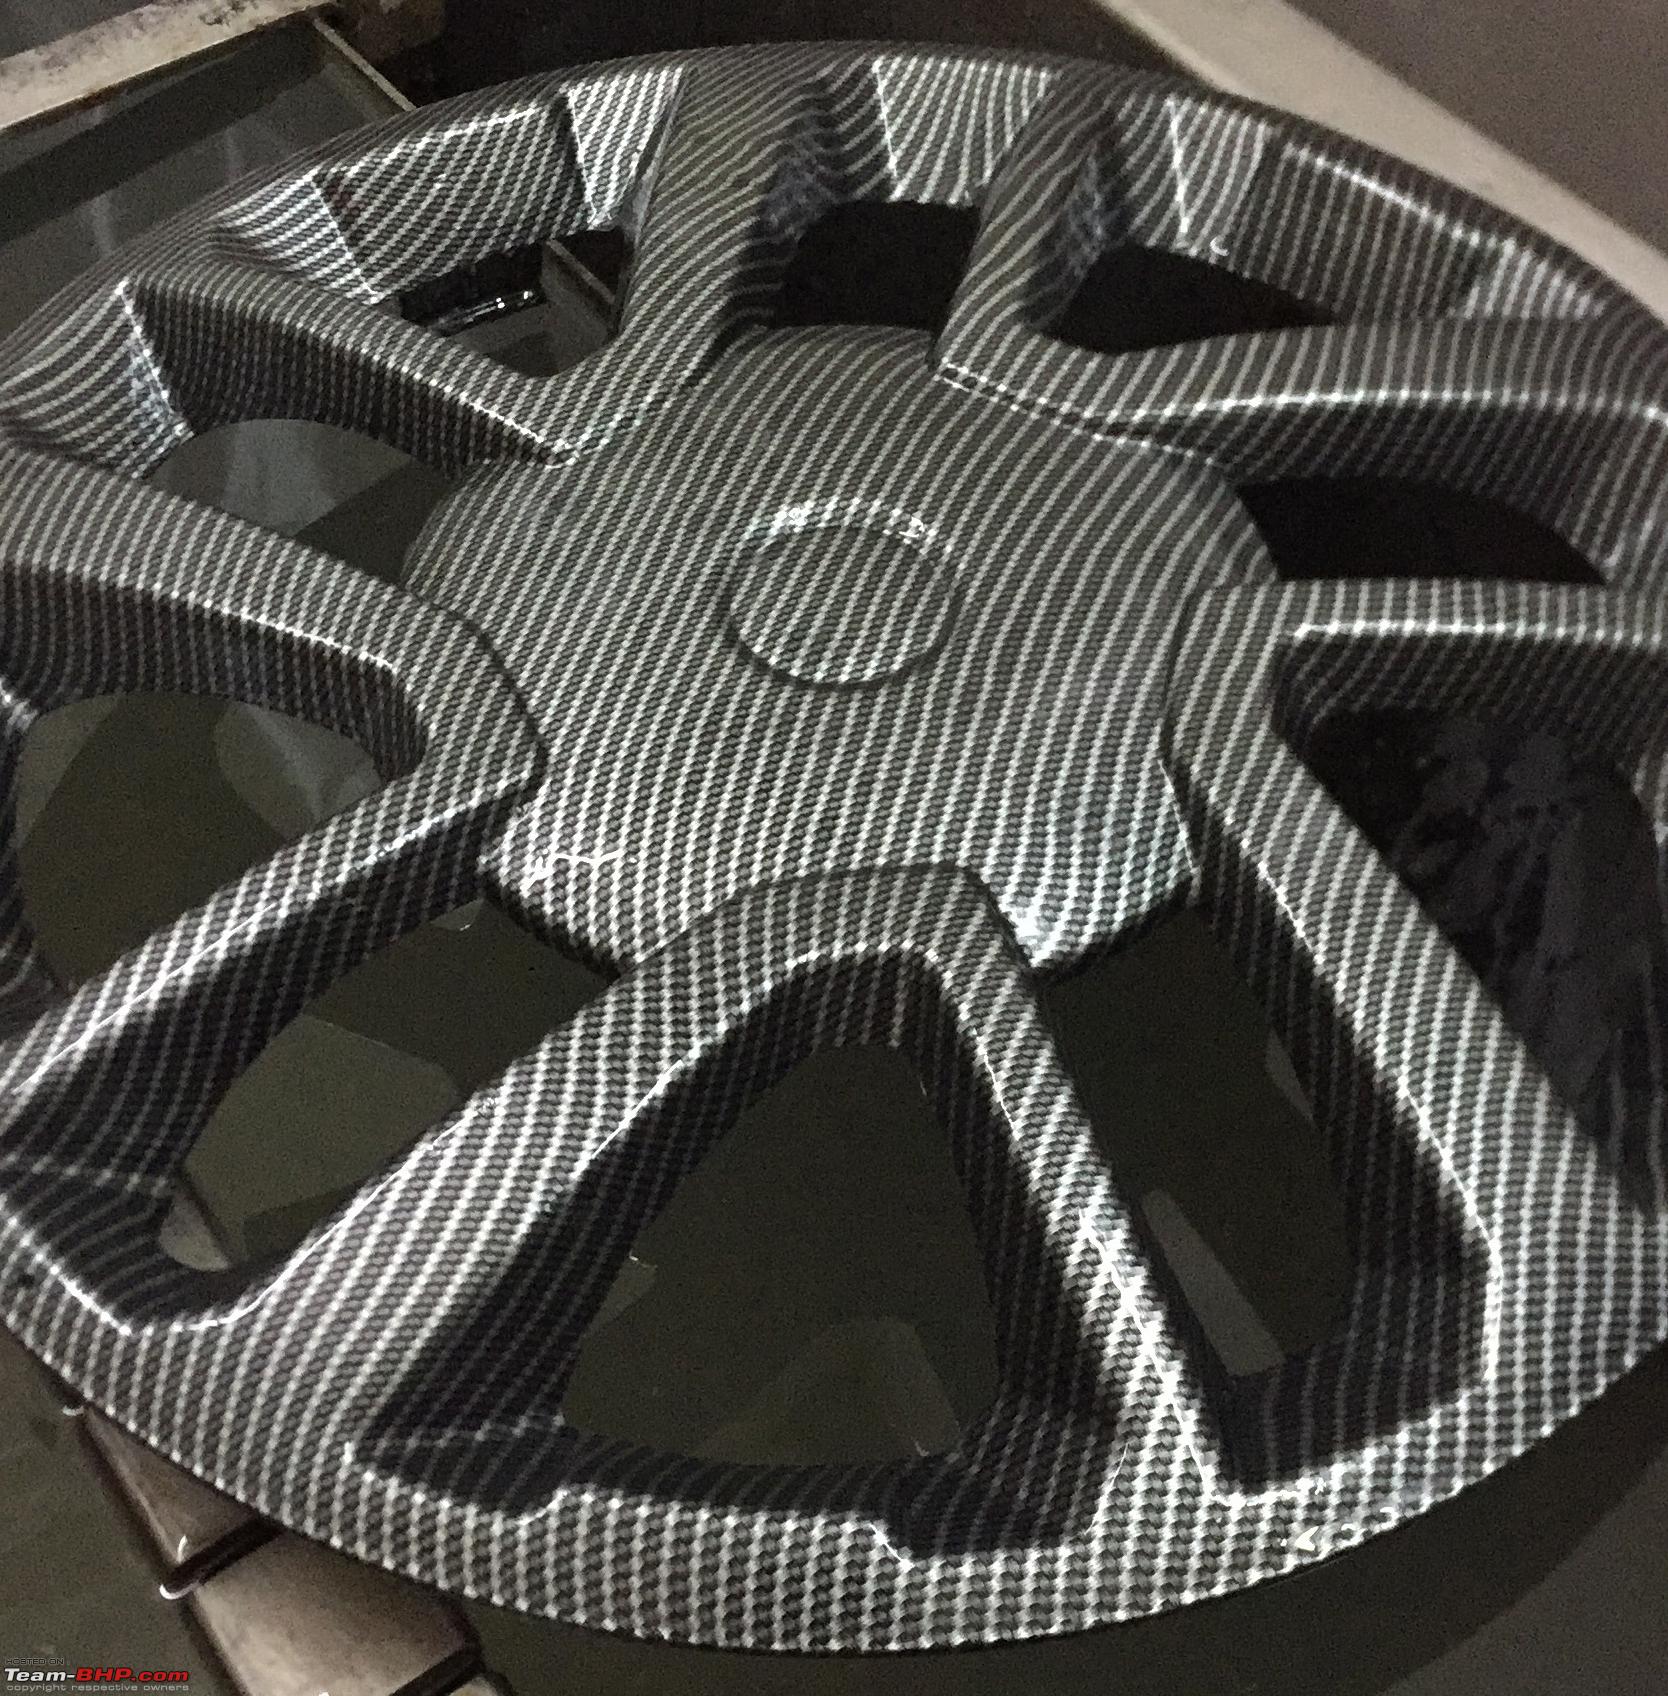
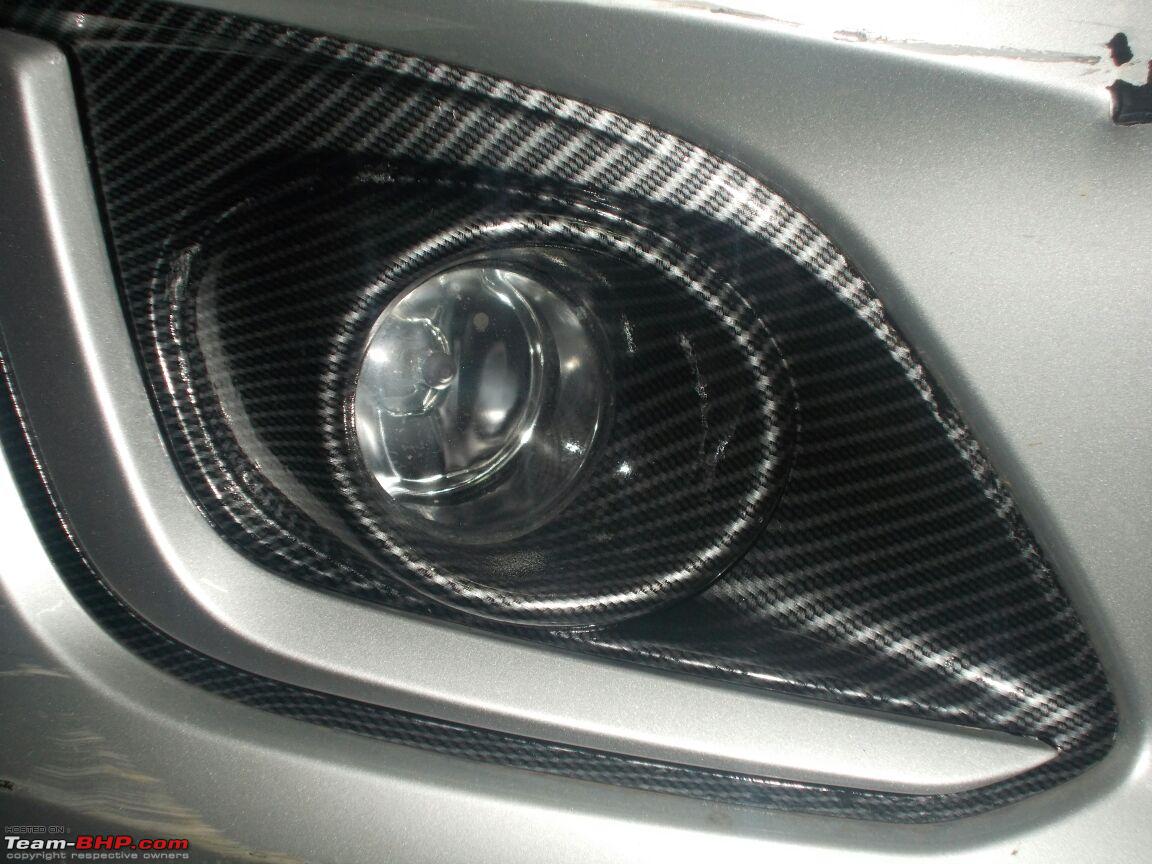
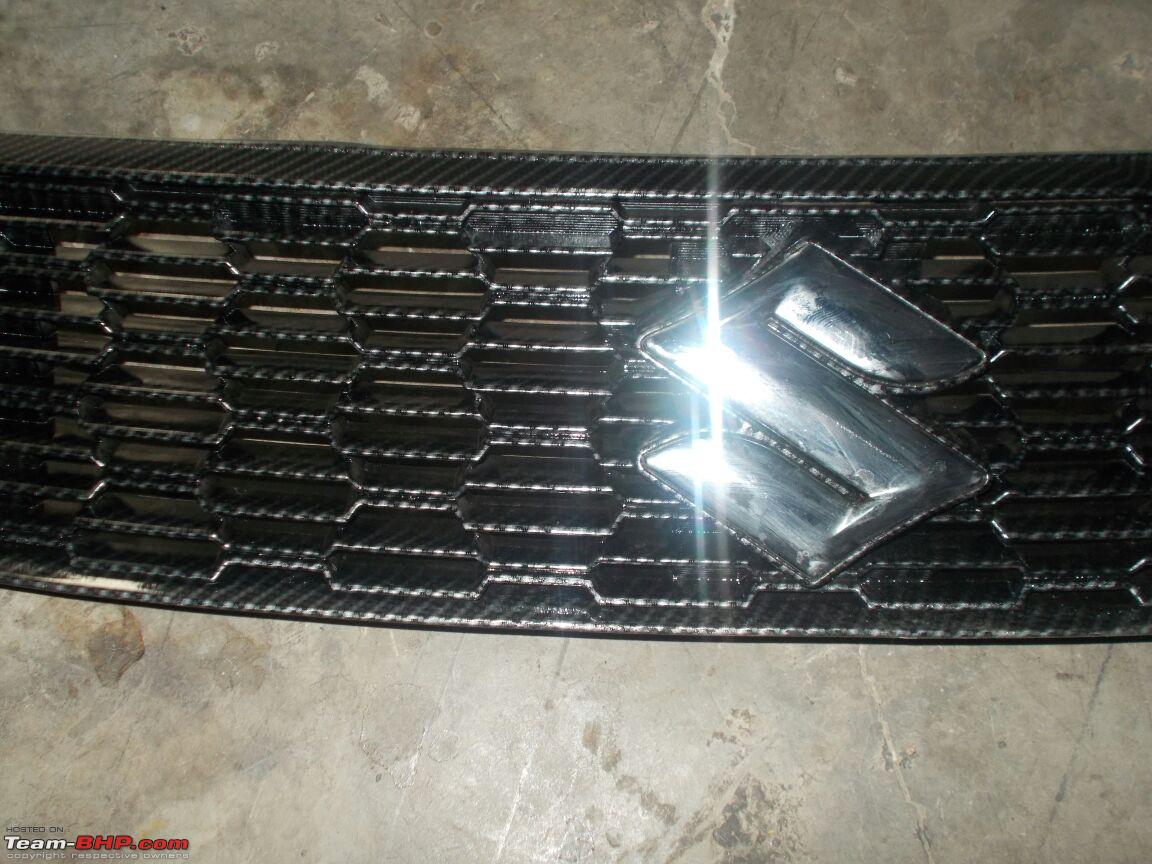
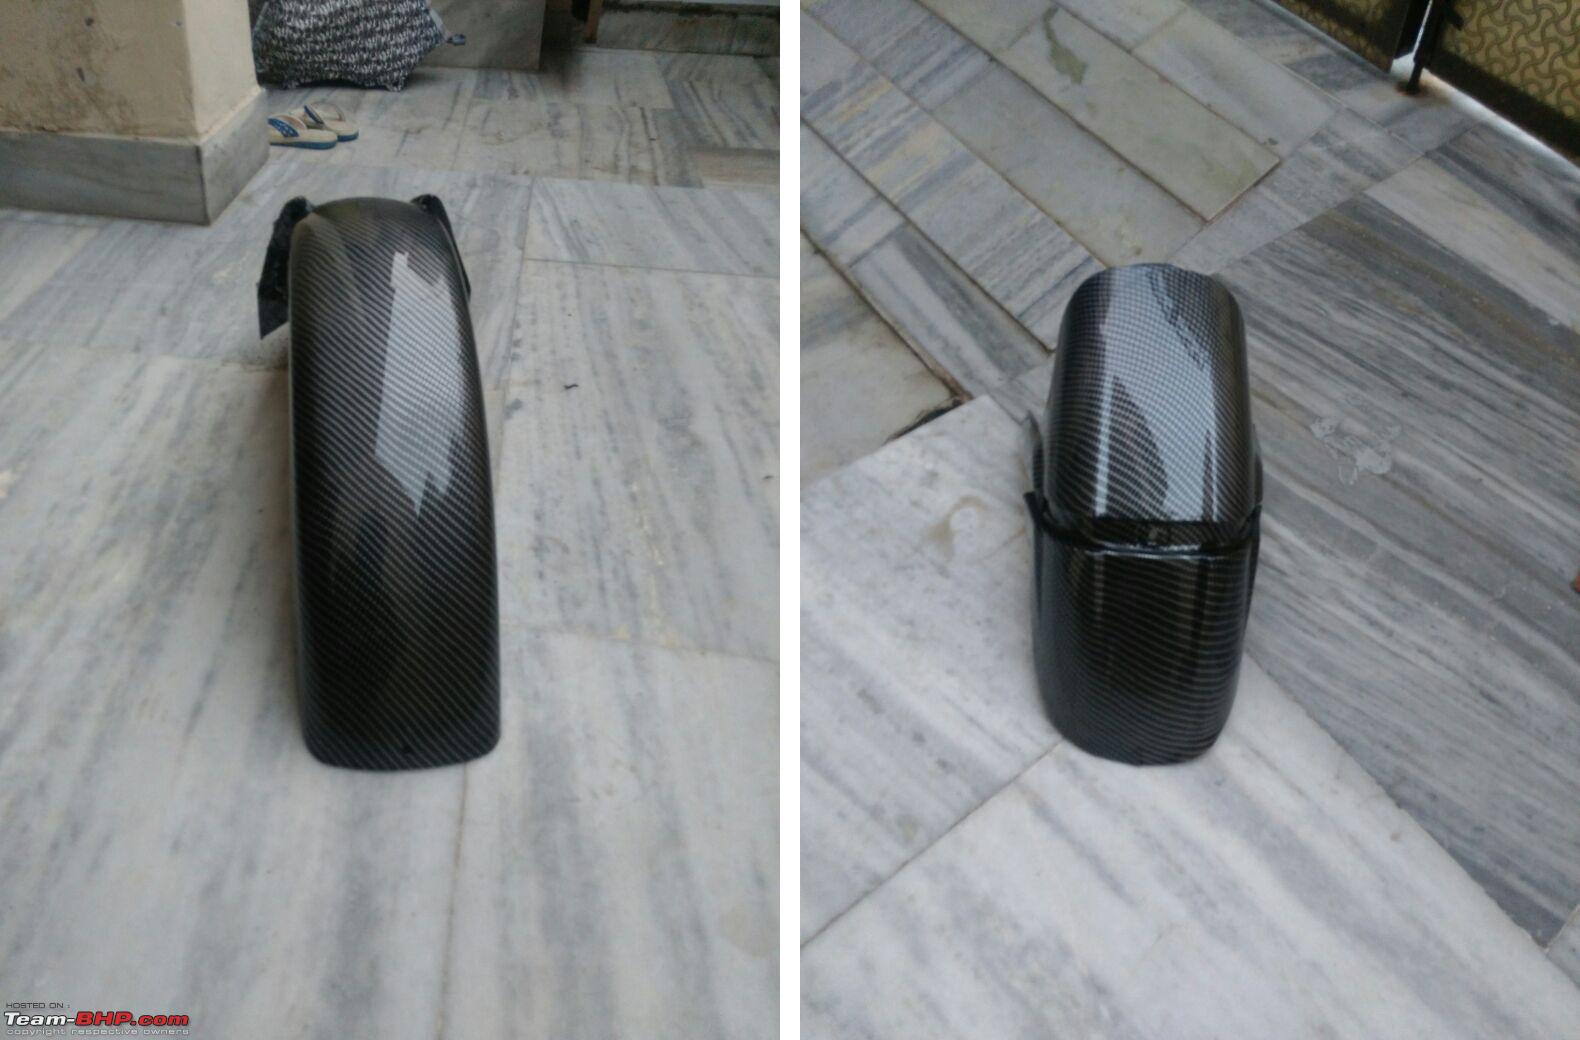
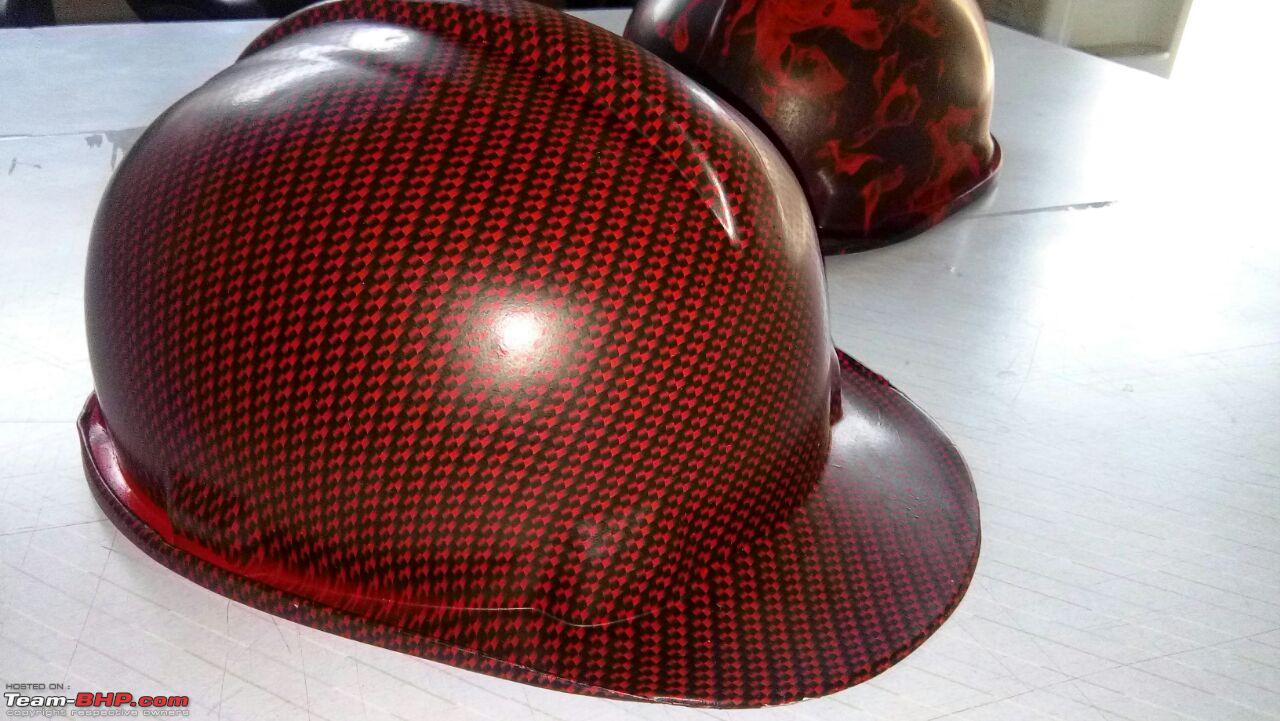
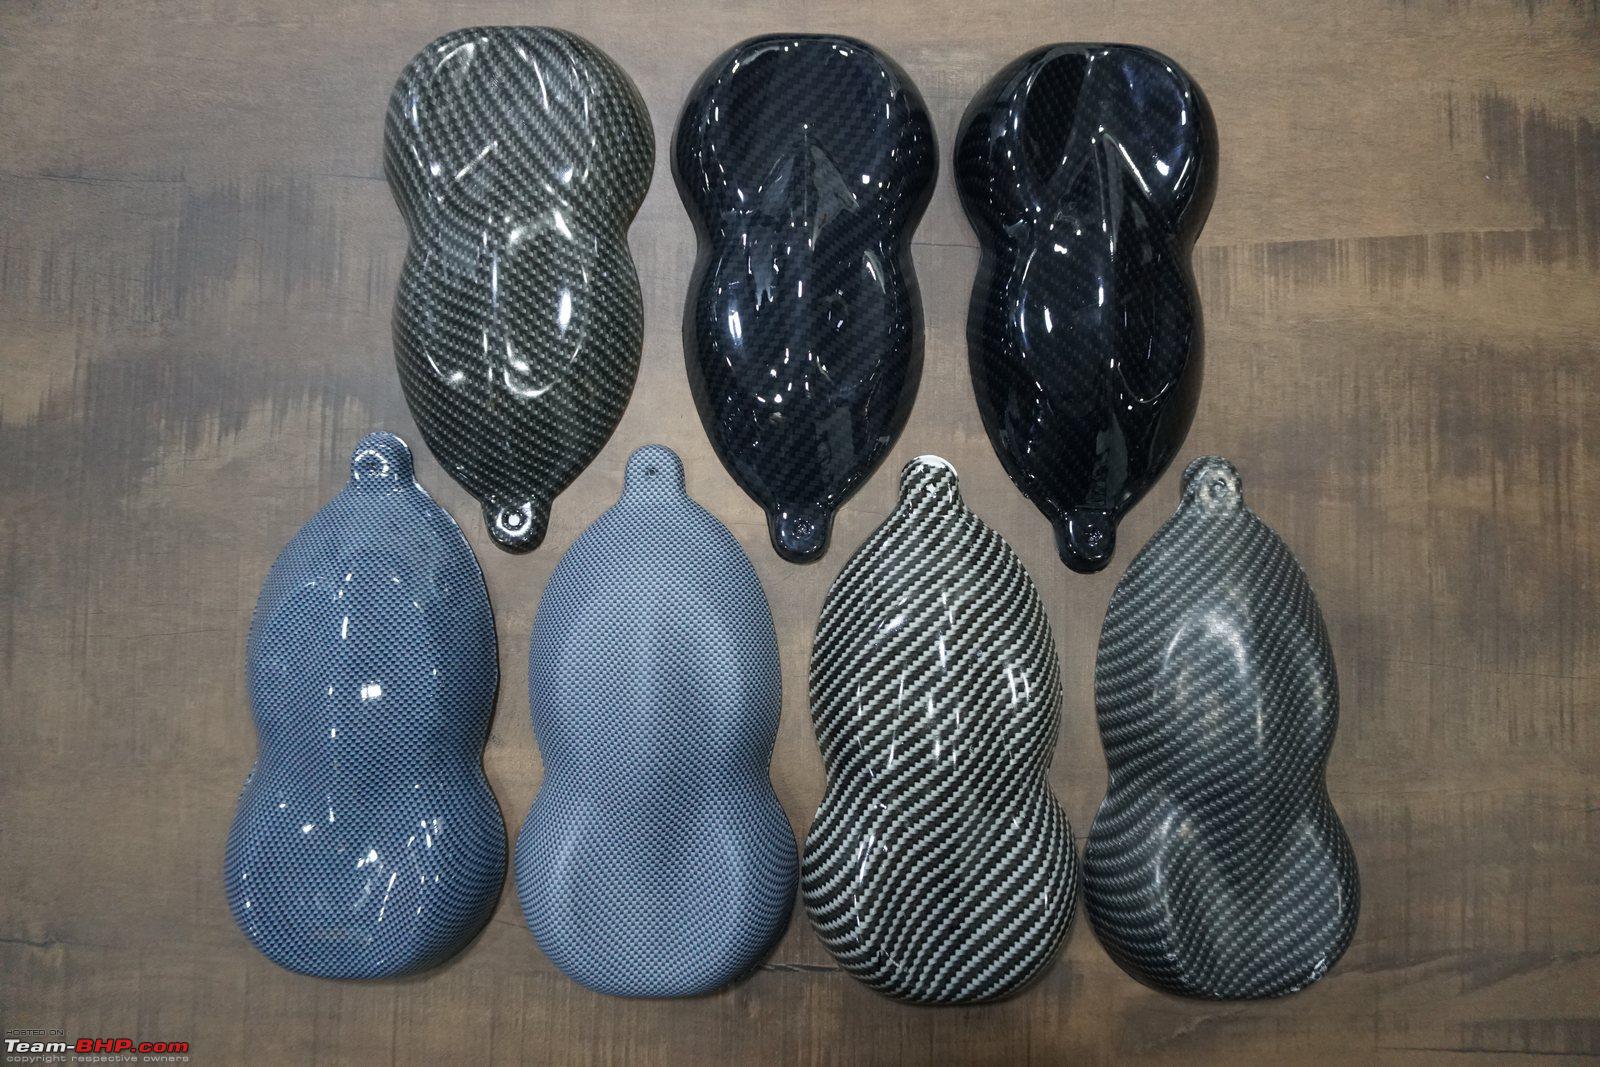
And what we've been waiting for... the Carbon-fibre patterns:
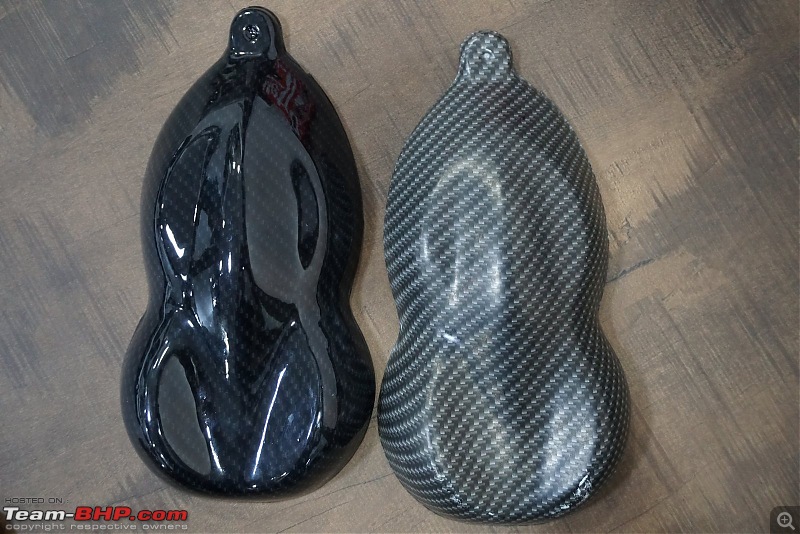
Once again, a glossy vs matte comparison:
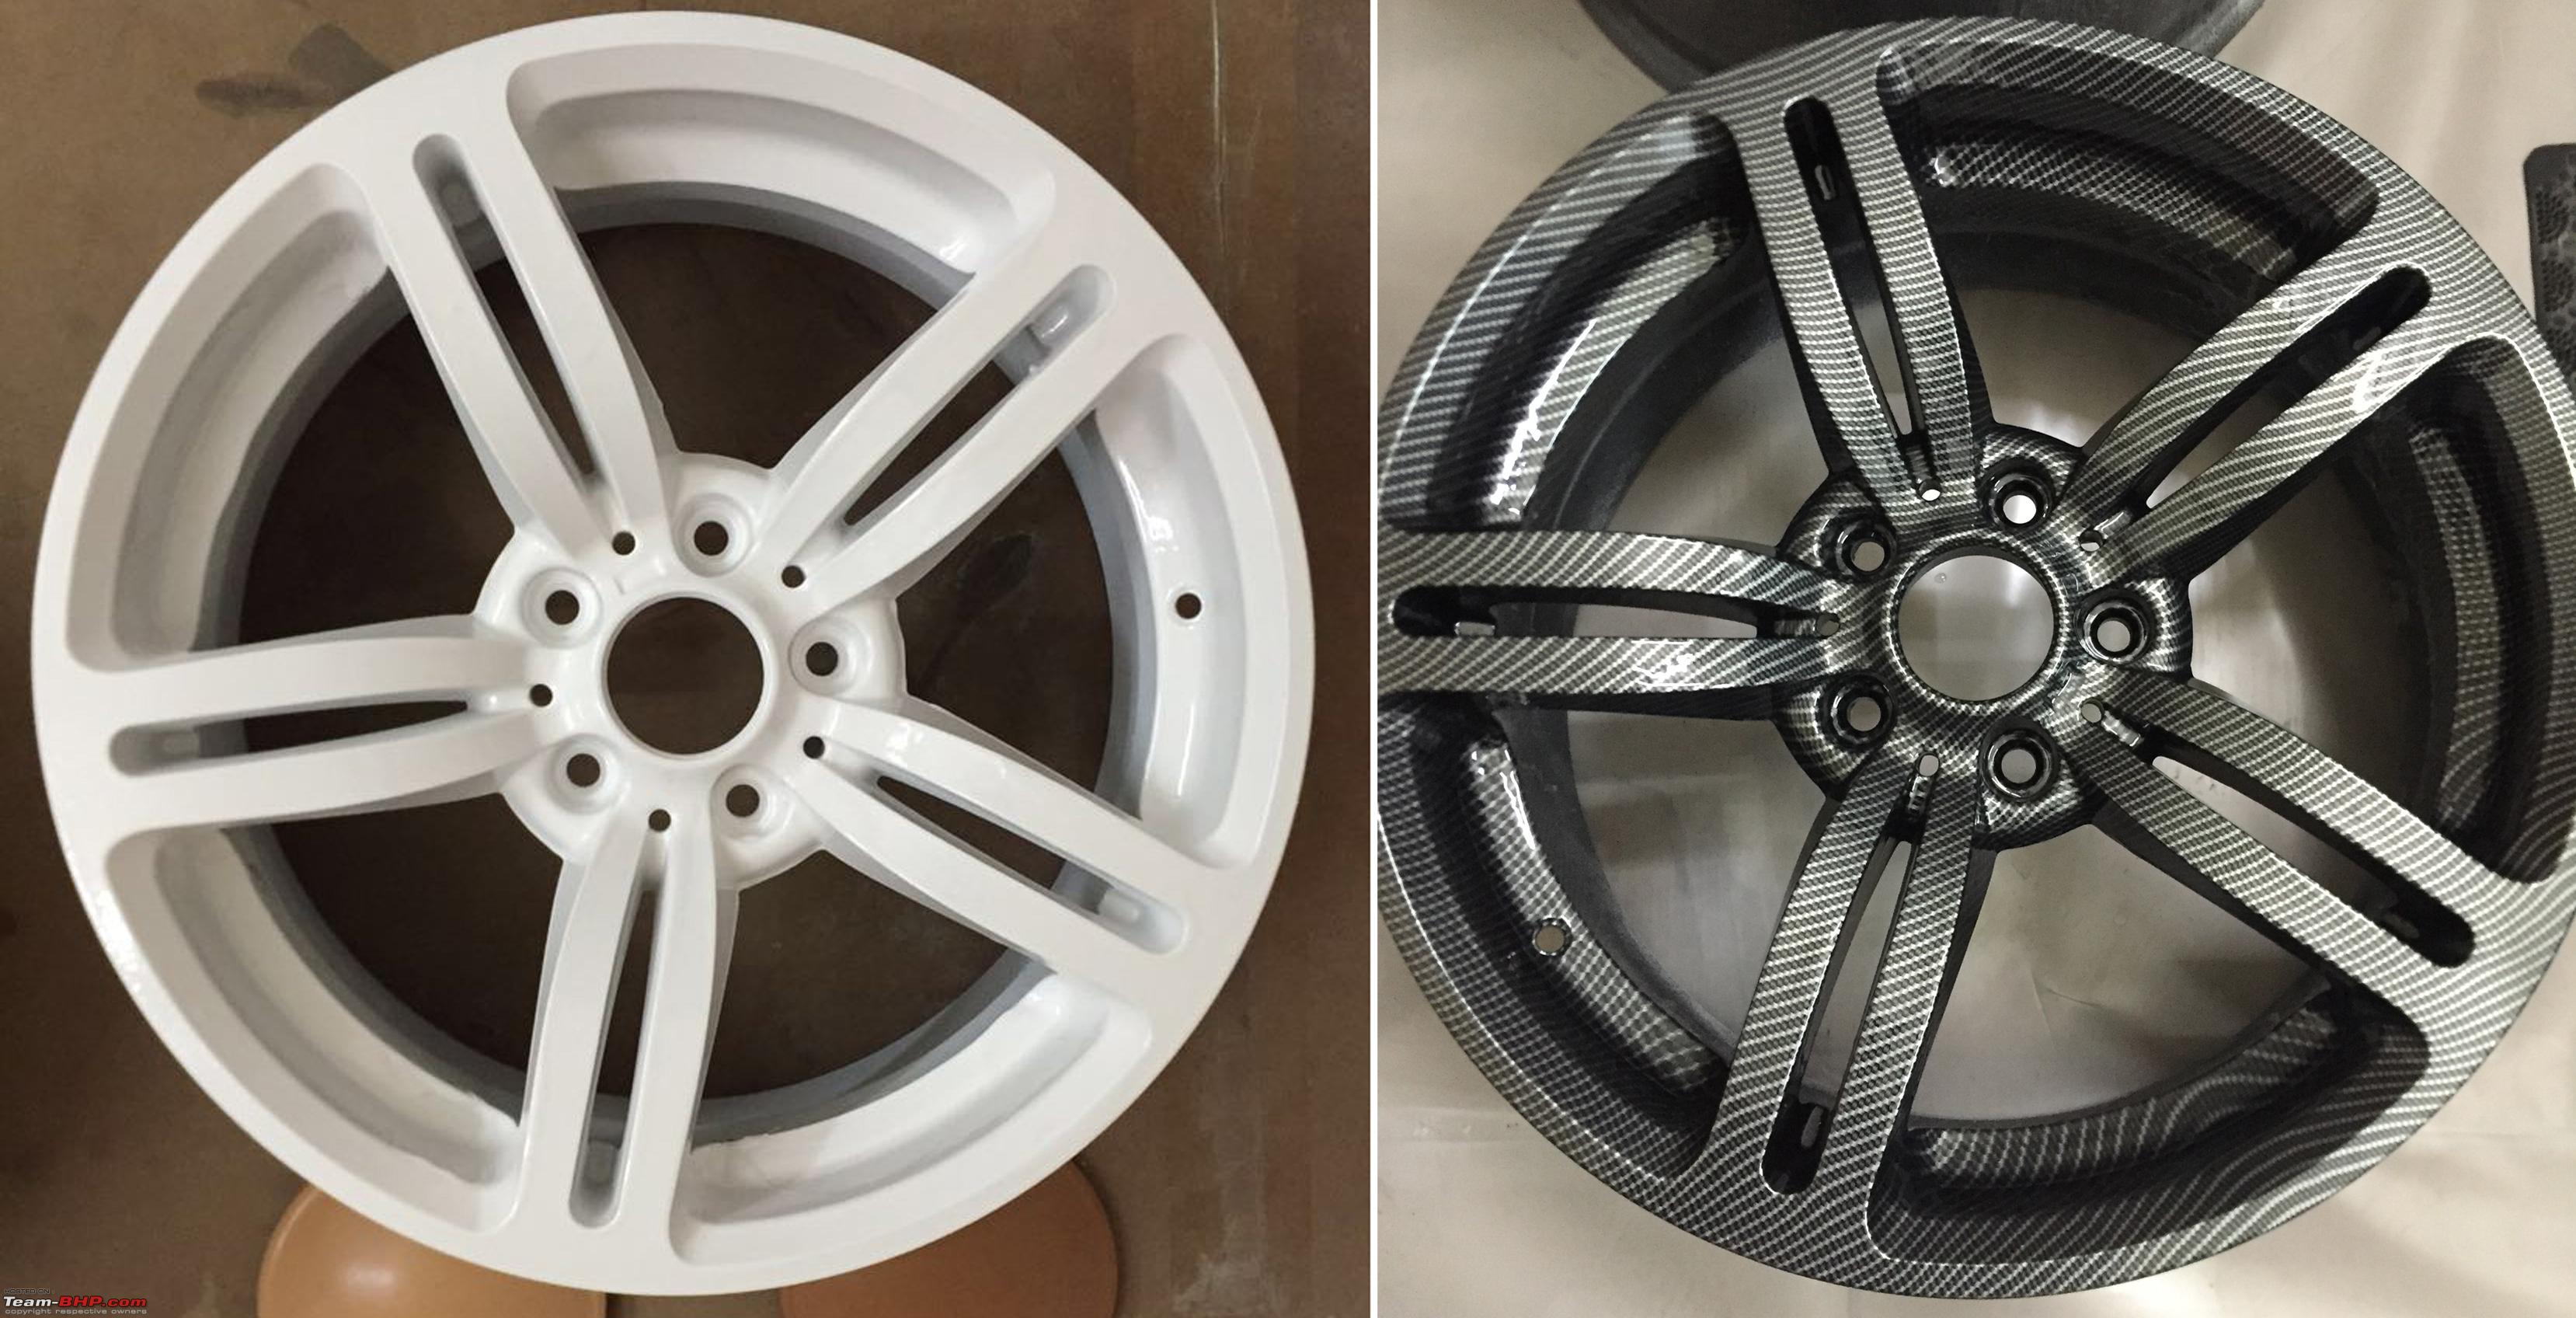
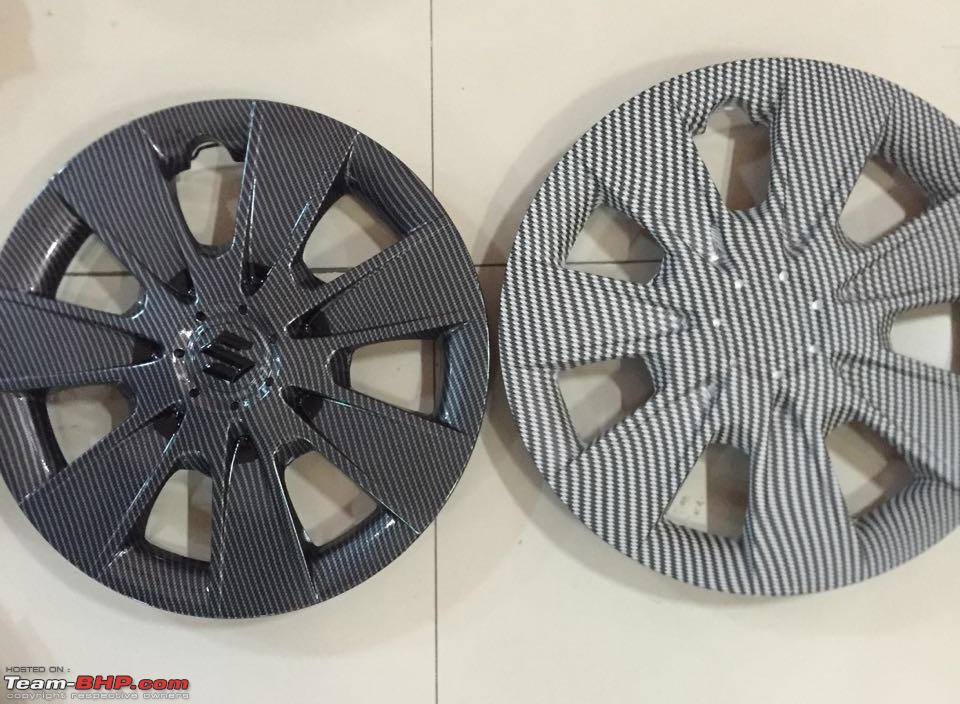
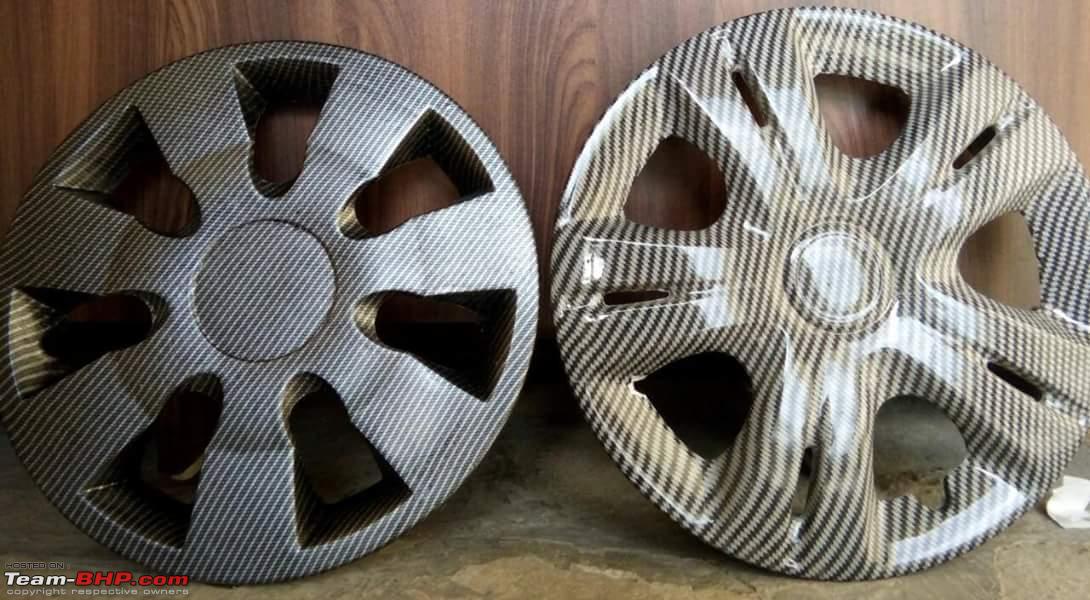
This is interesting! It's the same print on both, though the piece on the left was painted grey before printing, while the one on the right was white:
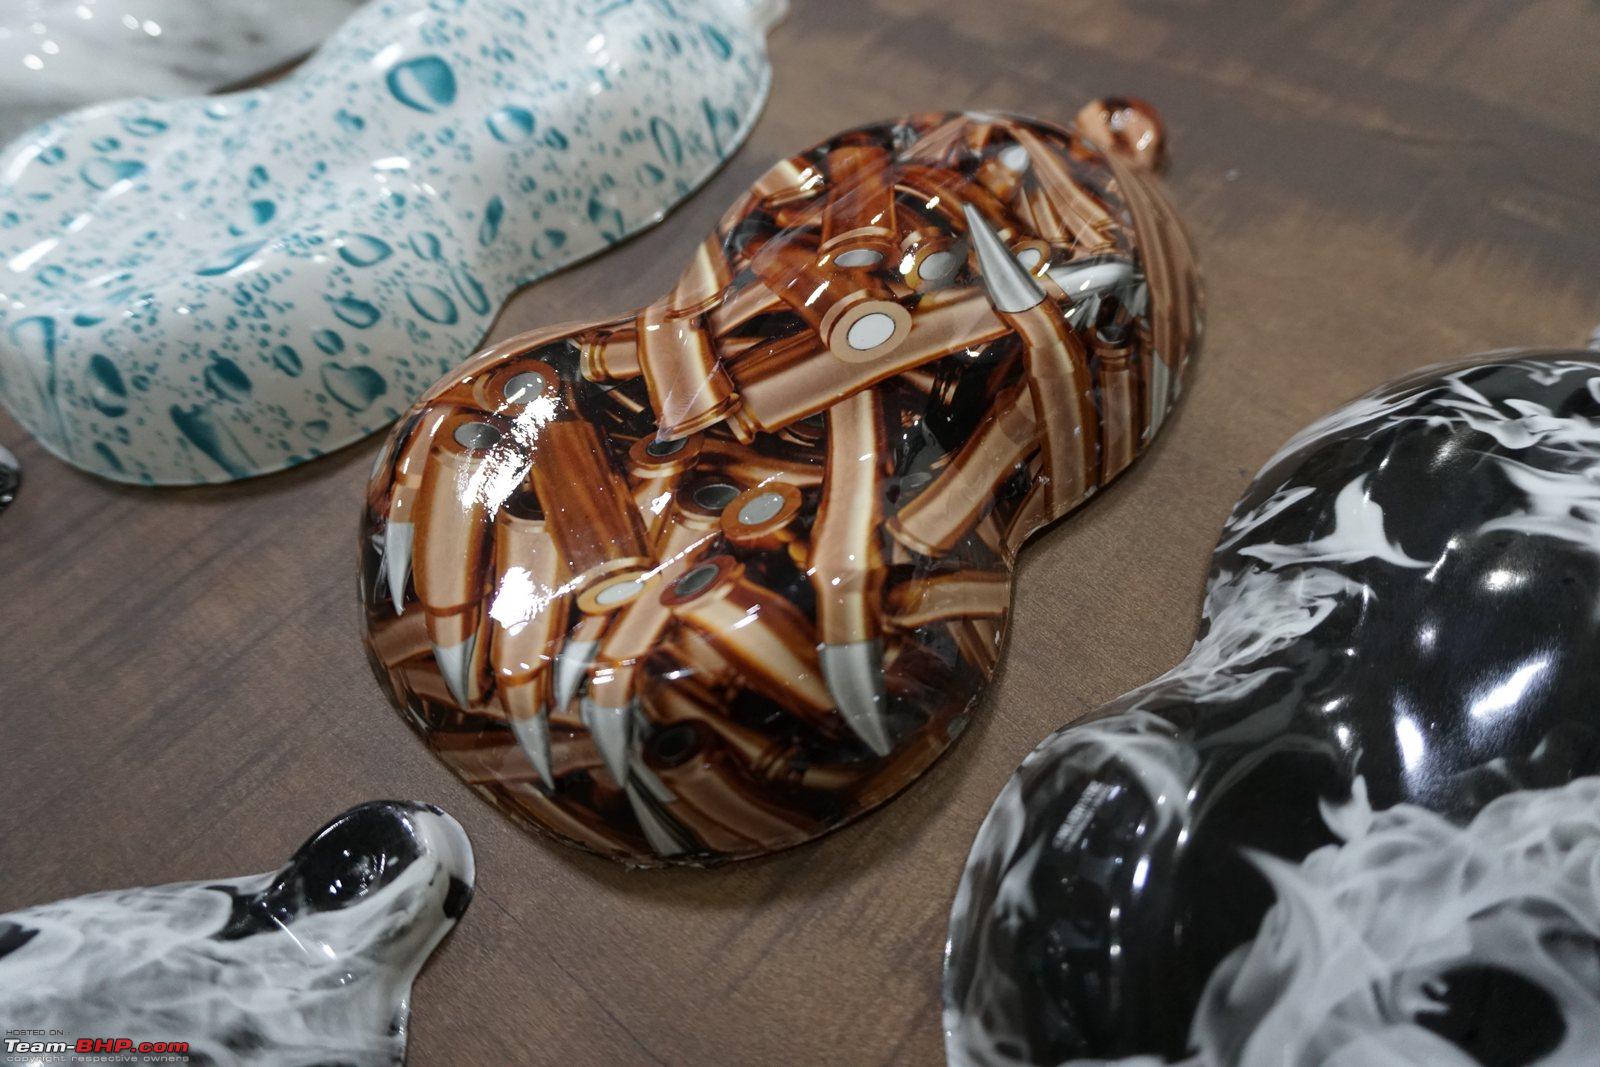
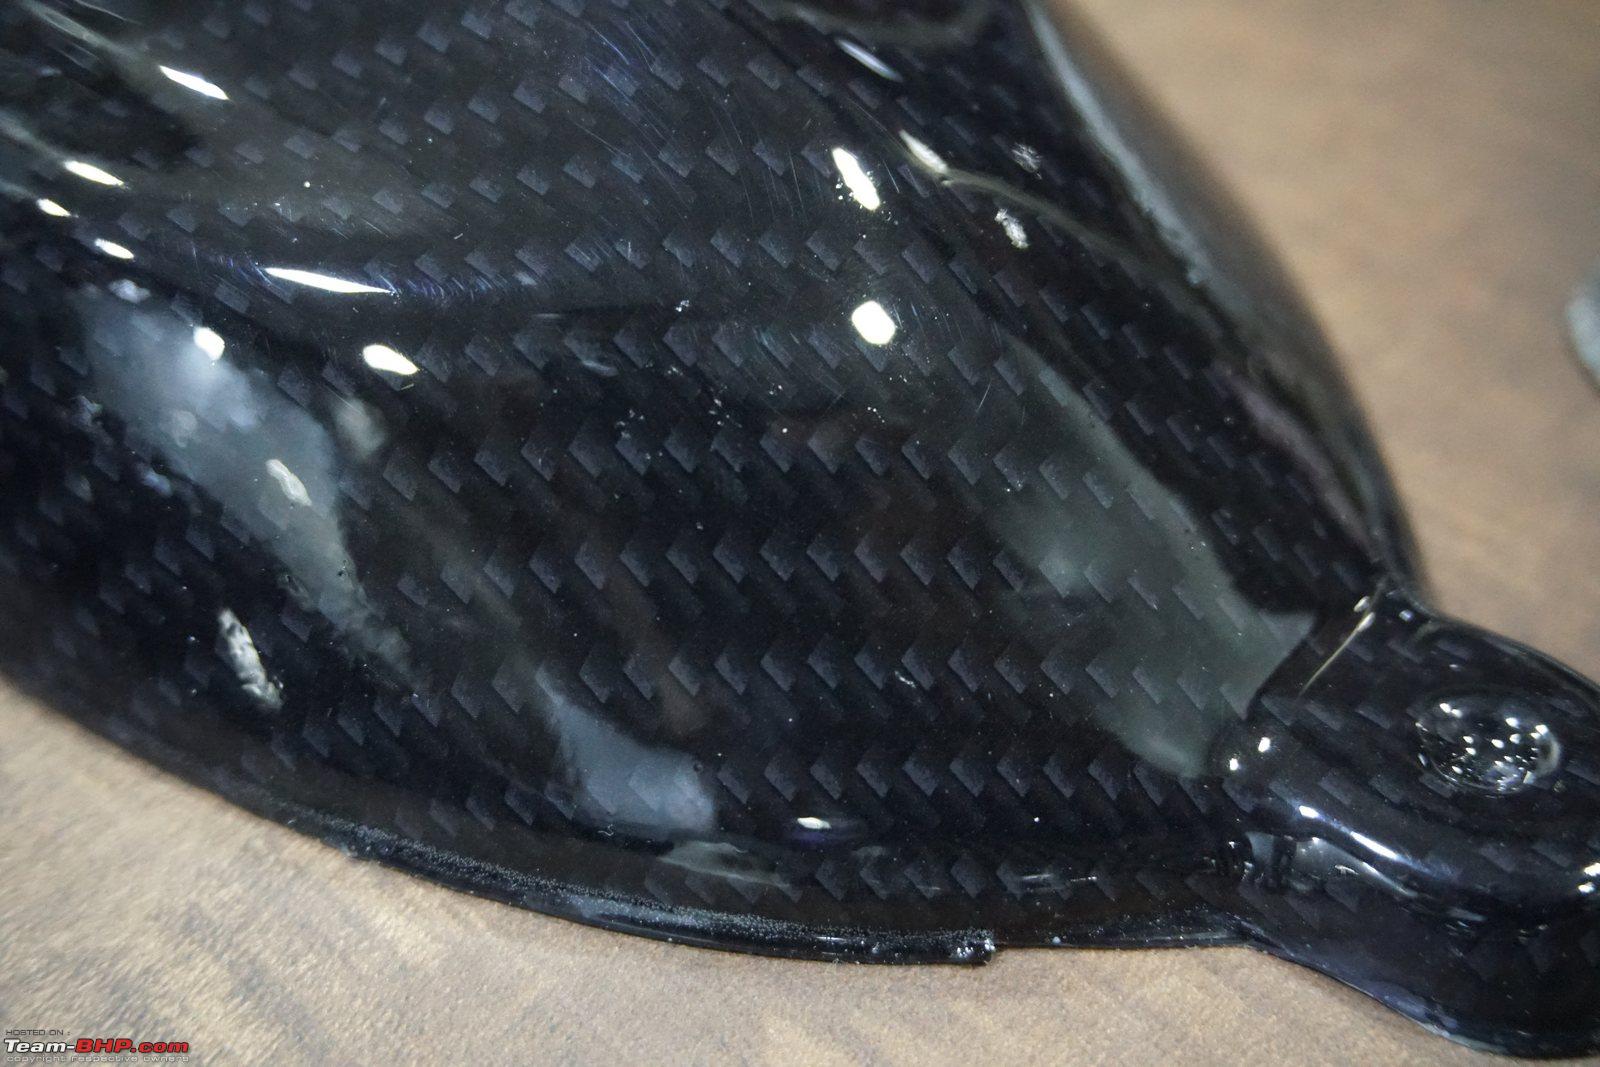
A close up of one of the CF pattern:
Looks pretty neat:
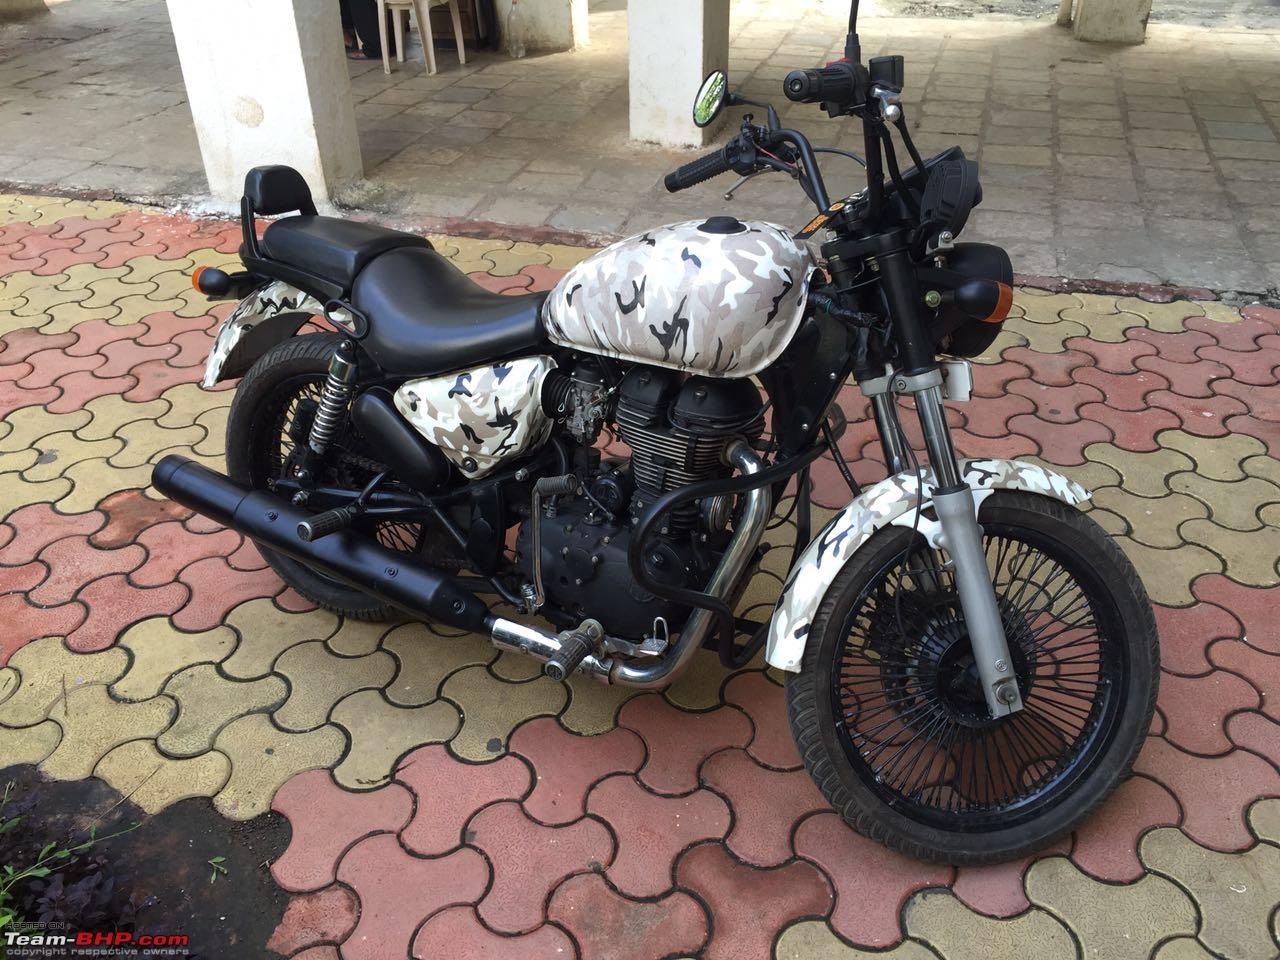
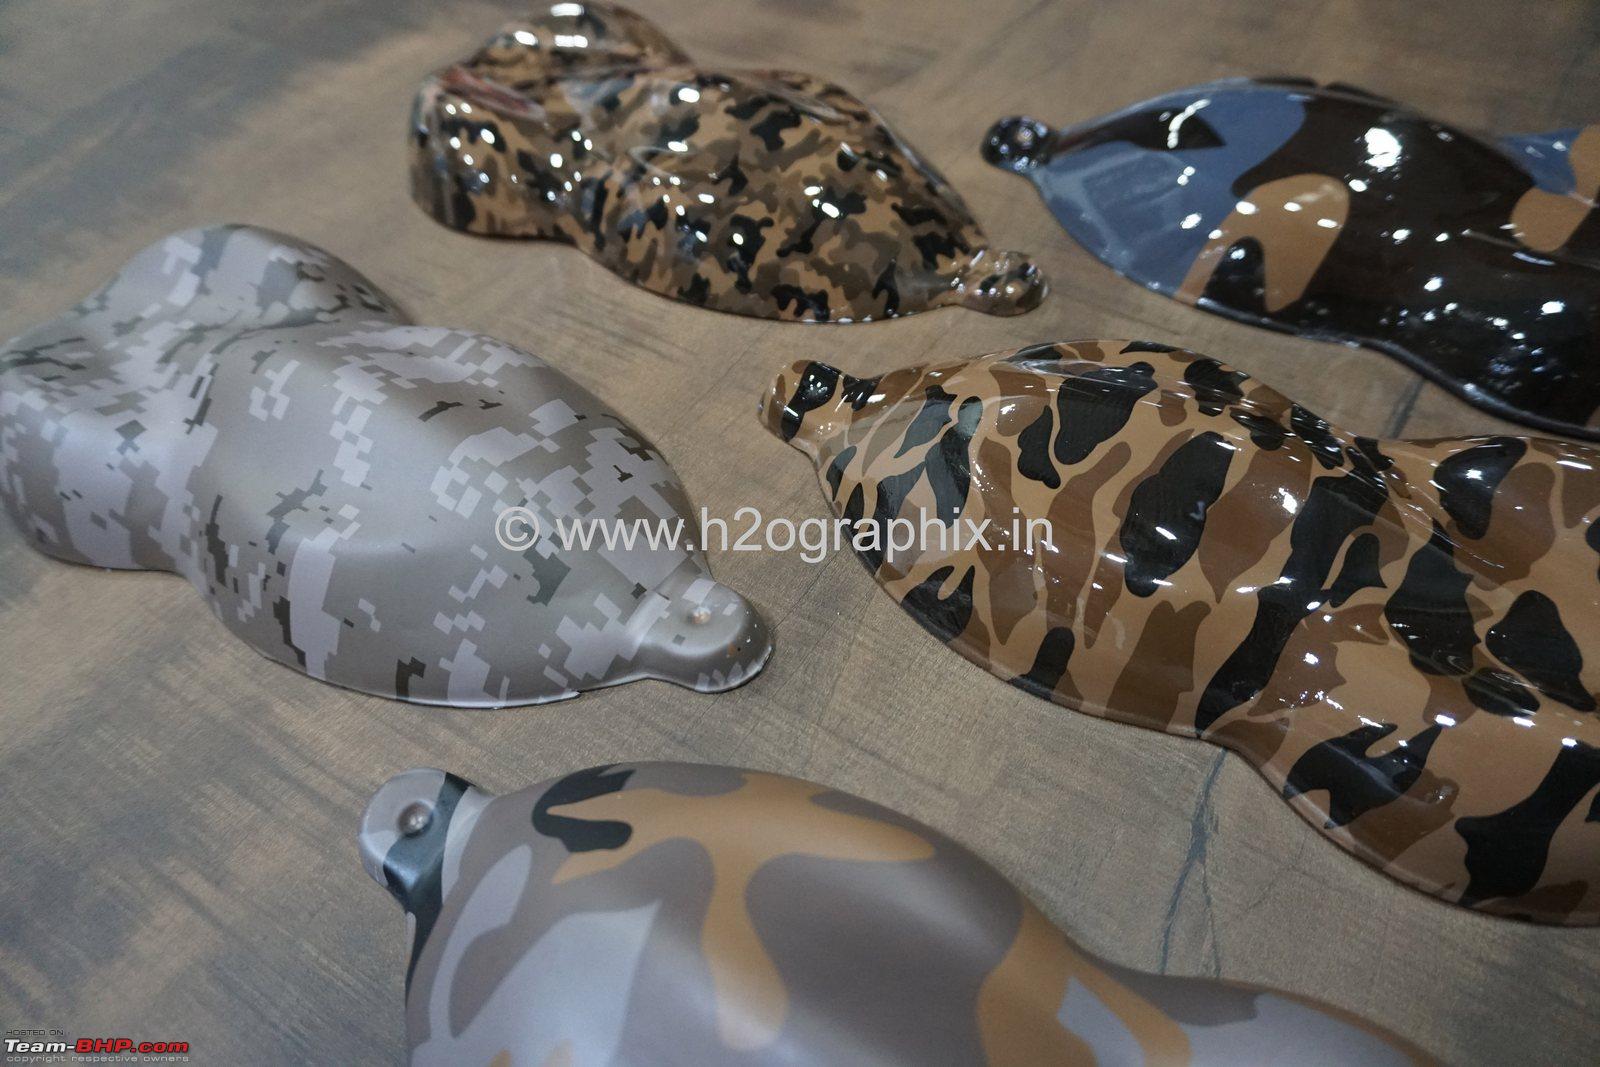
Here are some custom developed patterns that the guys at H2OGraphix are only willing to apply on Royal Enfield and Harley Davidson bikes:
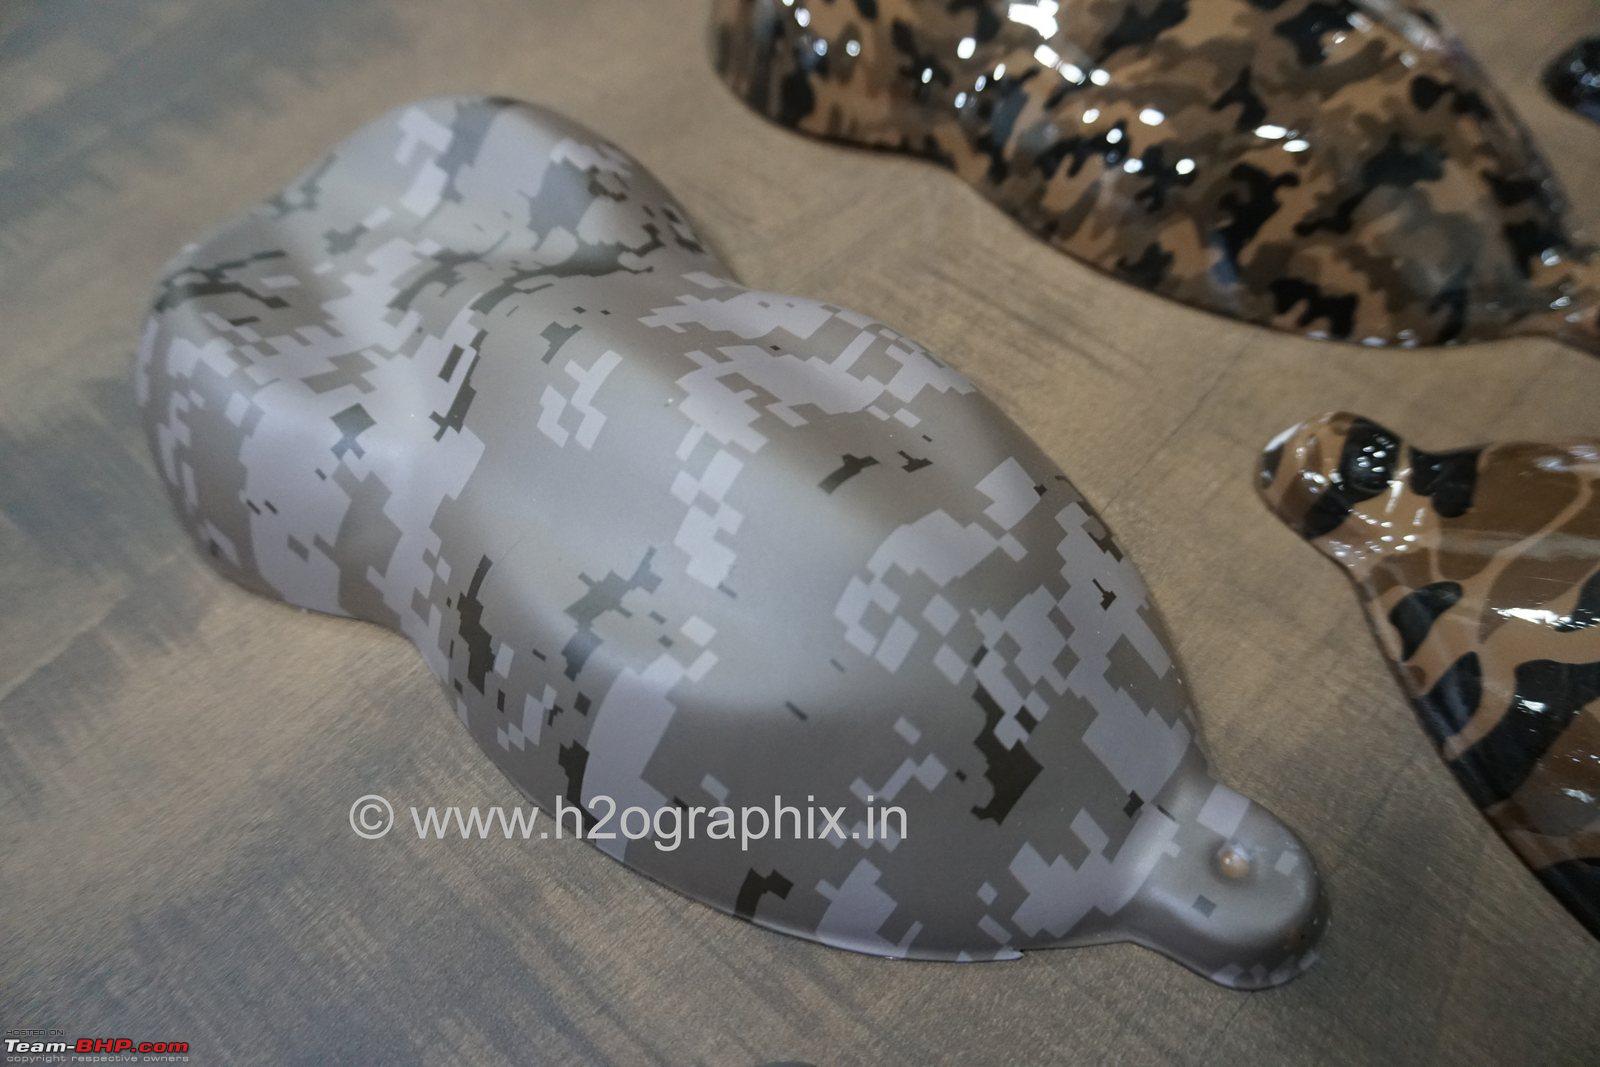
I liked this digital-camo look the best:
|
Originally Posted by deetjohn
(Post 4082561)
I think Nippon Toyota (one of the biggest dealers here) does hydrographic printing for alloys here. And they are open to other brands too, not just Toyota. |
|
Originally Posted by deetjohn
(Post 4082561)
I didn't take it forward as the carbon fibre finish they have is a bit too loud. Was a bit too sharp with a higher contrast for my liking. |
|
Originally Posted by sudeepg
(Post 4082653)
How resistant is this type of printing? As we all know, wheels are constantly in harsh environments and exposed to elements of the environment. Will this printing technique withstand them? |
|
Originally Posted by marsbhp
(Post 4082955)
Just discovered that Priya Hydrographics does the same in Chennai, too |
|
Originally Posted by autodoctor
(Post 4083771)
Have any one personally used this? How does it cope with the brake dust and other crap from the road.? |
|
Originally Posted by Rehaan
(Post 4082787)
Yes. The printing itself adheres to the material, but it's the Polyurethane (PU) top-coat that provides an incredibly tough clear coat over it. I'm told it's just as durable as automotive paint + clearcoat. |
|
Originally Posted by marsbhp
(Post 4082955)
Just discovered that Priya Hydrographics does the same in Chennai, too clap:clap: |
| All times are GMT +5.5. The time now is 03:17. |