Team-BHP > Vintage Cars & Classics in India > Post-War


Reply
  Search this Thread
327,959 views
Old 9th February 2010, 17:46   #31
BHPian
 
Ksingh544's Avatar
 
Join Date: Jun 2008
Location: Delhi, Jammu
Posts: 230
Thanked: 486 Times

Quote:
Originally Posted by the mole View Post
Boss which car are you talking about in Mumbai?
rehaan is correct i did mean the radio
Ksingh544 is offline  
Old 10th February 2010, 01:14   #32
BHPian
 
mbz180's Avatar
 
Join Date: Jan 2010
Location: Kolkata
Posts: 893
Thanked: 1,023 Times

@Kundan: Thanks for the compliment on the radio, I think you had The Mole a little worried since he thought that you were wrongly complimenting my car, in the sense that if you did see my car in Bombay, it would have been The Mole's and not mine, make any sense?

@Rehaan: Been fiddling with Photoshop, can you PM me as to exactly how you selected the blue part of the Merc picture I sent you? I have to try it on actual photos of my car, but so far even my office design guy who uses photoshop the whole day has no idea how you selected only the blue parts. He thinks you did it manually with the pen tool!
mbz180 is offline  
Old 10th February 2010, 22:32   #33
Senior - BHPian
 
the mole's Avatar
 
Join Date: Nov 2006
Location: Mumbai
Posts: 2,189
Thanked: 825 Times
Interiors for Pontons

Hi Prithvi, while in Stuttgart at the Mercedes Benz museum I happened to see a display for original swatches for paints and fabrics for Pontons, 190SL, 300SL cars they may come in handy when you think about your interior scheme.
Attached Images
   
the mole is offline   (1) Thanks
Old 12th February 2010, 03:25   #34
BHPian
 
mbz180's Avatar
 
Join Date: Jan 2010
Location: Kolkata
Posts: 893
Thanked: 1,023 Times

Quote:
Originally Posted by the mole View Post
Hi Prithvi, while in Stuttgart at the Mercedes Benz museum I happened to see a display for original swatches for paints and fabrics for Pontons, 190SL, 300SL cars they may come in handy when you think about your interior scheme.

Amol, wow it's great that you actually got to see some of the paints and interior combinations in the Stuttgart Museum. The Museum visit is top on my list of priorities when my car gets done. As of now, I've fixed the body paint as DB516 Mittelrot (Medium Red). I've tried this colour on Photoshop on a photo and shown my dad as well, and he thinks it's a great colour to have. It maybe called Medium Red but is actually a deep red. I think the deep red paint chip on the first picture you have sent is the same colour. The interiors will be light tan while the carpets will be deep tan or brown. I think this combination would suit my car very well, though there is a long way to go before paint and I'm flexible, so if anyone thinks of a better colour scheme I can always change my mind!
mbz180 is offline  
Old 12th February 2010, 14:40   #35
Team-BHP Support
 
Rehaan's Avatar
 
Join Date: Feb 2004
Location: Bombay
Posts: 24,037
Thanked: 34,067 Times

Quote:
Originally Posted by mbz180 View Post
....He thinks you did it manually with the pen tool!
Yea i kinda did

Well, i used a combination of the lasso and magnetic lasso. Don't be too particular (or high-res) and it'll take all of 5 minutes to do.

After that you can use "Replace color" or "Hue/Saturation" in the Image>Adjustments menu.

cya
R
Rehaan is offline  
Old 12th February 2010, 18:07   #36
Senior - BHPian
 
the mole's Avatar
 
Join Date: Nov 2006
Location: Mumbai
Posts: 2,189
Thanked: 825 Times

Quote:
Originally Posted by mbz180 View Post
The Museum visit is top on my list of priorities when my car gets done.
Well you really need to visit the museum before you get into any restoration on a mercedes the resources are immense, to give you an example. Find attached pics of a Factory Ponton displayed there with negligible mileage and everything intact. I learned for instance that some of the early pontons had wool tops (mouse fur). I always thought they were vinyl but I was wrong. Anyway enjoy the pics. I have several more Ponton related pics which I will upload on the weekend.

Dont miss how the fog lights are mounted just like my car
Attached Images
  

Last edited by the mole : 12th February 2010 at 18:21.
the mole is offline   (3) Thanks
Old 13th February 2010, 11:55   #37
BHPian
 
mbz180's Avatar
 
Join Date: Jan 2010
Location: Kolkata
Posts: 893
Thanked: 1,023 Times

Quote:
Originally Posted by the mole View Post
I learned for instance that some of the early pontons had wool tops (mouse fur). I always thought they were vinyl but I was wrong. Dont miss how the fog lights are mounted just like my car

Amol, what a lovely early 180, absolutely stunning. You really have a rare 180 in the sense I've never come across another ponton with fog lights mounted like yours, and after seeing the pics of the factory 180 now I know for a fact that it was obviously an early original option. Bumpu usually fits the classic cars he restores with wool headliners, and it looks very period, but even I thought that pontons always came with standard vinyl perforated tops. Now that I know you've seen early pontons with wool tops, what should I go with? Will a wool top, as period as it may look, be correct for a later 1958 model like mine? Also, where can I get new triangular blinkers as was fitted to 4 cylinder pontons? I have one decent piece, but the other has faded lenses. MB Classic Centre doesn't have them anymore and I haven't been able to find a vendor who has new ones.

Regards
Prithvi
mbz180 is offline  
Old 21st February 2010, 20:05   #38
BHPian
 
mbz180's Avatar
 
Join Date: Jan 2010
Location: Kolkata
Posts: 893
Thanked: 1,023 Times

Hello everyone,

After a long time, I managed to take half the day off from work and went to Bumpu's workshop outside Kolkata as I wanted to see the progress that has been made. The body work has not yet started since a 1947 Mercury which requires a lot of tin work is being done, but that should be over within a month and then my car's body work will start. Bumpu is now concentrating on the mechanicals of the car, which he wants to complete first. I wanted the engine to be tackled first, as it was overhauled exactly a year back but not by Bumpu, but my own garage mechanic. So I wanted Bumpu to start her up again and see how she was since she hasn't been started in a while.

Last Wednesday morning I got a frantic call from the workshop, saying that the engine will not budge from the flywheel end by hand. 
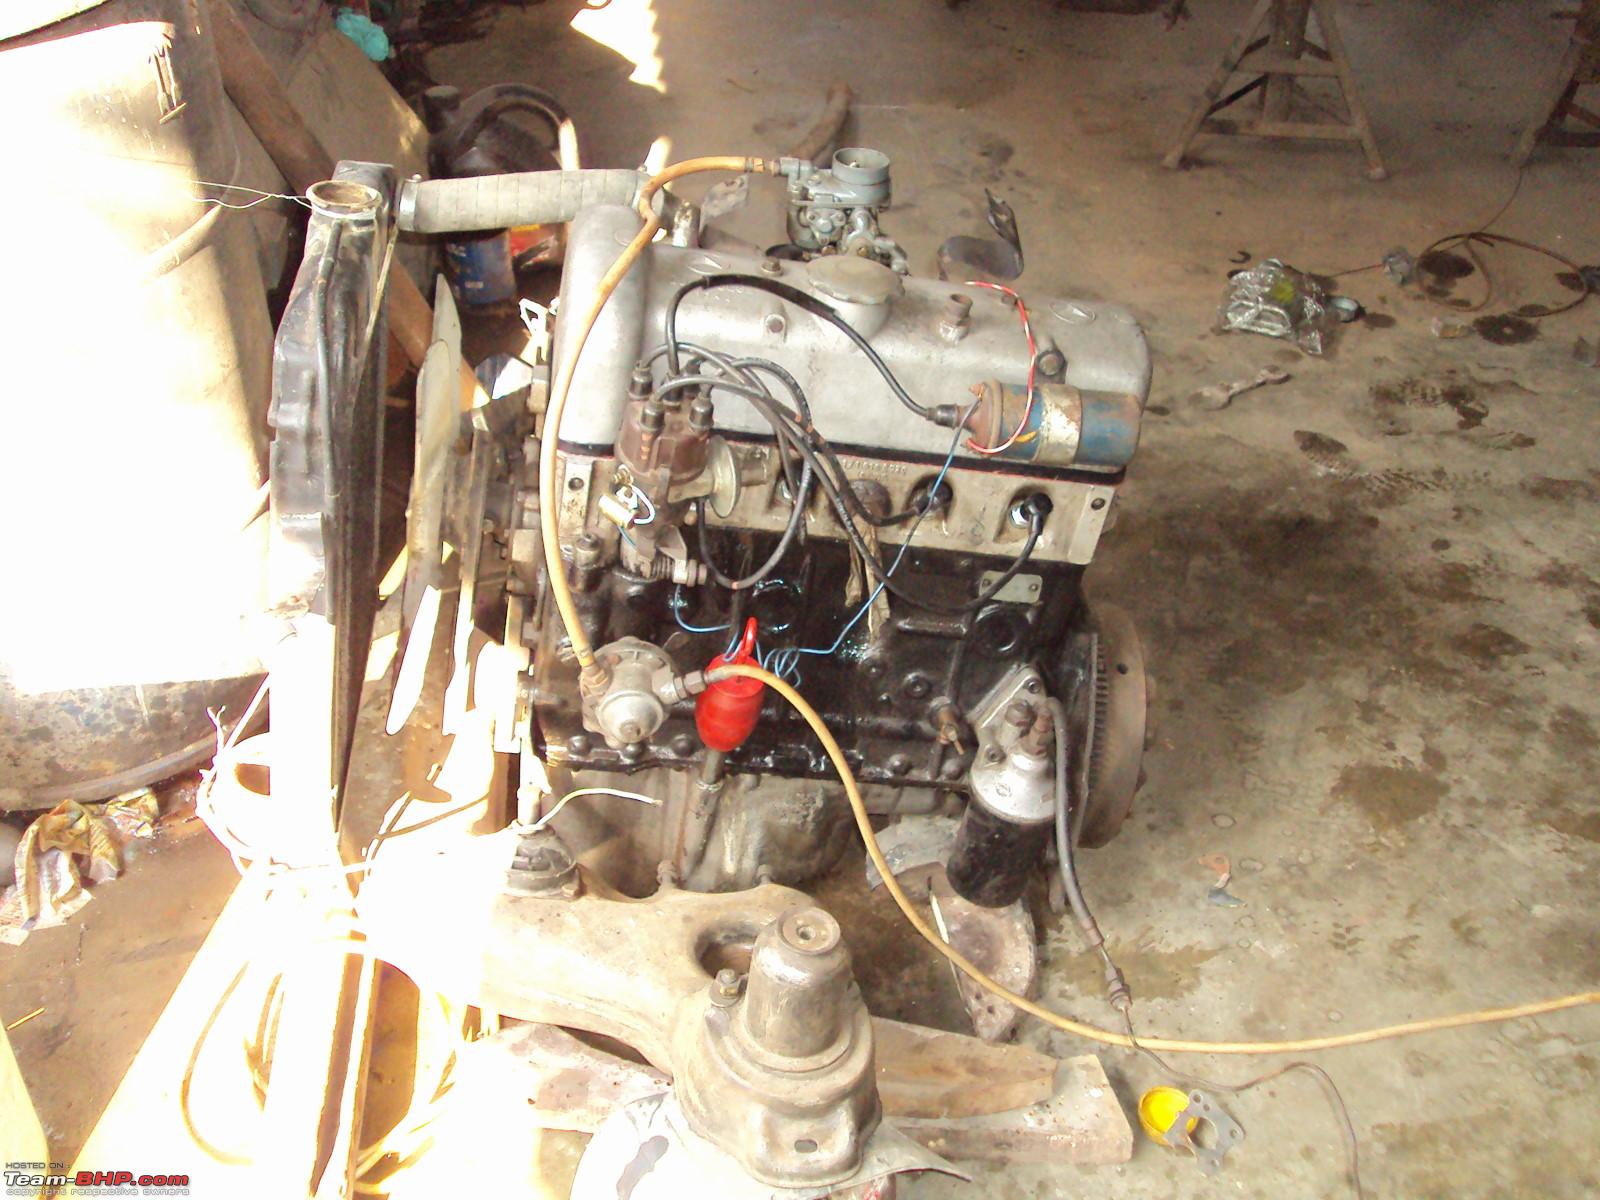
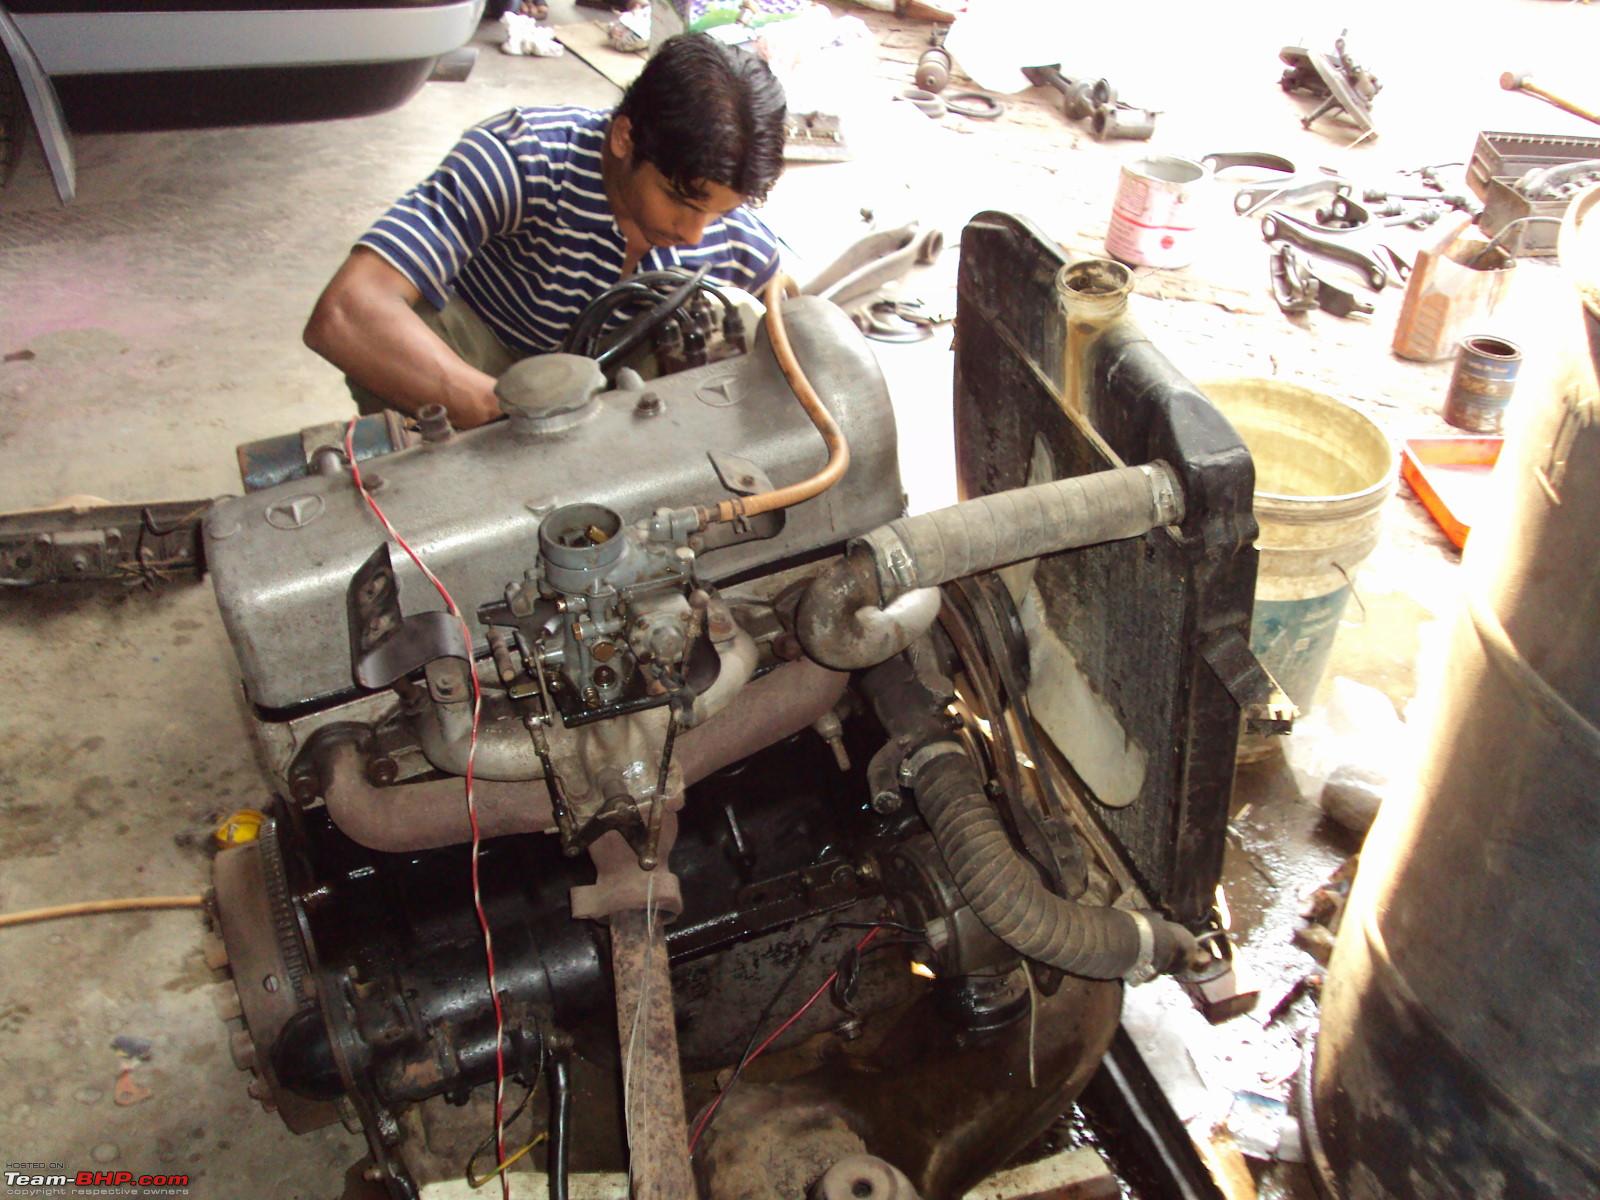
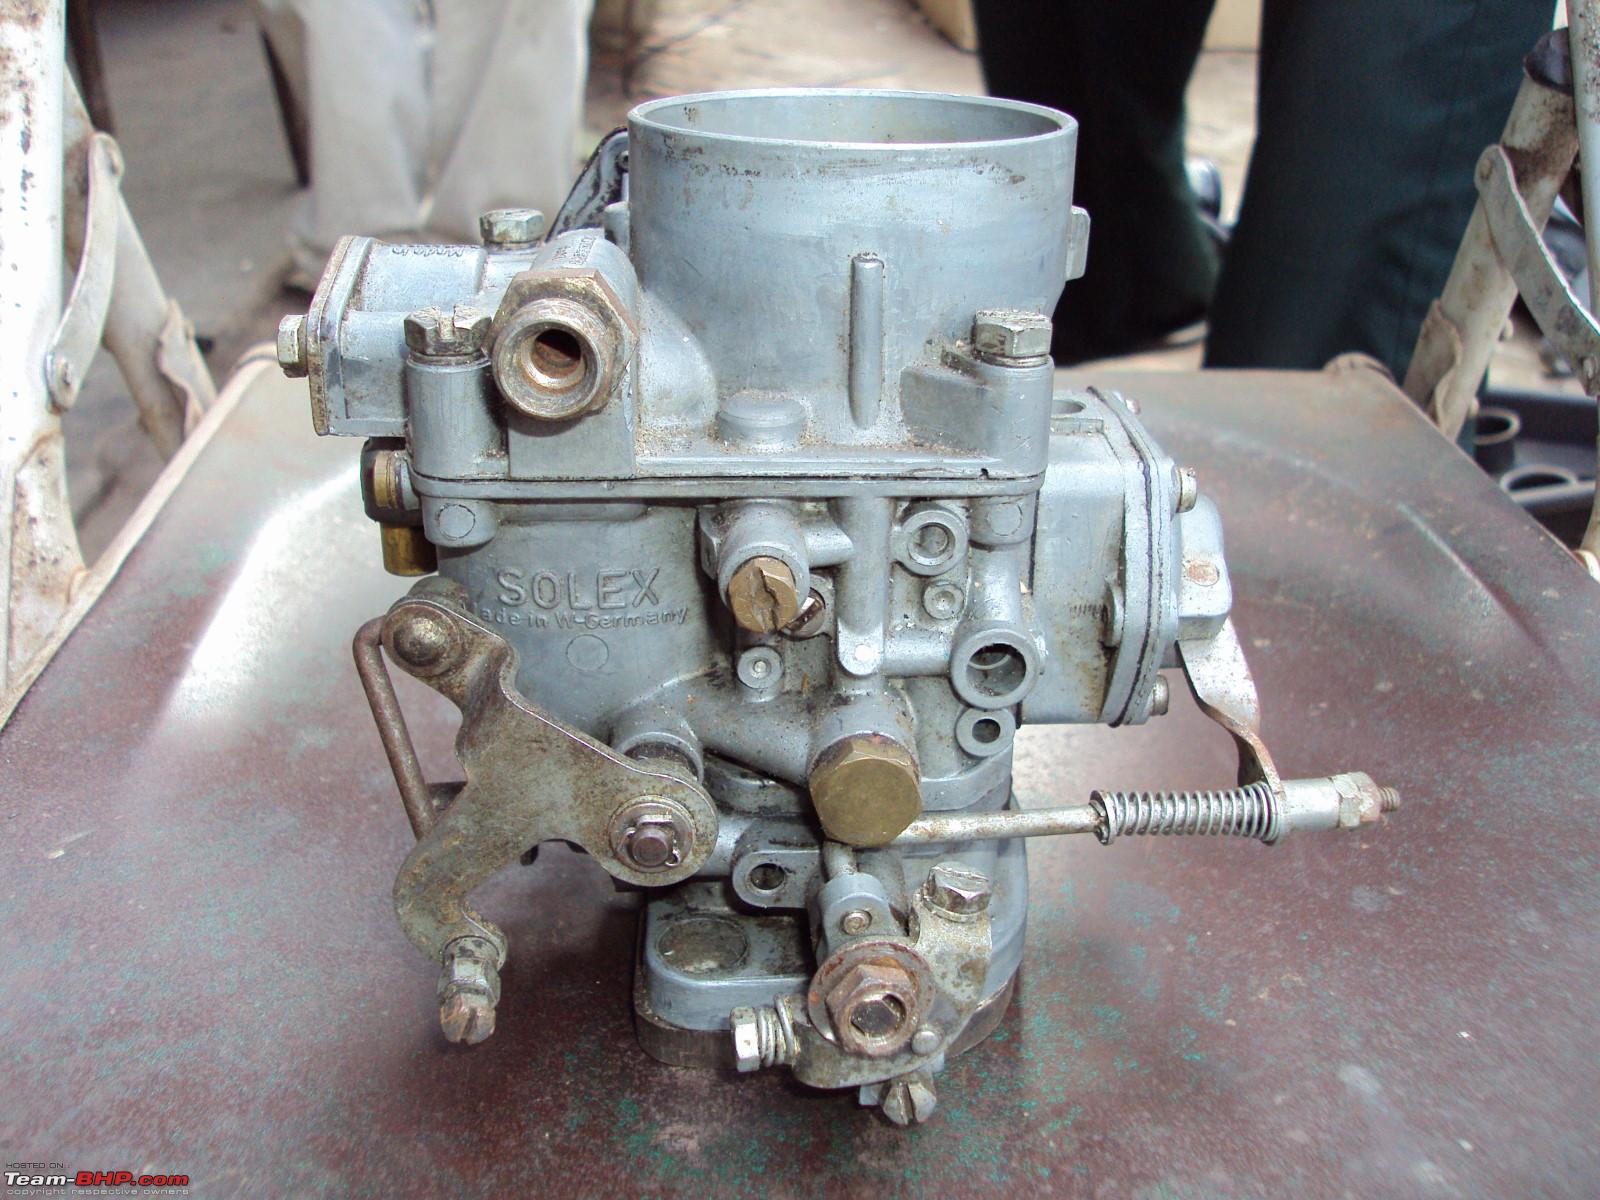
I was quite horrified! After all, the last time the engine was in action, that too after an overhaul was when I drove the car to the workshop, following which it was taken of the car and stored. Luckily, I then got another call saying that after a lot of trying, this time from the front end, there was a "tick" kind of noise and finally the engine could be turned by hand. What a relief. But Bumpu told me that whoever did the engine, made everything too tight fitting which is why so much effort was required for it to turn. The engine oil was still fresh and more than adequate, so it was mounted onto its actual subrame and secured. Then the radiator was secured on a wooden plank and tied to the subframe, while a rudmentary exhaust pipe (without muffler) was fitted into the exhaust manifold. The carb was cleaned, and she fired up after a few cranks.

However, all was not well, Bumpu told me the engine was running very laboriously and wouldn't idle anywhere near smooth. Then he came across some sort of brainwave, basically he kept adding some 2T oil in the fuel and gradually, the engine started getting better and better. When I went yesterday, the engine had freed up to some extent, and Bumpu demonstrated to me what happens when he added 2T oil; when he added a few drops from the top of the carb, as if by magic the revs would rise and the engine would become absolutely smooth! Bumpu thinks that the engine needs to be run everyday until it eventually frees up, and doesn't think that it needs to be opened as of now. He decided this after the oil pressure gauge showed full pressure for the 2 hours that the engine was on, and only dropped a little when it got to full operating temperature.

Even the water temperature gauge reading was well within limits, except after the first hour when the engine started to sputter and got really hot as a result of which it was switched off but as soon as this happened, large amounts of water was thrown out from the radiator like a volcanic eruption of sorts!

What quite the problem is I'm not sure, but apparently, this only happened yesterday when I was there, not when it was run for the few days before! Anyway, after she cooled a bit, she was re-started and then behaved quite well and I sat close to the engine to try and make out what she was trying to say and realised there was some sort of friction noise. I pointed this out to Bumpu and he investigated by disconnecting the fan belt, after which he spun the fan by hand; the water pump bearing was gone completely and made a very loud noise! The engine was then started without the fan belt driving the fan and now sounded much better. So atleast we now know that the water pump needs an overhaul (this was not done by us), and perhaps the cooling will also improve once that is done. The engine was run again for another hour with Bumpu cautiously adding drops of 2T for added upper engine lubrication. This is now going to be the routine for the engine till it behaves to Bumpu's satisfaction, and if it does not, then we need to redo the engine again. The differential is now in epoxy putty mode and will be painted and closed next week, with all it's new rubber bushes, bellows etc. Then the front and rear suspension work will start for which I need to get front coil springs (one of them was broken when it was taken off!), front kingpin sets and all the wheel cylinders, which are seized very badly.

Here are a few pics of the engine on its test bed, differential and some suspension parts.

Also some trim parts (used) which have come in from Australia a couple of weeks back and which will be refurbished later. The headlamps are what I required most, since I didn't have original ones and brand new ones are in the region of USD 600, each! This is way beyond what I'm willing to spend for headlamps so I went with these decent used ones from Australia, though they weren't really reasonably priced. For some reason, complete ponton headlamps fetch astronomical prices on e-bay and elsewhere. Oh, I must mention that the Becker Radio was also tested yesterday and works.

Last edited by aah78 : 22nd February 2010 at 00:44. Reason: Post split into paragraphs for easy reading. Please limit smileys to 2/post. Thanks!
mbz180 is offline   (2) Thanks
Old 21st February 2010, 21:13   #39
BHPian
 
mbz180's Avatar
 
Join Date: Jan 2010
Location: Kolkata
Posts: 893
Thanked: 1,023 Times

Here are the photos which I messed up attaching.

Engine on its test bed
My 1958 Mercedes-Benz Type 180a Ponton-engine_1.jpg

Smoothens out everytime Dr. Bumpu adds 2T oil
My 1958 Mercedes-Benz Type 180a Ponton-engine_3.jpg

At least the oil pressure is healthy
My 1958 Mercedes-Benz Type 180a Ponton-oel_1.jpg

The rudimentary exhaust pipe without muffler
My 1958 Mercedes-Benz Type 180a Ponton-engine_4.jpg

Top view of differential housing
My 1958 Mercedes-Benz Type 180a Ponton-dif_top.jpg

Typical MB single joint swing axle
My 1958 Mercedes-Benz Type 180a Ponton-diff_1.jpg

With epoxy primer and putty
My 1958 Mercedes-Benz Type 180a Ponton-diff_2.jpg

With new bellow

My 1958 Mercedes-Benz Type 180a Ponton-newbellow_1.jpg
My 1958 Mercedes-Benz Type 180a Ponton-newbellow_2.jpg

New front lower arm rubber buffers
My 1958 Mercedes-Benz Type 180a Ponton-newfrontbuffers_1.jpg

NOS front lower arms
My 1958 Mercedes-Benz Type 180a Ponton-newlowerarms_1.jpg

NOS gearbox mounting
My 1958 Mercedes-Benz Type 180a Ponton-gearboxmnt_1.jpg

Rebuilt ATE power brake booster from US which was optional on the 4 cylinder pontons and will now be fitted to my car
My 1958 Mercedes-Benz Type 180a Ponton-brake_1.jpg
My 1958 Mercedes-Benz Type 180a Ponton-brake_2.jpg

Replacement rebuilt Solex twin barrel carb from the US will replace the existing problematic(?) carb
My 1958 Mercedes-Benz Type 180a Ponton-uscarb_1.jpg
My 1958 Mercedes-Benz Type 180a Ponton-uscarb_2.jpg

Still have most of the original tools which came with my car thanks to the previous owner
My 1958 Mercedes-Benz Type 180a Ponton-alltools_1.jpg

The original tools have "Mercedes Benz" embossed on them
My 1958 Mercedes-Benz Type 180a Ponton-closeuptool_1.jpg

My car's original Instruction Manual
My 1958 Mercedes-Benz Type 180a Ponton-manual_1.jpg

The tire jack. My car has this type called a "Rachet" jack as opposed to the more common Bilstein crank handle type that was offered on pontons
My 1958 Mercedes-Benz Type 180a Ponton-tirejack_1.jpg

Original tool kit canvas bag. I have kept the this bag for preservation. A reproduction tool kit bag will take its place now
My 1958 Mercedes-Benz Type 180a Ponton-toolkit_2.jpg
My 1958 Mercedes-Benz Type 180a Ponton-toolkit_1.jpg

Used Bosch headlamps from Australia. These will be refurbished later
My 1958 Mercedes-Benz Type 180a Ponton-headlamps_1.jpg

Side view of headlamp showing the funnel for reflector adjustment
My 1958 Mercedes-Benz Type 180a Ponton-sideview_1.jpg

Set of 13 inch full wheel caps; 2 from Kolkata (NOS), 2 from Australia and 1 from Bangalore!
My 1958 Mercedes-Benz Type 180a Ponton-fullcaps_1.jpg

Rear door trims and spear shaped front fender blinkers with old lenses from Australia
My 1958 Mercedes-Benz Type 180a Ponton-trims_1.jpg

In 2003 at the Tolly Display when the car was restored in my garage
My 1958 Mercedes-Benz Type 180a Ponton-frontview_1.jpg

In 2005 at the Statesman Rally with me on the left and my painter on the right. Never drove the car for another 4 years after that
My 1958 Mercedes-Benz Type 180a Ponton-rallyfront_1.jpg

Interiors in 2005
My 1958 Mercedes-Benz Type 180a Ponton-frontint_1.jpg
My 1958 Mercedes-Benz Type 180a Ponton-rearint_1.jpg
mbz180 is offline   (3) Thanks
Old 22nd February 2010, 00:55   #40
Senior - BHPian
 
V-16's Avatar
 
Join Date: May 2005
Location: mumbai
Posts: 4,594
Thanked: 950 Times

Awesome!! What a labour of love and a great effort you are putting it back together. The only other person whom i know to have done research with so much passion is The Mole.

Im all eyes for this project and will be learning a lot for and when i manage to get my coveted ponton. Meanwhile guys keep the information coming in.

Buddy remember to get thick white walls for her too!!
V-16 is offline  
Old 22nd February 2010, 22:22   #41
BHPian
 
imperial.s.a's Avatar
 
Join Date: Nov 2008
Location: bangalore
Posts: 260
Thanked: 32 Times

hi mbz the long fender lights you have pics posted comes for the s class in the ponton not for 180 or 190
imperial.s.a is offline  
Old 22nd February 2010, 22:58   #42
Senior - BHPian
 
the mole's Avatar
 
Join Date: Nov 2006
Location: Mumbai
Posts: 2,189
Thanked: 825 Times

Quote:
Originally Posted by imperial.s.a View Post
hi mbz the long fender lights you have pics posted comes for the s class in the ponton not for 180 or 190
Apparently they were offered as options by some dealers in germany, they were aftermarket for 180's and 190's and standard on 220S' and 220S. cabriolets

Last edited by the mole : 22nd February 2010 at 22:59.
the mole is offline  
Old 22nd February 2010, 22:58   #43
BHPian
 
mbz180's Avatar
 
Join Date: Jan 2010
Location: Kolkata
Posts: 893
Thanked: 1,023 Times

Quote:
Originally Posted by imperial.s.a View Post
hi mbz the long fender lights you have pics posted comes for the s class in the ponton not for 180 or 190

Hi,

Actually you're quite right, they didn't come standard on the 180 or 190 but were standard on the 219, 220a and 220s. However, let me add that though these fender running lights were not a factory option, on special request and at extra cost, a Mercedes Benz authorized dealer could always install these on the 4 cyl pontons. Like this there were several "dealer options" that a customer could choose when buying these cars. Please have a look at this picture, of a 190 Ponton that belongs to Jeff Miller, Editor of the International Ponton Owner's Group (IPOG). Note his car also has the dealer option of 190SL Hella rectangular foglamps, as opposed to the typical round ones fitted to pontons.

My 1958 Mercedes-Benz Type 180a Ponton-mb_190_16jun2001a.jpg
mbz180 is offline  
Old 22nd February 2010, 23:07   #44
Senior - BHPian
 
the mole's Avatar
 
Join Date: Nov 2006
Location: Mumbai
Posts: 2,189
Thanked: 825 Times

So are you going to blank the original bee hive indicators below the headlight? I would!
the mole is offline  
Old 22nd February 2010, 23:17   #45
BHPian
 
mbz180's Avatar
 
Join Date: Jan 2010
Location: Kolkata
Posts: 893
Thanked: 1,023 Times

Amol,

My car never had bee hive lenses under the headlamps in the first place, I put them there. My car only had the standard triangular blinkers, the bee hive lenses were only for USA Export models! But now I'm going to retain one of the blinkers apart from the standard one, either the spear lamps on top of the fender or the bee hives under the headlamps, don't know which as yet.
mbz180 is offline  
Reply

Most Viewed
Thread Tools Search this Thread
Search this Thread:

Advanced Search

Copyright ©2000 - 2024, Team-BHP.com
Proudly powered by E2E Networks