Team-BHP > Shifting gears
Register New Topics New Posts Top Thanked Team-BHP FAQ


Reply
  Search this Thread
87,625 views
Old 4th December 2020, 12:04   #91
BHPian
 
Join Date: Feb 2012
Location: Pune
Posts: 510
Thanked: 1,882 Times
Re: The Woodworking Thread

Hello Everyone,

I enjoy reading the posts here, while am nothing compared to most of your skill levels, I try to do some small stuff whenever an opportunity presents itself.

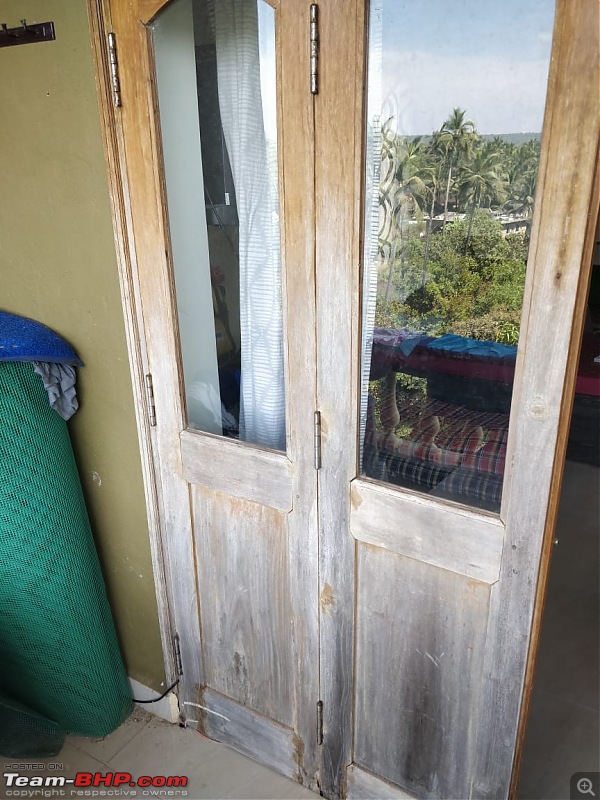
I write here today for some advise and suggestion on what kind of treatment/application needs to be done on this door and a suitable paint.

This door is in my West balcony and is exposed to Sun and Rain. The outer layer is washed away almost and I fear it will now damage the door - hoping it hasn't already.
Once applied, for such a weather exposed item, what should be the periodicity of maintenance and what kind of maintenance is needed to prevent further damage.

Attaching pic for reference.

The Woodworking Thread-door-paint-needed.jpeg
Trojan is offline   (2) Thanks
Old 17th December 2020, 19:42   #92
Newbie
 
thesquaremile's Avatar
 
Join Date: Aug 2019
Location: London
Posts: 11
Thanked: 69 Times
Re: The Woodworking Thread

This thread probably makes the best home for my post - so here goes.

Some background
Our much loved back garden is not quite the idealistic picture of manicured grass and water-features , but we consider it to be a little oasis of tranquility. In fact, we are rather drawn towards the rawness of it, and with the sheer force of nature to conquer everything in its path. In this aspect the garden never disappoints, there is Ivy [Latin name: Hedera helix] and all sorts of weeds spreading over that tend to become a pain in the rear.

In the warmer months, especially in Spring this little patch of land explodes with life, as if an entire ecosystem has been quietly hibernating in its womb. With the onset of winter though, the whole place sort of closes-in on itself and becomes inaccessible. Cold weather, slush, mud, water logging make it an unappealing prospect.

Garden Project Phase One- Decking
November 2020 - imminent lockdowns rearing their ugly head again and my one-and-a-half-year-old daughter bursting with energy, I found some motivation to take up a project. To make the garden (or a patch of it) a part of daily life, whatever the weather.

So for phase-1 of ‘the project’ was to create a deck, This would be used as a breakfast bar, play-area, beer garden,star-gazing platform, and so on. In the process, I would (hopefully) learn a new skill. And redeem myself from all my historical DIY disasters (the lesser said about the better!). Honestly, I was expecting this to be a journey of doom, but it actually turned out to be rather special.

So this is how it went..

Step-1 was to decide on the right spot
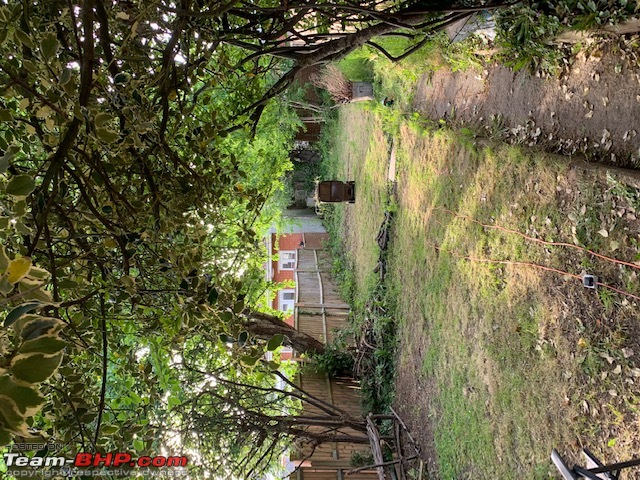
Main criteria was a) minimal destruction to plants/ life b) privacy from neighbors and c) amount of sunlight (for those 2 glorious weeks of the British summer). I decided this to be next to a little hamlet of trees in the middle of the garden that checked all the boxes

The spot
The Woodworking Thread-img_2398.jpg

Step-2 was to level the ground
This proved to be quite the ask. It took a lot of back-and-forth to get this right. Besides uneven patches, they were tree roots that came in the way.

The Woodworking Thread-img_4326.jpg

Step-3 was laying the foundation

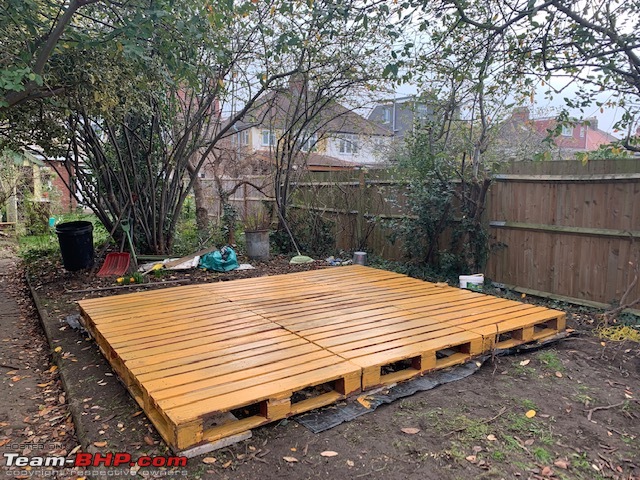
Wooden joist frames are the gold standard of decking. But as I was doing this solo and without any prior experience, I decided to use wooden pallets. Sourced ‘Grade-A’ recycled wooden pallets off ebay- and they turned out to be an easier way of laying the foundation.

The prerequisite was laying paving slabs, that would be the base for pallets to rest on, and act as a robust support layer against subsistence. A weed membrane was laid to act as a shield from weeds.

The Woodworking Thread-img_4349.jpg

Pallet base of the deck
The Woodworking Thread-img_4350.jpg
The Woodworking Thread-img_4369.jpg

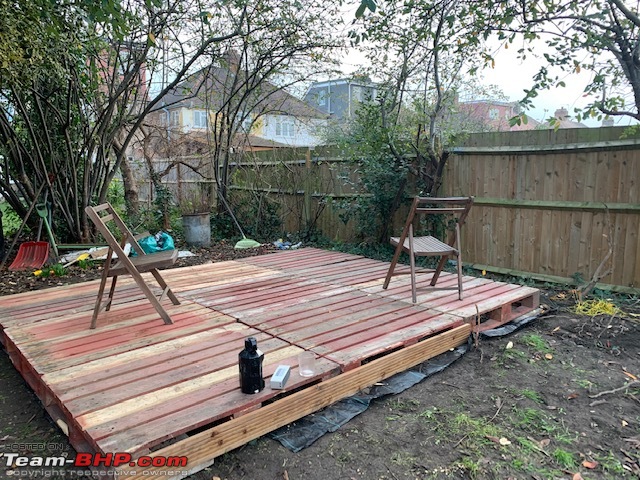
Next step was to treat the pallet wood with protective paint to prolong life.

Attachment 2094187
The Woodworking Thread-img_4380.jpg

All this done and then came
Step-4 Bolting-in the decking boards.

The stage was set. An eager week went as work took over, and the paint let to dry. I now started screwing in the decking boards. Using carbon-plated 65mm screws I did the first row without issues.
Now came the dilemma, continuing the sequence on the second row would require wood-cutting. Now, I have used a saw before, but there was no way I was going to cut 12 decking boards using a hand saw. So I decided to take a horizontal approach.
The Woodworking Thread-img_4420.jpg

But It just didn't look right.
So, I decided to buy on these beauties
The Woodworking Thread-ae235.jpg
190mm circular saw with a 24-tooth blade and 1500W worth of juice

Result!
It look me about 25 minutes, and no broken fingers or severed arms to split 11 decking boards into halves.

The Woodworking Thread-img_4478.jpg

My wife and daughter lending a hand
The Woodworking Thread-img_4471.jpg

Final Product
The Woodworking Thread-img_4520.jpg
The Woodworking Thread-img_4522.jpg
Now for the last bits

Step-5 Lighting
Solar fairly lights and bulbs to give it the Bohemian look (in UK temperatures ).

The Woodworking Thread-img_4539.jpg

So that's it, I will update the post when I get to phase-2 - that will include building a dining table and bench, and more decking at the end of the garden. Cheers!
Attached Thumbnails
The Woodworking Thread-img_4309.jpg  

The Woodworking Thread-img_4368.jpg  

The Woodworking Thread-img_4378.jpg  

The Woodworking Thread-img_4416.jpg  

The Woodworking Thread-img_4418.jpg  

The Woodworking Thread-img_4419.jpg  

The Woodworking Thread-img_4422.jpg  

The Woodworking Thread-img_4423.jpg  

The Woodworking Thread-img_4424.jpg  

The Woodworking Thread-img_4472.jpg  

The Woodworking Thread-img_4473.jpg  

The Woodworking Thread-img_4474.jpg  

The Woodworking Thread-img_4476.jpg  

The Woodworking Thread-img_4477.jpg  

The Woodworking Thread-img_4479.jpg  


Last edited by Aditya : 1st January 2021 at 08:27.
thesquaremile is offline   (11) Thanks
Old 31st December 2020, 21:53   #93
BHPian
 
GutsyGibbon's Avatar
 
Join Date: Mar 2008
Location: Southern Calif.
Posts: 755
Thanked: 4,541 Times
Re: The Woodworking Thread

Quote:
Originally Posted by thesquaremile View Post
This thread probably makes the best home for my post - so here goes.
Looks awesome! Are you planning on adding any shade? Do you even need a shade where you live? You seem to have a rather nice tree cover anyways.

I think you can consider staggering the panels. One row you would start with a large piece, and the next row you would start with the smaller piece. That would eliminate that gap because of all the panels lining up. This would improve the structural stability by a lot. All the panels are already cut to size, you just need to rearrange it.
GutsyGibbon is offline   (1) Thanks
Old 31st December 2020, 23:33   #94
BHPian
 
Join Date: Nov 2013
Location: Bir-Billing, HP
Posts: 478
Thanked: 895 Times

Has anyone over here tried their hands on Wood and Epoxy tables. They seem to be all the craze for sometime now. I found a provider by the name of Haksons in India for the Epoxy and they even have Youtube video for the same and might even help out with some issues during the build. In US, there are many better products of course. For example, with the Haksons product, for a 2 inch thick pour, I'll have to pour the epoxy 4 times, whereas with the product Liquid Glass available in US, one can do even a 4 inch pour in a single step.
rdst_1 is offline  
Old 31st December 2020, 23:57   #95
Senior - BHPian
 
Join Date: Apr 2008
Location: Dombivli
Posts: 3,056
Thanked: 2,139 Times
Re: The Woodworking Thread

Quote:
Originally Posted by Trojan View Post
This door is in my West balcony and is exposed to Sun and Rain. The outer layer is washed away almost and I fear it will now damage the door - hoping it hasn't already.
Once applied, for such a weather exposed item, what should be the periodicity of maintenance and what kind of maintenance is needed to prevent further damage.
Sand it down to remove the existing paint if any, apply wood putty to amoothen it out and then use a water proof polish - one way to go. You may have to do this every year or year and a half, depending on how long the polish remains.

Instead of polish, use mica to cover the wood - another way. Fairly low maintenance, but not sure how it will face the elements.

Replace the door with a fiber one that is water proof - another way. Zero maintenance.


And keep those hinges oiled and rust free.
honeybee is offline  
Old 1st January 2021, 04:44   #96
Senior - BHPian
 
Join Date: Apr 2008
Location: Dombivli
Posts: 3,056
Thanked: 2,139 Times
Re: The Woodworking Thread

Quote:
Originally Posted by vibbs View Post

I have a question on how to hang? Basically to take the weight.

...

Also how do you guys join the plys with each other. I have used normal Nails. Hope they are good enough to hold the whole structure together?
Check out French cleats - this is I guess what drsingh has mentioned as the pro way of hanging it.

But it's indeed not a very simple job. You will need a 45 degree cut along the edge of the cleats. If you don't have a table saw or a circular saw, you might want to get those cleats done by someone else who has those tools.

Else plain old screwing the back to the wall and having a strip of plywood at the bottom for support.

As for the joints, I hope you have used fevicol or some other wood glue and not just nails. If just nails, then I would strongly recommend taking them out, apply glue / fevicol to join the pieces and then put the nails in.

Also, generally screws will hold better than nails, so try to use screws instead.
honeybee is offline  
Old 3rd January 2021, 22:26   #97
Newbie
 
thesquaremile's Avatar
 
Join Date: Aug 2019
Location: London
Posts: 11
Thanked: 69 Times
Re: The Woodworking Thread

Quote:
Originally Posted by GutsyGibbon View Post
Looks awesome! Are you planning on adding any shade? Do you even need a shade where you live? You seem to have a rather nice tree cover anyways.

I think you can consider staggering the panels. One row you would start with a large piece, and the next row you would start with the smaller piece. That would eliminate that gap because of all the panels lining up. This would improve the structural stability by a lot. All the panels are already cut to size, you just need to rearrange it.
Hey, thanks GutsyGibbon! Yep, the tree cover is pretty adequate for shade in the summer months.. although I would probably deploy a Parasol umbrella if need arises. Like your suggestion about staggering the panels, will go ahead with it. Cheers.
thesquaremile is offline   (1) Thanks
Old 5th January 2021, 03:04   #98
BHPian
 
GutsyGibbon's Avatar
 
Join Date: Mar 2008
Location: Southern Calif.
Posts: 755
Thanked: 4,541 Times
Re: The Woodworking Thread

I broke down my workbench, router table and the miter saw station and redesigned the whole thing. I reused a bunch of leftover plywood and did several versions of this redesign. Below is what I came up with. Tablesaw outfeed, Router table, carpenter's vice, 5HP vacuum, dust deputy dust separator. I also added a tool caddy to keep things off the working surface, and a drawer. I see a big improvement in setup time and cleanup, it is not good-looking but very functional.
The Woodworking Thread-wb2.jpg
The Woodworking Thread-wb1.jpg

Couple projects to keep the wife happy. Oh the life of a backyard woodworker!
The Woodworking Thread-knifeholder.jpg
The Woodworking Thread-spoonrest.jpg
GutsyGibbon is offline   (6) Thanks
Old 29th March 2021, 11:15   #99
Senior - BHPian
 
deathwalkr's Avatar
 
Join Date: Nov 2007
Location: Trivandrum
Posts: 1,284
Thanked: 4,144 Times
Re: The Woodworking Thread

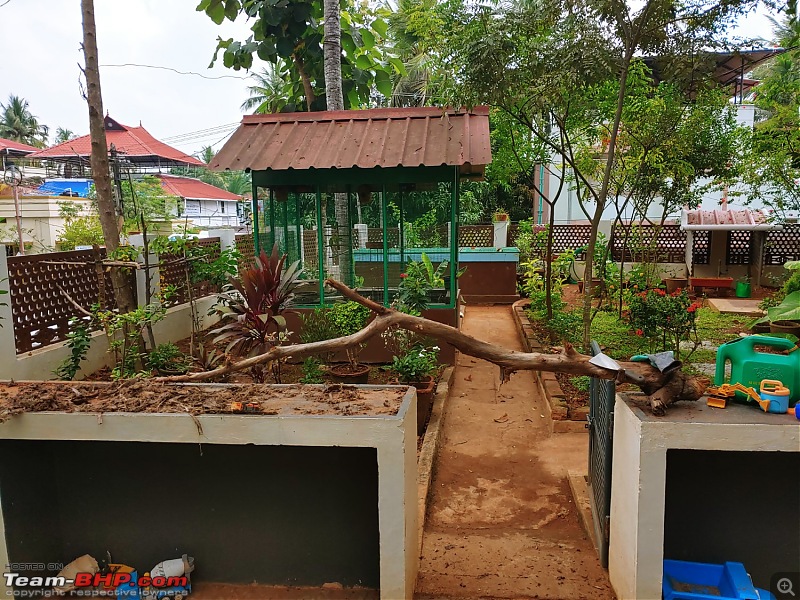
A tale of a tree root, a trunk and a stump.

The Root:
The Woodworking Thread-1.jpg

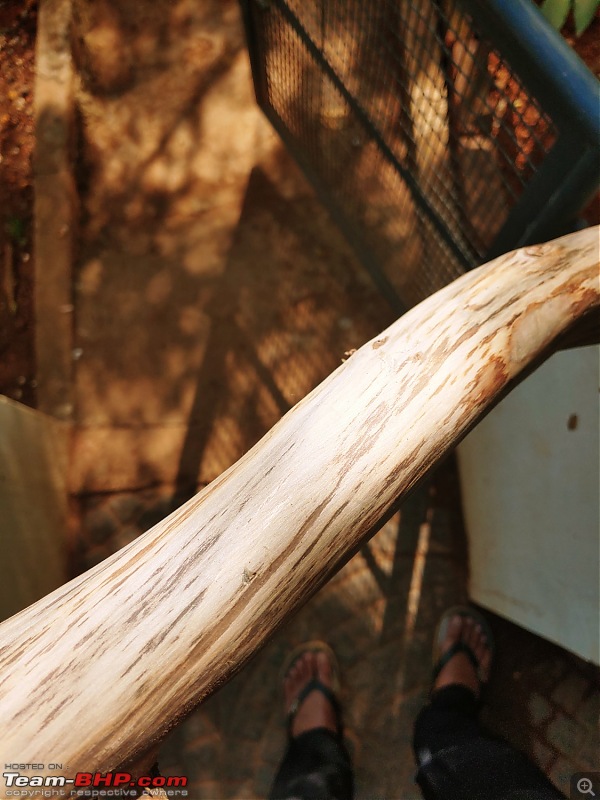
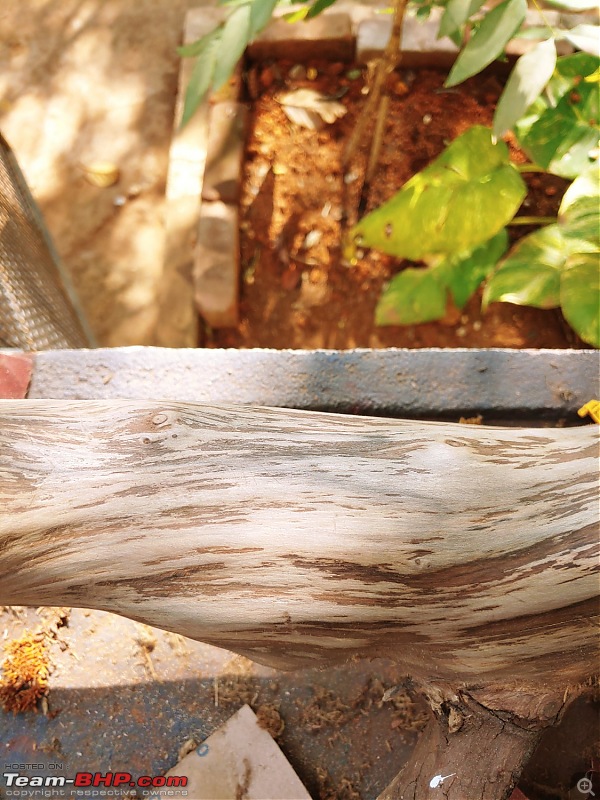
It started the day, when my wife wanted me to remove a mango sapling that was growing where it was not to be growing. It was 3-4ft in height. Ok, trivial job i assumed, but the roots were holding tight and without any proper tools, i managed to wrest it out.

The root part was nicely curled and i could only think of Gandalf's staff!

Kept it safe, let it dry out in the sun for a few weeks. Started to debark it with a set of woodworking knives and sandpapering it with 100 and 150. It's a nice white and maybe this Sunday i will be able to remove the bark from the root tendrils.

Plan is to polish it and hang it somewhere in my little man cave.

The Trunk
The Woodworking Thread-2.jpg

So the root triggered something inside and next up on the agenda was a dead tree. Probably around 10-12ft tall but sadly it died for god knows what reason. Anyway, chopped off a large piece of the trunk with a small axe and trimmed off the branches with a hand saw.

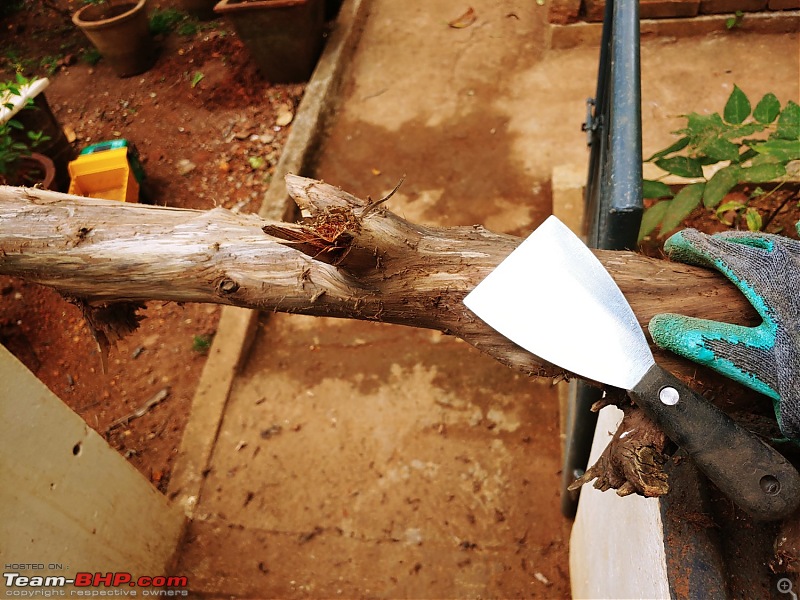
The Woodworking Thread-3.jpgThe Woodworking Thread-4.jpgThe Woodworking Thread-5.jpgThe Woodworking Thread-6.jpg
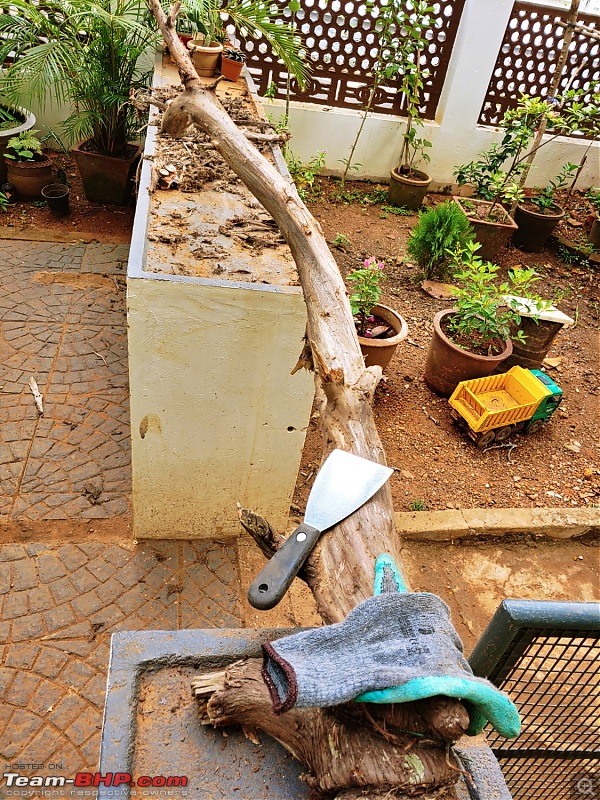
Again left it exposed to the elements for a few months and started the process of debarking it. Got a paint scraper and gloves to help me this time. Thankfully since it was a dead and dried up tree, the debarking was relatively easy. After a few hours, decided it was enough for the day and kept it in the garage.

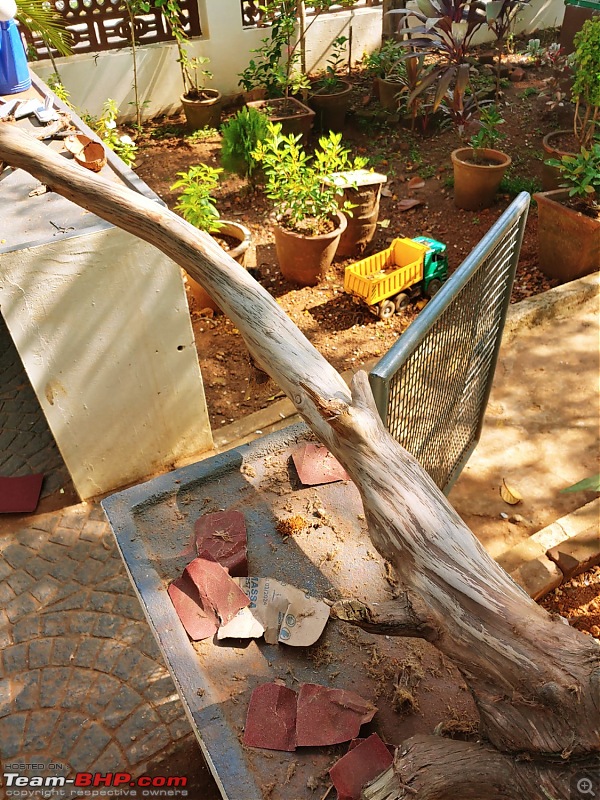
The Woodworking Thread-9.jpgThe Woodworking Thread-7.jpgThe Woodworking Thread-8.jpg
Took it out yesterday and started sandpapering it to remove the bark bits and to make it smooth. Man, the amount of wood dust it kicked up. Was wearing mask and googles so it was ok. (i hope) Had some people coming over so had to wind up the session earlier. Work to continue next Sunday.

Plan for this is to use as a driftwood in my 10ft pond for now. After a few years, might setup a large glass tank and this would be the centerpiece

The Stump:

Next is the tale of the stump. A tree that was chopped off sometime back, started to sprout nice green leaves from the stump again and i was hoping to see it grow back again. But i guess termites took control or whatever else reason it gave up. So in my mind i thought, yay one more driftwood for another pond and future tank.

This was probably the toughest job of the three. Pulling it out. Took me three Sunday mornings to get it out.

The Woodworking Thread-10.jpg
First stage, dug out the soil around the stump and underneath it to expose the roots on one side. Then sawed off the roots.

The Woodworking Thread-11.jpg
Second stage repeat for the other side.

The Woodworking Thread-12.jpg
Third stage, the main root under the stump. Sawing was tough because i could not get an angle right, so used axe, crowbar, spade and what not to finally pull it out.

The Woodworking Thread-13.jpg
Since it was recent passing, the stump is still "green", so it lies in the sun soaking up the rays to hasten it's drying. Ideally i should be boiling it but no scope for that. Did pour a few buckets of hot water on it though.

So there you go, the tale of the root, the trunk and the stump. Thanks for reading, shall post finished pics as and when they are done.
deathwalkr is offline   (3) Thanks
Old 2nd May 2021, 02:41   #100
Newbie
 
thesquaremile's Avatar
 
Join Date: Aug 2019
Location: London
Posts: 11
Thanked: 69 Times
Re: The Woodworking Thread

Hello again guys!

Here in the UK we are now well into spring and approaching the summer months. As short-lived and underwhelming the British summer usually is, it has been longgg awaited. Determined to make the most out of it and for those alfresco summer evenings, I have been busy with second phase of my garden project. Glad to report that things have worked out well. I am still alive with hands and limbs intact. More importantly, I have been able to construct relatively solid and weatherproof furniture for the deck.

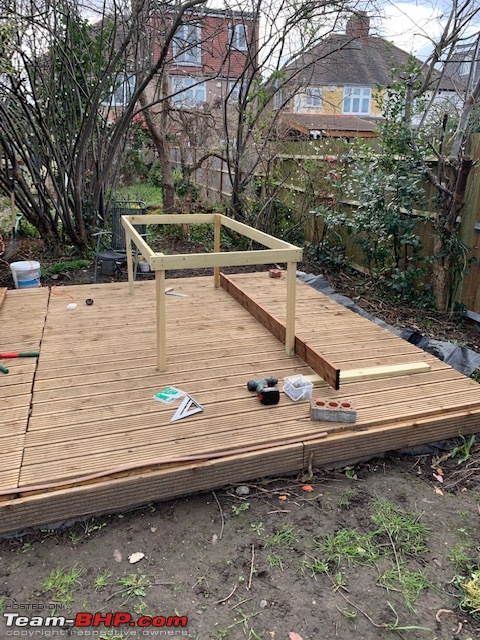
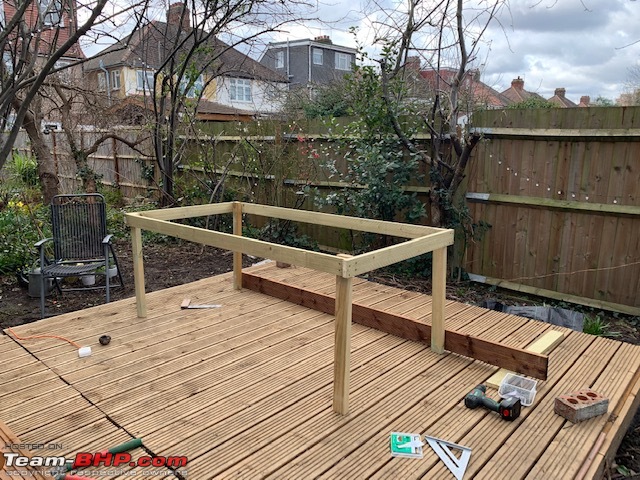
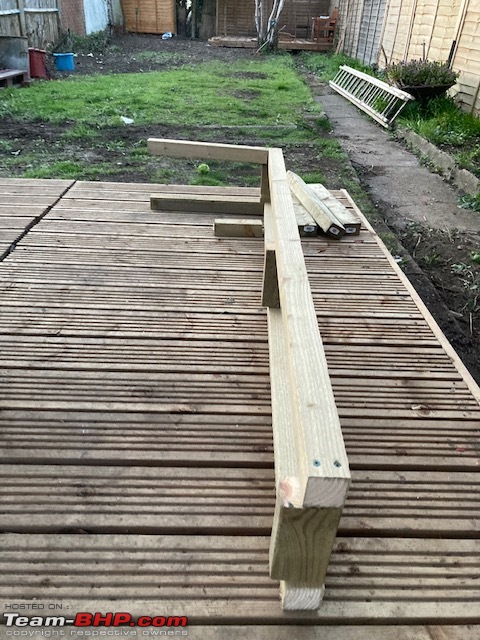
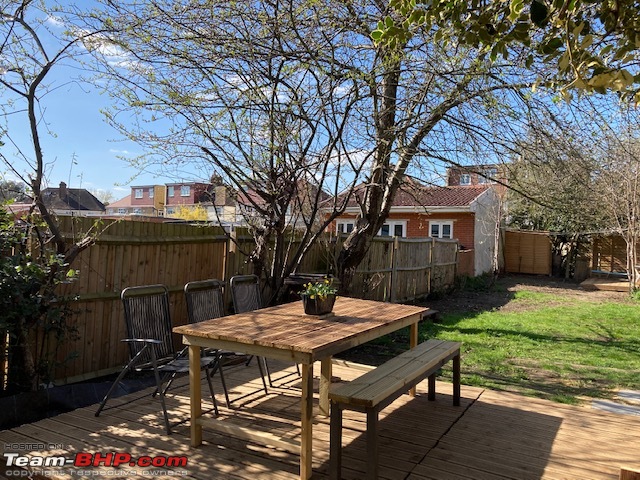
With good weather on the horizon, the deck was desperately calling out for an all-weather dining table and a bench to accompany. Armed with my newly discovered (and very rudimentary) woodworking skills I decided to build a frame base made out of timber, roughly 6X3 feet, and top made out of left over decking boards, roughly 6.5 feet.

The Woodworking Thread-img_4968.jpg

The challenge here was to get all to get all the right angles right. I just could not get this right 100%, despite of using a square speed, but good enough.

The Woodworking Thread-img_4969.jpg

The frame was then bolstered with a center leg for it to take the weight from the decking boards. Bolting the boards themselves was relatively simpler process.

The Woodworking Thread-img_4972.jpg

Ready for use

The Woodworking Thread-img_4977.jpg

Next step - build a bench using the same template

The Woodworking Thread-img_5035.jpg
The Woodworking Thread-img_5036.jpg
The Woodworking Thread-img_5060.jpg
The Woodworking Thread-img_5061.jpg

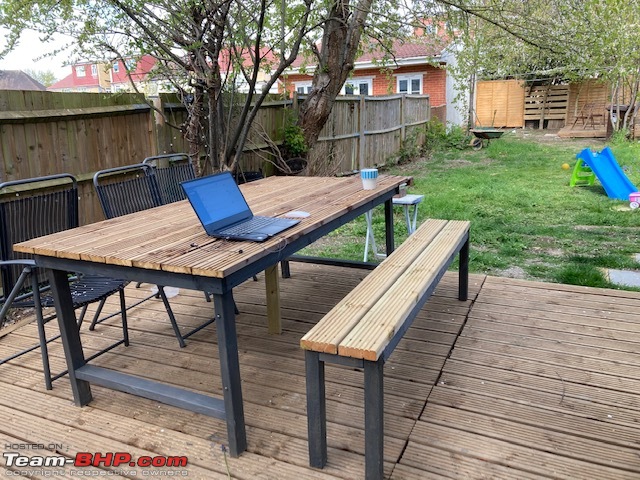
And that's it! So far so good. An almost instant change - we as a family now find ourselves dining outside more often than inside, weather permitting of course.

The Woodworking Thread-img_5065.jpg
The Woodworking Thread-img_5091.jpg
The Woodworking Thread-2f02fe49d3c246c6bddc056b28771152.jpg
The Woodworking Thread-45d387096019402cb4d54b5f01622c03.jpg

Also serving as a WFH desk. Frame has been painted with protective paint.

The Woodworking Thread-img_5345.jpg
The Woodworking Thread-img_5346.jpg


End of post, hope you liked it. Please take care of yourselves and families in this incredibly difficult time. Best wishes.
thesquaremile is offline   (3) Thanks
Old 8th May 2021, 22:52   #101
BHPian
 
Join Date: Oct 2012
Location: Bangalore
Posts: 648
Thanked: 668 Times
Re: The Woodworking Thread

Dear Team BHPians,

I need your valuable help / advice on on DIY project I am about to do.

Due to continued wfh scenario, I need to setup a proper space for myself to work. Due to space constraint, I am unable to get a new computer table, and due to widespread covid, I am avoiding outsourcing the work to any carpenter.

I sit at the dining table to work and use a Plastic nilkamal chair which is taking a toll on my back. I need to address this issue at the earliest.

I have this computer table, but the space on it is not sufficient. I need to build a rack attached to this so that I can shift the spike buster, google home and the printer on top of it and use the space to keep my laptop to work. If space permits I might even get an additional monitor which will be useful for me.

Please suggest what sort of wood and tools I need to make this. I have a basic set of tools like hacksaw blade, drill gun with various sizes of bits and I am fairly good at handling power tools.

Please advise on how to source it online, how should I ensure a good finish to this new set up.

Please excuse me for the rough diagram I created on MS paint

The Woodworking Thread-computertable-copy.jpeg
girimajiananth is online now  
Old 9th May 2021, 06:30   #102
BHPian
 
Amrik Singh's Avatar
 
Join Date: Aug 2010
Location: New Delhi
Posts: 660
Thanked: 3,371 Times
Re: The Woodworking Thread

Since you have a clear wall on the edge of the Table, you can think of Shelf like addition to the Wall, completely independent of the Table. The biggest culprit requiring additional space is the Printer due to its depth. Now this has to be frequently accessed too. So adding to the depth of the table (presently 65 cm), at the Table height would be more convenient. For example, adding a 20 cm board to 65 cm would create enough space for additional gizmos.
If the idea suits you, it can be discussed further.
Amrik Singh is offline   (1) Thanks
Old 9th May 2021, 10:06   #103
BHPian
 
Join Date: Oct 2012
Location: Bangalore
Posts: 648
Thanked: 668 Times
Re: The Woodworking Thread

Quote:
Originally Posted by Amrik Singh View Post
For example, adding a 20 cm board to 65 cm would create enough space for additional gizmos.
If the idea suits you, it can be discussed further.
I thought of this earlier but extending the table means I would be blocking the entrance to the room and my folks will find it difficult. This table is kept right outside the room.

My best option is to extend this vertically.
girimajiananth is online now  
Old 9th May 2021, 10:41   #104
BHPian
 
GutsyGibbon's Avatar
 
Join Date: Mar 2008
Location: Southern Calif.
Posts: 755
Thanked: 4,541 Times
Re: The Woodworking Thread

Quote:
Originally Posted by girimajiananth View Post
Dear Team BHPians,
I need your valuable help / advice on on DIY project I am about to do.
Please advise on how to source it online, how should I ensure a good finish to this new set up.
I would build a hutch with 3/4 inch plywood and 1/4 inch plywood at the back for structural strength.

To keep the hutch in place, drill 3 dowel holes, place dowels in it, and then align the hutch. You can use fevicol, if you are sure you like the setup.
Use plywood edge trim to make it look clean.

Can you get rip cuts at a sawmill? Get the plywood cut based on the depth of the printer.

Something like this
https://www.officedepot.com/a/produc...SBHy:1crjkcgcd

Last edited by GutsyGibbon : 9th May 2021 at 10:43.
GutsyGibbon is offline   (1) Thanks
Old 9th May 2021, 13:33   #105
BHPian
 
Join Date: Oct 2012
Location: Bangalore
Posts: 648
Thanked: 668 Times
Re: The Woodworking Thread

Quote:
Originally Posted by GutsyGibbon View Post
I would build a hutch with 3/4 inch plywood and 1/4 inch plywood at the back for structural strength.

To keep the hutch in place, drill 3 dowel holes, place dowels in it, and then align the hutch. You can use fevicol, if you are sure you like the setup.
Use plywood edge trim to make it look clean.

Can you get rip cuts at a sawmill? Get the plywood cut based on the depth of the printer.

]

Thanks for your inputs, but you will have to dumb it down for me.

1. What is a hutch ? Is it just a plain wood piece to support the top plank ?
2. How do I make a dowel hole ? I saw a few you tube videos, I think its a bit complicated for me.
3. Why cant I mark holes, align it and simply use screws to hold it in place.
4. Would it be a good idea to use rubber wood ? Something like this below.

https://www.indiamart.com/proddetail...314810255.html

5. I will not be able to go to a saw mill, and there is no saw mill near my place.
girimajiananth is online now  
Reply

Most Viewed


Copyright ©2000 - 2024, Team-BHP.com
Proudly powered by E2E Networks