Team-BHP > Motorbikes > Superbikes & Imports


Reply
  Search this Thread
152,888 views
Old 5th August 2010, 21:01   #136
BHPian
 
anku94's Avatar
 
Join Date: Dec 2009
Location: Bangalore
Posts: 249
Thanked: 351 Times

It's beautiful. The bike, and the mind-boggling precision. Wish I could understand half of those technical terms.

Wish you best of luck for the next steps.
anku94 is offline  
Old 7th August 2010, 15:25   #137
BHPian
 
luky_13's Avatar
 
Join Date: Nov 2008
Location: Bangalore
Posts: 580
Thanked: 156 Times
BOTTOM END: Install breather and oil pump

This is one of the most critical parts of a Twin cam build.

Using the cam holder, aligned the two dots on each cam and placed the chain. Alignment of the cams dictate the timing of intake/exhaust opening/closing. Placed the bearings on the cam ends, heated the cam plate for installation. Tightened the bearing retaining clamp.
Dreamweaver build-off: HD Fatboy-1.jpg

Lubricated and installed the breather on the crank rod.
Dreamweaver build-off: HD Fatboy-2.jpg

Next, placed the oil pump on the crank rod after installation of breather o-ring.
Dreamweaver build-off: HD Fatboy-3.jpg

Installed the cam plate and torqued the 6 bolts to 13 nm.
Dreamweaver build-off: HD Fatboy-4.jpg

Installed the rubbing block and then the gears to check alignment. Notice the 2 dots on the cam and crank gears.
Dreamweaver build-off: HD Fatboy-5.jpg

Removed the gears, lubricated and installed the chain. Placed them back.
Dreamweaver build-off: HD Fatboy-6.jpg

Using the locking tool, torqued the cam gear to 34nm and the crank gear to 24nm, then released the chain pre-tensioner.
Dreamweaver build-off: HD Fatboy-7.jpg

Installed the gasket and the chrome cam cover. Lower end assembly complete
Dreamweaver build-off: HD Fatboy-8.jpg
luky_13 is offline   (1) Thanks
Old 7th August 2010, 15:53   #138
BHPian
 
sajjt's Avatar
 
Join Date: Jul 2010
Location: Cochin
Posts: 525
Thanked: 116 Times

Lucky, awesome work mate, Hats off to you.
I wish I could be there from the day one to see the whole thing in real flesh.

Looking forward to the day of final ride.
My best wishes
sajjt is offline  
Old 7th August 2010, 16:36   #139
BHPian
 
luky_13's Avatar
 
Join Date: Nov 2008
Location: Bangalore
Posts: 580
Thanked: 156 Times

Thanks mate. Coming up next...
  • Houston, we have a problem ! - how we almost installed the wrong cylinder head
  • Cylinder install
  • Head install
  • Rocker and chrome cover install
luky_13 is offline  
Old 7th August 2010, 18:44   #140
lsp
BHPian
 
lsp's Avatar
 
Join Date: Aug 2009
Location: New Delhi
Posts: 381
Thanked: 188 Times

Hey luky
I have negligible knowledge of bikes and most of what you describe goes over my head, but please accept my best wishes. Hope this project comes out as you wish and in good time. I am sure all the hardwork, energy, time and resources you are pumping in, will definitely be rewarded very soon.

I am sure the bike will turn out be a stunner and will make you proud.

Waiting to see the final outcome soon.
lsp is offline  
Old 9th August 2010, 09:12   #141
BHPian
 
ricky_1605's Avatar
 
Join Date: Feb 2006
Location: Gurgaon
Posts: 335
Thanked: 49 Times

I missed the subscription to this thread but now i am hooked to it. I hope everything goes the way you want it. All the best mate.
ricky_1605 is offline  
Old 10th August 2010, 11:59   #142
BHPian
 
luky_13's Avatar
 
Join Date: Nov 2008
Location: Bangalore
Posts: 580
Thanked: 156 Times
Houston, we have a problem !

We were getting all the parts required for engine top end assembly in order when suddenly wisdom struck. Thankfully, we decided to strip the valves from the heads to inspect them one last time before locking them into eternity.

TOOLING
To remove valves we fabricated a Valve compression tool that would plug on a standard C-clamp to compress the valve spring thus aiding removal. Picked some old steel junk and machined the tool, this one was a breeze. Similar tools from JIMS or Harley cost $150 (INR 12K, landed). Considering the labour and material costs this one costed us below 500.
Dreamweaver build-off: HD Fatboy-doubletake-result.jpg

VALVE PROBLEM
We removed one of the valves and as suspected realized there was severe damage on the valve as well as the seating.
Dreamweaver build-off: HD Fatboy-damage.jpg
At this point in the bike build we were not ready for porting the head(s) (reserved for a later day, when we turbo charge the bike). So we had to replace the head with another one from our small inventory 
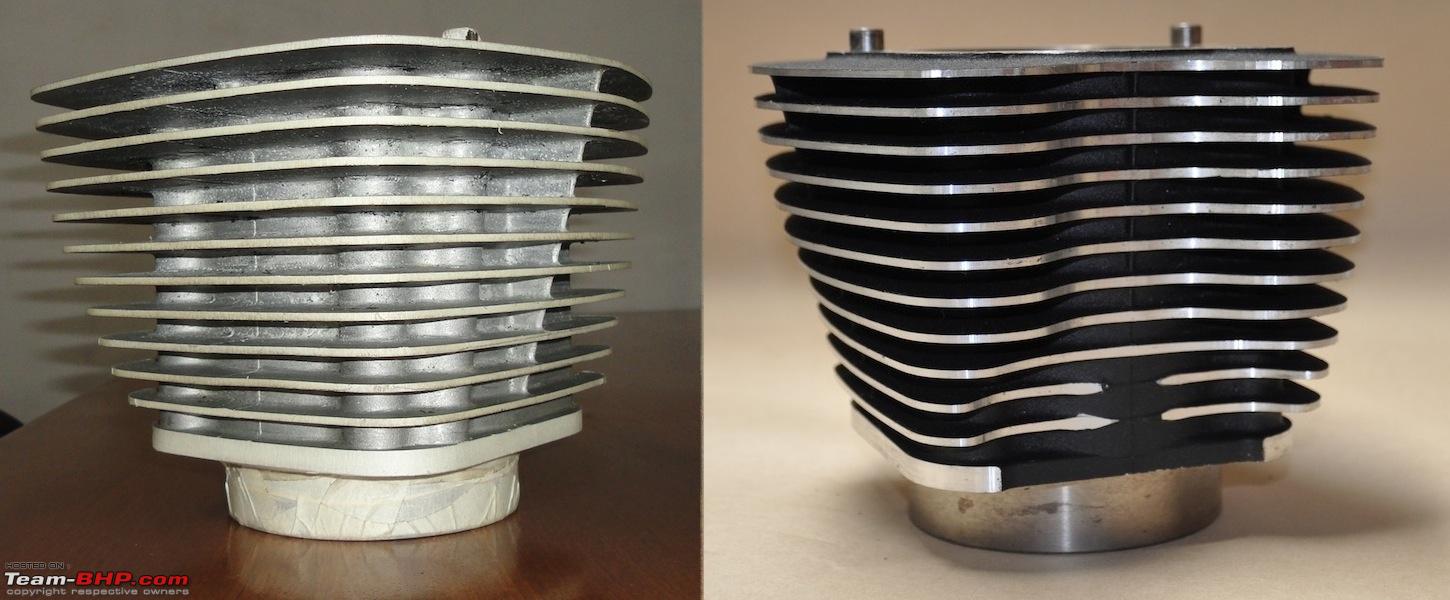
, the problem was this replacement was grey in colour. Next challenge, mask the head and a matching cylinder for powder coat. Removed both the valves and started the tedious process of masking.
Dreamweaver build-off: HD Fatboy-masking.jpg

Waiting for the head and cylinder to come back from powder coating, today evening. Fingers crossed !
luky_13 is offline   (1) Thanks
Old 10th August 2010, 12:41   #143
Senior - BHPian
 
aargee's Avatar
 
Join Date: Jan 2010
Location: TSTN
Posts: 6,233
Thanked: 9,615 Times

@Luky13 - I'm under the impression that you're building the frame, swing arms, tank & so on; basically except the 88 cu in engine. But I see now that you're building that too or am I missing something? Pls help understand.
aargee is offline  
Old 10th August 2010, 12:58   #144
BHPian
 
luky_13's Avatar
 
Join Date: Nov 2008
Location: Bangalore
Posts: 580
Thanked: 156 Times

Quote:
Originally Posted by aargee View Post
@Luky13 - I'm under the impression that you're building the frame, swing arms, tank & so on; basically except the 88 cu in engine. But I see now that you're building that too or am I missing something? Pls help understand.
Absolutely right, initially there was no plan to build a motor. We have one stock Twin cam, a couple of months back we happen to get another one (in parts) so could not resist the temptation, moreover this is a 96cu engine. To be honest, it has been one rocking but utterly enjoyable experience.
luky_13 is offline  
Old 10th August 2010, 13:40   #145
Senior - BHPian
 
aargee's Avatar
 
Join Date: Jan 2010
Location: TSTN
Posts: 6,233
Thanked: 9,615 Times

Quote:
Originally Posted by luky_13 View Post
We have one stock Twin cam, a couple of months back we happen to get another one (in parts) so could not resist the temptation, moreover this is a 96cu engine. To be honest, it has been one rocking but utterly enjoyable experience.
Oh!!! That's excellent to hear; Tell me, is it going to be 96cu in or 96B twin cam engine? I wish you build the latter, but will eat out the brains isn't it? What's that your going to build?
aargee is offline  
Old 10th August 2010, 13:44   #146
BHPian
 
luky_13's Avatar
 
Join Date: Nov 2008
Location: Bangalore
Posts: 580
Thanked: 156 Times

96cu unbalanced for now, a balanced engine is on the anvil for our next build. Yet to finalize the design and the components. The balanced ones are a bit more tricky.
luky_13 is offline  
Old 11th August 2010, 15:07   #147
BHPian
 
luky_13's Avatar
 
Join Date: Nov 2008
Location: Bangalore
Posts: 580
Thanked: 156 Times
Problem solved

The head and cylinder just came back from powder coating, cleaned them and removed all the masking tape. The finish and the quality has exceeded my expectations.

Before and After
Dreamweaver build-off: HD Fatboy-doubletake-result-1.jpg

Dreamweaver build-off: HD Fatboy-doubletake-result1.jpg

The pair
Dreamweaver build-off: HD Fatboy-dsc_5253.jpg

The remaining of the engine build - cylinder and head install, will continue in a couple of days.

Last edited by luky_13 : 11th August 2010 at 15:13.
luky_13 is offline  
Old 11th August 2010, 19:59   #148
Senior - BHPian
 
aargee's Avatar
 
Join Date: Jan 2010
Location: TSTN
Posts: 6,233
Thanked: 9,615 Times

You're absolutely right, the quality, fit & finish is way too good. I hope you're planning for stock air filter box & not screaming Eagle. Have you sourced those parts or making one by yourself? How about exhaust? I'm growing highly impatient, pls bear with me
aargee is offline  
Old 11th August 2010, 20:16   #149
BHPian
 
luky_13's Avatar
 
Join Date: Nov 2008
Location: Bangalore
Posts: 580
Thanked: 156 Times

Quote:
Originally Posted by aargee View Post
You're absolutely right, the quality, fit & finish is way too good. I hope you're planning for stock air filter box & not screaming Eagle. Have you sourced those parts or making one by yourself? How about exhaust? I'm growing highly impatient, pls bear with me
As of now we have restricted ourselves to just fabricating tools but a turbo design and manufacture is around the corner.
luky_13 is offline  
Old 11th August 2010, 20:20   #150
Senior - BHPian
 
aargee's Avatar
 
Join Date: Jan 2010
Location: TSTN
Posts: 6,233
Thanked: 9,615 Times

Quote:
Originally Posted by luky_13 View Post
As of now we have restricted ourselves to just fabricating tools but a turbo design and manufacture is around the corner.
Sorry, I couldn't understand much out here; did you mean turbo design as the air filter box design or something else? Because, I'm under the impression that the air filter box contains only a standard round air filter as part of intake manifold or does it contain something else? Or are you talking about screaming eagle? Pls educate. Tks.
aargee is offline  
Reply

Most Viewed
Thread Tools Search this Thread
Search this Thread:

Advanced Search

Copyright ©2000 - 2024, Team-BHP.com
Proudly powered by E2E Networks