Team-BHP > Technical Stuff
Register New Topics New Posts Top Thanked Team-BHP FAQ


Reply
  Search this Thread
81,793 views
Old 18th December 2013, 19:49   #31
BHPian
 
DeepakMenon's Avatar
 
Join Date: Nov 2008
Location: Mumbai
Posts: 278
Thanked: 180 Times
Re: Let the Restoration Begin - Mercedes W124

Quote:
Originally Posted by kavesh55 View Post
Hi Deepak,


Why is this thread of my interest ? Its because I was offered a W124 220 at a mouthwatering price. Problem is with a crank sensor and the bodywork. The car is parked at a place for more than a year. It is exposed to Mumbai sea wind at full blast. The corrosion is evident in the C pillar and the A pillar, same as your car. Im sure if the grey cladding is removed more would be revealed. So these need to be corrected along with a full paint job inside out, as its cracked in small pieces on the top.


Regards,
Kavesh
Well if everything thats supposed to be there, it can be restored. All spares are available. The only issue is interiors they cost a bomb. Rest can be figured out


Thanks Sunny Boi. Will try some local detailers or my own hands, i just hope it works
DeepakMenon is offline  
Old 18th December 2013, 22:34   #32
BHPian
 
jatinpatel's Avatar
 
Join Date: Jun 2010
Location: Mumbai
Posts: 610
Thanked: 196 Times
Re: Let the Restoration Begin - Mercedes W124

Quote:
Originally Posted by kavesh55 View Post
Hi Deepak,

This thread is exactly what I need. I will be watching this place very carefully.
In the initial images, one would imagine why do you need a restoration. As the images progress, we know why.

I think I know where this work is being done. There was a TN something W140 being restored at the same place some time back, and rare W123 limo being restored in the vicinity. Let me know when are you or Jatin at the spot. Will drop in if I have the time.

Why is this thread of my interest ? Its because I was offered a W124 220 at a mouthwatering price. Problem is with a crank sensor and the bodywork. The car is parked at a place for more than a year. It is exposed to Mumbai sea wind at full blast. The corrosion is evident in the C pillar and the A pillar, same as your car. Im sure if the grey cladding is removed more would be revealed. So these need to be corrected along with a full paint job inside out, as its cracked in small pieces on the top.

Wish you all the luck and let me know if you are looking for parts, as I stay at Opera house itself.

Regards,
Kavesh


Hi Kavesh,

The W140 your talking off is a S320 with a Blown Head gasket and is stuck in big dispute between the mechanic and the cars owner and add to it loads of electrical and body issues.
Well time will only tell if the car survies or get scrapped as 2weeks back a W124 E250D got scrapped after it was stuck in big disptue for 8months+.

Deepak must be knowing the above W124 E250D very very well


Best Regards
Jatin.Patel
jatinpatel is offline  
Old 24th December 2013, 16:54   #33
BHPian
 
DeepakMenon's Avatar
 
Join Date: Nov 2008
Location: Mumbai
Posts: 278
Thanked: 180 Times
Re: Let the Restoration Begin - Mercedes W124

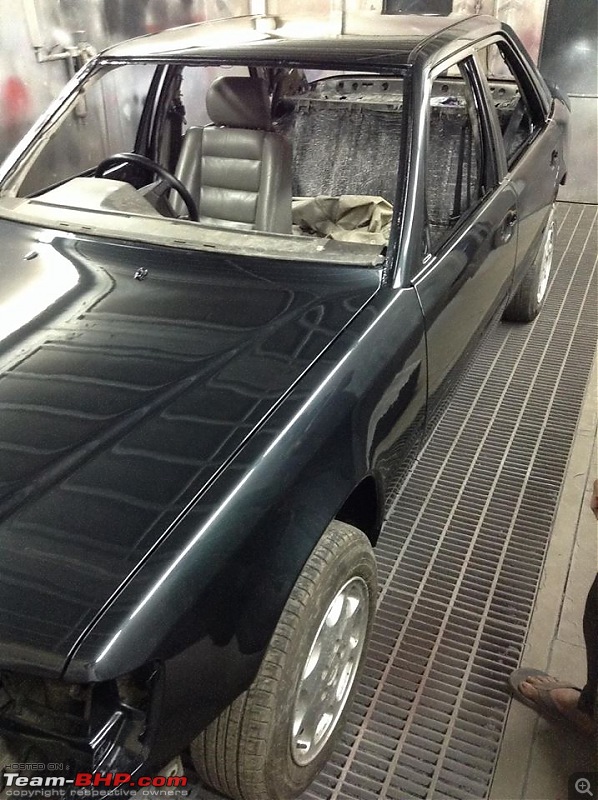
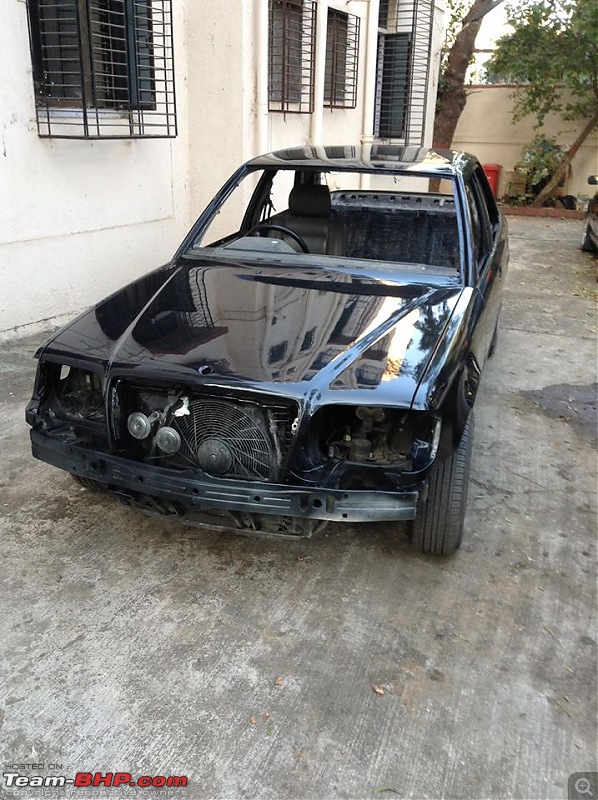
After nearly a week of me missing on account of my birthday, the big day arrived last night. The car body prep for paint was finally over and it was ready to get its coat.

The plan was to do the painting in two different days to accommodate my buzy schedule

1. Paint the entire body of the car yesterday
2. Paint the cladding and bumpers later in the week


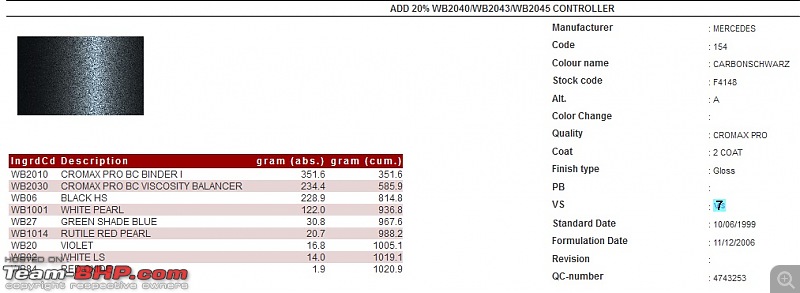
As you know the color of choice is MB-154, paint was purchased. We did not go with water based Standox as it was not only expensive but also the booth or the painter did not have the expertise. So we stuck to normal Dupont mix


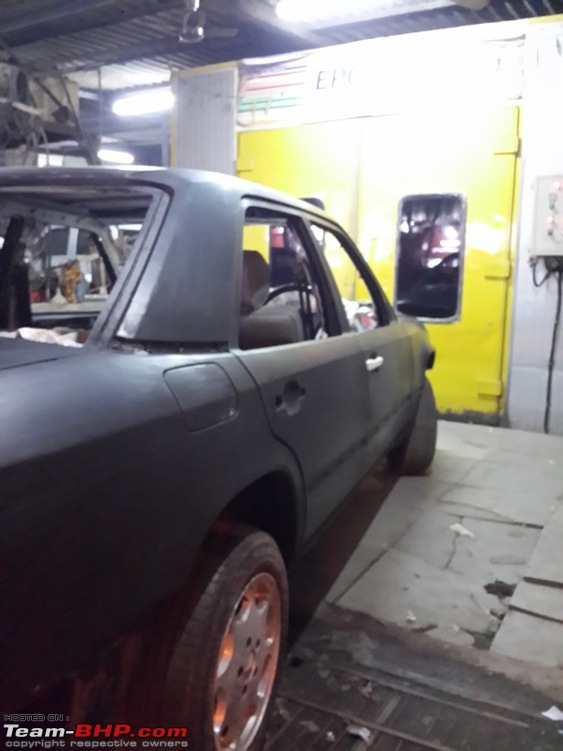
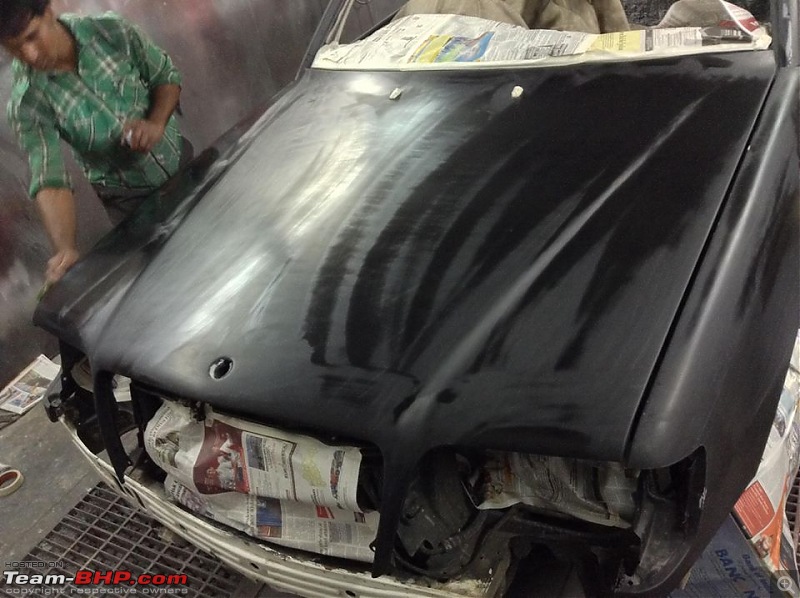
The body was prepped in black primer with minor fillers around the C-pillar

Thanks a lot for Jatin to arm twist the paint booth guys to ensure that we get the booth for the whole night

Why?

Typically a car is painted and heat cycle is done for a hour in the booth and then the car is moved out. Jatin did not want my car to go through this normal affair. My car will be painted in the night, Will get its heat cycle and will stay in a locked booth overnight. This allows the pain to cure slowly in the heat cycle and cool cycle free of any dust.


The car rolled in the booth at 9 and by 12 it was done, removed from booth at 8 in the morning.

I was banned from being in the Booth, as Jatin did not want my enthusiasm troubling the painter. So I was left to see through a see through glass. Hence Please ignore the quality of pics


Pictures don't to justice to the color or the perfection

3 Coats of Color and 3 heavy coats of Clear


Waiting for its Turn outside the Booth
Let the Restoration Begin - Mercedes W124-waiting-turn.jpg

Cant Wait anymore
Let the Restoration Begin - Mercedes W124-waiting-turn-2.jpg


Inside Finally
Let the Restoration Begin - Mercedes W124-inside.jpg


Car does not look all that bad in primer alone
Let the Restoration Begin - Mercedes W124-primer.jpg


Masking the Tires, driver Seat and Dashboard
Let the Restoration Begin - Mercedes W124-masking.jpg


Final Prep, Cleaning and Tack Cloth
Let the Restoration Begin - Mercedes W124-tack.jpg
Let the Restoration Begin - Mercedes W124-tacking.jpg
Let the Restoration Begin - Mercedes W124-final-prep.jpg


Paint in a Can
Let the Restoration Begin - Mercedes W124-paint-can.jpg


Formulation for those who are interested
Let the Restoration Begin - Mercedes W124-154.jpg

Base Coat of Color
Let the Restoration Begin - Mercedes W124-base-coat.jpg


First Coat of Clear, U Can see the Color Pop Now
Let the Restoration Begin - Mercedes W124-first-coat-clear.jpg


Well One Coat of Clear Done, Got in the Paint booth as Jatin could not hold me back anymore
Let the Restoration Begin - Mercedes W124-coating-2.jpg


Post this I was too excited to take anymore pictures, I must tell you guys its the best feeling to see coat after coat go on your project car. Every bit of money and trouble just pays for itself. I am not joking I could not sleep last night. I was again allowed inside the paint booth after all coats were complete to have a final look and from that moment I have not spoken a word. Jatin worries that I may have not liked what I saw, But for me I was speechless.


Let the Restoration Begin - Mercedes W124-coating.jpg


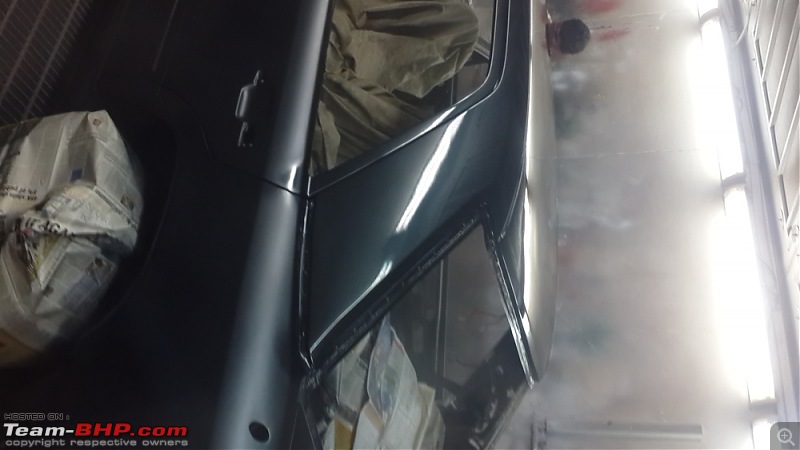
The car was left for its heat cycle inside the boot, and then overnite cooling, Early morning the car was taken out and woke up to these pictures

Let the Restoration Begin - Mercedes W124-morning.jpg

Point to Note, No correction polish yet done, or required
Also How does the new C-pillar Skin Look?
Let the Restoration Begin - Mercedes W124-morning2.jpg

Let the Restoration Begin - Mercedes W124-morning3.jpg

Let the Restoration Begin - Mercedes W124-morning4.jpg


Now the car will rest for few days before all this and many more will happen
- Cleaning the interiors, floor pan
- All windscreen clips to re-riveted
- All Glasses to go back in
- Body cladding to be painted
- All external trim to be put pack
- Go around the car carefully and use cavity wax as per manual
- Alloys go for a refinish
- All plastic trims to scrubbed and cleant before they go in
- Interiors to Go back
- Full interior detailing
- Restored Binnacle to go back
- All door seals, rubber and other trims


But first of All, Put the new carpets in.. More to come on that

I could never get those glue marks cleant..But I have something better coming in a weeks time.


*********************************************
DeepakMenon is offline   (3) Thanks
Old 6th January 2014, 18:45   #34
BHPian
 
DeepakMenon's Avatar
 
Join Date: Nov 2008
Location: Mumbai
Posts: 278
Thanked: 180 Times
Re: Let the Restoration Begin - Mercedes W124

First of All Happy New Year Guys, could not update this thread as was on a holiday

Meanwhile in the last few weeks was slow on the car, as didn't want to rush installation

Finally all my parts have arrived, Some progress below


Front New Windscreen Clip installed [Only 1 reused],

Let the Restoration Begin - Mercedes W124-img20131231wa0000.jpg

Rear Windscreen Garnish Clips, New
Let the Restoration Begin - Mercedes W124-img20131231wa0001.jpg

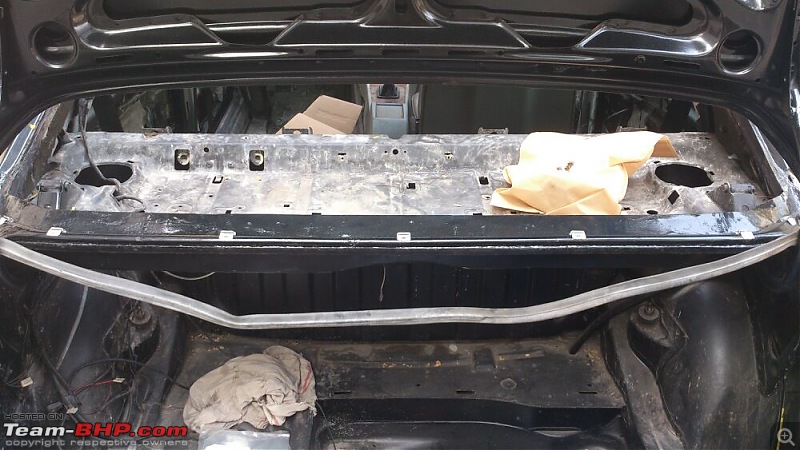
Boot given a coat of POR
Let the Restoration Begin - Mercedes W124-img20140103wa0009.jpg


Car now undergoing the pain staking job of cleaning all parts that were removed and cataloged. Which is the most difficult and labor intensive part of a restoration

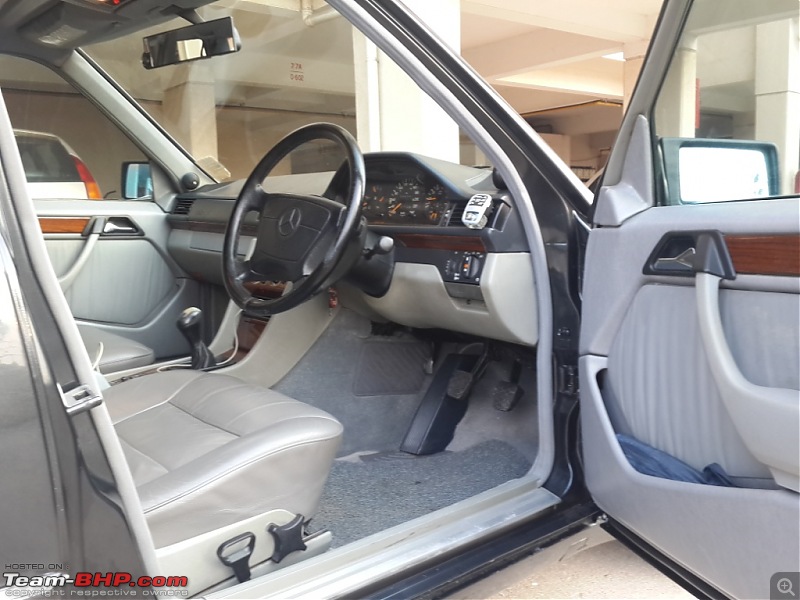
I personally restored the binnacle, got the odometer up and running and cleant the inside

Before and After [Before pictures are of internet, mine just looked the same, white spots and dirty]
Let the Restoration Begin - Mercedes W124-console-before-after.jpg


Trying Plasti-Dip on the Front Grill Will it finally have it or not will decided at day of delivery
Let the Restoration Begin - Mercedes W124-img20131230wa0011.jpg


New carpet Material Scoured, OEM Grey color, Cut-Pile. It took me months to find the right material and the right installer. All the carpet would be restored in the car and all fitting like heel guard, tabs will be reproduced


Carpet Material
Let the Restoration Begin - Mercedes W124-img20140106wa0005.jpg


Tailor Removing one of the Guard from OEM carpet to be used on new material
Let the Restoration Begin - Mercedes W124-img20140106wa0006.jpg


Other things finished
- New Door Seals Installed, It changed the way door closes
- Rear Window motor casing changed to address a rattle
- Window Channels cleant and re-installed
- New Outer Window garnish installed [14000 MB OEM]
- New Chrome Garnish on front windscreen installed [5100 OEM]
- Floor Pan cleant and prepared for new carpet, Audio installation happening at this stage to ensure proper wiring
- Boot Seal Installed
- New Antennae installed
- Headliner Installed


Paint has cured, however no polishing will be done for another few weeks as freshly painted cars should be given at-least 4-8 weeks before you apply any kind of wax or sealant.

Correction Polish, End of Jan [5 weeks from day painted]


If you guys are interested in all the new parts and cost give me few days, will upload


For the Ones who want to know where I scoured it from, below is the contact detail and my feedback

GuruGobind Automobiles
Ravinder : 022 3001 6114

Positives
- Understand EPC and verifies everything before ordering
- Has a competitive pricing
- All parts can be scoured, Not a single parts was a "No"

Negative
- Will never deliver on the day he commits, Never
- Will never follow-up or return your follow-up, will give you a wild goose chase once you make the payment

I spent 63K on spares, placed ordered on 13 Nov through a NEFT which was supposed to be with me by end of Nov. Today I got the final 3 parts which completes the order which came in 4 installments. So please use him at your own risk, or only pay 50% up advance. I had to mark a CC to my lawyer :( to make him take me seriously


*****************************
Day After tomorrow is the Pre Delivery Inspection, And This Friday night Delivery

Cant Wait...
DeepakMenon is offline   (2) Thanks
Old 6th January 2014, 19:29   #35
BHPian
 
Join Date: Mar 2009
Location: Bangalore
Posts: 277
Thanked: 222 Times
Re: Let the Restoration Begin - Mercedes W124

Wonderful !
I wish I could also joined you for this restoration.
It would be great if you could finally provide a mini-EPC for all those small and elusive parts ( e.g. clips ) and respective costs.

How about steering wheel restoration ? Mine is quite faded and became quite smooth - will like to get the original feel back. Any thoughts about that ?
Ravindra M is offline  
Old 6th January 2014, 21:59   #36
BHPian
 
DeepakMenon's Avatar
 
Join Date: Nov 2008
Location: Mumbai
Posts: 278
Thanked: 180 Times
Re: Let the Restoration Begin - Mercedes W124

Quote:
Originally Posted by Ravindra M View Post
Wonderful !
I wish I could also joined you for this restoration.
It would be great if you could finally provide a mini-EPC for all those small and elusive parts ( e.g. clips ) and respective costs.

How about steering wheel restoration ? Mine is quite faded and became quite smooth - will like to get the original feel back. Any thoughts about that ?

Will do the parts piece, give me sometime

On the steering wheel you get leather restorer kits in UK/US for few dimes; however you can't import it sitting in India as it is deemed hazardous for shipping. Feb/Mar when I am in UK i will get my hand on the kit.

It just needs a bit of sanding and application of the new leather dye and it will brand new

http://www.leatherique.com/steering-wheels.html

The best product money can buy, You can even change the color of your leather seat. A lot of elbow grease but worth it
DeepakMenon is offline   (1) Thanks
Old 13th January 2014, 19:25   #37
BHPian
 
DeepakMenon's Avatar
 
Join Date: Nov 2008
Location: Mumbai
Posts: 278
Thanked: 180 Times
Re: Let the Restoration Begin - Mercedes W124

Update

Choose to paint the bumper inserts mat black; just want to try them out, All panels fitted


Teaser Picture
Let the Restoration Begin - Mercedes W124-img20140109wa0008.jpg


Interior Cleant, Teaser Again
Let the Restoration Begin - Mercedes W124-img20140111wa0008.jpg


Sneak Preview of the New carpets
Let the Restoration Begin - Mercedes W124-img20140110wa0006.jpg
Let the Restoration Begin - Mercedes W124-img20140110wa0005.jpg


Roof Clips installed [ Remember the one that has a black insert goes near rear windscreen]
Let the Restoration Begin - Mercedes W124-img20140110wa0002.jpg


So the car was ready, in his showroom finish and then Bad news, In the final test drive, a stone fell from the skywalk and broke my rear windscreen :(


Dont want to show you pictures anymore, as next installment will be once the new glasses are installed and delivery pics
DeepakMenon is offline   (2) Thanks
Old 25th January 2014, 18:36   #38
BHPian
 
DeepakMenon's Avatar
 
Join Date: Nov 2008
Location: Mumbai
Posts: 278
Thanked: 180 Times
Re: Let the Restoration Begin - Mercedes W124

Over...
Correction polish etc left to be done in Mar-April

Quick Photos, proper will be done later

Let the Restoration Begin - Mercedes W124-20140125_173324.jpg

Let the Restoration Begin - Mercedes W124-20140125_173345.jpg

Let the Restoration Begin - Mercedes W124-20140125_173356.jpg

Let the Restoration Begin - Mercedes W124-20140125_173402.jpg

Let the Restoration Begin - Mercedes W124-20140125_173415.jpg

Let the Restoration Begin - Mercedes W124-20140125_173422.jpg

Let the Restoration Begin - Mercedes W124-20140125_173434.jpg

Let the Restoration Begin - Mercedes W124-20140125_173459.jpg

Let the Restoration Begin - Mercedes W124-20140125_173511.jpg
DeepakMenon is offline   (7) Thanks
Old 25th January 2014, 19:39   #39
BHPian
 
laxmanrk's Avatar
 
Join Date: Feb 2011
Location: Hyderabad
Posts: 139
Thanked: 90 Times
Re: Let the Restoration Begin - Mercedes W124

Dear Deepak

You are an inspiration to all W124 owners on the forum.

Awesome finish and am quite sure it will only look better once the final polish etc are done later on.

May I ask you for 2 details which I have been scouring the internet and not found at all.

1) The wing mirror part numbers - correct numbers are required to ensure the wing mirrors match our driving side. (They are not equally sized and are different for LHD vehicles)

2) The gearbox number or gear ratios of the manual E220 you own.

Thanks in advance mate and keep going.. Want to see many more pictures of your car.
laxmanrk is offline  
Old 25th January 2014, 19:43   #40
BHPian
 
DeepakMenon's Avatar
 
Join Date: Nov 2008
Location: Mumbai
Posts: 278
Thanked: 180 Times
Re: Let the Restoration Begin - Mercedes W124

Post or PM your VIN, will give u the part numbers and gearbox numbers tomorrow,
DeepakMenon is offline  
Old 27th January 2014, 13:27   #41
BHPian
 
DeepakMenon's Avatar
 
Join Date: Nov 2008
Location: Mumbai
Posts: 278
Thanked: 180 Times
Re: Let the Restoration Begin - Mercedes W124

Quote:
Originally Posted by laxmanrk View Post
Dear Deepak

You are an inspiration to all W124 owners on the forum.

Awesome finish and am quite sure it will only look better once the final polish etc are done later on.

May I ask you for 2 details which I have been scouring the internet and not found at all.

1) The wing mirror part numbers - correct numbers are required to ensure the wing mirrors match our driving side. (They are not equally sized and are different for LHD vehicles)

2) The gearbox number or gear ratios of the manual E220 you own.

Thanks in advance mate and keep going.. Want to see many more pictures of your car.


PM you the part numbers and datacard, and confirmed the gearbox number; do let me know how the transplant goes; I may want to convert to auto if doable
DeepakMenon is offline  
Old 29th January 2014, 18:45   #42
BHPian
 
Join Date: Feb 2010
Location: Bangalore
Posts: 84
Thanked: 43 Times
Re: Let the Restoration Begin - Mercedes W124

Quote:
Originally Posted by DeepakMenon View Post

"...........If you guys are interested in all the new parts and cost give me few days, will upload
===========I had to mark a CC to my lawyer :( to make him take me seriously......"

Cant Wait...
Hi Deepak Menon !
I must congratulate you on the love & affection you have bestowed on the W124 which is evident by the results. Kudos to you ! I would be happy to have the details of the spares used and the costs thereof.

Meanwhile I need to ask you for help and advice - kindly tell me where the vacuum lines for the rear head restraints run? Is anyone able to tell me where I could locate the vacuum line / circuit diagram for the car in totality. I describe the problem that I face:-
The right head restraint releases and drops down but the left one does not. Three weeks ago was the last occasion that I operated the dashboard switch to drop the restraints, the right one released first and then the left released after a delay of a few seconds. Today only the right headrest released and after repeated tries I noticed that there is a soft click heard but the restraint does not drop down and then some time later a second click is heard. I tried again by sitting in the rear and assisting the mechanism in between the clicks but of no avail as I was not wishing to apply force on the mechanism. I suspect that the vacuum connection or the mechanism is faulty / sticky. The big question is how do I reach the lines; and if need be how to lubricate the mechanism. Please help me with any of the photos that you may have taken at the time of restoration !
Karadi is offline  
Old 30th January 2014, 14:27   #43
BHPian
 
DeepakMenon's Avatar
 
Join Date: Nov 2008
Location: Mumbai
Posts: 278
Thanked: 180 Times
Re: Let the Restoration Begin - Mercedes W124

Quote:
Originally Posted by Karadi View Post
Hi Deepak Menon !
I must congratulate you on the love & affection you have bestowed on the W124 which is evident by the results. Kudos to you ! I would be happy to have the details of the spares used and the costs thereof.

Meanwhile I need to ask you for help and advice - kindly tell me where the vacuum lines for the rear head restraints run? Is anyone able to tell me where I could locate the vacuum line / circuit diagram for the car in totality. I describe the problem that I face:-
The right head restraint releases and drops down but the left one does not. Three weeks ago was the last occasion that I operated the dashboard switch to drop the restraints, the right one released first and then the left released after a delay of a few seconds. Today only the right headrest released and after repeated tries I noticed that there is a soft click heard but the restraint does not drop down and then some time later a second click is heard. I tried again by sitting in the rear and assisting the mechanism in between the clicks but of no avail as I was not wishing to apply force on the mechanism. I suspect that the vacuum connection or the mechanism is faulty / sticky. The big question is how do I reach the lines; and if need be how to lubricate the mechanism. Please help me with any of the photos that you may have taken at the time of restoration !

Give me sometime, work is taking its toll, will upload all details


On your question of vaccum, answer below in the W124 thread

http://www.team-bhp.com/forum/techni...ml#post3357880
DeepakMenon is offline   (1) Thanks
Old 30th January 2014, 14:57   #44
BHPian
 
Join Date: Feb 2010
Location: Bangalore
Posts: 84
Thanked: 43 Times

Quote:
Originally Posted by DeepakMenon View Post
Give me sometime, work is taking its toll, will upload all details


On your question of vaccum, answer below in the W124 thread

http://www.team-bhp.com/forum/techni...ml#post3357880
Thank you Mr. Deepak Menon. I shall revert to you once I have attempted to zero in on the cause of the problem. How do I access the EPC diagrams please, I'm ignorant.

Is there a possibility of swapping the right drivers mirror (OVRM) of a RHD car with that of a right passenger mirror (with the relevant rubber shroud / garnish) of a LHD car? I would prefer to have a convex mirror and hence the question. Where could I source the same if it is possible and what would be the outlay that I would have to be prepared for?
Thanks.

Last edited by Jaggu : 30th January 2014 at 15:12.
Karadi is offline  
Old 30th January 2014, 16:16   #45
BHPian
 
DeepakMenon's Avatar
 
Join Date: Nov 2008
Location: Mumbai
Posts: 278
Thanked: 180 Times
Re: Let the Restoration Begin - Mercedes W124

Quote:
Originally Posted by Karadi View Post
Thank you Mr. Deepak Menon. I shall revert to you once I have attempted to zero in on the cause of the problem. How do I access the EPC diagrams please, I'm ignorant.

Is there a possibility of swapping the right drivers mirror (OVRM) of a RHD car with that of a right passenger mirror (with the relevant rubber shroud / garnish) of a LHD car? I would prefer to have a convex mirror and hence the question. Where could I source the same if it is possible and what would be the outlay that I would have to be prepared for?
Thanks.

Before I answer the above questions and the mod kills me, could you post this is the relevant thread of w124 support group?
DeepakMenon is offline   (1) Thanks
Reply

Most Viewed


Copyright ©2000 - 2024, Team-BHP.com
Proudly powered by E2E Networks