Team-BHP > Technical Stuff


Reply
  Search this Thread
42,222 views
Old 13th March 2014, 17:03   #16
BHPian
 
ashvar87's Avatar
 
Join Date: Sep 2008
Location: krishnagiri
Posts: 58
Thanked: 151 Times
Re: Tasteful Maruti SS80 Restoration, my gift to Dad

Quote:
Originally Posted by kutlee View Post
nice to see the preparation effort. Take time for perpetration. Painting will be only as good as the preparation. One suggestion, try to use a foot long sanding block to find out the waviness on the metal. most of the guys use really short sanding blocks and they may not reveal the waviness which will look sad after painting.
Thank you for your valuable inputs bro. As you said I am very cautious, keen and patient in the preparatory work, as red colour will easily reveal all the errors in the surface. Regarding the sanding block, if you notice keenly in one of my previous posting, you can see a foot long sanding block Expecting more inputs from you in further restoration process.

Quote:
Originally Posted by audioholic View Post
Appreciate the attention to detail you are giving to this car. I bet it has reached the right owner from the seller. It will complement the effort the previous owner had put in keeping the car in top shape. Your dad will definitely love it. How about the engine and mechanicals? I see only body related work being done here?

Please keep the thread updated. I am glued and like seeing the whole process.
Thank you for your compliments bro. Regarding the mechanicals, almost everything is in phase and good in the vehicle, mechanically touchwood. Will be doing up some essentials alone, after the painting. Only after the mechanical works the vehicle will be polished.

Thank you
ashvar87 is offline  
Old 13th March 2014, 17:18   #17
Senior - BHPian
 
kutlee's Avatar
 
Join Date: Jul 2005
Location: Hyderabad
Posts: 1,141
Thanked: 232 Times
Re: Tasteful Maruti SS80 Restoration, my gift to Dad

take effort to keep the dust out when spraying. Most guys will not take care and think that dust can be sanded out. But this won't look good at all. clean environment is essential. Also make sure all the nooks and crannies of the bumpers and plastics are clearly sanded and prepped. Else paint will start chipping off after some time.
kutlee is offline   (1) Thanks
Old 13th March 2014, 19:08   #18
BHPian
 
ashvar87's Avatar
 
Join Date: Sep 2008
Location: krishnagiri
Posts: 58
Thanked: 151 Times
Re: Tasteful Maruti SS80 Restoration, my gift to Dad

@ Kutlee, Bro I think, we are birds of the same feathers Just have a look at my Desi paint booth set-up in the coming pictures. Regarding the bumpers and plastic, you are very rite and I am surely taking up your suggestion.

Updates,

First of all we are in time! Yesterday first base coat was given and after all error corrections, we went on with second base yesterday itself and after all satisfactory inspections we decided to proceed on with final coats and clear today.

First task for today was to set-up and prepare a Desi paint booth. So i went as early by today morning to the paint shop and first cleaned it up completely and next made the paint shop and surroundings completely wet and clean with water.

Next step was to hire high wattage flood lights for working as well as to heat up the paint after the paint job and two big almonard fans to pull out all the paint smoke out of the closed room to prevent over-spray of paint. Totally 2000 watt flood lights - 4, 1000 watt flood lights - 4 and almonard fans - 2, were brought and set-up. This is how I got the booth ready.

Next step was to prepare the car, We made sure that the car is completely dust free. we again poured water completely on the walls and flooring of the closed room and drenched the room completely to avoid dust.

So now starts up the paint process, two coats of Dupont St. German red and clear was applied. During the paint process, we kept cleaning the new surface with felt every-time to clean up the paint over spray and kept repeating it for every new surface instantly during the paint process. After completion of the paint process we left the car to heat up with flood lights for an hour. Our target was to achieve the best finish before polishing itself and I hope it has come up so. The Desi booth set-up really worked flawlessly, nevertheless to say the almonard fans which kept the room almost smoke free and the flood lights which gave ample lighting and heating.

Now let the pictures speak.

Thank you
Attached Thumbnails
Tasteful Maruti SS80 Restoration, my gift to Dad-imag1086.jpg  

Tasteful Maruti SS80 Restoration, my gift to Dad-imag1089.jpg  

Tasteful Maruti SS80 Restoration, my gift to Dad-imag1096.jpg  

Tasteful Maruti SS80 Restoration, my gift to Dad-imag1092.jpg  

Tasteful Maruti SS80 Restoration, my gift to Dad-imag1093.jpg  

Tasteful Maruti SS80 Restoration, my gift to Dad-imag1094.jpg  

Tasteful Maruti SS80 Restoration, my gift to Dad-imag1098.jpg  

Tasteful Maruti SS80 Restoration, my gift to Dad-imag1106.jpg  

ashvar87 is offline   (8) Thanks
Old 14th March 2014, 12:03   #19
Senior - BHPian
 
kutlee's Avatar
 
Join Date: Jul 2005
Location: Hyderabad
Posts: 1,141
Thanked: 232 Times
Re: Tasteful Maruti SS80 Restoration, my gift to Dad

looks good man. try and do a wet sanding (2000 grit) before clear coat. then do a clear coat and then do wet sanding again. you will get mirror finish. This will elimiate all orange peel effect. do black powder coating on steel rims.
kutlee is offline  
Old 15th March 2014, 19:40   #20
BHPian
 
ashvar87's Avatar
 
Join Date: Sep 2008
Location: krishnagiri
Posts: 58
Thanked: 151 Times
Re: Tasteful Maruti SS80 Restoration, my gift to Dad

@Kutlee, sure bro.

Updates,
Yesterday morning we brought her to my place and started up with next phase of work. Firstly we started up with cosmetic fittings work and electrical. We had to postpone the mechanical work by evening, as my mechanic was to arrive only by late evening.

I have sourced all the rubber beadings, lights and almost all possible cosmetic items but only missed out item was the weather strips which I had to use the old one which was already serving for 30 odd years. And not to miss the monograms which I could not find anywhere, friends kindly help me with monograms, Stanley sealed beam lights and weather strips.

We fixed up all the cosmetics and made a new thermocole lining inside the cabin floor to minimise heat. My tinker was so enthusiastic to work with cosmetics. All nuts and bits which I preserved, everything went back safely into the vehicle. Was really happy to see the vehicle coming up beautifully and was really admiring her after each and every part goes back into her.

Electrical works were really no messy, since I removed the wiring by myself and kept safely aside, electrician finished up his work in hardly half an hour.

Really didn't know the time whiling away, and it was almost 7pm and our mechanic arrived.

Engine was missing a lot due to dust accumulation in the carburettor. We opened up the carb and cleaned it completely using the de-carbonizer, after checking the timing and valve clearance, we fired the engine and took the vehicle for a short drive, all I can say is WOW

Really the vehicle performed awfully, but personally I felt the engine needs some more fine tuning. There was no sign of valve wear but a slight negotiable misalignment. Again an instant decision, I decided to open the head and check it up.

We opened up the engine head and found absolutely no issues but for worn out stem seals and weak gasket. Thank god, we opened up in time. Then again an instant decision, we pulled out the complete engine with gearbox to inspect the engine completely and inspect the clutch.

It was really a pleasure to open up a 30year old factory sealed engine. I was a bit curious about the engine block about its wear, but again our SS80 gave a smile in our face. It had no issues at all, everything in standard size with absolutely no wear n tear.

So the works scheduled for now is to just service the head with new valve guides and stem seals, change the oil pump (as I didn't want to take a chance with old one), replace the connector rod bearings, rings, main bearings and oil seals. And not to leave the clutch plate, pressure plate and releaser.

By afternoon we sent the Head to Salem, In the mean time I told my staffs to completely sand, pressure wash and clean-up the engine block and all peripherals, I told my painter to come by evening to paint the engine block and all peripherals.

Gafoor again cleaned all the items and gave a zinc primer and two coats of duco black.

Expecting the engine head to reach by today night. I guess we will be firing up the engine by tomorrow evening.

Thank you.
Attached Thumbnails
Tasteful Maruti SS80 Restoration, my gift to Dad-imag110.jpg  

Tasteful Maruti SS80 Restoration, my gift to Dad-imag1274.jpg  

Tasteful Maruti SS80 Restoration, my gift to Dad-imag1289.jpg  

Tasteful Maruti SS80 Restoration, my gift to Dad-imag1293.jpg  

Tasteful Maruti SS80 Restoration, my gift to Dad-imag1398.jpg  

Tasteful Maruti SS80 Restoration, my gift to Dad-imag1373.jpg  

Tasteful Maruti SS80 Restoration, my gift to Dad-imag1348.jpg  

Tasteful Maruti SS80 Restoration, my gift to Dad-imag1350.jpg  

ashvar87 is offline   (8) Thanks
Old 16th March 2014, 12:24   #21
BHPian
 
shk 8896's Avatar
 
Join Date: Aug 2010
Location: CLT/TVM
Posts: 384
Thanked: 186 Times
Re: Tasteful Maruti SS80 Restoration, my gift to Dad

Congrats ashvar87 on the restoration of the Original People's Car.
I have been hooked to this thread. The work done on the car looks superb.Any specific reasons for doing cosmetics first and then mechanicals?
Waiting for more pics and best of luck for the project.
Regards
Sreehari
shk 8896 is offline   (1) Thanks
Old 17th March 2014, 00:12   #22
BHPian
 
Join Date: Apr 2013
Location: Hyderabad
Posts: 237
Thanked: 254 Times
Re: Tasteful Maruti SS80 Restoration, my gift to Dad

Lovely restoration. Congratulations.

By looking at the valves, all I can say is that whoever tuned the carburetor was an expert. The mixture was perfect as in a Fuel Injected Engine.

Last edited by interc00led : 17th March 2014 at 00:13.
interc00led is offline   (1) Thanks
Old 18th March 2014, 10:44   #23
BHPian
 
ashvar87's Avatar
 
Join Date: Sep 2008
Location: krishnagiri
Posts: 58
Thanked: 151 Times
Re: Tasteful Maruti SS80 Restoration, my gift to Dad

Quote:
Originally Posted by shk 8896 View Post
Congrats ashvar87 on the restoration of the Original People's Car.
I have been hooked to this thread. The work done on the car looks superb.Any specific reasons for doing cosmetics first and then mechanicals?
Waiting for more pics and best of luck for the project.
Regards
Sreehari
Thank you for your wishes bro. Regarding the mechanical work, it was an incidental decision bro, nothing specific. Mechanically vehicle was well fit before restoration itself, but I didn't want to take a chance, so opened up.

Quote:
Originally Posted by interc00led View Post
Lovely restoration. Congratulations.

By looking at the valves, all I can say is that whoever tuned the carburetor was an expert. The mixture was perfect as in a Fuel Injected Engine.
You are very right, really the engine was very well maintained.

Updates,
We are bit slow on our schedule as, cleaning all the engine parts itself took nearly one and half days. Hopefully we will be firing the engine today.

Some WIP pics for you.
Attached Thumbnails
Tasteful Maruti SS80 Restoration, my gift to Dad-imag1410.jpg  

Tasteful Maruti SS80 Restoration, my gift to Dad-imag1411.jpg  

Tasteful Maruti SS80 Restoration, my gift to Dad-imag1421.jpg  

Tasteful Maruti SS80 Restoration, my gift to Dad-imag1426.jpg  

Tasteful Maruti SS80 Restoration, my gift to Dad-imag1428.jpg  

Tasteful Maruti SS80 Restoration, my gift to Dad-imag1431.jpg  

Tasteful Maruti SS80 Restoration, my gift to Dad-imag1437.jpg  

Tasteful Maruti SS80 Restoration, my gift to Dad-imag1438.jpg  

Tasteful Maruti SS80 Restoration, my gift to Dad-imag1439.jpg  

ashvar87 is offline   (9) Thanks
Old 19th March 2014, 13:07   #24
BHPian
 
ashvar87's Avatar
 
Join Date: Sep 2008
Location: krishnagiri
Posts: 58
Thanked: 151 Times
Re: Tasteful Maruti SS80 Restoration, my gift to Dad

Updates,
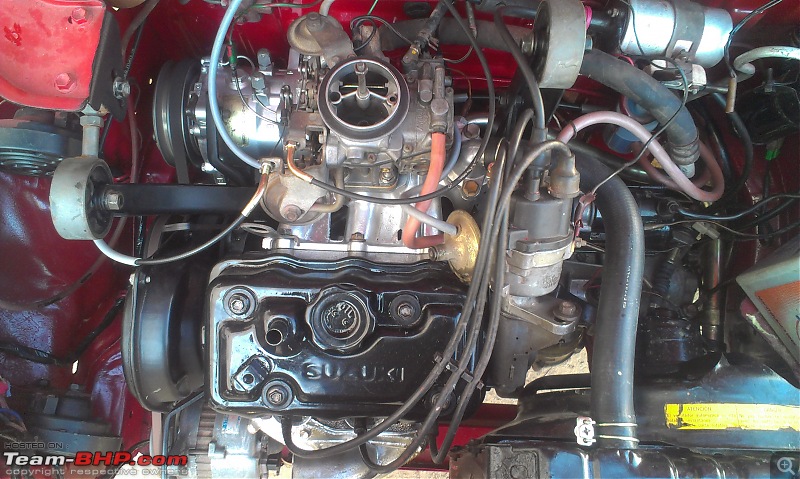
I took almost three long days to bring the engine back to life, we made sure every bit of the engine and engine bay are detailed and attended. The complete wiring harness inside the engine bay was reorganised and sleeved up.

And finally by yesterday evening we fired up the engine In the mean time we started up with the A/c work also, on the first phase of A/c work, we cleaned up the compressor and then the condenser and serviced them completely in-house. We made sure all the old R12 oil is flushed out, since we are converting the refrigerant to R134a. The dryer unit was totally clogged, so we decided to replace it with a new one, just waiting for the dryer unit to reach us from coimbatore. Hopefully we will TD the vehicle by today night.


Engine back into the bay
Tasteful Maruti SS80 Restoration, my gift to Dad-imag1450.jpg
Tasteful Maruti SS80 Restoration, my gift to Dad-imag1451.jpg
A/c condenser pressure wash
Tasteful Maruti SS80 Restoration, my gift to Dad-imag1446.jpg
A/c Condenser pressure wash
Tasteful Maruti SS80 Restoration, my gift to Dad-imag1447.jpg

Thank you
ashvar87 is offline   (4) Thanks
Old 21st March 2014, 23:26   #25
BHPian
 
ashvar87's Avatar
 
Join Date: Sep 2008
Location: krishnagiri
Posts: 58
Thanked: 151 Times
Re: Tasteful Maruti SS80 Restoration, my gift to Dad

updates,
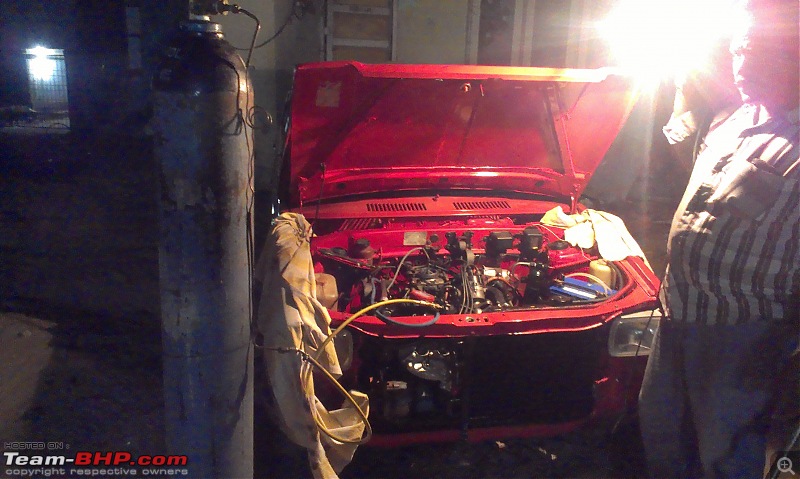
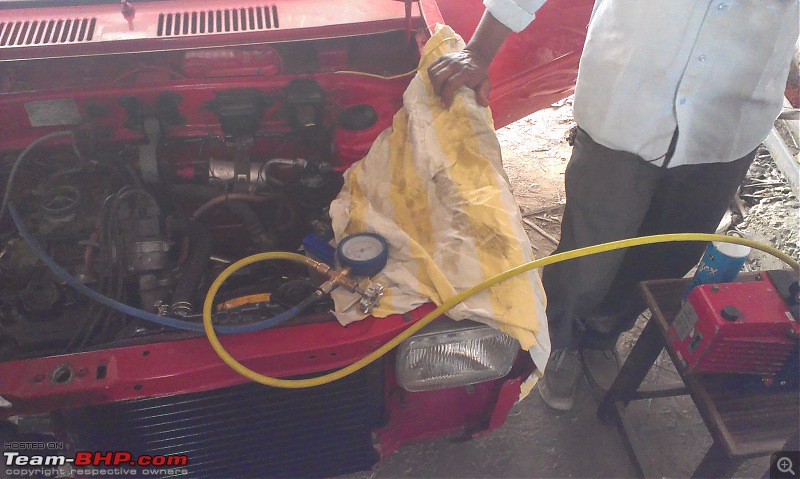
Since we are converting the A/c refrigerant to R134a, we had to take care in each and every step, let me explain them step by step, since it may help our forum readers to insist these procedure to their A/c mechanics while conversion.

1. completely flush the condenser with Petrol using air compressor.

2. Again flush the condenser with IP solution using Nitrogen gas, keep repeating the process until the condenser is completely block free.

3. Flush the compressor using petrol and IP (with nitrogen gas) remove all the old R12 oil completely.

4. Flush the cooling coil with petrol and IP (With nitrogen gas) remove all the old R12 oil completely.

5. Replace the old dryer unit with a new one, replace hoses if they are dry/ weak.

6. Once you are confident that your A/c system is completely flushed and
cleaned up,fill up the 134 lube oil, fill the unit with nitrogen gas, check for leakages, once all leakages are fixed, note the pressure gauge reading and leave the system undisturbed for minimum 12 hours, to check if there is any leakage.

7. After 12 hours, again check the pressure level and if there is no pressure loss, do a vacuum suction for a minimum of 15 minutes.

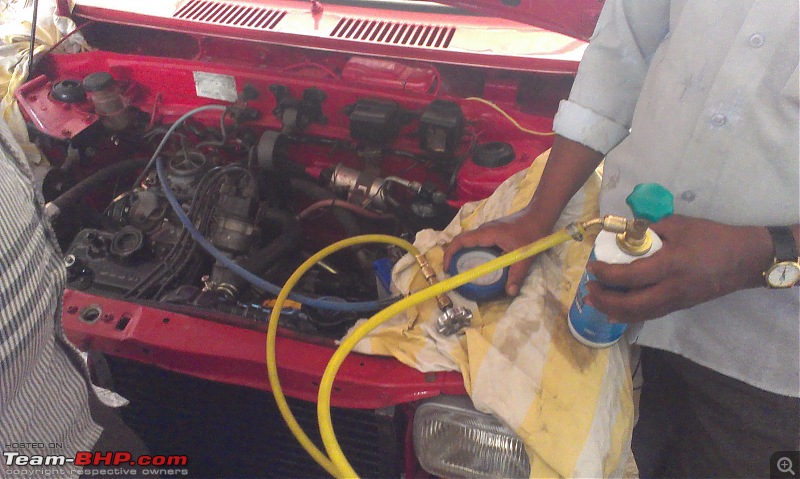
8. Now you can go a head with R134a gas filling.

We have completed the A/c work today and vehicle was moved to paint shop for polishing work.

Since the mechanical work, Electrical work and A/c was done In-house, I was able to extract the best out of them. Now I am just fingers crossed for the final outcome but on the other way, I am confident too. Hoping the best.

Here are few pictures for you.

Adding nitrogen gas to the system (overnight leak check)
Tasteful Maruti SS80 Restoration, my gift to Dad-imag1458.jpg

Vacuum suction by morning (after pressure check)
Tasteful Maruti SS80 Restoration, my gift to Dad-imag1460.jpg

R134a refrigerant ( 500g X 2)
Tasteful Maruti SS80 Restoration, my gift to Dad-imag1462.jpg

Adding R134a to the system
Tasteful Maruti SS80 Restoration, my gift to Dad-imag1465.jpg

An awesome and unforgettable gift from my FB Friend Michael Jackson
Tasteful Maruti SS80 Restoration, my gift to Dad-imag1466.jpg

Getting Dressed up
Tasteful Maruti SS80 Restoration, my gift to Dad-imag1469.jpg

All set for polishing
Tasteful Maruti SS80 Restoration, my gift to Dad-imag1470.jpg

Thank you.

Last edited by Aditya : 24th March 2014 at 12:30. Reason: Typo
ashvar87 is offline   (1) Thanks
Old 22nd March 2014, 19:34   #26
BHPian
 
ashvar87's Avatar
 
Join Date: Sep 2008
Location: krishnagiri
Posts: 58
Thanked: 151 Times
Re: Tasteful Maruti SS80 Restoration, my gift to Dad

Hi all,
Polishing work completed. Here are some Teaser pictures for you all

Tasteful Maruti SS80 Restoration, my gift to Dad-imag1304.jpg

Last edited by aah78 : 25th March 2014 at 01:32. Reason: Duplicate picture removed.
ashvar87 is offline   (3) Thanks
Old 23rd March 2014, 12:44   #27
BHPian
 
ashvar87's Avatar
 
Join Date: Sep 2008
Location: krishnagiri
Posts: 58
Thanked: 151 Times
Re: Tasteful Maruti SS80 Restoration, my gift to Dad

Hi Friends,
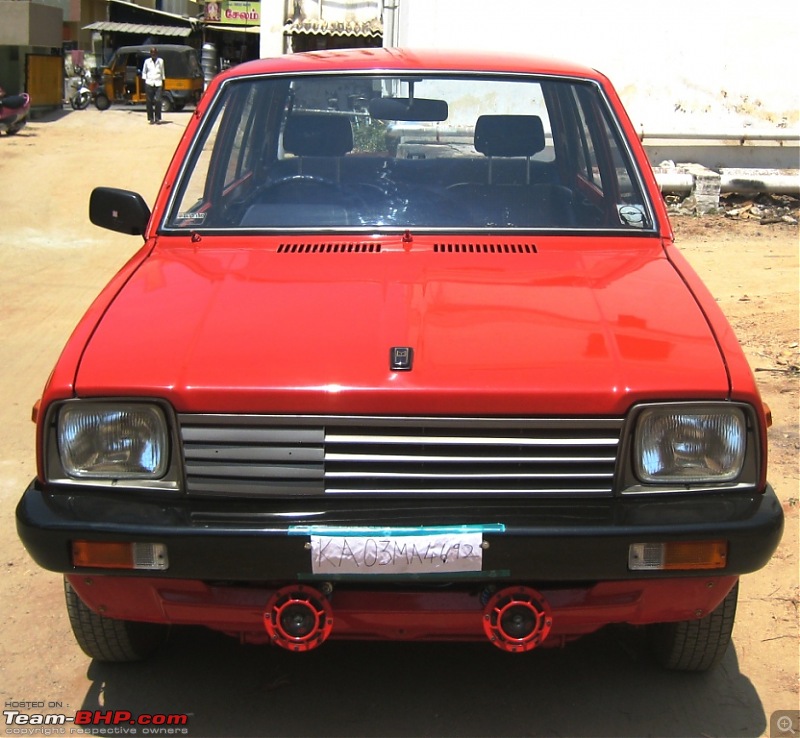
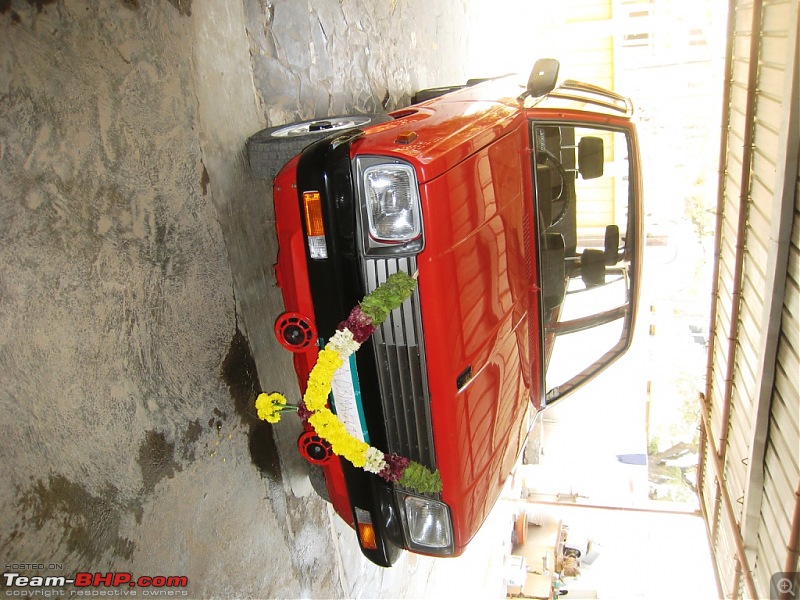
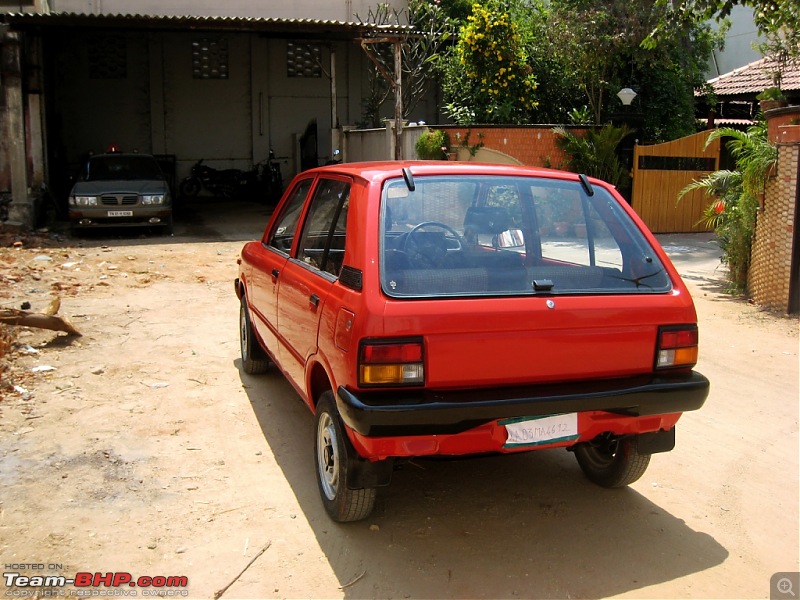
Finally here are some pictures for you all, I have done my best to this Japanese beauty, hope everyone will like it There are few more goodies to be added to the vehicle to retain originality, which I will be listing in my next message, kindly help me in sourcing them friends.

Will keep this thread updated, Now let the pictures speak.

Almost 20 years old, Original German Hella Horn from my parts bin.
Tasteful Maruti SS80 Restoration, my gift to Dad-img_2954.jpg

Tasteful Maruti SS80 Restoration, my gift to Dad-img_2928.jpg

Tasteful Maruti SS80 Restoration, my gift to Dad-img_2935.jpg

Tasteful Maruti SS80 Restoration, my gift to Dad-img_2937.jpg

Tasteful Maruti SS80 Restoration, my gift to Dad-img_2943.jpg

Tasteful Maruti SS80 Restoration, my gift to Dad-img_2946.jpg

Tasteful Maruti SS80 Restoration, my gift to Dad-img_2950.jpg

Tasteful Maruti SS80 Restoration, my gift to Dad-img_2939.jpg

Thank you
ashvar87 is offline   (12) Thanks
Old 23rd March 2014, 14:48   #28
Distinguished - BHPian
 
SS-Traveller's Avatar
 
Join Date: Jan 2009
Location: New Delhi
Posts: 8,162
Thanked: 27,119 Times
Re: Tasteful Maruti SS80 Restoration, my gift to Dad

Nice restoration, Ashwin.

A quick query: what did your AC guy do about replacing the seals and hoses in the aircon system with R134a-compatible materials?
Quote:
Originally Posted by ashvar87 View Post
An awful and unforgettable gift from my FB Friend Michael Jackson
Attachment 1222352
I'd guess you meant awesome instead of awful, didn't you?
SS-Traveller is offline   (1) Thanks
Old 23rd March 2014, 15:01   #29
BHPian
 
ashvar87's Avatar
 
Join Date: Sep 2008
Location: krishnagiri
Posts: 58
Thanked: 151 Times
Re: Tasteful Maruti SS80 Restoration, my gift to Dad

Quote:
Originally Posted by SS-Traveller View Post
Nice restoration, Ashwin.

A quick query: what did your AC guy do about replacing the seals and hoses in the aircon system with R134a-compatible materials?

I'd guess you meant awesome instead of awful, didn't you?
Thank you for your wishes friend. You are right, it was my grammatical error. Was not able to edit, as I crossed the 30 minute, timeline for editing my post.

Regarding the a/c, there was no need to replace the seals and hoses in my unit, as almost everything was new already. But I strongly recommend to replace them for headache free run. In my opinion, there is no specific hose or seals for 134, correct me if I am wrong.

Thank you.
ashvar87 is offline  
Old 23rd March 2014, 20:15   #30
Distinguished - BHPian
 
SS-Traveller's Avatar
 
Join Date: Jan 2009
Location: New Delhi
Posts: 8,162
Thanked: 27,119 Times
Re: Tasteful Maruti SS80 Restoration, my gift to Dad

Quote:
Originally Posted by ashvar87 View Post
Regarding the a/c, there was no need to replace the seals and hoses in my unit, as almost everything was new already. But I strongly recommend to replace them for headache free run. In my opinion, there is no specific hose or seals for 134, correct me if I am wrong.
There's a dichotomy of opinions as to whether to change the O-rings and hoses to HNBR during R12>R134a conversion. Some consider the HNBR material to be more leak-resistant and less porous than those used with R12 systems, and thus leakages from the system are eliminated. Others say old hoses and O-rings can leak anyway - it has nothing to do with the material - so why change hoses and O-rings unless refrigerant leakage is a major problem.

I wanted to know which opinion your AC mechanic agrees with.
SS-Traveller is offline  
Reply

Most Viewed
Thread Tools Search this Thread
Search this Thread:

Advanced Search

Copyright ©2000 - 2024, Team-BHP.com
Proudly powered by E2E Networks