Team-BHP > Technical Stuff
Register New Topics New Posts Top Thanked Team-BHP FAQ


Reply
  Search this Thread
21,419 views
Old 8th September 2020, 23:01   #1
BHPian
 
Pferdestarke's Avatar
 
Join Date: Nov 2013
Location: Vijayawada
Posts: 637
Thanked: 1,317 Times
A weekend warrior's venture into the world of comprehensive detailing

A weekend warrior's venture into the world of comprehensive detailing


"Like most detailing gurus say, detailing can become an obsession and yes, it happened so in my case but fret not obsession is a young man’s game!"


I stepped in to the world of detailing in 2013 with a basic wash and waxing stuff. Thanks to my anankastic personality, I started digging up tons of info and slowly I’ve become a detailing junkie!

The passion grew even stronger with my latest acquisition, Abarth Punto in Hip-Hop Black.

Carried out a comprehensive detailing session on my car a few weeks back and here's how I did it:


SCHEDULING:

Detailing is one job that needs patience and time, tons of it!

I always make sure that I have plenty of time in my hands while performing detailing. I hate to rush and compromise on quality.


LOCATION:

Indoor is ideal but not possible for an apartment dweller like me.

I choose a shady spot with ample illumination and minimal human interference.

Note: I spray water all over the place so that dust settles down. A dust free environment is must for detailing.

My arsenal:

A weekend warrior's venture into the world of comprehensive detailing-prep-3.jpg

A weekend warrior's venture into the world of comprehensive detailing-prep-1.jpg.jpg

A weekend warrior's venture into the world of comprehensive detailing-prep-2.jpg


A grit guard helps to keep the grit off the wash mitts


INSPECTION:

Before starting anything, I spend at least 10-15 minutes on assessing paint defects, scratches, swirls and plan my process accordingly.


A weekend warrior's venture into the world of comprehensive detailing-ins-1.jpg

A weekend warrior's venture into the world of comprehensive detailing-ins-2.jpg

A weekend warrior's venture into the world of comprehensive detailing-ins-3.jpg


WASH:

I use a hose with spray gun connected to the plumbing from the overhead tank (Thanks to gravity, the water pressure is good enough to wash away muck).


A weekend warrior's venture into the world of comprehensive detailing-wash-1compressed.jpg

A fresh water rinse to start with!


After rinsing with plain water I use a manual foam sprayer to apply foam and let it dwell for 2 minutes, then agitate with wash mitts (I use 2 separate mitts, one for the dirty areas and the other for not-so-dirty areas).

The order I follow while washing: Rims and under-body – wheel arches – side skirts and air dams – then roof followed by rest of the panels.

For cleaning wheels, I spray liberally CarPro T.R.I.X and let it dwell for 3 minutes then apply foam and agitate with brush then rinse with water.


A weekend warrior's venture into the world of comprehensive detailing-wash-3.jpg

Car Pro T.R.I.X being applied over rims to remove brake dust, iron and road grime

A weekend warrior's venture into the world of comprehensive detailing-wash-4.jpg

Notice the purple liquid ( T.R.I.X turns purple on reacting with iron)

A weekend warrior's venture into the world of comprehensive detailing-wash-5.jpg

Lug holes and tight areas being cleaned with brushes

A weekend warrior's venture into the world of comprehensive detailing-wash-6compressed.jpg

Final cleanse with foam and water

For body panels, I spray Poor Boy’s World Bug squash diluted in 3:1 as a pre-wash. This product works like magic for removing bugs, road grime, tree sap and bird droppings. I let it dwell for 3 minutes then agitate with a mitt.


A weekend warrior's venture into the world of comprehensive detailing-wash-2.jpg

Poor Boy’s World Bug squash Pre-Wash solution


Then I spray CarPro Iron – X and let it dwell for 2 minutes (Caution: Never let it dry, you’ll find it hard to remove the stains).


A weekend warrior's venture into the world of comprehensive detailing-wash-9.jpg

A weekend warrior's venture into the world of comprehensive detailing-wash-10.jpg

Never skip on this step along with claying before going for paint correction

Finally a coat of thick foam and thorough agitation with 2 mitts followed by cleaning tight and difficult to reach areas with horse hair brushes. (Note: Don’t forget the fuel filler cap)


A weekend warrior's venture into the world of comprehensive detailing-wash-7-2.jpg

A weekend warrior's venture into the world of comprehensive detailing-wash-8.jpg

A weekend warrior's venture into the world of comprehensive detailing-wash-11.jpg

A weekend warrior's venture into the world of comprehensive detailing-wash-12.jpg

A weekend warrior's venture into the world of comprehensive detailing-wash-13.jpg

Tight spaces were cleaned with detailing brushes and micro fiber towels


Finally rinse with plain water properly and pat dry with drying towels.


A weekend warrior's venture into the world of comprehensive detailing-dry.jpg


Products used:
  • Meguiar’s NXT shampoo
  • CarPro T.R.I.X
  • CarPro Iron-X
  • Poor Boy’s World Bug Squash
  • Wash mitts
  • Amazon Basics drying towels
  • Horse hair detailing brushes
  • Tire agitating brush
  • Rim cleaning brush

Last edited by Pferdestarke : 11th September 2020 at 22:19.
Pferdestarke is offline   (47) Thanks
Old 9th September 2020, 21:42   #2
BHPian
 
Pferdestarke's Avatar
 
Join Date: Nov 2013
Location: Vijayawada
Posts: 637
Thanked: 1,317 Times
Re: A weekend warrior's venture into the world of comprehensive detailing

CLAYING:

Since this car is not a daily driver, I clay it once in 6 months. But if you’re clueless if your car needs claying, there’s a small inspection technique recommended by Mike Philips @ Autogeek. In his own words:

“Feel the paint with the fingertips of your clean hand

1. First, wash and dry your car.

2. Now place your hand inside a plastic bag and feel the paint.

Does the paint finish feel smooth and glassy? If the answer is yes you don't need to clay your car's paint.

Does the paint feel rough or textured? If you feel little bumps or any kind of roughness or surface imperfections, this is a strong indicator that you need to clay your car's paint.”

A weekend warrior's venture into the world of comprehensive detailing-clay-1.jpg

I prefer traditional clay bars over modern alternatives like Nanoscrub for most panels

I used Meguiar’s clay bar and ONR (6ml in 500ml distilled water) as clay lube and carried out the process. Ensure liberal coverage of lube over panels before moving the clay to prevent paint marring.

A weekend warrior's venture into the world of comprehensive detailing-clay-2.jpg

Note: I move the clay bar in to-and-fro & side-to-side motion but never in circles.

A weekend warrior's venture into the world of comprehensive detailing-clay-3.jpg

Notice the contaminants picked after doing a pass over hood.


Once done, dry the panels with a clean microfiber towel.

Products Used:
  • Meguiar’s Clay bar
  • Nanoscrub sponge for roof
  • ONR as clay lube
MASKING:

Re-assess the paint defects and decide on the appropriate correction steps needed.

Just a couple of months before this session I got my RH front and rear doors repainted from Privilege Motomall, Chennai.

Though their paint matching and overall job felt decent, I found quite a few defects like fish eyes, solvent pops and unmatched orange peel when compared to factory painted panels. Hence, I decided to perform wet sanding.

Before carrying out any paint corrective steps, proper masking is must to prevent damage to the panel edges, plastics, rubber parts, emblems and decals.

A weekend warrior's venture into the world of comprehensive detailing-mask-1.jpg

A weekend warrior's venture into the world of comprehensive detailing-mask-2.jpg

A weekend warrior's venture into the world of comprehensive detailing-mask-3.jpg

Products used: 3M masking tape

Last edited by Pferdestarke : 11th September 2020 at 22:52.
Pferdestarke is offline   (29) Thanks
Old 9th September 2020, 22:56   #3
BHPian
 
Pferdestarke's Avatar
 
Join Date: Nov 2013
Location: Vijayawada
Posts: 637
Thanked: 1,317 Times
Re: A weekend warrior's venture into the world of comprehensive detailing

PAINT CORRECTION:

Used a 1500 grit 3M sanding paper on a foam block for heavy defects and 2000 grit paper for minor ones.

A weekend warrior's venture into the world of comprehensive detailing-wet-sand-1.jpg

A sanding block helps to distribute the pressure evenly over surface

A weekend warrior's venture into the world of comprehensive detailing-wet-sand-2.jpg

After leveling out the defects

A weekend warrior's venture into the world of comprehensive detailing-wet-sand-3.jpg

Residual defects were noted and sanded again till they were sorted out


Finished with 3000 grit Rupes sanding disc (courtesy of BHPian blackwasp) on a DA polisher to ensure easy removal of sanding marks with compound.


A weekend warrior's venture into the world of comprehensive detailing-wet-sand-4.jpg

A weekend warrior's venture into the world of comprehensive detailing-wet-sand-5.jpg

Notice the even and fine sanding marks after doing a couple of passes with 3000 grit sanding disc

Divided each panel into 4 small sections for the ease of machine polishing.

A weekend warrior's venture into the world of comprehensive detailing-stuff-2.jpg

Menzerna HC 400 compound. Excellent one!

A weekend warrior's venture into the world of comprehensive detailing-stuff-3.jpg

Buff & Shine Polishing pads

For removal of sanding marks I used Menzerna Heavy Cut 400 compound on a 5” cutting pad (Buff & Shine) with Poor Boy’s world DA polisher.

A weekend warrior's venture into the world of comprehensive detailing-polisher.jpg

Poor Boy's World DA polisher [DAS-6 PRO]

A weekend warrior's venture into the world of comprehensive detailing-pad-compound.jpg

Pad attached and ready to buff

Since this is a DAT compound I had to work for 6 passes in each section to finish each cycle. And most sections were already LSP ready with one cycle. This compound has got hell of a cut and slick finsih!!

A weekend warrior's venture into the world of comprehensive detailing-comp-1.jpg

Checking for residual swirls/sanding marks in between using a spot light

A weekend warrior's venture into the world of comprehensive detailing-comp-2.jpg


Check this door panel after 4 passes with Menzerna HC 400. Looks LSP ready!

A weekend warrior's venture into the world of comprehensive detailing-hand-comp.jpg

Panel edges and crease lines are corrected by hand using a Wolfgang Trifoam pad

I made sure to clean the pads between switching to next section and used 2 pads for 2 doors.

(Note: Prime the pad properly before initiating the process).

A weekend warrior's venture into the world of comprehensive detailing-pad-cleaning.jpg

Cleaning pads

A weekend warrior's venture into the world of comprehensive detailing-post-compound.jpg

This is just after finishing with compound

As a next step, I moved on to polishing with Meguiar’s Ultimate Polish on Buff & Shine polishing pads.

A weekend warrior's venture into the world of comprehensive detailing-polish.jpg

A weekend warrior's venture into the world of comprehensive detailing-polish-2.jpg


After polishing each panel I sprayed 12% IPA wipe to check for residual defects.

Products Used:
  • 3M Wet or dry sand papers (Assorted ranging from 400 grit to 2500 grit)
  • Rupes sanding disc (3000 grit)
  • Menzerna Heavy Cut 400 compound
  • Meguiar’s Ultimate polish
  • Buff and Shine heavy cut, medium cut and polishing pads
  • Poorboy’s world DA polisher

Last edited by Pferdestarke : 11th September 2020 at 22:53.
Pferdestarke is offline   (28) Thanks
Old 9th September 2020, 23:00   #4
BHPian
 
Pferdestarke's Avatar
 
Join Date: Nov 2013
Location: Vijayawada
Posts: 637
Thanked: 1,317 Times
Re: A weekend warrior's venture into the world of comprehensive detailing

PROTECTION:

Once done with the paint correction, it’s highly important that you protect your hard work from elements.

For this I used 2 coats of Meguiar’s NXT 2.0 sealant using DA with 24 hours curing time in between.

A weekend warrior's venture into the world of comprehensive detailing-lsp.jpg

Though the product is marketed as wax, it is technically a sealant and is a pretty good one

After 48 hours I have rinsed the paint with ONR QD [Quick Detailer] and then applied a coat of Collinite 845.

A weekend warrior's venture into the world of comprehensive detailing-bead-1compressed.jpg


Water beading after one coat of Meguiar's NXT sealant

Panel reflections after 2 coats of sealant

A weekend warrior's venture into the world of comprehensive detailing-ref-1.jpg

A weekend warrior's venture into the world of comprehensive detailing-ref-2.jpg

A weekend warrior's venture into the world of comprehensive detailing-ref-3.jpg

A weekend warrior's venture into the world of comprehensive detailing-ref-4.jpg


Also, applied 2 coats of 845 on rims and treated my eyes with the final results.

A weekend warrior's venture into the world of comprehensive detailing-rims.jpg

Rims after a couple of coats with Collinite 845

Products used:
  • Buff and Shine Black finishing pad
  • Wolfgang trifoam applicator pad
  • Meguiar’s NXT 2.0 paste wax (Sealant)
  • Collinite 845 Insulator wax
  • 500 GSM Microfiber towels for buffing off the wax
TRIM, WHEELS & RUBBER:

Removed masking tapes, wiped clean using a wet microfiber cloth then applied protectants.

For rubber strips: CarPro P.E.R.L

For plastic cladding: Meguiar’s Natural shine protectant

Applied Armorall tyre shine gel for shiny black tyres.


ENGINE BAY:

Blowed off dry dust before washing the car using a power blower, then covered sensitive parts like ECU, battery terminals, alternator and sensors using cling wrap.

Sprayed a diluted solution for CarPro Multi-X for engine degreasing then agitated using various sized brushes.

A weekend warrior's venture into the world of comprehensive detailing-bay.jpg

ECU and important sensors covered with a cling wrap

Sprayed plain water and wiped using microfiber cloth.

Applied CarPro P.E.R.L for protection.

A weekend warrior's venture into the world of comprehensive detailing-bay-2.jpg

After degreasing

Last edited by Pferdestarke : 11th September 2020 at 22:55.
Pferdestarke is offline   (31) Thanks
Old 10th September 2020, 16:23   #5
BHPian
 
Pferdestarke's Avatar
 
Join Date: Nov 2013
Location: Vijayawada
Posts: 637
Thanked: 1,317 Times
Re: A weekend warrior's venture into the world of comprehensive detailing

The finished product after 2 coats of Meguiars NXT sealant and a single coat of Collinite 845

A weekend warrior's venture into the world of comprehensive detailing-20200702_114611compressed.jpg

A weekend warrior's venture into the world of comprehensive detailing-20200702_120247.jpg

A weekend warrior's venture into the world of comprehensive detailing-20200702_120303.jpg

A weekend warrior's venture into the world of comprehensive detailing-20200702_120343.jpg

A weekend warrior's venture into the world of comprehensive detailing-final-6.jpg

A weekend warrior's venture into the world of comprehensive detailing-final-2.jpg

A weekend warrior's venture into the world of comprehensive detailing-final.jpg

A weekend warrior's venture into the world of comprehensive detailing-20200702_120318.jpg

I'm a sucker for reflections and this made my day


Regards,

Pferdestarke

Last edited by Pferdestarke : 11th September 2020 at 22:46.
Pferdestarke is offline   (111) Thanks
Old 12th September 2020, 06:14   #6
GTO
Team-BHP Support
 
GTO's Avatar
 
Join Date: Feb 2004
Location: Bombay
Posts: 70,512
Thanked: 300,696 Times
Re: A weekend warrior's venture into the world of comprehensive detailing

Thread moved out from the Assembly Line. Thanks for sharing!
GTO is offline   (3) Thanks
Old 12th September 2020, 09:52   #7
Senior - BHPian
 
blackwasp's Avatar
 
Join Date: Apr 2015
Location: Navi Mumbai
Posts: 2,974
Thanked: 26,325 Times
Re: A weekend warrior's venture into the world of comprehensive detailing

Lovely read man. I was so awaiting for this thread. Nothing is more satisfying than working on our own car.

You have quite a collection of car care products there (might I say, enough to shame some detailers out there ).

Just a quick question, what were the ambient temperatures out there when you were working on the car?
blackwasp is offline   (6) Thanks
Old 12th September 2020, 11:49   #8
BHPian
 
Join Date: Apr 2013
Location: Bangalore
Posts: 42
Thanked: 133 Times
Re: A weekend warrior's venture into the world of comprehensive detailing

Nice post Pferdestarke. Loved your passion and detailing steps especially the engine bay cleaning as I was always worried to splash any water there but a simple cling paper hack would protect the important electricals as you mentioned.
tanaysn is offline   (1) Thanks
Old 12th September 2020, 11:52   #9
BHPian
 
viXit's Avatar
 
Join Date: Apr 2020
Location: Hyd
Posts: 804
Thanked: 2,876 Times
Re: A weekend warrior's venture into the world of comprehensive detailing

I really hate orange peel and am always waiting to wet sand all of it down, but I’ve learnt from experts that the factory paint with orange peel doesn’t have enough clear coat on top of it to wet sand and have enough clear coat for protection, quite the bummer.

Seeing your car makes me want to buy a black car just for that shine!
Amazing.
viXit is offline   (2) Thanks
Old 12th September 2020, 13:00   #10
BHPian
 
Join Date: May 2020
Location: Bangalore
Posts: 96
Thanked: 153 Times
Re: A weekend warrior's venture into the world of comprehensive detailing

Wow. That is an awesome detail. That shine it out of this world.A friend of mine recommended a ceramic coating from Meguiars. Have you tried this or if any of our members have tried it, please post your comments.
Attached Thumbnails
A weekend warrior's venture into the world of comprehensive detailing-20200912_124730.jpg  

Bsimhan is offline   (3) Thanks
Old 12th September 2020, 13:43   #11
BHPian
 
Join Date: Jul 2020
Location: Gurugram
Posts: 41
Thanked: 75 Times
Re: A weekend warrior's venture into the world of comprehensive detailing

Greetings,

That’s a great post and was indeed a good read. It surely has motivated me atleast to do detailing with such passion and perseverance.

Thanks a lot for such a wonderful post.
adv.yzr is offline   (1) Thanks
Old 12th September 2020, 15:03   #12
BHPian
 
Pferdestarke's Avatar
 
Join Date: Nov 2013
Location: Vijayawada
Posts: 637
Thanked: 1,317 Times
Re: A weekend warrior's venture into the world of comprehensive detailing

Quote:
Originally Posted by blackwasp View Post
Just a quick question, what were the ambient temperatures out there when you were working on the car?
Thanks buddy! This went well because of you. That sanding disc surely helped a ton for refining the process.

I washed the car in morning when temp was 27-30`C and LSP was carried out in the evening when temp was around 35`C.

Quote:
Originally Posted by tanaysn View Post
Nice post Pferdestarke. Loved your passion and detailing steps .
Glad you liked it and found it helpful.

Quote:
Originally Posted by viXit View Post
I really hate orange peel and am always waiting to wet sand all of it down, but I’ve learnt from experts that the factory paint with orange peel doesn’t have enough clear coat on top of it to wet sand.
You are right! Factory painted clear coats are very thin 50 - 75 microns and are better not sanded for the fear of thinning it out.

Check this video bud! Top notch job leveling the orange peel on a Maybach!


Quote:
Originally Posted by adv.yzr View Post
Thanks a lot for such a wonderful post.
I'm glad this motivated you! Thanks for your kind words!
Pferdestarke is offline   (6) Thanks
Old 12th September 2020, 15:51   #13
BHPian
 
viXit's Avatar
 
Join Date: Apr 2020
Location: Hyd
Posts: 804
Thanked: 2,876 Times
Re: A weekend warrior's venture into the world of comprehensive detailing

Quote:
Originally Posted by Pferdestarke View Post
You are right! Factory painted clear coats are very thin 50 - 75 microns and are better not sanded for the fear of thinning it out.

Check this video bud! Top notch job leveling the orange peel on a Maybach!
I've seen this one before, I still don't know what can be so secretive about their methods that they don't show us in the video.
I have spent endless hours watching detailing videos on youtube, it had almost become an addiction. But there's nothing as satisfying.

MOD NOTE - Please remove You Tube's URL when quoting a post. Thank You.

Last edited by Sheel : 12th September 2020 at 18:40. Reason: Mod note attached.
viXit is offline   (3) Thanks
Old 12th September 2020, 16:47   #14
BHPian
 
ramnaresh_2000's Avatar
 
Join Date: May 2017
Location: Hyderabad
Posts: 792
Thanked: 2,830 Times
Re: A weekend warrior's venture into the world of comprehensive detailing

Great post. You don't need a mirror in your home after detailing your car. I burnt my hands while detailing my vehicle, sometimes the wax doesn't go and leaves patches and sometimes the Ceramic coat leaves ugly marks. Once due to compounding, it left ugly swirls marks on my car 
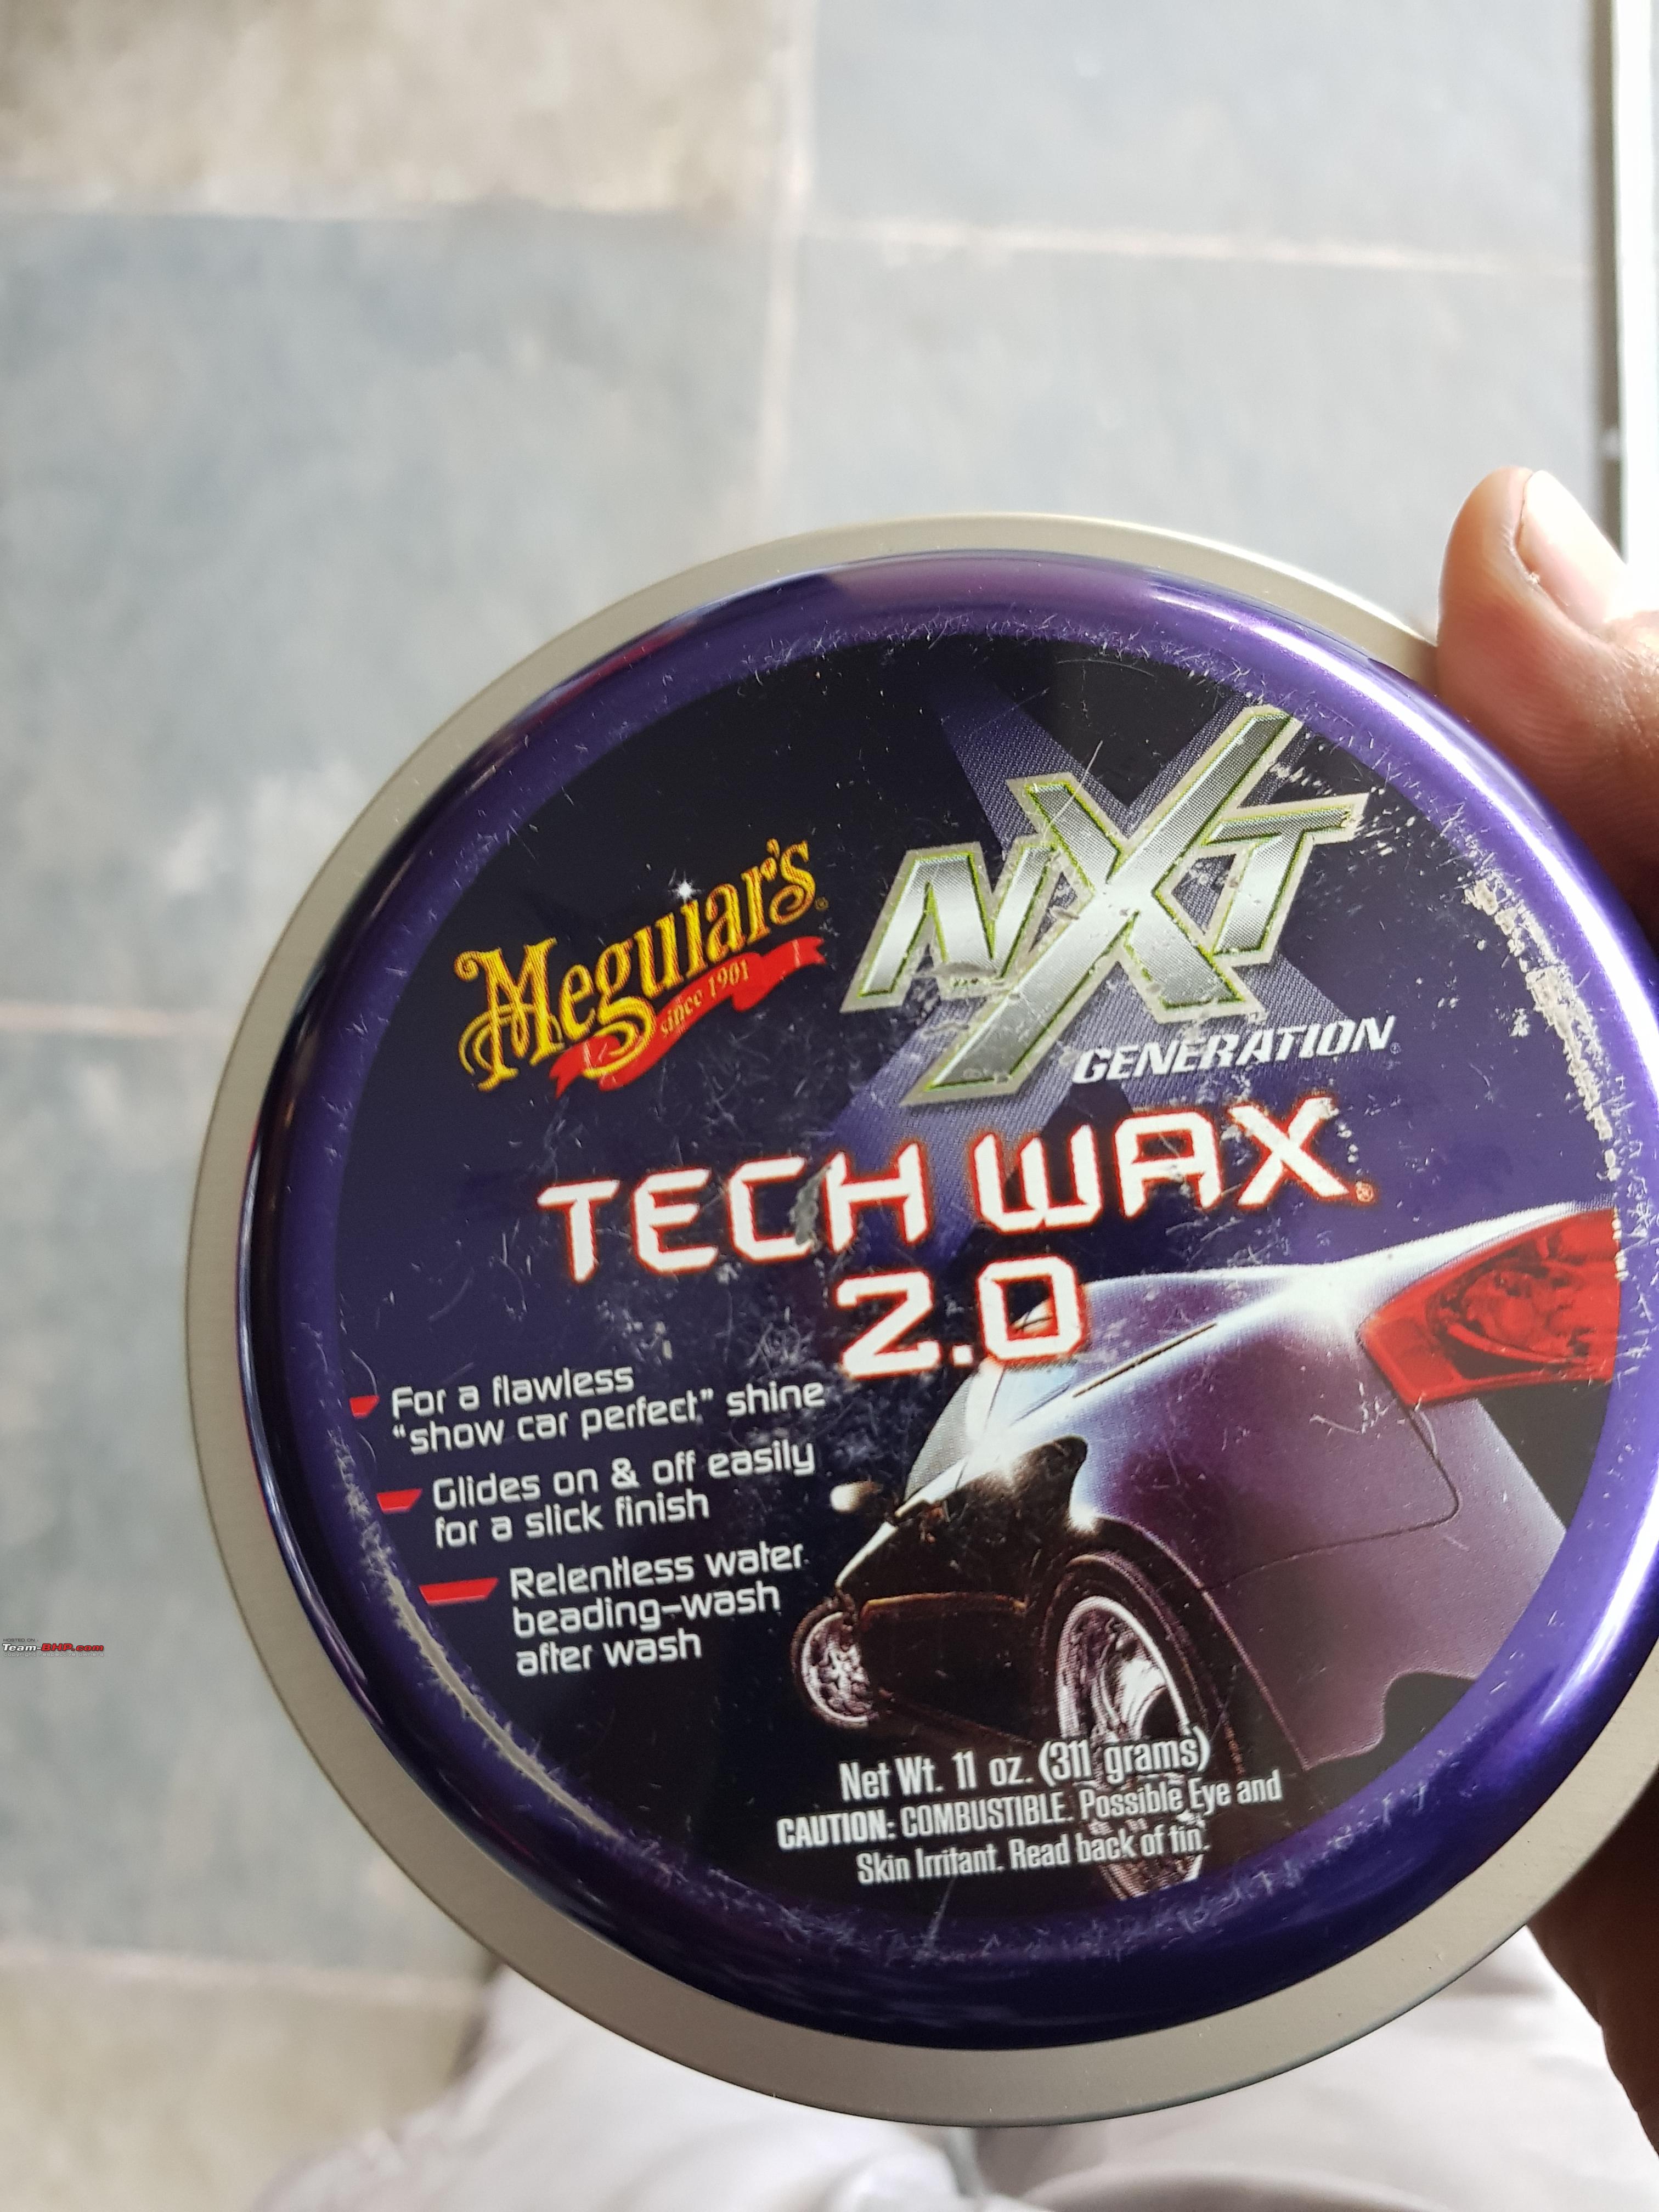
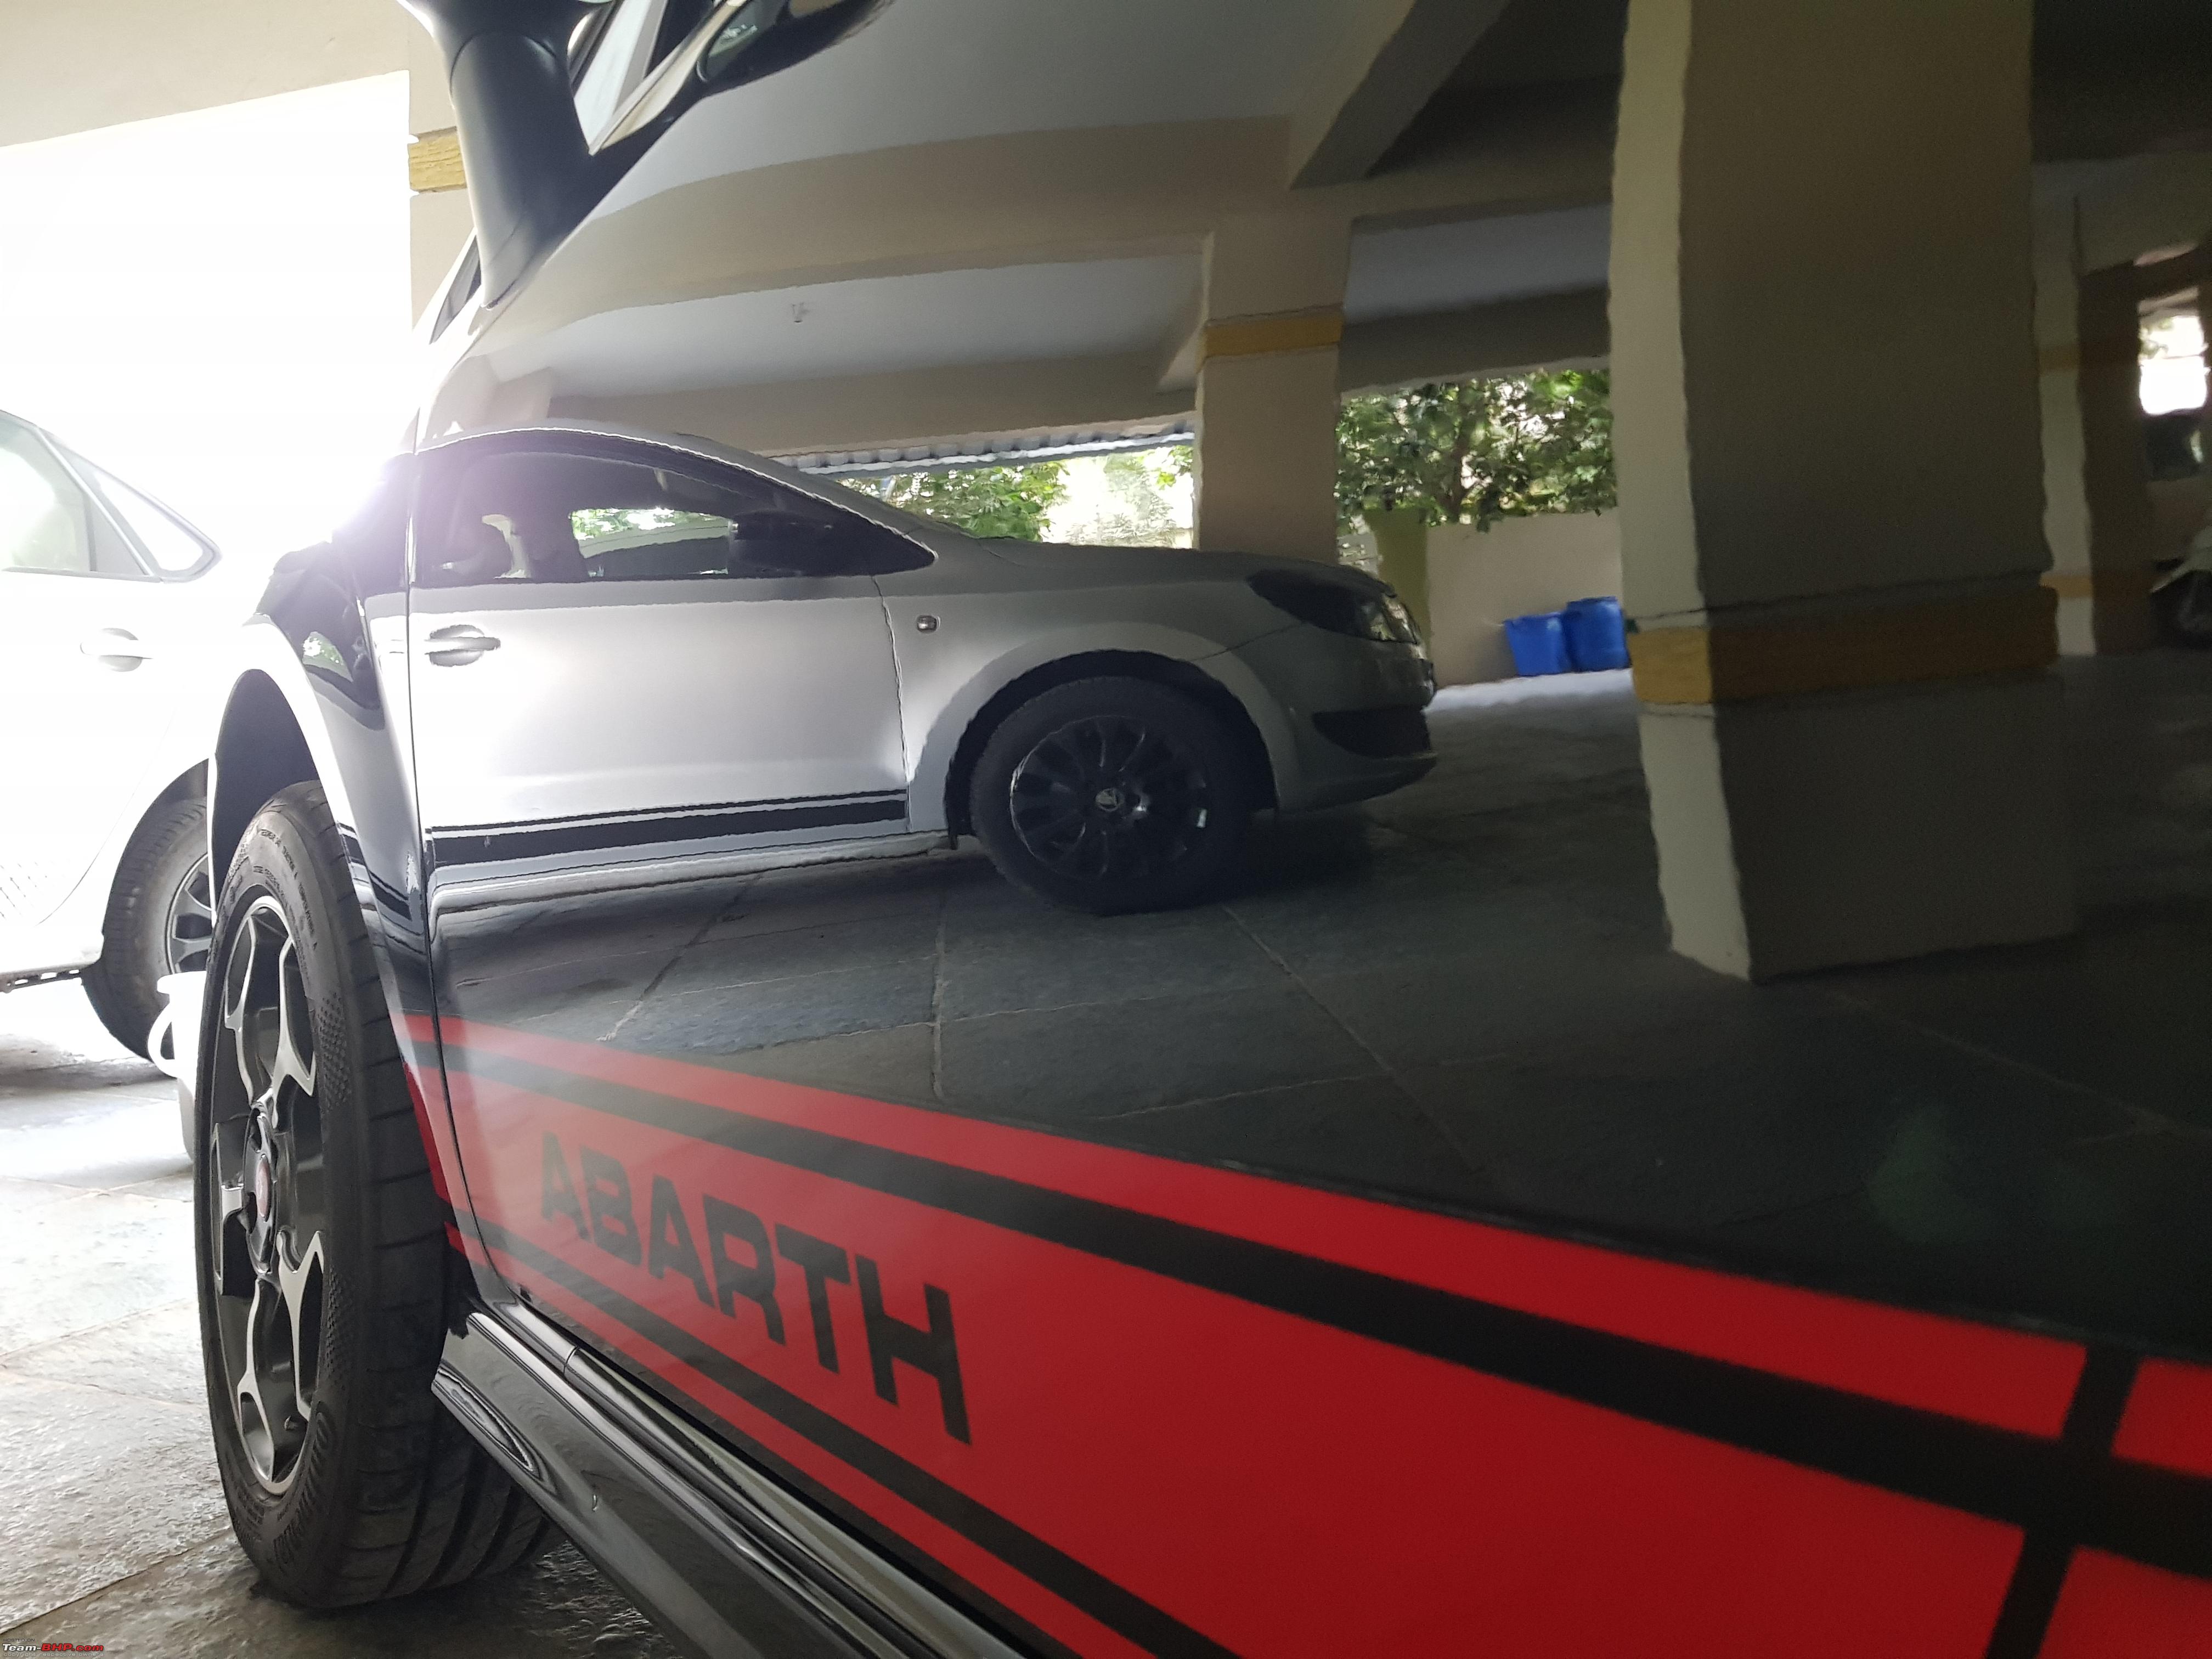
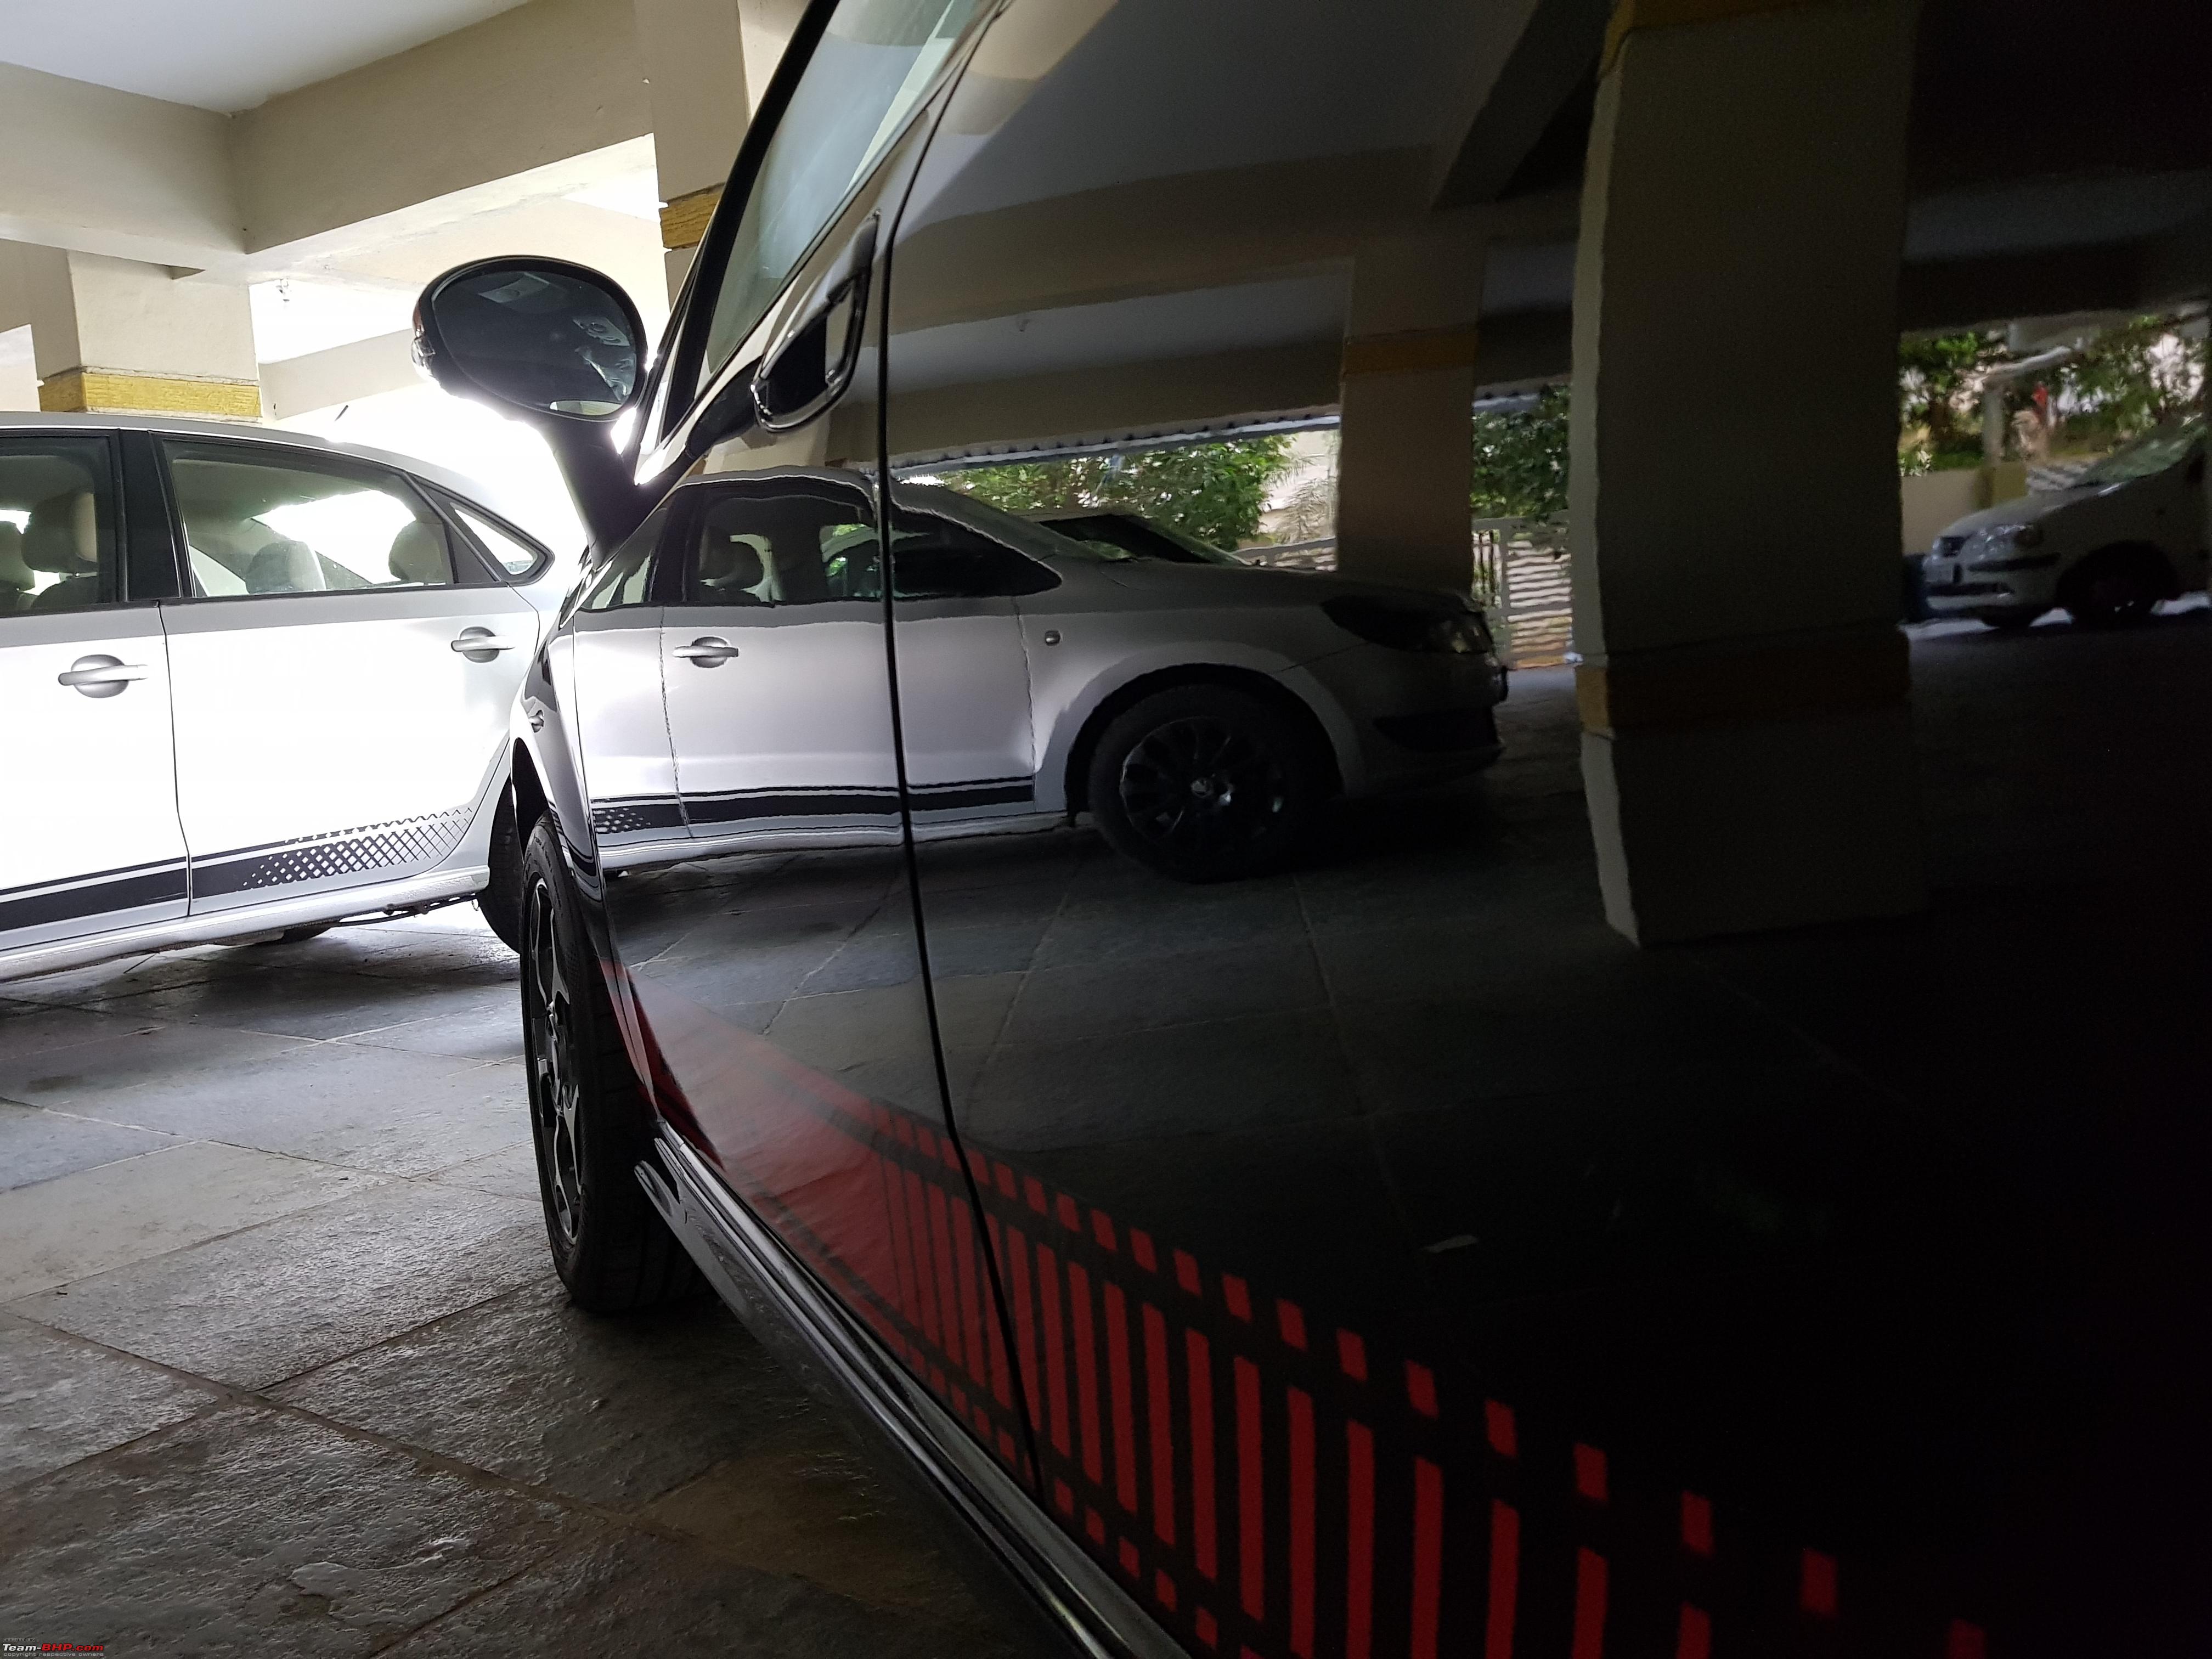
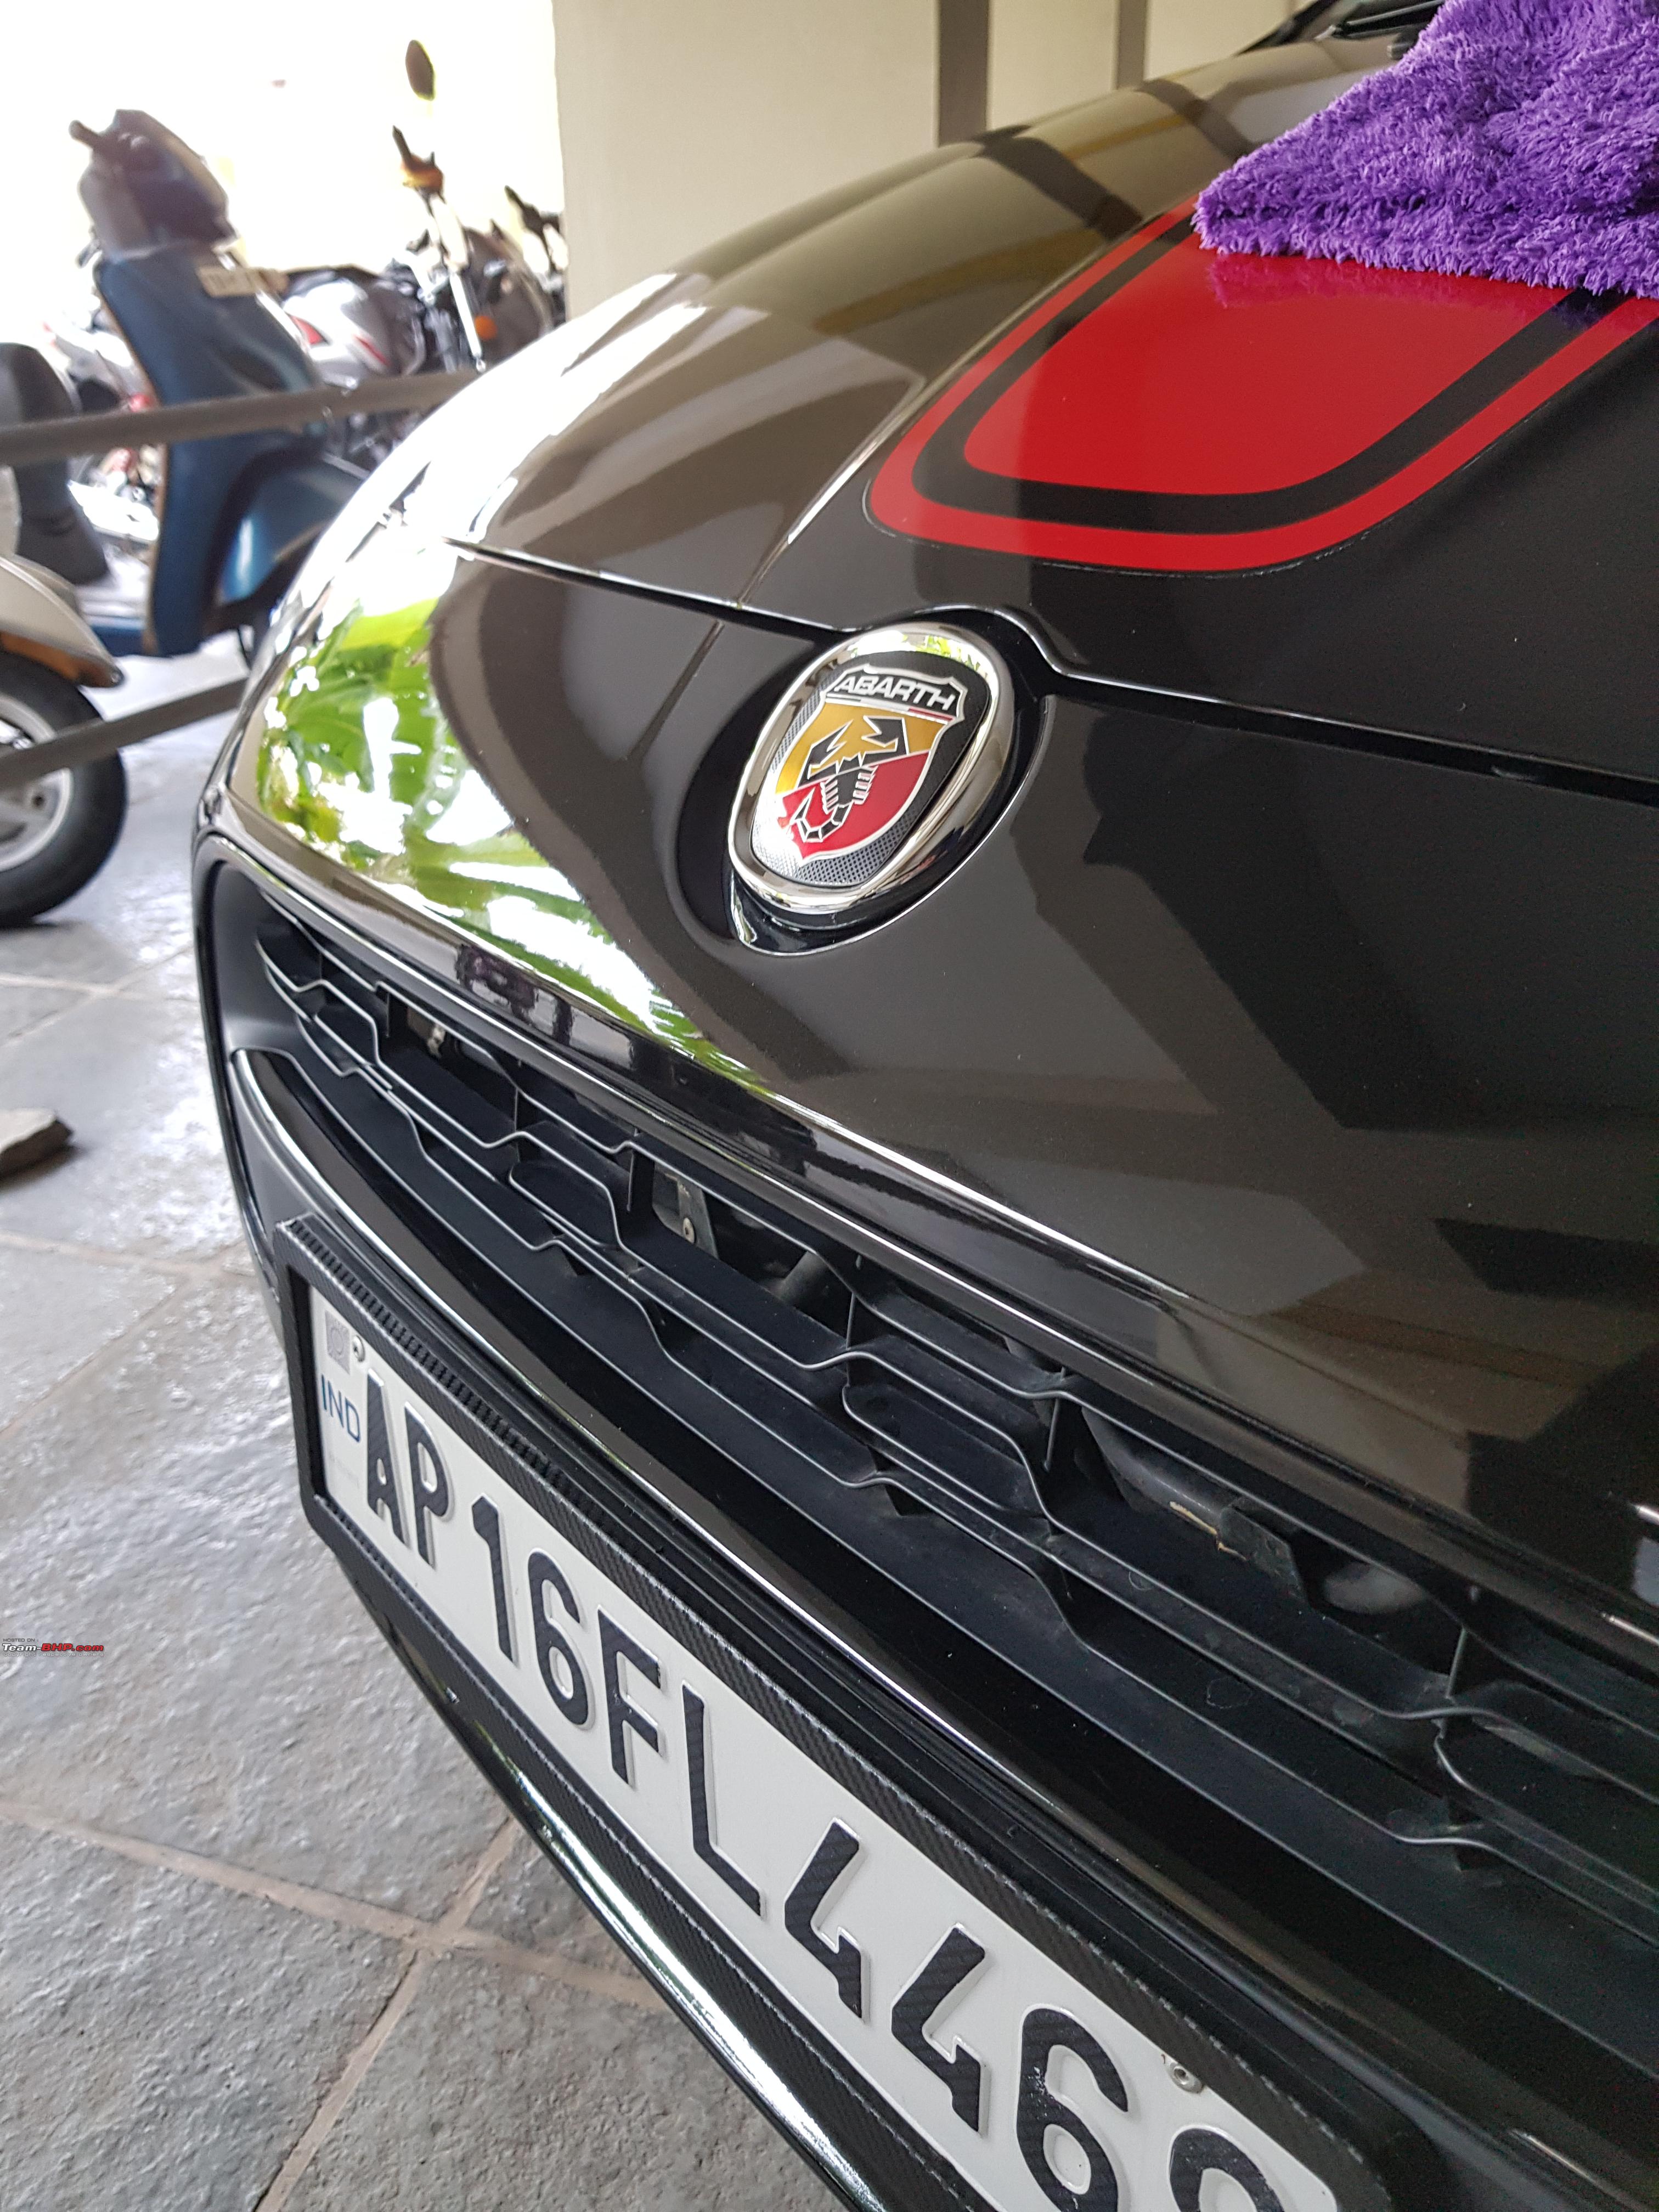
From then on I just wash my car and leave the detailing to the experts.

If not done properly it will ruin you cars colour and will leave scratches, especially on black ones. I watched countless YouTube videos on detailing as they are so addictive and transformations are always inspiring.

Now my weapon of choice are just the 3M wax paste and Tire polish, which I used regularly. 3M only on bonet, tire polish I also use on plastics to make them shine.
ramnaresh_2000 is offline   (1) Thanks
Old 12th September 2020, 16:59   #15
BHPian
 
Varun_HexaGuy's Avatar
 
Join Date: May 2017
Location: Hyderabad
Posts: 341
Thanked: 2,086 Times
Re: A weekend warrior's venture into the world of comprehensive detailing

Great job there! Looks like you went all-out with the detail though. I'd tried something similar exactly a month ago and the end results were more than satisfying.

I'd done a basic paint correction which took care of the clear coat scratches, swirls et al. I'm yet to tackle the cracked paint using block sanding. That's due and I intend to do something for it soon. Have invested on the basics for now. Need to invest on a few more things (a pressure washer is the only thing missing actually). I'd gotten the Shinemate Dual Action polisher. How's the Menzerna Heavy Cut Compound 400 performing? I've personally used the Menzerna Heavy Cut Compound 1000 along with the Menzerna 3-in-1 step polish.
Varun_HexaGuy is offline   (3) Thanks
Reply

Most Viewed


Copyright ©2000 - 2024, Team-BHP.com
Proudly powered by E2E Networks