Team-BHP > Technical Stuff
Register New Topics New Posts Top Thanked Team-BHP FAQ


Reply
  Search this Thread
118,752 views
Old 26th December 2020, 18:14   #91
BHPian
 
kunalsingh's Avatar
 
Join Date: Jun 2020
Location: New Delhi
Posts: 129
Thanked: 606 Times
Re: Restoration of my '09 Honda City "Hondu"

Quote:
Originally Posted by GTsunny View Post
And, what’s the next DIY update planned!
Hey GTsunny, thanks for writing in. Hondu has been munching up miles slowly but steadily, with most of the running being inter-city. I have also been slightly busy with the festive season and forgot to share Nakul's latest video over here (many thank to you for sharing it!)

I tanked up recently (it took much longer to run through a full tank this time as my running was low) and got an average FE of 14.1 Kmpl, which I think is quite reasonable considering the inter-city running with short trips and frequent stops.

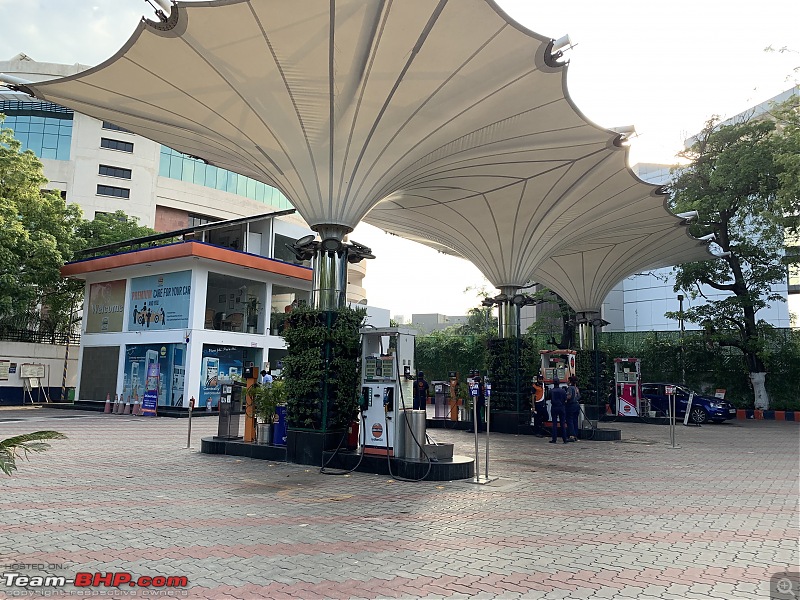
Hondu at my preferred fuel station. Indian Oil COCO pump :

Hondu: Restoring my 3rd-gen '09 Honda City-img_1608.jpg

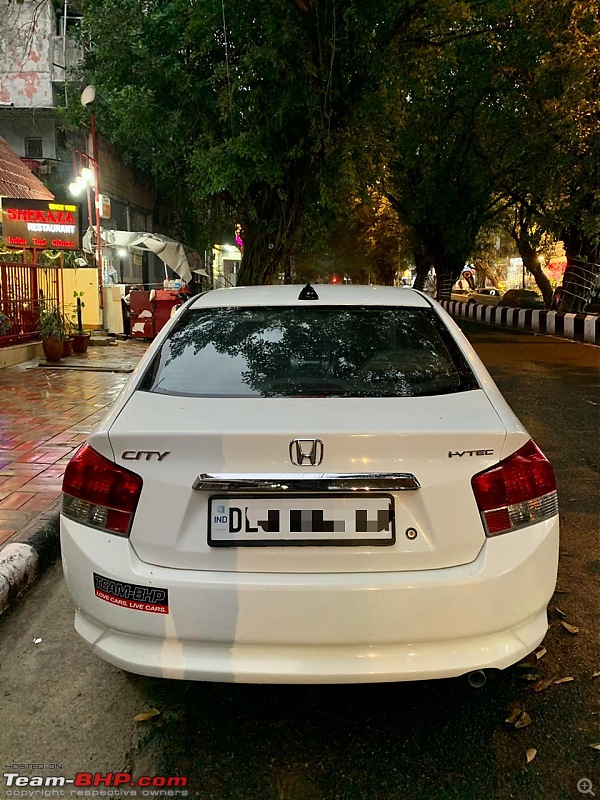
Some mods planned for Hondu are - the Shark fin Antenna (I have heard about the radio receptivity issues but I don't listen to the radio and I absolutely love the visual appeal of the antenna) and a set of Auxiliary lights (fog lamps) to help visibility during winter driving. I'm leaning towards the Hella LED bar lights. Will have to decide after making a trip to Karol Bagh market.

Will be posting an update on all the mods soon!
kunalsingh is offline   (3) Thanks
Old 20th January 2021, 23:18   #92
BHPian
 
kunalsingh's Avatar
 
Join Date: Jun 2020
Location: New Delhi
Posts: 129
Thanked: 606 Times
Re: Hondu: Restoring my 3rd-gen '09 Honda City

Update on 20th Jan, 2021:


Greetings dear members! My sincere apologies for being MIA. I've been caught with professional commitments and have not had the time to post an update.

Hondu has been treading up the miles slowly and steadily without a single complaint. I have covered just 500kms in the past month while averaging 13.3kmpl. This drop in fuel economy is due to most of the running being inter-city with stop and go traffic.

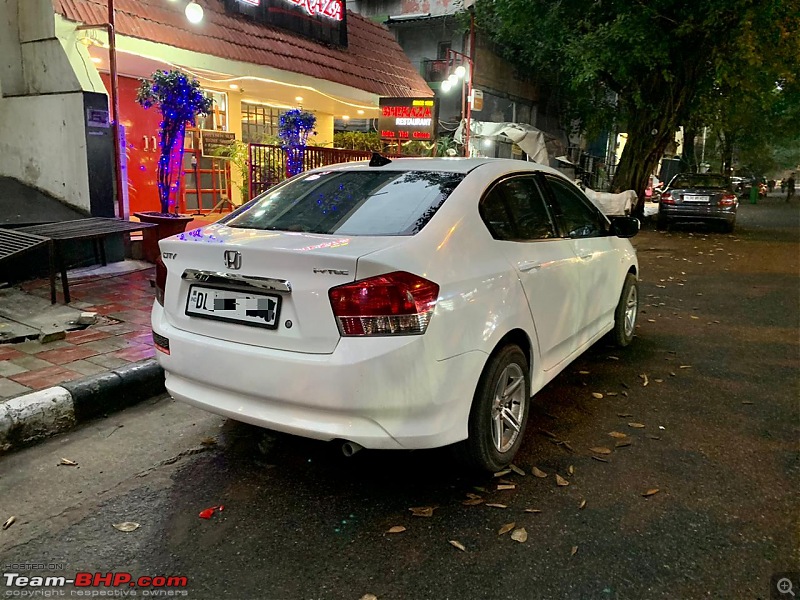
I also got around to install the Shark Fin antenna (finally!!).Got it installed from a nearby car accessory shop and it turned out to be quite a good buy. Here are some pictures -

Installation :

Hondu: Restoring my 3rd-gen '09 Honda City-img_1896.jpg

I decided to go with a black coloured antenna (against my initial plan of going for a white one) as 1. I couldn't find a white antenna that matched the colour of the car, and 2. I've seen from experience that the white coloured aftermarket shark fin antennas start fading and turn off-white/yellow very quickly (unless protected by a layer of clear coat). Plus I liked the visual contrast created by the black antenna which seemed to go well with the theme of the car.

Hondu: Restoring my 3rd-gen '09 Honda City-e72aa515ad19419883ca649a6a81475b.jpg

Hondu: Restoring my 3rd-gen '09 Honda City-cb3b90c34e004220919023fdaae3a009.jpg

The antenna is from a company called "ER". The build quality looked quite decent and certainly much better than the ones I had previously ordered from Amazon. The total cost was Rs.500/- including installment which I felt was quite reasonable.

Hondu: Restoring my 3rd-gen '09 Honda City-img_1895.jpg

Here is a picture in daylight :

Hondu: Restoring my 3rd-gen '09 Honda City-img_1919.jpg

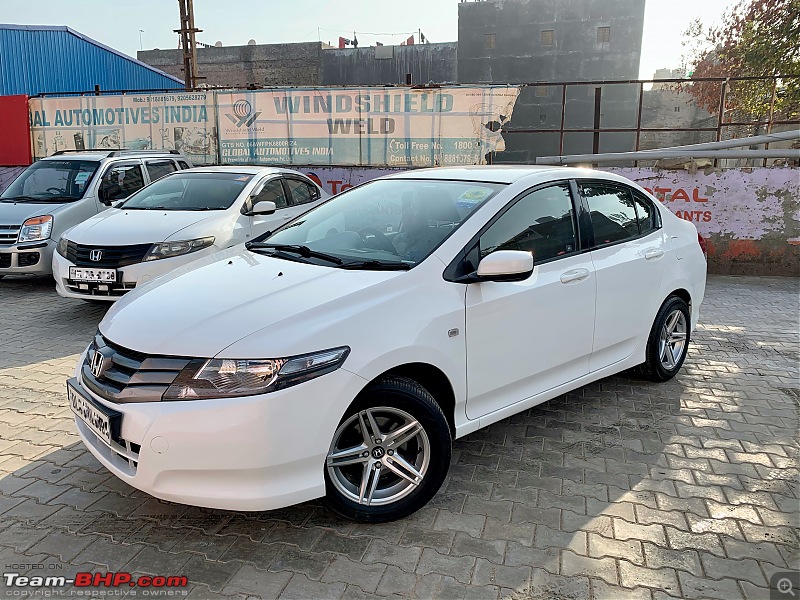
I also made a quick trip to GAI (Global Automotives India) to meet Nakul and to get his opinion on a small issue with Hondu (small issue but big enough to trigger my OCD ). Delhi had a bout of winter monsoon some time ago and during that time, I noticed the reoccurrence of my nemesis - RUST. However, I will not spoil the suspense and will post all the details about this in my next update

In the meanwhile, here are some pictures of Hondu at GAI earlier today, clicked after a nice pressure wash :

Hondu: Restoring my 3rd-gen '09 Honda City-img_2060.jpg

Hondu: Restoring my 3rd-gen '09 Honda City-img_2062.jpg

Hondu: Restoring my 3rd-gen '09 Honda City-img_2063.jpg
kunalsingh is offline   (6) Thanks
Old 1st March 2021, 17:56   #93
BHPian
 
kunalsingh's Avatar
 
Join Date: Jun 2020
Location: New Delhi
Posts: 129
Thanked: 606 Times
Re: Hondu: Restoring my 3rd-gen '09 Honda City

Update : Dealing with RUST (my archenemy)


Greetings dear members! The last few days have been very interesting to say the least and made me realise the value of the proverbial saying "A stitch in time saves nine". Read on to know about the (re)occurrence of rust on Hondu and how a seemingly excessive solution turned out to be be just the right one to resolve a problem that could end up giving me a lot of trouble in the long run.


Sometime in Jan 2021, Delhi experienced an unusual bout of winter rain, and Hondu (being parked under a tree) was subjected to its full wrath of muddy rain water mixed with leaves and twigs, bird droppings and tree saplings which ended up clogging each and very nook and crevice of the car. I wasn't doing a lot of driving in those days and Hondu was just taken out for short drives very rarely.

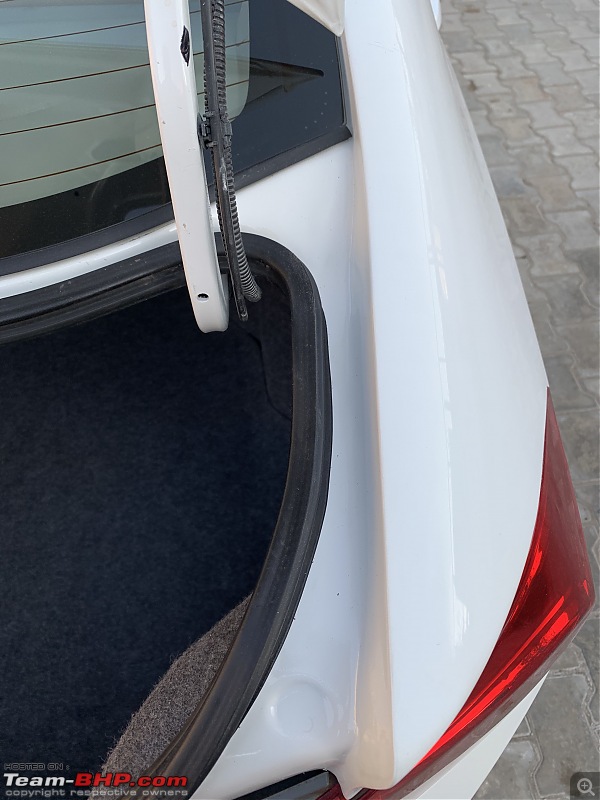
As mentioned in the previous update, I took Hondu to GAI for a pressure wash and noticed that there was a slight build up of rust below the rear glass :

Hondu: Restoring my 3rd-gen '09 Honda City-img_2096.jpg

Hondu: Restoring my 3rd-gen '09 Honda City-img_2100.jpg

The rust appeared to be quite superficial and I was told to ignore it for the time being by Mr. Manoj (Manager, GAI) but the area around the rust looked a little off to me (like when metal starts cracking and lifting) and I didn't want to take any chances with rust and wanted to get it sorted once and for all. So Nakul and I both agreed that it's better to get it sorted for complete piece of mind (he shares the same obsession for perfection like me haha).

I took the car GAI on Saturday, 20th February and we decided on this plan of action - remove the rear glass, sand out the rust and treat the affected area, give it a fresh coat of paint and re-install the glass.

Hondu at GAI :

Hondu: Restoring my 3rd-gen '09 Honda City-img_2309.jpg


In the process of removing the rear-glass :

Hondu: Restoring my 3rd-gen '09 Honda City-img_2310.jpg

Hondu: Restoring my 3rd-gen '09 Honda City-img_2311.jpg

Removing a fixed glass panel is quite a challenging job as there is always the risk of cracking the glass while doing it. We had to be extra careful not to damage the glass or scratch the paint job while cutting through the silicon sealant.

Hondu: Restoring my 3rd-gen '09 Honda City-img_2314.jpg

Hondu: Restoring my 3rd-gen '09 Honda City-img_2316.jpg

Rear windshield removed :

Hondu: Restoring my 3rd-gen '09 Honda City-img_2319.jpg


It was only after removing the rear glass that we could see the true extent of the rust. There was much more of it than we had anticipated, and we realised that a lot of corners had been cut by the Honda A.S.S. workshop while carrying out the initial repair job. It work done was so shoddy that most of the replaced metal panels were not even painted before installing neither was the glass sealant installed properly (our glass cutter literally just went through the entire length of the bonding sealant in one go without any effort).

Dust and debris trapped below the glass - many of which had been installed incorrectly (without proper welding) and that too without any painting the surfaces :


Hondu: Restoring my 3rd-gen '09 Honda City-img_2327.jpg

Hondu: Restoring my 3rd-gen '09 Honda City-img_2322.jpg

Hondu: Restoring my 3rd-gen '09 Honda City-img_2318.jpg

We also noticed that rain water had been seeping in through the sealant and was collecting at this spot :
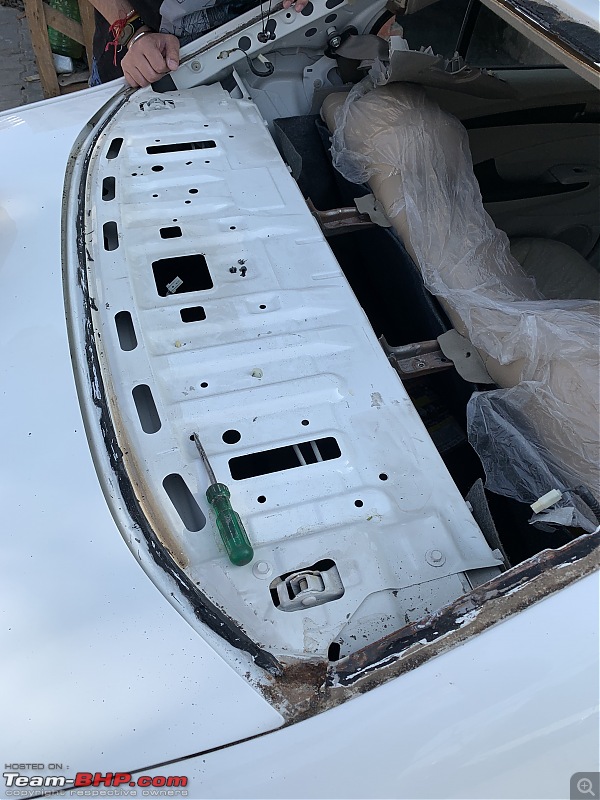
Hondu: Restoring my 3rd-gen '09 Honda City-img_2326.jpg


The sealant used was also of an inferior quality and it was very difficult to remove :

Hondu: Restoring my 3rd-gen '09 Honda City-img_2324.jpg


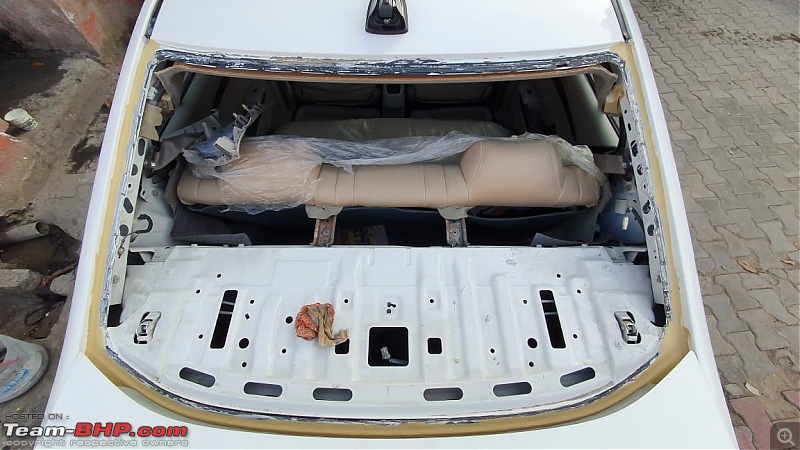
We finally got around to removing most of the leftover silicon sealant, dirt and debris and started grinding the surface to remove rust and even out the surface :

Hondu: Restoring my 3rd-gen '09 Honda City-df1ba5b928b544afb1ec2c653cbb8b66.jpg

Hondu: Restoring my 3rd-gen '09 Honda City-3a2ea43db78949ee844f6e43c1f23a01.jpg

Grinding down to bare metal; Rust removed :

Hondu: Restoring my 3rd-gen '09 Honda City-f53ac2c3386047a7863bf25631b9a3bb.jpg

We then cleaned and dried out the area properly before applying a layer of filler onto the panels. This was left for dry for a day before being sanded down to create drain channels :
Hondu: Restoring my 3rd-gen '09 Honda City-d16f87dd6ac9461281c67045c033051f.jpg

Hondu: Restoring my 3rd-gen '09 Honda City-345b047c481b48a2aa3378f2e9ed3286.jpg

Hondu: Restoring my 3rd-gen '09 Honda City-50211e2c96cc46318fe3658136f7c6d0.jpg

Hondu: Restoring my 3rd-gen '09 Honda City-4623ec05ae7a47f9a25396a4882f4822.jpg

Next day, the area was masked and painted thoroughly. Here some shots of the during and after the paint process :

Hondu: Restoring my 3rd-gen '09 Honda City-d1415c83ba6240dba1bc426d4dd20bfb.jpg

Hondu: Restoring my 3rd-gen '09 Honda City-4a0ce8d41f51441a96bbae76410b71c5.jpg

Hondu: Restoring my 3rd-gen '09 Honda City-883e9511668745d98e563beed8c52ec7.jpg

Hondu: Restoring my 3rd-gen '09 Honda City-31870c4c71c74ed39a5edfab0581f9a9.jpg

Hondu: Restoring my 3rd-gen '09 Honda City-c13a24626b0b4a8383a940858e9e1cb2.jpg

The paint was then left to dry for the rest of the day after which the rear glass was re-installed over a fresh tube of sealant and left to dry throughout the night.
The car was parked inside the garage and then washed and vacuumed the next morning before being handed back.


Some shots of Hondu after the work was completed :

Hondu: Restoring my 3rd-gen '09 Honda City-img_2375.jpg

Hondu: Restoring my 3rd-gen '09 Honda City-img_2376.jpg

Hondu: Restoring my 3rd-gen '09 Honda City-img_2377.jpg

Looking as good as ever :

Hondu: Restoring my 3rd-gen '09 Honda City-img_2373.jpg

Hondu: Restoring my 3rd-gen '09 Honda City-img_2372.jpg

The whole process took two full days. GAI took it's time with the job and didn't rush through any of it and to make sure that no corners were cut. I appreciate their attention to detail and gave them full flexibility with the timeline. Overall, I was impressed by the result and happy to have Hondu back in top condition once again!

Total cost was Rs.2500/- which I feel was appropriate for the amount of work put in and the cost of materials involved in the job.

I also have a put in a word about Nakul and the people at GAI at this point - I feel lucky to have finally found a garage with people who admire and appreciate the love and passion I have for my car. I also admire their honesty and hard working attitude and their simple and straightforward approach towards their work.
Wish these so called "authorised service centres" and their management take a page out of their book and actually focus more on helping people rather than always trying to fleece them. Let your work speak for itself.

Last edited by kunalsingh : 1st March 2021 at 18:00.
kunalsingh is offline   (20) Thanks
Old 11th March 2021, 23:42   #94
BHPian
 
ibisbrew's Avatar
 
Join Date: Dec 2020
Location: Manipal
Posts: 56
Thanked: 170 Times
Re: Hondu: Restoring my 3rd-gen '09 Honda City

I have been following your thread for a while now. I must say, you've done a fine job of documenting the restoration. In fact, I recently purchased a very well kept, pre-owned Honda City (2012) and your thread helped me be on the lookout for the common trouble areas. So thank you for that.
ibisbrew is offline   (3) Thanks
Old 13th March 2021, 21:29   #95
BHPian
 
kunalsingh's Avatar
 
Join Date: Jun 2020
Location: New Delhi
Posts: 129
Thanked: 606 Times
Re: Hondu: Restoring my 3rd-gen '09 Honda City

Quote:
Originally Posted by ibisbrew View Post
I have been following your thread for a while now. I must say, you've done a fine job of documenting the restoration. In fact, I recently purchased a very well kept, pre-owned Honda City (2012) and your thread helped me be on the lookout for the common trouble areas. So thank you for that.
Hello ibisbrew, thank you for the kind words and many congratulations on your purchase (please do share some pictures of your car)! I feel happy knowing that this thread could be of use to you
kunalsingh is offline  
Old 19th April 2021, 00:30   #96
BHPian
 
ibisbrew's Avatar
 
Join Date: Dec 2020
Location: Manipal
Posts: 56
Thanked: 170 Times
Re: Hondu: Restoring my 3rd-gen '09 Honda City

Quote:
Originally Posted by kunalsingh View Post
Hello ibisbrew, thank you for the kind words and many congratulations on your purchase (please do share some pictures of your car)! I feel happy knowing that this thread could be of use to you
I have been meaning to reply for so long, but I had no pictures in hand, and then my car was in shipping. Finally got it today after a whole shipping debacle lasting 18 days.

Adding two hurried pictures. Hoping to make an ownership thread soon.

Thanks to you again for this great thread.
Attached Thumbnails
Hondu: Restoring my 3rd-gen '09 Honda City-inkedimg_2752_li.jpg  

Hondu: Restoring my 3rd-gen '09 Honda City-inkedimg_2756_li.jpg  

ibisbrew is offline   (4) Thanks
Old 12th May 2021, 09:43   #97
BHPian
 
mohitchalla's Avatar
 
Join Date: Jan 2020
Location: Tokyo/Ahmedabad
Posts: 121
Thanked: 643 Times
Re: Hondu: Restoring my 3rd-gen '09 Honda City

I have followed your thread since the beginning and also watched the restoration videos on Nakul Khanna's YouTube channel. The quality of work is fantastic! I thoroughly enjoyed watching the videos and reading this thread.

I have owned a 2010 Honda City 1.5V MT for 10 years and I still miss that car. The reason for selling was that I had 2 cars and I needed only one. So I decided it was financially a good decision to let one of them go. I really wish I could keep both. If I still had my City, I would have restored it thoroughly, just like you.
mohitchalla is offline   (2) Thanks
Old 3rd July 2021, 22:27   #98
BHPian
 
kunalsingh's Avatar
 
Join Date: Jun 2020
Location: New Delhi
Posts: 129
Thanked: 606 Times
Re: Hondu: Restoring my 3rd-gen '09 Honda City

Quote:
Originally Posted by ibisbrew View Post
I have been meaning to reply for so long, but I had no pictures in hand, and then my car was in shipping. Finally got it today after a whole shipping debacle lasting 18 days.

Adding two hurried pictures. Hoping to make an ownership thread soon.

Thanks to you again for this great thread.
Dear ibisbrew, thanks for sharing pictures of your Honda City. It looks to be in fantastic condition and the silver shade really complements the car. Wishing you many miles of happy driving! Do reach out if you need any help during your ownership experience.

Quote:
Originally Posted by mohitchalla View Post
I have followed your thread since the beginning and also watched the restoration videos on Nakul Khanna's YouTube channel. The quality of work is fantastic! I thoroughly enjoyed watching the videos and reading this thread.

I have owned a 2010 Honda City 1.5V MT for 10 years and I still miss that car. The reason for selling was that I had 2 cars and I needed only one. So I decided it was financially a good decision to let one of them go. I really wish I could keep both. If I still had my City, I would have restored it thoroughly, just like you.

Thank you for the kind words, Mohit! I can understand the kind of sentiments you had attached to your City as I have similar feelings for mine. However, we sometimes have to listen to the head over the heart. I hope life gives you plenty of opportunities to enjoy many more wonderful cars

Last edited by kunalsingh : 3rd July 2021 at 22:34.
kunalsingh is offline   (2) Thanks
Old 1st August 2021, 13:00   #99
BHPian
 
Join Date: Dec 2019
Location: Bengaluru
Posts: 947
Thanked: 3,503 Times
Re: Hondu: Restoring my 3rd-gen '09 Honda City

Does anyone know the fuse location for the interior light in the 3rd gen Honda city? The owner s manual doesn't seem to mention it..which is impossible but I can't seem to find it.

Note: trying to find it for the dashcam.
JithinR is offline  
Old 4th August 2021, 13:54   #100
BHPian
 
kunalsingh's Avatar
 
Join Date: Jun 2020
Location: New Delhi
Posts: 129
Thanked: 606 Times
Re: Hondu: Restoring my 3rd-gen '09 Honda City

A Long Due Update :

Greetings dear members, my apologies for being MIA (missing in action)! The past 3-4 months have been quite eventful with a lot of personal and professional ups and downs, and life has only just begun to get back to normal now *touchwood*.

Hondu has been perfuming flawlessly and did not given a single complaint even during the second wave lockdown where I was bound to leave it parked for weeks at end. I have barely covered a few thousand kilometres since my last post but I thought I should share some updates that have happened along the way.

Brake noise & Disk Rotor skimming

Sometime just before the second wave, the front brakes started making a soft (but very annoying) screeching sound while being applied at crawling speeds. This was surprising because I had just replaced the pads with genuine Honda replacements in September last year and I had not expected the new Pads to put grooves into the Disks (As per my understanding, the screeching noise occurs due to lines/grooves on the Disk Rotors).

Hondu: Restoring my 3rd-gen '09 Honda City-img_2639.jpg

Hondu: Restoring my 3rd-gen '09 Honda City-img_2640.jpg

I was near GAI so thought I'll get the brakes checked. The diagnosis was as expected, there were sharp grooves on the front Disks which were accentuated by the new brake pads (the pads had also taken the shape of the lining/grooves). It was not a mechanical issue and we initially took out the pads and sanded them down to make the surface even. We then cleaned out both the front and rear brakes using compressed air.

Hondu: Restoring my 3rd-gen '09 Honda City-img_2641.jpg

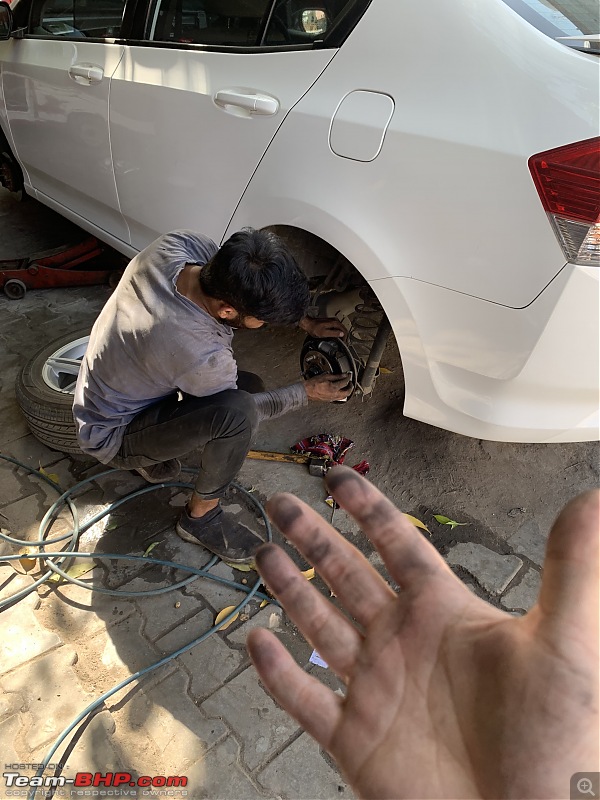
Getting my hands dirty!

Hondu: Restoring my 3rd-gen '09 Honda City-img_2644.jpg

We tried this solution but the noise came back after a few days of driving. So we figured the best way to go about it would be to get the disk Rotors skimmed to eliminate the noise completely.

We also sanded down the Brake Pads to an even level (as they had seen under 2000km of use) and installed them back. The Rotors also had plenty of thickness in them as they had never been skimmed prior to this. Sharing some before and after pictures.

In the process :

Hondu: Restoring my 3rd-gen '09 Honda City-img_2739.jpg


You can notice the deep grooves in the Disk Rotors :

Hondu: Restoring my 3rd-gen '09 Honda City-img_2741.jpg

Hondu: Restoring my 3rd-gen '09 Honda City-img_2744.jpg


And some after shots :

Hondu: Restoring my 3rd-gen '09 Honda City-img_2745.jpg

Hondu: Restoring my 3rd-gen '09 Honda City-img_2746.jpg


This solution was successful in eliminating the problem and the Brakes have been performing without any noises since then!


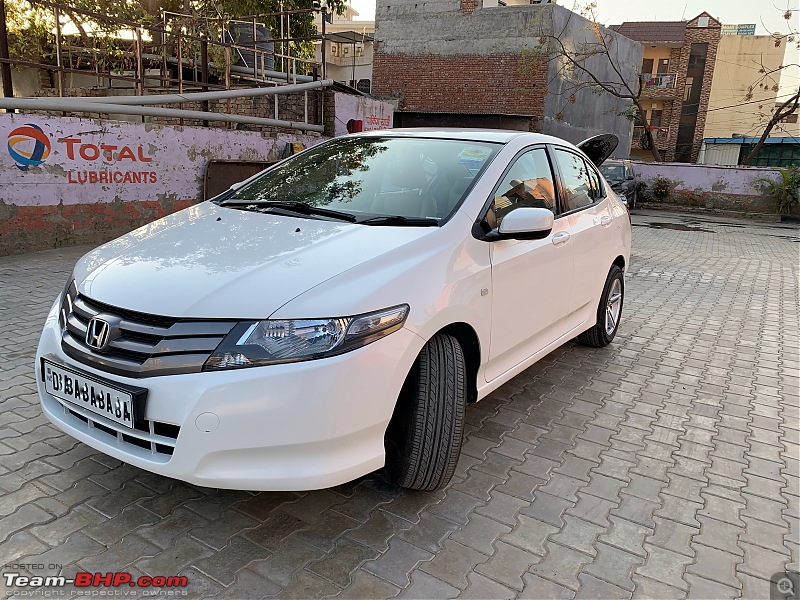
And an update on the Odometer - Hondu is nearing the 41,000km mark slowly but steadily. This is from a recent tank-up from the IOC COCO pump next to the Indian Oil Headquarters :
Hondu: Restoring my 3rd-gen '09 Honda City-img_5163.jpg

Topping up the air (I fill 32/30) :

Hondu: Restoring my 3rd-gen '09 Honda City-img_5164.jpg


Indian Oil HQ COCO Pump :

Hondu: Restoring my 3rd-gen '09 Honda City-img_5166.jpg


Until next time!
kunalsingh is offline   (5) Thanks
Old 10th November 2021, 20:30   #101
BHPian
 
Join Date: Apr 2019
Location: Kuzhithurai
Posts: 36
Thanked: 78 Times

Note from Support: Please DO NOT quote large posts entirely. Please quote only relevant portions of large post. Thanks!


Quote:
Originally Posted by kunalsingh View Post
Next Update - Mods and accessories (and a swanky new set of wheels from BK Tyres)
Hey Kunal,
That was really awesome. Why don't you replace the front bumper with the full option one with the fog lamps, that would really look beautiful. I live in Bahrain, and my father got a silver Honda City in 2009 when I was in the first grade. We had it until 2016. I loved it soo much and this very car made me a car enthusiast. And one more thing, the rear trunk 'CITY' and 'i-vtec' letters on your car are actually a little off placed to down than OEM spec, and I know this car so well that for me it kind of a eye sore .
These pictures are of young me and our car on Bahrain National Day in 2012. And yes, those are OEM alloy wheels that the Honda City got in the Middle East. Aren't they Extremely beautiful?

My Honda City had acquired around 5 major accidents and many uncountable ones in the time we had it and the last time we saw it, it had acquired 2,20,000 kms, but it was still running strong and perfectly, except for the rear window motor and some issues with the remote control.
Legend says that it still running on Bahrain's roads with over 3,00,000 kms.
In its lifetime, I remember some of its problems (I was too young to remember everything) it once needed it's washer lines replaced. Its fuel tank once somehow started leaked badly due to the Arab world's summer heat. Below is a picture of some souvenirs that I kept from the car, the old remote shell and spare keys, and the rear logo that I got to keep when the car met with one of its major accidents in the rear.

Hondu: Restoring my 3rd-gen '09 Honda City-10423889_774309742652736_699946616118539387_n.jpg

Hondu: Restoring my 3rd-gen '09 Honda City-img_20211110_204443.jpg

Name:  FB_IMG_1636553103013.jpg
Views: 986
Size:  64.4 KB

Last edited by aah78 : 10th November 2021 at 23:56. Reason: Pictures inserted in-line. See note. ;)
Panneer Selven is offline   (4) Thanks
Old 24th November 2021, 11:36   #102
BHPian
 
Join Date: Aug 2012
Location: Gurgaon
Posts: 428
Thanked: 464 Times
Re: Restoration of my '09 Honda City "Hondu"

Quote:
Originally Posted by kunalsingh View Post
Next up were Alloy wheels. The alloys had to be stock size, i.e. 15", 100x4 PCD and between 6.0-6.5J since this was basically just a feel-good upgrade.

Total cost came to Rs.17,500/- which included installation, Wheel Balancing and print out of custom Honda labelled Hub Caps.

Overall, it was a really good experience dealing with BK Tyres. Mr. Jitesh was a thorough gentleman and helped me get a good deal on the alloys. He's also a proper auto-enthusiast and follows the forum actively!

And to wrap up this section - presenting some shots of Hondu with it's swanky new set of wheels
Hey Kunal hope you and your car are doing well!
How are these wheels holding up? Did you have to install any hubrings or was it a direct fit?
Also, do you face any sort of wobbling at high speeds?
rayjaycleoful is offline   (1) Thanks
Old 24th November 2021, 23:36   #103
BHPian
 
kunalsingh's Avatar
 
Join Date: Jun 2020
Location: New Delhi
Posts: 129
Thanked: 606 Times
Re: Restoration of my '09 Honda City "Hondu"

Quote:
Originally Posted by rayjaycleoful View Post
Hey Kunal hope you and your car are doing well!
How are these wheels holding up? Did you have to install any hubrings or was it a direct fit?
Also, do you face any sort of wobbling at high speeds?
Hey rayjaycleoful, the alloy wheels have been holding up extremely well! In fact, I have not even had a single puncture since I got them last year

No need for hub rings since these were a direct fit (same as the OEM spec) and I have not faced any issues WRT wobbling at higher speeds. If anything, the car has become more stable at highway speeds. Regards,
kunalsingh is offline   (1) Thanks
Old 21st December 2021, 13:35   #104
Newbie
 
Join Date: Nov 2016
Location: BHUBANESWAR
Posts: 19
Thanked: 5 Times
Re: Restoration of my '09 Honda City "Hondu"

Dear Kunal,
Since you have installed wider 195mm width tyres against the OEM size of 175mm width tyres, are you experiencing heavy steering than with the earlier 175mm width tyres?
Wheel Spin is offline  
Old 21st April 2023, 12:53   #105
BHPian
 
ManasN95's Avatar
 
Join Date: May 2020
Location: Thane
Posts: 158
Thanked: 352 Times
Re: Hondu: Restoring my 3rd-gen '09 Honda City

Hi, it's been a long time since the last update! How are you and your Hondu? Any updates for us?

I own a 2012 Honda City, and I have been facing major rust issues on all four doors as well. (I live in Mumbai.)

Assessing options whether the doors can be salvaged or I would need to hunt for 2 pairs of good second hand doors in the markets.
ManasN95 is offline  
Reply

Most Viewed


Copyright ©2000 - 2024, Team-BHP.com
Proudly powered by E2E Networks