Team-BHP > Technical Stuff
Register New Topics New Posts Top Thanked Team-BHP FAQ


Reply
  Search this Thread
8,967 views
Old 17th June 2010, 21:33   #16
BHPian
 
Join Date: Sep 2007
Location: mumbai
Posts: 220
Thanked: 113 Times

Quote:
Originally Posted by mb_jg View Post
I removed the entire HL assembly. It was not easy, but I had a lot of time to kill on a specific Sunday. It's better to get it done at one go instead of trying to fix it over & over again.
But trust me, this sealant thing has worked. I managed to take my car through a veryyyyy big puddle the other day when it rained like hell in Pune, & I did not notice any moisture the next morning.

Hmm
I think i will do that by next weekend. I also have my doubts about this temporary fix working with heavy rains
Thanks again for all the help
rikhav is offline  
Old 18th June 2010, 15:40   #17
BHPian
 
s3va's Avatar
 
Join Date: Jun 2009
Location: Dubai
Posts: 646
Thanked: 5 Times

Yahoo! Groups

got this from PUG
s3va is offline  
Old 18th June 2010, 15:43   #18
Senior - BHPian
 
planet_rocker's Avatar
 
Join Date: Sep 2006
Location: Bong-land
Posts: 2,323
Thanked: 426 Times

@ S3va - it will be great if you can paste the contents of the article here. the link / website is blocked at work.
planet_rocker is offline  
Old 19th June 2010, 07:57   #19
BHPian
 
Join Date: Sep 2007
Location: mumbai
Posts: 220
Thanked: 113 Times

Hi Siva, Manish and Planet_rocker
First of all let me tell you that there was moisture again in my car's healight within a few hours of drying it up with the help of a hair dryer. So one thing is for sure that i will need to remove it and then apply the sealant.
This is what is written on PUG about how to go about with the process

"If you are a bit mechanically inclined and know what a screw is then
for all those who have a headlight moisture problem I would suggest
you first get yourself a silicone sealent before your weekend. This
sealent is the one used to seal fish tanks and flush fitted rear glass
of the Palio and also to stop any rain inlet leaks. With spanners and
screw drivers remove your headlight assembly. If you are not well
versed with it then ask your neighbour hood machanic to remove the
same on a saturday evening. Once you have the unit in you hand clean
it thouroughly with a mildly wet cloth which you have squeezed
thoroughly. Next remove the bulb after carefully removing the rubber
seal which prevents moisture entering the light assembly inthe first
place. Inspect for any cracks in this rubber seal as any cracks inthis
rubber piece will put tonought your whole days wait. I need not tell
you that you will ruin you halogen bulb if you touch the glass of the
bulb with your bear hands. always use clean cloth and and handle it
with the metal tabs only. Clean the edge that joins the rear plastic
housing with the front clear glass. Next thoroughly seal all the
joints with copious quantity of the silicone sealant. Wipe away any
excess with a flat ruler such that it does not spread onto the clear
perspex glass. Using cloth will invariably spread the sealent onto
unintended areas.

A word of warning here that even a miniscule amount of the silicone
sealent will irrepairably damage your catalytic converter and also
your oxygen sensor so after you have used the sealent never ever think
of using it for any sealing which even remotely might result in its
reaching your fuel supply or water supply.

"After sealing the edges leave it to dry the clear plastic facing the
sun from 10 am to 12 am on a sunny day with the bulb and the rubber
rear seal removed. From 12 noon to evening place the connector end
upwards such that the clear glass is laid face down on piece of cloth.
Your concrete terrace has silica particles which can scratch the clear
plastic easily. With rains round the corner you better do it this sunday.
It will be extremely warm to the touch by evening and should have
dried away all the moisture. Before it cools down put the bulb back in
and also the rubber seal at the back and put the whole assembly back
by evening after it cools down. You would have got rid of the moisture
problem for good if you have painstakingly sealed all the air inlets
joints.
Bye and wear your seatbelts. You would have noticed even schummi
wears them in a much safer cockpit than what our palios provide us."


I always thought that one also needs to remove the bumper to remove the healights but I think thats not the case. Manish, can you confirm this please
Also is it required to open the headlight assembly to get rid of the water which may be accumulated inside it?
rikhav is offline  
Old 21st June 2010, 15:11   #20
BHPian
 
Speed Pujari's Avatar
 
Join Date: Nov 2007
Location: Bangalore
Posts: 429
Thanked: 396 Times

This technique did not work for me at least. I bought the GE sealant and applied it on the joints. Before that I cleared the moisture inside the HL which again a very clumsy job.
Dont know wat is the proper soln.
Speed Pujari is offline  
Old 21st June 2010, 15:48   #21
Senior - BHPian
 
clevermax's Avatar
 
Join Date: Jun 2006
Location: Tvm/Amsterdam
Posts: 2,086
Thanked: 2,639 Times

You have to use some silicone sealant and seal the assembly properly. No mechanic would do that, at least no-one I asked ever had this idea in mind. but it works. If you check PUG, there is a neat long write-up on how to DIY this. (it is written by Dr. Pullockaran who is also a bhpian)

Quote:
Originally Posted by Speed Pujari View Post
This technique did not work for me at least. I bought the GE sealant and applied it on the joints. Before that I cleared the moisture inside the HL which again a very clumsy job.
Dont know wat is the proper soln.
But did you dismantle the headlamps and did this as suggested by dr. pullockaran? No right

EDIT: Aha! the DIY write-up is copied and pasted above!

Last edited by clevermax : 21st June 2010 at 15:50.
clevermax is offline  
Old 21st June 2010, 16:08   #22
BHPian
 
Join Date: Feb 2006
Location: Pune
Posts: 485
Thanked: 124 Times

Rikhav, you have to remove the bumper to get clear access to the entire HL unit. I dismantled the entire HL unit very leisurely, dry it up & then apply the sealant. I did this over a long weekend, so yes, it takes a ton of time & patience to do it right.
A quick fix won't do.
I wish I had taken pics of the process!

Last edited by mb_jg : 21st June 2010 at 16:11.
mb_jg is offline  
Old 21st June 2010, 16:29   #23
Senior - BHPian
 
clevermax's Avatar
 
Join Date: Jun 2006
Location: Tvm/Amsterdam
Posts: 2,086
Thanked: 2,639 Times

Quote:
Originally Posted by mb_jg View Post
Rikhav, you have to remove the bumper to get clear access to the entire HL unit. I dismantled the entire HL unit very leisurely, dry it up & then apply the sealant. I did this over a long weekend, so yes, it takes a ton of time & patience to do it right.
A quick fix won't do.
I wish I had taken pics of the process!
I tried this once, but when I realized that I have to remove the bumper to dismantle the headlamp easily, I gave up
clevermax is offline  
Old 21st June 2010, 16:42   #24
Senior - BHPian
 
jacs's Avatar
 
Join Date: Nov 2007
Location: Kochi
Posts: 1,499
Thanked: 1,047 Times

Quote:
Originally Posted by clevermax View Post
I tried this once, but when I realized that I have to remove the bumper to dismantle the headlamp easily, I gave up
+1 clever. I did face the same thing, fun is that this happened when I was in Kerala for vacation (in 2007) and no local garage wallas knew how to take off the headlights . Then I had to get it done from a Skoda mechanic though my friend.

It really depends on weather, in humid conditions its pathetic. My lights lost its clarity and brightness due to this repeated humid and dry season changes. Its better to fix on day one.

Last edited by jacs : 21st June 2010 at 16:43.
jacs is offline  
Old 21st June 2010, 21:53   #25
Senior - BHPian
 
clevermax's Avatar
 
Join Date: Jun 2006
Location: Tvm/Amsterdam
Posts: 2,086
Thanked: 2,639 Times

Yes, and if you're lucky, your headlamps will not have this problem. One headlamp in my car had this problem after Concorde guys changed the bulb. I had to eventually buy a new headlamp. But the other headlamp as well as the changed one don't have this problem at all, even in humid Kerala weather conditions. 4 years and the headlamps look like new.

Fiat Petra 1.6 Issues-paliofront.jpg

Last edited by clevermax : 21st June 2010 at 22:05.
clevermax is offline  
Old 22nd June 2010, 07:43   #26
BHPian
 
Join Date: Sep 2007
Location: mumbai
Posts: 220
Thanked: 113 Times

Hi Manish, Jacs & Clevermax,
Thanks for the inputs

@ manish - Time is the only reason I am having double mind to do it or not. Also, I cant find one guy who will be ready to do it very carefully and without doing any kind of haste.
So until I find someone who can do it properly I will not take any chances because if not done properly it will only lead bigger issues,

Even in my car before the rains only the right side HL had mositure in it. But now both have the same problem. In my case the HL assembly was removed to work on the radiator. If i remember well, the issue started after that only
rikhav is offline  
Old 27th June 2010, 09:08   #27
Senior - BHPian
 
planet_rocker's Avatar
 
Join Date: Sep 2006
Location: Bong-land
Posts: 2,323
Thanked: 426 Times

While I was giving 'gyaan' for free, someone was playing games at the back of my head.

Last evening, something strange caught my eye:

Fiat Petra 1.6 Issues-photo0441.jpg

But hey this one looks OK:

Fiat Petra 1.6 Issues-photo0442.jpg

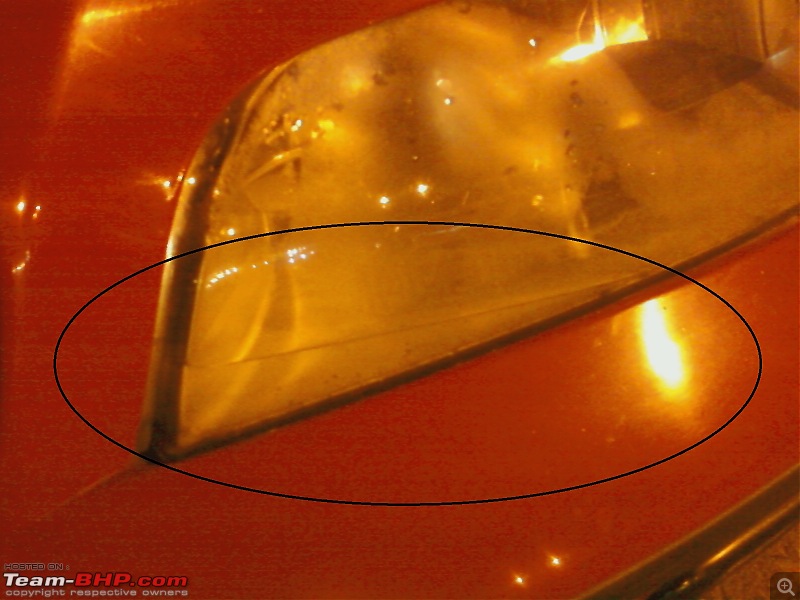
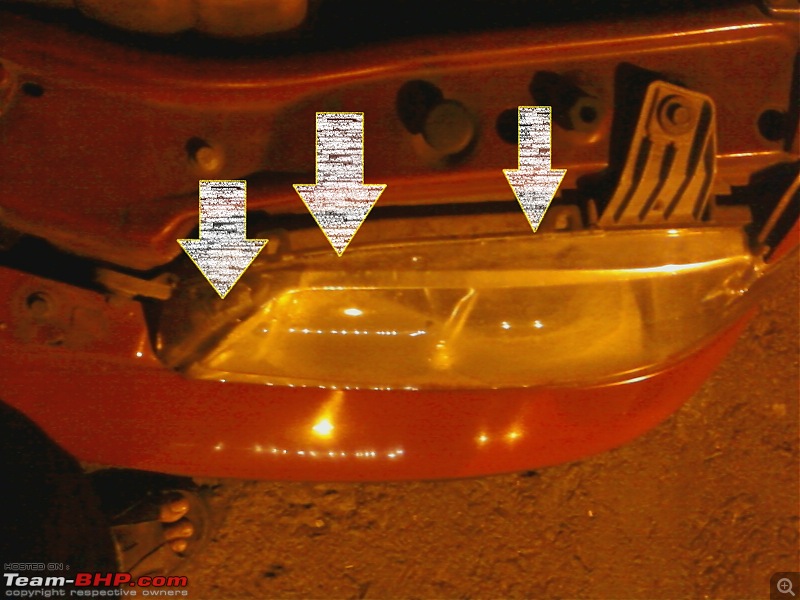
hmmm! looks bad, very bad - this is not foggy headlamp! this is a case of flooded headlamp:

Fiat Petra 1.6 Issues-photo0443.jpg

Carefull inspection reveals the source of water / moisture in the cluster:

Fiat Petra 1.6 Issues-photo0444.jpg

Fiat Petra 1.6 Issues-photo0445.jpg

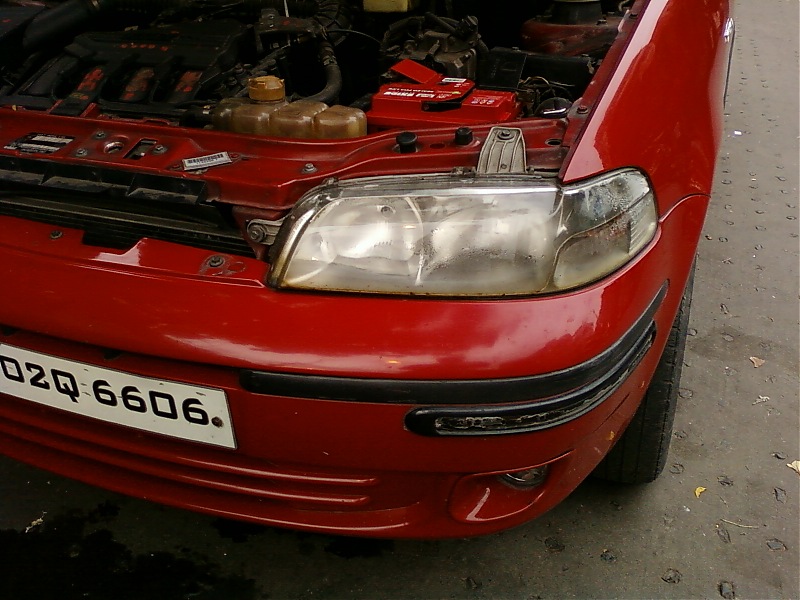
Day light Pics:

Fiat Petra 1.6 Issues-photo0446.jpg

This doesn't attract moisture even with this temporary bandaid

Fiat Petra 1.6 Issues-photo0448.jpg

PS: we went for a drive of 28kms last night - when i parked the car - there was no water in the headlamp - today morning - it was back.

Last edited by planet_rocker : 27th June 2010 at 09:13.
planet_rocker is offline  
Old 27th June 2010, 22:45   #28
BHPian
 
Join Date: Sep 2007
Location: mumbai
Posts: 220
Thanked: 113 Times

Hi Planet_rocker

Same thing happens with my car. If the car is driven with the headlights on the moisture disappears. But after few hours its back
As of now I have not got the problem fixed as i am unable to find the right person.
rikhav is offline  
Old 28th June 2010, 11:15   #29
Senior - BHPian
 
planet_rocker's Avatar
 
Join Date: Sep 2006
Location: Bong-land
Posts: 2,323
Thanked: 426 Times
DIY - Get rid of Water from Headlamp Cluster - PALIO

Quote:
Originally Posted by rikhav View Post
Same thing happens with my car. If the car is driven with the headlights on the moisture disappears. But after few hours its back.
As of now I have not got the problem fixed as i am unable to find the right person.
Well, i did this - an unprofessional method, but worked for me for the time being.

1. The Flooded Headlamp Cluster:

Fiat Petra 1.6 Issues-photo0449.jpg

2. Unlock the back cover of the High Beam [i parked the car in an incline so that the water accumulates near the high beam part and pull out the bulb (careful not to touch the bulb glass)] - the black back cover of the high beam & water inside the high beam part:

Fiat Petra 1.6 Issues-photo0450.jpg

Fiat Petra 1.6 Issues-photo0451.jpg

3. I used a simple cotton cloth to soak the water inside the cluster.

Fiat Petra 1.6 Issues-photo0452.jpg

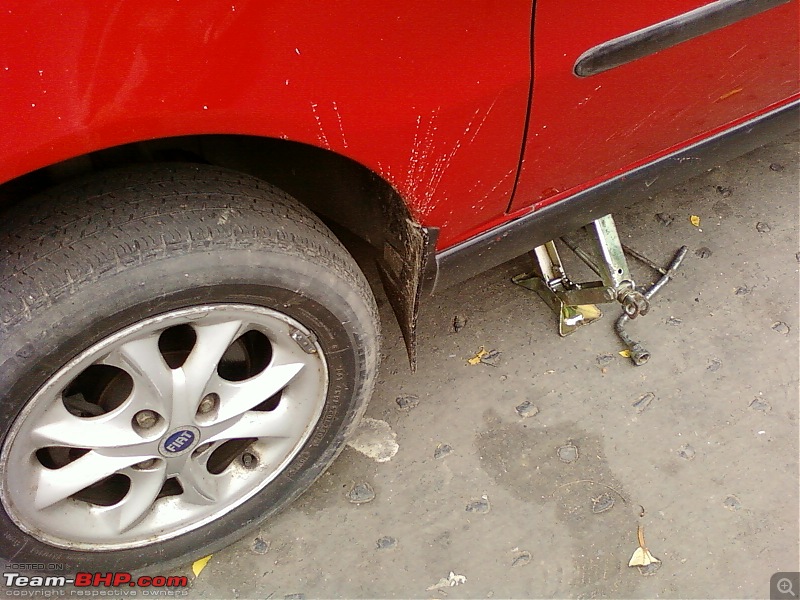
4. Jacked up the car to increase the height so as to drain all water to a corner. See the amount of water i sqeezed out. it seemed as if someone poured 2 glasses of water inside.

Fiat Petra 1.6 Issues-photo0454.jpg

Fiat Petra 1.6 Issues-photo0453.jpg

5. some pics during and after almost all water was soaked

Fiat Petra 1.6 Issues-photo0455.jpg

Fiat Petra 1.6 Issues-photo0456.jpg

Fiat Petra 1.6 Issues-photo0457.jpg

Fiat Petra 1.6 Issues-photo0458.jpg

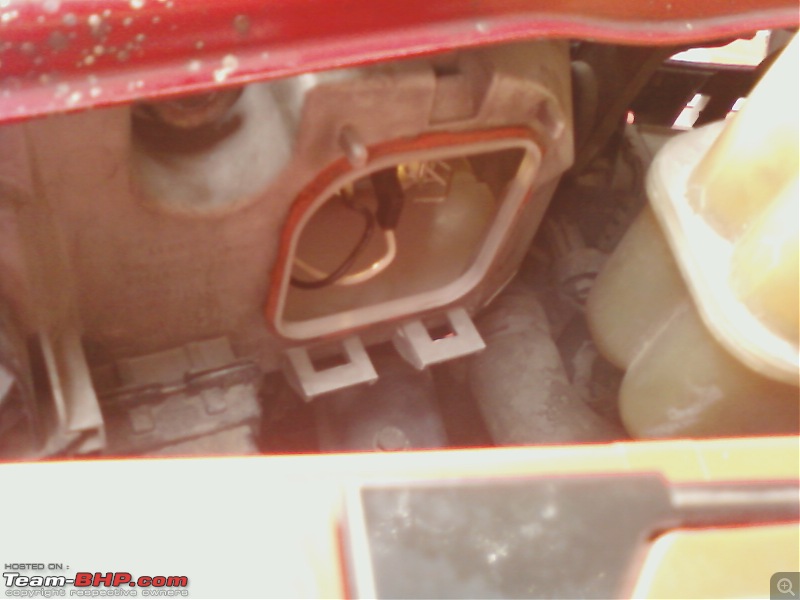
6. plugged back the bulb and the back cover. Notice the red thingy around the compartment - that acts as a sealant - i didn't have any sealant with me - so i left it as it is. Notice that the black back cover has a spongy thingy which further seals the cluster. make sure it fits properly.

Fiat Petra 1.6 Issues-photo0461.jpg

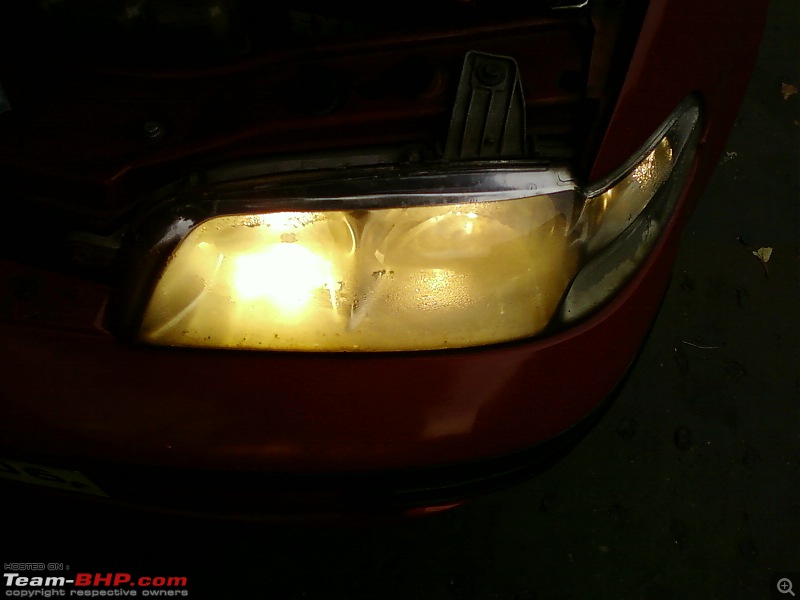
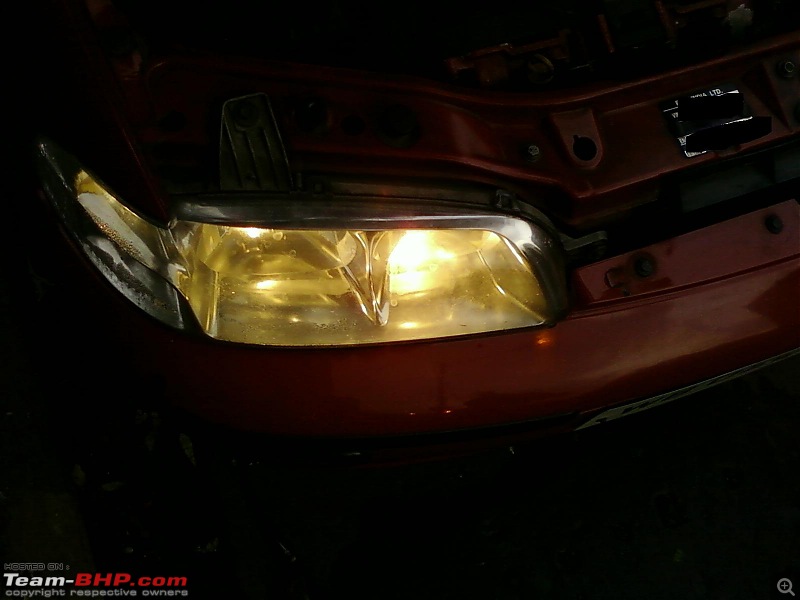
7. Switched on the headlamps to dry some of the moisture - this is how it looks.

Fiat Petra 1.6 Issues-photo0459.jpg

Fiat Petra 1.6 Issues-photo0460.jpg

8. Seal the edges with a thick layer if Fevicol. Wash your hands properly - the end

PS:
This is a temporary solution - you can see that the LHS cluster has lost the shine. You can ask your friendly mechanic to open the bumper> open the HL cluster and buff it (??) to get back the shine and seal the head lamp properly.

I did it in half n hour - quality of work done is not good - there is still a bit of water inside which i will clean later.

Last edited by planet_rocker : 28th June 2010 at 11:28.
planet_rocker is offline  
Old 28th June 2010, 15:09   #30
Senior - BHPian
 
jacs's Avatar
 
Join Date: Nov 2007
Location: Kochi
Posts: 1,499
Thanked: 1,047 Times

@Planet Rocker. Thats a very useful post indeed. But most of the Palio's suffer from headlamp fogging tough not leaky enough to permit water inside. And there requires a very precise work .
jacs is offline  
Reply

Most Viewed


Copyright ©2000 - 2024, Team-BHP.com
Proudly powered by E2E Networks