| |||||||

| Search Forums |
| Advanced Search |
| Go to Page... |
 |
| Search this Thread |  263,545 views |
 22nd January 2021, 09:48
| #61 |
| BHPian Join Date: Oct 2020 Location: Pune, San Diego
Posts: 247
Thanked: 2,446 Times
| 1700kms Up! Few Niggles, Tweaks and Updates Crossed the 1700km mark today and realised I hadn't made any updates to this thread. A lot has been happening with respect to my Polo ownership experience and I think this is a good milestone to write about some good and bad traits about this vehicle, along with a few niggles I've faced. Drivetrain Performance Contrary to the belief that newer engines do not need to be run-in, the first 500kms with this car, were a stark contrast to the feel of the engine I'm used to today. The engine feels a lot more at home now and its become a very predictable affair driving this car around town. The highlight of this Polo, has to be the sweet-sounding, rev happy, explosive 1.0 TSI Engine. The rest of the components in my opinion are mere pawns on this chessboard. It's such a quick engine and truly gives you the satisfaction by its quick power delivery. Long Morning Idle A characteristic of this engine is that it takes a very sweet time to reduce its idle speed after a cold start. I've timed this about 30-40 times and the 1.0 TSI took about 1min and 20 seconds or so on an average each time! If you try and reverse the car at this high idle, you are doomed! The car is indeed very difficult to be controlled at this time due to the high idle. In fact, this is the Scary Creep! which many have documented. After the idling reduces, the creep is pretty much like any other automatic car, but if you don't wait for the idle to reduce, then you'd be shocked by how aggressive the creep feels. Gearbox The gearbox 09G by AISIN, is offered in its newest avatar for this 1.0 TSI Engine, is a fair gearbox at best. In-gear acceleration is its strongest strength but I'm not a fan of the stock gearbox tuning. Its definitely tuned for efficiency and wants to climb to D3 as soon as it can, but in stop and go traffic, the D3-D2 clunk is very perceptible to me. The clunk is the faintest when the gearbox is cold, and The only way I can neglect it, is to have some good music running. Other than the D3-D2, I find it to be a fairly smooth and competitive offering, which I wouldn't mind since its theoretically more reliable than the quick DSG. However, when in D, you can feel that flat spot, when you slow down for a speed breaker, and there's a good 1.5-2 seconds delay before the turbo starts spooling again, and I did not notice this flat spot when I was enjoying the Manual Test Drive vehicle. I have been trying to get in touch with some European tuners to receive an optimised Gearbox Map for the 09G, which could prolong the upshift and reduce the number of times I feel the D3-D2 jerk. A temporary solution to avoid the shift-shock, is slotting to Sports, which many enthusiasts did for their DSGs. Fuel Efficiency I have been really happy with the Fuel Efficiency, considering how quick this car is. 10.8km/l on a consistent basis on city drives in Pune's average traffic is really good considering the 1.2L i10 Auto barely manages 8-9km/l. On highways though, the 09G's 5th and 6th gears ensure a healthy double digit mileage which doesn't dip too much even if you push this drivetrain hard. On my trips to Ahmednagar, could manage a healthy 15-16km/l which is really good considering this is a Turbo charged petrol engine. Again, the comparison for me is the i10's 1.2L engine which barely managed a 12km/l here that too by strictly driving at around 80km/h. Sports Mode For the first 1300kms, I had never tried the S mode, because I somehow didn't feel the need. Now, I really love spending time with this mode. It does not merely hold the gear, but definitely feels a lot more special than the mundane Drive 'D' mode. Definitely a fuel guzzler but makes driving a lot more fun. Might be a placebo, but the steering feels a tiny bit freer in S.  Air Filter Cleaning DIY!  So a few weeks into the ownership, I ended up purchasing a Euro Spec Intake from Boodmo and was contemplating whether or not I should install it. After installing the Underbody Stone guard, there was a reduction in the roar of the road noise I heard during highway trips, but I had the perception that the Internal Ambient Temperatures were higher post the fitment. Now I did pickup the Petrol Specific underbody guard and it does have its scoops for the air intake. I classify myself as an average level enthusiast and this index has been rising for me, drastically so, from the last few years. A few scattered posts hinted at the following two concerns on switching to a Eurospec intake. Water Ingress due to the open design of the Euro Spec Intake and Quicker contamination of the Air Filter element. Now water ingress should not be a concern since there is a proper Water Drain hole provision, but the extra dust could be an issue. Will keep you guys updated after I switch to the Eurospec intake.  To learn more about the two concerns, I performed an Air Filter service for the EA211 1.0 TSI Engine sold on the Polo and Vento, which I have documented here! (DIY : VW Polo Engine Air Filter Service) Some Extra Thoughts On The Air Filter Service
Niggles Facing
Important VCDS Tweaks
Cabin Light Upgrade  Got a little sick of this stock Cabin Light and upgraded it to a better offering available abroad. Will share a detailed post with my insights ahead! Last edited by fluidicjoy : 22nd January 2021 at 09:50. |

|  (25)
Thanks (25)
Thanks
 |


| The following 25 BHPians Thank fluidicjoy for this useful post: | adityan27, amarendernag, Avikbrio, BackstraightBoy, Big Smoke, bipinbn, CarBot, CEF_Beasts, Chaman K, Crazy_cars_guy, DriverNo.420, Gaboonviper04, GaryTSI, hridaygandhi, Jattitude, jithin23, Mu009, Researcher, RoadMonkey, sagwal, Shreyas_H, somspaple, The_Outsider!, Vik0728, yogiii |
| |
|
5th February 2021, 21:42
| #62 |
| BHPian Join Date: Oct 2020 Location: Pune, San Diego
Posts: 247
Thanked: 2,446 Times
| Genuine OE Flip Camera Retrofit I personally believe the Polo 6R which Volkswagen continues to sell in India, comes with a fairly long and usable feature-list, but still theres no going around the fact that we still do not get a company fitted reverse camera on this camera, which still holds its ground as a Premium Hatchback touching the 11L mark. Its absolutely disgraceful that even entry level offerings from 5L OTR or even lower pack in a very usable reverse camera. Now the Polo Auto-Dimming IRVM works like a charm, but it is slightly on the tinier side. The ORVMs are not really generous either. Installing OPS had already made life super comfortable for me when it comes to parking this hatch, but I hate to admit that Reverse Cameras have spoiled us. The reverse camera on our i10 has been so good that my mother just refuses to drive this Polo, because of its absence. It's quite psychological to the extent it gets annoying. As per my conversations with fellow Polo owners, most dealerships are charging upto 10K for installing a Reverse Camera at the dealership and all of these are Aftermarket Cameras which sit near the License Plate Lights, at a very low vantage point with respect to the ground. I often wonder why and the quick answer was to AVOID Voiding the Warranty. I think I took the quote Life is too short for warranties quoted by a fellow BHPian a long back too seriously and started on my mission to make this beast even better. Its funny how I had already read the DIY : Flip Camera Thread by Graaja (Installed: VW Flip Camera in my Polo GT TSi. EDIT: Custom Adapter Plate & Water Drain on Page #3) at least 3-4 times 2-3 years back, even before I knew wed be considering a Polo in 2020. The thread was very inspiring and I was so glad that someone had done their homework and been kind enough to share it with me. Graajas DIY has been the backbone for my DIY, and so I wont waste time repeating the detailed steps, but will only be focussing on my experiences. Parts Needed 
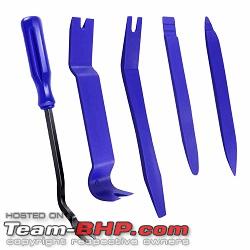
Tools I Needed 
Summary Of Steps
I took about 3 days at the rate of 4 hours per day to complete this project and I'm very satisfied with this DIY. It was fairly straightly, very fulfilling and helped me learn and needed application of quite a lot of technical skills. Getting Started 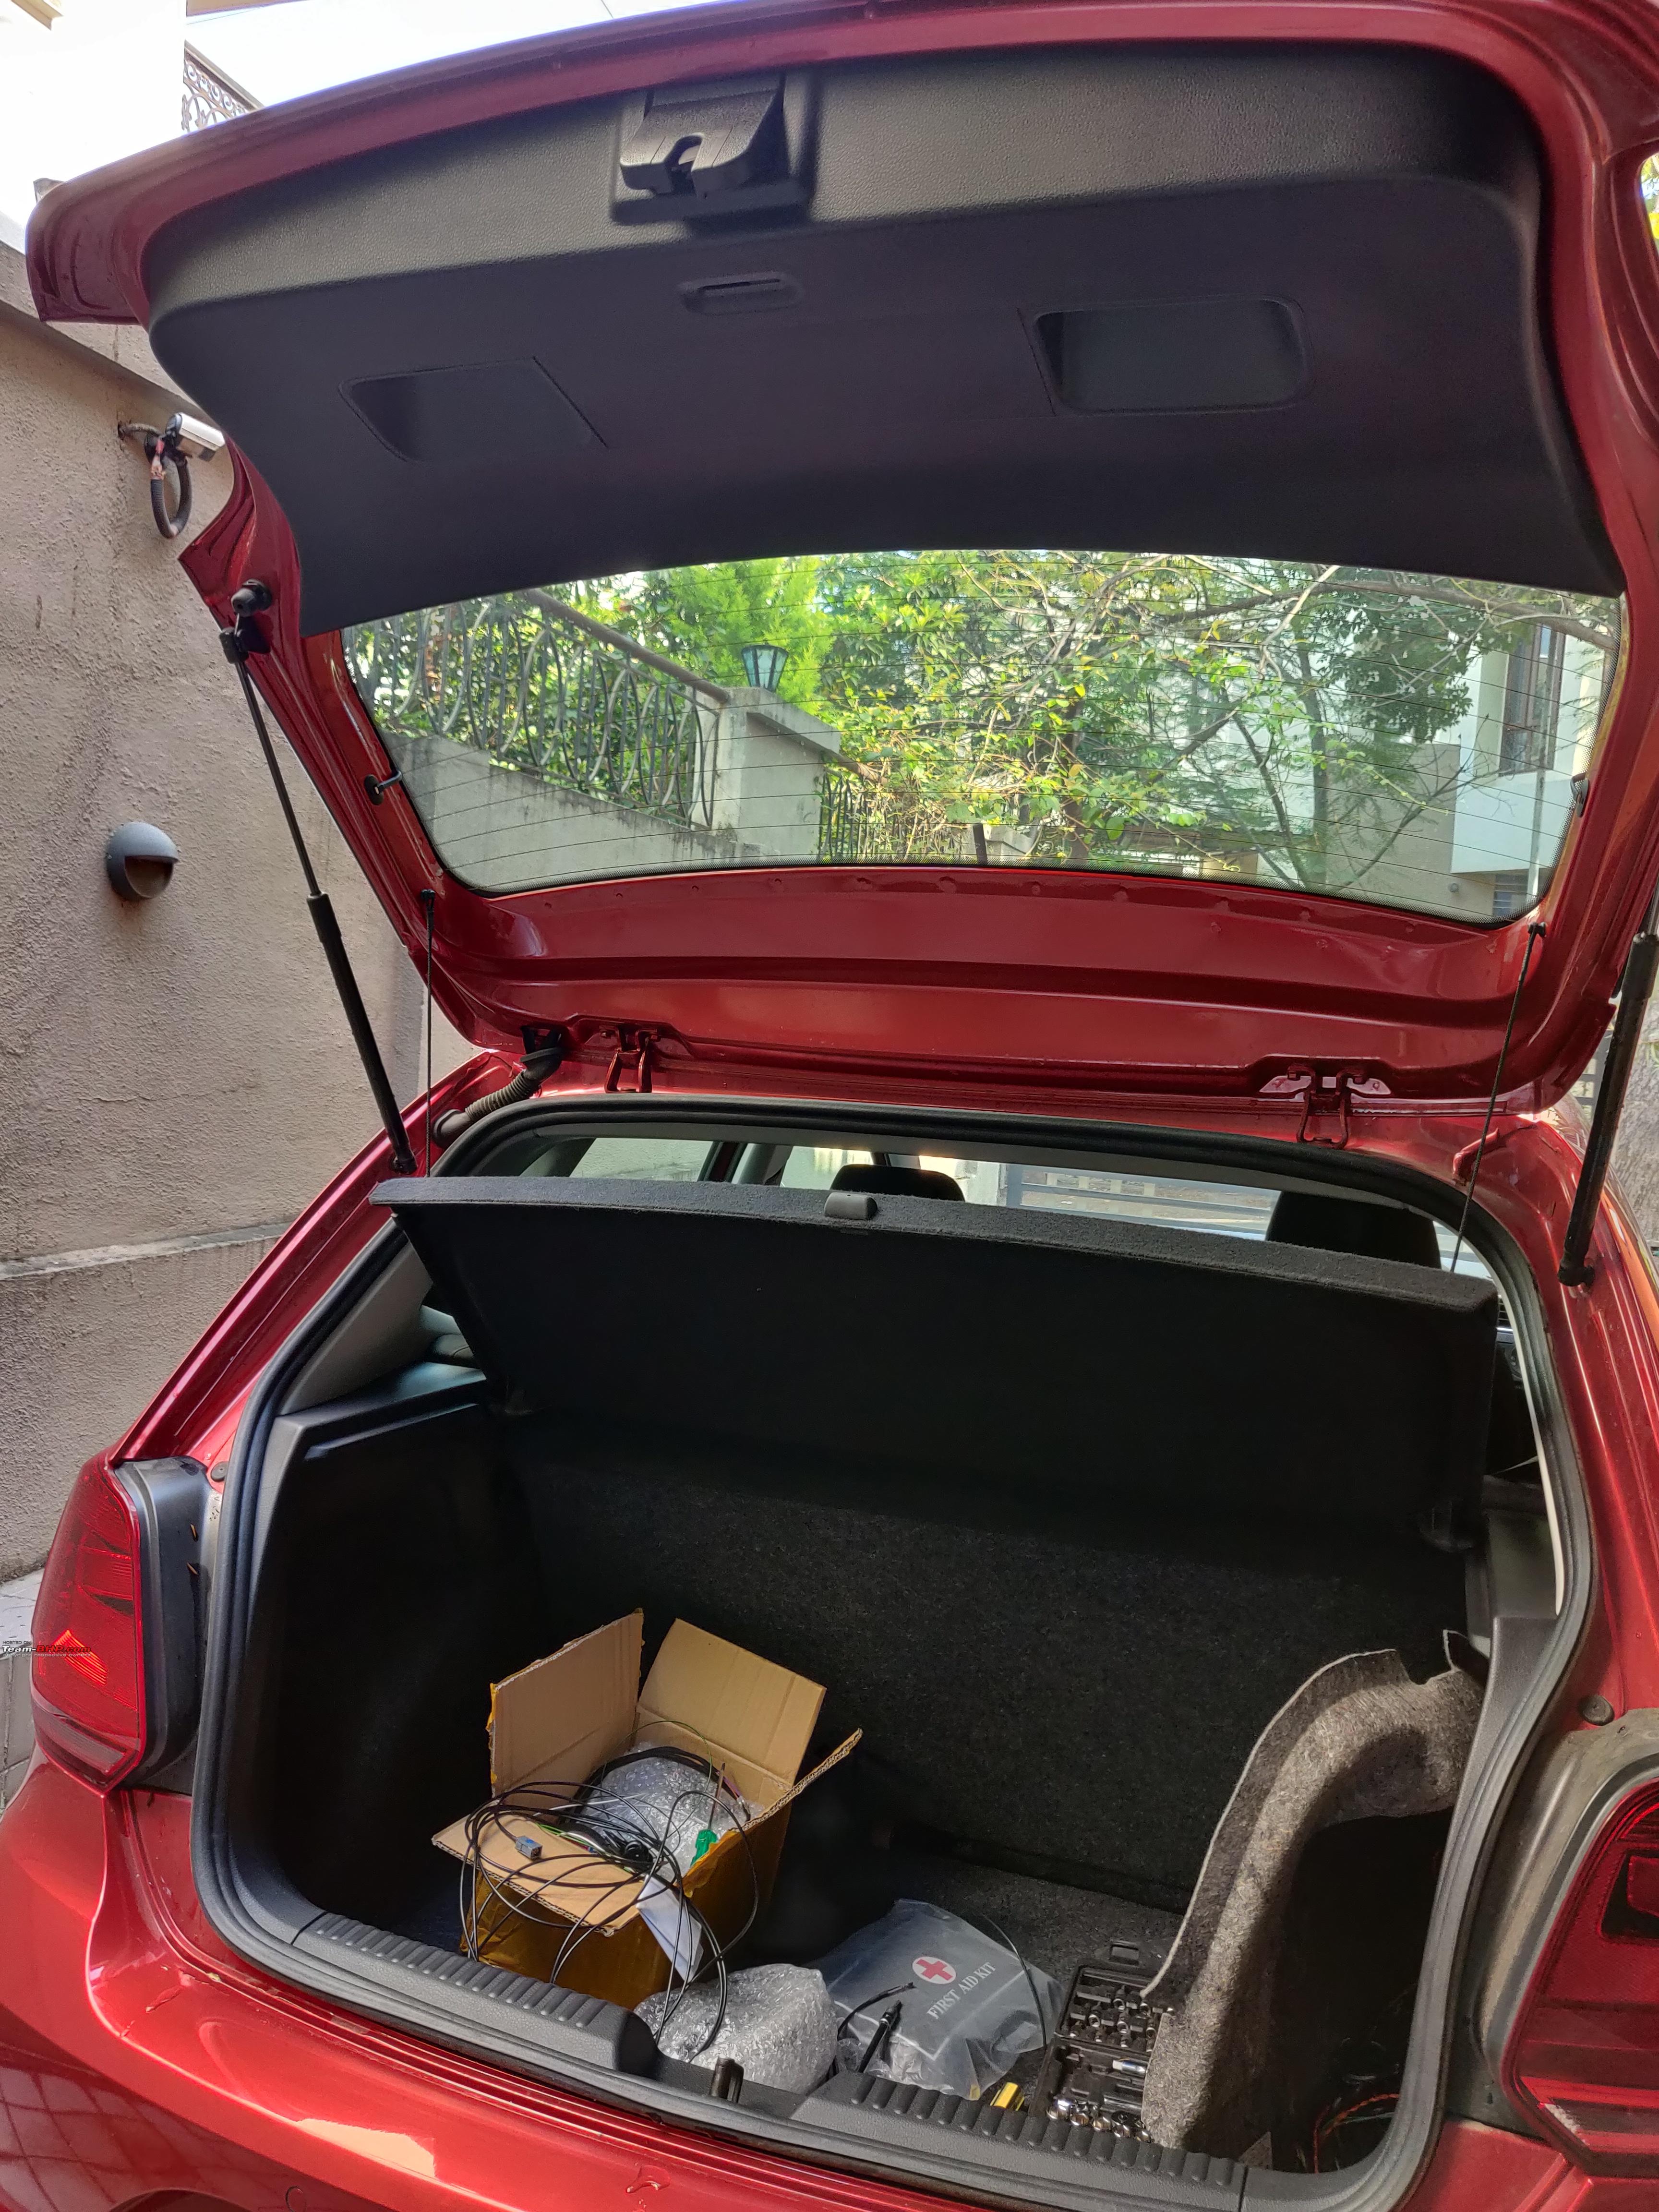 The project starts with the removal of the Hatch Trim, which is held in by two T25 Torx Screws. Since I was opening this hatch trim for the first time, I was being very gentle since I did not want to break any plastic clips nor did I want to deform any metal clips. Removing the entire panel was fairly simple, but it definitely helps to have a long screw driver to help pry off the trims.  Next, I undid the two Pin Boot Release connector and unscrewed the three T30 screws holding the Emblem Boot Handle to the hatch.  If you've read through Graaja's detailed thread, you should already know that the Flip Camera mounting points do not align with the mounting holes for the Polo 6R and contrary to popular belief, this is true even for European Polo 6Rs. The Polo 6R was never officially sold with a flip reverse camera, but it was always retrofitted by enthusiasts. The product I purchased already had a Flip Camera Mounting bracket in the box, but it was far from perfect. I could screw in only 2/3 holes and would have had to resort to the use of a washer to securely mount the camera to the hatch. I was not comfortable with this approach on a new car, and so I sought Graaja's Adapter Plate file and wanted to 3D print it and inspect the fitment. It somehow did not work out, since I was unable to convert the file to a suitable .stl file and so I directly had a plate laser cut from the .dwf file. I still have a few extra plates, which I'm happy to offer interested individuals.  Using this laser cut plate, I mounted the frame of the Flip Camera to the hatch and checked the alignment of the Volkswagen logo. On fully tightening the assembly, I find this alignment as good as it can get. The new logo has a black rubber O-Ring like seal which should prevent water entry directly into the boot area. Laying Out The Wires The wires need to be routed from the hatch lid and they split after they reach the inside of the car. The video and power cables need to travel to the front of the car, while the reverse light is tapped from the rear section of the car. In my case, I did not have to tap the reverse wire, since I had already installed the 8K OPS a few months back. I used a spare Finolex cable as a pulling wire to and fro along the hatch area. I found it helpful to pry open what I believe is the defogger cutout to easily route the wire from the hatch lid.  If you get a Master Cable, you can simply tie the ends of the rest of the wires and pull the entire wire bundle inside.  Ultimately, the wires need to be passed through the tough rubber grommet which can be really tight on a brand new car. I tried using my hands to widen the rubber openings, and almost thought I would manage to do the job, but I messed up every single time. I unfortunately hurt myself in the process, and cursed myself at each instance for skipping on work gloves.  It was then, that a brilliant idea came to mind, and I applied a few drops of Silicone Grease to the rubber ends, and voila!  The entire grommet and the tight passage had suddenly become a super slippery corridor for the wires, but ultimately, it was done!  Here is a closer look at the bottom grommet and you can tell, it has a Plastic Sleeve which you can dislodge. I found this to make life a lot simpler. Then, I had to remove the rear wheel side carpet lining and manage to route the wire to the seat area. To do the job in the neatest and most OE way, I had to take out quite a lot of trims, but what is must needs to be done. This also meant taping the video and power cables with TESSA tape to achieve a near OE look.  I was initially a little skeptical to pull panels on a brand new car, but I gulped down my fears and proceeded very slowly and steadily with my trusted plastic trim tool and it turned out to be quite a neat affair. One of the metal clips was already deformed during removal, and I thought I'd repair or replace it before going for the final fitment. The trim piece for the left and right side on the Polo 6R which bypasses the Front Seat belts is one single piece, and it pops right out, once you start serially. 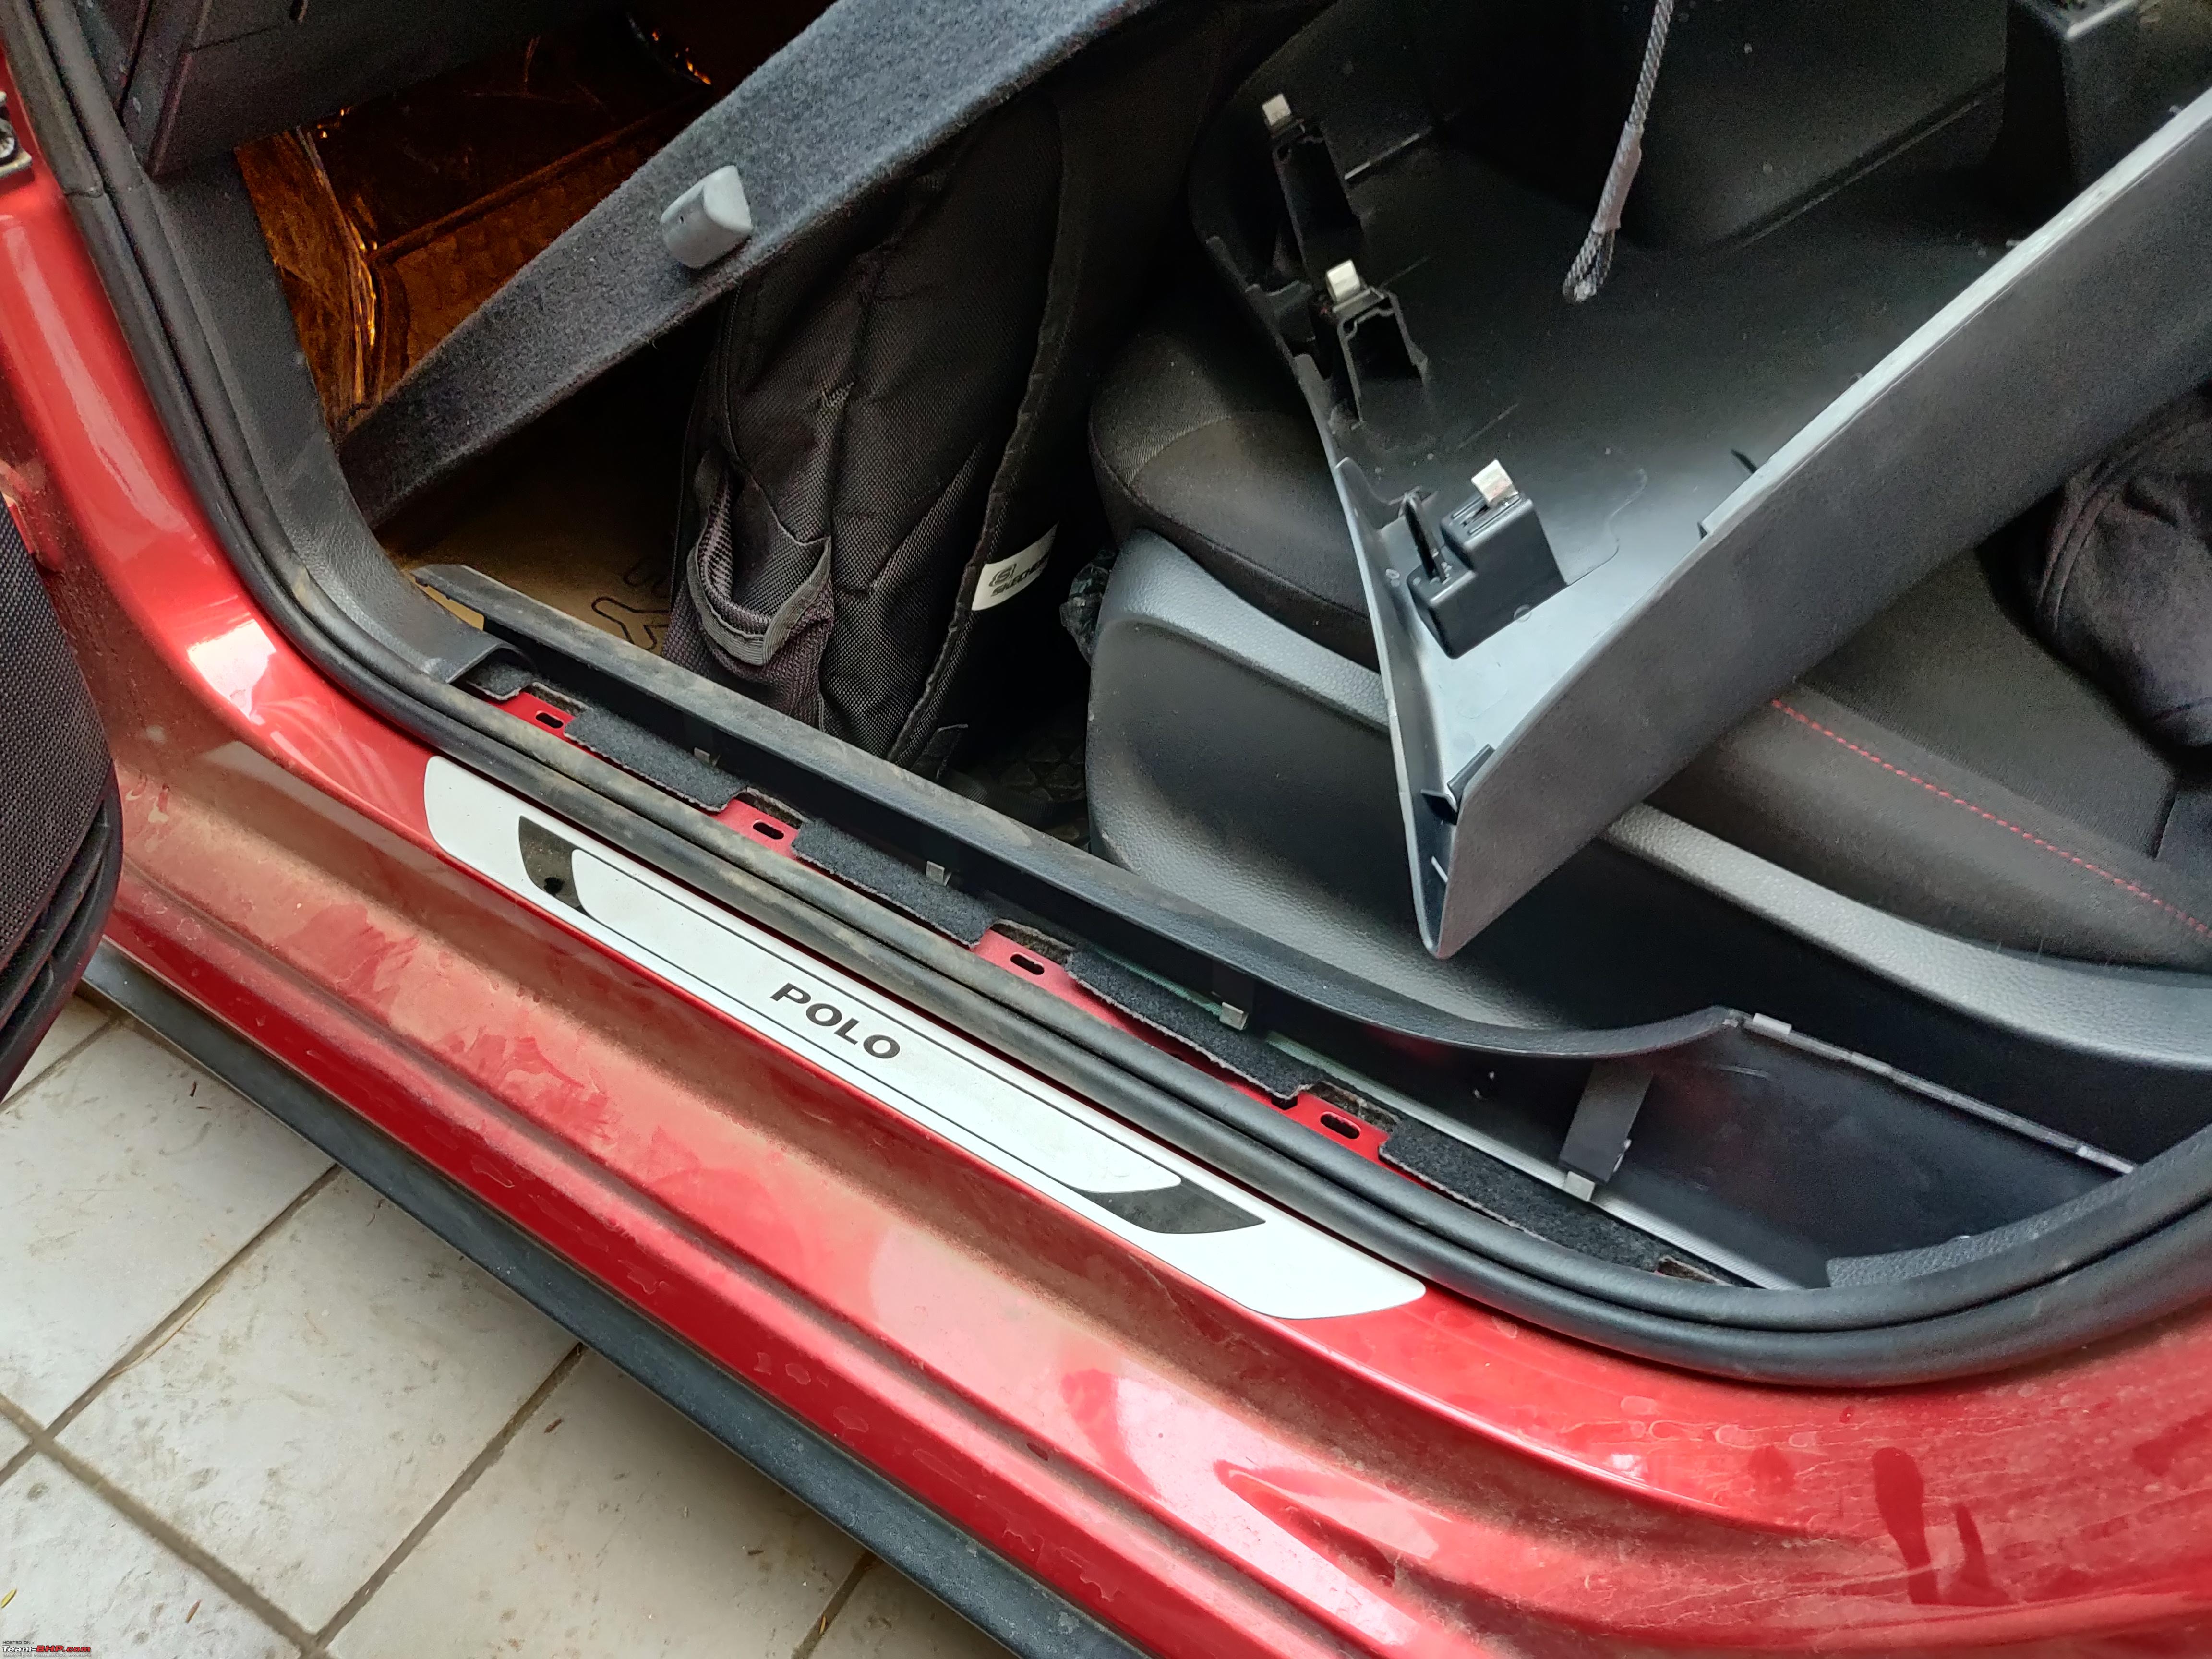 Then, I had to remove the Headunit Trim to access the Quadlock Connector of the RCD340 Radio and this is where I plugged in my OE Camera Video Signal. 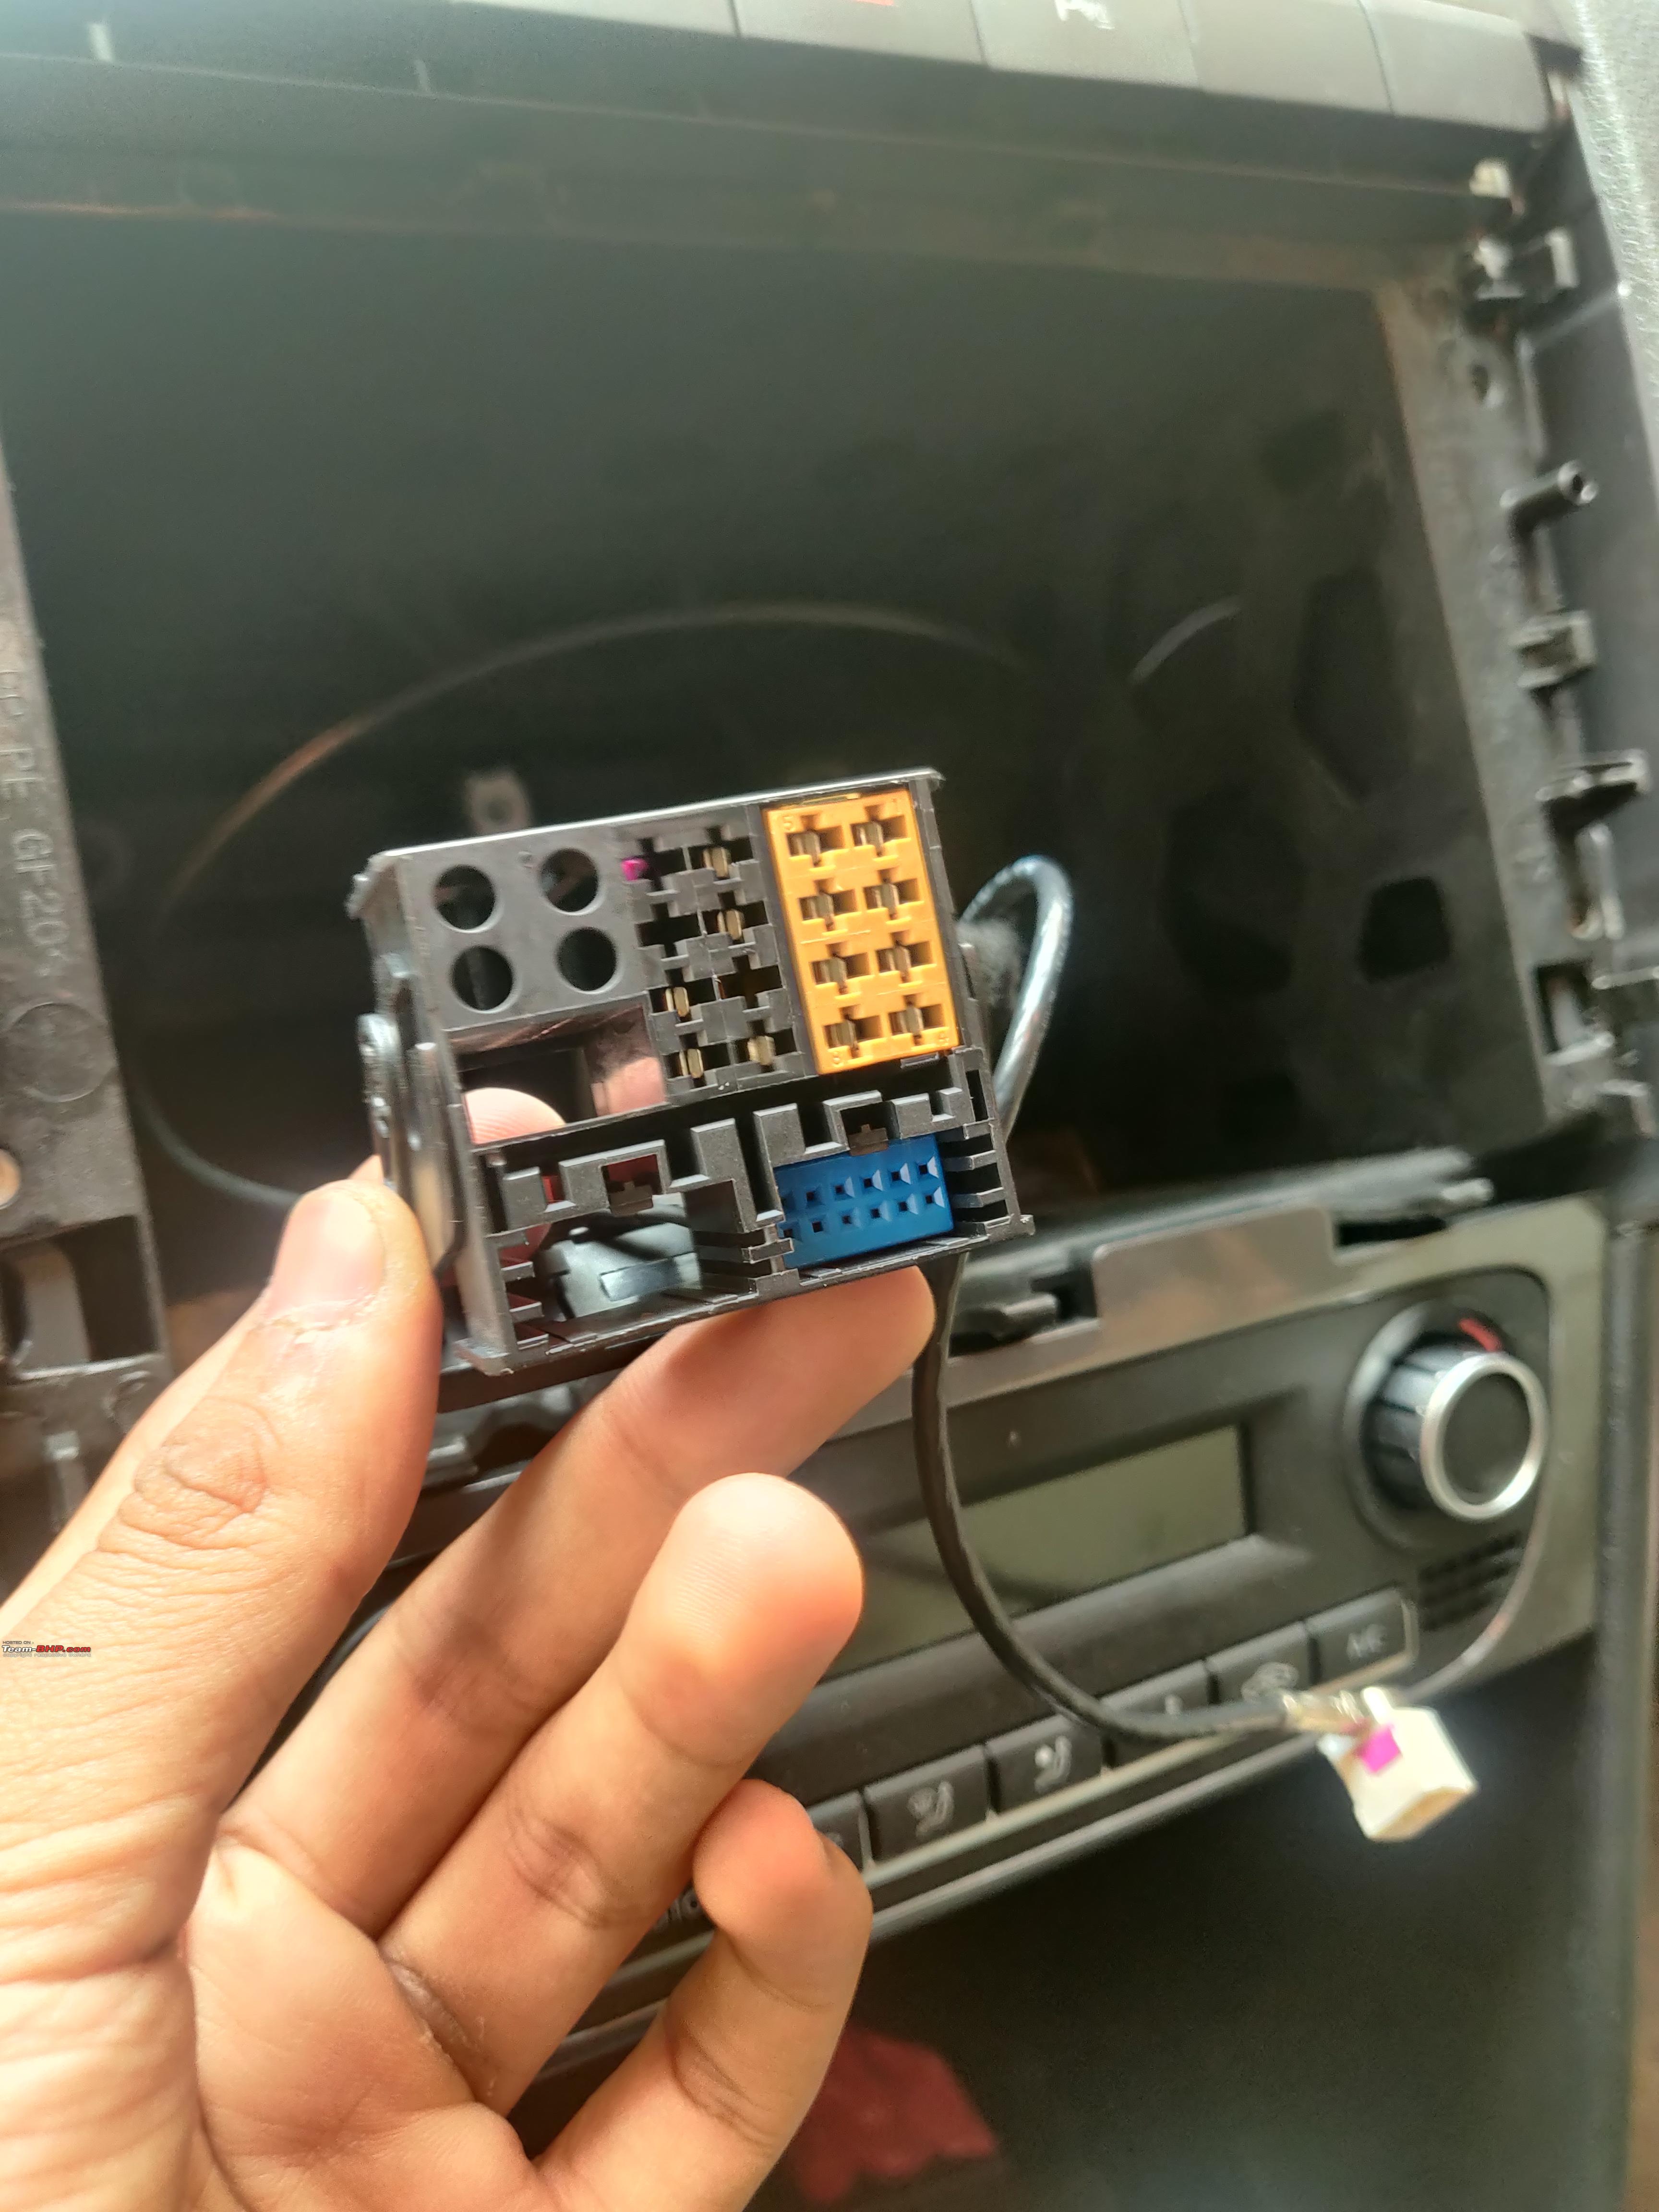 The blue block on the right is the Video Adapter. The power cable moved ahead to the Fusebox for power. Temporarily, I'll be using a Fuse Tap since I've been a little lazy to undo the Fusebox and neatly hardwire the Power Source. Testing Everything  After connecting all of the harnesses, we need to test if the Camera Folds in and Folds out correctly with the Reverse Output. The camera has a 15 second delay module after which the camera folds back in, provided Reverse Gear is not engaged. The boot lock needs to be engaged for the camera to be working. A few of the wires on my harness were not matched correctly, but having a multimeter and terminal removal tools helped me diagnose the issue at every point. Notice how the wiring and signal adapters are different from an AV Camera which we have commonly seen.  Coding And Road Test  I coded the Radio to enable the Reverse Camera input and checked all of the connections and the camera came to life. Now what was left was to test this camera out on the road, and so I took the car for a short road test on varying roads to inspect how the mounting screws, wires and other loose ends were holding up.  Video Quality I'm pleasantly surprised by the video quality and it feels at par with an OEM product. The colour reproduction and contrast can be minorly tweaked from the Headunit, but it is of sufficient quality to read a rear number plate. I'd rate it near 720p. The night time quality is also surprisingly good, and while there is evident noise, it's not glaring to the point where the camera becomes unusable. The night vision can be improved by upgrading to better and brighter LED Reverse Lights.  Drain Hole  This is a necessity, if you don't want to have long term trouble and so I wanted to get it done right away. The water drain pipe mouth needs to be removed for installing the camera in place and the pipe is held down by two T8 Torx bits. It turns out, that you do not need to drill a hole on the sill of the hatch. The manufacturer has included two grommets which can be used for routing a water drain pipe. The second hole I used was where the wiring harness was clipped onto, but detaching the mounting would not result in a big problem. I must say that routing a drain pipe was a genuine pain and needed a lot of improvisations and comebacks to do in one seating. Silicone Grease came to the rescue once again.  After connecting the drain pipe, I tied a zip tie and also applied a uniform beading of silicone on the crevices I presumed to be susceptible to water ingress. My drain pipe has a minor kink, but the entire setup passed the water tests and so I'll be calling it a day. End Result  Now I feel like I've a car that belongs in 2021, with a cool looking, head turning reverse camera, which also helps me move around a lot more confidently, especially when I'm reversing. As always, here's a video where I've shown the performance of the camera along with the water drain in action, and this should be the cherry on the top! |
|
| (105)
Thanks
|
| The following 105 BHPians Thank fluidicjoy for this useful post: | adhd92, adityan27, anoop.u, arjunsatheesh, ArunRam, Asif 6959, atulanand13, Avikbrio, Batfreak, batladanny, Bee, bharatbs, Big Smoke, BigBrad, bipinbn, Blow Horn Ok, brownkaiser, carfreak7, car_guy1998, CEF_Beasts, click, debashishsen26, DevilzzzzOwn, DriverNo.420, GaryTSI, gauravanekar, GauravDas, GeeTee TSI, Godzilla, graaja, GTO, Guna, harish, hellraizer, highwaypatrol, icar, InControl, jalsa777, jayakumarkp, jithin23, kap04, Karthik Chandra, katoom, knan, lemedico, Leoshashi, lightfootdriver, lionell, Lobogris, lonetraveller89, mac187, manson, motor_breathing, Mu009, museycal, Nair.V8, neelkumar, ostreichwein, Pigcee, pmbabu, PraNeel, pratik1992, punterccrx8s, punto_, r0nit7, ram_bishop, RedPhobos, Researcher, rpm, sagwal, saikishor, sameerpatel90, Samfromindia, sammyboy, sarfraz1997, Seenz, Sen, ShankarG, Shome, Shreyas, Shreyas_H, sole_rider, somspaple, SS8939, ST172, SuhairZain, suryakamal, tchsvy, Thanos-VV, The_Outsider!, TokyoDrifter, vamsi_k_b, Varun_HexaGuy, Venkatesh, vijith, Vik0728, VinNam, vishy76, VivekCherian, whitewing, Xaos636, yajaman99, yesyeswe, yogiii, Zen_forever |
|
7th February 2021, 17:23
| #63 |
| BHPian | Re: Review: Driving home our Sunset Red VW Polo Highline+ TSI Automatic Brilliant DIY post and the way you have explained the steps to install the reverse camera can help a lot of VW owners. The fit and finish looks OE. As you said, VW can add this camera at an additional amount and it's super helpful. The senors in the current GT Only give out audio beeps but no indication of proximity to the object. Add paddle shifters and you're car is complete!  Such simple mods helps in elevating the ownership experience |
|
| (1)
Thanks
|
| The following BHPian Thanks jithin23 for this useful post: | fluidicjoy |
|
8th February 2021, 10:09
| #64 |
| Newbie Join Date: Dec 2020 Location: Bhopal
Posts: 6
Thanked: Once
| Re: Review: Driving home our Sunset Red VW Polo Highline+ TSI Automatic Impressive DIY. Very well done I must say. Just one question. As you mentioned, there are chances of the warranty becoming void. And if yes, does the complete warranty become void, or only for the electricals? |
|
| (1)
Thanks
|
| The following BHPian Thanks ani_999 for this useful post: | fluidicjoy |
|
8th February 2021, 17:40
| #65 | ||
| BHPian Join Date: Oct 2020 Location: Pune, San Diego
Posts: 247
Thanked: 2,446 Times
| Re: Review: Driving home our Sunset Red VW Polo Highline+ TSI Automatic Quote:
 Quote:
| ||
|
| (5)
Thanks
|

| The following 5 BHPians Thank fluidicjoy for this useful post: | adityan27, ani_999, Chaman K, sagwal, yogiii |
|
8th February 2021, 19:42
| #66 | |
| BHPian Join Date: Nov 2019 Location: Nagpur
Posts: 90
Thanked: 439 Times
| Re: Review: Driving home our Sunset Red VW Polo Highline+ TSI Automatic Quote:
Coming to the calculations for the NEXON EV, you've missed the following: 1) ₹1,00,000.00 subsidy in Maharashtra for the first 10,000 cars 2) upto ₹1,50,000.00 rebate in interest under Sec 80EEB 3) 80% depreciation, if you/ your family owns a business. | |
|
| (1)
Thanks
|
| The following BHPian Thanks Jattitude for this useful post: | adityan27 |
|
9th February 2021, 22:45
| #67 |
| BHPian Join Date: Oct 2020 Location: Bangalore
Posts: 31
Thanked: 31 Times
| Re: Review: Driving home our Sunset Red VW Polo Highline+ TSI Automatic Nicely done DIY fluidicjoy!  You certainly are enticing other polo owners to go your way! You certainly are enticing other polo owners to go your way!Agree with jithin23 about paddle shifters! May be required for that flat spot you mentioned earlier? And also regarding warranty; My SA, during my first service mentioned that, they keep track of mods done to a car! According to him this is a requisite by VW! He said that the related parts warranty due to mods -current and prior; but now removed- may be rejected. He said there was a case with steering column electrical part claim and it was rejected because of HID installation in the car. |
|
| (1)
Thanks
|
| The following BHPian Thanks ArunRam for this useful post: | fluidicjoy |
|
11th February 2021, 19:55
| #68 | ||
| BHPian Join Date: Oct 2020 Location: Pune, San Diego
Posts: 247
Thanked: 2,446 Times
| Re: Review: Driving home our Sunset Red VW Polo Highline+ TSI Automatic Quote:
Quote:
| ||
|
| (2)
Thanks
|
| The following 2 BHPians Thank fluidicjoy for this useful post: | Jattitude, sagwal |
|
13th February 2021, 12:03
| #69 | |
| BHPian Join Date: Nov 2019 Location: Nagpur
Posts: 90
Thanked: 439 Times
| Re: Review: Driving home our Sunset Red VW Polo Highline+ TSI Automatic Quote:
| |
|
| (2)
Thanks
|
| The following 2 BHPians Thank Jattitude for this useful post: | fluidicjoy, pritanshchandra |
|
16th February 2021, 17:29
| #70 | |
| BHPian Join Date: Oct 2020 Location: Bangalore
Posts: 31
Thanked: 31 Times
| Re: Review: Driving home our Sunset Red VW Polo Highline+ TSI Automatic Quote:
https://www.cars-equipment.com/en/sh...il#prettyPhoto I got this link from a friend of mine, but they have not responded to my queries | |
|
| ()
Thanks
|
|
16th February 2021, 18:46
| #71 | |
| BHPian Join Date: Oct 2020 Location: Pune, San Diego
Posts: 247
Thanked: 2,446 Times
| Re: Review: Driving home our Sunset Red VW Polo Highline+ TSI Automatic Quote:
| |
|
| ()
Thanks
|
| |
|
17th February 2021, 00:19
| #72 |
| BHPian Join Date: Oct 2020 Location: Bangalore
Posts: 31
Thanked: 31 Times
| Re: Review: Driving home our Sunset Red VW Polo Highline+ TSI Automatic Thanks fluidicjoy. Appreciate your offer to help. I might take it up! Few more posts and I should be to PM you. You are right. There are many variants and I was looking for one like the current steering wheel but with paddles. The cruise control is on a stalk anyways |
|
| ()
Thanks
|
|
21st February 2021, 11:34
| #73 |
| BHPian Join Date: Oct 2020 Location: Bangalore
Posts: 31
Thanked: 31 Times
| Re: Review: Driving home our Sunset Red VW Polo Highline+ TSI Automatic What are the prying tools you have in your arsenal? I was about to order some, so just wanted to know if I should anything specific. Thanks |
|
| ()
Thanks
|
|
21st February 2021, 14:23
| #74 | |
| BHPian Join Date: Oct 2020 Location: Pune, San Diego
Posts: 247
Thanked: 2,446 Times
| Re: Review: Driving home our Sunset Red VW Polo Highline+ TSI Automatic Quote:
 Been using these three prying trim tools for almost 4 years now. There was another piece in the kit, without a curved edge which did help on quite a few occasions, but I've misplaced it somewhere. The smallest trim removal tool on the left helped to remove the radio and air-conditioner trims. The curved tools helped during taking out the floor panels and the open end helps pull out any stuck metallic trim clips in the floor or body. A long flat blade screw driver has also been a super versatile faithful prying tool. The other VAG specific tools you could want is a T20, T25, T30 screw driver, and having a T20 Long Handle Magnetic end screw driver from Taparia has made life a lot simpler for me. Got this STANLEY tool box just a week back, with the hope of arranging and taking better care of my tools. | |
|
| (2)
Thanks
|
| The following 2 BHPians Thank fluidicjoy for this useful post: | Mu009, sagwal |
|