Team-BHP
(
https://www.team-bhp.com/forum/)
So guys, finally I get my lazy *** around to doing this guide! So here goes:
For repairing a tubeless tyre puncture, you will need the following equipment:
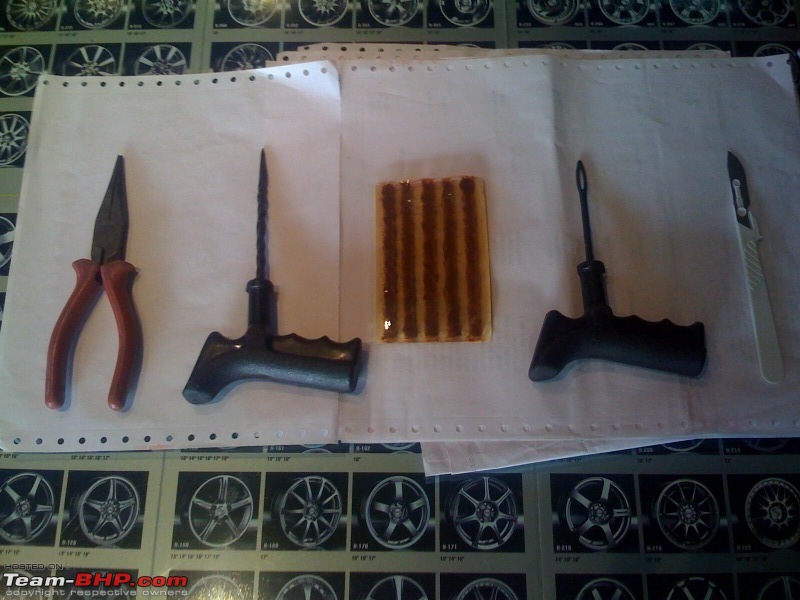
(L to R) In order of their usage.
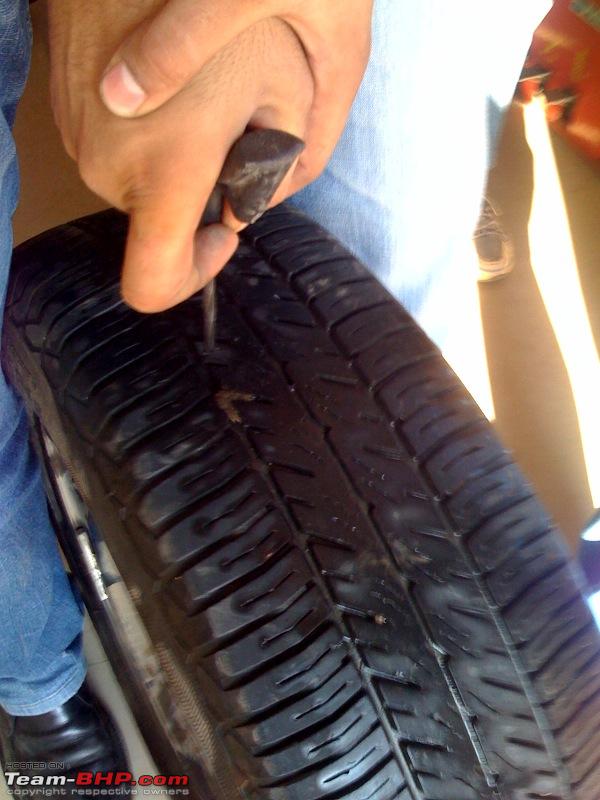
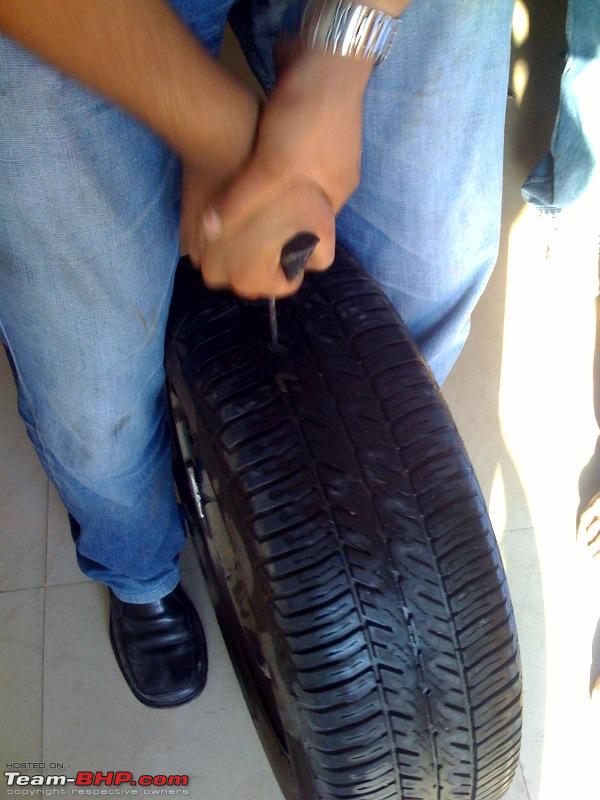
1. Pliers - To extract the puncture causing object
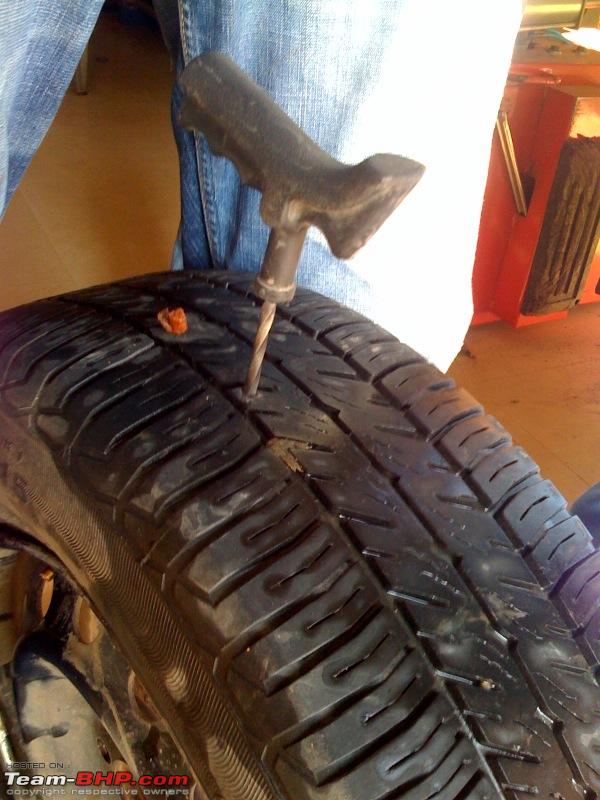
2. Smoothening tool - To ensure that the sides are smoothened out for the puncture strip to be applied.
3. Puncture Repair strips
4. Puncture Strip Insertion Tool
5. Knife/Blade - To cut off excessive strip protruding out
And here is how it is done:
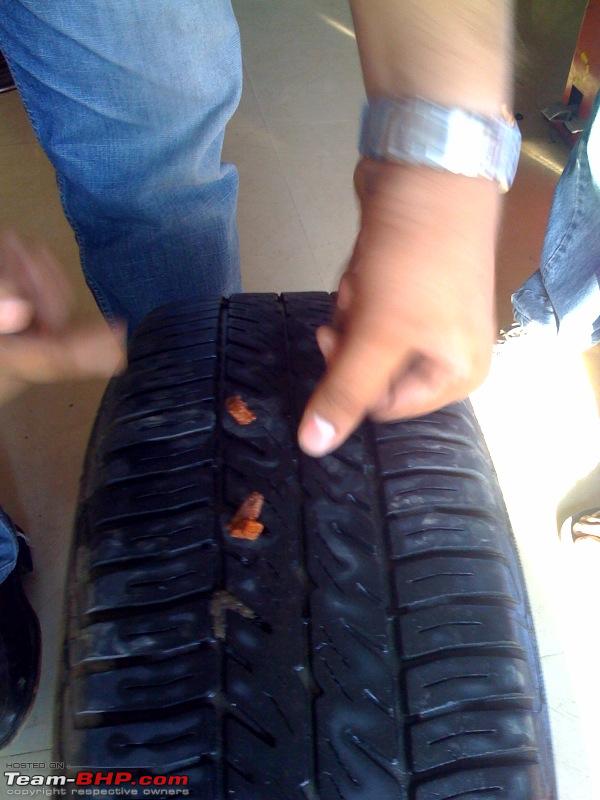
First you extract the nail from the tyre using the pliers 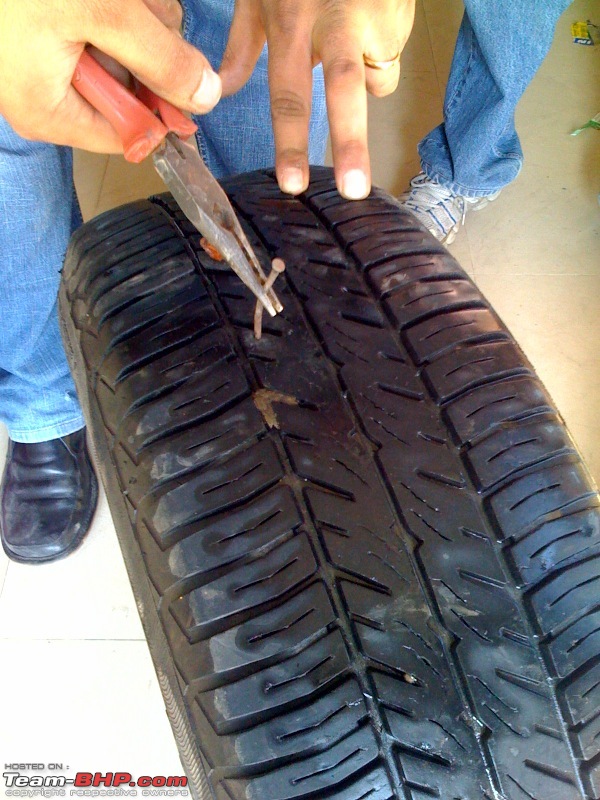
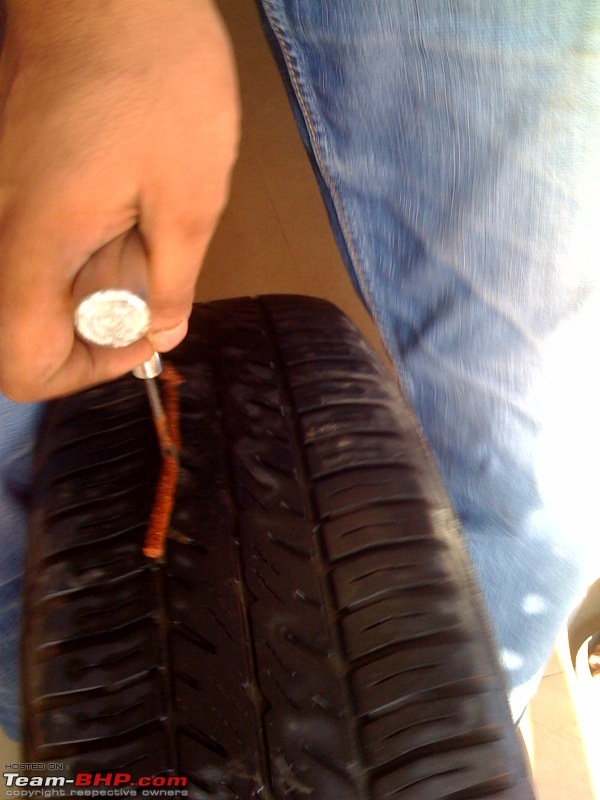
Then you insert the smoothening tool & insert & extract it a few times to make sure the puncture the big enough to accommodate the repair strip & is also smooth enough. 

Then leave the tool half-inserted 
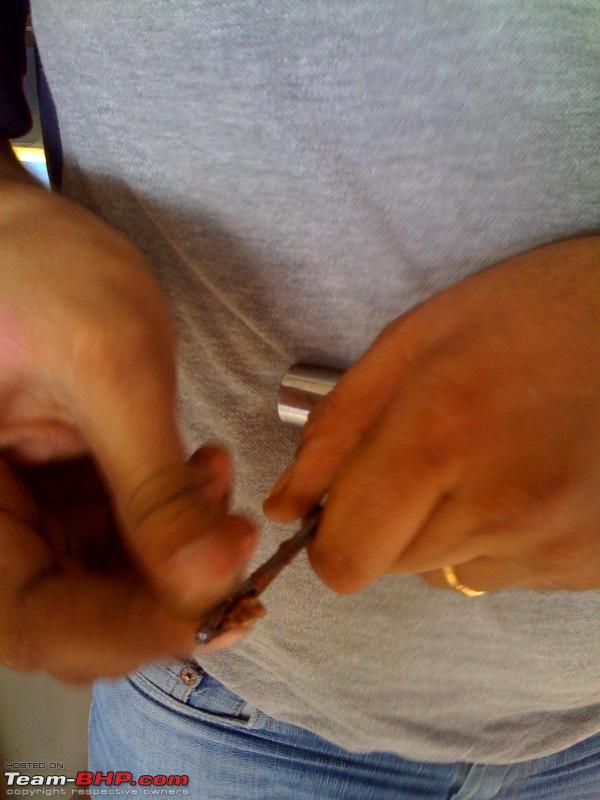
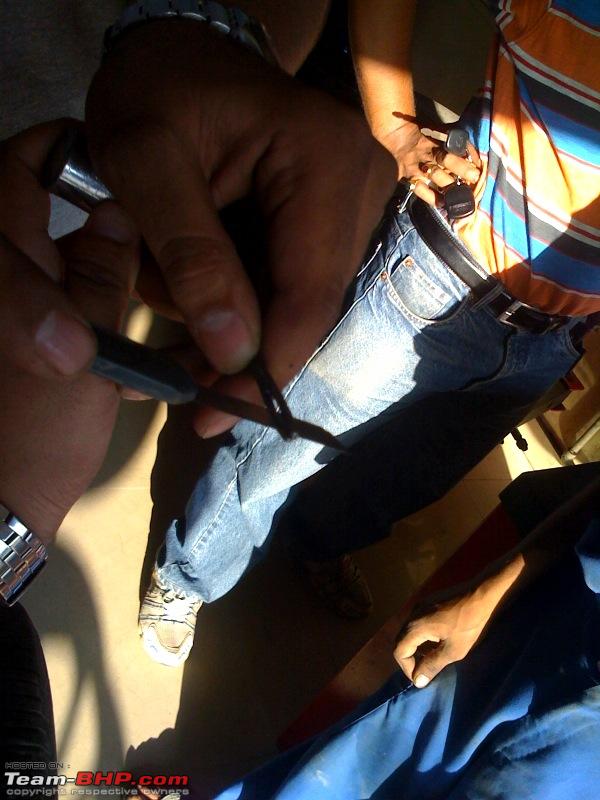
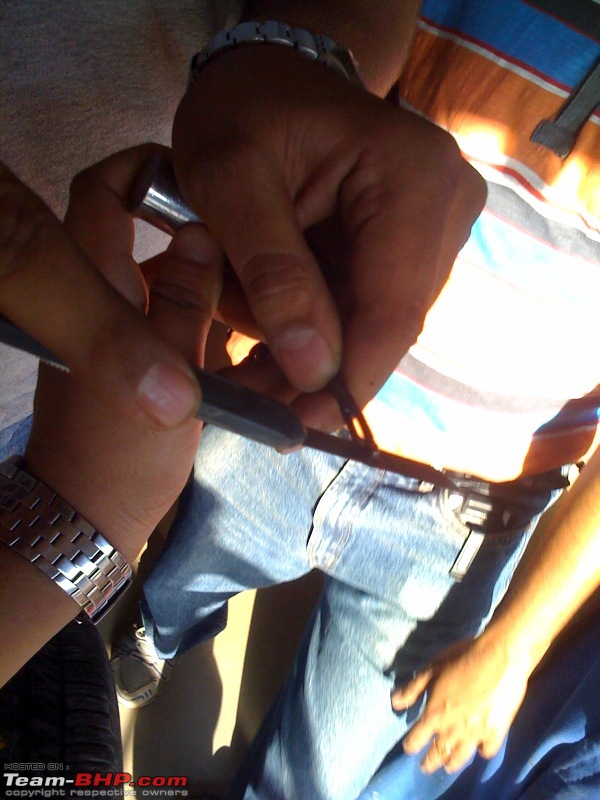
Now, take one Puncture Repair Strip & inert it into the Puncture Strip Insertion Tool. It's like threading a needle! 
It's fine when the strip is halfway through the tool. 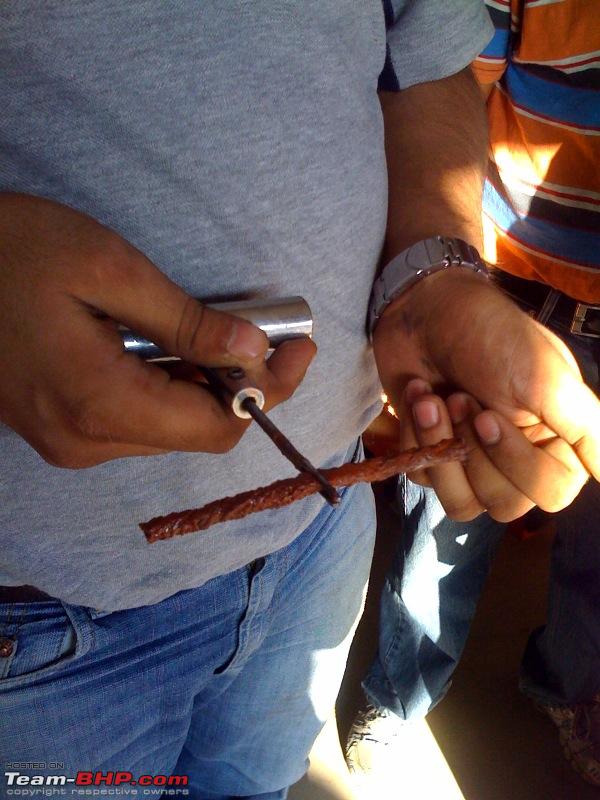
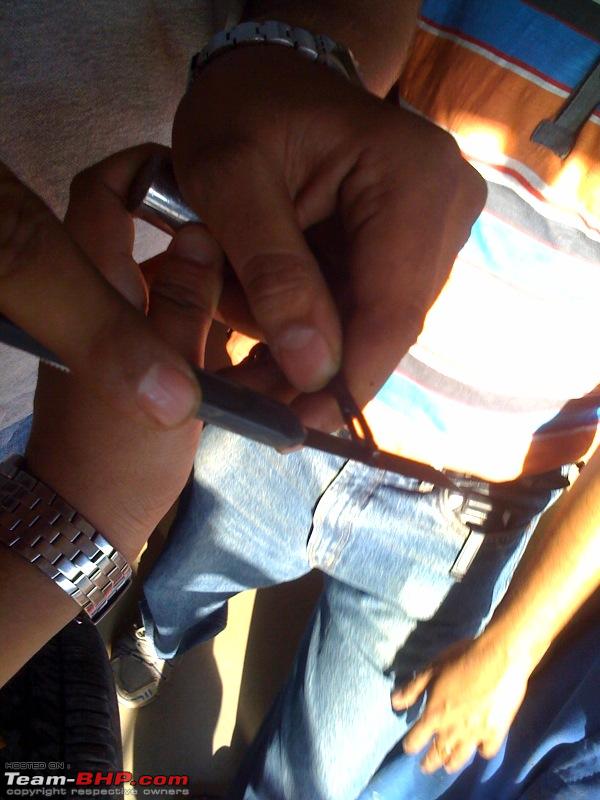
Now take out the Smoothening tool & insert the Insertion Tool. 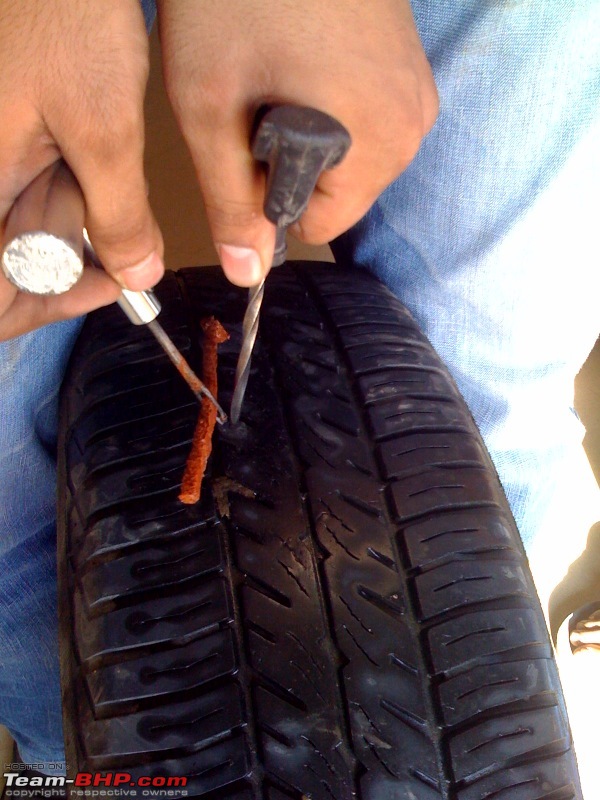
Insert the same till only about 10mm of the strip is left above the tyre. 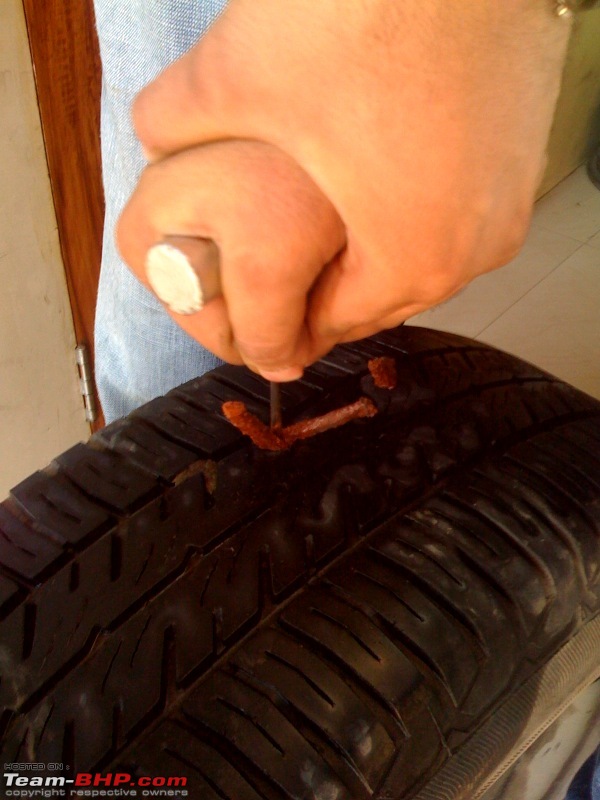

If anyone is wondering how the strip is removed from the Insertion tool, it's because the tool has a slit at the bottom which allows the strip to stay inside the tyre which the tool is extracted. Demonstrated below: 
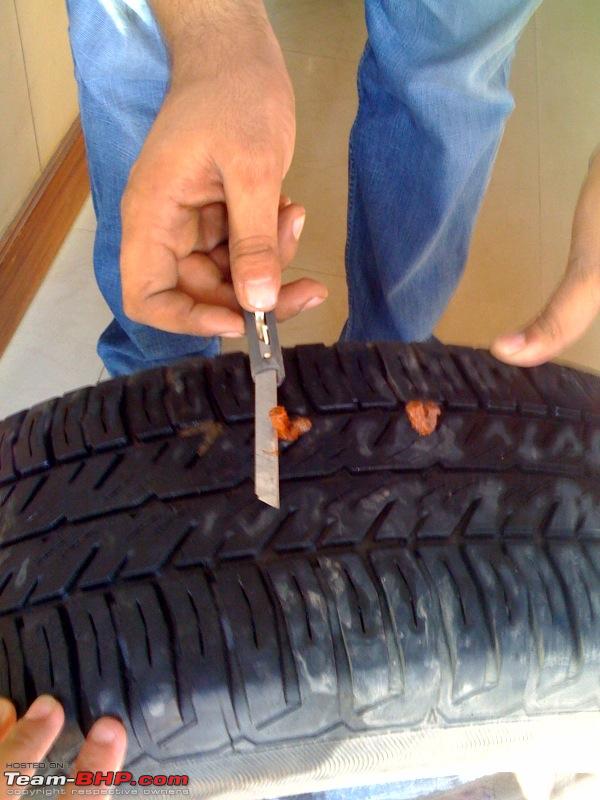
You can now trim if you think the strip is protruding out too much: 
Now, you're all set to go! Just fill up the tyre up to the desired pressure & check for leaks & all is good!
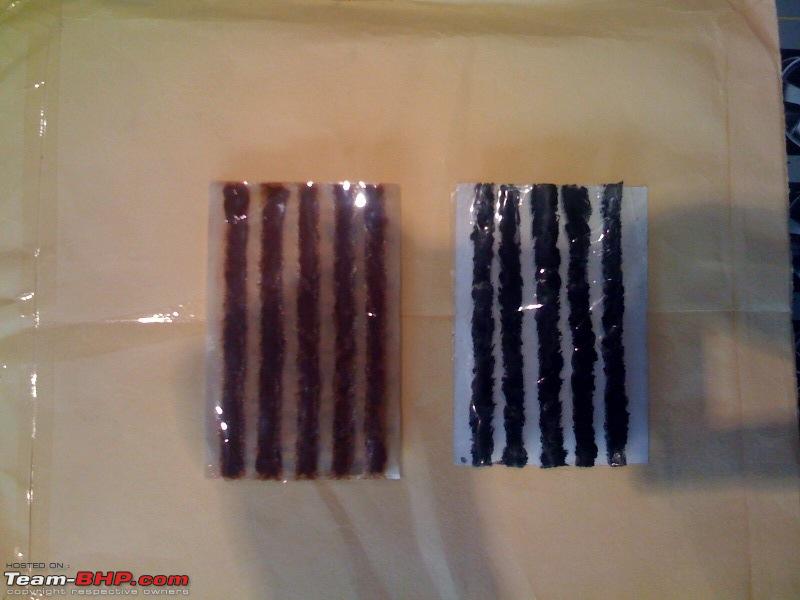
Just a note of caution though, since Puncture repair strips are available seperately from the kit (So you don't have to buy the kit again & again) do make sure you buy the original strips not the fake ones available. Both are shown in the picture below:
Original & Fake 
Hope this helps!
This was really helpful. However, I have noted that in India, tubeless repair is done from the outside surface of the tyre, but in tyre shops in US the tyre is taken off and glue added from inside the tyre and then the wheel is balanced.
Well done!! Highly useful for those who wondering how the tubeless tyre is repaired. Excellent!!
Quote:
Originally Posted by 1100D
(Post 990565)
This was really helpful. However, I have noted that in India, tubeless repair is done from the outside surface of the tyre, but in tyre shops in US the tyre is taken off and glue added from inside the tyre and then the wheel is balanced.
|
Thanks! That process is done here too & it requires usage of a Mushroom patch puncture repair. I'm going to carry out that one in the next instalment of this guide. But I think that is not really going to be a DIY thing.
Iraghava,
This is indeed the best and most down to earth Puncture repair Guide that I have come across , no confusions after going through the entire procedure at all , I tried to google many a times but never came across a guide thats as good as this. With Images that too :)
I sincerely appreciate the Efforts that you have put in compiling this guide , it will surely benefit all the TeamBhpians who will be viewing this henceforth including me as I have just upgraded my Car tyres to Michelin tubeless and was looking forward for some knowhow on puncture removals for such tyres.
Once again appreciate you going the Extra mile for this Simple yet Excellent Compilation.
One Question though , in the entire process there was no Puncture filler cement or a solution involved ? dont we need it at all ?
Cheers,
Peterclap:
Quote:
Originally Posted by iraghava
(Post 990569)
Thanks! That process is done here too & it requires usage of a Mushroom patch puncture repair. I'm going to carry out that one in the next instalment of this guide. But I think that is not really going to be a DIY thing.
|
Yes you are right. But I think I read during the initial days of Tubeless introduction in our country that, repairing a flat from the outside is not recommended. However, my tyre dealer always does it the way you just illustrated.
Good guide, informative and simple.
Should not the insertion tool be turned about 90 degrees (1/4th turn) after the insertion when 10 mm of the strip remains on the outside and then pulled out. (I was told to do so). Please clarify this point.
Lets make this thread and a thread about how to change the spare wheels on a vehicle sticky in the tyre and alloy wheel section.
Such a thread is as important as the tire size speedo error calculator thread and pcd thread
Many Thanks Ishan & your friends!
I was hunting for this picture guide, finally got it! Cheers!
Mods: Please mark this thread as sticky.
thanks iraghava. useful for people who travel a lot on highways.
@iragahava. I feel a few more things should be added to your original post. Points like
1) Symptoms to identify when the tubeless is having a puncture (as many a time the tyre will lose air gradually and will not be able to make it out)
2) How to identify which location in the tyre is punctured. (using water and how)
3) How to jack the vehicle and then go on to repair the puncture. (Many times there is no need to remove the wheel to fix the puncture, usually the front tyres where the wheel can be turned and easily worked upon)
Ishan, what exactly is the strip material? And is it required to do the mushroom plug thingy at a later point of time, or is the strip good enough for the entire tyre life?
Nice thread :)
Good job Ishaan. clap:
I wish you' done this a few months before. I would've saved 2 of those rubbery things, which I wasted during trials.
One addition to your guide:
Puncture can be repaired without actually removing the tyre!
Cheerscheers:
Thanks iraghava for the nice step by step photo guide. One lastish step is missing where you turn the needle a bit with the strip inside the tyre. But I must say once again - step 2 is not an easy first timer's job. It is very hard to insert the probe (the spiral thingy) in a new tyre.
I think there should be similar step by step guides for other basic stuff like changing wheels, fixing a fuse, jump starting a battery, or even opening the bonnet for some ;)
| All times are GMT +5.5. The time now is 15:29. | |