Team-BHP > Vintage Cars & Classics in India
Register New Topics New Posts Top Thanked Team-BHP FAQ


Reply
  Search this Thread
63,303 views
Old 20th January 2013, 02:31   #46
Senior - BHPian
 
SPIKE ARRESTOR's Avatar
 
Join Date: Nov 2009
Location: Germany
Posts: 2,854
Thanked: 1,532 Times
Re: Rolls Royce Phantom II Continental Restoration

I am not a frequent visitor in the classic cars section but seeing DKG's post, I guessed there was something special lying here.

After seeing these pics, only one word comes to my mind - awesome ! Little things like manufacturing stands to keep the powertrain combo, chassis, body etc. goes a long way in speaking about the restoration.

Ragtop, thanks for sharing your experiences here, this is definitely a visual treat to our eyes. Good luck with the restoration !

Spike
SPIKE ARRESTOR is offline  
Old 22nd January 2013, 14:53   #47
BHPian
 
Ragtop's Avatar
 
Join Date: Jul 2009
Location: Mumbai
Posts: 90
Thanked: 248 Times
Re: Rolls Royce Phantom II Continental Restoration

Just as we refilled the oil in the shocks, we found a couple of them were leaking!! A quick check revealed that the gland (rope like seal) was old and worn. This step was then skipped as we had to wait for the seals to be procured. Meanwhile, the paint prep doesn’t stop. Now we think we have a clean body line but decide to do a quick check before calling it a day. We mix some black paint with primer and spray on a light coat, then leave it outside to “bake”. The reason for this is to follow this up with a light sanding. The black tint will reveal all the surface undulations quite clearly that will then need to be worked on

Rolls Royce Phantom II Continental Restoration-dsc01273_800x532.jpg
Rolls Royce Phantom II Continental Restoration-dsc01275_800x532.jpg

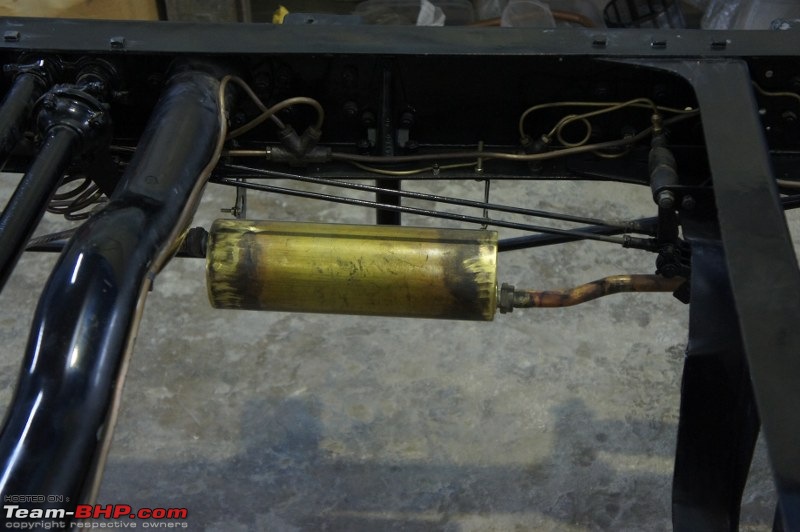
And the reassembly continues. We had to fabricate the canister that that is connected to an engine breather line – it is designed like a silencer. The original was badly rusted and falling apart but good enough to copy

Rolls Royce Phantom II Continental Restoration-dsc01280_800x532.jpg
Rear axle back on, oil line connections, shocks and brakes pending


Rolls Royce Phantom II Continental Restoration-dsc01281_800x532.jpg

We replaced all the bushings ….Had some in stock and had to make some locally.


Rolls Royce Phantom II Continental Restoration-dsc01283_800x532.jpg


Installation of all the oil lines that lubricate the real suspension from a centralized chassis lubrication system which is actuated via a foot lever from the cabin. The manual suggests that the lever be pushed in once before each drive! A close look at the pipe going up the differential reveals that it had been flattened due to some impact (probable hit the silencer at some time will traversing our wonderful roads). This now needs to be replaced and perhaps re-routed to ensure that this does not happen again. The consequence of this flattening was a reduction in oil supply to the leaf-spring shackle which when opened was found to have seized! We had to replace the shackle bushes.
A closer look at the oil pipes and the flattened portion (on the right)

Rolls Royce Phantom II Continental Restoration-dsc01284_800x532.jpg
Ragtop is offline   (10) Thanks
Old 22nd January 2013, 16:27   #48
Senior - BHPian
 
Viju's Avatar
 
Join Date: May 2006
Location: Yokohama, Japan
Posts: 1,069
Thanked: 2,591 Times
Re: Rolls Royce Phantom II Continental Restoration

Dear Ragtop

I've been following your thread since the day you started it. It is a pleasure to be a part of this epic journey you are on. I love the idea of giving a new life to an old machine, and have done some very small restorations myself.

Your systematic approach and terrific attention-to-detail makes the outcome worth looking forward to! All the very best!
Viju is offline  
Old 23rd January 2013, 12:18   #49
BHPian
 
Ragtop's Avatar
 
Join Date: Jul 2009
Location: Mumbai
Posts: 90
Thanked: 248 Times
Re: Rolls Royce Phantom II Continental Restoration

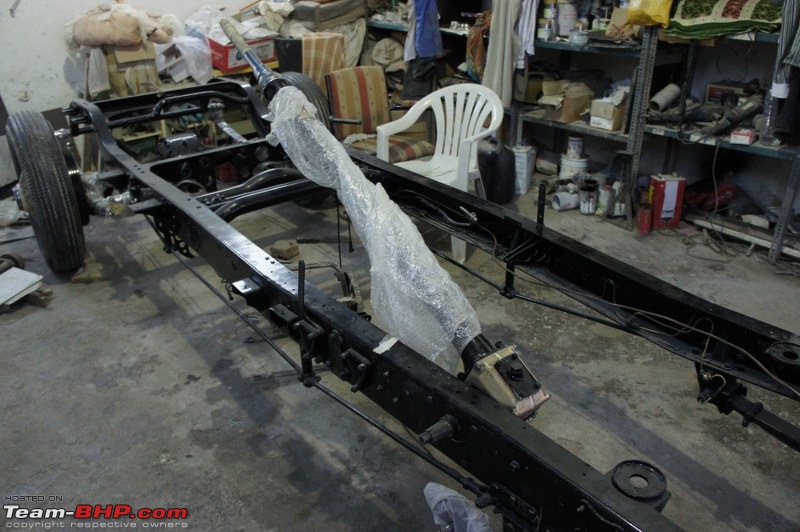
Front axle re-installed, oil pipes and steering column remain before we can remount the engine and firewall


Rolls Royce Phantom II Continental Restoration-dsc01286_800x532.jpg

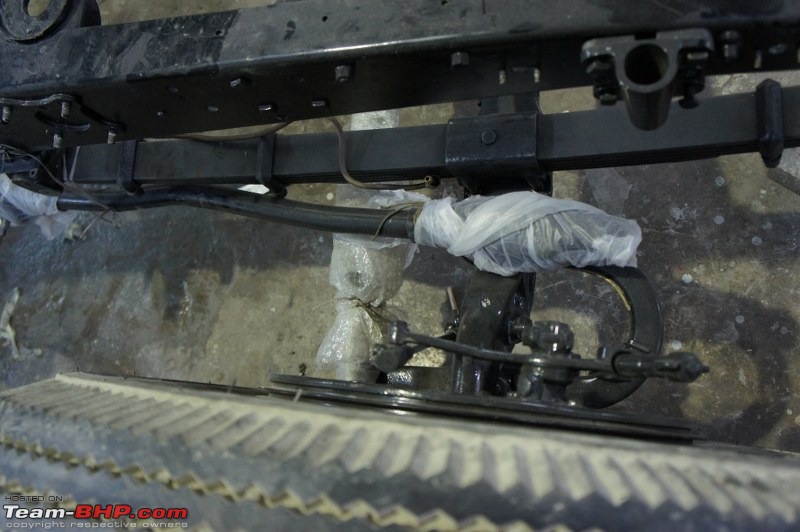
Steering rod on and plastic used to protect the leather gaiters for the steering ball joints.

Rolls Royce Phantom II Continental Restoration-dsc01289_800x532.jpg

Steering column mounted...before completing this, we found some roughness in the steering movement which was traced to a damaged cone bearing in the steering shaft just below the steering wheel, and this too was procured and replaced.

Rolls Royce Phantom II Continental Restoration-dsc01291_800x532.jpg

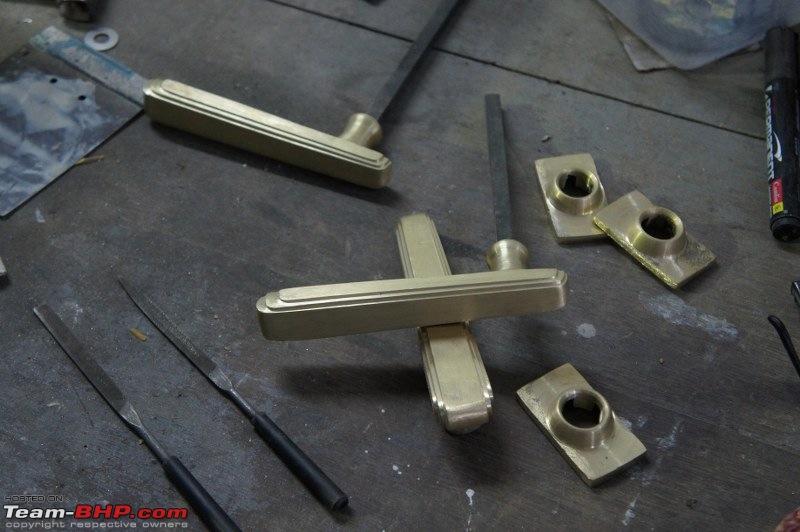
Concurrently, the team had been preparing for the body and interior rebuild. To that end, the little things that needed to be refurbished were being worked on. We found that one of the door handles was not of the original design and the other badly worn, so we decided to recast all the handles. Here they are before finishing and chrome.

Rolls Royce Phantom II Continental Restoration-dsc01295_800x532.jpg

The sanding continues. Now the black in the primer helps highlight those areas where the body levels are not perfect so the team gets cracking on fixing those. Minor, but ever so important to get that perfect finish.

Rolls Royce Phantom II Continental Restoration-dsc01299_800x532.jpg

After dealing with those few issues, we really had to decide on the final paint scheme. It was the moment I had been dreading all along. While I really wanted to bring the car back to its original specs, I did not really like the original green that we had discovered on the car, however, in the interest of sticking to plan we decided to run some more samples that were close to original and decided to do a test run. We decided to paint one side of the car to help make the final decision. Heres how it went.

First, the coach-lining went on:

Rolls Royce Phantom II Continental Restoration-img_0599_800x600.jpg

And then the green...

Rolls Royce Phantom II Continental Restoration-img_0603_800x600.jpg

And finally the cream...We decided to mock-up the entire side to get a true sense for the final look. We propped up one of the wheels and held up the frnt mud-guard with a jerry-can to get a sense for the final outcome. I have to admit, it was growing on me. It looked truly period as opposed to an old car that was painted in a more modern combination...Did we finally go with this - I cannot reveal that now. Regardless, this exercise did help us make the final decision. Now we had to complete the prep to put on the final paintwork.


Rolls Royce Phantom II Continental Restoration-dsc01313_800x532.jpg
Rolls Royce Phantom II Continental Restoration-dsc01304_800x532.jpg
Ragtop is offline   (18) Thanks
Old 23rd January 2013, 13:27   #50
Senior - BHPian
 
harit's Avatar
 
Join Date: Nov 2008
Location: Mumbai
Posts: 4,033
Thanked: 3,281 Times
Re: Rolls Royce Phantom II Continental Restoration

Quote:
Originally Posted by Ragtop View Post
........... After dealing with those few issues, we really had to decide on the final paint scheme. It was the moment I had been dreading all along. While I really wanted to bring the car back to its original specs, I did not really like the original green that we had discovered on the car, however, in the interest of sticking to plan we decided to run some more samples that were close to original and decided to do a test run. We decided to paint one side of the car to help make the final decision. Heres how it went.

First, the coach-lining went on:...........And then the green...

........ And finally the cream...We decided to mock-up the entire side to get a true sense for the final look. We propped up one of the wheels and held up the frnt mud-guard with a jerry-can to get a sense for the final outcome. I have to admit, it was growing on me. It looked truly period as opposed to an old car that was painted in a more modern combination...Did we finally go with this - I cannot reveal that now. Regardless, this exercise did help us make the final decision. Now we had to complete the prep to put on the final paintwork...........
Personally, I would keep the green and hope that you did/will too. You will get used to the shade, the car will stand out, I can already visualise the result.
Looks like the front suspension needs some correcting
On a serious note, I like what I see

Cheers harit
harit is offline   (1) Thanks
Old 23rd January 2013, 14:53   #51
DKG
Senior - BHPian
 
DKG's Avatar
 
Join Date: Feb 2008
Location: Hyderabad
Posts: 3,711
Thanked: 1,389 Times
Re: Rolls Royce Phantom II Continental Restoration

A very pale pastel green and ivory would have looked stunning and very Art Deco. Not a fan of the parrot like green you have tried out !

Somehow I feel in pursuit of the original scheme even the Orchha Cadillac got a horrid blue and cream.
DKG is offline  
Old 23rd January 2013, 18:14   #52
Distinguished - BHPian
 
Join Date: Mar 2008
Location: Ann Arbor
Posts: 2,934
Thanked: 8,551 Times
Re: Rolls Royce Phantom II Continental Restoration

Quote:
Originally Posted by Ragtop View Post
Front axle re-installed,
And then the green...

Attachment 1041588

And finally the cream...We decided to mock-up the entire side to get a true sense for the final look. We propped up one of the wheels and held up the frnt mud-guard with a jerry-can to get a sense for the final outcome. I have to admit, it was growing on me. It looked truly period as opposed to an old car that was painted in a more modern combination...Did we finally go with this - I cannot reveal that now. Regardless, this exercise did help us make the final decision. Now we had to complete the prep to put on the final paintwork.
Amir, looks like you were faithful to the original scheme- green on the wings and swage lines only (like the drawing). Congratulations, it will be a stunner!
travancore is offline  
Old 23rd January 2013, 23:43   #53
Senior - BHPian
 
the mole's Avatar
 
Join Date: Nov 2006
Location: Mumbai
Posts: 2,189
Thanked: 825 Times
Re: Rolls Royce Phantom II Continental Restoration

Amir you have made this whole process look easy when we all know its not. I think this is the first thread that documents the restoration of a car in the calibre that your rolls royce really is in. Kudos to your meticulous documentation of the whole restoration and more to come.

I personally think the green looks superb. I have see your car up close in standstill and in motion and i feel it has truly come into being with the new/ original paint scheme. Thanks for sharing!

Last edited by the mole : 23rd January 2013 at 23:45.
the mole is offline  
Old 24th January 2013, 16:23   #54
BHPian
 
Ragtop's Avatar
 
Join Date: Jul 2009
Location: Mumbai
Posts: 90
Thanked: 248 Times
Re: Rolls Royce Phantom II Continental Restoration

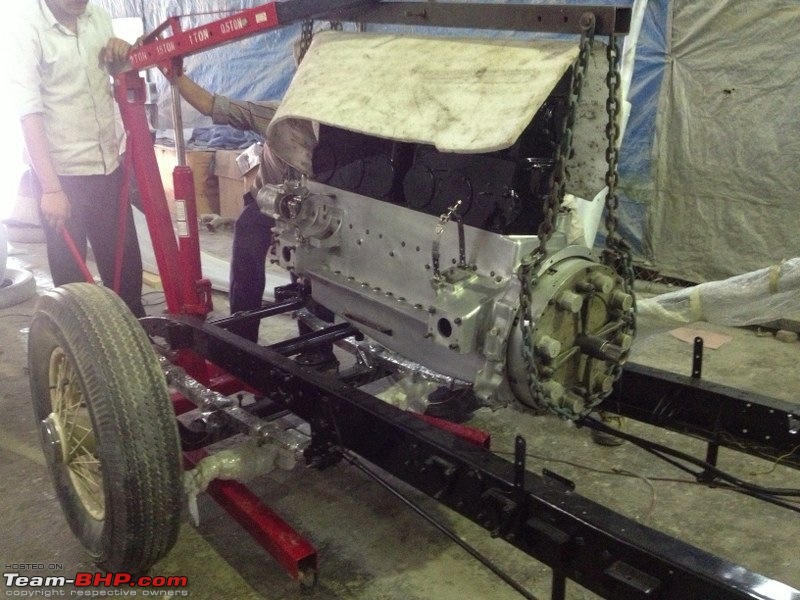
Meanwhile, the engine was remounted onto the chassis
Rolls Royce Phantom II Continental Restoration-img_0612_800x600.jpg
Once the engine was in, we could now begin the detail-oriented work of attaching all of the engine components and linkages...
Rolls Royce Phantom II Continental Restoration-dsc01318_800x532.jpg

We were also simultaneously working on rebuilding the firewall and all its components. We needed to run a test on the lubrication system before the firewall was installed so that access to pipes would be easier. We mounted all of the firewall components since some of the bolts were really hard to reach once the firewall was installed. Once the engine had been mounted I ran a quick check on the steering and it seemed lighter than before, however, only a test drive will reveal the final outcome. One thing did look good though and that was the camber on the front springs. Before we embarked upon this craziness, the front leaves had a flat to negative camber, after all the work we had done they now showed a mild positive, which was the way it was supposed to be – yeah!!


Rolls Royce Phantom II Continental Restoration-dsc01321_800x532.jpg

Rolls Royce Phantom II Continental Restoration-dsc01320_399x600.jpg

After all the paint prep, we reinstalled the windscreen just to make sure the frame was in alignment with the body.

Rolls Royce Phantom II Continental Restoration-dsc01340_800x532.jpg

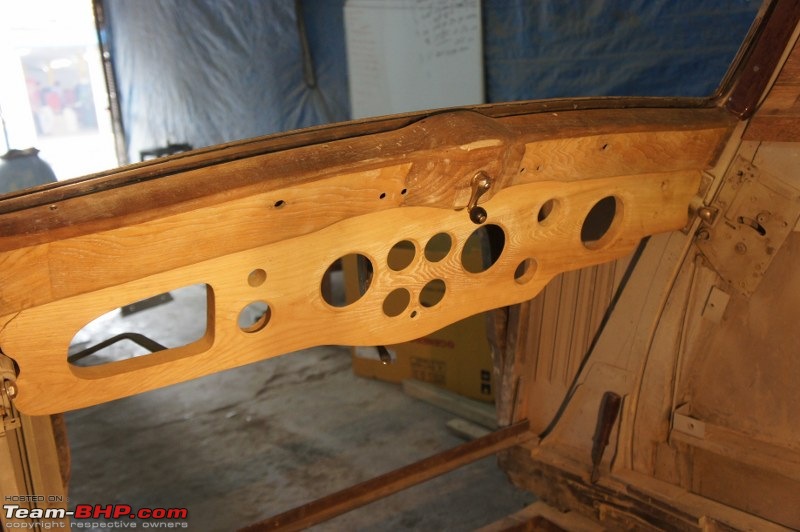
The original dash was well worn so we sourced some oak wood (as per original specs) and duplicated the original, here was the first fit-out in progress. We wanted to check all the fittings and even mount the dash with all its fittings prior to polish so we would not have to handle the dash in any way after polishing except for fitting into place.
Rolls Royce Phantom II Continental Restoration-dsc01346_800x532.jpg

The dynamo back from a complete overhaul and buffing. In keeping with our original philosophy of refraining from over-restoration with the goal to prolong the life of the car and its components, we decided against scrapping down the metal and re-chroming due to the damage that would do to the dynamo body. All we did was buff the existing body and this was the outcome! I feel this looks great, gives the car some character and is a tribute to its age.

Rolls Royce Phantom II Continental Restoration-dsc01347_800x532.jpg
Ragtop is offline   (7) Thanks
Old 24th January 2013, 16:42   #55
Distinguished - BHPian
 
karlosdeville's Avatar
 
Join Date: Jul 2006
Location: Pune
Posts: 11,976
Thanked: 18,275 Times
Re: Rolls Royce Phantom II Continental Restoration

Quote:
Originally Posted by Ragtop View Post
The original dash was well worn so we sourced some oak wood (as per original specs) and duplicated the original, here was the first fit-out in progress. We wanted to check all the fittings and even mount the dash with all its fittings prior to polish so we would not have to handle the dash in any way after polishing except for fitting into place.
Obviously I assume you have safely stored the original dash - you could consider mounting it in your garage or office - a great conversation piece!
karlosdeville is offline   (2) Thanks
Old 29th January 2013, 11:44   #56
BHPian
 
Ragtop's Avatar
 
Join Date: Jul 2009
Location: Mumbai
Posts: 90
Thanked: 248 Times
Re: Rolls Royce Phantom II Continental Restoration

Meanwhile, wiring has begun. We sourced original thread wound wiring as per the original color codes.

Rolls Royce Phantom II Continental Restoration-dsc00909_800x532.jpg
Rolls Royce Phantom II Continental Restoration-dsc01371_800x532.jpg
Rolls Royce Phantom II Continental Restoration-dsc01374_800x532.jpg

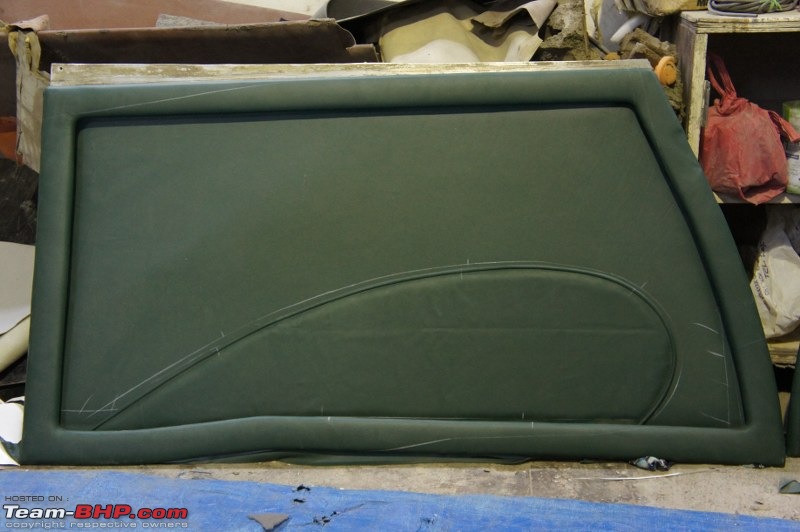
Also, the door upholstery was being worked on. The design of the chrome embellishment on the spats was being carried through into the door pocket. This was also a nice break to the monotony of the large door.


Rolls Royce Phantom II Continental Restoration-dsc01375_800x532.jpg


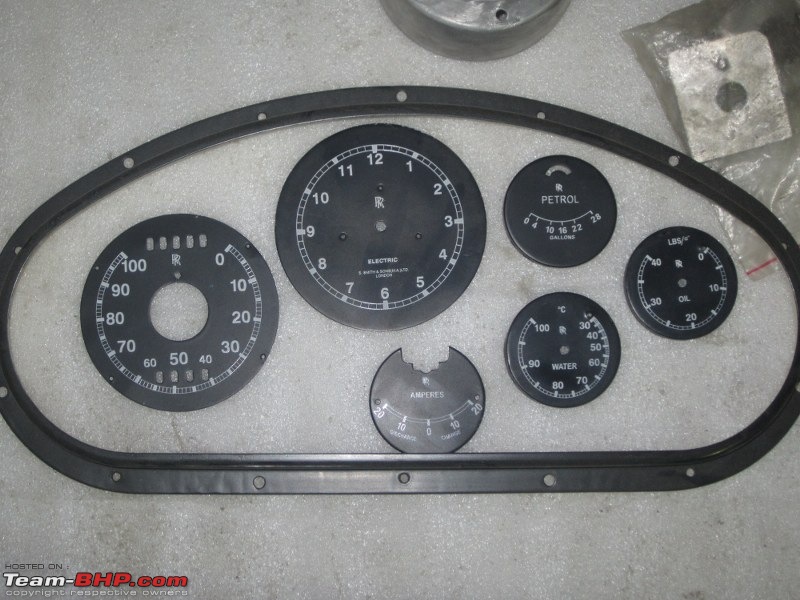
The meters too were being completely overhauled. The white lettering in the counters had faded significantly. Heres the reworked speedo.


Rolls Royce Phantom II Continental Restoration-dsc01407_800x532.jpg


The devil is truly in the details! The details were tasking way longer than planned for and we were into a real time crunch! Over the past few days, we Installed the tank, battery box and wiring conduits and removed wheels for sand blasting and paint. We also painted the woodwork inside the body but I cant share images of that since it will give away the final paint scheme!


Rolls Royce Phantom II Continental Restoration-dsc01419_800x532.jpg


We also completed the screen printing for the meters, now the assembly begins:


Rolls Royce Phantom II Continental Restoration-img_2901_800x600.jpg


The seat adjustment sliders were prepped for ENP and chrome and the silencer was completed and installed. We were still awaiting the gearbox which was the real bottleneck at this point. I was unwilling to mount the body without the gearbox in place since that would easily damage paint if we attempted to mount the gearbox later. Polish on the dash and interior woodwork had also begun. We found that the interior wood windscreen surround was also damaged so that was being made as well.
We also found that there were a few metal bits that needed to be cast (spark plug caps and the like) so we also decided to go ahead and make a town-cap for the car, which is essentially a radiator cap without the mascot. I am always nervous about leaving the car parked anywhere with the mascot for fear of it getting stolen. On this note, I had received a humorous piece of writing about this from someone some years back – here it is....


BEAT THE MASCOT MANIAC
This problem of people pinching our mascots is getting extremely serious, and after applying an incredible amount of thought to the matter I have a solution which is guaranteed to amaze with its simplicity.

First of all it is necessary to run two wires from the ignition switch, one to the mascot and one so that it trails on the ground beneath the radiator. This done, all you need to do when you park outside the local hostelry is to leave the car in gear with the handbrake off and just turn the radiator drain tap until a steady drip of coolant issues. Ha! now observe the thief tiptoeing across the ca rpark, shoes in hand so as not to be heard. He grasps the mascot with ignition wire attached but (we hope) cunningly concealed. He is about to utter a soft oath because he has trodden in a puddle of antifreeze but he never gets the chance because the other wire from the ignition is also communing with the puddle of antifreeze, and by his simple move he has made the ignition circuit. Now we all know that Rolls-Royces all start on the ignition (aheml) and the car being in gear it leaps forward, adroitly killing the thief. The thief, being dead, falls backward and so breaks the ignition, causing the engine to stop, and the car rolls to a standstill neatly covering the now defunct mascot pincher. All very well you say, but what about the embarrassment of explaining to the local constabulary the presence of a redundant carcass reclining under your car? This is the clever bit. I have observed from recent correspondence in the Bulletin that the coolant in the radiator has an acidity of ph2, quite a strong solution we are informed. We now see that our friend is lying in a puddle of ph2 and furthermore extra ph2 is anointing him all the while. Therefore when we make our departure, having consumed half a pint of nauseating shandy and three fingers of even worse orange juice, all that is left is a strong smell of hydrogen and ammonia, and the thief's shoes, with perchance a gold pocket watch as well.

Last edited by aah78 : 6th August 2018 at 17:11. Reason: Alcohol reference removed.
Ragtop is offline   (12) Thanks
Old 29th January 2013, 14:17   #57
BHPian
 
Join Date: Dec 2009
Location: planet earth
Posts: 888
Thanked: 1,188 Times
Re: Rolls Royce Phantom II Continental Restoration

The floor of this beauty being wooden, it should have a metal plate at a point where the exhaust system is closest to the floor. I hope that plate is retained as its absence creates a fire hazard. The car is coming up nicely. She deserves to be entered in the competition class as she is nowhere as she was during the first show which was anyway a few years ago. The attention to detail, both mechanical as well as cosmetic makes it a worthy contender for best in show.
Bulldogji is offline   (2) Thanks
Old 30th January 2013, 15:51   #58
BHPian
 
Ragtop's Avatar
 
Join Date: Jul 2009
Location: Mumbai
Posts: 90
Thanked: 248 Times
Re: Rolls Royce Phantom II Continental Restoration

Quote:
Originally Posted by Bulldogji View Post
The floor of this beauty being wooden, it should have a metal plate at a point where the exhaust system is closest to the floor. I hope that plate is retained as its absence creates a fire hazard. The car is coming up nicely. She deserves to be entered in the competition class as she is nowhere as she was during the first show which was anyway a few years ago. The attention to detail, both mechanical as well as cosmetic makes it a worthy contender for best in show.
Actually the silencer itself has a heat shield all along its surface which dissipates some of the heat, also, the wooden floor then has a metal plate below it and there is also some foam between the metal and the wood to act as an insulator, it is all in place.
Ragtop is offline   (1) Thanks
Old 31st January 2013, 11:27   #59
BHPian
 
Ragtop's Avatar
 
Join Date: Jul 2009
Location: Mumbai
Posts: 90
Thanked: 248 Times
Re: Rolls Royce Phantom II Continental Restoration

At this stage, we were were working on all kinds of things simultaneously. Here are some random images of what was being worked on:

Wheels were painted and ready for tyres to be installed:

Rolls Royce Phantom II Continental Restoration-img_2911_800x600.jpg

polish on the woodwork was progressing slowly. We had decided to go with a very traditional approach to the polish with 'Lac' and french polish only - a tedious job!

Rolls Royce Phantom II Continental Restoration-img_2915_800x600.jpg

Meters were ready to be installed

Rolls Royce Phantom II Continental Restoration-img_2919_800x600.jpg

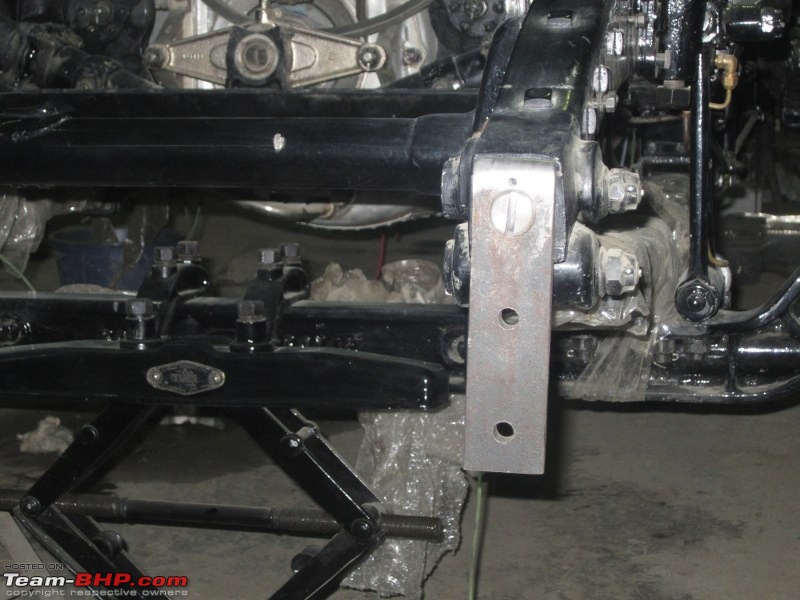
At some point in the future I will add bumpers, we decided to go ahead and build in the brackets right now to make that job easier in the future..

Rolls Royce Phantom II Continental Restoration-img_2930_800x600.jpg

All the cups for wheel weights were painted and ready. I will attach images later to show how the wheels are balanced.

Rolls Royce Phantom II Continental Restoration-img_2938_800x600.jpg

Steering controls off and ready for restoration..

Rolls Royce Phantom II Continental Restoration-img_2946_800x600.jpg

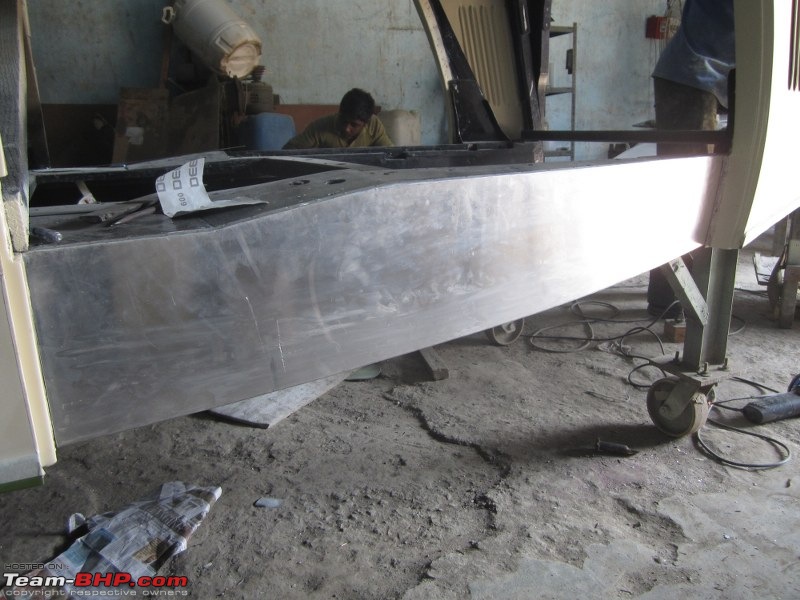
Aluminum on the side replaced. The originals were just too dented to get a clean paint finish.

Rolls Royce Phantom II Continental Restoration-img_2950_800x600.jpg

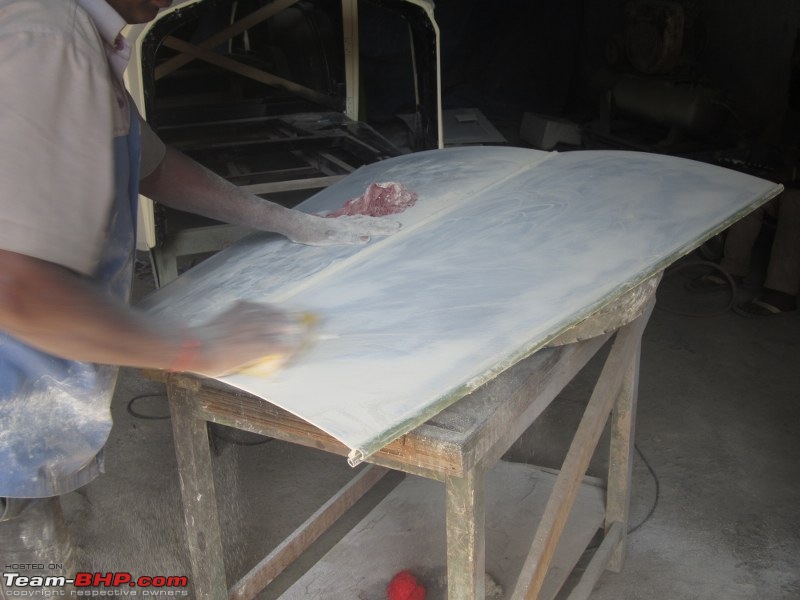
Bonnet being sanded - its been weeks - when will it end!!

Rolls Royce Phantom II Continental Restoration-img_2954_800x600.jpg
Ragtop is offline   (6) Thanks
Old 31st January 2013, 11:44   #60
BHPian
 
Join Date: Mar 2008
Location: Mumbai
Posts: 329
Thanked: 188 Times
Re: Rolls Royce Phantom II Continental Restoration

Absolutely mind-blowing detailing. Dying to see the final...final product as this is for me "The Best" RR in the country. Can't wait upto 10th Feb anymore
67Bug is offline  
Reply

Most Viewed


Copyright ©2000 - 2024, Team-BHP.com
Proudly powered by E2E Networks