News
DIY Guide: Hyundai Verna diesel fuel filter replacement

Today, I bring to you another interesting DIY, which is the replacement of Verna's diesel fuel filter.
BHPian stanjohn123 recently shared this with other enthusiasts.
Today, I bring to you another interesting DIY, which is the replacement of Verna's diesel fuel filter. It's the first time I'm doing it, so please bear with some of the mistakes I commit.
For those of you who are not patient with reading this long post, can jump to the video I made here.
Now let's begin, shall we?
Tools Required
- 10mm and 12mm spanner
- 10mm socket type wrench
- Filter Wrench - Cost 270 Rs
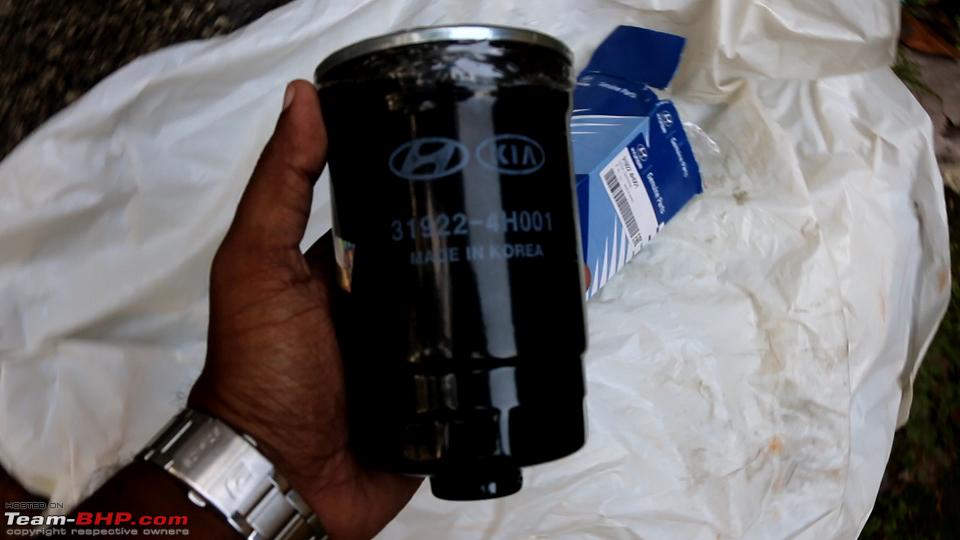
- Diesel Fuel Filter - Cost Rs 1,740, including shipping Part # 31922 4H001

STEP 1: Remove the Car Battery. Just note that there is a 12mm screw at the bottom that requires a T-type wrench to remove. Power Terminals come out with a 10mm spanner.
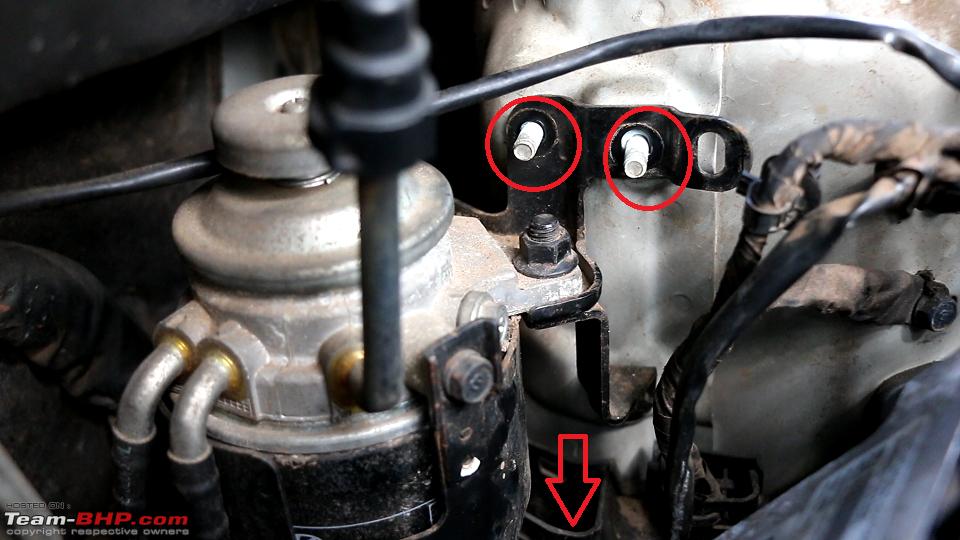
STEP 2: Remove the ECU Bracket. To get free access to the fuel lines and to remove the bottom 10mm nut from the Fuel Filter housing, you need to move the ECU out of the way.
For this, there are 3 x 10 mm screws which need to be removed. After that you can just pull forward the ECU unit for easy access.
STEP 3: Unplugging the Fuel Lines. By pressing 2 green push buttons you can unplug the Inlet and Outlet Fuel lines.
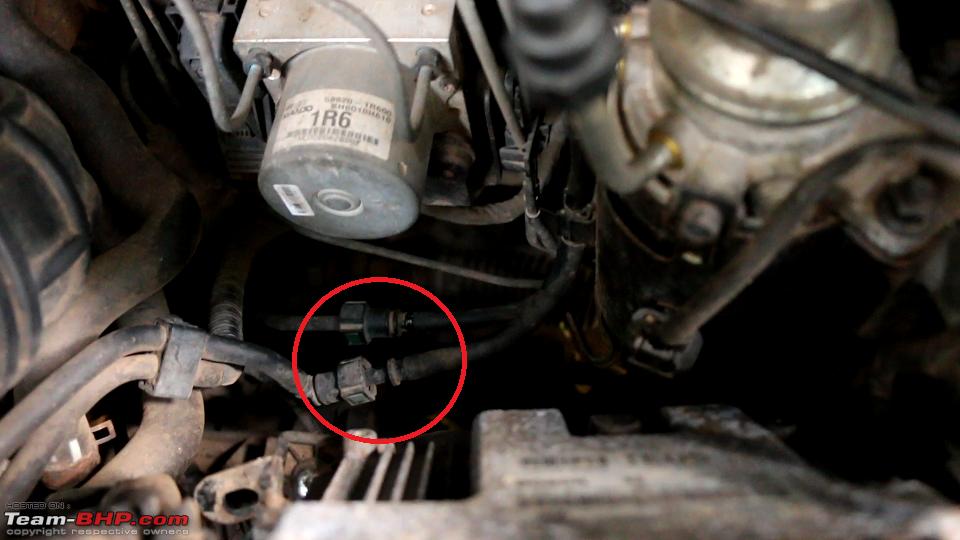
After Unplugging, the fuel lines should look like the below pic


STEP 4: Unplug the Water Sensor. Just press the clip and pull it upwards to unplug.


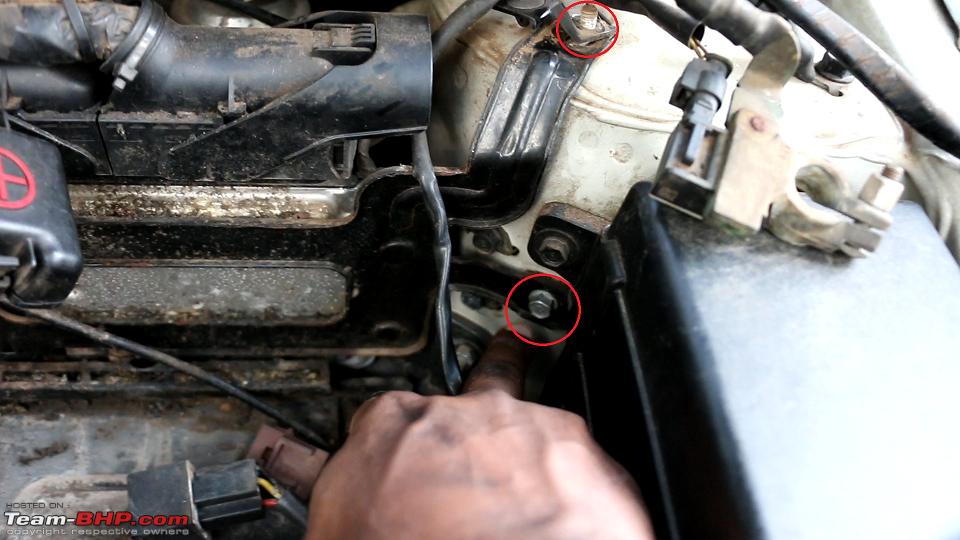
STEP 5: Remove the Fuel Filter Housing. This is held in place by 3 x 10mm nuts. The top 2 nuts can be removed with the 10mm spanner while the bottom nut needs the 10mm socket wrench.
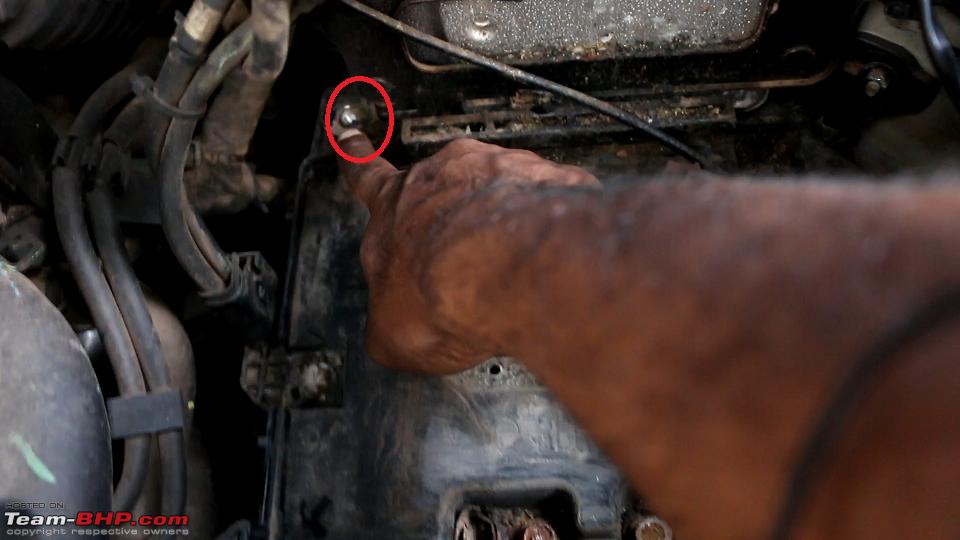
The Earth wiring also might need to be removed for easy access to the bottom nut. It is stubbornly held in place by a 12 mm screw. So it's better you remove this one as well.
STEP 6: Remove the filter housing from the engine bay and separate the Housing from the Filter. This is simple. Just remove the 2x 10mm screws on the sides and 2 x 12mm Nuts on the top side. This will release the housing from the Filter.


Also don't forget to unhook the water sensor socket from the Filter Housing.

STEP 7: Remove the Water Sensor from the Filter and then remove the Filter from the Fuel pump top assembly.
Just screw the water sensor in the anti-clockwise direction gently will release it from the filter. Be careful as precious fuel will flow out from the filter. If you don't want to waste it, just capture it using a funnel and bottle. Just don't reuse it for your car though.

Then use the filter Wrench to remove the filter from the top pump housing. This is a bit difficult. In Workshops they use a machine to hold one end onto place but I used Juggad-style of laying it down on the floor and holding it onto place with my foot on one end and rotating with the Filter wrench on the other end.

STEP 8: Replace new Diesel Filter. Reconnect the water sensor connector at the bottom of Filter. Now fill the Filter with Fresh Diesel up to the brim and lubricate the washer with Diesel. Then just screw the new filter back onto the top housing.

STEP 9: Reverse the entire step. Place the filter onto the Filter Housing assembly and tighten it. Then place the Fuel Filter assembly back in the engine bay and tighten all the screws.
An Important step here is to just reconnect the Inlet Fuel Line and leave the Outlet Fuel line open. You need to pump the top of the filter housing to make sure fuel is coming out of the outlet pipe and to free any air bubbles. Once you see fuel coming out freely even after you stop pumping, just reconnect the Outlet Fuel Lines as well.

STEP 10: After Re-connecting the Fuel Outlet Keep pumping the top of the Fuel Filter Housing till you can't pump any longer. It'll become really hard and tight. That's the cue to stop.
Reconnect the ECU Housing, Earth Wire and Battery and you're done.
Hope you guys liked this DIY and I do hope you try it out as well.
Check out BHPian comments for more insights and information.
Find Car News
Just News


About Us