News
DIY: Here's how I installed a central armrest in my Tata Nexon XM(S)


I have been doing minor and major upgrades since I bought it to improve it and make it more convenient as per my requirements.
BHPian KarDIY recently shared this with other enthusiasts.
I own a Tata Nexon XM(S) and I have been doing minor and major upgrades since I bought it to improve it and make it more convenient as per my requirements. One feature which is available in the top model and is the most convenient is the armrest. So, after researching a lot I decided to install it in my car. I will show you how to do it in a few easy steps.
If you are someone who understands better by watching a video, watch this.
Tools Required:
- Screw Driver Set
- Pry Tools
- Wrench set
- T Handle ¼"
- Blade/Knife
- Armrest, Console and other parts
- Filer/Sanding paper
Procedure:
1. Remove both front seats. Each seat has 5 Torx bolts. (Don't forget to remove the coupler under the seat)

2. Remove both side silver panels on the centre console. On the right side, you will find a screw under this silver panel, remove it.

3. Remove the front side panel of the centre console (Do this on both sides). They have one plastic screw and rest clips.

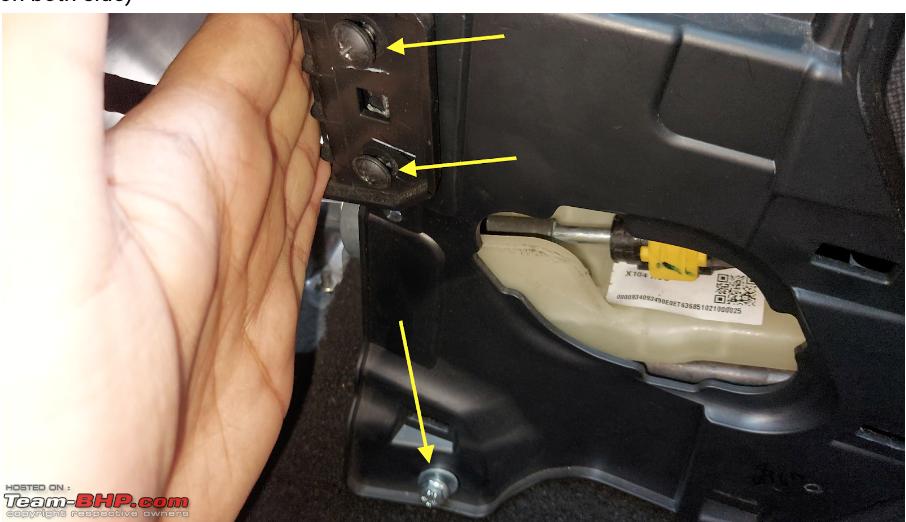
4. Remove both side front brackets with 5 screws. (Do this on both sides)

5. Now remove 2 screws and 1 bolt in front of the main centre console trim. (Do this on both sides)
6. Now remove the bolt in the rear of the main centre console trim, these are under plastic covers. (Do this on both sides)

7. Now remove the rear lower panel which will give access to the main bracket bolts.

8. Under the above-mentioned panel you will find a plastic bracket. Remove this rear plastic bracket connecting both side trims, it has 2 screws.

9. Remove 2 bolts and 5 screws of the main bracket.

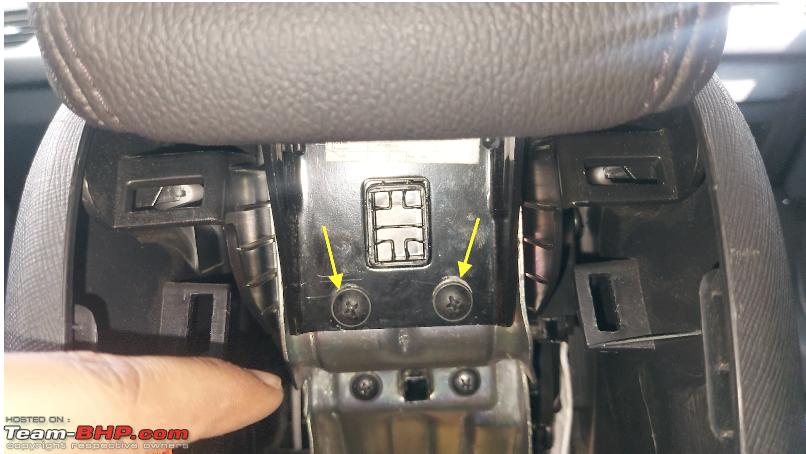
10. Remove the parking brake access cover and remove the screw under it.

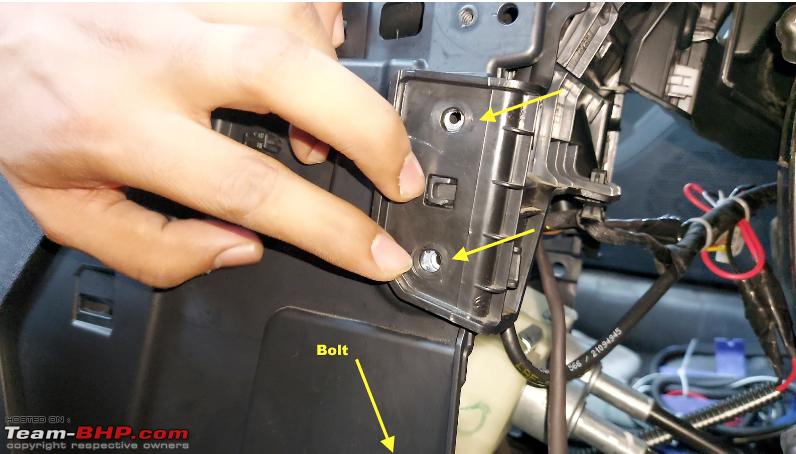
11. Main console body has 2 bolts, remove these. One in front under a rubber mat and the second in the rear under a plastic cover.

12. Now the whole centre console will start moving. At this stage, you can remove the inner screws of both main side trims. There are 2 screws on each side.

13. Remove the gear trim and gear boot. There is one screw near the gear trim, remove it.

14. Also do not forget to disconnect the drive mode selector switch.

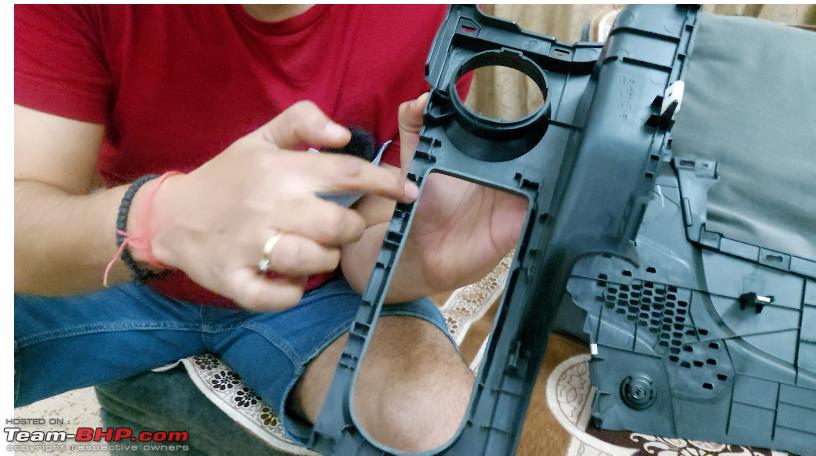
15. Now once the main centre console body is out, you have to remove the top panel on it. (Top panel which has drive selector switch in it)
16. Modify the top panel according to the new console. (You have to trim some clips and grind them so that the tambour door can slide properly).
17. Now connect the main side trims with the main console body. Each trim has 2 screws and rests clips.

18. After connecting side panels it will become an assembly. Now we have to fix this assembly as it is in the car.
19. Start with the main metal bracket bolts. Tighten these 2 bolts.

20. Then tighten the rear 2 bolts on each side of the main side panel. Don't forget to put the plastic cover back.

21. Now tighten the 2 screws and one bolt in front of the main side panel. (Do this for each side)
22. Now tighten the screw under the parking brake access cover on the left side main panel.

23. Now tighten the screw under the silver panel on the right side of the main panel. Also, Tight one screw near the gear panel.


24. Put a side bracket with 5 screws back. (Do this for both sides)

25. Also, fix the drive selector wire.

26. Now put the top panel (that we modified) back in its place. Don't forget to put the drive mode selector switch.
27. Put the Parking brake access cover back.
28. Put the gear panel back and adjust the gear boot accordingly.
29. Now tighten the 3 bolts of the main console body (i.e. shutter wall part). Here you have to put 3 bolts so you need one extra bolt.

30. Now put back front side panels, they have one plastic screw. (Do this for both sides)

31. Put side silver panels back on both sides.
32. Now let's go to the rear. Put the bracket back which connects the side trims at the rear. It has 2 screws.

33. Then put the rear lower panel back in its place.
34. Now connect the armrest and it has 4 screws.

35. Now cut the rear main panel as per the requirement so that it fits with the armrest. (7" will be the height)
36. Put the front seats back.
With this, you are good to go.
Check out BHPian comments for more insights and information.
- Tags:
- Indian
- Tata
- Member Content
- DIY
- Tata Nexon
- armrest
Find Car News
Just News


About Us

Buy & Sell
USED CARS