News
DIY: How I retrofitted ADAS in my Ford Ecosport
Being a manual, stop and go function would not work in a car like mine. If the system detects that the engine is stalling or high-revving, it disengages and recommends the driver to perform a gear change.
BHPian nighthaven recently shared this with other enthusiasts.
Hello all. It's been sometime since I posted any updates. I have been away from the car for quite some time and had other priorities with whatever little time I could spend during my trips to India.
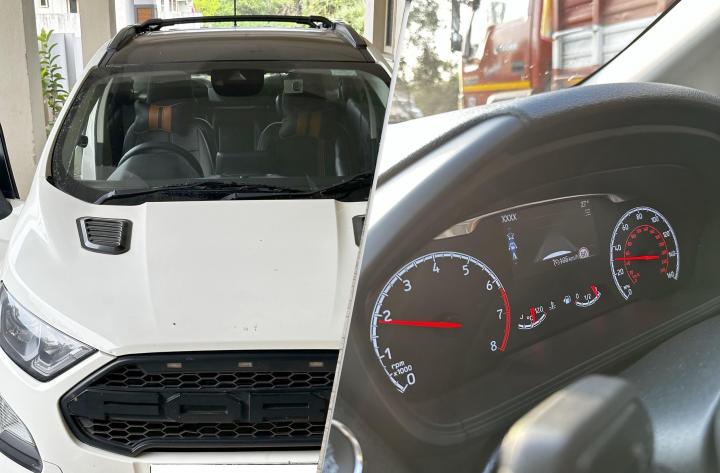
I finished installing Ford's Advanced driver-assistance system (ADAS) camera in the windshield and Adaptive Cruise Control Radar last week. Ford started offering EcoSport with Pre-Collision Assist (PCA) with Auto Emergency Braking (AEB) and Blind Spot Assist System (BLIS) with Cross-Traffic Alert (CTA) in Europe. I don't understand why Ford has not offered the same in USA variants, probably something to do with stringent road safety regulations in the EU. Other ADAS functions such as Lane Keeping System (LKS) and Adaptive Cruise Control (ACC) are not available in EcoSport anywhere in the world.
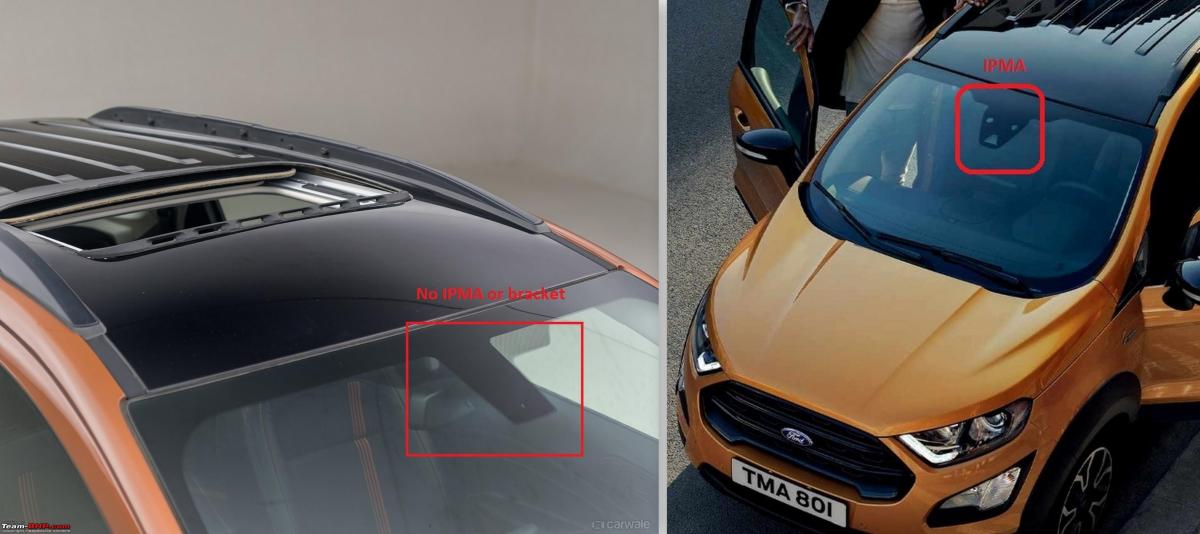
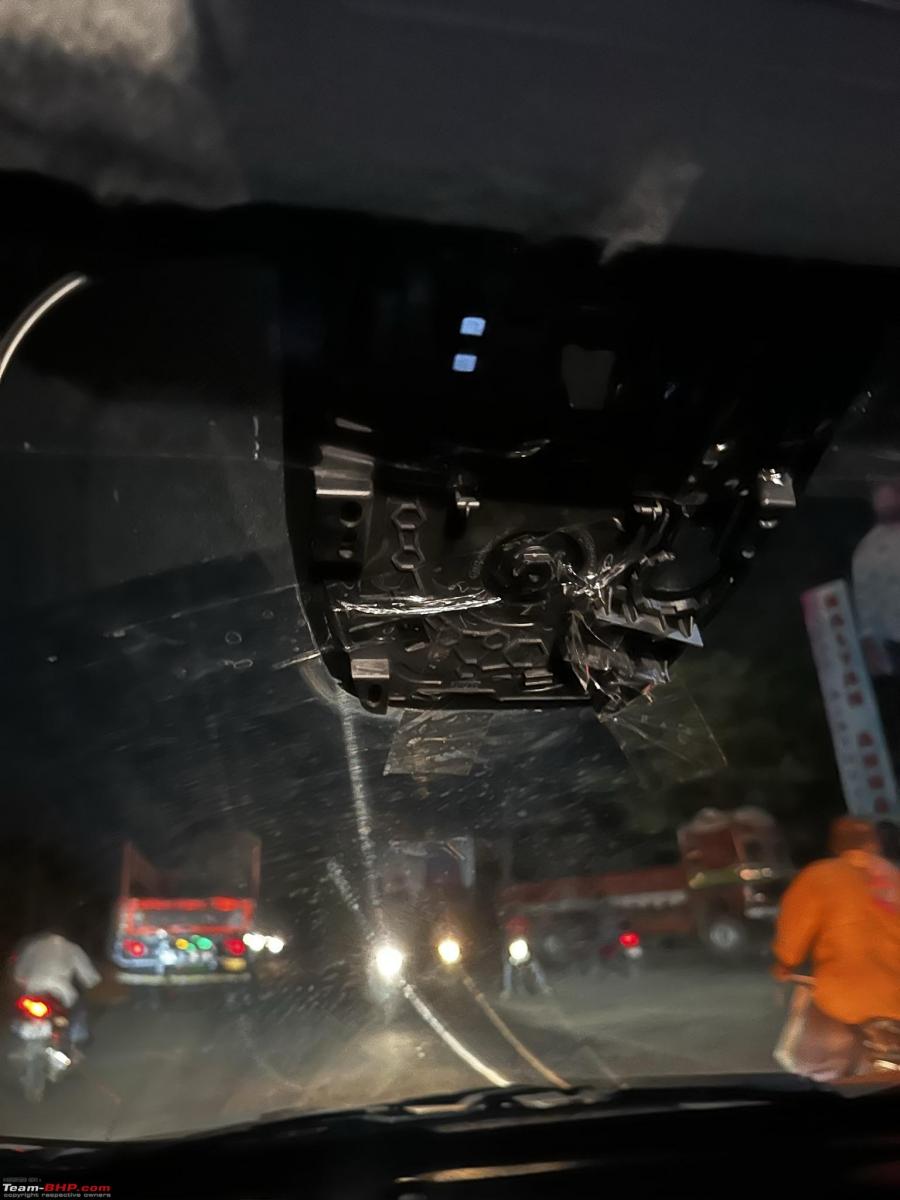
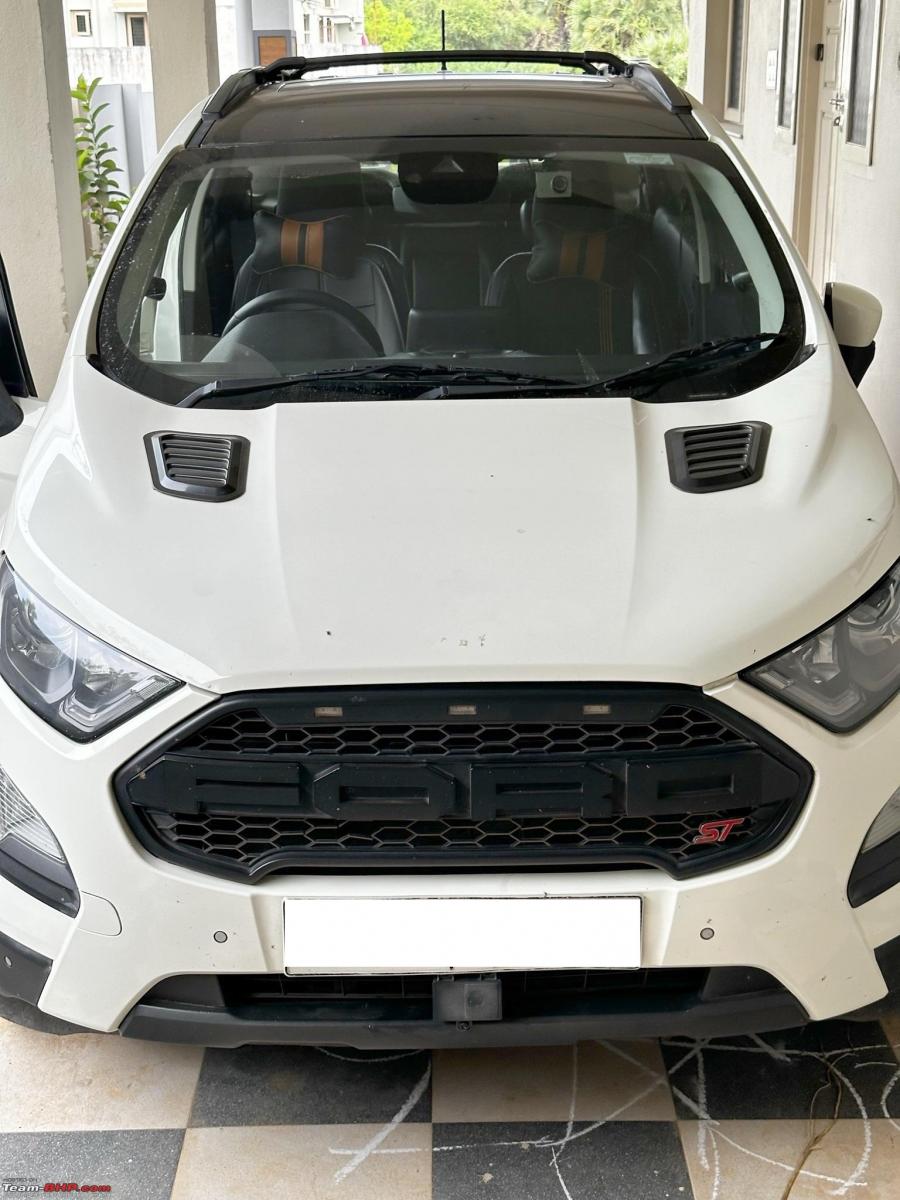
Major challenge with this mod is finding and installing an ADAS IPMA mounting bracket. For reference:
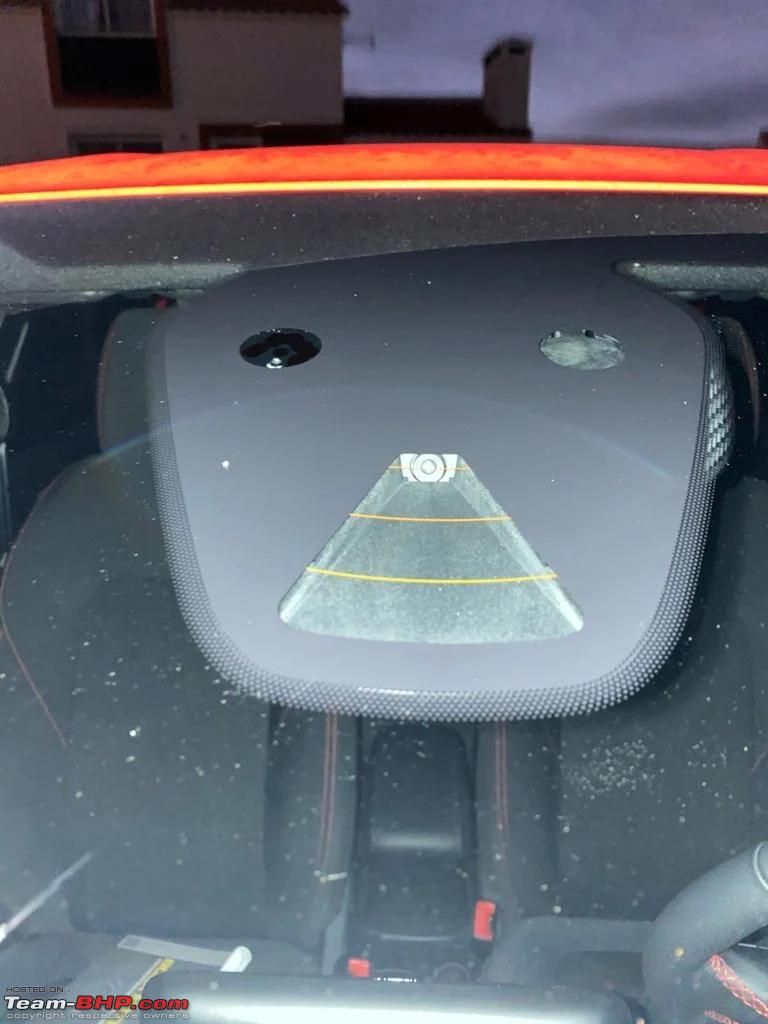
Close up.
Being a manual, stop and go function would not work in a car like mine. If the system detects that the engine is stalling or high-revving, it disengages and recommends the driver to perform a gear change. After gear change, the system resumes operation. This mod is still in progress. I have trouble calibrating the ACC radar as it requires ideal road conditions for calibration which I couldn't find near my hometown and I had very less time to tinker around. I will sort this out in my next visit.
Parts required:
- ADAS Camera from a Ford Focus mk4/Ford Fiesta mk8/EcoSport/Puma. Part no: ABCD-19H406-XY Price: 80 pounds.

ABCD can vary depending on model year and donor car such as JX7T (focus mk4), H1BT (fiesta mk8), L1TT (Ecosport/puma). Any of the three should work as the hardware is the same model manufactured by Visteon.
'X' can be A/B/C (fiesta, puma, Ecosport) and G (for ford focus), defines the features available in the camera. A only supports Lane Departure Warning, B supports A features as well as TSR and AHB, C supports B features as well as ACC, PCA with AEB. Ideally it's best to go for the 'C' or 'G' variants as they support all features.
'Y' is the revision. So it doesn't matter.
- Windshield mounting bracket along with respective plastic trim panels (Price: 70 pounds) - This is not a child part and that makes it very challenging to find and buy. The mounting bracket comes attached with the windshield directly from the glass manufacturer. I had to search around and find a car recycler who pried open the bracket from a Ford focus windshield.
- ACC radar (Part no: ABCD-9G768-XY) (Price: 120 pounds).
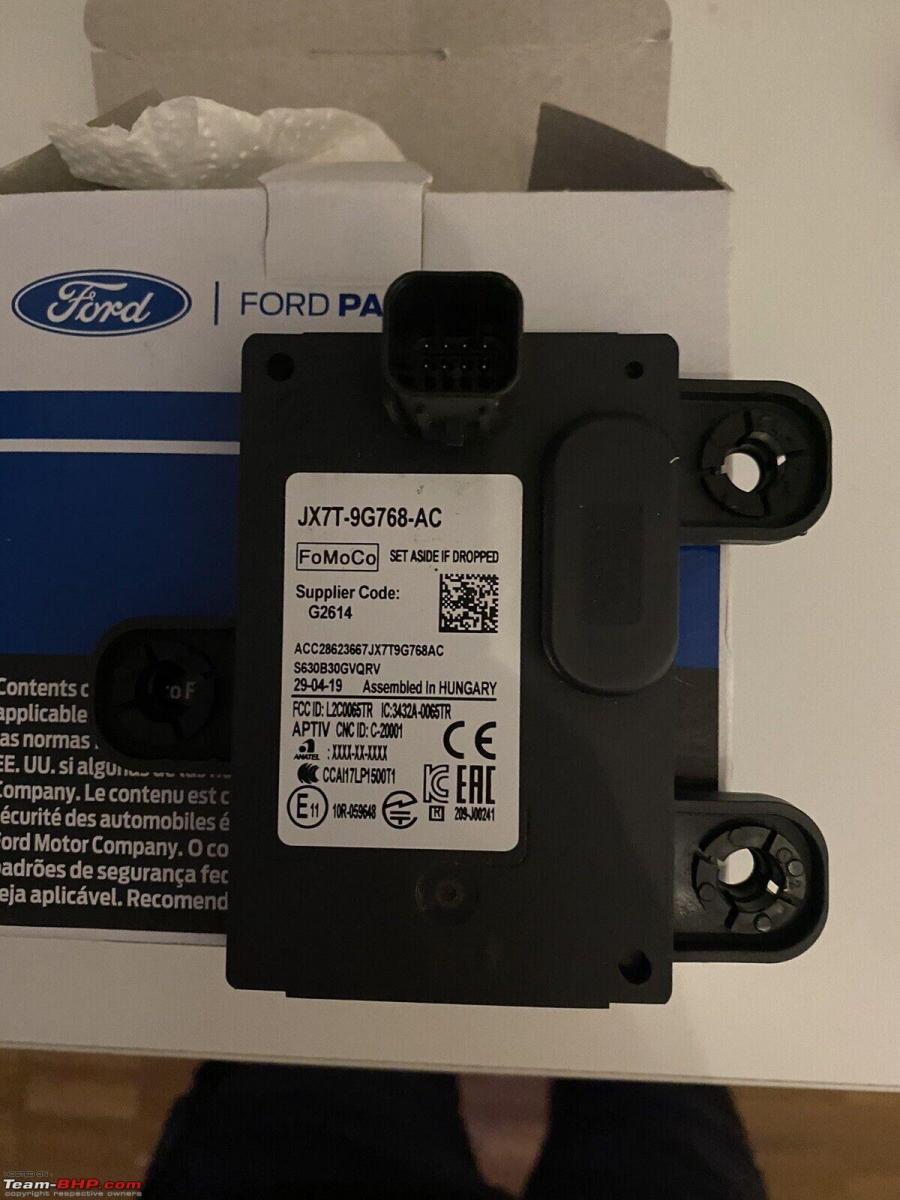
D code does not matter as long as the radar is from a Ford Focus mk4/Ford Fiesta mk8/Puma. This part is required only if you are looking to install Adaptive Cruise Control (ACC). At this point I dont know if I can make this function work or not.
Installation:
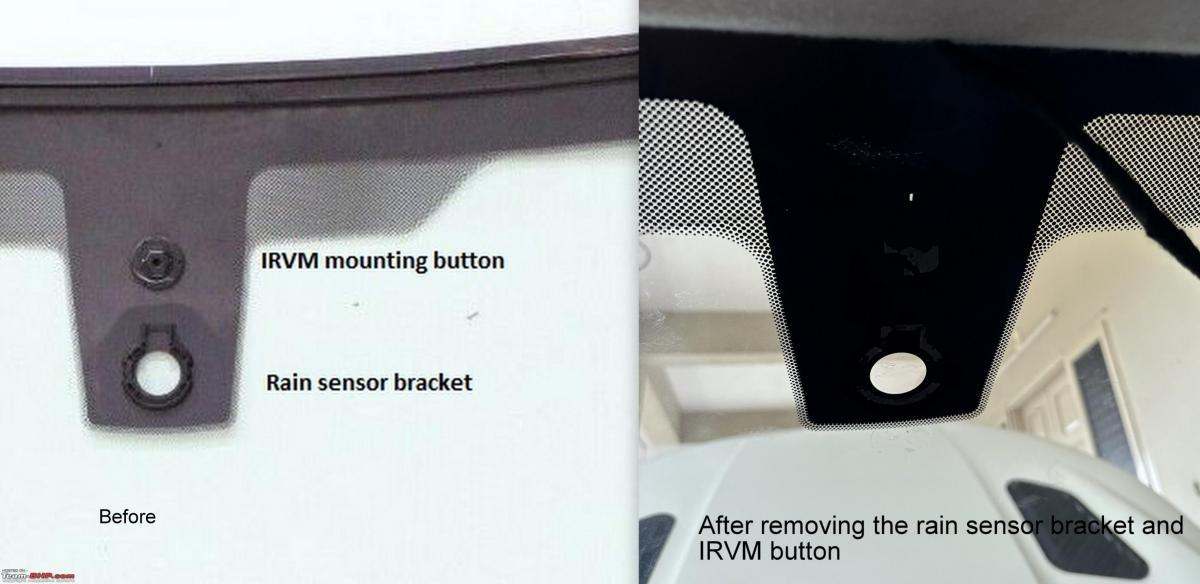
Removed the center mirror trim panel by pulling the two trims apart; unhooked the rain sensor and IRVM from the mounting button. There is silicone gel pad between the rain sensor and windshield glass to ensure there is no gap between them (to help with refraction). You will need this for the sensor to work effectively. Remove this very carefully as it can tear off easily.

Used a heat gun gently on the IRVM mounting button and Rain sensor bracket to weaken the adhesive and pried them out carefully from the glass. Store the IRVM mounting button and silicone gel pad as we will need them later. Rain sensor bracket is not required as the new ADAS mount has one.
Aligned the mounting bracket on the windshield and marked the sensor locations that need to be sanded. Sanded the black layer (technically called 'Frit' and is baked on the top layer of the glass during manufacturing) with sand paper (Grit size: #80 - #120). Me and my brother did it manually taking turns as I did not have low grit paper which could be attached to a sanding machine. Sanded the surfaces progressively using a sanding machine (used a Black and Decker drill with a sanding attachment) with higher grit papers #240, #500, #1000, #2000, followed by polishing with ceriux oxide compound on a felt polishing pad. Spent about 15-20 minutes at each stage. This has to be most physically stressful mod I have ever done due to the ergonomically awkward posture involved. Ensure you are spraying enough water with breaks in between. DO NOT LET the glass OVERHEAT as it will melt the plastic layer laminated between the glass and will give a blurred look or worse crack the glass due to heat.

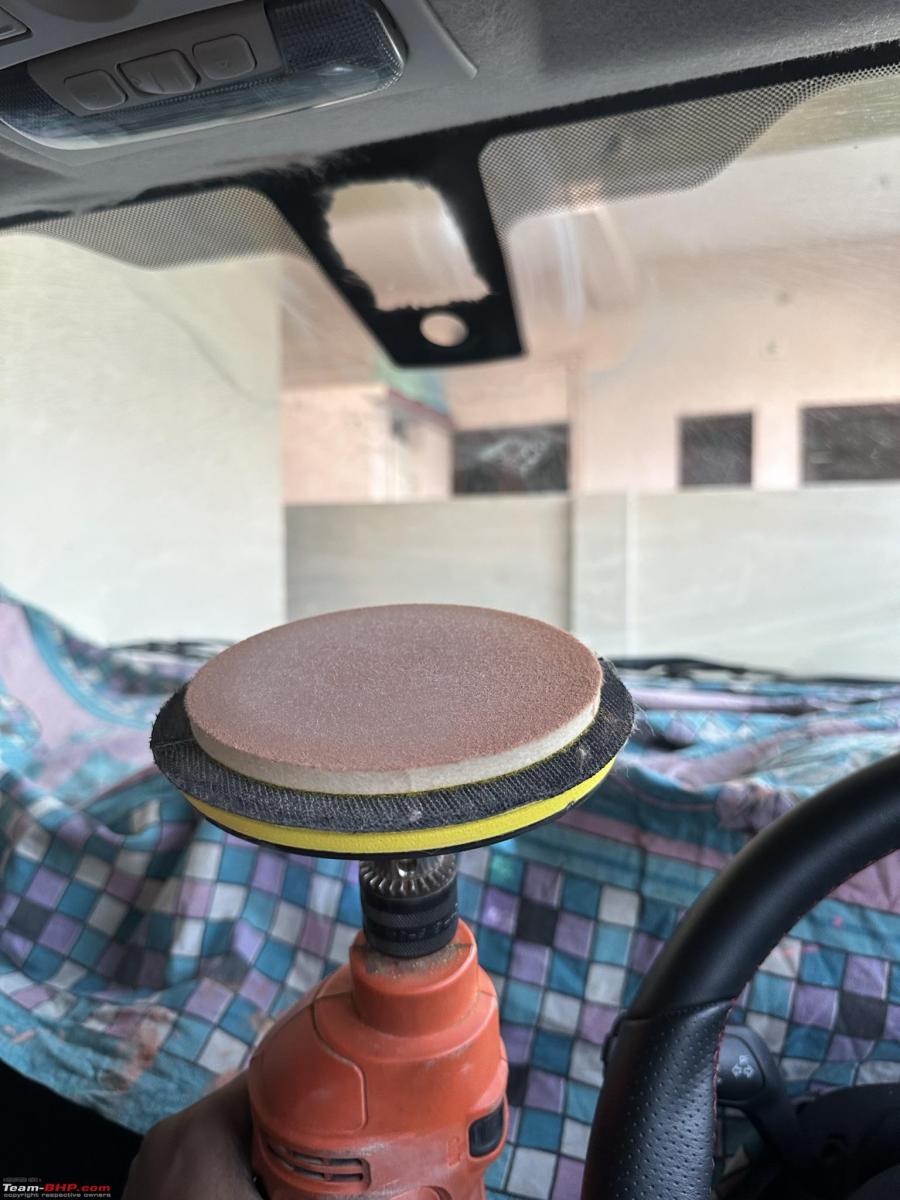
Sanding paper (I got from local market)
Cerium oxide powder (must be made into a paste with water)
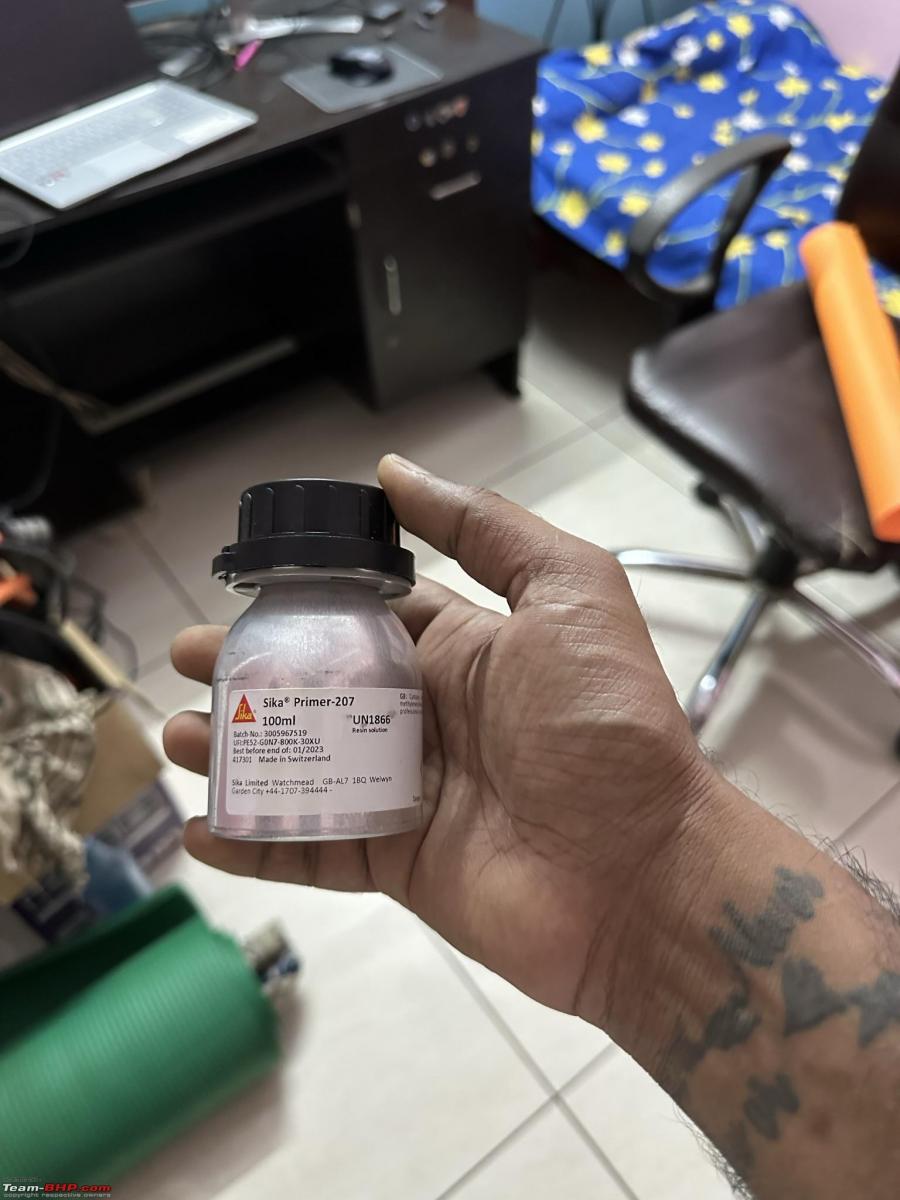
Marked the mounting location on the glass using chart paper and paper tape cut in shape. This is to ensure that you are not applying primer on the surface you just sanded. Alignment of the bracket is very critical, therefore I had to recheck a 100 times before I moved forward. Once the sensor locations (sanded to 100% transparency) are covered in tape, I applied Sika Primer 207 (got from Ebay UK) on the marked areas. This primer is specially made for automotive glass to improve adhesion and provide UV protection. Allowed the primer to dry overnight.
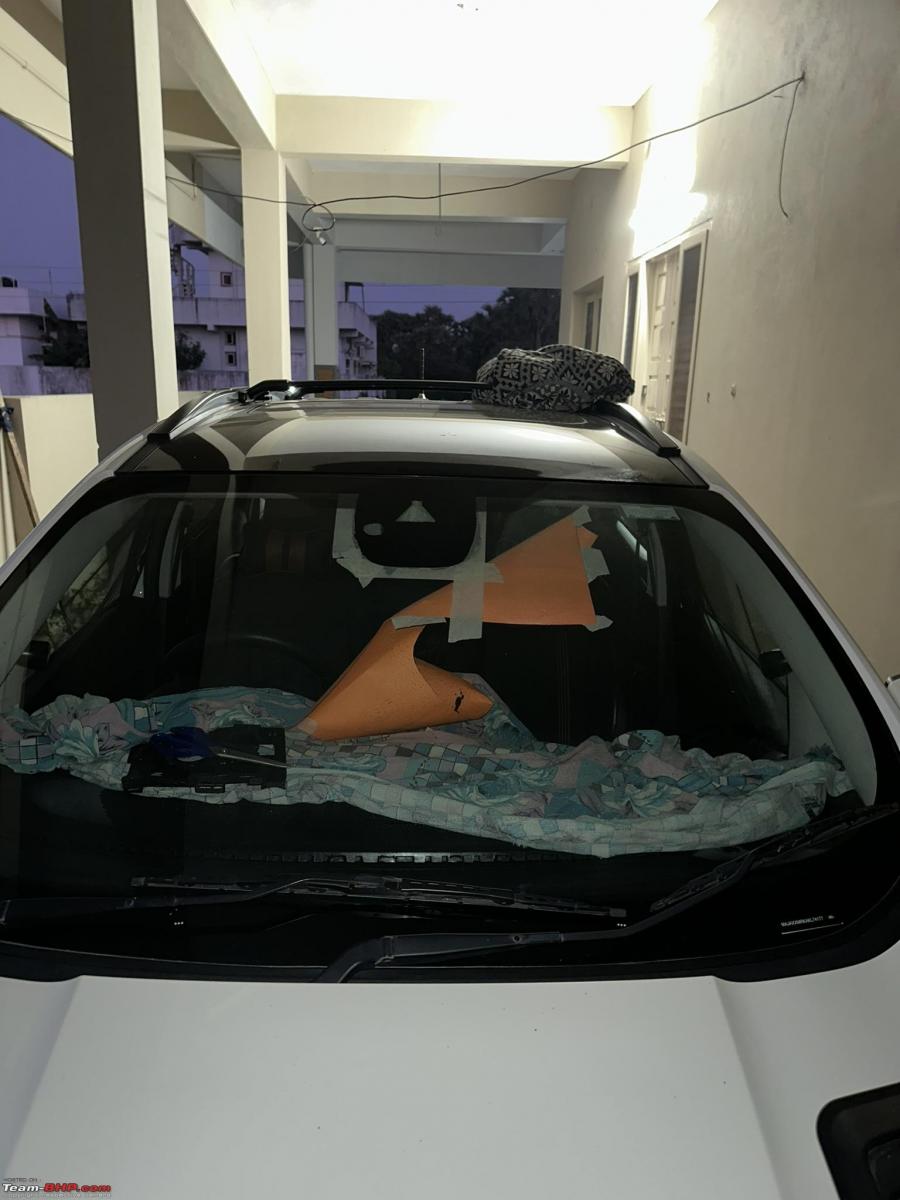
Used heat gun to warm up the mounting bracket and make it perfectly flat by applying pressure over a flat floor (my bracket had a small 5 degree curvature between top and bottom half which was inducing little play while trying to attach it to glass). Removed the tape carefully and then drove to a windshield glass installer. I had him apply Urethane adhesive (used for attaching new glass to the car body) on the mounting bracket along the marked locations for Rs.100 and stuck the bracket carefully on the windshield aligning the sanded sensor areas. Applied tape to hold the bracket in place until the adhesion process is complete for 1 hour.
Sanded the IRVM mounting button until it was clean, applied permatex rear view mirror adhesive (got from Ebay UK) on the button as per instructions and fixed it on the glass at the center aligning with the ADAS mounting bracket. Applied tape on top of it to ensure sufficient tension while the adhesion is in progress for about 2 hours.
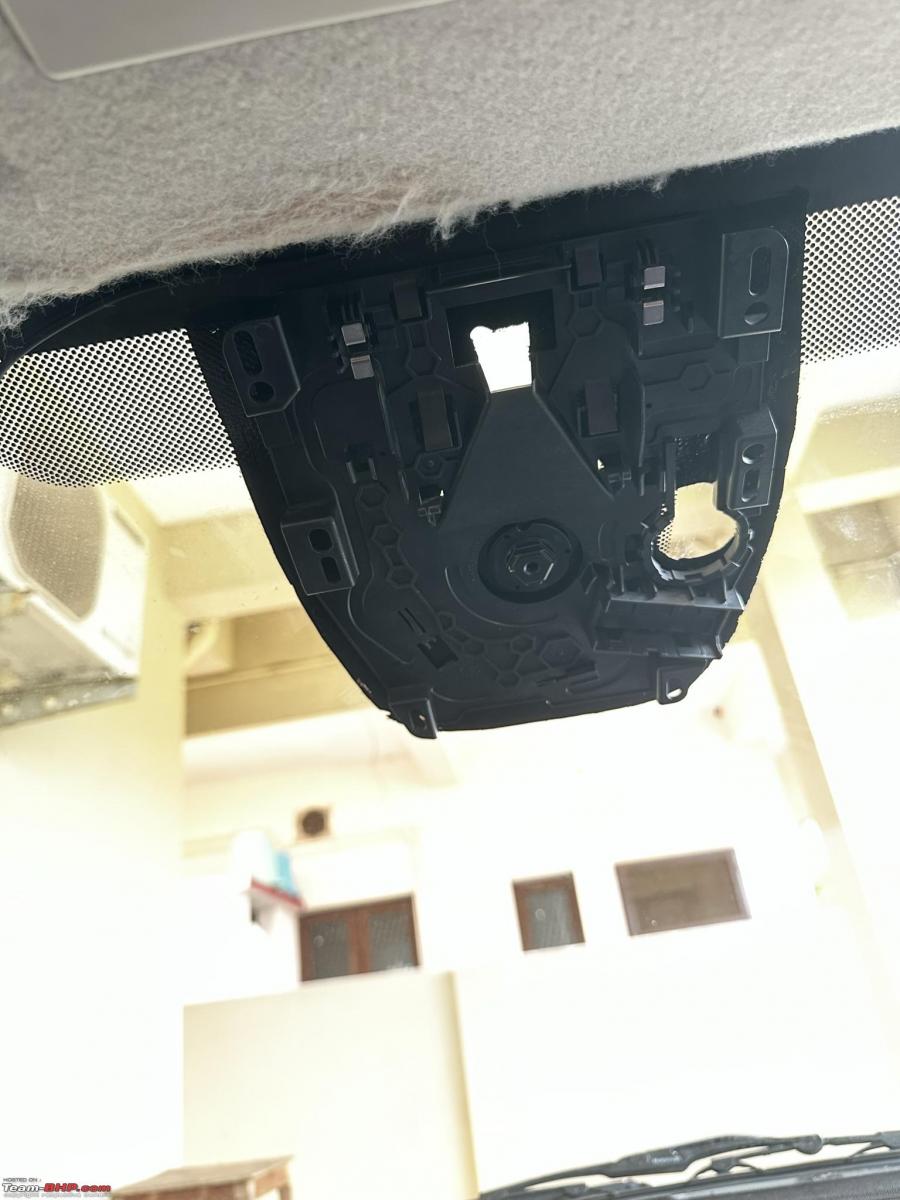
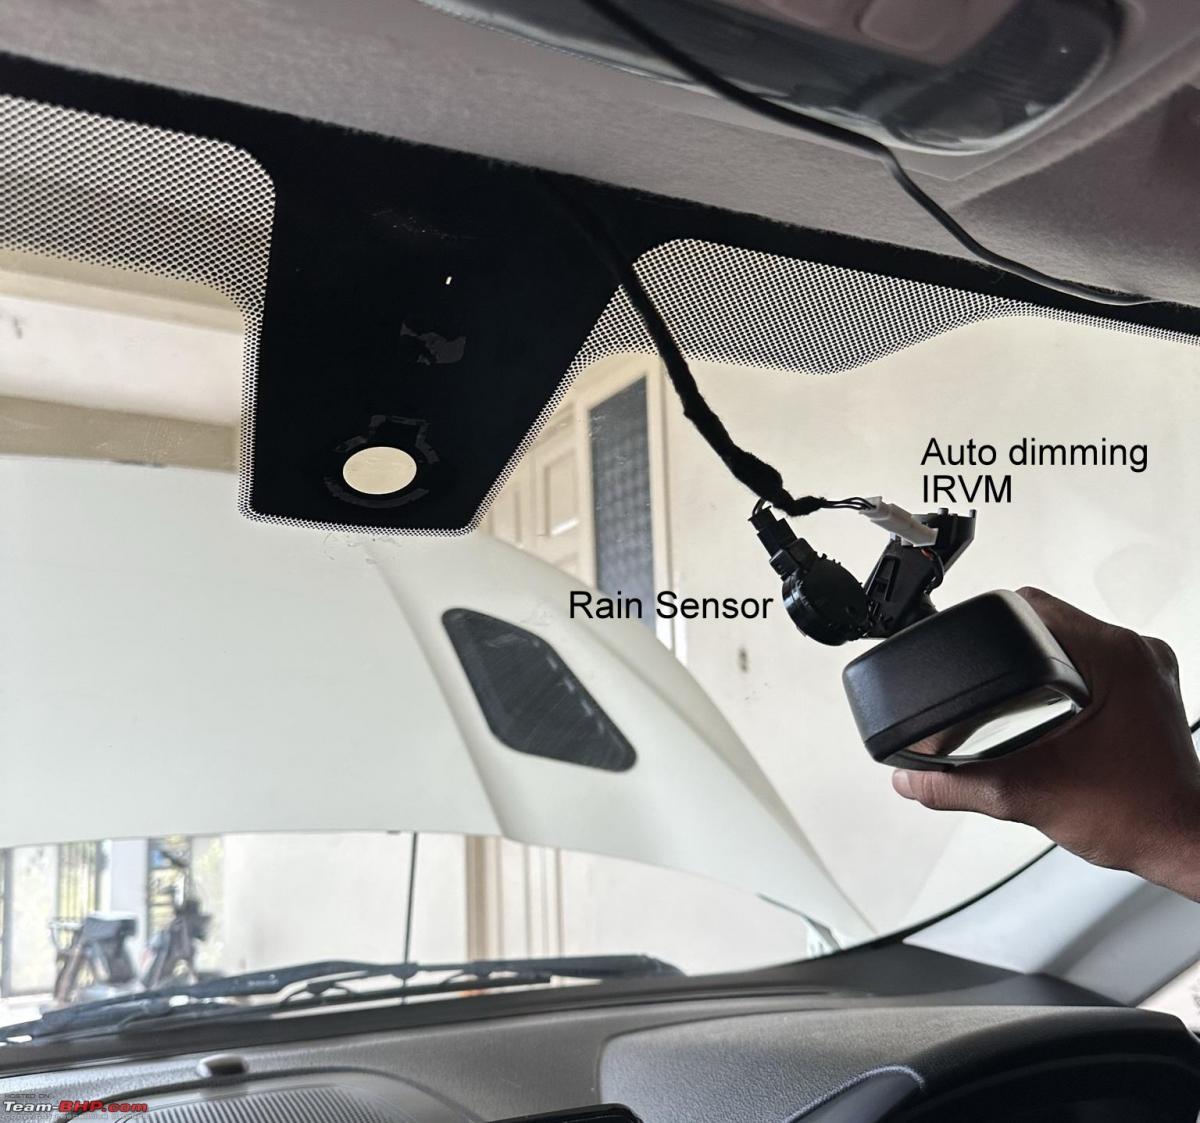
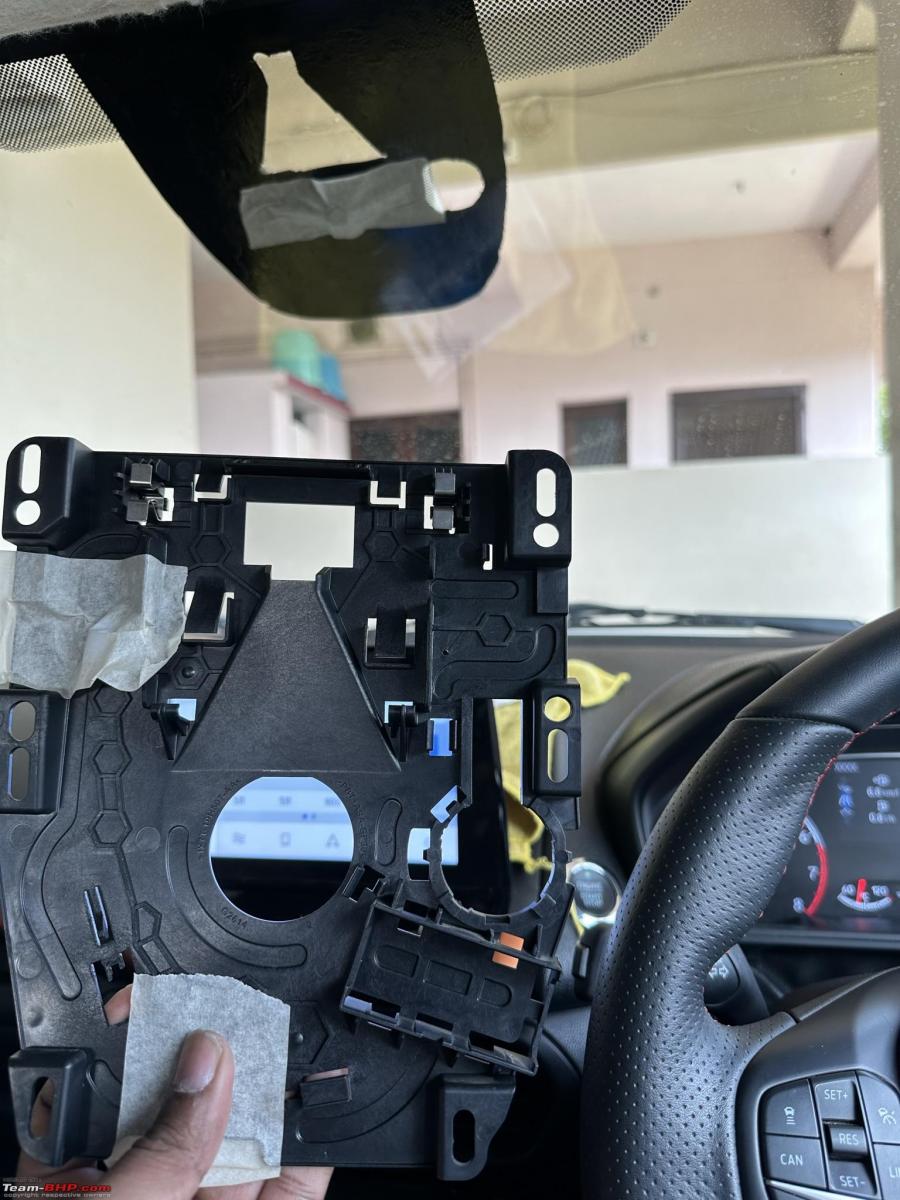
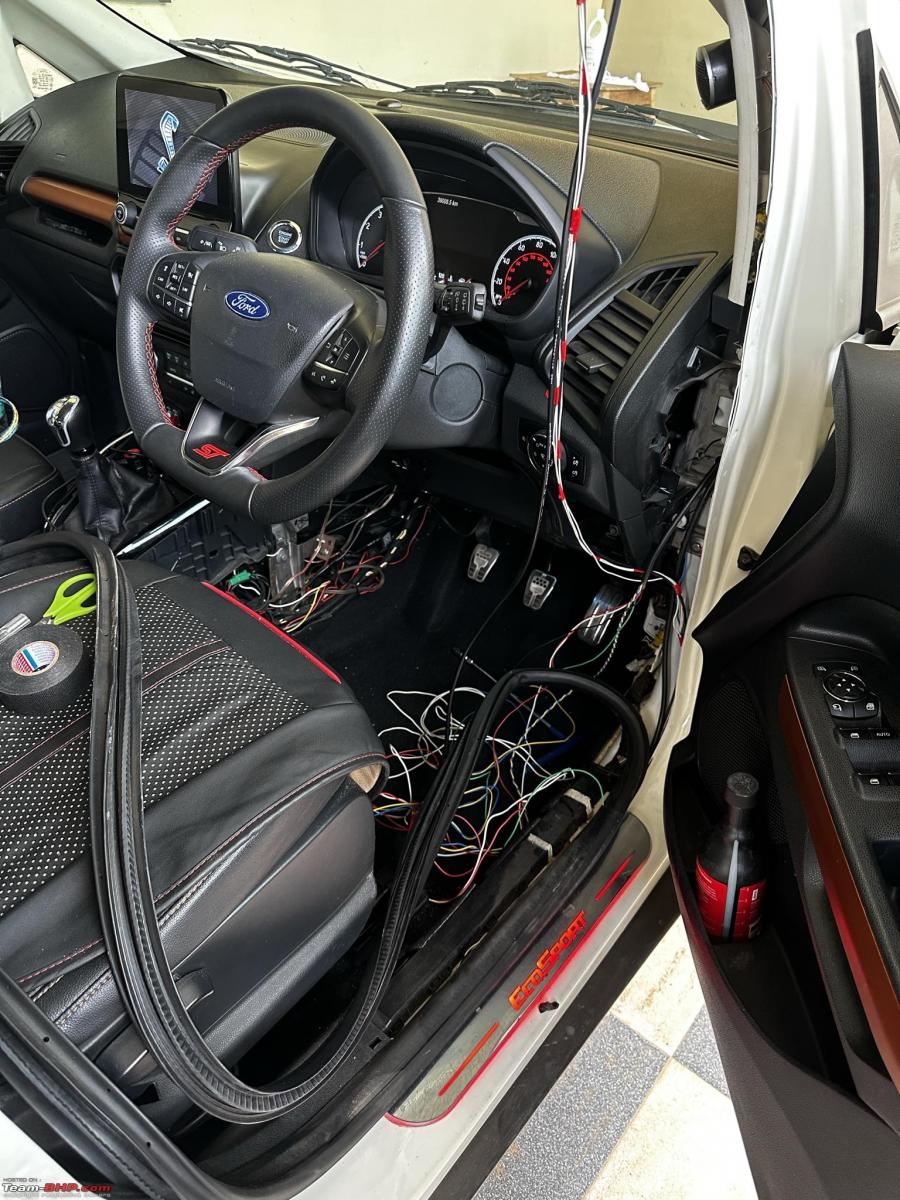
Mounted the IPMA camera and rain sensor (with silicone pad) on the new bracket. Used a six core cable to connect the IPMA camera to HS2 CAN bus (at OBD module), Power (have a fuse tap in passenger fuse box to power all my after market accessories and mods), and Radar (custom mounted last year during front parking sensor mod, refer to first post). Placed the new plastic trim panels to cover the retrofitted electronics.


Jacked up the rear tyres and changed the unidirectional ABS sensors to bi-directional sensors on both rear wheels
Ecosport models with ADAS from 2020 come with an ABS controller that starts with LN15-2B373-XX (while indian varaints get an older firmware GN15-XXXX-XX) and new firmware which supports the ADAS functions and bi-directional sensors. Ford uses same controller (manufactured by ATE) on all their passenger cars. I tried flashing this new firmware onto mine using UCDS software previously, but for some reason it was unable to flash. I bought a used LN15 series ABS pump module (120 pounds) from Ebay UK and intended to install it into mine. As I have given up hope, I was tweaking and trying different flash settings in UCDS and voila! I was able to flash the new firmware onto my ABS module.
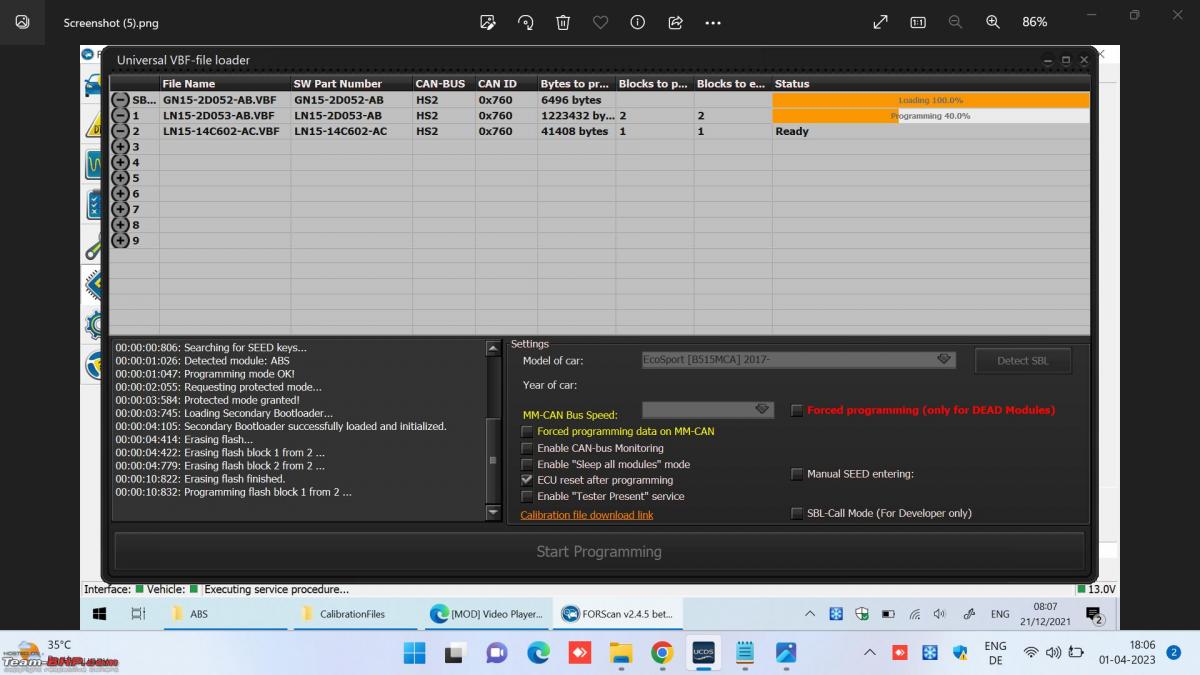
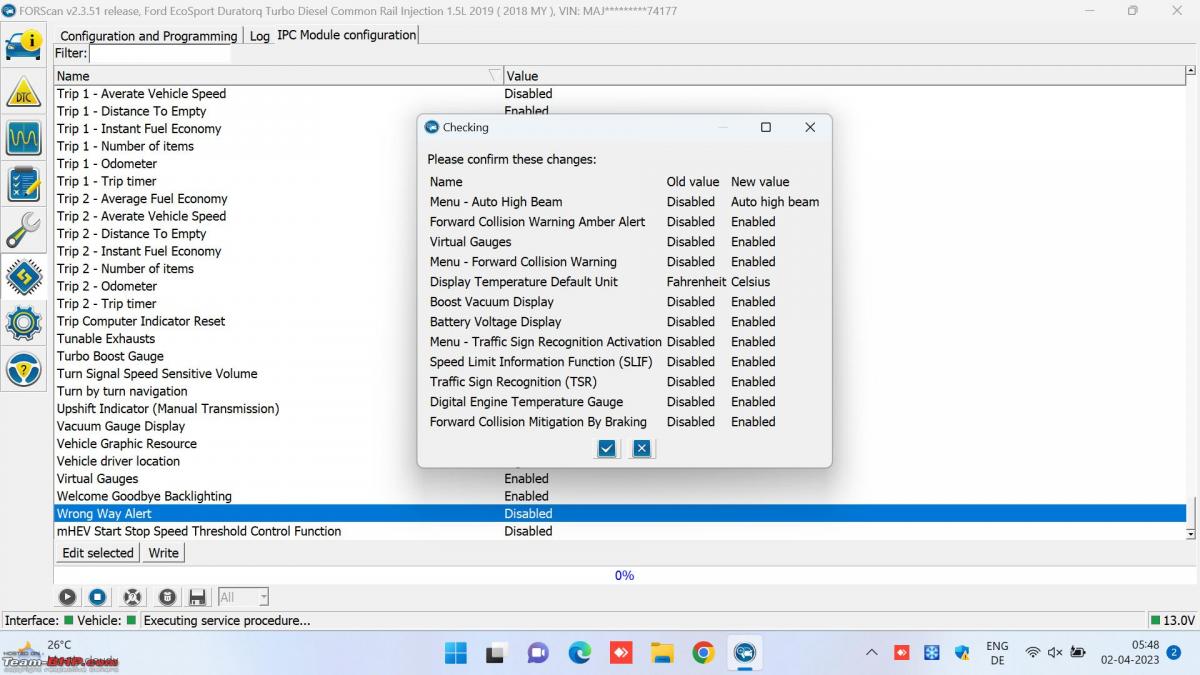
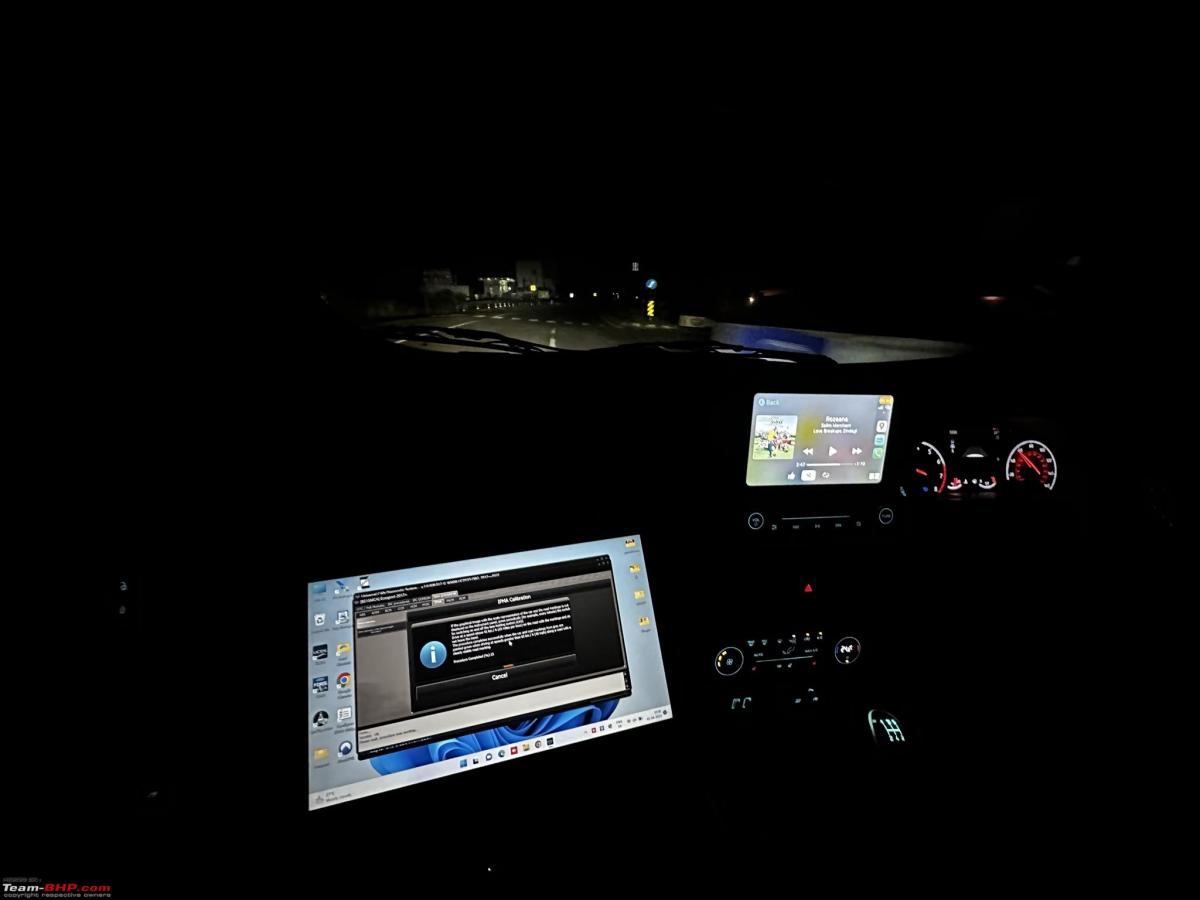
Fired up UCDS/Forscan and made the relevant changes in the ABS, IPC, IPMA, PCM, SCCM modules to enable the ADAS features. UCDS was throwing calibration missing error for the ADAS IPMA camera. For this the car needs to be driven for 10 minutes at 40 MPH (64 kmph) on a road with clear lane markings to calibrate the camera and alignment. The saddest part was I had no such road long enough near my home. I decided to calibrate the camera on the well built NH-5 as I was gonna fly off back to Frankfurt the next day from Visakhapatnam.


LKS:
TSR:

Videos:
- ADAS functions on cluster.
- IPMA camera calibration.
- ADAS controls from the center stack. Some settings are glitchy as they are greyed out while they work on the settings in the instrument cluster.
Considering ADAS has inherent risks involved especially considering its a retrofit, I have currently activated only passive assist features. Active assist will be activated on public roads only after more testing such as AEB using dummy cardboard in controlled conditions when I am back. Considering I got the ADAS features to work on my way to airport leaving the country, I do not have any more videos to share. I look forward to getting back as soon as possible and continue my journey with ACC activation and PSCM retrofit.
Thank you for reading! Happy motoring and effortless mile munching!
Check out BHPian comments for more insights and information.
Find Car News
Just News


About Us