News
DIY: Sway bar link rod - Fixing noise from front suspension
These are the words of BHPian gopa99.
My Mahindra KUV100 (32,000 KMs ODO) of late had this strange metal clatter sound originating from the front left suspension whenever the car moved over a rough patch of road, and this was more evident on bad roads and at lower speeds. Not wanting to go to the service center for this repair given the COVID-19 pandemic and with the spare time working from home, I decided to search around for the cause and a possible DIY fix.
Of all the Youtube videos I browsed on this topic, this one was straight to the point and impressed me the most. Another video I found helpful (though a desi one) was this.
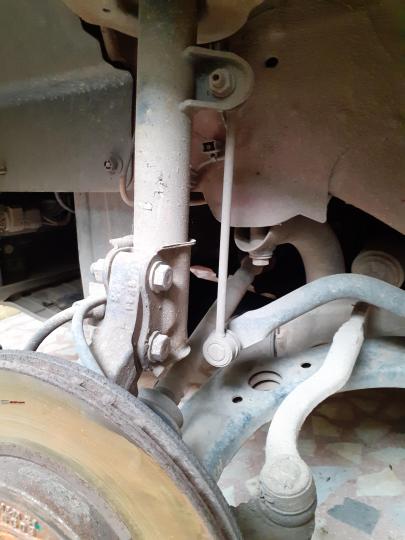
Sway bar, Stabilizer bar or Antiroll bar, as it is known in common parlance, is connected to the front wheel suspension through the link rod. Convinced that the link rod can be replaced at home, and given the requirement of a spare link rod, I decided to move ahead and order a genuine spare through boodmo.com. So this was my first purchase and I should say I am impressed with their website interface and even for a layman like me, I could locate the exact part number that I needed to buy.
Do find the link for ordering a spare for a KUV100.
It did take about 3 weeks for the item to get delivered, but finally the wait was over, and I decided to install it the same day it arrived at my doorstep.
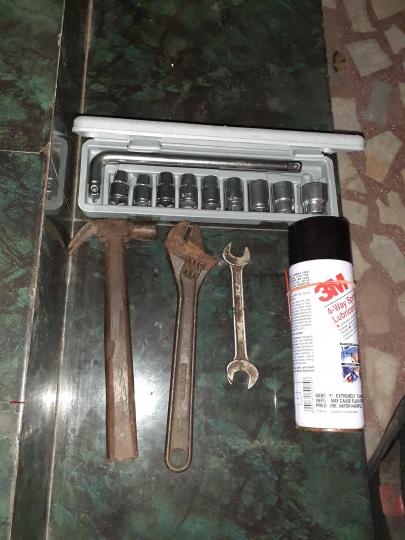
I had with me a set of tools and an aid for this task, and at the end of the task, I realized this was almost all I needed apart from some cotton cloth waste to handle that grime and a crowbar which I had used to get some thrust while removing and fixing the link rod into its groove.
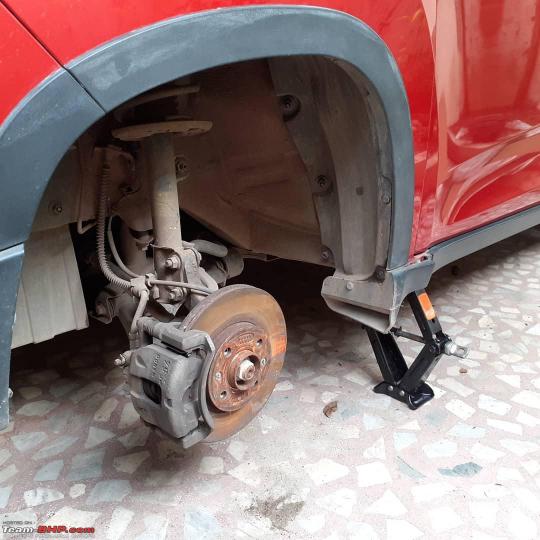
Now reaching the link rod was simple, first I had to get the car on the jack, and remove the front tire, in my case the left one, and locating the link rod.
The link rod was secured on 2 nuts, one on the top to the vehicle suspension and other on the sway bar at the bottom, both were of metric 17mm size. Having a socket spanner helped me remove the nut on the top and facing outside. To access the bottom nut, I used a simple open-end spanner as there was no space for my socket wrench to get in. Before I could get the wrench to work, I sprayed copious amounts of rust penetrant on both the nuts to make my life easy.
Once the nuts were loosened and pulled out, I had to use my crowbar to nudge the sway bar a bit to free up the bolts. The same story repeated when I had to insert the new link rod into its groove. Without this, it is almost impossible to get the bolts to come off or get in the groove as else they would remain stressed from the torsion exerted by the sway bar; another easy trick I realized was to lift the front control arm a bit off the floor. That would be lot easier if you used a secondary screw jack. In my case, the crowbar just worked fine.
Once I got the bolts secured, and that was it. I was expecting to see a split washer or a lock nut in the bolting arrangement but not sure why it wasn't present especially given the vibrations the bolted assembly gets exposed to while running.
I tested my car later on, and it was just fine; the noise had disappeared. I think I saved a cool amount of money by avoiding a service station visit, not to mention the joy of having a DIY done on my machine.


