News
How I made a 12V Lithium-Ion battery at home for just Rs. 650

The total cost of making this 17.05 Ah 12v Lithium-ion battery came to less than INR 650.
BHPian Chhanda_Das recently shared this with other enthusiasts.
Making a DIY 12v Lithium-ion battery at home
If it looks like a lead-acid battery then it must be a lead-acid battery, right ? Not necessarily
Here is how my son made a 12v Lithium-ion battery but first a little background information. We had a 6 year old UPS (Uninterruptible Power Supply) battery of capacity 7.5 Ah that had died twice in the past and had been refurbished twice with some fresh battery acid solution. We had been using that battery for the past 2 years as a solar battery (with a 50 watt solar panel) for running a small fan (6-7 watts), a small dimmed light (3.5 watts) and the occasional charging of USB devices. That battery weighed approximately 2.25 kilograms. Recently, that battery started showing signs of dying again. As a result, we decided that we have had enough and wanted to upgrade to a lithium battery. And since the prices of lithium battery packs are exorbitant (relatively speaking), my son decided to make one by himself again using salvaged cells from dead laptop computer battery packs. For that, he drew heavily from the experience gained during an earlier DIY project involving the making of a portable power station (link).
Hence, for fear of being repetitive, this thread will be a largely pictorial account. So put your seatbelts on, grab a snack, grab a drink and let us begin.
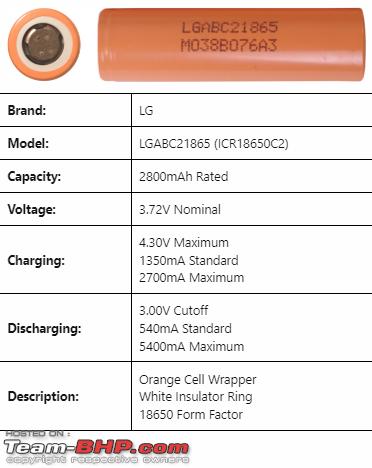
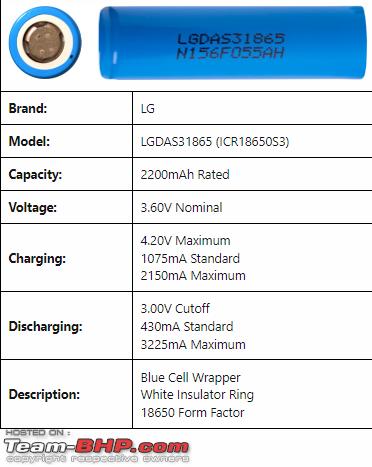
Firstly, we needed to determine how many 18650 model cells could be installed in a 3S (3 cells in series) configuration inside the lead-acid battery's case. In our instance, we found that we could install exactly 21 such cells inside the case while accounting for the battery management system (BMS) printed circuit board (PCB) as well. The image below shows the 3 cells in perfectly fine working condition that my son managed to salvage from his own laptop computer's dead battery pack.

Similar to the ones above, my son managed to salvage more cells from dead battery packs of laptop computers that he purchased from computer repair shops near our location.
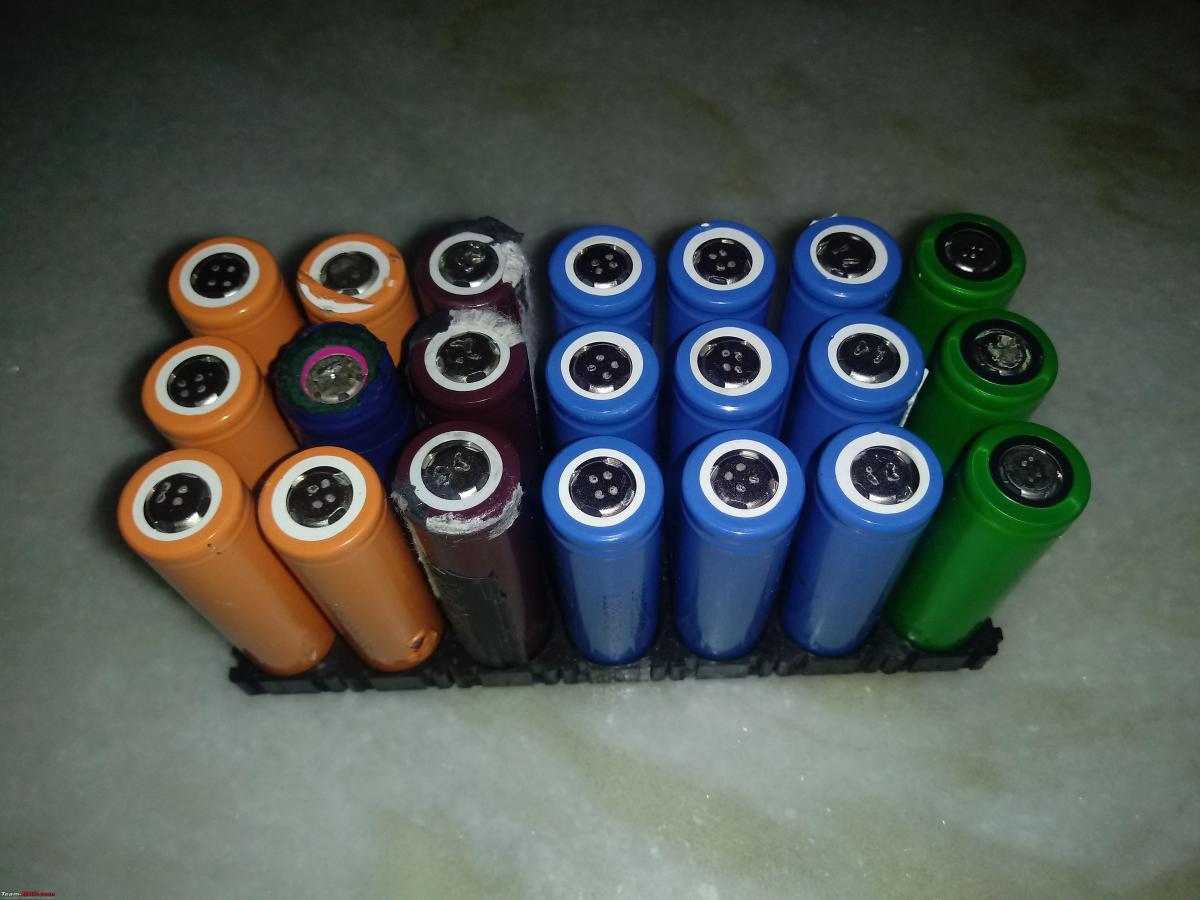
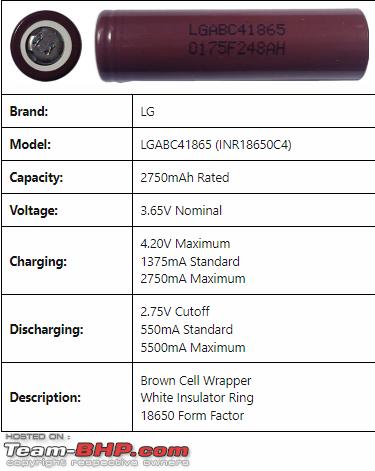
Here are the details of the cells from left to right in the image above that we found online as follows :-

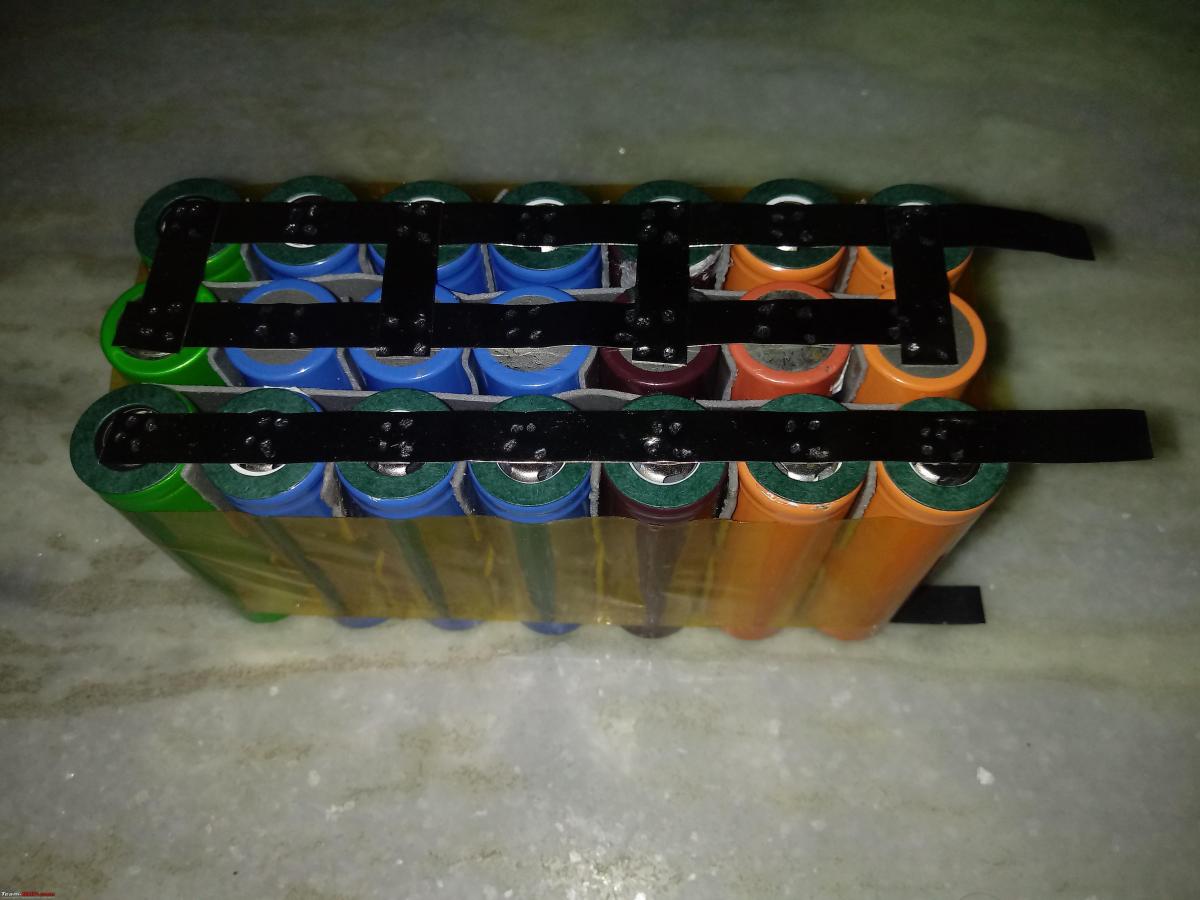
However, we could not fit the cells inside the case if we used the plastic spacers and hence we had to go ahead without the spacers. On the other hand, we still needed to find a way to keep the cells physically separated from each other to prevent thermal runaway so that even if one cell overheats then the remaining ones would remain unaffected up to an extent. But we had to somehow hold the cells together as well and hence we decided to go for some double-sided adhesive tape.
Then the cells were bound by some polyimide adhesive tape aka Kapton tape and 18650 ring insulators made of barley paper were attached around the positive terminals of the cells. After that nickel-plated strips with a cross-sectional area of 7 mm x 0.15 mm were spot welded to the cells in such a way as to make a 3S7P (3 cells in series 7 cells in parallel) battery pack as you can see in the image below.
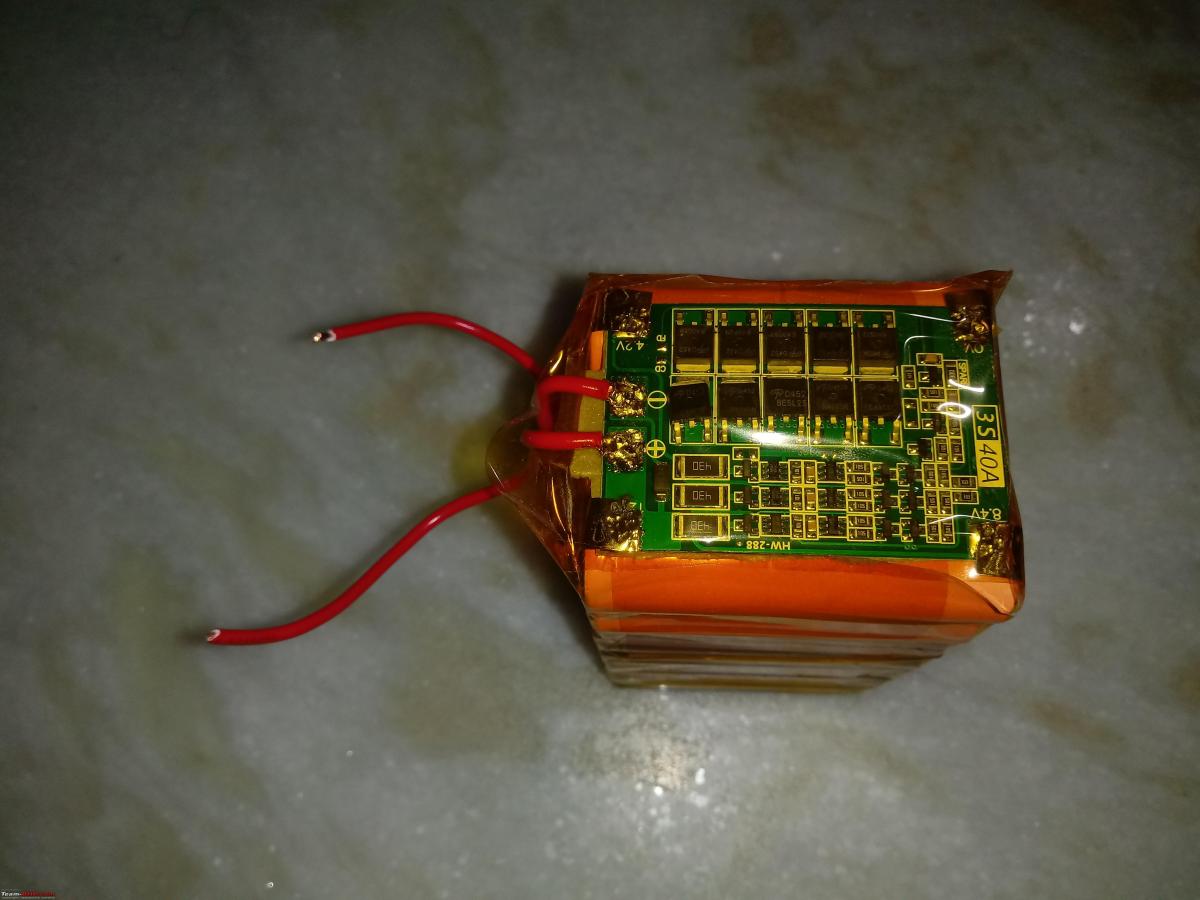
Finally, after coating the 6 terminals of the BMS with some melted soldering wire, we attached two small wires of 1 square millimetre cross-sectional area to the main input/output terminals of the BMS. Sadly, we could not find a black coloured wire for the negative terminal and had to make do with the red wire. Then the BMS was attached to one of the smaller sides of the battery pack (using a double layer of double-sided adhesive tape) corresponding to the cell voltages of the battery pack. The remaining terminals were spot welded to the nickel-plated strips of the 3S7P battery pack as per the voltages and/or polarities. The unnecessary portions/terminals of the nickel-plated strips were obviously cut off from the battery pack before the spot welding. Then the battery pack was covered completely with polyimide adhesive tape. Here it is important to note that we could have easily gone for a 20 ampere BMS but we went for the 40 ampere one to maintain some scope for capacity upgrades in the future if necessary.

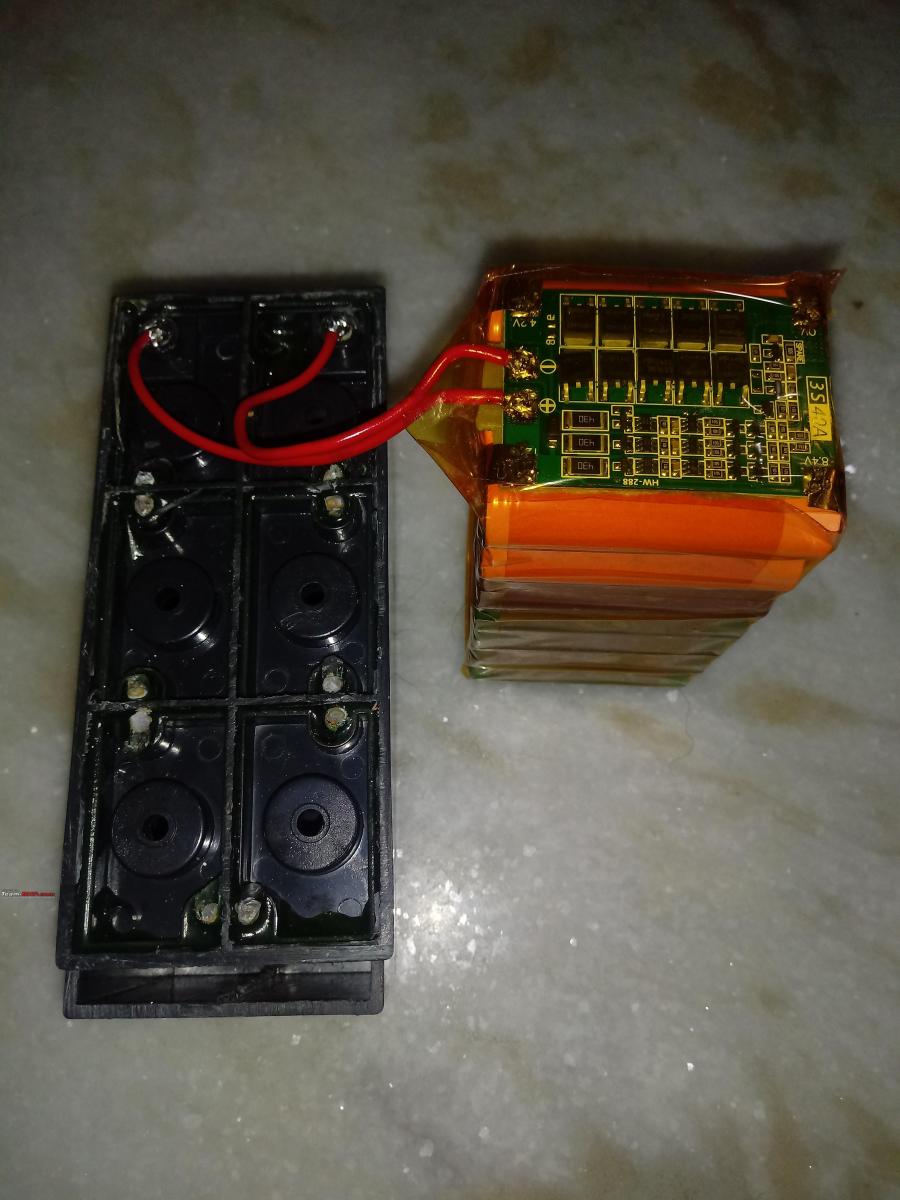
Now keeping the Lithium battery pack aside, it was time to prepare the housing case for the battery pack. My son took the old 7.5 Ah lead-acid battery and completely drained all the electrical power from it by connecting a 12v bulb that had a filament in it. When the voltage was completely zero, he removed the top cover of the lead-acid battery and all 6 rubber valve caps. Then he drained all the electrolyte solution and gave the battery a thorough wash under running water. Next, he used a bow saw (a hack saw would work too) to carefully cut the main top cover of the lead acid battery horizontally. Here is the result in the image below after removing all the lead plates from the 6 individual chambers inside the housing case.

Now he had to remove the individual cell partitions from the case and make the case as obstacle-free as possible for the lithium battery pack to go in it. He used a pair of small tin-cutting scissors for this.

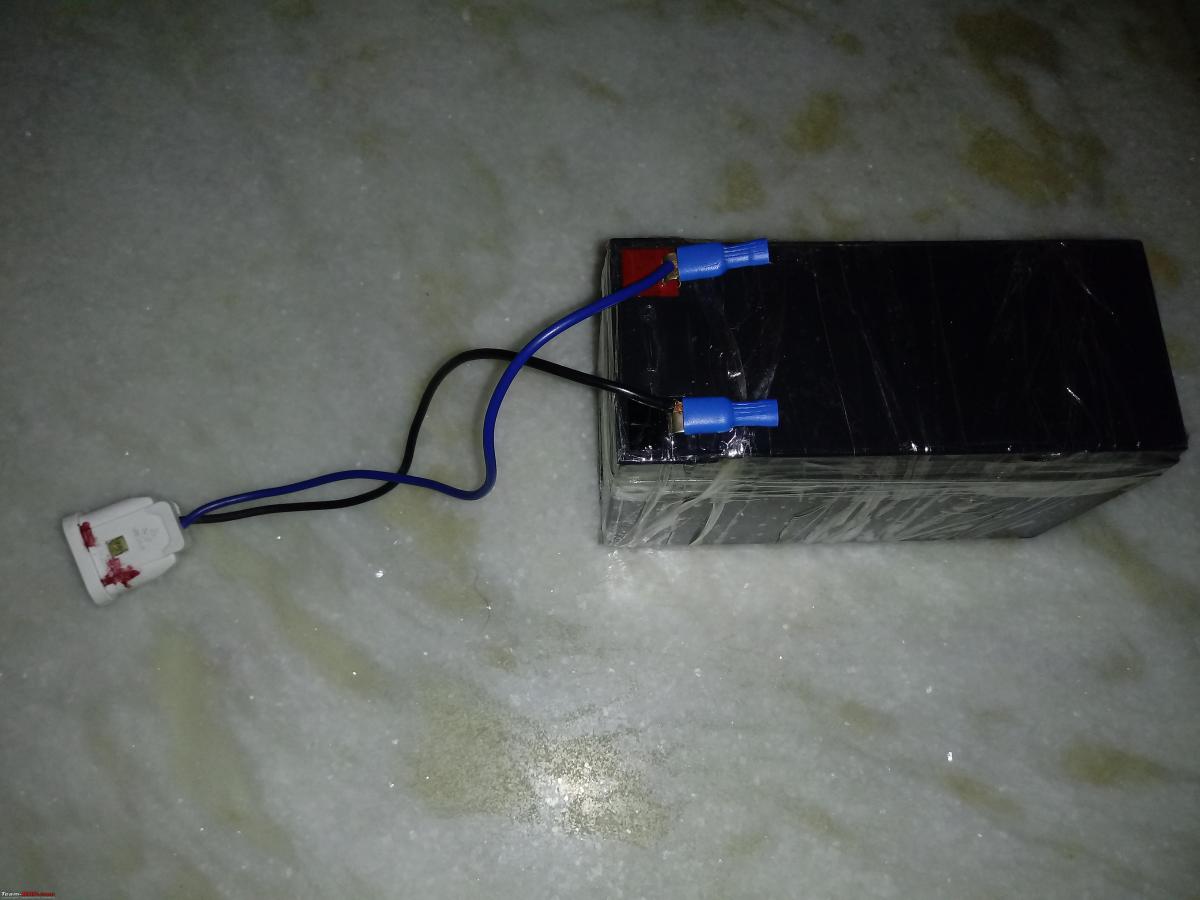
Then he had to solder the main input/output wires of the Lithium battery pack's BMS to the terminals of the housing case of the erstwhile lead-acid battery as per the markings on the terminals.
Finally, he cut some cardboard pieces to size and inserted them on all 6 outer sides of the Lithium battery pack to prevent it from rattling around inside the Lead-acid battery's case. Please note that this is not sponsored by Amazon. We just happened to have some Amazon delivery boxes lying around from when we had gotten some stuff delivered to our home from them.
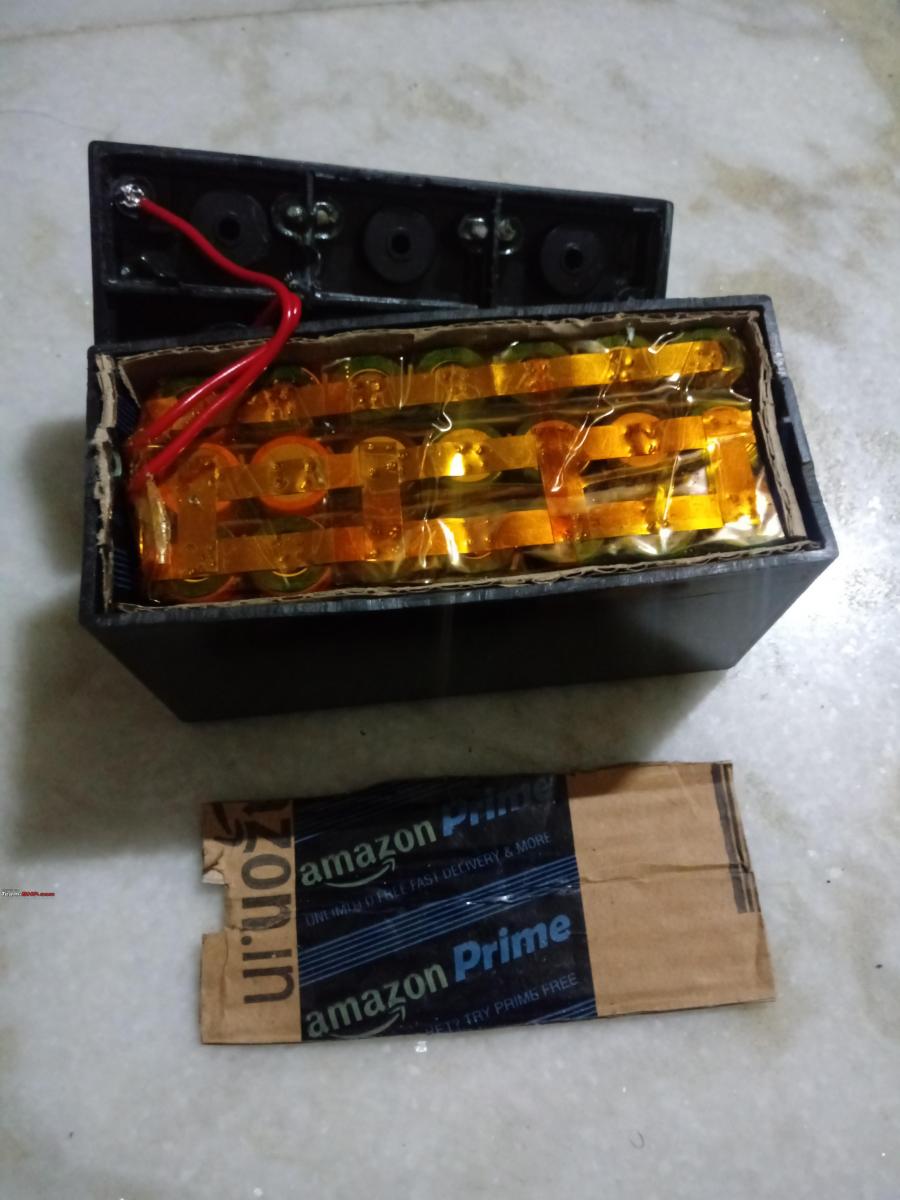
Finally, he used some adhesive cellophane tape to keep the lead acid battery case's cover attached to the case. As an alternative, we can also use some acrylic-based glues like Fevikwik, etc or epoxy compounds like M-seal, etc for cleaner aesthetics.

In the end, the total rated capacity of this Lithium-ion battery pack came to 17.05 Ah with the maximum charging current restricted to 15.6 amperes at 12.6 volts. We are not too worried about the maximum discharge rate of this battery pack since we will never be drawing more than 30 watts of power at a time. The charging rate will not exceed (5+2.5) amperes since that is the maximum production capacity of the (100+50) watt solar panels connected to a PWM (Pulse Width Modulation) solar charge controller in my home. The final weight of this battery came to less than 1.20 kilograms.
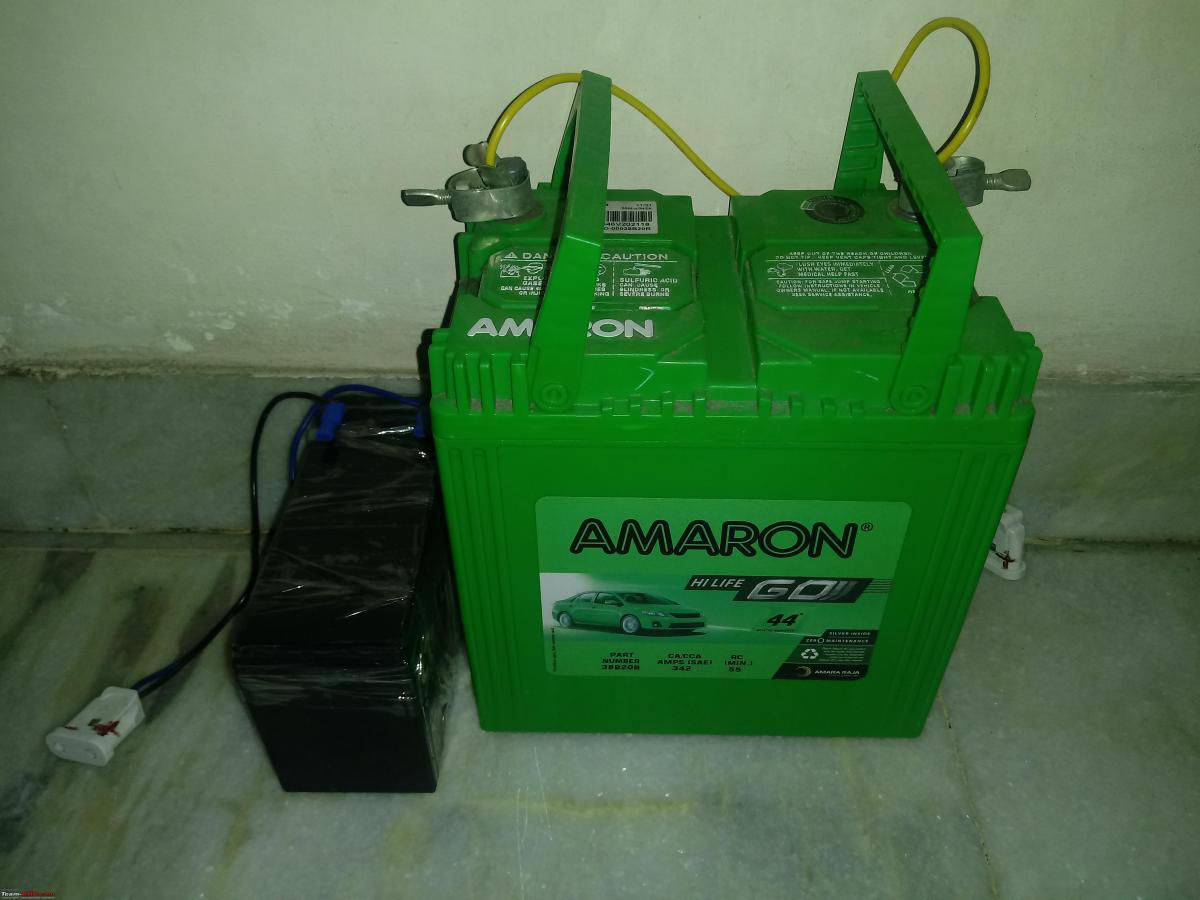
For reference, here is a size comparison with a 35 Ah lead-acid car battery which can safely deliver approximately the same amount of usable power as the 17.05 Ah Lithium-ion battery that my son made, theoretically speaking.
The total cost of making this 17.05 Ah 12v Lithium-ion battery came to less than INR 650. Please note that the cost will be lower by approximately INR 100 if you use a 20 ampere-rated BMS instead of the 40 ampere BMS that we used. This battery pack would still run absolutely fine with the 20 ampere BMS.
Disclaimer : If you want to replicate this project then please do so at your own risk.
I hope that you found the above interesting and I wish you all happy and safe drives ahead
Read BHPian comments for more insights and information.
Find Car News
Just News


About Us