News
Installing auto-dimming IRVM in my Tata Nexon without cutting any wire
I switched to a manual dimming IRVM earlier & now I have decided to fit an auto-dimming IRVM as it is much more convenient.
BHPian KarDIY recently shared this with other enthusiasts.
DIY Install: Auto-Dimming IRVM in TATA Nexon Without Cutting Wire
If you are someone who drives a lot at night, you can understand how frustrating it is because of the glares from behind reflecting through the IRVM. It’s like people forget that the car has a low beam option too. I have a TATA Nexon XM(S) which has the basic IRVM without the dimming feature. This is why I changed to a manual dimming IRVM 8 months ago. But now I have decided that I will switch to auto-dimming IRVM. The reason for this change is that auto-dimming IRVM is much more convenient. So, I bought a TATA Nexon Genuine Auto-Dimming IRVM and in this post, I will show you step-by-step how to install it easily.
If you are someone who understands better by watching a video then watch this video.
Tools Required
- Screwdriver set
- Socket set
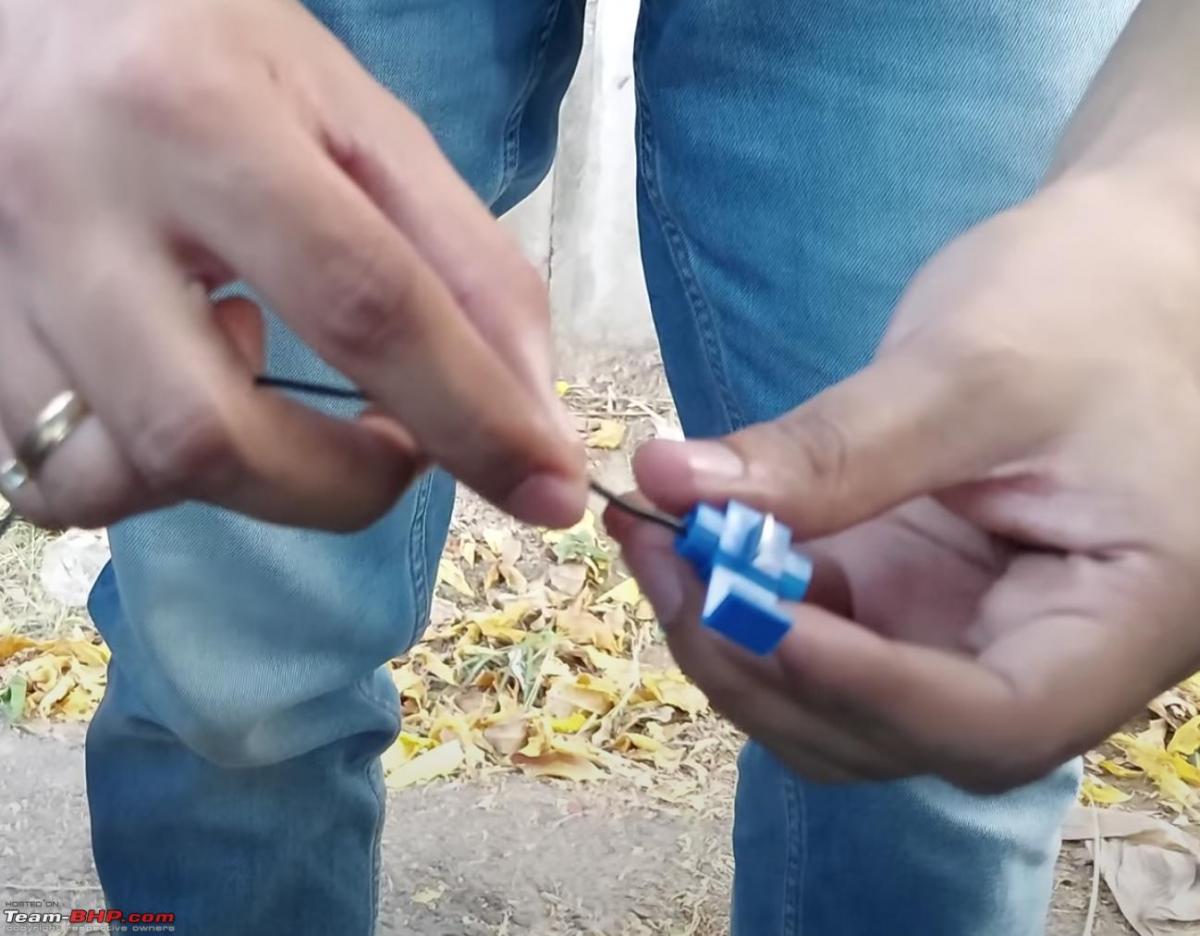
- Wedge Button
- Grub Screw M4x10mm
- Mirror Wire Connector
- Scotch Lock
- Mini Fuse 5A
- Single Side Foam Adhesive
- Cable Tie
- Auto-Dimming IRVM
- Plier
- Pry Tools
- Allen Key Set
- Multimeter (optional)
- Fuse tap
- Crimping tool
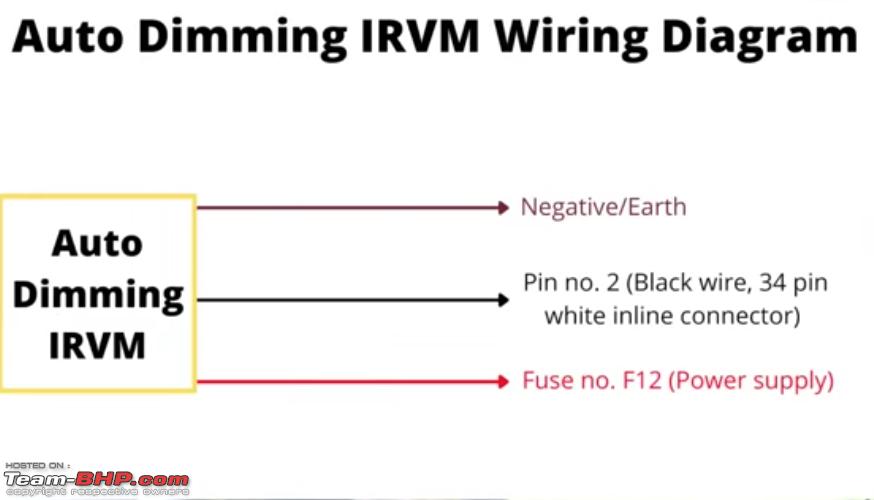
Wiring Diagram
Procedure
- Pull the IRVM upwards to pull it out of its adapter.
- Put the wedge button in the adapter.
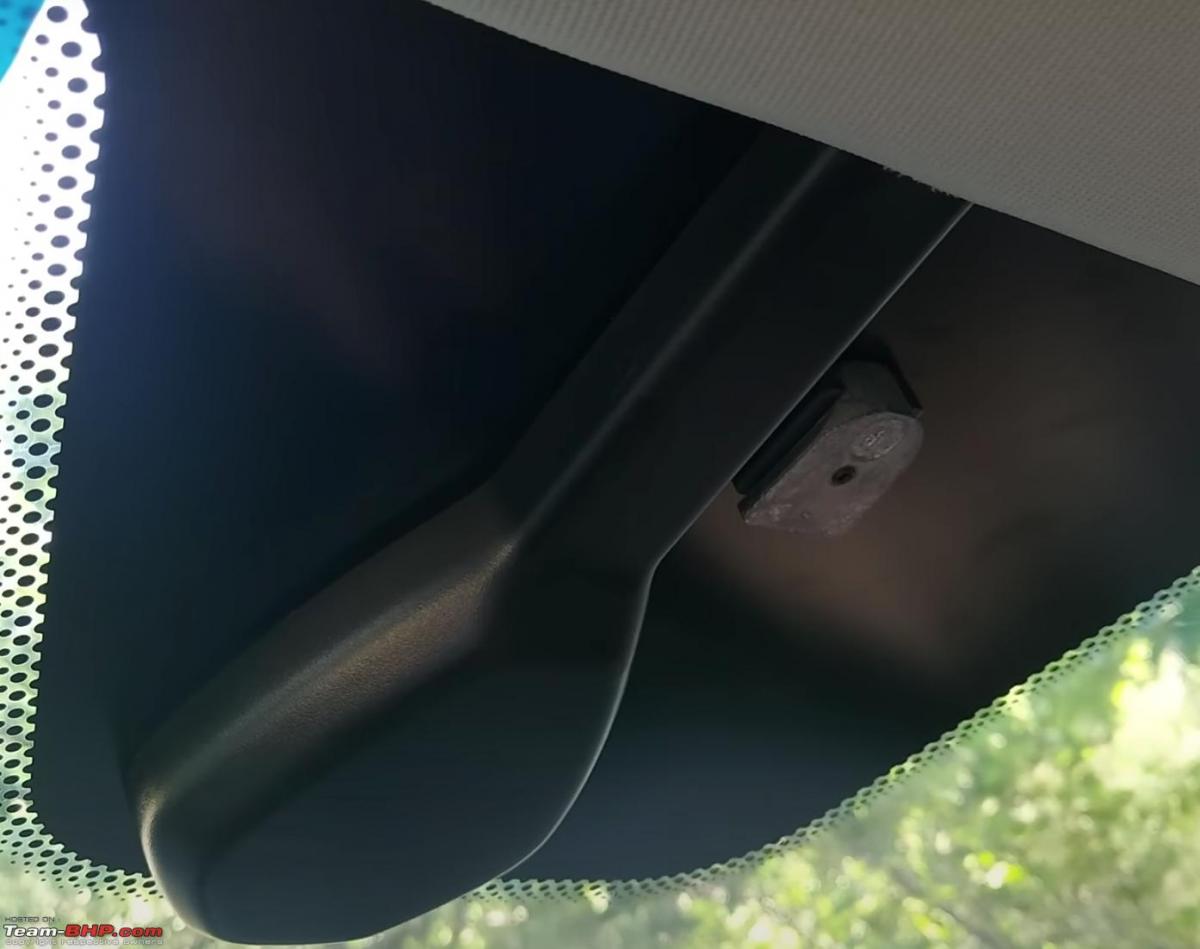
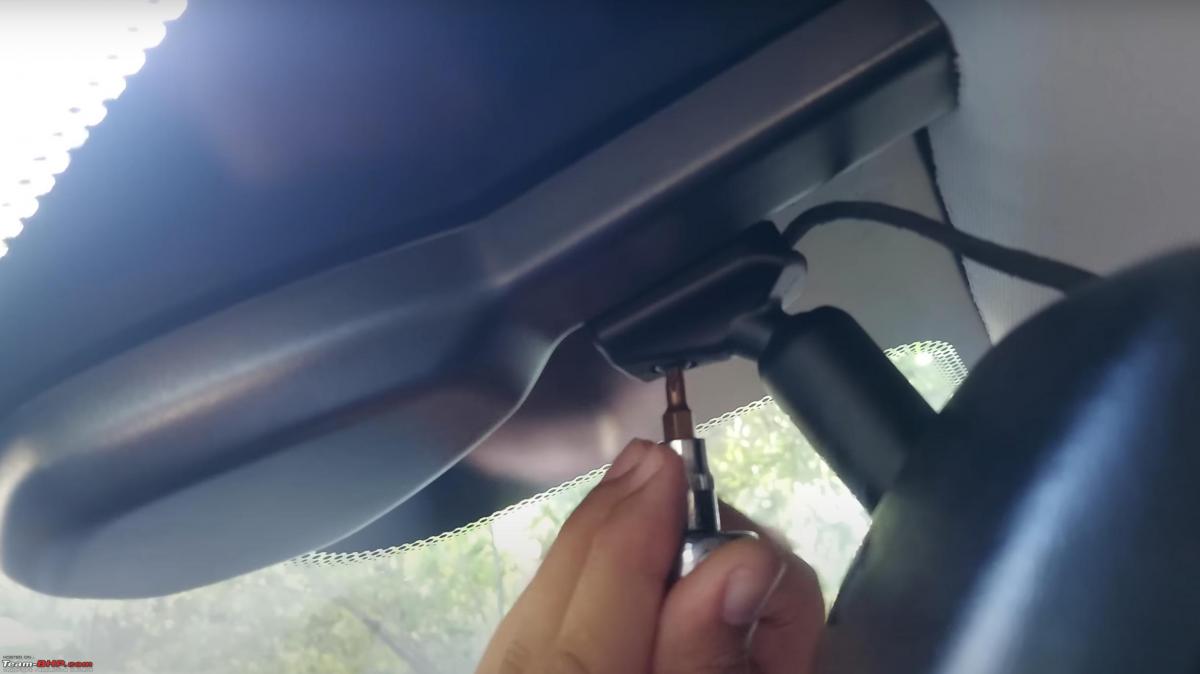
- Use Allen key number 2 to screw the grub screw. (Note: Don’t screw it too tight otherwise you will break the mounting bracket. Do it gently and keep checking if it is tight enough or not.)
- Take the auto-dimming IRVM and slide it into the wedge button. Make sure the orientation is correct, the button should be on the bottom.
- Use a T20 Torx screwdriver and screw the screw provided here. (Note: Make sure you don’t screw it too tight otherwise you will damage the IRVM.)
- Remove the weather strip near A-Pillar and remove the A-Pillar panel.
- Remove the weather strip near Lower A-Pillar Trim, remove the tree clip just below the bonnet button and remove the Lower A-Pillar Trim. (Note: Remove it gently as it is held in its place using clips. Using excessive force might break the clips and then you will be unable to put the panel back properly.)
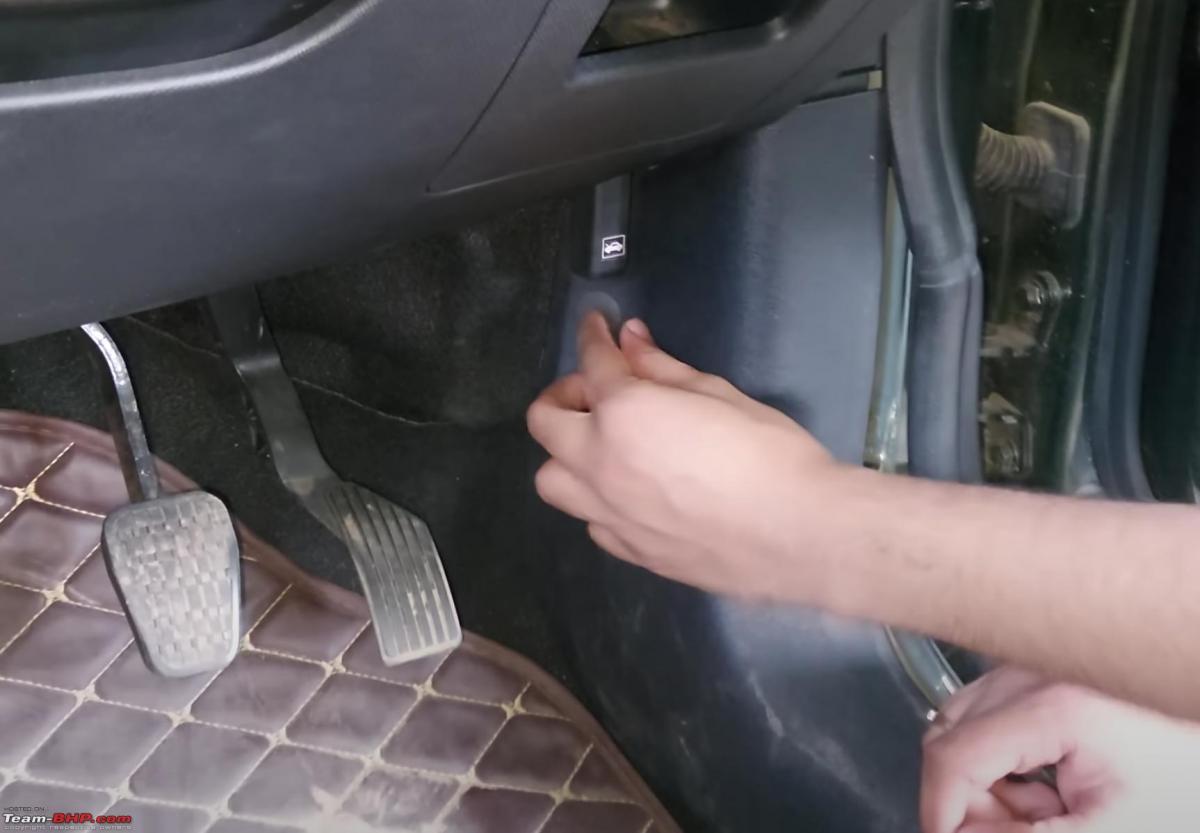
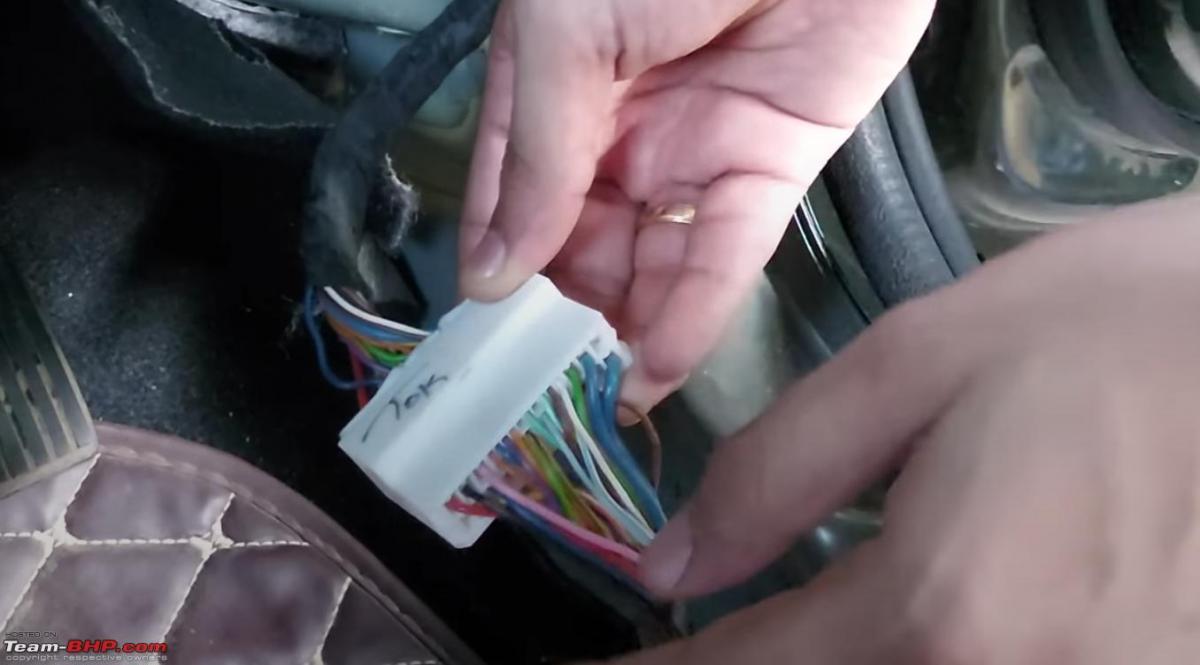
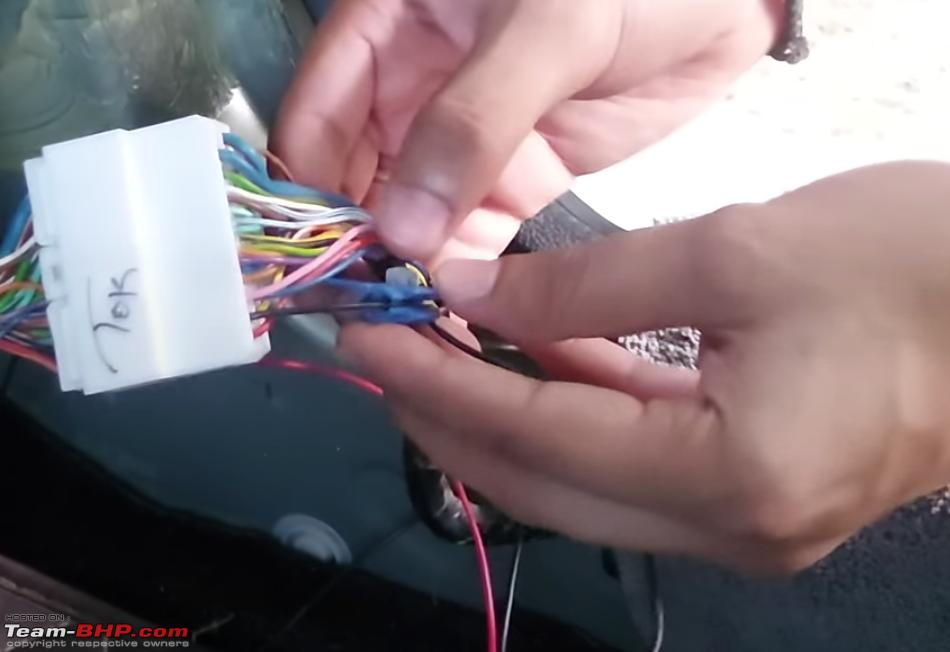
- In the manual, there was an error regarding the wiring for Nexon but the wiring matched for Altroz. So, just to be on the safe side, I used a multimeter to check the correct connection point. Put the red terminal of the multimeter in the second slot with black wire and touch the black terminal on the car's body. Engage reverse gear, multimeter should show 12V, this means that this is the correct socket for the connection.
- Connect the mirror to the wiring using the given connectors.
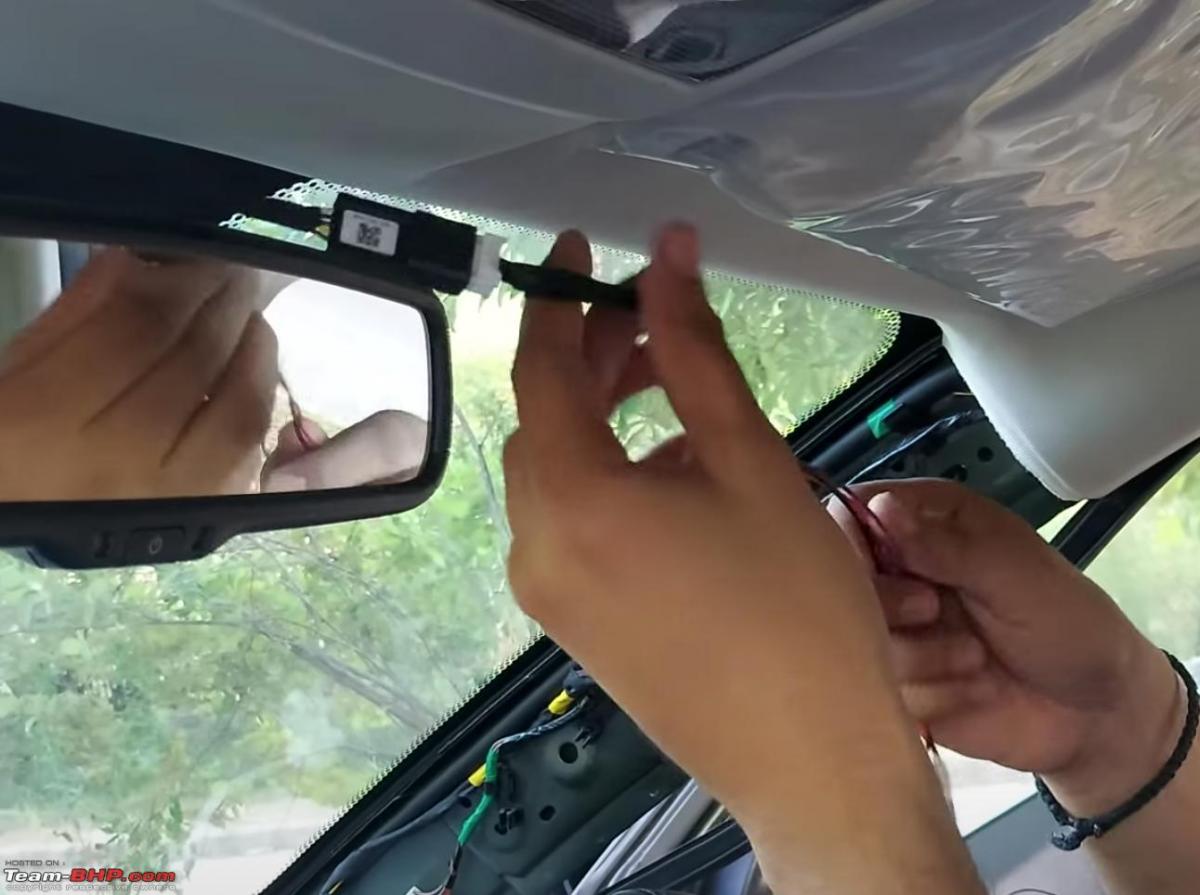
- Using the hole in A-Pillar, bring the wire down.
- Now, we will connect the mirror’s black wire to the main black wire (reverse wire in 34-pin white socket, pin no. 2) we just used in step 8. Put the mirror’s black wire in the scotch lock. Put the scotch lock on the main wire and press it using pliers.
(Note: Putting the scotch lock a little further from the socket is a good idea. In case you need to cut any wire you would still have a lot of wire left. I left a gap of 20 mm.)
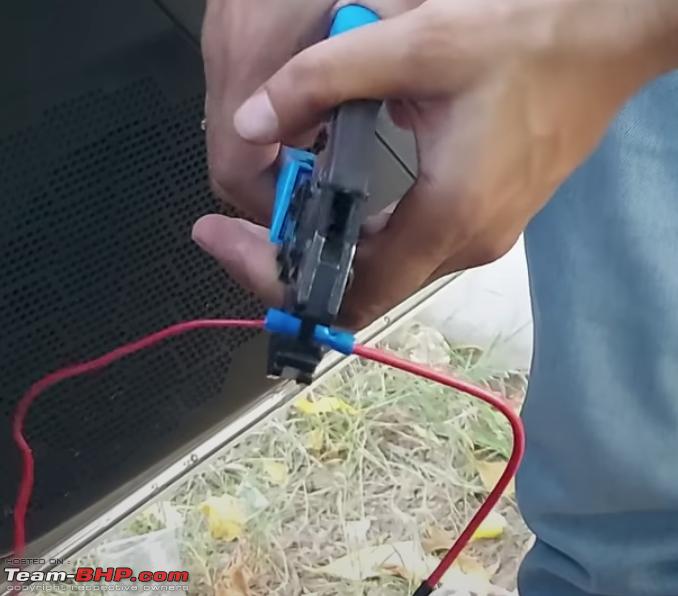
- Connect the red wire to the fuse tap using a crimping tool.
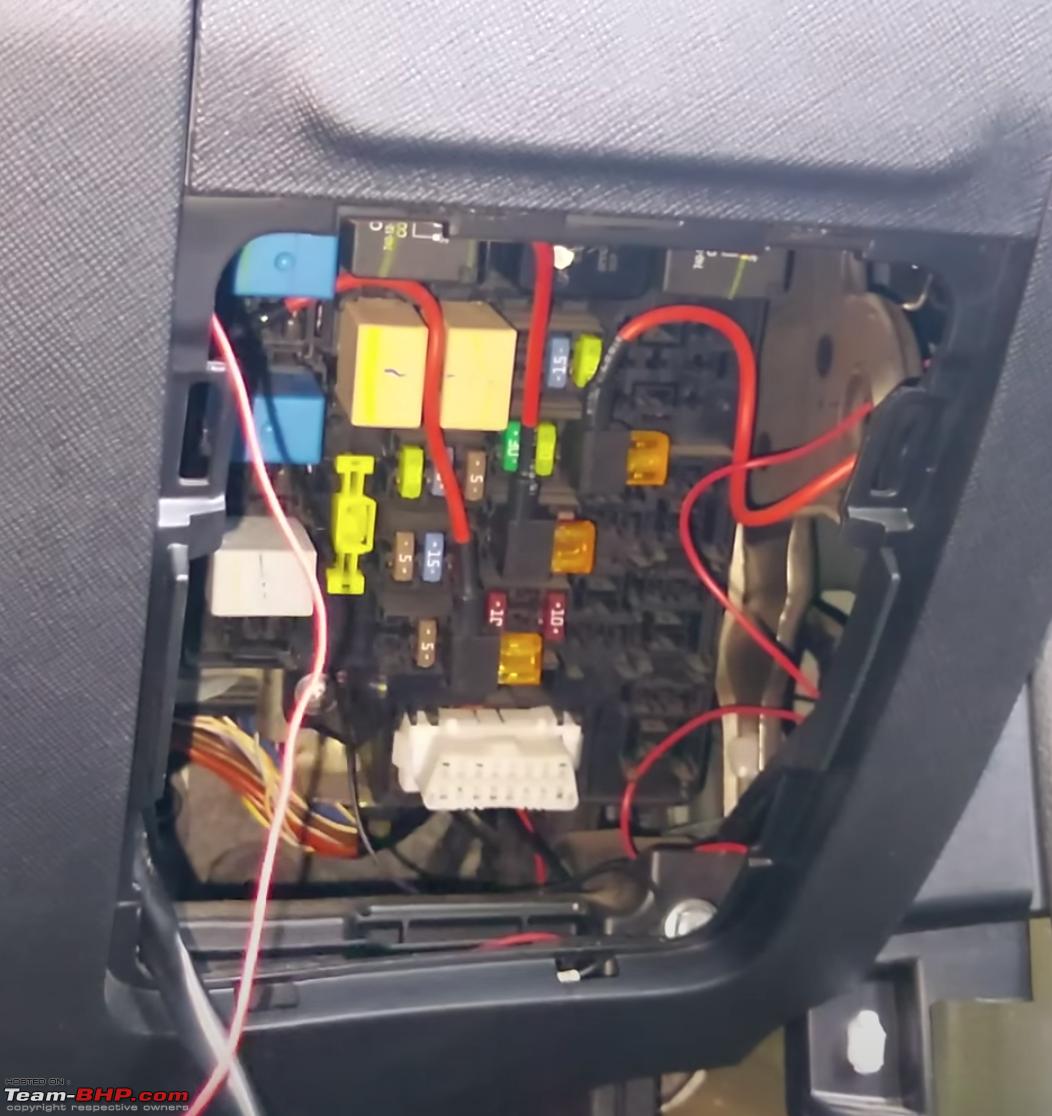
- Remove the fuse box panel.
- Remove the F12 fuse which is the one used for ignition. Now, put the fuse in the fuse tap and put the fuse tap in the fuse box. (Note: Push the wire from below so that you can put back the panel.)
- Ground the brown wire using the bolt in A-Pillar.
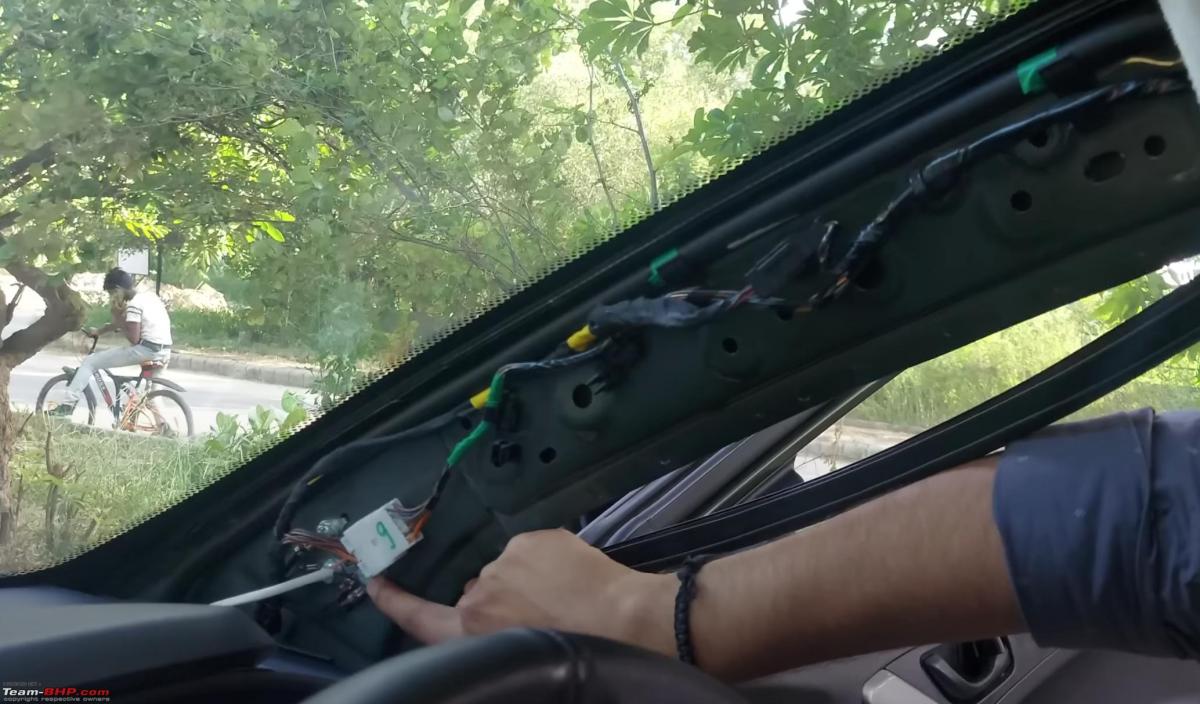
- Push the end of the wire and the connector under the roof's inner lining. (Note: Wrap them in the provided foam tape. This will keep them bundled together and prevent them from making any unnecessary noise.)
- Now, bundle the extra wire together and wrap them together using foam tape and zip ties. Put them in the space provided in the A-Pillar.
- Put the A-Pillar Panel back.
- Put the Lower A-Pillar Trim back.
With this, your auto-dimming IRVM is good to go.
Check out BHPian comments for more insights and information.
- Tags:
- Indian
- Member Content
- Tata Nexon
- IRVM
Find Car News
Just News


About Us


Buy & Sell
USED CARS