News
My 1998 Jeep Cherokee: Putting parts back together after repairing them

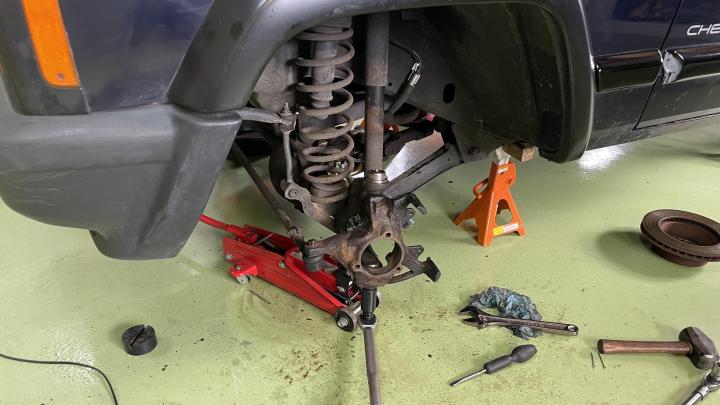


With the universal joint back in place the next thing is to install the complete hub and bearing assembly.
BHPian Jeroen recently shared this with other enthusiasts.
Would you believe it

The one day we have quite a bit of frost and about 4 centimetres of snow, meaning I really could use a four-wheel drive to drive up the dike.
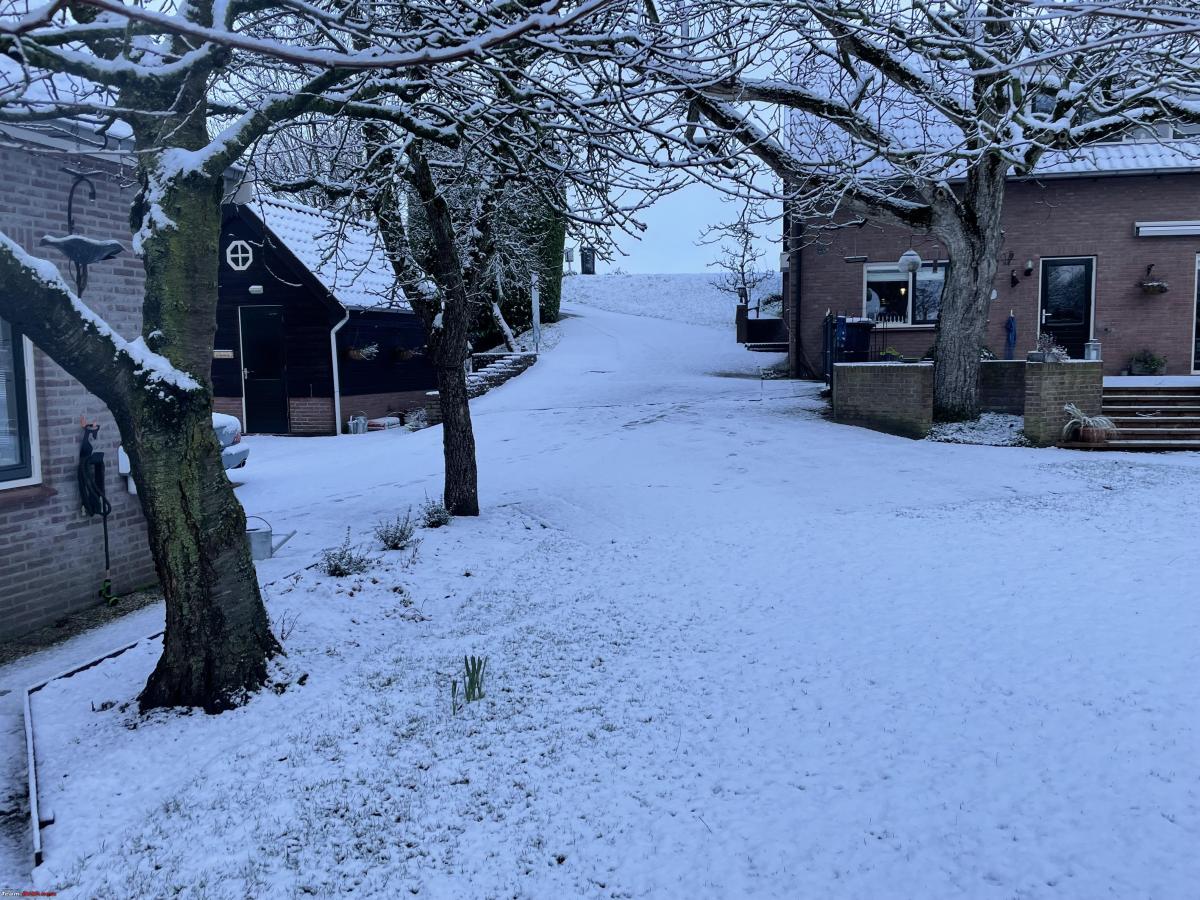
But unfortunately, my Jeep is still out of commission! No wheels, no front axles, no front ball joints, no front nothing!

As I could not go out, at least I could work on the Jeep some more. Made some excellent progress.
In general, putting things back together tends to go quicker than taking things apart I find. Primarily because you don’t always know how things were put together. But mostly because on old cars, things tend to get very very very stuck.
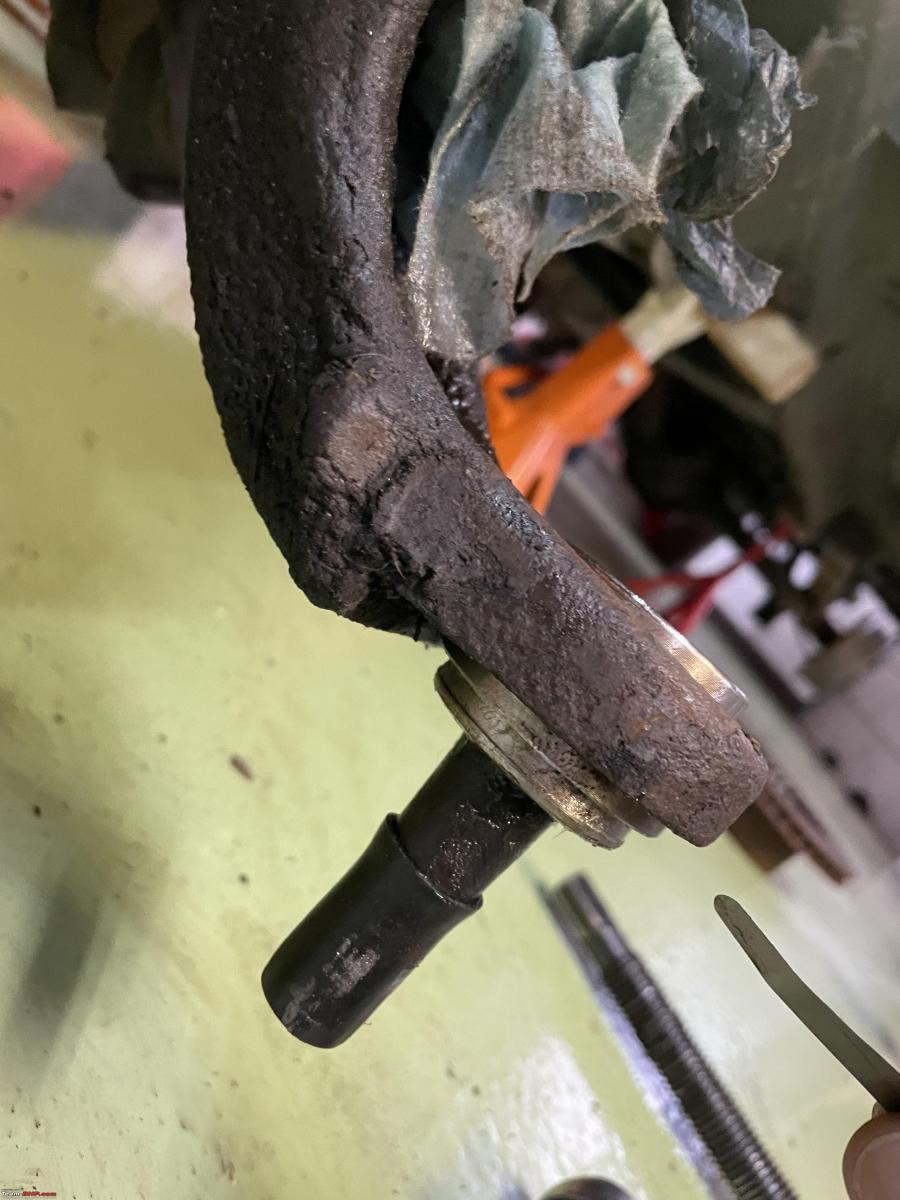
First thing I wanted to do is fit the ball studs back on. Which means pressing them back in!! It was fairly easy getting them out. But getting them back in requires a little bit more finesse. You have to make sure they go in exactly straight. Jeep has some special tools that cater for the shape of the steering knuckle.

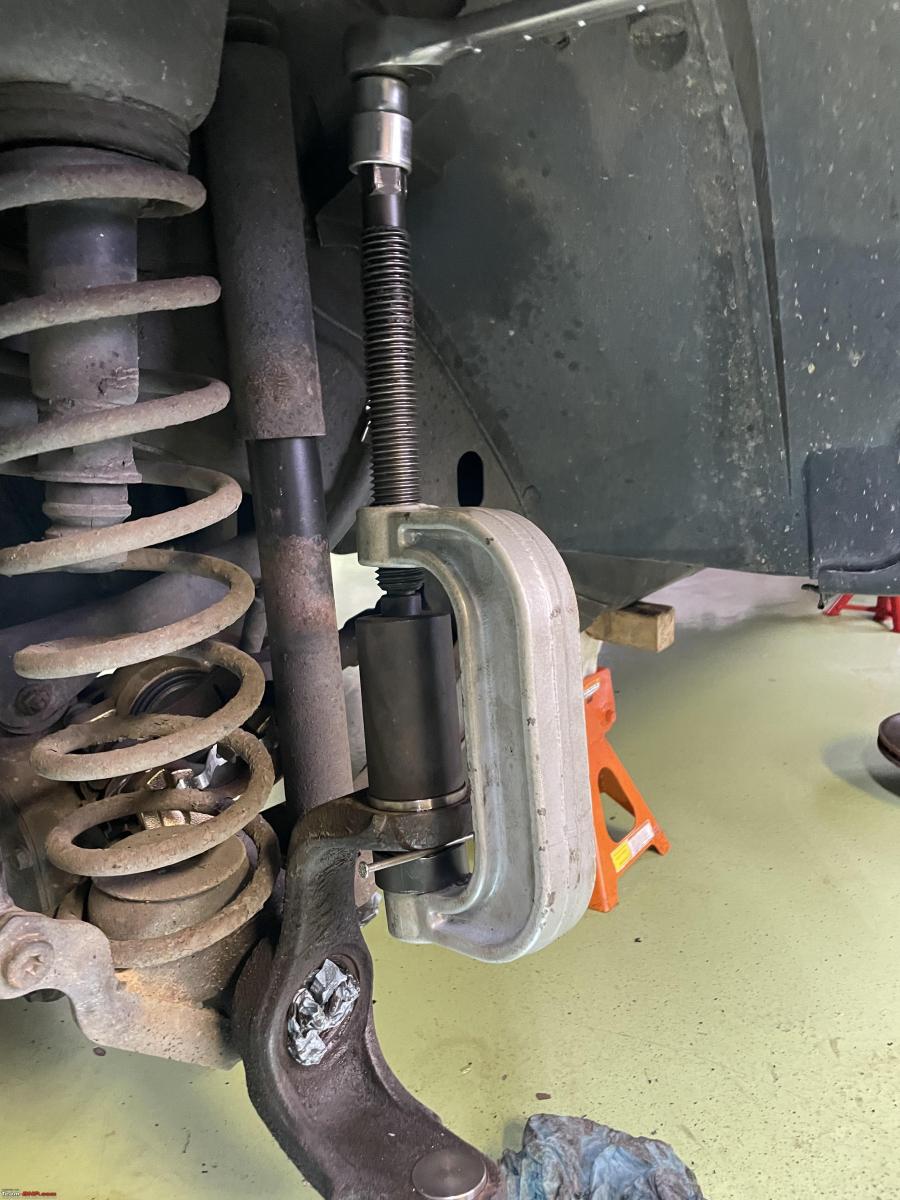
I just have a general C-clamp set, so it requires a bit of improvisation as you will see. Of course, everything needs to be properly cleaned, all rust needs to be gone. I use my pneumatic tools with various steel/Brass brushes.

Because I used a non-standard tool, the sequence of pressing in the ball studs is different from the Jeep procedure too. I start on the lower one.

It went in very nicely. I used a nail underneath the clamp so it would compensate for the peculiar angle as mentioned above.
One ball stud done! Notice I left the protective plastic cover on to protect the thread, also the rubber sleeve is removed as it would get damaged by the pressing in.
Once you have tightened the C-clamp I undo it, give the rim of the knuckle a couple of whacks with a hammer and reset the clamp. That will ensure I get a good even pressure across the ball studs and it will seat properly. I use a 0.05 feeler gauge around the rim to check it is properly seated.
Rubber sleeve put back on. One done, three more to go!

The upper one went smoothly as well. Notice the nail!! Very low tech, but perfectly adequate! And very cheap too!
With both ball studs in place it was time to reconnect the steering knuckle back to the ball studs. It just slides on, put the two castle nuts on and tightens them with the torque wrench to the correct setting.

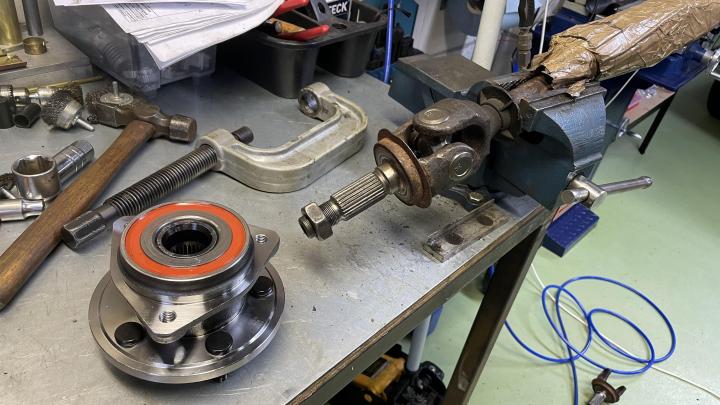
Next thing I did was to take the wheel bearing hub assembly apart. As I mentioned earlier, Jeep specialist Martin had managed to undo the nut.

Next a lot of cleaning and brushing of the various parts where the Universal joints will be installed.
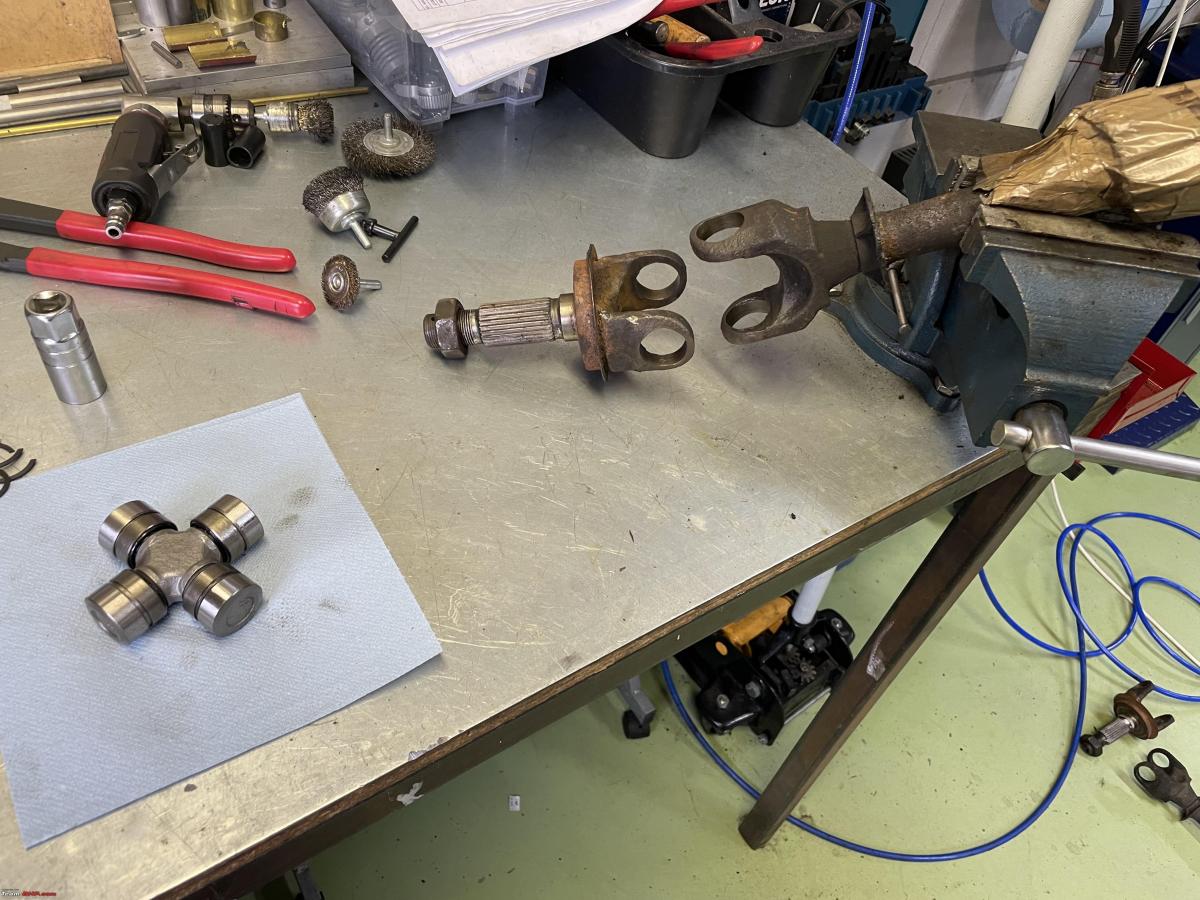

In order to install a U-joint you need to take the four end caps off and put the spider as it is known inside the two yokes. When you take the end caps off, best check each and every single one very carefully. I am very glad I did, because as you will see, in one of them, two bearing needles had come undone. They are just held in place by the grease!


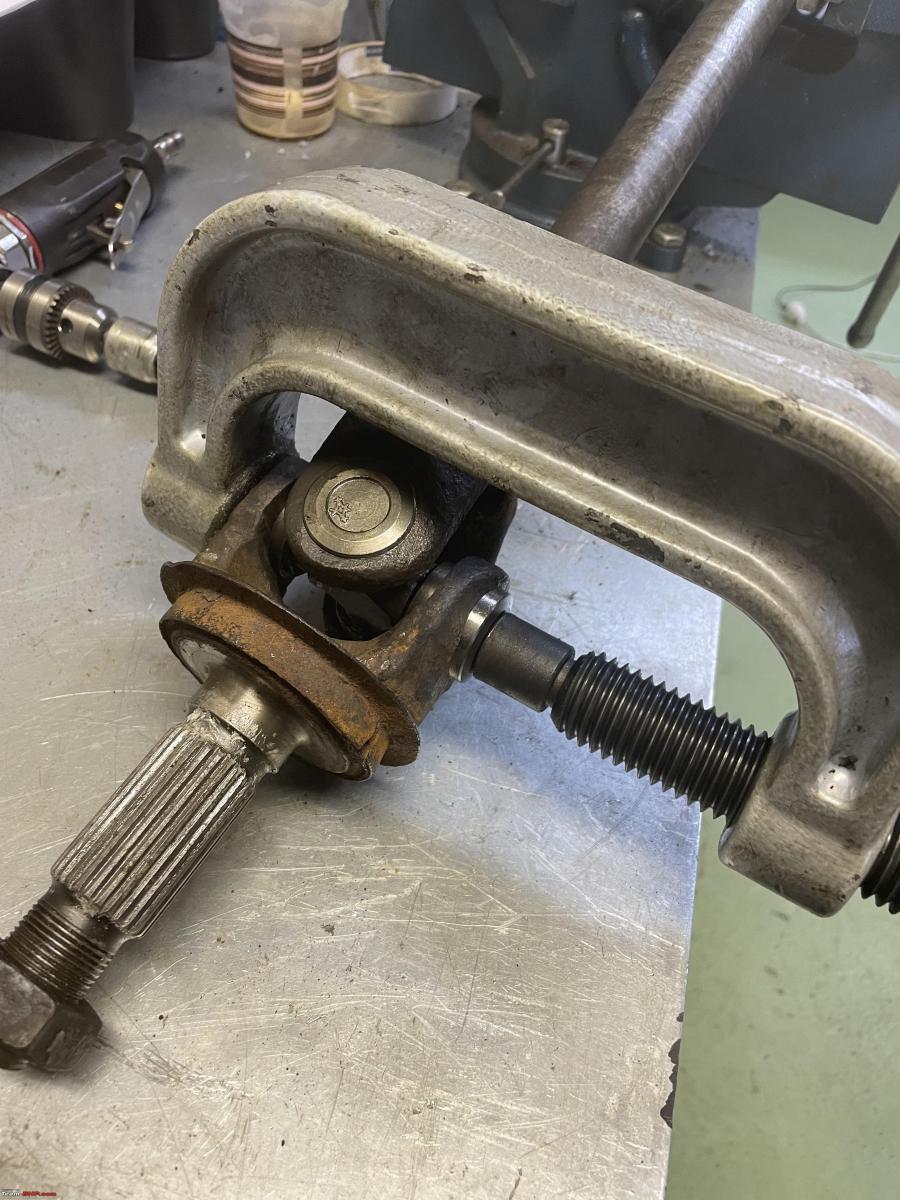
I just press the endcaps in manually so I know the bearing needles are locked and can’t fall out.
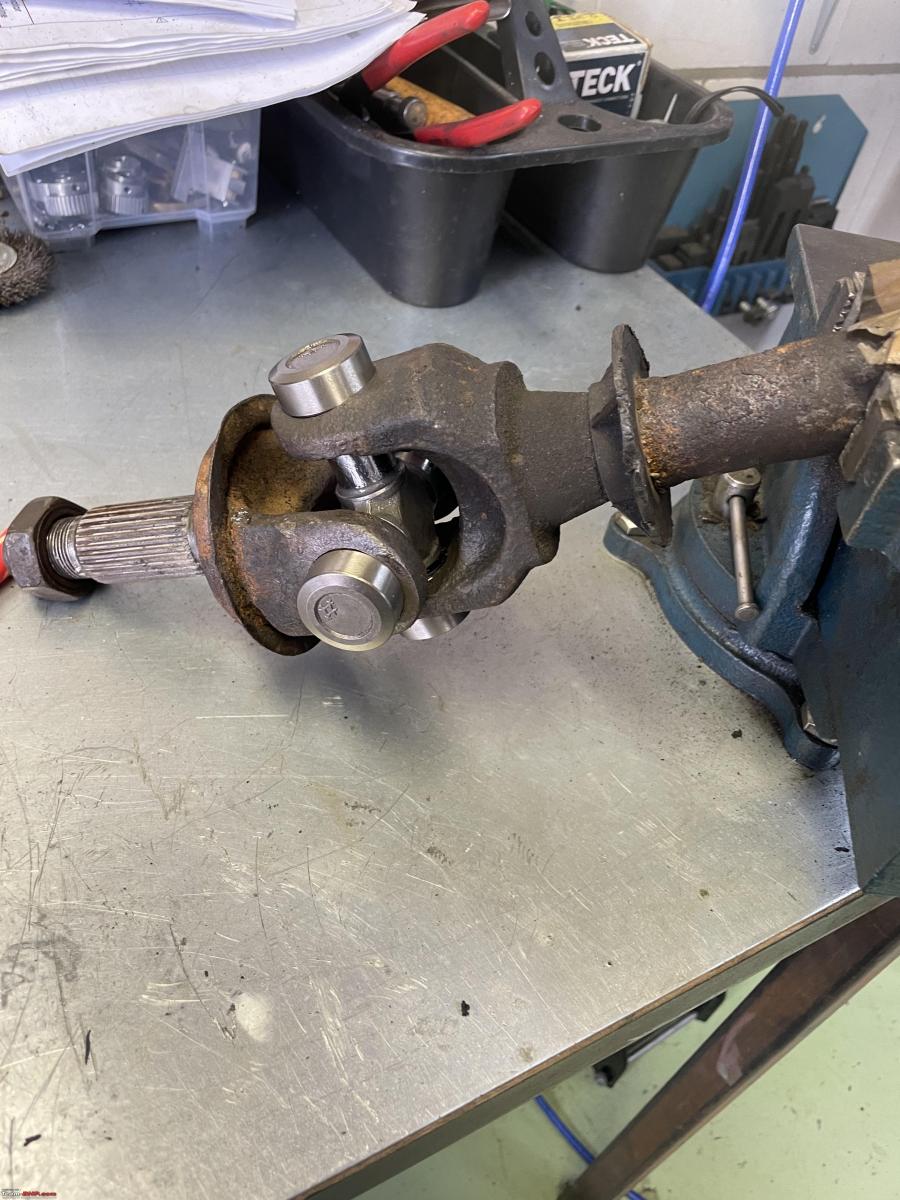
Then it is just a question of using the C-clamp to push all four of them in. Some people use a vice, but you need to be careful. It does require quite a bit of force and you might damage your vice. These C-clamps are ideal for these jobs. You need to position the endcaps so that you put the little C-clip on the inside. Which might mean going back and forth a couple of times. As you are pressing on the Yoke it actually deforms ever so slightly. So you need to give it a couple of good whacks with a hammer as you are repositioning the end caps. That will ensure any tension will be released.
With the universal joint back in place the next thing is to install the complete hub and bearing assembly. Again, lots of cleaning.

There is no seal or anything between the steering knuckle and the hub and bearing assembly. So Jeep relies on the seal of the bearing to do all the sealing!
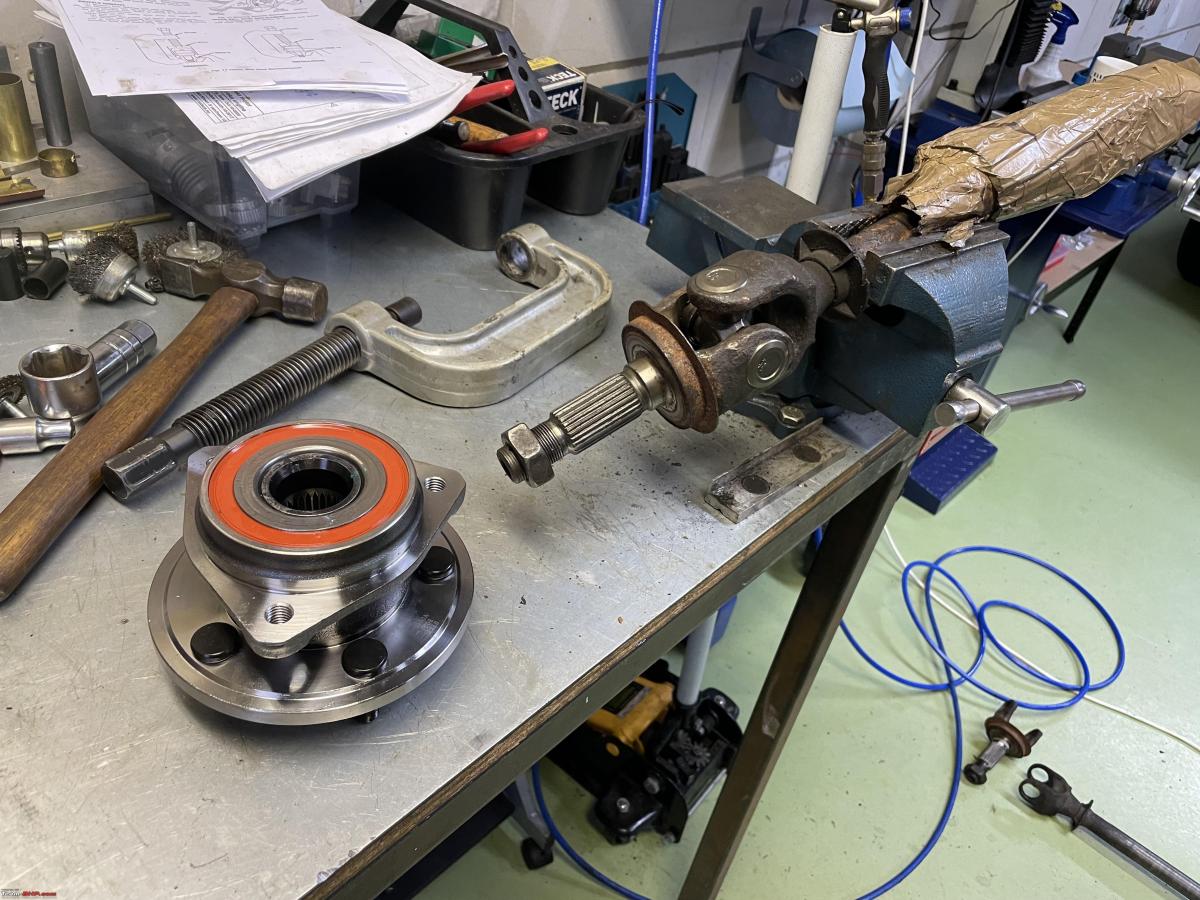
I also cleaned the spline very carefully, this is where the complete force from the axle is transmitted to the wheel. So it needs to be clean and I added some high-pressure grease too.
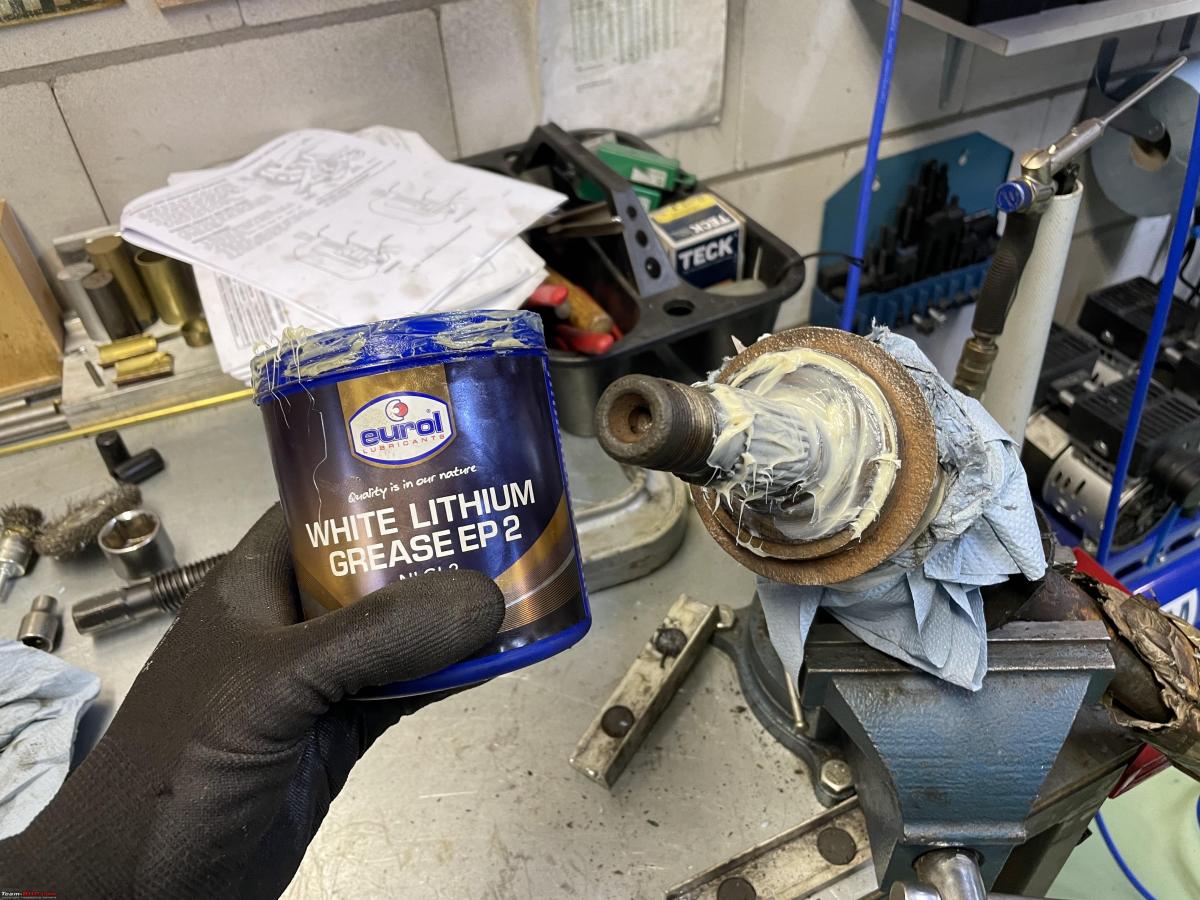
The complete hub and bearing assembly is held in place by three bolts, clean the bolts! And put some ceramic paste on them.


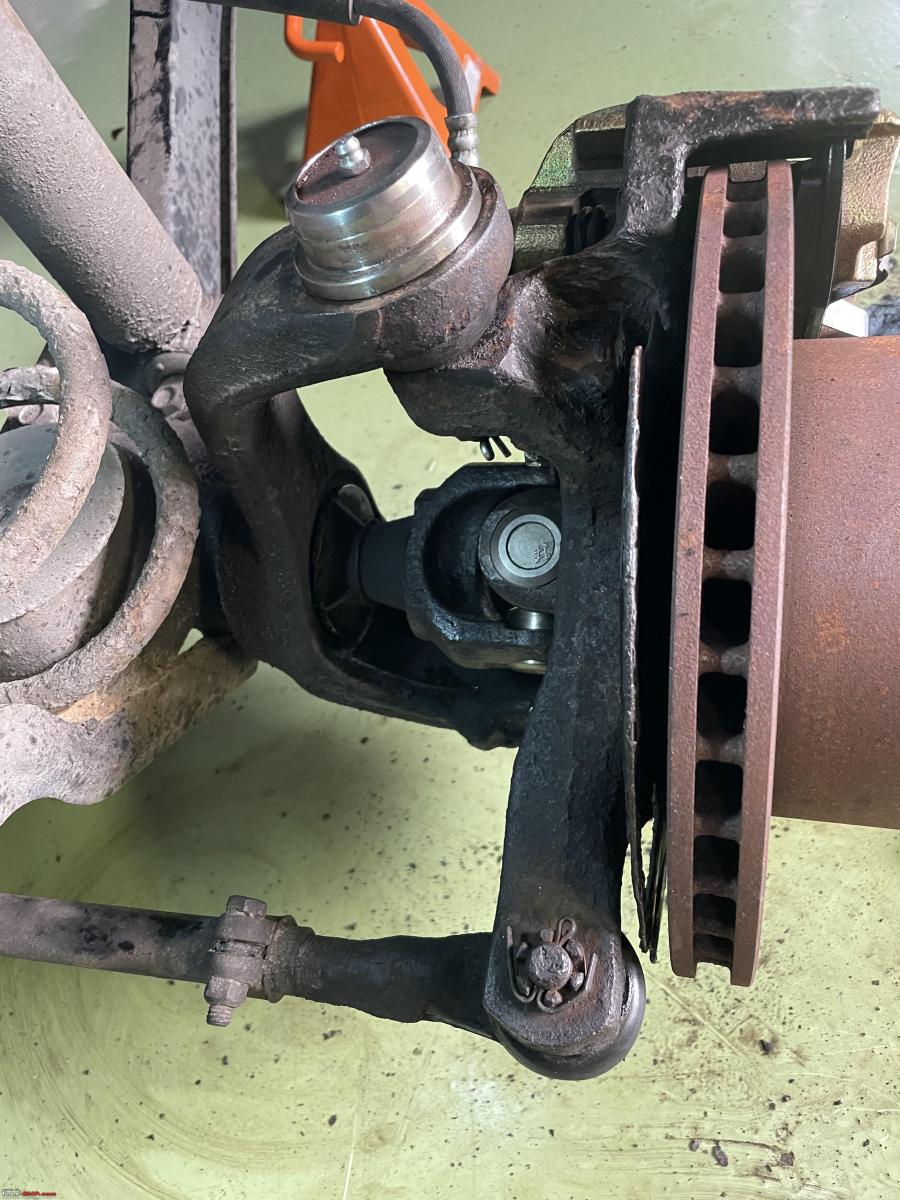
Here the complete re-assembled front axle with hub and bearing assembly, is ready to be installed. It just slides in, you need to be a bit careful and the rear spline goes through a seal which sits deep inside the front differential.

With the whole thing slid back in, all you need to do is tighten up the three bolts holding it all together and re-install the brake calliper. Also, remember to install the brake dust shield. I forgot and had to pull everything apart again!
But this is how it all looks, properly assembled once again! You will notice that the upper ball stud has a grease nipple. I put a little grease on both with my grease gun as well. Just a bit as there was quite a bit of grease in it already.

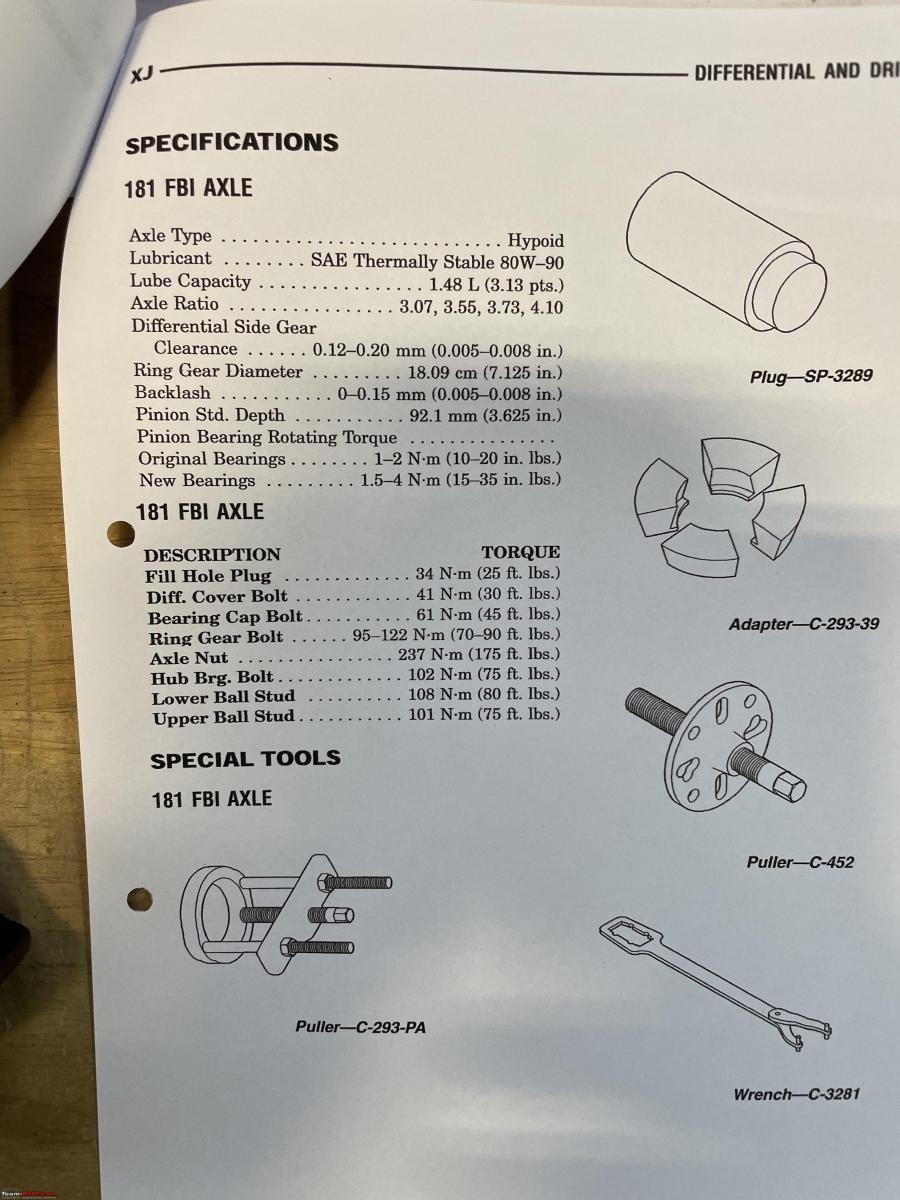
That is the complete left side done! With the exception of torquing the central nut. I checked my Jeep manuals and that nut needs 237Nm of torque!! That is a lot of torques, believe me. I have four torque wrenches, but none will go over 200Nm. So I checked with my AC Specialist neighbour Jack and luckily he has one I can borrow. I can’t tighten them now. Because the two front axles are connected with the front differential I need to have the wheels back in place, in order to lock the axles, or rather hold them in place. Will do so on Monday.
First complete the right side.
Continue reading Jeroen's experience for BHPian comments, insights and more information.
Find Car News
Just News


About Us