News
Retrofitting my Volkswagen Ameo with VW Passat dome lights

The difference in my installation is, that I did not splice/tap the headlight switch wire and instead powered the light using a fuse tap.
BHPian SuperSuri recently shared this with other enthusiasts.
Hello everyone,
Hope you all read this in the best of health.
Wanted to update the thread as I retrofitted the Passat-style dome light in my car. There have been a lot many threads with the same installation, however, the only difference in my installation is, that I did not splice/tap the headlight switch wire and instead powered the light using a Fuse tap on slot number 7 of the fuse box.
Materials required:
- Passat style dome light with wiring connectors.
- Torx T20 screwdriver.
- Electric tape/Felt tape.
- Wire splicer and crimping tool.
- Mini ATM APM style fuse tap.
- Extra fuse (I used 10 AMP fuses, going to buy a 7.5 AMP fuse when I visit the ASC this weekend.
- Soldering iron (if soldering the new wiring setup, which I did).
- Heat-shrink sleeves to cover the connections.
- LOTS OF PATIENCE!
The Passat Style Dome Light:
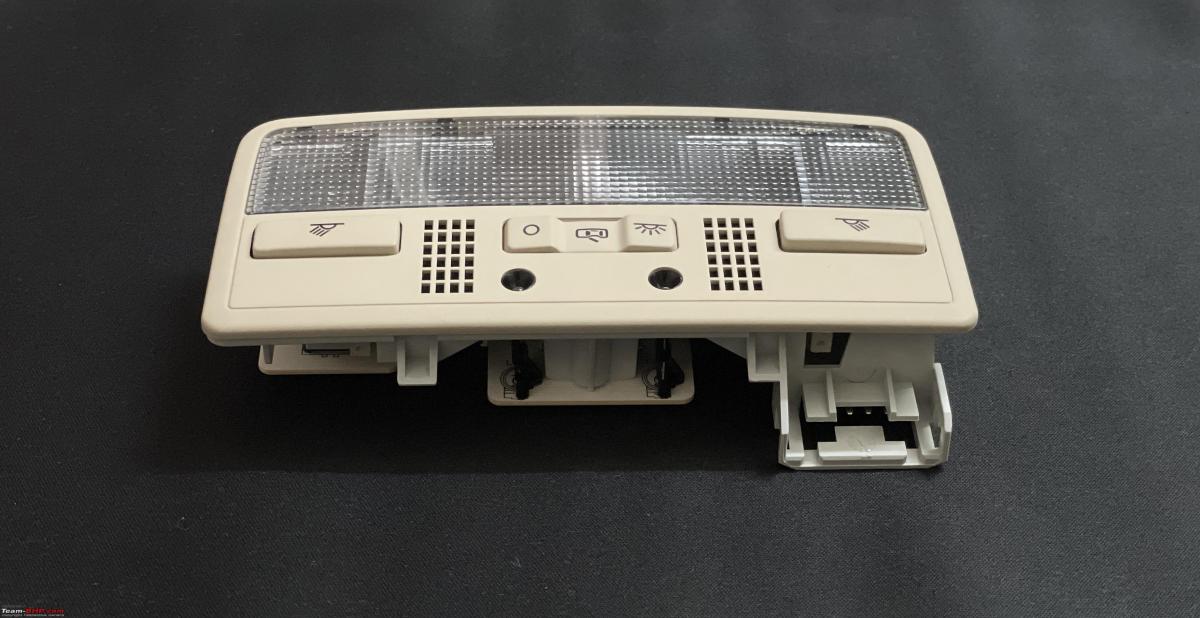

Wiring Connectors that came with the light. The 3-pin connector goes to the stock wiring harness connector and the 6-pin one goes to the new light:

MINI ATM APM type fuse tap:

Sharing the steps of the installation and connections as follows:
OPENING THE STOCK DOME LIGHT: Pry open the dome light’s lens by flexing the roof liner. Once open, there are 2 screws (Torx T20 type). Unscrew both and keep at a safe place(I lost one of the 2). Then use a flat head screwdriver to push the tabs at both sides of the dome light. The light can easily be removed now.
PREPARING THE NEW WIRING: I used the diagram provided in LizardKing’s thread to prepare the wiring harness. I made sure to solder all the joints and cover the same with heat-shrink sleeves.

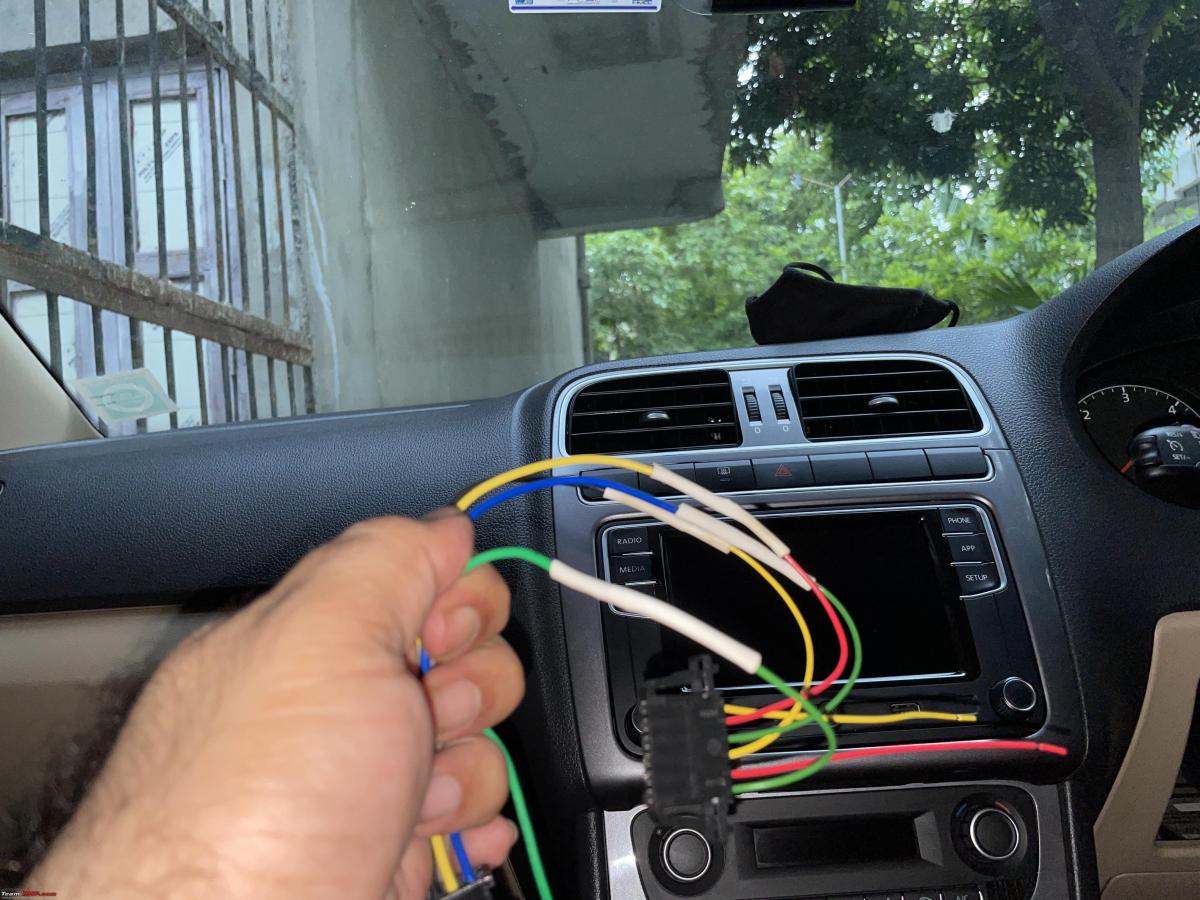
ROUTING THE NEW WIRING: Only the wire connected to Pin number 1 of the 6 Pin connector needs to be routed. I used a 1 mm wire to connect to this terminal via soldering. Routed the same wire via the cavity of dome light on the roof liner. You also need to remove the driver’s side A-pillar trim to route the wire in order to do a clean setup. You may use a metal wire and tie the end of the wire to it and it can easily be routed to the A-pillar cavity. From there you need to pull the wire to the right corner of the dashboard, open the trim from the side of the dashboard and route the wire through it. Now the only difficult step is to push the wire through the small gap using your fingers. Trust me this was the HARDEST step for me due to my big hands. Once done, join the wire to a fuse tap (MINI ATM APM type) with the help of a wire crimping tool. I did not have one, so had to use a plier. My hands are still aching due to the same. Once done, 90% of the job is done.
CONNECTION TO THE FUSE BOX: Remove the fuse from slot no 7 (7.5AMP in my car, however, it could be 5 AMP in some cars). Insert this fuse in one of the slots of the fuse tap. On the other slot, you need to add another fuse, preferably the same AMP used in your car. Once done, connect the fuse tap to the fuse box and VOILA! The beautiful red ambient light is on.
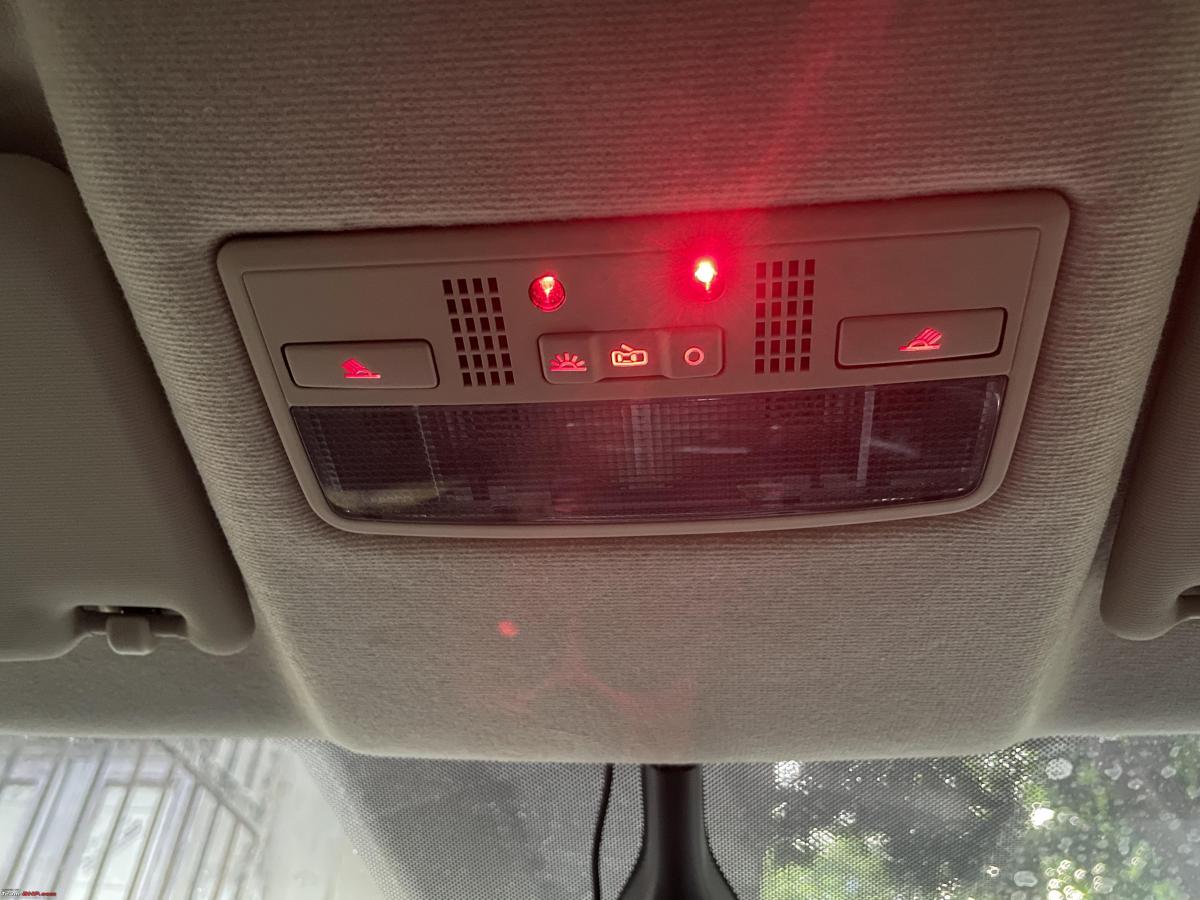
PUTTING BACK THE TRIMS: Put back the A-Pillar trim, and install the new light in the place. Also worth mentioning: the new light does not use any screws for installing it to the headliner, rather it uses the clips at one of the ends. It is a snug fit and no rattling felt during a small test drive.
I will let the images do the talking:
Stock Light removed

Wiring harness prepared:
6 Pin connector installed in the new light for testing if it works:

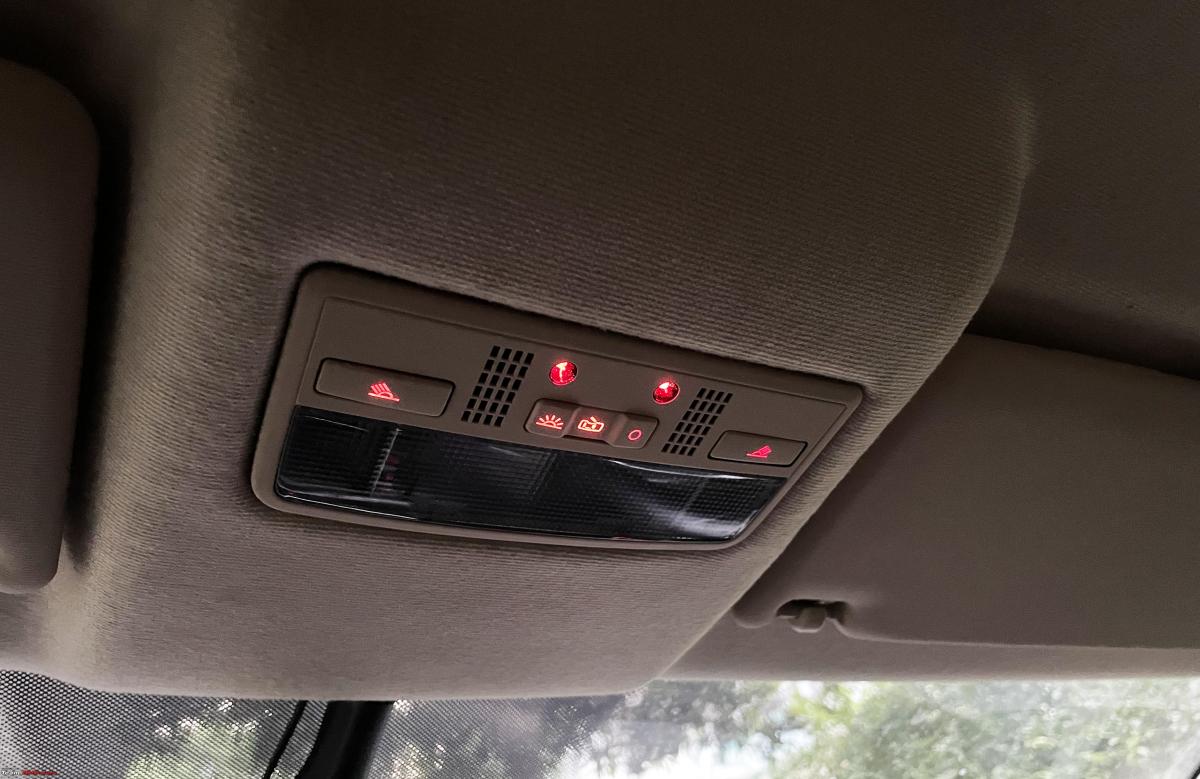
Routing the wire for ambient light & backlight of the switches on the new light. Without this only the halogens can be turned on, the red backlighting can not:
A-Pillar trim removed and wire routed. The black wire seen in the image is for the dashcam I had installed earlier:

The trim cover opened from the side of the dashboard and wire routed through it:

Wire routed till the fuse box. Remember, this is the most difficult and time-consuming process:

The fuse tap needs to be connected to slot number 7 of the fuse box. Use the existing fuse provided along with an extra fuse of the same amp:

LET THERE BE LIGHT!


I would like to thank Viraat, Prerak Kataria and Shankhneel Burman for their valuable tips for the installation. Thanks, Gannu & LizardKing for inspiring me to execute some mods on my car. Thank you all for reading till the very end of the update. Will try to click some more pics during the night & post.
Check out BHPian comments for more insights and information.
Find Car News
Just News


About Us

Buy & Sell
USED CARS