News
Virtus GT 1.5 DSG: Why I think it's a logical upgrade from the Polo
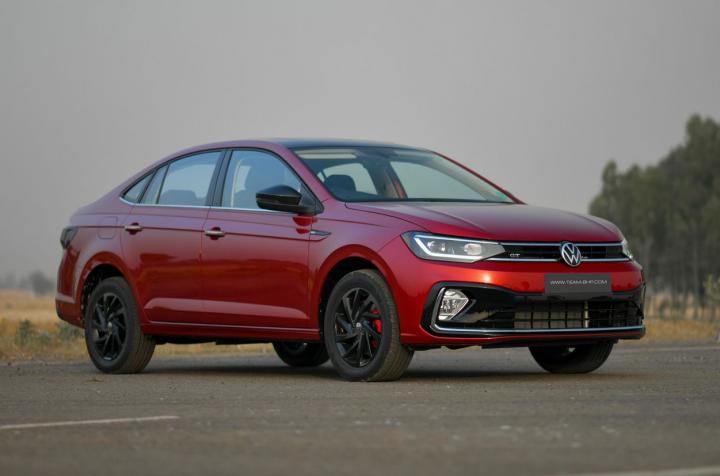
The 1.5L TSI paired with DSG is by far the best engine gearbox combo in the segment.
BHPian GrandTourer recently shared this with other enthusiasts.
Took a longish test drive of the 1.5 TSI DSG today in Bangalore and thought would share some of the things I liked, and disliked and a few things I found mildly infuriating.
I had gone for my HSRP fitment for my Polo to KUN VW, JP Nagar where I enquired about the Virtus GT. A very professional and helpful Mr. Mohammed Saleem helped me with the details, but since the TD vehicle had gone out to another prospect, I couldn't take a test drive then. So today, he got the car to Bellandur, a good 12 km from his dealership, and gave me a 10km test drive.Shoutout to Saleem for going the extra mile.
Coming to the test drive, the TD vehicle was fairly new and had run only 10k kms so far, and was well maintained and clean. Kudos to KUN VW.
Here's what I liked:
- The 1.5L TSI paired with DSG is by far the best engine gearbox combo in the segment. Coming from 1.2 TSI, the big brother is even more exhilarating to drive
- The suspension is very good at handling bad roads. I took the TD on a road I usually travel on in the Polo and there was a world of difference. Also, took the Bellandur Lake road at a decent click (empty weekday afternoon), and the car handled quite well. For those who know this road, it is a series of decent bends and a good tarmac. Of course, nothing close to testing a car like Virtus for handling, but the road gives a good perspective since I drive quite often on it
- The seats are very comfortable, both front and rear. Although the rear seats felt a little low to me or lacked under-thigh support.
- Braking performance was good, and nothing compared to what I have come to experience from the TVS brakes on my Polo. I was pleasantly surprised and hopefully, these don't warp as early as the ones on the Polo.
- AC is very capable & ventilated seats are a boon. Took the TD at 12:30, and the car kept me cool
- The space at the rear is very good. I'm 5'10'' and I could sit easily behind my driving seat with enough wiggle room for my knees and foot
- Paddle shifters are very convenient for that quick overtake
Things that I disliked:
- Everything is touch-sensitive. Thankfully VW listened to customers and is reverting back to buttons. But current models probably won't get that
- The armrest is essentially just a lid for the storage beneath. Even in a fully forward position, I couldn't rest my arms and hold the steering at the same time
- Not a fan of the body colored dashboard trim. At least it's only on the red car. The white one gets a silver insert instead, thankfully!
- Could have given soft touch material on the dash and door for a 24L car. Creta, Hector and a few others do, and Verna too I think
Things I found mildly infuriating (mostly cost-cutting in the wrong places):
- One touch-up-down window for driver only. My 6yo Polo has it all around
- That puny little horn... Why VW!!
- Is it just me or has plastic quality gone down compared to the previous decade of VWs?
- No mute button on the steering wheel. You gotta fiddle with the touch screen. Even Saleem wasn't sure where it was until the younger associate accompanying him informed us to press (ugh touch) the power button on the screen to mute/unmute
- There's a button on the steering on the left side that is not connected to any function, and nor can we do it in the settings
Still, with all the dislikes and irks, the pros far outweigh the cons, and this seems like a logical upgrade from the Polo. Soon!
Check out BHPian comments for more insights and information.
- Tags:
- Indian
- Volkswagen
- Virtus
- Polo
News
Bought a Honda Elevate CVT for my wife: Her 7 likes and dislikes

While we also considered the Toyota Hyryder and Maruti Jimny, we eliminated the Kia Sonet, Hyundai Creta, Verna and i20 N Line as well as the Kia Seltos.
BHPian ajmat recently shared this with other enthusiasts.
My wife's Polo 1.6 was 11 years old so it was time for a change.
What we wanted
- Petrol
- Auto - not an AMT
- Reasonable build quality
- Reasonably spacious
- Maneuverability in town
We eliminated the following
- Kia Sonet/Hyundai Venue - Nice on paper and in the showroom but found them bland
- Hyundai Creta - Poor safety record and the deconstructed looks
- Kia Seltos - Decent but a little bigger than required. Price and safety rating took it off the list.
- Hyundai Verna - strong contender but the design put me off
- Hyundai i20 N Line - Was concerned with its braking
We considered the following
- The Kushaq/ Taigun twins. They would have been ideal but the interior finish, rattles, weak air conditioning (very important for my wife) were the deal breakers. With a demanding job, the niggles were things I did not want to deal with. They also were expensive comparatively
- The Toyota Hyryder was nixed as it was not fun to drive and interior plastics were scrappy.
- The Jimny - Cute but the turning circle is not that great for town and my wife did not really like it.
Along came the Elevate. I liked the styling or rather the absence of a chrome fest. Took a couple of test drives which reinforced that this was the one! Acceleration in town is brisk up to 60km/h. Responsive steering and the decent interiors sold it for me. What sealed the deal was the left side lane change camera.
The City BHeV was under consideration but the price and dated interior put me off.
I ordered the car in October from Dakshin Honda and gave the details to my company's leasing agent who went and sourced the car from Whitefield Honda. (that's another story). The process was seamless and straightforward. It was much smoother than Hyundai (I was buying an Exter at the same time, they harassed you with phone calls for every small thing)
I tried to get the car before Xmas but an RTO snafu meant the car came on 26th Dec. The car is used by my wife. It was pressed into duty for the city use and the odd airport drop. My wife was a little scared of the size. Now she loves it.
What she likes
- Space
- Colour
- Visibility
- Smooth
- Easy to place with the cameras
What she does not like
- The size
- The ADAS system is a bit sudden
I tend to use Elevate in town as it is parked at home. The Audi is parked 15 min away at my mother's house.
What I like
- Brisk acceleration at city speeds
- Accurate steering
- Chuckable
- Ergonomics
What I don’t like
- CVT moos like a cow- under hard acceleration or press on driving
- Bump absorption is poor due to short travel suspension
- Seats are a bit flat
- ADAS is aggressive as well as the radar cruise control. It is a 0 -1 game - full on or full off whether brakes or acceleration.
The Bangalore mods and I took it for a running-in party to a nice curvy road. It kept up on the heels of a BMW 328i which I thought was doing tail-out slides. However, using the paddle shifts for the correct torque band did not cut the mustard.
So I have become boring with 2 SUVs - the Honda and the Audi

The Audi is turning 10
- It has a better build quality
- You feel really safe and secure
- High-speed dynamics and grip
- Mid-range acceleration
- Comfortable seats and driving position
- Bump absorption
- Better music system
The Honda is much easier to drive in town and has more modern features like Apple Car Play but I am not exactly dying for this. The Audi's usage has come down since I prefer to use diesel for longer runs where the engine properly warms up. It is the pick for long trips and airport runs. Unless something interesting comes along, it stays. My office is moving to Whitefield so might use it for commuting if I cannot get time for a 30 min walk to the Metro station.
Check out BHPian comments for more insights and information.
- Tags:
- Indian
- Honda Elevate
- Honda
- Polo
- Volkswagen
News
Brazil: Volkswagen Polo Robust unveiled for farmers


The Volkswagen Polo Robust is powered by a small 1.0-litre petrol engine.
Volkswagen has unveiled a new iteration of its popular Polo hatchback in the Brazilian market. Called the Volkswagen Polo Robust, the hatchback revisits the rugged look of the old Polo Cross and even gets a raised suspension setup.
As per reports, the new VW Polo Robust has been "developed and tested with customers in the agricultural segment." The crossover-esque version of the Polo has been raised for better ground clearance and even comes with a trailer hitch. Inside, VW Brazil has fitted the Polo Robust with vinyl seats that are easier to clean while also offering rubber floor mats.
The Volkswagen Polo Robust is powered by a small 1.0-litre petrol engine. It produces 84 BHP and 101 Nm and is paired with a standard 5-speed gearbox.
The VW Polo Robust is said to be a smaller alternative to the pickups available locally.
Source: HTAuto
- Tags:
- Indian
- Polo
- International
News
Republic Day drive over Atal Setu with Volkswagen India

The new Atal Setu bridge sure makes short work of long distances!
BHPian Maky recently shared this with other enthusiasts.
Republic's Day went a bit like this.
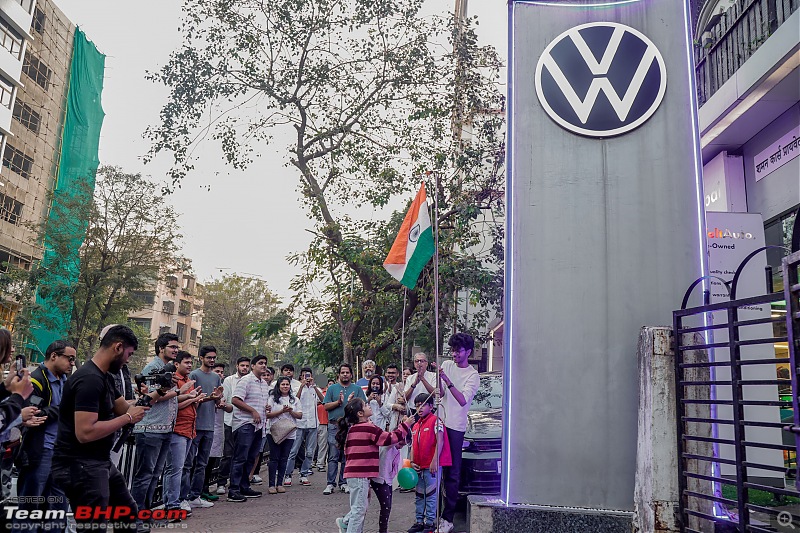
As before Volkswagen Downtown, Prabhadevi organised the event but this time Volkswagen India joined in
Gathered around 6:30 AM at VW Downtown's Prabhadevi showroom

Flag Hoisting ceremony at around 7 AM with the little kiddos doing the honours : )
And off we all went.


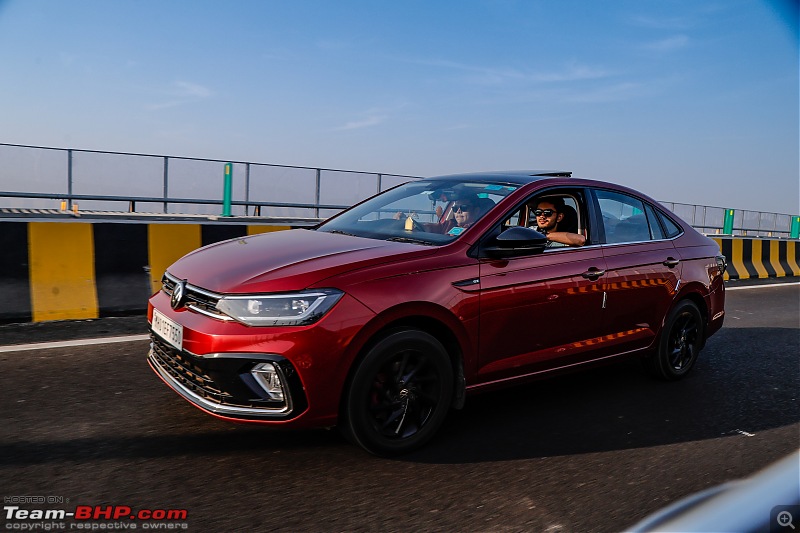


Nimble on the roads, Beast on the highways

Arriving at Saltt, Karjat. The new Atal Setu bridge sure makes short work of long distances!

Breakfast is just an excuse for us enthusiasts, isn't it : P

Us

A few hours were well spent with like-minded passionate people.
Some coffee to go and left for home

Many many thanks to Volkswagen Downtown for organising this run. Looking forward to more events in the future.
Check out BHPian comments for more insights and information.
News
Safety measures: Selling a car to a buyer in a different state

I want to sell my VW Polo 1.6 which is registered at an MH RTO whereas the buyer is from Karnataka.
BHPian 2000rpm recently shared this with other enthusiasts.
Hi Guys,
I have been thinking about selling my Polo 1.6 and had posted about this on our classifieds.
I have been approached by a buyer from Bangalore who is very keen to purchase the 1.6 variant. I have been in two minds about this sale as I want a clean transfer for the car and I am not sure about out-of-state transfers. (My car is currently MH and the potential buyer is from KA).
I spoke to my agent and he mentioned the following:
- Once we provide the NOC for transfer, the car can be then registered in the other state.
- NOC implies that my association with the car is done and any future liabilities from the car will be with the person whose name the NOC states. (The NoC is specific to a person, not generic it seems).
My questions to the forum are:
- Is the above information correct?
- If the person who takes the car, doesn't transfer or delays the transfer of the vehicle, do I have to worry about anything?
- Any specific things I should do to be careful with this?
Here's what BHPian hothatchaway had to say about the matter:
NOC in this case means that the issuing RTO has no objection to the car being re-registered elsewhere. This usually means another state within the Union of India, since only ownership transfer needs to be done if sold within the same state but with a different RTO. It is specific to the vehicle and not the owner and it does not absolve you of any liability if that is what you mean. What if you take NOC without selling it to a third party and do not re-register it elsewhere? The car still remains registered to the original RTO.
In this case, keep copies of the signed forms 28/29/30 and email soft copies to the RTO it is registered in. If you are paranoid, ask the buyer to come to the RTO with you and submit form 28 with chassis imprint, however, the buyer will still have to complete the re-registration process at his RTO in Karnataka with the forms 29/30 that you give him.
Cars are bought and sold every day, just keep copies of the forms, the buyer's ID proof, the sale deed and the delivery note. Collect the payment via bank transfer so that you have proof of the transaction. If you must hire a broker, get a better one as this one doesn't know the process. Read through buying/selling a used car on our very own forum, you will get enough past examples.
Here's what BHPian omar had to say about the matter:
The NOC is issued to a specific person/entity. However, the onus of transferring would still be with the buyer, even after getting the NOC. A NOC can be issued, but not be actioned on, as well. In this case, the car will still be in your name.
Would you be handing over the car, and then asking the buyer to transfer the car in his name? If yes, I would advise you to follow the below:
- Get an affidavit made detailing the sale and terms. Mention the details of the sale and the steps to be followed. For example, the responsibility of the NOC would be with you (seller). Post the sharing of NOC, the buyer should initiate a transfer to the local RTO within x number of days.
- The usual practice is for the buyer to withhold a nominal amount until the NOC is received from the seller. This can be mentioned in the affidavit as well.
- Mention you do not have any liability post the handover of the vehicle on the document. Get it notarised.
Coincidentally, I had done a similar thing in 2022, for a buyer from Bangalore. Reach out to me if you have any additional questions.
Check out BHPian comments for more insights and information.
- Tags:
- Indian
- Volkswagen
- Polo
- Used Cars
- RTO
News
"Left pull" issue on my VW Polo TSI is spoiling the driving pleasure

Apart from the alignment, I had the suspension checked by the service centre and an FNG. I even changed all four tyres but the problem still remains.
BHPian nerdonwheels recently shared this with other enthusiasts.
I have a peculiar problem with my 2020 Polo TSI. The problem is "left pull". The car just drifts to the left.
Currently, the ODO is at the 53000 mark and the problem manifested "right after" the 45K service.
I made three visits to the service centre and they tried to rotate the wheels and correct the alignment. After the alignment, as I keep driving, the problem reappears within a few km. When I pushed the SA to get the problem rectified, the kind of response and steps taken showed no intent to address the issue and I lost hope with them.
I have checked the alignment at multiple places and am convinced that it's not just an alignment issue. Every time after the alignment is rectified, for the first few km, it will hold well and in ~100km, the problem reoccurs.
Apart from alignment, I had the suspension checked by ASS and FNG. All came back saying the suspension was clean.
The car was due for a tyre change and I changed all 4 to Conti. Still no luck. The problem persists with the new tyres too.
This has become a nagging issue now and it's spoiling the driving pleasure this beautiful machine offers. Requesting other members here to throw some light and provide any guidance they could offer to get this machine to its original state.
Here's what BHPian ais had to say about the matter:
Have you checked all the bushings and mounts- engine, suspension and its components, and the steering rack?
Here's what BHPian ankitsharma had to say about the matter:
2 primary contenders assuming the alignment & balancing is done right.
- Suspension Mounts. Look for space between the car body and the stopper on the top. If there is significant space, change the mounts.
- Lower front arm bushes. Specifically the ones more towards the rear. At 53K they must have developed cracks, either one or both of them.
Here's what BHPian nerdonwheels replied:
Apart from the steering rack, I have checked the rest. Will check the rack too.
I am making a visit to the SC again this week. Will check the suspension mounts too. As a layman's inspection, one thing which I noticed was the space between the rear tyres and the body (wheel arch). Having the car on a plane surface, when I checked this spacing, on the left-hand side, I found it to be short by close to a cm. Not sure whether this is of any significance. But this is one observation.
Check out BHPian comments for more insights and information.
- Tags:
- Indian
- Polo
- Volkswagen
News
4500 km in my Jimny AT: Why it's a worthy replacement for Polo DSG
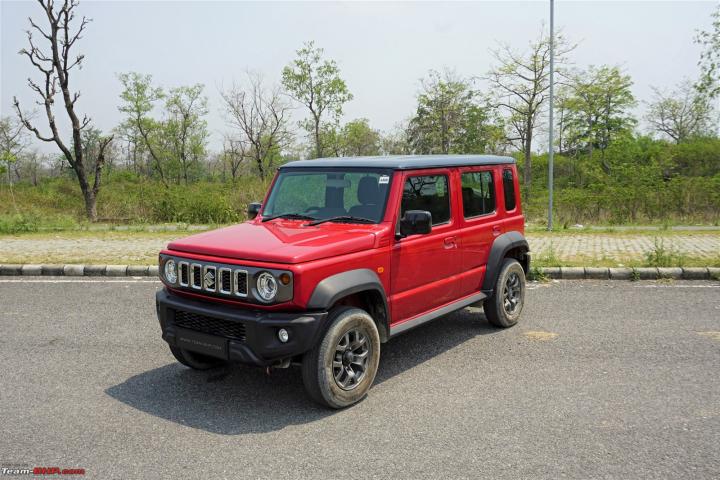
Had anybody told me that I would be using a 4x4 as a city car, I would have laughed at them really hard.
BHPian androdev recently shared this with other enthusiasts.
Have clocked 4500KM on my Jimny AT
City driving:
It has comfortably replaced my Polo DSG. Different cars but the small footprint, smooth auto, and good suspension make it a good city car for those who are uninspired by crossover deluge. The rear seat is bouncy but our distances are short and kids don't mind. Had anybody told me that I would be using a 4x4 as a city car, I would have laughed at them really hard. Some drawbacks exist (tight turns are painful but that's not like an everyday thing and not so good FE)
Highway driving:
It has to compete with my S Class. I have some trips where 400KM is on the highway and the last mile 30KM is on rural roads/non-roads. I am forced to take Jimny on such trips (reason for buying it). When I was in my 20s and 30s - my driving was just one-dimensional - go very fast and always used European sedans. Now in my mid-40s, I use my brain more sensibly and drive according to the traffic and drivetrain at hand.
Power is the least of my problems in this car - it's a comfortable cruiser between 80-100 kmph speed, that's the max speed one should do anyway with this type of body. Pick-up is slow but the highways I visit are 2 lane dual carriageways so I can take off at my own pace. Sometimes I put the OD button to good use to get out of truck congestion, etc. In general, I pace myself to cruise at 80-100 kmph without trying to outgun anyone and it was a comfortable drive. Used only the front two seats and we had comfortable non-stop 6 hr drives - we both are used to very comfortable European sedans and we found Jimny to offer a very compliant ride. No experience with rear seats on long drives.
One major drawback is the safety aspect. It's not stable if you have to do panic braking and manoeuvre your way out of trouble - the margin of safety needs to be very high - lack of power is really a boon! I would have hated this in my 20s but now I have a better sense of anticipation and drive very defensively - kind of enjoy and take pride in doing it. Unfortunately, to reach remote areas, I have accepted this compromise till I come up with a better plan. This is one reason why I would say go for a safe crossover if you intend to do a lot of highway driving.
Rural roads/no-roads:
Simply the G.O.A.T. and it looks so good doing it.
Check out BHPian comments for more insights and information.
- Tags:
- Indian
- Maruti Suzuki
- Jimny
- Polo
News
Cars with surprisingly high maintenance costs

We always knew the Polo would be more expensive to maintain, but didn't expect the gap to the Swift to be so wide.
BHPian Omkar recently shared this with other enthusiasts.
Maintenance costs have always been a deciding factor when purchasing a car in India. You don't want to spend lakhs on a car to get it and then spend some more lakhs on the upkeep. We have 2 cars in the family currently, a Maruti Swift Petrol and a VW Polo TDI. The Swift was bought brand new and the Polo is pre-owned. Both these cars don't see as much of the highways as they should, but they're used regularly in the city. The Swift has clocked about 35,000 km over the years and the Polo is at 55,000 km. We also had an Alto for about 11 years.
Volkswagen Polo TDI
The Polo wasn't in the greatest of conditions when we got it, so had to spend some time and money to get it in shape.
Here’s a look at the first OBD scan report:
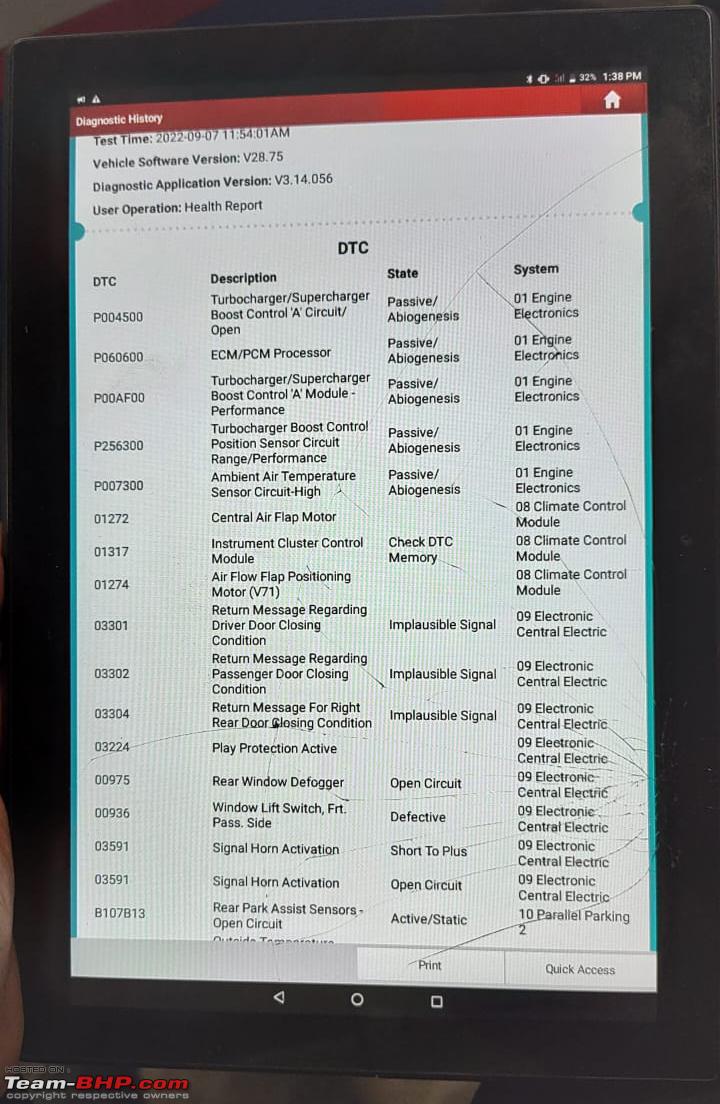
- There was an issue with the turbo boost pressure sensor which was replaced.
- The clutch had worn out and hence replaced.
- Rear shock absorbers had to be replaced.
- Then there was a gasket oil leak followed by an oil sump leakage.
- After getting all the major stuff sorted out in the beginning, the car hasn’t given much trouble in the last year.
- Yearly cost of maintenance is ~Rs. 8,000 - 9,000. Alternate service includes diesel filter replacement, which adds another Rs. 2,500 to the cost.
Maruti Swift & Alto
Both the Marutis have been extremely easy on the pocket. The Swift was getting serviced at the authorised service centre till the time it was under warranty. After that, it has been going to a friend's garage. The yearly cost of maintenance is ~Rs. 6,000 - 7,000. The Alto since it was always serviced at the authorised service centre, the yearly maintenance was ~Rs. 4,500-5000.
In conclusion, the VW emerges as the one with higher-than-expected upkeep. Yes, it’s a diesel and yes, it’s a used car, but still, the Polo's spares are expensive and it's also a bit more complicated and harder to work on than the Maruti. We always knew the Polo would be more expensive to maintain, but didn't expect the gap to the Swift to be so wide.
Do share your experiences with some of the cars that you have owned. Which of them had surprisingly high maintenance costs?
Here's what GTO had to say about the matter:
Great thread, really made me think.
Surprisingly, my barebones basic Jeep, the 1997 Mahindra Classic! Total engine failure at 140,000 km, gearbox fully overhauled, has needed two complete body overhauls (one within just 7 years of ownership), radiators, oil leaks, overheating, starting issues etc. etc. The factory body was a rust bucket. I eventually installed a new body and dipped it in Wurth to solve the problem.
Somehow, things completely settled down after the 3rd engine was installed (Bolero 2.5L IDI diesel from Mahindra itself) with all brand-new components & ancillaries. The Jeep has been way more reliable since. But there is a LOT of money sunk into this barebones car.

Here's what BHPian greenhorn had to say about the matter:
My Indica! Its yearly service costs far exceed those of my other cars (Civic, Etios)
People think I'm crazy to spend 40k a year on average on it (and those people are probably right)
Here's what BHPian Bhodrolok had to say about the matter:
The VW2.0 maintenance costs are actually much lower but the quality is just not the same. So there is a trade-off when the cost cutting happens.
Here's what BHPian Newtown had to say about the matter:
Our Tata Estate without a shred of doubt. Had two engine rebuilds within 60,000 kms. When it worked that was an awesome vehicle to cruise in. But such times were few and far between.
My now-sold Baleno manual - I was alarmed at the Nexa maintenance pricing. Cost was in the ballpark of my previous gen VW's!
Here's what BHPian Kosfactor had to say about the matter:
I remember my uncle saying that his M800 was cheaper to service than his then-Hero Honda CD100, so Maruti had taken care of such things those days.
Our own M800 was easy on the pocket, hardly needed anything, nor would most people who own an M800 would bother knowing much about car maintenance as such - fuel, service - drive.
Fast forward to 2016 - Nano was surprisingly expensive to maintain for what it was.
Here's what BHPian revsperminute had to say about the matter:
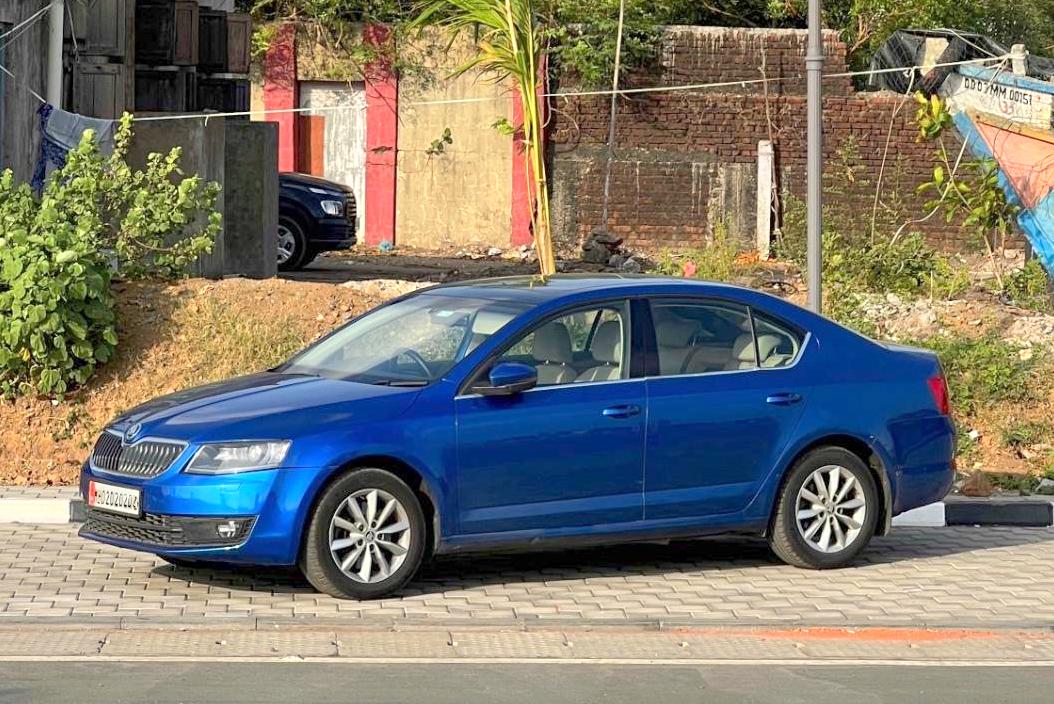
A picture is worth a thousand words.
With the old girl knocking on the door for her 9th birthday, maintenance costs have inadvertently crept up. Have spent about ~2L over the previous 2 years counting all the parts replaced and general service.
Check out BHPian comments for more insights and information.
- Tags:
- Indian
- Maintenance
- Car Service
- Polo
- Nano
- Octavia
News
Small yet fun and happy Sunday meet and drive with four German cars

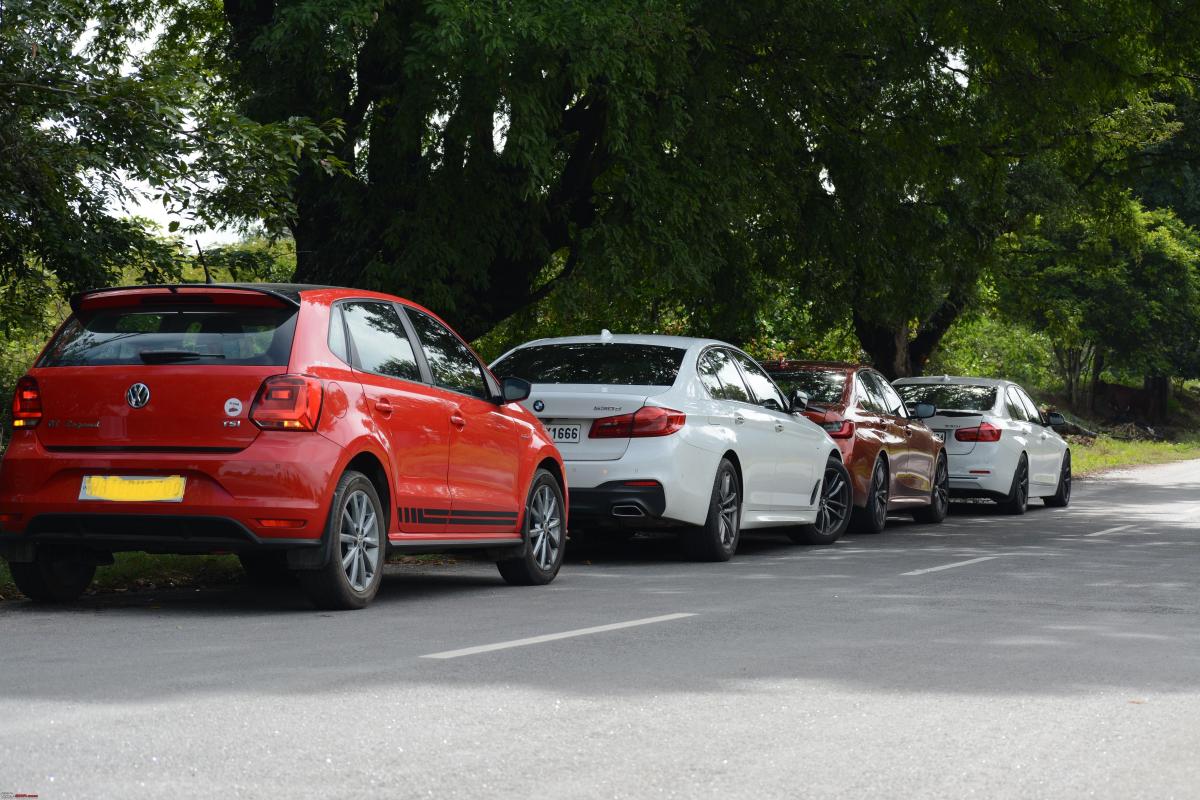
It was mega fun to watch the Polo 1.0L TSI move. The BMW 530d was built to do this and it was perhaps the least exerted on the highway run.
BHPian megazoid recently shared this with other enthusiasts.

Max Verstappen was going about his business in style and Kalle Rovanpera had already claimed this year's WRC crown. What remained was for us to make our Sunday a wee bit special.
The city and nearby areas had got a fair bit of rain in the past few days and everything was looking pretty. Woke up to good weather and tried sneaking out of the apartment without disturbing anyone. Promptly dropped the water bottle, which bounced in numerous ways not only waking up folks at home but also the neighbour's dog. Cursing the water bottle, made my way into the car and saw the fuel needle resting on its side making no effort to wake up. Realized I needed gas and that would make me further delayed.
Drove into a neighbouring pump and filled regular petrol, rolled the windows down, made small sounds of happiness and drove to the meet point about 20kms away. The day looked lovely with the sun slowly popping out and the early morning folks were up and about, enjoying their day. Tried to fiddle around with the phone while driving and saw a board clearly stating "No mobile phones while driving", refrained from doing anything foolish and concentrated on getting to the location safely.
Low and Fast

One interesting thing about our bunch of driving buddies is that everyone is extremely punctual. Nothing gets more irritating than to see a friend turn up sipping orange juice with a smile while others are melting in the sun. Everyone wanted to quickly get on with the drive and we started moving quickly.
There was a 1.0L Polo AT, a 530d, a 340i and a 330i. We kept a nice rhythm and picked up pace as we left the city behind. After an hour's drive, got to our breakfast point where a BMW Z4 was gathering eyeballs along with a bunch of big bikes. Felt that our day had started on a good note. Had a quick breakfast and polished off a coffee before continuing with the drive.
It was mega fun to watch the Polo move. As a past Polo owner, I could imagine the fun Nerd1200 was having behind the wheel. The 530d was built to do this and it was perhaps the least exerted on the highway run. d3mon knows his car very very well technically had put all his buttons to good use and used his locomotive torque and set sail. The M340i has seen most roads around these parts and it likes fast action and robimahanta happily obliged.
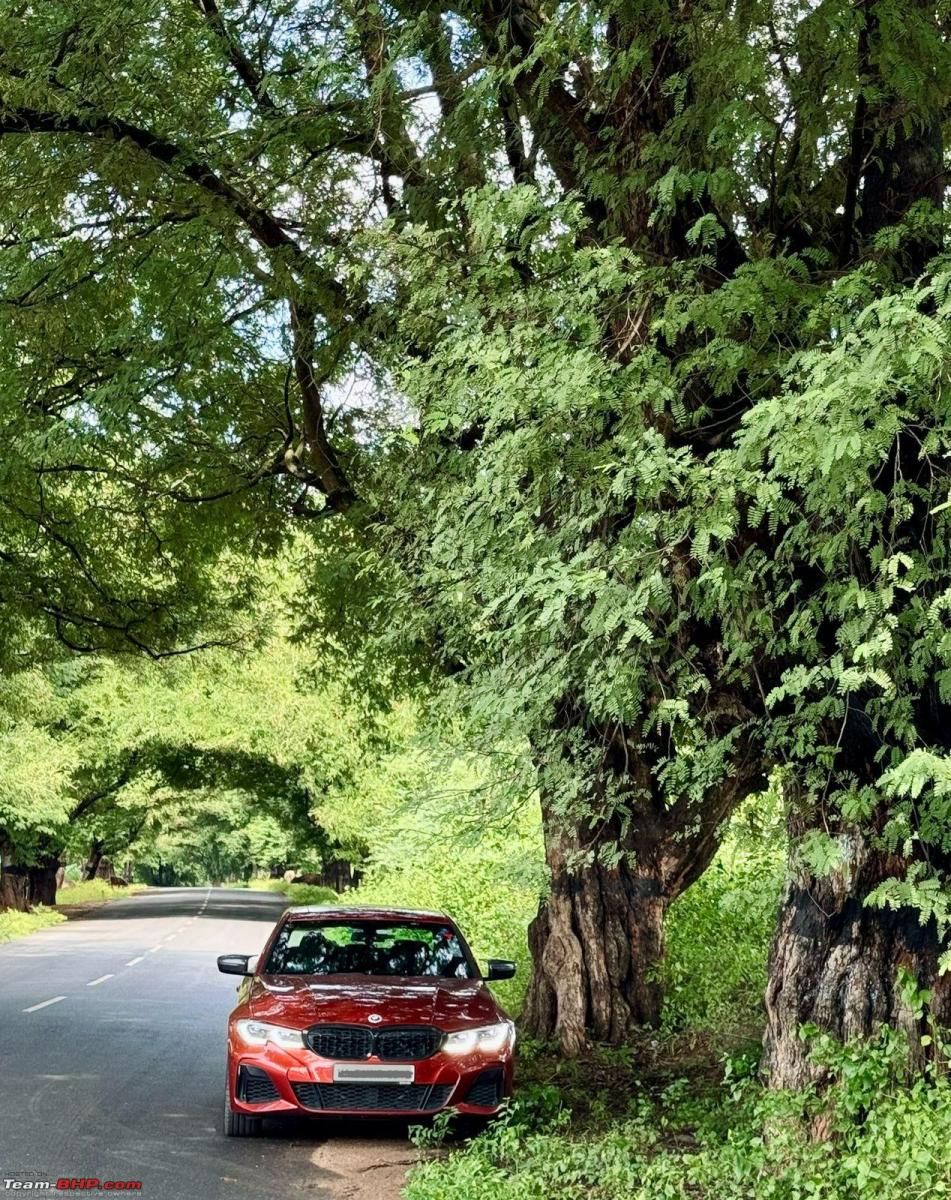
We veered off the fast highway into an undulating curvy stretch which had lovely tree cover. Apart from the beautiful scenery, the car and its occupants were subjected to strong lateral forces that proved beyond doubt that our heads weren't just freely mounted on our necks. Every now and then, we would park, jump out of the car gesticulating wildly about the beauty of the cars making the villager going about his life obviously puzzled at these antics.
Reservoir

After being challenged by curvy two-lane roads, we decided to make things more interesting and landed up on a single-lane winding piece of road that turned out to be super fun. We gathered together at some nice spots for some photos and some relaxation before starting to drive again. At some point, I lost my bearing and went deeper and deeper into some bylanes and finally reached a point of no progress. The Big 5 series just would not be able to squeeze through this alley. This brought out another interesting aspect of the group. People are extremely accommodating even when something were to go wrong with the plan.
Fast and Furious
A short fuel break and we were on the move again. The pace picked up again once the small settlements were behind us and all the cars and their occupants had a great time. We got through a tight ghat that had the 530d tires squealing in protest. The 340i was clinically fast and the Polo was sitting pretty in the rearview mirror easily.
Robi had to drop his friend, who was with us on the drive, at the airport. The friend turned out to be a very good pilot and drove the 340i really well. They had to make it back and could not join us for lunch. The rest of us had a late lunch and then parted ways making it a small yet happy driving day.
Men of honour
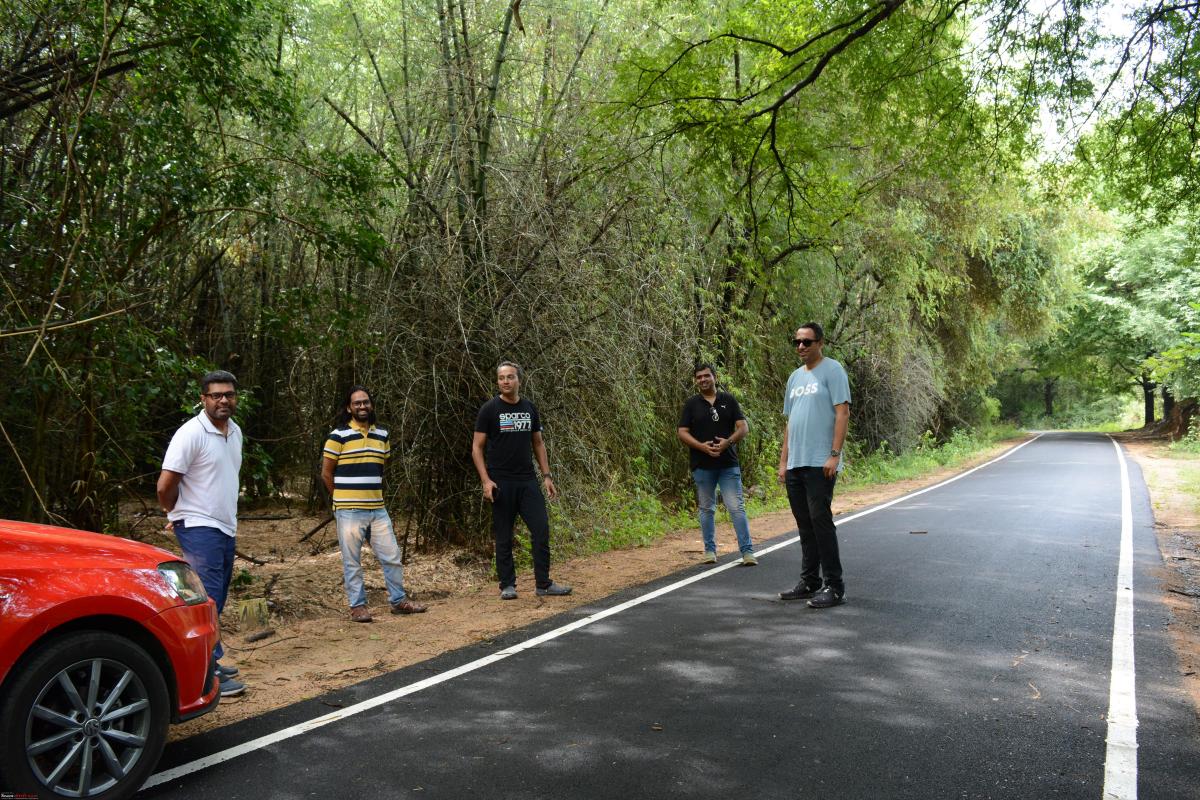
Credit for all the pictures to the rightful owners.
May the tribe grow!

Check out BHPian comments for more insights and information.
News
Installing a rear cabin roof light in 3 cars - Ignis, Polo and Nexon


I got a Maruti WagonR front roof / S-Cross rear cabin lamp from Boodmo. Good alternatives are also available - like the cabin light of Tata Punch / Altroz.
BHPian Reinhard recently shared this with other enthusiasts.
Adding Roof Light To Rear Cabin Area Of Ignis, Polo & Nexon
A few months pass & then there's a DIY itch with the car. Suddenly something starts to feel missing, regardless of whether it's really missing or not! Here we go again.
So the title is clear enough I think to set the context. All 3 cars I own are really just small hatchbacks of various lengths. Yet - the makers of all 3 have been very smart in installing the sole cabin illumination in the front, near the IRVM. Everything in the back should remain a dark secret they said. So far - the Nexon has a detachable LED with USB charging installed on the C pillar within reach of my son from his child seat (its documented in the Nexon ownership thread). But then - something permanent, without LiIon battery & directly linked to the front lamp / doors - is definitely better. And since it's needed in 2 other cars - I decided to install it in the Nexon as well. The cleaner the better. Let there be light!
Warning - if you don't have the cold heart needed to use a cutter and literally chop away parts of your beloved car - this is where you close the tab & don't read further. Some very cruel blade work will be needed for this project & you need to have that cold blood.
As usual, Japanese efficiency and cheap modularity to the rescue. Sourced a WagonR front roof / SCross rear cabin lamp from Boodmo (3Nos) for this purpose. There are good alternatives available - like the cabin light of Tata Punch / Altroz. They are better finished & come with an LED light. But then - they cost 4 times as much.
This is the part that I sourced from Boodmo - Suzuki Cabin Roof light
Part Number is - 36210 M 55K00-6GS
As usually is the case - the lamp does have a cheap halogen bulb included - but does not include the connector we need, to attach the wiring. And it's a typical non-standard connector that's hard to source online. If you want to source it from Boodmo - the options are roof harnesses of other cars like Swift / Baleno (In my case it was rather costly to procure 3 especially since Boodmo stupidly multiplies shipping charges for every added quantity of the same item in the order). The easiest option is to buy the Swift roof harness. It costs around 205 INR + shipping. Boodmo.com.
The use of this harness is just to get the suitable connector and 2 wires of suitable length pre-crimped. Most parts of the harness other than the roof lamp wiring, we'll anyway have to cut away.
I luckily stumbled onto KARDIY once on YouTube and saw that they are stocking the connectors with small 3-wire pig-tail, available for sale via their Whatsapp catalogue. Checked with them & they had it in stock. INR 100+ shipping per unit. That's really well priced. The gentleman is kind & I liked doing business. Added to contacts for the future! We'll use a set of Polycab wires covered in the shield to extend the pigtails to the desired power sources.
We'll go one car at a time in the next posts. The steps are pretty much the same -
- Make a cut-out in the roof liner while praying that you don't cut it more than needed. You get just 1 shot at getting it right.
- Route the wiring harness from it to the front cabin lamp OR desired fuse tap / other power source as per car.
- Test that it works, put the lamp into the cut-out firmly, close all opened panels.
For harness preparation, temperature & fireproofing, sound deadening you may also want to have:
- Good quality copper wires of 3 different colours. These really have to be heat / fire resistant. Remember - they'll run under the roof / inside the pillars. Areas that get extremely hot when the car is parked under the Sun. I used 1sq mm Polycab copper wires (that we usually use for household wiring upto 10 Amp).
- Automotive tape. Amazon.in - Automotive tape
- Larger LED lights to replace the existing yellow halogen. Amazon.in - LED replacement roof bulb
- Some sponge / foam pieces - mainly on the inner top side of the lamp, to avoid any fouling/rattling/scratching with the metal roof panel above the fabric roof liner.
- Double sided tape pieces.
- Couple of 10 Amp (Check the exact rating in your car's user manual's fuse specifications for cabin fuse) blade fuses (of appropriate type - micro/mini/standard) for replacement in case you accidentally blow out the existing fuse while wiring. These are readily available at car/motorcycle spare part shops or on Amazon.in.
So since the project involves cutting away roof liner parts, something that is irreversible (especially painful if you get it wrong), it had to be the Suzuki in the garage that was the guinea pig! Can't imagine messing up something on the Polo/Nexon, would have to be taken to the ER with spasms. We'll be doing a pathfinder installation with the Ignis, learning as we go, & fine tuning the process as we move to the next 2 cars.
Jump To Car:
About the Suzuki Light -


- The part quality really is bad. We won't complain too much about it, because it is also very cheap to purchase one! Can't expect much for this price in today's world.
- It comes with a halogen festoon bulb. I have replaced those with LED ones of course, for more and better lighting. Here it is, with a 3M tape that I applied on the back, to stick it safely inside the dome light, to avoid rattles.

- It shows the Japanese efficiency + Indian cost-cutting literally everywhere in its build. For example - the rear is totally exposed, with metal contact plates that carry current open to the air. If they touch a metal-like roof outer metal sheet (which does touch in the Ignis, but not in Nexon & Polo) - you'll have short contacts and a blown cabin lamp fuse! Marked by blue boxes in this image.
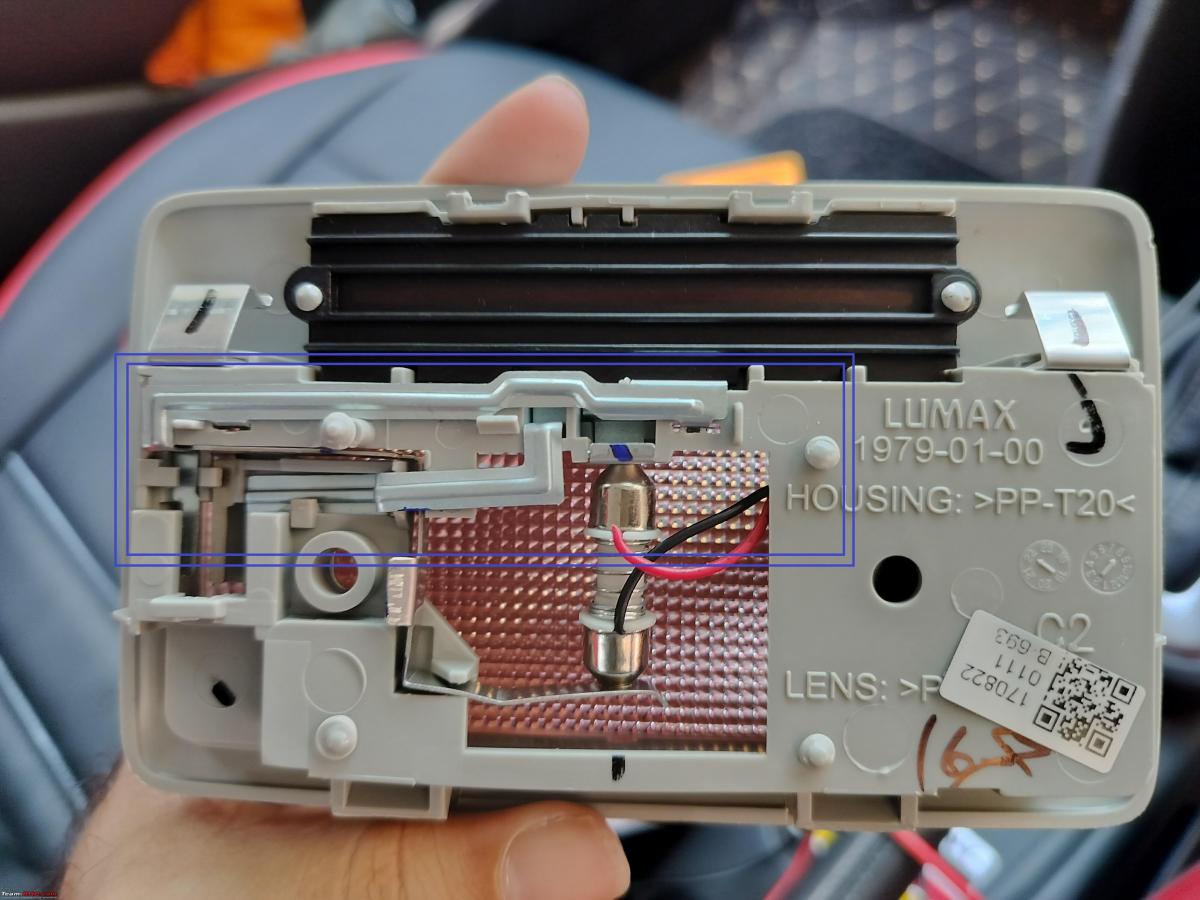
- The only way by which Suzuki has attempted to avoid this short circuit - is a 2 mm tall dimple at 2-3 places on the back of the lamp assembly, which basically creates a small gap with the roof! But then - they are of different heights and if retained, result in the lamp sitting in a rather crooked position! Marked by the red & blue boxes in this image. Note that the one marked by red boxes is taller, and also has a pointy head. If you retain this - please do not push the lamp too hard into the roof, especially in a Suzuki car. It will create a nice dimple outward on the roof sheet metal, immediately. I had a hard time "undoing" it afterwards.

- Okay, that aside - the functionality is good. Has the usually needed ON & DOOR positions along with OFF. The diffuser is good & spreads light very well all around.
- The control switch is a slider & not a push-button action (like in the one for the Brezza or Altroz/Punch). This I feel is better since it is a retrofit in our cars. A push action would put more strain on our cut-out roof liner edges, which don't have any metal borders for strength.
- The results are outstanding & more than worth the effort & money spent. Rear part of the cabin is so conveniently well-illuminated, that it is really impossible to imagine how we lived without the light earlier! If you have kids / anyone else travelling in your car regularly in the rear seat - this lamp is a very useful addition. Definitely a better investment than them chrome kits!
Suzuki Ignis
So, without further ado, let's get on with the experiment cum learning exercise with the Ignis, hopefully in a step-by-step manner of documentation.
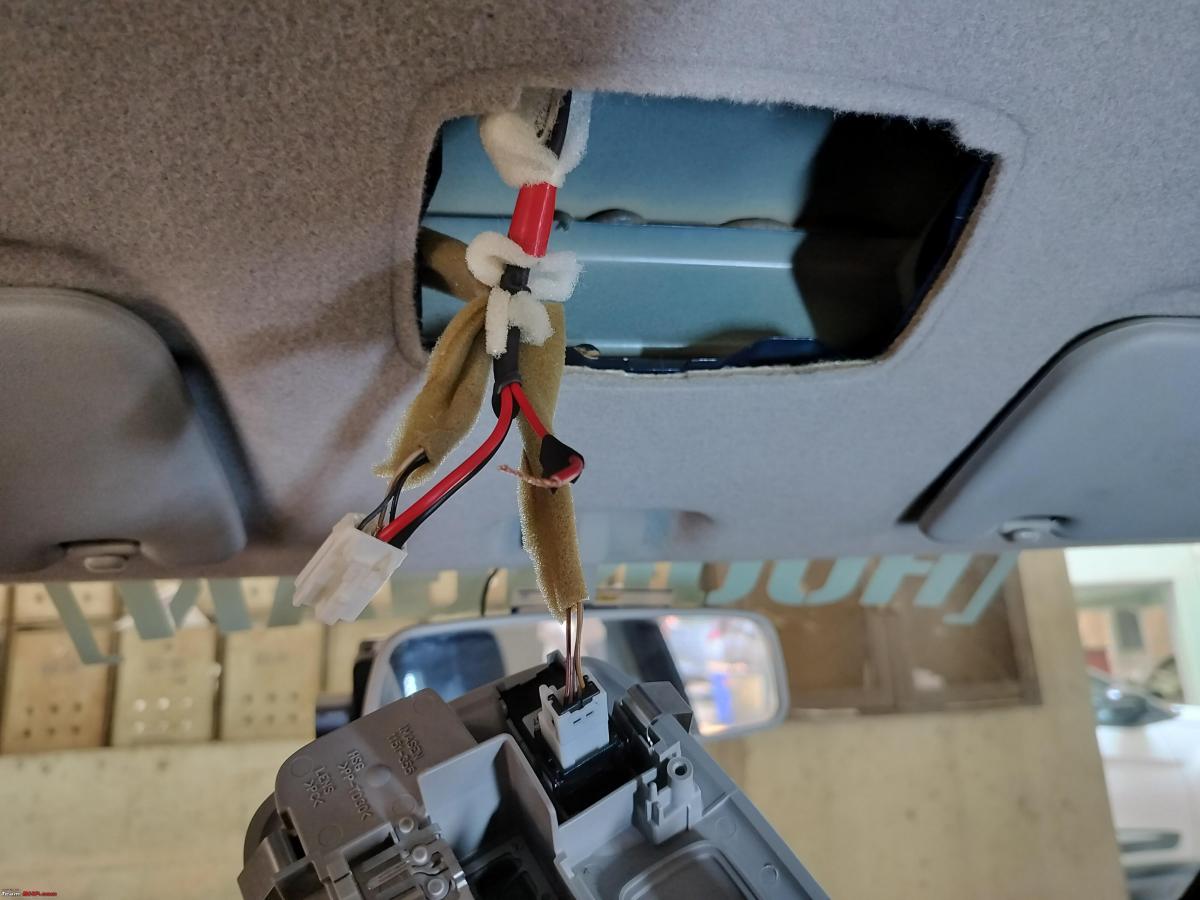
- Open the stock cabin lamp in the front. Use a trim removal spatula to pull it down, from the edge near the mic / control switch. i.e. the edge nearest to us. It's simply held in place by metal bendy plates & will come out easily.


- Now - one of the connectors is for the onboard mic for phone, and the other is for the roof lamp. I have marked them in the image below. Also marked - are the purposes of the 3 wires in the connector. Disconnect both these and keep the stock lamp aside for now. Otherwise, it keeps hanging by the really thin wires.

- Now before doing any actual modifications to the roof-liner / wiring - we will test that the light & wiring harness that we procured, work. Just attach the pigtail to the lamp, and strip open the ends of the pigtail to expose copper strands.
- Also marked in the image below - are the purposes of the 3 wires in the new pigtail.
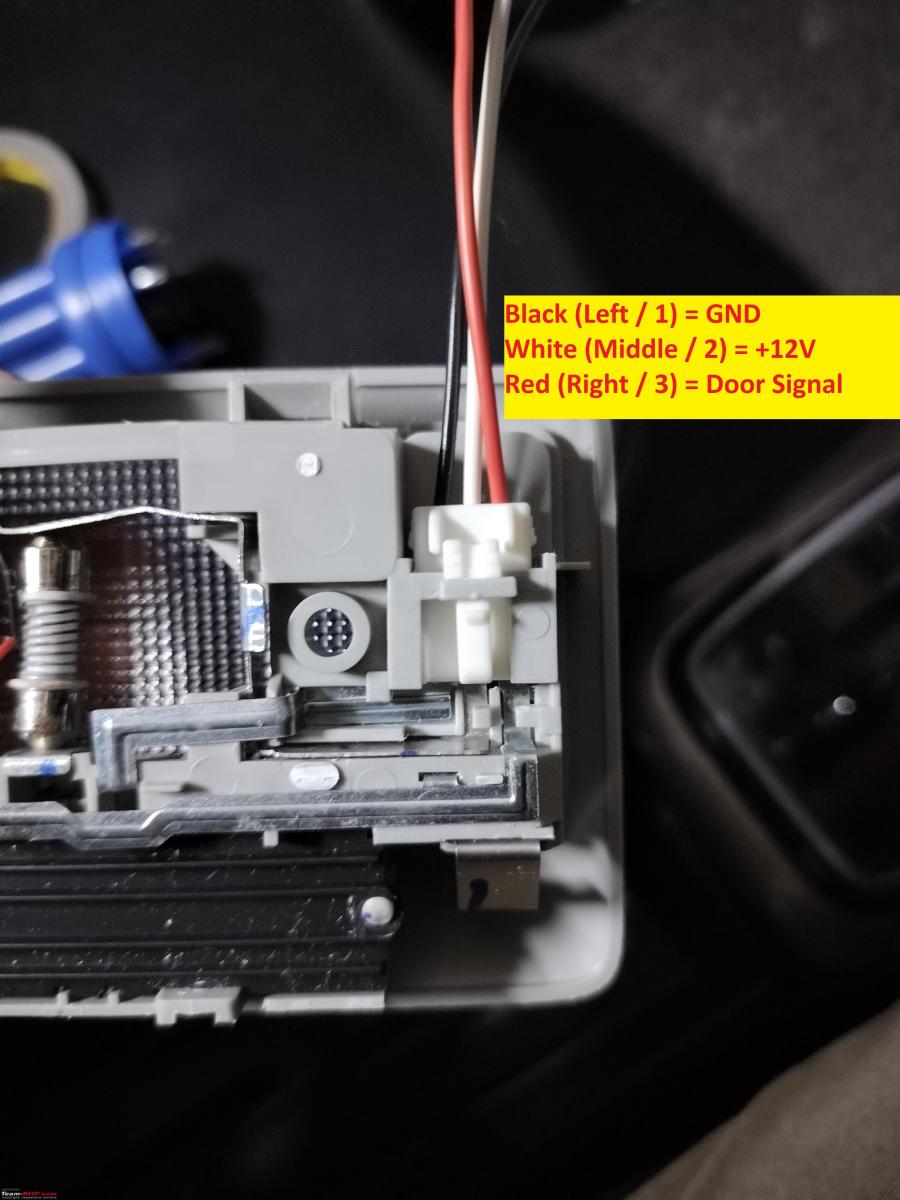
- Just take the lamp to the car and connect the GND to GND, +12V to +12V and Door signal to Door signal - from the new pigtail to the stock connector.
- Now test that the lamp's 3-position switch works as expected in OFF-DOOR-ON positions. Et voila!

- Thanks to the negligible space between the liner and the outer roof sheet - I cut away all 3 plastic protrusions on the backside of the lamp & pasted a cardboard sheet on its back with FeviBond for electric insulation. Apologies, forgot to take a picture of this.
- Now that it works as expected - we will proceed to make a cut-out in the roof liner to install the lamp. It's a really simple and yet painful process.
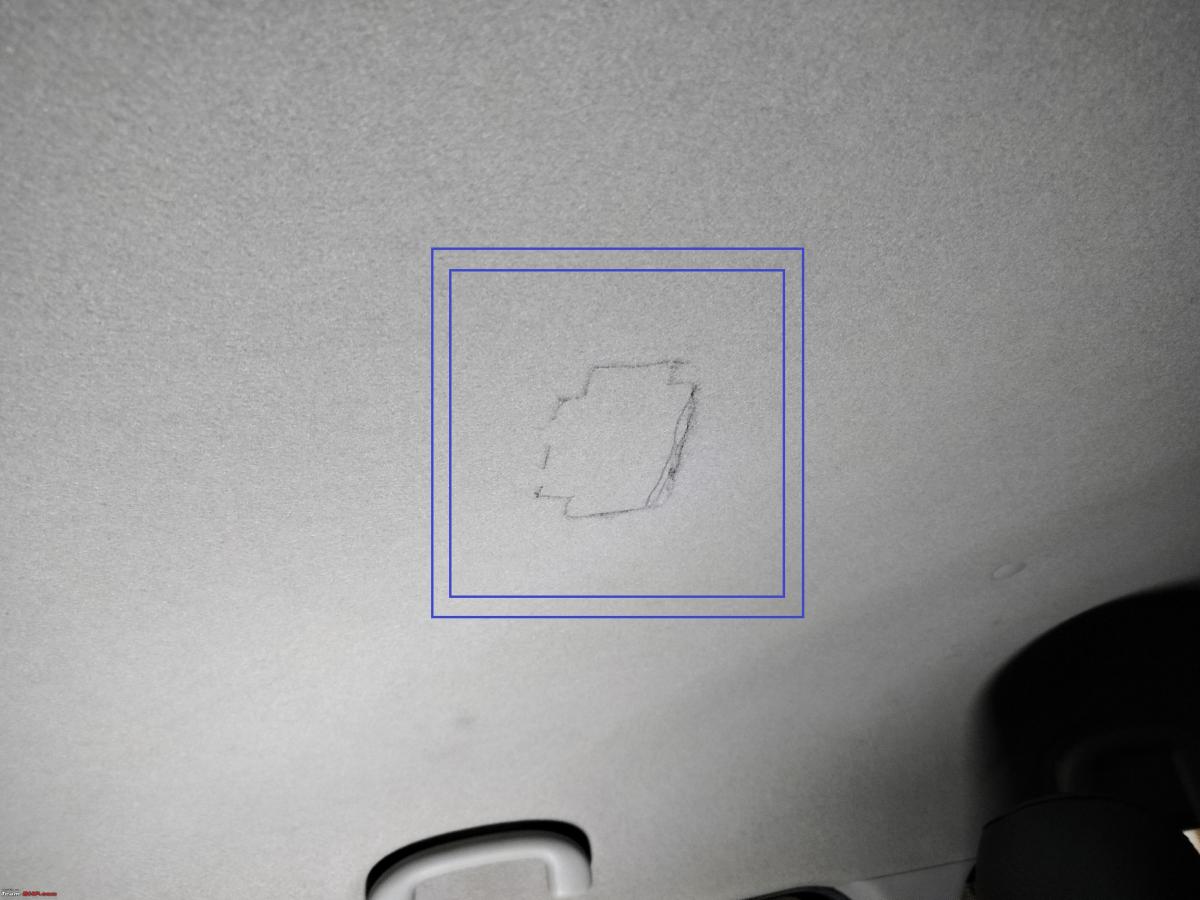
- Get in the rear seat of the car. With a tape measure OR with just your visual referencing skills, identify the best central part of the roof to install the lamp. Hold it parallel to the windshield / stock lamp / horizontal metal band inside the roof liner if there is one. And now - simply mark the inside border of the lamp's rear, by a pencil on the roof liner. At least I did it this way. You can be more sophisticated and prepare a stencil / template on a blank paper, and use that to mark the edges then on the roof.
- Review your marked area as many times as it takes for you to be 100% sure that it is well-aligned and not larger than what it should be. A smaller cut-out is fine, as you can still widen it later. If you cut it too large - you are done for. The lamp won't stay secured in it & in the worst case, you are looking at replacing the roof-liner altogether! Look from all angles, from outside the car, from the boot hatch, and from the front seats. Be sure that it is well aligned.
- Now simply take a pointy-tip paper cutter from your stationary bin & start cutting away along your marking carefully but ruthlessly. The Ignis' (and in general Suzuki's roof liner is pretty mediocre quality. It tries its best to just fall apart! Also note - there is nothing above the liner. It's direct roof sheet metal. So be careful not to damage / deform the metal by applying too much pressure on the cutter / knife.
- Once the cut is complete, take the cut-out away, and see how your lamp fits. It took me 3 more attempts to widen the cut-out to perfect size, as I had intentionally marked it smaller by a few mm & had cut on the inner edge of the marking.

- Now - check how well the lamp fits. Should be good!

- Now with this - we'll proceed to prepare the harness. Simply estimate / measure the distance between the 2 lamps now. We will prepare a harness of total length which is about 6 inches longer than this distance (for working & error margin).
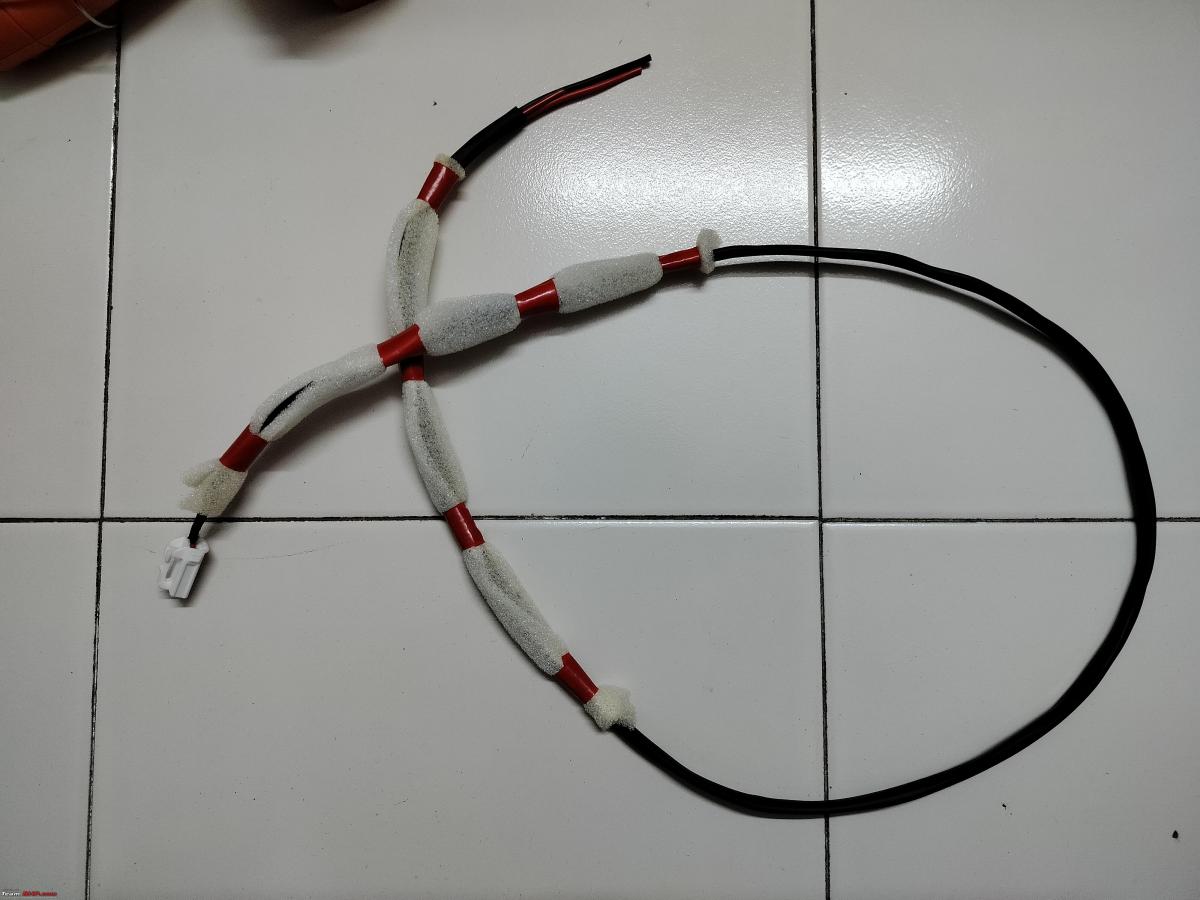
- Solder 3 high quality (I used Polycab 1sqmm copper wires as usual) to the 3 wires from the new pigtail, with proper flux, and good quality solder. It's best to use wires of the same 3 colours as the one you have in the pigtail. I did this on a day when all hardware stores were closed & I used the existing 2 wires at my home. Which meant I had 1 black & 2 red wires in this car. Marked one of the wires with a black tape on the other end, for easy identification afterwards. Cover the solder connections for all 3, using good shrink tubes for safe long term insulation.

- Cover the pigtail from the connector upto the solder joints with good-quality automotive tape (Or the entire length of the new harness, no problem).

- Cover the rest of the 3-wire length, with a good quality shrink tube cover & shrink it using a heat gun, just keeping an inch or two of the wires exposed on the other end.

- Now - I used a waste sponge sheet from a t-shirt packing, to cut pieces and wrap them around the harness, for dampening and cushioning. This will keep the harness snugly in place inside the roof liner & will also ensure there are no rattles / vibrations during driving in future. Intentionally kept the central part uncovered, as there is a beam in the Ignis that pushes snugly against the roof liner near the driver's head. In that part - the roof liner and the beam - hold the harness tightly in place, and it doesn't need additional sponge / foam here.
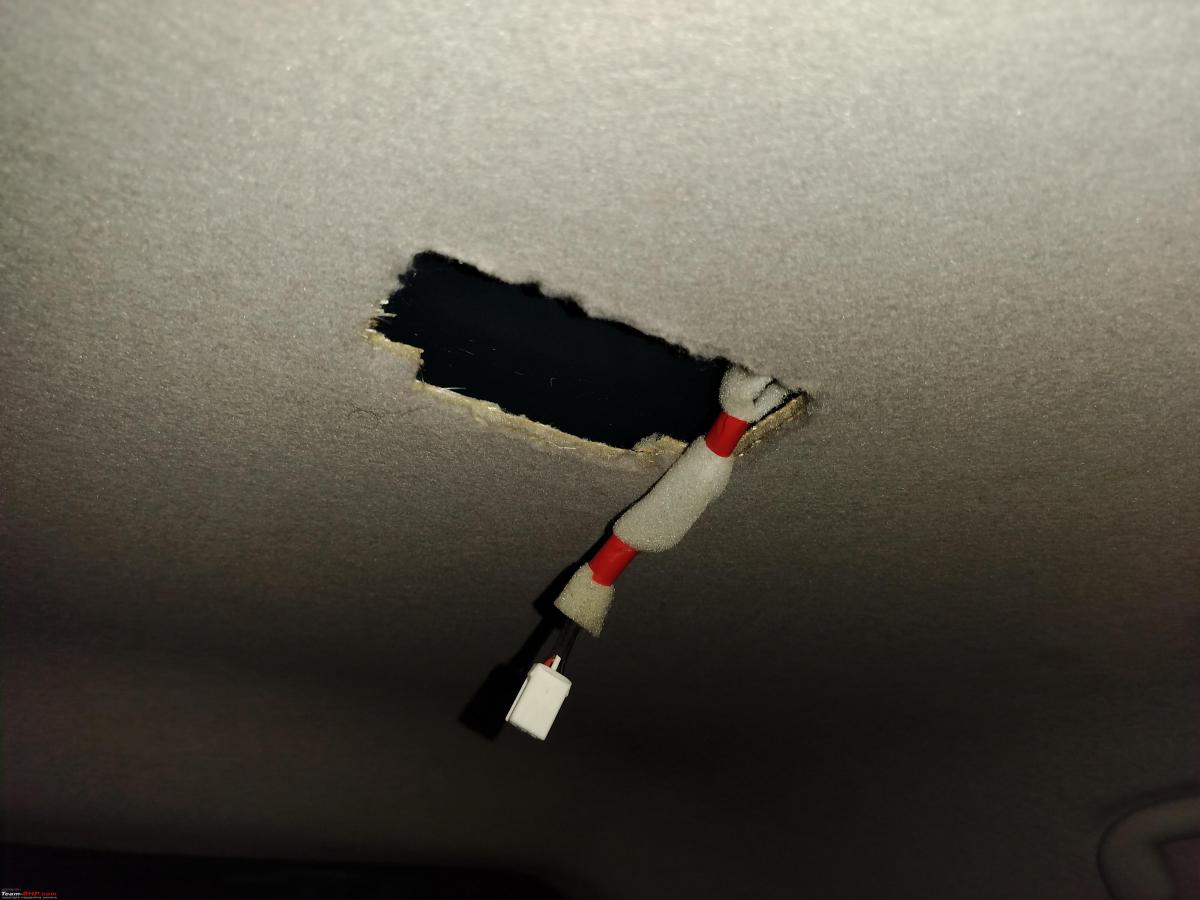
- And now we go back to the car. Simply push the open ends of the new harness into the roof liner from the new cut-out in the rear part of the cabin that we made. Gently keep the roof liner pulled down to create enough space for the wire to slide in. Keep pushing in, and eventually, you'll be able to find it come out around the front roof lamp. Quite an easy step this.

- Now - use a needle / pin-remover tool's pin, to take out 1 connector pin at a time from the stock coupler.


- And - connect its appropriate partner from the new harness safely inside the pin using existing gaps/holes. One at a time, complete this connection & push the pin back in place & then pull the next one out. Be very careful in this step. In case you short wrong pins - you'll blow up the cabin-lamp fuse, and the fuse box in the Ignis, is placed in a really inhumane place.
Here is a photo with 2 pins done & one pending.
- With all 3 pins done, secure the new and stock harnesses together properly with zip ties or automotive tapes for safety and long-lasting fitment.
- Connect both the front lamp's connectors back into place & test the front as well as rear lamps once for operations in ON and DOOR positions. All working, push both lamps carefully into their places & we are done!
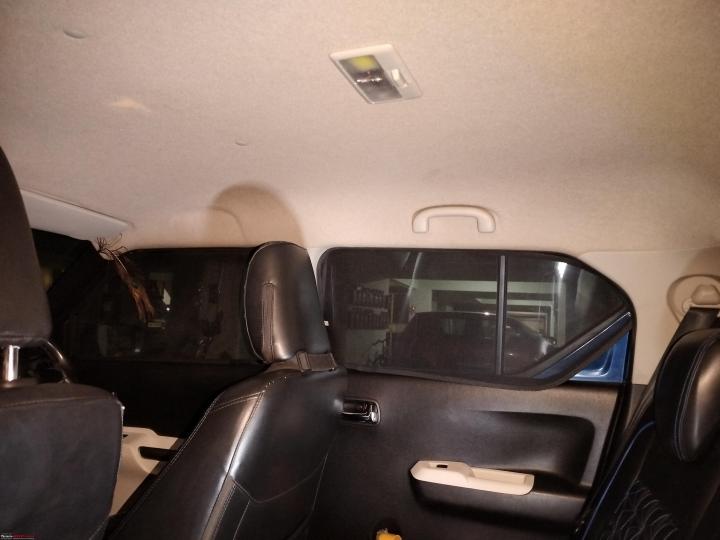
- Here are some pictures taken at the end of the process, for overall positioning, lighting test & comparison of BEFORE and AFTER lighting in the rear part of the cabin -


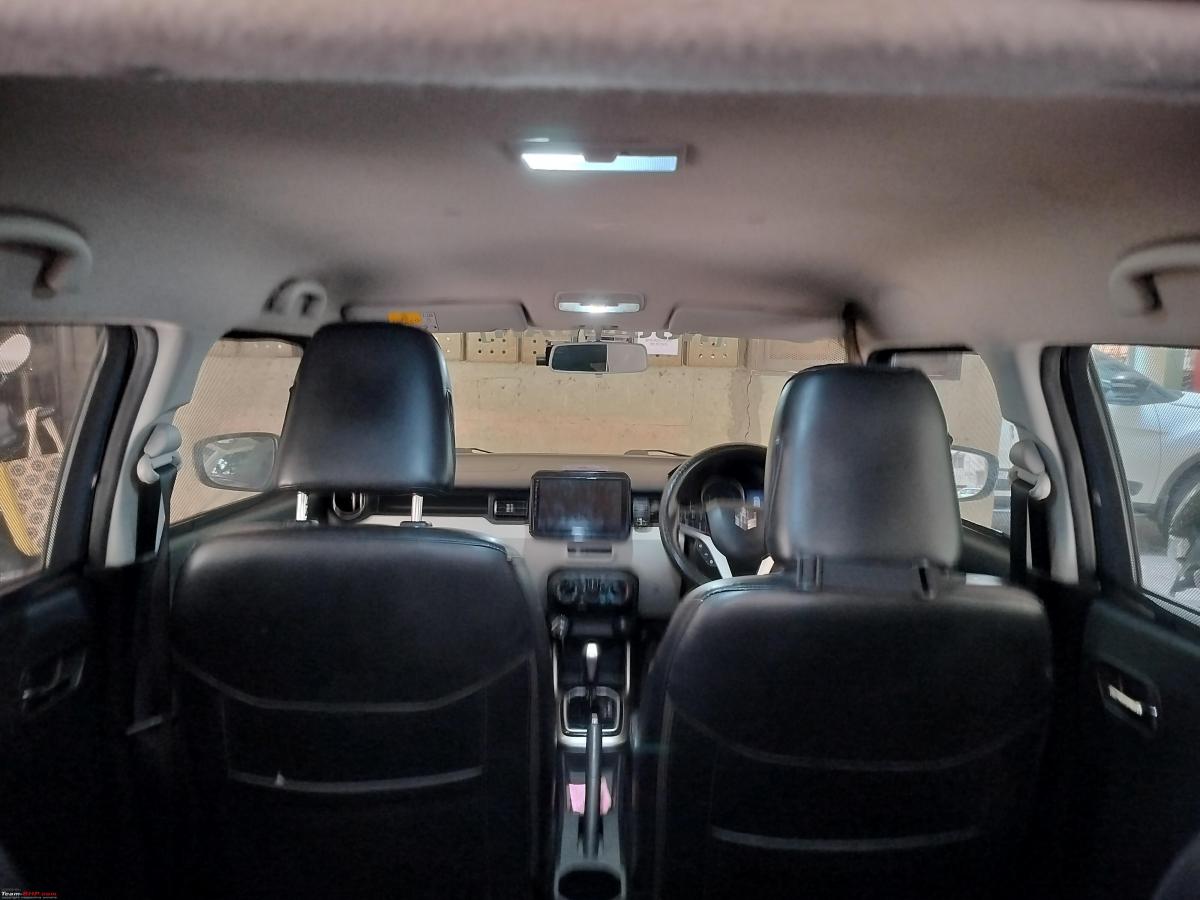
BEFORE - (Taken simply by switching off the new lamp)
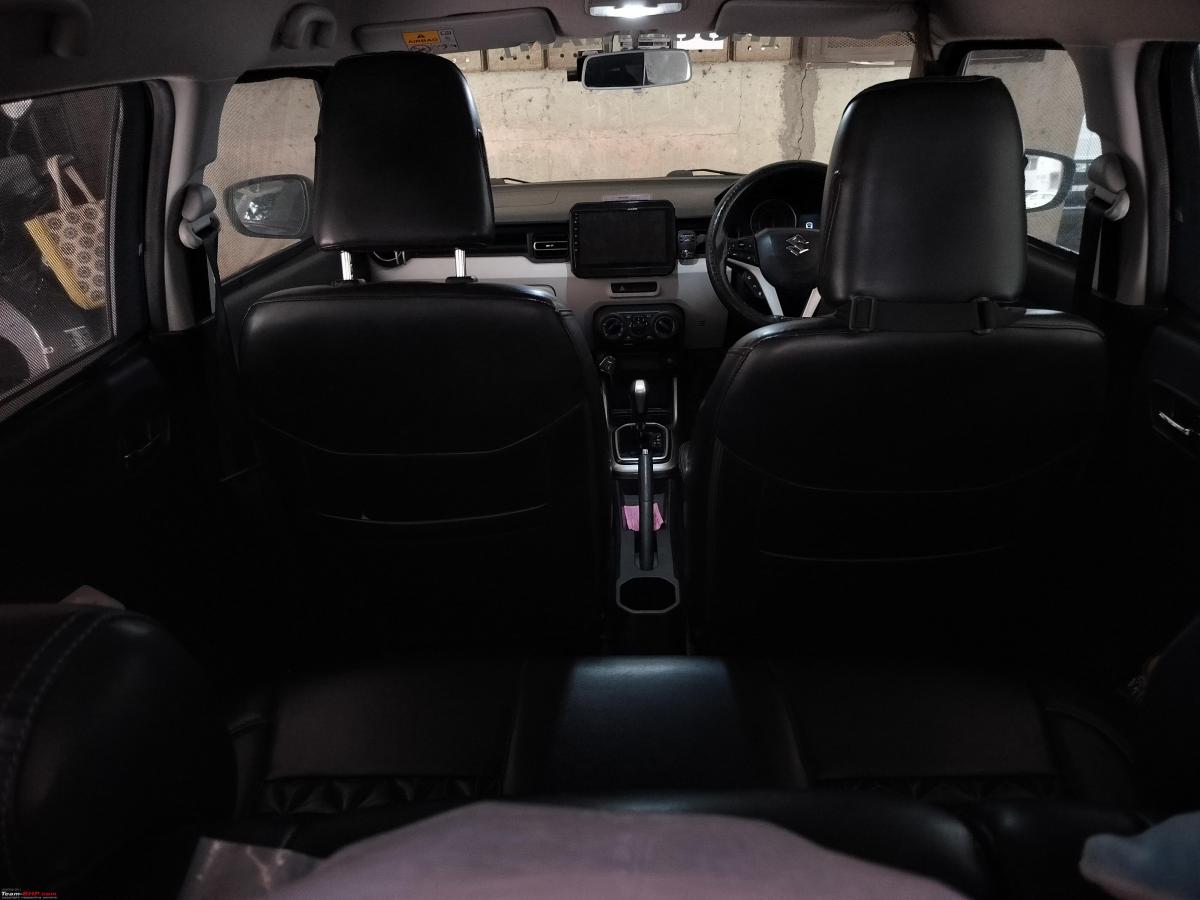
AFTER - (With the new lamp also ON with door position)
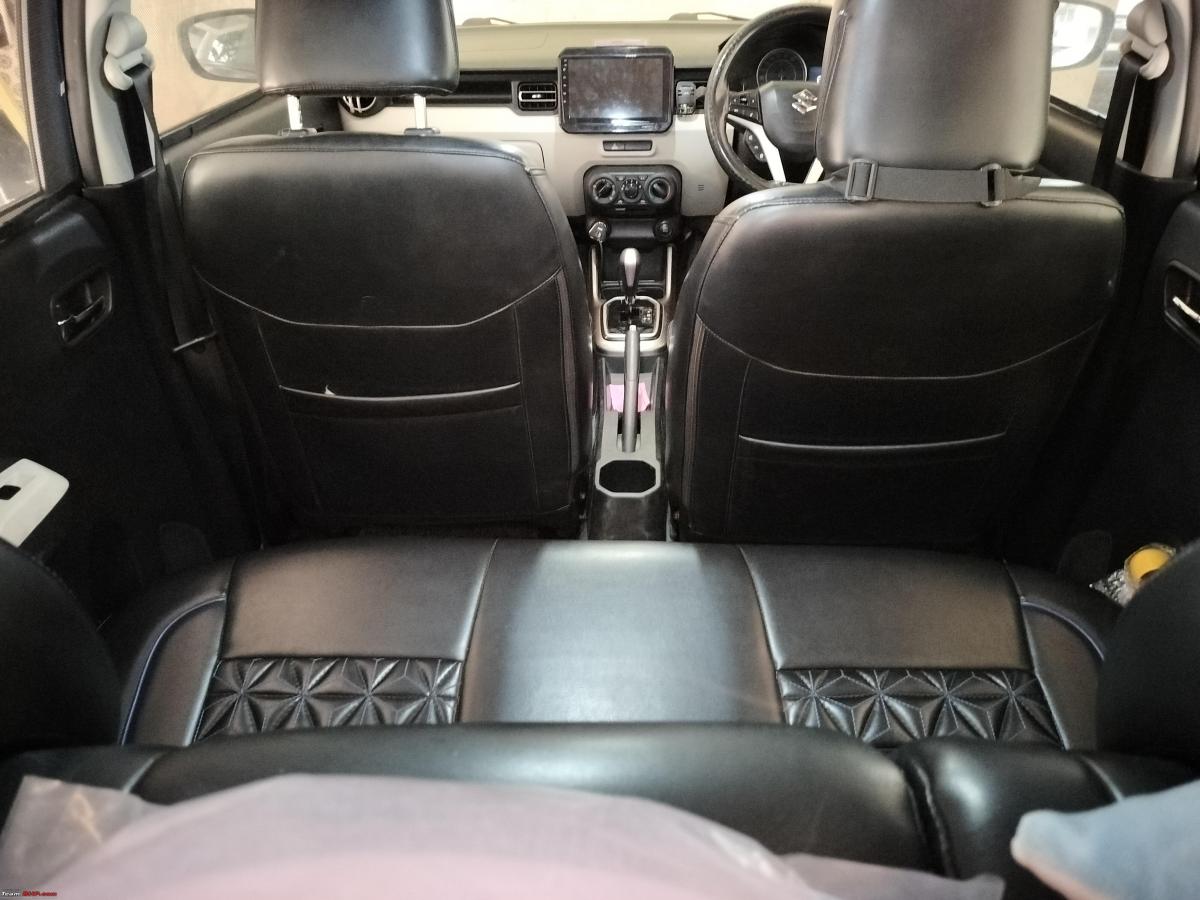
- Eventually, if you want - you can apply a few drops of FeviQuick / FeviBond / Silicone sealant inside the edges of the cabin lamp, to stick it steady to the roof-liner. I haven't done so yet, and the built-in spring clips are holding it in place alright.
That's it! The Ignis project is done & we have learned what it takes to do this. On towards the Polo now.
Continue reading about Reinhard's DIY experience for BHPian comments, insights and more information.
Pages
About Us